Time and Attendance System User s Manual
|
|
|
- Hannah Charles
- 8 years ago
- Views:
Transcription
1
2 Time and Attendance System The Time Clock terminal is designed to record employee s arrival and departure times. For ease and efficiency in using the Time Clock terminal, it is recommended that the system be used with the PC interface software (included with 50' interface cable) which requires an IBM compatible PC. (See Minimum system requirements, 1.2). The system may also be used as a stand-alone terminal and may be connected directly to an IBM compatible printer to print reports. (Note: printer cable not included.) Two supervisor's badges are supplied for setup in this mode of operation. This manual is a confidential proprietary document solely for the use of Acroprint Time Recorder customers. Material in this manual is subject to change without notice and does not represent an obligation on the part of Acroprint Time Recorder. No part of this manual may be reproduced or transmitted in any form by any means without the express written permission of Acroprint Time Recorder. Acroprint Time Recorder and the Acroprint logo are registered trademarks of Acroprint Time Recorder Company. IBM is the registered trademark of International Business Machines. Microsoft, Windows, Windows 95, Windows '98, and Windows NT are registered trademarks of Microsoft Corporation. Other product names mentioned in this manual may be trademarks of their respective companies and are hereby acknowledged. FCC Radio Frequency Interference Statement (USA): This equipment has been tested and found to comply with the limits for a Class A digital device, pursuant to part 15 of FCC Rules. These limits are designed to provide reasonable protection against harmful interference to radio communications. Operation of this equipment in a residential area is likely to cause harmful interference in which case the user will be required to correct the interference at his or her own expense. Warning: Changes or modifications to this unit not expressly approved by the party responsible for compliance could void user s warranty and authority to operate this equipment. Time and Attendance System User s Manual Acroprint Time Recorder Company 5640 Departure Drive Raleigh, North Carolina IN USA national@acroprint.com Fax:
 Two supervisor's badges are supplied for setup in this mode of operation.")
3 Table of contents 1. Introduction Product overview Minimum system requirements Employee punch capacity Site requirements Data protection (employee lockout) Unpacking and inspection Installing Time & Attendance PC software PC Software for Windows 95/98/NT/2000 workstations installations Terminal installation Electrical connections Terminal mounting Connecting Time Clock terminal to IBM compatible PC Printer connections (Stand-alone Operation or with Additional Printer) Parallel printer connection Serial printer connection (Stand-alone Operation Only) Connecting the power cord and securing the access door Establishing communications between terminal and PC Time and date Setup Factory settings Clock rules Pay period Next period start date Max time on clock Daily overtime after Weekly overtime after th Day Overtime Pay interval round Click on More... button for second screen in setup Daylight savings time Time Clock terminal printer type Date format Time totals format Time of day format Day change offset Shift rules Shifts Shift number Shift start time Shift round start Table of contents 3
... 12 3.5 Connecting the power cord and securing the access door... 13 3.")
4 5.5 Shift grace start Shift dock start Shift stop time Shift round stop Shift grace stop Shift dock stop Lunch rules enable Lunch start time Lunch end Lunch duration Auto lunch deduct after Entering employees into system Name Badge Number Shift (can be used as departments) Supervisor s badges Supervisors Editing punches Punch editing Reports Print, view, archive (save to disk) Time card report Hours summary report Employee profile report Clock rules report Who's in, who's out report Save to disk, archiving, & exporting Save to disk Exporting Bell schedule Programming terminal without software Introduction Supervisor s menu map Terminal diagnostics Appendix A Error messages at PC monitor Appendix B Error messages at terminal Appendix C FAQ S Appendix D Support agreement Appendix E Companion products Table of contents

5 1. Introduction 1.1 Product overview The Time and Attendance System of tomorrow The Time and Attendance system is designed for small businesses to make payroll processing easy and accurate. This microprocessor based clock uses magnetically encoded badges to record employee times. The system can handle up to 120 employees. (See 1.3 Employee punch capacity.) The terminal may be connected directly to an IBM compatible printer to print reports or used with the PC Interface supplied with the system. The system eliminates the need to buy, prepare, distribute, and calculate employee time cards. No more need to store and save bulky time cards for years to meet government regulations. Employee time cards can be saved on 3½" floppy disk and easily stored for future reference. Each employee is assigned an Identification Badge. The employee swipes the badge in the terminal when arriving and departing work, the same as punching IN and OUT on a time clock. The Time Clock terminal needs to be set only once. The system offers battery backup in case of power failures, Auto Month, Date, Year advance, and Automatic Daylight Savings changes. At each swipe the employee sees his or her daily and pay period totals on the terminal display. The system can handle Weekly, Bi- Weekly, Semi-Monthly, and Monthly payroll periods. The system calculates employee s hours worked based on your company's pay policies. Regular and overtime hours are totaled fast and accurately, eliminating costly payroll errors. Employee hours can be exported to payroll packages, accepting ASCII file output, for generating payroll checks. It is recommended that the Time Clock terminal be used with the included PC Interface. The PC Interface for Windows allows for easy setup of clock rules and employee data, editing employee punches, reviewing reports at the PC monitor, exporting to payroll packages, and a signal control program. (Signal not included.) The Introduction 5

6 IMPORTANT PC Software offers On-line Help for quick assistance and answers to your questions. 1.2 Minimum system requirements IBM PC compatible computer, Pentium or higher processor with a minimum of 4 MB of RAM Microsoft Windows 95, Windows 98, Windows 2000 or Windows NT Workstations 1 MB available hard disk space 3.5" floppy disk drive Available serial port 1.3 Employee punch capacity The system can handle up to 120 employees. It has a capacity of storing over 21,000 transactions (employee punches). The chart below is a guide to the maximum* number of punches allowed when 120 EMPLOYEES are assigned on the clock. EMPLOYEE EMPLOYEE PAY MAX PUNCHES MAX PUNCHES PERIOD PER PAY PERIOD PER DAY Weekly (7) Biweekly (14) Semimonthly (16) Monthly (31) *Maximum punches are based on employees punching everyday of the pay period. Additional daily punches may apply if not punching each day of the pay period. NOTE: The maximum number of punches for any employee, regardless of the configuration, is 240 punches per pay period. 6 Introduction
. The chart below is a guide to the maximum* number of punches allowed when 120 EMPLOYEES are assigned on the clock.")
7 1.4 Site requirements The Time Clock terminal can be installed in any typical office environment. The terminal does require 120VAC 60 Hz. and should be located near a standard electrical outlet. Power cord is approximately 6' in length. The PC Interface is supplied with 50' of cable. The distance from the terminal to the PC must also be taken into consideration. No special wiring or cooling is required. However, DO NOT use the Time Clock terminal under the following conditions: Extremely high or low temperature (temperature range: 0-50 C ( F)) Extremely high or low humidity (humidity range: 0-90% RH) Areas of high dust concentration Areas of chemical fume concentration Areas of extreme vibration or when placed on an unstable or unlevel surface 1.5 Data protection (employee lockout) The Time and Attendance system is designed to hold two pay periods of data. As a safety feature, the terminal will not allow employees to punch in on a third pay period without printing a completed previous HOURS SUMMARY report for ALL EMPLOYEES AFTER the end of the pay period. (The pay period ends on the last day at the day change time set in the clock rules default time: Midnight.) Employees attempting to punch before the report is printed will be prompted at the display Locked out report old data 1st. After the report(s) are printed the data stored in the terminal will be deleted from memory allowing employees to punch in on the current pay period. Once data is deleted, it cannot be recovered. IMPORTANT IMPORTANT! READ ME! Introduction 7
) Extremely high or low humidity (humidity range:")
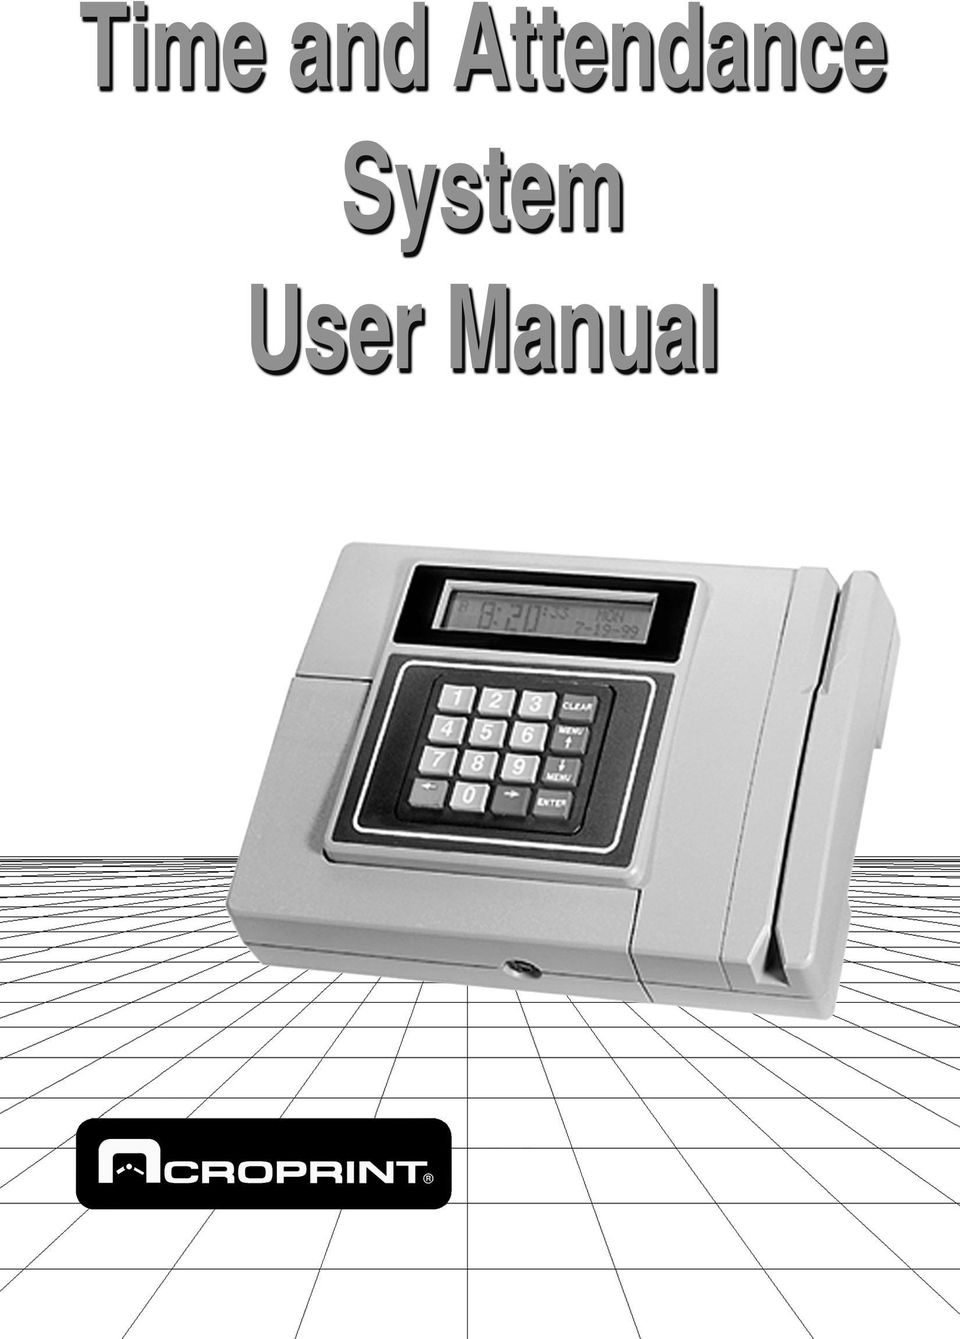
8 CROPRINT CROPRINT CROPRINT CROPRINT CROPRINT CROPRINT CROPRINT CROPRINT CROPRINT CROPRINT CROPRINT CROPRINT 1.6 Unpacking and inspection Open the shipping carton and carefully remove the contents. Inspect the Time Clock terminal and accessories for damage. Report any damage or shortages to the company from which the unit was purchased. IMPORTANT: Complete the registration card and return it to Acroprint to ensure warranty registration. 8: A :59 MON Supervisor Badge CLEAR MENU MENU Time Clock Terminal ENTER Supervisor Badge Power Cable Identification Badge 0001 Identification Badge Supervisor Badge 0001 Identification Badge Supervisor Badge 0001 Identification Badge Supervisor Badge 0001 Identification Badge Supervisor Badge 0001 Identification SupervisorBadge Badge 0001 Identification Badge Supervisor Badge 0001 Identification Badge Supervisor Badge 0001 Identification SupervisorBadge Identification Badge Supervisor Badge User Manual Supervisor Badge 2 Supervisor Badges Employee Badges 4 Screws Time & Attendance Software 50' of modular cable DB9 Connector NOTE: Please keep all the packing materials so they may be used should you wish to transport the system in the future. They are specifically designed to protect your product during shipment. 8 Introduction

9 2. Installing Time & Attendance PC software 2.1 PC Software for Windows 95/98/NT/2000 workstations installations 1. Start Windows. 2. Choose Start > Settings > Control Panel. 3. Double-click the Add/Remove Programs Properties option. 4. At the dialog screen choose the Install/Uninstall tab. Installing Time and Attendance PC software 9

10 5. Click Install. At the dialog screen titled Install Program from Floppy Disk or CD-ROM insert the 3½" Time and Attendance PC Software floppy disk into the drive and click Next. Follow the onscreen instructions. 6. Command line: A:\Setup.exe, Click Finish 7. Default directory: C:\TSIF, click OK if you don t want to change. 8. When setup has installed the software, click on OK. 9. The Read me file may be printed, read at the monitor, or closed. 10 Installing Time and Attendance PC software

11 3. Terminal installation 3.1 Electrical connections Wiring connections for power, PC interface or printer (stand-alone mode) and mounting bracket can be located by removing the terminal's access door. Access Door 3.2 Terminal mounting The Time Clock terminal is supplied with a reversible bracket on back of the unit for desk or wall mounting. The unit is shipped with the bracket in the desk mounting position. With the access door removed, you are able to remove the bracket. Reverse the bracket and secure the bracket to the wall with the four screws. Recommended distance from floor to top of bracket is 54". The bracket has molded wire routing slots and a center hub for securing wires using nylon ties. After the bracket is fastened to the wall, mount the terminal on to the bracket. Complete wiring connections and replace the access door. 3.3 Connecting Time Clock terminal to IBM compatible PC 1. Make sure power is off at both the Time Clock terminal and the PC, and the access door on the terminal is removed. 2. Using the cable supplied with the terminal (50'), connect the RJ-11 modular connector to the RS-232 port on the lower left corner. 3. Connect the other end of the RJ-11 to the 9-pin adaptor WAND RS 485 RS 232 9V Terminal installation 11

12 supplied with the system. If your computer has a 25-pin serial port you will need a 9-pin to 25-pin adaptor available at most computer stores. 4. Connect the adaptor to the RS-232 serial port located on the rear of your computer. 5. Replace the access door on the terminal. 3.4 Printer connections (Stand-alone Operation or with Additional Printer) The Time Clock terminal may be connected directly to an IBM PC compatible printer. Reports can be printed without a PC Parallel printer connection The terminal can accommodate a standard parallel printer cable available at most computer stores. The cable requires a 25-pin connector (to Time Clock terminal) on one end and a 36-pin Centronics type connector (to printer) on the other end Serial printer connection (Stand-alone Operation Only) The serial printer cable is unique due to the phone jack interface to the RS 232 port. Contact Acroprint to order this cable. 12 Terminal installation
 on one end and a 36-pin Centronics type connector (to printer) on the other end. 3.4.")
13 3.5 Connecting the power cord and securing the access door Plug in the power cord coming from the wall mount transformer into the Time Clock terminal. To reattach the access door and secure the unit to the reversible bracket, screw on the lower front panel of the unit to tighten the access door. Power Cord Access Door 3.6 Establishing communications between terminal and PC In most cases the software will automatically locate the PC serial port. If the software does not locate the serial communications port: 1. From the PC, start the Time and Attendance program. 2. Select the communications icon; then select the correct communications port and baud rate. NOTE: The baud rate on the PC must match the baud rate set on the Time Clock terminal. Default setting on the terminal is The baud rate may be changed at the terminal by using the Supervisor s badge (see section 12. Manually programming the terminal). READ THIS! Terminal installation 13

14 3.7 Time and date Select the Time and Date icon from the main menu. To set time you may scroll up/down or you may enter the time in the AM/PM format. Set month, date, and year, and click on OK. With correct communications established the time and date will be sent to the Time Clock terminal. 14 Terminal installation

15 4. Setup Setup is the set of instructions telling the Time and Attendance system how to calculate employee s hours. These Clock Rules along with the Shift Rules will be used to calculate employee s time worked. The Time and Attendance Software for Windows provides on-line reference to assist you in setting up your Time and Attendance systems to correctly calculate your employee hours worked. Help may be accessed from any screen by clicking on the Help Button or selecting Help at the main menu and then choosing Contents. Clicking on the Search button at top allows you to select a subject or search for help by a word. If you require additional assistance you may contact Acroprint Time Recorder. When you call you should be at your computer and have the product documentation. Telephone support To assist us in answering your questions or resolving your problem please have the following information available: Record serial numbers here for future reference. Terminal Serial Number (Available on outside of packing box or on the back of the terminal under bracket) (6 digits with 2 alpha characters) PC software interface version (Available on outside of packing box, disk label, or through the Help screen by selecting About. PC Interface version Serial Number Current settings. (Run the Clock Rules report see Section 9.5.) Description of what happened when the problem occurred and what you did to correct the problem Exact wording of any message(s) that appeared on the PC monitor or the terminal display Terminal functions may be tested using one of the Supervisor Badges supplied with the system. See Section 12.3, Terminal diagnostics for testing terminal functions. Setup 15

16 HINT: PRINT THIS REPORT FOR FILE COPY HINT: USE ON-LINE HELP SCREENS TO ANSWER QUESTIONS AND TO ASSIST IN PROGRAMMING 4.1 Factory settings The Clock Rules report initially contains the default factory settings on the Time Clock terminal. It is recommended that you print this report. To Print: select the report icon; under reports select Clock Rules and under report output, print manager. Click on print. Review settings and pencil in settings that fit your work schedule(s). To return to factory settings, enter changes at the PC or reinitialize the terminal using the Supervisor s badge (see Section 12, Programming the terminal manually). Caution: Reinitializing the terminal will remove all punches and employee profiles, and reset all selections, including date and time, to default settings. 4.2 Clock rules Select the Setup icon from the menu: Pay period The length of time during which time worked totals will accumulate for a time card. Select and click on type of pay period Next period start date The date the NEXT pay period will start. Select date. Caution: Changing date after pay period could result in lockout Max time on clock The system assumes the employee has missed a punch after the maximum time on clock has been exceeded. Select time with arrow keys. After Max Time has been reached, the system will automatically punch out the employee. 16 Setup
.")
17 4.2.4 Daily overtime after The amount of time worked in a day, after which, overtime will begin to accumulate. Note: Leave at the default setting, 24 hours if you pay overtime based on a weekly setting only (i.e. 40 hours). Daily overtime may be set to 2 levels (i.e. 8:00 and 12:00). Click on time window to change time Weekly overtime after The amount of time worked in a week, after which, overtime will begin to accumulate. Note: Weekly overtime does not apply to semimonthly or monthly pay periods. Weekly overtime may be set to 2 levels (i.e. 40:00 and 48:00). Click on time window to change time th Day Overtime When this feature is enabled, all hours worked on the seventh consecutive worked day will be promoted to the next highest pay level provided that the seven consecutive days start at the beginning of the first or second week of the weekly or biweekly pay period. This feature does not affect weekly overtime calculations and will not override weekly overtime thresholds. The default setting for this feature is disabled Pay interval round Increment of time used to calculate time worked totals as if the punch occurred at the interval division selected. Selecting 1 minute calculates employee time on a minute to minute basis. Options include 1, 5, 6, 10 or 15 minute increments Click on More... button for second screen in setup. Setup 17

18 4.2.9 Daylight savings time If enabled, the system will automatically assign the first Sunday in April and the last Sunday in October as beginning and ending dates of daylight savings. This will occur each year without resetting. Time change will occur at 2:00 AM on these dates. Dates may be changed in countries where dates may be different. If not enabled, automatic daylight change will not occur Time Clock terminal printer type Used in the stand-alone mode when the terminal is to be connected directly to a printer to print reports. Options include None, Serial or Parallel. When using the PC interface select type, None. May be used to print reports from terminal when using interface Date format Select one of six date formats: (i.e. DDMMYY = 2 digit date, month, year) Time totals format You may select employees total hours to print in Minutes (half past the hour 30 ) or Hundredths ( half past the hour.50 ) Time of day format You may select hours to print in the AM/PM format (5:00 PM) or in the military format (5:00 PM will print 17:00 ) Day change offset The time a new day begins. Default is set at midnight. Day change can be moved forward or backward of midnight so time worked can be credited to the day intended. 18 Setup

19 5. Shift rules Shift Rules defines shift start time, stop time, lunch periods, round, grace and dock times. Employees worked time will be calculated based on the Clock Rules and the rules of the Shift the employee is assigned. The Time and Attendance system allows for 12 shifts or different schedules. Note: When using Round, Grace, and Dock features actual punched time will always be shown on time card. Features are used for hours worked calculations. 5.1 Shifts At the main menu, select the Shift icon. 5.2 Shift number Select the number you wish to assign to the shift. You may choose between 1 and 12 shifts. Click on box to enable shift rules. 5.3 Shift start time The time of day employees would normally start work. To select time scroll up/down or enter in either the AM/PM format (5:00 PM) or military format (17:00). 5.4 Shift round start The minutes before the start time during which employee punches will be treated as if they occurred exactly on the start time. A 15 minute round would allow an employee punch at 7:45 AM to be treated as an 8:00 AM punch for the purpose of calculation. 5.5 Shift grace start The minutes after the start time during which the employee punches are treated as if they occurred exactly on the start time. A 3 minute grace would allow an employee punch at 8:03 to be treated as a 8:00 AM punch for the purpose of calculation. Shift rules 19

20 5.6 Shift dock start The minutes the employee will lose from time work totals if punched in after the Start Time plus Grace, if used. (i.e. 8:00 AM start, 3 minute grace, 15 minute dock, employee punch at 8:04 AM would be treated as a 8:15 punch.) 5.7 Shift stop time The time of day the employee would normally stop work. To select time, scroll up/down or enter in either the AM/PM format (5:00 PM) or military format (17:00). 5.8 Shift round stop The minutes after the stop time during which employee punches are treated as they occurred exactly on the stop time. A 15 minute round would allow an employee punch at 5:15 PM to be treated as a 5:00 PM punch. 5.9 Shift grace stop The minutes before the stop time which employee punches are treated as if they occurred exactly on the stop time. Caution: A 3 minute Grace on a 5:00 PM stop time would allow employees to punch out at 4:57 PM and be treated as a 5:00 PM punch Shift dock stop The minimum minutes the employee will lose from time worked totals if punching before the stop time (minus grace). Without a shift grace stop assigned a 15 minute dock on a 5:00 PM stop time would allow an employee punch at 4:58 to be treated as a 4:45 PM punch. 20 Shift rules
.")
21 5.11 Lunch rules enable Click on button to set lunch rules Lunch start time The earliest time of day an employee can punch out for lunch Lunch end The latest time of day at which an employee should punch back in from lunch Lunch duration The number of minutes for lunch which will be subtracted from time worked totals. If the Lunch Duration is 60 minutes and employee punches out at 12:01 PM and punches back in at 12:55 PM (54 minutes) one hour will be deducted for lunch Auto lunch deduct after Automatic Lunch deduct Enter the number of hours and minutes following an IN punch that the system will deduct for lunch. The lunch duration will then be subtracted from the time worked totals. An employee IN punch at 8:00 AM and an Auto After setting of 6 hours will allow the system to assume the employee has taken lunch and will deduct a lunch duration at 2:00 PM. Shift rules 21
22 6. Entering employees into system From the main menu select Employee Profiles icon. To enter an employee, click on Insert. 6.1 Name At the Insert Employee screen enter employee s name. Employee name field has 21 characters including spaces. Note: Enter employee s last name first if reports are to be sorted by last name. 6.2 Badge Enter 4 digit badge number (see Badge) assigned to employee. 6.3 Number You may enter up to a 9 digit employee number (not required). 6.4 Shift (can be used as departments) Enter Shift number assigned. (Note: Employee time totals will be calculated based on these shift rules.) Hint: Shifts can also be used to define department numbers. (Shift 1 could be used as department 1, assigning employees to a department called shifts for reporting.) 22 Entering employees into system
23 7. Supervisor s badges Supervisor s badges are used to access setup information and reports at the Time Clock terminal. The system includes two Supervisor s badges. Supervisor s badges will not allow access to the Punch Editing, the Bell program or Data Export features. These can only be accessed through the PC Interface software. Up to 10 employee badges may be designated Supervisor Badge. Employee badge(s) assigned as a supervisor badge may not be used as an employee badge. Once an employee badge designated as a supervisor badge has been deleted, it may be used as an employee badge. To assign additional supervisor badges, follow the procedure described below. 7.1 Supervisors To designate an employee badge as a supervisor s badge or to delete the employee badge from supervisor status click on the Supervisors icon in the main menu. To add a supervisor badge click on Insert and assign the employee badge number you want to be a supervisor. To delete an employee badge from supervisor status, click on the badge number and then click on the Delete button. You will be prompted Are you sure? Yes will delete the badge. Supervisor s badges 23
24 8. Editing punches The Time and Attendance system allows you to edit employee punches in the current or the previous pay periods. Punches may be added or deleted. Employees who missed punching times can be added so that the system will calculate total hours worked. Punches outside of the shift parameter will be noted with an exclamation mark (!). The Punch Editor screen also allows you to edit totals in Regular and Overtime categories. Clicking on the Details button in the punch editor will show the system calculations of hours worked. 8.1 Punch editing At the main menu, click on Punch Editing. In the Punch Editor screen select the employee to edit. Click on the Pay Period (current or previous). To add a punch, click on Insert. Enter time in either AM/PM format (5:00 PM) or military format (17:00). Enter date as needed. Next to punch the word Inserted will appear. To Delete a punch, select the punch and click on Delete. If the punch was an employee swiped punch the word Deleted will appear next to the punch. If the punch was Inserted, it may be deleted without a notation. 24 Editing punches
25 9. Reports 9.1 Print, view, archive (save to disk) There are five (5) standard reports available from the Time and Attendance system. To print reports, select the Report icon from the main menu: 1. Select the report you wish to print or view at the PC monitor: Hours Summary Time Card Who s In, Who s Out Employee Profiles Clock Rules NOTE: The Time and Attendance system is designed to hold two pay periods of data. A completed Hours Summary report for all employees must be printed after the end of the pay period. Failure to do so will result in employees attempting to punch in on a third pay period being locked out of the clock. This is a safety feature to avoid loss or tampering of unreported data. 2. Select Report Output 1. Time Clock Printer (This is the printer connected directly to the terminal for stand-alone operation.) 2. Print Manager (To print reports selected from printer connected to the PC) 3. PC screen (If you wish to view report on PC monitor, does not print) 4. ASCII File save report to floppy disk (Archive to disk-save information) You will asked to name file and destination drive. May require floppy disk. 3. Employees: Select: All, Individual Employees, or Individual shift (select shift number) Reports 25
26 4. Select Pay Period: Current or Previous 5. Sort By: Allows you to select reports sorted by Name, Badge Number, Employee Number or by Shift. 6. Click on the button in the upper right hand corner of the report screen to: Report Output Button Time Clock Printer Send Print Manager Print PC Screen View ASCII File Create 26 Reports
27 9.2 Time card report The Time Card report is a listing by employee of all IN-OUT punches along with hours worked totals. This may be for the current or previous pay period. The report may be for one employee, employees on a specific shift, or for all employees. When a Time Card report has punch times with an! exclamation mark beside them, this indicates that the punch is either too early or too late to conform to shift or lunch rules that were enabled. If the words TIME CHANGE are printed underneath a punch in time, that indicates the real time clock in the Time Clock terminal was changed while that person was punched in. (Note: A Daylight Savings Time adjustment will cause this if someone is on the clock at 2:00 a.m.) The word missed, followed by * asterisks, will appear in the place of a punch out time if MAX TIME ON CLOCK has been exceeded. Note that the asterisks will also appear beside the totals and summaries of any employees who have missed a punch. TIME CARDS : SELECTED EMPLOYEES 2/15/01 10:46 AM PAGE 1 T ============================================================================ I M ADAMS, LINDA # SHIFT-01 PAY PERIOD ENDING - 2/11/01 E PUNCH DATE TIME IN/OUT HOURS DAY TOTAL WEEK TOTAL C A MON FEB 5 8:00AM IN R MON FEB 5 12:00PM OUT 4:00 D MON FEB 5 1:00PM IN S MON FEB 5 5:00PM OUT 4:00 MON 8:00 TUE FEB 6 7:45AM IN TUE FEB 6 12:45PM OUT 5:00 TUE FEB 6 1:15PM IN TUE FEB 6 4:15PM OUT 3:00 TUE 8:00 WED FEB 7 8:00AM IN 2 WED FEB 7 12:30PM OUT 4:30 / WED FEB 7 1:30PM IN 1 WED FEB 7 5:00PM OUT 3:30 WED 8:00 5 THU FEB 8 7:30AM IN / THU FEB 8 12:00PM OUT 4:30 0 THU FEB 8 12:30PM IN 1 THU FEB 8 4:00PM OUT 3:30 THU 8:00 FRI FEB 9 8:00AM IN FRI FEB 9 11:30AM OUT 3:30 1 FRI FEB 9 12:30PM IN 0 FRI FEB 9 5:00PM OUT 4:30 FRI 8:00 40:00 REG : 0:00 OT1 4 0:00 OT A PAY PERIOD: HOURS (+/-)EDITS TOTAL ADJUSTED M REGULAR 40:00 40:00 REG FIRST LEVEL OVERTIME 0:00 0:00 OT1 SECOND LEVEL OVERTIME 0:00 0:00 OT2 SUPERVISOR: EMPLOYEE: ADAMS, LINDA TIME CARD STATUS: COMPLETE... END TIME CARDS:SELECTED EMPLOYEES... Reports 27
28 IMPORTANT: PRINTING A PREVIOUS HOURS REPORT FOR ALL EMPLOYEES AFTER PAY PERIOD ENDS AND BEFORE EMPLOYEE PUNCH IN NEW PAY PERIOD WILL PREVENT LOCKOUT. 9.3 Hours summary report The Hours Summary report list hours worked totals by regular and overtime hours. This may be for an individual employee, a specific shift, or all employees; for the current or previous pay period. If an employee has a missed punch, the HOURS SUMMARY TOTAL will be noted with an *. HOURS SUMMARY : ALL EMPLOYEES 2/15/01 9:44 AM PAGE 1 H ============================================================================ O U PAY PERIOD ENDING: 2/11/01 R S NAME NUMBER BADGE SHIFT REGULAR OVERTIME 1 OVERTIME S ADAMS, LINDA :00 0:00 0:00 U ELLIS, STEVEN :00 0:00 0:00 M JOHNSON, JAMES :00 1:00 0:00 M JONES, CAROL :00 0:00 0:00 A MARTIN, LARRY * 32:00 0:00 0:00 R SMITH, ROBERT :00 2:00 0:00 Y TAYLOR, ROBERT :00 0:00 0:00 THOMAS, KATHERI :00 0:00 0:00 TUCKER, DONALD :00 0:00 0:00 2 WEBSTER, BETTY :00 0:00 0:00 / WILLIAMS, MARTI * 36:00 0:00 0:00 1 WILSON, MELVIN :00 0:00 0:00 5 / REGULAR OVERTIME 1 OVERTIME PAY PERIOD TOTAL HOURS: * 460:00 3:00 0:00 PAY PERIOD STATUS: COMPLETE 9 TOTAL EMPLOYEES: 12/12 : 44 A M... END HOURS SUMMARY:ALL EMPLOYEES Reports
29 9.4 Employee profile report The Employee Profile report lists All employees who have been programmed into the system with their assigned employee number, badge number and shift number. EMP PROFILES : ALL EMPLOYEES 2/15/01 9:30 AM PAGE 1 E ============================================================================ M P EMPLOYEES: P NAME NUMBER BADGE SHIFT R O ADAMS, LINDA F ELLIS, STEVEN I JOHNSON, JAMES L JONES, CAROL E MARTIN, LARRY S SMITH, ROBERT TAYLOR, ROBERT THOMAS, KATHERI TUCKER, DONALD WEBSTER, BETTY / WILLIAMS, MARTI WILSON, MELVIN / TOTAL EMPLOYEES: 12/ SYSTEM INFORMATION: LAST CHANGE: 2/10/99 12:07 PM SOFTWARE REVISION: TSW - VERSION :3 0 A M... END EMP PROFILES:ALL EMPLOYEES... Reports 29
30 9.5 Clock rules report The Clock Rules report lists ALL of the programmed setup, shift, and lunch rules. CLOCK RULES 2/15/01 12:24 PM PAGE 1 C ============================================================================ L O CLOCK RULES: C K MAX TIME ON CLOCK 12:00 HOURS PAY INTERVAL-ROUND 01 MINUTES R PAY PERIOD WEEKLY U NEXT PAY PERIOD START DATE 2/19/01 L DAY CHANGE TIME 12:00 AM E FIRST DAILY OVERTIME AFTER 24:00 HOURS S FIRST WEEKLY OVERTIME AFTER 40:00 HOURS SECOND DAILY OVERTIME AFTER 24:00 HOURS SECOND WEEKLY OVERTIME AFTER 168:00 HOURS 7TH DAY OVERTIME DISABLED DST START DATE 4/04/01 DST END DATE 10/28/01 2 PRINTER PARALLEL / COM PORT BAUD RATE SUPERVISOR BADGES: / NO SUPERVISOR BADGES ASSIGNED 0 1 SHIFT RULES: SHIFT 1 SHIFT 2 SHIFT SHIFT RULES DISABLED DISABLED DISABLED : START TIME ROUND GRACE DOCK P STOP TIME M ROUND GRACE DOCK LUNCH RULES DISABLED DISABLED DISABLED START TIME STOP TIME DURATION AUTO AFTER CLOCK RULES 2/15/01 12:24 PM PAGE 2 C ============================================================================ L O SHIFT RULES:(CONT.) C K SHIFT 4 SHIFT 5 SHIFT R SHIFT RULES DISABLED DISABLED DISABLED U LUNCH RULES DISABLED DISABLED DISABLED L E S SHIFT 7 SHIFT 8 SHIFT SHIFT RULES DISABLED DISABLED DISABLED LUNCH RULES DISABLED DISABLED DISABLED / 15 SHIFT 10 SHIFT 11 SHIFT 12 / SHIFT RULES DISABLED DISABLED DISABLED 1 LUNCH RULES DISABLED DISABLED DISABLED BELL SCHEDULE: 2 : TIME DURATION SUN MON TUE WED THU FRI SAT SYSTEM INFORMATION: P LAST CHANGE: 2/11/99 12:11 PM M SOFTWARE REVISION: TSW - VERSION END CLOCK RULES Reports
31 9.6 Who's in, who's out report The Who s In, Who s Out report lists all employees or a specific shift of names by who is punched IN or punched OUT. IN/OUT : SELECTED EMPLOYEES 2/15/01 8:22 AM PAGE 1 I ============================================================================ N / SHIFT 1: O U IN OUT T ADAMS, LINDA THOMAS, KATHERI MARTIN, LARRY WEBSTER, BETTY SMITH, ROBERT WILLIAMS, MARTI SHIFT 2: IN OUT ELLIS, STEVEN JONES, CAROL 2 WILSON, MELVIN / SHIFT 3: 1 5 IN OUT / JOHNSON, JAMES 1 TAYLOR, ROBERT TUCKER, DONALD TOTAL EMPLOYEES: 12/12 5 IN 8 7 OUT : 22 A M... END IN/OUT:SELECTED EMPLOYEES... Reports 31
32 10. Save to disk, archiving, & exporting The Time and Attendance system allows you to save pay period data to disk eliminating the need to keep hard copies. A generic ASCII export file can be created to export to other programs. (Check with your computer support consultant.) Export files for selected national payroll processors have been included. Check with one of these companies in your area for pricing and information about their services. READ THIS! 10.1 Save to disk To save payroll data on disk select the Reports icon from the main menu. Select the Report you wish to save. Under Report Output select ASCII File. Then select Employees, Pay Period, and Sort By preference. Click on Create. At the Save As screen enter a File Name and select a drive. Click on OK Exporting To export data click on the Export icon at the main menu. At the Data Export screen select output format. Choosing one of the national payroll processors will put data in the format required by that processor. If you select the generic ASCII file you must determine the format needed at the import program. (Check with your computer support consultant.) Next select the current or previous pay period. Click on the Group Selection required. Click on the Export button. 32 Save to disk, archiving, & exporting
33 11. Bell schedule The Time and Attendance system includes a signal schedule allowing for 24 program signal times, with individual durations from.1 to 25.5 seconds, and individual day of the week selection. An optional external signal buzzer is available for office environments. See Appendix D. Optional bells/horns may require relay box. Call Acroprint for details. Bell schedule 33
34 12. Programming terminal without software 12.1 Introduction The Time Clock terminal is primarily self-prompting to supervisors. The Main Menu is activated by swiping a Supervisor Badge. The headings for each group on the next four pages are the choices which appear in the Main Menu. The menu key (either up or down) is used to reach the menu subject desired. Pressing ENTER opens the specific task menu. The following Supervisor's Menu Map shows menus and choices available. All branches in the menu can be reached by simply using the ARROW and ENTER keys. The CLEAR key will move you to the previous menu. A prompt for further input may appear after a function has been selected. The ARROW keys can still be used, but the Time Clock terminal provides the convenience of a numerical pad. If prompted for a Badge Number or to select an employee, the option of swiping the badge may be used. After a critical function or data has been entered, an >ENTER TO CONFIRM< prompt is used to protect against unwanted entries. Typically, the Time C lock terminal will display the programmed data on the bottom line of the display as the selections are being scrolled through on the top line. The data programmed into the Time Clock terminal can be reviewed in this fashion. If there are any doubts about what has been programmed, simply print the appropriate report. HINT: PROGRAM TERMINAL AT PC USING SOFTWARE AND CABLE SUPPLIED BEFORE USING AS STAND-ALONE TERMINAL. 34 Programming the Time Clock terminal manually
35 12.2 Supervisor s menu map MAIN MENU REPORTS ADD/EDIT EMPLOYEE EDIT TIME TOTALS EDIT SHIFT RULES SUPERVISOR CARDS TIME AND DATE SETUP TEST FEATURES TEST FEATURES SELECT A TASK BADGE READER TEST DISPLAY TEST KEYBOARD TEST AUDIO TEST PRINTER TEST BELL TEST REPORTS SELECT A REPORT HOURS SUMMARY TIME CARDS WHO S IN, WHO S OUT EMPLOYEE PROFILES CLOCK RULES } } SELECT REPORT FILTER ALL EMPLOYEES INDIVIDUAL SHIFT SELECT A SHIFT INDIVIDUAL EMPLOYEE SELECT AN EMPLOYEE SELECT REPORT FILTER ALL EMPLOYEES INDIVIDUAL SHIFT SELECT A SHIFT INDIVIDUAL EMPLOYEE SELECT AN EMPLOYEE SELECT PAY PERIOD CURRENT PREVIOUS REPORT SUBMITTED Programming the Time Clock terminal manually 35
36 ADD/EDIT EMPLOYEE SELECT A TASK ADD AN EMPLOYEE EDIT AN EMPLOYEE DELETE AN EMPLOYEE SELECT AN EMPLOYEE {EMPLOYEE NAME} ENTER BADGE NUMBER EMPLOYEE NAME EMPLOYEE NUMBER SHIFT NUMBER SELECT AN EMPLOYEE {EMPLOYEE NAME} EDIT TIME TOTALS SELECT AN EMPLOYEE CURRENT REGULAR HRS CURRENT OVERTIME 1 CURRENT OVERTIME 2 PREVIOUS REGULAR HRS PREVIOUS OVERTIME 1 PREVIOUS OVERTIME 2 SUPERVISOR CARDS SELECT A TASK ADD SUPERVISOR BADGE DELETE A SUPERVISOR } ENTER BADGE NUMBER 36 Programming the Time Clock terminal manually
37 EDIT SHIFT RULES SELECT A SHIFT SHIFT RULES = DISABLED SHIFT RULES = ENABLED SHIFT START TIME SHIFT START ROUND SHIFT START GRACE SHIFT START DOCK SHIFT STOP TIME SHIFT STOP ROUND SHIFT STOP GRACE SHIFT STOP DOCK SHIFT LUNCH RULES = DISABLED SHIFT LUNCH RULES = ENABLED LUNCH WINDOW BEGIN LUNCH WINDOW END LUNCH DURATION AUTO LUNCH AFTER TIME AND DATE SELECT A TASK SET THE TIME SET THE DATE TIME FORMAT DATE FORMAT TIME TOTALS FORMAT ENTER TIME OF DAY 12 HOUR 24 HOUR DAY MONTH YEAR DAY YEAR MONTH MONTH DAY YEAR MONTH YEAR DAY YEAR DAY MONTH YEAR MONTH DAY MINUTES HUNDREDTHS Programming the Time Clock terminal manually 37
38 SETUP MAX TIME ON CLOCK PAY INTERVAL ROUND PAY PERIOD LENGTH PAY PERIOD START DAY CHANGE OFFSET OVERTIME RULES DAYLIGHT SAVINGS SETUP PRINTER COMM PORT BAUD RATE REMOVE ALL PUNCHES REINITIALIZE SYSTEM ENTER ELAPSED TIME SELECT PAY INTERVAL 1 MINUTE(S) 5 MINUTE(S) 6 MINUTE(S) 10 MINUTE(S) 15 MINUTE(S) SELECT PAY PERIOD WEEK PAY PERIOD TWO WEEK PAY PERIOD SEMIMONTHLY PERIOD MONTHLY PAY PERIOD ENTER TIME OFFSET 1ST DAILY OT AFTER 1ST WEEKLY OT AFTER 2ND DAILY OT AFTER 2ND WEEKLY OT AFTER 7TH DAY OVERTIME DISABLED ENABLED DAYLIGHT SAVE START DAYLIGHT SAVINGS END DISABLED SELECT PRINTER TYPE PARALLEL SERIAL NONE SELECT BAUD RATE Programming the Time Clock terminal manually
39 12.3 Terminal diagnostics The Time Clock terminal has a self-testing feature. The badge reader, display, keyboard audio, printer and bell program can be tested using a Supervisor s badge. At the terminal: 1) Swipe the Supervisor badge. 2) Scroll up/down to Test Features. 3) Press ENTER. 4) Scroll menu to select test 5) Press ENTER and proceed as instructed. TEST DESCRIPTIONS Badge reader: Display: Keyboard: Audio: Printer: Bell: This test will display the badge number that is swiped through the slot. This test may help identify a defective badge. The display will scroll through the various characters. The display will show which key is being pushed. Press clear twice to end the test. The internal speaker will beep at graduated frequencies for this test. Outputs a patterned character string to the printer. This test will ring a connected bell or buzzer (see Companion products) to ensure it is working properly. NOTE: Setting a bell schedule is only possible using the PC Interface Program. IMPORTANT Programming the Time Clock terminal manually 39
40 Appendix A Error messages at PC monitor Error: A change has occurred in the Primary database... Reason: Database changed since PC last communicated with the terminal. Punches may have occurred or supervisor changes may have been made at the terminal. New data must be reloaded at the PC. Unsaved changes made at PC will be discarded. Error: A Field Validation Error Has Occurred on Field: <Field Name> Reason: Invalid value entered in the field indicated. Reenter data according to the rules applied to the indicated field. Error: A Report Error Has Occurred. Reason: An error occurred while attempting to execute a report. Check printer and printer connections. Error: Cannot Export Data - The following employee has an incomplete time card: <Name> <Badge Number>. Reason: Incomplete time card data. Correct all missing punches and make sure all employees have completed pay period. Error: Cannot insert punch. Punch is <before/after> pay period <start/end> date. Reason: Attempted to insert punch outside of pay period parameters. Correct punch Date, Time or Pay Period. 40 Appendix A Error messages at PC monitor
41 Error: Error Messages regarding: <Clearing> <Cummunicating> <Deleting> <Inserting> <Loading> <Marking> <Updating> <Clock Terminal not responding> Reason: Error occurred in communication between the PC and terminal: 1) Try again. 2) Check connections between PC and terminal. 3) Insure communications cable does not exceed recommended length, in specifications, located away from other wiring and is not coiled. 4) Try lowering baud rate. (This must be done at both the PC and the terminal.) Error: Error <Creating> <Opening> File: <File Name> Reason: Check and reenter valid file name. Error: Next Pay Period Date exceeds limit of Pay Period length. Reason: Specified Start of Next Pay Period beyond parameters. Reenter valid date. Error: No employees have been <Define> <Selected> Reason: An attempt to execute an employee based report without employee(s) being <defined> or <selected>. Define or select employees and try again. Error: Unable to initialize the connection to Print Manager. Reason: The PC interface was unable to open the Windows default printer. Check printer settings using the Windows Print Manager and check hardware printer port settings. Appendix A Error messages at PC monitor 41
42 Error: Unable to open <any> COM port <n>. Reason: PC interface unable to open a COM port. Check hardware settings and connections. Error: Unable to start a timer. Reason: Windows unable to initiate a timer. Close some programs and try again. Error: Clock Terminal not responding. Reason: Terminal did not respond to a communication packet sent by the PC. 1) Check all connections between terminal and PC. Make sure terminal is powered up. Check baud rate is the same at PC and terminal. 2) Make sure communication cable is the recommended length and to specifications. Check that cable is not coiled or running through switches, over fluorescent lights or other sources of electromagnetic noise. 3) Try a slower baud rate. Terminal baud rate can be accessed using the Supervisor s badge. Then change baud rate in the PC program to match the terminal. 4) Check for IRQ (Interrupt request line) conflicts on the PC. Make sure the number assigned to the Time Clock terminal COM port is not the same used on other ports. NOTE: If you are uncertain about changing system settings, please consult a computer technician. Acroprint DOES NOT support operating system software and provides this information only for your convenience. 42 Appendix A Error messages at PC monitor
43 To check if an IRQ conflict on the COM port supporting the Time Clock terminal exists on your computer you can run a Resource Summary Report: Windows 95: a) Under My Computer icon click on Control Panel b) Click on the System icon. c) Click on tab Device Manager. d) Click on Print, OK. e) Click on OK again to exit. The Resource Summary Report contains an IRQ Usage Summary. If the port attached to the Time Clock terminal uses the same IRQ as another device this could cause a problem. The Device Manager can be used to change a device s configuration: * Identify a free IRQ setting and assign the device to that setting. * Disable the conflicting device to determine if it is causing a problem. * Rearrange settings used by another device or devices to free a setting needed by the device with the conflict. * Change jumpers on your hardware to match the new settings. NOTE: If the device uses hardware jumpers or switches to change settings and you use Device Manager to change the settings, you must also change the settings on the hardware. Device Manager does not change hardware settings. Windows 3.xx While Windows 3.xx does not include Device Manager, it does allow you to change settings at each COM port. Access to Setup for Ports is obtained through the Control Panel. No two devices can use the same IRQ setting. If necessary, change COM port to a nonconflicting IRQ setting. Appendix A Error messages at PC monitor 43
44 Appendix B Error messages at terminal These are error messages you may encounter while using the clock. BADGE OUT OF RANGE The badge number is not or one of the three special supervisor badges. BADGE READER TEST INVALID DATA Errant badge read during badge reader test. CAN T COMPLETE TASK 1. Response when database failed to remove all punches. 2. Record verification prior to deleting an employee failed. Simply try again. 3. Database access problem. 4. An attempt was made to modify a setting to an invalid value. CAN T COMPLETE TASK BADGE NOT FOUND The badge number is not entered on the clock. CAN T COMPLETE TASK BADGE NOT ON FILE The badge number is not entered on the clock as either an employee, or a supervisor. CAN T COMPLETE TASK DATE OUT OF RANGE The pay period start date must be beyond the current date and time set on the clock and it must be within one pay period s duration from the current time and date. CAN T COMPLETE TASK EMPLOYEE FOUND Attempting to add a supervisor or employee badge to the clock that is already programmed as an employee s badge. 44 Appendix B Error messages at Time Clock terminal
45 CAN T COMPLETE TASK INVALID BADGE Attempting to add/delete a supervisor or employee badge that is outside of the acceptable badge number range (1-9999). CAN T COMPLETE TASK INVALID DATE 1. An invalid date was entered by the users. An example of an invalid date is Feb. 30, When manually entering daylight savings time thresholds, the dates must be beyond the current date and time and it must be within 400 days of the current date and time. CAN T COMPLETE TASK INVALID DAY For monthly pay periods, the pay period start day must be between For semimonthly pay periods, the two pay period start days must be between The second day must be greater than the first. CAN T COMPLETE TASK INVALID ELAPSED TIME 1. Max time on the clock, lunch after, and daily overtime thresholds must be in the range of minutes. 2. Weekly overtime thresholds must be in the range of 0-29,999 minutes. 3. Edit time totals must be in the range of -29,999 to 29,999 minutes. 4. A shift round, grace or dock value is out of range. 5. A lunch duration is out of range. CAN T COMPLETE TASK INVALID NAME The employee s name contains characters that are not capital letters, spaces, periods or commas. Appendix B Error messages at Time Clock terminal 45
User s Guide. Table of Contents
 09/2009 User s Guide Table of Contents Getting Started 01. Logging In 1.1 Changing Login Name and Password 02. Entering Upgrade Codes Setting Up Your System Establishing Communication 03. Adding Clock
Attendance Rx User Guide
 Attendance Rx User Guide Welcome to Attendance Rx The Attendance Rx system allows the user to manage an entire company's time and attendance from a single Windows-based PC. Key Time and Attendance Features:
Automated Time & Attendance System BIG EFFICIENCY FOR BUSINESS
 Automated Time & Attendance System BIG EFFICIENCY FOR BUSINESS PAYROLL BECOMES A UTOMATIC Business owners used to have little choice when it came to processing time and attendance data either spend a lot
timeqplus User Guide Publication: 06-0414-000 Date of Publication: Sept. 12, 2013 Revision:
 timeqplus User Guide Publication: 06-0414-000 Date of Publication: Sept. 12, 2013 Revision: C Contacting Acroprint When contacting customer support, please have your product CD and registration information
Meridian 1 Meridian 1 Attendant PC LAN Interface Installation Guide
 Meridian 1 Meridian 1 Attendant PC LAN Interface Installation Guide Document Number: P0874391 Document Release: Standard 1.00 Date: November 1997 Year Publish FCC TM 1997 All rights reserved Printed in
History of Revisions. Ordering Information
 No part of this document may be reproduced in any form or by any means without the express written consent of II Morrow Inc. II Morrow, Apollo, and Precedus are trademarks of II Morrow Inc. Windows is
Exeba -ATS. User Guide. Escan Technologies Corporation
 Escan Technologies Corporation Exeba -ATS User Guide Escan Technologies Corp. 12140 Severn Way Riverside, CA 92503 Phone (909) 270-0043 Fax (909) 270-0920 1 ESCAN TECHNOLOGIES CORPORATION Exeba -ATS User
PayClock PC600 Time and Attendance System Model PC600
 PayClock PC600 Time and Attendance System Model PC600 User s Guide THIS EQUIPMENT COMPLIES WITH FCC REQUIREMENTS PURSUANT OF PART-15 This device complies with Part 15 of the FCC Rules. Operation is subject
PayClock PC600 Series Time and Attendance System Model PC600
 PayClock PC600 Series Time and Attendance System Model PC600 User s Guide THIS EQUIPMENT COMPLIES WITH FCC REQUIREMENTS PURSUANT OF PART-15 This device complies with Part 15 of the FCC Rules. Operation
Installation Guide. APA-1460 SlimSCSI. PCMCIA-to-SCSI Host Adapter
 R Installation Guide APA-1460 SlimSCSI PCMCIA-to-SCSI Host Adapter Introduction This document explains how to install and use Adaptec s APA -1460 SlimSCSI PCMCIA-to-SCSI adapters. The SlimSCSI adapters
Installing MPU-401 Compatible Cards in Windows 95
 MPU-401 May 14, 1996 Compatible Cards Supplemental Notes Installing MPU-401 Compatible Cards in Windows 95 These notes are designed to help you install the following Roland MIDI cards and configure them
Technical Manual. For use with Caller ID signaling types: Belcore 202, British Telecom, & ETSI
 Technical Manual For use with Caller ID signaling types: Belcore 202, British Telecom, & ETSI Caller ID.com WHOZZ CALLING? POS 2 Caller ID Monitoring Unit Technical Manual For use with Caller ID signaling
-Helping to make your life betterwww.person-to-person.net
 Household Telephone Management System Built on Interceptor ID Technology Owner/Operation Manual Telephone Management System- Model P2P101 Call Receiver - Model P2P301 (Receiver may be sold separately)
OWNERS MANUAL. Status Monitor. for Windows 95, 98, ME, NT 4, 2000 & XP. SIGNALCRAFTERS TECH, INC. www.signalcrafters.com
 OWNERS MANUAL Status Monitor for Windows 95, 98, ME, NT 4, 2000 & XP SIGNALCRAFTERS TECH, INC. www.signalcrafters.com 57 Eagle Rock Avenue, East Hanover, NJ 07936 Tel: 973-781-0880 or 800-523-5815 Fax:
Keep it Simple Timing
 Keep it Simple Timing Support... 1 Introduction... 2 Turn On and Go... 3 Start Clock for Orienteering... 3 Pre Start Clock for Orienteering... 3 Real Time / Finish Clock... 3 Timer Clock... 4 Configuring
Time Clock - User's Manual. InTagral, the clock for easy-to-use Attendance monitoring.
 Time Clock - User's Manual InTagral, the clock for easy-to-use Attendance monitoring. InTagral User s Manual Version 1.70 Contents Page iii Contents 1. Introduction...1 1.1. System Overview...1 1.2. This
MTX-15 TM. Data Collection Terminal. Installation and Operation Guide
 MTX-15 TM Data Collection Terminal Installation and Operation Guide Proprietary Notice Thank you For purchasing another fine product from Amano Cincinnati, Inc. This document contains proprietary information
USING THE MODEL IQ 1000 INTELLICLOCK
 USING THE MODEL IQ 1000 INTELLICLOCK The IQ 1000 is an advanced model of time clock with many features and benefits designed to offer you a wide range of options in how you collect your time and attendance
SETTING UP YOUR 6000 SERIES TIME RECORDER
 INTRODUCTION The Pyramid 6000 Series Time Recorder is an electronic time recorder designed to make payroll processing easier and more efficient. The 6000 series will meet your business needs whether your
SMART Board 8055i and 8055i-SMP
 SMART Board 8055i and 8055i-SMP Interactive flat panel Installation guide Product registration If you register your SMART product, we ll notify you of new features and software upgrades. Register online
SMART Board 8070i-SMP and 8070i
 SMART Board 8070i-SMP and 8070i Interactive flat panel Installation guide Product registration If you register your SMART product, we ll notify you of new features and software upgrades. Register online
EPSON USB/Parallel Adapter User s Guide
 EPSON USB/Parallel Adapter User s Guide EPSON Stylus COLOR 440 EPSON Stylus COLOR 800 EPSON Stylus COLOR 600 EPSON Stylus COLOR 850 EPSON Stylus COLOR 640 EPSON Stylus COLOR 1520 EPSON Stylus Photo EX
USING THE MODEL V800 VELOCITY CLOCK
 USING THE MODEL V800 VELOCITY CLOCK Velocity Clocks are advanced clocks with many options and features. They can be used to restrict employee punching, allowing employees to punch at the clock during their
2100 POS System. 2100 User Guide
 2100 POS System 2100 User Guide Thank you for selecting UTC RETAIL s innovative Model 2100 Point of Sale solution! This guide is designed to acquaint you with the features and functionality of the 2100
1. Make sure that no client accounts are open. 2. Click on Setup, then click Modem. The Modem Setup window will appear.
 SECURITY SYSTEM MANAGEMENT SOFTWARE FOR WINDOWS WINLOAD MODEM SETUP The modem setup is a very important step in the connection process. If the modem setup is not properly completed communication between
Winlead Dialer Software Users Manual Addendum 3 Installing Winlead Dialer Software on the Windows 2000 System
 Winlead Dialer Software Users Manual Addendum 3 Installing Winlead Dialer Software on the Windows 2000 System Copyright 2002 by Winlead Dialer Software 1.0 - Install Guide for Winlead Dialer Software Software
User s Guide for version 5 Page
 Network Management Interface Catalog VPi 32.15E For use with these ATS products: 7000 & 4000 Series (Group 5 Controller) Series 300 (Group 1 Controller), and 940, 962, 436, 434, 447, 448 (Group 6A/7A Control
Contents. Quick Start Steps 1. Welcome to PayClock 3. Product Overview 8. Routine Operations Guide 17
 User's Guide Contents Quick Start Steps 1 Verify the Contents...1 Mount the Terminal (PC600 and FaceIN Only)...1 Verify the System Requirements...1 Install the PayClock Software...2 Open PayClock...2
Getting Started. rp5800, rp5700 and rp3000 Models
 Getting Started rp5800, rp5700 and rp3000 Models Copyright 2011 Hewlett-Packard Development Company, L.P. The information contained herein is subject to change without notice. Microsoft, Windows, and Windows
466-1936 Rev E October 2004 ZZZ*(6HFXULW\FRP. Part No: 60-883-95R. CareGard. User Guide
 ) *(6HFXULW\ 466-1936 Rev E October 2004 ZZZ*(6HFXULW\FRP Part No: 60-883-95R CareGard User Guide FCC Notices FCC Part 15 Information to the User Changes or modifications not expressly approved by GE Security
PayClock Pro Time and Attendance Software Version 5
 PayClock Pro Time and Attendance Software Version 5 Setup and Users Guide Important Notice Please carefully read the PayClock Pro Version 5 Installation Guide before inserting this CD and beginning the
reflecta Super 8 Scanner
 reflecta Super 8 Scanner User Manual 1 FEDERAL COMMUNICATIONS COMMISSION (FCC) STATEMENT This Equipment has been tested and found to comply with the limits for a class B digital device, pursuant to Part
FrontDesk Installation And Configuration
 Chapter 2 FrontDesk Installation And Configuration FrontDesk v4.1.25 FrontDesk Software Install Online Software Activation Installing State Related Databases Setting up a Workstation Internet Transfer
File Management Utility. T u t o r i a l
 File Management Utility T u t o r i a l Contents System Requirements... 2 Preparing Files for Transfer to GlobalMark... 2 Application Launch... 2 Printer Setup... 2 Communication Status... 4 Communication
Internal Modem Installation with Windows 95
 Internal Modem Installation with Windows 95 You will need these items from your U.S. Robotics modem box: modem phone cord Plus: a screwdriver (not included) Determining Available Resources Your U.S. Robotics
PRODUCTIVITY THROUGH INNOVATION 600 CONTROL DIRECT DRIVE TECHNICAL/OPERATION MANUAL
 Rev. D PRODUCTIVITY THROUGH INNOVATION 600 CONTROL DIRECT DRIVE TECHNICAL/OPERATION MANUAL 10 BORIGHT AVENUE, KENILWORTH NEW JERSEY 07033 TELEPHONE: 800-524-0273 FAX: 908-686-9317 TABLE OF CONTENTS Page
PC Program User s Guide (01.01.05) 1. Connecting the PC. 2. Installation and Start-up. 3. Programming
 1. Connecting the PC. 2. Installation and Start-up. 3. Programming") Work Off-Line Set up a new database or modify a previously saved database (without being connected to the telephone system). This helps minimize on-site programming time. Work On-Line (connected directly
Work Off-Line Set up a new database or modify a previously saved database (without being connected to the telephone system). This helps minimize on-site programming time. Work On-Line (connected directly
Dual Ports Serial PC Card User Manual
 Dual Ports Serial PC Card User Manual FCC COMPLIANCE STATEMENTS This equipment has been tested and found to comply with the limits for a Class B digital device, pursuant to Part 15 of the FCC Rules. These
POS-X Stock Manager User s Guide
 POS-X Stock Manager User s Guide Version 1.3 Copyright 2005 POS-X Inc. All rights reserved. POS-X.com 1-800-790-8657 1 POS-X Stock Manager User s Guide Stock Manager Version 1.1.67 POS-X Inc. Telephone:
Centran Version 4 Getting Started Guide KABA MAS. Table Of Contents
 Page 1 Centran Version 4 Getting Started Guide KABA MAS Kaba Mas Welcome Kaba Mas, part of the world-wide Kaba group, is the world's leading manufacturer and supplier of high security, electronic safe
User Manual 2-Port USB KVM Switch with Audio GCS632U PART NO. M0104
 User Manual 2-Port USB KVM Switch with Audio 1 GCS632U PART NO. M0104 Welcome Thank you for purchasing one of the most feature-rich keyboard, video, and mouse switches on the market. IOGEAR s MiniView
ADP CollectAll Manager v2.4 User s Guide
 ADP CollectAll Manager v2.4 User s Guide ADP CollectAll Manager Version 2.4 User s Guide 2007 Automatic Data Processing, Inc. ADP provides this publication as is without warranty of any kind, either express
CipherLab 5100 Time Attendance Utility Manual
 CipherLab 5100 Time Attendance Utility Manual K:\Products\Product Technical\BI\BI-PC5100T\CipherLab5100TimeAttendnaceUtilityManual0707-process.doc Page 1 / 13 1 Login A popup form as follows will appear
4 Backing Up and Restoring System Software
 4 Backing Up and Restoring System Software In this Chapter... Planning a Backup Strategy, 4-3 Preparing for Disaster Recovery, 4-4 Creating Boot Recovery Diskettes, 4-5 Making a Full Backup Tape, 4-8 Restoring
DUKANE Intelligent Assembly Solutions
 PC Configuration Requirements: Configuration Requirements for ipc Operation The hardware and operating system of the PC must comply with a list of minimum requirements for proper operation with the ipc
Master Time Clock MTC-200 MTC-400 MTC-600. Users Manual
 Master Time Clock MTC-200 MTC-400 MTC-600 Users Manual Toll Free (888)713-0373 Phone (972)987-4408 FAX (877)720-9291 www.midwest-time.com sales@midwest-time.com TABLE OF CONTENTS TOPIC PAGE GENERAL DESCRIPTION
Networking. General networking. Networking overview. Common home network configurations. Wired network example. Wireless network examples
 Networking General networking Networking overview A network is a collection of devices such as computers, printers, Ethernet hubs, wireless access points, and routers connected together for communication
Getting Started with IntelleView POS Administrator Software
 Getting Started with IntelleView POS Administrator Software Administrator s Guide for Software Version 1.2 About this Guide This administrator s guide explains how to start using your IntelleView POS (IntelleView)
Monnit Wi-Fi Sensors. Quick Start Guide
 Monnit Wi-Fi Sensors Quick Start Guide Inside the Box You should find the following items in the box: Monnit Wi-Fi (MoWi ) Sensors 2 x AA Batteries for Each MoWi Sensor Quick Start Guide Note: A MoWi USB
Korosi Monitoring System (KMS) Software Manual
 Software Manual") PT. KOROSI SPECINDO Corrosion Monitoring System Eng. Doc. No.: KS-MNL-KMS Korosi Monitoring System (KMS) Software Manual Revision Date Prepared Approved Description 0 23/05/2008 ES JH Issued for approval
PT. KOROSI SPECINDO Corrosion Monitoring System Eng. Doc. No.: KS-MNL-KMS Korosi Monitoring System (KMS) Software Manual Revision Date Prepared Approved Description 0 23/05/2008 ES JH Issued for approval
How To Use Mview On A Powerline 2.2 (Powerline) On A Pc Or Macbook 2 (Powerplst) On An Iphone Or Ipa 2 (Aldo) On Your Iphon 2 (
 On A Pc Or Macbook 2 (Powerplst) On An Iphone Or Ipa 2 (Aldo) On Your Iphon 2 (") mview for V8.53 and Later Motion Software mview is an elevator monitoring application. Through 1 Ethernet, the computer running mview may be connected directly to a single Motion 2000 or Motion 4000 controller
mview for V8.53 and Later Motion Software mview is an elevator monitoring application. Through 1 Ethernet, the computer running mview may be connected directly to a single Motion 2000 or Motion 4000 controller
Chapter 2 Installation
 Installation Chapter 2 Installation This chapter will guide you through the installation of the Quartet Serial PCI. There are no jumpers or switches to set for this PCI Plug-n-Play board. 2-1 Hardware
mysensors mysensors Wireless Sensors and Ethernet Gateway Quick Start Guide Information to Users Inside the Box mysensors Ethernet Gateway Quick Start
 mysensors Information to Users mysensors Wireless Sensors and Ethernet Gateway Quick Start Guide This equipment has been tested and found to comply with the limits for a Class B digital devices, pursuant
Newton Backup Utility User s Guide. for the Windows Operating System
 Newton Backup Utility User s Guide for the Windows Operating System K Apple Computer, Inc. 1995 Apple Computer, Inc. All rights reserved. Under the copyright laws, this manual may not be copied, in whole
Lenovo IdeaCentre Q180 Series
 Machine type: 10087/3110 Lenovo IdeaCentre Q180 Series User Guide Version 1.0 2011.09 31500665 Important Safety Information Before using this manual, it is important that you read and understand all of
Micro-computer Electronic Time Clock. User Manual
 Micro-computer Electronic Time Clock User Manual For more information on Acroprint products Acroprint offers a complete line of standard Time Recorders, state-of-the-art Electronic Time Recorders, Document
for Windows Media Center User's Guide
 for Windows Media Center User's Guide Table of Contents Introduction System Requirements Installation Running HAI Home Control Using HAI Home Control Product Support Introduction Thank you for purchasing
GUARD1 PLUS SE Administrator's Manual
 GUARD1 PLUS SE Administrator's Manual Version 4.4 30700 Bainbridge Road Solon, Ohio 44139 Phone 216-595-0890 Fax 216-595-0991 info@guard1.com www.guard1.com i 2010 TimeKeeping Systems, Inc. GUARD1 PLUS
TIME CLOCK COMMUNICATION
 TIME CLOCK COMMUNICATION Qqest Software Systems, Inc. Contents Introduction............................... 1 ETC Clock Models......................... 1 Time & Attendance Clocks (100 Series)....... 1 Job
Business Audio System: Music & Messaging MP3 Player. by Grace Digital Audio. User Guide. Model No. GDI-USBM10
 Business Audio System: Music & Messaging MP3 Player by Grace Digital Audio User Guide Model No. GDI-USBM10 User Guide Contents Introduction 2 Safety & General Use Information 2 Features 3 Set Up & Operation
ROM ACCESS CONTROL USER S MANUAL
 ROM ACCESS CONTROL USER S MANUAL Manual Software Pro-Access Page: 1 PRO-ACCESS SOFTWARE GUIDE PRO-ACCESS SOFTWARE GUIDE 1 0. INTRODUCTION 3 1. INSTALLIG THE SOFTWARE 4 2. SOFTWARE OPERATORS AND COMPETENCIES.
Using the enclosed installation diagram, drill three holes in the wall with the lower hole 1150mm from the floor.
 Terminal Installation When choosing the location of the terminal, care should be taken to select an area with consistent light levels throughout the day and avoid areas where the unit may be subjected
Aquadyne TechTip TITLE: TROUBLESHOOTING PC COM PORT AND MODEM PRODUCTS AFFECTED SYMPTOMS POSSIBLE CAUSES
 Aquadyne TechTip TITLE: TROUBLESHOOTING PC COM PORT AND MODEM COMMUNICATIONS WITH AN OCTOPUS. Article # 072297-1 Last reviewed: 03/25/98 Keywords: Serial Port, Modem, Polling, AquaWeb, Node Not Responding
EPSON USB/Parallel Adapter User s Guide
 EPSON USB/Parallel Adapter User s Guide EPSON Stylus COLOR 440 EPSON Stylus COLOR 1520 EPSON Stylus COLOR 600 EPSON Stylus COLOR 3000 EPSON Stylus COLOR 640 EPSON Stylus Photo 700 EPSON Stylus COLOR 660
SMART Response PE. Quick Start Guide. Safety and Compliance Information...2. Compliance...2. What s in the Box?...3. Environmental Considerations...
 SMART Response PE Quick Start Guide Safety and Compliance Information...2 Compliance...2 What s in the Box?...3 Environmental Considerations...3 Installing the Clicker Batteries...3 Installing SMART Response
AC-115 Compact Networked Single Door Controller. Installation and User Manual
 AC-115 Compact Networked Single Controller Installation and User Manual December 2007 Table of Contents Table of Contents 1. Introduction...5 1.1 Key Features... 6 1.2 Technical Specifications... 7 2.
FCC COMPLIANCE STATEMENT FOR AMERICAN USERS
 FCC COMPLIANCE STATEMENT FOR AMERICAN USERS This equipment has been tested and found to comply with the limits for a CLASS A digital device, pursuant to Part 15 of the FCC Rules. These limits are designed
User s Manual Model KB990W
 Wireless Internet Keyboard & Optical Mouse User s Manual Model KB990W FCC Statement This device complies with part 15 of FCC Rules. Operation is subject to the following two conditions: (1) this device
Diamond II v2.3 Service Pack 4 Installation Manual
 Diamond II v2.3 Service Pack 4 Installation Manual P/N 460987001B ISS 26APR11 Copyright Disclaimer Trademarks and patents Intended use Software license agreement FCC compliance Certification and compliance
Table of Contents TIME CLOCK...2
 Table of Contents TIME CLOCK...2 PUNCH IN / OUT...2 CLOCK IN / OUT BREAK...2 DAILY WAGE COST...3 Wage Cost Log...4 Wage Cost Setup...4 TODAY S TIME TOTALS...5 PAY PERIOD REPORT...5 PAY PERIOD SUMMARY REPORT...5
TIME BOX User support
 TIME BOX User support Should you have any comment concerning the use of this product or our services, please write to the following address: marketing@bodet.com BODET Software B.P. 40211 Boulevard du Cormier
User Manual. Humidity-Temperature Chart Recorder. Model RH520
 User Manual Humidity-Temperature Chart Recorder Model RH520 Introduction Congratulations on your purchase of the Extech RH520 Temperature + Humidity Chart Recorder. The RH520 measures and displays Temperature,
IEEE 802.11b WLAN PC Card
 IEEE 802.11b WLAN PC Card User s Guide Version: 1.3 August 2001 Please install the Utility/Driver first before inserting the PCMCIA Card. FCC Class B Radio Frequency Interference Statement The manufacturer
Ethernet. Customer Provided Equipment Configuring the Ethernet port.
 Installing the RDSP-3000A-NIST Master Clock. Ethernet Connect the RJ-45 connector to a TCP/IP network. Equipment The following equipment comes with the clock system: RDSP-3000A-NIST Master Clock Module.
GV-Keyboard. User's Manual V2.0
 GV-Keyboard User's Manual V2.0 Before attempting to connect or operate this product, please read these instructions carefully and save this manual for future use. 2007 GeoVision, Inc. All rights reserved.
2 Setting Up the Hardware for a Wired Ethernet Network... 13. 3 Setting Up the Software for an Ethernet Network... 21
 Contents 1 Networking Basics............................................... 1 Selecting a network connection........................................ 2 Wired Ethernet network...........................................
V2.0 Attendance System Hardware Suite Guide Instructions Manual
 CONTENTS TA920 V2.0 Attendance System Hardware Suite Guide Instructions Manual Chapter One - Introduction 1.1 Communication Port 5 1.2 Power Source Control. 5 1.3 Attendance Users. 6 1.4 Registering Ways..
HP UPS R1500 Generation 3
 HP UPS R1500 Generation 3 Installation Instructions Part Number 650952-001 NOTE: The rating label on the device provides the class (A or B) of the equipment. Class B devices have a Federal Communications
TR-3 Channel Editor. Software Manual
 TR-3 Channel Editor Software Manual Trilithic Company Profile Trilithic is a privately held manufacturer founded in 1986 as an engineering and assembly company that built and designed customer-directed
Programming and Using the Courier V.Everything Modem for Remote Operation of DDF6000
 Programming and Using the Courier V.Everything Modem for Remote Operation of DDF6000 1.0 Introduction A Technical Application Note from Doppler System July 5, 1999 Version 3.x of the DDF6000, running version
JEROME COMMUNICATIONS SOFTWARE (JCS) INSTALLATION and OPERATION MANUAL V1.02 for Windows XP
 INSTALLATION and OPERATION MANUAL V1.02 for Windows XP") AZI P/N 700-0042-B Last update May 2009 USER MANUAL JEROME COMMUNICATIONS SOFTWARE (JCS) INSTALLATION and OPERATION MANUAL V1.02 for Windows XP May 2009 ARIZONA INSTRUMENT LLC 3375 N Delaware Street Chandler,
AZI P/N 700-0042-B Last update May 2009 USER MANUAL JEROME COMMUNICATIONS SOFTWARE (JCS) INSTALLATION and OPERATION MANUAL V1.02 for Windows XP May 2009 ARIZONA INSTRUMENT LLC 3375 N Delaware Street Chandler,
When upgrading your TAPIT software make sure that all call accounting data has been exported before you begin the installation process.
 When upgrading your TAPIT software make sure that all call accounting data has been exported before you begin the installation process. Registration Settings: SERIAL NUMBER: COMPUTER ID: REGISTRATION NUMBER:
Data Analysis Software
 TRAKPRO Data Analysis Software User s Manual November 1996 P/N 1980200 Rev. D TSI Incorporated TRAKPRO Data Analysis Software User s Manual November 1996 P/N 1980200 Rev. D SHIP TO: TSI Incorporated 500
Frontier DSL SelfConnect Guide
 Frontier DSL SelfConnect Guide Frontier DSL Self-Installation Guide Table of Contents Getting Started...2 Customer and Computer Requirements...2...3 STEP 1: Install Microfilters...3 STEP 2: Install Your
V Series. Intelligent Programmer Software (DOS Version) User Manual
 User Manual") V Series Intelligent Programmer Software (DOS Version) User Manual Copyright 1996, 1997, 1999, 2002 Best Lock Corporation dba Best Access Systems. All rights reserved. Printed in the United States of America.
V Series Intelligent Programmer Software (DOS Version) User Manual Copyright 1996, 1997, 1999, 2002 Best Lock Corporation dba Best Access Systems. All rights reserved. Printed in the United States of America.
Topaz Installation Sheet
 Topaz Installation Sheet P/N 460924001E ISS 08FEB12 Content Introduction... 3 Recommended minimum requirements... 3 Setup for Internet Explorer:... 4 Topaz installation... 10 Technical support... 14 Copyright
Config software for D2 systems USER S MANUAL
 DT-CONFIG SOFTWARE Config software for D2 systems USER S MANUAL CONTENTS 1. Introductions ------------------------------------------------------------------- 3 2. System Requirement and Connection ----------------------------------------
Taurus Super-S3 LCM. Dual-Bay RAID Storage Enclosure for two 3.5-inch Serial ATA Hard Drives. User Manual March 31, 2014 v1.2 www.akitio.
 Dual-Bay RAID Storage Enclosure for two 3.5-inch Serial ATA Hard Drives User Manual March 31, 2014 v1.2 www.akitio.com EN Table of Contents Table of Contents 1 Introduction... 1 1.1 Technical Specifications...
Document authored by: Native Instruments GmbH Software version: 2.6.4 (09/2013)
") Setup Guide Disclaimer The information in this document is subject to change without notice and does not represent a commitment on the part of Native Instruments GmbH. The software described by this document
Setup Guide Disclaimer The information in this document is subject to change without notice and does not represent a commitment on the part of Native Instruments GmbH. The software described by this document
First Data FD130 Terminal. Quick Set-up Guide
 First Data FD130 Terminal Quick Set-up Guide Thanks for choosing a First Data Terminal. First Data Terminals are some of the fastest, most secure point-of-sale terminals available. Installation is quick
Xerox DocuPrint P12 Print Driver User Guide
 Xerox DocuPrint P12 Print Driver User Guide Xerox Corporation 800 Phillips Road Webster, New York 14580 1998 Xerox Corporation. Xerox, The Document Company, the stylized X, and the identifying product
Modbus RTU (RS-485) TCP/IP (Ethernet)
 TCP/IP (Ethernet)") Eaton Innovative Technology PEM PC Software Installation and Operation Instruction Manual: IM01005006E Rev. 2 March 2007 Modbus RTU (RS-485) TCP/IP (Ethernet) Effective Date 3/2007 For more information
Eaton Innovative Technology PEM PC Software Installation and Operation Instruction Manual: IM01005006E Rev. 2 March 2007 Modbus RTU (RS-485) TCP/IP (Ethernet) Effective Date 3/2007 For more information
A0 Time & Attendance. Management System. Software Manual
 A0 Time & Attendance Management System Software Manual Application: Fingerprint terminal, Fingerprint access control terminal, Fingerprint terminal with access control and visible walky-talky system, IC/ID
How To Use An Easymp Network Projector On A Computer Or Network Projection On A Network Or Network On A Pc Or Mac Or Ipnet On A Laptop Or Ipro Or Ipo On A Powerbook On A Microsoft Computer On A Mini
 EasyMP Network Projection Operation Guide Contents 2 Before Use Functions of EasyMP Network Projection....................... 5 Sharing the Projector....................................................
User s manual. Corded telephone. w w w.v t e c h c a n a d a. c o m. Big Button Big Display. Model:CD1281 DIR CID
 User s manual w w w.v t e c h c a n a d a. c o m DIR CID Model:CD1281 Corded telephone Big Button Big Display Congratulations on purchasing your new VTech product. Before using this telephone, please read
ATR9800 Reference Manual. Manual Revision A Published JUNE 2000 ACROPRINT TIME RECORDER CO. 5640 DEPARTURE DRIVE RALEIGH, NC 27616
 ATR9800 Reference Manual Manual Revision A Published JUNE 2000 ACROPRINT TIME RECORDER CO. 5640 DEPARTURE DRIVE RALEIGH, NC 27616 Printed in the United States of America Copyright 1999 ACROPRINT TIME RECORDER
Time and Attendance System
 Time and Attendance System ETHERNET Pyramid TimeTrax EZ ETHERNET MODEL SOFTWARE MUST BE FULLY INSTALLED PRIOR TO CONNECTING ANY TERMINAL CABLES WHAT S IN THE BOX? Pyramid TimeTrax time recorder AC Power
BillQuick Agent 2010 Getting Started Guide
 Time Billing and Project Management Software Built With Your Industry Knowledge BillQuick Agent 2010 Getting Started Guide BQE Software, Inc. 2601 Airport Drive Suite 380 Torrance CA 90505 Support: (310)
CashFlow Programming Module CPM
 CashFlow Programming Module CPM Installation & User Guide GB REV G4 08/08/2006 Table of Content Table of Content... 2 CashFlow Programming Module (CPM)... 4 What is a CPM?... 4 CPM Identification... 4
SYNERGY CONFIGURATION SOFTWARE AND HARDWARE SETUP V 2.2 11/02
 SYNERGY CONFIGURATION SOFTWARE AND HARDWARE SETUP V 2.2 11/02 CONTENTS: SECTION 1: WIN 95/98...2 INSTALL SYNERGY CONFIGURATION SOFTWARE...2 INSTALL NIC PCI CARD AND DRIVER FOR WIN 95/98/ME...2 RECORD SETTINGS