Sentric, Inc. Web Pay User Guide
|
|
|
- Zoe Flowers
- 10 years ago
- Views:
Transcription
1 Sentric, Inc. Web Pay User Guide

2 Thank you for choosing Sentric, Inc as your payroll service provider! This User Guide, in combination with Web Pay training by one of our Implementation Specialists, will provide you with the resources you need to utilize Web Pay successfully. For ongoing service and support, you have been assigned a Customer Service Representative (CSR). Their information is as follows: CSR s Name: CSR s Phone Number: ( ) - CSR s Remember when communicating with your Customer Service Representative (CSR) to always have your PIN available for security purposes. Your PIN is the four-character code that you selected in order to keep sensitive data secure when communicating with Sentric, Inc. Since we are continuously enhancing the Web Pay system, please watch for updates in the Sentric, Inc. Monthly News publication that will be sent to you electronically towards the end of each quarter. Also, you can access various types of information from our website at Once on the site, find the section labeled Client in the left margin. The Support link contains documentation, such as this User Guide, and requires a username and password. (Contact your CSR for the login information.) The Training Calendar link will launch a document containing the various training sessions offered by Sentric, Inc. in a calendar format. The Holiday Processing link will display a list of holiday processing dates for the next few years. Tax Authority Links will display a map of the United States and allow you to jump to the websites of many tax bureaus. Sentric, Inc. looks forward to servicing you! 2
 to always have your PIN available for security purposes.")
3 Table of Contents Section 1: Using Web Pay 1. Accessing Web Pay Using the Interface...6 Section 2: Company Setup Module 3. View Only vs. View/Edit Tabs Company Setup Tabs...9 Section 3: Employee Information Module 5. New Employees Selecting an Employee Employee Information...37 Section 4: Payroll Data 8. Starting Payroll Entering Payroll Data Verifying Data and Submitting Payroll Payroll Entry Recap Manual Checks and Voided Checks...87 Section 5: Reports 13. Printing Reports Report Writer...95 Section 6: Employee Self Service (ESS) 15. Company Level Administration Employee Setup Employee Access Appendix A Report Writer Static Text/Simple Formulas Appendix B Frequently Asked Questions Index
 15. Company Level Administration...107 16. Employee Setup...110 17. Employee Access...111 Appendix A Report Writer Static Text/Simple Formulas.")
4 Section 1: Using Web Pay Chapter 1. Accessing Web Pay You must have a web browser and Internet access to log into Web Pay. Any recent version web browser should work, although we highly recommend Internet Explorer 4.0 or later as it is currently much faster than Netscape Navigator. In the Address window of your browser, enter the address This will take you to the Sentric, Inc. website where you can login to Web Pay. The following screen should appear: Select the Login link in the upper right side of the screen. 4


5 Customer Login Links will appear. Select WebPay Employer Login and the following box should appear: You should enter the Username, Password, and Company ID that you have been supplied by Sentric, Inc. These fields are case sensitive and should not be shared with anyone. This will allow you access to the Main Menu (see below). 5

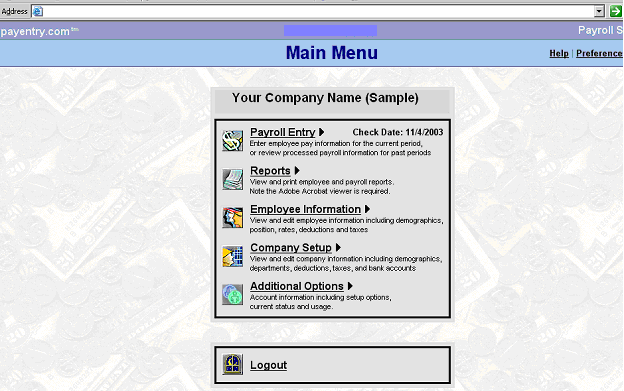
6 6


7 Chapter 2. Using the Interface The user interface, consisting of the Main Menu module windows, is contained in the main application window. Click on the icons or links to navigate to the desired module. Company Name Current Check Date Module Selection Options It is important to use the navigation tools within Web Pay. Do not use the Back or Forward button on your browser or you will be logged out and changes you have made could be lost. Once you have navigated into a module, you will notice that all pages have links at the top and bottom of the page in order to go back to the Main Menu. Items that are bold and underlined can be used for navigation. OR Remember, when making modifications within Web Pay, to Save Changes, or you will get a warning and will not be allowed to leave that screen until you save or undo the change. The Undo Changes button will allow you to undo the last change you have made subsequent to selecting Save Changes. 7

8 The Module Windows The module windows are used to quickly access any of the modules. Web Pay Modules Payroll Entry: The Payroll Entry Module is used to process the current payroll and calculate manual checks. Reports: The Reports Module is used to create, view, and print reports. Employee Information: The Employee Information Module is used to enter new employees and add/edit existing employee information. Company Setup: The Company Setup Module is used to view company information including earning codes, taxes, deductions, and client/service bureau information.. You can also edit job code, department, and company auto pay information. Additional Options: The Additional Options Module is used to configure employee self-service. 8

9 Section 2: Company Setup Module Chapter 3. View Only vs. View/Edit Tabs Next to each chapter title in this section, there will be a guideline showing if the tab has view only or view/edit capabilities. You may wonder why this guide states that some tabs are view only when you clearly have the ability to edit the information on the tab. In these instances, the client user does not have access to all fields necessary to configure changes to be made to the tab and therefore it is in the best interest of the client to rely upon the CSR to make these changes. It is highly recommended that any changes made to your company on view/edit tabs be communicated to your CSR so that adjustments can be made to general ledger setup, calculation codes and more. 9


10 Chapter 4. Company Setup Tabs Demographics view only tab The Demographics tab contains your Company s name and address and client user contact information. Any changes needed to any information on this tab must be communicated to your CSR. Departments view/edit tab The Departments tab contains your company s cost center/organizational structure. Web Pay will allow up to five levels of cost centers, with an unlimited number of departments within each level. 10


11 To view or edit existing departments or to add new ones, click on the Departments link. Code: Each department must have a unique, alphanumeric department code id. Name: This field is the department s description. Details: This link will take the user to a screen where additional options are available. 11


12 Department Name and Address: The department name will already be populated from the Departments screen. If the department is at an offsite location, the address can be added for reporting purposes. Other Information: The fields in this area are used to enter company overrides for any hours or wages assigned to this department. Rate: This field can be used to enter a specific rate to be associated with the department as opposed the employees base rate. Rate Code: This field can be used to select the Rate Code to be associated with the department selected. The Rate Codes for the employee are stored on the Rates tab. If the code is not set up on the employee, the base rate will be used. Shift: Select the shift code to associate with this department. WCC: Select the worker s compensation code to associate with this department. To modify the departments, edit the fields and click Save Changes. When adding information for a new department, populate the bottom row of fields and click the Add button. This will move the new department data up to the list of departments and insert a new blank row for future use. 12


13 Earnings view only tab To add or modify earnings codes, please contact your CSR. The definition of each earnings category paid by your company is setup here. There must be a company level definition for each earnings category used by the company, regardless if it is scheduled or one time activity. After the earning has been added to the company level and defined, it can be added to the employee as a scheduled event or used in Payroll Entry as an override to existing scheduled earnings or for one time earnings. Code: Each earnings category must be identified by a unique earnings code id. Description: This field contains the earnings category description. Short Description: This field contains the earning category s description that will display on the employees pay checks and company reports. Rate Multiplier: This field contains a multiplier for the employees rate of pay. For example, when an Overtime earnings category is created a multiplier of 1.5 is used so that the employees rate of pay will be multiplied by 1.5 for any hours earned in this category. If the field is left to default to zero, the employees rate of pay will not be affected. Details: This link will take the user to a screen where various other details for the earnings category can be entered. Some information displayed in the details area is auto populated from the main Earnings screen. A description of additional fields is as follows: 13


14 Type: The type field designates whether this earnings category is for regular earnings, overtime, memo code, etc. for payroll processing and reporting purposes. Calc Code: This field is used to select how Web Pay is to perform the calculation of this earning. Rate Code: This field is used if you want the earning to be calculated using one of the employees additional Rate Codes, which are stored on the Rates tab. If the code is not set up on the employee, the base rate will be used. Rate: This field can be used to enter a specific rate to be associated with the earning as opposed the employees base rate. Rate Additional: This field can be used to enter an additional amount to be added to the employees rate of pay. Rate Multiplier: This field contains a multiplier for the employees rate of pay. For example, when an Overtime earnings category is created, a multiplier of 1.5 is used so that the employees rate of pay will be multiplied by 1.5 for any hours earned in this category. If the field is left to default to zero, the employees rate of pay will not be affected. Maximum: This is the lifetime maximum amount the employee will be paid under this earnings category. Once this amount is reached, the employee will not receive these earnings again. Annual Maximum: This is the annual maximum amount the employee will be paid under this earnings category. Once this amount is reached, the employee will not receive these earnings again until the start of the next calendar year. 14


15 Agency: Agencies allow you to make payments to third parties on behalf of employees. If you have chosen to do that for this certain earnings category, the agency code will be displayed in this field. Matching Deduction: This field contains a corresponding deduction code that will be associated with the employees paycheck if this earnings category is selected. Print On Check Stub?: The client has the ability to determine if they want earnings categories to display on the check stub in the earnings section, in the benefits section, or to be hidden. Hidden codes still display on payroll reports. W2 Field: If the earnings category should display in any box other than 1 on the W2 Field, the box is selected in this field. Reduce Autopay?: Checking this box will result in the employees salary and hourly autopays being reduced by the hours and amounts received in this earnings category. Company Auto Pays view/edit tab The Company Auto Pays tab is used to produce entries in the payroll entry screens for the purpose of reducing data entry time and increasing accuracy. Earnings, tax, and deduction categories added to this screen will be added to ALL employees in payroll entry. To remove the codes from individual employees, remove it from their payroll entry grid. Please note that if a time clock import is being used, you must be careful not to duplicate any entries already made in the time clock. Please also note that this screen must be setup prior to clicking Start Payroll during the payroll process. Once the payroll has been started, adjustments made to this screen will not take effect until the next time payroll is processed. Code and Description: Select the earnings, tax, or deduction code to be automatically paid to all employees. Hours: Enter the number of hours to be automatically paid to all employees. 15


16 Rate: This field can be used to enter a specific rate to be associated with the auto pay as opposed to the employees base rate. Rate Code: This field is used if you want the earning to be calculated using one of the employees additional Rate Codes, which are stored on the Rates tab. If the code is not set up on the employee, the base rate will be used. Amount: This field is used to enter a flat dollar amount associated with the auto pay. Deductions view only tab To add or modify deduction codes, please contact your CSR. The definition of each deduction used by your company is setup here. There must be a company level definition for each deduction used by the company, regardless of whether it is a scheduled or a one time activity. After the deduction has been added to the company level and defined, it can be added to the employee as a scheduled event, or used in Payroll Entry as an override to existing scheduled deductions or for one time deductions. Code: Each deduction must be identified by a unique deduction code id. Description: This field contains the deduction description. Short Description: This field contains the deduction s description that will display on the employees pay checks and company reports. 16


17 Details: This link will take the user to a screen where various other details for each deduction can be entered. Some information that displays in the details area is auto populated from the main Deductions screen. A description of additional fields is as follows: Type: Determines the taxability and calculation of the deduction for pretax, retirement, and garnishment deductions. Priority: The priority number determines the order in which the deductions reduce net pay. Low numbers indicate high priority while higher numbers indicate lower priority. Auto Drop: This box is automatically checked when a deduction is added. It will not allow for any portion of the deduction to be taken if there is not enough money in the employees net pay. Partial Drop: Checking this box (in addition to the Auto Drop box) will allow for a partial amount of the deduction to reduce the net pay, even if there is not enough to take the entire deduction. In cases where there is not enough to take the entire deduction, enough will be deducted to reduce the net pay to zero. Auto Makeup: In the event that only a partial amount, or none of the deduction reduces net pay during the current payroll, checking this box results in the amount not taken to be deducted during the next payroll cycle, in addition to the standard deduction amount already scheduled. Rate: This field can be used to enter a specific rate to be deducted for all employees. 17

18 Calc Code: This field is used to select how Web Pay is to perform the calculation of this deduction. Print On Check Stub?: The client has the ability to determine if they want deductions to display on the check stub or to be hidden. Hidden codes still display on payroll reports. W2 Field: If the deduction should display on the W2, the box is selected in this field. Agency: Agencies allow you to make payments to third parties on behalf of employees. If you have chosen to do that for this certain deduction, the agency code will be displayed in this field. Minimum: The amount of the deduction withheld cannot be lower than this amount. If the calculated deduction amount is less than the value of this field, the amount entered in this field will be withheld. Maximum: The amount of the deduction withheld cannot exceed this amount. If the calculated deduction amount is greater than the value of this field, the amount entered in this field will be withheld. Annual Maximum: If an amount is entered, this deduction will not be withheld once the YTD withholding for the deduction equals this amount. Each calendar year, the deduction will begin again with the first check date in January, and deduct until the YTD Max is reached that year. This will continue on an annual basis. Please note that the annual maximums for retirement deductions are stored elsewhere in the system. Taxes view only tab To add or modify tax codes, please contact your CSR. The definition of each tax type related to the company is setup here. This includes all Federal, State and Local tax types. Only taxes setup here can be added to the employee. Multiple "versions" of individual tax types can be created. This is most common with Unemployment taxes where the rates are reassigned annually 18


19 Code: Each Tax must be identified by a unique tax code id. Description: This field contains the tax description. EIN: The Employer Identification Number for the tax authority is entered in this field. Start/End Dates: These fields are used to enter the starting and ending dates of the tax. If the CHECK DATE falls outside of this range, the tax will not be available for use on the employees. Details: This link will take the user to a screen where various other details for each tax can be entered. Some information that displays in the details area is auto populated from the main Taxes screen. A description of additional fields is as follows: 19


20 Default Employer Tax Rate: This field contains the taxing authority s standard tax rate. Override Employer Tax Rate: If the employer s tax rate is not equal to the taxing authority s standard tax rate, that rate must be entered into this field. Default Employer Wage Limit: This field contains the taxing authority s standard wage limit for each employee. Override Employer Wage Limit: If the employer s wage limit is not equal to the taxing authority s standard wage limit, that amount must be entered into this field. Block Tax: To track wages for this tax on the employees, but not have the tax deducted from their net pay, this box is checked. Deposit Frequency: The option selected dictates how often tax deposits are created due to payroll processing. Deposit Method: The option selected dictates the manner in which Sentric, Inc. deposits the tax incurred, due to payroll processing, to the taxing authority. Applicable options include electronic funds transfer, live check, and none. Accruals view only tab To add or modify accrual codes, please contact your CSR. Company time off accrual policies are defined here. There is no limit to the number of time off policy definitions. 20


21 Code: Each accrual must be identified by a unique deduction code id. Description: This field contains the accrual description. Details: This link will take the user to a screen where various other details for each accrual can be entered. Some information that displays in the details area is auto populated from the main Accruals screen. A description of additional fields is as follows: Frequency: This field determines how often the accrual is calculated. Accrue On: If the accrual is based upon an earnings category, or group of earnings categories, it is selected in this field. Reduce By: The earnings category, or group of earnings categories, that will reduce the employees available accrual balance is selected in this field. Hours Based: If checked (and Accrue Dollar is not), then Accrued Hours is defined as hours worked multiplied by the Accrual Rate. If both Hours Based and 21
22 Accrue Dollars are checked, then Accrued Hours equals the Accrual Rate and there are no Accrued Dollars. Accrue Dollars: If Accrue Dollars is checked (and Hours Based is not), then Accrued Hours equals Accrual Rate divided by Pay Rate and Accrued Dollars equals the Accrual Rate. Min Hours: This is the minimum number of hours that an employee must work before being awarded an accrual amount. Max Accrue On: If the accrual is based upon the number of hours the employees work, then this is the maximum number of hours that will be considered when the accrual calculation is performed. New Employee Filter: This selection allows the user to choose a group of employees to automatically receive the accrual once added in the New Employee Wizard screen. Probation: This field contains the number of days from hire until the employee will be eligible to receive the accrual benefit. When Cleared: This field determines when, if ever, the accrual balances are to be reset on all employees. Transfer Balance To: When a cleared balance is to be transferred to another accrual code, that code is selected in this field. Check Stub: This option allows the user to control if and how the available accrual balance will display on the employees pay stubs. Desc: This is the descriptive label that will display next to the available accrual balance on the employees pay stubs. Divisor: Available accrual balances display in increments of hours. To display these amounts as days, weeks, or months, a divisor is entered in this field. For instance, to display the balance in days rather than hours, enter a divisor of 8 if your employees typically work 8 hours a day. Decimals: Allows the user to set the number of decimal places that will be used when displaying the accrual balances. Agencies view only tab To add or modify agency codes, please contact your CSR. Agencies allow you to make payments to third parties on behalf of an employee or group of employees. These payments can either be made via paper checks or electronically as ACH transactions. 22

23 Code: Each agency must be identified by a unique agency code id. Name: This field contains the agency payable to. Frequency: This field determines how often payment is remitted to the third party agency. Details: This link will take the user to a screen where various other details for each agency can be entered. Some information that displays in the details area is auto populated from the main Agencies screen. A description of additional fields is as follows: 23

24 Last Paid: This field contains the last time that payment was remitted to the third party agency. Current Process Only: Checking this box allows for payment to be remitted for the current payroll process only, nothing prior. Use Warehouse (Do Not Print With Payroll): To remit payment at some frequency other than during normal payroll processing, this box must be checked. This option only available if the Frequency Every Pay is used. Electronic Payment Information: The default payment method to the third party agency is by live check. To remit payment electronically via ACH, these fields must be completed. Misc view/edit tab This is a view/edit tab; however, it is strongly recommended that any changes be communicated to your CSR. This tab holds a variety of information. In most cases the information is static in nature and is setup and not touched again. The various entries in the drop list represent fields populated in various employee maintenance tabs. EEO Class Codes: EEOC codes are the professional classifications required for some types of EEOC reporting. Each classification consists of an identifying code and a brief description. EEOC is assigned to an employee in Employees Information > Dept/Pos Tab. Employee Types Codes: Definitions for the various categories of employees (Full Time, Part Time Temp, etc) are created here. This allows the company to report on their employees by type. Employee Types Codes are assigned to an employee in Employees Information > Dept/Pos Tab. Rate Codes: Rate code definitions are setup here. The rate code is given an id and a brief description of the rate type. Rate codes can then be assigned throughout various tabs in Employee Information and in Payroll Entry. 24
25 Skill Codes: Definitions of user defined skill codes (Certified Network Engineer, Bilingual, etc.) are setup here. Once a skill code id and a description have been added, the skill codes can be added to employees in Employees Information > Skills Tab. Supervisor Codes: Definitions of the various Supervisor positions in the company are setup here. Organizational reporting can be performed utilizing this information. Once the supervisor code id and description have been entered, the supervisor code is added to the employee in Employees Information > Dept/Pos Tab. Employee Status Codes: Definitions for the various states of employment (Active, Terminated, Leave of Absence) are created here. A for Active must be present in the list as this status identifies employees to be present on a number of reports and in the creation of payroll entry. You can create an unlimited number of User defined status codes. If the status code is not assigned at the employee level, some reports may return incorrect results. The Emp Status is found in the Employee Information > Dept/Pos Tab. Event Codes: Definitions for various events (except Raises and Reviews) in the employee's history (Employee of the Month, Sales Person of the Year) are defined here. Events can also be used to track disciplinary history of an employee by defining event categories relating to disciplinary issues (Verbal Warning, Written Warning, etc.). Events are added to an employee in the Employees Information > Events Tab. Review Codes: Definitions for the various Review codes (90 Day, Annual, Merit) a company uses are setup here, along with a brief description. The review codes can then be assigned to an employee in the Employees Information > Reviews Tab. Shift Codes: Shift code definitions are setup here. Each shift is given an id, along with a brief description of the shift. Each shift can be predefined with the following rate options: Rate: The rate per unit of work for the shift. Rate +: A rate modifier. The Rate + amount is added to the rate to come up with a new rate per unit for the shift. Rate x: A rate multiplier. The number entered here is multiplied by the rate to come up with a new rate for the shift. (For example 1.5 would create an earning that paid time and a half.) Shift codes can be assigned in a variety of tabs in Employee Information, Company Setup, and Payroll Entry. Union Codes: Union code definitions are entered here. Each union has an id (usually the Union or Local number) and a brief description. Union codes are added to the employee in the Employees Information > Miscellaneous Tab. Paycheck Attr view/edit tab This is a view/edit tab; however, it is strongly recommended that any changes be communicated to and made by your CSR. 25
 that affect how the check will be calculated or taxed.")
26 Paycheck attributes allow a company to create predefined check types to be used by the company when payroll entry is done. Each Paycheck type can have different functionality (attributes) that affect how the check will be calculated or taxed. The idea behind this is different paycheck types are created for different purposes. Example: A company pays a quarterly Bonus where there are no direct deposits and Federal tax is calculated at 25%. You can create a Bonus check type with these attributes preset. The paycheck types can then be added to the calendar or to batches within the calendar, so that the correct check type is used on future payrolls. Any attribute of a paycheck type can be overridden at the employee level in Payroll entry. Code: Each paycheck attribute must be identified by a unique code id. Description: This field contains the paycheck attribute description. Details: This link will take the user to a screen where various other details for each paycheck attribute can be entered. Some information that displays in the details area is auto populated from the main Paycheck Attrs screen. A description of additional fields is as follows: 26

27 Tax Frequency: Allows you to override the employee level Tax Frequency (Employee Information > Auto Pays) for this check type. If left blank the employees tax frequency setup is used. Override FITW %: If a percentage is entered in here it will override the standard FITW calculation. All Employee level tax overrides are ignored. The percentage should be entered as a whole number. Example: Ten percent is entered as Override SITW %: If a percentage is entered in here it will override the standard SITW calculation. All Employee level tax overrides are ignored. The percentage should be entered as a whole number. Example: Ten percent is entered as Deduction Multiplier: Allows you to increase the number of times deductions are taken on a paycheck. When a deduction is taken from the employees check, the deduction multiplier is multiplied by the deduction amount to calculate the actual amount of the deduction. If the number is set to 0 or 1, the deduction is multiplied by 1. Special Payment: In the Details of the Employee Information > Direct Deposit Tab, there is an option to mark the employees direct deposit as Exclude Special Payment. When the Special Payment box is checked for a paycheck attribute, any employees whose direct deposit accounts are marked as Exclude Special Payment will receive a live check. In addition, Webpay will use a supplemental tax rate for Federal tax. Block Labor Allocation: Labor distribution will be overridden for all employees. All earnings, tax and direct deposit information will be coded to the employees home departments. Block Direct Deposit: Direct Deposit will be overridden for all employees. All employees will receive live checks. Block Earnings Tab: All earnings setup on the company will appear on this tab. Any recurring earnings selected will be blocked on this paycheck type. If a 27

28 blocked earning is entered in the Pay Details screen, the earning will not be blocked. Block Deductions Tab: All deductions setup on the company will appear on this tab. Any recurring deductions selected will be blocked on this paycheck type. If a blocked deduction is entered in the Pay Details screen, the deduction will not be blocked. Checkstub Memo Tab: A simple message can be entered here and will be displayed on all employees check stub. For example, "Great Job this quarter" or "Company wide meeting on 02/25/2002". This memo appears on employee pay checks until removed by the user. User Memo: This field allows the user to enter notes regarding the paycheck attribute. Custom Fields view/edit tab This tab allows the user to create customized user defined fields to capture additional information on the Demographics and Miscellaneous Tabs in Employee Information. The Demographics tab allows for four text fields, the Miscellaneous Tab allows for five checkboxes and one text field. The data typed into the fields will be the text field/checkbox labels on those Employee Information Tabs. 28

29 Users view only tab Company users and their corresponding contact information is located on this tab. Any changes must be communicated to your CSR. Services view only tab A "Service" is a series of programs organized to perform a group of related tasks. Typical services that are added to accounts include Payroll (to process payroll information), Checks (to print check stubs and direct deposit vouchers), Tax (to track liabilities and remit deposits), and New Hire (to report new employees to their state of employment). 29

30 Jobs view/edit tab For companies that want to track earnings and expenses for certain jobs worked, job codes can be set up on this tab. If the company needs to submit payroll information for government work, those jobs can be marked as certified. Payroll information for those jobs is then available for the Certified Payroll Reporting system. Code: Each job must be identified by a unique code id. Description: This field contains the job description. Details: This link will take the user to a screen where various other details for each job can be entered. Some information that displays in the details area is auto populated from the main Jobs screen. A description of additional fields is as follows: 30

31 Rate Code: This field can be used to select the Rate Code to be associated with the Job selected. The Rate Code for the employee are stored on the Rates tab. If the code is not set up on the employee, the base rate will be used. Rate: The rate per unit of work for the job. Rate +: A rate modifier. The Rate + amount is added to the rate to come up with a new rate per unit for the job. Rate x: A rate multiplier. The number entered here is multiplied by the rate to come up with a new rate for the job. (For example, 1.5 would create an earning that paid time and a half.) Shift: Select the shift worked to be associated with the job code selected. Certified Job?: To submit payroll information for government work this box must be checked. 31

32 Section 3: Employee Information Module Chapter 5. New Employees To add a new employee, select Employee Information from the Main Menu. You will find the link to add a New Employee above and to the right of your list of employees. After clicking on New Employee, you will enter the new employee wizard. Simply fill out this form and press the Add Employee button at the bottom of the page. If you exit this screen without first clicking Add Employee, you will lose the information you have entered. Detailed information about this screen follows. The Basic Information section is used to enter the employee s name, address and other personal information. The ID field is used to enter the employee payroll ID used by Web Pay. The next available ID will be assigned automatically, but you may override it using 32

33 numbers, letters, or a combination of both. ID length can be 6 characters or less. The ID should not contain any spaces or special characters and must be unique within the company. Once the ID is entered, it CANNOT be changed once the employee is added to the system. The Last Name, First Name, and SSN are required fields and will appear on tax forms, such as W-2s, as they are entered. Although the birth date is not required by Web Pay, IT IS REQUIRED for New Hire reporting. Please enter the birth date. Dates can be entered into the field by either typing the date in mm/dd/yy format or clicking on the calendar icon to the right of the field and selecting the date. The employee SSN must be filled in. If hyphens are not entered, they will be populated when the employee is added to the system. The Department and Status Information section is used to enter the employee s status, hire date, and home cost center information. The default value for the hire date is today s date. If the hire date is not today, you should change this field to the correct date. The Workers Comp Code field should be completed if workers compensation is tracked in Web Pay. A cost center must be selected for all department levels for the employee. The Rate Information section is used to enter information about the employee s rate of pay and pay frequency. Auto Pay Hours: If an employee is to be auto paid a defined number of hours, click on the radio button to the left of the word Hours in order to activate the option. Enter the hourly rate in the Rate field and enter the hours per pay period in the Default Hours field. If you will key hours or import them from a timekeeping system, do not choose this option. Auto Pay Salary: If an employee is to be automatically paid a salary, click on the radio button to the left of the word Salary to activate the option. Enter the 33

34 per pay salary amount in the Salary field. This option is recommended for all salaried employees. Auto Pay None: If this option is selected, the employee will not automatically receive a predetermined amount of hours or salary. Choose this option for hourly employees for whom you will key hours or import them from a timekeeping system. Frequency is used to specify the employee s pay frequency. This is a required field and is used when calculating the employee s taxes and will normally default to your standard payroll processing frequency. The Tax Summary section is used to enter information regarding the employee s taxes. Tax Form is used to determine the tax form that the system will generate at the end of each calendar year in order for the employee to file his/her personal income taxes. *Note: If a 1099 contractor already exists in the Web Pay software, and is now hired by your company as an employee, you MUST enter that individual as a new hire in the New Employee wizard. The software must contain separate employee records for each form: 1099 and W2. Web Pay will allow for multiple employee records to exist in the software with the same SSN. Federal Tax is populated with the Federal Income Tax Withholding code. This field should automatically populate with the appropriate withholding code. State Tax is used to determine the state income tax withholding tax code. This is typically the state in which the employee lives. Use the drop-down list in order to find the proper state withholding code. SUI Tax is used to determine the state unemployment tax code(s). This is typically the state in which the employee works (at least the majority of the time). Use the drop-down list in order to find the proper state for unemployment. Work State is a field that represents the state in which the employee works. This code does not affect taxes, but must be populated. 34

35 Local Tax 1, Local Tax 2 are used to select local taxes that determine local income tax withholding, county tax withholding, local services tax, etc. for the employee. If there is a need for more than two local tax codes, the additional codes must be added after completing the new employee wizard by going to the employee s Taxes tab in the Employee Information module and adding the desired tax codes. The Federal/State/Local Tax Details area is used to enter filing status information for the employee s income tax withholding. Filing Status is where the proper filing status for the employee is entered as it is completed on Form W-4. Valid filing status codes are listed to the right of the field. Enter S for employees claiming head-of-household or married filing at the higher single rate. Exemptions is where the proper number of exemptions for the employee is entered as it is completed on Form W-4. Note: Some states require completion of their own version of the Federal Form W-4 to determine the appropriate filing status, exemptions, and any other potential additional exemptions. 35

36 Once all of the information is complete, press the bottom of the page. button at the If all required information was entered, Web Pay will automatically browse to the new employee s maintenance information, in order for you to complete the setup of additional employee information. If any required fields were skipped, they will be listed at the top of the screen and they will be highlighted in red. Simply enter the missing information and press the successfully add the employee into Web Pay. button again to 36
37 Chapter 6. Selecting an Employee Employee selection and navigation is easy in Web Pay. First, select Employee Information from the Main Menu and you will see your employee selection list. Next, decide how you want to list your employees. Filter: The employee filter is used to specify which group of company employees is displayed in the employee select list. You can view All the employees in the company, or Active employees only. Sort Order: There are multiple sort order options (all in ascending order): Name: Sort employee list alphabetically by Name. ID: Sort employee list by ID number. Dept/Name: Sort employee list alphabetically within Department. Dept/ID: Sort employee list by ID within Department. SSN: Sort employee list by SSN (social security number). Clock: Sort employee list by clock number. Page: The page browser arrows allow you to navigate through the pages of employees. Page Length: You can select the number of employees shown on each page by selecting a number in the Page Length box. To select an employee, simply click on his/her ID or Name. 37
38 Chapter 7. Employee Information Web Pay provides storage for a large range of employee data. This chapter will cover the information that can be stored for an employee. To start, select Employee Information from the Main Menu. Next, select an employee from the employee select list. Notice that you will maintain the ability to filter through your list of employees via the bar above the tabs: The Filter and Sort drop downs contain the same options provided on the Employee Select screen. Employee: The employee browser allows you to navigate through your list of employees without having to return to the Employee List screen. New Employee: This link allows you to enter the new hire wizard without having to return to the Employee Select screen. Once an Employee has been selected from the Employee List screen, the following are the tabs that will appear: Demographics The Demographics tab is used to enter some basic information for the employee. Most of this information will have been entered in the Add New Employee screen. Not all information is required. When a change is made, click on Save Changes at the bottom of the tab. 38

39 Name: The fields in this area are used to store the employee s full name. Address: The fields in this area are used to store the employee s entire home address. Other Information: The fields in this area are used to store additional demographic information. Gender: This field is used to select the employee s gender. Ethnicity: This field is used to enter the employee s ethnicity. For additional ethnicity codes, contact your Sentric, Inc. CSR. Birth Date: This field is used to enter the employee s birth date. SSN: This field is used to enter the employee s social security number. Clock Number: This field is used to enter the employee s clock number, if applicable. Contact Information: The fields in this area are used to store information that can be used to contact the employee. Home Phone: This field is used to enter the employee s home phone number. Work Phone: This field is used to enter the employee s work phone number. Extension: This field is used to enter the employee s work phone extension. Address: This field is used to enter the employee s address. Mail Stop: This field is used to enter the location where the employee receives interoffice mail. 39

40 Custom Fields: Web Pay allows the user to create customized user defined fields to capture additional information on the Demographics and Miscellaneous Tabs in the Employee Information module. Once the user defined fields have been labeled on the Custom Fields tab in Company setup, the user can key data into the Custom Fields at the employee level. The Demographics tab allows for four text fields. Department/Position Web Pay allows you to keep track of status, position, location, and job information for each employee. The Dept/Pos tab is used to enter Department, Status, and Position information. When a change is made, click on Save Changes at the bottom of the tab. Home Department: The Home Department/Cost Center group is used to enter the employee s main location within the company s structure. A cost center, or organization level, is a logical sub-division of the company, such as division, branch, and department. In Web Pay, each company can have up to 5 levels of cost centers. The drop-down option(s) in the Home Department group are used to select the employee s location in each of the company's cost centers. Status: The fields in this area are used to enter status types, various dates, and termination information for the employee. Status: This field is used to select the employee s status. New status codes can be added by contacting your Sentric, Inc. CSR. Note: Even though the Status 40
41 field can contain user-defined values, the code A should always be used for an active employee. Type: This field can be used to select the employment type (full time, part time, etc.). New employment types can be added by contacting your Sentric, Inc. CSR. Pay Group: This field can be used to place the employee in a payroll group for reporting purposes. Hire Date/Rehire Date: These fields can be used to enter the employee s original hire date and rehire date. Adj. Seniority: This date field can be used to enter an adjusted seniority date for the employee. If a date is entered in this field, it will be used in place of the hire date when Web Pay calculates length of service. Len. of Service: This field will display the calculated length of service. Term Date/Term Reason: These fields can be used to enter a termination date and reason. When terminating an employee, populate these fields and change the Status to T Terminated. New termination reasons can be added by contacting your Sentric, Inc. CSR. How to terminate an employee: 1. From the Employee Select List, click on your employee s name or ID number. 2. Click on the Dept/Pos tab. 3. Set the employee s Status to T for Terminated. 4. Enter the employee s last working day in the Term Date field. 5. Select a reason for termination in the Term Reason field (this is optional). *Note: Terminated employees can be paid via payroll entry. For more information, please see Chapter 9 Entering Payroll Data. If you would prefer to not terminate this employee until after the individual received a final pay check, please do not terminate the individual until the next payroll process. How to rehire an employee: Sentric, Inc. does not purge ANY information for employees who have received payment via Web Pay. Therefore, if you need to rehire an individual who now has a status of terminated simply: 1. Set the Filter on the Employee Select List to ALL and click on your employee s name or ID number. 2. Click on the Dept/Pos tab. 3. Set the employee s Status to A for Active. 4. Enter the date of Rehire in the Rehire Date field. 41

42 Position: The fields in this area are used to enter position information for the employee. Additional codes can be added to drop-down lists at the company level. Position: This field can be used to select the employee s position code. Title: This field can be used to enter a job title for the employee. Supervisor: This field can be used to select the employee s supervisor. Worker Comp Code: This field can be used to select the employee s WCC. Tipped?: This field can be used to select if the employee is tipped directly or indirectly. OT Exempt: This field can be checked if the employee is exempt from overtime. Note: This area is for informational purposes only. If this box is checked, the system will not prohibit a user from entering overtime earnings for this employee. Miscellaneous The Miscellaneous tab is used to enter additional information for the employee that is not stored in any other employee tab. Just as its name implies, it stores miscellaneous information. When a change is made, click on Save Changes at the bottom of the tab. Memo: This field can be used to enter a memo in regards to this employee. This memo is for the Web Pay user and will not display on the employee s check stub. In order to view the memo during payroll entry, check the Show memo in pay entry box. Tax Form Information: These fields are used to determine the type of Tax Form the employee will receive during the year-end process (W2 or 1099) and the boxes on the W- 2 that will be marked for the employee. *Note: This field is never to be changed in order to report a 1099 independent contractor as a W2 employee or vice versa. If a 1099 contractor already exists in the Web Pay software, and is now hired by your company as an employee, you MUST enter that individual as a new hire in the New Employee wizard. The software must contain separate employee records for each form: 1099 and W2. 42
43 Web Pay will allow for multiple employee records to exist in the software with the same SSN. Miscellaneous: These fields are used to determine miscellaneous boxes that will be marked on the employee s Tax Form. Employment Eligibility: These fields are used for informational purposes only. I-9 Verified: Check off this box if the employee s I-9 form has been completed and verified. I-9 Reverify: This box can be used to enter the date that the I-9 is to expire and will need reconfirmed. Citizenship: This field can be used to store the employee s citizenship. Visa Type: This field can be used to store the employee s Visa type. Visa Expiration: This field can be used to enter the date on which the employee s Visa will expire. Union Affiliation: These fields are used to store information regarding the employee s union. They are also for information purposes only. Actual Union Dues would be collected by utilizing the Deductions tab in Employee information. Reviews Union: This field can be used to select the union that the employee belongs to. New codes can be added at the company level. Date: This field can be used to store a date related to the union. It is up to the user to determine what this date will represent (union membership date, initiation date, etc.). Initiation Fees Collected/Collect Union Dues: These fields can be used to label the employee as having paid initiation fees or having dues collected from wages. Web Pay allows a user to track reviews conducted by a supervisor or management for each employee. History of reviews can also be stored, as seen in the sample below. This tab is for HR purposes and is informational only. When a change is made, click on Save Changes at the bottom of the tab. When adding information for a new review, populate the bottom row of fields and click the Add button. This will move the new review data up to the list of reviews and insert a new blank row for future use. 43

44 Review: This field is used to store the date of the review. Reviewer: This field is used to store the name of the person who conducted the review. Rating: This field is used to select a rating from the drop-down list. Codes must be added at the Company Setup level to be available for selection on employees. Contact your CSR to load this list. Next Review Date: This field is used to store the date of the next review. Note: This date is for informational purposes only. The system will not flag a user to conduct a review. Details: This link will take the user to a screen where various other details for each review can be entered. Some information that displays in the details area is auto populated from the main Reviews screen. A description of additional fields is as follows: Raise Date: Enter the effective date of the employee s rate increase. Raise Amount: Enter the difference between the employee s old rate of pay and the new rate. New Pay Amount: Enter the employee s new rate of pay in this field. 44

45 Reviewer s Notes: This field allows the user to enter notes created by the reviewer during the appraisal process. Employee s Notes: This field allows the user to enter notes created by the employee during the appraisal process. Dependents * Note: Please note that any information entered on the main Reviews screen and the secondary Details screen is for informational and reporting purposes only. This means: You will not automatically receive any reminders as to the next review date via any messaging/ program simply because the Next Review Day is populated. New Pay rates MUST be entered on the Rates tab in order to affect payroll processing. This tab is used to store an unlimited number of dependents for the employee. These dependents might be family or household members, or dependents for various insurance plans. This tab is for HR purposes and is informational only. When a change is made, click on Save Changes at the bottom of the tab. When adding information for a new dependent, populate the bottom row of fields and click the Add button. This will move the new dependent data up to the list of existing dependents and insert a new blank row for future use. Last Name, First Name, Middle Name: These fields can be used to store the name of the dependent. Relationship: This field can be used to select the relationship of the dependent to the employee. Telephone: This field can be used to store the telephone number of the dependent. Details: This link will take the user to a screen where various other details for each dependent can be entered. Some information that displays in the details area is auto 45
46 populated from the main Dependents screen. Additional fields on this screen are selfexplanatory and can be completed for reporting purposes. Education This tab can be used to store educational information for the employee. This tab is for HR purposes and is informational only. When a change is made, click on Save Changes at the bottom of the tab. Note: In addition to schools and actual degrees awarded, this tab could contain certifications, seminar attendance, etc., as shown in the sample below. When adding new information for education, populate the bottom row of fields and click the Add button. This will move the new education data up to the existing list of education information and insert a new blank row for future use. 46
47 Years: The number of years the employee attended the school. School: The name of the school attended. Major: The field of academic study in which the employee specialized in. Degree Awarded: The type of award conferred by the school to the employee. GPA: Enter the employees ending Grade Point Average for the degree attained. Emergency Contacts Web Pay allows for storage of an unlimited number of emergency contacts. Standard field definitions apply. This tab is for HR purposes and is informational only. When a change is made, click on Save Changes at the bottom of the tab. When adding information for a new emergency contact, populate the bottom row of fields and click the Add button. This will move the new contact up to the list of existing contacts and insert a new blank row for future use. Details: This link will take the user to a screen where various other details for each emergency contact can be entered. Some information that displays in the details area is auto populated from the main Emergency Contacts screen. Additional fields on this screen are self-explanatory and can be completed for reporting purposes. 47

48 Events Various events (except Raises and Reviews) in the employee's history (Employee of the Month, Sales Person of the Year, Verbal Warning.) are stored here. Codes must be added at the Company Setup level to be available for selection on employees. Contact your CSR to load this list. Standard field definitions apply. This tab is for HR purposes and is informational only. When a change is made, click on Save Changes at the bottom of the tab. When adding information for a new event, populate the bottom row of fields and click the Add button. This will move the new event data up to the list of events and insert a new blank row for future use. 48

49 Previous Employers This tab can be used to store an unlimited number of previous employer information for an employee. The Details link will allow additional information to be tracked, such as prior salary and termination reason. Standard field definitions apply. This tab is for HR purposes and is informational only. When a change is made, click on Save Changes at the bottom of the tab. When adding new information for a previous employer, populate the bottom row of fields and click the Add button. This will move the new information data up to the list of existing previous employers and insert a new blank row for future use. 49

50 Skills This tab can be used to store various skills that are coded at the company level. Skill code lists are custom to the client, as each type of business could have its own type of skill requirements. The user can select the skill code and complete the Skill, Description, and Date. Codes must be added at the Company Setup level to be available for selection on employees. Contact your CSR to load this list. The Details link allows the user to enter the employee s proficiency and notes. This tab is for HR purposes and is informational only. When a change is made, click on Save Changes at the bottom of the tab. Standard field definitions apply. When adding information for a new skill, populate the bottom row of fields and click the Add button. This will move the new skill data up to the list of existing skills and insert a new blank row for future use. 50
.")
51 Rates The Rates tab is used to enter the initial pay rate, subsequent raises (rate history) and multiple rates of pay. An employee may have multiple pay rates active at one time as long as the rate code is different, as in the example below (Base and A2). Because rate history can be stored in this tab, it is recommended that when a rate change is necessary, a new instance of the rate be added instead of changing or deleting existing rate data. When a change is made, click on Save Changes at the bottom of the tab. When adding information for a new rate, populate the bottom row of fields and click the Add button. This will move the new rate up to the list of rate history and insert a new blank row for future use. See the Start Date/End Date section below for more information on ending old pay rates and adding new pay rates. Rate Code: This field is used to select the rate code for the rate being entered. Base represents the standard base rate for the employee. Additional rates can be entered accordingly. For example, Rate Code A2 might represent a second rate for an employee who crosses job titles or departments often. Salary: This field is used to enter the per pay salary amount. Rate/Per: These fields are used to enter the rate of pay and the per determination associated. The Per field is normally Hour. Start Date: This is the effective date of the rate increase/decrease. End Date: This is the last date the rate will be in effect for the employee. Web Pay will enter a default ending date of 12/31/2100. This can be changed at any time. * Note: These dates are in relation to the CHECK DATE, not pay period beginning or end dates for payroll processing. 51
52 Details: This link will take the user to a screen where various other details for each rate can be entered. Some information that displays in the details area is auto populated from the main Rates screen. A description of additional fields is as follows: Departments: This allows the user to select a department to be associated with the rate of pay. When keying hours for this department on this employee in Payroll Entry, the hours will automatically be paid at this assigned rate. How to Increase/Decrease an employee s rate of pay 1. Change the End Date on the current rate with a date one day prior to the new rate effective date. (I.E. if the new rate is effective 04/01/2008, enter an End Date of 03/31/2008 on the current record.) 2. Add the new rate information in the empty fields and click Add at the end of the row. *Note: The new rate will be used for payroll processing when the check date is on or after the rate Start Date. Web Pay will not automatically adjust the employees earnings to reflect rate changes made during the middle of a pay period. The user must make these changes manually in Payroll Entry. See Chapter 9 - Entering Payroll Data for more details. Auto Pays The Auto Pays tab is used to determine if any earnings are to automatically post to the employee s pay detail each time a new payroll batch is started. When a change is made, click on Save Changes at the bottom of the tab. The tab is divided into two sections Base Auto Pay and Employee Auto Pays. 52

53 Base Auto Pay: This area contains information for an employee if they are setup to be automatically paid based on a certain number of hours or a per pay salary amount. Auto Pay Hours: If an employee is to be auto paid a defined number of hours, click on the radio button to the left of the word Hours in order to activate the option. The hourly rate in the Rate field will already be auto-populated from the Rates Tab. Enter the hours per pay period in the Default Hours field. If you will key hours or import them from a timekeeping system, do not choose this option. Auto Pay Salary: If an employee is to be automatically paid a salary, click on the radio button to the left of the word Salary to activate the option. The salary per pay amount in the Salary field will already be auto-populated from the Rates Tab. This option is recommended for all salaried employees. Auto Pay None: If this option is selected, the employee will not automatically receive a predetermined amount of hours or salary. Choose this option for hourly employees for whom you will key hours or import them from a timekeeping system. Frequency: This field determines the employee s pay frequency. It is also used in calculating certain taxes during payroll processing. *Note: Hourly rates and salary per pay amounts should not be updated on this tab. Any increases or decreases to the employee s rate of pay must be entered on the Rates tab to maintain a historical record. Employee Auto Pays: This area is used to apply additional earnings that the user wants to automatically be displayed on the employee s pay screen during payroll entry. These additional earnings are above and beyond hourly and salary pay (i.e. bonus and commission.) This serves as a time saver for the user since the code is already on the employee s pay screen. Note: When using this area of Auto Pays, the employee will be paid this amount even if you do not input data for a regular paycheck. 53
54 Remember to delete the item from pay entry if you do not want the amount to be paid. Code: This field is used to select the code to be automatically posted. Hours: This field can be used to enter standard hours to be auto paid each payroll run. Rate Code: This field can be used to select the Rate Code to be associated with the Code selected. The Rate Codes for the employee are stored on the Rates tab. If the code is not set up on the employee, the base rate will be used. Rate: This field can be used to enter a specific rate to be associated with the Code and/or Hours field as opposed to the employee s base rate. Amount: This field can be used to enter a flat dollar amount to be auto paid. Start Date/End Date: These fields are used to enter the beginning and ending dates for the auto pay Code. If the CHECK DATE falls outside this range, the auto pay information will not be posted to the employee. Details: This link will take the user to a screen where various other details for each Employee Autopay can be entered. Some information that displays in the details area is auto populated from the main Auto Pays screen. A description of additional fields is as follows: Overrides: Entering the Job Code and Department level information in this section will result in these codes being automatically applied to the auto pay the employee receives in payroll entry. It is not recommended to use these fields if job and department codes will be changing during each payroll process. 54

55 Autopay Filters: This allows the user to select which type of check the autopay is to be paid to the employee. For instance, if Bonus is selected, the autopay will appear on the employee s payroll entry tab only when the Pay type Bonus is selected. This must be completed prior to Starting Payroll. When adding new information under Employee Auto Pays, populate the bottom row of fields and click the Add button. This will move the new earning data up to the list of existing auto pays and insert a new blank row for future use. How to add an Auto Pay code to an employee without assigning a standard per pay amount. 1. Simply add the code to the employee. 2. Leave the Hours, Rate Code, Rate, and Amount fields blank or zero. 3. This will put the code on the employee every payroll. The user can enter hours, rates, and/or amounts at will in Payroll Entry. If the employee is not to receive the earnings for the current payroll process, the Hours, Rates, and amount fields can be left to zero and the employee will not receive them, nor will zero earnings/hours appear on the check stubs or client reports. Fringe The Fringe tab is used to set up recurring earnings and/or fringe benefits such as car allowance, group term life insurance, personal use auto, etc. The earnings will NOT be posted to the pay screen but will be added to the employee s check and will display in the calculation. Codes added to this screen will not be paid to the employee during the current payroll process UNLESS the employee receives their standard hourly or salary pay. Since the fringe earnings are not added to the pay screen, they are not modifiable by the user during payroll entry. If you want the earnings posted to the pay screen, you should set it up on the Auto Pays tab. When a change is made, click on Save Changes at the bottom of the tab. 55
56 Code: This field is used to select the earning code to be added to the employee s paycheck. Calc Code: This field is used to select how Web Pay is to perform the calculation of this earning. Normally, if a Calc Code should be used, the selection will populate upon the selection of the earning code. Units: This field is used to enter a number of units (hours) to be used with this earning. In the sample above, the Units field has entered for the GTerm (group-term life insurance) earning. This is because Web Pay can calculate group-term life insurance taxable income for an employee based on the total amount of the policy (entered in Units) and the employee s birth date, which is stored on the employee s Demographics tab. Contact your CSR for more information on the group-term life insurance calculation. Rate Code: This field is used if you want the earning to be calculated using one of the employee s additional Rate Codes, which is stored on the Rates tab. If the code is not set up on the employee, the base rate will be used. Rate: This field is used to enter a specific rate for the earning as opposed to the employee s base rate. Amount: This field is used to enter a flat dollar amount associated to the fringe. In the sample above, the Amount field has entered for the PAuto (personal use auto) earning. Frequency: This field is used to specify when the earning is given to the employee. The default is Every Period, which represents every payroll process. Start/End Dates: These fields are used to enter the starting and ending dates of the earning. If the CHECK DATE falls outside of this range, the earning will not be applied to the employee. Details: This link will take the user to a screen where various other details for each fringe can be entered. Some information that displays in the details area is auto populated from the main Fringes screen. A description of additional fields is as follows: 56
57 Goal: The amount in this field indicates the maximum amount an employee is allowed to be paid under this earnings category. Paid: This field contains the cumulative amount the employee has been paid under this earnings category. This field is automatically updated by Web Pay each time payroll is processed. Minimum: The amount of the earning paid to the employee cannot be lower than this amount. If the calculated earning amount is less than the value of this field, the amount entered in this field will be paid. Maximum: The amount of the earning paid cannot exceed this amount. If the calculated earning amount is greater than the value of this field, the amount entered in this field will be paid. YTD Max: If an amount is entered, this earning will not be paid once the YTD withholding for the earning equals this amount. Each calendar year, the earning will begin again with the first check date in January until the YTD Max is reached that year. This will continue on an annual basis. Agency: Agencies allow you to make payments to third parties on behalf of employee(s). If you have chosen to do that for this certain earnings, the agency code will be displayed in this field. Misc Info: Enter the required employee identifying information for the fringe category in this field. When adding information for a new fringe, populate the bottom row of fields and click the Add button. This will move the new fringe earning up to the list of existing fringe data and insert a new blank row for future use. How do I set up a goal (target) amount for a fringe? 1. Click on the Details link of the code on the Fringe Tab in Employee Information 2. Enter the goal(target) amount of the code in the Goal field. 3. Enter any amounts already paid to the employee outside of the regular payroll process. 57

58 4. That s it. Web Pay will automatically track the cumulative amount Paid. Once the Paid equals the Goal, the employee will no longer receive earnings under this earnings category. Deductions The Deductions tab is used to enter any scheduled deductions that are to be automatically taken. One-time deductions can be entered in pay entry as needed and should not be entered here. When a change is made, click on Save Changes at the bottom of the tab. Deduction: This field is used to select the deduction code from the drop-down list. If the deduction has a predefined Calc Code, Rate/Amount, or Frequency at the company level, the field(s) will populate automatically. If not, you will need to enter the information accordingly. Calc Code: This field is used to select how Web Pay is to perform the calculation of this earning. For example, this code might tell the system to calculate the Rate/Amount field as a percentage. Contact your CSR for more information on Calc Codes. Rate/Amount: This field is used to enter a specific rate or amount for the deduction. Frequency: This field is used to specify the frequency the deduction is taken from the employee. The default is Every Period, which represents every payroll process. Start/End Dates: These fields are used to enter the starting and ending dates of the deduction. If the CHECK DATE falls outside of this range, the deduction will not be applied to the employee. Details: This link will take the user to a screen where various other details for each deduction can be entered. Some information that displays in the details area is auto populated from the main Deductions screen. A description of additional fields is as follows: 58
59 Goal: The amount in this field indicates the maximum amount an employee will have deducted under this deduction category. Paid: This field contains the cumulative amount the employee has had deducted under this deduction. This field is automatically updated by Web Pay each time payroll is processed. Minimum: The amount of the deduction withheld from the employee cannot be lower than this amount. If the calculated deduction amount is less than the value of this field, the amount entered in this field will be withheld. Maximum: The amount of the deduction withheld cannot exceed this amount. If the calculated deduction amount is greater than the value of this field, the amount entered in this field will be withheld. YTD Max: If an amount is entered, this deduction will not be withheld once the YTD withholding for the deduction equals this amount. Each calendar year, the deduction will begin again with the first check date in January until the YTD Max is reached that year. This will continue on an annual basis. Agency: Agencies allow you to make payments to third parties on behalf of employee(s). If you have chosen to do that for this certain deduction, the agency code will be displayed in this field. Misc Info: Enter the required employee identifying information for the deduction category in this field. When adding information for a new deduction, populate the bottom row of fields and click the Add button. This will move the new deduction up to the list of existing deductions and insert a new blank row for future use. How do I set up a goal (target) amount for a deduction? 1. Click on the Details link of the code on the Deduction Tab in Employee Information. 2. Enter the goal(target) amount of the code in the Goal field. 3. Enter any amounts already paid to the employee outside of the regular payroll process. 59

60 4. That s it. Web Pay will automatically track the cumulative amount Paid. Once the Paid equals the Goal, the employee will no longer have the deduction withheld from their paycheck. Direct Deposit Web Pay allows an unlimited number of direct deposits for each employee. The Direct Deposit Tab is used to enter and modify all direct deposit information for the employee. When a change is made, click on Save Changes at the bottom of the tab. Priority: The priority number determines the order in which the direct deposits are processed. Direct deposits with lower numbers are processed first. This is important if the employee s net pay is less than the amount of direct deposits. Direct deposits with the higher number will not be taken. In most cases, the highest number priority will be the net pay account, or the account that all leftover funds should be deposited to once the lower priority accounts are fulfilled. For example, an employee has the direct deposits shown in the table below. Direct Deposit Priority Amount Code Amount A 1 % 50 B 2 Flat 100 C 3 Flat 100 If the employee s net pay were $300, then $150 (50% x $300) would go to direct deposit A. Next, $100 would go to direct deposit B. Direct deposit C should get $100, but the employee only has $50 ($300 - $150 - $100) left, so only $50 will go to direct deposit C. ABA Transit/Account: Both a bank transit and account number are required, and can be entered in the ABA Routing (transit) and Account fields respectively. 60
61 Checking: This field is used to specify the type of account. By placing a check mark in the field, the system will recognize the account as a checking account. Do not check off this box if the account is a savings or other type of account. Amount Code/Amount: There are three different options available for entering the direct deposit amount. You can withhold a percentage of the employee s net pay, a fixed dollar amount, or all of the employee s pay minus a fixed dollar amount. The following table describes how to set up these three options using the Amount Code and Amount fields. Option Amount Code Field Amount Field Example Amount Example Dir Dep Percentage of net % Percentage to withhold Flat amount Flat Amount to withhold All except flat amount Flat- Amount not to withhold 50 $100 (.5 x $200) 50 $50 50 $150 ($200 - $50) In the example screen shot, the Priority 1 account is set up to have a flat $400 deposited. The Priority 2 account is set up to have 100% of net pay deposited into it. The second account will receive 100% of the net pay that is left over after Priority 1 is fulfilled. Prenote Date: When a user enters direct deposit information, the Prenote Date field should be left blank. Web Pay will populate the field with a date when the bank account is sent to the bank for a prenote. A prenote is a zero dollar entry sent through the ACH system. Web Pay will begin to credit the bank account with live transactions 14 business days after the prenote date. This allows enough time to verify the bank transit and account numbers. Start/End Dates: These fields are used to enter the starting and ending dates of the direct deposit account. If the CHECK DATE falls outside of this range, the bank account will not be applied to the employee. Details: This link will take the user to a screen where various other details for each direct deposit account can be entered. Some information that displays in the details area is auto populated from the main Direct Deposit screen. Additional fields on this screen are self-explanatory and can be completed for reporting purposes. When adding information for a direct deposit account, populate the bottom row of fields and click the Add button. This will move the new direct deposit up to the list of existing direct deposit accounts and insert a new blank row for future use. 61

62 How do I override the prenote process and force direct deposit live immediately? 1. Simply enter a date in the prenote field that is 14 days prior to the next check date. *Note: It is highly recommended that all clients utilize the prenote process to ensure accuracy and on time payment to employees. If a direct deposit account is being forced live and the information entered into Web Pay in regards to the account is incorrect, it could take anywhere from 2 or more days from the check date to get the money returned from the bank and to the employee. Even marking an account as savings instead of checking (or vice versa) could result in the employee not receiving payment on check date. Taxes The Taxes tab is used to configure all of the employee s tax information. The tab lists all the taxes applicable to the employee s payroll information (employee and employer taxes). The tax codes are separated by category on the screen in order to designate between Federal, State, etc. You will notice that all tax codes appropriate for the employee are listed on this tab, including employer tax codes. When any change is made to this tab, click on Save Changes at the bottom of the tab. Employee Work State: Whether you are utilizing our Worker s compensation tracking service or not, you will want to maintain this field at all times. When a Tax Code is selected, by clicking on a field in the row to the right of the code, the Legend near the bottom of the tab is populated with a short description of the tax and/or 62

63 the calculation for the tax. This can be helpful when determining status and/or exemption instructions for a particular tax. Filing Status: The Filing Status list box contains all of the valid statuses for the selected tax. Exemptions/Exemptions 2: Many taxes allow the employee to claim personal, dependent, or special allowances. Complete the field(s) as needed. Additional Flat Amount/Additional Percentage: Some employees may elect to have an additional amount of money withheld each pay period for the selected tax. Web Pay offers two ways to enter that amount. You can enter additional withholding as a flat dollar amount or as a percentage of the employee s pay in the appropriate fields. For example, in the sample above, this employee has elected to have an Additional Flat Amount of $50 withheld for Federal Income tax (FITW). The amount of the employee s tax would be the result of the tax calculation on Single-0 (the filing status and exemptions) plus $50 (the additional flat amount). (Please enter percentages as whole numbers.) Start/End Dates: These fields are used to enter the starting and ending dates of the tax. If the CHECK DATE falls outside of this range, the tax will not be applied to the employee s pay. Details: This link will take the user to a screen where various other details for each tax code can be entered. Some information that displays in the details area is auto populated from the main Taxes screen. A description of additional fields is as follows: 63
64 Override Tax Calc: To ignore the system-calculated tax and only deduct the Additional Flat Amount and/or Additional Percentage, check the Override Tax Calc box. For many taxes, supplemental checks (bonus, commission, etc.) are taxed at a rate different than the rate used for normal wage payments. The Supplemental list box allows you to specify how supplemental payments for the currently selected tax are handled. The following table lists the options for supplemental payments: Option Blocked Noeff Description The tax will not be taken out of supplemental checks. The supplemental flag has no effect on this tax. Special Supp Supp+ Only the employee s Additional Flat Amount and Additional Percentage will be withheld for the tax. The supplemental rate for the tax will be used. The supplemental rate and the employee s Additional Flat Amount and Additional Percentage will be used. To add a new tax code, click on the Add Tax to Employee option that is located under the Legend. The system will step through a wizard to add the appropriate tax. How do I mark an employee as exempt from a tax? 1. Click on the Details link of the tax the employee is to be exempt from. 2. Check the Override Tax Calc box. 3. Leave the Additional Flat Amount and Percentage Fields at zero. 4. Click Save Changes. 64

65 Accruals The Accruals tab allows a user to track each employee s time off and benefit accrual information as a balance of used and available hours. Rules for each accrual code are set up in Company Setup > Accruals. When a change is made, click on Save Changes at the bottom of the tab. Accrual Code: To add an accrual code to an employee, select the proper code from the drop-down list in the Accrual column. Used Hours: The Used Hours field will populate as each payroll is processed if the employee has been paid hours through an earning code that is set up to reduce an accrual code balance. You can manually override this field by simply deleting the existing hours and entering a new number. Avail Hours: If there is an automatic accrual that has been programmed at the company level, the Avail Hours should populate automatically. This field can contain a negative number if an employee has used more hours than were available. Once again, simply deleting the existing hours and entering a new balance will override this field. Last Accrue: This field displays the date that the accrual was last calculated and given to the employee. If the accrual is frequency based, meaning it is awarded on a predefined schedule (per pay, annually, etc.), enter a date into this field when setting up the accrual on an employee. Calculate the date that the employee would have last received the accrual calculation and enter that date in this field. Start/End Dates: These fields are used to enter the starting and ending dates of the accrual. If the CHECK DATE falls outside of this range, the accrual will not be applied to the employee. Details: This link will take the user to a screen where additional options are available. Adjusted LOS Date: The Adjusted LOS Date (adjusted length of service date) is used to enter an override hire date for the employee. This can be beneficial when an accrual code is set up to award hours or dollars to each employee based on 65

66 their length of service. An employee s accrual can be calculated at a different rate as a result of credit for previous employment or contract negotiation. For example, an employee worked for the company for a year, left for six months, and returned on July 15, If the employee s Adjusted LOS Date is set to July 15, 2003 (7/15/04 1 year), the employee will receive credit for the first year of employment with the company. Override Rate: This field can be used to override the rate (hours) to be accrued. Override Hours: This field can be used to override the hours that are accrued on. Override Amount: This field can be used to override the dollar amount to be accrued. Carryover Maximum: This field can be used to override the carryover maximum allowed when the accrual code is cleared. Accrual Maximum: This field can be used to override the maximum number of hours that the employee can accrue until the accrual clears and resets itself. Balances: This section displays the current balances for the employee and totals the Used and Available fields. When adding information for a new accrual code, populate the bottom row of fields and click the Add button. This will move the new accrual up to the list of existing accrual codes and insert a new blank row for future use. 66

67 Labor Allocation The Labor Alloc tab is used to automatically allocate all earnings, deductions, and tax expenses in this employee s paychecks across selected departments/job codes by percentage. If the percentage amounts do not add up to 100, Web Pay will not allow the user to move forward. When a change is made, click on Save Changes at the bottom of the tab. Pay History Web Pay holds all pay history for each employee and does not purge data. The checks are listed in chronological order, with the most recent entries at the bottom. To view specific information about a check, click the Details link to the right of the check recap data. The bottom of the Pay History tab contains an area for Totals. You can select a Predefined date range to view totals for or select a Custom date range. When modifying the date range, click Recalculate to update your screen. 67
68 Section 4: Payroll Data Chapter 8. Starting Payroll You can start the payroll cycle by entering the Payroll Entry module from the Main Menu. The first thing you will need to do is to verify that Web Pay is using the correct check date. If the check date displayed on the top of the pay cycle screen is incorrect, call your CSR to assist you in changing the check date. Once you have verified the current check date, you will notice that the Payroll Overview contains a paragraph explaining how to process a payroll run. The system prompts you to follow the three steps listed. Click on the Start Payroll command, which is labeled as Step 1. 68

69 Once you press Start Payroll, Web Pay will display information about the batch(s) that will be created in this step. A user can choose the Edit Payroll Options link in order to change period dates, autopay options, etc. Once you are comfortable with the batch settings, click the Start Payroll button located at the bottom of the Start Payroll Cycle window. A window will appear informing you that the payroll cycle is starting. For further details, please read the entire window (see sample below). Click the Refresh button at the bottom of the window to refresh your screen and see if your batches are ready for data entry or time import. 69

70 Once the Start Payroll job is finished, the system will automatically take you into Step 2, which is Payroll Batches. This is where the payroll information is imported through a time clock import file and/or entered manually. If you use a time clock file to import payroll data into Web Pay, the Time Clock Import section will appear. Click the Time Clock Import link, browse for the import file, and click the Upload button to bring in the data from the file. 70

71 Once the time clock import job has completed, the user will be directed to Time Clock Import Queued screen: Click on the time clock import job link to view the results of the import process. Within the Job Details screen, scroll down to the Results section to review the results of the time import job. There are two types of results a user can expect to see: Warning and Successful. Time Clock Import Completed With Warning: If the Progress Log is preceded by a Warning Log outlined in yellow, the job has not completed successfully. The Warning Log alerts the user to any information that did not import into the payroll batch. The Time Clock Import Recent Imports screen will also alert the user to the status of the job. The Warning status is indicated by the yellow exclamation point: Clicking on the Details link directs the user to the Job Details screen shown above. 71

72 There are various reasons a time clock import job will not complete successfully: bad employee numbers, bad earnings codes, bad job numbers, etc. Often the information was entered into the time clock, but not into Web Pay. If you are able to correct the error manually in Payroll Entry, do so; otherwise, contact your CSR for assistance. Time Clock Import Completed Successfully: If the Progress Log is not preceded by a Warning Log outlined in yellow, the job has completed successfully. The Time Clock Import Recent Imports screen will also alert the user to the status of the job. The successful job status is indicated by the blue check mark. Once the time clock import has been completed successfully, the user is able to move on to Payroll Data Entry. The Payroll Data Entry section contains the payroll batch(s). To the right of each batch are the Pay Entry options and Verify tasks you will perform on the batch. Employee Pay Entry: This link allows you to enter payroll information for each employee individually. Employees have their own payroll screen and information is entered one employee at a time. Batch Pay Entry: This link allows you to view employees in a list format with employees on each page and to view or key data in a grid format. This method is normally faster to perform data entry, although you may be required to use the Employee Pay Entry method in order to add additional checks, use override functions, or view the check detail calculation. 72
73 The Verify section contains the tasks you should perform in order to audit the batch contents and close the batch to prepare for submission of payroll for processing. Totals: This option will allow the user to enter control totals for data entered into the batch. The control totals will be displayed next to the actual totals for fast and easy comparison. Difference columns will contain the difference between actual data and control data in order to assist in finding errors. Register: Selecting this link will take you to the report request screen and allow you to run a Preprocess Register, which will show details of each check from gross to net. From this screen you can select some properties of the Preprocess Register and select a delivery method. The delivery method, either view or , allows you to choose how to display the report once it is complete. Once selections are made, select Run Report at the bottom of the screen. A window will appear showing you the status of the report (Pop Up Blockers must be disabled for this website in order for reports to process). You should ALWAYS run a Preprocess Register prior to submitting payroll. Close: By selecting this option, you will close the batch. You will ALWAYS close ALL batches prior to submitting payroll, but should not do so until you have verified that all information in the batch is correct and complete. Restart: This option will remove all payroll information you have keyed into the batch and will return the batch to the state it was in after the Start Payroll step was complete. Add New Batch: The Add New Batch option will allow the user to enter a new batch code and description and create a brand new payroll batch. Check Calculator: This option is used for calculating manual checks. You may view the information, save it, and in some cases print the manual check. See the chapter on Manual Checks for instruction on how to use Check Calculator. 73

74 Chapter 9. Entering Payroll Data There are two options that will allow you to enter payroll data. The first option is Employee Pay Entry, which gives the user more options and information by displaying one employee at a time. The second option, Batch Pay Entry, displays employees in a grid format and allows you to view and key information quickly. Each option can be defined to user specifications via the Preferences link at the top right hand corner of the screen in Employee Pay Entry and Batch Pay Entry. Preferences are USER defined, not COMPANY defined. Employees of Sentric, Inc. do not have access to edit any User s Preferences. Each user who has access to Web Pay must set up their own individual Preferences. Once Preferences have been set, they will remain in effect until changed by the user again. Setting up User Preferences Employee Pay Entry: While in the Employee Pay Entry window, click on the Preferences Link at the top right hand corner of the screen. Scroll down on the Preferences screen to the Employee Pay Entry Settings section. Field: Select the field to be displayed in Employee Pay Entry. Options include all user defined Department levels, WCC (worker s compensation codes), Job Code, Rate Code, and more. Size: The maximum number of characters allowed in the field will automatically populate in this field. To increase or decrease the amount, simply overwrite with a new number. Order: Fields can be moved from left to right on the Employee Pay Entry screen by changing their order in this list. To move a field to the left, click on the up arrow. To move a field to the right, click on the down arrow. Add: Once the field has been selected, click the Add button to save your work. Remove: To remove a field from Employee Pay Entry, click the remove button. This field can be added again at a later time. 74

75 Batch Pay Entry Code: Select the field to be displayed in Employee Pay Entry. Options include all user defined Department levels, WCC (worker s compensation codes), Job Code, Rate Code, and more. Field: This determines which attribute of the field that will be visible in Batch Pay Entry. For instance, if you have selected the earnings code Regular, under Field you have the option of choosing whether you want to see the Hours or the Amount that cooresponds to that field. Note: you can enter the same code multiple times and select different attributes of the field. Regular could be selected three times with the Hours, WCC, and Department code visible in Batch Pay Entry. Size: The maximum number of characters allowed in the field will automatically populate in this field. To increase or decrease the amount, simply overwrite with a new number. Order: Fields can be moved from left to right on the Employee Pay Entry screen by changing their order in this list. To move a field to the left, click on the up arrow. To move a field to the right, click on the down arrow. Add: Once the field has been selected, click the Add button to save your work. Remove: To remove a field from Employee Pay Entry, click the remove button. This field can be added again at a later time. Payroll Entry Option 1: The Employee Pay Entry option will allow you to view each employee s check individually. After selecting the Employee Pay Entry method, select an employee from the list. After choosing an employee, their input screen will appear. It will look similar to the following example. 75

76 The top of the screen displays some basic demographic information about the employee including their name and employee id number. The left side contains information from the Dept/Pos tab and the social security number. The middle section contains all employee rates from the Rates tab. The right side of the screen contains the accrual balance of hours available from the Accruals tab. If an Employee Memo is in effect, that note will display above the employee s demographic information. The paycheck information is listed below employee information in a grid layout. There are some basic characteristics of this area of the screen. Paycheck 1: Each of the employee s checks will have its own tab. Paycheck 1 is the first check; Paycheck 2 is the second check, etc. Select the tab that corresponds to the check you want to modify. New Paycheck: Select this tab to add a separate check for the employee. You may create as many paychecks as you need using this option. Note: Remember to use the Edit feature (explained below) to override deductions, etc., if applicable. 76

77 Autopay: If this box is checked the employee will be automatically paid based on the setting of the Auto Pay field on the employee s Auto Pays tab. Check Type: This field is used to select the check type for the check. Check Types are set up at the company level (Paycheck Attributes) and can contain various characteristics regarding deductions, direct deposit, check stub memos, etc. Edit: Press the Edit button to override the properties (Paycheck Attributes) of the Check Type selected (described above). The following configuration items can be found on the override properties for a check type. Tax Frequency: This is used if you want to use a pay frequency other than the employees default frequency to calculate the taxes for the employee. Override FITW %/Override SITW %: These fields are used to enter a specific rate to be used for federal and/or state taxes on this check. Deduction Multiplier: If a number greater than 1 is entered in this field, Web Pay will multiply all of the employee s deductions by that number. This can be used if the user is creating a single check that is for more than one pay period. 77
78 Special Payment Flag: Check the box if the check is being used for supplemental payment that should get taxed at the supplemental rate (federal rate of 25%). Block Labor Allocation: Checking this box will block the auto labor allocation for this check that is set on the Labor Alloc tab. Block Earnings/Deductions/Direct Deposits: These fields are used to block specific earnings, deductions and direct deposits on this check. All codes with a check mark next to them will be blocked. Notice that each section has the ability to Check All or Clear All, which is a time saving option. Check Stub Memo: This field is used to enter the check stub memo to appear on this employee s check. User Memo: This field is used to enter notes about this check type. These notes will NOT be displayed on the employee s check. Save Changes - This Paycheck Only: Pressing this button will save any changes you have made for this check only. No other checks will be affected. Save Changes - This Employee Only: Pressing this button will save your changes for all checks with the same check type on the same employee until the user changes the properties. Undo Changes: Pressing this button will undo all changes made. Cancel: Pressing this button will cancel the action of editing properties. Choose the Return to Employee link near the bottom of the screen to return to the payroll entry screen. Various earning codes are already listed on the check for data entry use. The codes that appear are set up on the Auto Pays tab in Company Setup. Across from the code, the user can key hours in the Hours column, which will be multiplied by the employee s base rate unless a rate is entered in the Rate column. There is also an Amount column where gross amounts should be entered. You may customize these columns as needed. For example, you might add department or job code to perform labor allocation. Click on the Preferences link in the top right corner of the screen and find the section labeled Employee Pay Entry Settings to customize the columns. To remove a row of pay information, click the Remove option at the end of the row. To add a new line of pay information, select a code from the drop-down list below the last row, enter hours, rate, and/or amount, and click Add. Note: If entering deduction code information into the pay entry grid, Web Pay will add the amount the user enters to the standard deduction. If entering tax codes into the pay entry grid, Web Pay will use the amount that is entered in place of the calculated tax amount. After entering information into the pay entry grid click Save Changes at the bottom to save. To undo what you have modified, click Undo Changes. To remove the entire paycheck, click Delete Paycheck. To display detailed pay information, click Calculate Check. Calculate Check allows the user to view detailed pay information for the employee s check. All recurring earnings and deductions are shown. All calculated employee taxes 78

79 and the taxable wages for the employer taxes are shown. The Totals section includes Net Pay, which will either be listed as a Net Check amount or display under the Direct Deposits section. Option 2: The Batch Pay Entry displays multiple employees on one page in a grid format. This allows you to review and key payroll information rapidly. After selecting the Batch Pay Entry method, select your Sort and Page Length preferences using the options above the list of employees. It will look similar to the following example. 79
80 Each employee is listed in a separate row. The first employee has an employee memo attached to his record. To read the note, point to it with your mouse or double-click on it and it will appear in a pop-up window. Autopay: If this box is checked, the employee will be automatically paid based on the setting in the Auto Pay field on the employee s Auto Pays tab. Use the columns to key Hours or a gross dollar amount under the appropriate code. You may customize these columns as needed. For example, you might add a vacation or sick earning code. Click on the Preferences link in the top right corner of the screen and find the section labeled Batch Pay Entry Settings to customize the columns. Details: This link will advance you to the Employee Pay Entry area where you can apply overrides, view the entire paycheck, delete the paycheck, or add new earning or deduction codes that are not on the Batch Pay Entry screen. New: This link will advance you to the Employee Pay Entry area and automatically add a new paycheck you can key into. Once all payroll data has been entered on this page, click the Next Page link at the bottom of the list of employees to continue with data entry. After entering information into the pay entry grid click Save Changes at the bottom to save. To undo what you have modified, click Undo Changes. How To Distribute Employee Hours to Branches, Departments, or Jobs This is done most efficiently in Employee Pay Entry rather than Batch Pay Entry. Begin by setting user preferences to include the Branch, Department, and/or Job code. 1. While on the employee in Employee pay entry select the appropriate code from the Code drop down menu. 2. Enter the hours in the Hours column. 3. If these hours are to be calculated at a different hourly rate than the employee s base hourly rate, enter that hourly rate in the Rate column. 4. In the Branch, Department, or JobCode column, select the appropriate item from the drop down menu that these hours are to be distributed to. 80

81 5. Continue to distribute the hours as instructed above as needed. 6. Click the Save Changes button. How to pay an employee who receives a rate increase during the pay period. This is done most efficiently in Employee Pay Entry rather than Batch Pay Entry. Entering the actual start date of the increase on the employee s Rates tab will not prompt Web Pay to automatically calculate the correct amount of wages. This must be done manually in payroll entry. Salary employees receiving an AutoPay salary amount: 1. In Employee Pay Entry uncheck the AutoPay: Pay $XXX box. 2. Select the Salary earnings code from the Code and Description drop down menu. 3. Enter the total amount the employee is to be paid for the pay period in the Amount Field. Hourly employees: 1. If the employee receives an AutoPay of hours, uncheck the AutoPay: Pay XXX Hours box. 2. Select the earnings code(s) needed to pay the employee at the old rate of pay and enter the hours and rate in the corresponding fields. 3. Select the earnings code(s) needed to pay the employee at the new rate of pay and enter the hours and rate in the corresponding fields. 4. Repeat as necessary for all earnings codes needed. 81

82 How to pay a terminated employee during the current payroll process Terminated employees can receive paychecks while still maintaining a status of terminated. 1. In either Employee Pay Entry, or Batch Pay Entry, set the filter on the Employee Bar to All. 2. Select the terminated employee from the Employee List 3. Add a new paycheck: a. In Employee Pay Entry click on the add a new paycheck link in the No Paychecks dialog box. b. In Batch Pay Entry, click on the Add a paycheck link next to the employee s name. 4. Enter current pay data information as normal. 82

83 Chapter 10. Verifying Data & Submitting Payroll Regardless of the pay entry method used, once all pay information is entered for all employees, click on the Return to Batches link at the bottom of the screen. This link will take you back to the Payroll Batches page. Click on the Totals option to verify your Control Hours and Amounts against the Actual Hours and Amounts. Verify Totals The Actual columns show data as it sits in Web Pay. The Control columns allow the user to enter totals as they should be according to a time clock import report, or other batch balancing information created by the user. The Difference columns show the difference between the Actual amounts in Web Pay and the Control Hours entered by the user. If there is no amount listed, the difference is zero. If necessary, go back into the pay entry screens to make modifications to get the totals in balance. After verifying and balancing the Totals page, click the Return to Batches link. Verify Register Click on Register under the Verify options to run the Preprocess Register for each batch. The Preprocess Register is a report that shows each check gross to net, in a format that will allow you to print the report for your records. You must have Adobe Acrobat (or another PDF compatible program) to view or print reports from Web Pay. If you do not currently have a program installed, you can download a free version of Acrobat Viewer from this screen. Note: There is another option to run the Preprocess Register under the Verification and Completion section of the Payroll Batches screen. That link produces one Preprocess Register that includes all batches, representing the entire payroll. 83

84 The report parameters need to be set prior to running the report. Sorting: Select your Sort Order and leave the Type as Detail to show each employee. Additional Options: Modify Additional Options as needed. For example, if there are multiple batches in a payroll run, the batch code can be entered in the Value column of the Batch option to run the PreProcess Register for only one batch. Output Format: The default Output Format is PDF. The PDF format will preview in Adobe Acrobat Reader. This format is the most commonly used because it will result in the most legible looking report of all output formats. Delivery: Select either View completed report to preview the report when it is ready or completed report to the address that is entered in the field. Click Run Report at the bottom of the screen. A Job Status window will appear. You can Refresh periodically or wait until the report previews for you. Either print the report or save it somewhere for your reference. This report can be kept as a backup to the work 84

85 you have completed. Note: In order to retrieve a copy of this report within 24 hours after running it, go to Reports from the Main Menu and navigate to the Pickup Area tab to Download the report. If upon review of your Preprocess Register, you find that you need to make any changes in your batch, click on Return to Batches and go to Employee Pay Entry. When you feel comfortable that your payroll is accurate and complete, go back to the batch page and run another Preprocess Register to keep for your records. Once a correct Preprocess Register is complete, click Close at the end of the batch row. Once a batch is closed, no further modifications can be made to the batch. The next screen will prompt you to Close Batch or Cancel. Only Cancel if you are not ready to close the batch. Once the batch is closed, it will have a blue checkmark to the left of the batch. Follow this procedure for each batch. When ALL batches are closed, scroll to the bottom of the batch page and select Close Payroll. Once again, click Close Payroll at the bottom of the page. Only select Cancel if you are not ready to close payroll. After payroll is closed, click Submit Payroll. This will initiate the submission of payroll to Sentric, Inc. This may take a few minutes depending on Internet speed and traffic. Monitor the submit payroll job on the screen, which you will be able to refresh periodically. When the job is complete, you will be notified via another window that will appear. The Payroll Overview screen should now contain three blue check marks. This represents the successful completion of each step in the payroll process. If you receive a red X to the left of any of these steps (as opposed to a blue check mark), call your CSR in order to resolve the error. 85

86 Your payroll will now appear in a queue at Sentric, Inc. and will be processed in a timely manner. At this point, you can logout of the system using the Logout option in the top right corner of the screen or return to the Main Menu and continue to navigate through Web Pay using the link in the top left corner. 86
87 Chapter 11. Payroll Entry Recap Employee Information 1. Add new hires. New employees may be added at any time during the payroll period. 2. Perform all employee maintenance. Maintenance can be done at any time during the payroll period. 3. Complete any employee terminations. Company Setup 1. Go to Auto Pays to adjust any auto posting globally. Payroll Entry Payroll Overview 1. Review the check date. If the check date is incorrect, contact your CSR. 2. Click Start Payroll. Start Payroll Menu 1. Review dates and/or Edit Payroll Options. 2. Click Start Payroll. Payroll Batches Menu 1. Modify settings using the Preferences link in the top right corner of the screen. 2. If applicable, click on the Time Clock Import option. 3. Select your Pay Entry method (Employee or Batch). 4. Sort employees accordingly and perform data entry, saving changes as you go. 5. Return to Payroll Batches menu when data entry is complete. Verify Options 1. Go to Totals to enter control totals (optional). 2. Run a Preprocess Register. 3. Make corrections in Pay Entry, if necessary. 4. Repeat Steps 1, 2, and 3 as necessary. 5. Print or save the final Preprocess Register for a record of payroll information. 6. Close each batch once the Preprocess Register has been verified. Submit Payroll 1. Close Payroll at the bottom of the Payroll Batches screen. 2. Click Submit Payroll. 87

88 Chapter 12. Manual Checks and Voided Checks Manual Checks To create a manual check and calculate the net amount, you must go to the Check Calculator link in the Payroll Entry module. (The Check Calculator option can be utilized without performing any of the three payroll steps.) After you click on the Check Calculator link, select the employee for whom you would like to enter a manual check from the list. Upon selection of an employee, the check calculator screen will appear. 88

89 Select your pay codes, just as you would in the pay entry screen when processing payroll, and enter check data accordingly. You have the option to block Autopay, Automatic Pays, Deductions, and Direct Deposits. You can also modify Tax Frequencies, Override FITW or SITW, and use Supplemental Tax Rates. Note: The default setting is to calculate net pay from a gross amount, but by checking off the Net to Gross box and entering a dollar figure in the field, Web Pay will calculate a gross up figure. Once you have all of the information entered, click Calculate Check and the check will calculate and appear on the bottom of the screen for you to preview. After previewing your manual check calculations, make any modifications necessary and click Recalculate Check to update each change. If you are simply testing calculations, you can exit the Check Calculator at this point using the Cancel button at the bottom of the screen. If you are saving the information, scroll down to the Save Check section. 89

90 Period Begin/Period End: These dates will be auto populated by Web Pay to reflect the pay period begin and end dates of the next pay period to be processed. Leave these fields default. Issue check immediately using the following information: Use this option when you are issuing the manual check using another method of writing the check other than Web Pay. For example, you might be writing a check out of an Accounts Payable bank account or another checking account from your office. The Bank Account field should default to the bank account labeled Client Payroll. The Check Number field should ALWAYS be populated with a number other than zero. If you have already issued the manual check to the employee, enter the Check # that was issued. If you do not have a check number yet, you can always use today s date as a standard. The Print Check option is available for those clients with MICR toner and check stock, which allows them to print manual checks directly out of Web Pay to give to the employee. Issue check as part of the next payroll processed: Use this option if you want Web Pay to issue the check for the employee in the next payroll run that is processed. This would only be used if you were not paying the employee through another check or method of payment. Save Check: This button will save the check under the method that you have chosen. 90

91 Voided Checks To void employee paychecks contact your CSR to initiate that process. Click on the Payroll Batches link to return to the batch page. Web Pay will separate the manual check into a separate batch from the regular payroll. The batch is labeled VM, which stands for Voids and Manuals. All manual and voided checks are stored separately from the regular payroll to avoid confusion while performing data entry. This will also keep the batch totals separate. Since you have probably not even performed step 1 of the payroll cycle yet, Start Payroll, your standard payroll batch(s) probably will not have a green arrow at this point. Click on the Main Menu link at the top left corner of the screen to continue navigating through the system. 91
 and can be run directly from Web Pay. To find the reports you want to print, select Reports from the Main Menu.")
92 Section 5: Reports Chapter 13. Printing Reports Web Pay comes with over 60 standard payroll and human resource reports. All reports were designed using a commercial report writer (Crystal Reports) and can be run directly from Web Pay. To find the reports you want to print, select Reports from the Main Menu. The Reports section is organized into three tabs. The Request Area is where you select the report to run and modify properties where applicable. The Report Writer is explained in the next chapter. The Pickup Area is where you can view the reports that you have requested to view, as opposed to , upon completion. After finding a report in the Request Area under the All Reports heading, select the Run link to the right of the report name. The system will take you to a screen that contains properties of the report that you might want to change. Each report s options are different since each report contains different information. The following are the basic options that you will normally find: 92

93 Date Range: The common date settings include Most Recent Pay Period (the last payroll processed, not currently open or processing), Current Month, Current Quarter, Year to Date, or Quarter ranges. You may also choose to Override Dates and select a custom date range using the Begin and End fields. Sorting: The common sort options include Name (alphabetical), ID (by employee ID), Dept Name (alphabetically within home department), and Dept ID (by employee ID within home department). Some reports may contain more or less options. The Type of the report can be Summary or Detail. The Summary will not show employee detail, but will show totals based on the sort option selected. The Detail option will show all employee detail. Additional Options: This section is where each report varies the most, as far as options are concerned. The Name and the Description show what the field represents and the value shows how the field is currently displayed. Some reports will allow you to modify values by giving you a drop-down box with various other fields to select. For example, an employee line might currently be set to Employee SSN, which you may modify to result in a report without social security number included. Alternatively, you might be able to add or remove Values via a checkbox. Perhaps the value for a specific field is currently checked off, which is recognized as True or Yes and you would like to remove that section from the report. Simply uncheck the box to accomplish this. 93
, which is normally sufficient and will use Adobe Acrobat to preview. Other options are available.")
94 Output Format: The Output Format designates the format that Web Pay will use to generate the report. The default is Portable Document Format (PDF), which is normally sufficient and will use Adobe Acrobat to preview. Other options are available. Always be sure to preview the result when changing the output format to ensure that the result is legible. Depending on the format selected, properties can be lost. Delivery: When the report is ready, you can view it in two different ways. The first option, which is the default, is to View completed report. This will preview the report on your screen as well as store it in the Pickup Area upon completion. The second option is to completed report to the address that is entered in the field. This will the report when it is finished running. Once all report properties are set, click Run Report. You will see a Job Status window that will show the job running. The report will be delivered and the window will disappear upon completion. 94
95 If you close the job status window or want to view the report again after closing the preview, proceed to the Pickup Area. The reports in the Pickup Area are stored there for 24 hours and are available to run anytime with the criteria you selected. After 24 hours, the report will no longer be available in the Pickup Area and you will need to repeat the steps in this chapter in order to set your specific report criteria and run the report again. In the Pickup Area, you can find the report you want to view and click Download to launch a preview of it. 95

96 Chapter 14. Report Writer The built-in Report Writer on Web Pay is a quick and easy way to create and store custom reports containing hr and/or payroll data. The Report Writer allows users to create, edit, and save an unlimited number of custom reports. This chapter describes various features and functions of the Report Writer, as well as some sample reports for reference. To access the Report Writer option, select Reports from the Main Menu. The Reports section is organized into three tabs. The Request Area displays all existing Report Writer Reports in the top section. To run any existing Report Writer Reports, simply select the Run link to the right of the report name. To modify any of the reports, click the Edit link to the right of the report name. There are six steps to creating a new Report Writer Report. defining each step follow. Detailed instructions Step 1. Select a Report Type and enter a Report Title Step 2. Add the appropriate fields Step 3. Format the fields Step 4. Add the sort(s) Step 5. Add the filter(s) Step 6. Run the report 96
 Click the New button to create a new report. The screen will update and three fields will appear Report Type, Report Title, and Sub Title.")
97 Step 1. Select a Report Type and enter a Report Title To create a new report, go to the Report Writer tab. (This tab can also be used to edit an existing report.) Click the New button to create a new report. The screen will update and three fields will appear Report Type, Report Title, and Sub Title. The Report Type field is one of the most important decisions to make when creating a new report. The setting controls the type of data made available to add to the report, as well as the level of detail that a report contains. By default, all Report Types will allow the user to select fields from Company List and Employee List, even if they are not selected from the list. The most commonly used Report Type is Employee List. It contains most data that users want to include in custom reports and lists one line per employee. The following table lists some of the different employee report types available. Report Type Available Data (in addition to Company List and Employee List) Report Detail Employee Accruals Employee Accrual Setup 1 line per accrual per employee. Employee Deductions Employee Deduction Setup 1 line per deduction per employee. Employee Dependents Employee Dependents 1 line per dependent per employee. Employee Direct Deposits Employee Direct Deposit Setup 1 line per direct deposit per employee. Common Uses Time Off Balances EE Accrual Setup EE Deduction Setup (for reports that include current, mtd, or ytd deduction amounts use the Employee List type.) Dependent Listing EE Direct Deposit Setup 97
98 Employee Education Employee Education 1 line per education entry per employee. Report Type Employee Emergency Contacts Available Data (in addition to Company List and Employee List) Employee Emergency Contacts Report Detail 1 line per emergency contact per employee. Employee Events Employee Events 1 line per event per employee. Employee Fringe Benefits Employee Fringe Setup 1 line per fringe earning code per employee. Employee List Employee Demographic and Summarized Payroll Information EE Education Listing Common Uses EE Emergency Contact Listing EE Event Listing EE Fringe Setup 1 line per employee. Employee List, 401k export files, Reports with payroll numbers. Employee Paychecks Employee Prior Checks 1 line per check. Check Register Employee Rates Employee Rate Setup 1 line per rate code EE Rate Setup per employee. Employee Reviews Employee Reviews 1 line per review per EE Review Listing employee. Employee Skills Employee Skills 1 line per skill per EE Skill Listing employee. Employee Taxes Employee Tax Setup 1 line per tax code per employee. EE Tax Setup Examples: (1) If you needed to create a report showing all of the different recurring deductions set up on employees, including the deduction code, the effective dates, and the contribution amounts, you would select a type of "Employee Deductions" because it will give you access to employee deduction setup information, and because it will have 1 line for each individual deduction code set up on an employee. If your company had 2 employees "Joe" and "Lisa", each with a 401k and a 125 deduction, the report would have 4 lines on it, 1 for each individual deduction. On each line you can display any piece of setup information for the deduction. (2) If you needed to do a report to show the current amounts paid towards specific deductions, you would use an Employee List report (not a deduction list), because the employee list contains 1 line per employee. On each line you can display any piece of employee information and summarized payroll information. The Report Title is the name of the report. This will be displayed in the list of Report Writer Reports on the Request Area tab. It will also be displayed in the report title block, included at the top of all pages in the report. The Sub Title is an optional field. Whatever is entered in this field will be displayed in the report title block directly under the Report Title. 98
99 Once these fields are completed, click the Save button (located between the New and Run buttons) to save your report and bring up the designer screen. The designer screen is where configuration of new reports and editing of existing reports is performed. Note: You should press the Save button periodically while editing your report. 99
100 Step 2. Add the appropriate fields Adding fields to the report is fast and easy. The left side of the screen contains a list of Available Fields. (The list of fields will depend on the Report Type selected in Step 1.) The list of fields under the Employee Fields category contains mostly employee demographic data. The fields are, for the most part, grouped by tabs found in Employee Information. The end of the list of Employee Fields contains subgroups of employee fields. The Deductions section is used to get the current deduction setup information for any deduction code. To access the deduction codes, simply click on the plus sign to the left of Deductions and you will be able to view the list of deductions. Find the code to add to the report, expand the code by clicking on the plus sign, and select the field to add to the report from the list of fields that are available, by clicking on the fieldname once. The CYTD, CQTD, CMTD, and Current sections are used to add pay history information to your report. CYTD contains current year-to-date information. CQTD contains current quarter-to-date information. CMTD contains current month-to-date information. Current contains current information as of the last payroll processed by Sentric, Inc. Pay history fields are grouped the same within each section. First, code groups are listed. Code Groups are multiple earning, deduction, and/or tax codes that have been grouped together to result in one lump sum. This saves the user from having to add a number of codes together manually. Second, the deduction codes are listed in alphabetical order, preceded by the letter D. These are amounts from pay history, not 100

101 necessarily those amounts that employees are set up to have deducted. Third, earning codes are listed in alphabetical order, preceded by the letter E. Last, tax codes are listed in alphabetical order, preceded by the letter T. Expand each code group/code to reveal the options within them. Note: When building a report using fields in Current, the report properties can be modified, just as they can with a standard report, to select a date range. When building a report using fields in CYTD, CQTD, or CMTD, date ranges cannot be modified. Due to the database structure, those three categories will always display results in the predefined date ranges described above. The Rates section is used to access current rate code information, including Base Rate. Expand this option to display all rate codes available and expand each rate code to display fields that correspond to the information stored in the system. To select a field to add to the Fields tab in the designer screen, click once on the field name in the list of Available Fields. The field code will be added to the Fields tab in the Field column. Static text and simple formulas can also be entered in the Field column. Please see Appendix A for explanations of these options and examples of them. 101

102 Step 3. Format the fields As indicated earlier, the Fields tab is used to select the data to display on your report. Each entry in the list of fields produces a column of data on the finished report. The columns are displayed on the report from left to right starting with the first row in the fields list. The Heading column, to the right of the field code, contains the heading that will appear at the top of each column on the report. This field is automatically filled in when a field is selected, but can be modified by keying new text. The Len column is used to specify the width of the column. This field is automatically populated when a field is selected, but can be modified by keying a new number. It is important to remember that when entering static text or a formula (explained later in Step 2), the Len needs entered as a number greater than zero, or the column will not display on the report. A good rule of thumb when entering the Len manually is to start with the number 10 and increase or decrease the width accordingly. The Dec column is used to specify the number of decimal places to display for numeric fields such as pay rates and other dollar amounts. The L/R column is used to left justify or right justify the column data. The Fill column is used to fill any extra space in a field with the character that is entered. For example, if you have a numeric field and enter 0 in the Fill column, the number value will be padded with zeros ( ). This is especially useful when creating fixed length formats. The Order arrows allow the user to move the field up or down (left or right on the report display) without having to delete and re-add them. The Remove button will remove the field from the report. The Format button (to the left of the Field column) will open an additional formatting menu for that field. The menu will give special formatting options for the field. See the following table describing the special formatting codes. 102
103 Formatting Option Description Show 0 This setting controls how number fields are displayed when the value to be shown is 0. If this box is checked, zeros are displayed; if it is unchecked the field is blank. Total This setting is used to specify which number fields are included in sub totals and in report totals. If the box is checked, the field will be displayed on the total lines. No Punct This setting is used to strip all punctuation from the field before it is displayed. This is especially helpful for formatting items like phone and social security numbers when creating output files. No Periods This setting is used to strip decimal points from fields. No Commas This setting is used to strip commas from fields. OverPunch This setting is used to convert number fields to an overpunch format. The overpunch format replaces the last digit in a field with a character that is based on the value of the last digit and on the sign (positive or negative) of the number. UpperCase This setting will convert the field to all uppercase letters if checked. Note: You should press the Save button periodically while editing your report. 103
.")
104 Step 4. Add the sort(s) The Sorts tab is located to the right of the Fields tab and is used to create groups with subtotals, as well as control the sort order of data within a group. All sorts are displayed on the report in ascending order. Feel free to sort on fields that are not included on the Fields tab (not on the display of the report). The Field column is used to enter the field code that you want to group and/or sort on. Use the field selection tool on the left side of the screen to find the field you are looking for. To select a field to add to the Sorts tab, click once on the field name in the list of Available Fields. The grouping and sorting is performed based on the first field entered on the tab, then the second, and so on for all fields that you select. For example, in the screen shot above, the data on the report will be grouped by Department, and then sorted by employee last name, and finally employee first name, within each department. The Description column is used to enter the text description for the field selected to sort on. This will automatically be populated when a field is selected using the field selection tool. This information will not appear on the display of the report. The Sub Total column is the setting that specifies when a particular group should have a subtotal displayed after the group. For example, in the screen shot above, the report will display a subtotal after each department because the Sub Total field is checked off. A subtotal will not be displayed for each last name or first name since the box is unchecked. The Order arrows allow the user to move the field up or down to change the list of sorting fields. The first priority of the group or sort is always the first field, and so on down the field list. The Remove button will remove the field from the list of sorts. Note: You should press the Save button periodically while editing your report. 104
 the data that is displayed on the report. Select the Company Filter tab to filter on company demographic data.")
105 Step 5. Add the filter(s) There will typically be more than one filter tab located to the right of the Sorts tab on the report designer screen. The filter tabs are used to filter (limit) the data that is displayed on the report. Select the Company Filter tab to filter on company demographic data. Select the Employee Filter tab to filter on employee data. (Since most reports will contain filters based on employee data, the rest of this step will give examples based on employee data.) Feel free to filter based on fields that are not included on the Fields tab (not on the display of the report). The Field column is used to enter the field code that you want to filter on. Use the field selection tool on the left side of the screen to find the field you are looking for. To select a field to add to the Employee Filter tab, click once on the field name in the list of Available Fields. The system performs filtering by comparing the field you select to a value you provide. The Comparison column is used to select the comparison value the system should use to compare the field and the value. For example, you can filter for all employees where the employee status (ee.empstatus) is not equal to (<> Is Not Equal To) terminated (T). Another example is a filter for all employees where the home department (ee.cc1) is equal to (= Equals) department 300 (300). Both of these examples are shown in the screen shot above. The system allows for several different comparisons such as greater than and less than. The Value column, as mentioned above, contains the value to use in conjunction with the field and comparison value. If you are not sure of the value that you should use, it can be helpful to navigate back to Employee Information from the Main Menu and move through the system to find the field and value to filter on. For example, if you want to set up a filter where employees in the Administration department are included, you can navigate to the Dept/Pos tab on an employee and find the correct department code for Administration, such as 300. You can add multiple filters to one report. The And/Or column allows the system to determine if the employee must meet all filter conditions (AND) or if they only must meet at least one condition (OR). If the employees must meet all conditions, select AND in this field between the filters. If the employees need to meet one condition, select OR in the And/Or column. For example, if you want all active full time employees, you might use the following filters: 105
106 Field Comparison Value And/Or ee.empstatus = A AND ee.emptype = Full filters: If you want all employees in either departments 100 and 200, enter the following Field Comparison Value And/Or ee.cc1 = 100 OR ee.cc1 = 200 If you want all active employees in either departments 100 and 200, enter the following filters: Field Comparison Value And/Or ee.empstatus = A AND ee.cc1 = 100 OR ee.cc1 = 200 Please note that all And conditions should be set before any Or conditions. The Remove button will remove the filter. Pressing the Advanced link above the Remove buttons will allow you to edit your filter(s) free form as opposed to using the standard field/comparison/value interface described above. If you use this option, you will no longer be able to use the field/comparison/value interface for the report. It is suggested that you do not use the Advanced method unless you are experienced in using Report Writer. Note: You should press the Save button periodically while editing your report. 106
.")
107 Step 6. Run the report While developing your report, you can run it directly from the designer by clicking the Run button at the top of the screen. If the Run button is not available, the report has been modified since it was last saved. In order to run the report, save the report (click the Save button). Once the report has been saved, the Run button will become active. Report Writer Reports can also be run from the Request Area. They are grouped together above the All Reports section. To run any of them, click the Run link located to the right of the report s Edit link. Multiple options, including custom date ranges and output format modifications, are available when running a report. Refer to Chapter 9 for further information on the options available. 107

108 Section 6. Employee Self Service (ESS) Chapter 15. Company Level Administration ESS is a feature that allows employees to view personal demographic and payroll data online. This is a VIEW ONLY feature, but an employee may print prior check stubs. Depending on your service level, this option may or may not be available to you. Contact your CSR if this is an option you would like to offer employees. Company Level Administration Each company has access to the Employee Self Service configuration under the Main Menu. Go to Main Menu and click on the Additional Options module. Under Company Options click setup section. The setup section allows access to the Employee Self Service Setup. Sentric, Inc. will configure most of this area, but each item is explained below for your reference. In order to exit this area, click the Logout link in the top right area of the screen. Company Access: Enter this area to configure which employees can access ESS. The Login Policy allows three options None (no employees), All Active employees, or Specific employees only (add each employee to the list individually). When Specific 108

109 employees only is selected, those employees with addresses may be granted access by checking off the box to the left of their name. Click on an employee s name to enter the Employee Setup page in order to add an employee s address. Sidebar Setup: Company level sidebars are shown to ALL employees in a company. The company sidebars are shown before the Sentric, Inc. sidebars. Parameter Setup: The parameter options in this section are for authentication purposes. When making changes in this screen, be sure to click Save Changes before exiting. The following values can be set: Days Before Password Expires: Enter a value between 1 and 999 (default is 90). Days Before Password Can Be Reused: Enter a value between 1 and 999 (default is 365). Maximum Failed Login Tries: Enter a value between 1 and 99 (default is 5). Support Phone Number: Enter the phone number that your employees can call to get support with ESS. This number will be displayed on the login page. This parameter is not required. 109
110 Support Enter the address that your employees can use to get support with ESS. This parameter is not required. Employee Setup: Enter this area to reset an employee s password to ESS or change an employee s address. Select the employee by clicking on their name or ID. Click the Reset Password button to reset the password to the default value. The employee will receive an with the new password. Click the Reset Username button to reset the username. The employee will receive an with the new username. Click Change Address to change the employee s address. 110

111 Chapter 16. Employee Setup 1. Log into WebPay by going to our website: and clicking on Employer Login under Millennium Web Pay on the left hand side. 2. Click on the Reports module and then click on Run to the right of the Employee Self Service Enrollment report. a. If you are running this report for the first time for all employees, scroll down to the bottom and click on Run Report. b. If you are running this report for a NEW HIRE, on the properties of the report enter the Employee s ID number under Additional Options and then click Run Report. 3. After you click Run Report, a report will preview on the screen with one employee to a page. This report will contain instructions for accessing ESS and have the employee s temporary password on it. 4. Distribute this document amongst your employees so that they can access ESS. 111
112 Chapter 17. Employee Access Employees Logging into ESS for the 1 st Time 1. Log into ESS by going to the website 2. Enter your Social Security Number as the Username and then enter the temporary password from the report. 3. Enter your address and your temporary password again and click Submit. 4. A message pops up that lets you know that your address must be verified before you can log in. Open your and you should have an sent from [email protected]. Close the ESS window. 5. Click on the link in the from [email protected] and click on the Log into PayEntry button. 6. Enter your Social Security Number as your username and your temporary password. Click Login. 7. Click on the check off box to acknowledge that you will no longer be able to use your social security number as your username and will need to use your address instead. 112

113 8. Enter your new password and then confirm it by typing it again. Finally, enter your temporary password in the Current Password field and click the Submit button. 9. Click Continue on the screen that explains that the changes have been applied. You will receive an informing you of these changes. Employees must enter their username and password. 113

114 Note: After an employee has first been enabled for ESS, there is a delay of up to an hour before they can login. Passwords Employees are assigned default passwords, which are provided to them via when they are granted access to ESS. When employees log in with their default password, they are immediately prompted to setup a new password. The new password must be between 8 and 32 characters in length and must contain at least one numerical character and one non-numerical character. Employees can be forced to change their password if their password has expired, a component of their account is reset, they forgot their login and requested it be sent to them, or their account has been disabled due to too many failed logins. When a new password is set up the default password is no longer valid. Home Page Employees may customize their home page to view the data that is most important to them. Users should go to Maintenance under Quick Links, then My Home Page. What can an Employee View? Employees can view the following areas, anytime, by going to Employee under Quick Links. * Accruals * Contact Information * Deductions * Direct Deposits * Pay History * Status and Position * Taxes Account Maintenance Page Employees may modify components of their account at any time. Users should go to Maintenance under Quick Links, then Account. From the Account Maintenance screen, employees can change their password, username, address, and/or their authentication question and answer. When any of the values is changed, the appropriate 114

115 message will be sent to the employee informing them of the change and instructions on how to acknowledge receipt of the change. Sample ESS Home Page The employee in the sample page prefers to see Pay History, Accruals, Direct Deposits, and Taxes, in that order. Pay History is set to display where the other three areas are collapsed. 115

116 To view check detail information, click on Details. The Details show earnings, deductions, taxes, and direct deposits for a specific pay period. You can print the information by choosing the Print Check Stub button at the bottom of the page. 116
117 Appendix A - Report Writer Static Text/Simple Formulas In addition to adding fields to your report by selecting them from the Available Fields, you can enter static text fields and/or simple formulas. This can be helpful to format fields a specific way or when the need for a basic math calculation arises. Static Text If you want a column to contain specific text you simply need to enter the text you want surrounded by quotes into the Field column. For example, if you were creating an export file and needed to put the characters T01 at the beginning of each line you would enter T01 (with the quotes) as the first field in your report. In the screen shot below, this field is the second field (after the EE #). Note: The text you enter will be repeated on each line of the report. Simple Formulas The report writer will allow you to enter a simple formula in place of a field. A formula can be used to provide special text formatting, such as displaying the employees first and last name together in the same field. For example, the formula ee.lastname + ", " + ee.firstname will display employees names as last name, first name (Doe, John). In the same screen shot below, this field is the third field (after T01 ). A formula can also be used to add values together such as combining employee and employer 401(k) contribution amounts. Simple math formulas can be created using addition, subtraction, multiplication, and/or division. Formulas can be written using the VB scripting syntax and can make use of most VB script methods and functions. VB scripting will not be covered by this document. 117

118 118
119 Appendix B Frequently Asked Questions Index How to 18. Add an employee Decrease an employee s rate of pay Distribute employee hours to branches, departments, or jobs Increase an employee s rate of pay Mark employees exempt from taxes Override prenotes Pay a terminated employee during the current payroll process Pay an employee with a rate increase during the pay period Rehire an employee Set up a goal (target) amount for a deduction Set up a goal (target) amount for a fringe Terminate an employee
Payco, Inc. Evolution and Employee Portal. Payco Services, Inc.., 2013. 1 Home
 Payco, Inc. Evolution and Employee Portal Payco Services, Inc.., 2013 1 Table of Contents Payco Services, Inc.., 2013 Table of Contents Installing Evolution... 4 Commonly Used Buttons... 5 Employee Information...
Alliance Payroll Services, Inc Payentry.com. Training manual
 Alliance Payroll Services, Inc Payentry.com Training manual 0 Table of Contents Employee Information Getting Started..1-2 Employee Selection..3 Demographics.4 Department/Positions 5 Labor Allocation..6
PayData A Vermont Company Working for You!
 PayData A Vermont Company Working for You! Introduction Welcome to the Evolution Employee Set Up and Payroll Processing Reference Manual! This manual is one part of an ongoing initiative to provide comprehensive
Paychex Online Payroll
 Paychex Online Payroll Common Tasks Reference Guide ABOUT THIS GUIDE Use these resources in conjunction with the Paychex Online Payroll Training site, which is available when you log in to www.paychexonline.com.
The M3 Payroll Cycle. M3 Training Manual MPI Software
 The M3 Payroll Cycle M3 Training Manual MPI Software Starting The Payroll Cycle You can start the payroll cycle by going to the payroll entry area off of the main menu. Setting the check date The first
CONFIGURING ASCENTIS HR 3 ASCENTIS HR SECURITY 27 CREATING & MAINTAINING BENEFIT PLANS 41 SETTING UP LEAVE & ATTENDANCE POLICIES 71
 Table of Contents CONFIGURING ASCENTIS HR 3 DATA DEPENDENCIES 4 COMPANY INFORMATION 5 KEY TABLES IN SETUP MANAGER 9 REVIEW QUESTIONS: 25 ASCENTIS HR SECURITY 27 DEFINING ROLES 28 CREATING USERS 33 MAINTAINING
Sage HRMS Sage 100 ERP Payroll Link User Guide. February 2015
 Sage HRMS Sage 100 ERP Payroll Link User Guide February 2015 This is a publication of Sage Software, Inc. Document version: January 30, 2015 Copyright 2015. Sage Software, Inc. All rights reserved. Sage,
Instant Payroll Tutorial
 Instant Payroll Tutorial CORPORATE HEADQUARTERS Advantage Payroll Services, Inc. 126 Merrow Road PO Box 1330 Auburn, Maine 04211-1330 Tel: 1-800-876-0178 http: //www.advantagepayroll.com Edition 3.2 2013
Web Payroll. User Guide. 2013 Payroll Solutions, Inc & www.payrollmadeeasy.com
 Web Payroll User Guide 2013 Payroll Solutions, Inc & www.payrollmadeeasy.com Overview Introduction This web-based system was designed to give our clients more access and control of their payroll operations
for Sage 100 ERP Payroll Overview Document
 for Sage 100 ERP Payroll Document 2012 Sage Software, Inc. All rights reserved. Sage Software, Sage Software logos, and the Sage Software product and service names mentioned herein are registered trademarks
To create your payroll, go to Payroll and make sure you are on the Payroll Tab at the top.
 Creating Payroll Prior to creating the payroll, it is important to understand the different parts of payroll and what information resides in each section. Payroll This section is where you verify items
Sage HRMS 2014 Sage HRMS Payroll Getting Started Guide. October 2013
 Sage HRMS 2014 Sage HRMS Payroll Getting Started Guide October 2013 This is a publication of Sage Software, Inc. Document version: October 18, 2013 Copyright 2013. Sage Software, Inc. All rights reserved.
How to Set Up Group Term Life Insurance
 Task Sheet How to Set Up Group Term Life Insurance This document explains how to set up Group Term Life Insurance in Millennium. Group term life insurance (GTL) is treated as an in and out earning in Millennium
TheFinancialEdge. Converting to Payroll 7
 TheFinancialEdge Converting to Payroll 7 101811 2011 Blackbaud, Inc. This publication, or any part thereof, may not be reproduced or transmitted in any form or by any means, electronic, or mechanical,
Setting up the Payroll Module 34 Setting Up Payroll Posting Options 34 Setting Up the Group Insurance Table 35 Setting Up Time Off Options 36 Setting
 Table of Contents ACS Payroll Overview 6 ACS Payroll Procedures Outline 6 Daily/Weekly procedures 7 Month-end Procedures 7 Quarter-end Procedures 7 Year-end Procedures 7 Getting Started with ACS Payroll
Interim Onboarding New Hire and Rehire
 Interim Onboarding New Hire and Rehire March 2015 State of Minnesota Minnesota Management & Budget SEMA4 HR Services 658 Cedar Street St. Paul MN 55155 5/12/2015 Interim Onboarding New Hire and Rehire
EMPLOYEE SELF SERVICE: ACCESSING YOUR INFORMATION
 EMPLOYEE SELF SERVICE: ACCESSING YOUR INFORMATION The implementation of the Human Resources Self-Service system means that you can access your information via the University s PipelineMT portal. The official
If you re reading this appendix, you ve probably decided to use Intuit s Basic or
 Running Payroll with an Intuit Payroll Service APPENDIX D If you re reading this appendix, you ve probably decided to use Intuit s Basic or Enhanced Payroll service. (Pages 416 417 of QuickBooks 2015:
QuickBooks. Payroll. Getting Started Guide
 QuickBooks Payroll Getting Started Guide Copyright Copyright 2012 Intuit Inc. All rights reserved. STATEMENTS IN THIS DOCUMENT REGARDING THIRD-PARTY STANDARDS OR SOFTWARE ARE BASED ON INFORMATION MADE
BPA Restaurant Professional Payroll System
 BPA Restaurant Professional Payroll System TABLE OF CONTENTS Summary... 4 Uploading Federal Tax Tables... 5 Defining Employees with Payroll Parameters... 6 Adding Employees To BPA... 7 Page 1... 7 Page
Hierarchy of a Standard PEO. Company
 Client Maintenance This section details the procedures necessary to create a PEO client and describes the fields and options that appear on the Client Maintenance window. For details on setting up an ASO
Overview of Kronos iseries Manager
 REVISED: 10/07/2013 Table of Contents OVERVIEW OF KRONOS ISERIES MANAGER... 3 LOGGING INTO KRONOS... 4 TIME LIMIT... 5 CHANGING YOUR PASSWORD... 6 UNDERSTANDING THE DISPLAY... 7 GENIE VIEWS... 8 Hours
TheFinancialEdge. Records Guide for Accounts Receivable
 TheFinancialEdge Records Guide for Accounts Receivable 102511 2011 Blackbaud, Inc. This publication, or any part thereof, may not be reproduced or transmitted in any form or by any means, electronic, or
Munis Human Resources/Payroll
 Munis Human Resources/Payroll Major Enhancements Version 10.1 March 9, 2012 For more information, visit www.tylertech.com. TABLE OF CONTENTS Munis Human Resources and Payroll... 4 Munis Ribbon... 4 Human
Champion Controller to Red Wing Payroll Migration Instructions
 Champion Controller to Red Wing Payroll Migration Instructions Before you convert your data and run Red Wing Payroll you need to have a good working knowledge of the Red Wing Payroll application. Only
TheFinancialEdge. Payroll Processing Guide
 TheFinancialEdge Payroll Processing Guide 101811 2011 Blackbaud, Inc. This publication, or any part thereof, may not be reproduced or transmitted in any form or by any means, electronic, or mechanical,
Payroll Setup Manual. Full Contact Accounting Professional Business Manager
 Payroll Setup Manual Full Contact Accounting Professional Business Manager This Page Intentionally Left Blank. Table of Contents Chapter 1 - Create A New Company File...1-1 Chapter 2 - Import Accounts
SAGE ACCPAC. Sage Accpac ERP. U.S. Payroll 5.5A. Update Notice
 SAGE ACCPAC Sage Accpac ERP U.S. Payroll 5.5A Update Notice 2008 Sage Software, Inc. All rights reserved. Sage Software, Sage Software logos, and all Sage Accpac product and service names are registered
DarwiNet Client Level
 DarwiNet Client Level Table Of Contents Welcome to the Help area for your online payroll system.... 1 Getting Started... 3 Welcome to the Help area for your online payroll system.... 3 Logging In... 4
Alliance Payroll Services, Inc. Millennium Report Writer
 Alliance Payroll Services, Inc. Millennium Report Writer Introduction to Millennium Table of Contents Table of Contents Symbols Used in this Manual Chapter 1 - Overview of Report Writer Tool Accessing
TimeClock Plus Deviations Document Introduction
 TimeClock Plus Deviations Document Introduction After working closely with our customers and taking into account the time and attendance tracking needs of companies of all sizes, we are pleased to debut
If you re reading this appendix, you ve probably decided to use Intuit s Basic or
 Running Payroll with an Intuit Payroll Service APPENDIX D If you re reading this appendix, you ve probably decided to use Intuit s Basic or Enhanced Payroll service. (Page 419 of QuickBooks 2016: The Missing
ACHieve Access 4.3 User Guide for Corporate Customers
 ACHieve Access 4.3 User Guide for Corporate Customers January 2015 Citizens Bank 1 February 2015 Table of Contents SECTION 1: OVERVIEW... 4 Chapter 1: Introduction... 5 How to Use This Manual... 5 Overview
CORPORATE HEADQUARTERS
 CORPORATE HEADQUARTERS Advantage Payroll Services, Inc. 126 Merrow Road PO Box 1330 Auburn, Maine 04211-1330 Tel: 1-800-876-0178 http://www.advantagepayroll.com Edition 19.03.00 USER GUIDE This user guide
New Hire Onboarding. Delivered by
 New Hire Onboarding Delivered by All ideas and information contained within these documents are the intellectual property rights of HKP. These documents are not for general distribution and are meant for
National Finance Center Office of the Chief Financial Officer U.S. Department of Agriculture December 2012. webta-timekeeper Training Guide
 National Finance Center Office of the Chief Financial Officer U.S. Department of Agriculture December 2012 webta-timekeeper Training Guide Table of Contents Training Objectives and webta Navigation Overview...
Payroll processing is just the beginning.
 Payroll processing is just the beginning. PRODUCTS AND SERVICES Founded in 1995, Custom Payroll Services has grown to be one of the most successful independent payroll providers in the Mid-Atlantic region.
Employee Self Service Instructions
 Employee Self Service Instructions Logging on to ESS There are two ways to login to ESS: PikePeople (Intranet) - You may access through the PikePeople (Intranet) by going to Quick Links and then clicking
Online Payroll: Set Up Checklist for Regions Customers
 Getting started with Regions Online Payroll is easy. Our setup process is completely self guided we make it easy! No tutorials or training are required in order to complete setup and run payroll. We even
Paychex Time and Labor Online User s Guide
 Paychex Time and Labor Online User s Guide This manual is the property of Paychex, Inc. and should never be removed from the office premises without the manager's express permission. Copyright 2014 Paychex,
Employer Online Access Documentation
 Employer Online Access Documentation BBCS Payroll Services Online Portal The following has been provided as a brief introduction to the Online Access Portal for BBCS Payroll Customers. It is to help you
Dear Payroll Client, Thank you, Precision Payroll of America Team. Table of Contents
 At Your Service. Dear Payroll Client, It is that time of year again and year-end is upon us! This document is a crucial part of our fourth quarter and year-end processing which will guide you to a smooth
Accounts Receivable WalkThrough
 PRACTICE CS Accounts Receivable WalkThrough Version 2014.x.x TL 27675a 1/16/15 Copyright Information Text copyright 2004-2015 by Thomson Reuters. All rights reserved. Video display images copyright 2004-2015
Year End Guide 2015. At Your Service.
 Year End Guide 2015 Precision Payroll of America (PPA) would like to take this opportunity to thank you for your business and to wish you a happy holiday season and a prosperous New Year. Please review
efiling and Reporting for Sage ERP MAS 90 and 200
 Product: Sage ERP MAS 90 and MAS 200 Description This document contains a detailed overview of Sage ERP MAS 90 and 200's Tax efiling and Reporting feature in v4.3 and above. The state and federal payroll
Munis Self Service. Employee Self Service User Guide Version 9.3. For more information, visit www.tylertech.com.
 Munis Self Service Employee Self Service User Guide Version 9.3 For more information, visit www.tylertech.com. TABLE OF CONTENTS Employee Self Service... 4 Employee Self Service Users... 4 ESS Navigation...
Quick Guide: Payroll tips
 Quick Guide: Payroll tips QuickBooks Payroll lets you pay employees with just a few clicks and minimal data entry, usually just the hours employees worked. To make the most of the payroll features: When
Banner Web Time Entry. University of Dallas
 Banner Web Time Entry University of Dallas 8/1/2011 Log on to Banner Self Service Information System. Double click Enter Secure Area. Can anybody else get access to my personal data? The only way anybody
AFN-PayrollEndofYearGuide-080807
 080807 2007 Blackbaud, Inc. This publication, or any part thereof, may not be reproduced or transmitted in any form or by any means, electronic, or mechanical, including photocopying, recording, storage
Electronic Timekeeping Supervisors Manual
 Swarthmore College Electronic Timekeeping Supervisors Manual Modified from: National Times Systems, Inc. (2007). Attendance on Demand User Manual, 1.11.07. Cinnaminson, NJ. 1 Original publication: Attendance
TOPS PROFESSIONAL ACCOUNTS PAYABLE MANUAL. By TOPS Software, LLC Clearwater, FL
 TOPS PROFESSIONAL ACCOUNTS PAYABLE MANUAL By TOPS Software, LLC Clearwater, FL Document History Version Edition Date Document Software Version 1 10-2011 TOPS-AP 10-10-11 Professional Version 4 Trademark
All rights reserved. Banyon Data Systems, Inc. 350 W Burnsville Parkway Burnsville, Minnesota 55337 (800) 229-1130. www.banyon.com
 229-1130. www.banyon.com") Banyon Data Systems Payroll Software Version 10 All rights reserved by Banyon Data Systems, Inc. 350 W Burnsville Parkway Burnsville, Minnesota 55337 (800) 229-1130 www.banyon.com 1 2 TABLE OF CONTENTS
Banyon Data Systems Payroll Software Version 10 All rights reserved by Banyon Data Systems, Inc. 350 W Burnsville Parkway Burnsville, Minnesota 55337 (800) 229-1130 www.banyon.com 1 2 TABLE OF CONTENTS
for 740 N. Plankinton Ave 12463 Rancho Bernardo Rd Suite 730 PMB #157 Milwaukee, Wisconsin 53203 San Diego, CA 92128 (800) 654-0441 (866) 402-8901
 654-0441 (866) 402-8901") for Integrated Time Systems Advanced Time Concepts 740 N. Plankinton Ave 12463 Rancho Bernardo Rd Suite 730 PMB #157 Milwaukee, Wisconsin 53203 San Diego, CA 92128 www.integratedtime.com www.timesystems.biz
for Integrated Time Systems Advanced Time Concepts 740 N. Plankinton Ave 12463 Rancho Bernardo Rd Suite 730 PMB #157 Milwaukee, Wisconsin 53203 San Diego, CA 92128 www.integratedtime.com www.timesystems.biz
Microsoft Dynamics GP. U.S. Payroll
 Microsoft Dynamics GP U.S. Payroll Copyright Copyright 2010 Microsoft. All rights reserved. Limitation of liability This document is provided as-is. Information and views expressed in this document, including
Contents. Chapter 1 QuickBooks Payroll - Getting Started. Chapter 2 QuickBooks Payroll Setup
 i Contents Chapter 1 QuickBooks Payroll - Getting Started QuickBooks payroll services... 2 Basic payroll (Do-it-yourself)... 2 Standard payroll (Do-it-yourself)... 2 Enhanced payroll (Do-it-yourself)...
1. Employee Records. 1a. Identity Management Tool
 1. Employee Records Each employee, in order to be paid through the MyTime system, must have an active MyTime record. The employee record contains information about the employee, such as their name, ID
ACS Version 10.6 - Accounts Payable
 ACS Version 10.6 - Accounts Payable Table Of Contents 1. Accounts Payable... 1 Accounts Payable Overview... 1 Accounts Payable Startup Outline... 2 Procedures Outline... 2 Customizing Program Defaults...
for Sage 100 ERP General Ledger Overview Document
 for Sage 100 ERP General Ledger Document 2012 Sage Software, Inc. All rights reserved. Sage Software, Sage Software logos, and the Sage Software product and service names mentioned herein are registered
North Dakota University System
 North Dakota University System Payroll Manual PEOPLESOFT VERSION 9.1 Payroll Page 1 Table of Contents EMPLOYEE TAX DISTRIBUTION... 6 Overview... 6 Update Tax Distribution Data... 6 Tax Distribution...
Cyber Pay ONLINE Product Manual Payroll Administrator User Guide
 -1- Cyber Pay ONLINE Product Manual Payroll Administrator User Guide -2- Table of Contents 1. Overview 3 2. Logging In 4 a. The Log In Screen 4 b. Forgotten Password 5 3. Basic Interface 5 4. Payroll Entry
How To Setup & Use Insight Salon & Spa Software Payroll - Australia
 How To Setup & Use Insight Salon & Spa Software Payroll - Australia Introduction The Insight Salon & Spa Software Payroll system is one of the most powerful sections of Insight. It can save you a lot of
Lexis Back Office - Payroll. Getting Started
 Lexis Back Office - Payroll Getting Started ADP's Trademarks The ADP Logo is a registered trademark of ADP of North America. Third-Party Trademarks LexisNexis, Lexis, and the Knowledge Burst logo are registered
NEW JERSEY WORKERS COMPENSATION INSURANCE PLAN
 NEW JERSEY WORKERS COMPENSATION INSURANCE PLAN MANUAL FOR ONLINE APPLICATION FOR DESIGNATION OF AN INSURANCE COMPANY IMPORTANT: This Procedure Guide is designed to ease your navigation through the New
QBClips Payroll Setup Instructions
 BusinessWise Training, Inc. "Power up Your QuickBooks with QBClips 3580 Linden Ave St Paul MN 55110-5132 651-407-7040 651-779-6688, Fax [email protected] www.qbclips.com QBClips Payroll Setup Instructions
Dayforce HCM Employee Access Employee Guide
 Dayforce HCM Employee Access Employee Guide Contents Employee Tasks... 2 Dayforce HCM Login... 2 Tool Bar Buttons... 3 Time Entry 4 Time Clock Entry 4 Hours Entry..6 Time In/Out Manually Entered..7 Salaried
Business Online. Quick Reference Guide
 Business Online Quick Reference Guide . All rights reserved. This work is confidential and its use is strictly limited. Use is permitted only in accordance with the terms of the agreement under which it
Online Payroll System Help
 Table of Contents Switch My View... 3 Employee Maintenance... 4 Employee Search... 5 Adding New Employee... 7 Required Information... 8 New Employee Wizard... 9 Demographics... 10 Job and Labor Info...
Brokerage Payment System (BPS) User Manual
 User Manual") Brokerage Payment System (BPS) User Manual December 2011 Global Operations Education 1 Table of Contents 1.0 ACCESSING BPS...5 2.0 LOGGING INTO BPS...6 3.0 BPS HOME PAGE...7 4.0 FIRMS...8 5.0 BROKERS...10
Brokerage Payment System (BPS) User Manual December 2011 Global Operations Education 1 Table of Contents 1.0 ACCESSING BPS...5 2.0 LOGGING INTO BPS...6 3.0 BPS HOME PAGE...7 4.0 FIRMS...8 5.0 BROKERS...10
Sage Payroll Services
 SAGE ACCPAC Sage Accpac ERP Sage Payroll Services Integration Guide 2006 Sage Accpac International, Inc. All rights reserved. Sage Software, Sage Software logos, and all Sage Accpac product and service
Client Start-up Checklist
 Client Start-up Checklist Adding clients to Intuit Online Payroll for Accounting Professionals is easy! Just gather some basic client information listed in step 1, set up your client s payroll account
TRACKING EMPLOYEE SICK LEAVE ACCRUED & USED
 TRACKING EMPLOYEE SICK LEAVE ACCRUED & USED First, plan your Sick Leave policy (or policies). Determine whether you want to have a single policy for all employees, or whether different types of employees
Employee Self Service Human Resources & Payroll
 Employee Self Service Human Resources & Payroll Employee Self Service (ESS) is a web-based application that allows employees to view payroll and Human Resources information. This application serves as
MSI Payroll Version 6.0
 MSI Payroll Version 6.0 User s Guide Municipal Software, Inc. 1850 W. Winchester Road, Ste 209 Libertyville, IL 60048 Phone: (847) 362-2803 Fax: (847) 362-3347 Contents are the exclusive property of Municipal
MAINTAINING EMPLOYEE INFORMATION 3 HIRING EMPLOYEES WITH ASCENTIS HR 13 MAINTAINING EMPLOYEE HISTORY 37 MAINTAINING EMPLOYEE LEAVE 67
 Table of Contents MAINTAINING EMPLOYEE INFORMATION 3 EMPLOYEE MANAGER COMPONENTS 3 NAVIGATION TIPS 4 USING THE EMPLOYEE FINDER 5 WORKING WITH WINDOWS AND TABS 8 UNDERSTANDING FORMATTED DATA FIELDS 11 HIRING
Microsoft Dynamics GP. Cashbook Bank Management
 Microsoft Dynamics GP Cashbook Bank Management Copyright Copyright 2007 Microsoft Corporation. All rights reserved. Complying with all applicable copyright laws is the responsibility of the user. Without
Greenshades Garnishments
 Greenshades Garnishments Product Guide and FAQ Greenshades Software Support Team [email protected] 1-888-255-3815 1 Table of Contents Table of Contents... 2 General Overview... 3 About this Guide...
Replicon ADMINISTRATOR S GUIDE
 Replicon ADMINISTRATOR S GUIDE Notices 1999-2014 Replicon, Inc. All rights reserved. All parts of this document are the property of Replicon, Inc. No part of this document may be reproduced in any manner
Doing Payroll With QuickBooks. Lesson 12
 Doing Payroll With QuickBooks Lesson 12 1 Lesson objectives 2 To gain an overview of payroll in QuickBooks To learn more about payroll setup To set up employee payroll information To set up payroll schedules
Introduction. Work Instruction Hiring Staff (Form) BU Temporary or Non-Compensated Employee. Process and Trigger
 BU Temporary or Non-Compensated Employee. Process and Trigger") Introduction Process and Trigger Perform this procedure to hire a Boston University (BU) Temporary (Casual) or Non-Compensated employee into a position that has already been created and approved via an
Introduction Process and Trigger Perform this procedure to hire a Boston University (BU) Temporary (Casual) or Non-Compensated employee into a position that has already been created and approved via an
Doing payroll with QuickBooks
 LESSON 12 Doing payroll with QuickBooks 12 Lesson objectives, 318 Supporting materials, 318 Instructor preparation, 318 To start this lesson, 318 Overview of payroll tracking, 319 Calculating payroll with
Welcome to ComputerEase 10.0
 Welcome to ComputerEase 10.0 This manual is designed to walk you through basic functions by ComputerEase Software, Inc. This manual will be a useful tool as you explore ComputerEase. If you have upgraded
Human Resources Training. Payroll Training
 Human Resources Training Payroll Training Vista HRMS 4.1 Payroll Processing Version 10/2009 Copyright 2009 Personnel Data Systems, Incorporated 470 Norristown Road Blue Bell, PA 19422 (610) 238-4600 www.pdssoftware.com
M4 Systems. Advanced Timesheets and Expenses (ATS&E) User Guide
 User Guide") M4 Systems Advanced Timesheets and Expenses (ATS&E) User Guide M4 Systems Ltd Tel: 0845 5000 777 International: +44 (0)1443 863910 www.m4systems.com www.dynamicsplus.net Table of Contents Operating the
M4 Systems Advanced Timesheets and Expenses (ATS&E) User Guide M4 Systems Ltd Tel: 0845 5000 777 International: +44 (0)1443 863910 www.m4systems.com www.dynamicsplus.net Table of Contents Operating the
W-2 Helpful Hints. Tax Table Maintenance
 W-2 Helpful Hints Make sure all W-2s, Governmental Reports, 941s, and other reports have been printed with the proper past year Tax Table installed before performing Year-end Processing. From the Payroll
INTUIT PROFESSIONAL EDUCATION. Payroll Done Right: An Advanced End-to-End Perspective
 INTUIT PROFESSIONAL EDUCATION Payroll Done Right: An Advanced End-to-End Perspective Copyright Copyright 2008 Intuit Inc. All rights reserved Intuit Inc. 5601 Headquarters Drive Plano, TX 75024 Trademarks
Microsoft Dynamics GP. Cashbook Bank Management
 Microsoft Dynamics GP Cashbook Bank Management Copyright Copyright 2010 Microsoft. All rights reserved. Limitation of liability This document is provided as-is. Information and views expressed in this
UI Online Claimant User Guide. Claimant Activities
 UI Online Claimant User Guide Claimant Activities Massachusetts UI Online System Department of Unemployment Assistance (DUA) Commonwealth of Massachusetts Version 1.01 June 25, 2013 Document Revision History
MSI Accounts Receivable Version 4.0
 MSI Accounts Receivable Version 4.0 User s Guide Municipal Software, Inc. 1850 W. Winchester Road, Ste 209 Libertyville, IL 60048 Phone: (847) 362-2803 Fax: (847) 362-3347 Contents are the exclusive property
2012 Year End Accountant Guide
 2012 Year End Accountant Guide For your clients using RUN Powered by ADP This guide contains information and critical dates to assist you with year end payroll and tax filing tasks. HR. Payroll. Benefits.
Payroll Basics for ADP Workforce Now. Automatic Data Processing, LLC ES Canada
 Payroll Basics for ADP Workforce Now Automatic Data Processing, LLC ES Canada PAYROLL LEVEL 1 FOR WORKFORCE NOW ADP s Trademarks The ADP Logo and ADP Workforce Now are registered trademarks of ADP, Inc.
Sage HRMS 2015 Sage Employee Self Service Release Notes. November 2014
 Sage HRMS 2015 Sage Employee Self Service Release Notes November 2014 Document version: November 11, 2014 This is a publication of Sage Software, Inc. Copyright 2014 Sage Software, Inc. All rights reserved.
Munis Human Resources and Payroll
 Munis Human Resources and Payroll Major Enhancements Version 10.4 to 10.5 For more information, visit www.tylertech.com. TABLE OF CONTENTS Human Resources for Version 10.4... 4 Applicant Master... 4 Applicant
YWCA. ADP ezlabormanager. User s Manual
 YWCA ADP ezlabormanager User s Manual Table of Contents Page Section 1 Introduction 2 Section 1: System Requirements 3 Section 2: Logging on to ezlabor 6 Section 3: Supervisor Setup 7 Section 4: Verify
Staff Management WalkThrough
 PRACTICE CS Staff Management WalkThrough version 2014.x.x TL 27718a (1/16/2015) Copyright Information Text copyright 2004 2015 by Thomson Reuters. All rights reserved. Video display images copyright 2004