CapTel 840i /14. Setup Guide
|
|
|
- Sylvia Chapman
- 10 years ago
- Views:
Transcription
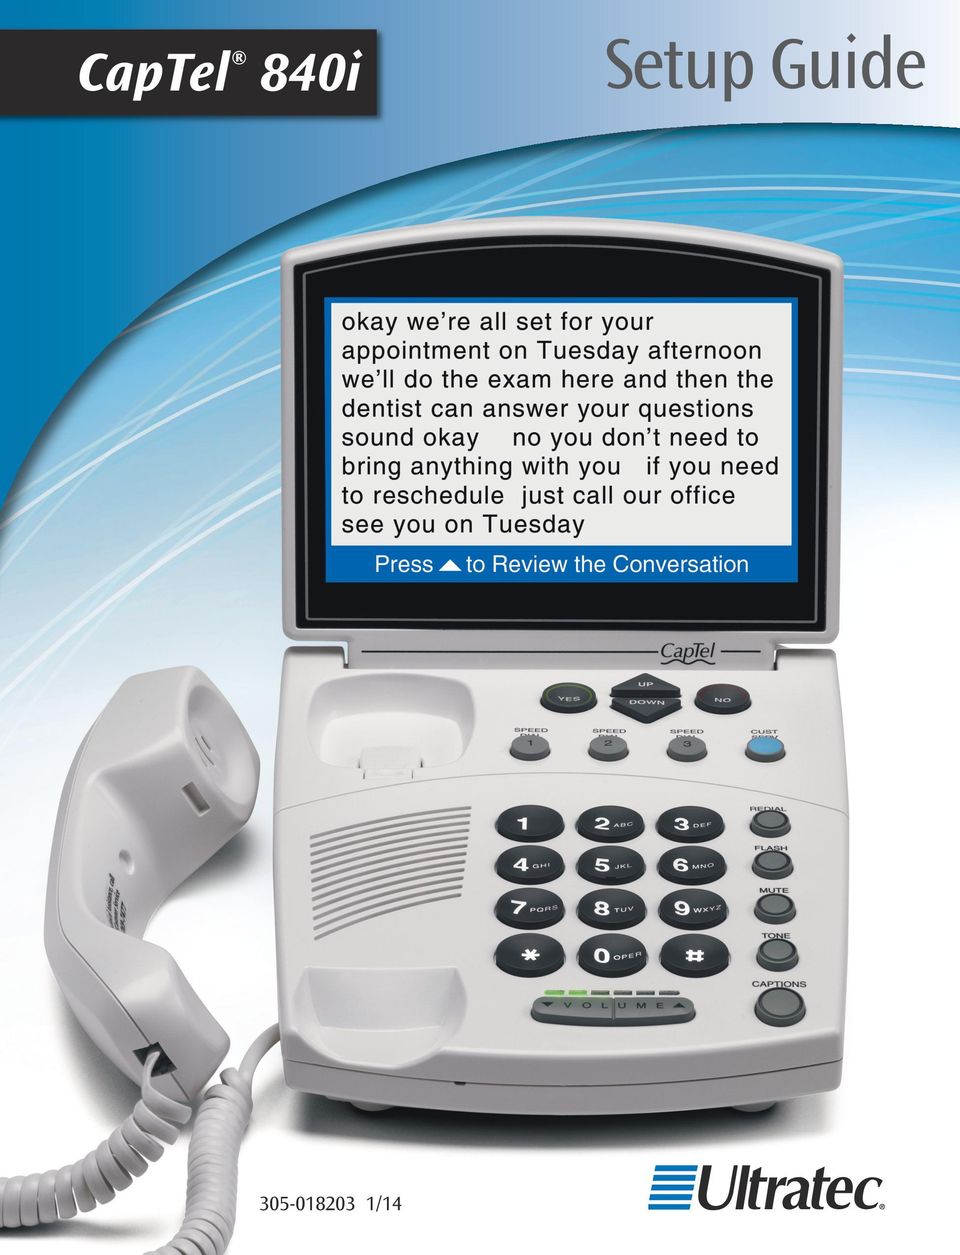
1 CapTel 840i /14 Setup Guide
2 About Your New CapTel 840i Your new CapTel 840i is like any other telephone in many ways: it connects to a telephone line, you talk and listen to your callers, and you place/answer calls the same way you use any other telephone. Your new CapTel 840i is also different than a traditional telephone in some important ways. In order to show captions, your CapTel 840i connects to the Internet the same way you connect a computer to the Internet. The Internet connection links to a free Captioning Service, where a specially-trained operator transcribes everything your caller says into captions. The captions are sent back over the Internet to your CapTel 840i phone, for you to read in the display. Because the CapTel 840i relies on the Internet to provide captions, setting up the phone takes a few extra steps to make sure it is connected to the Internet properly. Action Needed Registration The Federal Communications Commission (FCC) requires that all CapTel 840i users register. As you set up your new phone, please follow registration directions on the screen. The Captions feature cannot be activated until registration is complete. Need help registering? Call

3 Where To Get Help Help is available 24 hours a day, 7 days a week. Please contact: Toll-Free Installation Help Line: [email protected] Fax: (608) Online Help: If someone else installed your home computer or your Internet connection, you may want to consult with that person as you set up the CapTel 840i. You can also try the Troubleshooting suggestions at the end of this guide to help with any problems. Important Information when Calling for Help The following information may help CapTel Customer Service troubleshoot your problem. If possible, please have this information handy when you call for help: My Telephone Number My CapTel 840i Electronic Serial Number (ESN) (located underneath your CapTel phone) My Internet Service Provider My Telephone Service Provider If using WiFi: Name of WiFi Network (SSID) WiFi Password (also sometimes called Pass Phrase or Network Key ) Installation Help: WHERE TO GET HELP 1

4 T A B L E O F C O N T E N T S Step 1 Requirements...3 Step 2 Choosing a Location...4 Step 3 Connect to a Power Outlet...5 Step 4 Connect the Telephone Line...6 Step 5 Connect to Your Internet Service...7 Step 6 Setting the Time and Date...18 Step 7 Registering Your Phone...19 Step 8 Record Personal Greeting Message (Optional)...21 Troubleshooting...23 How CapTel 840i Works You talk back and forth with callers over the Telephone Connection. Captions of the call are provided over the Internet Connection. NOTE: The CapTel 840i phone does not generate captions of the phone call on its own. The phone works with the Captioning Service (over the Internet) to display captions during your calls. 2 TABLE OF CONTENTS Installation Help:
 to display captions during your calls.")
5 STEP 1 Requirements Before you set up your phone, make sure you already have: Telephone Service Connects to the CapTel 840i via a telephone cord using a standard RJ11 connection. Your telephone service can be any of the following: Standard analog service DSL (Digital Subscriber Line) filter recommended Digital Cable phone service NOTE: Your CapTel 840i does NOT work with digital Private Branch Exchange (PBX) phone systems found in some business settings, residential facilities, and hotels, unless an analog port is available. Access to High-speed Internet Service Connects to the CapTel 840i via an Ethernet cable or via a Wireless (WiFi) network. Your Internet service must be working properly in order for the CapTel 840i to display captions. A high-speed Internet connection is required. Dial-up Internet service will not work. In home settings that do not have a wireless network, you may need a router or switch to connect more than one device to your Internet service. Your Internet modem and/or router should support DHCP. You should also check if a firewall is active on either the modem or the router, as it might interfere with connecting the CapTel 840i to your network (see Troubleshooting on page 25 for tips). Standard Electrical Power VOIP (Voice Over Internet Protocol) phone service FIOS (Fiber Optic Service) phone service The CapTel 840i plugs into a standard electrical wall outlet. You must use the power adapter that came with the CapTel 840i. Using any other adapter may damage the CapTel and will void the warranty. Installation Help: REQUIREMENTS 3
 network.")
6 STEP 2 Choosing a Location If possible, make sure that the outlets for your telephone service and your electrical power are located close to your Internet service outlet (for wired installations) or within range of your wireless router (for WiFi installations). For settings where the outlets are not located close to one another, see page 9 for more installation tips. Choose a location where: There is a telephone jack, an electrical outlet, and an Internet jack (Ethernet) all located nearby.* The surface it will be set on or mounted to is stable and secure. The area is protected from excessive heat or humidity. * In WiFi settings, it is not necessary for your CapTel phone to be in the same room/area as the wireless router. However, your wireless signal strength may be stronger the closer your CapTel phone is positioned to the wireless router. What is in the box? Your CapTel 840i includes the following parts: CapTel 840i Phone Telephone Cord Power Adapter to plug into a wall outlet Important! Use only the power adapter that came in the box with your CapTel 840i Ethernet Cable to connect to Internet service (not necessary for WiFi installations) CapTel Setup Guide and CapTel How-to Guide Warranty Card 4 CHOOSING A LOCATION Installation Help:

7 STEP 3 Connect to a Power Outlet Plug the power adapter cord into the power socket labeled Power Located on the back (top) edge of the CapTel 840i. Be sure to use the power adapter that came with your new CapTel 840i. Plug the power adapter into a wall outlet or power strip The CapTel display screen will light up to let you know power is connected. TIP: Plug your power adapter into an electrical power surge protector to protect your CapTel 840i from damage caused by unspecified electrical voltage or damage caused by lightning. Do not use an electrical outlet controlled by a "dimmer" or wall switch. WARNING: Be sure to use only the power adapter that came with your CapTel 840i. Using any other power adapter may damage your phone. Once you plug in the power, your CapTel phone will automatically check that everything is connected and working properly. You can follow along on the CapTel display screen, which will tell you what is happening during the set up process. Installation Help: CONNECT TO A POWER OUTLET 5

8 STEP 4 Connect the Telephone Line Plug one end of the telephone cord into the telephone jack labeled Line 1 Located on the back (top) edge of the CapTel 840i. Be sure to use the telephone cord that came with your new CapTel 840i phone. Plug the other end of the telephone cord into a telephone wall outlet 6 CONNECT THE TELEPHONE LINE Installation Help:

9 STEP 5 Connect to Your Internet Service There are two ways to connect to your Internet service: Option 1: Wired using an Ethernet cable to connect to the Internet. Please follow instructions for Wired Installations below. Option 2: Wireless using your home/office WiFi network to reach the Internet. Please follow instructions for Wireless/WiFi Installations on page 13. For Wired Installations 1. Plug one end of the Ethernet cable into the jack labeled Ethernet, located on the back (top) edge of the CapTel 840i. Be sure to use the Ethernet cable that came with your new CapTel 840i phone. 2. Connect the other end of the Ethernet cable into the jack you use to access your Internet service. Depending on how your Internet service is set up for your home/office, you could be plugging into any of the following: An available Ethernet jack on a digital cable modem An available Ethernet jack on a DSL modem An available Ethernet jack on a router in your home An available Ethernet jack in a wall outlet NOTE: When connected properly, the LNK/ACT indicator light will glow. The LNK/ACT indicator light is located next to the Ethernet jack on the back (top) edge of the CapTel 840i. Installation Help: CONNECT TO YOUR INTERNET SERVICE 7
 edge of the CapTel 840i. Be sure to use the Ethernet cable that came with your new CapTel 840i phone. 2.")
10 Use the examples on the following pages to match your setting with the correct installation method. Case 1: All Outlets Located Together Example 1: All of the connection outlets (telephone, Internet, and power) are available in the same room that you are planning to use the CapTel 840i. Example 2: If there is not an available Ethernet jack in your DSL or Cable Modem, you will need a router or switch that lets you connect more than one device to the Internet. Contact your Internet Service Provider for information about what router or switch will work with your modem. The router should support DHCP. Connect the router to your DSL/Cable Modem. Then connect the CapTel 840i to the router or switch using the Ethernet cable as shown below. 8 CONNECT TO YOUR INTERNET SERVICE Installation Help:

11 Case 2: Outlets Located in Separate Rooms If your Internet connection is located in a different room from where you plan to use your CapTel phone, choose one of the following examples that best matches your setting. Example 1: Use a wireless "WiFi" router (See page 13 for set up instructions). Installation Help: CONNECT TO YOUR INTERNET SERVICE 9
.")
12 Example 2: Use Powerline Network Adapters Outlet should not have other devices plugged in. * Powerline Network Adapters (sold separately) are available from a computer electronics store or online from WCI ( at an additional cost. IMPORTANT: The Powerline Network Adapters cannot be plugged into a power strip, surge protector, extension cord or GFI-type outlet. They must be connected directly into the electrical wall outlet. 10 CONNECT TO YOUR INTERNET SERVICE Installation Help:

13 Example 3: Install an Ethernet Wall Jack Some newly-constructed homes are wired for Internet connectivity by having Ethernet cable jacks built right into a wall outlet (similar to how an electrical outlet or a telephone outlet would work). For approximately the same cost as buying Powerline Network Adapters, your telephone company or Internet Service Provider can install Ethernet jacks/wiring in your home or office directly in the room that you plan to use your new CapTel telephone. To learn more about this option, please contact your Internet Service Provider. Installation Help: CONNECT TO YOUR INTERNET SERVICE 11

14 Example 4: Extra Long Ethernet Cable You can use an extra long Ethernet cable (longer than the standard Ethernet cable that came with your CapTel telephone) to bridge the distance between your phone location and your Ethernet jack. Extra long Ethernet cables (sold separately) are available from a computer electronics store or online from WCI ( at an additional cost. 12 CONNECT TO YOUR INTERNET SERVICE Installation Help:
 at an additional cost.")
15 For Wireless/WiFi Installations If you have a wireless ( WiFi ) network in your home or office, your CapTel phone can connect to the Internet using the WiFi network. You do not need to plug in an Ethernet cable. To set up your CapTel for WiFi use, you will need to know the name of your wireless network (also called the SSID) as well as any passwords that may be necessary to access the network. The way you access your WiFi network with CapTel will be very similar to the way you access the network from a computer or mobile device. Installation Help: CONNECT TO YOUR INTERNET SERVICE 13

16 NOTE: If someone helped install the wireless network in your home or office, it may be helpful to consult with them as you set up your CapTel phone. 1. The display asks, Press YES for WiFi Setup. Press the YES button. 2. Your CapTel checks if any wireless networks have been used previously and are already saved in memory. If no previous networks are detected, CapTel scans for available networks in your location. 3. CapTel lists any WiFi networks detected, in order of the strongest signal strength to the weakest signal strength. Use the UP/DOWN arrows to highlight the wireless network you want to use. Press the YES button to select. SETUP - CONNECT TO INTERNET Please plug in Ethernet Cable. NOTE: CapTel may detect wireless networks in your location that you do not recognize such as a wireless network from a neighbor or nearby office. Be sure to select the SSID that matches your WiFi network. If you do not see the network you want listed, try moving your CapTel phone to an area closer to your wireless router and selecting Refresh Network List. CapTel will re-scan for available networks. See Troubleshooting for WiFi Networks on page 27 for additional directions. Or Press YES for WiFi Setup Press YES for WiFi Setup SSID SECURITY Ch. SIGNAL 2WIRE269 WPA 08 OfficeNet WPA 06 ACBRDBAND WPA 06 NETWORK1 WPA 04 Refresh Network List Enter Network Manually Press YES to Select a Wireless Network Press NO To Refresh Network List 14 CONNECT TO YOUR INTERNET SERVICE Installation Help:

17 4. If required, CapTel asks for the password to access your WiFi network. NOTE: Where to find your WiFi password? This is the same password you need to access the WiFi network from any computer or mobile device. The password (sometimes called a pass phrase or network key ) is assigned by your Internet Service Provider or by whomever set up your wireless network. In some cases, the password may be listed directly on your wireless router. Use the dialing pad to enter the letters or numbers of your password. Look for the letters listed on the number keys to know which number key to press. For some letters/numbers, you will need to press the number key several times until the correct letter/number appears on the display screen. For special characters (i.e., #, &, %) press the 1 key repeatedly. SETUP - WiFi Please Enter WPA Password: _ Press YES to Accept for Shift, for Backspace, # for Space TIP: Some passwords are case-sensitive. Press the UP button to shift lock for capital letters. Press the UP button again to return to lower case. Example: To enter the letter R, press the UP arrow button to set shift-lock to capital letters, then press the number 7 key three times until you see R on the display screen. NOTE: Depending on the type of security on your wireless network, you may not be asked to enter a password. TIP: After you have typed your password, double-check that you have all the letters and numbers listed correctly, and that any capital/lower case letters are entered properly. If the password is not correct, CapTel will not be able to connect to your WiFi network. 5. After you have entered the password, press the YES button to accept. CapTel will save your network settings, and connect to your wireless network. Installation Help: CONNECT TO YOUR INTERNET SERVICE 15

18 Entering a Network Manually If you do not see your network name in the list of available WiFi networks, you can manually enter the name of the network you want to use. 1. Use the DOWN arrows to highlight Enter Network Manually. Press the YES button to select. SSID 2WIRE269 OfficeNet ACBRDBAND WPA WPA WPA Use the dialing pad to enter the name of the wireless network you want to use (also called the SSID ). Look for the letters listed on the number keys to know which number key to press. For some letters/numbers, you will need to press the number key several times until the correct letter/number appears on the display screen. For special characters (i.e., &, #. %) press the 1 key repeatedly. Example: To enter the letter R, press the UP arrow button to set shift-lock to capital letters, then press the number 7 key three times until you see R on the display screen. Please Enter the SSID: RayNETWORK2 _ SETUP - WiFi SECURITY Ch. SIGNAL NETWORK1 WPA 04 Refresh Network List Enter Network Manually Press YES to Select a Wireless Network Press NO To Refresh Network List Press YES to Accept for Shift, for Backspace, # for Space TIP: Some network (SSID) names are case-sensitive. Press the UP button to shift lock for capital letters. Press the UP button again to return to lower case. Use the DOWN button to backspace. 3. Use the UP/DOWN buttons to highlight the type of Network Security on your WiFi network. Press the YES button to select. NOTE: If you don't know which Network Security to use, please check with the person who set up your WiFi network. SETUP - WiFi No Security WPA/WPA2 Security WEP Security Press YES to select or press NO to exit 16 CONNECT TO YOUR INTERNET SERVICE Installation Help:

19 4. If required, CapTel asks for the password to access your WiFi network. Use the dialing pad to enter the letters or numbers of your password. Look for the letters listed on the number keys to know which number key to press. For some letters/numbers, you will need to press the number key several times until the correct letter/number appears on the display screen. For special characters (i.e., #, &, $) press the 1 key repeatedly. SETUP - WiFi Please Enter WPA Password: _ Press YES to Accept for Shift, for Backspace, # for Space TIP: Some passwords are case-sensitive. Press the UP button to shift lock for capital letters. Press the UP button again to return to lower case. Example: To enter the letter R, press the UP arrow button to set shift-lock to capital letters, then press the number 7 key three times until you see R on the display screen. 5. Confirm that your password is listed correctly, then press the YES button to accept. 6. CapTel saves your wireless settings, and then connects to the wireless network that you specified. If you have any problems accessing your wireless network with CapTel, please see Troubleshooting on page 27 or contact CapTel Customer Service for help. SETUP - WiFi Checking Saved Configuration RayNETWORK2 Connecting to WiFi Network...OK Getting DHCP Information...OK Resolving Caption via DNS...OK Wireless Setup Complete NOTE: Once your CapTel phone connects to the Internet, it automatically checks to make sure that you have the most current software version. If needed, your phone will automatically update its software over the Internet connection. Watch the display screen to follow the progress. Your CapTel phone may reboot as part of the update process. Once the entire update process is completed, you will be able to continue with the installation. Installation Help: CONNECT TO YOUR INTERNET SERVICE 17

20 STEP 6 Setting the Date and Time To Set the Date and Time 1. CapTel shows you the current time and date setting. Use the UP or DOWN arrow buttons to move the blue highlight over the number that you want to change. 2. On the dialing pad, press the key that lists the number you want to use. Example: To set the time for 11:30, press the 1 key twice, then press the 3 key followed by the 0 key. TIP: To change the time from AM to PM, make sure the AM/PM section is highlighted, then press the 2 key for AM and the 7 key for PM. SET THE TIME AND DATE 12:13 AM 01/01/2012 Use 2 for AM Use 7 for PM Use the keypad to enter the Time and Date Press YES to accept or NO to exit SET THE TIME AND DATE 12:13 AM 10/15/2012 Use 2 for AM Use 7 for PM Use the keypad to enter the Time and Date Press YES to accept or NO to exit NOTE: When you enter the date setting, only the last two numbers in the year can be changed. 3. When you have set the time and date, press the YES button to save. 18 SETTING THE DATE AND TIME Installation Help:

21 STEP 7 Registering Your Phone The first time that you set up your new CapTel 840i telephone, you will be asked to register your phone by reviewing and agreeing to the Terms & Conditions for using CapTel. Registration is required by the FCC before the Captions feature can be activated. Once you complete this step, you will not need to register again, even if you move your phone to a new location. NOTE: If your phone display shows different directions than the instructions below, please follow the directions on your CapTel phone display screen to complete your registration. To register: In some cases, the display screen may ask you to register your CapTel phone by calling CapTel Customer Service or going online. Follow the directions on the screen to register. For help registering, please press the blue Customer Service button to reach an Installation Help Specialist. 1. The display screen alerts you that you should read and agree to the Terms & Conditions for using CapTel. 2. The display screen lists the Terms & Conditions for using the CapTel phone. **************** Terms & Conditions **************** Before using the CAPTIONS feature, please register your phone at or Contact CapTel Customer Service. This phone s ESN is 398H Press NO to exit Before using CAPTIONS feature, please read and agree to the following Terms & Conditions Downloading Please Hold Installation Help: REGISTERING YOUR PHONE 19
22 3. Follow the directions on the display screen to review the Terms & Conditions. Press the YES button to accept. If you do not agree with the Terms & Conditions, press the NO button. The CAPTIONS feature will remain off during your calls. You can still use CapTel as a standard telephone, but you will not receive captions during your calls. Terms & Conditions were not accepted. CAPTIONS will remain off until accepted. Press CAPTIONS button to review. Press YES for Options 12:53 PM To review the Terms & Conditions wording again, press the CAPTIONS button. The Terms & Conditions information will appear again, and you will have another opportunity to accept the Terms & Conditions by pressing the YES button. If you have any questions about the Terms & Conditions or how to register your CapTel phone, please press the blue Customer Service button for assistance. 20 REGISTERING YOUR PHONE Installation Help:
23 STEP 8 Record a Personal Greeting Message for the Answering Machine (Optional) Before you begin making/receiving calls, you may want to record a personal greeting message for the CapTel 840i Answering Machine. If you do not want to record a personal greeting, the Answering Machine will use a pre-recorded greeting that says, Hello. No one is available to take your call. Please leave a message after the tone. To record a personal greeting message: 1. Press the YES button to see Options. 2. Press the DOWN button to highlight Answering Machine. Press YES to select.? OPTIONS Dial from Phone Book Answering Machine Call History Edit Phone Book Conversations Settings Press YES to select or press NO to exit Options 3. Press the DOWN button to highlight Greeting Message. Press YES to select. ANSWERING MACHINE Answering Machine On/Off Play Messages Clear All Messages Greeting Message Answering Machine Settings Caption External Ans Machine Press YES to select or press NO to exit Installation Help: RECORD A GREETING MESSAGE 21
24 4. Press the DOWN button to highlight Record New Greeting. Press YES to select. GREETING MESSAGE Play Current Greeting Record New Greeting Use Default Greeting 5. Lift the CapTel handset and watch the display screen to know when to start speaking. When you see the REC message, begin speaking into the handset to record your greeting message. 6. When you are finished, press the YES button to stop. Your new message will play back over the handset for you to review. If you d like to re-record your greeting, press the NO button to begin recording again. 7. When you are satisfied with your new greeting, hang up the telephone handset. CapTel will send out your personal greeting whenever the Answering Machine picks up an incoming call. Press YES to select or press NO to exit RECORD NEW GREETING Lift Handset to Record Greeting or Press NO to exit RECORD NEW GREETING Message Is Recording Speak Into the Handset Press YES to End Recording NOTE: For more information about the Answering Machine, please see the CapTel 840i How-to Guide. 22 RECORD A GREETING MESSAGE Installation Help:
25 Troubleshooting Problem with Power Problem: The display screen is blank. Press any of the buttons on the CapTel 840i dialing pad to confirm that the phone is not in sleep mode. The display screen should light up. Confirm that the power adapter is plugged completely into the socket on the back (top) edge of the CapTel 840i phone and into a working wall outlet or power strip/surge protector. If plugged into a power strip, confirm that the power strip is turned on. If plugged into a wall outlet, check whether a wall switch controls the outlet and, if so, make sure it is switched on. NOTE: Using an electrical outlet controlled by a wall switch is not recommended. Confirm that you are using the power adapter provided with the CapTel 840i ( mamps). Do not use a different power adapter than the one supplied with the CapTel 840i as this may damage the phone and will void the warranty. Installation Help: TROUBLESHOOTING 23
26 No Telephone Service The CapTel 840i needs to connect to the telephone service using an RJ11 jack/phone cord, like the one provided with the phone. The telephone connection can be to any land-line phone service, including: Standard analog service DSL (Digital Subscriber Line) filter recommended Digital Cable phone service VOIP (Voice Over Internet Protocol) phone service FIOS (Fiber Optic Service) phone service The CapTel 840i does NOT work with digital Private Branch Exchange (PBX) systems found in some office environments, residential facilities, and hotels, unless an analog port is available. NOTE: The Ethernet connection with the CapTel 840i ONLY provides the captions. The CapTel 840i still requires telephone service to work. Connecting your CapTel 840i to the Internet via the Ethernet jack or via WiFi does not give you Internet phone service. Whatever type of telephone service you use is still needed to make and answer calls. Confirm that the telephone cord is plugged into the CapTel 840i and into your telephone wall outlet (or into your telephone service adapter/modem, if necessary). Lift the CapTel handset and listen for a dial tone. The Signal Meter on the display screen helps show if a dial tone is present (CAPTIONS button must be on). If there is no dial tone, unplug the phone cord and power for one minute, then plug back in. If a dial tone is not present, there may be a problem with your telephone service. Check whether other telephones in your home are working properly. Try a different telephone plugged into the same wall jack to confirm the jack is working properly. Confirm that you are using the telephone cord provided with the CapTel 840i. Is a number (such as 9 ) required to dial an outside line, as is common in office environments? If so, then you need to dial the 9 first before you can place a call. 24 TROUBLESHOOTING Installation Help:
27 Problem with Internet Access Problem: CapTel display screen says Check Network Settings Check that Internet access is working: Are you able to access the Internet via a computer in your home? If you get your Internet access through your Digital Cable service, check that your TV is still getting cable channels. If not, your cable service may be temporarily down, affecting your Internet service. Do you have to enter a password every time you access the Internet? If so, you may need to connect a router to your DSL or cable modem, and then connect the CapTel 840i to the router. If you ve plugged the CapTel 840i into a router, does your router support DHCP? Check the specifications in the instruction manual that came with your router. If your router only supports static IP addresses, contact Customer Service for assistance. Your Internet service provider may also be able to help you identify how your Internet service is configured. Check that your Internet modem (DSL modem or Digital Cable modem) supports DHCP. While most Internet modems support multiple protocols, some modems are set to only PPOE. CapTel 840i should be used with DHCP support. Your Internet service provider can confirm/adjust the modem settings for you. If you are installing CapTel in a business environment (or in a locked down environment), your network firewall security may be blocking communication from the network to your CapTel 840i. Please contact CapTel Customer Service for assistance setting up your CapTel phone to work with your network security. Installation Help: TROUBLESHOOTING 25
28 Problem: CapTel display screen says Waiting for Captions but nothing happens or the CapTel dialing keys/buttons seem unresponsive. Try resetting the CapTel phone by briefly unplugging the AC adapter and then plugging it back in. Wait for the logo screen to appear. The Captions button should be lit (press the Captions button to turn it on if needed). Try resetting the network connection by unplugging the CapTel AC adapter, then turning off the router and the Internet modem. Wait a minute, then turn on the modem (make sure it s fully reset, with lights going steady). This may take up to five minutes to fully reset. Next, turn on the router, making sure it is fully reset. Then plug in the CapTel 840i AC adapter, all in that order. Wait for the logo screen to appear. The Captions button should be lit (press the Captions button to turn it on if needed). Try electronically resetting the CapTel phone to its original factory default settings. Make sure you are at the idle screen (not in Options menu). Then, with the handset hung up, press on the dialing keypad (zero RESET). Press YES to reset. WARNING: This will delete any saved phone numbers or speed dial settings. 26 TROUBLESHOOTING Installation Help:
29 Problem with WiFi Network Problem: My WiFi network SSID does not appear in the list of available networks. If your network SSID is not included in the list of networks available, try moving your CapTel 840i to an area closer to your wireless router. As you try new locations, use the UP/DOWN arrow to highlight Refresh Network List and press the YES button to select. Your CapTel 840i will re-scan for WiFi networks within range. Look again to see if your network appears in the list of available networks. Try adding your network manually. Use the UP/DOWN arrow to highlight Enter Network Manually and press the YES button to select. Then, follow the instructions on page 16 to enter your network name and password if needed. Problem: CapTel display says, A Network Error Has Occurred Press the NO button to get more information about the type of problem. Please contact CapTel Customer service for assistance. Problem: CapTel display says: Router is out of range or invalid passphrase was entered Check that your wireless router is turned on. Confirm that you have entered the wireless password correctly, including upper and lower case letters if necessary. To re-enter your network password: Press the YES button to see OPTIONS Press the DOWN arrow repeatedly until Settings is highlighted. Press the YES button to accept. Press the DOWN arrow repeatedly until Network Settings is highlighted. Press the YES button to accept. Installation Help: TROUBLESHOOTING 27
30 Press the DOWN arrow until Change Network Connection is highlighted. Press the YES button to accept. CapTel asks if you are sure you want to leave this Network? Press YES to confirm. CapTel will scan for available WiFi networks, and display of list of networks within range. Use the UP/DOWN arrow buttons to highlight your WiFi network. When asked, carefully enter the wireless network password on the dialing keypad, using the guidelines on page 15. When you are finished entering the password, double-check that everything is spelled correctly and that upper/lower case letters are listed properly. Press YES to accept. Check that the signal strength of your wireless router is strong enough to reach the CapTel phone. To check: Press the YES button to see OPTIONS Press the DOWN arrow repeatedly until Settings is highlighted. Press the YES button to accept. Press the UP/DOWN arrow repeatedly until Network Settings is highlighted. Press the YES button to accept. Confirm that View Current Network is highlighted. Press the YES button to accept. 28 TROUBLESHOOTING Installation Help:
31 CapTel shows information about the current WiFi setup. Check the signal strength diagram next to the Power setting. This indicates how strong the signal strength is between the CapTel and your wireless router. The more bars that are colored in, the stronger the signal strength. CURRENT NETWORK INFORMATION SSID: 2WIRE269 Security: WPA-PERSONAL Channel: 8 Power: -48dBm Press NO to exit If the signal strength is very low, your phone may be too far away from the wireless router to establish a reliable connection. Try moving your CapTel phone to a location closer to your wireless router. Then, repeat this process to check the Current Network Settings again to determine if the signal strength can be increased. Please call CapTel Customer Service for additional assistance: Installation Help: TROUBLESHOOTING 29
32 CapTel 840i Installation Help Line: CapTel is the latest innovation from Ultratec, Inc. 450 Science Drive Madison, WI (888) V/TTY (866) (Spanish CapTel Customer Service) Fax: (608) Web: Ultratec, Inc. All rights reserved. Ultratec and CapTel are registered trademarks of Ultratec, Inc.
Setup Guide. CapTel 840i 305-018800 9/13. Catch every word with CapTel from Access Comm
 CapTel 840i Setup Guide 305-018800 9/13 Catch every word with CapTel from Access Comm About Your New CapTel 840i Your new CapTel 840i is like any other telephone in many ways: it connects to a telephone
CapTel 840i. Setup Guide 305-018200 2/12
 CapTel 840i Setup Guide 305-018200 2/12 About Your New CapTel 840i Your new CapTel 840i is like any other telephone in many ways: it connects to a telephone line, you talk and listen to your callers, and
CapTel 800i. Installation Guide 305-016705 5/11
 CapTel 800i Installation Guide 305-016705 5/11 About Your New CapTel 800i Your new CapTel 800i is like any other telephone in many ways: it connects to a telephone line, you talk and listen to your callers,
CapTel 800i. Installation Guide 305-016702-A 11/09
 CapTel 800i Installation Guide 305-016702-A 11/09 About Your New CapTel 800i Your new CapTel 800i is like any other telephone in many ways: it connects to a telephone line, you talk and listen to your
CATCH EVERY WORD. CapTel 800i. Installation Guide 305-017301 6/11
 CapTel 800i CATCH EVERY WORD Installation Guide 305-017301 6/11 About Your New CapTel 800i from Access Comm Your new CapTel 800i is like any other telephone in many ways: it connects to a telephone line,
SETUP GUIDE. CapTel. 2400i 305-019452 3/15
 SETUP GUIDE CapTel 2400i 305-019452 3/15 Important Note As you set up your new CapTel phone, be sure to follow the directions on the display screen for registering your phone. Per a recent ruling by the
SETUP GUIDE. CapTel. 2400i 305-019451 2/13
 SETUP GUIDE CapTel 2400i 305-019451 2/13 Important Note As you set up your new CapTel phone, be sure to follow the directions on the display screen for registering your phone. Per a recent ruling by the
How To Use A Captel 840I Phone
 CapTel 840i How-to Guide 305-019100 1/13 Emergency Dialing Instructions: With CapTel 840i, calls to 111 are handled exactly the same as if you called from any other phone connected to your telephone service,
CapTel 800i. How-to Guide 305-016605 11/11
 CapTel 800i How-to Guide 305-016605 11/11 CapTel 800i Specifications Physical Dimensions Size: 9" x 6.5" x 7.5" Weight: 2 lb. 10 oz. Power AC Adapter: 6 VDC, 1670 ma (barrel is negative) Adapter is UL/CSA
2-Line CapTel User Guide
 2-Line CapTel User Guide This information is provided as a supplement for CapTel users who wish to use 2-line capabilities. For more complete information about using your CapTel, please refer to the CapTel
Home Network. Installation Instructions
 Home Network Installation Instructions TM Installation Instructions Table of Contents Overview...2 Installation Considerations...2 Quick Installation Instructions...2 Identifying and Creating the Home
Using Your CapTel Model 200
 Using Your CapTel Model 200 305-014207 5/09 IMPORTANT! Dialing 911 in an Emergency To reach help as quickly as possible in an emergency, all 1-Line CapTel calls placed to 911 connect directly to Emergency
Quick & Easy Set-Up of Packet8 Internet Phone Service
 For the Way You Live & Work Quick & Easy Set-Up of Packet8 Internet Phone Service Welcome to Packet8 Internet Phone Service. Soon, you ll be able to make all your calls over the Internet and save a bundle
Installation Guide (No Router)
") Installation Guide (No Router) This installation guide will show you how to get your voip phone service working. This installation guide should be used if you have a standard DSL or cable modem and no
Installation Guide (No Router) This installation guide will show you how to get your voip phone service working. This installation guide should be used if you have a standard DSL or cable modem and no
Installation Guide. EarthLink
 Installation Guide EarthLink Welcome to EarthLink DSL & Home Phone Service Congratulations! You ve made the smart choice for super-fast DSL and super-simple phone service. Follow the instructions in this
Networking. General networking. Networking overview. Common home network configurations. Wired network example. Wireless network examples
 Networking General networking Networking overview A network is a collection of devices such as computers, printers, Ethernet hubs, wireless access points, and routers connected together for communication
Diamante WiFi Wireless Communication User Guide. Linksys E1200
 Diamante WiFi Wireless Communication User Guide Linksys E1200 Release: February 2012; August 2011; February 2011 Patent Pending. Copyright 2012, Stenograph, L.L.C. All Rights Reserved. Printed in U.S.A.
Quick Start. PowerLINE WiFi 1000 Models PL1000 and PLW1000
 Quick Start PowerLINE WiFi 1000 Models PL1000 and PLW1000 Package Contents In some regions, a resource CD is included with your product. 2 Get Started PowerLINE adapters give you an alternative way to
Diamante WiFi Wireless Communication User Guide. CradlePoint CTR35
 Diamante WiFi Wireless Communication User Guide CradlePoint CTR35 Release: July 2011; March 2011 Patent Pending. Copyright 2011, Stenograph, L.L.C. All Rights Reserved. Printed in U.S.A. Stenograph, L.L.C.
Life Is Calling. Meet Your New CaptionCall Phone. Spoken Words into Captions. Free Service Means No Cost to You. 2 CaptionCall
 setup guide Life Is Calling Meet Your New CaptionCall Phone We d like to introduce you to CaptionCall. Your new CaptionCall phone looks and works pretty much like an ordinary telephone, but with one big
AC750 WiFi Range Extender
 Model EX6100 User Manual April 2014 202-11307-03 350 East Plumeria Drive San Jose, CA 95134 USA Support Thank you for selecting NETGEAR products. After installing your device, locate the serial number
Phone Adapter. with 2 Ports for Voice-over-IP. Installation and Troubleshooting Guide. Model No. PAP2 Ver. 2. Voice
 Phone Adapter with 2 Ports for Voice-over-IP Voice Installation and Troubleshooting Guide Model No. PAP2 Ver. 2 Copyright and Trademarks Specifications are subject to change without notice. Linksys is
Quick Start Guide. Vonage VWR Device
 Quick Start Guide Vonage VWR Device Before you begin 1. If you purchased your Vonage Device from a retail store, you must first activate your Vonage phone service. (You will need to provide the MAC ID
DVG-2101SP VoIP Telephone Adapter
 This product can be set up using any current web browser, i.e., Internet Explorer 6 or Netscape Navigator 6.2.3. DVG-2101SP VoIP Telephone Adapter Before You Begin 1. If you purchased this VoIP Telephone
User s manual. Corded telephone. w w w.v t e c h c a n a d a. c o m. Big Button Big Display. Model:CD1281 DIR CID
 User s manual w w w.v t e c h c a n a d a. c o m DIR CID Model:CD1281 Corded telephone Big Button Big Display Congratulations on purchasing your new VTech product. Before using this telephone, please read
Do you have difficulty hearing on the phone?
 Do you have difficulty hearing on the phone? We ve got a solution for you... Free Captioned Telephone Services n CapTel 840 n CapTel 840i n CapTel 880i n Federal CapTel What is Captioned Telephone Service?
Frequently Asked Questions: Home Networking, Wireless Adapters, and Powerline Adapters for the BRAVIA Internet Video Link
 Frequently Asked Questions: Home Networking, Wireless Adapters, and Powerline Adapters for the BRAVIA Internet Video Link What is a home network? A home network is a way of connecting your BRAVIA Internet
WELCOME TO VERIZON HIGH SPEED INTERNET FOR BUSINESS
 WELCOME TO VERIZON HIGH SPEED INTERNET FOR BUSINESS For a better online experience, start here today. YOUR GUIDE TO INSTALLING AND USING VERIZON HIGH SPEED INTERNET. Congratulations on choosing Verizon
Link Link sys E3000 sys RE1000
 User Guide High Performance Extender Wireless-N Router Linksys Linksys RE1000 E3000Wireless-N Table of Contents Contents Chapter 1: Product Overview 1 Front 1 Top 1 Bottom 1 Back 2 Chapter 2: Advanced
Installation. Powerline 500 Model XAVB5221
 Installation Powerline 500 Model XAVB5221 Package Contents In some regions, a resource CD is included with your product. 2 Getting Started Powerline networking solutions give you an alternative to Ethernet-only
Installation. N300 WiFi Range Extender Model WN3100RP
 Installation N300 WiFi Range Extender Model WN3100RP Getting Started The NETGEAR WiFi Range Extender increases the distance of a WiFi network by boosting the existing WiFi signal and enhancing the overall
USER GUIDE AC2400. DUAL BAND GIGABIT Wi Fi ROUTER. Model# E8350
 USER GUIDE AC2400 DUAL BAND GIGABIT Wi Fi ROUTER Model# E8350 Table of Contents Product overview E8350..................................... 1 Setting Up Your E-Series Router Where to find more help.........................
Network Installation Guide. Artisan 810 Series
 Network Installation Guide Artisan 810 Series Before You Begin Make sure you installed ink cartridges and loaded paper as described on the Start Here sheet. Then follow the instructions in this guide to
Linksys WAP300N. User Guide
 User Guide Contents Contents Overview Package contents 1 Back view 1 Bottom view 2 How to expand your home network 3 What is a network? 3 How to expand your home network 3 Where to find more help 3 Operating
A quick Guide to your Super Hub 2ac
 A quick Guide to your Super Hub 2ac HELLO. W el c o m e t o t h i s h a n d y g u i d e t o y o u r n ew v i r g i n m e d i a b u s i n e s s b r o a d b a n d. What s inside Getting to know your Super
Home Wi-Fi Gateway Instructions
 Home Wi-Fi Gateway Instructions 1. Connect the gateway. Use the coaxial cable provided by BendBroadband to connect the cable port (A) to your cable outlet. 2. Connect your computer to the cable modem gateway
User Guide. E-Series Routers
 User Guide E-Series Routers Table of Contents Table of Contents Product overview E900/E1200/E1500/E2500/E3200 1 Back view 1 Bottom view 1 E4200 2 Top view 2 Back view 2 Setting Up Your E-Series Router
IMPORTANT NOTICE CONCERNING EMERGENCY 911 SERVICES
 IMPORTANT NOTICE CONCERNING EMERGENCY 911 SERVICES Your service provider, not the manufacturer of the equipment, is responsible for the provision of phone services through this equipment. Any services
Home Phone - VoIP. Installation Guide
 Home Phone - VoIP Installation Guide Package Contents Package Contents D-link DG-102S VoIP Adapter 1 2 3 4 5 6 Serial Cable Ethernet Cable Power Adapter 1 2 3 4 5 6 Power Adapter Serial Cable Used only
N300 WiFi Range Extender
 Model EX2700 User Manual July 2014 202-11395-01 350 East Plumeria Drive San Jose, CA 95134 USA Support Thank you for selecting NETGEAR products. After installing your device, locate the serial number on
Almond. Quick Setup Guide
 Almond Quick Setup Guide 2 Contents 1 Introduction 1.1 Getting to know your Almond 2 Connecting your Almond as a Range Extender (Repeater) 3 Connecting your Almond as a Router 3.1 Using your Almond with
Welcome. Unleash Your Phone
 User Manual Welcome Unleash Your Phone For assistance with installation or troubleshooting common problems, please refer to this User Manual or Quick Installation Guide. Please visit www.vonage.com/vta
Owning your dialtone The signature ooma dialtone is music to your ears. It means you have unlimited calling within the US with no monthly fees.
 Quick Start guide GET READY TO SAY HELLO TO: Everything you need to get started is inside this box, and everything you need to know about installation is in your hands. Don t be fooled by the size of this
WiFi DSL Modem Router
 Support Thank you for purchasing this NETGEAR product. After installing your device, locate the serial number on the label of your product and use it to register your product at https://my.netgear.com.
Installing Your Vonage Device in Front of an Existing Router for customers with DSL INTERNET SERVICE
 Installing Your Vonage Device in Front of an Existing Router for customers with DSL INTERNET SERVICE Figure 1. Sample Installation Setup - Vonage phone adapter in front of router 1. Determine Internet
Frequently Asked Questions
 FAQs Frequently Asked Questions Connecting your Linksys router to the Internet 1 What computer operating systems does my Linksys router support? 1 Why can t I connect my computer or device to my router?
2.4 GHz Dual Handset Cordless Telephone Answering System 2255 with Caller ID/Call Waiting
 USER S MANUAL Part 2 2.4 GHz Dual Handset Cordless Telephone Answering System 2255 with Caller ID/Call Waiting Please also read Part 1 Important Product Information AT&T and the globe symbol are registered
Getting started guide Turbo Hub
 Getting started guide Turbo Hub NETGEAR MVBR1210C Welcome and thanks for choosing Bell. Your new Turbo Hub will enable you to connect to the Internet and make voice calls using a landline phone. This guide
Quick Start Guide. Vonage Device Motorola VT2142
 Quick Start Guide Vonage Device Motorola VT2142 Before you begin 1. If you purchased your Vonage Device from a retail store, you must first activate your Vonage phone service. (You will need to provide
Finding What You Need... 4 Setting Up the Wireless Network Feature... 6 Practice Using the Touchscreen Display... 15
 user guide Table of Contents Getting Started Finding What You Need... 4 Setting Up the Wireless Network Feature... 6 Practice Using the Touchscreen Display... 15 Using Your Phone Making Captioned Phone
IMPORTANT NOTICE CONCERNING EMERGENCY 911 SERVICES
 IMPORTANT NOTICE CONCERNING EMERGENCY 911 SERVICES Your service provider, not the manufacturer of the equipment, is responsible for the provision of phone services through this equipment. Any services
Get to Know Your Device 4G LTE BROADBAND ROUTER WITH VOICE
 Get to Know Your Device 4G LTE BROADBAND ROUTER WITH VOICE FRONT VIEW The Verizon 4G LTE Broadband Router with Voice is a wireless device that delivers Internet connectivity and telephone service. You
Hands-on MESH Network Exercise Workbook
 Hands-on MESH Network Exercise Workbook Santa Clara County RACES Date: 18 March 2015 Version: 1.0 scco_wifi_intro_exonly_v150318.docx 1 Table of Contents HANDS ON! Exercise #1: Looking at your Network
Quick Reference Guide
 Welcome to BT Business Total Broadband Quick Reference Guide Follow the steps in this Quick Reference Guide to set up and start using your new BT Business Total Broadband service. The CD will help you
VOIP-2CH. Telephone Clocking Adapter. Installation Guide
 VOIP-2CH Telephone Clocking Adapter Installation Guide FCC Statement This equipment has been tested and found to comply with the limits for a Class B digital device in accordance with the specifications
Network Installation Guide. WorkForce 610 Series Artisan 710 Series
 Network Installation Guide WorkForce 610 Series Artisan 710 Series Contents Before You Begin.......................................... 3 Choose Your Connection Type................................ 4 Wireless.............................................
User s Manual. w w w. v t e c h p h o n e s. c o m. Model: ia5874, ia5876, ia5877
 User s Manual w w w. v t e c h p h o n e s. c o m Model: ia5874, ia5876, ia5877 Table of Contents GETTING STARTED................... 4 Before You Begin..................... 4 Parts Check List:...................
Quick start guide. CL4939 Big button big display telephone/answering system with caller ID/ call waiting
 Quick start guide CL4939 Big button big display telephone/answering system with caller ID/ call waiting Introduction This quick start guide provides you basic installation and use instructions A limited
ADSL2+ BROABDAND INTERNET
 ADSL2+ BROABDAND INTERNET Your modem comes pre-configured, so simply plug it in as per the instructions received with the modem and it should be working. A diagram of what a typical set up might look like
HP-1000 Powerline Ethernet Adapter
 HP-1000 Powerline Ethernet Adapter User s manual BEFORE INSTALLATION Plan ahead the installation of your powerline network. Note: You will need at least two powerline adapters to create a powerline network.
HP-1000 Powerline USB Adapter
 HP-1000 Powerline USB Adapter User s manual BEFORE INSTALLATION Plan ahead the installation of your powerline network. Note: You will need at least two powerline adapters to create a powerline network.
Diamante and CaseViewNet WiFi Wireless Communication. User Guide
 Diamante and CaseViewNet WiFi Wireless Communication User Guide Release: January 2013 Patent Pending. Copyright 2013, Stenograph, L.L.C. All Rights Reserved. Printed in U.S.A. Stenograph, L.L.C. Adjustable
mini box User s Manual
 mini box User s Manual Version. Updated: 0/0/4 04 Cox Communications, Inc. Table of Contents Chapter : Introduction... About This Manual... Chapter : Installing & Activating Your mini box... 4 Connecting
Quick Start Guide. RV 120W Wireless-N VPN Firewall. Cisco Small Business
 Quick Start Guide Cisco Small Business RV 120W Wireless-N VPN Firewall Package Contents Wireless-N VPN Firewall Ethernet Cable Power Adapter Quick Start Guide Documentation and Software on CD-ROM Welcome
Linksys Gateway SPA2100-SU Manual
 Linksys Gateway SPA2100-SU Manual Manuel de l'utilisateur Table of Contents Looking for Basic Setup Instructions?... 3 Most Recent Version of this Manual... 3 Advanced Setup Instructions... 4 Wiring Your
Getting Started...2 Landline vs. Non-landline... 2 Provisioning (Landline version only)... 2
... 2") User Guide table of contents iii Getting Started...2 Landline vs. Non-landline... 2 Provisioning (Landline version only)... 2 Basic Calling...4 Verify ooma Service is Working... 4 Placing Calls... 4 Answering
User Guide table of contents iii Getting Started...2 Landline vs. Non-landline... 2 Provisioning (Landline version only)... 2 Basic Calling...4 Verify ooma Service is Working... 4 Placing Calls... 4 Answering
BT Business Total Broadband User Guide
 BT Business Total Broadband User Guide Contents To install your BT Business Hub, follow your handy Quick Start guide. This User Guide contains more detailed set-up and service information, including troubleshooting.
Technical Support. Package Contents. D6300 WiFi ADSL Modem Router Installation Guide
 Technical Support Thank you for selecting NETGEAR products. After installing your device, locate the serial number on the label of your product and use it to register your product at NETGEAR.com/register.
Hardware Overview. Ooma Linx devices These are installed around the office and are used to connect phones and other devices to your Ooma Office system
 Quick Start Guide Introduction Installation Overview Setting up the Ooma Office system in your business is easy. You should have your first extensions up and running in about 20 minutes. Ooma Office blends
Technical and Troubleshooting. Guide AIRAVE 2.5
 Technical and Troubleshooting Guide AIRAVE 2.5 Welcome! Sprint is committed to developing technologies addressing in-home coverage and ensuring you have a great wireless experience. This booklet provides
Quick Start Guide. Cisco SPA232D Mobility Enhanced ATA
 Quick Start Guide Cisco SPA232D Mobility Enhanced ATA Package Contents Analog Telephone Adapter Ethernet Cable Phone Cable Power Adapter Quick Start Guide Product CD-ROM Welcome Thank you for choosing
How To Use A Modem On A Pc Or Mac Or Ipad (For A Laptop)
") CLEAR MODEM with Wi-Fi USER GUIDE GET TO KNOW YOUR CLEAR MODEM WITH WI-FI 3 WHAT S IN THE BOX? 3 INFORMATIVE LED INDICATORS 3 USE WITH CARE 3 SET UP THE MODEM 4 PLACE THE MODEM ON A FLAT, STABLE SURFACE
CLEAR MODEM with Wi-Fi USER GUIDE GET TO KNOW YOUR CLEAR MODEM WITH WI-FI 3 WHAT S IN THE BOX? 3 INFORMATIVE LED INDICATORS 3 USE WITH CARE 3 SET UP THE MODEM 4 PLACE THE MODEM ON A FLAT, STABLE SURFACE
Features Phone Access... 1. Features Web Access... 3. emta Quick Reference Guide...14. Troubleshooting...15. Quick Reference Guide...
 Phone TABLE OF CONTENTS Features Phone Access... 1 Features Web Access... 3 emta Quick Reference Guide...14 Troubleshooting...15 Quick Reference Guide...16 Features Phone Access Caller ID Feature that
N750 WiFi DSL Modem Router Premium Edition
 Support Thank you for purchasing this NETGEAR product. After installing your device, locate the serial number on the label of your product and use it to register your product at https://my.netgear.com.
SOYO G668 VOIP IP PHONE USER MANUAL
 SOYO G668 VOIP IP PHONE USER MANUAL Inglos Networks Industrial Global Solutions Teléfono: +1 (585) 217-9864, Fax: + 1 (585) 872-9627, Email: [email protected] Table of Content SAFETY INFORMATION... 1 INTRODUCTION...
EX6100 WiFi Range Extender Installation Guide
 EX6100 WiFi Range Extender Installation Guide Getting Started The NETGEAR WiFi Range Extender increases the distance of a WiFi network by boosting the existing WiFi signal and enhancing the overall signal
Quick Reference Guide
 Welcome to BT Business Total Broadband Quick Reference Guide Read the information in this Quick Reference Guide to help you start using your new BT Business Total Broadband service powered by fibre. The
Welcome to life on. Get started with this easy Self-Installation Guide.
 Welcome to life on Get started with this easy Self-Installation Guide. Welcome to a network that s light years ahead. Welcome to life on FiOS. Congratulations on choosing Verizon FiOS! You re just a few
BT Business Total Broadband Fibre User Guide
 BT Business Total Broadband Fibre User Guide Fibre Contents Learn about 4 Your Fibre Hub and BT Business Total Broadband Fibre service. Extra features 7 Setting up extra features once you re online security,
User Guide. Linksys PLWK400. Powerline AV Wireless Network Extender Kit
 User Guide Linksys PLWK400 Powerline AV Wireless Network Extender Kit Contents Contents Overview............... 3 Features..................... 3 PLE400 3 PLW400 4 How Powerline networking works...........
How To Set Up A 9339 Voip Phone For The First Time
 Interquartz 9339HS VoIP Phone Quick Start User Guide Rev 3a 1/16 9339HS VoIP Phone Quick Start Up Guide The 9339HS VoIP (Voice over Internet Protocol) Phone provides a cost-saving solution for small business/home
B890 4G LTE Smart Hub Getting Started Guide
 B890 4G LTE Smart Hub Getting Started Guide HUAWEI TECHNOLOGIES CO., LTD. Thank You for Purchasing the B890 4G LTE Smart Hub! Before You Begin What s in the Box : 1. B890 4G LTE Smart Hub 2. Power adapter
Broadband Phone Gateway BPG510 Technical Users Guide
 Broadband Phone Gateway BPG510 Technical Users Guide (Firmware version 0.14.1 and later) Revision 1.0 2006, 8x8 Inc. Table of Contents About your Broadband Phone Gateway (BPG510)... 4 Opening the BPG510's
élan Mira WiFi Wireless Communication User Guide
 élan Mira WiFi Wireless Communication User Guide Release: May 2008; September 2007 Patent Pending. Copyright 2007, Stenograph, L.L.C. All Rights Reserved. Printed in U.S.A. This material is protected by
How To Use An Ooma System Without A Landline Phone Without A Backup Plan
 User Guide i table of contents iii Getting Started...2 Using the ooma System with a Landline... 2 Landline Provisioning... 2 Basic Calling...4 Verify ooma Service is Working... 4 Placing Calls... 4 Answering
Fax Getting Started Guide
 Fax Getting Started Guide April 2009 www.lexmark.com Contents IMPORTANT SAFETY INSTRUCTIONS...3 Getting started...4 Finding more information about the printer...4 Navigating menus using the printer control
Printed in China. Issue 4 AT&T 12/11. Message Guard is a registered trademark of Advanced American Telephones.
 www.telephones.att.com 2011 Advanced American Telephones. All Rights Reserved. AT&T and the AT&T logo are trademarks of AT&T Intellectual Property licensed to Advanced American Telephones, San Antonio,
Introduction. Overview. Contents. Linksys AC1200 Max Wi-Fi Range Extender. Front
 User Guide RE6500 Linksys AC1200 Max Wi-Fi Range Extender Introduction This User Guide can help you connect the extender to your network and solve common setup issues. You can find more help from our award-winning,
Here s your guide to easy installation. Get the most out of Verizon High Speed Internet.
 Here s your guide to easy installation. Get the most out of Verizon High Speed Internet. Congratulations on choosing Verizon High Speed Internet. In this guide, you ll find everything you need to set up
High Speed Internet, Welcome Kit. If your apartment is served by Ethernet: How do I connect to the network if not using a router?:
 High Speed Internet, Welcome Kit We provide a WIRED High Speed Internet connection to your apartment. Your apartment will be served by a DSL modem or Ethernet jack. If you have multiple users in your apartment
IN THIS GUIDE YOU WILL LEARN HOW TO GET YOUR ROUTER GOING IN NO TIME THE INCREDIBLY EASY GUIDE TO SETTING UP YOUR DGN2200 WIFI MODEM ROUTER
 IN THIS GUIDE YOU WILL LEARN HOW TO GET YOUR ROUTER GOING IN NO TIME THE INCREDIBLY EASY GUIDE TO SETTING UP YOUR DGN2200 WIFI MODEM ROUTER MAKE SURE YOU HAVE THESE BITS AND BOBS HANDY The Netgear WiFi
5330 IP Phone Quick Reference User Guide
 5330 IP Phone Quick Reference User Guide Introduction to your Mitel 5330 IP Phone The Mitel 5330 IP Phone provides the similar functionality as the Mitel 3000 Feature Phone. It can be connected directly
Digital Phone Installation & User Guide
 Digital Phone Installation & User Guide Telephone #1 Voicemail PIN Telephone #2 Voicemail PIN skybeam high speed internet digital phone We would like you to verify that the 911 address we have for you
The following is a set of definitions used in FAQs for the Partner product line:
 Frequently Asked Questions Office Switching Systems Partner/Partner II/Partner Plus The following is a set of definitions used in FAQs for the Partner product line: PR1 = Partner Release 1 PR2,3,4 = Partner
quick reference guide
 quick reference guide / Product Overview Product Overview Wireless (Blue) The Wireless LED lights up when the wireless feature is enabled. It flashes when the Valet sends or receives data over the wireless
P-2302HWUDL-P1. Quick Start Guide. 802.11g Wireless VoIP Station Gateway. with Built-in DECT Base Station
 P-2302HWUDL-P1 802.11g Wireless VoIP Station Gateway with Built-in DECT Base Station Quick Start Guide Version 3.60 Edition 1 3/2007 Overview The P-2302HWUDL-P1 model is a router with IEEE 802.11g wireless
OM2260VW2 USER MANUAL VERIZON WIRELESS HOME PHONE CONNECT
 OM2260VW2 USER MANUAL VERIZON WIRELESS HOME PHONE CONNECT Welcome to Verizon Wireless Thank you for choosing Verizon Wireless Home Phone Connect. You re now connected to the power of America s most reliable
Quick Installation Guide DSL-2750U/NRU. 3G/ADSL/Ethernet Router with Wi-Fi and Built-in Switch
 DSL-2750U/NRU 3G/ADSL/Ethernet Router with Wi-Fi and Built-in Switch BEFORE YOU BEGIN Delivery Package Router DSL-2750U/NRU Power adapter RJ-11 telephone cable Straight-through Ethernet cable (CAT 5E)
Powerline 1200 User Manual
 User Manual Models PL1200 PLP1200 January 2016 202-11566-01 350 E. Plumeria Drive San Jose, CA 95134 USA Support Thank you for purchasing this NETGEAR product.you can visit www.netgear.com/support to register
20 minutes to unlimited calling within the US
 Quick Start Guide i YOU RE ALMOST READY TO Everything you need to get started is in this box, and everything you need to know about your ooma setup is in your hands. Don t be fooled by the size of this