REVENU QUÉBEC. SRM USER GUIDE. Mandatory billing in the restaurant sector IN-577-V ( )
|
|
|
- Rhoda Weaver
- 8 years ago
- Views:
Transcription
1 REVENU QUÉBEC SRM USER GUIDE Mandatory billing in the restaurant sector IN-577-V ( ) 1

2 TABLE OF CONTENTS 1. INTRODUCTION WHO THIS GUIDE IS FOR CONTENTS DEFINITIONS SRM AND DISPLAY STATION FEATURES THE SRM THE DISPLAY STATION STARTING AND ENDING A SESSION SHUTTING DOWN THE SRM CONFIGURING THE SRM SRM PASSWORD ADJUSTING THE DISPLAY STATION CONFIGURING SERIAL PORTS CHOOSING A TYPE OF PRINTER ADJUSTING THE TIME ON THE SRM INSTALLATION MODE CHANGING PRODUCTION FREQUENCY FOR THE SOMMAIRE PÉRIODIQUE DES VENTES (SPV) CHANGING MAXIMUM PRINTING VOLUME SETTINGS VIEW THE TCP-IP CONFIGURATION THE DIAGNOSTIC MENU STATUS AND CONDITION OF THE SRM DEACTIVATING THE SRM REACTIVATING THE MEV REINITIALIZING THE SRM CONTROLLING ACCESS TO THE SRM TERMINOLOGY USED PREDEFINED ROLES IN THE SRM REGISTERING ROLES PREDEFINED USER CODES IN THE SRM REGISTERING USERS CHOOSING AN AUTHENTICATION MODE PRESENTING THE BILL REPORTS PRODUCING A REPORT TYPES OF REPORTS SENDING THE SOMMAIRE PÉRIODIQUE DES VENTES REPORT THE PAPER REPORT THE ELECTRONIC REPORT EXTRACTING DATA FROM THE SRM COMPLETE OR BACKUP COPY OF DATA PARTIAL COPY OF DATA FREEING UP DISK SPACE ERROR AND INFORMATION MESSAGES

3 10.1 PRESENTATION OF THE BULLETIN BOARD MESSAGES RELATED TO AUTHENTICATION AND ACCESS MESSAGES RELATED TO PRODUCING REPORTS, PARAMETERS AND THE CONFIGURATION OF THE SRM MESSAGES RELATED TO COPYING DATA OTHER MESSAGES MENU DIAGRAM FOR THE SRM APPENDICES APPENDIX APPENDIX APPENDIX

4 1. INTRODUCTION If you are a restaurant operator who is also a QST registrant, you must produce a bill and submit it to the customer whenever you sell a meal (food or drink). This bill must be prepared using a sales recording module (SRM). The SRM is a microcomputer designed to be connected to a cash register or point-of-sale system. It receives data concerning the various transactions carried out, such as sales and tax data. The SRM records this transaction information in a secure memory. Once data transmission has begun, the device sends the necessary information to a printer so that a bill with a bar code and information on the restaurant can be printed. The SRM is used to produce reports such as the Sommaire périodique des ventes (SPV), or periodic sales summary report. This report contains information on sales and transactions carried out over a given period. This information is described in a subsequent section of this guide. Refer to the document titled Information for Restaurateurs (IN-575-V) to learn about the changes resulting from the new tax measures contained in the Act respecting the Québec Sales Tax. 1.1 WHO THIS GUIDE IS FOR This guide is for all restaurant operators or employees who use an SRM in the course of their duties. It can also be used as a reference manual for SRM installers. 1.2 CONTENTS This guide introduces the sales recording module and its peripherals. It also explains how to configure the SRM, manage access, print reports, make backups and extract data from the system. SRM reports and their contents are also presented, as well as error messages and their meanings. 4

5 1.3 DEFINITIONS ActiMEV Software that assists installers with various SRM configuration operations, such as activating the module and personalizing the restaurant s address. Bill A note that presents the breakdown of all food and drink consumed by a customer in a restaurant and the total of his or her expenditures. Display station A device with a keyboard and a screen that allows users to send information to or receive it from the SRM. Invoice A generic term which, under relevant legislation, refers to both the bill and the receipt. Prescribed document Document imposed by law and printed by the receipt printer (RP). Bills given to customers are prescribed documents. For that reason, they must contain certain mandatory information and a footer that includes distinctive content, namely a bar code and other information produced by the SRM. Receipt Proof of payment issued to the customer. Receipt printer (RP) A peripheral device connected to the SRM for printing receipts and all other documents produced by the sales recording system (SRS). 5
.")
6 Reference number A bill number that connects a modified bill with the original bill. Sales recording module (SRM) A microcomputer connected to an SRS for receiving commercial transaction data (such as data on bills, receipts and credit notes), extracting transaction data (such as total sales and applicable taxes) and storing it in a secure memory. Sales recording system (SRS) A computer system used to manage and record sales and produce bills. Note: This term refers to cash registers, point-of-sale systems and any other system with the same functions. The term sales recording system and the abbreviation SRS are used to designate any of these systems. Sommaire périodique des ventes (SPV) (periodic sales summary) A report containing summary information on transactions recorded in the SRM, particularly the total sales and taxes for a given period. Refer to the document titled Information for Restaurateurs (IN-575-V) for more information. Support centre The name given in this guide to s Centre d assistance aux services à la clientele. Transaction A recording performed by an SRS that produces a bill. To contact the support centre, dial Telephone service business hours: 6

7 Monday, Tuesday, Thursday and Friday: 8 a.m. to 6 p.m. Wednesday: 10 a.m. to 6 p.m. Please note that this service is not available on Québec statutory holidays. 7

8 2. SRM AND DISPLAY STATION FEATURES 2.1 THE SRM The SRM is a mini-pc, model AEC-6822, manufactured by AAEON and secured by IBM Canada by means of a seal featuring a unique number and an image identifying. It comes in a grey and blue aluminum case weighing a bit more than 2 kg (4.75 lb). Every SRM has a seal. The seal is used to detect attempted intrusions and consequently must not be broken. The images below do not show the seal and may differ from the actual model. Front view: Rear view: 8
. Every SRM has a seal.")
9 SRM dimensions: 212 mm (L) x 64 mm (H) x 112 mm (D) (8.35 x 2.52 x 4.41 ) French English Ports série Serial ports 2 ports USB 2 USB ports Commutateur d alimentation On/off switch Port série Serial port Fente Kensington Kensington security slot 2 prises de réseau 2 network jacks 2 ports USB 2 USB ports Port parallèle Parallel port Port série Serial port Sortie VGA VGA port Prise d alimentation Power supply input 2.2 THE DISPLAY STATION 1 The SRM s display station is made up of: A screen featuring four lines of text, each of which can contain 20 characters; A keypad (6 keys). The keypad Use the keys: o to move the cursor between menu choices on a vertical list; o to access letters (A to Z), numbers (0 to 9) and special characters. Use the keys: 1 This peripheral device should be connected at all times so that you can see any error messages. 9
.")
10 o to move the cursor left and right; o to move the cursor between menu choices on a horizontal list. Use the key: o to select a menu item. Use the key: o to return to the previous menu; o to end your session when the main menu is displayed. The display station will go into standby. 2.3 STARTING AND ENDING A SESSION Starting a session To start a session, press any key on the display station to display the SRM authentication screen. To enter characters such as your user code or password, press the and keys to scroll through the letters from A to Z, numbers from 0 to 9 and special characters until you reach the first character you want. Move on to the next character using the key and repeat until your user code or password is completely entered. Then press the key. Procedure Enter or select your user code, depending on the authentication method chosen (see section 5.6). o Select your user code from the horizontal list. or OUVRIR UNE SESSION Sélectionnez le code d utilisateur. EMPLOYE o Enter your user code by selecting its characters one by one. OUVRIR UNE SESSION Entrez le code d utilisateur. 10

11 Enter your password by selecting its characters one by one. The menu for your access profile will be displayed Ending a session OUVRIR UNE SESSION Entrez le mot de passe. To end a session, press the key repeatedly until the display station displays Fermer la session. After three seconds, the screen backlighting will turn off. 2.4 SHUTTING DOWN THE SRM There are two ways to shut down the SRM. We recommend the first method, using the display station. In this way, you will be able to choose between restarting the SRM or shutting it down entirely. Procedure using the display station After ending a session, press the key on the display station. Use the keys to shut down (Arrêt) or restart ARRÊT DU MEV Quelle option désirez-vous? Arrêter (Redémarrez) the module, as you wish. Then press the key. Press the key again to confirm. ARRÊT DU MEV Appuyer sur pour confirmer, ou sur X pour annuler. Procedure not using the display screen Press the on/off switch and release it immediately. The SRM is shut down when the indicator light is off. 11

12 3. CONFIGURING THE SRM 3.1 SRM PASSWORD Changing your password You can change your password only if you were authorized to do so during the setup of your access specifications (see section 5 for details). To change your password, you must enter your old password to prove your identity and then enter your new password. To confirm the change, you will have to re-enter the new password. Because SRMs operate independently of one another, you will have to change your password on each SRM you use. Procedure In the MENU PRINCIPAL, select the Préférences option. MENU PRINCIPAL Rapports Extraction Configuration Contrôle d accès Modifier état MEV Préférences Diagnostic From the PRÉFÉRENCES menu, select the Mod. mot de passe option. PRÉFÉRENCES Mod. mot de passe Luminosité Contraste Enter your old password by selecting its characters one by one. Press the or key to scroll MOD. MOT DE PASSE Entrez votre mot de passe actuel. through the letters from A to Z, numbers from 0 to 9 and special characters until you reach the first character you 12

13 want. Move on to the next character using the key and repeat until your password is completely entered. Then press the key. Enter your new password by selecting its characters one by one. Enter your new password again to confirm. The following message tells you that the operation has been completed: MOD. MOT DE PASSE Entrez le nouveau mot de passe. MOD. MOT DE PASSE Confirmez le nouveau mot de passe. MOD. MOT DE PASSE Opération terminée 3.2 ADJUSTING THE DISPLAY STATION Since ambient lighting changes throughout the day, the display station s contrast and brightness are set based on four six-hour shifts, beginning at midnight. When you adjust these settings, your changes apply only to the current shift. The settings you select for a given shift remain in effect until they are changed again. Adjusting the brightness - From the MENU PRINCIPAL, select the Préférences option. Then: - select Luminosité from the vertical list; - select the brightness percentage from the horizontal list. Adjusting the contrast - From the MENU PRINCIPAL, select the Préférences option. Then: - select Contraste from the vertical list; - select the contrast percentage from the horizontal list. 13

14 To ensure that the screen remains legible at all times, you cannot set the contrast below 30%. Adjusting the timeout interval After a certain period of inactivity, an active session will automatically close. Follow the instructions below to adjust the timeout interval: - From MENU PRINCIPAL, select the Configuration option. Then: - select Délai d inactivité from the vertical list; - select the timeout interval from the horizontal list. You have three seconds to stop the session from closing and the display station from being put on standby using the key. 3.3 CONFIGURING SERIAL PORTS Configuring serial ports enables communication between the SRM and peripherals like the sales recording system and invoice printer. The only property of the serial ports that can be modified via the SRM display station is transmission speed. The default speed is 9600 bauds, in accordance with industry standards. The installer will configure your serial ports when installing your SRM. Before changing the serial port transmission speed, check with your installer to avoid any communication problems between the SRM and its peripherals. To change the speed, proceed as follows: 14

15 From the MENU PRINCIPAL, select the Configuration option. In the CONFIGURATION menu, select one of the two serial ports to be configured: the printer port ( Port d imprimante ) or the sales recording system port ( Port du SEV ). MENU PRINCIPAL Rapports Extraction Configuration Contrôle d accès Modifier état MEV Préférences Diagnostic CONFIGURATION Mode installation Ajust. de l heure Délai d inactivité Fréquence du SPV Impression Imprimante Connectivité MEV Voir config. IP Port d imprimante Port du SEV You can change the speed using the arrows on the display station. These arrows let you increase or decrease the speed. When the desired speed is displayed, select it and confirm your choice. PORT D IMPRIMANTE Sélect. La vitesse de communication bauds PORT DU SEV Opération terminée The following message will advise you to restart the SRM: PORT DU SEV Redémarrez le MEV pour rendre le changement effectif. 15

16 3.4 CHOOSING A TYPE OF PRINTER This operation involves configuring the type of printer used in the SRM. Just select the printer make and model from the predefined list. If you do not see your printer listed, contact your installer. Once you have selected a printer, you will not have to restart the SRM. Procedure From the MENU PRINCIPAL, select the Configuration option. In the CONFIGURATION menu, select the Imprimante option. Select the printer make (MARQUE) and model (MODÈLE). MENU PRINCIPAL Rapports Extraction Configuration Contrôle d accès Modifier état MEV Préférences Diagnostic CONFIGURATION Mode installation Ajust. de l heure Délai d inactivité Fréquence du SPV Impression Imprimante Connectivité MEV Voir config. IP Port d imprimante Port du SEV MARQUE D IMPRIMANTE Canon Epson Lexmark MODÈLE D IMPRIMANTE TM88 TM82 T90 SERIE1 16

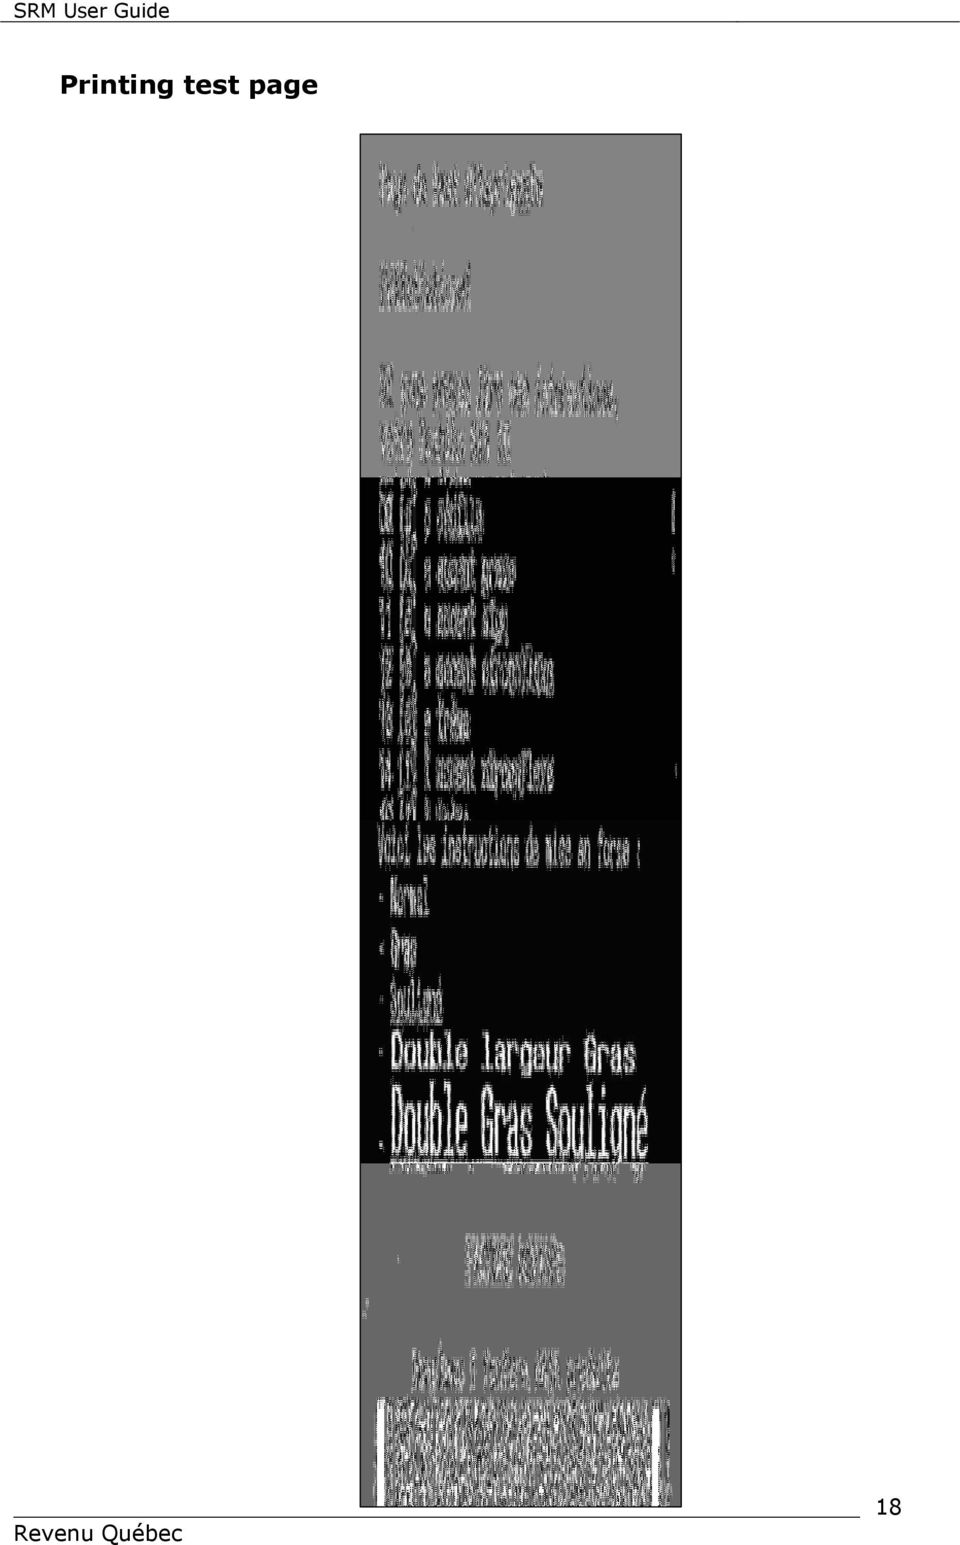
17 IMPRIMANTE Opération terminée Printing test After you select a printer, a printing test lets you make sure it is working properly. From the MENU PRINCIPAL, select the Diagnostic option. IMPRIMANTE Vous avez sélectionné une nouvelle imprimante. Vous pouvez effectuer un test d impression à partir du menu Diagnostic. MENU PRINCIPAL Rapports Extraction Configuration Contrôle d accès Modifier état MEV Préférences Diagnostic In the DIAGNOSTIC menu, select the Impr. page de test option. DIAGNOSTIC Vérif. des périph. Impr. page de test Détail du journal The test page lets you check that the printer handles special characters properly. On the next page you will find a sample print-out of a test page. If your printing test is not conclusive, contact your installer. IMPR. PAGE DE TEST Opération terminée 17

18 Printing test page 18
19 3.5 ADJUSTING THE TIME ON THE SRM The SRM has an internal clock that operates at all times, even if the module is not powered up. The clock adjusts automatically for seasonal time changes. The SRM s clock synchronizes automatically with the time shown by a recognized-time server on the Web when the SRM installation or update involves an Internet connection with ActiMEV. However, since the SRM does not maintain any regular connections to the outside world (via the Internet, for example), its clock cannot adjust automatically at all times. By adjusting the time manually, you can synchronize the SRM s internal clock as needed and thereby maintain consistency between the SRS time and that shown by the SRM s internal clock. Please note that you cannot change the date. This restriction ensures the historical consistency of the SRM s archived files. Procedure From the MENU PRINCIPAL, select the Configuration option. From the CONFIGURATION menu, select the Ajust. de l heure option. MENU PRINCIPAL Rapports Extraction Configuration Contrôle d accès Modifier état MEV Préférences Diagnostic CONFIGURATION Mode installation Ajust. de l heure Délai d inactivité Fréquence du SPV Impression Imprimante Connectivité MEV Voir config. IP Port d imprimante Port du SEV 19

20 The SRM s current date and time are displayed. However, you can change the time only. The format used is HH:MM:SS (hour:minute:second). AJUST. DE L HEURE Entrez la nouvelle heure _12:12:12 Then press the key. The following message confirms that the operation was carried out successfully: AJUST. DE L HEURE Opération terminée 3.6 INSTALLATION MODE This mode halts the operation of the sales recording and receipt printing feature and updates the SRM. 3.7 CHANGING PRODUCTION FREQUENCY FOR THE SOMMAIRE PÉRIODIQUE DES VENTES (SPV) The production frequency for the Sommaire périodique des ventes (periodic sales summary) report is a setting entered in the SRM. By default, the frequency is monthly, according to law. You should never change this setting other than at Revenu Québec s request. If it does so request, proceed as follows: From the MENU PRINCIPAL, select the Configuration option. MENU PRINCIPAL Rapports Extraction Configuration Contrôle d accès Modifier état MEV Préférences Diagnostic 20
 The production frequency for the Sommaire périodique des ventes (periodic sales summary) report is a setting entered in")
21 In the CONFIGURATION menu, select the Fréquence du SPV option. Select the SPV production frequency in the horizontal list. Confirm or cancel your selection. The following message confirms that you have successfully changed the SPV production frequency: CONFIGURATION Mode installation Ajust. de l heure Délai d inactivité Fréquence du SPV Impression Imprimante Connectivité MEV Voir config. IP Port d imprimante Port du SEV FRÉQUENCE DU SPV Sélect. la fréquence de production. MENSUELLE FRÉQUENCE DU SPV MENSUELLE pour confirmer: pour annuler: x FRÉQUENCE DU SPV Opération terminée 3.8 CHANGING MAXIMUM PRINTING VOLUME SETTINGS The detailed reports that you produce using the SRM can be very long. To limit their length, two settings let you set the maximum number of transactions to be printed. The two reports for which you can set the maximum number of transactions to be printed are: the Détail des ventes (sales detail) report; the Détail du journal des événements (event log detail) report. 21
22 Procedure From the MENU PRINCIPAL, select the Configuration option. From the CONFIGURATION menu, select the Impression option. MENU PRINCIPAL Rapports Extraction Configuration Contrôle d accès Modifier état MEV Préférences Diagnostic CONFIGURATION Mode installation Ajust. de l heure Délai d inactivité Fréquence du SPV Impression Imprimante Connectivité MEV Voir config. IP Port d imprimante Port du SEV Enter the maximum number of transactions for the Détail des ventes report and press the key. IMPRESSION Max. de trans. pour le Détail des ventes 120 Next, enter the maximum number of events for the Détail du journal des événements (event log detail) report and press the key. IMPRESSION Max. d évèn. pour le Détail du journal 50 Check the changes you have made and press the key to confirm or the key to cancel. IMPRESSION 120 trans./50 évèn. Pour confirmer: Pour annuler: x The following message confirms that the operation was carried out successfully. 22
23 IMPRESSION Opération terminée 3.9 VIEW THE TCP-IP CONFIGURATION To use the SRM on a network, the installer must have recorded the network address settings in the module. You can view these settings using the Voir configuration IP (view IP configuration) command. Procedure From the MENU PRINCIPAL, select the Configuration option. From the CONFIGURATION menu, select the Voir config. IP option. Select the data destination and press on the key. MENU PRINCIPAL Rapports Extraction Configuration Contrôle d accès Modifier état MEV Préférences Diagnostic CONFIGURATION Mode installation Ajust. de l heure Délai d inactivité Fréquence du SPV Impression Imprimante Connectivité MEV Voir config. IP Port d imprimante Port du SEV VOIR CONFIG. IP Sélectionnez la destination des données Terminal If the desired destination is Terminal, you will see the following screen: VOIR CONFIG. IP AAA.AAA.AAA.AAA BBB.BBB.BBB.BBB CCC.CCC.CCC.CCC 23
24 AAA.AAA.AAA.AAA is the sub-network mask. BBB.BBB.BBB.BBB is the SRM s network address. CCC.CCC.CCC.CCC are the addresses authorized to connect to the SRM. They are optional. Press or to finish. VOIR CONFIG. IP Opération terminée 3.10 THE DIAGNOSTIC MENU The Diagnostic menu options are used mainly by your installer when installing an SRM or making a service call. This menu s features are used to diagnose various operational problems or check the status of communications between the SRM and its peripherals. More specifically, they allow users to: print a test page; print the Détail du journal des événements (event log detail) report; check peripheral device connections. Printing a test page A test page is usually printed after selecting a printer in the Configuration menu so that users can ensure that the printer is operating normally. For more information, refer to section 3.4. Printing the Détail du journal des événements (event log detail) report Printing the Détail du journal des événements (event log detail) report allows you to track the event history when the SRM experiences operating difficulties. For a description of the report, refer to section 7.2. For information on how to produce the report, follow the instructions in section 7.1. Checking peripheral connections You can use this function to check connections between the SRM and its peripherals, including: the SRS; 24
25 the invoice printer; the display station; the inspector s handheld computer. However, this feature only partly checks the proper functioning of the CPS unit, which is used by SRSs that communicate by means of the parallel port. In this case, the verification allows users only to ensure that the adapter is working, and not to see whether the printer and the SRS are properly connected. Procedure From the MENU PRINCIPAL, select the Diagnostic option. MENU PRINCIPAL Rapports Extraction Configuration Contrôle d accès Modifier état MEV Préférences Diagnostic From the DIAGNOSTIC menu, select the Vérif. des périph. option. The verification is launched. DIAGNOSTIC Vérif. des périph. Impr. page de test Détail du journal VÉRIF. DES PÉRIPH. En exécution 3 sec. The results of the verification are displayed. VÉRIF. DES PÉRIPH. ERR SEV=COM1 OK Imprimante=COM3 ERR Portable=COM2 OK Terminal=COM8 The status of the peripheral is displayed first, followed by the name of the device. The communication port is also displayed when it can be detected. Possible statuses are: OK (operational); ERR (not operational). 25
26 The ERR (not operational) status may be displayed for the following reasons: - The peripheral is connected but not turned on. The peripheral is not connected to the SRM. The peripheral is experiencing a problem or is defective. The printer s buffer storage is full. 26
27 4. STATUS AND CONDITION OF THE SRM The status of the SRM refers to its activation status. The condition of the SRM refers to its operating condition, which must be known to and recorded in its files. When you acquire an SRM, ask that it be initialized. Once you have an initialized SRM, your installer will have to use the software ActiMEV to activate it. Certain changes in the status or condition of your SRM may occur and have to be reported. For instance, such changes may happen when you stop using the SRM after closing your patio for the winter season or when the SRM is damaged. In such an event, contact your installer and immediately to report any changes in the status or condition of your SRM. will send you a letter confirming the reported change or changes. List of possible SRM statuses Initialized Activated Deactivated The SRM contains no data or software. The SRM can produce prescribed invoices. The SRM cannot produce prescribed invoices but contains the software and all data. You are able to produce reports. List of possible SRM conditions Functional Stolen Lost Defective Damaged beyond repair The SRM is working. The SRM has been stolen. The SRM has been lost. The SRM requires repairs. The SRM cannot be repaired. 27
28 To contact s Centre d assistance aux services à la clientèle, dial Telephone service business hours: Monday, Tuesday, Thursday and Friday: 8 a.m. to 6 p.m. Wednesday: 10 a.m. to 6 p.m. Please note that this service is not available on Québec statutory holidays. 4.1 DEACTIVATING THE SRM Once it is deactivated, the SRM cannot be used to produce bills containing the information prescribed by law. The following deactivation procedure is carried out partly by telephone. You may also use the services of your installer. Note Even if you deactivate a SRM, you must still produce the sommaires périodiques des ventes (SPV) reports for the periods during which it was activated. Accordingly, when deactivating the SRM you must produce an SPV report for any periods for which such a report was not already produced. Once the SRM is deactivated, the SPV production period ends automatically on the day of the module s deactivation. You can then produce the SPV report for that period. Procedure From the MENU PRINCIPAL, select the Modifier état MEV option. From the MODIFIER ÉTAT MEV menu, select the Désactivation option. MENU PRINCIPAL Rapports Extraction Configuration Contrôle d accès Modifier état MEV Préférences Diagnostic MODIFIER ÉTAT MEV Désactivation 28
29 Call s support centre to provide your authorization request number, and press the key. DÉSACTIVATION MEV Votre numéro de dem. d autorisation MEV: Enter the authorization number provided by s support centre and press the key. You will see the following screen. Press the key to confirm. DÉSACTIVATION MEV Entrez le numéro d autorisation. - DÉSACTIVATION MEV Appuyer sur pour confirmer, ou sur X pour annuler. The SRM produces a confirmation number that you must provide to the support centre. Once the support centre has given you the DÉSACTIVATION MEV Succès. Numéro de confir.: final confirmation number, press the key. Make a note of this number for your records. 4.2 REACTIVATING THE MEV By reactivating your SRM, you will be able to produce bills containing the information prescribed by law as well as SPV reports at the prescribed frequency. If your SRM is currently deactivated, you can use the following procedure to reactivate it. However, if its current status is initialized, you will have to use the services of your installer. 29
30 Procedure From the MENU PRINCIPAL, select the Modifier état MEV option. MENU PRINCIPAL Rapports Extraction Configuration Contrôle d accès Modifier état MEV Préférences Diagnostic From the MODIFIER ÉTAT MEV menu, select the Réactivation option. MODIFIER ÉTAT MEV Réactivation Réinitialisation Call s support centre to provide your authorization request number, and press the key. RÉACTIVATION MEV Votre numéro de dem. d autorisation MEV: Enter the authorization number provided by s support centre and press the key. RÉACTIVATION MEV Entrez le numéro d autorisation. - You will see the following screen. Press the key to confirm. RÉACTIVATION MEV Appuyer sur pour confirmer, ou sur X pour annuler. The SRM produces a confirmation number that you must provide to the support centre. RÉACTIVATION MEV Succès. Numéro de confir.: Once the support centre has given you the final confirmation number, press the your records. key. Make a note of this number for 30
31 4.3 REINITIALIZING THE SRM The SRM must be reinitialized whenever it is installed in another facility or sold to another restaurant operator. Reinitialization erases all data stored in the SRM. In addition, the Réinitialisation command is available only when the SRM is deactivated. Before reinitializing your SRM, you must have produced all your sommaires périodiques des ventes (periodic sales summary) reports and made a backup copy. The following procedure is carried out partly by telephone. You may also use the services of your installer. Procedure Before reinitializing the SRM, you must make a backup copy. Refer to section 9 for more information. From the MENU PRINCIPAL, select the Modifier état MEV option. MENU PRINCIPAL Rapports Extraction Configuration Contrôle d accès Modifier état MEV Préférences Diagnostic From the MODIFIER ÉTAT MEV menu, select the Réinitialisation option. MODIFIER ÉTAT MEV Réactivation Réinitialisation Call s support centre to provide your authorization request number, and press the key. RÉINITIALISATION MEV Votre numéro de dem. d autorisation MEV: Enter the authorization number provided by s support centre and press the key. RÉINITIALISATION MEV Entrez le numéro d autorisation. - 31
32 You will see the following screen. Press the key to confirm. The SRM produces a confirmation number that you must provide to the support centre. Once the support centre has given you the RÉINITIALISATION MEV Appuyer sur Pour confirmer, ou sur X pour annuler. RÉINITIALISATION MEV Succès. Numéro de confir.: final confirmation number, press the of this number for your records. key. Make a note 32
33 5. CONTROLLING ACCESS TO THE SRM SRM access control functions are parameters related to the authentication and management of access rights. The SRM is equipped with an authentication mechanism that formally identifies users by means of an identifier and password. This mechanism enables restaurant operators, employees and agents (installers, accountants, etc.) to manage SRM use. Access control functions also make it possible to update the list of SRM users and define the roles that give them access to specific functionalities. You need to enter authentication and access management settings on each SRM. 5.1 TERMINOLOGY USED Functionality A set of SRM commands Here is the list of the SRM s functionalities and related commands: Functionality Reports Extraction Configuration Command(s) - Producing the Sommaire périodique des ventes (periodic sales summary) report - Producing the Détail des ventes (sales detail) report - Producing the Analyse transactionnelle (transactional analysis) report - Producing the Sommaire des ventes (sales summary) report - Producing the Sommaire du journal des événements (event log summary) report - Producing the Détail du journal des événements (event log detail) report - Producing the Informations générales (general information) report - Backup copy - Copying data - Recovering disk space - Installation mode - Adjusting the time 33
SRM USER GUIDE. Mandatory billing in the restaurant sector. revenuquebec.ca/resto
 SRM USER GUIDE Mandatory billing in the restaurant sector revenuquebec.ca/resto AS A RESTAURATEUR, YOU ACTIVELY PARTICIPATE IN THE ECONOMIC DEVELOPMENT OF QUÉBEC SOCIETY. Therefore, you need a competitive
You can choose to install the plugin through Magento Connect or by directly using the archive files.
 Magento plugin 1.5.7 installation 1. Plugin installation You can choose to install the plugin through Magento Connect or by directly using the archive files. 1.1 Installation with Magento Connect 1.1.1
ZeusPOS User s Manual TABLE OF CONTENTS
 ZeusPOS User s Manual TABLE OF CONTENTS ZeusPOS Configuration Pag. Getting Started.. 2 Store Setup.. 4 Software Activation... 5 Employee Setup... 6 Table Setup.. 7 Menu Categories.. 8 Menu Setup.. 9 Items
Maitre D Back Office User Manual
 Maitre D Back Office User Manual Maitre D software serves you better Page 1 of 135 The Maitre'D Back Office Start-up Guide is intended primarily for restaurant owners and managers, but is equally suited
February 2010 Version 6.1
 HansaWorld University Point Of Sales (POS) Training Material HansaWorld Ltd. February 2010 Version 6.1 Table Of Contents INTRODUCTION...5 What is Point Of Sales?...5 THE 4 DIFFERENT WAYS OF USING POS...6
Operating Instructions
 Operating Instructions (For Setting Up) Digital Imaging Systems Installation Overview Model No. DP-8060 / 8045 / 8035 Table of Contents Setting Your Machine Installation Overview General Installation Overview...
FrontDesk Installation And Configuration
 Chapter 2 FrontDesk Installation And Configuration FrontDesk v4.1.25 FrontDesk Software Install Online Software Activation Installing State Related Databases Setting up a Workstation Internet Transfer
USING THE MODEL IQ 1000 INTELLICLOCK
 USING THE MODEL IQ 1000 INTELLICLOCK The IQ 1000 is an advanced model of time clock with many features and benefits designed to offer you a wide range of options in how you collect your time and attendance
HOW TO REGISTER TO HEC EN LIGNE
 HOW TO REGISTER TO HEC EN LIGNE How to make your course choice on HEC en ligne? If you have any questions, don t hesitate to communicate with us Summary: First-time users and change your password How to
Skipjack VPOS User Guide
 Skipjack VPOS User Guide Skipjack 2230 Park Avenue Cincinnati, OH 45206 www.skipjack.com User Guide Table of Contents Click on a topic below to view its contents. Logging in to Your Account p. 3 Launch
Amicus Small Firm Accounting: Frequently Asked Questions
 Amicus Small Firm Accounting: Frequently Asked Questions Questions Administration... 3 1 How do I add another user account? 3 2 How are passwords set up and how are they used? 3 3 What does "Reset User
1 Minimum system requirements
 Metrohm AG CH-9101 Herisau Switzerland Phone +41 71 353 85 85 Fax +41 71 353 89 01 info@metrohm.com www.metrohm.com Installation MagIC Net 2.x 1 Minimum system requirements Operating system RAM Memory
Version 1.0 09/10. Xerox ColorQube 9301/9302/9303 Administration and Accounting
 Version 1.0 09/10 Xerox ColorQube 9301/9302/9303 2010 Xerox Corporation. All Rights Reserved. Unpublished rights reserved under the copyright laws of the United States. Contents of this publication may
Getting Started with IntelleView POS Administrator Software
 Getting Started with IntelleView POS Administrator Software Administrator s Guide for Software Version 1.2 About this Guide This administrator s guide explains how to start using your IntelleView POS (IntelleView)
Monitoring Network DMN
 Monitoring Network DMN User Manual Table of contents Table of contents... 2 1. Product features and capabilities... 3 2. System requirements... 5 3. Getting started with the software... 5 3-1 Installation...
Getting Started with POS. Omni POS Getting Started Manual. switched on accounting
 Omni POS Getting Started Manual switched on accounting i i Getting Started with Omni POS Table Of Contents Overview...1 Setting up POS...2 Initial Steps...2 Tellers...2 POS Clearing Account...3 Printing...4
V2.0 Attendance System Hardware Suite Guide Instructions Manual
 CONTENTS TA920 V2.0 Attendance System Hardware Suite Guide Instructions Manual Chapter One - Introduction 1.1 Communication Port 5 1.2 Power Source Control. 5 1.3 Attendance Users. 6 1.4 Registering Ways..
CANADA SAVINGS BONDS WEB TRANSMISSION GUIDE 2014. csb.gc.ca PAYROLL SAVINGS PROGRAM 20$ 40$ 80$ 50 $ 30$ WEBGUIDE-14
 7 WEB TRANSMISSION GUIDE 204 CANADA SAVINGS BONDS csb.gc.ca PAYROLL SAVINGS PROGRAM 40$ 5$ 30$ 0$ 20$ 80$ 70$ 0$ What are you saving for? 50 $ 40$ 20 0$ 80$ 4 20$ 7 7 $ $ $ $ $ $ $ $ $ $ $ $ WEBGUIDE-4
Reboot the ExtraHop System and Test Hardware with the Rescue USB Flash Drive
 Reboot the ExtraHop System and Test Hardware with the Rescue USB Flash Drive This guide explains how to create and use a Rescue USB flash drive to reinstall and recover the ExtraHop system. When booting
VisorALARM-Manager Application Quick Guide. (Ver. 1.3) Dm 380-I. V:3.0
 Dm 380-I. V:3.0") VisorALARM-Manager Application Quick Guide. (Ver. 1.3) Dm 380-I. V:3.0 1. Installation Requirements 1.1. PC Pentium III processor or higher. Minimum RAM memory: 128 Mbytes Operating system: Windows XP
VisorALARM-Manager Application Quick Guide. (Ver. 1.3) Dm 380-I. V:3.0 1. Installation Requirements 1.1. PC Pentium III processor or higher. Minimum RAM memory: 128 Mbytes Operating system: Windows XP
Hosting Users Guide 2011
 Hosting Users Guide 2011 eofficemgr technology support for small business Celebrating a decade of providing innovative cloud computing services to small business. Table of Contents Overview... 3 Configure
User Guide for the Orchid Key Phones KP416 & KP832
 User Guide for the Orchid Key Phones KP416 & KP832 Contents Page Introduction 2 Setting Up 2 Setting Date & Time 2 Making & Answering Calls 2 Call Pick 3 Call Transfer 3 Calls On Hold 3 Caller Display
USING THE MODEL V800 VELOCITY CLOCK
 USING THE MODEL V800 VELOCITY CLOCK Velocity Clocks are advanced clocks with many options and features. They can be used to restrict employee punching, allowing employees to punch at the clock during their
Administrer les solutions Citrix XenApp et XenDesktop 7.6 CXD-203
 Administrer les solutions Citrix XenApp XenDesktop 7.6 CXD-203 MIEL Centre Agréé : N 11 91 03 54 591 Pour contacter le service formation : 01 60 19 16 27 Pour consulter le planning des formations : www.miel.fr/formation
Version 6.0 USER MANUAL
 X-Charge Version 6.0 USER MANUAL X-Charge Version 6.0 10/10/2005 User Manual 4 Copyright 2005 by CAM Commerce Solutions, Inc. All rights reserved worldwide. This manual, as well as the software described
User Guide ICP BIA desk/complete
 User Guide ICP BIA desk/complete 22339 Hamburg Version 2.01 www.icp-companies.com Introduction The BIA desk/complete terminal is designed for the electronic processing of transactions that are initiated
TheFinancialEdge. Configuration Guide for Accounts Payable
 TheFinancialEdge Configuration Guide for Accounts Payable 102312 2012 Blackbaud, Inc. This publication, or any part thereof, may not be reproduced or transmitted in any form or by any means, electronic,
TCP/IP MODULE CA-ETHR-A INSTALLATION MANUAL
 TCP/IP MODULE CA-ETHR-A INSTALLATION MANUAL w w w. c d v g r o u p. c o m CA-ETHR-A: TCP/IP Module Installation Manual Page Table of Contents Introduction...5 Hardware Components... 6 Technical Specifications...
Using the enclosed installation diagram, drill three holes in the wall with the lower hole 1150mm from the floor.
 Terminal Installation When choosing the location of the terminal, care should be taken to select an area with consistent light levels throughout the day and avoid areas where the unit may be subjected
Exeba -ATS. User Guide. Escan Technologies Corporation
 Escan Technologies Corporation Exeba -ATS User Guide Escan Technologies Corp. 12140 Severn Way Riverside, CA 92503 Phone (909) 270-0043 Fax (909) 270-0920 1 ESCAN TECHNOLOGIES CORPORATION Exeba -ATS User
Empowered by Innovation. Setting Up and Using Fax Mail. P/N 1770087 July 2006 Printed in U.S.A.
 Empowered by Innovation Setting Up and Using Fax Mail P/N 1770087 July 2006 Printed in U.S.A. This manual has been developed by NEC Unified Solutions, Inc. It is intended for the use of its customers and
1 ST CONNECTION: HOW TO CREATE YOUR WEB ACCOUNT?
 1 ST CONNECTION: HOW TO CREATE YOUR WEB ACCOUNT? In order to access your member login on AGLAE s web site, you need to create your web account. However, we are afraid that at the moment the access for
Moneris HiSpeed 6200 OPERATING MANUAL For Credit, Chip and Debit Card Processing
 Moneris HiSpeed 6200 OPERATING MANUAL For Credit, Chip and Debit Card Processing Software Version: 3.17 Documentation Version: 1.05a Documentation Date: October 31, 2005 Copyright Moneris Solutions, 2005.
ADMISSION APPLICATION PROCEDURE
 Présentation Faculté des études supérieures Supérieures et postdoctorales et postdoctorales Visiting Research Students ADMISSION APPLICATION PROCEDURE 15 septembre 2014 This procedure will guide you step
BMC FootPrints Asset Core - Asset Discovery. Version 11.7
 BMC FootPrints Asset Core - Asset Discovery Version 11.7 Legal Notices Copyright 1999, 2009 BMC Software, Inc. Copyright 1994-2013 Numara Software, Inc. BMC, BMC Software, and the BMC Software logo are
OFBIZ POS USER MANUAL
 OFBIZ POS USER MANUAL Version 9.11 Release Date 2009-11-01 Apache OFBiz (http://ofbiz.apache.org) is a trademark of The Apache Software Foundation Page 1/24 OFBIZ POS USER MANUAL Version 9.11 Release Date
Technical Service Bulletin
 Technical Service Bulletin FILE CONTROL CREATED DATE MODIFIED DATE FOLDER OpenDrive 02/05/2005 662-02-25008 Rev. : A Installation Licence SCO sur PC de remplacement English version follows. Lors du changement
CENTAUR. Access Control Software Version 4.2 REFERENCE MANUAL
 CENTAUR Access Control Software Version 4.2 REFERENCE MANUAL Copyright (C) 2006-2008 CDVI Americas LTD. All rights reserved. Centaur access control system software is protected by copyright law and international
User Guide. Version 3.0 April 2006
 User Guide Version 3.0 April 2006 2006 Obvious Solutions Inc. All rights reserved. Dabra and Dabra Network are trademarks of Obvious Solutions Inc. All other trademarks owned by their respective trademark
System Manager/Zone Coordinator User s Guide
 System Manager/Zone Coordinator User s Guide LC-SMU2x0-0, LC-ZCU2x0-0, LC-ZCU4x0-0 Code No. LIT-12011444 Software Release 1.0 Issued July 2, 2008 Document Introduction.................................................
OnGuard Online User Guide
 OnGuard Online User Guide T81165/Rev ER-7991-40 Jan 2005 Contents 1 Introduction Related documents 1 1 Navigation of the software 1 2 How to use this guide 1 4 2 Managing Access Holidays and Timezones
ChamberMaster - QuickBooks Guide
 ChamberMaster - QuickBooks Guide CHAMBERMASTER ChamberMaster QuickBooks Guide ChamberMaster A Division of MicroNet, Inc. 14391 Edgewood Drive Baxter MN 56425 218.825.9200 800.825.9171 support@chambermaster.com
MobileMerchant Application Guide
 MobileMerchant Application Guide United Kingdom Ireland Version 6 Android: Google Play is a trademark of Google Inc. Apple: Apple, the Apple logo, iphone and ipad are trademarks of Apple Inc., registered
GV-Data Capture V3 Series User's Manual
 GV-Data Capture V3 Series User's Manual Before attempting to connect or operate this product, please read these instructions carefully and save this manual for future use. 2006 GeoVision, Inc. All rights
Pocket Verifier Smartphone Edition Release Version 1 User Guide and Tutorial for Windows Mobile 5 Smartphone Motorola Q Samsung i320
 Pocket Verifier Smartphone Edition Release Version 1 User Guide and Tutorial for Windows Mobile 5 Smartphone Motorola Q Samsung i320 Copyright 2006, Advanced Merchant Solutions Inc. All rights reserved.
Maintaining the Content Server
 CHAPTER 7 This chapter includes the following Content Server maintenance procedures: Backing Up the Content Server, page 7-1 Restoring Files, page 7-3 Upgrading the Content Server, page 7-5 Shutting Down
Embedded Web Server. User Guide. General usage guide lines to the ISONAS Embedded Web Server available on all ISONAS PowerNet reader-controllers
 Embedded Web Server User Guide General usage guide lines to the ISONAS Embedded Web Server available on all ISONAS PowerNet reader-controllers 06/12/09 Contents Revision history... 4 Scope... 4 Introduction...
Tool & Asset Manager 2.0. User's guide 2015
 Tool & Asset Manager 2.0 User's guide 2015 Table of contents Getting Started...4 Installation...5 "Standalone" Edition...6 "Network" Edition...7 Modify the language...8 Barcode scanning...9 Barcode label
Addendum Advanced POS Printer Drivers
 Addendum Advanced POS Printer Drivers Overview With the introduction of version 4.0, The General Store now supports the use of advanced, manufacturer s printer drivers for certain point of sale printers.
Firmware version: 1.10 Issue: 7 AUTODIALER GD30.2. Instruction Manual
 Firmware version: 1.10 Issue: 7 AUTODIALER GD30.2 Instruction Manual Firmware version: 2.0.1 Issue: 0.6 Version of the GPRS transmitters configurator: 1.3.6.3 Date of issue: 07.03.2012 TABLE OF CONTENTS
User Manual. Before you connect, start or configure your new point of sale terminal, please carefully read the User Manual
 User Manual Before you connect, start or configure your new point of sale terminal, please carefully read the User Manual Copyright This publication, including all photograhs, illustrations and software,
#65 4GHGTGPEG")WKFG #FXCPEGF"6GTOKPCN"5QHVYCTG 8GTUKQP"502 HQT"%QPVTQNNGT/#% Catalog # 100123 Rev.02
WKFG #FXCPEGF6GTOKPCN5QHVYCTG 8GTUKQP502 HQT%QPVTQNNGT/#% Catalog # 100123 Rev.02") #65 #FXCPEGF"6GTOKPCN"5QHVYCTG 8GTUKQP"502 HQT"%QPVTQNNGT/#% 4GHGTGPEG")WKFG Catalog # 100123 Rev.02 &RS\ULJKWý ý ýìääçñýìääåýe\ý(vkhgý5rerwhfýõìäåëôý/lplwhgï 2FWREHUýìääåýõ3')ýYHUVLRQô &DWDORJýúìííìëêý5HYïíë
#65 #FXCPEGF"6GTOKPCN"5QHVYCTG 8GTUKQP"502 HQT"%QPVTQNNGT/#% 4GHGTGPEG")WKFG Catalog # 100123 Rev.02 &RS\ULJKWý ý ýìääçñýìääåýe\ý(vkhgý5rerwhfýõìäåëôý/lplwhgï 2FWREHUýìääåýõ3')ýYHUVLRQô &DWDORJýúìííìëêý5HYïíë
OWNERS MANUAL. Status Monitor. for Windows 95, 98, ME, NT 4, 2000 & XP. SIGNALCRAFTERS TECH, INC. www.signalcrafters.com
 OWNERS MANUAL Status Monitor for Windows 95, 98, ME, NT 4, 2000 & XP SIGNALCRAFTERS TECH, INC. www.signalcrafters.com 57 Eagle Rock Avenue, East Hanover, NJ 07936 Tel: 973-781-0880 or 800-523-5815 Fax:
Table Of Contents. System Monitoring... 14 System Monitoring Display...14 Monitoring Zones...15 About Areas (partitions)...15 Area Status Display...
...15 Area Status Display...") Quick Start Table Of Contents Getting Started... 2 NEware Editions...2 Installing NEware...3 Installing Languages...3 Connecting to NEware...3 Changing Your IP100 Password...4 User Codes... 5 Master Feature...5
Quick Start Table Of Contents Getting Started... 2 NEware Editions...2 Installing NEware...3 Installing Languages...3 Connecting to NEware...3 Changing Your IP100 Password...4 User Codes... 5 Master Feature...5
Contents. Hardware Configuration... 27 Uninstalling Shortcuts Black...29
 Contents Getting Started...1 Check your Computer meets the Minimum Requirements... 1 Ensure your Computer is Running in Normal Sized Fonts... 7 Ensure your Regional Settings are Correct... 9 Reboot your
How to connect your D210 using Bluetooth. How to connect your D210 using GPRS (SIM Card)
") D210 En User Guide Content 3 Introduction 3 Scope 3 Related Documentation 4 Internet Connectivity 4 Using D210 with Mobile Phone 5 Using D210 with wireless (Wi-Fi) router 6 Using D210 with GPRS (requires
D210 En User Guide Content 3 Introduction 3 Scope 3 Related Documentation 4 Internet Connectivity 4 Using D210 with Mobile Phone 5 Using D210 with wireless (Wi-Fi) router 6 Using D210 with GPRS (requires
Chapter 6 The BIOS Setup Program
 6 Chapter 6 The BIOS Setup Program 6.1 Introduction The BIOS (Basic Input and Output System) Setup program is a menu driven utility that enables you to make changes to the system configuration and tailor
ReadyNAS OS 6 Desktop Storage Systems
 ReadyNAS OS 6 Desktop Storage Systems Hardware Manual Models: ReadyNAS 102 ReadyNAS 104 ReadyNAS 312 ReadyNAS 314 ReadyNAS 316 ReadyNAS 516 ReadyNAS 716X EDA 500 October 2013 202-11206-04 350 East Plumeria
Seagate Manager. User Guide. For Use With Your FreeAgent TM Drive. Seagate Manager User Guide for Use With Your FreeAgent Drive 1
 Seagate Manager User Guide For Use With Your FreeAgent TM Drive Seagate Manager User Guide for Use With Your FreeAgent Drive 1 Seagate Manager User Guide for Use With Your FreeAgent Drive Revision 1 2008
Point-Of-Sale Business Application. System Architecture
 Point-Of-Sale Business Application System Architecture Project: Point-Of-Sale Business Application Date: January 28 th 2008 Revision: 1.0.1 Company: Quantum Blue Technology LLC. Copyright Notice Copyright
Advanced User s Guide
 Advanced User s Guide MFC-9130CW MFC-9330CDW MFC-9340CDW Not all models are available in all countries. Version 0 USA/CAN User s Guides and where do I find them? Which Guide? What s in it? Where is it?
Xerox 700 Digital Color Press with Integrated Fiery Color Server. Utilities
 Xerox 700 Digital Color Press with Integrated Fiery Color Server Utilities 2008 Electronics for Imaging, Inc. The information in this publication is covered under Legal Notices for this product. 45072726
Strategic Asset Tracking System User Guide
 Strategic Asset Tracking System User Guide Contents 1 Overview 2 Web Application 2.1 Logging In 2.2 Navigation 2.3 Assets 2.3.1 Favorites 2.3.3 Purchasing 2.3.4 User Fields 2.3.5 History 2.3.6 Import Data
TRBOnet Enterprise 3.0
 TRBOnet Enterprise 3.0 Installation and Configuration Guide TRBOnet Enterprise Installation and Configuration Guide 2 Contents: Architecture Overview 1 1.1. Architecture Overview 1 1.2. System Diagram
Maitre'D Back Office Start-up Guide 2005 Edition
 Maitre'D Back Office Start-up Guide 2005 Edition i Copyright The Maitre'D Back Office Start-up Guide is intended primarily for restaurant owners and managers, but is equally suited for corporate IT departments.
25 Backup and Restoring of the Database
 25 Backup and Restoring of the Database Introduction 4D includes a full database backup and restore module. This module allows backing up a database currently in use without having to exit it. Each backup
1 System requirements (minimum)
") Metrohm AG CH-9101 Herisau Switzerland Phone +41 71 353 85 85 Fax +41 71 353 89 01 info@metrohm.com www.metrohm.com Installation 1 System requirements (minimum) Operating system RAM Memory Interface Windows
Metrohm AG CH-9101 Herisau Switzerland Phone +41 71 353 85 85 Fax +41 71 353 89 01 info@metrohm.com www.metrohm.com Installation 1 System requirements (minimum) Operating system RAM Memory Interface Windows
Contents SECTION 1 5 SECTION 2 9
 Contents SECTION 1 5 INTRODUCTION 6 STARTING UP 7 Starting the Workstations 7 Running Onetap 7 Logging On 7 Using the On Screen Keyboard 7 Minimise Onetap 8 Restore Onetap 8 Exiting and Shutting Down 9
Gift Card Program Using Your Terminal for Gift Card
 Gift Card Program Using Your Terminal for Gift Card For Moneris Mobile 8200 Contents Gift card program.............................. 2 Gift card entry options......................... 3 Hints and shortcuts............................
NETWORK PRINT MONITOR User Guide
 NETWORK PRINT MONITOR User Guide Legal Notes Unauthorized reproduction of all or part of this guide is prohibited. The information in this guide is subject to change without notice. We cannot be held liable
TR-3 Channel Editor. Software Manual
 TR-3 Channel Editor Software Manual Trilithic Company Profile Trilithic is a privately held manufacturer founded in 1986 as an engineering and assembly company that built and designed customer-directed
3 Easy Steps to Get Started
 Quick Start Guide Contents 1. What is icafe Manager?... 4 1.1. Server... 4 1.2. Client Terminal... 4 2. Downloading, Registering & Activating Cafe Code... 5 2.1. Downloading icafe Manager:... 5 2.2. Registering
User s Manual Ver. 2.3
 Office NAS 3.5 IDE/SATA Network Attached Storage Model # ANAS350 User s Manual Ver. 2.3 Table of Contents 1. Introduction... 3 1.1 Package Contents... 3 1.2 Features... 3 1.3 NAS Diagram... 4 2. Hard Drive
Manual. Danfoss Central Station Communications Software Version 3
 Manual Danfoss Central Station Communications Software Version 3 RS.8A.Q1.02 1-2001 Contents Introduction 4 System Overview 4 Minimum and Recommended Hardware Requirements 4 Using the Keyboard to Select
SAM Server Utility User s Guide
 SAM Server Utility User s Guide Updated May 2012 Copyright 2010, 2012 by Scholastic Inc. All rights reserved. Published by Scholastic Inc. PDF0157 (PDF) SCHOLASTIC, READ 180, SYSTEM 44, SCHOLASTIC EXPERT
How To Connect A300 To A300 Time Clock On A Pc Or Mac Computer
 1 TABLE OF CONTENTS INTRODUCTION CHAPTER 1 ESTABLISHING A CONNECTION TO TIME CLOCK 1.1 INSTALLATION OF SOFTWARE 1.2 CONNECT TIME CLOCK TO PC 2 1.2.A..VIA USB CABLE CONNECTION 2-5 1.2.B... VIA TCP/IP NETWORK
OfficeServ Link. User Guide. Version 2.1 June 2005
 OfficeServ Link User Guide Version 2.1 June 2005 OfficeServ Link Version 2.1 User Guide This manual should be read before the installation and operation of the OfficeServ Link Software. COPYRIGHT This
MFC6490CW Windows Network Connection Repair Instructions
 Difficulty printing from your PC can occur for various reasons. The most common reason a networked Brother machine may stop printing, is because the connection between the computer and the Brother machine
5050 Getting Started
 5050 Getting Started Getting Started.. The 50/50 system is basically made up of four components, the Software Application, Server, J2 Selling Stations (on tables) and the Handheld Selling Units. This manual
Sharp Remote Device Manager (SRDM) Server Software Setup Guide
 Server Software Setup Guide") Sharp Remote Device Manager (SRDM) Server Software Setup Guide This Guide explains how to install the software which is required in order to use Sharp Remote Device Manager (SRDM). SRDM is a web-based
Sharp Remote Device Manager (SRDM) Server Software Setup Guide This Guide explains how to install the software which is required in order to use Sharp Remote Device Manager (SRDM). SRDM is a web-based
Net Protector Admin Console
 Net Protector Admin Console USER MANUAL www.indiaantivirus.com -1. Introduction Admin Console is a Centralized Anti-Virus Control and Management. It helps the administrators of small and large office networks
LOREX CLIENT Remote Software 4.0
 LOREX CLIENT Remote Software 4.0 Instruction Manual English Version 2.0 MODEL: L20WD800 Series www.lorexcctv.com Copyright 2008 LOREX Technology Inc. Table of Contents Table of Contents Software Installation...
User s Guide for version 5 Page
 Network Management Interface Catalog VPi 32.15E For use with these ATS products: 7000 & 4000 Series (Group 5 Controller) Series 300 (Group 1 Controller), and 940, 962, 436, 434, 447, 448 (Group 6A/7A Control
Integrated Accounting System for Mac OS X and Windows
 Integrated Accounting System for Mac OS X and Windows Program version: 6.2 110111 2011 HansaWorld Ireland Limited, Dublin, Ireland Preface Books by HansaWorld is a powerful accounting system for the Mac
Wireless VoIP Phone User s Manual
 Wireless VoIP Phone User s Manual Table of Contents Chapter 1 Overview of the WiFi phone... 5 1.1 Front Panel and Keypad...5 1.2 Removing and Installing the Battery...7 1.3 Charging the WIFI PHONE...8
RADview/TDM. Element Management System for TDM Applications Optimux-T3. 1994 2005 RAD Data Communications Publication 06/05
 RADview/TDM Element Management System for TDM Applications Optimux-T3 1994 2005 RAD Data Communications Publication 06/05 Contents Chapter 1. Overview 1.1 Overview of the RADview FCAPS Model... 1-1 1.2
Electra Elite and InfoSet are registered trademarks of NEC America, Inc.
 reserves the right to change the specifications, functions, or features, at any time, without notice. has prepared this document for the use by its employees and customers. The information contained herein
Table of Contents. GETTING STARTED...1 Technical Support...1 Scanner Configuration...2 Login and Select a Mode...4
 Barcode Scanner Table of Contents GETTING STARTED...1 Technical Support...1 Scanner Configuration...2 Login and Select a Mode...4 USING THE SCANNER...7 Basic Functionality...7 Shipping or Receiving Mode...8
Global Monitoring + Support
 Use HyperTerminal to access your Global Monitoring Units View and edit configuration settings View live data Download recorded data for use in Excel and other applications HyperTerminal is one of many
SAFESCAN TA-Software / TA + -Software TIME ATTENDANCE SOFTWARE MANUAL ENGLISH NEDERLANDS DEUTSCH FRANÇAIS ESPAÑOL ITALIANO PORTUGUÊS
 SAFESCAN TA-Software / TA + -Software TIME ATTENDANCE SOFTWARE MANUAL ENGLISH NEDERLANDS DEUTSCH FRANÇAIS ESPAÑOL ITALIANO PORTUGUÊS TABLE OF CONTENTS INTRODUCTION AND DIRECTIONS FOR USE 1. THE BASICS
PIGCHAMP MOBILE. PigCHAMP Knowledge Software. Installation Guide for Mobile Units
 PIGCHAMP MOBILE PigCHAMP Knowledge Software Installation Guide for Mobile Units Table of Contents: Important Note:... 4 Chapter 1: PC Setup... 5 A. Install PigCHAMP Mobile Manager on Windows XP...5 B.
RACEAIR REMOTE PAGER SYSTEM
 Computech Systems, Inc. 301-884-5712 30071 Business Center Dr. Charlotte Hall, MD 20622 RACEAIR REMOTE PAGER SYSTEM TM Introduction: Computech s RaceAir Remote Competition Weather Station with the Data
Mobile credit & debit card acceptance for your Smart Phone or Tablet. MobilePAY Shuttle
 Mobile credit & debit card acceptance for your Smart Phone or Tablet MobilePAY Shuttle User Information Record your Merchant Account and other useful information here. From time to time, you may need quick
Quick Reference Guide. ict200 Series
 Quick Reference Guide ict200 Series Hotkey Support Pressing one of the numeric keys (0-9) from the Idle Screen will take the user directly to certain pre-assigned transactions or tasks. Should any of those
Verizon Wireless Field Force Manager Device User Guide
 Verizon Wireless Field Force Manager Device User Guide Verizon Wireless Field Force Manager Device User Guide Table of Contents General Information...4 System requirements...4 Privacy and mobility...4
NEXTGEN BUDGETARY ACCOUNTING TRAINING
 NEXTGEN BUDGETARY ACCOUNTING TRAINING TRANSACTIONS I. Vendor Maintenance II. III. IV. Requisition Entry - Routing Purchase Order Entry Accounts Payable - Invoice Entry V. Accounts Payable - Cash Disbursements
FOCUS FACT SHEET. E-procedures. Creating a Subscriber account WITHOUT a Certificate (email & password access)
") FOCUS FACT SHEET E-procedures Creating a Subscriber account WITHOUT a Certificate (email & password access) Latest update: July 2011 1/10 Contents 1. Presentation...3 1.1. Purpose of the fact sheet...3
FOCUS FACT SHEET E-procedures Creating a Subscriber account WITHOUT a Certificate (email & password access) Latest update: July 2011 1/10 Contents 1. Presentation...3 1.1. Purpose of the fact sheet...3
How To Create An Easybelle History Database On A Microsoft Powerbook 2.5.2 (Windows)
") Introduction EASYLABEL 6 has several new features for saving the history of label formats. This history can include information about when label formats were edited and printed. In order to save this history,
Introduction EASYLABEL 6 has several new features for saving the history of label formats. This history can include information about when label formats were edited and printed. In order to save this history,
Apple Server Diagnostics User Guide. For Version 3X10⁶
 Apple Server Diagnostics User Guide For Version 3X10⁶ KKApple Inc. 2009 Apple Inc. All rights reserved. Under the copyright laws, this manual may not be copied, in whole or in part, without the written
Call Center - Agent Application User Manual
 Forum 700 Call Center Agent Application User Manual Legal notice: Belgacom and the Belgacom logo are trademarks of Belgacom. All other trademarks are the property of their respective owners. The information