Interactive Drafting
|
|
|
- Adelia White
- 9 years ago
- Views:
Transcription
1 Interactive Drafting Preface What's New Getting Started Basic Tasks Advanced Tasks Workbench Description Customizing Glossary Index Dassault Systèmes All rights reserved.

2 Preface CATIA Version 5 Interactive Drafting is a new generation CATIA product that addresses 2D design and drawing production requirements. CATIA Interactive Drafting is a highly productive, intuitive drafting system that can be used in a standalone 2D CAD environment within a CATIA backbone system. It also expands the CATIA Generative Drafting product with both integrated 2D interactive functionality and an advanced production environment for the dressup and annotation of drawings. This provides an easy and smooth evolution from 2D to 3D-based design methodologies. Complementing an existing CATIA Version 4 installation, Interactive Drafting benefits from upward compatibilty with Version 4, making it possible to browse or complete in Version 5 drawings started with Version 4. The CATIA - Interactive Drafting User's Guide has been designed to show you how to create drawings from various complexities. There are several ways of creating a drawing and this documentation aims at illustrating the several stages of creation you may encounter.

3 Using This Documentation This User's Guide is intended for a draftman who needs to become quickly familiar with CATIA-Interactive Drafting Version 5 product. Before reading it, the user should be familiar with basic CATIA Version 5 concepts such as document windows, standard and view toolbars. To get the most out of this guide, we suggest that you start reading and performing the step-by-step tutorial Getting Started and the Workbench Description to find your way around the Drafting To get the most out of this guide, we suggest you start reading and performing the step-by-step tutorial Getting Started. This tutorial will show you how to create a basic drawing from scratch. The next sections deal with the handling of drawing, then the creation and modification of various types of features you will need to obtain a complex drawing. This guide also presents other InteractiveDesign capabilities allowing you to design complex parts. You may also want to take a look at the sections describing the Interactive Drafting menus and toolbars at the end of the guide.

4 Where to Find More Information Prior to reading this book, we recommend that you read the CATIA- Infrastructure User's Guide Version 5 that describes generic capabilities common to all CATIA Version 5 products. It also describes the general layout of CATIA V5, and interoperability between workbenches. Also read the CATIA V4 Integration documentation that presents interfaces with standard exchange formatas and most of all with CATIA V4 data. The CATIA - Generative Drafting User's Guide Version 5 and the CATIA- Assembly Design User's Guide Version 5 may prove useful too.

5 What's New Manipulating the Drafting Sheet New: Creating a Detail Sheet New: Creating Dittos on a Sheet Manipulating Dimensions Enhanced: Choosing the Angle Dimensions Enhanced: Lining up Dimensions Using Constraints Enhancement: Creating Constraints via Autodetection Enhancement: Creating Geometric Constraints Enhancement: Creating Dimensional Constraints Manipulating Annotations Enhanced: Adding a Leader to Existing Text Enhanced: Painting Existing Elements Enhanced: Creating a Welding Symbol Enhanced: Creating a Geometry Weld

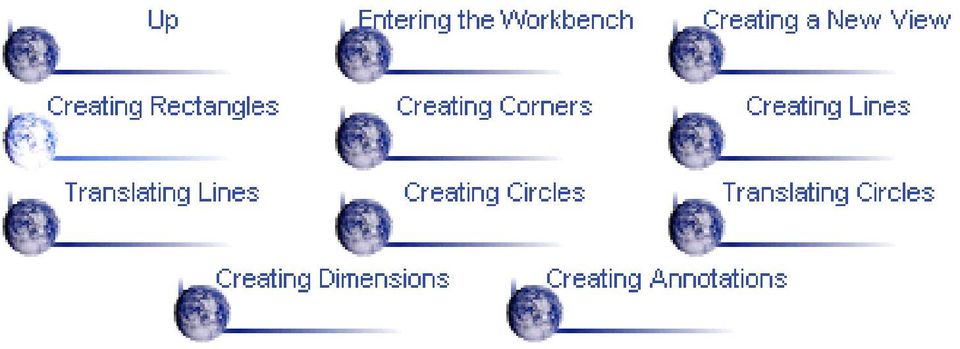
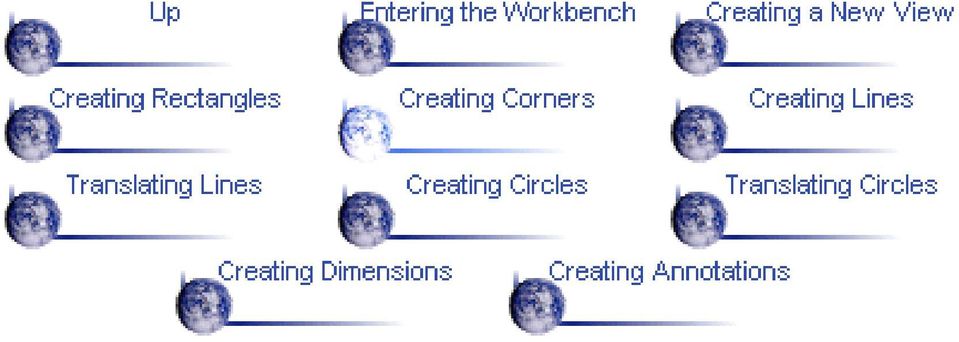
6 Getting Started Before getting into the detailed instructions for using Interactive Drafting workbench, the following tutorial aims at giving you a feel of what you can do with the product. It provides a step-by-step scenario showing you how to use key functionalities. The main tasks described in this section are : Tasks This step-by-step scenario introduces the basic capabilities of Interactive Drafting. You just need to follow the instructions as you progress along. Before discovering this scenario, you should be familiar with the basic commands common to all workbenches. These are described in the Basics User's Guide. All together, the tasks should take about 30 minutes to complete. The final drawing will look like this:

7

8 Entering the Interactive Drafting Workbench This first task shows you how to enter the Drafting workbench and start a new drawing. 1. Select the File -> New commands (or click the New icon). The New dialog box is displayed, allowing you choosing the type of the document you need. 2. Select Drawing in the List of Types field and click OK. The New Drawing dialog box is displayed, allowing you choosing the type of Standard, Format and orientation you need. 3. Select the ANSI standard and click the Landscape option. 4. Click OK. The Drafting workbench is loaded and an empty Drawing sheet opens:

9 5. Make sure you customized the unit accordingly. For this: a. Select the Tools -> Options command to display the Options dialog box. b. Click General in the list of objects to the left of the Options dialog box. c. Select the Units tab and set Length to Inch and then click OK. To visualize better your drawing, tile the windows horizontally from the menu bar. The commands for creating and editing features are available in the workbench toolbar. Now to fully discover the Interactive Drafting workbench, let's perform the following tasks.

10

11 Creating a New View In this task you will learn how to create a new view in the empty drawing you just opened using the Drafting Interactive workbench. Afterwards, you will draw geometry in this empty view. 1. Click the New View icon and click the Drawing sheet. In the following tasks, you will learn how to draw geometry in the empty view displayed which is by default a front view.

12 Creating a Rectangle This task shows you how to define geometry in the newly created empty view which is by default, the front view. In this particular case, let's create a rectangle from coordinates 0,0 to coordinates 3.5,2.5 (inches). 1. Click the Rectangle icon from the Geometry creation toolbar (Profiles subtoolbar). The Tools toolbar displays two value fields: horizontal value (H) and vertical value (V). 2. Enter the First Point coordinates. For example, H: 0in and V: 0in. 3. Press Enter. 4. Enter the Second Point coordinates. For example, H: 3.5in and V: 2.5in. 5. Press Enter to end the rectangle creation. The rectangle appears in the empty view. You can also move the cursor for directly positioning the second point. The corresponding values similarly appear on the Tools toolbar.

13
14 Creating Corners This task shows you how to create corners on an existing rectangle by multiselecting points. 1. Multiselect the rectangle endpoints. 2. Click the Corner icon from the Geometry edition toolbar (Relimitations subtoolbar). The Tools toolbar displays with a Radius field: 3. Enter a radius value in the Tools toolbar. For example, Radius: 0.25in. 4. The four corners are automatically created with the same radius value. You can also select the Corner icon first and then click the geometry for creating the corners one after the others.

15
16 Creating Lines In this task you will learn how to create a line. 1. Click the Line icon from the Geometry creation toolbar. The Tools toolbar displays First Point value fields: 2. Enter the line First Point coordinates. For example, H: 1.625in and V: 0in. 3. Press Enter. 4. Drag the cursor to the desired location for creating the second line point. For example, drag the line end point to the top rectangle horizontal line. In this particular case, autodetection is used for creating the line. In other words, you want the line to be parrallel with one of the rectangle lines.

17 Translating Lines This task shows you how to create additional lines from an existing one. 1. Select the line to be translated. 2. Click the Translate icon from the Geometry edition toolbar (Transformations subtoolbar). The Translation Definition dialog box appears and the Start Point value fields (H and V) display from the Tools toolbar. 3. The Duplicate mode option (Translation Definition dialog box) is activated, by default. If needed, actvate this mode. 4. Enter the duplicated line Start Point coordinates in the Tools toolbar. For example, H: 1.625in and 2.5in. 5. Press Enter. 6. Enter the duplicated line End Point coordinates in the Tools toolbar. For example, H: 1.625in and 0in. 7. Press Enter. 8. Enter the line Length Value in the Translation Definition dialog box. For example, 2.5in. The Snap Mode is automatically deactivated. 9. Click OK to validate. 10. Once you are satisfied with your operation, click inside the view. The second line is created.
 is activated, by default. If needed, actvate this mode. 4. Enter the duplicated line Start Point coordinates in the Tools toolbar.")
18 Proceed in the same manner to create the third, fourth, fifth and sixth lines.the process described above is valid for any other line to be created with the Translation command in our context. Select two lines at a time to perform your translation, it is time-saving. Your final drawing will look like this: You can also select the Translate icon first and then the geometry to be translated.

19 Creating Circles This task shows you how to create circles and circle centers using coordinates. 1. Select the Circle icon from the Geometry creation toolbar. The Tools toolbar displays circle value fields. 2. Enter the Circle Center coordinates. For example, H: 0.75in ans H: 2in. 3. Press Enter. 4. Enter the circle radius. For example, R: 0.375in. 5. Press Enter. 6. Repeat the scenario to create the second circle using the same values.

20 Now, let's create inner circles. For this: 7. Click again the Circle icon. 8. Select the existing circle center. 9. Enter the center circle radius. 10. Press Enter. 11. Repeat the scenario to create the second inner circle. This is what you obtain: You can either select the geometry to be translated first or the Translation command.

21
22 Translating Circles This task shows you how to duplicate existing circles using translation. 1. Select the circles to be translated. Use the multiselection capability. 2. Click the Translate icon from the Geometry edition toolbar. The Translation Definition dialog box and the Start Point value fields (Tools toolbar) display. 3. Enter the Start Point coordinates. For example, H: 0in and V: 0in.
23 4. Enter the End Point coordinates. For example, H: and V: 0in. 5. Press Enter. 6. Enter the desired Length value in the Translation Definition dialog box. For example, 1.875in. The Snap mode is deactivated. 7. Click OK to confirm your operation. This is what you obtain: You can either select the geometry to be translated first or the Translate icon.
24
25 Creating Dimensions This task shows you how to add dimensions to the geometry you previously created. 1. Click the dimension icon from the Dimensioning toolbar. 2. Click a first element in the view. For example, the rectangle top line. 3. Click a second element in the view. For example, the rectangle bottom line. The dimension type is automatically defined according to the selected elements. In this case, you create a distance dimension.
26 4. If needed, re-position the dimension to the desired location. Now that you know how to quickly apply dimensions to 2D geometry, create as many as required.
27 Creating Annotations This task shows you how to add annotations to existing 2D elements. 1. Click on an icon from the Annotations toolbar. For example, the Text icon. 2. Click an element you want to add an annotation. 3. Enter the required text in the Text Editor dialog box. The text you just entered in the dialog box appears below the annotation in a wysiwyg way. 4. If needed, drag the text to the desired location. 5. Now that you know how to quickly apply annotations to 2D geometry, create as many as required. The annotation will now remain associated to the selected 2D element. In other words, each time you move the 2D element, the associated annotation moves accordingly.
28
29 Basic Tasks The basic tasks you will perform in the Interactive Drafting workbench are mainly the creation and modification of two-dimensional elements and their related attributes on a predefined sheet. This section will explain and illustrate how to create various kinds of features to obtain a complete CATDrawing document. The table below lists the information you will find. Theme
30 Manipulating the Drafting Sheet The Interactive Drafting workbench provides a simple method to manipulate a sheet. Now, you are going to define and modify the sheet and its background through the creation of a frame title block. Tasks
31 Defining a Sheet This task will show you how to define a sheet. 1. Click or select the File -> New commands 2. Select the Drawing workbench, and click OK. 3. Select the Landscape option from the New Drawing dialog box. 4. Click OK. You can modify at any time the sheet orientation and/or scale. For this, you select the File->Page Setup items from the toolbar. The sheet size depends on the standard selected. For example, if you choose the ISO standard, the sheet will automatically be assigned the A0 format.
32 To add a new sheet, click the New Sheet icon automatically appears as follow :. The new sheet Once you have created more than one sheet, to activate one of the sheets, select this sheet from the dialog window.
33 Modifying the Sheet This task will show you how to modify the sheet orientation. Create a sheet using the Landscape orientation in the New Drawing dialog box. 1. Select the File->Page Setup items from the menu bar. 2. Click OK. Using this dialog and the Page Setup dialog box, you can also modify the sheet scale which is set to 1, by default.
34
35 Deleting a Sheet This task will show you how to delete a sheet. When a CatDrawing is open, a sheet is necessarily displayed. This is why you can only delete a sheet other than sheet number one. You created more than one sheet. 1. Select the sheet from the specification tree. For example, Sheet Right-click the selected sheet and display the contextual menu. 2. Select the Delete option from the contextual menu. Sheet 2 is deleted.
36
37 Creating a Frame Title Block This task shows you how to create a background sheet and insert a frame and a title block. Open a CATDrawing document. 1. Select the Edit->Background items from the menu bar. 2. Click the Frame Creation icon. The Insert Frame and Title Block dialog box is displayed.
38 3. Click OK. The Insert Frame and Title Block are as follows:
39
40 Creating a Detail Sheet This task will quickly show you how to create a detail sheet. In other words, you are going to create some kind of a intermediary catalog that you will use for positioning dittos on a drawing sheet afterwards. 1. Click the New Detail Sheet icon from the Sheets toolbar. The newly created detail sheet automatically displays. For more information on how to customize sheet background colors see CATIA.Generative Drafting user's guide.
41 Creating Dittos on a Sheet This task shows you how to create dittos from a detail previously created on a detail sheet. Create a detail sheet and enter the drawing sheet in which you want to insert dittos. 1. Click the Instantiate Detail icon. 2. Go to the detail sheet (sheet 2) and select the ditto. You can select the ditto from the design tree. You can also select a ditto that already exists on the drawing sheet. The drawing sheet automatically displays (sheet 1). 4. Click to position the ditto. 5. If needed, modify the newly positioned ditto scale and/or angle.
42 You can modify the ditto via manipulators. You can also modify a group of objects including a ditto. For positioning several dittos on the sheet, double click the Instantiate Detail icon.
43 Creating Views The Interactive Drafting workbench provides a simple method to create views. This task will show you how to create views. If the sheet is active, the first view you create is by default a front view. 1. Click the New View icon. 2. Click the Drawing window. A blue axis displays in a red frame. The front view created displays in the specification tree. 3. Click again the New View icon for creating more views. The views created are projection views as they are linked to the front view. You can create: Top views Bottom views Left views Right views from an active front view. If you need to switch to the Third angle projection method, specify it via the Sheet Properties option.
44 4. Activate a projection view by double-clicking the view. 5. Click the New View icon for creating the rear view. The following table shows the possibilities of view creation according to the active view type. Active View Resulting Projection Views (linked to the active view) Front view Bottom view Top view Right view Left view
45 Left view Right view Rear views or Auxiliary views Rear view Auxiliary view
46 Creating 2D Geometry The Interactive Drafting workbench provides a simple method for creating and editing two-dimensional geometry. The tools it offers enable you to create and edit geometry, dimension and create relations between 2D elements. Note also that the Interactive workbench provides Autodetection an easy-to-use tool designed to make all your geometry creation as simple as possible. Before creating 2D geometry, you can double-click the icon and then create as many elements as desired. Tasks
47
48 Helpful Tools This task shows how CATIA can assist you when creating two-dimensional geometry. Multiselection can be also very useful. The Tools toolbar provides four options: Grid Snap to Point Visualize/Create constraints *Differentiating between two-dimensional elements and generated elements from 3D Value Fields A Few Words About Multiselection Grid The grid will help you draw geometry in some circumstances. For example, the grid will make it easier to draw profiles requiring parallel lines. For more information about defining a grid, see Setting a Grid. Snap to Point If activated, this option makes your geometry begin or end on the points of the grid. As you are creating two-dimensional geometry the application forces points to the intersection points of the grid. Note that this option is also available in the Tools -> Options -> Drafting ->General tab. For more information, see Setting a Grid.
49 In this example, the black spline was created with Snap to Point on. The points are on the grid. Conversely, the highlighted spline was created with the option deactivated. The autodetection capability works even if this option is on. Differentiating Between 2D Elements and Elements Generated from 3D If activated this option allows you to differentiate within the same view, two-dimensional elements created through the Interactive workbench from generated elements. It is very helpful when you need to add purely interactive elements on generated views. The following example illustrates what you obtain. The generated elements appear in gray whereas, the two-dimensional elements remain black.
50 This command is available only with the Generative Drafting license. Value Fields (Tools Toolbar) The values of the elements you sketch appear in the Tools toolbar as you move the cursor. In other words, as you are moving the cursor, the Horizontal (H), Vertical (V) Length (L) and Angle (A) fields display the coordinates corresponding to the cursor position. You can also use these fields for entering the values of your choice. In the following scenario, you are going to sketch a line by entering values in the appropriate fields. 1.Click the line icon. The Tools toolbar displays frout value fields.
51 As you are moving the cursor, the Horizontal (H), Vertical (V) Lenght (L) and Angle (A) fields display the coordinates corresponding to the cursor's position. 1. Click the Line icon from the Geometry creation toolbar. The Tools toolbar displays information on value fields. 2. Enter the coordinates of the First Point. 3. Enter the coordinates of the Second Point. OR 4. Enter the length (L) of the line. 5. Enter the value of the angle (A) between the line to be created and the horizontal axis. The line is created. Depending on the number of fields available and the way you customized your toolbars, some fields may be truncated. What you need to do is just undock the Tools toolbars. A Few Words About Multiselection This task shows you that creating several corners is possible just by multiselecting points.
52 1. Multiselect the rectangle endpoints by pressing the Ctrl key and the cursor. 2.Click the Corner icon from the Geometry edition toolbar. 3. Enter a radius value in the Radius field that appears in the Tools toolbar. 4. The four corners are created at the same time with the same radius value..
53 Points This task shows you how to quickly create points by clicking: 1. Click the Point icon from the Geometry creation toolbar. 2. Click once for each point to be created. A point is created where you clicked. The logical constraints detected during the creation of a point are stored in memory.
54 Points Using Coordinates This task shows you how to create points by specifying coordinates. 1. Click the Point By Using Coordinates icon from the Points toolbar. The Point Definition dialog box is displayed. 2. Enter the point coordinates (h and v) from the Point Definition dialog box. You can use a cartesian or polar definition. 3. Click OK. The point is created.
55 Equidistant Points This task shows how to create a set of equidistant points on an arc. In other words, you can create points on the support of your choice. You only need to select the origin point, and specify the spacing and the number of points you wish. Create an arc. 1. Click the Equidistant Points icon from the Points toolbar. 2. Select the starting point of the arc on which you wish to create five equidistant points. 3. Select the arc endpoint on the left to define the arc. The Equidistant Points Definition dialog box is displayed. Ten equidistant New Points is the default value. The default spacing is 10mm.
56 4. Click the Reverse Direction button to reverse the creation direction. The points will then be created on the arc. 5. Enter the distance you need between each point. For example, 20mm. 6. Enter five as the desired number of points. 7. Click OK. The points are created and distributed along the arc. You can edit them individually. Note that if the support is edited, the points are not affected by modifications. The symbol used for points in the geometry area can be customized using the Edit -> Properties command.
57 Lines This task shows how to create a line between two points. 1. Click the Line icon from the Geometry creation toolbar. 2. Click to create the first point, and point elsewhere. A rubberbanding line follows the cursor, showing the shape of the line which will be created. 3. Click to create the second point. The logical constraints detected during the creation of a line are stored in memory.
58
59 Circles This task shows how to create basic circles with no precision. 1. Click the Circle icon from the Geometry creation toolbar. 2. Click the intended center of the circle. 3. Move the cursor to see the circle being created. A rubberbanding circle follows the cursor as you drag it.
60 4. Click once you are satisfied with the size of the circle. The logical constraints detected during the creation of a circle are stored in memory.
61 Three Point Circles This task shows how to create circles by indicating three points. 1. Click the circle icon from the Geometry creation toolbar (Circles and Ellipse subtoolbar). 2. Click two points. The application previews a circle. 3. Click the third point. The circle is created.
62
63 Circles Using Coordinates This task shows how to create circles specifying center point coordinates. By default, centers are created but if you do not need them you can specify this in the Options dialog box. For more information, please refer to Customizing Geometry Creation 1. Click the Circle Using Coordinates icon from the Geometry creation toolbar (Circles and Ellipse subtoolbar). The Circle Definition dialog box is displayed. 2. Enter the coordinates of the center point. 3. Enter the desired circle radius value. 4. Click OK. The circle and its center point are created.
64 You can also use the Polar tab options for creating a circle. In other words, you will define the circle using the radius and angle of the center point.
65 Arcs This task shows how to create an arc from a center point. 1. Click the arc icon from the Geometry creation toolbar (Circles and Ellipse subtoolbar). 2. Click to the intended center of the arc and drag the cursor. A circle appears. 3. Click when you are satisfied with the radius of your circle. This sets the first limit of the arc. 4. Now, moving the cursor clockwise and clicking, you would obtain this arc: 5. Moving the cursor counterclockwise and clicking, you would obtain this arc:
66
67 Three Point Arcs This task shows how to create an arc using three reference points to define the required size and angle 1. Click the Three Point Arc icon from the Geometry creation toolbar (Circles and Ellipse subtoolbar). 2. Point and click to where you wish the arc to begin. This point is the first point through which the arc will pass. 3. Click to the second point of the arc. An arc appears. 4. Point elsewhere and click again to create the last point of the arc. The logical constraints detected during the creation of an arc are stored memory.
68
69 Ellipses There is a simple way for creating an ellipse: this task shows how to do so. An ellipse has two axes. The midpoint of each axis is the center point of the ellipse. 1. Click the Ellipse icon from the Geometry creation toolbar (Circles and Ellipse subtoolbar). 2. Click to create the first point. 3. Click to create the second point. The first major semi-axis of the ellipse is created. 4. Click to create the third point. The second semi-axis is created and the ellipse is displayed.
70
71 Profiles This task shows how to create a profile using the different options of the profile command. You can create open or closed profiles. Profiles may be composed of lines, arcs or even curves. 1. Click the Profile icon from the Geometry creation toolbar. The Tools toolbar displays with Lines, Tangent Arcs and Three Point Arcs commands. The Line command is activated by default. 2. Click two points to create a line. A rubberbanding line follows the cursor, showing the next line which will be created.
72 3. Click the Tangent arc icon that is now available as you have created a line. 4. Drag the cursor and click where you wish to end the tangent arc. The tangency symbol is displayed. 5. Now, click the Three Point Arc icon. 6. Click two points as indicated. An arc is created as well as the three points you clicked. 7. Click the Line icon and drag the cursor vertically to create the line as shown. An arc is created as well as the three points you clicked.
73 Now you are going to create another line then a tangent arc but this time without using the command. 8. To create an arc as part of a profile drag and release at the point where you want to begin your arc rather than simply click for a line. A rubberbanding arc follows the cursor, showing the arc which will be created. The arc is automatically tangent to the previous element. 9. Double-click to end the profile creation.
74 Splines This task shows how to create a curve from scratch. 1. Click the Spline icon from the Geometry creation toolbar. 2. Click to indicate two points through which the curve passes. 3. Click as many times as needed to create the whole curve. 4. Double-click to end the curve. Clicking the Select icon ends the curve too.
75
76 Rectangles This task shows you how to create rectangles. 1. Click the Rectangle icon from the Geometry creation toolbar (Profiles subtoolbar). 2. Point to the intended first corner of the rectangle. 3. Drag to see the rectangle being created. A rubberbanding rectangle follows the cursor as you drag it. 4. Click to create the rectangle.
77
78 Oriented Rectangles This task shows how to create a rectangle oriented in the direction of your choice. 1. Click the Oriented Rectangle icon from the Geometry creation toolbar (Profiles subtoolbar). 2. Click two points to create the first side of the rectangle. 3. Drag to see the rectangle being created. 4. Click to create the rectangle. The logical constraints detected during the creation of the rectangle are stored in memory.
79
80 Parallelograms This task shows how to create a parallelogram. 1. Click the Parallelogram icon from the Geometry creation toolbar (Profiles subtoolbar). If you activate the and options from the Tools toobar. The constraints are shown and created. Refer to Helpful Tools and Customizing Constraints. 2. Click two points to create the first side of the parallelogram. 3. Drag to see the parallelogram being created. A rubberbanding parallelogram follows the cursor as you drag it. 4. Click to create the parallelogram. The logical constraints detected during the creation of a parallelogram are memorized.
81
82 Hexagons This task shows how to create an hexagon. 1. Click the Hexagon icon from the Geometry creation toolbar (Profiles subtoolbar). 2. Click a point to define the first point of the hexagon. 3. Drag the cursor to define a radius value. CATIA previews the hexagon to be created. 4. You can move the cursor clockwise or counter-clockwise to position the hexagon.
83 5. Click a second point when you are satisfied with the radius value and the orientation of the hexagon. The hexagon is created.
84 Oblong Profiles This task shows how to create an oblong profile. The steps required for creating this type of profile are similar to creating an ellipse. 1. Click the Oblong Profile icon from the Geometry creation toolbar (Profiles subtoolbar). 2. Click to create the first point and drag the cursor. 3. Click to create the second point. The first semi-axis of the profile is created. 4. Drag the cursor and click to create the third point. The second semi-axis is created and the oblong profile is displayed.
85
86 Curved Oblong Profile This task shows how to create a curved oblong profile. A construction arc assists you in creating this element. 1. Click the Curved Oblong Profile icon from the Geometry creation toolbar (Profiles subtoolbar). 2. Click two points to define the radius of the construction arc. The second point you clicked is the first endpoint of the construction arc. 3. Move the mouse counterclockwise and click to define the second construction arc endpoint. The profile shape looks like this:
87 4. Move the mouse away from the construction arc to define the radius of both of the arcs at the end of the profile. 5. Click when you are satisfied with the radius value. The construction arc radius as well as the profile ends radius are displayed. This a curved oblong profile:
88 Keyhole Profiles This task shows how to create a keyhole profile. 1. Click the Keyhole Profile icon from the Geometry creation toolbar (Profiles subtoolbar). 2. Click one point. This point is the centerpoint of the arc. 3. Click another point. 4. Drag to define the width of the lower part of the profile and click when satisfied. 5. Drag the cursor to define the circle radius of the upper part of the profile. 6. Click when you are satisfied with the radius value.
89 This is a keyhole profile:
90 Editing 2D Elements The Interactive Drafting workbench provides a simple method to edit 2D Geometry elements. Editing 2D elements means modifying their coordinates but also modifying their shapes using commands such as edit, relimit and break. Tasks
91 Modifying Element Coordinates Modifying your sketch coordinates will impact the feature defined on this sketch: CATIA maintains associativity. The instructions described below are valid for editing all elements. Note however, that profiles are not considered as entities when it comes to editing them. To edit a profile, you will need to edit the sub-elements composing it. This task shows how to edit the line coordinates. 1. Double-click the line you wish to edit. The corresponding dialog box appears indicating the line coordinates. 2. Enter new coordinates for changing your end points. 3. Check the Construction Element option if you wish to change the line type. 4. Press OK. Remember that the Edit -> Properties command lets you access and even edit two dimensional elements properties. Multiselection is not allowed before editing 2D elements.
92 Creating and Editing Corners The corner is an arc tangent to two curves. You can create rounded corners between consecutive lines, arcs, circles and any types of curves using the corner command which displays three trim options. Note that even if the curves are not consecutive, but simply intersect, the corner will be created. By default, centers are created but if you do not need them you can specify this in the Options dialog box. For more information, please refer to Customizing Geometry Creation Corners with Both ElementsTrimmed This task shows how to create a corner between two lines and trim these lines. 1. Click the Corner icon. The possible corner options are displayed. The Trim all command is activated by default. 2. Keep this option and select the first line. The selected line is highlighted. 3. Select the second line. The second line is also highlighted, and the two lines are joined by the rounded corner which moves as you move the mouse. This lets you vary the dimensions of the corner.
93 4. Click when you are satisfied with the corner dimensions. Both lines are trimmed to the points of tangency with the corner. An Alternative Method To create a corner between two consecutive lines created using the,, or the commands, you can apply the method described above, but you can also use the alternative method illustrated below, which is even more simple. 1. Click the Corner icon and for example, leave the default trim option. 2. Select the point intersecting the lines. The selected point is highlighted and the two lines are joined by the rounded corner which moves as you move the mouse.
94 3. Click when you are satisfied with the dimensions of the corner. Both lines are trimmed to the points of tangency with the arc. To edit a corner, you need to reconsider the center point location. This task will show you how to do so. 1. Double-click the corner to be modified. 2. Select circle->definition from the contextual menu The Circle Definition dialog box is displayed. 3. Enter a new radius value. 4. Click OK to confirm your operation Repeat the above scenario to edit chamfers
95 Creating Chamfers You can create beveled corners between any types of curves (lines, splines, arcs and so forth.) using the Chamfer command which displays three trim options. Note that if the curves are not consecutive, but simply intersect, the chamfer will be created and the intersecting curves will be trimmed. Chamfers with Both Elements Trimmed This task shows how to create a chamfer between two lines while trimming them. 1. Click the Chamfer icon. The possible chamfer options are displayed. The Trim all option is the default option. 2. Select the line. The selected line is highlighted. 3. Select the second line. The second line is also highlighted, and the two elements are connected by a line representing the chamfer which moves as you move the mouse. This lets you vary the dimensions of the chamfer. 4. Click when you are satisfied with the dimensions of the chamfer. The chamfer is created.
96 An Alternative Method To create a chamfer between two consecutive lines created with the Profile icon, or the command, you can also use the alternative method illustrated below: 1. Click the Chamfer icon and for example, leave the default trim option. 2. Select the intersection point as shown. The selected point is highlighted and the two lines are joined by the chamfer which moves as you move the mouse. 3. Click when you are satisfied with the dimensions of the chamfer. Both lines are trimmed.
97 Trimming Elements This task shows how to relimit a line. The trim command lets you relimit lines or circles, or points, lines or circles. 1. Click the Trim icon from the Geometry edition toolbar (Relimitations subtoolbar). The Tools toolbar displays the Trim All option (default command). 2. Select the first line. The selected element is highlighted. 3. Select the second point, line or circle. The second element is highlighted too, and both elements are trimmed. If you select the same first element, it will be trimmed at the location of the second selection. The location of the trim depends on the location of the mouse: 4. Click where you are satisfied with the trimmimg of the two elements: First example Second example
98 Third example Fourth example Now, If you prefer to trim just one element, this task shows how to do so. In this example, we use a line. We could also use a circle. 5. Click the Trim icon from the Geometry edition toolbar (Relimitations subtoolbar). 6. Click the Trim one element icon from the displayed Tools toolbar. 7. Select the first line. The selected line or circle is highlighted. 8. Select the second line. The first line selected is trimmed. If you select the same first element, it will be trimmed at the location of the second selection.
99 The location of the trimmimg depends on the location of the mouse.
100 Breaking Elements The purpose of this task is to show how to break a line using a point on the line and then a point that does not belong to the line. The Break command lets you break any types of curves. The elements used for breaking curves can be any Sketcher element. 1. Click the Break icon from the Geometry edition toolbar (Relimitations subtoolbar). 2. Select the line to be broken. 3. Select the breaking element, that is a point. The selected element is broken at the selection point. The line is now composed of two movable segments. 1. Click the Break icon from the Geometry edition toolbar (Relimitations subtoolbar). 2. Select the breaking point. 3. Select the line to be broken.
101 The application projects the point onto the line and creates another point. The line is broken at the projected point. The line is now composed of two segments that can be moved. Using the Break icon, you can also isolate points: if you select a point that limits and is common two two elements, the point will be duplicated. if you select a coincident point, this point becomes independent (is no more assigned a coincidence constraint).
102 Applying Transformations to 2D Geometry The Interactive Drafting workbench provides a simple method to create transformation features on 2D Geometry. Transformation features are obtained by applying commands on existing elements. Tasks
103 Creating Symmetry You can use the symmetry command whenever you wish to copy already existing 2D elements. You can repeat them using a line, construction line or an axis. This task shows how to duplicate a circle. Create a circle and an axis. 1. Select the circle to be duplicated by symmetry. The Symmetry icon is now available. 2. Click the Symmetry icon from the Geometry edition toolbar. 3. Select the axis you have previously created. The selected circle is duplicated and the application creates a symmetry constraint.
104
105 Translating This task will show you how to create copies of eements using translation in the duplicate mode. Multi-selection is not available. You may either perform a simple translation (by moving elements) or create several copies of two-dimensional elements. Make sure the view is active. 1. Click the Translate icon from the Geometry edition toolbar (Transformations subtoolbar). The Translation Definition dialog box diplays and will remain displayed throughout the operation. 2. Enter the number of Instances you need (Instances). The duplicate mode is activated by default. 3. Select the element(s) to be translated. You may select one 2D element to be translated or mutiselect the entire two-dimensional geometry drawn on your sheet. See A Few Words About Multiselection.
106 4. Click the translation vector start point on the sheet or select an existing one. 5. In the Translation Definition dialog box, enter a precise value for the translation length. For example, 10 mm. 6. Use the Autodetection to maintain horizontality. 7. Click OK in the Translation Definition dialog box to end the translation. The last translation is always highlighted. Thus, you may restart from the latter if you need more copies.
107 The Undo command is available from the toolbar, while you are translating elements. When the Duplicate mode is activated, only 2D geometry is translated, dimensions are not. When the Duplicate mode is deactivated, both 2D geometry and its associated dimensions are translated. Therefore associativity is maintained.
108 Rotating This task will show you how to rotate elements. In this scenario, the geometry is simply moved. But note that, you can also duplicate elements with the Rotating command. Make sure the view is active. 1. Click the Rotate icon from the Geometry edition toolbar (Transformations subtoolbar). The Rotation Definition dialog box diplays and will remain displayed all along your rotation. 2. Deactivate the Duplicate mode. 3. Enter the number of copies you need (Instances). 4. Select the geometry to be rotated. Here, multiselect the entire profile. 5. Click the rotation center point position or enter a precise value in the fields displayed. 6. Click a point for defining the reference line that will be used for computing the angle. 7. In the Rotation Definition dialog box, enter a precise value for the rotation angle. The step mode computes from 15 degrees to 15. But be the step mode activated or not, you may enter the value of your choice (for example, 92 degrees).
109 7. Click OK to end the rotation. When the Duplicate mode is activated, only 2D geometry is rotated, dimensions are not. When the Duplicate mode is deactivated, 2D geometry and the associated dimensions are rotated. Therefore, associativity is maintained.
110 Scaling This task will show you how to scale an entire profile. In other words, you are going to resize a profile to the dimension you specify. 1. Click the Scale icon from the Geometry edition toolbar (Transformations subtoolbar). The Scale Defintion dialog box diplays and will remain displayed all along your operation. 2. Select the element(s) to be scaled. Note that you can first select either the geometry or the scaling icon. If you select the Scale icon first, multiselection capability is available.
111 The value fields display in the Tools toolbar. 3. Enter the newly scaled element center point value. In the displayed Scale Definition dialog box: 5. Enter 0.5 as Scale Value: This is what you obtain: Note that you can also use the cursor and drag the geometry to the desired scale. The helpful elements. command is available from the toolbar, while you are scaling
112
113 Manipulating Dimensions The Interactive Drafting workbench provides a simple method to manipulate all types of dimensions using the following toolbar: The Interactive Drafting workbench allows you creating and/or modifying given types of dimensions. This is described in detrail in chapter called Before you Begin. Tasks
114
115 Before you Begin Creating Dimensions CATIA Interactive Drafting version 5 provides a unique and powerful command to create the following types of dimensions: Dimensions created on one element Length dimensions Diameter dimensions Radius dimensions Dimensions created on two elements Distance dimensions Angle dimensions The dimension type will depend on the selected elements as explained hereafter: Modifying the Dimension Attributes CATIA Interactive Drafting version 5 provides a unique and powerful command to modify the following attributes at any time before you click to validate the dimension creation:
116 Modify while creating Type Measure direction Modify while or just after creating Value position Overrun/blanking Inserted prefix Tool bar
117 Creating Dimensions This task will quickly show you how to create a dimension. When creating a dimension on 2D elements (except points), CATIA lets you preview the dimensions to be created. Open the Brackets_views.CATDrawing document from the \online\samples\intdrafting directory. 1. Click from the Dimensioning toolbar. 2. Click a first element in the view. 3. If needed, click a second element in the view. The dimension type is automatically defined according to the selected elements. At this step, two icons allow positioning the dimension line either according to a reference element or to a reference view. 4. Click either the Reference Element icon or the View Reference icon from the tools toolbar. 5. Click the View Reference icon. 6. Click the drawing window for validating the dimension creation.
118 Note that if you right-click the dimension before creation, a contextual menu lets you modify the dimension type and its value orientation as well as add funnels. Once the dimension is created, if you right-click you access the Properties options. Dimensions properties are detailed in Chapter Displaying and Editing Dimensions Properties.
119 Choosing Angle Dimension This task will quickly show you how to create an angle dimension and perform in the meantime three kinds of modifications: new angle sector, new angle sector location or turning an angle sector into a supplementary sector. Create two lines and apply an angle dimension to them (by selecting two line type elements). 1. Click from the Dimensioning toolbar. 2. Select the dimension line. 3. With the mouse, drag the angle dimension to the desired quadrant (or sector). Lastly, you may turn the angle sector into a supplementary sector. 4. Press the Constrol key and select the dimension line.
120 You may move the dimension to a new sector by using the contextual menu: Right-click the angle dimension and select the required Angle sector from the contextual menu. For example, Sector 3.
121 Modifying the Dimension Type This task will quickly show you how to modify the type as you create the dimension. On other words, you modify the dimension attributes. In this particular example, we will apply a Radius Center dimension type to a hole. Open the Brackets_views.CATDrawing document from the \online\samples\intdrafting directory. Create a diameter dimension. 1. Click from the Dimensioning toolbar and a first element in the view. 2. If needed, click a second element in the view. The dimension type is automatically defined according to the selected elements. 3. Right-click the dimension. 4. Select the required type from the displayed menu. For example, Radius Center. The diameter dimension is automatically snapped to a radius dimension.
122 5. Click the drawing window for validating the dimension creation and if needed, modify the dimension location.
123 Modifying the Dimension Line Location This task will quickly show you how to modify dimension line location very easily either before or after creating dimensions. In this example, we will use a previously created distance dimension. Open the Brackets_views.CATDrawing document from the \online\samples\intdrafting directory. Create a distance dimension. 1. Click, if needed. 2. Select the dimension to be modified. The distance dimension is highlighted. 3. Select the dimension line. 4. Drag the dimension line to the new position. You may modify the dimension line location using the extension line.
124
125 Modifying Dimension Value Text Position This task will quickly show you how to modify dimensions value text. In this example, we will use a previously created distance dimension. Open the Brackets_views.CATDrawing document from the \online\samples\intdrafting directory. Create a distance dimension. 1. Click, if needed. 2. Select the value text of the dimension. 3. Drag the value text to the new position. 4. Click to validate the position.
126 Modifying the Dimension Text Before/After This task will quickly show you how to insert text before or after the value text. Open the Brackets_views.CATDrawing document from the \online\samples\intdrafting directory. Create a distance dimension. 1. Click, if needed. 2. Click the dimension to be modified. 3. Click the left red triangle. The Insert Text Before dialog box displays: 4. Enter for instance L =. 5. Click OK. The Text Before is automatically inserted. 6. Click in the free space.
127
128 Modifying Dimension Overrun/Blanking This task shows you how to modify dimensions extension line overrun and/or blanking. In this example, we will use a previously created distance dimension. Open the Brackets_views.CATDrawing document from the \online\samples\intdrafting directory. Create a distance dimension. 1. Select the overrun or the blanking manipulator(s), as shown herebelow: 2. Drag the manipulator(s) to the new position, as shown herebelow: 3. If you need to be more precise, double-click the manipulator. The Overrrun/Blanking dialog box displays. 4. Enter the desired value for modifying a given blanking 5. If needed, deactivate the blanking/overrun to both extension lines sides option.
129
130 Creating Coordinate Dimensions This task will show you how to automatically create coordinate dimensions on 2D elements. Coordinates dimensions allow you defining the distance between a reference element and a 2D element. Open the Brackets_views.CATDrawing document from the \online\samples\intdrafting directory. 1. Click the Coordinate Dimension icon from the Dimensioning toolbar (Dimensions subtoolbar). 2. Select the element to be applied coordinates dimensions. 3. Click the free space. The Coordinate dimension is automatically created, without preview. 4. Click the Coordinate dimension for modifying the position. The clicked dimension is highlighted and the anchor point appears in Green. 5. Drag the dimension to the appropriate position. The Green anchor point is associative with the element which has been applied a coordinate dimension. Note that you are not allowed to create coordinate dimensions on 2D generated elements.
131
132 Lining up Dimensions This task will show you how to line up the following dimensions: Length dimensions Distance dimensions Radius dimensions (tangent) Diameter dimensions (tangent) Angle dimensions You will first organize dimensions into a system with a linear offset. The offset will align the dimensions to each others as well as to the smallest dimension. Open the Brackets_views.CATDrawing document from the \online\samples\intdrafting directory. Create distance dimensions. 1. Select the dimensions to be lined up. 2. Right click the selected dimensions and display the contextual menu. You can also select Tools->Line-up items. 3. Click either a dimension or a 2D element as a reference. Or just click anywhere desired on the drawing. The Line Up dialog box displays: 4. Enter the Offset desired value. 5. Click the Only organize into systems option. The dimensions are now aligned:
133 If you click in the empty space, the linear offset between the smallest dimension and the reference is automatically set to 0 value. The space between two dimensions will be the space defined in Tools/Options/Dressup (Line Up) settings. 1. Click an element as dimension position reference. 2. Enter the required Linear offset value in the Line Up dialog box and deactivate the Only organize into systems option. The smallest dimension positions according to the element selected and the 30 mm linear offset pre-defined. If you click OK without entering any offset value in the Line Up dialog box, the dimension line position will be similar to the selected reference.
134
135 Using Constraints A constraint is some kind of a relationship that allows specifying the geometry. Via Autodetection, you may detect geometrical constraints dynamically. But Autodection may simply be used for automaticaly detecting constraints without necessarily creating these constraints. Tasks
136 What Is a Constraint? Before you Begin A constraint is some kid of a relationship that allows specifying the geometry. In other words, if you modify the geometry afterwards via the geometry itself, these relations will be taken into account. Two kinds of constraints can be applied. A geometrical constraint is a relationship that forces a limitation between one or more geometric elements. A dimensional constraint is a constraint which value limits geometric object measurement. Geometrical Constraints support lines and circles distance Dimensional Constraints alignment parallelism perpendicularity length angle radius/diameter/ tangency concentricity horizontality verticality fix middle equidistant symmetrical What Is Autodetection? Via Autodetection, you may detect geometrical constraints dynamically. CARE that when you use autodetecion, you do NOT necessarily create constraints.
137 What Creating Constraints Means? You can create constraints as follows: 1. explicitely, via the existing Create Constraints command 2. via a dimension that you make to be a driving dimension constraint 3. via Autodetection, if you activate the Create Detected Constraints command. In other words, so that a detected constraint be automatically created.
138 Creating Constraints via Autodetection This task shows you how to detect, create and visualize constraints. For example, let's create two constrained parrallel lines. 1. Click the icon from the Tools toolbar. 2. Create a first line. 3. Create a second line. Autodetection is only valid for certain elements on the drawing. More precisely, only the elements which the mouse last went over will be used for applying autodection constraints. No Autodection available go over the line to be used for detecting parrallelism constraint. Constraint is detected and created. For visualizing detected and created constraints, make sure the Show Constraints command on, or the Tools/Options (Drafting/Geometry) is set to the visualize option. is
139 Creating Geometric Constraints This task shows you how to set a relationship that forces a limitation between one or more geometric elements. 1. Select the geometrical elements to be constrained to each others, for example two lines that are parallel. 2. Click the icon from the Gemetry edition toolbar. 3. Modify the Constraint Definition dialog box. For example, activate the Parrallelism switch. 4. Modify the position of one geometrical element. For example one end point on one line.
140 The lines are driven so as to remain parallel to each others whatever the new position and/or length you assign to one of them. SHIFT keyboard switch allows deactivating autodetection. CONTROL keyboard switch allows locking the constraint currently created and thereby ty to create others. Constraints are not necessarily visualized. Check the Show Constraints command from the Tools toolbar or go to Tools/Options menu bar (Drafting/Geometry), if needed. You may also modify the constraint color and/or width.
141 Creating Dimensional Constraints This task shows you how you can create dimensions that will drive associated constrained geometry. Click the icon from the Dimensioning toolbar and create a dimension on the geometry previously selected. In this example, create a length dimenson on a line. 1. Double-click the dimension. 2. Modify the dimension via the displayed Dimension Value dialog box. If the Drive geometry switch is on, the double-clicked dimension becomes a constraint and behaves as a dimensional constraint. The geometry is modified according to the driving dimension. Let's call it driven geometry. In other words, it is assigned the characteristics previously defined via Tools/Option (Drafting/Geometry). In this particular case, driving geometry visuaization is as follows:
142 SHIFT keyboard switch allows deactivating autodetection. CONTROL keyboard switch allows locking the constraint currently created and thereby ty to create others. The constraint visualization defined characteristics can be visualized on the condition you activated the Show Constraints command.
143 Manipulating Annotations The Interactive Drafting workbench lets you manipulate annotations. The tasks described in this section are presented in the following table: Tasks
144
145 Creating a Free Text This task shows you how to create a text element. This text is a free text and may either wrap or not wrap. This text is assigned an unlimited width text frame even though this text may reach the frame boundary. Create a rectangle. 1. Click the Text icon from the Annotations toolbar. 2. Click in free space to define a location for the text. At this step, you may decide that you want the text to be wrapped. For this, click in the free space and then drag a frame corresponding to the text horizontal boundary. The Text Editor dialog box is automatically displayed. 3. Enter the text in the dialog box edition field. The text automatically appears on the drawing as you are entering it in the Text Editor dialog box.
146 In the case you created a wrapped text the text appears as shown oposite: 4.Click again in free space or select a command icon to end the text creation. The resulting text appears as shown opposite: If you click the Select icon to end the text creation, the text remains highlighted so that you can modify it. Note that using the toolbar you may define the anchor point, text size and justification. You can set text properties either before or after you create text. Please refer to Setting Text Properties.
147
148 Creating an Associated Text from Scratch This task shows how to create a text which you want to be associated to an element. It also shows you how this text will remain associated with the element. Open the Brackets_views.CATDrawing document from the \online\samples\intdrafting directory. Create diameter dimensons. 1.Click the Text icon from the Annotations toolbar. 2. Select an element. Here, we will use a dimension. The text frame is displayed as well as the Text Editor dialog box. 3. Enter the text in the Text Editor dialog box. 4. Click in free space or click the Select icon to end the text creation.
149 5. If needed, move the dimension to the desired location. The text remains associated to the dimension. Note that the text is associative to the whole selected element. In other words and in the case of a dimension, if you move the dimension text exclusively, the associated text will not move accordingly. The table below lists the elements that can be assigned text: Elements That Can Be Assigned Text Annotations text datum feature datum target balloon
150 GD&T roughness symbols text Dimensions 2D elements points circles curves arrow Generative Draw Edges
151 Making an Existing Text Associative This task explains how, at any time once the text has been created, you can add a positional link between a text element and another element. Open the Brackets_views.CATDrawing document from the \online\samples\intdrafting directory. Create a text. 1. Click the Select icon. 2. Select any part of the text element (text, frame, or leader). 3. Right-click and select Positional Link->Create from the pop-up menu. 4. Select the element which you want the text to be linked to. You may delete existing associativity using the same dialog but selecting the Delete option from the Link->Delete (Positional Link pop-up menu). You may also display the offset distance between a text element and the element which it is linked to.
152 Creating a Text With a Leader The Interactive Drafting workbench provides a command to create a text with a leader in free space or a text with a leader associated with an element. Note that leader lines are displayed in either of the following ways, based on the standard set for the current drawing. Set the properties first if desired. You can set text properties either before or after you create text. Please refer to Setting text Properties for instructions. 1. Click the Leader icon from the Annotations toolbar (Texts subtoolbar). 2. Click in free space to define a location for the arrow end of the leader. Instead of clicking in the free space, you can select an element you want the arrow end of the leader to be associated with: 2D lines 2D circles 2D points Curves Generative Draw edges As in the case of free text, you can create text that wraps. For this, click and drag the cursor to create a text frame. The Text Editor dialog box displays. 4. Enter the text in the dialog box. 5. To end the text creation, click again in free space or select a command icon.
153 If you click the Select icon, the text remains highlighted so that you can modify it. The leader is associated with the element you selected. If you move either the text or the element, the leader stretches to maintain its association with the element. In the drawing below, the leader is associated with the box at the right edge, and it remains associated as the box is moved to different locations around the text. If you change the element associated with the leader, CATIA keeps the associativity between the element and the leader.
154 Adding a Leader to Existing Text This task shows you how to add a leader to text that was previously created. Open the Brackets_views.CATDrawing document from the \online\samples\intdrafting directory. Create a simple text. Set the properties first if desired. You can set text properties either before or after you create text. Please refer to Setting text Properties for instructions. 1. Right click the text to be added a leader. 2. Select the Add Leader command that appears in the contextual menu. 3. Click the leader arrow end. The leader appears. 4. If needed, position the leader at the desired location. To create as many leaders as required use Tools->Customize items and create the Add Leader command in a seperate toolbar. You will then be able to double-click the Add Leader command and then click for locating the leader(s) to be created.
155 If several elements are selected as you activate the Add Leader command, the selection is cleared and a message asks you for selecting an annotation. If you modify the text associated with the leader, associativity between the text and the leader is kept.
156 Moving a Text This task explains how to move a text element using either the cursor or x, y coordinates. Open the Brackets_views.CATDrawing document from the \online\samples\intdrafting directory. Create a text with a leader. 1. Click the Select icon. 2. Select any part of the text element (text,frame,or leader) and drag it to a new location.
157 If you want to move text using x,y coordinates, perform as follows: 1. Click the Select icon. 2. Select any part of the text element (text, frame, or leader). 3. Right-click and select Move from the pop-up menu. 4. Select either the Position tab or Translation tab. Use the Position tab to move the text relative to the origin of the drawing. Use the Translation tab to offset the text relative ot its current location. 5. Enter the desired x,y coordinates and select Apply.
158
159 Rotating a Text This task explains how to rotate a text element. Open the Brackets_views.CATDrawing document from the \online\samples\intdrafting directory. Create a text with a leader. 1. Click the Select icon. 2. Select any part of the text element (text, frame, or leader). 3. Right-click and select Move from the pop-up menu. 4. Select the rotation tab. 5. Enter the desired angle and select Apply. For instance, enter 30 degrees.
160 This is what you get.
161 Re-Applying Existing Graphical Properties This task shows you how to apply text graphical properties to texts already created. This is true for any type of Interactive Drafting element. In this task, we will take text as an example. Create texts. 1. Select the elements to be painted, for example text selected via multi-selection. 2. Click the Painter icon from the Graphic Properties toolbar. 3. Select the text to be used as a model for selected texts. The texts selected are automatically modified.
162
163 Creating Geometrical Tolerances This task shows you how to create a feature control frame for geometrical tolerance annotations. You can also copy an existing feature control frame and then edit its content to create a new one. See Copying a feature Control Frame Open the Brackets_views.CATDrawing document from the \online\samples\intdrafting directory. 1. Click the Geometrical Tolerance icon from the Dimensioning toolbar (Tolerancing subtoolbar). 2. Select any element, a point in free space, a dimension or a text. 3. Select again to position the feature control frame. Selecting an element or a point in free space defines a position for the end of a leader. If you select any element: If you select a point in free space: If you select a dimension or a text element, no leader is displayed. The feature control frame is positioned just below the element you selected. If you select a dimension: If you select a text element:
164 The Geometric Dimensioning And Tolerancing Parameters dialog box displays. Select to display in the Characteristic box only those symbols generally considered appropriate for the type of element selected. Select to display all characteristic symbols, regardless of the type of element selected. 4. In the Characteristic box, select a geometric characteristic for Line Define any of the following values, as appropriate, for Line 1 and/or Line 2: diameter zone tolerance feature modifier primary datum feature modifier secondary datum feature modifier tertiary datum feature modifier 6. After you entered a value, press Enter or Tab to move to the next field. The feature control frame is updated as you define values for each field.
165 7. Click OK to confirm your operation and close the dialog box.
166 Copying Geometrical Tolerances This task will show you how to copy an existing feature control frame and then edit the content for creating a new one. See Copying a feature Control Frame. 1. Click on the feature control frame you want to copy. 2. Right-click and select the Copy option from the contextual menu. 3. Select the element to which you want the feature control frame to be associated. 4. Right-click and select the Paste option on the contextual menu. 5. Double-click the copied feature control frame. 6. In the filter Symbols box, make sure that the desired option is activated. Select to display in the Characteristic box only those symbols generally considered appropriate for the type of element selected. Select to display all characteristic symbols, regardless of the selected type of element. 7. Modify any of the values. After you enter a value, press Enter or Tab to move to the next field. The feature control frame is updated as you define values for each field. 8. Click OK to confirm your operation and close the dialog box.
167
168 Modifying Geometrical Tolerances This task shows you how to modify a geometrical tolerance. 1. Double-click the feature control you want to modify. The Geometric Dimensioning And Tolerancing Parameters dialog box displays. 2. Modify any of the values.
169 3. Click OK to confirm your operation and close the dialog box. 4. Click in the free space to validate the geometrical dimension modification. In the filter Symbols box, make sure that the desired option is activated: Select to display in the Characteristic box only those symbols generally considered appropriate for the type of element selected. Select to display all characteristic symbols, regardless of the type of element selected.
170
171 Creating a Datum Feature This task will show you how to create a datum feature. Open the Brackets_views.CATDrawing document from the \online\samples\intdrafting directory. 1. Click the Datum feature icon from the Dimensioning toolbar. 2. Select the attachment point of the datum feature. 3. Select the anchor point of the datum feature. The Datum Feature dialog box displays with the datum feature character string. 4. Click OK. CATIA provides a wysiwyg capability. In other words, when editing the character string, the modification is simultaneously taken into account.
172 The datum feature is created. The datum feature is associative to the geometrical tolerance.
173 Modifying a Datum Feature This task shows you how to modify a datum feature. Open the Brackets_views.CATDrawing document from the \online\samples\intdrafting directory. Create a datum feature. 1. Double-click the datum feature you want to modify. The Modify Text dialog box displays. 2. Modify the datum feature value. 3. Click OK to confirm your operation and close the dialog box. 4. Click in the free space to validate the datum feature modification.
174
175 Creating a Datum Target This task will show you how to create a datum target on a right projection view. Open the Brackets_views.CATDrawing document from the \online\samples\intdrafting directory. 1. Click the Datum Target icon. 2. Select the attachment point of the datum target leader. 3. Select the datum target anchor point. 4. The Datum Target dialog box displays: enter the required field. 5. The datum target preview is displayed. 6. Click OK. CATIA provides a wysiwyg capability. In other words, when editing the character string, the modification is simultaneously taken into account. The datum target is created.
176
177 Modifying a Datum Target This task shows you how to modify a datum target. Open the Brackets_views.CATDrawing document from the \online\samples\intdrafting directory. Create a datum target. 1. Double-click the datum target you want to modify. The Modify Text dialog box displays. 2. Modify any of the datum target value. 3. Click OK to confirm your operation and close the dialog box. 4. Click in the free space to validate the datum target modification.
178
179 Creating a Balloon This task will show you how to create a balloon. Open the Brackets_views.CATDrawing document from the \online\samples\intdrafting directory. 1. Click the Balloon icon from the Annotations toolbar (Texts subtoolbar). 2. Select an element. 3. Click to define the balloon anchor point. The Balloon Creation dialog box displays: 4. Enter the desired character string. 5. Click OK to confirm your operation. CATIA provides a wysiwyg capability. In other words, when editing the character string, the modification is simultaneously taken into account.
180
181 Modifying a Balloon This task shows you how to modify a balloon. Open the Brackets_views.CATDrawing document from the \online\samples\intdrafting directory. Create a balloon. 1. Double-click the balloon you want to modify. The Modify Text dialog box displays. 2. Modify the balloon value. 3. Click OK to confirm your operation and close the dialog box. 4. Click in the free space to validate the balloon modification.
182
183 Creating a Roughness Symbol This task will show you how to create a roughness symbol. Open the Brackets_views.CATDrawing document from the \online\samples\intdrafting directory. 1. Click the Roughness symbol icon from the Annotations toolbar. 2. Select the attachment point of the roughness symbol. The Roughness Symbol Editor dialog box displays: 3. Enter the required field. 4. Click OK. Note that you can use the following symbols:
184 The roughness symbol is created. You may modify the roughness symbol position by dragging it to the required location. At any time, you can modify the roughness symbol. For this, double-click the roughness symbol to be modified and enter the modifications in the Roughness Symbol Editor dialog box.
185 Creating a Welding Symbol This task will show you how to create a welding symbol. Open the Brackets_views.CATDrawing document from the \online\samples\intdrafting directory. 1. Click the Welding Symbol icon from the Annotations toolbar (Symbols subtoolbar). 2. Select the attachment point of the welding symbol 3. Select a first element. 4. Select a second element. The Welding creation dialog box displays 3. Enter the required field. 4. Click OK.
186 The welding symbol is created. You may modify the welding symbol position by dragging it to the required location. At any time, you can modify the welding symbol. For this, double-click the welding symbol to be modified and enter the modifications in the displayed dialog box.
187 Creating a Geometry Weld This task will show you how to create a geometry weld. Open the Brackets_views.CATDrawing document from the \online\samples\intdrafting directory. 1. Click the Weld icon from the Annotations toolbar (Symbols subtoolbar). 2. Select a first element. 3. Select a second element. The Welding Editor dialog box displays: 3. For example, modify the thickness from ten to five. 4. Click OK. The geometry welding symbol is created as shown:
188
189 Modifying the Text Properties This task explains how to set font, size, justification, and other display properties for a text element. Create the text first, if needed. You can set text properties either before or after text creation. 1. Click the View menu from the menu bar and make sure the Text Properties command is activated. The Text Properties toolbar is therefore displayed: 2. Select the text element. 3. Select the desired options from the Text Properties toolbar. For Instance, the Italic and Bold options. The properties you set are applied to any selected text. These properties will be applied to any new text you will create from now on. The following table describes the options available from the Text Properties toolbar: Icon Name Description Font Name Font Size Bold Italic Underline Strikethru Overline Superscript Subscript Left Justify Changes the style of text. Changes the size of text. Changes the weight of text. toggles between normal and heavy (bold). Changes the angle of text. Toggles between normal and slanted (italic) Adds a line under the text Adds a line through the center of the text. Adds a line above the text. Raises the text above the normal text line. Lowers the text below the normal text line. Aligns multiple lines of text in the center of the text frame. Center Justify Aligns multiple lines of text along the left edge of the text frame Right Justify Aligns multiple lines of text along the right edge of the text frame Anchor point Changes the position of the point that connects the text to the drawing or to an element. There are nine choices: Along the top of the text: left,center, or right
190 Along the vertical center of text: left, center or right Along the bottom of the text: left, center, or right Frame Draws a single-line frame around the text.
191 Finding And Replacing Text This task explains first how to locate a string of characters and then how to replace it in the following elements: balloons datum features datum targets dimensions text elements Open the Brackets_views.CATDrawing document from the \online\samples\intdrafting directory. 1. In the menu bar, select the Edit->Find items. The Find dialog box is displayed: 2. Select any of the optional setting, as appropriate: 3. Enter the text you want to find and select. If the text exists in the drawing, the first instance found in search is highlighted. 4.Select to search for other instances. Each time, an instance of the text string is found, you can replace it with a new string. To do this, type in the replacement text and select. 5. A pop-up window is displayed when the search is complete. 6. Click OK to end your search. 7. Select to quit the Find dialog box.
192 Now, to replace a string of characters proceed as follows: 1. In the menu bar, select Edit->Replace. The Replace dialog box is displayed: 2. Select any of the optional settings as appropriate. 3. Key in the "find"string and select. If the string exists in the drawing, the first instance found in the search is highlighted. 4. Key in the replacement text. 5. select one of the replace options: To replace only the highlighted instance of the text, select. To replace all instances of the text, select. 6. If needed, select to search for other instances. 7. The search Complete pop-up window displays. 8. Click OK and quit the Replace dialog box.
193
194 Manipulating the Dress-Up of a View The Interactive Drafting workbench provides a simple method to create the following view dress-up elements on existing on 2D elements. Tasks
195 Creating Center Lines This task will show you how to apply center lines to a circle. Open the Brackets_views.CATDrawing document from the \online\samples\intdrafting directory. 1. Click the Center line icon from the Dressup toolbar (Axis and Threads subtoolbar). 2. Select a circle. The circle is automatically applied center lines. You may create a center line according to a linear reference. 1. Click the center line with a reference icon. 2. Select the circle to be applied a center line. 3. Select the reference line. The center line created is associative with the reference line. You may create a center line according to a circular reference (a point or a circle). 1. Click. 2. Select the circle to be applied a center line. 3. Select the reference circle.
196 You can multi-select circles before you enter the command and thereby apply center lines to the selected circles.
197 Modifying Center Lines This task will show you how to modify a center line. Open the Brackets_views.CATDrawing document from the \online\samples\intdrafting directory. Create center lines. 1. Click the center line. Green end points appear. 2. Select any end point and drag to the new position. The center line extremity length is modified globally. Now to modify the center line extremity length locally:
198 1. Click the center line. Green end points appear. 2. Press the Ctrl Key while selecting any end point and drag to the new position. The center line extremity length is modified locally. Multi-selection can be performed to modify center lines You can also modify the center line using the contextual menu via the Properties dialog box. The same method applies to axis lines.
199 Creating Threads The Interactive workbench provides two commands to create threads. You can either create a thread with a reference or without a reference. This task will show you how to apply a thread to a hole without a reference first and with a reference. Open the Brackets_views.CATDrawing document from the \online\samples\intdrafting directory. 1. Click the Drawing window, and click from the Axis and Threads toolbar. Activating this command displays two options in the Options toolbar. 2. Select either the "Tap" or the "Thread" type. The "Tap"type is activated by default 3. Select the "Thread" type. 4. Select a circle to be applied a thread. CATIA allows multiselection of 2D elements. The thread that appears on the circle is assigned a standard radius and representation (compliant with the selected standard). The thread is automatically "thread" type.
200 You may create threads with a circle, a point or a line as reference. For example, if you use a line as reference: 1. Click the Drawing window. 2. Click the Thread with reference icon from the Options suntoolbar. 3. Activating this command displays two options in the Options toolbar. 4. Select the "Reference Thread" type from the options toolbar as shown opposite 5. Select a circle. 6. Select a reference line: The thread that appears on the circle is assigned a standard radius and representation (compliant with the selected standard). The thread is automatically "thread" type. You can multi-select circles before you enter the command and thereby apply center lines to the selected circles.
201
202 Creating Axis Lines This task will show you how to create an axis line. Open the Brackets_views.CATDrawing document from the \online\samples\intdrafting directory. 1. Click the Drawing window, and click the Axis Line icon from the Dressup toolbar (Axis and Threads toolbar). 2. Select the two lines. 3. The axis line is created If needed, you may select two non-parallel lines that are not colinear Both for center lines and axis lines, a default overrun is created. If you need to modify an axis line, please refer to Modifying a center line as the method is similar. Note that multiselection can be performed for modifying axis lines
203 Creating the Area-Fill This task will show you how to apply to an existing hatching pattern a new area-fill. Open the Brackets_views.CATDrawing document from the \online\samples\intdrafting directory. Hatching patterns can only be applied to area-fills resulting from sketched elements. 1. Click the Drawing window, and click the pattern chooser from the Graphic Properties toolbar. The Pattern dialog box displays: 2. Select the representation you need. 3. Click within the area to be filled.
204 If you perform modifications to the filled area, the pattern will be modified accordingly. Make sure the view is active.
205 Creating Arrows This task will show you how to create an arrow. For example to precise the kind of hole to be applied. Open the Brackets_views.CATDrawing document from the \online\samples\intdrafting directory. 1. Click the Drawing window, and select the Arrow command from the menu bar. 2. Click a point. 3. Click an object. The arrow and the selected object are associative.
206 You may also either indicate two points or select two objects. If you need to edit the arrow, use the green end points or right-click the arrow and select the properties options. You can modify its graphical visualization and location.
207 Displaying and Editing Properties This section discusses the way for quickly accessing and editing information concerning two-dimensional geometry, dress-up elements, annotations and dimensions. The data you access varies depending on the element you select, but you always access it using the Edit Properties command. Tasks
208 Editing 2D Geometry Feature Properties Gathered in a same dialog box, the two-dimensional geometry properties consists of different indications you will have sometimes to refer to. This task explains how to access and if needed, edit the information. Open a CATDrawing document. 1. Select a 2D element on the CATDrawing you opened. 2. Select the Edit Properties command or select the Properties command from the contextual menu. The Properties dialog box displays with Feature Properties and Graphic tabs. The Feature Properties tab edits the Name field. 3. Enter a new name for the element in the field. The information displayed informs about the creation of the elements. 4. Click OK to validate.
209
210 Editing Dress-Up Element Graphic Properties Gathered in a same dialog box, the two-dimensional geometry properties consists of different indications you will have sometimes to refer to. This task explains how to access and if needed, edit the information. Open a CATDrawing document. 1. Select a 2D element on the CATDrawing you opened. 2. Select the Edit-> Properties command or select the Properties command from the contextual menu. The Properties dialog box displays, containing the Feature Properties and Graphic tabs that deal with Dress-up elements.
211 4. Click the Graphic tab and modify the line and curves color, for example. CATIA takes any modification into account. For more information on graphic properties, please refer to CATIA-Infrastructure User's Guide Version Click OK.
212 Editing Annotation Font Properties Gathered in a same dialog box, the annotations properties consists of different indications you will have sometimes to refer to. This task shows how to access and if needed, edit the information. Open a CATDrawing document. 1. Select an annotation on the CATDrawing you opened. 2. Select the Edit ->Properties command or select the Properties command from the contextual menu. The Properties dialog box displays, containing the following Font tab.
213
214 Editing Annotation Frame/Position Properties Gathered in a same dialog box, the annotations properties consists of different indications you will have sometimes to refer to. This task shows how to access and if needed, edit the information. Open a CATDrawing document. 1. Select an annotation on the CATDrawing you opened. 2. Select the Edit ->Properties command or select the Properties command from the contextual menu. The Properties dialog box displays, containing the following Frame and Position tab.
215
216 Editing Annotations Graphic Properties Gathered in a same dialog box, the annotations properties consists of different indications you will have sometimes to refer to. This task shows how to access and if needed, edit the information. Open a CATDrawing document. 1. Select an annotation on the CATDrawing you opened. 2. Select the Edit ->Properties command or select the Properties command from the contextual menu. The Properties dialog box displays, containing the following Graphic tab.
217 CATIA takes any modification into account. For more information on graphic properties, please refer to CATIA-Infrastructure User's Guide Version 5.
218 Editing Dimension's Text Properties Gathered in a same dialog box, the dimensions properties consists of different indications you will have sometimes to refer to. this task explains how to access and if needed, edit the information. Open a CATDrawing document. 1. Select a dimension (whatever the type) on the CATDrawing you opened. 2. Select the Edit Properties command or select the Properties command from the contextual menu. The Properties dialog box displays, containing the following tabs dealing with dimensions:
219
220 Editing Dimension Value Properties Gathered in a same dialog box, the dimensions properties consists of different indications you will have sometimes to refer to. this task explains how to access and if needed, edit the information. Open a CATDrawing document. 1. Select a Dimension (whatever the type) on the CATDrawing you opened. 2. Select the Edit Properties command or select the Properties command on the contextual menu. The Properties dialog box displays, containing the following Value tab.
221
222 Editing Dimension Tolerance Properties Gathered in a same dialog box, the dimensions properties consists of different indications you will have sometimes to refer to. This task explains how to access and if needed, edit the information. Open a CATDrawing document.. 1. Select a Dimension (whatever the type) on the CATDrawing you opened. 2. Select the Edit Properties command or select the Properties command on the contextual menu. The Properties dialog box displays, containing the following Tolerance tabs.
223
224 Editing Dimension Extension Line Properties Gathered in a same dialog box, the dimensions properties consists of different indications you will have sometimes to refer to. This task explains how to access and if needed, edit the information. Open a CATDrawing document.. 1. Select a Dimension (whatever the type) on the CATDrawing you opened. 2. Select the Edit Properties command or select the Properties command on the contextual menu. The Properties dialog box displays, containing the following Extension Line tab.
225
226 Editing Dimension Line Properties Gathered in a same dialog box, the dimensions properties consists of different indications you will have sometimes to refer to. This task explains how to access and if needed, edit the information. Open a CATDrawing document.. 1. Select a Dimension (whatever the type) on the CATDrawing you opened. 2. Select the Edit Properties command or select the Properties command on the contextual menu. The Properties dialog box displays, containing the following DImension Line tab.
227
228 Printing a CATDrawing Document The Interactive Drafting workbench provides a simple method to print one or more sheets inserted in your document. Tasks
229 Printing a Document Quickly This task will show you how to quickly print a given sheet. Open a CATDrawing document. Create a circle, a line and a profile on this document. 1. Select File -> Print Preview from the menu bar. The Print Preview dialog box is displayed. 2. Press OK.
230 3. Select File -> Print from the menu bar. The Print dialog box displays. 4. Click the required options from the box. 5. Press OK. You may print either all or given sheets (the sheet selected or a given number of existing sheets). You may also print the views currently displayed on your screen (Current display option).
231 You may also choose the number of copies you need to print. For details on Options, see CATIA - Infrastructure User's guide Version 5. By default the sheet to be printed will Fit to Printer Format. The printer default format will be used whatever the sheet format. Let's say the printer format is Portrait. If you check the options as described below, the sheet will be previewed and printed as follows. Best Orientation/Fit to printer format/clip to the sheet format
232 Fit to printer format/clip to the sheet format
233 Clip to the sheet format
234 Best orientation/clip to the sheet format
235 Let's start from a new drawing:
236 Best Orientation/Fit to printer format/clip to the sheet format Best Orientation/Fit to printer format
237
238 Printing a Document After Modifying Current Display Settings This task shows how to modify the settings of a document you will then print. Create views on different sheets with the Landscape orientation. 1. Select File -> Print from the menu bar. The Print dialog box is displayed. 2. Click the required Printer options from the dialog box. 3. Activate the Current display option. 4. Click the Options option from the box. 5. If needed, select the Color tab.
239 6. If needed, select the Banner tab. 7. If needed, select the Various tab. 8. Click OK. 9. Click the Settings option from the Print dialog box. The Layout dialog box is displayed. 10. Activate the Fit in Page option. 11. For example, click the center switch for positioning
240 the sheet at the center of the previewed layout. 12. Press OK. 13. Select the Print Preview option from the Print dialog box. The Print Preview dialog box is displayed. 14. Press OK. The Print dialog box is displayed. 15. Press OK to launch the printing operation.
241 Advanced Tasks See CATIA - Infrastructure User's guide Version 5 for details on DXF/DWG files.
242 Workbench Description This section contains the list of the icons and menus which are specific to Interactive Drafting workbench. You may read these pages whenever you need to know greater details on these commands documented in other parts of the guide. Theme Interactive Drafting Menu Bar Interactive Drafting Toolbar Purpose Describe access to view and dimension creation, annotation and geometry creation as well as sheet management Describe how to manipulate a CATDrawing and how to insert or edit views, dimensions, annotations sheets and sketcher or 2D elements
243 Interactive Drafting Menu Bar In this chapter we will describe the various menus, submenus and items specific to the Interactive Drafting workbench. File Edit Insert Tools Menu Purpose Save the document to the required format, customize the sheet and print it after modifying the settings if needed. Manipulate selected objects Insert various types of elements Set user preferences
244 File For all File menu items, see the CATIA Infrastructure User's Guide I
245 Edit Also refer to the CATIA Infrastructure User's Guide. For... See... Background Creating a Frame Title Block
246 Insert For... Annotations... Dimensions... Dressup... Sketcher... Transformations... Constraints... Views... New Sheet... See... Annotations Creation Creating Dimensions Manipulating the Dress-up of a view Geometry Creation Creating Transformations Setting Constraints Creating Views
247 Tools Also refer to the CATIA Infrastructure User's Guide. For... See... Line-Up Lining up Dimensions Layers And Filters
248 Interactive Drafting Toolbars This section describes the various icons of the Interactive Drafting workbench. The toolbars are located on each side of the workbench in the default set-up. Toolbar Geometry Creation Transformations Annotations Dressup Dimensions Constraints Properties Dimensions Properties Text Properties Graphic Properties Tools Use Defaults Purpose Create geometry Transfom existing 2D elements Add annotations to existing views by creating them Add Dressup elements on the drawing Create all types of dimensions needed for your drawing Add constraints to elements on the drawing Modify the dimensions properties Modify the text properties Modify the graphic properties of all kind of features Activate display and positionning tools Reset the default parameters
249 Geometry Creation See Points See Points Using Coordinates See Equidistant Points See Lines See Circles See Three Point Circle See Circles Using Coordinates See Ellipses See Arcs See Three Point Arc See Profiles See Curves See Rectangles See Oriented rectangles See Parallelograms See Hexagons See Oblong Profiles See Oblong Arcs See Keyhole Profiles
250 Transformations See Modifying a Corner See Modifying a Chamfer See Trimming Elements See Breaking Elements See Creating Symmetrical Elements See Translating Elements See Rotating Elements See Scaling Elements
251 Annotations See Creating Text See Creating & Editing Text with Leader See Manipulating Geometrical Tolerances See Creating a Datum Feature See Creating a Datum Target See Creating a Balloon See Creating a Roughness Symbol See Adding a Leader
252 Dressup See Creating a Center Line and Modifying a Center line See Creating a Center Line and Modifying a Center line See Creating a Thread See Creating a Thread See Creating an Axis Line See Creating the Area-Fill See Creating an Arrow
253 Dimensions See Creating Dimensions See Creating Coordinate Dimensions
254 See Setting Constraints Constraints
255 See Setting Text Properties Text Properties
256 Graphic Properties See Displaying and Editing Dress-Up Element Properties
257 Tools See Helpful Tools See Helpful Tools See Setting Constraints See Setting Constraints See Helpful Tools
258 Resets to default parameters Use Defaults
259 See Creating Views Views
260 Customizing This section mentions the different types of setting customization you can perform. The tasks you can perform are: Tasks Setting a grid Customizing Constraints Customizing Geometry Creation Customizing General Settings Customizing Autodetection Customizing Company Standard Management
261 absolute position angle dimension A sheet coordinates. Glossary Dimension applied to one or two linear elements or to circular elements. C chained dimension Dimension presentation mode made of a system chamfer dimension Dimension applied to a chamfer D A datum feature An element defining a contacting surface on a part. An element defining a contacting surface on a part and datum target represented by spherical or pointed locating pins. detail sheet A sheet that is used as an intermediate catalog for positioning 2D geometry elements that will be instantiated afterwards. diameter dimension dimension representing either a radius or a diameter. distance dimension dimension representing the dimension between two elements be they linear or circular type. ditto An instantiation of a 2D element that is stored on a detail sheet. document A common unit of data (typically a file) used in user tasks and exchanged between users. When saved on disk, a document is given a unique filename by which it can be retrieved. dress-up A graphical attribute of a 2D element. O object In the Drafting workbench, there are two kinds of object: activated and selected. The view frame of an activated object is displayed in red. P part A 3D entity obtained by combining different features in the Part Design workbench.
262 radius dimension sheet standard template title block view frame R Dimension applied to a circle, semi-circle or arc of a circle. S A set of views. Several sheets may be created in the Drafting workbench. The international conventions that are supported in the Drafting workbench: ANSI, ISO and JIS. T In the Drafting workbench, an object that is included in the document (for example, the title block). A frame which contains the title block. V A square or rectangular frame that contains the geometry and dimensions of the view.
263 Index A B C area-fill, arrow, axis line, balloon, Break command center line, commands Break Circle Circle with center point coordinates Point Point specifying coordinates Coordinate dimension, creating area-fill arrow axis line balloon center line coordinate dimensions datum feature dimension distance dimension points
264 sheet thread D datum feature datum target dimensions distance dimension, dressup DXF format DXF geometry, G geometrical tolerance, M P menu bar modifying center line distance dimension text Point command points creating S sheet creating
265 T W text thread toolbar workbench
Sketcher. Preface What's New? Getting Started Basic Tasks Customizing Workbench Description Glossary Index
 Sketcher Preface What's New? Getting Started Basic Tasks Customizing Workbench Description Glossary Index Dassault Systèmes 1994-99. All rights reserved. Preface CATIA Version 5 Sketcher application makes
Introduction to CATIA V5
 Introduction to CATIA V5 Release 16 (A Hands-On Tutorial Approach) Kirstie Plantenberg University of Detroit Mercy SDC PUBLICATIONS Schroff Development Corporation www.schroff.com www.schroff-europe.com
Understand the Sketcher workbench of CATIA V5.
 Chapter 1 Drawing Sketches in Learning Objectives the Sketcher Workbench-I After completing this chapter you will be able to: Understand the Sketcher workbench of CATIA V5. Start a new file in the Part
Generative Drafting. Page 1 1997 2001 DASSAULT SYSTEMES. IBM Product Lifecycle Management Solutions / Dassault Systemes
 Generative Drafting Page 1 Tutorial Objectives Description This Tutorial is an introduction to Generative Drafting. Message To show how CATIA V5 allows the user to automatically generate associative drafting
Sheet Metal Design. Preface What's New? Getting Started Basic Tasks Workbench Description Customizing Glossary Index
 Sheet Metal Design Preface What's New? Getting Started Basic Tasks Workbench Description Customizing Glossary Index Dassault Systèmes 1994-99. All rights reserved. Preface The V5 CATIA - Sheet Metal Design
Chapter 1. Creating Sketches in. the Sketch Mode-I. Evaluation chapter. Logon to www.cadcim.com for more details. Learning Objectives
 Chapter 1 Creating Sketches in Learning Objectives the Sketch Mode-I After completing this chapter you will be able to: Use various tools to create a geometry. Dimension a sketch. Apply constraints to
Part Design. Page 1 1997 2001 DASSAULT SYSTEMES. IBM Product Lifecycle Management Solutions / Dassault Systemes
 Part Design Page 1 Tutorial Objectives Description This tutorial is an introduction to Part Design. Message This tutorial illustrates how CATIA can Design precise 3D mechanical parts with an intuitive
CATIA Drafting TABLE OF CONTENTS
 TABLE OF CONTENTS Introduction...1 Drafting...2 Drawing Screen...3 Pull-down Menus...4 File...4 Edit...5 View...6 Insert...7 Tools...8 Drafting Workbench...9 Views and Sheets...9 Dimensions and Annotations...10
Part Design. Preface What's New? Getting Started Basic Tasks Advanced Tasks Workbench Description Customizing Glossary Index
 Part Design Preface What's New? Getting Started Basic Tasks Advanced Tasks Workbench Description Customizing Glossary Index Dassault Systèmes 1994-99. All rights reserved. Preface The CATIA Version 5 Part
SolidWorks Implementation Guides. Sketching Concepts
 SolidWorks Implementation Guides Sketching Concepts Sketching in SolidWorks is the basis for creating features. Features are the basis for creating parts, which can be put together into assemblies. Sketch
Wireframe and Surface
 Wireframe and Surface Preface What's New Getting Started Basic Tasks Workbench Description Glossary Index Dassault Systèmes 1994-99. All rights reserved. Preface CATIA Version 5 Wireframe and Surface allows
Structure Design. Preface What's New? Getting Started Basic Tasks Advanced Tasks Workbench Description Customizing Glossary Index
 Structure Design Preface What's New? Getting Started Basic Tasks Advanced Tasks Workbench Description Customizing Glossary Index Dassault Systèmes 1994-2000. All rights reserved. Preface CATIA Version
Getting Started with CATIA Version 5
 WB Getting Started with CATIA Version 5 Page 1 CATIA User Interface Let s review the following key features: Multi-document support Standard and specific menus & toolbars (File, Edit, Insert, ) Standard
CATIA Wireframe & Surfaces TABLE OF CONTENTS
 TABLE OF CONTENTS Introduction... 1 Wireframe & Surfaces... 2 Pull Down Menus... 3 Edit... 3 Insert... 4 Tools... 6 Generative Shape Design Workbench... 7 Bottom Toolbar... 9 Tools... 9 Analysis... 10
Basic AutoSketch Manual
 Basic AutoSketch Manual Instruction for students Skf-Manual.doc of 3 Contents BASIC AUTOSKETCH MANUAL... INSTRUCTION FOR STUDENTS... BASIC AUTOSKETCH INSTRUCTION... 3 SCREEN LAYOUT... 3 MENU BAR... 3 FILE
Speaker Drafting. Page 1 1997 2001 DASSAULT SYSTEMES
 Speaker Drafting Page 1 Tutorial Objectives Description This Tutorial is an introduction to Assembly Drafting. Message To show how CATIA V5 allows the user to automatically generate associative drafting
Generative Shape Design
 Generative Shape Design Preface What's New Getting Started Basic Tasks Advanced Tasks Workbench Description Glossary Index Dassault Systèmes 1994-99. All rights reserved. Preface CATIA Version 5 Generative
Introduction to Autodesk Inventor for F1 in Schools
 F1 in Schools race car Introduction to Autodesk Inventor for F1 in Schools In this course you will be introduced to Autodesk Inventor, which is the centerpiece of Autodesk s Digital Prototyping strategy
Introduction to Autodesk Inventor for F1 in Schools
 Introduction to Autodesk Inventor for F1 in Schools F1 in Schools Race Car In this course you will be introduced to Autodesk Inventor, which is the centerpiece of Autodesk s digital prototyping strategy
SpaceClaim Introduction Training Session. A SpaceClaim Support Document
 SpaceClaim Introduction Training Session A SpaceClaim Support Document In this class we will walk through the basic tools used to create and modify models in SpaceClaim. Introduction We will focus on:
TABLE OF CONTENTS. INTRODUCTION... 5 Advance Concrete... 5 Where to find information?... 6 INSTALLATION... 7 STARTING ADVANCE CONCRETE...
 Starting Guide TABLE OF CONTENTS INTRODUCTION... 5 Advance Concrete... 5 Where to find information?... 6 INSTALLATION... 7 STARTING ADVANCE CONCRETE... 7 ADVANCE CONCRETE USER INTERFACE... 7 Other important
Pro/ENGINEER Wildfire 4.0 Basic Design
 Introduction Datum features are non-solid features used during the construction of other features. The most common datum features include planes, axes, coordinate systems, and curves. Datum features do
SDC. Schroff Development Corporation WWW.SDCACAD.COM PUBLICATIONS. MultiMedia CD by Jack Zecher
 MultiMedia CD by Jack Zecher An audioi/visual presentation of the tutorial exercises SDC PUBLICATIONS Schroff Development Corporation WWW.SDCACAD.COM AutoCAD 2002 Tutorial 2-1 Lesson 2 Geometric Construction
CATIA Basic Concepts TABLE OF CONTENTS
 TABLE OF CONTENTS Introduction...1 Manual Format...2 Log on/off procedures for Windows...3 To log on...3 To logoff...7 Assembly Design Screen...8 Part Design Screen...9 Pull-down Menus...10 Start...10
Weld Design. CATIA V5 Training Foils. Weld Design. Copyright DASSAULT SYSTEMES 1. Instructor Notes:
 CATIA V5 Training Foils Weld Design Version 5 Release 19 January 2009 EDU_CAT_EN_WD1_FI_V5R19 1 About this course Objectives of the course Upon completion of this course you will be able to: - Weld parts,
CATIA Functional Tolerancing & Annotation TABLE OF CONTENTS
 TABLE OF CONTENTS Introduction...1 Functional Tolerancing and Annotation...2 Pull-down Menus...3 Insert...3 Functional Tolerancing and Annotation Workbench...4 Bottom Toolbar Changes...5 3D Grid Toolbar...5
CATIA Electrical Harness Design TABLE OF CONTENTS
 TABLE OF CONTENTS Introduction...1 Electrical Harness Design...2 Electrical Harness Assembly Workbench...4 Bottom Toolbar...5 Measure...5 Electrical Harness Design...7 Defining Geometric Bundles...7 Installing
Creating 2D Isometric Drawings
 1-(800) 877-2745 www.ashlar-vellum.com Creating 2D Isometric Drawings Using Graphite TM Copyright 2008 Ashlar Incorporated. All rights reserved. C62DISO0806. Ashlar-Vellum Graphite No matter how many Top,
Cabri Geometry Application User Guide
 Cabri Geometry Application User Guide Preview of Geometry... 2 Learning the Basics... 3 Managing File Operations... 12 Setting Application Preferences... 14 Selecting and Moving Objects... 17 Deleting
CATIA for Design and Engineering. Version 5 Releases 14 & 15. David S. Kelley. Central Michigan University SDC
 CATIA for Design and Engineering ersion 5 Releases 4 & 5 David S. Kelley Central Michigan University SDC PUBLICATIONS Schroff Development Corporation www.schroff.com www.schroff-europe.com TUTORIAL Extruded
Datum > Curve KIM,ME,NIU
 Datum > Curve Intersect First create at least one quilt on the surface of the model. Feature > Surface (> New) > Copy (do not use offset that creates a surface off the solid surface even with zero offset)
2013 Getting Started Guide
 2013 Getting Started Guide The contents of this guide and accompanying exercises were originally created by Nemetschek Vectorworks, Inc. Vectorworks Fundamentals Getting Started Guide Created using: Vectorworks
Introduction to Measurement Tools
 Introduction to Measurement Tools Revu's built-in measurement tools make it easy to take length, area, perimeter, diameter, volume and radius measurements, count from PDFs and perform area cutouts. Compatibility
Tutorial - First Level: 2D Fundamentals
 AutoCAD 2013 Prepares you for the Autodesk Certified Associate Exam Tutorial - First Level: 2D Fundamentals Randy H. Shih Multimedia DVD SDC PUBLICATIONS Schroff Development Corporation Better Textbooks.
Real Time Rendering. Preface What's New Getting Started Basic Tasks Advanced Tasks Workbench Description Index
 Real Time Rendering Preface What's New Getting Started Basic Tasks Advanced Tasks Workbench Description Index Dassault Systèmes 1994-99. All rights reserved. Preface CATIA Version 5 Real Time Rendering
PowerPoint 2013: Basic Skills
 PowerPoint 2013: Basic Skills Information Technology September 1, 2014 1 P a g e Getting Started There are a variety of ways to start using PowerPoint software. You can click on a shortcut on your desktop
First Level: 2D Fundamentals. by Randy H. Shih Oregon Institute of Technology
 AutoCAD 2008 Tutorial First Level: 2D Fundamentals by Randy H. Shih Oregon Institute of Technology MultiMedia CD by Jack Zecher Indiana University Purdue University Indianapolis SDC PUBLICATIONS Schroff
Mastercam X6 Basic 3D Design
 Basic 3D Design mastercam x getting started tutorials Mastercam X6 Basic 3D Design December 2011 Be sure you have the latest information! Information might have been changed or added since this document
Chapter 9. Editing Features. Learning Objectives
 Chapter 9 Editing Features Learning Objectives After completing this chapter, you will be able to: Edit features. Edit sketches of the sketch based features. Edit the sketch plane of the sketch based features.
Microsoft Word 2010. Quick Reference Guide. Union Institute & University
 Microsoft Word 2010 Quick Reference Guide Union Institute & University Contents Using Word Help (F1)... 4 Window Contents:... 4 File tab... 4 Quick Access Toolbar... 5 Backstage View... 5 The Ribbon...
Excel -- Creating Charts
 Excel -- Creating Charts The saying goes, A picture is worth a thousand words, and so true. Professional looking charts give visual enhancement to your statistics, fiscal reports or presentation. Excel
Getting Started With DraftSight A Guide For AEC Users
 Getting Started With DraftSight A Guide For AEC Users DraftSight.com Facebook.com/DraftSight Welcome to DraftSight a valuable tool for any AEC professional! DraftSight is more than a free, professional-grade
Chapter 23: Drafting in Worksheet View
 Chapter 23: Drafting in Worksheet View Worksheet View is a powerful, 2D production drafting module. Here you can find all of the drawing and editing tools needed to create fast, accurate, detailed working
Creating Drawings in Pro/ENGINEER
 6 Creating Drawings in Pro/ENGINEER This chapter shows you how to bring the cell phone models and the assembly you ve created into the Pro/ENGINEER Drawing mode to create a drawing. A mechanical drawing
Sample Table. Columns. Column 1 Column 2 Column 3 Row 1 Cell 1 Cell 2 Cell 3 Row 2 Cell 4 Cell 5 Cell 6 Row 3 Cell 7 Cell 8 Cell 9.
 Working with Tables in Microsoft Word The purpose of this document is to lead you through the steps of creating, editing and deleting tables and parts of tables. This document follows a tutorial format
SolidWorks Tutorial 3 MAGNETIC BLOCK
 SolidWorks Tutorial 3 MAGNETIC BLOCK Magnetic Block In this exercise you will make a magnetic block. To do so, you will create a few parts, which you will assemble. You will learn the following new applications
Introduction to the TI-Nspire CX
 Introduction to the TI-Nspire CX Activity Overview: In this activity, you will become familiar with the layout of the TI-Nspire CX. Step 1: Locate the Touchpad. The Touchpad is used to navigate the cursor
AutoDWG DWGSee DWG Viewer. DWGSee User Guide
 DWGSee User Guide DWGSee is comprehensive software for viewing, printing, marking and sharing DWG files. It is fast, powerful and easy-to-use for every expert and beginners. Starting DWGSee After you install
Excel 2007 Basic knowledge
 Ribbon menu The Ribbon menu system with tabs for various Excel commands. This Ribbon system replaces the traditional menus used with Excel 2003. Above the Ribbon in the upper-left corner is the Microsoft
Linkage 3.2. User s Guide
 Linkage 3.2 User s Guide David Rector Wednesday, April 06, 2016 Table of Contents Table of Contents... 2 Installation... 3 Running the Linkage Program... 3 Simple Mechanism Tutorial... 5 Mouse Operations...
Basic 2D Design Be sure you have the latest information!
 Basic 2D Design mastercam x getting started tutorials Basic 2D Design December 2011 Be sure you have the latest information! Information might have been changed or added since this document was published.
Learning Autodesk. Modeling, Analysis and Animation SDC. Randy H. Shih. Better Textbooks. Lower Prices. PUBLICATIONS www.sdcpublications.
 Learning Autodesk Inventor 2012 Modeling, Analysis and Animation Randy H. Shih SDC Better Textbooks. Lower Prices. PUBLICATIONS www.sdcpublications.com Schroff Development Corporation Visit the following
Drawing Basic Shapes:
 : Title: : Version: 1.0 First edition: November 2004 Contents Overview...ii Copyright and trademark information...ii Feedback... ii Acknowledgments...ii Modifications and updates... ii... iii Drawing
Merging Labels, Letters, and Envelopes Word 2013
 Merging Labels, Letters, and Envelopes Word 2013 Merging... 1 Types of Merges... 1 The Merging Process... 2 Labels - A Page of the Same... 2 Labels - A Blank Page... 3 Creating Custom Labels... 3 Merged
SolidWorks Tutorial 4 CANDLESTICK
 SolidWorks Tutorial 4 CANDLESTICK Candlestick In this tutorial you will make a simple container and a candlestick out of sheetmetal. You will learn about working with sheet metal in SolidWorks. We will
Creating a Poster in PowerPoint 2010. A. Set Up Your Poster
 View the Best Practices in Poster Design located at http://www.emich.edu/training/poster before you begin creating a poster. Then in PowerPoint: (A) set up the poster size and orientation, (B) add and
CATIA Tubing and Piping TABLE OF CONTENTS
 TABLE OF CONTENTS Introduction...1 Manual Format...2 Tubing and Piping design...3 Log on/off procedures for Windows...4 To log on...4 To logoff...8 Pull-down Menus...9 Edit...9 Insert...12 Tools...13 Analyze...16
Create a Poster Using Publisher
 Contents 1. Introduction 1. Starting Publisher 2. Create a Poster Template 5. Aligning your images and text 7. Apply a background 12. Add text to your poster 14. Add pictures to your poster 17. Add graphs
Product Structure Preface What's New? User Tasks
 Product Structure Preface Conventions What's New? User Tasks Entering the Product Structure Workbench Selecting Products only Selecting Modes Inserting a New Component Inserting a New Part Inserting a
House Design Tutorial
 Chapter 2: House Design Tutorial This House Design Tutorial shows you how to get started on a design project. The tutorials that follow continue with the same plan. When we are finished, we will have created
Guide To Creating Academic Posters Using Microsoft PowerPoint 2010
 Guide To Creating Academic Posters Using Microsoft PowerPoint 2010 INFORMATION SERVICES Version 3.0 July 2011 Table of Contents Section 1 - Introduction... 1 Section 2 - Initial Preparation... 2 2.1 Overall
Adobe Illustrator CS5 Part 1: Introduction to Illustrator
 CALIFORNIA STATE UNIVERSITY, LOS ANGELES INFORMATION TECHNOLOGY SERVICES Adobe Illustrator CS5 Part 1: Introduction to Illustrator Summer 2011, Version 1.0 Table of Contents Introduction...2 Downloading
Microsoft Word 2010 Prepared by Computing Services at the Eastman School of Music July 2010
 Microsoft Word 2010 Prepared by Computing Services at the Eastman School of Music July 2010 Contents Microsoft Office Interface... 4 File Ribbon Tab... 5 Microsoft Office Quick Access Toolbar... 6 Appearance
Tutorial Creating Vector Graphics
 Tutorial Creating Vector Graphics This tutorial will guide you through the creation of your own vector graphic and show you how best to meet the specific criteria for our print process. We recommend designing
Scientific Graphing in Excel 2010
 Scientific Graphing in Excel 2010 When you start Excel, you will see the screen below. Various parts of the display are labelled in red, with arrows, to define the terms used in the remainder of this overview.
Smart Board Notebook Software A guide for new Smart Board users
 Smart Board Notebook Software A guide for new Smart Board users This guide will address the following tasks in Notebook: 1. Adding shapes, text, and pictures. 2. Searching the Gallery. 3. Arranging objects
Creating an invitation
 Creating an invitation Michaela Maginot About the author Michaela Maginot lives in Unterhaching, Germany, not too far from Munich. She graduated from the Deutschen Meisterschule für Mode (German Master
Getting Started Guide
 3D Architect Home Designer Getting Started Guide Produced and published in the UK by Eleco Software Limited 2014 Eleco plc. All rights reserved. The software and hardware names and labels used in this
Avery DesignPro 2000 User Guide
 Avery DesignPro 2000 User Guide Creating labels and cards for your personal needs is easy with Avery DesignPro 2000 Avery DesignPro 2000 User Guide First edition of the condensed user manual for Avery
Introduction to Word 2007
 Introduction to Word 2007 You will notice some obvious changes immediately after starting Word 2007. For starters, the top bar has a completely new look, consisting of new features, buttons and naming
LESSON 7: IMPORTING AND VECTORIZING A BITMAP IMAGE
 LESSON 7: IMPORTING AND VECTORIZING A BITMAP IMAGE In this lesson we ll learn how to import a bitmap logo, transform it into a vector and perform some editing on the vector to clean it up. The concepts
Welcome to CorelDRAW, a comprehensive vector-based drawing and graphic-design program for the graphics professional.
 Workspace tour Welcome to CorelDRAW, a comprehensive vector-based drawing and graphic-design program for the graphics professional. In this tutorial, you will become familiar with the terminology and workspace
Drawing a little mechanical part using LibreCAD
 TUTORIAL Drawing a little mechanical part using LibreCAD Tutorial by Claudio Guarnieri CLAUDIO GUARNIERI: Drawing a little mechanical part using LibreCAD Page 1 of 17 Introduction Hello everyone! This
DWGSee Professional User Guide
 DWGSee Professional User Guide DWGSee is comprehensive software for viewing, printing, marking and sharing DWG files. It is fast, powerful and easy-to-use for every expert and beginners. Starting DWGSee
Plotting: Customizing the Graph
 Plotting: Customizing the Graph Data Plots: General Tips Making a Data Plot Active Within a graph layer, only one data plot can be active. A data plot must be set active before you can use the Data Selector
Freehand Sketching. Sections
 3 Freehand Sketching Sections 3.1 Why Freehand Sketches? 3.2 Freehand Sketching Fundamentals 3.3 Basic Freehand Sketching 3.4 Advanced Freehand Sketching Key Terms Objectives Explain why freehand sketching
This is a preview of the book "QCAD - An Introduction to Computer-Aided Design (CAD)" QCAD. An Introduction to ComputerAided Design (CAD)
 QCAD. An Introduction to ComputerAided Design (CAD)") QCAD An Introduction to ComputerAided Design (CAD) Andrew Mustun Table of Contents Introduction Part I: First Steps with QCAD Introducing the QCAD Application 8 15 16 The First Start 16 The Application
QCAD An Introduction to ComputerAided Design (CAD) Andrew Mustun Table of Contents Introduction Part I: First Steps with QCAD Introducing the QCAD Application 8 15 16 The First Start 16 The Application
K e y b o a r d s h o rt c ut s
 Keyboard shortcuts Mouse navigation Middle button (wheel) Click + drag = pan Double-click = re-center view Left button Click = tool operation Click + spacebar = pan Shift + click + drag = multi-select
TurboCAD Architectural
 TurboCAD Architectural Version 15 Getting Started Guide IMSI/Design LLC, US 100 Rowland Blvd. Novato. CA 94945, USA Tel: +1-415-878-4000 Fax: +1-415-897-2544 Web Site www.imsisoft.com www.turbocad.com
PowerPoint 2007: Basics Learning Guide
 PowerPoint 2007: Basics Learning Guide What s a PowerPoint Slide? PowerPoint presentations are composed of slides, just like conventional presentations. Like a 35mm film-based slide, each PowerPoint slide
Layout Tutorial. Getting Started
 Getting Started Layout Tutorial This tutorial will explain how create a layout template, send views to a layout page, then save the document in PDF format. In this tutorial you will learn about: Creating
Layout Tutorial. Chapter 10: Getting Started
 Chapter 10: Layout Tutorial In this tutorial we will create a layout template, send a few views to a layout page, then save this document in PDF format. In this tutorial you will learn about: Creating
Microsoft Publisher 2010 What s New!
 Microsoft Publisher 2010 What s New! INTRODUCTION Microsoft Publisher 2010 is a desktop publishing program used to create professional looking publications and communication materials for print. A new
Windows XP Pro: Basics 1
 NORTHWEST MISSOURI STATE UNIVERSITY ONLINE USER S GUIDE 2004 Windows XP Pro: Basics 1 Getting on the Northwest Network Getting on the Northwest network is easy with a university-provided PC, which has
Tutorial 1: The Freehand Tools
 UNC Charlotte Tutorial 1: The Freehand Tools In this tutorial you ll learn how to draw and construct geometric figures using Sketchpad s freehand construction tools. You ll also learn how to undo your
WORKBOOK MODELING OF MULTI- MEMBER MACHINES
 WORKBOOK MODELING OF MULTI- MEMBER MACHINES LUBLIN 2014 0 Author: Mirosław Ferdynus Desktop publishing: Mirosław Ferdynus Technical editor: Mirosław Ferdynus Figures: Mirosław Ferdynus Cover and graphic
Quick Start Guide. Microsoft Publisher 2013 looks different from previous versions, so we created this guide to help you minimize the learning curve.
 Quick Start Guide Microsoft Publisher 2013 looks different from previous versions, so we created this guide to help you minimize the learning curve. Quick Access Toolbar Add your favorite commands to the
Excel 2007 A Beginners Guide
 Excel 2007 A Beginners Guide Beginner Introduction The aim of this document is to introduce some basic techniques for using Excel to enter data, perform calculations and produce simple charts based on
CATIA: Navigating the CATIA V5 environment. D. CHABLAT / S. CARO [email protected]
 CATIA: Navigating the CATIA V5 environment D. CHABLAT / S. CARO [email protected] Standard Screen Layout 5 4 6 7 1 2 3 8 9 10 11 12 13 14 15 D. Chablat / S. Caro -- Institut de Recherche
Part Number: PMT1080-ENG Rev. 1
 2010 Dassault Systèmes, All Rights Reserved DraftSight and the DraftSight logos are trademarks of Dassault Systèmes or its subsidiaries in the US and/or other countries. Other brand or product names are
What s New V 11. Preferences: Parameters: Layout/ Modifications: Reverse mouse scroll wheel zoom direction
 What s New V 11 Preferences: Reverse mouse scroll wheel zoom direction Assign mouse scroll wheel Middle Button as Fine tune Pricing Method (Manufacturing/Design) Display- Display Long Name Parameters:
Design document Goal Technology Description
 Design document Goal OpenOrienteering Mapper is a program to draw orienteering maps. It helps both in the surveying and the following final drawing task. Support for course setting is not a priority because
Microsoft PowerPoint 2010 Computer Jeopardy Tutorial
 Microsoft PowerPoint 2010 Computer Jeopardy Tutorial 1. Open up Microsoft PowerPoint 2010. 2. Before you begin, save your file to your H drive. Click File > Save As. Under the header that says Organize
CATIA V5 Tutorials. Mechanism Design & Animation. Release 18. Nader G. Zamani. University of Windsor. Jonathan M. Weaver. University of Detroit Mercy
 CATIA V5 Tutorials Mechanism Design & Animation Release 18 Nader G. Zamani University of Windsor Jonathan M. Weaver University of Detroit Mercy SDC PUBLICATIONS Schroff Development Corporation www.schroff.com
User Guide. Ahead Software AG
 User Guide Ahead Software AG Information on copyright and trade marks The Nero Cover Designer user manual and all its contents are protected by copyright and are the property of Ahead Software. All rights
Autodesk Fusion 360: Assemblies. Overview
 Overview In this module you will learn how different components can be put together to create an assembly. We will use several tools in Fusion 360 to make sure that these assemblies are constrained appropriately
Microsoft Excel 2010 Tutorial
 1 Microsoft Excel 2010 Tutorial Excel is a spreadsheet program in the Microsoft Office system. You can use Excel to create and format workbooks (a collection of spreadsheets) in order to analyze data and
WHAT S NEW IN WORD 2010 & HOW TO CUSTOMIZE IT
 WHAT S NEW IN WORD 2010 & HOW TO CUSTOMIZE IT The Ribbon... 2 Default Tabs... 2 Contextual Tabs... 2 Minimizing and Restoring the Ribbon... 3 Customizing the Ribbon... 3 A New Graphic Interface... 5 Live
Project Setup and Data Management Tutorial
 Project Setup and Heavy Construction Edition Version 1.20 Corporate Office Trimble Navigation Limited Engineering and Construction Division 5475 Kellenburger Road Dayton, Ohio 45424-1099 U.S.A. Phone: