SpliceCom Navigate. Flip Connect. User Guide
|
|
|
- Kerry Ball
- 10 years ago
- Views:
Transcription
1 Flip Connect SpliceCom Navigate User Guide _- Flip Solutions Ltd t/a Flip Connect Unit 5/6, 29 Mill Lane, Welwyn Hertfordshire, AL6 9EU

2
3 Contents Introduction... 1 About this manual... 1 How Navigate will operate... 1 Feature Highlights... 4 The PCS range... 5 Basic Call Handling... 6 Make a Call... 6 Answer a Call... 7 End a Call... 8 Mute a call (IP soft phone only)... 8 Place a call on hold... 9 Transfer a Call... 9 Call Information Window Add a note to a call Parking a call Conference Call Using the Directory Viewing your Calls History Identifying the type of call Missed Incoming Calls Redial a number Dial a previous caller Choose Number to Dial Add Contact Get Info Nuisance Calls Users Directory View the Users Directory Make a call to a User Transfer a call to a User View a User s Details Make a call to a User s personal numbers Departments Working as a member of a Department Receiving a Department Call Make a call to a Department Transfer a call to a Department Calls History Log in or out of a Group Contacts View the Contacts Directory Receiving a call from a Contact Make a call to a Contact Contents Navigate User Manual v3.2/0413/3 i

4 Transfer a call to a Contact Make a call to a Contact s alternative numbers Add a note to a Contact during a Call Viewing Contact Details Amend a Contact s details Create a new Contact Delete a Contact Using an Ambiguous Number Integration with your Outlook Contacts User Configuration Call Waiting Call Forwarding Out of Office Message Do Not Disturb Personal Numbers Favourites Ring Tunes Extension Anywhere Quick Settings Voic Receiving a Message Listen to a message Message Handling Recording a Greeting Using an Assistant telephone number Ring back a caller Leave a message for a colleague Transfer a call to a colleague s voic Record a Call Record a Memo Voic for Departments Using Navigate as a Vision Call Centre Agent Status Bar Completion Codes Not Available Codes Navigate Configuration Hot Desking/Log In Manually label your parked calls Favourites on Top Partner Configuration Softphone Configuration Set up Information Icons in Brief Index ii Contents Navigate User Manual v3.2/0413/3

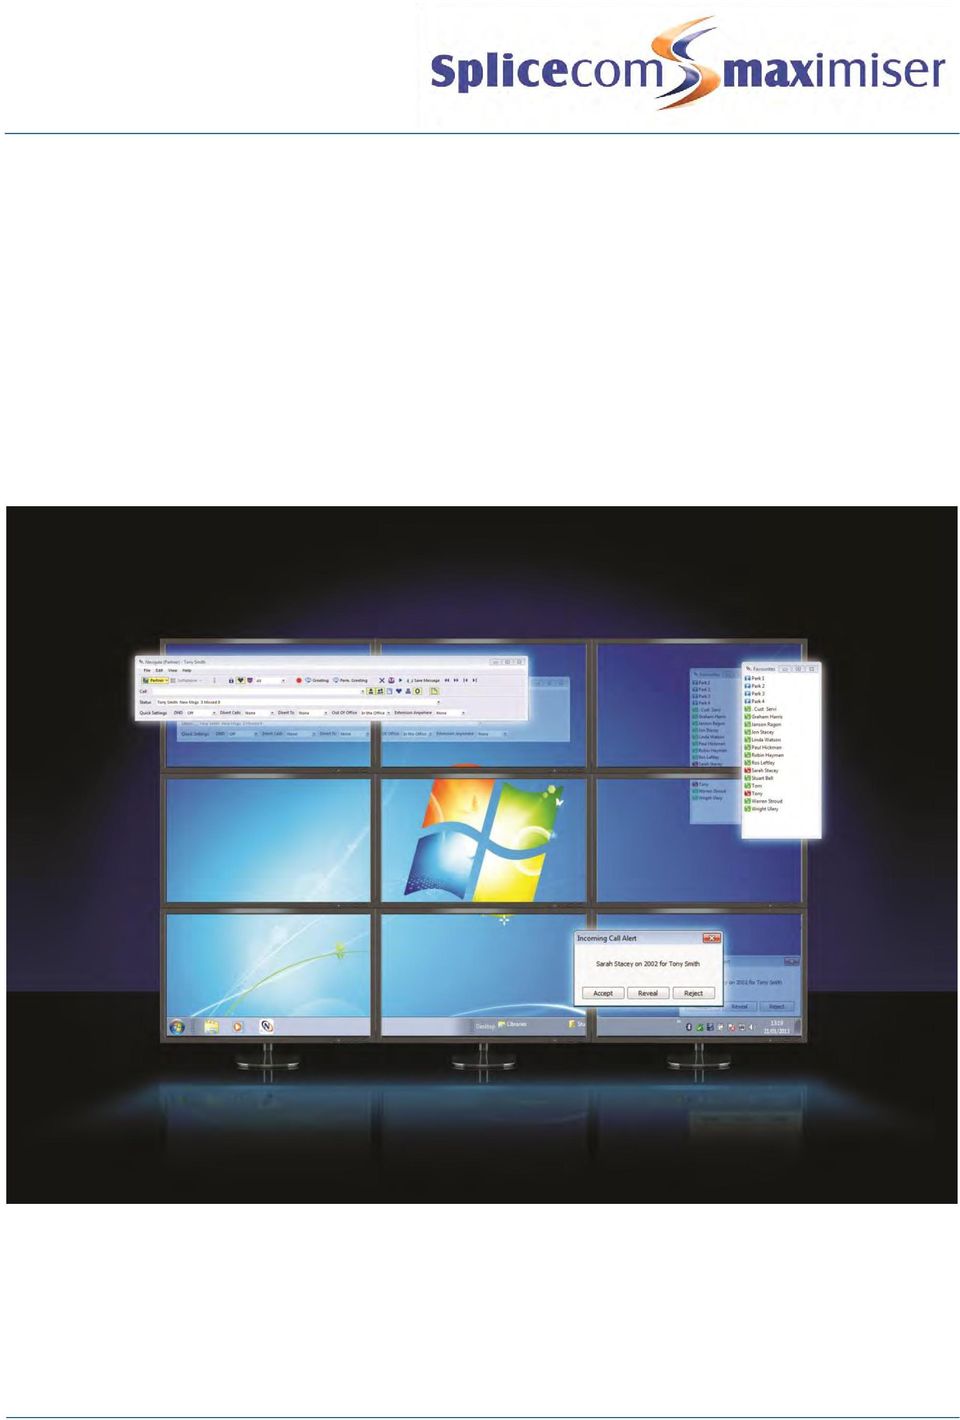
5 Introduction About this manual This manual contains all that you need to know to operate the Navigate application being run via a SpliceCom maximiser system using version 3.2 software. This manual assumes that the Navigate software has been loaded and configured on your PC by your system administrator. If this is not the case please refer to your System Administrator for further assistance. How Navigate will operate The Navigate software will be configured to run as an IP soft phone or as a partner to your telephone. If your Navigate has been configured to partner your telephone handset this means that your telephone conversations will be via the handset but Navigate will assist you to handle calls quickly and efficiently. If you are using your telephone with a headset your conversations will be via your headset and you can use Navigate solely to handle the calls. If your Navigate is running as an IP soft phone this means your PC becomes your telephone and you will require a headset and microphone connected in order to facilitate a telephone conversation. When Navigate is installed on your PC a shortcut will be automatically created on your desktop, double click on this shortcut to run Navigate. Otherwise your system administrator will inform you how Navigate will start up on your PC. When the application is running, a Navigate icon will be displayed in the Notification Area of your Taskbar. This will display applicable information when you make and receive calls as described in the relevant section in this manual. To ensure this facility is available your Notification Area (Windows 7) can be customised as follows: 1. Right click on the Taskbar on your PC and select Properties 2. Within the Notification Area section click on the Customize button 3. Find Navigate within the list of Notification Area Icons 4. Ensure that Show Icon and Notifications or Only Show Notifications is selected 5. Select OK to save the change Information similar to this diagram will be displayed from the Notification Area when you first open Navigate. This will disappear after a few seconds. Your User Account You are a User of the SpliceCom maximiser telephone system and as such you have a User account on the system. Your User name will be used to identify you as you make, receive and transfer calls. Each of your colleagues will also have a User account and will be identified in the same way, by their User name. A list of the Users of your maximiser system can be viewed via the Directory page as explained in the Users Directory section from page 23. Introduction Navigate User Manual v3.2/0413/3 1

6 Your User Name will appear in the Title Bar at the top of the application and in the Status Bar. As a User on the system you will be given an extension number, eg 2021, and possibly a DDI number, eg So that when a colleague rings your extension number or an external contact rings your DDI number these will be routed to your User account. Your DDI number may also be the number that is presented as your CLI when you make a call, please refer to your system administrator for further details. In most implementations the telephone on your desk (partner mode) or your PC (IP soft phone) will be your permanent phone and as such it will have been automatically allocated to you by your system administrator. Therefore, your User account will be permanently logged on to this handset. However, you may wish to log on to another handset if you are required to work in another part of your office or at another site. If this is the case, please refer to the Hot Desking/Log In section from page 70 for further details. Your User account will store all of your User settings (as described in the User Configuration section from page 38) so that when you log on to another handset these settings will be available to you and your calls will be routed to whichever phone you are logged on to. Guided Tour of the application Menu Bar The Menu Bar gives you access to some of the features and settings available with Navigate. Click on the menu you require and a list of the selectable options is displayed. Click on the option required. Alternatively, hover over another menu and the relevant list will be displayed, this can be repeated until the option you require is selected. If you do not wish to select an option from a menu click on the menu name and it will disappear. The Menu Bar can also be operated via your keyboard. Press the Alt key and the first letter of each menu will become underlined. Press the letter for the menu you require and a list of options will be displayed. Introduction 2 Navigate User Manual v3.2/0413/3

7 Use the Up and Down arrow keys to choose the option required. Use the Right and Left arrow keys to display another menu. Alternatively, press F10 and use your arrow keys to display the menu required. Tool Bar This tool bar gives access to the Login, Favourites and Calls History windows, and voic message handling. Each icon is described in detail within the relevant section of this manual. Call Bar This bar is used to make calls and search the Directory. The Directory filter icons determine which entries are displayed within the Directory. Status Bar The Status Bar will display your name as the currently logged in User together with the number of new voic messages you have received, and the number of calls missed and not answered. This bar is purely for information that enables you, at a quick glance, to ascertain the status of your extension and is described further in the relevant sections of this manual. If your User account has also be configured to monitor calls and voic for a Department(s) the Status Bar will also show these statistics for this Department(s). Click on the list box arrow to view and select the details for the Department(s). Quick Settings Bar These list boxes allow you to quickly turn on/off regularly used configuration settings such as Do Not Disturb and Follow Me. Each option is described in more detail in the relevant section of this manual. Please note: if your Quick Settings Bar is not displayed you have been given restricted access to your configuration options. Please refer to your System Administrator for further information. Call Status pane Call Status will appear when you are on a call. This will display the name of the person you have called or the caller (if known by the system), the number you have dialled or received, your name and the length of time of the call, together with call handling icons on the right hand side which will be covered in the relevant section of this manual. Favourites window The Favourites window will display your Park slot icons and Favourites (speed dials). This window can be displayed by selecting the Favourites icon on the Tool bar or by selecting Favourites from the View menu. This window enables you to quickly and easily make calls, park calls, transfer calls and pick up calls. To close this window click on the Favourites icon again or use the Close button. Introduction Navigate User Manual v3.2/0413/3 3

8 Feature Highlights Access to the System Database Navigate gives you access to a database of information stored on your maximiser system that provides directories of telephone numbers to help you to quickly and easily make and transfer calls. Making Notes during a call During the process of a call you can attach a note that will help you to remember the caller s name and details or the nature of the call. This text will then follow the call when it is transferred to help the recipient deal with the call proficiently. If the call is received from or made to an external number stored on the central database a note can be saved for future use and referred to at a later date. Parking a Call All calls received can be put on hold and the call remains in your control. However, another way to place a call on hold is to park the call into one of the system areas (or Park Slot). You can use this method to place a call on hold while you deal with another call or as a way of transferring the call as your colleagues will be able to pick up the call if they have access to the same park slot. Favourites As well as access to the directories stored on the telephone system s database you can also set up your own list of favourite numbers that you regularly call or transfer calls to. Your Favourites will also act as Busy Lamp Fields indicating when internal extensions are engaged or receiving calls and allow you to pick up a call ringing on a colleague s extension. Voic The SpliceCom maximiser system provides standard voic functionality which can be enabled on your system and for you as a User allowing your callers to leave a message if you are unable to deal with a call. Navigate allows you to easily manage these messages. Hot Desking If you share your PC or telephone handset with other colleagues Navigate will allow you and your colleagues to log in using your own extension number and access code so that you can use your own settings and be identified with your name when you make and receive calls. Microsoft Outlook Integration If you use Microsoft Outlook for your calendar and for storing your contacts, your User account can be configured to enable you to turn on Outlook Contact Lookup and Outlook Calendar Lookup in Navigate. Outlook Contact Lookup will enable Navigate to search within your Contacts so that you can easily and quickly dial numbers stored in your Outlook Contacts. The Outlook Calendar Lookup will enable Navigate to turn on Do Not Disturb if you have an appointment scheduled that is set as Busy or Out of Office, and if that appointment contains one of the five Out of Office Messages (In Meeting, At Lunch, On Holiday, Off Site and In the Office) in the body of the appointment this will set your Out of Office message at the relevant time. Introduction 4 Navigate User Manual v3.2/0413/3

9 The PCS range From affordable entry-level phones, through IP terminals that unify advanced telephony and IT applications at the desktop, to native IP Phone applications that run on Smart Phones, Tablets, PCs and Macs; in SpliceCom s comprehensive PCS telephony family you ll find the product that s the ideal match for every specific business requirement - whatever it may be. Designed to complement other market leading and stylish IT equipment on your desktop, SpliceCom s PCS 552, PCS 56x, PCS 57xG & PCS 58xG IP Phones combine looks, intelligence and desirability in equal measure. The world s slimmest desktop IP phones provide easy access to the benefits delivered by maximiser, SpliceCom s range of innovative and award-winning Unified Communications platforms. All PCS 5xx IP phones have large graphical displays, intuitive multi-functional context sensitive keys, and bold instantly recognisable icons to provide the ease-of-use associated with mobile phones, so delivering the ultimate business telephony user experience. The IP 530 is SpliceCom's entry-level IP Phone, designed to work with maximiser to address everyday business telephony needs. The PCS 520 is a display phone with pre-configured system access keys, desktop paging and combined Do Not Disturb/Message Waiting LED, with the entry-level PCS 505 completing SpliceCom s range of desktop phones. SpliceCom s ipcs is a native IP Phone application for Smart Phones and Tablets, allowing a mobile device to operate as a highly functional system phone extension. This makes it an ideal maximiser Office Mobility solution for the replacement of existing DECT wireless systems, or as an alternative for SIP/WiFi phones. Navigate is a Phone Partner application, delivering powerful personal call management features via Windows 7 & Windows 8 PCs for users of SpliceCom s broad range of PCS IP Phones, or existing 3rd party analogue telephones. Providing point and click access to both commonly used and advanced maximiser telephony & integrated Microsoft features, Navigate provides a single intuitive interface to manage business communications for all employees across an organization, irrespective of their role. Navigate can also be used as an IP Softphone with the addition of an associated licence, with PCS 60 offering similar functionality for Apple Mac OS X users and those running versions of Microsoft operating systems prior to Windows 7. Introduction Navigate User Manual v3.2/0413/3 5

10 Basic Call Handling Make a Call 1. In the Call box enter the number to be dialled (internal or external number). 2. Press Enter and the call will be made. The Outgoing Call Alert window will appear from the Navigation icon in the Notification Area and display the number you have dialled. Call Status will display the name of the person you have called (if known by the system), the number you have dialled, your name and length of time of the call, together with call handling icons on the right hand side which will be covered in the relevant section of this manual. The unanswered call icon answered call icon. will be displayed until the call is answered when it will be replaced by the If you have started to make a call, have changed your mind and wish to stop the call either replace your handset (partner mode) or select End from the Outgoing Call Alert window or select the Hang Up icon or press Esc. Please note that if you are using Navigate in partner mode, the telephone conversation will proceed via your handset. Your telephone will ring if a call is made and the handset has not been lifted. If you dial a number via your handset Call Status will appear as soon as you lift your handset and display the number you have dialled. If Navigate is hidden behind other windows or has been minimised select the Reveal button on the Outgoing Call Alert window and Navigate will become the active window. If you wish to make a call by looking up the number in the system directories please refer to the Make a call via the Directory page from page 16. Basic Call Handling 6 Navigate User Manual v3.2/0413/3

11 Entering additional digits You may be required to enter further digits once a call has been made, for example, when presented with an auto attendant, this can be done as follows: 1. Within the Call Status pane click on the Dial icon 2. The Keypad window will be displayed 3. Select the number(s) required either by clicking on the numbers with your mouse or enter the numbers on your keyboard. 4. Each number will flash as you enter it. 5. Use the Close icon at the top right to close the Keypad window when you have finished. Account Codes Accounts codes on a maximiser system enable calls to be tracked. This feature would be useful if you wish to bill customers for time spent on their job or calculate the cost of a project, for example. Please refer to your system administrator for further details if you wish to use this facility. Once configured on your system, you can enter the account code when you dial the number (please refer to your system administrator for the relevant digits to enter). Alternatively, your User account can be configured so that you can only make an external call if you enter an Account Code, please refer to your system administrator for further details. If this is the case, the following dialogue box will be displayed from the Navigation icon within your Notification Area, when you make an external call: Enter the code you wish to use in the Enter Account Code field and select OK. Proceed with the call as normal. Answer a Call When you receive a call the caller s details will be displayed in the Incoming Call Alert window, which will appear from the Navigate icon in the Notification Area. Call Status will display the caller s name (if recognised by the system), the caller s number and who the call is for. This will either be your name, the name of the colleague who has forwarded their calls to you or a Department name. All this information enables you to answer the call in the required manner. If Navigate is hidden behind other windows or has been minimised and you wish to bring it forward, select the Reveal button on the Incoming Call Alert window and Navigate will become the active window. Basic Call Handling Navigate User Manual v3.2/0413/3 7

12 To answer the call, lift your handset (partner mode only) or Select the Answer icon, from Call Status or Select Accept from the Incoming Call Alert window or Press Enter Please note that if you are using Navigate in partner mode, the telephone conversation will proceed via your handset. If you answer a call via Navigate your handset will continue to ring until the handset has been lifted. Call Status will display the name of the caller (if known by the system), the number received with the call, your name and length of time of the call, together with call handling icons on the right hand side which will be covered in the relevant section of this manual. Reject a call 1. If you do not wish to answer the call, Replace select the Hang Up icon, from Call Status or Select Reject from the Incoming Call Alert window or Press Esc 2. The call will be passed to your Forward on Busy number (if set), or voic (if enabled), or cancelled If you do not answer it will be passed to your Forward on No Answer number (if set), or voic (if enabled) or will continue to ring until the caller hangs up. The amount of time the call will ring before going to your Forward on No Answer number or voic will be dependent on the time set on your User account, please refer to your system administrator for further details. End a Call Replace your handset (partner mode only) or Select the Hang Up icon, from Call Status or Press Esc Mute a call (IP soft phone only) The Mute facility will allow you to prevent a caller from hearing, for example, your conversation with another colleague. You will be able to hear the caller but they will not be able to hear you. 1. Select the Mute icon 2. The Mute icon will be displayed with a red circle to indicate that this facility is on. Your caller will be unable to hear you. 3. Select this icon again to talk to your caller Basic Call Handling 8 Navigate User Manual v3.2/0413/3

13 Place a call on hold 1. From Call Status, select the Hold icon, 2. Note that the Hold icon is now displayed on the left hand side of Call Status, with the call details, indicating that this call is on hold External callers will be played music on hold if configured. (Please refer to your System Administrator for further details.) To retrieve the call, click on the call details within Call Status, or select the Hang Up icon Transfer a Call Announced Transfer 1. Place the call on hold by selecting the Hold icon 2. In the Call box enter the number to be dialled (internal or external number) 3. Press Enter or 1. In the Call box enter the number to be dialled (internal or external number) 2. Press Enter (the original call will be put on hold) 3. Wait for the call to be answered and announce the caller 4. The two calls will be displayed in Call Status together with additional call handling icons. or or 5. To transfer the original call, select the Transfer icon, from Call Status or press Enter. You will no longer have control of the call 5. To clear the current call and return to the original caller select the Hang Up icon or press Esc or wait for the other end to hang up. 5. To return to the original call and place the second call on hold, select the Switch icon or click on the original call within Call Status 6. Use the Switch icon to toggle between the two calls, or click on the required call within Call Status (note that the Call Handling icons will be displayed alongside the active call) Basic Call Handling Navigate User Manual v3.2/0413/3 9
 3. Press Enter or 1.")
14 or 7. Finally, select the Transfer icon to connect the two calls (regardless of which call you are currently connected to). 5. Select the Hang Up icon to clear the call you are currently connected to and return to the other call or wait for the other end to hang up Please note: The green telephone icon indicates the call you are currently connected to The Hold icon indicates the call currently on hold. Unannounced Transfer (Blind Transfer) 1. Place the call on hold by selecting the Hold icon 2. In the Call box enter the number to be dialled (internal or external number). 3. Press Enter or 1. In the Call box enter the number to be dialled (internal or external number). 2. Press Enter 3. The original call will be put on hold 4. Once the ringing tone is heard, Select the Transfer icon or Press Enter or Replace your handset (partner mode only) You will no longer have control of the call. Call Information Window The Call Information window will give you information about your current call and help you deal with the call, particularly when a colleague is transferring a call to you as explained below, and when using Notes as explained in the Add a note to a call section from page 11. Open the Call Information window from the View menu select Call Information. If you receive a call from a colleague who has another call on hold the following information will be displayed. I have [caller s name if recognised by the system] (caller s number) on hold [name of User making the call to you] time and date. Basic Call Handling 10 Navigate User Manual v3.2/0413/3
. 3. Press Enter or 1. In the Call box enter the number to be dialled (internal or external number). 2. Press Enter 3.")
15 Once the call has been transferred the history of the call will be displayed in the Call Information window, ie the name(s) of the User(s) who transferred the call together with your name as the next recipient of the call. If you are the recipient of an unannounced transfer the Call Information window will display the name of the User who transferred the call together with your name as the next recipient of the call. Close the Call Information window when you no longer wish to view this information, otherwise it will automatically close at the end of the call. Add a note to a call During a call you may wish to make notes about the call, for example, the caller s name, the details of his enquiry, etc. This information not only acts as a reminder for you but will also be passed to another User of Navigate, PCS 60 and PCS 58x/57x/56x when the call is transferred. 1. During a call click on the Add Note icon from the Call Status pane 2. Enter any text in the Note box Basic Call Handling Navigate User Manual v3.2/0413/3 11

16 3. Select Add to Call Please note that if the Add to Contact button is available in the Note box this means that the call has been made to or received from a number stored in the Contacts Directory. Please refer to the Contacts section from page 29 for further details. This Note can be viewed in the Call Information window (from the View menu select Call Information). The text together with your name as the originator of the note and the date and time will be displayed. This information will be passed on with the call if it is transferred, and will disappear once the call has ended. The Call Information window will also display Notes added by a colleague when they are transferring a call to you, for example. Parking a call The Park facility allows calls to be put on hold in a system area, rather than on your phone. Either, a colleague can pick up the call (if they have access to the same park slot), or you can pick up the call when you wish to return to the caller. This is useful as another method to transfer a call, or if you wish to deal with other calls while a call is on hold. By default, you will be given access to Park slots 1, 2, 3 and 4 via the four Park icons displayed in the Favourites window. By default, all your colleagues using Navigate, PCS 60 or PCS 58x/57x/56x will also have access to these same park slots. (This default configuration may be different on your system, please refer to your system administrator for further details.) A call will remain parked for 5 minutes (default), after this time the call will be represented to your extension and you can answer the call in the normal way. Basic Call Handling 12 Navigate User Manual v3.2/0413/3

17 Park a call 1. Click on the Park Call icon, on the far right hand side of Call Status 2. The call will be parked in your first available park slot If you wish to view the parked call select the Favourites icon to open the Favourites window, if not already open. The details of the caller will be displayed within the Park icon If there are calls parked in all of your Park slots (please remember that these slots may be shared by other Users on your telephone system) your call will not be parked and the No free park slots message will be displayed from the Navigate icon within your Notification Area. Alternatively, 1. Click on the Favourites icon to open the Favourites window, if not already open 2. Click on Park icon required 3. The details of the caller will be displayed with the Park icon Pick up a parked call 1. Click on the Favourites icon to open the Favourites window, if not already open 2. Click on the Park icon displaying the call you wish to return to Transfer a parked call 1. Make a call to the intended recipient of the parked call (internal or external number). 2. Place the call on hold 3. Click on the Favourites icon to open the Favourites window, if not already open 4. Click on the relevant Park icon to un-park the original call 5. The two calls will be displayed in Call Status 6. To connect the two calls select the Transfer icon. You will no longer have control of the calls. For further information on transferring calls please refer to page 9. The Favourites window will stay open so that your Favourites and Park icons are constantly available. Use the Close icon if you no longer wish to view or use this window. Please note: If your Park Label option is turned on, the Enter park label dialogue box will appear when you click on a Park icon. Please refer to the Manually label your parked calls section from page 71 for further details. Basic Call Handling Navigate User Manual v3.2/0413/3 13
 your call will not be parked and the No free park slots message will be displayed from the Navigate icon within your Notification Area. Alternatively, 1.")
18 If you pick up a parked call while in the progress of another call, this call will be automatically parked in the next available slot. If a colleague needs to pick up a parked call via an analogue handset and does not have the use of Navigate or PCS 60, please refer to your system administrator for the relevant short code he/she should use. If a call parked by a colleague is not accessible via your Park icons, your Park slots may have been configured differently or you may be operating within a different Company to your colleague. Please refer to your system administrator for further details. If you belong to a Company on the maximiser system, this Company may be configured with a different Park Timeout to the default 5 minutes. Please refer to your system administrator for further details. By default the four Park icons displayed are configured to access Park slots 1, 2, 3 and 4. However if you wish to access alternative Park slots in order to create either group or private park slots you can create icons to access other Park Slots, eg Park slot 5, or Park slot 7, 60, 123 etc. Please refer to the Favourite section from page 48 for further details. If you do not use the Park facility and wish to remove the Park icons, please refer to the Favourite section from page 48 Conference Call The conferencing facility allows you to create a 3-way conversation between yourself and two internal and/or external calls. (Please note that this feature must be enabled on your telephone system. Please refer to your System Administrator if this feature is not available.) Creating a conference call 1. Make a call to the first number required (internal or external), or you may have already received a call from the first member of the conference. 2. Placed this call on hold 3. Make a call to the second number required (internal or external) 4. Once the call has been answered select the Conference icon 5. You are now in a 3-way conference with your two calls, as shown by the In Conference icon. Cancel a conference call You may wish to cancel the conference and return to a 2-way conversation with your calls as follows. 1. Select the In Conference icon. 2. You will return to the caller that you were last speaking to before creating the conference. The other caller will be put on hold. Use the Switch icon to toggle between the two calls or click on the call required in Call Status (note that the Call Handling icons are displayed alongside the active call). The two calls can be connected via the Transfer icon or ended in the normal way. You can return to a conference with your two calls at any time by selecting the In Conference icon. Basic Call Handling 14 Navigate User Manual v3.2/0413/3


19 If you select the Hang Up icon while on a conference you will hang up the caller that you were last speaking to before creating the conference, and return to a 2-way conversation with the other call. If one of the conference members hangs up you will return to a 2-way conversation with the other caller. End a conference call (partner mode only) If you replace your handset while on a conference call, you will end the conference and hang up all the calls. Using the Directory The Directory provides access to a database of contact information that is stored centrally on your telephone system. Your System Administrator is responsible for the maintenance of this database and will be able to assist you with your queries. The type of records displayed is determined by the Directory Filter icons displayed beside the Call box. Select or de-select the options as required. Users Filter will display a list of the User accounts on your telephone system allowing you to quickly and easily call a colleague. Departments Filter will give access to the list of Departments configured on your maximiser system that will allow your call to be routed efficiently to a group of Users. Contacts Filter will display the list of external contacts entered on your telephone system allowing you to quickly and easily make calls to customers, suppliers, etc. The search will be made within the Name column. Company Filter will display the list of external contacts entered on your telephone system allowing you to quickly and easily make calls to customers, suppliers, etc. The search will be made within the Company column. Favourites Filter will display your personal list of regularly used telephone numbers stored in your User account. Please refer to the Favourites section from page 48 for further details. View the Directory 1. In the Call box enter the name or number of the User or Department or Contact or Company you wish to view 2. As you starting typing the list of the records matching the text you have entered will be displayed. Basic Call Handling Navigate User Manual v3.2/0413/3 15


20 You can enter an asterisk (*) in to the Call box to view all the records in one list (dependent on the Directory Filter icons selected). The Busy icon indicates that this colleague is currently on a call. If you ring this number you will be passed to the User s Forward on Busy number (if set) or to their voic (if enabled) or you will get busy. The Do Not Disturb icon indicates that this colleague has Do Not Disturb set. If you ring this number you will be passed to the User s Forward on Busy number (if set) or to their voic (if enabled) or you will get busy. Each column displayed in the Directory can be resized by pointing at the line to the right of the column title with your mouse. A double headed arrow shape will appear. Hold down your mouse and move the column to the left or right. If you no long wish to view the Directory, click on the down arrow next to Call box or press Esc on your keyboard, and the directory will disappear. Make a call via the Directory page 1. In the Call Box enter the name or number of the User or Department or Contact or Company to be dialled. 2. As you starting typing the list of the records matching the text you have entered will be displayed (dependent on the Directory Filter icons selected). 3. When the entry you require is displayed, Click on the number you wish to dial, and the call will be made. or Double click on the Name, and the number displayed in the Telephone Number column will be dialled. Transfer a call via the Directory page 1. Place the call on hold by selecting the Hold icon 2. In the Call box enter the name or number of the User or Department or Contact or Company to be dialled. 3. When the entry you require is displayed, Click on the number you wish to dial, and the call will be made. or Basic Call Handling 16 Navigate User Manual v3.2/0413/3

21 Double click on the name, and the number displayed in the Telephone Number column will be used. 4. Wait for the call to be answered and announce the caller 5. To connect the two calls, select the Transfer icon. You will no longer have control of the calls. Please note that if you wish to continue talking to the caller while using the Directory ignore step 1. The caller will be put on hold once you make the call in step 4. For further information on transferring a call please refer to page 9. Please refer to the Users Directory section from page 23, the Departments section from page 26 and the Contacts section from page 29 for further details on using the Directory. Basic Call Handling Navigate User Manual v3.2/0413/3 17
22 Viewing your Calls History All calls received or made by your extension will be logged and can be viewed via the Messages icon. When a call has been received that you did not answer the Messages icon will be displayed with the Missed Call symbol to indicate that you have missed a call. If you have missed a call and have received a new voic message the Messages icon will be displayed with a handset and red circle in the background. Click on either of these icons to view your Calls History. Identifying the type of call Signifies an answered incoming call Signifies an unanswered (or missed) incoming call (up to 10 displayed, then the oldest will be deleted) Signifies an answered outgoing call Signifies an unanswered outgoing call Signifies a new or unread voic message Signifies an old or read voic message Entries are listed in date and time order with the newest at the top. The time and date of each call will be displayed; together with the caller s or recipient s name (if recognised by the system) and the caller s number (if received) or recipient s number. The Mailbox column will display your name as the creator of the call or, for incoming calls, will indicate the recipient of the call. This will be your name, or if you are receiving Department calls, the Department s name (please refer to the section Departments from page 26 for further details), or a colleague s name if he/she has forwarded his/her calls to your extension. Calls History 18 Navigate User Manual v3.2/0413/3
23 Each column can be resized by pointing at the line to the right of the column title with your mouse. A double headed arrow shape will appear. Hold down your mouse and move the column to the left or right. If you no long wish to view Calls History, click on the down arrow next to Call box or press Esc on your keyboard or click on the Messages icon, and the directory will disappear. Missed Incoming Calls When a call has been received that you did not answer the Messages icon will be displayed with the Missed Call symbol to indicate that you have missed a call. Once you have viewed the missed call, by clicking on the Messages icon, this symbol will disappear. Please note that if a call is answered by voic and the caller has left a message, this call will not be registered as a missed call. The Status Bar will also indicate the number of calls missed on your extension. The Navigate icon on your Task Bar will also indicate if you have missed a call. If you hover your mouse over the Navigate icon within the Notification Area the number of calls you have missed will be displayed. Redial a number When you make a call the details of the call are logged and can be viewed via the Messages icon. This information enables you to redial the number quickly and easily. 1. Select the Messages icon 2. The and icons indicate a number you have previously dialled 3. Click on the number you wish to dial or Double click on the entry required (within the Time column) and the number displayed will be dialled. Dial a previous caller When you receive a call the details of the call are logged and can be viewed via the Messages icon. This information enables you to ring back the caller quickly and easily. 1. Select the Messages icon 2. The and icons indicate an incoming call 3. Double click on the entry required and the number displayed will be dialled If the caller s number has been withheld or not received by the system this facility will not be available. The Number column will indicate if the caller s telephone number has been received. Calls History Navigate User Manual v3.2/0413/3 19
24 Choose Number to Dial You can dial another number, eg a mobile number, stored with the number displayed in the selected call, if this number is recognised by the system, ie an extension number, or a number stored in a User s personal numbers, or a number stored in a Contact. 1. Right click on the entry required 2. Select Choose number to dial 3. The Select Number window will be displayed 4. Click on the relevant button to dial the number required Please refer to the Users Directory section from page 23 and the Contacts section from page 29 for further details. Add Contact If you wish to store the external number received with a call in the centralised Contacts database, the Add Contact option will allow you to create a new Contact where the external number displayed in the selected call will automatically populate the Telephone field. 1. Right click on the entry required 2. Select Add Contact 3. The Contact Details dialogue box will be displayed 4. The telephone number received with the call will be entered into the Telephone field. 5. Enter further details as required 6. Select OK when ready. Please note This entry will be stored in the centralised Contacts database and will be available to all your colleagues. If you select this option for an internal call, the User Details form will open. If you select this option for a number already stored in the Contacts database the relevant Contact Details form will open. If the Contact Details dialogue box does not appear when you select this option you do not have the rights to add entries to the Contacts database. Please refer to your system administrator for further details. Please refer to the Contacts section from page 29 for further details on using the Contacts database. Calls History 20 Navigate User Manual v3.2/0413/3
25 Get Info Further details, stored on the system, for the internal or external number displayed can be viewed via the Get Info option. The relevant User Details or Contact Details dialogue box will open. 1. Right click on the entry required 2. Select Get Info 3. The Contact Details or User Details dialogue box will be displayed 4. Select OK when finished. Please note that if the number displayed is not stored on the system the Contact Details dialogue box will open and the number will be entered into the Telephone field. Further details can be added, and if you select OK this entry will be stored in central Contacts database. If the Contact Details dialogue box does not appear, you do not have the rights to add entries to the Contacts database, please refer to your system administrator for further details.. Please refer to the Contacts section from page 29 for further details on using the Contacts database. Nuisance Calls The Add to Blacklist option will allow you to black list incoming external numbers so that you will no longer receive a call from this number; the caller will either be routed to another User or Department, or played a message. However this facility must be available on your system, please refer to your System Administrator for further information. Calls History Navigate User Manual v3.2/0413/3 21
26 1. Right click on the entry required 2. Select Add To Blacklist 3. The Contact Details dialogue box will be displayed with ZZZNUISANCE<number> entered in the Name field and number entered in the Telephone field. 4. Further details can be entered if required 5. Select OK when finished. Calls History 22 Navigate User Manual v3.2/0413/3
27 Users Directory The Users Directory allows you to quickly and easily call a colleague without having to remember their extension number. This directory also allows you to call a colleague s mobile or home number, if stored in their User account, and makes it easy for you to transfer calls to all these numbers. Please refer to the Your User Account section from page 1 for further details. View the Users Directory 1. Firstly, ensure the Users filter is turned on 2. In the Call box enter the name or number of the colleague you wish to view 3. As you starting typing the list of the records matching the text you have entered will be displayed. You can enter an asterisk (*) in to the Call box to view all the records in one list (dependent on the Directory Filter icons selected). The Busy icon indicates that this colleague is currently on a call. If you ring this number you will be passed to the User s Forward on Busy number (if set) or to their voic (if enable) or you will get busy. The Do Not Disturb icon indicates that this colleague has Do Not Disturb set. If you ring this number you will be passed to the User s Forward on Busy number (if set) or to their voic (if enabled) or you will get busy. Make a call to a User 1. Firstly, ensure the Users filter is turned on 2. In the Call box enter the name or extension number of the User to be dialled. Users Directory Navigate User Manual v3.2/0413/3 23
28 3. As you starting typing the list of the records matching the text you have entered will be displayed. 4. When the entry you require is displayed, Click on the number you wish to dial, and the call will be made. or Double click on the Name and the extension number displayed in the Telephone Number field will be dialled. Call Status will display the name and number of the User you are calling. Transfer a call to a User 1. Place the call on hold by selecting the Hold icon 2. Ensure the Users filter is turned on 3. In the Call box enter the name or number of the User to be dialled. 4. As you starting typing the list of the records matching the text you have entered will be displayed. 5. When the entry you require is displayed, Click on the number you wish to dial, and the call will be made. or Double click on the Name and the extension number displayed in the Telephone Number field will be dialled. 6. Wait for the call to be answered and announce the caller 7. To transfer the original call select the Transfer icon. You will no longer have control of the call. Please note that if you wish to continue talking to the caller while using the Directory ignore step 1. The caller will be put on hold once you make the call in step 4. For further information on transferring a call please refer to page 9. Users Directory 24 Navigate User Manual v3.2/0413/3
29 View a User s Details 1. Firstly, ensure the Users filter is turned on 2. Within the Call box, search for the User required 3. Right click on the User required and select Get Info Please note that you will only be able to amend your own details. Select OK to save any changes, if relevant. Otherwise, select Close or Cancel to close the window. Make a call to a User s personal numbers You can enter and store your mobile number, home number and two spare numbers in your User account, please refer to the Personal Numbers section from page 47 for further details. Your colleagues can do the same. If you wish to dial your colleagues on any of these numbers you can search for their entry within the Directory and click on the number within the Directory window as explained in the Make a call to a User section from page 23. Alternatively, you can use the following method to dial a colleague s personal numbers: 1. Firstly, ensure the Users filter is turned on 2. Within the Call box, search for the User required 3. Right click on the User required and select Choose Number to Dial 4. The Select Number dialogue box will appear displaying the numbers stored with this User 5. If you wish to dial the Mobile number click on the Mobile button or if you wish to dial the Home number click on the Home button, and so on. This method can also be used to transfer a call to a User s personal numbers. Users Directory Navigate User Manual v3.2/0413/3 25
30 Departments Departments are a feature of the maximiser system that allows calls to be routed efficiently to a group of Users by dialling one number either internally or externally. The following describes the usage of Navigate when Departments are used on your maximiser system. Working as a member of a Department Due to your role in your company you may have been placed in a Group on the maximiser system. For example, if you are part of a Sales team you may be placed in a Sales Group, or part of a Reception team or part of a Support team you may have been placed in a Group. The purpose of creating Groups on your system is to ensure the efficient handling of incoming calls. For example, you may wish to ensure all incoming calls to Reception are shared among several colleagues to ensure the calls are answered quickly, or you may wish to ensure that support calls are shared equally among the Support team. A Department determines the routing of a call to your Group and your System Administrator will inform you if you will be receiving Department calls and how that Department is configured. Receiving a Department Call When you receive a call for a Department, instead of your details being displayed within Call Status, the Department name is displayed. This allows you to determine, before answering the call, whether you are receiving a personal or Department call and allows you to answer the call in the correct manner. If you wish to distinguish a Department call from a personal call by using a different ring tune please refer to the Ring Tunes section from page 55 for further information. Wrap Up Time A Department can be configured with a Wrap Up time whereby at the end of each call received for the Department you will not receive any further calls until this time has expired. The purpose of this feature is to give you time to complete any administrative tasks, such as completing a contact report, updating a database, and so on. You can truncate this Wrap Up time by lifting and replacing your handset (partner mode only). Please note that if you are an Agent within a Vision call centre, Completion Codes, if configured, will be displayed during the Wrap Up time. Please refer to the Using Navigate as a Vision Call Centre Agent section from page 69 for further details. Please refer to your System Administrator for further information. Make a call to a Department You may wish to talk to any available member of, for example, the Personnel department or Support team. Rather than ringing one member of that department only to find they are not available and then having to Departments 26 Navigate User Manual v3.2/0413/3
31 ring another extension, etc. you could ring the relevant Department, if set up. Your call will be answered by any available member of this Department saving you time. 1. In the Call box enter the extension number of the Department you wish to dial 2. Press Enter and the call will be made 3. Your call will be answered by an available member of that team. Alternatively, you can use the Directory: 1. Select the Departments filter icon, if not already selected. 2. Type in the name of the Department you wish to dial. As you starting typing the list of the records matching the text you have entered will be displayed. 3. When the record you require is displayed click on the Telephone Number, or Double click on the Name, and the call will be made. Please note that you can enter an asterisk (*) in to the Call box to view all the records in one list (dependent on the Directory Filter icons selected). Transfer a call to a Department 1. Place the call on hold by selecting the Hold icon 2. In the Call box enter the extension number of the Department to be dialled. 3. Press Enter and the call will be made 4. Wait for the call to be answered and announce the caller 5. To transfer the original call, select the Transfer icon. You will no longer have control of the call. Alternatively, you can use the Directory: 1. Select the Departments filter icon, if not already selected. 2. In the Call box enter the name of the Department to be dialled 3. As you starting typing the list of the records matching the text you have entered will be displayed. 4. When the record you require is displayed, Click on the Telephone Number or Double click on the Name 6. Wait for the call to be answered and announce the caller 7. To transfer the original call, select the Transfer icon. You will no longer have control of the call. Please note that if you wish to continue talking to the caller while using the Directory ignore step 1. The caller will be put on hold once you make the call in step 4. For further information on transferring a call please refer to page 9. Calls History The Calls History window can also display the incoming answered and missed calls received for a Department. Your System Administrator can configure this facility for you, if not already available. This facility will also give you access to voic messages for the Department, please refer to the Voic section from page 59 for further information. Departments Navigate User Manual v3.2/0413/3 27
32 If this facility has been configured for you, the Status Bar will also indicate how many missed calls the Department has received, together with the number of new voic messages. Click on the list box arrow to the right of the Status Bar to view this information for the relevant Department. Log in or out of a Group As member of a Group there may be situations when you wish to temporarily remove yourself from the Group so that you do not receive Department calls. For example, you may wish to log yourself out of the Accounts group when you are working on a particular project and are not to receive general calls, or you may wish to have the ability to log yourself into the Reception group when cover is required. This feature must have been previously set up for you on the system, please refer to your System Administrator for further details. 1. Select the Login icon 2. The Groups that you are able to log in or out of are listed in the Login dialogue box 3. Remove the tick to log out of a Group or Add a tick to log in to a Group. 4. Choose Close or Cancel to close the dialogue box. Departments 28 Navigate User Manual v3.2/0413/3
33 Contacts A database of external Contacts such as customers, suppliers, etc can be stored on the maximiser system. Your system administrator is responsible for the maintenance of this database. The purpose of the Contacts database is to match the incoming number of an external call and to display the name of the caller in Call Status if a match is found, and to enable you to make external calls to regular contacts quickly and easily. The Directory within Navigate provides access to this database of contact information by selecting the Contacts filter icon or Company filter icon : Contacts Filter will display the list of external contacts entered on your telephone system. The search will be made within the Name column. Company Filter will display the list of external contacts entered on your telephone system. The search will be made within the Company column. View the Contacts Directory 1. Firstly, ensure the Contacts filter and/or Company filter is turned on 2. In the Call box enter the name or number of the Contact or Company you wish to view 3. As you starting typing the list of the records matching the text you have entered will be displayed. You can enter an asterisk (*) in to the Call box to view all the records in one list (dependent on the Directory Filter icons selected). Contacts Navigate User Manual v3.2/0413/3 29
34 Receiving a call from a Contact If the incoming number of an external call is matched within the Contacts database the name of the caller will be displayed within Call Status and Incoming Call Alert enabling you identify the call and answer the call in the appropriate manner. Make a call to a Contact 1. Firstly, ensure the Contacts filter and/or Company filter is turned on 2. In the Call box enter the name or number of the Contact or Company to be dialled. 3. As you starting typing the list of the records matching the text you have entered will be displayed. 4. When you entry you require is displayed, Click on the number you wish to dial, and the call will be made. or Double click on the Name, and the number displayed in the Telephone Number column will be used. Call Status will display the name and number of the Contact being dialled. Transfer a call to a Contact 1. Place the call on hold by selecting the Hold icon 2. Ensure the Contacts filter and/or Company filter is turned on 3. In the Call box enter the name or number of the Contact or Company to be dialled. 4. When the entry you require is displayed, Click on the number you wish to dial, and the call will be made or Double click on the Name, and the number displayed in the Telephone Number column will be used. 5. Wait for the call to be answered and announce the caller 6. To transfer the original call, select the Transfer icon. You will no longer have control of the call. Please note that if you wish to continue talking to the caller while using the Directory ignore step 1. The caller will be put on hold once you make the call in step 4. For further information on transferring a call please refer to page 9. Contacts 30 Navigate User Manual v3.2/0413/3
35 Make a call to a Contact s alternative numbers Up to 5 telephone numbers can be stored for each Contact - the main Telephone Number, Mobile Number, Home Number, and two Spare numbers. If you wish to dial a Contact on any of these numbers you can search for their entry within the Directory and click on the number within the Directory window as explained in the Make a call to a Contact section from page 30. Alternatively, you can use the following method to dial one of the numbers store for a Contact: 1. Firstly, ensure the Contacts filter and/or Company filter is turned on 2. Within the Call box, search for the Contact required 3. Right click on the Contact required and select Choose Number to Dial 4. The Select Number dialogue box will appear displaying the numbers stored with this Contact 5. If you wish to dial the Mobile number click on the Mobile button or if you wish to dial the Home number click on the Home button, and so on. This method can also be used to transfer a call to a User s personal numbers. Add a note to a Contact during a Call During a call you may wish to make notes about the call, for example, the caller s name, the details of his enquiry, etc. This information not only acts as a reminder for you but will also be passed to another User of Navigate, PCS 60 and PCS 58x/57x/56x when the call is transferred. If the call has been made to or received from a Contact these notes can be stored permanently on the database for future reference, as follows: 1. During a call click on the Add Note icon, from the Call Status pane 2. Enter any text in the Note box 3. Select Add to Contact The text will be stored permanently with the Contact on the database and will be displayed whenever a call is received by or made to this Contact so that you are fully aware of previous conversations with this customer, for example. Contacts Navigate User Manual v3.2/0413/3 31
36 Please note that if you select the Add to Call button the text will disappear once the call has ended and will not be stored. For further information please refer to the Add a note to a call section from page 11. This Note can be viewed in the Call Information window (from the View menu select Call Information). The text together with your name as the originator of the note and the date and time will be displayed. This information will be passed on with the call if it is transferred. The Call Information window will also display Notes added by a colleague when they are transferring a call to you, for example. Viewing Contact Details All information, for example, the address, telephone numbers etc, stored on the database for a particular Contact can be viewed. 1. Within the Call box, search for the Contact to be viewed. 2. Right click on the entry and select Get Info 3. The Contact Details dialog box will be displayed for the selected Contact 4. Select Cancel to exit. Contacts 32 Navigate User Manual v3.2/0413/3
37 View a Note If you wish to view the notes stored for this Contact select the Notes button. Select Cancel or Close to return to the Contact Details form. Amend a Contact s details Please note that you will only be able to make a change to the details stored for a Contact if given the required permission. Please refer to your system administrator for further information. 1. Within the Call box, search for the Contact to be amended. 2. Right click on the entry and select Get Info 3. The Contact Details dialog box will be displayed for the selected Contact 4. Make the changes required 5. Select OK to save the changes. Add a Note If you wish to add a note to the Contact while viewing the Contact Details click on the Notes button. 1. Click within the text box at the bottom 2. Enter the text required 3. Select the Add button 4. The new entry will be listed above. 5. Select the OK button when finished Contacts Navigate User Manual v3.2/0413/3 33
38 Amend a Note 1. Select the Note to be amended, by clicking on the Originator s name 2. Click within the text box at the bottom 3. Make the changes required 4. Click on the Update button when ready 5. Select the OK button when finished Delete a Note 1. Select the Note to be deleted, by clicking on the Originator s name 2. Click on the Delete button 3. Select the OK button when finished Create a new Contact Please note that you will only be able to add a new Contact to the database if given the required permission. Please refer to your system administrator for further information. A new Contact will be saved Contacts 34 Navigate User Manual v3.2/0413/3
39 in the centralised database and therefore will be available to all your colleagues also using Navigate, PCS 60 or PCS 56x or 57x or 58x 1. Right click on an entry within the directory and select Add Contact 2. The Contact Details form will be displayed. Enter all the information required. 3. If you wish to add notes to this Contact select the Note button and enter the text required and select OK. 4. When ready, select OK to save the new Contact. Create a new Contact from Calls History If you have received a call from or made a call to an external number this call will be listed in your Calls History. The number listed can be used to create a new Contact record by right clicking on the required entry and then selecting Add Contact. The number displayed will be automatically entered into the Telephone number field of the Contact Details form and further information can be added. Please refer to the Viewing your Calls History section from page 18 for further details. Using the Auto URL and Dir Auto URL fields A Contact can be configured so that a web page relevant to that Contact is available when a call is received from and/or made to this Contact when a colleagues is using a PCS 60 or PCS 58x. This facility can be used to view websites available via the Internet or stored on your company s Intranet or on the telephone system s internal web server to provide your colleagues with information to help them deal with a call to or from the Contact. 1. In the Web field enter the address to the web page required, eg 2. From the AutoURL list box select: No Action the web page will be displayed when requested by the User, or Show Info on Ring the web page will be displayed when a call is made to and/or received by this Contact, or Show Info on Connect the web page will be displayed once a call to and/or from this Contact has been answered. 3. From the DirAutoURL list box select: Both Way the web page will be displayed when a call is made to this Contact and when a call is received from this Contact, or Contacts Navigate User Manual v3.2/0413/3 35
40 Incoming the web page will only be displayed when a call is received from this Contact, or Outgoing the web page will only be displayed when a call is made to this Contact Please refer to your system administrator for further assistance when configuring this facility. For details on using the Direct Rt To field please refer to your system administrator. Delete a Contact Please note that you will only be able to delete a Contact if given the required permission. Please refer to your system administrator for further information. The Contact will be deleted from the centralised database and therefore will no longer be available to your colleagues. 1. Within the Call box, search for the Contact to be amended. 2. Right click on the entry to be deleted and select Get Info 3. Select the Delete button. 4. The contact will be deleted from the centralised Contacts database on your telephone system. Using an Ambiguous Number When a company has a large DDI number range a Contact can be created that will match any incoming call from this company so that you and your colleagues are always aware when a call is received from this company. A question mark (?) is used to specify the part of the telephone number that will vary, eg an entry of ??? will match a call from , , etc. 1. Create a new Contact or open the Contact Details for the Contact to be amended. 2. In the Ambiguous field enter the number required using a? where a digit will be variable. 3. Select OK to save the changes. Please note: Contacts containing a complete match to the incoming number will take priority over an ambiguous number. You will only be able to add or amend a Contact if given the required permission. Please refer to your system administrator for further information. Integration with your Outlook Contacts If you are using Microsoft Outlook to store your own contact details your User account can be configured to enable you to use the Outlook Contacts Lookup feature which will allow you to dial these number via Contacts 36 Navigate User Manual v3.2/0413/3
41 Navigate. Please note that this feature must be previous configured on your User account, please refer to your system administrator for further details. Select the Enable Outlook Contact Lookup icon, on the right hand side of the Call bar, to enable the Directory to search within your Outlook Contacts. Please note that the search will only be made within the Name field. Make a call to an entry within your Outlook Contacts 1. Firstly, ensure the Enable Outlook Contact Lookup icon is turned on 2. In the Call box enter the name or number of the Outlook Contact you wish to dial 3. As you starting typing the list of the records matching the text you have entered will be displayed. 4. When the entry you require is displayed, Click on the number you wish to dial, and the call will be made. or Double click on the Name, and the number displayed in the Telephone Number column will be used. Call Status will display the name and number of the Contact being dialled. Please note that if you right click on an entry from your Outlook contacts: The Add Contact and Get Info options will open a blank Contact Details form and save this new entry in the Contact database stored centrally on your telephone system. The Add to Favourites option will create a Favourite using the Contact Name and Telephone Number displayed in the directory. The Choose Number to Dial option will display the numbers stored for the entry in your Outlook Contacts. You can dial these numbers by clicking on the button beside the number you wish to dial. Contacts Navigate User Manual v3.2/0413/3 37
42 User Configuration The maximiser system gives you the ability to configure features such as call waiting, forwarding, do not disturb, speed dials and ring tunes on your extension. Navigate enables you to configure these facilities via an easy to use dialog box or via the Quick Settings Bar. Please note that these settings are stored in your User account and therefore will travel with you when you log on to another handset or PC running Navigate. The User Configuration form can be accessed by selecting Settings from the Edit menu. Please note: If the User Configuration dialogue box does not appear when you select Settings from the Edit menu you have not been given the access required to change your configuration options. If the Favourites tab and Ring Tunes tab are the only tabs that appear in your User Configuration form you have been given restricted access to this dialogue box. If the Quick Settings Bar is not displayed within Navigate you have not been given the access required to change your configuration options via this bar. Please refer to your System Administrator for further information. Call Waiting The Call Waiting feature allows you to receive a second call while connected to another call. Turn on Call Waiting 1. From the Edit menu select Settings 2. Select the General tab 3. From the Call Waiting list box select Enabled 4. Select OK or Save. User Configuration 38 Navigate User Manual v3.2/0413/3
43 Handling a waiting call 1. When a second call is received you will hear an intermittent beep via your telephone handset (partner mode) or Navigate software, and the Call Waiting message will appear from the Navigate icon within the Notification Area. This message will disappear after a few seconds or alternatively click on the message. 2. Call Status will also display the details of the second call waiting to be answered. 3. To answer the second call click on the call within Call Status. The first call will be placed on hold. 4. The second call will ring on your extension, click on the Answer icon or press Enter or Hang up the call select Hang up icon (the call will be automatically passed to your Forward on Busy number (if set) or to voic (if enabled)) or Send the call to voic select Send to VM Alternatively, 1. Select the Switch icon and the first call will be placed on hold. 2. The second call will ring on your extension, click on this call in Call Status 3. Select the Answer icon or press Enter or Hang up the call select Hang up icon (the call will be automatically passed to your Forward on Busy number (if set) or to voic (if enabled)) or Send the call to voic select Send to VM When you have two calls active on your phone you can:- Use the Switch icon to toggle between the two calls. Select the Conference icon to create a 3-way conference between yourself and the two calls. (For further information on conference calls please refer to page 14.) Use the Hang Up icon to end the call you are currently connected to. If you choose to ignore a call waiting on your phone the call will be automatically passed to your Forward on No Answer number (if set) or to voic (if enabled), otherwise the call will continue to ring on your extension. User Configuration Navigate User Manual v3.2/0413/3 39
44 If you select the Switch icon and choose not to answer the call waiting the caller will be automatically passed to your Forward on No Answer number (if set) or to voic (if enabled) and you will be returned to your previous call. Turn off the Intermittent Beep When the Call Waiting feature is enabled you may not wish to hear the intermittent beep when a second call is received and may wish to be informed visually via Navigate only. This tone can be turned off as follows: 1. From the Edit menu select Settings 2. Select the General tab 3. From the Call Waiting list box select No Tone 4. Select OK or Save. When the No Tone option is turned on and a second call is received the Call Waiting message will appear on the screen, the call will be displayed in Call Status and the Switch icon will become available. Handle the call as described above. Turn off the Intermittent Beep in the headset only (Partner mode only) If you do not wish to hear the beep in your headset but wish to hear the beep via Navigate, ie via your PC. This feature can be set as follows: 1. From the Edit menu select Settings 2. Select the General tab 3. From the Call Waiting list box select Phone Tools 4. Select OK or Save. Please note: your PC must have a sound card and speakers in order for you to hear the intermittent beep. Turn off Call Waiting 1. From the Edit menu select Settings 2. Select the General tab 3. From the Call Waiting list box select None 4. Select OK or Save. Call Forwarding The Call Forwarding facility enables you to forward calls to a colleague or to your mobile, for example, when you are out of the office, not at your desk or on another call to ensure your callers can reach you wherever you are or to ensure your calls are dealt with by another member of staff. Please note: Partner mode - When Follow Me or Forwarding has been set your handset will provide a broken dial tone to remind you that this feature has been enabled. If your calls are forwarded to an internal extension and that extension is not answered or busy the caller will be passed to your voic and the call will be logged as a missed call on your extension. User Configuration 40 Navigate User Manual v3.2/0413/3
45 Using Follow Me This facility allows you to configure your extension so that your calls follow you to an internal extension or to an external number so that when you are, for example, working at another desk, working at home, or using your mobile etc, your calls will still reach you. You could also use this feature when you are, for example, on holiday and wish all your calls to be diverted to your assistant or another colleague. Turn on Follow Me 1. From the Edit menu select Settings 2. Select the General tab 3. From the Follow Me list box select one of the following: Personal all calls to your extension and direct line number will be forwarded Dual Personal all calls to your extension and direct line number will be forwarded, however your extension will also ring. This will ensure that you can pick up the call wherever you are. All all calls to your extension, direct line number and any Department calls will be forwarded Dual All All calls to your extension, direct line number and any Department calls will be forwarded, however your extension will also ring. This will ensure that you can pick up the call wherever you are. 4. In the Follow Me Number field enter the internal or external number to which calls are to be forwarded. 5. Select OK or Save. The Dual Personal and Dual All options are useful if you are in role where you are constantly moving away from your desk. You could set your Follow Me to your mobile, for example, so that you can answer calls wherever you are, and when you are back at your desk you do not need to turn off Follow Me to answer the calls at your desk. When you have these options set you can set a different ring tune to play on your handset (partner mode) or PC to remind yourself that this feature has been set. Please refer to the Ring Tunes section from page 55 for further details. Turn off Follow Me 1. From the Edit menu select Settings 2. Select the General tab 3. From the Follow Me list box select None 4. Select OK or Save You do not need to remove the Follow Number as you may wish to use this number again. User Configuration Navigate User Manual v3.2/0413/3 41
46 Quick Settings Bar Once a Follow Me number has been entered, the Follow Me facility can be turned on and off via the Quick Settings Bar. 1. From the Divert Calls list box select either Personal, Dual Personal, All, Dual All or None. If your home, mobile or assistant telephone numbers have been entered in your User account (please refer to page 47 for further details) you can set your Follow Me facility to one of these numbers via the Quick Settings Bar. 1. From the Divert Calls list box select either Personal, Dual Personal, All, or Dual All. 2. From the Divert To list box select Mobile, Home or Assistant. Forward on Busy The Forward on Busy feature will redirect your calls to either an internal or external number when you are on an existing call or have Do Not Disturb set. This is useful if you wish to ensure your calls are answered by your assistant or another member of your team. The feature can be turned on as follows: 1. From the Edit menu select Settings 2. Select the Forwarding tab 3. Select the Forward on Busy tick box 4. In the Forward on Busy number field enter the internal or external number to which calls are to be forwarded. 5. Select OK or Save To turn off this feature un-tick the Forward On Busy tick box User Configuration 42 Navigate User Manual v3.2/0413/3
47 Forward on No Answer The Forward on No Answer feature will redirect your calls to either an internal or external number when you do not answer your extension. This is useful if you wish to ensure your calls are answered by your assistant or another member of your team or redirected to your mobile when you are temporarily away from your desk. The feature can be turned on as follows: 1. From the Edit menu select Settings 2. Select the Forwarding tab 3. Select the Forward on No Answer tick box 4. In the Forward on No Answer number field enter the internal or external number to which calls are to be forwarded. 5. Select OK or Save To turn off this feature un-tick the Forward On Busy tick box By default, your extension will ring for 20 seconds before your extension is considered not answered. Your System Administrator will be able to tell you if this default setting has been changed. Receiving a Forwarded Call When a colleague s calls have been forwarded to your extension your colleague s details will be displayed in Call Status. This information will enable you to identify and answer a forwarded call correctly. Out of Office Message When you are unable to answer your phone you may wish to inform your colleagues of your whereabouts and when you will be available. An Out of Office Message can be configured and this will be displayed on your colleagues Navigate, PCS 60, PCS 56x, 57x or 58x when they attempt to call you. Setting an Out of Office Message 1. From the Edit menu select Settings 2. Select the General tab 3. From the Out of Office list box select In Meeting, At Lunch, On Holiday or Off Site 4. In the Out of Office text box enter the message that will accompany the above message eg until Monday, until 3 pm etc 5. Select OK or Save User Configuration Navigate User Manual v3.2/0413/3 43
48 Please note that if voic is enabled on your User account, when you set an Out of Office message your voic greeting will also change. Your callers will be played the In Meeting greeting, the At Lunch greeting, the On Holiday greeting or the Off Site greeting depending on the Out of Office message selected. By default, this will be your Permanent Greeting as described in the Recording a Greeting section from page 63. However if you wish to record a specific greeting for each Out of Office message please refer to your System Administrator for further details. Making a call to a colleague with an Out of Office message When a call is made to a colleague who has an Out of Office message set this information will appear in the balloon displayed via Navigate icon within the Notification Area. This feature will not change the manner in which your call is handled. Turn off the Out of Office message 1. From the Edit menu select Settings 2. Select the General tab 3. From the Out of Office list box select In the Office 4. Select OK or Save You can remove the message in the Out of Office text box or leave it if you want to use this same text again. Quick Settings Bar The Out of Office message can be turned on and off via the Quick Settings Bar. 1. From the Out of Office list box select In Meeting, At Lunch, On Holiday, Off Site, or In the Office to turn off this feature. Integration with your Outlook Calendar If you are using Microsoft Outlook as your calendar your User account can be configured to enable you to use the Outlook Calendar Lookup feature to set your Out of Office message. Please note that this feature must be previous configured on your User account, please refer to your system administrator for further details. Select the Enable Outlook Calendar Lookup icon Navigate to use your Calendar., on the right hand side of the Call Bar, to enable In the relevant appointment in your Calendar enter one of the following Out of Office messages and at the appropriate time this message will be turned on within your User account. User Configuration 44 Navigate User Manual v3.2/0413/3
49 In the Office In Meeting At Lunch On Holiday Off Site These messages are case sensitive and must be the first words that appear in the body of the appointment. Your Out of Office message will return to In the Office at the End Time of your appointment. Do Not Disturb The Do Not Disturb facility allows you set your extension as permanently busy. This useful if, for example, you are holding a meeting in your office and do not wish to be disturbed. Turn on Do Not Disturb 1. From the Edit menu select Settings 2. Select the General tab 3. Select the Do Not Disturb tick box 4. Select OK or Save Your calls will be automatically passed to your Forward on Busy number, if configured, or to voic , if enabled, or cancelled. Calls will be logged in your Missed Calls list. Your telephone handset will provide a broken dial tone to remind you that this feature has been enabled (partner mode only). The Navigate icon on the Task Bar will display the Do Not Disturb icon to indicate that you have this feature enabled. User Configuration Navigate User Manual v3.2/0413/3 45
50 When a colleague uses the Users directory to find your entry the Do Not Disturb icon will be displayed beside your name to indicate that your extension has Do Not Disturb set. Turn off Do Not Disturb 1. From the Edit menu select Settings 2. Select the General tab 3. De-select the Do Not Disturb tick box 4. Select OK or Save Quick Settings Bar Do Not Disturb can be turned on and off via the Quick Settings Bar 1. From the DND list box select Off or On. Do Not Disturb Exception Number You may wish to turn on Do Not Disturb but still receive a call from a colleague or an external number. This is useful if you are expecting an urgent or important call but do not wish to be disturbed by other calls. The relevant number can be set as a Do Not Disturb exception as follows. Entering a DND Exception Number 1. From the Edit menu select Settings 2. Select the DND Exceptions tab 3. In the DND Exception Number field (at the bottom) enter the internal or external number required 4. Select Add (the number will be displayed in the DND Exceptions list) 5. Select OK User Configuration 46 Navigate User Manual v3.2/0413/3
51 Once a DND Exception number has been entered whenever you turn on Do Not Disturb you will still receive calls from this number. These numbers can stay in the list as long as required to be used each time you turn on Do Not Disturb. Removing a DND Exception Number 1. From the Edit menu select Settings 2. Select the DND Exceptions tab 3. Select the number to be deleted 4. Select the Del button 5. Select OK Integration with your Outlook Calendar If you are using Microsoft Outlook as your calendar your User account can be configured to enable you to use the Outlook Calendar Lookup feature to enable and disable Do Not Disturb. Please note that this feature must be previous configured on your User account, please refer to your system administrator for further details. Select the Outlook Calendar Lookup icon use your Calendar., on the right hand side of the Call Bar, to enable Navigate to When you have an appointment scheduled in your Calendar that is set as Busy or Out of Office, Do Not Disturb will be enabled on your User account. If you have an appointment scheduled in your Calendar but do not wish DND to be enabled, ensure the appointment is set at Free or Tentative. Do Not Disturb will be disabled at the End Time of your appointment. Personal Numbers Your home and mobile numbers, and two additional external numbers, can be entered on the central database, together with the internal or external number that you wish to use as your Assistant number. These numbers are used: 1. To identify you when you make a call from one of these telephone numbers. Your name and details will appear in Call Status. 2. By the Directory to enable a colleague to call you on one of these numbers User Configuration Navigate User Manual v3.2/0413/3 47
52 3. By voic a. when accessing your messages from your mobile or home phone (please refer to your System Administrator for further details), b. your callers can be given the option to be transferred to your assistant number rather leave a message (please refer to the Using an Assistant telephone number section from page 64 for further details). 4. By the Follow Me facility (please refer to the Call Forwarding section from page 40 for further information). Enter your personal numbers 1. From the Edit menu select Settings 2. Select the Numbers tab 3. In the Mobile, Home, Assistant, Spare 1 and/or Spare 2 Number fields enter the numbers required 4. Select OK Please note: You cannot change your extension number If all the fields are grey then you are unable to edit these fields. Please refer to your System Administrator for further details. Do NOT enter internal extension numbers into Mobile, Home, Spare1 or Spare2. These fields are used to match incoming CLI and dial external numbers only. Favourites The Favourites section of your User Configuration form allows you to set up your own personal list of regularly used telephone numbers (internal or external). These are displayed and accessed within the Favourites window by click on the Favourites icon. Favourites set up for internal extensions will also act as Busy Lamp Fields (BLF), in other words they will indicate when that User is on the phone. User Configuration 48 Navigate User Manual v3.2/0413/3
53 Create a Favourite 1. From the Edit menu select Settings 2. Select the Favourites tab 3. In the Description field enter any text (alpha-numeric characters only) that will identify this Favourite (up to 13 characters will be displayed in the Favourites window) 4. In the Telephone Number field enter the number to be dialled (internal or external number) 5. Select Add (the entry will be displayed in the list above) 6. Repeat steps 3 to 5 to add another Favourite 7. Select OK when you have finished Please note: if a telephone number entered in a Favourites is also stored in the Contacts or Users directory, when a call is made to or received from this number, the text entered in the Description field of the Favourite will be displayed in Call Status in preference to the name used in the corresponding Contact or User directory entry. Favourites window Your Favourites will be displayed in the Favourites window which can be displayed by selecting the Favourites icon on the Tool bar or by selecting Favourites from the View menu. This window enables you to quickly and easily make calls, transfer calls and pick up calls. Up to 13 characters of the Favourite s Description will be displayed in the Favourites window. User Configuration Navigate User Manual v3.2/0413/3 49

54 A Favourite displayed for an internal extension will act as a Busy Lamp field: An internal Favourite displayed with a green icon indicates that your colleague s extension is free An internal Favourite displayed with a red icon indicates that your colleague is currently on a call. An internal Favourite flashing between a yellow and red icon indicates that either the User s extension is currently ringing or there are calls queuing for that Department. The number of calls waiting to be answered will be displayed. You can pick up a call ringing for this extension or Department by clicking once on the Favourite. If you would like your Favourites window to always be displayed on top of all windows on your Desktop please refer to the Favourites on Top section from page 72 for further details. Make a call using a Favourite 1. Click once on the Favourite required and a call to this number will be made automatically If you select a Favourite where the internal extension is busy you will be passed to the colleague s Forward on Busy number (if set) or to their voic (if enabled) or the call will be cancelled. Transfer a call using a Favourite 1. Click once on the Favourite required 2. The original call will be placed on hold and a call will be made to the telephone number stored with the Favourite 3. Wait for the call to be answered 4. When ready select the Transfer icon to transfer the original call. For further information on transferring a call please refer to page 9. Viewing your Favourites via the Directory page If you prefer you can access your Favourites via the Directory page, this might be useful if you do not wish to display the Favourites window, for example. Select the Favourites Filter icon so that when you enter text in the Call box the search will also look in your Favourites. User Configuration 50 Navigate User Manual v3.2/0413/3
55 Amend a Favourite 1. From the Edit menu select Settings 2. Select the Favourites tab 3. Select the Favourites to be amended 4. The Favourite s details will be displayed in the fields below 5. Make the changes required 6. Select Update 7. Select OK to finish Delete a Favourite 1. From the Edit menu select Settings 2. Select the Favourites tab 3. Select the Favourites to be deleted 4. Select the Delete button 5. Select OK to finish Grouping Favourites If you have multiple Favourites you may wish to organise them into Favourite Groups to make them easier to find. For example, you may wish to separate your personal Favourites from your business Favourites, or organise your Favourites by project or department, eg Exhibition, Directors, and so on. Firstly you will need to create a Favourite Group and then assign a Favourite to that group. Creating a Favourite Group 1. Create a new Favourite as described from page In the Description field enter the name you wish to give the group, eg Personal 3. In the Short Code field enter GH:group number, eg GH:1 4. Remove any text from the Telephone field so that this field is blank 5. The Favourite Group will appear in your Favourites pane indicated by a blue folder icon Assigning a Favourite to a Favourite Group 1. Create a new Favourite as described from page 49 or open an existing Favourite 2. In the Short Code field enter G:group number, eg G:1 3. Select Update or Add (depending on whether this is a new or existing Favourite) 4. Select OK when finished 5. This Favourite will now be available by selecting the relevant Favourite Group 6. Use the Back option to return to main Favourites list User Configuration Navigate User Manual v3.2/0413/3 51
56 The following diagram gives an example configuration: Prioritising Favourites All Favourites and Favourite Groups will be displayed in alphabetical order. However if you wish to display your Favourites in a different sequence a display order number can be assigned using the following methods. If you wish to specify where a Favourite will be displayed in your Favourites window, in the Short Code field enter PRI:order number, eg PRI:1. If you wish to specify where a Favourite Group will be displayed in your Favourites window, in the Short Code field add a comma and then the order number required, eg GH:1,6 If you wish to specify where a Favourite assigned to a Favourite Group will be displayed within that group, in the Short Code field add a comma and then the order number required, eg G:2,1. User Configuration 52 Navigate User Manual v3.2/0413/3
57 Call Pick up You can pick up a call ringing on another extension via the Favourites window. This is useful if, for example, you wish to answer your colleague s phone when they are not at their desk or you wish to assist with answering calls to a Department. You do not have to be a member of the Department to pick up a Department call. 1. A Favourite displaying a flashing yellow/red icon indicates that the relevant extension has a call waiting to be answered. 2. Click once on the Favourite 3. The call will be answered by your extension Please note: If you pick up a ringing call while you are on a call your original call will be parked in the first available park slot. Please refer to page 12 for further information on parking a call. If you do not wish your colleagues to pick up calls ringing on your phone via their Favourites, please contact your System Administrator who can configure this for you. Assigning a short code to a Favourite For numbers that you dial regularly you may prefer to assign a short code to a Favourite so, for example, you could dial just 33 to ring (Please note that the short code you use must not be the same as a short code you are already using for other system functionality, please refer to your System Administrator for further assistance.) 1. From the Edit menu select Settings 2. Select the Favourites tab 3. In the Description field enter any text (alpha-numeric characters only) that will identify this Favourite 4. In the Short Code field enter the code to be used to speed dial the number 5. In the Telephone Number field enter the number to be dialled (internal or external number) 6. Select Add (the entry will be displayed in the Favourites list) 7. Select OK to finish Park icons By default all Users of Navigate, PCS 60, and PCS 58x, 57x and 56x, within your company will have icons/buttons to access park slots 1-4. However you can choose to: create icons to access alternative park slots. This would be useful if you need an icon to a park slot that is only going to be used by the colleagues in your department, or you would like an icon to a park slot only used by yourself, for example. remove all the Park icons. This would be useful if, for example, you don t use the Park facility and you wish to have more room for your Favourites Please refer to the Parking a call section from page 12 for information on how to use the Parking facility. User Configuration Navigate User Manual v3.2/0413/3 53
58 Create a Park icon 1. From the Edit menu select Settings 2. Select the Favourites tab 3. In the Telephone Number field enter slot followed by the park slot number to be accessed eg slot5, slot8, slot99 etc (The higher the number the less likely this slot will be used by other colleagues. There is no limit.) 4. Select Add (the entry will be displayed in the Favourites list) 5. Select OK to finish When you create a new Park icon the original icons to park slots 1-4 will be removed from your Favourites window so that only the Park icons you require are displayed. (If you delete the new Park icon they will return.) You can recreate the icons to park slots 1-4 if required. User Configuration 54 Navigate User Manual v3.2/0413/3
59 To help you identify the entry, within the Favourites list, you can enter any text (alpha-numeric characters) in the Description field. However, this text will not be displayed with icon within the Favourites window. slot# will always be displayed as, eg Park 1, Park 8, Park 99 and so on. Please note: that if you delete all the Park icons that you created via the User Configuration form the default Park icons to Park Slots 1-4 will return to the Favourites window. Remove the Park icons If you do not wish to use the Park icons and would prefer to utilise the space for your Favourites these can be removed as follows: 1. From the Edit menu select Settings 2. Select the Favourites tab 3. In the Telephone Number field, enter slot0 4. Select Add (the entry will be displayed in the Favourites list 5. Select OK to finish If you delete this entry in your Favourites list the icons to Park slots 1-4 will return. Ring Tunes The Ring Tunes section of the User Configuration form allows you to use ring tunes played by your Navigate application to distinguish between the different types of incoming calls, for example, between a Department call and a call to your User account. Your PC must have a sound card in order to use the Ring Tunes facility and the selected ring tune will be played over your PC s speakers. If you are using Navigate application to partner your PCS 58x, 57x or 56x this configuration will also affect the ring tune used by these handsets. Any other telephone handset will continue to use one of its pre-set ringing cadences. Change the ring tune for an internal or external call You may wish to distinguish between an incoming external call from an incoming internal call by the ring tone that you hear. User Configuration Navigate User Manual v3.2/0413/3 55
60 1. From the Edit menu select Settings 2. Select the Ring Tunes tab. 3. From the Type list box select Internal or External 4. From the Tune list box select the Tune required. 5. Select the Add button. The new entry will appear in the Ring Tunes list. 6. Select OK to finish Assigning a ring tune to a specific incoming number You may wish to assign a ring tune to a specific number so that when you receive a call from a colleague or customer, for example, you will be able to recognise their call immediately. 1. From the Edit menu select Settings 2. Select the Ring Tunes tab. 3. From the Type list box select Caller ID 4. In the Telephone Number field enter the incoming number, either internal or external number 5. From the Tune list box select the Tune required. 6. Select the Add button. The new entry will appear in the Ring Tunes list. 7. Select OK to finish Differentiate a Department call from a call to your extension If you are receiving Department calls you may wish to distinguish between a call to your User account and a Department call by using a different ring tune. 1. From the Edit menu select Settings 2. Select the Ring Tunes tab. 3. From the Type list box select Destination. 4. In the Telephone Number field enter the relevant number. a. If you wish to differentiate your User calls from other calls enter your extension number here, or b. If you wish to differentiate calls to a specific Department, enter the Department extension number here (please refer to your System Administrator if you are unsure which number to use here). 5. From the Tune list box select the Tune required. 6. Select the Add button. The new entry will appear in the Ring Tunes list.. 7. Select OK to finish For further information on Departments please refer to page 23. User Configuration 56 Navigate User Manual v3.2/0413/3
61 Assign no ringing sound for a specific incoming call If you wish that no ringing is heard for a specific incoming call create the entry as described above however in the Tune field select a tune number where no corresponding WAV file is stored on your PC. By default, this will be Ring Tune 7, 8, 9. Please refer to your system administrator for further assistance. Assign a ring tune for Follow Me Dual Personal or Dual All If you have Follow Me Dual Personal or Dual All set (please refer to page 41 for further details) you may wish to have a different ring tune played on Navigate to remind you that this feature has been set. 1. From the Edit menu select Settings 2. Select the Ring Tunes tab. 3. From the Type list box select Dual Ringing. 4. From the Tune list box select the Tune required. 5. Select the Add button. The new entry will appear in the Ring Tunes list. 6. Select OK. System Ring Tune Type The System Type is used for calls generated by the telephone system, for example voic call-back. Please refer to your System Administrator for further information. Amend a Ring Tune entry 1. From the Edit menu select Settings 2. Select the Ring Tunes tab 3. Select the Ring Tune to be amended 4. The entry will be displayed in the fields below 5. Make the changes required 6. Select Update 7. Select OK to finish Delete a Ring Tune entry 1. From the Edit menu select Settings 2. Select the Ring Tunes tab 3. Select the Ring Tune to be deleted 4. Select the Delete button 5. Select OK to finish Extension Anywhere If you are a user of a PCS 58x/57x/56x or analogue handset and your Navigate is partnering this telephone you can use the Extension Anywhere feature when you are, for example, working from home. This feature will allow you to receive and make calls from, for example, a home telephone or mobile as though you were in the office. This means callers/recipients will be unaware that you are working from home, you will not incur any call charges and you will be able to handle the call as if you were in the office, eg transfer calls. User Configuration Navigate User Manual v3.2/0413/3 57
62 Your System Administrator can configure this facility for you. Once set up you can use the Extension Anywhere list box in your Quick Settings Bar to turn this feature on or off. Firstly, you must enter your Extension Anywhere number, for example, your home telephone number, into your Assistant Number field as follows: 1. From the Edit menu select Settings 2. Select the Numbers tab 3. In the Assistant Number field enter the number required, for example, your home telephone number 4. Select OK to save the changes. Turn on Extension Anywhere From the Extension Anywhere list box in your Quick Settings Bar select Assistant Turn off Extension Anywhere From the Extension Anywhere list box in your Quick Settings Bar select None Please ensure that you do not have Follow Me turned on at the same time as Extension Anywhere otherwise you will receive two calls, and if you answer the forwarded call you will not be able to use the Extension Anywhere facilities, such as the ability to transfer the call. Please refer to your system administrator for further information on the Extension Anywhere feature. Quick Settings The Quick Settings bar enables you to quickly and easily turn on or off Do Not Disturb, Follow Me, your Out of Office message and Extension Anywhere. These features are covered in more detail above, in the relevant chapter of the User Configuration section from page 38. User Configuration 58 Navigate User Manual v3.2/0413/3
63 Voic The voic facility allows your callers to leave you a message if you are on the phone or do not answer a call. Your System Administrator can enable this facility for you, if not already available. (Further information on using voic is available in the Understanding Voic document obtainable via the SpliceCom website.) Receiving a Message If you are busy on a call or do not answer your phone the caller will be automatically passed to your voic and will be able to leave a message. By default, your extension will ring for 20 seconds before your extension is considered not answered. Your System Administrator will be able to tell you if this default setting has been changed. If a caller has left a message the Messages icon with flash until you have listened to the message. The Navigate icon on your Task Bar will also display the Messages icon to indicate that you have received a new voic message. The broken dial tone provided by your handset may also indicate that you have a new message (partner mode only). If you have received a new message and have missed a call the Messages icon will flash but will also display a telephone handset and a red circle in the background. Divert an incoming call to voic If you do not wish to answer a call and wish to route the caller to your voic , select the Send to VM icon, from Call Status. Please note that if you reject a call you do not wish to answer (via the Hang Up icon or Esc key on your keyboard or Reject button on the Incoming Call Alert window) the call will also be routed to your voic unless you have Forward on Busy set. Status Bar The Status Bar will display the number of new messages currently stored in your mailbox to give you a quick visual indication of your voic status. Listen to a message 1. Select the Messages icon from the Tool Bar. 2. Your messages will be listed in your calls history. Voic Navigate User Manual v3.2/0413/3 59

64 3. A new message will be indicated by a blue icon displaying a closed envelope 4. Partner mode - lift your handset and double click on the message you wish to listen to or IP soft phone mode - double click on the message you wish to listen to 5. This message will be played to you. 6. You can hang up at this point or delete/save/forward etc the message as described in the Message Handling section below. The message will now be displayed in your calls history with a blue icon displaying an open envelope icon, as this is now an old message and will be deleted after 7 days unless manually saved. A message is marked as old after listening to the first 10 seconds. Voic Information While listening to a message, you can view the details of the call via the Voic Information window as follows. 1. While listening to a message, from the View menu select Voic Information. This window will automatically close when you select the Hang Up icon or replace your handset (partner mode). Voic 60 Navigate User Manual v3.2/0413/3
65 View just your voic messages in Calls History If you want to quickly find all your voic messages, rather than scrolling through your calls history, from the Messages list box select Messages, then click on the Message icon. The Calls History pane will display just your voic messages. From the Messages list box select All to view your complete calls history. Message Handling While a message is being played the following options are available: Delete - delete the message permanently Forward Message - forward the message to a colleague(s) Play Message - listen to the message again Save Message - save the message until manually deleted Rewind Message rewind the message by 2 seconds Fast Forward Message Skip Back Message forward the message by 2 seconds listen to the previous message Skip Forward Message listen to next message Delete a message 1. Click on the Messages icon 2. Within the Calls History window, double click on the message you wish to delete 3. Select the Delete icon. or 2. Within the Calls History window, right click on the message you wish to delete 3. Select Delete Voic Navigate User Manual v3.2/0413/3 61
66 Forward a message The Forward Message facility allows you to forward a message to a colleague or group of colleagues or Department if the content is more relevant to another member of staff, for example. Alternatively, you can forward a message to a colleague s or Department s account or to your own account. The message will appear as a sound file in an and a PC with a sound card and speakers will be required to listen to the message. (This facility must be previously set up on your telephone system please refer to your System Administrator for further information.) Forward a message to a colleague s, a group of Colleague s or Department s voic 1. Click on the Messages icon 2. Within the Calls History window, double click on the message you wish to forward 3. Ensure that the Directory Filter icons required are selected. (The list of entries displayed in the Forward Voic window will be dependent on the filter icons selected.) 4. Click on the Forward Message icon 5. In the Forward Voic window, in the text box at the bottom, start to enter the name of the colleague or Group or Department you wish to forward the message to. 6. Once the name required is displayed, select this User or Group or Department. 7. Select Send to Mailbox 8. A note will be displayed from the Navigate icon in the Notification Area, indicating that the message has been forwarded 9. You can repeat steps 3 to 6 to forward the message to another colleague or Group or Department 10. Select OK when you have finished Forward a message to an account 1. Click on the Messages icon 2. Within the Calls History window, double click on the message you wish to forward 3. Ensure that the Directory Filter icons required are selected. (The list of entries displayed in the Forward Voic window will be dependent on the filter icons selected.) 4. Click on the Forward Message icon 5. In the Forward Voic window, in the text box at the bottom, start to enter the name of the colleague you wish to forward the message to. Voic 62 Navigate User Manual v3.2/0413/3
67 6. Once the name required is displayed, select this User. 7. Select Send to 8. A note will be displayed from the Navigate icon in the Notification Area, indicating that the message has been forwarded 9. You can repeat steps 3 to 6 to forward the message to another colleague 10. Select OK when you have finished Forward a message to multiple Users, Groups or Departments Within the Forward Voic dialog box use either the Shift or Ctrl key to select multiple Users. Please note that you can use the asterisks (*) to view all the entries in one list (dependent on the Directory Filter icons selected). Recording a Greeting A default message will be played to a caller when transferred to your voic . However you may wish to record your own personal message. You can record two voic greetings via Navigate. Firstly, you have a daily greeting that can be used to inform a caller of your whereabouts on a particular day, for example You have reached Alice Barker s voic on Tuesday, 4 July. I am currently in a meeting until 11 o clock. Please leave a message and I will call you on my return. Your second greeting, the permanent greeting, can be used to give a message that can be used on any day, for example You have reached Alice Barker s voic . Sorry I am unable to take your call. Please leave a message and I will get back to you as soon as possible. If you record a permanent greeting your daily greeting is deleted at midnight and the permanent greeting is then used until a new daily greeting is recorded. Record a daily greeting Partner mode 1. Lift your handset 2. From the Tool bar, click on the Greeting icon Voic Navigate User Manual v3.2/0413/3 63
68 3. Your existing greeting will be played 4. When requested record your new greeting and press # on your handset when you have finished. 5. Your new greeting will be played back to you. 6. Replace your handset or select the Hang up icon to save the new greeting and finish. IP Soft Phone mode 1. From the Tool bar, click on the Greeting icon 2. Your existing greeting will be played 3. When requested record your new greeting 4. Wait in silence for a few seconds and your new greeting will be played back to you 5. Select the Hang up icon to save the new greeting and finish Record a permanent greeting Partner mode 1. Lift your handset 2. From the Tool bar, select the Perm. Greeting icon 3. Your existing greeting will be played 4. When requested record your new greeting and press # on your handset when you have finished. 5. Your new greeting will be played back to you. 6. Replace your handset or select the Hang Up icon to save the new greeting and finish. IP Soft Phone mode 1. From the Tool bar, click on the Perm. Greeting icon 2. Your existing greeting will be played 3. When requested record your new greeting 4. Wait in silence for a few seconds and your new greeting will be played back to you 5. Select the Hang up icon to save the new greeting and finish You can also record a further four greetings used when you have set an Out of Office message as described from page 43. Your callers will be played the In Meeting greeting, the At Lunch greeting, the On Holiday greeting or the Off Site greeting depending on the Out of Office message selected. By default, this will be your Permanent Greeting. However if you wish to record a specific greeting for each Out of Office message please refer to the Understanding Voic document available on the SpliceCom website or your System Administrator for further details. Using an Assistant telephone number You may wish to give your callers the option to be transferred to a colleague, such as your assistant or another member of your team, or to your mobile rather than leave a message. The Assistant telephone number feature can be configured as follows: 1. From the Edit menu select Settings 2. Select the Numbers tab 3. In the Assistant field enter the number which callers are to be transferred to. 4. Select OK to save the changes. Voic 64 Navigate User Manual v3.2/0413/3
69 Once this feature has been configured your caller can press 0 while listening to your greeting and be transferred to your Assistant telephone number. You will need to re-record your greeting to inform your callers that facility is available. Please note If the Assistant field is greyed out then you are unable to edit this field. Please refer to your System Administrator for further details. The Assistant number is also used with the Call Forwarding feature. Please refer to page 40 for further details. The Assistant number is also used with the Extension Anywhere feature. Please refer to the Extension Anywhere section from page 57 for further information. Ring back a caller After receiving a message from a caller you may wish to ring them back. The number that was received with the original call will be shown within the Number column and the Choose icon will enable you to speed dial this number. 1. Select the Messages icon 2. Within the Calls History window, click on the number you wish to dial Please note: If the caller s number has been withheld or not received by the system this facility will not be available. The Number column will indicate if the caller s telephone number has been received. If the caller s number received with the message is matched to a User or Contact stored on the system you will be able to right click on the entry and use the Choose Number to Dial option to dial other numbers, eg a mobile number, stored against this User or Contact. Leave a message for a colleague You will automatically transfer to your colleague s voic if they are busy or do not answer their phone. However you can pre-empt this and transfer directly to their voic . 1. Make a call to your colleague 2. Click on the Send to VM icon, from the Call Status pane 3. Leave a message when requested Leave a message for a colleague without dialling the number first 1. Enter the colleague s name or extension number in the Call box 2. Within the Directory window right click on the User required 3. Select Choose Number to Dial 4. Select the Voic button Voic Navigate User Manual v3.2/0413/3 65
70 5. Leave a message when requested Transfer a call to a colleague s voic 1. Place the call on hold by selecting the Hold icon 2. Enter the colleague s name or extension number in the Call box 3. Within the Directory window right click on the User required 4. Select Choose Number to Dial 5. Select the Voic button 6. You will no longer have control of the call. Record a Call During any call (internal or external or conference call) you can record the conversation. The resulting recording will become a new voic message and can be accessed in the usual way. Please note that the use of this feature is controlled by your System Administrator. If the Record icon is not available please refer to your System Administrator. 1. During a call select the Record icon, from the Call Status pane 2. The Record icon will become red To end the recording either select the Record icon or end the call. Record a Memo You may wish to record a message to yourself, for example when you wish to record a reminder to perform a particular task - book a meeting, phone a customer etc. The resulting recording will become a new voic message and can be accessed in the usual way. (Please note that the use of this feature is controlled by your System Administrator. If the Memo icon is not available please refer to your System Administrator.) Partner mode 1. Lift your handset 2. From the Tool bar, select the Memo icon 3. Record the message you require 4. Replace your handset or select the Hang up icon to finish and save the memo IP Soft Phone mode 1. From the Tool bar, select the Memo icon 2. Record the message you require 3. Select the Hang up icon to finish and save the memo The memo can be access via the Messages icon and Mailbox columns. and Calls History will display your name in the Name Voic 66 Navigate User Manual v3.2/0413/3
71 Voic for Departments Each Department can be configured to use the voic service provided by the maximiser system. If voic has been enabled, a call to a Department will automatically pass to voic after the time specified by the Department s configuration on the system. Please refer to your System Administrator for further details. Listen to a message for a Department Your Messages window can give you access to voic messages received for a Department. Your System Administrator can configure this facility for you, if not already available. You can retrieve and handle the messages in the same way as your personal messages. The Mailbox column will indicate in which mailbox the message is stored. The Status Bar will indicate how many new messages and missed calls the Department has received. Click on the list box arrow to the right of the Status Bar to view this information for the relevant Department. Please note that if you are able to access Department voic messages via Navigate, answered and missed calls for the Department will also be displayed in your call history. Please refer to the Viewing your Calls History section from page 18 for further details. Leave a message for a Department 1. Make a call to the Department 2. Click on the Send to VM icon, from the Call Status pane 3. Leave a message when requested Leave a message for a Department without dialling the number first 1. Via the Call box search for the Department required 2. Within the Directory window right click on the Department required 3. Select Choose Number to Dial 4. Select the Voic button 5. Leave a message when requested Transfer a call to a Department s voic 1. Place the call on hold by selecting the Hold icon 2. Use the Call box to search for the Department required. Voic Navigate User Manual v3.2/0413/3 67
72 3. Within the Directory window right click on the Department required 4. Select Choose Number to Dial 5. Select the Voic button 6. You will no longer have control of the call. For further information on using the Directory please refer to the Using the Directory section from page 15. For further information on transferring a call please refer to page 9. Voic 68 Navigate User Manual v3.2/0413/3

73 Using Navigate as a Vision Call Centre Agent If you are an agent within a SpliceCom Vision Call Centre the following features may be available to you. For further information on Vision please refer to your System Administrator. Status Bar The Status Bar will display the number of calls you have answered since log in and the number of calls that have been presented to your extension but you have not answered. Your Not Answered data is presented as x(y) where x is the number of successive calls that you have not answered, and y is the total number of calls you have not answered since log in. Completion Codes After receiving a call as an agent your phone may be placed in Wrap Up to give you time to complete administrative tasks. Completion Codes can be configured to be displayed during this time (these enable your supervisor/manager to monitor calls via reports available with Vision). If configured on your system, when you end the call, the Vision Completion Codes window will be displayed, select the completion code required. This may be configured to take you immediately out of Wrap-up so that you can take another call, or configured to give you extra Wrap-Up time in order to complete further tasks. Your system administrator will inform you of the functionality of each completion code. Not Available Codes Not Available Codes can be configured on your system to enable you to inform your supervisor why you are unable to take calls. These will appear in your Quick Settings Bar if configured. From the NA Codes list box select the code that is relevant to you. This code may be configured so that you no longer receive Agent calls but can still receive calls to your extension and DDI number, or configured to turn on Do Not Disturb so that you do not receive any calls. For further information on using DND please refer to the Do Not Disturb section from page 45. For further information on any of these features please refer to your system administrator or the Vision User Manual available on the SpliceCom website. Using Navigate as a Vision Call Centre Agent Navigate User Manual v3.2/0413/3 69
74 Navigate Configuration Hot Desking/Log In If you are a hot desking User, in other words a User who has been given the ability to log in to any phone on the system because, for example, you need to move around the building or you are rarely in the office and do not need a permanent telephone or you share a desk with a colleague(s), you can log in via Navigate. The benefit of logging in as yourself rather than using someone else s phone is that all your User settings follow you. This means that when you make a call the recipient will know the call is from you; you will have access to your User configuration and can set features such as DND, Follow Me etc; all your Favourites will be available to you; you will be informed when you receive a new voic message and you will be able to easily listen to these messages. You will need to know your extension number and Login Access Code, please refer to your System Administrator for these details. If your Navigate is configured to partner a handset, by logging on via Navigate you will also be logging on to the associated handset. This is useful if you share a desk with a colleague and therefore the PC on that desk. (You can also log on via the handset and this will automatically partner Navigate to this handset. Please refer to your system administrator for further details.) Log On 1. From the Tool bar, select the Login icon 2. In the Extension Number field enter your extension number, eg In the Access Code field enter your Login Access Code, eg Select the Login button 5. Wait for Navigate to communicate with the telephone system 6. When the log in is complete the Status Bar will indicate who is currently logged in. Log off If you have finished using the handset (partner mode) or Navigate you are currently logged on to, you can log yourself out. Unless you log on to another handset or Navigate, your extension will be unavailable therefore your calls will go to your Forward on Busy number (if set), or to voic (if enabled) or the caller will receive the busy tone. 1. Select the Login icon 2. Select the Logout button 3. Wait for Navigate to communicate with the telephone system (this may take a while) 4. Navigate will log back in the assigned User (in other words the User permanently allocated to this handset (partner mode) or Navigate on the PC (IP soft phone) or display Searching for Server. Navigate Configuration 70 Navigate User Manual v3.2/0413/3
75 Please note: Your User account may be configured to automatically log you off after the extension is not used for a specified amount of time. This is useful if you forget to manually log off. Please refer to your System Administrator for further details. If, when you come into the office, you sit at any available desk and wish to the use the handset on that desk partnered with Navigate on your laptop, for example. Navigate can be configured to enable you to log on to any handset (PCS 58x/57x/56x or analogue handset only) available. Please refer to your system administrator for further details. Manually label your parked calls When you park a call the name (if the incoming number is recognised by the system) or number of the caller will be displayed within the Park icon. (For further information on parking a call please refer to the Parking a call section from page 12 for further details.) Alternatively you can determine the information displayed by using the Park Label option. For example, you could use this facility to display the caller s name rather than their number. This is useful if you receive a lot of calls where the incoming CLI will not be matched within the Contacts database. Alternatively, you could display the name of the colleague that the caller is waiting for, this might be useful to ensure your colleagues pick up the correct call. Turn on Park Label 1. From the Edit menu 2. Select Park Label This option will be displayed with a tick when enabled. Using a Park Label 1. Within the Favourites window, click on the Park icon where you wish to park a call 2. The Enter park label dialogue box is displayed 3. In the text box enter the text you wish to display on the Park icon 4. Select Park when you are ready 5. This text will now be displayed on the relevant Park icon 6. This text will also be displayed on all your colleagues park icons that access the same park slot Navigate Configuration Navigate User Manual v3.2/0413/3 71
76 If you select Cancel within the Enter park label dialogue box the call will not be parked. If you do not enter any text within the Enter park label dialogue box and select Park the default information will be displayed within the park icon, ie the User name or Contact name (if the number is recognised by the system) or the caller s number. Turn off Park Label 1. From the Edit menu 2. Select Park Label This option will no longer be displayed with a tick. Favourites on Top If you would prefer your Favourites window to always be visible, you can configure Navigate so that the Favourites window is permanently at the front of any other windows you have open on your PC. 1. Open your Favourites window, by clicking on the Favourites icon on the Tool bar 2. From the Edit menu select Favs. On Top This option will be displayed with a tick when enabled. When you want the Favourites window to return to normal behaviour, so that it will disappear behind the active window, from the Edit menu select Favs. On Top. This option will no longer be displayed with a tick. Partner Configuration If Navigate is configured to partner your handset the Partner button on the Toolbar will be active. This configuration can be accessed by selecting the down arrow beside the Partner icon. In most cases these options will be configured for you and must not be changed, however here is a brief description of each field for your information. Please refer to your system administrator for further details if required. Navigate Configuration 72 Navigate User Manual v3.2/0413/3
77 IP Address: The IP address of the module or PCS 58x/57x/56x that the Navigate application will connect to. Port: The number corresponding to the port on the module entered in the IP Address field. This will always be 5001 if partnering a PCS 58x/57x/56x. Partner Login Code: The digits entered in the handset s Partner Login field on the system configuration. Hot Desk Number and Hot Desk Code: These fields, in conjunction with the Port and Partner Login Code fields, can be used to assist you if you are a hot desking User. These fields can be configured to allow you to log on to more than one choice of handset and your Navigate will automatically partner any of these handsets. This is useful if, for example, you are a laptop user and when you come in to the office you log on to any available phone at any available desk. Navigate can be configured once to partner any of these handsets (PCS 58x/57x/56x or analogue handset only). Please refer to your system administrator for further information. Proxy Server: not currently used Speech Input: this will be taken from the setting on your PC, otherwise use the drop down list to select the Microphone you would like to use. Speech Output: this will be taken from the setting on your PC, otherwise use the drop down list to select the Speakers you would like to use. Softphone Configuration If Navigate is running as an IP Soft Phone the Softphone button on the Toolbar will be active. This configuration can be accessed by selecting the down arrow beside the Softphone icon. In most cases these options will be configured for you and must not be changed, however here is a brief description of each field for your information. Please refer to your system administrator for further details if required. Navigate Configuration Navigate User Manual v3.2/0413/3 73
78 IP Address: The IP address of the Call Server that the Navigate application will connect to. Hotdesk Number, Hotdesk Code and Proxy Server: not currently used Speech Input: this will be taken from the setting on your PC, otherwise use the drop down list to select the Microphone you would like to use. Speech Output: this will be taken from the setting on your PC, otherwise use the drop down list to select the Speakers you would like to use. Set up Information The version of Navigate software being used and set up information can be viewed by selecting the Help menu and then About Navigate. The following window will be displayed: Software version IP address of the PC User currently logged in Extension number of the User IP address of the Call Server to which Navigate is connected IP address of the Call Server providing the User s voic service. Navigate Configuration 74 Navigate User Manual v3.2/0413/3
79 Icons in Brief Tool Bar Use the Down arrow to open the Partner Configuration dialogue and view the settings that enable Navigate to partner your telephone Use the Down arrow to open the Softphone Configuration dialogue and view the settings that enable Navigate to run as an IP soft phone Mute the current call (IP soft phone only) Mute is turned on. Your caller cannot hear you but you can hear your caller. (IP soft phone only) Display the Login dialogue box to enable you to either log in or out of a Group, or log into as another User. Open the Favourites window to view your Park slot icons and Favourites View and manage your Calls History and voic messages The Messages icon will be replaced by the Missed Call icon if you have received a missed call. Click on this icon to view your Calls History and the Messages icon will return. The Messages icon will be displayed with a red circle in the background and with a telephone handset if you have missed a call and have received new voic messages. Click on this icon to view your Calls History and the Messages icon will return. Use this list box to view all entries in your Calls History or just your voic message Record a memo Record a daily greeting Record a permanent greeting Call Status - Incoming Call Answer the incoming call. Hang up the incoming call. The call will be passed to your Forward on Busy number (if set) or to voic (if enabled) or cancelled. Call Status - Answered Call Hang up the call. Put the call on hold. Record the current call. The call is currently being recorded Add a note to the call which will be displayed in the Call Information window. Display the Keyboard window to enable you to enter additional digits when presented with an auto attendant, for example. Park the call in your first available Park slot. Icons in Brief Navigate User Manual v3.2/0413/3 75
80 Call Status - Multiple calls Directory search Calls History Hang up the currently connected call, indicated by the green icon. Put the current call on hold Transfer - connect the two calls displayed in Call Status. Record the current call. The call is currently being recorded Add a note to the call which will be displayed in the Call Information window. Switch - toggle between the two calls displayed in Call Status. Create a 3-way conference with the two calls displayed in Call status. You are currently in a conference call with your two calls Users Filter - display the list of the User accounts on your telephone system allowing you to quickly and easily call a colleague. Departments Filter - display the list of Departments configured on your maximiser system that will allow your call to be routed efficiently to a group of Users. Contacts Filter - display the list of external contacts entered on your telephone system allowing you to quickly and easily make calls to customers, suppliers, etc. The search will be made within the Name column. Favourites Filter - display your personal list of regularly used telephone numbers stored in your User account. Company Filter - display the list of external contacts entered on your telephone system allowing you to quickly and easily make calls to customers, suppliers, etc. The search will be made within the Company column. Enable Outlook Contact Lookup enable the search within your Outlook contacts (if enabled on your User account) Enable Outlook Calendar Lookup enable integration with your Outlook Calendar to set Do Not Disturb when you have appointment scheduled as Busy, and enable your Out of Office message if you have relevant text in the body of your appointment. Signifies an answered incoming call Signifies an unanswered (or missed) incoming call (up to 10 displayed, then the oldest will be deleted) Signifies an answered outgoing call Signifies an unanswered outgoing call Signifies a new or unread voic message Signifies an old or read voic message Icons in Brief 76 Navigate User Manual v3.2/0413/3
81 Listening to a voic message Delete - delete the message permanently Forward Message - forward the message to a colleague(s) Play Message - listen to the message again Save Message - save the message until manually deleted Rewind Message rewind the message by 2 seconds Fast Forward Message forward the message by 2 seconds Skip Back Message listen to the previous message Skip Forward Message listen to next message Icons in Brief Navigate User Manual v3.2/0413/3 77
82 Index Account Codes, 7 add a note during a call, 11 to a contact during a call, 31 ambiguous number, 36 announced transfer, 9 answer a call, 7 answer a department call, 26 auto attendant entering numbers while on a call, 7 black list callers, 21 blind transfer, 10 broken dial tone do not disturb, 45 follow me, 40 voic , 59 busy lamp field favourites, 48 users directory, 23 call bar, 3 call forwarding, 40 call pick up, 53 call waiting, 38 calls history, 18 black list callers, 21 column width, 19 departments, 27 messages filter, 61 missed calls, 19 nuisance calls, 21 redial a number, 19 ring back a caller, 19 voic , 59 calls list, 18 cli matching via a favourite, 49 via a User s personal numbers, 47 column width calls history, 19 directory, 16 company filter, 15, 29 completion codes, 69 conferencing cancel a conference call, 14 create a conference call, 14 end a conference call, 15 contacts, 29 add a note, 33 add a note during a call, 31 ambiguous number, 36 amend a note, 34 amend contact details, 33 contacts directory, 29 create a contact, 34 create a contact from Calls History, 35 delete a contact, 36 delete a note, 34 make a call to a contact, 30 outlook integration, 36 receiving a call from a contact, 30 transfer a call to a contact, 30 view a note, 33 view contact details, 32 contacts filter, 15, 29 departments, 26 calls history, 27 groups, 26 log in or out of a group, 28 make a call to a department, 26 receiving a department call, 26 transfer a call to a department, 27 voic , 67 wrap up time, 26 departments filter, 15 directory, 15 column width, 16 company filter, 15, 29 contacts directory, 29 contacts filter, 15, 29 departments, 26 departments filter, 15 favourites filter, 15 users directory, 23 users filter, 15 do not disturb, 45 exception number, 46 outlook integration, 47 end a call, 8 extension anywhere, 57 external ring tune, 55 favourite groups, 51 favourites, 4, 48 amend a favourite, 51 assign a short code, 53 busy lamp field, 48 call pick up, 53 cli matching, 49 create a favourite, 49 create park icons, 54 delete a favourite, 51 favourite groups, 51 favourites on top, 72 favourites window, 3, 49 make a call using a favourite, 50 prioritising favourites, 52 remove park icons, 55 Index 78 Navigate User Manual v3.2/0413/3
83 transfer a call using a favourite, 50 favourites filter, 15 favourites on top, 72 follow me, 41 broken dial tone, 40 forward on busy, 42 forward on no answer, 43 forwarding calls, 40 grouping favourites, 51 groups, 26 log in or out of a group, 28 hang up a call, 8 hold, 9 home number, 47 hot desk code, 73 hot desk number, 73 hot desking, 4, 70 icons in brief, 75 internal ring tune, 55 ip address, 73, 74 ip soft phone configuration, 73 log in/out hot desking, 70 log in or out of a group, 28 log in or out of Navigate, 70 make a call, 6 to a contact, 30 to a contact s alternative numbers, 31 to a department, 26 to a user, 23 to a user s personal numbers, 25 using a favourite, 50 using the directory, 16 menu bar, 2 missed calls, 18, 19 department calls, 27 status bar, 19 mobile number, 47 mute a call, 8 Navigate configuration favourites on top, 72 park icon label, 71 partner configuration, 72 set up information, 74 softphone configuration, 73 not available codes, 69 nuisance calls, 21 out of office message, 43 outlook integration, 44 voic greeting, 64 outlook integration contacts lookup, 36 do not disturb, 47 out of office message, 44 park a call, 13 create park icons, 54 park icon label, 71 pick up a parked call, 13 remove park icons, 55 transfer a parked call, 13 park icon label, 71 park icons, 53 partner configuration, 72 hot desk code, 73 hot desk number, 73 ip address, 73, 74 partner login code, 73 port, 73 partner login code, 73 PCS range, 5 pick up a call, 53 port, 73 prioritising favourites, 52 quick settings bar, 3, 42, 44, 46 record a call, 66 record a memo, 66 redial a number, 19 reject a call, 8 ring back a caller calls history, 19 voic , 65 ring tunes, 55 amend a ring tune entry, 57 assign a ring tune to calls to your extension, 56 assign a ring tune to department calls, 56 assign ring tune for follow me, 57 assign ring tune to an incoming number, 56 delete a ring tune entry, 57 external ring tune, 55 internal ring tune, 55 system ring tune, 57 set up information, 74 ip address, 74 logged in extension, 74 logged in user, 74 software version, 74 short codes favourites, 53 softphone configuration, 73 software version, 74 status bar, 2, 3 agent call data, 69 departments, 28, 67 missed calls, 19 voic , 59 title bar, 2 tool bar, 3 transfer a call, 9 to a contact, 30 to a department, 27 to a user, 24 to voic , 66 Index Navigate User Manual v3.2/0413/3 79
84 using a favourite, 50 using the directory, 16 unannounced transfer, 10 user account, 1 user configuration, 38 call forwarding, 40 call waiting, 38 do not disturb, 45 extension anywhere, 57 favourites, 48 follow me, 41 forward on busy, 42 forward on no answer, 43 out of office message, 43 park icons, 53 personal numbers, 47 quick settings bar, 42, 44, 46 ring tunes, 55 users directory, 23 busy lamp field, 23 make a call to a contact s alternative numbers, 31 make a call to a user, 23 make a call to a user s personal numbers, 25 transfer a call to a user, 24 user details, 25 users filter, 15 vision, 69 completion codes, 69 not available codes, 69 status bar, 69 voic , 4, 59 assistant telephone number, 64 delete a message, 61 departments, 67 divert incoming call to voic , 59 forward a message to a colleague, 62 forward a message to a colleague s , 62 forward a message to multiple colleagues, 63 information window, 60 leave a message, 65 listen to a message, 59 message handling, 61 messages filter, 61 receive a message, 59 record a call, 66 record a daily greeting, 63, 64 record a greeting, 63 record a memo, 66 ring back a caller, 65 status bar, 59 transfer a call to voic , 66 voic information window, 60 wrap up time, 26 Index 80 Navigate User Manual v3.2/0413/3
85
86 SpliceCom Britain s leading developer of telephone systems The Hall Farm Business Centre, Berry Lane, Chorleywood, Hertfordshire WD3 5EX Tel: Fax: [email protected] Website:
Unified Communications. Using Jabber for Windows
 Unified Communications Using Jabber for Windows Version: January 2014 TABLE OF CONTENTS Introduction to Jabber... 2 Computer phone settings... 3 Contacts... 4 How to add a contact... 4 How to find a contact...
IP Office Phone Manager Users Guide
 IP Office Phone Manager Users Guide 40DHB0002USAR Issue 6 (03/04/2002) Contents Getting Started... 3 Introduction... 3 Getting Started... 4 Phone Manager... 5 Main Window... 5 Call Status... 6 Call History...
2 line (1 symbol, 1 display) / 16 character display
 / 16 character display") Aastra Office 60 & 60IP Overview of the phone 2 line (1 symbol, 1 display) / 16 character display Message and Phone Status LEDs Absence Redial Phone Book Loudspeaker Microphone key Volume (+ / -) Call
Aastra Office 60 & 60IP Overview of the phone 2 line (1 symbol, 1 display) / 16 character display Message and Phone Status LEDs Absence Redial Phone Book Loudspeaker Microphone key Volume (+ / -) Call
Vision User Manual. Version 1.4 December 2012
 Vision User Manual Version 1.4 December 2012 Document No. 013 Version No. v1.4/1212/6 Copyright SpliceCom Ltd SpliceCom Ltd The Hall Business Centre, Berry Lane Chorleywood, Herts WD3 5EX Tel: 01923 287700
Polycom 2-Line Desk Phone Quick Reference Guide
 Polycom 2-Line Desk Phone Quick Reference Guide ACC-1142 PUG Table of Contents INTRODUCTION TO YOUR POLYCOM 2-LINE DESK PHONE... 2 WELCOME... 2 DESK PHONE... 2 HOW TO USE YOUR POLYCOM 2-LINE DESK PHONE...
User Guide. IP Multimedia m6350 Client
 User Guide IP Multimedia m6350 Client Content 1. IP Multimedia m6350 buttons & usage 2. Logging on / off your PC Phone 3. Changing your password 4. Making a call 5. Receiving a call 6. Answering a call
Help Menu. Kakapo Systems Ltd 1
 Help Menu 1. Introducing Unity 2. Initial Login and Setup 3. Getting Started 3.1. Resizing Unity 3.2. Maximising and Minimising 3.2.1. Using Unity From the System Tray 4. Call Control 4.1. Make a Call
User Guide. IP Multimedia 1110, 1120, 1140 & 1150 phones
 User Guide IP Multimedia 1110, 1120, 1140 & 1150 phones Content 1. IP Phone buttons & usage 2. Logging on / off your IP Phone 3. Changing your password 4. Making a call 5. Receiving a call 6. Placing a
ShoreTel Communicator User Guide Professional
 ShoreTel Communicator User Guide Professional Using Communicator for Basic Call Handling Features and Functions Making Calls Type Name of desired party or enter Extension Number in Quick Dialer When populated
Understanding Departments
 Version 3.2 April 2010 Document No. 011 Version No. V3.2/0410/1 Copyright SpliceCom Ltd SpliceCom Ltd The Hall Business Centre, Berry Lane Chorleywood, Herts WD3 5EX Tel: 01923 287700 Website: www.splicecom.com
Unified Communications. Using Jabber for Mac 9.2.2. Common Tasks
 Unified Communications Using Jabber for Mac 9.2.2 Common Tasks April 2015 Table of contents Introduction to Jabber... 3 Contacts... 4 1.1 How to find a contact... 4 1.2 How to add a contact to the contacts
Polycom Conference Phone Quick Reference Guide ACC-1144 PUG
 ACC-1144 PUG Polycom Conference Phone Quick Reference Guide Table of Contents INTRODUCTION TO YOUR POLYCOM CONFERENCE PHONE... 2 WELCOME... 2 CONFERENCE PHONE... 2 HOW TO USE YOUR POLYCOM CONFERENCE PHONE...
IP Office one-x Portal for IP Office User Guide
 one-x Portal for User Guide 15-601131 Issue 02d - (29 April 2010) 2010 AVAYA All Rights Reserved. Notice While reasonable efforts were made to ensure that the information in this document was complete
Understanding Voicemail
 Version 3.2 September 2010 Document No. 100 Version No. V3.2/0910/1 Copyright SpliceCom Ltd SpliceCom Ltd The Hall Business Centre, Berry Lane Chorleywood, Herts WD3 5EX Tel: 01923 287700 Website: www.splicecom.com
Contents How do I gain access to the Horizon website... 2 Logging in as the End User... 2 How do I customise my Dashboard?... 2 How do I initially
 Contents How do I gain access to the Horizon website... 2 Logging in as the End User... 2 How do I customise my Dashboard?... 2 How do I initially configure my user access?... 2 The Dashboard... 3 How
Vertical 4-Line Desk Phone Quick Reference Guide ACC-1145 PUG
 ACC-1145 PUG Vertical 4-Line Desk Phone Quick Reference Guide Table of Contents INTRODUCTION TO YOUR XCELERATOR DESK PHONE... 2 WELCOME... 2 DESK PHONE... 2 HOW TO USE YOUR XCELERATOR DESK PHONE... 3 Answering
TABLE: The 2420 Telephone Components
 2420 Telephone TABLE: The 2420 Telephone Components 1. Display, Call Appearance and Feature buttons: Call Appearance Keys allow the user to handle multiple calls and the display shows call information.
Phone & Features Guide. Edition Eleven
 Phone & Features Guide Edition Eleven Contents Introduction To The Guide... 11 1. Star2Star Supported Phones... 12 2. Polycom Phones... 15 a). Answering a Call... 15 b). Making a Call... 15 c). Microphone
Hosted Voice Quick Start Guide
 Hosted Voice Quick Start Guide EATEL 225-621-4100 Welcome Welcome to Hosted Voice from EATEL! This guide is intended to get you up and running for the basic features associated with the product. Pages
1 VoIP/PBX Axxess Server
 - 1 1 VoIP/PBX Axxess Server The Axxess Server supports comprehensive Voice Over Internet Protocol network services, which are based on the Open Source Asterisk VoIP software. The Axxess Server VoIP telephony
IP Office 3.2 Phone Manager User Guide
 IP Office 3.2 Phone Manager User Guide 15-600988 Issue 14b (14 th June 2006) 2006 Avaya Inc. All Rights Reserved. Introduction Notice While reasonable efforts were made to ensure that the information in
IP Office 2402/5402 Phone User Guide
 2402/5402 Phone User Guide 15-601075 Issue 05a - (16 July 2009) 2009 AVAYA All Rights Reserved. Notice While reasonable efforts were made to ensure that the information in this document was complete and
Business Communications Solutions 9910 Irvine Center Drive Irvine, CA 92618 www.bcsconsultants.com [ m ] 949.333.1000 [ f ] 949.333.
![Business Communications Solutions 9910 Irvine Center Drive Irvine, CA 92618 www.bcsconsultants.com [ m ] 949.333.1000 [ f ] 949.333.](/thumbs/28/12943220.jpg "Business Communications Solutions 9910 Irvine Center Drive Irvine, CA 92618 www.bcsconsultants.com [ m ] 949.333.1000 [ f ] 949.333.") VERTICAL VIEWPOINT 2.0 USER GUIDE Business Communications Solutions 9910 Irvine Center Drive Irvine, CA 92618 www.bcsconsultants.com [ m ] 949.333.1000 [ f ] 949.333.1001 TABLE OF CONTENTS Logging on to
VERTICAL VIEWPOINT 2.0 USER GUIDE Business Communications Solutions 9910 Irvine Center Drive Irvine, CA 92618 www.bcsconsultants.com [ m ] 949.333.1000 [ f ] 949.333.1001 TABLE OF CONTENTS Logging on to
PCS Desktop Telephones. SpliceCom. Defining next-generation communication
 PCS Desktop Telephones SpliceCom Defining next-generation communication Business Telephony To Meet Every Need From affordable entry-level phones to IP terminals that unify advanced telephony and IT applications
UniCom Enterprise Phone (Polycom CX600) User Guide
 User Guide") UniCom Enterprise Phone (Polycom CX600) User Guide 1 6 What is UniCom Enterprise?...1 Frequently Used Make a Call...6 What is Microsoft Lync?...1 Call Functions Use Call Controls...7 Who can use UniCom
UniCom Enterprise Phone (Polycom CX600) User Guide 1 6 What is UniCom Enterprise?...1 Frequently Used Make a Call...6 What is Microsoft Lync?...1 Call Functions Use Call Controls...7 Who can use UniCom
Phone & Features Guide
 Phone & Features Guide Seventh Edition 11/19/08 Contents Introduction To The Guide...6 1. Star2Star Supported Phones...7 2. Polycom Phones...9 a). Answering a Call...9 b). Making a Call...9 c). Microphone
Cloud Voice Service Cisco Unified IP Phone 6921 User Guide. (Version 1.0)
") Cisco Unified IP Phone 6921 User Guide (Version 1.0) Table of Content 1 Phone Set Features and Functions... 3 1.1 Operation for IP Phone 6921... 3 2 Location of Control... 4 3 Preference Setup... 6 3.1
Cisco Unified IP Phone 6921 User Guide (Version 1.0) Table of Content 1 Phone Set Features and Functions... 3 1.1 Operation for IP Phone 6921... 3 2 Location of Control... 4 3 Preference Setup... 6 3.1
Featuring the Vertical Xcelerator IP Phone System DESK PHONE USER GUIDE V1.5
 Featuring the Vertical Xcelerator IP Phone System DESK PHONE USER GUIDE V1.5 For Service Purchased After May 1 st 2009 Table of Contents INTRODUCTION TO YOUR XCELERATOR DESK PHONE... 2 WELCOME... 2 XCELERATOR
Basic Training Syllabus
 Mastering the ShoreTel IP Communication System Basic Training Syllabus Personal Call Manager - P a g e 1 Objectives of the class: Understanding new technology can at times appear challenging. However,
Masergy Unity Client User Guide with FAQ. 1-800-942-4700 masergy.com
 Masergy Unity Client User Guide with FAQ Quick Guide Content Initial Login and Setup... 4 Introducing Masergy Unity... 4 Logging In/Out of Call Center Groups... 4 Hoteling... 4 Window Layout... 5 Resizing
Your Phones Display and Buttons. Using Your Phone. Personalising Your Phone. Call Handling Features
 Your Phones Display and Buttons Using Your Phone Using Line Keys Using Busy Lamp Fields Handling Missed Calls Do Not Disturb Making Calls Taking Calls Taking Multiple Calls Accessing Voicemail Personalising
Polycom VVX410. Full user guide. Gamma, Kings House, Kings Road West, Newbury, Berkshire RG14 5BY
 Polycom VVX410 Full user guide Contents Contents... 2 Introduction... 4 How to set up the Polycom VVX410... 5 Phone Keys and Hardware... 6 Using your phone... 7 Home view... 7 Lines View... 8 Calls View...
Cisco IP Phone Training 8/26/15
 Cisco IP Phone Training 8/26/15 Using your Phone This document will provide information on the following: Introduce you to your phone Place, transfer, forward, park and pick up a call Set voice mail passwords
Corporate Telephony Toolbar User Guide
 Corporate Telephony Toolbar User Guide 1 Table of Contents 1 Introduction...6 1.1 About Corporate Telephony Toolbar... 6 1.2 About This Guide... 6 1.3 Accessing The Toolbar... 6 1.4 First Time Login...
TruConnect. Hosted PBX User Guide. Quick Start Guide - Page 2. Table of Contents - Page 5. 1-800-768-1212 www.truvista.net
 TruConnect Hosted PBX User Guide R R Quick Start Guide - Page 2. Table of Contents - Page 5. 1-800-768-1212 www.truvista.net TruConnect User Guide Page 1. Hosted TruConnect IP PBX Quick Reference Guide
Hosted VoIP Phone System. Desktop Toolbar User Guide
 Hosted VoIP Phone System Desktop Toolbar User Guide Contents 1 Introduction... 3 1.1 System Requirements... 3 2 Installing the Telesystem Hosted VoIP Toolbar... 4 3 Accessing the Hosted VoIP Toolbar...
3102 Business Telephone Guide for 3Com Asterisk. Part Number 900-0469-01 Rev AB Published January 2008 http://www.3com.com/
 3102 Business Telephone Guide for 3Com Asterisk Part Number 900-0469-01 Rev AB Published January 2008 http://www.3com.com/ 3Com Corporation 350 Campus Drive Marlborough, MA 01752-3064 Copyright 2007-2008,
eircom advantage IP Professional phone user guide
 eircom advantage IP Professional phone user guide DM Specifications subject to change without notice. Facilities described may or may not be supported by your network. eircom advantage is the registered
Telego User Guide. August 2011 Issue 1. Software Release 1.2
 Telego User Guide August 2011 Issue 1 Software Release 1.2 Copyright, Trademarks, and Legal Disclaimers 2011 Telego Telego, the names of Telego products, and Telego logos are trademarks owned by Telego.
Cisco IP Phone Models 7941 and 7945 Quick Reference Guide December 23, 2011
 Emergency Calls Dial 911 or 3 911 Cisco IP Phone Models 7941 and 7945 Quick Reference Guide December 23, 2011 Place a Call Lift handset (or press the Speaker button, the line button, or New Call soft key)
Hosted PBX End User Training Guide For the Polycom Soundpoint IP 321, 331 and 335 Phone
 Hosted PBX End User Training Guide For the Polycom Soundpoint IP 321, 331 and 335 Phone HOSTED PBX END USER TRAINING GUIDE ACCESSING VOICEMAIL To retrieve your voicemail, press the Menu button, button
Guide to using your CISCO IP 6941 phone at Imperial College
 Cisco IP Phone 6941 Cisco IP 6941 Phone Screen 1. Header Displays date, time and extension number 2. Programmable feature button - Shows feature button programming depending on your confi guration 3. Primary
South College VOIP Phone Training
 South College VOIP Phone Training Some of the components of your new telephone system are Cisco IP phones (Series 7945/7962), Call Manager and Unity Express Voice Mail. Some employees will have 7945/7962
IP Office 4602/5602 Phone User Guide
 4602/5602 Phone User Guide 15-601076 Issue 04d - (12 December 2008) 2008 AVAYA All Rights Reserved. Notice While reasonable efforts were made to ensure that the information in this document was complete
AVAYA VOICE OVER INTERNET PROTOCOL (VOIP) TELEPHONE USER MANUAL. Revised by Leeward CC IT October 2012. University of Hawaiʻi Community Colleges
 TELEPHONE USER MANUAL. Revised by Leeward CC IT October 2012. University of Hawaiʻi Community Colleges") AVAYA VOICE OVER INTERNET PROTOCOL (VOIP) TELEPHONE USER MANUAL Revised by Leeward CC IT October 2012 University of Hawaiʻi Community Colleges Hawaiian Telecom Copyright 2012 Table of Contents PLACING
AVAYA VOICE OVER INTERNET PROTOCOL (VOIP) TELEPHONE USER MANUAL Revised by Leeward CC IT October 2012 University of Hawaiʻi Community Colleges Hawaiian Telecom Copyright 2012 Table of Contents PLACING
WTC Communications Hosted PBX User Guide
 WTC Communications Hosted PBX User Guide Version 7.13.1 Section Subject Page 3 Making Calls...5 3.1 Internal...5 3.2 External...5 3.3 Emergency Calls...5 3.4 Speaker Phone...5 3.5 Ending Calls...5 4 Answering
Telephone User Instructions
 Telephone User Instructions Telephone User Guide Snom 300 1 Contents Contents 1. Key Panel... 3 2. Making and Receiving calls... 4 2.1 Incoming calls... 4 2.2 Outgoing calls... 4 2.3 Re-dial... 4 2.4 Missed/Received
UniCom Enterprise Phone (Polycom CX600) User Guide
 User Guide") UniCom Enterprise Phone (Polycom CX600) User Guide 1 6 What is UniCom Enterprise?...1 Frequently Used Make a Call...6 What is Microsoft Lync?...1 Call Functions Use Call Controls...7 Who can use UniCom
UniCom Enterprise Phone (Polycom CX600) User Guide 1 6 What is UniCom Enterprise?...1 Frequently Used Make a Call...6 What is Microsoft Lync?...1 Call Functions Use Call Controls...7 Who can use UniCom
Cisco Unified Communications System End-User Guide
 Cisco Unified Communications System End-User Guide Version 1.0 Revised July 25, 2012 Customized for Neptune School District Note: Information in this document is drawn from Cisco documentation. These guides
IP Office 5420/2420 Phone User Guide
 IP Office 5420/2420 Phone User Guide Issue 6d (15 th September 2005) Table of Contents The Telephone... 4 Overview... 4 Call Appearance Keys... 6 Call Appearance Keys Icons... 7 System Features... 7 Basic
Hosted Phone System User Guide
 Hosted Phone System User Guide GXP-2020 Phone System GXP-2010 Phone System Agency Number: 1234 585 Lifetime Street Sunny, FL 10024 904-646-5837 Last Updated 6/25/2009 User friendly guide to using your
Buddy User Guide. www.connectnz.co.nz 1
 Buddy User Guide www.connectnz.co.nz 1 Contents Please click titles to navigate through the guide CHAPTER 1 What is Buddy TM and first steps Setting up Buddy TM on your browser and logging in 3 CHAPTER
IP Office 3.2 2402 and 5402 User Guide
 IP Office 3.2 2402 and 5402 User Guide [15-601075] Issue [11] (5 June 2006) 2006 Avaya Inc. All Rights Reserved. Notice While reasonable efforts were made to ensure that the information in this document
VoiceManager User Guide Release 2.0
 VoiceManager User Guide Release 2.0 Table of Contents 2013 by Cox Communications. All rights reserved. No part of this document may be reproduced or transmitted in any form or by any means, electronic,
Cisco Unified Communications System End-User Guide
 Cisco Unified Communications System End-User Guide Version 1.0 Revised 11/19/2012 Customized for East Orange School District Note: Information in this document is drawn from Cisco documentation. These
Place a call using the handset Pick up the handset and enter a number. An Overview of Your Phone, page 8 Place a call using the speakerphone
 Basic Call Handling You can perform basic call-handling tasks using a range of features and services. Feature availability can vary; see your system administrator for more information. Placing a Call Basic
Q. The Phone Manager call banner disappears after being displayed for a couple of seconds...5 Q. The Phone Manager icon in the taskbar is blue and
 Phone Manager FAQ s Q. The Phone Manager call banner disappears after being displayed for a couple of seconds...5 Q. The Phone Manager icon in the taskbar is blue and has a cross on it. 5 Q. Some options
Polycom VVX500 4 and 6-Line Touch Screen Desk Phone Quick Reference Guide
 Polycom VVX500 4 and 6-Line Touch Screen Desk Phone Quick Reference Guide Contents Introduction to your Polycom VVX500 Touch Screen Desk Phone... 3 Welcome... 3 Desk Phone... 3 Interacting with your Polycom
IP Office 9608 Telephone Quick Reference Guide
 9608 Telephone Quick Reference Guide Your 9608 Telephone The supports the 9608 telephone. The phone supports 24 programmable call appearance/feature buttons. The labels for these are displayed in the main
PCS Desktop Telephones. SpliceCom. Defining next-generation communication
 PCS Desktop Telephones SpliceCom Defining next-generation communication Business Telephony To Meet Every Need From affordable entry-level phones to IP terminals that unify advanced telephony and IT applications
silhouette Cloud-Based Phone System Mitel IP Phone User Reference Guide Release 5.0 Final
 silhouette Cloud-Based Phone System Mitel IP Phone User Reference Guide Release 5.0 Final Contents Introduction...1 Setting your language...1 Setting your language for the web interface...1 Setting your
Cisco IP Phone Training
 Cisco IP Phone Training TRAINING OVERVIEW Cisco IP Phone & Agent Training Cisco IP Phone 7821, 8831, 8851 Call Control Features Button review User Options How is my phone connected? Voicemail Cisco IP
Verizon Collaboration Plug-In for Microsoft Outlook User Guide
 Verizon Collaboration Plug-In for Microsoft Outlook User Guide Version 4.11 Last Updated: July 2011 2011 Verizon. All Rights Reserved. The Verizon and Verizon Business names and logos and all other names,
MySphere Assistant User Guide
 MySphere Assistant User Guide Release 070420 Document Version 1 TeleSphere 9237 E. Via de Ventura Blvd. 2 nd Floor Scottsdale, AZ 85258 888-MYSPHERE 480.385.7007 WWW.TELESPHERE.COM Page 1 of 44 Table of
Communicator for Mac Help
 Communicator for Mac Help About the ShoreTel Communicator Introduction to the ShoreTel Communicator for Mac ShoreTel Communicator elements Learn about the window layout, panels, icons, buttons and notifications
Quick start guide to your IP phone
 Quick start guide to your IP phone IP Phone Models SPA501G, SPA502G, SPA504G, SPA508G, and SPA509G Welcome Thank you for choosing the Cisco Small Business IP Phone. This guide describes how to install
Integrator Soft Client User Guide
 Integrator Soft Client User Guide Contents Introduction... 3 Installing the Integrator Soft Client... 4 Signing in... 5 Passwords... 5 Settings and Configuration... 6 Telephony settings... 6 Interface
Lync 2010. Basics. CITES Training Services University of Illinois. Microsoft
 Microsoft Lync 2010 Basics CITES Training Services University of Illinois 2 Table of Contents Getting Started... 5 Starting Lync 2010... 6 Understanding the Lync 2010 Program Screen... 7 Using Help...
Personal Call Manager User Guide. BCM Business Communications Manager
 Personal Call Manager User Guide BCM Business Communications Manager Document Status: Standard Document Version: 04.01 Document Number: NN40010-104 Date: August 2008 Copyright Nortel Networks 2005 2008
VoIP Handset User Manual. Digital Voice Quality Business Grade Handset Easy Plug & Play
 Digital Voice Quality Business Grade Handset Easy Plug & Play Table of Contents 1.0 Getting Started... 1 1.1 Unpacking the box... 1 1.2 Assembling the Phone... 2 2.0 Phone Button Features... 3 3.0 Phone
Cloud Voice Service Cloud Communicator User Guide. (Version 1.0)
") Cloud Voice Service Cloud Communicator User Guide (Version 1.0) Table of Content 1.0 Cloud Communicator Installation Guide... 3 1.1 Install Cisco AnyConnect VPN...3 1.2 Install Cisco IP Communicator...5
Cloud Voice Service Cloud Communicator User Guide (Version 1.0) Table of Content 1.0 Cloud Communicator Installation Guide... 3 1.1 Install Cisco AnyConnect VPN...3 1.2 Install Cisco IP Communicator...5
OfficeSuite Cloud-Based Phone System Mitel IP Phone User Reference Guide Release 5.0 Final
 OfficeSuite Cloud-Based Phone System Mitel IP Phone User Reference Guide Release 5.0 Final Note: The information contained in this document is the property of Broadview Networks Inc. and is disclosed to
Verizon Collaboration Plug-In for Microsoft Outlook User Guide
 Verizon Collaboration Plug-In for Microsoft Outlook User Guide Version 4.11 Last Updated: July 2011 2011 Verizon. All Rights Reserved. The Verizon and Verizon Business names and logos and all other names,
VIRTUAL PBX USER GUIDE
 VIRTUAL PBX USER GUIDE All you need to know Sales & Enquiries 1300 733 995 Business Support 1300 887 899 www.mynetfone.com.au/business P. 1 Customer Service At MyNetFone, we pride ourselves on delivering
Horizon End User Guide
 Horizon End User Guide Contents How do I gain access to the Horizon website?... 4 How do I change my password?... 4 Logging in as the End User... 5 How do I customise my Dashboard?... 5 How do I initially
Abacus Hosted PBX Solution Polycom IP550/560 Phone Training
 Abacus Hosted PBX Solution Polycom IP550/560 Phone Training Revised: June 15, 2012 1 Getting to know your Polycom IP 550/560 Programmable Speed Dial Buttons 3 Line Buttons Shortcut to call logs Menu navigation
Cloud Voice Service. Cisco Unified IP Phone 7942G User Guide. (Version 1.0)
") Cisco Unified IP Phone 7942G User Guide (Version 1.0) Table of Content 1. Phone Set Features and Functions... 2 1.1 Operation for IP Phone 7942G... 3 1.2 Adjusting the Height of the Footstand... 4 2. Preference
Cisco Unified IP Phone 7942G User Guide (Version 1.0) Table of Content 1. Phone Set Features and Functions... 2 1.1 Operation for IP Phone 7942G... 3 1.2 Adjusting the Height of the Footstand... 4 2. Preference
Avaya 9608 IP Phone Quick Reference User Guide
 Avaya 9608 IP Phone Quick Reference User Guide The phone supports 24 programmable call appearance/feature buttons. The labels for these are displayed in the main display and can be controlled by the adjacent
Telstra Digital Business
 Telstra Digital Business User Guide September 2011 Telstra Digital Business, User Guide, Version 1.1 This work is copyright. Apart from any use as permitted under the Copyright Act 1968, information contained
Telephony Toolbar Corporate. User Guide
 Telephony Toolbar Corporate User Guide Release 7.1 March 2011 Table of Contents 1 About This Guide...7 1.1 Open Telephony Toolbar - Corporate... 7 1.2 First Time Login... 8 1.3 Subsequent Use... 11 2 Using
Using Basic Call Management Functions
 Using Basic Call Management Functions This chapter provides instructions on using your basic phone functions. It includes the following sections: Managing the Audio Source and Volume, page 28 Answering
User Manual. 3CX VOIP client / Soft phone Version 6.0
 User Manual 3CX VOIP client / Soft phone Version 6.0 Copyright 2006-2008, 3CX ltd. http:// E-mail: [email protected] Information in this document is subject to change without notice. Companies names and data
1608 PHONE INSTRUCTIONS FOR IP OFFICE. 1 Proprietary to CPCS 1608 Document
 1 Proprietary to CPCS 1608 Document CALL HANDLING FEATURES PLACING A CALL To Place an Outside Call Lift the handset and dial the number. To place a call using a headset, press the Headset button and dial
Unified Communicator Advanced Training Handout
 Unified Communicator Advanced Training Handout About Unified Communicator Advanced (UCA) Video Summary (must have access to the internet for this to launch) http://www.mitel.tv/videos/mitel_unified_communicator_advanced_na
9608/9611 IP Phone User Guide
 CTI INSIGHT www.cons ol tech.com 9608/9611 IP Phone User Guide Answering and Making Calls Placing a call Lift the handset and dial the number. Answering a call Lift the handset If you are using a headset,
IP Office 2030 & 2050 Telephone User Guide
 IP Office 2030 & 2050 Telephone User Guide 40DHB0002UKAG Issue 3 (04/03/2002) Page 2 Contents Contents The 2030 & 2050 Phone... 3 Making Calls... 5 Speed Dials... 7 Account Codes... 8 Busy or Unanswered...
Unify OpenScape UC Web Client User Manual
 Unify OpenScape UC Web Client User Manual Contents Introduction... 1 E164 Numbers... 1 Dialling out... 1 Logging in to the Unify OpenScape Web Client... 2 Using the Unify OpenScape Web Client Main Toolbar...
TELEPHONE BUTTONS & ICONS TOUCHSCREEN OVERVIEW
 This Telephone Guide describes the various features available to you. Telephone Buttons and Icons describe the physical buttons and keys on the phone, the Touchscreen Overview outlines basic functions,
User Guide. Aastra 6753i
 User Guide Aastra 6753i Content Phone overview Basic telephony features How to place a call How to answer a call How to terminate a call How to redial a number How to mute a call How to set a call on hold
3 Com Phone System Training
 3 Com Phone System Training If you have any questions about the phone system contact: Karen Escavage Phone: 521-7526 Email: [email protected] Richard Blackwell Phone: 521-7544 Email: [email protected]
Training Guide For 7960 & 7940 Series Cisco IP Phones
 Training Guide For 7960 & 7940 Series Cisco IP Phones Prepared by: Corporate Technologies, LLC 2000 44 th Street SW, Suite 100 Fargo, ND 58103 (701) 893-4000 1 Table of Contents: Section I: GETTING STARTED
IP Office 3.0 Phone Manager User Guide
 IP Office 3.0 Phone Manager User Guide 40DHB0002USAR Issue 12 (2 nd February 2005) Table of Contents Getting Started... 5 Introduction... 5 Phone Manager Feature Comparison... 6 Getting Started... 8 Logging
Telephone Devices. SpliceCom. Britain s leading developer of telephone systems
 Telephone Devices SpliceCom Britain s leading developer of telephone systems The SpliceCom Difference SpliceCom s product architecture is unique. All core platforms, phones and applications have been developed
SIP-T22P User s Guide
 SIP-T22P User s Guide Thank you for choosing this T-22 Enterprise IP Phone. This phone is especially designed for active users in the office environment. It features fashionable and sleek design, and abundant
Gazelle Hosted PBX V8.0 End User Guide
 Gazelle Hosted PBX V8.0 End User Guide Document VPM-777-200, Version 1.2 08 Apr 2013 Document Version 1.2 Gazelle Communications Metaswitch Hosted PBX V8.0 08 Apr 2013 End User Guide Contents 1 Introduction...
Analogue Telephone User Guide
 Analogue Telephone User Guide IP COMMUNICATIONS PLATFORM FOR THE SMALL BUSINESS Specifications subject to change without notice. Facilities described may or may not be supported by your network. This documentation
Fax Messages. You can double click a new message to show it on your computer or a right click on it will bring up more options as follows:
 Fax Messages If you have the Open Scape Fax Server installed you will be receiving faxes to your myportal. This tab shows you the fax messages you have received, the number you have received them from
Getting to Know Your Cisco VoIP Phone 303G, 504G, 508G and 514G
 Getting to Know Your Cisco VoIP Phone 303G, 504G, 508G and 514G Getting to know your new phone is easy. This guide will help you get started. You ll learn how to: Use the feature buttons Navigate your