MANUAL BUILDER. We all become builders. Version Website link
|
|
|
- Paulina Marshall
- 9 years ago
- Views:
Transcription
1 MANUAL Version 3.02 We all become builders Website link

2 PRINTING SPECIFICATIONS PRINTER Print technology FDM / FFF Fused Deposition Method Dimensions printer (LxWxH): Solo/Dual: 385x370x400 mm (15.16x14.57x15.75 inch) Big Builder:385x370x900 mm (15.16x14.57x35.43 inch) Buildvolume (LxWxH): Solo: 210x220x175 mm (8.27x8.66x6.89 inch) Dual: 210x220x164 mm (8.27x8.66x6.46 inch) Big: 210x220x664 mm (8.27x8.66x26.14 inch) Resolution: Low quality: mm Normal quality: mm High quality: mm Printspeed: Solo: mm/s Dual: mm/s Travelspeed: Solo: mm/s Dual: mm/s Position accuracy X: 10 micron Y: 12.5 micron Z: 2.5 micron Weight: Color frame: Print platform: Certificate: Nozzle diameter: 0.4 mm TEMPERATURE Solo / Dual Printer: 15 kg Transport: 18 kg Big Builder Printer: 25 kg Transport: 32 kg Red / black Glass bed, option heated bed CE certificate Filament 1.75 mm PLA/ PVA / Wood-Bronzfill Operating - temp. printer: C Operating temp. nozzle ELECTRONICS Solo: C Dual: C Storage - temp. printer: SOFTWARE AC input: V 3A 50/60Hz Software Opensource Repetier (Cura / Kissslicer) 0-35 C Power: 120 W Operating systems Windows, MAC Connections: USB, Display Standalone SD card (including) File types STL / OBJ / AMF / DAE CAUTION: The Builder warranty is only valid when Builder approved material is used. MANUAL 2

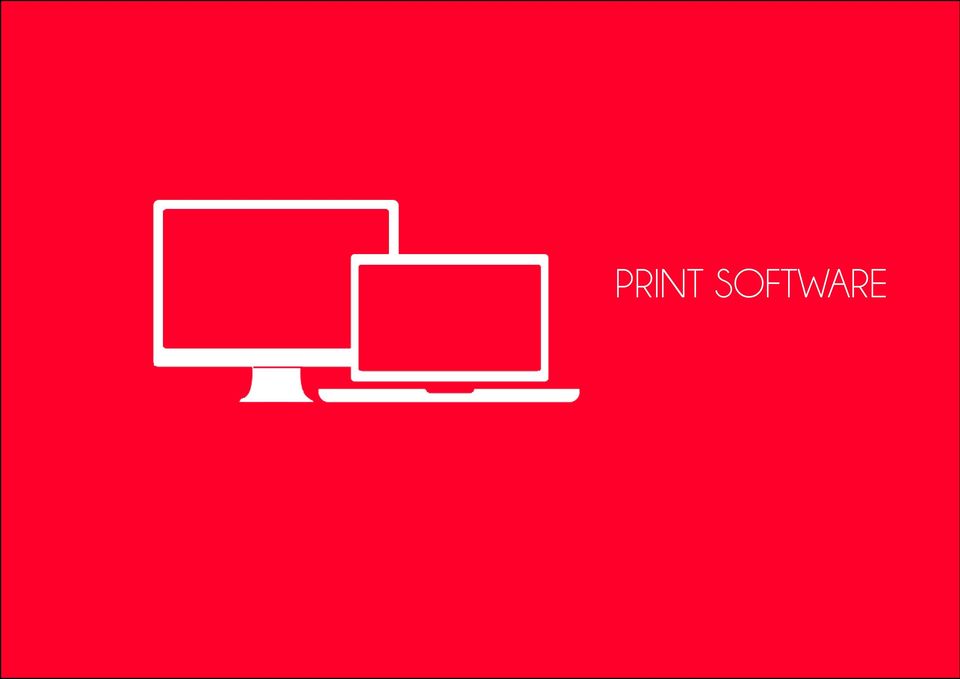
3 CONTENT SPECIFICATION 2 HARDWARE OVERVIEW 5 ACCESSOIRES 6 UNBOXING 7 INSTALLING 8 CONTROL 9 MONO-EXTRUDER DUAL-FEED EXTRUDER FILAMENT 16 PRINTING INTERFACE LEVELING BED MAINTENANCE 27 TROUBLESHOOT SAVETY INSTRUCTIONS 30 CONTACT INFORMATION 31 PRINT SOFTWARE PRINT SOFTWARE REPETIER HOST MANUAL 3

4 HARDWARE

5 OVERVIEW Onderdelen: 1. USB socket 2. Power socket 3. Control button 4. SD-card slot 5. LCD display 6. Print head 7. Spool holder 8. Clip filament guide 9. Filament guide tube MANUAL 5 UNLESS OTHERWISE SPECIFIED: DIMENSIONS ARE IN MILLIMETERS SURFACE FINISH: TOLERANCES: LINEAR: ANGULAR: FINISH: DEBUR AND BREAK SHARP EDGES DO NOT SCALE DRAWING

6 ACCESSOIRES The following parts are included with your Builder 3D printer. Please check if the items below are inside the box. Note: No filament is included. Filament is available in different colors and can be found in our webshop. 1x 1x 1x 1x 1x Dual Builder BUILD PLATE SPOOL HOLDER FILAMENT GUIDE TUBE TAPE PRESSURE PLUG 1x 1x 1x 1x POWER CORD CLIP FILAMENT GUIDE USB CORD STEEL WIRE CLEANING NOZZLE MANUAL 6

7 UNBOXING The product images may be different than the actural product Place the box on a flat surface 2. Open the box and lift up the Builder printer with both hands. While lifting or moving do not grab belts, rods or the extruder. 3. Uncut and remove the plastic tiewrap that strap the axes together. Now remove the foam by rotating the z-axis (the spindle). 4. Attach the spool holder to the frame of the Builder by inserting the top of the spool holder into the frame hole 5. Now press down the spool holder until it snaps into place. 6. Mount the filament spool onto the spool holder. 7. Place a piece of tape underneath the clip filament guide this will prevent the clip from sliding during printing. 8. Attach the clip filament guide on top of the Builder. 9. Push the filament guide tube inside the clip filament guide. 10. Now you can switch on the Builder by pressing the on/off button wich is located at the back of the printer. Note: The Builder can be switched off at any time, it is recommended to only turn off the Builder when it s not in use MANUAL 7

8 INSTALLING Place the Builder on a stable surface. Make sure the power switch is in the Off position. Plug the power cord into the power input of the Builder. Now plug the power cord of your printer into a grounded outlet. MANUAL 8

9 CONTROL Control Recomended is to use the printer stand alone. Navigate through the display menu by pressing or rotating the button. Located in the front is the SD-card slot for stand alone printing. Push the SDcard to eject it. The display provides information about the printer and object as shown in the image. MANUAL 9


10 MONO-EXTRUDER General The Builder Mono extruder is simple, easy-to-maintain and a easy to use printer. This printer is specially designed for beginners. For tutorials about the Builder Mono extruder check out the YouTube channel of Builder 3D Printers. Installing filaments Insert filament material by following the steps below Go to prepare and heat up the printhead of your Builder Mono extruder by clicking preheat 210 Open the printhead and insert the filament Push down the filament until some comes out of the nozzle Close the extruderhead. The filament material is installed correctly and the Builder Mono extruder is ready to print. Start printing Select a print file on the SD-card and press the button to start printing. Note: If inserting the filament is difficult, bend it gently until it s straight or cut the filament at an angle MANUAL 10

11 MONO-EXTRUDER Maintain printhead Maintaining your Builder 3D printer is important to achieve the best result. After a lot of printing, the filament material feeding wheel can contain small plastic parts. For cleaning, follow the next steps. Open the printhead of your Builder Mono extruder Check the feeding wheel for stuck printing material. Remove this by using a simple brush or compressed air. When cleaning the feeding wheel is hard, you can choose to remove the feeding wheel from the extruder motor. Remove only when needed! When assembling the feeding wheel, be sure the groove is above the hotend entrance Cleaning wire When not enough material is released from the nozzle, something could be blocking the nozzle. Cleaning the nozzle is recommended. Heat up the printhead of your Builder Mono extruder (preheat 210) Open the printhead of your Builder Mono extruder Insert the supplied wire from the bottom, upwards through the nozzle Remove the wire which comes out of the top of the printhead Printing other materials After printing with other materials it s wise to extrude some PLA to prevent jamming. Push down the filament until it comes out. MANUAL 11

12 DUAL-FEED EXTRUDER General With the Dual-Feed system from Builder 3D printers, it s not needed to calibrate anymore. Besides, it s possible to mix colors. Check chapter Colormixing for how to mix colors with the Dual-Feed system. For tutorials about the Dual-Feed system check out the YouTube channel of Builder 3D Printers. Installing filaments Insert filament material by following the steps below Heat up the printhead of your Builder Dual-Feed extruder Load the filaments by pushing the levers of your Builder Dual-Feed system. Keep pushing the levers, then push down the filament until it comes out of the nozzle. Do this with both filaments. Release the pressure of the levers. The filaments are installed correctly and the Builder is ready to print. Start Printen Select a print file on the SD-card and press the button to start printing. Attention: Make sure that both filaments are installed inside the Dual-Feed system MANUAL 12

13 DUAL-FEED EXTRUDER Maintain printhead Maintaining your Builder 3D printer is important to achieve the best result. After a lot of printing, the filament material feeding wheel can contain small plastic parts. For cleaning this follow the next steps. Press down both levers of the Dual-Feed system Use the pressure plug to remove the shaft that is holding both levers in place. Take both levers out of the extruderhead Check the feeding wheel for stuck printing material. Remove this by using a simple brush or compressed air. When cleaning the feeding wheel is hard., you can choose to remove the feeding wheel from the extruder motor. Remove only when needed! When assembling the feeding wheel be sure that the groove is above the hotend entrance After cleaning, assemble both levers in place by pushing the shaft through MANUAL 13

14 DUAL-FEED EXTRUDER Pressure plug In case the filament material gets jammed, you can choose to use the pressure plug. Only use the pressure plug when there is no other option. Heat up the printhead of your Builder Dual-Feed extruder Press down both levers of the Dual-Feed system Use the pressure plug to remove the shaft that is holding both levers in place. Take both levers out of the extruderhead Place the pressure plug into the jammed hole Add some pressure to the pressure plug until the jammed material comes out of the nozzle. After cleaning, assemble both levers in place by pushing the shaft through Printing other materials After printing with other materials it s wise to extrude some PLA to prevent jamming. Push down the filament until it comes out. Caution: When using the pressure plug do not slide it along the feeding wheels. This can damage the printer feeding wheel serious. MANUAL 14


15 DUAL-FEED EXTRUDER Colormixing Besides printing two colors or support material with the Dual-Feed extruder system, it s possible to mix two colors. When using the colormixing tool, a color gradient can be made. Also manually a color gradient can be made during printing. Colormixing Tool: Activate the colormix application with the received activation code (starts with BP) Upload the Gcode file you want to colorize. Click browse to upload. Choose the gradient by sliding the bars. The colors are an example of how the product should look like. Color in the middle is a mix of the top color and bottom color. In the example blue and yellow makes green. Save the colored Gcode when you are satisfied with the settings. Color mixing manually For a manual colormixing object, navigate trough the LCD menu as shown below. During printing, the flow percentage of each (front/rear) extruder can be set. Select the extruder you want and set the amount of flow you want. MANUAL 15

16 FILAMENT Filament Builder 3D printers delivers many different types of filament. Every filament that is for sale is tested on our printers. The following types are available in our web shop Woodfill, wooden look Bronzefill, a bronze appearance after polishing PVA, material which dissolves when it makes contact with water PLA Printing other materials After printing with other materials it s wise to extrude some PLA to prevent jamming. Push down the filament until it comes out. MANUAL 16

17 PRINT SOFTWARE
18 PRINT SOFTWARE Cura (Windows, MAC, Linux) Cura is a open source program which prepares your object into a file (gcode) that can be read by the Builder 3D printer. Download Cura software After installing Cura, select Custom machine and enter the sizes of your Builder Download the INI-files for your Builder 3D printer Load the INI-files in Cura by using the option open profile Enter the number of extruders in the Machine settings menu Reopen this menu and set the extruders offset (X-Y) values to zero. For more information about Cura, check the manual. Repetier Repetier Host prepares your object into a file (gcode) that can be read by the Builder 3D printer. Download Repetier Host from our website Repetier Host is adjusted to the settings of the Builder 3D printer For more information about Repetier Host, check chapter Repetier Host MANUAL 18
 that can be read by the Builder 3D printer. Download Repetier Host from our website http://3dprinter4u.nl/3d-printer-installatie/.")
19 PRINT SOFTWARE Repetier for MAC The following steps should be taken to be able using the settings of builder in Slic3r. 1. Use the following link Go ahead to step 2 and download the Ini-files 2. Start Repetier-Host 3. Open the tab Slic3r 4. Press Configure to activate Slic3r. 5. Choose Load Config in the file menu. MANUAL 19

: This option can be used when printing a cup or vase.")
20 REPETIER HOST Slicer Before the Builder is able to print STL-files they need to be converted to a G-code. This can be done with Slicer. Builder 3D Printers has preinstalled a few settings for you. Print settings: breaking it of the actual object after the print is finished. Single wall print (vase): This option can be used when printing a cup or vase. The software will build up the object like a spiral. This will create a single wall. Make sure the object (STL file) is solid. Slicer will create the single wall in the software. G-code editing With this tab it s possible to edit the G-code. Editing new commando s like pause the print, using the other extruder or to recognize any mistakes that are in the G-code. Solid single wall Extruder 1: Builder PLA settings: These settings represent the filament diameter and the print temperature of the PLA/filament. High quality print: this option can be used to print an object in high quality. The layer height of this option is 0.1 mm. the minimum layer height of the Builder is 50 micron. Normal quality print: this is the most used option. The normal quality print can be used to print faster with a high quality result. The layer height of this option is 0.2 mm. Normal quality print + support: when printing an object with overhangs, support material is needed. With this option the object will be printed with support material which you can remove by Extra cooling: When printing a very small object you might need the extra cooling option. This option makes sure the print speed per layer is on its lowest to provide the object with the required cooling. MANUAL 20


21 REPETIER HOST Manual control After the Builder has been connected to the pc or laptop the Builder is able to be controlled with Repetier Host. The following options are available Section manual control: The arrows allow you to move the print head to the x, y and z directions. When clicking on the cross the print head will move to its home position. 2. Section speed mutiply: Feedrate: This setting will change the printing speed. The flowrate will automaticly increase with the speed Flowrate: This number affects the amount extruded material. Changing this will affect the wall thickness. 3. Section extruder: Preheat the extruder for inserting the filament. Extrude: Number of mm s that is manual extruded by pressing the button. Retraction: Number of mm s that is retracted during printing (max 8 mm). MANUAL 21
22 PRINTING

23 INTERFACE LCD screen The LCD screen shows the most important information. From this information screen a few settings can be changed while printing. The most commonly used functions are explained in this chapter. Restore Failsafe With the Restore Failsafe function, the Builder can be reset to his factory settings. Warning: Changing parameters in the control menu, except the functions explained below, may change the object drastically. We take no responsibility for the quality of the print when the parameters have been changed. MANUAL 23
24 INTERFACE Disable Steppers The function Disable Steppers can be used to disable the stepper motors. Now it s possible to move the extruder head by hand. To check the bed leveling for example Auto home The Auto home functions moves the extruderhead to his 0 position. Preheat 210 The function Preheat 210 heats up the extruder head to 210 degrees Celsius. This may be necessary for inserting filament. Move axis Use the function Move axis for moving de X-Y and Z axis. Move after selecting, the axis by rotating the button of your LCD screen. Extruder some material by using the options Move 1mm and Move 0,1mm. Temperature The options Nozzle and Fan speed are shown in the Tempature menu. Temperature: the print temperature can be adjusted here Fan speed: The speed of the fan can be adjusted here MANUAL 24
25 BED LEVELING Bed leveling Leveling the print bed is extremely important for a good quality print. From Builder 3D printers the print bed is leveled correctly. It s possible that during shipment the height of the print bed has changed. We recommend to check the height before printing by following these steps Apply the adhesion layer Apply a adhesion layer to the print bed. We recommend you to use: Tape (included) Glue stick Woodworkers glue Place the print bed Make sure the four screws fit perfectly in the print bed. If necessary, push on the print bed to make sure it s stable. Do not turn the screws. Home position Move the extruder head to his home position. After this proceed with leveling the print bed. MANUAL 25
26 LEVELING BED Set height Clean the nozzle Prevent the print bed against wobbling, by rotating the screws. Make sure the space between the head and bed is mm. Check this by moving the extruderhead across the printbed manually. Adjust when necessary, the bed height by turning two screws at the same time mm Control Check the space between the nozzle and print bed by running the bed levelling from the SD-card. The first layer of this prints job has to stick to the platform as shown in the image below. During printing it is possible to optimize the height by rotating the screws of the print bed. MANUAL 26
27 MAINTENANCE Maintenance To achieve the best results and lifetime, maintaince of your Builder 3D printer is very important. Use grease to lubricate point 1 Use oil to lubricate point 2 and Lubricate Lubrication of the rotating and sliding parts is important for a nice print surface. Lubricate the axis (X-Y) 2 and 3 with oil when the printed objects shows some signs of vibrations. Lubricate the Z axis when those feel dry. Feeder wheels After a lot of printing, the filament material feeding wheel can contain small plastic parts. For cleaning, use a tooth brush or compressed air. Please go to the chapter Dual-Feed or Mono Extruder for further instructions. Nozzle During printing, print material can stick to the nozzle. This stuck material can pollute the object while printing. Clean the nozzle before printing. Warning: the nozzle is hot, 210 degrees Celsius. Cleaning the nozzle can be done by using a thick towel. Do not use any sharp objects to clean the nozzle, this can damage the nozzle. MANUAL 27
28 TROUBLESHOOTING The first layer does not stick to the print bed This problem is well known in the 3D printing world. The color substances added to the filament may influence the melting point of the filament. To optimize the adhesion of first layer make sure that: The space between the nozzle and print bed is not correct. This should be mm. Clean the print bed, replace the tape or use Pritt or wood workers glue. Increase the first layer thickness for a better adhesion. Place a skirt around the object. The skirt is a line drawn around the object at the first layer. This helps prime your extruder. Extrude material before printing. Under extrusion Make sure the extruder wheels are clean. After a lot of printing these wheels can be full of dust and/or filament. Clean them with a brush or compressed air. There is not enough pressure on the filament. Increase the pressure by tightening the lever screws The extrusion speed is too high. Decrease the print speed. The nozzle got jammed. Clean the nozzle with the tools provided by Builder 3D Printers. Increase the temperature (250C) for a short time (max 5 min). The Builder will melt the old material and extrude this through the nozzle. The filament specs are different from the filament delivered by Builder 3D Printers. Every filament has its own specs. Contact the filament supplier for more info. The thermal protection is activated as the extuder head got to hot. Cool down the extruder head. After cooling down the Builder is ready to print again. Value E steps/mm are incorrect. Check the G-code and/or reset the Builder to the fabric settings with LCD menu (restore failsafe). MANUAL 28
29 TROUBLESHOOTING No connection with the Builder: The Builder 3D Printers are stand-alone printers. Simply use the SD-card for the G-codes. If the Builder is connected to the pc or laptop but the software is unable to identify the printer this might be the problem: Is the driver installed correctly? Use administrator rights. Check to which COM port the Builder is connected. Use device management. Difficulty with inserting the filament Bend the filament straight and cut the filament at an angle. This makes it easier to insert the filament in the extruder head. Broken filament in the extruder head. Preheat to 210 and remove the broken filament. If the filament is too short, use the pressure plug. Extruder screws are too tight. Turn them a bit looser. The 3D printed object doesn t look good. Not enough cooling. Increase the minimum layer height Check the tension on the timing belts. Increase the tension if needed. Check our official YouTube channel: The filament specs are different from the filament delivered by Builder 3D Printers. Every filament has its own specs. Contact the filament supplier for more info. MANUAL 29
30 SAFETY INSTRUCTIONS Warning: If you do not follow these next instructions, it will lead to fire, electric shocks or other injuries or damage to the Builder or other properties. Read all safety information below before you start using the Builder. Do NOT use water or fluid liquids, the bottom contains electric components. Minimum age for use of the Builder is age 14. Use the Builder in a bright area and preferably in 20 degrees Celsius. Do NOT enter the printing area with your hands when the printer is in use. Make sure the Builder is placed in a ventilated room. When cleaning the nozzle, use a piece of cloth, but beware(!!) the nozzle is still hot after printing. After a 30 hour print, clean the round conduction with a piece of cloth and provide the printer with new grease/oil if necessary. Turn the Builder off with the main switch on the back of the Builder when the printer needs maintenance. The Builder has been extensively tested, but if a failure occurs please contact [email protected]. Do NOT open the bottom side, but leave this to our certified workers. If you decide to leave the Builder unattended to print, make sure to remove flammable objects near the printer. MANUAL 30
31 Contact information: Builder 3D Printers HQ Smelterij 2, 2211 SH Noordwijkerhout The Netherlands Telephone +31 (0) Helpdesk: Website:
Manual Premium Builder
 Manual Premium Builder Version 1.0 We all become builders Specifications Printing Printer Print technology FDM / FFF Fused Deposition Method Weight: Small: 18 KG Medium: 22 KG Large: 24 KG Buildvolume
Creator Start-up Guide
 www.ff3dp.com Creator Start-up Guide Zhejiang Flashforge 3D Technology Co., Ltd. www.ff3dp.com Contents Precautions:... 1 1. What's in the box?...1 2. Unboxing... 2 3. Initial Hardware Installation...5
Printrbot Getting Started Guide. For models: Printrbot Plus (v2) Printrbot LC (v2) Printrbot jr
 Printrbot LC (v2) Printrbot jr") Printrbot Getting Started Guide For models: Printrbot Plus (v2) Printrbot LC (v2) Printrbot jr Contents 4 Chapter 1: Welcome 4 Overview 4 Support 5 Chapter 2: Your Printrbot has arrived... now what? 5
Printrbot Getting Started Guide For models: Printrbot Plus (v2) Printrbot LC (v2) Printrbot jr Contents 4 Chapter 1: Welcome 4 Overview 4 Support 5 Chapter 2: Your Printrbot has arrived... now what? 5
Printrbot Getting Started Guide. For models: Simple
 Printrbot Getting Started Guide For models: Simple Contents 4 4 4 5 5 5 6 6 6 6 7 8 Chapter 1: Welcome Overview Support Chapter 2: Your Printrbot has arrived... now what? Printrbot Kits Pre-Assembled Printrbots
WINDOWS 7/8 instruction guide for your Printrbot printer and computer software
 Software To start printing with your Printrbot Simple 3d printer, you need to download 3 pieces of software and two digital models (STL files). 1. The teensy Serial Driver. This connects the printer to
Original. The fast, easy to use, Open-source 3D printer. User manual. English Version 1.1
 Original The fast, easy to use, Open-source 3D printer User manual English Version 1.1 Table of Contents A. Welcome to the Ultimaker Original A1. The Ultimaker experience A2. Specifications of the Ultimaker
Cura for Type A Machines Quick Start Guide
 Cura for Type A Machines Quick Start Guide 1 Table of Contents About Cura for Type A Machines Downloading Cura for Type A Machines Installing Cura for Type A Machines Mac Windows Linux About the Configuration
WINBO 3D PRINTER USER MANUAL VERSION: WB20141117
 WINBO 3D PRINTER USER MANUAL VERSION: WB20141117 Table of Contents A. MACHINE SPECIFICATIONS... 2 B. SOFTWARE INSTALLATION... 2 B.1 SOFTWARE INSTALLTION... 2 B.2 SOFTWARE CONFIGURATION... 3 C. SOFTWARE
Manual Leapfrog Creatr
 1 Leapfrog BV Dear customer, Congratulations with the purchase of your very own Leapfrog Creatr Single or Dual Extruder! We would like to help you get started so you can make your first 3D print on the
FOLGER TECHNOLOGIES, LLC 2020 i3 3D Printer Kit
 FOLGER TECHNOLOGIES, LLC 2020 i3 3D Printer Kit CONFIG GUIDE Rev. A http://www.folgertech.com 2020 Prusa i3 Config Guide Page: 1 / 15 You did it! You built your Folger Tech 2020 i3 Printer and now you
Leapfrog 3D Printers - Manual Xeed 1
 Leapfrog 3D Printers - Manual Xeed 1 Leapfrog 3D Printers - Manual Xeed 2 Dear customer, Congratulations with the purchase of your very own Leapfrog Xeed 3d-printer. We want to help you make your first
The fast, easy to use, Open-source 3D printer. User manual. English Version 1.13
 The fast, easy to use, Open-source 3D printer User manual English Version 1.13 Table of Contents A. Welcome to the Ultimaker 2 A1. The Ultimaker experience A2. Specifications of the Ultimaker 2 B. Get
FTDI VCP DRIVER (free) (WIN/MAC/LINUX) http://www.ftdichip.com/drivers/vcp.htm
 (WIN/MAC/LINUX) http://www.ftdichip.com/drivers/vcp.htm") 002 - CONNECTING THE PRINTER Now that you have an idea what 3D printing entails, we can continue and connect the printer to your computer. First make sure you have a computer with a decent amount of RAM
002 - CONNECTING THE PRINTER Now that you have an idea what 3D printing entails, we can continue and connect the printer to your computer. First make sure you have a computer with a decent amount of RAM
Ultimaker 2 Extended+ OUR MOST ADVANCED 3D PRINTER JUST GOT EVEN BETTER
 Ultimaker 2 Extended+ OUR MOST ADVANCED 3D PRINTER JUST GOT EVEN BETTER INSTALLATION AND USER MANUAL Original manual V1.0 2015 DISCLAIMER Please read and understand the contents of this installation and
Owners & Installation Manual for the Sheridan, Mountainair, Pine Valley and Old Forge Ceiling Fan Family
 Owners & Installation Manual for the Sheridan, Mountainair, Pine Valley and Old Forge Ceiling Fan Family Part of the Kiva Lighting Family Custom Lighting and Fans Since 1992 1312 12th St NW Albuquerque,
Cura 13.11.2. User manual. Ultimaker s software for making 3D prints. English Version 1.0
 Cura 13.11.2 Ultimaker s software for making 3D prints User manual English Version 1.0 Table of Contents A. Welcome to Cura A1. Cura for your Ultimaker A2. Latest upgrade and fixes B. Installing and configuring
UPLIFT Height Adjustable Standing Desk (T-Frame) DIRECTIONS FOR ASSEMBLY AND USE - - ALSO - - Watch our assembly video
 DIRECTIONS FOR ASSEMBLY AND USE - - ALSO - - Watch our assembly video") UPLIFT Height Adjustable Standing Desk (T-Frame) DIRECTIONS FOR ASSEMBLY AND USE - - ALSO - - Watch our assembly video http://bit.ly/9ywwh! CAUTION MAKE SURE NO OBSTACLES ARE IN THE DESK S PATH AND ALL
UPLIFT Height Adjustable Standing Desk (T-Frame) DIRECTIONS FOR ASSEMBLY AND USE - - ALSO - - Watch our assembly video http://bit.ly/9ywwh! CAUTION MAKE SURE NO OBSTACLES ARE IN THE DESK S PATH AND ALL
Wall-Mounting your HP computer. User Guide
 Wall-Mounting your HP computer User Guide The only warranties for Hewlett-Packard products and services are set forth in the express statements accompanying such products and services. Nothing herein should
Documentation version 1.4 ASSEMBLY INSTRUCTIONS REV 1.1
 Documentation version 1.4 ASSEMBLY INSTRUCTIONS REV 1.1 / 2 INTRODUCTION / 3 INTRODUCTION Target : Prupose a visual guide of the differents steps to build and use a µdelta printer Designers : Hugo Flye
Table of Contents. www.hunterfan.com. What to Expect with. Preparation. Tools Needed. Wiring. Hanging the Fan. Blades. Motor Housing.
 www.hunterfan.com Table of Contents What to Expect with Your Installation 30 inches Hanging the Fan Wiring 8 Maintenance, Operation & Cleaning Light Kit 13??? 14 1 9 Troubleshooting 11 5 Blades Motor Housing
Manual for GlobePharma Mini-Press II Rotary Tablet Press
 1 of 13 Preparing the Rotary Press 1. Make sure the rotary press is unplugged. 2. Open the bottom cabinet of the rotary press and take out the grey tool kit, and the beige box of punches and dies. 3. Take
How To Use A Brother Ql700
 User's Guide QL-700 Be sure to read and understand this guide before using the machine. We recommend that you keep this guide nearby for future reference. www.brother.com US ENG ver.0 Thank you for purchasing
TABLE OF CONTENTS AIRWOLF 3D YOUTUBE CHANNEL 2 INTRODUCTION...3
 TABLE OF CONTENTS INTRODUCTION...3 TECHNICAL SPECIFICATIONS...4 BOX CONTENTS...5 PARTS DIRECTORY...6 HOW IT WORKS...7 VIKI LCD SCREEN...8 VIKI LCD SCREEN LAYOUT...9 VIKI LCD: HOW TO...10 GUIDE TO 3D PRINTING...24
CONTENTS. 2 CHAPTER I: Welcome to Your ROBO 3D Experience! 3 CHAPTER II: Installing Software. 4 CHAPTER III: Connecting Your R1 3D Printer
 CONTENTS 2 CHAPTER I: Welcome to Your ROBO 3D Experience! 3 CHAPTER II: Installing Software 4 CHAPTER III: Connecting Your R1 3D Printer 8 CHAPTER IV: Software Navigation 21 CHAPTER V: Slice 34 CHAPTER
FCC COMPLIANCE STATEMENT FOR AMERICAN USERS
 FCC COMPLIANCE STATEMENT FOR AMERICAN USERS This equipment has been tested and found to comply with the limits for a CLASS A digital device, pursuant to Part 15 of the FCC Rules. These limits are designed
Digital Photo Picture Frame. Operation Manual
 Digital Photo Picture Frame Operation Manual 20070309 CONGRATULATIONS on your purchase of a Polaroid 7 LCD Digital Photo Picture Frame. Please read carefully and follow all warnings and instructions in
Doc. No: 412-121033 Issue: 1 Date: Aug 2014. BTT-02 card printer manual THERMAL TRANSFER CARD PRINTER BTT-02
 Date: Aug 2014 THERMAL TRANSFER CARD PRINTER BTT-02 TABLE OF CONTENTS Introduction... 3 System Contents and Initial Checks... 3 Installation... 4 Preparation of Installation Site... 4 Printer Connections...
Vision Engravers and Routers PRE-Installation Guide. 2015 Vision Engraving & Routing Systems
 Vision Engravers and Routers PRE-Installation Guide Revised: 8/19/2015 Vision Engravers and Routers PRE-Installation Guide All rights reserved. No parts of this work may be reproduced in any form or by
3D Printer Extruder. Application Note. Martez Steverson ECE 480. Design Team 8 3/28/14. Abstract
 3D Printer Extruder Abstract Application Note By Martez Steverson ECE 480 Design Team 8 3/28/14 The purpose of this paper is to instruct the reader on how to construct an extruder for a 3D printer and
Control Box Wiring For PRSstandard Tool
 888-680-4466 ShopBotTools.com Control Box Wiring For PRSstandard Tool Copyright 2016 ShopBot Tools, Inc. page 1 Copyright 2016 ShopBot Tools, Inc. page 2 Table of Contents Introduction:...5 Installation:...5
24 Wide Screen LED Monitor with HDMI
 24 Wide Screen LED Monitor with HDMI USER MANUAL L24LE11B_MANUAL_EN_R1 Please read this manual carefully before using, and keep it for future reference. TABLE OF CONTENTS GETTING STARTED Monitor Stand
Kop. Platte tekst. Mac Version. Full manual available in EN / NL / DE / FR from creatrhs.lpfrg.com
 Kop Platte tekst Mac Version Full manual available in EN / NL / DE / FR from creatrhs.lpfrg.com Follow us online! facebook.com/lpfrg twitter.com/leapfrog_3d instagram.com/leapfrog_3d Sign up for our newsletter
EPSON Stylus. Start Here
 EPSON Stylus C84 EPSON Stylus Start Here C84 CPD-16675R1 4043482-00 XXX 1 Unpack 1 Remove everything from the box. Paper support Printer Manual Power cord Ink cartridges CD-ROM 2 Remove all the blue tape
PR 50 Frymaster Universal Holding Cabinet (UHC)
") PREP EQUIPMENT PR 50 Frymaster Universal Holding Cabinet (UHC) Models UHCP2, UHCP4, UHCPN4 Daily maintenance tasks PR 50 D1 Clean UHC Monthly maintenance tasks PR 50 M1 Calibrate UHC Annual maintenance
PREP EQUIPMENT PR 50 Frymaster Universal Holding Cabinet (UHC) Models UHCP2, UHCP4, UHCPN4 Daily maintenance tasks PR 50 D1 Clean UHC Monthly maintenance tasks PR 50 M1 Calibrate UHC Annual maintenance
TRIMMING UNIT/DIAMOND MACHINE TST.13
 TRIMMING UNIT/DIAMOND MACHINE TST.13 REFERENCE BOOK rel. 02.15 TRIMMING UNIT/DIAMOND MACHINE TST.13 REL. 02.15 ENGLISH LANGUAGE 1 MACHINE DESCRIPTION TST.13 was designed and built for processing methacrylate.
16/32 Channel 1U Rack Mount CCTV Power Supply
 16/32 Channel 1U Rack Mount CCTV Power Supply Manual PH-A3224-GUQ Shown 16-Channel 32-Channel PTC PH-A1612-PUQ PH-A3224-PUQ Glass Fuse PH-A1612-GUQ PH-A3224-GUQ Industrial design 12 Amp 3 Amps per channel
1. SAFETY RULES. 8. Avoid placing objects in the path of the blades.
 1 1. SAFETY RULES 1. To reduce the risk of electric shock, insure electricity has been turned off at the circuit breaker or fuse box before beginning. 2. All wiring must be in accordance with the National
Economy Combo Heat Press Manual Model No.: ECH-800
 Economy Combo Heat Press Manual Model No.: ECH-800 CONTENTS I. Assembly Drawing -----------------------------------------------------------------------------------2 II. Technical Parameters ------------------------------------------------------------------------------2
Safety and Compliance 05 About the MakerBot Replicator 07
 USER MANUAL table of contents 1 WELCOME 04 Safety and Compliance 05 About the MakerBot Replicator 07 2 getting started 10 Accessory Checklist 11 Unpacking the MakerBot Replicator 12 Setting up the MakerBot
TABLE OF CONTENTS QUICK START... 1 DIAGRAM OF THE DIGITAL PHOTO FRAME... 2 KEYPAD BUTTON FUNCTIONS... 3 REMOTE CONTROL FUNCTIONS..
 TABLE OF CONTENTS QUICK START........ 1 DIAGRAM OF THE DIGITAL PHOTO FRAME... 2 KEYPAD BUTTON FUNCTIONS..... 3 REMOTE CONTROL FUNCTIONS..4 DIGITAL PHOTO FRAME NAVIGATION........5 OSD MENU FUNCTIONS..6
Original Assembly Guide
 TCT Multipurpose Single Bevel Sliding Compound Mitre Saw Original Assembly Guide Read instructions before assembling this tool. Table of Contents GB Assembly Guide Read instructions before assembling this
Assembly instructions
 The fast, easy to use, Open-source 3D printer Assembly instructions English version 2.0 Ultimaker Original+ Assembly manual Dear customer, Thank you for purchasing the Ultimaker Original+ DIY kit and welcome
DIGITAL WARMING CABINETS
 DIGITAL WARMING CABINETS INSTALLATION-OPERATION-MAINTENANCE USER MANUAL Mac Medical 820 S Mulberry St. Millstadt, IL 62260 California OSHPD Pre-approved (618) 476-3550 phone (618) 476-3337 fax December
Hot-End Replacement Guide. BFB 3000 plus & 3D Touch
 Hot-End Replacement Guide BFB 3000 plus & 3D Touch Pre assembly checks: Testing the hot-end before fitting: Check the heating cable: Set the multi-meter to read resistance (2000 ohms) Test the two outside
Owner s Guide and Installation Manual. Vancouver Model Name. 21321, 21328 Model No. English Español
 For Your Records and Warranty Assistance For reference, also attach your receipt or a copy of your receipt to the manual. Vancouver Model Name 21321, 21328 Model No. Type A Models Owner s Guide and Installation
MAKERBOT DESKTOP. All instructions in this tutorial are for use with a Flashforge Creator X (replicator single) using Makerbot Desktop.
 using Makerbot Desktop.") MAKERBOT DESKTOP All instructions in this tutorial are for use with a Flashforge Creator X (replicator single) using Makerbot Desktop. Download Software Download software fromhttps://www.makerbot.com/desktop
MAKERBOT DESKTOP All instructions in this tutorial are for use with a Flashforge Creator X (replicator single) using Makerbot Desktop. Download Software Download software fromhttps://www.makerbot.com/desktop
Pet hair clipper. Model 96822. Diagrams within this manual may not be drawn proportionally.
 Pet hair clipper Model 96822 Cleaning And Operation Instructions Diagrams within this manual may not be drawn proportionally. Due to continuing improvements, actual product may differ slightly from the
INSTALLATION AND OPERATING INSTRUCTIONS For Model GL1 Gate Locks
 Securitron Magnalock Corp. www.securitron.com ASSA ABLOY, the global leader Tel 800.624.5625 [email protected] in door opening solutions INSTALLATION AND OPERATING INSTRUCTIONS For Model GL1 Gate
Auto Sentry-eXP Maintenance
 Auto Sentry-eXP Maintenance Maintenance Procedures for Auto Sentry exp Bill Dispenser Credit Card Reader Bill Acceptor Bill Dispenser Maintenance Bill Dispenser Problem / Cause Bill Dispenser Error Codes
ASSEMBLY MANUAL MATERIA 101. Revision 04
 ASSEMBLY MANUAL MATERIA 101 Revision 04 24 NOVEMBER 2014 00 INDEX 03 01 - Introduction 42 08 - Board wiring 05 06 07 07 07 08 02 - KIT Contents Parts list Box A Box B Box C Notes 46 49 09 - Calibration
MBSAW. Meat Cutting Band Saw With Meat Grinder Assembly & Operating Instructions
 06/2011 MBSAW Meat Cutting Band Saw With Meat Grinder Assembly & Operating Instructions READ ALL INSTRUCTIONS AND WARNINGS BEFORE USING THIS PRODUCT. This manual provides important information on proper
Service Guide. Gateway M275
 Service Guide Gateway M275 Contents Replacing Gateway M275 Components.................................... 1 Identifying the convertible tablet PC model...................................... 2 Identifying
FlashForge Creator Quick Start Manual
 FlashForge Creator Quick Start Manual Safety Information... 1 Please always check power setting before plug in... 1 Unboxing... 3 Package Contents... 3 Unboxing... 3 Initial Hardware Setup... 5 The First
P3000 Printer Guide. 566372-001 Rev A. January 2006
 P3000 Printer Guide 566372-001 Rev A January 2006 Information resources for the P3000 ID Card Printer Installation Message Help To install one printer to a PC using a USB cable, see the Installation Map,
OWNER S MANUAL. Permolock C3. Docking system for Power wheelchair in vehicle
 OWNER S MANUAL US Permolock C3 Docking system for Power wheelchair in vehicle How to contact Permobil Head Office of the Permobil group Permolock C3 Docking system for electric wheelchair in vehicle Produced
Portable Air Conditioner
 Portable Air Conditioner Owner's Manual Model:3 in 1 12,000 Btu/h Series 3 Please read this owner s manual carefully before operation and retain it for future reference. CONTENTS 1. SUMMARY...1 2. PORTABLE
WARNING CANADIAN D.O.C. WARNING
 Each product and program carries a respective written warranty, the only warranty on which the customer can rely. Avery Dennison Corp. reserves the right to make changes in the product, the programs, and
Zenbot CNC User s guide www.zenbotcnc.com
 Zenbot CNC User s guide www.zenbotcnc.com Note: If at any point you are unsure what to do or would like assistance, don t hesitate to email [email protected], or call 559-901-8329. Customer satisfaction
GeekDesk Max Instructions for Assembly & Use
 GeekDesk Max Instructions for Assembly & Use Work Sitting OR Standing! With the touch of a button... Elevate Your Work Instructions release 1.5, 2012-08-09 WELCOME! Thank you for purchasing a GeekDesk!
TRIMBLE TX5 3D LASER SCANNER QUICK START GUIDE
 TRIMBLE TX5 3D LASER SCANNER QUICK START GUIDE Equipment 1 8 9 5 6 7 4 3 2 The TX5 laser scanner ships with the following equipment: 1 Scanner transport and carry case 6 USB memory card reader 2 AC power
SMD Rework Station TABLE OF CONTENTS
 SMD Rework Station Thank you for purchasing the Hakko 50B SMD Rework Station. The Hakko 50B is designed to solder and desolder surface mounted devices with hot air. Please read this manual before operating
Light Source User Guide
 Light Source User Guide Compact DMX Light Source Models covered by this manual: UFO 150 CDMXG Glass, DMX - 240V UFO 150 CDMXP Plastic, DMX - 240V Universal Fibre Optics Issue 2 Revised: 23092013 Universal
Wiper Motor Marinco 2.5. Installation Instructions
 Wiper Motor Marinco 2.5 Installation Instructions Wiper Motor Marinco-2.5 The Marinco 2.5 Wiper Motor Offers the Following Features: Fully sealed base and housing which allows installation in outdoor wet
HYDRAULIC LIFT TABLE CART 2200-LB.
 HYDRAULIC LIFT TABLE CART 2200-LB. OWNER S MANUAL WARNING: Read carefully and understand all MACHINE ADJUSTMENT AND OPERATION INSTRUCTIONS before operating. Failure to follow the safety rules and other
Building A Computer: A Beginners Guide
 Building A Computer: A Beginners Guide Mr. Marty Brandl The following was written to help an individual setup a Pentium 133 system using an ASUS P/I- P55T2P4 motherboard. The tutorial includes the installation
TROUBLESHOOTING AND MAINTENANCE
 TROUBLESHOOTING AND MAINTENANCE TABLE OF CONTENTS 1 TROUBLESHOOTING 04 Objects Do Not Stick to the Build Plate 05 Objects are Difficult to Remove from the Build Plate 05 Extrusion Stops 06 Replicator
QUICK REFERENCE. Connecting the Cables The power supply automatically switches between 115V and 230V.
 QUICK REFERENCE This Quick Reference contains supply loading and general care and maintenance procedures for the Monarch 9906 printer. For more detailed information, refer to the Operator s Handbook available
Practical 3D Printers
 Practical 3D Printers Brian Evans Apress* Contents J About the Author About the Technical Reviewer Acknowledgments Introduction xvii xix xxi xxiii Chapter 1: A World of 3D Printers 1 Tea. Earl Grey. Hot
Fish Grader User Manual
 Fish Grader User Manual 1400 Fish Grader Contents Basic Parts... 2 Set up... 3 Control board needs to be setup... 3 Adjustable legs... 3 Adjustable Inlet cute... 3 Motor... 3 Control-board... 4 Remote
How do I monitor the ink levels on my EPSON Stylus printer using Windows 2000 or XP?
 Faulty analysis Error indicators Status Monitor PrintJet Doesn't Print Mats are not drawn in or transported Mats are not delivered correctly The statusmonitor caused an error message Maintenance of PrintJet
1. SAFETY RULES WARNING TO REDUCE THE RISK OF FIRE, ELECTRIC SHOCK OR PERSONAL INJURY, MOUNT FAN TO OUTLET BOX MARKED "ACCEPTABLE FOR FAN SUPPORT".
 1 1. SAFETY RULES 1. To reduce the risk of electric shock, insure electricity has been turned off at the circuit breaker or fuse box before beginning. 2. All wiring must be in accordance with the National
Rapid Prototyping with the MakerBot Replicator 2X
 PURDUE MECHANICAL ENGINEERING Rapid Prototyping with the MakerBot Replicator 2X (MakerBot 2X & Makerbot Desktop v3.3) This document contains information and instructions on how to bring your computer designed
POSEIDON 2-29, 2-25 & 2-22 POSEIDON 2-29, 2-25 & 2-22 XT
 POSEION 2-29, 2-25 & 2-22 POSEION 2-29, 2-25 & 2-22 XT Repair Manual Index A. Safety precautions 3 B. Technical data 4 C. Structure 5-6. Service / Repair 7-23 E. Tools 24 F. Function 25-26 G. Electric
Checking the Package Contents. Installing the Printer Software. Connecting. Unpacking the. the Printer. Printer. Attaching
 Installing the Printer Software Checking the Package Contents Connecting the Printer Unpacking the Printer Installing the Ink Cartridges Plugging in the Printer Attaching the Printer Parts 4032216-00 EUL
Assembly and Set-Up Instructions
 HP Designjet 5XX series printers Assembly and Set-Up Instructions 1. Check the Contents of the Package Day-to-day package containing Using Your Printer documentation CD. Box containing paper bin and printer
TECHNICAL INFORMATION
 TECHNICAL INFORMATION Models No. 2012NB Description 304mm (12") Automatic Thickness Planer CONCEPTION AND MAIN APPLICATIONS * Compact and light weight (27 Kg./59 lbs) automatic thickness planer for easier
Compaq Presario Desktop Products. Upgrading and Servicing Guide
 Compaq Presario Desktop Products Upgrading and Servicing Guide The information in this document is subject to change without notice. Hewlett-Packard Company makes no warranty of any kind with regard to
SP55 Printer Guide 554733-001. August 2004
 SP55 Printer Guide 554733-001 August 2004 Information resources for the SP55 Printer Installation Message Help To install the printer: To install one printer on a PC using a USB cable, see the Installation
PRODUCT MANUAL - M090
 PRODUCT MANUAL - M090 MODEL 203/266 ELECTRIC CAN OPENER 1 SAFETY CAUTION: SEVERED CAN LIDS HAVE CUTTING EDGES. USE OF A PROTECTIVE GLOVE OR TONGS IS ADVISED WHEN HANDLING LIDS. WARNING To avoid risk of
Alfa Romeo 147 On board instruments installation guide
 Alfa Romeo 147 On board instruments installation guide Alfa Romeo 147 On board instruments installation guide This guide is describing how I installed oil temperature and oil pressure gauges to my Alfa
18974 (736) Singer No. 20-2. SINGER No. 20-2 ELECTRIC SEWING MACHINE INSTRUCTION MANUAL
 Singer No. 20-2. SINGER No. 20-2 ELECTRIC SEWING MACHINE INSTRUCTION MANUAL") SINGER No. 20-2 ELECTRIC SEWING MACHINE INSTRUCTION MANUAL Next Page Main Parts Accessories To start the Motor To Stop the Motor To Change the Speed Needles and Thread Relative Sizes of Needle and Thread
SINGER No. 20-2 ELECTRIC SEWING MACHINE INSTRUCTION MANUAL Next Page Main Parts Accessories To start the Motor To Stop the Motor To Change the Speed Needles and Thread Relative Sizes of Needle and Thread
SECTION G2: CABLE PROCESSOR MODULE MAINTENANCE
 SECTION G2: CABLE PROCESSOR MODULE MAINTENANCE Cable Processor Module overview WARNING! When tipping the Cable Processor Module back, (after removing the toggle arm pin), use extreme caution not to drop
National- Spencer Inc.
 9-27-2010 National- Spencer Inc. 19.2V HEAVY DUTY GREASE GUN PRODUCT SPECIFICATION Charger Input Power 110 VAC Battery Output Power 19.2V Battery Capacity 1500 MAH Battery Pack Charge Time 1 Hour Maximum
IMPORTANT SAFETY INSTRUCTIONS WARNING READ AND SAVE THESE OPERATING AND SAFETY INSTRUCTIONS BEFORE USING THIS HEATER.
 THERMAWAVE CERAMIC HEATER Model HZ-850 Series Model HZ-860 Series IMPORTANT SAFETY INSTRUCTIONS WARNING READ AND SAVE THESE OPERATING AND SAFETY INSTRUCTIONS BEFORE USING THIS HEATER. Warning Failure to
How the uprint Rapidprotyping Machine Works
 The University of New Haven Tagliatela College of Engineering Industrial and System Engineering Laboratory, Buckman B225 How the uprint Rapidprotyping Machine Works Prepared By: Carolina White, MS Industrial
Awning Instructions. Full Cassette 1.5m to 6m
 Awning Instructions Full Cassette 1.5m to 6m English Full Cassette Manual & Electric Instructions Contents Warning 1.5m - 3.5m Awnings 8 x Expansion bolts ** 2 x brackets 1 x Awning 1 x Winder 4.0m -
User s Guide. Oreck Air Purifier with HEPA Filtration. Important! Read this manual carefully, and keep for future reference.
 User s Guide Oreck Air Purifier with HEPA Filtration Important! Read this manual carefully, and keep for future reference. Enjoy Congratulations on your purchase of the Oreck Air Purifier with HEPA Filtration.
LUCCI AIRFUSION QUEST II CEILING FAN
 LUCCI AIRFUSION QUEST II CEILING FAN WITH IR REMOTE INSTALLATION OPERATION MAINTENANCE WARRANTY INFORMATION CAUTION READ INSTRUCTIONS CAREFULLY FOR SAFE INSTALLATION AND FAN OPERATION. V1.0 QUEST II IR
- 2 - IMPORTANT SAFETY REMINDERS
 USER MANUAL IMPORTANT SAFETY REMINDERS This appliance should only be used for domestic cleaning, as described in this user guide. Please ensure that this guide is fully understood before operating the
110244-003. PrintPAD CN3/4/3e/4e. User Guide
 110244-003 PrintPAD CN3/4/3e/4e User Guide TABLE OF CONTENTS PrintPAD CN3/4 & PrintPAD CN3e/4e Printer Views...1 Open View...1 Closed View...1 Using Batteries: General Guidelines...1 Installing and/or
GUTTER MACHINE CONTROLS STANDARD
 GUTTER MACHINE CONTROLS STANDARD Note: determine what type of control package is installed on the machine. --more-- All operators should familiarize themselves with the appropriate controls prior to any
CNC USB dual layer PCB milling
 CNC USB dual layer PCB milling by tim23x I've recently built a CNC machine out of various pieces of high-quality salvage. With the money I saved in the construction of the system I bought a controller
Basic Spring Motor Roller Shades
 Comprehensive Roller Shade Installation Guide Basic Spring Motor Roller Shades ATTENTION!!! READ CAREFULLY! This shade has a reliable long-lasting Spring Motor. The Spring Motor must have proper tension
LBP-1210 Laser Printer
 LBP-1210 Laser Printer Getting Started Guide IMPORTANT: Read this manual carefully before using your printer. Save this manual for future reference. Copyright Copyright 2002 Canon Inc. All information
Quick Start Turning on the Tablet PC for the First Time
 User s Manual DL46 Getting Started Congratulations on your purchase of a Tablet PC. The Tablet PC is a fully functional PC with built-in LAN, and wireless connectivity. With your Tablet PC you will be
Cooktop Low-Profile Ventilation Hoods
 INSTALLATION GUIDE Cooktop Low-Profile Ventilation Hoods Contents Wolf Cooktop Low-Profile Ventilation Hoods........ 3 Cooktop Low-Profile Hood Specifications.......... 4 Cooktop Low-Profile Hood Installation............
Taurus Super-S3 LCM. Dual-Bay RAID Storage Enclosure for two 3.5-inch Serial ATA Hard Drives. User Manual March 31, 2014 v1.2 www.akitio.
 Dual-Bay RAID Storage Enclosure for two 3.5-inch Serial ATA Hard Drives User Manual March 31, 2014 v1.2 www.akitio.com EN Table of Contents Table of Contents 1 Introduction... 1 1.1 Technical Specifications...
IMPORTANT INSTALLATION GUIDE VALENCIA SQUARE CORNER SHOWER READ ALL INSTRUCTIONS CAREFULLY BEFORE STARTING THE INSTALLATION
 INSTALLATION GUIDE VALENCIA SQUARE CORNER SHOWER SEALANT REQUIRED TO COMPLETE THIS INSTALLATION: (Not supplied) Sika Sikasil NG (Arctic White) To seal the WHITE shower door and returns to the shower tray.