Arduino Lesson 13. DC Motors. Created by Simon Monk
|
|
|
- Sheena Howard
- 9 years ago
- Views:
Transcription
1 Arduino Lesson 13. DC Motors Created by Simon Monk

2 Guide Contents Guide Contents Overview Parts Part Qty Breadboard Layout Arduino Code Transistors Other Things to Do Adafruit Industries Page 2 of 11

3 Overview In this lesson, you will learn how to control a small DC motor using an Arduino and a transistor. You will use an Arduino analog output (PWM) to control the speed of the motor by sending a number between 0 and 255 from the Serial Monitor. Adafruit Industries Page 3 of 11

4 Parts To build the project described in this lesson, you will need the following parts. Part Qty Small 6V DC Motor 1 PN2222 Transistor 1 1N4001 diode Ω Resistor (red, purple, brown stripes) 1 Half-size Breadboard 1 Adafruit Industries Page 4 of 11
 1 Half-size Breadboard 1 Adafruit Industries")
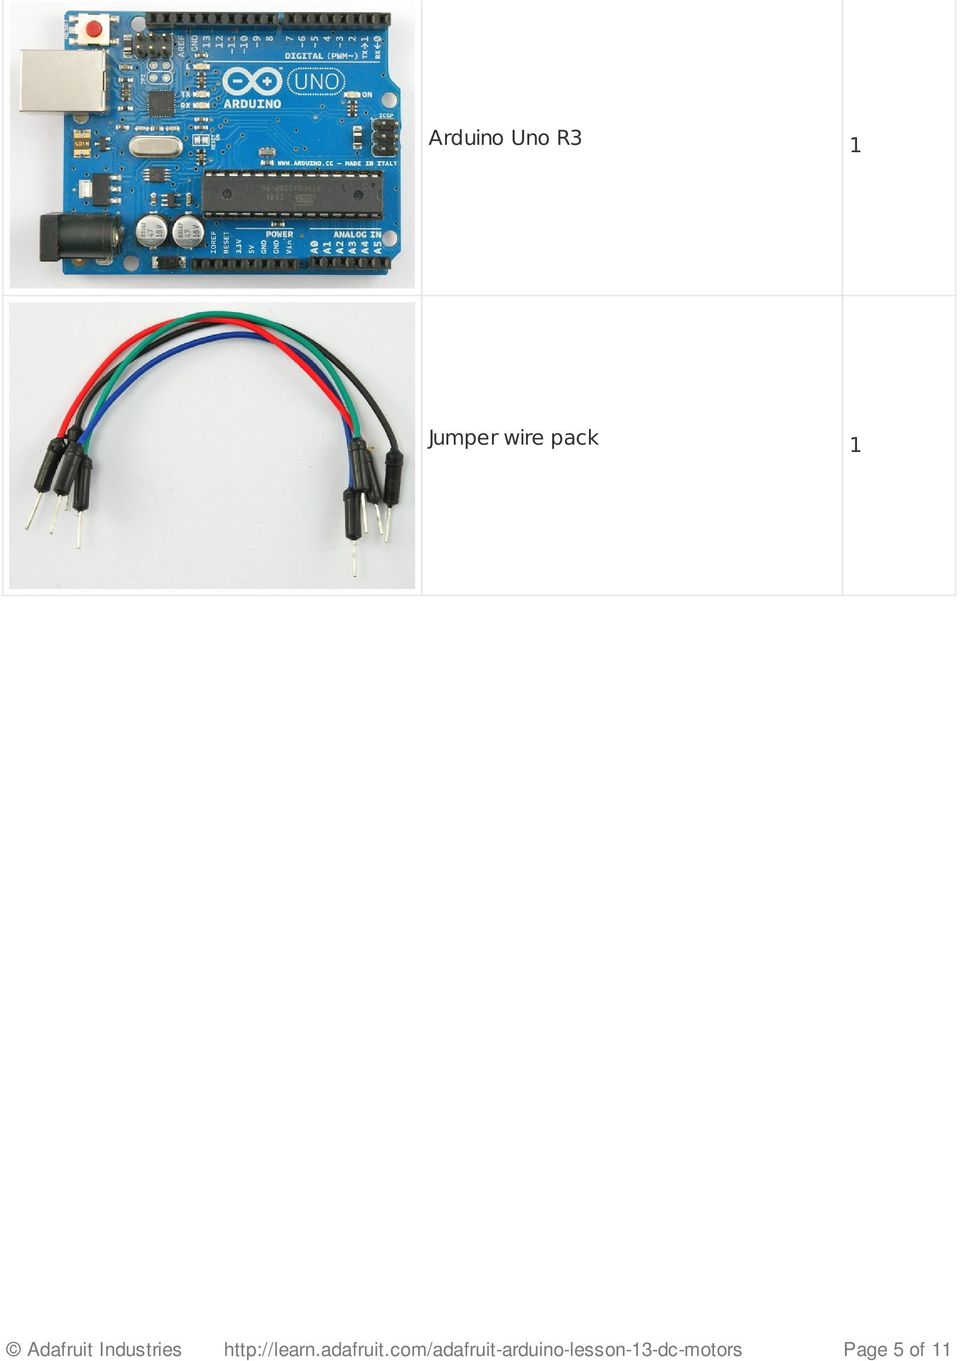
5 Arduino Uno R3 1 Jumper wire pack 1 Adafruit Industries Page 5 of 11
6 Breadboard Layout When you put together the breadboard, there are two things to look out for. Firstly, make sure that the transistor is the right way around. The flat side of the transistor should be on the right-hand side of the breadboard. Secondly the striped end of the diode should be towards the +5V power line - see the image below! The motor that comes with Adafruit Arduino kits does not draw more than 250mA but if you have a different motor, it could easily draw 1000mA, more than a USB port can handle! If you aren't sure of a motor's current draw, power the Arduino from a wall adapter, not just USB The motor can be connected either way around. Adafruit Industries Page 6 of 11

7 Arduino Code Load up the following sketch onto your Arduino. /* Adafruit Arduino - Lesson 13. DC Motor */ int motorpin = 3; void setup() { pinmode(motorpin, OUTPUT); Serial.begin(9600); while (! Serial); Serial.println("Speed 0 to 255"); } void loop() { if (Serial.available()) { int speed = Serial.parseInt(); if (speed >= 0 && speed <= 255) { analogwrite(motorpin, speed); } } } The transistor acts like a switch, controlling the power to the motor, Arduino pin 3 is used to turn the transistor on and off and is given the name 'motorpin' in the sketch. When the sketch starts, it prompts you, to remind you that to control the speed of the motor you need to enter a value between 0 and 255 in the Serial Monitor. Adafruit Industries Page 7 of 11

8 In the 'loop' function, the command 'Serial.parseInt' is used to read the number entered as text in the Serial Monitor and convert it into an 'int'. You could type any number here, so the 'if' statement on the next line only does an analog write with this number if the number is between 0 and 255. Adafruit Industries Page 8 of 11

9 Transistors The small DC motor, is likely to use more power than an Arduino digital output can handle directly. If we tried to connect the motor straight to an Arduino pin, there is a good chance that it could damage the Arduino. A small transistor like the PN2222 can be used as a switch that uses just a little current from the Arduino digital output to control the much bigger current of the motor. The transistor has three leads. Most of the electricity flows from the Collector to the Emitter, but this will only happen if a small amount is flowing into the Base connection. This small current is supplied by the Arduino digital output. The diagram below is called a schematic diagram. Like a breadboard layout, it is a way of showing how the parts of an electronic project are connected together. Adafruit Industries Page 9 of 11

10 The pin D3 of the Arduino is connected to the resistor. Just like when using an LED, this limits the current flowing into the transistor through the base. There is a diode connected across the connections of the motor. Diodes only allow electricity to flow in one direction (the direction of their arrow). When you turn the power off to a motor, you get a negative spike of voltage, that can damage your Arduino or the transistor. The diode protects against this, by shorting out any such reverse current from the motor. Adafruit Industries Page 10 of 11

11 Other Things to Do Try reversing the connections to the motor. What happens? Try entering different values (starting at 0) into the Serial Monitor and notice at what value the motor starts to actually turn. You will find that the motor starts to 'sing' as you increase the analog output. Try pinching the drive shaft between your fingers. Don't hold it like that for too long, or you may cook the transistor, but you should find that it is fairly easy to stop the motor. It is spinning fast, but it does not have much torque. About the Author Simon Monk is author of a number of books relating to Open Source Hardware. The following books written by Simon are available from Adafruit: Programming Arduino ( 30 Arduino Projects for the Evil Genius ( and Programming the Raspberry Pi ( Adafruit Industries Last Updated: :02:50 PM EDT Page 11 of 11

Arduino Lesson 14. Servo Motors
 Arduino Lesson 14. Servo Motors Created by Simon Monk Last updated on 2013-06-11 08:16:06 PM EDT Guide Contents Guide Contents Overview Parts Part Qty The Breadboard Layout for 'Sweep' If the Servo Misbehaves
Arduino Lesson 9. Sensing Light
 Arduino Lesson 9. Sensing Light Created by Simon Monk Last updated on 2014-04-17 09:46:11 PM EDT Guide Contents Guide Contents Overview Parts Part Qty Breadboard Layout Photocells Arduino Code Other Things
Arduino Lesson 16. Stepper Motors
 Arduino Lesson 16. Stepper Motors Created by Simon Monk Last updated on 2013-11-22 07:45:14 AM EST Guide Contents Guide Contents Overview Parts Part Qty Breadboard Layout Arduino Code Stepper Motors Other
Arduino Lesson 5. The Serial Monitor
 Arduino Lesson 5. The Serial Monitor Created by Simon Monk Last updated on 2013-06-22 08:00:27 PM EDT Guide Contents Guide Contents Overview The Serial Monitor Arduino Code Other Things to Do 2 3 4 7 10
Arduino Lesson 0. Getting Started
 Arduino Lesson 0. Getting Started Created by Simon Monk Last updated on 204-05-22 2:5:0 PM EDT Guide Contents Guide Contents Overview Parts Part Qty Breadboard Installing Arduino (Windows) Installing Arduino
Arduino Lesson 4. Eight LEDs and a Shift Register
 Arduino Lesson 4. Eight LEDs and a Shift Register Created by Simon Monk Last updated on 2014-09-01 11:30:10 AM EDT Guide Contents Guide Contents Overview Parts Part Qty Breadboard Layout The 74HC595 Shift
Arduino Lesson 1. Blink
 Arduino Lesson 1. Blink Created by Simon Monk Last updated on 2015-01-15 09:45:38 PM EST Guide Contents Guide Contents Overview Parts Part Qty The 'L' LED Loading the 'Blink' Example Saving a Copy of 'Blink'
Basic DC Motor Circuits. Living with the Lab Gerald Recktenwald Portland State University [email protected]
 Basic DC Motor Circuits Living with the Lab Gerald Recktenwald Portland State University [email protected] DC Motor Learning Objectives Explain the role of a snubber diode Describe how PWM controls DC motor
Basic DC Motor Circuits
 Basic DC Motor Circuits Living with the Lab Gerald Recktenwald Portland State University [email protected] DC Motor Learning Objectives Explain the role of a snubber diode Describe how PWM controls DC motor
Arduino Lesson 17. Email Sending Movement Detector
 Arduino Lesson 17. Email Sending Movement Detector Created by Simon Monk Last updated on 2014-04-17 09:30:23 PM EDT Guide Contents Guide Contents Overview Parts Part Qty Breadboard Layout Arduino Code
Your Multimeter. The Arduino Uno 10/1/2012. Using Your Arduino, Breadboard and Multimeter. EAS 199A Fall 2012. Work in teams of two!
 Using Your Arduino, Breadboard and Multimeter Work in teams of two! EAS 199A Fall 2012 pincer clips good for working with breadboard wiring (push these onto probes) Your Multimeter probes leads Turn knob
Adafruit's Raspberry Pi Lesson 9. Controlling a DC Motor
 Adafruit's Raspberry Pi Lesson 9. Controlling a DC Motor Created by Simon Monk Last updated on 2014-04-17 09:00:29 PM EDT Guide Contents Guide Contents Overview Parts Part Qty PWM The PWM Kernel Module
Basic Pulse Width Modulation
 EAS 199 Fall 211 Basic Pulse Width Modulation Gerald Recktenwald v: September 16, 211 [email protected] 1 Basic PWM Properties Pulse Width Modulation or PWM is a technique for supplying electrical power
Eric Mitchell April 2, 2012 Application Note: Control of a 180 Servo Motor with Arduino UNO Development Board
 Eric Mitchell April 2, 2012 Application Note: Control of a 180 Servo Motor with Arduino UNO Development Board Abstract This application note is a tutorial of how to use an Arduino UNO microcontroller to
RGB LED Strips. Created by lady ada. Last updated on 2015-12-07 12:00:18 PM EST
 RGB LED Strips Created by lady ada Last updated on 2015-12-07 12:00:18 PM EST Guide Contents Guide Contents Overview Schematic Current Draw Wiring Usage Example Code Support Forums 2 3 5 6 7 10 12 13 Adafruit
Adafruit's Raspberry Pi Lesson 11. DS18B20 Temperature Sensing
 Adafruit's Raspberry Pi Lesson 11. DS18B20 Temperature Sensing Created by Simon Monk Last updated on 2015-04-09 03:47:48 PM EDT Guide Contents Guide Contents Overview Other Code Libraries Parts Hardware
Arduino Motor Shield (L298) Manual
 Manual") Arduino Motor Shield (L298) Manual This DFRobot L298 DC motor driver shield uses LG high power H-bridge driver Chip L298P, which is able to drive DC motor, two-phase or four phase stepper motor with a
Arduino Motor Shield (L298) Manual This DFRobot L298 DC motor driver shield uses LG high power H-bridge driver Chip L298P, which is able to drive DC motor, two-phase or four phase stepper motor with a
Sending an SMS with Temboo
 Sending an SMS with Temboo Created by Vaughn Shinall Last updated on 2015-01-21 01:15:14 PM EST Guide Contents Guide Contents Overview Get Set Up Generate Your Sketch Upload and Run Push to Send Wiring
PHYS 2P32 Project: MIDI for Arduino/ 8 Note Keyboard
 PHYS 2P32 Project: MIDI for Arduino/ 8 Note Keyboard University April 13, 2016 About Arduino: The Board Variety of models of Arduino Board (I am using Arduino Uno) Microcontroller constructd similarly
SSH to BeagleBone Black over USB
 SSH to BeagleBone Black over USB Created by Simon Monk Last updated on 2015-06-01 12:50:09 PM EDT Guide Contents Guide Contents Overview You Will Need Preparation Installing Drivers (Windows) Installing
Electronics 5: Arduino, PWM, Mosfetts and Motors
 BIOE 123 Module 6 Electronics 5: Arduino, PWM, Mosfetts and Motors Lecture (30 min) Date Learning Goals Learn about pulse width modulation (PWM) as a control technique Learn how to use a Mosfets to control
Playing sounds and using buttons with Raspberry Pi
 Playing sounds and using buttons with Raspberry Pi Created by Mikey Sklar Last updated on 2015-04-15 01:30:08 PM EDT Guide Contents Guide Contents Overview Install Audio Install Python Module RPi.GPIO
Lab 6 Introduction to Serial and Wireless Communication
 University of Pennsylvania Department of Electrical and Systems Engineering ESE 111 Intro to Elec/Comp/Sys Engineering Lab 6 Introduction to Serial and Wireless Communication Introduction: Up to this point,
ECEN 1400, Introduction to Analog and Digital Electronics
 ECEN 1400, Introduction to Analog and Digital Electronics Lab 4: Power supply 1 INTRODUCTION This lab will span two lab periods. In this lab, you will create the power supply that transforms the AC wall
Electronic Brick of Current Sensor
 Electronic Brick of Current Sensor Overview What is an electronic brick? An electronic brick is an electronic module which can be assembled like Lego bricks simply by plugging in and pulling out. Compared
cs281: Introduction to Computer Systems Lab08 Interrupt Handling and Stepper Motor Controller
 cs281: Introduction to Computer Systems Lab08 Interrupt Handling and Stepper Motor Controller Overview The objective of this lab is to introduce ourselves to the Arduino interrupt capabilities and to use
Thermistor. Created by Ladyada. Last updated on 2013-07-26 02:30:46 PM EDT
 Thermistor Created by Ladyada Last updated on 2013-07-26 02:30:46 PM EDT Guide Contents Guide Contents Overview Some Stats Testing a Thermistor Using a Thermistor Connecting to a Thermistor Analog Voltage
Adafruit's Raspberry Pi Lesson 5. Using a Console Cable
 Adafruit's Raspberry Pi Lesson 5. Using a Console Cable Created by Simon Monk Last updated on 2014-09-15 12:00:13 PM EDT Guide Contents Guide Contents Overview You Will Need Part Software Installation
Character LCDs. Created by Ladyada. Last updated on 2013-07-26 02:45:29 PM EDT
 Character LCDs Created by Ladyada Last updated on 2013-07-26 02:45:29 PM EDT Guide Contents Guide Contents Overview Character vs. Graphical LCDs LCD Varieties Wiring a Character LCD Installing the Header
Adafruit's Raspberry Pi Lesson 5. Using a Console Cable
 Adafruit's Raspberry Pi Lesson 5. Using a Console Cable Created by Simon Monk Last updated on 2016-04-12 08:03:49 PM EDT Guide Contents Guide Contents Overview You Will Need Part Software Installation
Set up and Blink - Simulink with Arduino
 Set up and Blink - Simulink with Arduino Created by Anuja Apte Last updated on 2015-01-28 06:45:11 PM EST Guide Contents Guide Contents Overview Parts and Software Build the circuit Set up compiler support
Adafruit MCP9808 Precision I2C Temperature Sensor Guide
 Adafruit MCP9808 Precision I2C Temperature Sensor Guide Created by lady ada Last updated on 2014-04-22 03:01:18 PM EDT Guide Contents Guide Contents Overview Pinouts Power Pins I2C Data Pins Optional Pins
Selecting and Implementing H-Bridges in DC Motor Control. Daniel Phan A37005649
 Selecting and Implementing H-Bridges in DC Motor Control Daniel Phan A37005649 ECE 480 Design Team 3 Spring 2011 Abstract DC motors can be used in a number of applications that require automated movements.
How to Make a Pogo Pin Test Jig. Created by Tyler Cooper
 How to Make a Pogo Pin Test Jig Created by Tyler Cooper Guide Contents Guide Contents Overview Preparation Arduino Shield Jigs The Code Testing Advanced Pogo Jigs Support Forums 2 3 4 6 9 11 12 13 Adafruit
IR Communication a learn.sparkfun.com tutorial
 IR Communication a learn.sparkfun.com tutorial Available online at: http://sfe.io/t33 Contents Getting Started IR Communication Basics Hardware Setup Receiving IR Example Transmitting IR Example Resources
The self-starting solar-powered Stirling engine
 The self-starting solar-powered Stirling engine This project began at the request of an artist who had proposed a Stirling-engine-powered sculpture to a client. The engine only had to run, not really produce
revolution Contents: Introduction Power 28-pin Project Board with input/output cables
 28-PIN IN IN PROJECT BOARD Contents: AXE020 28-pin Project Board with input/output cables Introduction The 28-pin project board is designed to allow rapid prototyping with 28-pin PICAXE microcontrollers.
Adafruit's Raspberry Pi Lesson 5. Using a Console Cable. Created by Simon Monk
 Adafruit's Raspberry Pi Lesson 5. Using a Console Cable Created by Simon Monk Guide Contents Guide Contents Overview You Will Need Part Software Installation (Mac) Software Installation (Windows) Connect
Table 1 Comparison of DC, Uni-Polar and Bi-polar Stepper Motors
 Electronics Exercise 3: Uni-Polar Stepper Motor Controller / Driver Mechatronics Instructional Laboratory Woodruff School of Mechanical Engineering Georgia Institute of Technology Lab Director: I. Charles
ARDUINO SEVERINO SERIAL SINGLE SIDED VERSION 3 S3v3 (REVISION 2) USER MANUAL
 USER MANUAL") ARDUINO SEVERINO SERIAL SINGLE SIDED VERSION 3 S3v3 (REVISION 2) USER MANUAL X1: DE-9 serial connector Used to connect computer (or other devices) using RS-232 standard. Needs a serial cable, with at least
ARDUINO SEVERINO SERIAL SINGLE SIDED VERSION 3 S3v3 (REVISION 2) USER MANUAL X1: DE-9 serial connector Used to connect computer (or other devices) using RS-232 standard. Needs a serial cable, with at least
2.2" TFT Display. Created by Ladyada. Last updated on 2014-03-31 12:15:09 PM EDT
 2.2" TFT Display Created by Ladyada Last updated on 2014-03-31 12:15:09 PM EDT Guide Contents Guide Contents Overview Connecting the Display Test the Display Graphics Library Bitmaps Alternative Wiring
Theory and Practice of Tangible User Interfaces. Thursday Week 2: Digital Input and Output. week. Digital Input and Output. RGB LEDs fade with PWM
 week 02 Digital Input and Output RGB LEDs fade with PWM 1 Microcontrollers Output Transducers actuators (e.g., motors, buzzers) Arduino Input Transducers sensors (e.g., switches, levers, sliders, etc.)
DS1307 Real Time Clock Breakout Board Kit
 DS1307 Real Time Clock Breakout Board Kit Created by Tyler Cooper Last updated on 2015-10-15 11:00:14 AM EDT Guide Contents Guide Contents Overview What is an RTC? Parts List Assembly Arduino Library Wiring
Microcontroller Programming Beginning with Arduino. Charlie Mooney
 Microcontroller Programming Beginning with Arduino Charlie Mooney Microcontrollers Tiny, self contained computers in an IC Often contain peripherals Different packages availible Vast array of size and
Cornerstone Electronics Technology and Robotics I Week 15 Voltage Comparators Tutorial
 Cornerstone Electronics Technology and Robotics I Week 15 Voltage Comparators Tutorial Administration: o Prayer Robot Building for Beginners, Chapter 15, Voltage Comparators: o Review of Sandwich s Circuit:
Servo Motors (SensorDAQ only) Evaluation copy. Vernier Digital Control Unit (DCU) LabQuest or LabPro power supply
 Evaluation copy. Vernier Digital Control Unit (DCU) LabQuest or LabPro power supply") Servo Motors (SensorDAQ only) Project 7 Servos are small, relatively inexpensive motors known for their ability to provide a large torque or turning force. They draw current proportional to the mechanical
Servo Motors (SensorDAQ only) Project 7 Servos are small, relatively inexpensive motors known for their ability to provide a large torque or turning force. They draw current proportional to the mechanical
POWER SUPPLY MODEL XP-15. Instruction Manual ELENCO
 POWER SUPPLY MODEL XP-15 Instruction Manual ELENCO Copyright 2013 by Elenco Electronics, Inc. REV-A 753020 All rights reserved. No part of this book shall be reproduced by any means; electronic, photocopying,
Data Sheet. Adaptive Design ltd. Arduino Dual L6470 Stepper Motor Shield V1.0. 20 th November 2012. L6470 Stepper Motor Shield
 Arduino Dual L6470 Stepper Motor Shield Data Sheet Adaptive Design ltd V1.0 20 th November 2012 Adaptive Design ltd. Page 1 General Description The Arduino stepper motor shield is based on L6470 microstepping
Arduino Wifi shield And reciever. 5V adapter. Connecting wifi module on shield: Make sure the wifi unit is connected the following way on the shield:
 the following parts are needed to test the unit: Arduino UNO R3 Arduino Wifi shield And reciever 5V adapter Connecting wifi module on shield: Make sure the wifi unit is connected the following way on the
Introduction to Arduino
 Introduction to Arduino // Basic Arduino reference sheet: Installation: Arduino: http://www.arduino.cc/en/guide/homepage Fritzing: http://fritzing.org/download/ Support: Arduino: http://www.arduino.cc,
Adafruit SHT31-D Temperature & Humidity Sensor Breakout
 Adafruit SHT31-D Temperature & Humidity Sensor Breakout Created by lady ada Last updated on 2016-06-23 10:13:40 PM EDT Guide Contents Guide Contents Overview Pinouts Power Pins: I2C Logic pins: Other Pins:
Transistor Characteristics and Single Transistor Amplifier Sept. 8, 1997
 Physics 623 Transistor Characteristics and Single Transistor Amplifier Sept. 8, 1997 1 Purpose To measure and understand the common emitter transistor characteristic curves. To use the base current gain
CONSTRUCTING A VARIABLE POWER SUPPLY UNIT
 CONSTRUCTING A VARIABLE POWER SUPPLY UNIT Building a power supply is a good way to put into practice many of the ideas we have been studying about electrical power so far. Most often, power supplies are
Hand Crank Generator (9 May 05) Converting a Portable Cordless Drill to a Hand Crank DC Generator
 Converting a Portable Cordless Drill to a Hand Crank DC Generator") Converting a Portable Cordless Drill to a Hand Crank DC Generator The unit is light weight (2.5 lb), portable, low cost ($10-$20) and can be used to recharge single cell batteries at from 1-3.5 amps. It
Converting a Portable Cordless Drill to a Hand Crank DC Generator The unit is light weight (2.5 lb), portable, low cost ($10-$20) and can be used to recharge single cell batteries at from 1-3.5 amps. It
How to program a Zumo Robot with Simulink
 How to program a Zumo Robot with Simulink Created by Anuja Apte Last updated on 2015-03-13 11:15:06 AM EDT Guide Contents Guide Contents Overview Hardware Software List of Software components: Simulink
DEPARTMENT OF ELECTRONICS ENGINEERING
 UNIVERSITY OF MUMBAI A PROJECT REPORT ON Home Security Alarm System Using Arduino SUBMITTED BY- Suman Pandit Shakyanand Kamble Vinit Vasudevan (13103A0011) (13103A0012) (13103A0018) UNDER THE GUIDANCE
Tiny Arduino Music Visualizer
 Tiny Arduino Music Visualizer Created by Phillip Burgess Last updated on 2014-04-17 09:30:35 PM EDT Guide Contents Guide Contents Overview Wiring Code Troubleshooting Principle of Operation Ideas 2 3 4
1.8" TFT Display Breakout and Shield
 1.8" TFT Display Breakout and Shield Created by lady ada Last updated on 2015-04-09 03:48:28 PM EDT Guide Contents Guide Contents Overview Breakout Pinouts Breakout Assembly Prepare the header strip: Add
The MOSFET Transistor
 The MOSFET Transistor The basic active component on all silicon chips is the MOSFET Metal Oxide Semiconductor Field Effect Transistor Schematic symbol G Gate S Source D Drain The voltage on the gate controls
Surveillance System Using Wireless Sensor Networks
 Surveillance System Using Wireless Sensor Networks Dan Nguyen, Leo Chang Computer Engineering, Santa Clara University Santa Clara, California, USA [email protected] [email protected] Abstract The
Pololu DRV8835 Dual Motor Driver Shield for Arduino
 Pololu DRV8835 Dual Motor Driver Shield for Arduino Pololu DRV8835 Dual Motor Driver Shield for Arduino, bottom view with dimensions. Overview This motor driver shield and its corresponding Arduino library
TRANSISTOR/DIODE TESTER
 TRANSISTOR/DIODE TESTER MODEL DT-100 Lesson Manual ELENCO Copyright 2012, 1988 REV-G 753115 Elenco Electronics, Inc. Revised 2012 FEATURES Diode Mode: 1. Checks all types of diodes - germanium, silicon,
DC Motor with Shaft Encoder
 Learning Objectives DC Motor with Shaft Encoder By the end of this laboratory experiment, the experimenter should be able to: Explain how an encoder operates and how it can be use determine rotational
UIM2901-5A MACH3 breakout board
 User Manual UIM2901-5A MACH3 Breakout Board UIM2901-5A MACH3 Breakout Board UIM2901-5A MACH3 breakout board Features General DB25 interface between PC and user device Fully buffered opto-isolated I/O (Input
H-Bridge Motor Control
 University of Pennsylvania Department of Electrical and Systems Engineering ESE 206: Electrical Circuits and Systems II Lab H-Bridge Motor Control Objective: The objectives of this lab are: 1. To construct
Using Arduino Microcontrollers to Sense DC Motor Speed and Position
 ECE480 Design Team 3 Using Arduino Microcontrollers to Sense DC Motor Speed and Position Tom Manner April 4, 2011 page 1 of 7 Table of Contents 1. Introduction ----------------------------------------------------------
The basic set up for your K2 to run PSK31 By Glenn Maclean WA7SPY
 The basic set up for your K2 to run PSK31 By Glenn Maclean WA7SPY I am by no means an expert on PSK31. This article is intended to help someone get on PSK31 with a K2. These are the things I did to get
KTA-223 Arduino Compatible Relay Controller
 8 Relay Outputs 5A 250VAC 4 Opto-Isolated Inputs 5-30VDC 3 Analog Inputs (10 bit) Connections via Pluggable Screw Terminals 0-5V or 0-20mA Analog Inputs, Jumper Selectable 5A Relay Switching Power Indicator
GLOLAB Two Wire Stepper Motor Positioner
 Introduction A simple and inexpensive way to remotely rotate a display or object is with a positioner that uses a stepper motor to rotate it. The motor is driven by a circuit mounted near the motor and
Adafruit Proto Shield for Arduino
 Adafruit Proto Shield for Arduino Created by lady ada Last updated on 2016-08-04 11:06:30 PM UTC Guide Contents Guide Contents Overview Make it! Lets go! Preparation Prep Tools Parts list Parts List Optional
Green House Monitoring and Controlling Using Android Mobile Application
 Green House Monitoring and Controlling Using Android Mobile Application Aji Hanggoro [email protected] Mahesa Adhitya Putra [email protected] Rizki Reynaldo [email protected] Riri Fitri
AirCasting Particle Monitor Bill of Materials
 AirCasting Particle Monitor Bill of Materials Shinyei PPD42NS Seeed http://www.seeedstudio.com/depot/grove- dust- sensor- p- 1050.html?cPath=25_27 JY- MCU HC- 06 Bluetooth Wireless Serial Port Module FastTech
UPS PIco. to be used with. Raspberry Pi B+, A+, B, and A. HAT Compliant. Raspberry Pi is a trademark of the Raspberry Pi Foundation
 UPS PIco Uninterruptible Power Supply with Peripherals and I 2 C control Interface to be used with Raspberry Pi B+, A+, B, and A HAT Compliant Raspberry Pi is a trademark of the Raspberry Pi Foundation
Current Loop Application Note 1495
 Current Loop Application Note Document No. CLAN1495 International Headquarter B&B Electronics Mfg. Co. Inc. 707 Dayton Road -- P.O. Box 1040 -- Ottawa, IL 61350 USA Phone (815) 433-5100 -- General Fax
Model 201 Wiegand Touchpad Reader Installation Guide
 Model 201 Wiegand Touchpad Reader Installation Guide P/N 460353001C 15AUG11 2011 UTC Fire & Security. All rights reserved. This document may not be copied in whole or in part or otherwise reproduced without
ABB Drives. User s Manual HTL Encoder Interface FEN-31
 ABB Drives User s Manual HTL Encoder Interface FEN-31 HTL Encoder Interface FEN-31 User s Manual 3AUA0000031044 Rev B EN EFFECTIVE: 2010-04-06 2010 ABB Oy. All Rights Reserved. 5 Safety instructions
TSL2561 Luminosity Sensor
 TSL2561 Luminosity Sensor Created by lady ada Last updated on 2015-06-12 12:10:28 PM EDT Guide Contents Guide Contents Overview Wiring the TSL2561 Sensor Using the TSL2561 Sensor Downloads Buy a TSL2561
Application Examples
 ISHAY SEMICONDUCTORS www.vishay.com Optocouplers and Solid-State Relays Application Note 2 INTRODUCTION Optocouplers are used to isolate signals for protection and safety between a safe and a potentially
Points Position Indicator (PPI1) for Points Motors with Common Ground
 for Points Motors with Common Ground") Points Position Indicator (PPI1) for Points Motors with Common Ground Monitors Points Action and Operates Leds on a Control Panel Monitors the brief positive operating voltage across points motors when
Points Position Indicator (PPI1) for Points Motors with Common Ground Monitors Points Action and Operates Leds on a Control Panel Monitors the brief positive operating voltage across points motors when
Physics 623 Transistor Characteristics and Single Transistor Amplifier Sept. 13, 2006
 Physics 623 Transistor Characteristics and Single Transistor Amplifier Sept. 13, 2006 1 Purpose To measure and understand the common emitter transistor characteristic curves. To use the base current gain
Adafruit BME280 Humidity + Barometric Pressure + Temperature Sensor Breakout
 Adafruit BME280 Humidity + Barometric Pressure + Temperature Sensor Breakout Created by lady ada Last updated on 2016-04-26 12:01:06 PM EDT Guide Contents Guide Contents Overview Pinouts Power Pins: SPI
RGB Wall Washer Using ILD4035
 ILD4035 Application Note AN216 Revision: 1.0 Date: RF and Protection Devices Edition Published by Infineon Technologies AG 81726 Munich, Germany 2010 Infineon Technologies AG All Rights Reserved. Legal
XPort Universal Demo Board User Guide
 XPort Universal Demo Board User Guide Part Number 900-563 Revision A September 2009 Copyright and Trademark Contacts 2009 Lantronix. All rights reserved. No part of the contents of this book may be transmitted
Battery Power for LED Pixels and Strips. Created by Phillip Burgess
 Battery Power for LED Pixels and Strips Created by Phillip Burgess Guide Contents Guide Contents Overview About Batteries Diode Fix for Alkaline Batteries Powering the Microcontroller Estimating Running
INDEX. Trademarks All name and product s trademarks mentioned below are the property of their respective companies.
 USB2.0 EASY IDE ADAPTER INDEX Trademarks ---------------------------------------------------------------------------- Introduction ---------------------------------------------------------------------------
Using voltage regulator to convert 5-12V range to 3.3V. Huan Lin
 Using voltage regulator to convert 5-12V range to 3.3V Huan Lin 4/2/2010 1 Table of Contents 1. Introduction... Error! Bookmark not defined. 2. Objective... Error! Bookmark not defined. 3. Implementation...
A REST API for Arduino & the CC3000 WiFi Chip
 A REST API for Arduino & the CC3000 WiFi Chip Created by Marc-Olivier Schwartz Last updated on 2014-04-22 03:01:12 PM EDT Guide Contents Guide Contents Overview Hardware configuration Installing the library
Experiment NO.3 Series and parallel connection
 Experiment NO.3 Series and parallel connection Object To study the properties of series and parallel connection. Apparatus 1. DC circuit training system 2. Set of wires. 3. DC Power supply 4. Digital A.V.O.
STUDY OF CELLPHONE CHARGERS
 STUDY OF CELLPHONE CHARGERS Author : Suraj Hebbar Systems Lab, CeNSE,IISc Banglore ABSTRACT This report shows charging nature of different cellphone chargers with different cellphones. Here we took into
MIDECO 64-outputs MIDI note decoder USER MANUAL. Roman Sowa 2012
 MIDECO 64-outputs MIDI note decoder USER MANUAL Roman Sowa 2012 www.midi-hardware.com 1.Overview Thank you for choosing MIDECO as your new MIDI-to-digital converter. This short manual will guide you through
Adding a Real Time Clock to Raspberry Pi
 Adding a Real Time Clock to Raspberry Pi Created by lady ada Last updated on 2016-04-29 11:45:10 PM EDT Guide Contents Guide Contents Overview Wiring the RTC Set up I2C on your Pi Verify Wiring (I2C scan)
WinLIN Setup and Operation:
 Frequently Asked Questions about the 07551-Series Masterflex L/S Computer-Compatible drives and about the Masterflex WinLIN Linkable Instrument Control Software (07551-70) WinLIN Setup and Operation: Will
POINTS POSITION INDICATOR PPI4
 POINTS POSITION INDICATOR PPI4 Advanced PPI with Adjustable Brightness & Simplified Wiring Monitors the brief positive operating voltage across points motors when they are switched Lights a corresponding
LM 358 Op Amp. If you have small signals and need a more useful reading we could amplify it using the op amp, this is commonly used in sensors.
 LM 358 Op Amp S k i l l L e v e l : I n t e r m e d i a t e OVERVIEW The LM 358 is a duel single supply operational amplifier. As it is a single supply it eliminates the need for a duel power supply, thus
Controlling a Dot Matrix LED Display with a Microcontroller
 Controlling a Dot Matrix LED Display with a Microcontroller By Matt Stabile and programming will be explained in general terms as well to allow for adaptation to any comparable microcontroller or LED matrix.
Current Loop Tuning Procedure. Servo Drive Current Loop Tuning Procedure (intended for Analog input PWM output servo drives) General Procedure AN-015
 General Procedure AN-015") Servo Drive Current Loop Tuning Procedure (intended for Analog input PWM output servo drives) The standard tuning values used in ADVANCED Motion Controls drives are conservative and work well in over 90%
Servo Drive Current Loop Tuning Procedure (intended for Analog input PWM output servo drives) The standard tuning values used in ADVANCED Motion Controls drives are conservative and work well in over 90%
8 Channel Status Input Panel model SIP-8
 Description The Sine Systems model SIP-8 Status Input Panel is to be used with the RFC-1/B Remote Facilities Controller. It consists of a long PC board mounted on a 1.75 inch (1U) rack panel. The SIP-8
Servo Info and Centering
 Info and Centering A servo is a mechanical motorized device that can be instructed to move the output shaft attached to a servo wheel or arm to a specified position. Inside the servo box is a DC motor