* QuickMode: A form editor for the non-programmer and people who want their forms to be done very quickly but nice looking.
|
|
|
- Percival Roberts
- 8 years ago
- Views:
Transcription
1

2 Table of Contents 1 Overview Getting Started Subscription Plans / Disclaimer Requirements Installing Breezing Forms Installation Errors You May Receive Using Breezing Forms Configuration Working with Form Modes Quick Mode Easy Mode Classic Mode FAQ s/ Coding Tips and Ideas...77

3 1 Introduction Breezing forms is a complete Customizable solution for your Joomla! powered website. As the #1 Component to creating amazing Customizable Forms, Breezing Forms I praised on its ability to deliver an easy to use, yet powerful, solution to Creating Registrations forms, appointment calendars, and even Job Applications. Its mission is simple: create a amazing form with little to no experience in coding. If you want absolute power and flexibility, Breezing Forms is right for you, too! It puts you in charge of creating dynamic forms. Look at the different feature and modes below to see which category fits you best. * QuickMode: A form editor for the non-programmer and people who want their forms to be done very quickly but nice looking. * EasyMode: A form editor for layout centric form creation. Very powerful but simple in usage. Ideal for designers. * ClassicMode: A wysiwyg editor for creating forms. For technicians and fans of FacileForms. Feature QuickMode EasyMode ClassicMode Target Audience Non-Programmers Designers Technicians Custom validations and actions yes yes yes Display Type Managed Layout based Free float Display-Edit Records (front- or backend) yes yes yes MailChimp Integration yes yes yes Ajax File Uploads (Progress Bar) yes no no Turn fields on/off conditionally yes no no Summary item yes no no Maxlength for textareas (including counter) yes no no Built-In validations and actions yes yes yes Form elements All + many special All + many special All + Captcha Multipage forms yes yes yes Reply-To fields yes yes yes Page 1

4 Feature QuickMode EasyMode ClassicMode Custom mail subjects yes yes yes Mail templates yes yes yes File attachments yes yes no Form import and export yes yes yes Database storage yes yes yes CSV, PDF & XML export yes yes yes Data integration yes yes yes Captcha (+ recaptcha for QuickMode) yes yes yes Calendar item yes yes yes PayPal (includes pay to download file) yes yes no DirectPayment (Sofortüberweisung) yes yes no So whether you re looking to build a simple contact for or a complex Room Booking Form, This component is right for you. 2 Getting Started 2.1 Subscription Plans Disclaimer Our subscription plans are especially targeted on people and businesses that need frequent updates and support. Each plan includes the following services: Unlimited use of all extensions (or templates if a template club has been chosen) from the plan selected: No support-per-domain restrictions. No limits on numbers of installations and servers, infinite use beyond expired plans, no hidden extra costs Unlimited access to all extensions (or templates if a template club has been chosen) that are included in your selected plan during the course of your subscription Unlimited access to all updates of extensions that are included in your selected plan at any time during the course of your subscription Unlimited access to video tutorials, documentations and our knowledgebase with tips and best practices Club Forum access with prioritized answers from our team Page 2

5 The 6-months plan includes 6 months access to all extensions (or templates if a template club has been chosen) that are included with your selected plan + 3 months of support. The 1-year plan includes 12 months access to all extensions (or templates if a template club has been chosen) that are included with your selected plan + 6 months of support. The professional plan includes timely unlimited access to all extensions, form apps, breezingforms themes and templates that are included with the selected plan + 12 months of support. Reaction time is usually within 24 to 48 hours. You will receive adequate and professional answers to each of your support requests but there is no guarantee on reaction times. Under certain circumstances (weekends, public holidays and heavy workload), there might be delays. If communicating with our support, make sure your address given to support is correct and check your spam folders if answers seem overdue. Support languages: Native English Native German Included in support: Installation help General usage help NOT Included in Support: Custom programming Consulting Fixing of 3rd party caused issues Page 3

6 2.2 Refunds We grant refunds on a case-by-case basis. Please contact our support if you feel you should receive a refund. In general, there are no refunds based on subjective experiences like "but I thought it can do this" or "it is not easy". The features of each extension are explained clearly and there are demos and videos available that give a broad overview if the extension fits your level of experience. On doubts, please contact the support before purchasing. There is also no refund possible on support matters. For example: a 3rd party extension/template is causing conflicts with one of our extensions, it is up to the 3rd party developer to fix this problem - please consult the 3rd party developer's support or request a refund there. We can help you collecting evidence that the issues are not on our side or -- if time allows -- exceptionally provide a workaround. Our extensions are developed to work on regular and properly configured systems, as you can see on our demo pages. Thank you for your understanding. NOTE: Unlike others, there are no domain, or server restrictions of any kind - no domain limitations on support - You are free to use our products the way you want, as long as you want! 2.3 Requirements Joomla! 1.5.x, 1.6.x, 1.7.x or 2.5.x, PHP 5+, MySQL 3+, Firefox 3.x or Google Chrome (very fast!) for the EasyMode Any other modern browser for the Quick and ClassicMode. This package includes the latest version of the component, the module, the plugin and the mmfuncs. 3 Installation / Setup If your product is a piece of software that users can install on their machines, be sure to include thorough instructions for each particular operating system you support. The idea is get the user up and running as quickly as possible. Screenshots are especially helpful at this stage. For a complete installation of BreezingForms, there are three separate elements that you will need to upload and install: Component - for basic form functionality Plugin - allows you to embed a form in an article Module - allows you to use a form in a module position So, let's get you started! The first thing you'll need to do is: Page 4

7 Download and Unzip BreezingForms Download the latest BreezingForms package (BreezingForms_*version*_UNZIP_FIRST.zip). The newest version of BreezingForms is available here. The older, free version of BreezingForms is available for download at the Joomla! Extensions Directory. Unzip the package using your favorite file extraction program. Once unzipped, your file folder should look something like this: Install the Component STEP 1 OF 2 Log into your Joomla! administrator and go to Extensions > Install/Uninstall. Page 5

8 In the extension manager, under Upload Package File, click on the BROWSE button (A) and navigate to the unzipped BreezingForms folder. (You must unzip the initial Breezing Forms download file before you start.) Page 6

 with a reminder (E) to proceed to Step 2 to complete")
9 Select the package, com_breezingforms_*version*.zip, click OPEN (B), and then click on Upload and Install (C). You will then see the following on-screen message (D) with a reminder (E) to proceed to Step 2 to complete installation. Page 7
 to proceed to Step 2 to complete")
10 STEP 2 OF 2 To complete the installation, go to the menu Components > BreezingForms > Configuration. First Time Installation: If you are installing BreezingForms for the first time, in the Select database install/update mode, choose "New install: Create tables (drops existing tables)." (F) Page 8

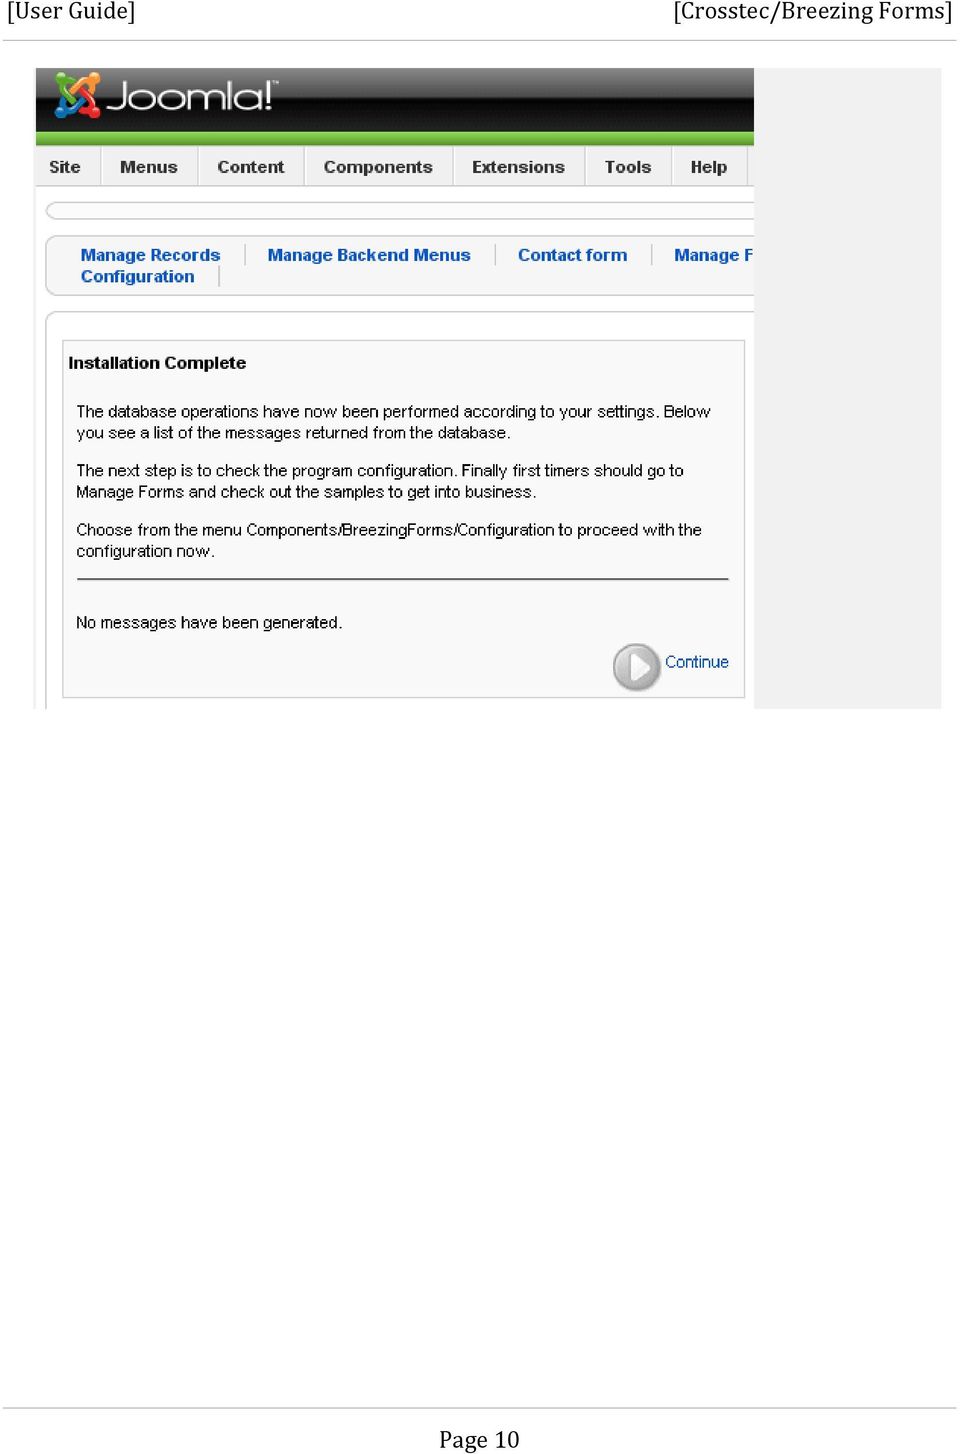
11 Reinstalling or Upgrading: If you are reinstalling or upgrading BreezingForms, then in the Select database install/update mode,choose "Reinstalling 1.4.* (Table structures are up-to-date)." (G) You have the option to load the sample forms with your installation. If you'd like to do so, check the box to the left of "Sample forms (Samples)." (H) Click on Continue (I) to complete installation and you should see the following message: Page 9
.")
12 Page 10
13 Alternate Component Installation STEP 1 OF 2 Occasionally, Joomla's Extension Manager will fail to install the component. If that happens, please take these steps instead: 1. Unzip the initial BreezingForms zip file (breezingforms_*version*_unzip_first.zip (i.e. breezingforms_175_unzip_first.zip). Once unzipped, you should have a folder which contains the following: 2. Now unzip the com_breezingforms_*version*.zip file (i.e. com_breezingforms_171.zip). Once unzipped, you should have a folder which contains the following: Page 11
.")
14 3. Next, login to your server via FTP or through cpanel's file management system and navigate to the /tmp/ directory in your Joomla root. Double-click on it, and then create a new directory which we'll call bf_install for the purpose of this example. 4. Once created, double click on the bf_install folder to open it. 5. In the left-hand directory tree in your FTP tool or cpanel screen, navigate to the folder where you unzipped the com_breezingforms_*version*.zip file and double-click on it. Then select all of the folders and files in that window for upload into your/tmp/bf_install/ folder. Page 12

15 Your /tmp/bf_install folder on the right-hand (Remote System) side should now contain all of the files and folders shown in the left-hand (Local System) side of the screen above. 6. Log in to your Joomla! administrator and go to Extensions > Install / Uninstall. 7. In the Install From Directory field, specify the path to the /tmp/bf_temp/ directory that you just created. Note: The text below is only anexample. You will likely need to include the full path to your /tmp/bf_install folder. Then click on the INSTALL button. Page 13

16 You will then see the following on-screen message (D) with a reminder (E) to proceed to Step 2 to complete installation. Page 14

17 STEP 2 OF 2 To complete the installation, go to the menu Components > BreezingForms > Configuration. First Time Installation: If you are installing BreezingForms for the first time, in the Select database install/update mode, choose "New install: Create tables (drops existing tables)." (F) Page 15

18 Reinstalling or Upgrading: If you are reinstalling or upgrading BreezingForms, then in the Select database install/update mode,choose "Reinstalling 1.4.* (Table structures are up-to-date)." (G) You have the option to load the sample forms with your installation. If you'd like to do so, check the box to the left of "Sample forms (Samples)." (H) Click on Continue (I) to complete installation and you should see the following message: Page 16
.")
19 Page 17

20 Install the Plugin The BreezingForms plugin enables you to embed a form within an article on your Joomla site. To install the plugin, please follow the steps below. Log into your Joomla! administrator and go to Extensions > Install/Uninstall. In the extension manager, under Upload Package File, click on the BROWSE button (A) and navigate to the unzipped BreezingForms folder. (You must unzip the initial BreezingForms download file before you start.) Select the package, plg_breezingforms_*version*.zip, click OPEN (B), and then click on Upload and Install (C). Page 18
 Select the package, plg_breezingforms_*version*.")
21 Once successfully installed, you'll see the following screen (which will also provide you with information on how to use the plugin): For Easier Use here is a copy of the code: Requirements: The BreezingForms component must also be installed (same version) The bot must be published Pattern syntax: { BreezingForms : formname [, page, border, urlparams, suffix ] Page 19
22 Parameter description: BreezingForms : This tag must be present literally and in exact upper/lowercase. formname : The name of the form to include, also in exact upper/lowercase. page border : The starting page number. Defaults to 1 when omitted. : 0=no border, 1=with border. Defaults to 1 when omitted. urlparams : Parameters to pass in URL style (no commas or closing brackets allowed). suffix : Suffix appended to all CSS class names in the form. Examples: { BreezingForms : SampleContactForm { BreezingForms : MyVeryForm, 2 { BreezingForms : AnotherForm, 1, 0, &ff_param_xy=123&ff_param_foo=bar {BreezingForms:testform,,,&ff_param_foo=bar,mysuffix But attention with the following one. Basically it would work, but when using a WYSIWYG editor, it will insert line breaks as <br/>and the bot will no longer recognize the pattern: { BreezingForms: AnotherForm, 1, 0, &ff_param_xy=123&ff_param_foo=bar Page 20
23 Install the Module 1. Log into your Joomla! administrator and go to Extensions > Install/Uninstall. 2. In the extension manager, under Upload Package File, click on the BROWSE button (A) and navigate to the unzipped BreezingForms folder. (You must unzip the initial BreezingForms download file before you start.) 3. Select the package, mod_breezingforms_*version*.zip, click OPEN (B), and then click on Upload and Install (C). 4. Once successfully installed, you'll see the following screen: Page 21
24 Page 22
25 Installation Errors You May Receive: Timeout Errors / White Screen on Installation When I try to install the BreezingForms component, I get a timeout error. What should I do? If you receive timeout errors or a white screen when trying to install the component, then it is likely that you don't have native zip support installed and/or activated with your php installation. If you encounter this error, you can make your life easier by enabling it in your php.ini file; or if you are the administrator, install it if is not already installed. For Windows machines using XAMPP, you would do this by removing the ";" in the php.ini: ;extension=php_zip.dll If you do not activate native zip support, Joomla! uses an alternative way of unzipping, which seems to be a lot slower OR causes an infinite loop. You could also try using the alternate installation method described here: Components Menu on Installation Shows All BreezingForms Links Separately After I installed BreezingForms, the components menu shows all the links separately (like Manage Records, Manage Forms, etc.), instead of showing the BreezingForms menu with the other links dropping down when it's moused over. Why would this happen? Some possible reasons for this are: 1. The /tmp folder at your Joomla root isn't writable. Permissions should be set to The path to the /tmp folder is incorrectly stated in Joomla's Global Configuration settings. The installation process requires use of the /tmp folder while in progress, and if it is not available, the installation will not finalize. Installation Fails with JFolder Error When I try to install BreezingForms, I get an error that says: * JFolder::create: Could not create directory * Warning! Failed to move file. What do I have to do to get this installed? 1. Check your FTP settings and make sure that they are correct. If they are correct but you are still getting that error, then try #2 below. Page 23
26 2. Go to Help > System Info > Directory Permissions and make sure that your directories are writable. If not, it would definitely affect the ability to install, save changes, etc. Below is a link to the Joomla Help site where they discuss the need for writable directories. Start at this page: nstaller/slide05.htm And then click through the slides for more information. Here is another post with additional information: Try changing permissions as they recommend, and check to see if your BreezingForms installation works correctly after that. If it doesn't, then I would recommend you use the alternate installation method. For more information, please see this KnowledgeBase article: Installing with XAMPP I am trying to install BreezingForms on an XAMPP server but have been unsuccessful in getting it to work. If you are using version 1.7.4, you might want to consider downgrading to version Many forums indicate that XAMPP is not a very stable application. Joomla and many of its extensions (including BreezingForms) have some serious problems with it. Buttons and Menu Items Missing in Admin After doing an install, all of the buttons and menu items are missing from my BreezingForms admin. There is just PHP text where the buttons and menu items should be. Try uploading the languages files to your server -- it sounds like they are either not there or didn't get overwritten with the new files. Unzip the com_breezingforms.zip file and upload the files noted below to the locations described: Page 24
27 Unzipped file: /admin/languages/en-gb/admin/en-gb.com_breezingforms.ini Upload to: /JoomlaRoot/administrator/language/en-GB/en-GB.com_breezingforms.ini Unzipped file: /admin/languages/en-gb/admin/en-gb.com_breezingforms.menu.ini Upload to: /JoomlaRoot/administrator/language/en-GB/en- GB.com_breezingforms.menu.ini Unzipped file: /admin/languages/en-gb/admin/en-gb.com_breezingforms.sys.ini Upload to: /JoomlaRoot/administrator/language/en-GB/en-GB.com_breezingforms.sys.ini Unzipped file from: /admin/languages/en-gb/public/en-gb.com_breezingforms.ini Upload to: /JoomlaRoot/language/en-GB/en-GB.com_breezingforms.ini Warning: Invalid Argument Supplied Installation Error After installing BreezingForms on my server, I got an error message that says: Warning: Invalid argument supplied for foreach() in C:\Joomla\libraries\joomla\database\database\mysql.php on line 678 Warning: Invalid argument supplied for foreach() in C:\Joomla\libraries\joomla\database\database\mysql.php on line 678 Please check your Joomla Global Configuration settings to see which SQL version you are using. If it is set to mysql, try changing it tomysqli (or vice versa) and see if that makes a difference. Page 25
28 Upgrading to Version from Version Build 730 to Version Upgrading to Version from Version Build 730 to Version To upgrade to BreezingForms from BreezingForms Build 730 through Version 1.7.3, unzip the upgrade file and then follow the instructions as noted below. 1. IMPORTANT!!! Save and backup your Joomla installation files and database before upgrading! 2. If you have any custom QuickMode themes, PDF templates, templates or any other custom resources, copy them from your server to your hard drive using your FTP client. 3. Using an FTP client, copy the contents of the folder /component-files/administrator/ to your Joomla's /administrator/ directory. 4. Using an FTP client, copy the contents of the folder /component-files/components/ to your Joomla's /components/ directory. 5. Using an FTP client, copy the contents of the folder /component-files/language/ to your Joomla's /language/ directory. 6. Using an FTP client, copy back to the server all of your custom QuickMode themes, PDF templates, templates or any other custom resources that you saved in Step 2 above. 7. (Re-)install the plugin and module if you are using them. 8. In some cases you will need to re-assign the validations and actions in your forms. So check your form validations right after the upgrade to make sure they're okay. That's it, you're all done! Page 26
29 Using Breezingforms Manage records: Here on the manage forms page is where you come to see all of the forms submitted to the database. From here you can view, export and even check payment and download times of a form. PDF, CSV and XML Buttons: Allows you to create files of the selected records All Form, Viewed, exported and Achieved Buttons : Allow you to switch the view of the records to the corresponding button to see if the items were used or not for the selected buttons. Manage Errors/Issues You May Receive: CSV Exports Aren't Opening Correctly I am trying to export records from within BreezingForms to Excel in CSV format, but when the file opens, the columns aren't formatted correctly. How can I fix it? If you are using Excel 2003, you should use the semicolon ( ; ) as the separator. If you are using 2007, you should use the comma (, ) as a separator. During the export, instead of opening the file in Excel immediately, choose the option to save it instead. Once saved, go to the file directory where you stored it and rename the file from FILENAME.csv to FILENAME.txt. Then open the TXT file in Excel. When you try to open it, you should see a Text Import Wizard dialog box. The fields should be completed as follows: Page 27
30 Choose the file type: DELIMITED (not Fixed Width) Start Import at Row 1 Click NEXT Delimiter should be ; or, depending on which you entered in the configuration Text qualifier should be " unless you have changed it Click NEXT You can choose format for each column if you'd like to use it, then click FINISH. Your data should now open in column form. Export Records to Excel In my Manage Records section, I created a CSV file, but when I import it into Excel, it's all bunched up in the first column. How do I fix it? If you go to Components > BreezingForms > Configuration, you will see that there are some variables at the bottom that affect how your CSV file is exported. You could try changing the comma separator to a semicolon (which one to use depends on which version of Excel you have). You could also try switching the linebreak setting from 'Normal' to 'Masked' (or vice versa). Also, this information found on the Microsoft website might help: ISSUE: All of the text in the file appears in the first column. SUGGESTED FIX: 1. Select the range of cells that contains the text values. The range can be any number of rows tall, but no more than one column wide. Note: There must be enough blank columns to the right of the selected column to accommodate the columns of data you want to create or the data to the right of the selected column will be overwritten. 2. On the Data menu, click Text to Columns. 3. Follow the instructions in the Convert Text to Columns Wizard to specify how you want to divide the text into columns. Allow Manager Access I want one of my staff with Manager-level rights to be able to access the records in BreezingForms, but only an Administrator can. Is there a way around that? Page 28
31 Yes, there is. Please note, however, that this code fix will give a Manager access to ALL areas of BreezingForms, not just the Manage Records section. To grant rights to a Manager within BreezingForms, open this file: In BreezingForms Build 730 and higher: /administrator/components/com_breezingforms/admin.breezingforms.php In BreezingForms Build 729 and lower: /administrator/components/com_facileforms/admin.facileforms.php Look for: if ($my->usertype!= 'Super Administrator' && $my->usertype!= 'Administrator') { and change it to: if ($my->usertype!= 'Super Administrator' && $my->usertype!= 'Administrator' && $my- >usertype!= 'Manager') { Page 29
32 BreezingForms Configuration How do I configure BreezingForms once it is installed? Configuration Once the BreezingForms component is installed, click on the Configuration link to access the configuration settings. Use live site in configuration.php If you select "Yes" here, it will force the form to use the $live_site variable in the php.ini file; however, it is deprecated, so in most circumstances, you should leave this set to "No." Run backend preview in an iframe If you select "Yes" here, true WYSIWYG with the front-end stylesheet will be enabled. Preview window grid size This field applies only to forms created in Classic Mode. If you would rather not use the grid, their is an option to turn it off while in Classic Mode. Use WYSIWYG editor for text elements The WYSIWYG editor is selectable in Joomla's global configuration options. On this screen, the option should remain set at "No." Compress JavaScript and HTML If "Yes" is selected, compressing the JavaScript and HTML will reduce the traffic from the server to the browser. However, if you are trying to debug the code, you will need to set this option to "No." (Remember to revert the option back to "Yes" when debugging is complete.) Get provider with GetHostByAddr If you want to know the Hostname of the user filling in the form, then select "Yes" here. The information will then be sent to you via the notification's header, as well as being stored in the database. Choosing this option could result in a heavier server load and slower response time, so unless there is a specific need to get the Hostname, it is recommended that the setting be kept at "No." Page 30
33 Number of lines for textareas With this field, you can define for yourself how large the textareas should be. This can be used in classic mode where you add scripts and pieces, in the other modes on the form settings screen, as well as for the Scripts and Pieces Libraries. (More information will be added in the applicable sections.) Limit descriptions in listviews to XX characters. This field defines the size of the textarea in the Scripts and Pieces Library that shows the description of each script and piece. Default notification address In this field, please enter the default address you wish to use. If you wish to add more than one address, separate them with semi-colons, like this: Address1; Address2; Address3 The first address will become the 'REPLY-TO' address, and it, plus any additional addresses listed after it, will receive a copy of the form but only if the MAIL RECIPIENTS field in the form properties for a specific form is left blank. Path for {ff_images substitute Unless you have changed the default directory name for BreezingForms, this should be left as is. Path for {ff_uploads substitute Unless you have changed the default directory name for BreezingForms, this should be left as is. Once you have finished making changes, click on the SAVE icon at the bottom of the screen. Page 31
34 Packages What is a package? There may be times when you want to copy one of your forms to another domain. Perhaps you created it on a test site and now need to install the final version on your client's server, or maybe you've created a custom form for use on all of your client sites. Using BreezingForm's 'Package' option in the BreezingForms configuration screen, copying forms from one domain to another is a BREEZE, as long as the other domain is running Joomla! with the SAME OR A NEWER VERSION of the BreezingForms extension. (There may be some instances where it could be backwards-compatible and work on a site running an earlier version, but this cannot be guaranteed, though in most cases it should work with a form created using Classic Mode.) When you create a package, you are actually creating an XML file which can then be shared with others. To send it via though, you might have to zip the file first, as not all applications / webhosts will accept XML files. Create a Package How do I create a package? Create Package To create a package for installation on another domain, here's what you'll need to do. Go to Components > BreezingForms > Configuration. In the BreezingForms configuration screen, you'll see this: Click on 'Create Package' at the bottom of the Configuration screen. Page 32
35 ID Leave the ID section blank. Package Name Give your package a name file name (no spaces). Version Assign a version number to your form. Package Title Enter the title of your package (spaces are allowed). Page 33
36 Author Name Enter your name. Author Enter your address. Author URL Enter your website URL, if applicable. Description Enter a brief description of your package and/or form. Copyright If there are copyright restrictions on your package or form, enter the terms here. Form Selection Select the form that you wish to include in the package. Backend Menuitem Selection Choose the Backend Menuitem that you wish to include in the package, if applicable. Script Selection If you have created any custom scripts that should be exported with your form, select them here. Piece Selection If you have created any custom pieces that should be exported with your form, select them here. Then click on the Continue button. You will be prompted to save an XML file. (Be aware that your browser might block, or attempt to block it. Check for any warnings in that regard.) Install a Package How do I install a package? Package Installer To install a package, here's what you'll need to do. Go to Components > BreezingForms > Configuration. In the BreezingForms configuration screen, you'll see this: Click on 'Package Installer' at the bottom of the Configuration screen. Page 34
37 Upload File Choose whether to upload the file from your hard drive ('from client') or from a file on your server. If you are uploading a file from your hard drive, you will see a 'Browse' button. Click on it to locate the package you wish to upload. If you are installing a package from a file on a server, select that radio button. In the field below, enter the path or URL to the file you are uploading. Then click on the "Install Package" icon locate at the top of the right-hand side of the page. Package Installation Report Once installed, you will be directed to a Package Installation Report which contains a summary of the information provided by the package creator. Complete Installation Click on "Continue" to complete the installation. Your form should now be accessible through the 'Manage Forms' link. Page 35
38 Manage Forms (Quickmode): Breezingforms Quick mode is the easiest mode for beginners yet powerful enough for advanced users. Combined with a easy to use interface and predefined scripts, it makes making forms a breeze. Getting Started with Forms Getting started with forms in QuickMode Create Forms - QuickMode Using QuickMode, you will be able to create a form quickly and easily. Let's start by walking you step-bystep through the creation of a simple, one-page job application form. To begin, login to your Joomla account and go to Components -> BreezingForms -> Manage Forms. Once you're on the Manage Forms screen, click on the green QuickMode icon (as circled below). Page 36
39 Form Properties You will see that the QuickMode screen is comprised of two areas. On the left side, you can add new pages, sections and elements, while on the right side you have access to numerous form and element properties. Page 37
40 Title QuickMode will generate a Title for the form automatically. You can change the title at any time under the Form properties. In the example shown above, the form Title is "My First Form." Name QuickMode will generate a Name for the form automatically. You can change the name at any time under the Form properties. In the example shown above, the form Name is "myfirstform." Important: The form's "Name" field provides a way to reference the form in a script and in the Joomla! component itself. We therefore recommend that you avoid using special characters and/or blank spaces in the form name. Description Enter a short description about your form. This will appear in your list of forms on the Manage Forms screen. Last Page is Thank You Page If you check this option, your form page will refresh and the respondent will see a Thank You message on the page indicating that their form has been submitted. (If you would like to redirect a respondent to a completely different URL, please click here for instructions on how to do that.) Mail Notification If you want to send a copy of the form results to an address, then please check the box for Mail Notification. Page 38
41 Mail Recipient(s) If you want to send a copy of the form results to an address (or multiple addresses) other than the default address that you entered on the configuration form, then enter it here. To enter multiple addresses, please use the format below: Address1@mycompany.com; Address2@mycompany.com; Address3@mycomp any.com Include Submit Button If you want to include a 'Submit' button at the bottom of your form, please choose "Yes" here. (If you would prefer to include a 'Submit' button that uses a custom graphic, please click here for instructions on how to do so.) Submit Button Label If you are using the default 'Submit' button for your form (rather than one using a custom graphic), you can choose to label it whatever you want. (e.g. "Send It!" or "Enter Me Now!") To change the button's label, just type the alternate text you wish to use in this field. Paging Include If your form consists of multiple pages, you can choose to add a 'Next' and/or 'Back' label, as applicable, to each page. To do so, choose "Yes" here. If your form is only one page long, you can disregard the settings - the labels will only appear on a multi-page form. Include Cancel Button If you want to include a 'Cancel' button at the bottom of your form, please choose "Yes" here. (If you would prefer to include a 'Cancel' button that uses a custom graphic, please click here for instructions on how to do so.) Cancel Button Label If you are using the default 'Cancel' button for your form (rather than one using a custom graphic), you can choose to label it whatever you want. (e.g. "Cancel" or "Clear Form") To change the button's label, just type the alternate text you wish to use in this field. Save Properties Once you have filled in the necessary fields on the Properties tab, click the "Save Properties" button located at both the top and bottom of the screen. Save Form Important: The "Save Properties" button only saves the parameters of the form tab that you are on. IT DOES NOT SAVE THE FORM ITSELF. To save the form, click on the "Save" icon in the upper right-hand corner of the page. Page 39
42 Advanced Form Properties Learn more about advanced form properties. QuickMode: Advanced Form Properties From the Advanced tab, you can define a number of form effects as described below. Form Options - More Options Once you have saved the form, a link to "More Options" will appear where noted on the image above. On that screen you will see the following tabs: Settings Scripts Form Pieces Submit Pieces Other Options Theme With BreezingForms versions 1.65 and higher, the ability to select and customize themes for forms is now included; however, this feature is only available in QuickMode. Version of QuickMode provides two themes: Qmtheme, which is a clean, light-blue theme; and Default, which has no defined colors. Version has added additional themes. These themes can easily be customized via CSS. Page 40
43 Use Alerts on Errors If you have set any of your form fields to validate, an error message is generated if a field isn't filled in, or is filled in incorrectly. If this field is left unchecked, the error message will appear at the top of the form. If you check this field, then an alert will pop up, like this: Fading Effect on Form Entry If you select this option, your form fields will fade in as the page loads. NOTE: if you are using Flash file uploads, this effect should be disabled due to a current bug in the code. (On the list to be corrected...) Rollover This box is checked by default. When checked, a field will change color when it is moused over. Rollover Color If you'd like to change the rollover color, enter the hex code here for your preferred color. Don't understand hex codes or know which one you want? Here's a good source for you. Visibility Rules In order to turn fields and/or sections on and off conditionally, you need to add your visibility rules in this field. For more information about conditional fields and visibility rules, please click here. Save Properties Once you have filled in the necessary fields on the Properties tab, click the "Save Properties" button located at both the top and bottom of the screen. Save Form Important: The "Save Properties" button only saves the parameters of the form tab that you are on. IT DOES NOT SAVE THE FORM ITSELF. To save the form, click on the "Save" icon in the upper right-hand corner of the page. Page 41
44 Advanced Form Options Learn more about advanced form options and settings. QuickMode: Form Options - More Options: Settings The "Settings" tab carries forward some settings initially defined elsewhere and allows you to change them and/or define some additional parameters, such as the order you want the form to appear in, whether it will run in the frontend or on the backend (admin) side, and so on. For more information on each individual element, please read on. Title This field will automatically carry forward the title you defined when you created the form. If you change it here, then save the settings at the bottom of the page, and then save the form itself, your old title will be overwritten with the new one you just defined. Name This field will automatically carry forward the form name you defined when you created the form. If you change it here, then save the settings at the bottom of the page, and then save the form itself, your old form name will be overwritten with the new one you just defined. Ordering This dropdown allows you to change the order in which your form appears on the "Manage Forms" screen. If you'd like it to appear at the very top of the list, select 0 First. If you'd like it to Page 42
45 appear somewhere else on the list, just choose the number that corresponds with the order that you want it in. (For example, to have it appear in the third position, choose number 3.) Published Select "yes" if the form should be published; "no" if it should not be published yet. Run Mode There are three select values for Run Mode, as follows: o Any - Form will run on either the frontend or backend (admin) side o Frontend - Form will run on the frontend o Backend - Form will run on the admin side Width The width of your form can be defined in pixels or as a percentage. (By default, it is set at 400 pixels.) NOTE: This definition only works for forms that will be displayed within an iframe. To set the width of a regular QuickMode form, please see this KnowledgeBase Article: Adjust Form Width. Height The height of your form must be defined in pixels. Note: Auto and Automax require specification of a bottom 'margin' in pixels. The 'margin,' however, is actually defining the form's height in pixels, so make sure you leave it high enough to display your entire form. Log to Database If you want to retain form entries from your site, BreezingForms gives you the ability to log entries to the database. In this field, you can choose from one of three options: o No - No entries will be logged o Nonempty values - Fields that include data will be recorded o All values - All form fields will be logged to the database Notification This field allows you to choose whether or not you want to receive copies of submitted forms via . There are three options available: o No - will not be sent o To Default Address - Forms will be sent to the address you defined as the default in the Configuration section of BreezingForms. If you select this option, you will have two other fields to complete: Report - Choose to the header only, nonempty values, or all values. FORMS_ATTACHMENT - You can choose whether or not to send the form data as an attachment to the . If yes, you may choose from one of the following formats: XML, CSV, or PDF. o To Custom Address - If you specified a different address to send the forms to on the Form Properties page, it will automatically carry forward to this field. If you hadn't previously specified a custom address (or addresses) to send the form to, you may do so here. For multiple addresses, you must use a semicolon (;) to separate them. If you select this option, you will have two other fields to complete: Report - Choose to the header only, nonempty values, or all values. FORMS_ATTACHMENT - You can choose whether or not to send the form data as an attachment to the . If yes, you may choose from one of the following formats: XML, CSV, or PDF. Custom Mail Subject If you would like to include a custom subject in the confirmation you are sent, you may do so here. Description The description field will carry forward the form description that you specified on the Form Properties page. If you'd like to change or enhance it, you can do so here. You will see three numbers in square brackets beside the Description title. Each one reflects the number of lines to Page 43
46 be displayed in the text area. If you click on [4], a four-line text area will be displayed. Likewise, if you click on [12]or [20], a 12- or 20-line text area will be displayed. Save Settings Once you have finished making changes on this screen, you must click on the "SAVE" icon at the bottom of the screen. Page 44
47 Settings in BreezingForms and Higher Changes have been made to the way s are handled in BreezingForms Please see below for details. In previous versions of BreezingForms, some of the settings for options determined how s would be handled for both the Admin s and the Mailback s. As of version 1.7.3, this has changed. Both functions are now handled in separate screens. To work with settings, go to your form's properties > Advanced tab > More Options. You will now see that there are two new tabs there -- one for Admin s and one for Mailback s. ADMIN S Click on the Admin s tab. You will then see a screen that looks like this: Page 45
48 Notifications There are three options available in this dropdown: 1. No - will not send an to Admin. 2. To Default Address - will send an to the default address specified in BreezingForms' configuration. 3. To Custom Address - will send an to the custom address that you enter in the " to" field below the dropdown.(it's probably obvious, but remember to change it from your@ .com to the address you want the admin sent to.) Report In the Admin that is sent, you can choose to report (send) the following data: 1. Header only - will only send the header data 2. Nonempty values - will send data from all fields which were completed, but will not send data from fields that were left empty. 3. All values - will send data from all form fields, whether completed or not. Page 46
49 Attachment You can choose whether to send an attachment with the Admin . The options are: 1. No - do not send attachment 2. XML - send form data in XML format 3. CSV - send form data in CSV format 4. PDF - send form data in PDF format Alternative From / Alternative From Name By default, BreezingForms uses the address and name defined in your Joomla global configuration settings as the 'From' name/address for form s. There may be times, however, when you want the 'From' field to show a different name and/or address. If so, you can specify those here. Custom Subject If you want the Admin to have a custom subject that will appear in every sent for this form, you can define it in this field. Edit s 1. Default - uses the default template (or custom template if you have created one) as described in this section of the KnowledgeBase: 2. Custom - This is a new feature in BreezingForms You can now create a quick template using a simple tagging system. When you click on the 'Custom' button, a new section will appear, as follows: Page 47
50 Click on one of the bracketed links in the left-hand column, and it will then be displayed in the textbox on the right. Within that textbox, you can manipulate the layout as you wish. Page 48
51 If you choose the YES button to send as HTML, then you can wrap the labels and values within paragraphs, use different fonts and colors, etc. (In fact, if you specify that it should be sent as HTML but don't use HTML tags in the message, the sent will be displayed without linebreaks or other formatting.) If you choose the NO button, the will be sent in plain-text format, and the layout that you create will be retained in the , including whatever linebreaks you might include. Once you have the layout done the way you want, you can go to the Mailback tab to customize your settings there. TIP: You might want to save your changes before moving on. If so, scroll down to the bottom of the frame and click on the SAVE button. You will then be returned to the main form screen. Click the SAVE button in the upper right-hand corner of the screen to ensure that your changes are saved. MAILBACK S The screen for Mailback s is almost identical to the one for Admin s. The only difference is that the Address dropdown and " To" textfield are not included. Page 49
52 Notification - Report In the Mailback that is sent, you can choose to report (send) the following data: 1. Header only - will only send the header data 2. Nonempty values - will send data from all fields which were completed, but will not send data from fields that were left empty. 3. All values - will send data from all form fields, whether completed or not. Attachment You can choose whether to send an attachment with the Mailback . The options are: 1. No - do not send attachment 2. XML - send form data in XML format 3. CSV - send form data in CSV format 4. PDF - send form data in PDF format Page 50
53 Alternative From / Alternative From Name By default, BreezingForms uses the address and name defined in your Joomla global configuration settings as the 'From' name/address for form s. There may be times, however, when you want the 'From' field to show a different name and/or address. If so, you can specify those here. Custom Subject If you want the Mailback to have a custom subject that will appear in every sent for this form, you can define it in this field. Edit s 1. Default - uses the default template (or custom template if you have created one) as described in this section of the KnowledgeBase: 2. Custom - This is a new feature in BreezingForms You can now create a quick template using a simple tagging system. When you click on the 'Custom' button, a new section will appear, as follows: Page 51
54 Click on one of the bracketed links in the left-hand column, and it will then be displayed in the textbox on the right. Within that textbox, you can manipulate the layout as you wish. Page 52
55 If you choose the YES button to send as HTML, then you can wrap the labels and values within paragraphs, use different fonts and colors, etc. (In fact, if you specify that it should be sent as HTML but don't use HTML tags in the message, the sent will be displayed without linebreaks or other formatting.) If you choose the NO button, the will be sent in plain-text format, and the layout that you create will be retained in the , including whatever linebreaks you might include. Once you have made the necessary changes, scroll down to the bottom of the frame and click on the SAVE button. You will then be returned to the main form screen. Finally, click the SAVE button in the upper right-hand corner of the screen to ensure that your changes are saved. Page 53
56 Install Additional QuickMode Themes How do I choose a template for my form? I would like to create a form just like your demo(s): After unzipping the main breezingforms_version NUMBER_UNZIP_FIRST.zip file, you will see a folder called quickmode_additional_themes. Within it you will find numerous new form themes for QuickMode. To install a theme for QuickMode, simply login to your site using your FTP client and upload each desired folder to /components/com_breezingforms/themes/quickmode/ The theme(s) will then be accessible in your forms. Open up the form you are working with, and go to the Advanced tab. There you will see a dropdown list of available themes. To use the one from that example, scroll down to the 'Plastic Light Blue' theme and choose it. Then click the "Save Properties" button to save your change to the properties, and finally, click on the SAVE icon in the upper right-hand corner of the screen to save the form itself. Adjust Form Width How do I adjust the form width in QuickMode? I changed the setting in More Options, but it didn't work. In the form's properties > Advanced tab > More Options, the form width field there only works for forms that are being displayed within an iframe. For a form being displayed normally, the change needs to be made to the CSS file of the form theme that you are using. For example if you have assigned the "Aqua" theme to your form, you would have to make changes to: /components/com_breezingforms/themes/quickmode/aqua/theme.css Around line 27, you should see something like:.bfquickmode { width: 100%; // here you can change the width of the form padding: 0px; margin: 0px; Page 54
57 Form Elements Checkbox How do I set up a Checkbox element? To create a checkbox element, use the following settings in the element's properties: Type: Checkbox Label: Check here to (whatever) - Use whatever wording you want Name: checkbox1 (or whatever name you want to assign to it) Value: Enter whatever value here that you want to appear in the database and/or address. Some examples: CHECKED - UNCHECKED - AGREED TO TERMS - YES - NO etc. This field MUST have a value entered in order to return a result. Checked: If you want the box to be checked by default, put a checkmark in the box. Readonly: Check this box if you want the field to be read-only. Hint: If you feel the element needs a hit / tooltip, enter it here. VALIDATION SECTION If you want the element to be validated, then use the following settings: Required: If checked, an asterisk will appear to signify the element is required. (Does not actually validate the field. Please see this KnowledgeBase article for more information about validation.) Validation: Library Error Message: Please check (or uncheck) the checkbox to agree to terms (or whatever you want it to say). Script: FF::ff_checked (to verify that the checkbox has been checked) or Script: FF::ff_unchecked (to verify that the checkbox is NOT checked) Page 55
1: 2: 2.1. 2.2. 3: 3.1: 3.2: 4: 5: 5.1 5.2 & 5.3 5.4 5.5 5.6 5.7 5.8 CAPTCHA
 Step by step guide Step 1: Purchasing a RSMembership! membership Step 2: Download RSMembership! 2.1. Download the component 2.2. Download RSMembership! language files Step 3: Installing RSMembership! 3.1:
JTouch Mobile Extension for Joomla! User Guide
 JTouch Mobile Extension for Joomla! User Guide A Mobilization Plugin & Touch Friendly Template for Joomla! 2.5 Author: Huy Nguyen Co- Author: John Nguyen ABSTRACT The JTouch Mobile extension was developed
XCloner Official User Manual
 XCloner Official User Manual Copyright 2010 XCloner.com www.xcloner.com All rights reserved. xcloner.com is not affiliated with or endorsed by Open Source Matters or the Joomla! Project. What is XCloner?
DIY Email Manager User Guide. http://www.diy-email-manager.com
 User Guide http://www.diy-email-manager.com Contents Introduction... 3 Help Guides and Tutorials... 4 Sending your first email campaign... 4 Adding a Subscription Form to Your Web Site... 14 Collecting
Chapter 15: Forms. User Guide. 1 P a g e
 User Guide Chapter 15 Forms Engine 1 P a g e Table of Contents Introduction... 3 Form Building Basics... 4 1) About Form Templates... 4 2) About Form Instances... 4 Key Information... 4 Accessing the Form
Manual for CKForms component Release 1.3.4
 Manual for CKForms component Release 1.3.4 This manual outlines the main features of the component CK Forms including the module and the plug-in. CKForms 1.3 is the new version of the component for Joomla
Adobe Dreamweaver CC 14 Tutorial
 Adobe Dreamweaver CC 14 Tutorial GETTING STARTED This tutorial focuses on the basic steps involved in creating an attractive, functional website. In using this tutorial you will learn to design a site
5.2.3 Thank you message 5.3 - Bounce email settings Step 6: Subscribers 6.1. Creating subscriber lists 6.2. Add subscribers 6.2.1 Manual add 6.2.
 Step by step guide Step 1: Purchasing an RSMail! membership Step 2: Download RSMail! 2.1. Download the component 2.2. Download RSMail! language files Step 3: Installing RSMail! 3.1: Installing the component
BreezingForms Guide. 18 Forms: BreezingForms
 BreezingForms 8/3/2009 1 BreezingForms Guide GOOGLE TRANSLATE FROM: http://openbook.galileocomputing.de/joomla15/jooml a_18_formulare_neu_001.htm#t2t32 18.1 BreezingForms 18.1.1 Installation and configuration
User Guide for Smart Former Gold (v. 1.0) by IToris Inc. team
 by IToris Inc. team") User Guide for Smart Former Gold (v. 1.0) by IToris Inc. team Contents Offshore Web Development Company CONTENTS... 2 INTRODUCTION... 3 SMART FORMER GOLD IS PROVIDED FOR JOOMLA 1.5.X NATIVE LINE... 3 SUPPORTED
User Guide for Smart Former Gold (v. 1.0) by IToris Inc. team Contents Offshore Web Development Company CONTENTS... 2 INTRODUCTION... 3 SMART FORMER GOLD IS PROVIDED FOR JOOMLA 1.5.X NATIVE LINE... 3 SUPPORTED
WP Popup Magic User Guide
 WP Popup Magic User Guide Plugin version 2.6+ Prepared by Scott Bernadot WP Popup Magic User Guide Page 1 Introduction Thank you so much for your purchase! We're excited to present you with the most magical
Mistral Joomla Template
 Mistral Joomla Template Documentation Copyright arrowthemes Table of Contents Introduction... 4 1.1 Template Overview... 5 Theme Styles and admin options... 5 Theme profiles... 5 Theme Layouts... 5 1.2
shweclassifieds v 3.3 Php Classifieds Script (Joomla Extension) User Manual (Revision 2.0)
 User Manual (Revision 2.0)") shweclassifieds v 3.3 Php Classifieds Script (Joomla Extension) User Manual (Revision 2.0) Contents Installation Procedure... 4 What is in the zip file?... 4 Installing from Extension Manager... 6 Updating
shweclassifieds v 3.3 Php Classifieds Script (Joomla Extension) User Manual (Revision 2.0) Contents Installation Procedure... 4 What is in the zip file?... 4 Installing from Extension Manager... 6 Updating
Search help. More on Office.com: images templates
 Page 1 of 14 Access 2010 Home > Access 2010 Help and How-to > Getting started Search help More on Office.com: images templates Access 2010: database tasks Here are some basic database tasks that you can
Decision Support AITS University Administration. Web Intelligence Rich Client 4.1 User Guide
 Decision Support AITS University Administration Web Intelligence Rich Client 4.1 User Guide 2 P age Web Intelligence 4.1 User Guide Web Intelligence 4.1 User Guide Contents Getting Started in Web Intelligence
BT CONTENT SHOWCASE. JOOMLA EXTENSION User guide Version 2.1. Copyright 2013 Bowthemes Inc. support@bowthemes.com
 BT CONTENT SHOWCASE JOOMLA EXTENSION User guide Version 2.1 Copyright 2013 Bowthemes Inc. support@bowthemes.com 1 Table of Contents Introduction...2 Installing and Upgrading...4 System Requirement...4
JOOMLA 2.5 MANUAL WEBSITEDESIGN.CO.ZA
 JOOMLA 2.5 MANUAL WEBSITEDESIGN.CO.ZA All information presented in the document has been acquired from http://docs.joomla.org to assist you with your website 1 JOOMLA 2.5 MANUAL WEBSITEDESIGN.CO.ZA BACK
Joomla! 2.5.x Training Manual
 Joomla! 2.5.x Training Manual Joomla is an online content management system that keeps track of all content on your website including text, images, links, and documents. This manual includes several tutorials
Virtual Exhibit 5.0 requires that you have PastPerfect version 5.0 or higher with the MultiMedia and Virtual Exhibit Upgrades.
 28 VIRTUAL EXHIBIT Virtual Exhibit (VE) is the instant Web exhibit creation tool for PastPerfect Museum Software. Virtual Exhibit converts selected collection records and images from PastPerfect to HTML
ITP 101 Project 3 - Dreamweaver
 ITP 101 Project 3 - Dreamweaver Project Objectives You will also learn how to make a website outlining your company s products, location, and contact info. Project Details USC provides its students with
Webmail Instruction Guide
 Webmail Instruction Guide This document is setup to guide your through the use of the many features of our Webmail system. You may either visit www.safeaccess.com or webmail.safeaccess.com to login with
Intellect Platform - The Workflow Engine Basic HelpDesk Troubleticket System - A102
 Intellect Platform - The Workflow Engine Basic HelpDesk Troubleticket System - A102 Interneer, Inc. Updated on 2/22/2012 Created by Erika Keresztyen Fahey 2 Workflow - A102 - Basic HelpDesk Ticketing System
EMAIL CAMPAIGNS...5 LIST BUILDER FORMS...
 Basic User Guide Table of Contents INTRODUCTION...1 CAMPAIGNER FEATURES...1 WHO SHOULD READ THIS GUIDE?...1 GETTING STARTED...2 LOGGING IN TO CAMPAIGNER...2 DASHBOARD...3 Modify Your Dashboard...4 EMAIL
How To Change Your Site On Drupal Cloud On A Pcode On A Microsoft Powerstone On A Macbook Or Ipad (For Free) On A Freebie (For A Free Download) On An Ipad Or Ipa (For
 On A Freebie (For A Free Download) On An Ipad Or Ipa (For") How-to Guide: MIT DLC Drupal Cloud Theme This guide will show you how to take your initial Drupal Cloud site... and turn it into something more like this, using the MIT DLC Drupal Cloud theme. See this
How-to Guide: MIT DLC Drupal Cloud Theme This guide will show you how to take your initial Drupal Cloud site... and turn it into something more like this, using the MIT DLC Drupal Cloud theme. See this
Joomla! template Blendvision v 1.0 Customization Manual
 Joomla! template Blendvision v 1.0 Customization Manual Blendvision template requires Helix II system plugin installed and enabled Download from: http://www.joomshaper.com/joomla-templates/helix-ii Don
Salesforce Customer Portal Implementation Guide
 Salesforce Customer Portal Implementation Guide Salesforce, Winter 16 @salesforcedocs Last updated: December 10, 2015 Copyright 2000 2015 salesforce.com, inc. All rights reserved. Salesforce is a registered
Using the Content Management System 05-02-12
 Using the Content Management System 05-02-12 Using the Content Management System Introduction 2 Logging In 3 Using the Editor 4 Basic Text Editing 5 Pasting Text 7 Adding Hyperlinks 8 Adding Images 9 Style
Results CRM 2012 User Manual
 Results CRM 2012 User Manual A Guide to Using Results CRM Standard, Results CRM Plus, & Results CRM Business Suite Table of Contents Installation Instructions... 1 Single User & Evaluation Installation
CMS Training. Prepared for the Nature Conservancy. March 2012
 CMS Training Prepared for the Nature Conservancy March 2012 Session Objectives... 3 Structure and General Functionality... 4 Section Objectives... 4 Six Advantages of using CMS... 4 Basic navigation...
WP Popup Magic User Guide
 WP Popup Magic User Guide Introduction Thank you so much for your purchase! We're excited to present you with the most magical popup solution for WordPress! If you have any questions, please email us at
How To Write A Cq5 Authoring Manual On An Ubuntu Cq 5.2.2 (Windows) (Windows 5) (Mac) (Apple) (Amd) (Powerbook) (Html) (Web) (Font
 (Windows 5) (Mac) (Apple) (Amd) (Powerbook) (Html) (Web) (Font") Adobe CQ5 Authoring Basics Print Manual SFU s Content Management System SFU IT Services CMS Team ABSTRACT A summary of CQ5 Authoring Basics including: Setup and Login, CQ Interface Tour, Versioning, Uploading
Adobe CQ5 Authoring Basics Print Manual SFU s Content Management System SFU IT Services CMS Team ABSTRACT A summary of CQ5 Authoring Basics including: Setup and Login, CQ Interface Tour, Versioning, Uploading
DIRECT MESSAGING END USER GUIDE ALABAMA ONE HEALTH RECORD. Unify Data Management Platform 2012/2013 Software Build 5.15
 DIRECT MESSAGING END USER GUIDE ALABAMA ONE HEALTH RECORD Unify Data Management Platform 2012/2013 Software Build 5.15 April 2015 Proprietary and Confidential Property of Truven Health Analytics Inc.
Appspace 5.X Reference Guide (Digital Signage) Updated on February 9, 2015
 Updated on February 9, 2015") Appspace 5.X Reference Guide (Digital Signage) Updated on February 9, 2015 1 TABLE OF CONTENTS 2 What is Appspace For Digital Signage... 4 3 Access Appspace... 4 4 Best Practices and Notes... 4 5 Appspace
Appspace 5.X Reference Guide (Digital Signage) Updated on February 9, 2015 1 TABLE OF CONTENTS 2 What is Appspace For Digital Signage... 4 3 Access Appspace... 4 4 Best Practices and Notes... 4 5 Appspace
BT MAGAZINE. JOOMLA 3.x TEMPLATE. Total User Guide Version 1.0. Copyright 2013 Bowthemes.com support@bowthemes.com. www.bowthemes.
 1 BT MAGAZINE JOOMLA 3.x TEMPLATE Total User Guide Version 1.0 Copyright 2013 Bowthemes.com support@bowthemes.com 1 Table of Contents INTRODUCTION... 2 Template Features... 2 Compressed File Contents...
Vodafone Business Product Management Group. Hosted Services Announcer Pro V4.6 User Guide
 Vodafone Business Product Management Group Hosted Services Announcer Pro V4.6 User Guide Vodafone Group 2010 Other than as permitted by law, no part of this document may be reproduced, adapted, or distributed,
Configuring the JEvents Component
 Configuring the JEvents Component The JEvents Control Panel's Configuration button takes you to the JEvents Global Configuration page. Here, you may set a very wide array of values that control the way
Magento module Documentation
 Table of contents 1 General... 4 1.1 Languages... 4 2 Installation... 4 2.1 Search module... 4 2.2 Installation in Magento... 6 2.3 Installation as a local package... 7 2.4 Uninstalling the module... 8
UNIVERSITY OF CALGARY Information Technologies WEBFORMS DRUPAL 7 WEB CONTENT MANAGEMENT
 UNIVERSITY OF CALGARY Information Technologies WEBFORMS DRUPAL 7 WEB CONTENT MANAGEMENT Table of Contents Creating a Webform First Steps... 1 Form Components... 2 Component Types.......4 Conditionals...
Google Sites: Creating, editing, and sharing a site
 Google Sites: Creating, editing, and sharing a site Google Sites is an application that makes building a website for your organization as easy as editing a document. With Google Sites, teams can quickly
collab.virginia.edu UVACOLLAB ECLPS: BUILDING COURSE PORTALS UVaCollab User Guide Series collab-support@virginia.edu
 UVACOLLAB ECLPS: BUILDING COURSE PORTALS UVaCollab User Guide Series collab-support@virginia.edu Revised 4/28/2014 CONTENTS The eclps Overview... 3 Objectives... 3 Adding the Syllabus or Lessons Tool to
Create a survey using Google Forms
 Create a survey using Google Forms You can plan events, make a survey or poll, give students a quiz, or collect other information in an easy, streamlined way with Google Forms. Google Forms can be connected
Using Adobe Dreamweaver CS4 (10.0)
") Getting Started Before you begin create a folder on your desktop called DreamweaverTraining This is where you will save your pages. Inside of the DreamweaverTraining folder, create another folder called
Getting Started Before you begin create a folder on your desktop called DreamweaverTraining This is where you will save your pages. Inside of the DreamweaverTraining folder, create another folder called
SelectSurvey.NET Basic Training Class 1
 SelectSurvey.NET Basic Training Class 1 3 Hour Course Updated for v.4.143.001 6/2015 Page 1 of 57 SelectSurvey.NET Basic Training In this video course, students will learn all of the basic functionality
SmartBar for MS CRM 2013
 SmartBar for MS CRM 2013 Version 2013.26 - April 2014 Installation and User Guide (How to install/uninstall and use SmartBar for MS CRM 2013) The content of this document is subject to change without notice.
BT MEDIA JOOMLA COMPONENT
 BT MEDIA JOOMLA COMPONENT User guide Version 1.0 Copyright 2013Bowthemes Inc. support@bowthemes.com 1 Table of Contents Introduction...3 Related Topics:...3 Product Features...3 Installing and Upgrading...4
How To Use Senior Systems Cloud Services
 Senior Systems Cloud Services In this guide... Senior Systems Cloud Services 1 Cloud Services User Guide 2 Working In Your Cloud Environment 3 Cloud Profile Management Tool 6 How To Save Files 8 How To
User Guide. User Guide Title Page Page i
 User Guide User Guide Title Page Page i Table of Contents Welcome 1 Welcome to Avvo Websites 1 Getting Started 2 Accessing your Avvo Website Dashboard 2 Dashboard Features 3 Screen Options 4 Submitting
Online International Business Certificate Programs
 Online International Business Certificate Programs User s Guide for Students Copyright 2007, Bisk Education, Inc., and Thunderbird School of Global Management. All rights reserved. i Table of Contents
Installation & User Guide
 SharePoint List Filter Plus Web Part Installation & User Guide Copyright 2005-2011 KWizCom Corporation. All rights reserved. Company Headquarters KWizCom 50 McIntosh Drive, Unit 109 Markham, Ontario ON
HOW TO USE THIS GUIDE
 HOW TO USE THIS GUIDE This guide provides step-by-step instructions for each exercise. Anything that you are supposed to type or select is noted with various types and colors. WHEN YOU SEE THIS Click Help
GP REPORTS VIEWER USER GUIDE
 GP Reports Viewer Dynamics GP Reporting Made Easy GP REPORTS VIEWER USER GUIDE For Dynamics GP Version 2015 (Build 5) Dynamics GP Version 2013 (Build 14) Dynamics GP Version 2010 (Build 65) Last updated
UH CMS Basics. Cascade CMS Basics Class. UH CMS Basics Updated: June,2011! Page 1
 UH CMS Basics Cascade CMS Basics Class UH CMS Basics Updated: June,2011! Page 1 Introduction I. What is a CMS?! A CMS or Content Management System is a web based piece of software used to create web content,
ConvincingMail.com Email Marketing Solution Manual. Contents
 1 ConvincingMail.com Email Marketing Solution Manual Contents Overview 3 Welcome to ConvincingMail World 3 System Requirements 3 Server Requirements 3 Client Requirements 3 Edition differences 3 Which
Content Management System User Guide
 Content Management System User Guide support@ 07 3102 3155 Logging in: Navigate to your website. Find Login or Admin on your site and enter your details. If there is no Login or Admin area visible select
Creating Online Surveys with Qualtrics Survey Tool
 Creating Online Surveys with Qualtrics Survey Tool Copyright 2015, Faculty and Staff Training, West Chester University. A member of the Pennsylvania State System of Higher Education. No portion of this
Managing your Joomla! 3 Content Management System (CMS) Website Websites For Small Business
 Website Websites For Small Business") 2015 Managing your Joomla! 3 Content Management System (CMS) Website Websites For Small Business This manual will take you through all the areas that you are likely to use in order to maintain, update
2015 Managing your Joomla! 3 Content Management System (CMS) Website Websites For Small Business This manual will take you through all the areas that you are likely to use in order to maintain, update
Chapter 14: Links. Types of Links. 1 Chapter 14: Links
 1 Unlike a word processor, the pages that you create for a website do not really have any order. You can create as many pages as you like, in any order that you like. The way your website is arranged and
Cloud. Hosted Exchange Administration Manual
 Cloud Hosted Exchange Administration Manual Table of Contents Table of Contents... 1 Table of Figures... 4 1 Preface... 6 2 Telesystem Hosted Exchange Administrative Portal... 7 3 Hosted Exchange Service...
1-Step Appraisals Jewelry Appraisal Software
 User Guide for 1-Step Appraisals Jewelry Appraisal Software Version 5.02 Page Table of Contents Installing 1-Step Appraisals... Page 3 Getting Started... Page 4 Upgrading from a Previous Version... Page
USER GUIDE. Unit 2: Synergy. Chapter 2: Using Schoolwires Synergy
 USER GUIDE Unit 2: Synergy Chapter 2: Using Schoolwires Synergy Schoolwires Synergy & Assist Version 2.0 TABLE OF CONTENTS Introductions... 1 Audience... 1 Objectives... 1 Before You Begin... 1 Getting
emarketing Manual- Creating a New Email
 emarketing Manual- Creating a New Email Create a new email: You can create a new email by clicking the button labeled Create New Email located at the top of the main page. Once you click this button, a
Creating Personal Web Sites Using SharePoint Designer 2007
 Creating Personal Web Sites Using SharePoint Designer 2007 Faculty Workshop May 12 th & 13 th, 2009 Overview Create Pictures Home Page: INDEX.htm Other Pages Links from Home Page to Other Pages Prepare
Using Webmail. Technical Manual: User Guide. Document Updated: 1/07. The Webmail Window. Displaying and Hiding the Full Header.
 Using Webmail Technical Manual: User Guide The Webmail Window To save an attachment: 1. Click once on the attachment name. Or, if there are multiple attachments, click the Save icon to save all attachments
EMAIL MAKER FOR VTIGER CRM
 EMAIL MAKER FOR VTIGER CRM Introduction The Email Maker is extension tool designed for vtiger CRM. Using EMAIL Maker you can create email templates with predefined information and send them from all the
Your complete guide to installing the info@hand Self-Service Portal and estore.
 Your complete guide to installing the info@hand Self-Service Portal and estore. Install the Portal & estore as shrink-wrapped software, or as add-ons to an existing Joomla! installation. Then configure
Index. Page 1. Index 1 2 2 3 4-5 6 6 7 7-8 8-9 9 10 10 11 12 12 13 14 14 15 16 16 16 17-18 18 19 20 20 21 21 21 21
 Index Index School Jotter Manual Logging in Getting the site looking how you want Managing your site, the menu and its pages Editing a page Managing Drafts Managing Media and Files User Accounts and Setting
Google Apps Migration
 Academic Technology Services Google Apps Migration Getting Started 1 Table of Contents How to Use This Guide... 4 How to Get Help... 4 Login to Google Apps:... 5 Import Data from Microsoft Outlook:...
SAHARA DIGITAL8 RESPONSIVE MAGENTO THEME
 SAHARA DIGITAL8 RESPONSIVE MAGENTO THEME This document is organized as follows: Chater I. Install ma_sahara_digital8 template Chapter II. Features and elements of the template Chapter III. List of extensions
Writer Guide. Chapter 15 Using Forms in Writer
 Writer Guide Chapter 15 Using Forms in Writer Copyright This document is Copyright 2005 2008 by its contributors as listed in the section titled Authors. You may distribute it and/or modify it under the
User Guide for Smart Former (v. 2.3) by IToris Inc. team
 by IToris Inc. team") User Guide for Smart Former (v. 2.3) by IToris Inc. team Contents Introduction...4 Installation...5 Smart Former Usage...6 Form Manager...6 Form Editor...7 Layout...7 Boxes managing...8 Text input box...9
User Guide for Smart Former (v. 2.3) by IToris Inc. team Contents Introduction...4 Installation...5 Smart Former Usage...6 Form Manager...6 Form Editor...7 Layout...7 Boxes managing...8 Text input box...9
Appointment Scheduler
 EZClaim Appointment Scheduler User Guide Last Update: 11/19/2008 Copyright 2008 EZClaim This page intentionally left blank Contents Contents... iii Getting Started... 5 System Requirements... 5 Installing
How To Create A Website In Drupal 2.3.3
 www.webprophets.com.au PO Box 2007 St Kilda West Victoria Australia 3182 Phone +61 3 9534 1800 Fax +61 3 9534 1100 Email info@webprophets.com.au Web www.webprophets.com.au Welcome to the Drupal How to
Hypercosm. Studio. www.hypercosm.com
 Hypercosm Studio www.hypercosm.com Hypercosm Studio Guide 3 Revision: November 2005 Copyright 2005 Hypercosm LLC All rights reserved. Hypercosm, OMAR, Hypercosm 3D Player, and Hypercosm Studio are trademarks
User Guide. Making EasyBlog Your Perfect Blogging Tool
 User Guide Making EasyBlog Your Perfect Blogging Tool Table of Contents CHAPTER 1: INSTALLING EASYBLOG 3 1. INSTALL EASYBLOG FROM JOOMLA. 3 2. INSTALL EASYBLOG FROM DIRECTORY. 4 CHAPTER 2: CREATING MENU
CONTENTM WEBSITE MANAGEMENT SYSTEM. Getting Started Guide
 CONTENTM WEBSITE MANAGEMENT SYSTEM Getting Started Guide Table of Contents CONTENTM WEBSITE MANAGEMENT SYSTEM... 1 GETTING TO KNOW YOUR SITE...5 PAGE STRUCTURE...5 Templates...5 Menus...5 Content Areas...5
Ad Hoc Reporting. Usage and Customization
 Usage and Customization 1 Content... 2 2 Terms and Definitions... 3 2.1 Ad Hoc Layout... 3 2.2 Ad Hoc Report... 3 2.3 Dataview... 3 2.4 Page... 3 3 Configuration... 4 3.1 Layout and Dataview location...
Web Mail Guide... Error! Bookmark not defined. 1 Introduction to Web Mail... 4. 2 Your Web Mail Home Page... 5. 3 Using the Inbox...
 Powered by Table of Contents Web Mail Guide... Error! Bookmark not defined. 1 Introduction to Web Mail... 4 1.1 Requirements... 4 1.2 Recommendations for using Web Mail... 4 1.3 Accessing your Web Mail...
Authorize.net for WordPress
 Authorize.net for WordPress Authorize.net for WordPress 1 Install and Upgrade 1.1 1.2 Install The Plugin 5 Upgrading the plugin 8 2 General Settings 2.1 2.2 2.3 2.4 2.5 2.6 2.7 2.8 2.9 2.10 2.11 Connecting
OET Cloud Services Getting Started Guide
 OET Cloud Services Getting Started Guide Introduction OET Cloud Services uses Google Drive to let you store and access OET files anywhere -- on the web, and access them on your PC, or on any device connected
There are numerous ways to access monitors:
 Remote Monitors REMOTE MONITORS... 1 Overview... 1 Accessing Monitors... 1 Creating Monitors... 2 Monitor Wizard Options... 11 Editing the Monitor Configuration... 14 Status... 15 Location... 17 Alerting...
We automatically generate the HTML for this as seen below. Provide the above components for the teaser.txt file.
 Creative Specs Gmail Sponsored Promotions Overview The GSP creative asset will be a ZIP folder, containing four components: 1. Teaser text file 2. Teaser logo image 3. HTML file with the fully expanded
System Administration Training Guide. S100 Installation and Site Management
 System Administration Training Guide S100 Installation and Site Management Table of contents System Requirements for Acumatica ERP 4.2... 5 Learning Objects:... 5 Web Browser... 5 Server Software... 5
Administering Jive for Outlook
 Administering Jive for Outlook TOC 2 Contents Administering Jive for Outlook...3 System Requirements...3 Installing the Plugin... 3 Installing the Plugin... 3 Client Installation... 4 Resetting the Binaries...4
Joomla/Mambo Community Builder
 Joomla/Mambo Community Builder Version 1.1 Installation Guide document version 1.1 03.Aug.2007 Copyright No portions of this manual may be reproduced or redistributed without the written consent of the
Ingeniux 8 CMS Web Management System ICIT Technology Training and Advancement (training@uww.edu)
") Ingeniux 8 CMS Web Management System ICIT Technology Training and Advancement (training@uww.edu) Updated on 10/17/2014 Table of Contents About... 4 Who Can Use It... 4 Log into Ingeniux... 4 Using Ingeniux
Ingeniux 8 CMS Web Management System ICIT Technology Training and Advancement (training@uww.edu) Updated on 10/17/2014 Table of Contents About... 4 Who Can Use It... 4 Log into Ingeniux... 4 Using Ingeniux
How To Test Your Web Site On Wapt On A Pc Or Mac Or Mac (Or Mac) On A Mac Or Ipad Or Ipa (Or Ipa) On Pc Or Ipam (Or Pc Or Pc) On An Ip
 On A Mac Or Ipad Or Ipa (Or Ipa) On Pc Or Ipam (Or Pc Or Pc) On An Ip") Load testing with WAPT: Quick Start Guide This document describes step by step how to create a simple typical test for a web application, execute it and interpret the results. A brief insight is provided
Load testing with WAPT: Quick Start Guide This document describes step by step how to create a simple typical test for a web application, execute it and interpret the results. A brief insight is provided
Create a Google Site in DonsApp
 Create a Google Site in DonsApp 1 Google Web Site Interactive. Constructivist. Collaborative. Communities. WHAT IS GOOGLE SITE? With one single click, you can create a website without any knowledge of
Online Master of Science in Information Technology Degree Program User s Guide for Students
 Online Master of Science in Information Technology Degree Program User s Guide for Students Copyright 2006, Bisk Education, Inc., and Florida Tech. All rights reserved. i Online User s Guide for Students
ultimo theme Update Guide Copyright 2012-2013 Infortis All rights reserved
 ultimo theme Update Guide Copyright 2012-2013 Infortis All rights reserved 1 1. Update Before you start updating, please refer to 2. Important changes to check if there are any additional instructions
By the end of this section, you will be able to: Create an Email Campaign Link Email Campaign to Interest Category. Populate Initial Campaign Audience
 Email Campaigns Overview...2 EXERCISE 4.1: View an Email Message...3 Review: Constituent360 Groups...4 Key Concept: Email Campaigns...6 Email Campaigns...8 Email Calendar...9 Creating a New Campaign...
How to Use Swiftpage for SageCRM
 How to Use Swiftpage for SageCRM 1 Table of Contents Basics of the Swiftpage for SageCRM Integration 3 How to Install Swiftpage for SageCRM and Set Up Your Account...4 Accessing Swiftpage s Online Editor
FORTIS. User Guide. Fully responsive flexible Magento theme by Infortis. Copyright 2012-2013 Infortis. All rights reserved
 FORTIS Fully responsive flexible Magento theme by Infortis User Guide Copyright 2012-2013 Infortis All rights reserved How to use this document Please read this user guide carefully, it will help you eliminate
Using your Drupal Website Book 1 - Drupal Basics
 Book 1 - Drupal Basics By Karl Binder, The Adhere Creative Ltd. 2010. This handbook was written by Karl Binder from The Adhere Creative Ltd as a beginners user guide to using a Drupal built website. It
Admin Guide Web Hosting (Windows Websites) MailStreet Hosting Control Panel (CP)
 MailStreet Hosting Control Panel (CP)") Admin Guide Web Hosting (Windows Websites) MailStreet Hosting Control Panel (CP) DOCUMENT REVISION DATE: October, 2009 Web Hosting Admin Guide / Table of Contents Page 2 of 112 Table of Contents HOW TO
Admin Guide Web Hosting (Windows Websites) MailStreet Hosting Control Panel (CP) DOCUMENT REVISION DATE: October, 2009 Web Hosting Admin Guide / Table of Contents Page 2 of 112 Table of Contents HOW TO
Chapter 15 Using Forms in Writer
 Writer Guide Chapter 15 Using Forms in Writer OpenOffice.org Copyright This document is Copyright 2005 2006 by its contributors as listed in the section titled Authors. You can distribute it and/or modify
Bitrix Site Manager ASP.NET. Installation Guide
 Bitrix Site Manager ASP.NET Installation Guide Contents Introduction... 4 Chapter 1. Checking for IIS Installation... 5 Chapter 2. Using An Archive File to Install Bitrix Site Manager ASP.NET... 7 Preliminary
Intellect Platform - Tables and Templates Basic Document Management System - A101
 Intellect Platform - Tables and Templates Basic Document Management System - A101 Interneer, Inc. 4/12/2010 Created by Erika Keresztyen 2 Tables and Templates - A101 - Basic Document Management System
Qualtrics Survey Tool
 Qualtrics Survey Tool This page left blank intentionally. Table of Contents Overview... 5 Uses for Qualtrics Surveys:... 5 Accessing Qualtrics... 5 My Surveys Tab... 5 Survey Controls... 5 Creating New
User s Guide. Version 2.1
 Content Management System User s Guide Version 2.1 Page 1 of 51 OVERVIEW CMS organizes all content in a tree hierarchy similar to folder structure in your computer. The structure is typically predefined