Posterizing Prints STUDIO. PROJECT 3 For use with Chapter 5. Objectives SUPPLIES
|
|
|
- Shanon Bryan
- 7 years ago
- Views:
Transcription
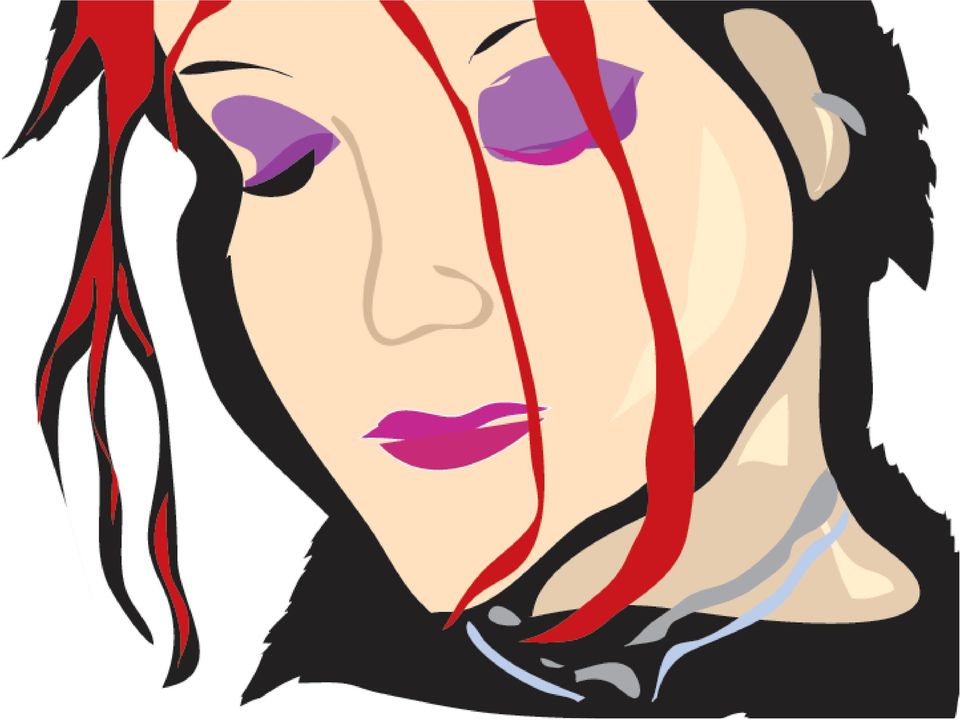
1 STUDIO PROJECT 3 For use with Chapter 5 Name Posterizing Prints Date Class Period Objectives Alter an original photo using a posterization filter in a photo editing program. Continue experimenting with this image using a traditional print process. SUPPLIES Original color photograph Scanner Computer with photo editing program Zip disk or CD (optional) Special Note: An ordinary photo can transform into a dramatic image through the use of the posterization filter in photo editing programs. This posterizing effect reduces the number of colors used in the image, and the color areas increase in size.this is similar to the way large posters were designed and printed and to paint-by-numbers pictures. Figure 3 Student work. Step 1 Select an original color photograph that depicts a face. Step 2 Scan your photo in grayscale mode at 300 dpi (dots per inch). Use the scanner selection tool to crop your image. Cropping the image focuses attention on the central image while eliminating distracting details. Step 3 If necessary, save this scanned image onto a storage device (Zip disk or CD) to transfer to your computer. Step 4 Open the scanned photograph in a photo editing program. For best results, equalize your image to increase the overall contrast of your image. From the Image pulldown menu, select Equalize, then slide the bar in the dialogue box to increase the value contrast. Save your changes. Step 5 Select your image using the Select All command. Select the Filters menu and click on the Posterize filter. A dialogue box will appear that allows you to input the level and percentage of change that you want. Make your selection. The number selected will provide the level of change. The image window will then preview the image with posterization applied. Close this box. Digital Studio Projects ArtTalk 5

2 Step 6 Your image will change to reveal light, middle, and dark values. Continue to work with the filter until you get the results you desire. If you do not like the change in the image, you can click Undo in the Edit menu or use the shortcut keyboard command Command-Z (Mac OS) or Control-Z (Windows). Step 7 Add colors to your grayscale image that represent the colors typically seen in a human face. Select colors from the Fill Color palette. Select a fill color that is similar in value; for example, light blue for light gray. Make note of the percentage of the gray so that you can use that same gray throughout your artwork for that color value. Step 8 Changing one fill color at a time makes it easy to change the color variations in your image. Using this approach, you can experiment with various color schemes. You might try creating a warm or cool monochromatic color scheme for the same image. Step 9 Once you are satisfied with the outcome, save and print your image. Step 10 Use the printed image as a guide for continuing in the traditional printmaking process of your choice. Choices include the linoleum-cut, woodcut, or silk-screen process. Use reference books or refer to ArtTalk pages and 433 to learn more about printmaking techniques. Examining Your Work 1. Was the photograph you selected an appropriate choice for use with the filters? Explain. 2. How did the Equalize effect change the image? Did it successfully simplify the image into lights and darks? 3. Was a balance of light, middle, and dark values achieved in the posterized human face? 4. Do the colors selected for each part of the face accurately depict human facial form? If not, explain why not. 6 ArtTalk Digital Studio Projects

3

4 STUDIO PROJECT 4 For use with Chapter 5 Name Digital Woodcuts Date Class Period Objectives Create an electronic version of a woodcut print. Draw an object or person from direct observation and explore the layering capabilities of a draw program. SUPPLIES Object or subject to draw Computer with draw program Printer Special Note: Layering shapes using digital media can simulate the look of a carved and printed woodcut.this is done by representing the subject as a black shape and adding layers of colored details on top of the black shape. Figure 4 Student work. Understanding the Tools The Freehand or Pencil tool places anchor points automatically as you draw.you can set the general preferences for freehand drawing to make the lines smooth or rough. Solid shapes can be created easily with the Freehand or Pencil tool in a draw program. Shapes are defined by determined anchor points that, when clicked, are connected by lines.this is similar to connecting the dots in children s coloring books. Once the shape is completed and closed, it can be filled with color or a pattern or left empty. Step 1 Carefully observe the silhouette or shape of your object or subject. Step 2 Draw this shape using the Freehand or Pencil tool. Step 3 Select a black line and black fill color for the shape by clicking on black in the Swatches palette. Step 4 Place this black shape on a white background, allowing the negative space to define details of your object or subject. Step 5 Carefully look for the details of your object or subject. Step 6 Select your next color for the line stroke by first selecting the line stroke and Digital Studio Projects ArtTalk 7

5 then clicking on a color from the Swatches palette. Step 7 fill color. Follow the same procedures for the Step 8 Now that your colors are selected, draw the shapes of your object s or subject s details, one shape at a time. This is similar to working with cut paper. For example, if a woman has light yellow highlights in her brown hair, you have to cut the shape of each highlight and place it on top, one section at a time. Step 9 Position these individual shapes on top of the black silhouette in their correct places. Step 10 To simulate the carved effect seen in traditional woodcut techniques, draw the shapes with a series of zigzag corner points. Print your final work. Examining Your Work 1. Did the shapes accurately define the subject? If not, what can you do next time to improve your work? 2. How many details of your object or subject did you depict? 3. How does your digital drawing simulate the look of a woodcut print? 8 ArtTalk Digital Studio Projects

6
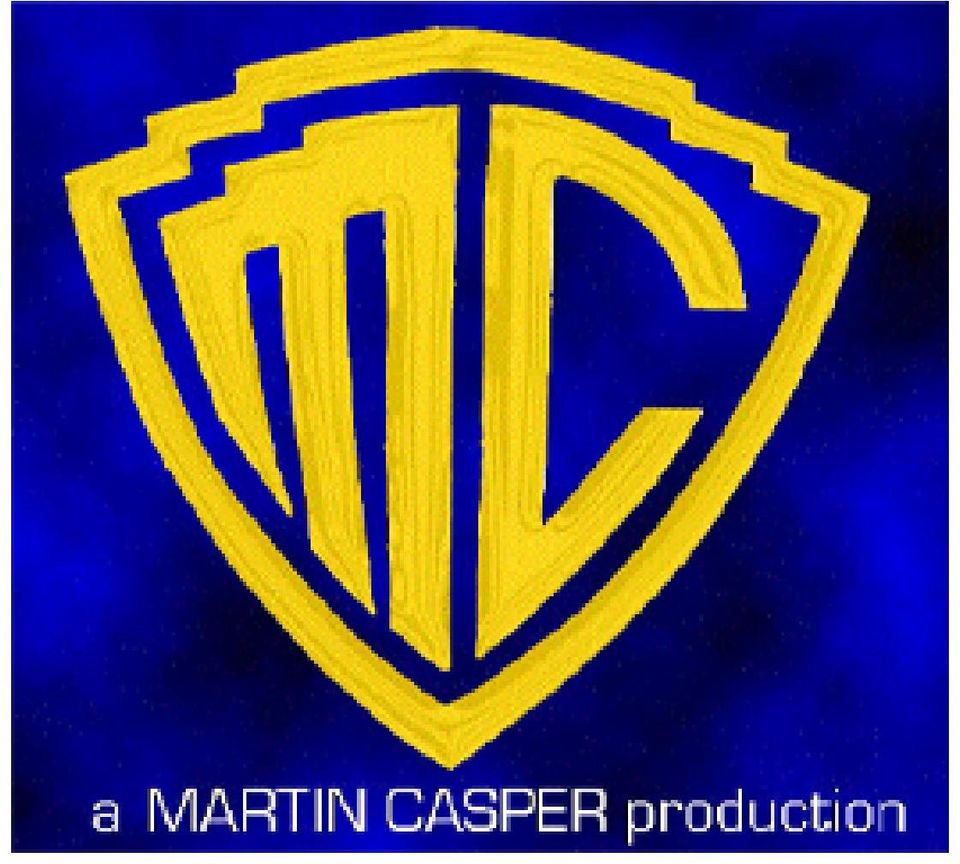
7 STUDIO PROJECT 5 For use with Chapter 5 Name Name That Company Date Class Period Objectives Develop a logo as the corporate identity for an imaginary company. Explore the effective use of positive and negative space in a black-and-white design. Enhance the logo on the computer. SUPPLIES Sketchbook and pencil Computer with draw or paint program Printer Special Note: When working for clients, it is important to understand their likes and dislikes. Although you may love your design, it may not meet their needs or suit their taste.try numerous ideas to explore different design styles for your logo. Figure 5 Student work. Step 1 Brainstorm ideas for an imaginary company. Decide what type of company it is. What services does it offer? Step 2 Using a pencil, draw preliminary ideas for a logo design for the imaginary company in your sketchbook. A logo is a symbol that represents a person or a company. to more creative solutions, but remember that logo designs should be readable and easily understood. Step 5 In combination with the name or initials, consider the incorporation of symbols of items used in the business. For example, you could incorporate a chef s hat into the design for a cooking school logo. Step 3 Use the letters from the name of the imaginary company to create the logo. Sketch these ideas quickly, as the computer will be used for the final enhancement and further development of the logo design. Step 4 Open a draw program on the computer. Re-create the design sketches using the Pencil, Paintbrush, and/or Type tool on the toolbar. Let your imagination guide you Step 6 Vary the arrangement of the words, letters, and symbols. Try different approaches with the same logo: white letters on a black background, black letters on a white background, or a creative combination of the two. Step 7 Complete your design and save it. Print the final logo design. Digital Studio Projects ArtTalk 9

8 Examining Your Work 1. Is the logo clearly identifiable? 2. Does the design have bold, crisp, and clean shapes? 3. Does the logo reflect the line of business it represents? 4. Did you use symbols in your design? If not, why not? Would the use of a symbol better communicate the nature of the business? 10 ArtTalk Digital Studio Projects


9
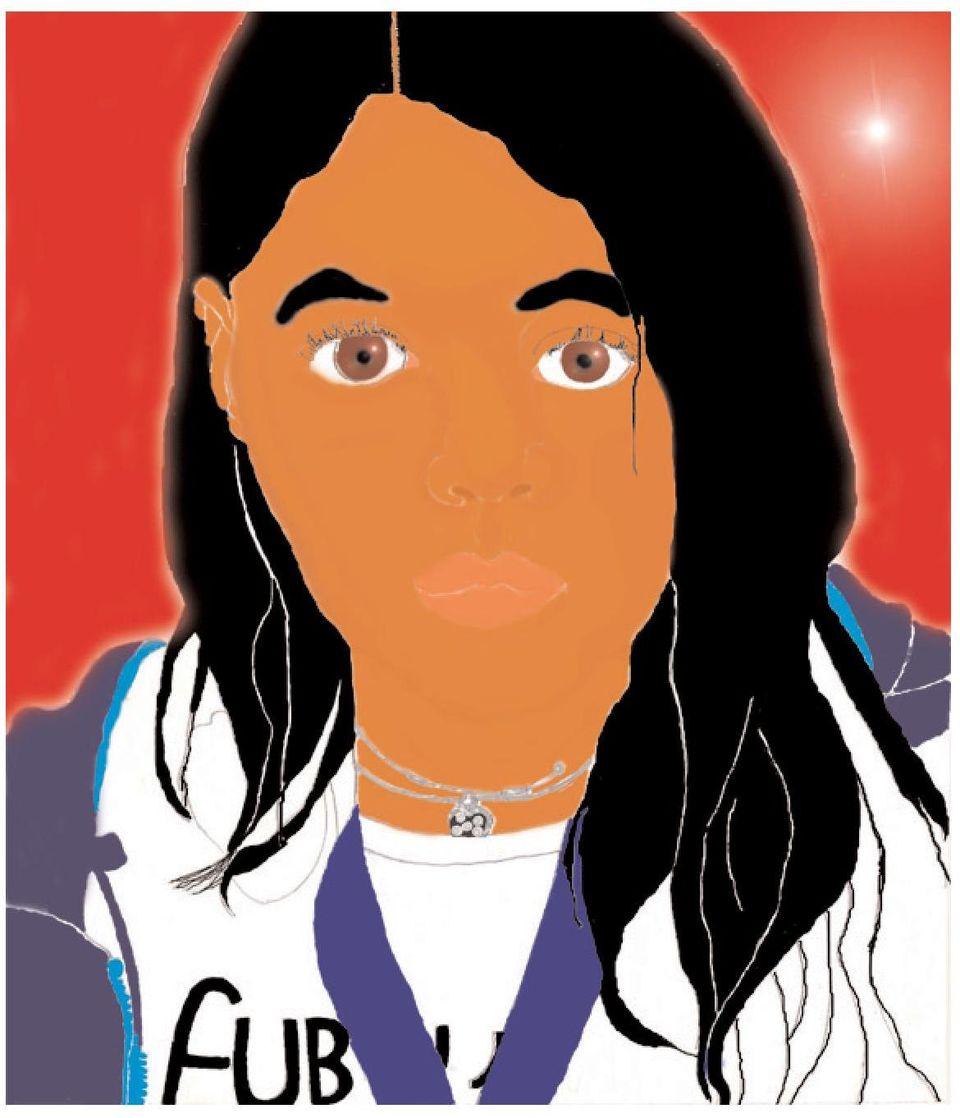
10 STUDIO PROJECT 6 For use with Chapter 5 Name Date Class Period If Leonardo Had a Laptop Objective Reinterpret a great master s work using digital media to communicate an event from your own life or create a self-portrait. SUPPLIES Sketchbook and pencil Computer with paint or draw program Printer Figure 6 Student work. Step 1 Select an art movement or style to research from the images listed below. They can be found in ArtTalk on the pages listed. Rembrandt Harmensz van Rijn, Aristotle with a Bust of Homer (Figure 5.36, page 124) Mary Cassatt, Margot in Blue (Figure 6.8, page 140) Joan Miró, Landscape (The Hare) (Figure 9.13, page 235) Jan Vermeer, Girl with the Red Hat (Figure 13.13, page 362) Paul Cézanne, The Gulf of Marseilles Seen from L Estaque (Figure 13.23, page 371) Paul Gauguin, Faaturuma (Melancholic) (Figure 13.24, page 372) Vincent van Gogh, The Starry Night (Figure 13.25, page 373) René Magritte, The False Mirror (Figure 13.28, page 375) Roy Lichtenstein, Blam (Figure 13.32, page 379) Step 2 Study the choices above while considering your life events. Select one of the masters works to use as the springboard for your digital artwork. Step 3 Create preliminary pencil sketches in your sketchbook. Step 4 Open a draw or paint program. Select either a horizontal (landscape) or vertical (portrait) format by clicking on Page or Document Setup in the File menu. Using the Pencil or Paintbrush tool, draw your portrait or scene in a new document. Study the master s artwork you selected to determine how to compose your artwork. Digital Studio Projects ArtTalk 11
 Mary Cassatt, Margot in Blue (Figure 6.8, page 140) Joan Miró, Landscape (The Hare) (Figure 9.")
11 Step 5 Using a color palette that is similar to that of the master artist you selected, fill the shapes in your drawing. Use the Paint Bucket or Fill tool to fill the shapes with colors and/or patterns. Step 6 As you work, continue to compare the master artist s work to that of your own. Once you are satisfied, save and print your final artwork on letter-size paper. Step 7 Write an artist s statement that compares and contrasts your digital artwork with the traditional master s artwork. Include a statement about how your work was inspired by the master s artwork. Special Note: To extend this studio project, use your printed digital image as a source for a traditional media artwork. Choices could include an acrylic or oil painting, an oil pastel or watercolor pencil drawing, or a collage or print. Examining Your Work 1. Compare and contrast your digital artwork with the artwork of the master artist you selected. How are they similar? How are they different? 2. Does your work tell the story you intended? 3. What about the master s work inspired you to work in his or her style? 12 ArtTalk Digital Studio Projects

12
13 STUDIO PROJECT 7 For use with Chapter 5 Name Opposite Effects: Mouse-Pad Design Date Class Period Objective Create a mouse-pad design by experimenting with the inversion of positive and negative shapes and type using a limited palette of colors and values. SUPPLIES Computer with draw or paint program Printer Understanding the Tools The Invert command changes all white pixels to black and all black pixels to white.this effect is similar to photographic negatives. Invert will also change colors to be the inverse or opposite of the original color. Figure 7 Student work. Step 1 Open a new document in a draw or paint program. Set the document size to match the size of a standard mouse pad (6 by 8 inches). Step 2 Select or create an inspirational slogan or phrase. Step 3 Select a variety of font styles and sizes for use in this design. Step 4 Type your chosen words or phrase in a large-size font. Repeat these words until you have filled the space of the mouse pad. Try different arrangements of your words. For example, crowd your letters in some places to create tension between the positive and negative spaces. Step 5 Use the rectangular Marquee selection tool to highlight small sections of the words or phrase. Step 6 Click Invert on the Image pulldown menu. The colors will change to their opposites. Black will become white and white will become black, and so on. If you do this and do not like the change, click Undo on the Edit pull-down menu or type Command-Z (Mac OS) or Control-Z (Windows). The image will revert back to the original colors. Step 7 Continue to use the selection tool to invert parts of the design. Do this until you are satisfied with the balance of the Digital Studio Projects ArtTalk 13

14 lights and darks throughout the entire composition. For a more organic look to your inverted shapes, use the lasso-shaped selection tool instead of the rectangular Marquee tool. Step 8 Use the Fill tool to change parts to another color or value for variety or emphasis before you invert the parts. However, remember to balance the use of the new color or value by adding it to the arrangement repeatedly to create movement and unity in your composition. Step 9 Try several different layout designs of the words until you are satisified with the composition. Save and print your final design on letter-size paper. Examining Your Work 1. Are the words of your slogan or phrase readable? 2. How effectively did you achieve a balance of the positive and negative shapes? 3. Were you successful in achieving a balance of colors or values? If not, what would you do differently next time? 14 ArtTalk Digital Studio Projects

15

Animation Action STUDIO. PROJECT 11 For use with Chapter 8. Objective SUPPLIES
 STUDIO PROJECT 11 For use with Chapter 8 Name Animation Action Date Class Period Objective Draw a simple animation sequence in a sketchbook and import your drawings into a multimedia program to create
Graphic Design. Background: The part of an artwork that appears to be farthest from the viewer, or in the distance of the scene.
 Graphic Design Active Layer- When you create multi layers for your images the active layer, or the only one that will be affected by your actions, is the one with a blue background in your layers palette.
ClarisWorks 5.0. Graphics
 ClarisWorks 5.0 Graphics Level 1 Training Guide DRAFT Instructional Technology Page 1 Table of Contents Objectives... Page 3 Course Description and Organization... Page 4 Technology Requirements... Page
Instructions for Creating a Poster for Arts and Humanities Research Day Using PowerPoint
 Instructions for Creating a Poster for Arts and Humanities Research Day Using PowerPoint While it is, of course, possible to create a Research Day poster using a graphics editing programme such as Adobe
ART/VCDMA PORTFOLIO TIPS
 ART/VCDMA PORTFOLIO TIPS What is a portfolio? A portfolio represents your skills as an artist, including craftsmanship, technique, creativity, and the ability to communicate visual ideas. High school seniors
Norman Public Schools VISUAL ART ASSESSMENT GUIDE FOR GRADE 7
 Norman Public Schools VISUAL ART ASSESSMENT GUIDE FOR GRADE 7 2013-2014 VISUAL ART NPS ARTS ASSESSMENT GUIDE Grade 7 This guide is to help teachers incorporate the Arts into their core curriculum. Students
For this project, you will be using TORN PAPER to create a COLLAGE!
 Torn Paper Collage For this project, you will be using TORN PAPER to create a COLLAGE! You can use virtually any kind of paper you can find. Magazines, newspapers, junk mail Artwork, sheet music, pages
ART 170: Web Design 1
 Banner Design Project Overview & Objectives Everyone will design a banner for a veterinary clinic. Objective Summary of the Project General objectives for the project in its entirety are: Design a banner
Creating a Poster Presentation using PowerPoint
 Creating a Poster Presentation using PowerPoint Course Description: This course is designed to assist you in creating eye-catching effective posters for presentation of research findings at scientific
Realistic Art & Proportion
 Notes 9/8 Name: Period: Date: Realistic Art & Proportion Realistic art is art that shows recognizable objects; just like things you would see in real life. Sometimes, realistic art looks so real, it almost
MASKS & CHANNELS WORKING WITH MASKS AND CHANNELS
 MASKS & CHANNELS WORKING WITH MASKS AND CHANNELS Masks let you isolate and protect parts of an image. When you create a mask from a selection, the area not selected is masked or protected from editing.
Greenwich Visual Arts Objectives Computer Graphics High School
 Media, Techniques and Processes Greenwich Visual Arts Objectives 1. Uses a variety of tools to draw digitally to capture the essence of the subject using an application program such as Apple works Paint
Making a Poster Using PowerPoint 2007
 Making a Poster Using PowerPoint 2007 1. Start PowerPoint: A Blank presentation appears as a Content Layout, a blank one one without anything not even a title. 2. Choose the size of your poster: Click
Organize your project in a way that identifies the research questions and methodology you will use.
 Step 1- Content Organize your project in a way that identifies the research questions and methodology you will use. Collect and analyze data using accepted scientific and statistical methodology. Think
Elementary Curriculum Map Visual Art First Grade
 Unit: Line Learning Goal: The student will create an artwork by using a variety of line types. Essential Questions/Understandings: Why do lines have meaning? Why do we associate horizontal lines with being
What makes it necessary to have rituals in the Art room?
 FOURTH GRADE QUARTER ONE - LINE Why is it important to have Rules What makes it necessary to have rituals in the Art room? rituals and routines in the art room? routines Rituals & Routines: Teacher establishes
First Grade: April Lesson 6: Night Landscape Oil Pastel and Watercolor
 First Grade: April Lesson 6: Night Landscape Oil Pastel and Watercolor Objective: To create a resist painting showing a night landscape Technique: Drawing with oil pastels, adding a watercolor wash Set-up:
La Comedie des Arts by Emmanuel Romeuf
 Adobe Illustrator CS5 How-To Guide La Comedie des Arts by Emmanuel Romeuf Emmanuel Romeuf lives and works in Paris, and takes his inspiration from great artists of the past such as René Magritte. In the
QUICK REFERENCE: ADOBE ILLUSTRATOR CS2 AND CS3 SECTION 1: CS3 TOOL BOX: PAGE 2 SECTION 2: CS2 TOOL BOX: PAGE 11
 QUICK REFERENCE, ADOBE ILLUSTRATOR, PAGE 1 QUICK REFERENCE: ADOBE ILLUSTRATOR CS2 AND CS3 CS2 SECTION 1: CS3 TOOL BOX: PAGE 2 SECTION 2: CS2 TOOL BOX: PAGE 11 SECTION 3: GENERAL CONCEPTS: PAGE 14 SELECTING
Greetings Card. Projects 1
 Projects 1 h b Whether it s to celebrate a birthday, an anniversary, or a graduation, or simply to tell a friend you are thinking of them, we all enjoy sending and receiving greetings cards. With PagePlus,
NDSU Technology Learning & Media Center
 1 NDSU Technology Learning & Media Center QBB 150C 231-5130 www.ndsu.edu/its/tlmc Creating a Large Format Poster (Plot) Using PowerPoint 2013 Posters should be designed and created in a manner that best
ELEMENTS OF ART & PRINCIPLES OF DESIGN
 ELEMENTS OF ART & PRINCIPLES OF DESIGN Elements of Art: 1. COLOR Color (hue) is one of the elements of art. Artists use color in many different ways. The colors we see are light waves absorbed or reflected
Course Project Lab 3 - Creating a Logo (Illustrator)
") Course Project Lab 3 - Creating a Logo (Illustrator) In this lab you will learn to use Adobe Illustrator to create a vector-based design logo. 1. Start Illustrator. Open the lizard.ai file via the File>Open
Course Project Lab 3 - Creating a Logo (Illustrator) In this lab you will learn to use Adobe Illustrator to create a vector-based design logo. 1. Start Illustrator. Open the lizard.ai file via the File>Open
Elements of Art Name Design Project!
 Elements of Art Name Design Project! 1. On the Project paper Lightly & Largely sketch out the Hollow letters of your first name. 2. Then Outline in Shaprie. 3. Divide your space into 7 sections (any way
Communicate: In Print
 Communicate: In Print A simple guide Work areas Communicate: In Print has two different modes in which to edit your documents: Create and Adjust modes. These are easily interchangeable and the toolbars
PATTERN: A two-dimensional decorative visual repetition. A pattern has no movement and may or may not have rhythm.
 Project: Elements of Design - NAME Elements: Line, Color, Value, Shape, Space, Texture Principles: Consider what principles you may have used based on the definition of each. Artist to Remember: Research
MassArt Studio Foundation: Visual Language Digital Media Cookbook, Fall 2013
 INPUT OUTPUT 08 / IMAGE QUALITY & VIEWING In this section we will cover common image file formats you are likely to come across and examine image quality in terms of resolution and bit depth. We will cover
Neshannock Township School District Curriculum Overview Computer Graphics Plan Course of Study
 Neshannock Township School District Curriculum Overview Computer Graphics Plan Course of Study Course Objectives: Materials: Knowledge Base: Grading Procedure and Assessments: Curriculum Alignment: Course
[2011] Digital. Photography Lesson Plan 2. The Subject
![[2011] Digital. Photography Lesson Plan 2. The Subject](/thumbs/27/9828966.jpg "[2011] Digital. Photography Lesson Plan 2. The Subject") Digital [2011] Photography Lesson Plan 2 [This lesson is intended to engage the students with the concepts of art in photography. We will be discussing the use of compositions, background, foreground and
Digital [2011] Photography Lesson Plan 2 [This lesson is intended to engage the students with the concepts of art in photography. We will be discussing the use of compositions, background, foreground and
Publisher 2010 Cheat Sheet
 April 20, 2012 Publisher 2010 Cheat Sheet Toolbar customize click on arrow and then check the ones you want a shortcut for File Tab (has new, open save, print, and shows recent documents, and has choices
CREATING POSTERS WITH POWERPOINT
 CREATING POSTERS WITH POWERPOINT PowerPoint files will be required for Posters on CD-Rom with very few exceptions. WHY POWERPOINT? Although there are many software programs that will create posters, PowerPoint
Digital Photography Composition. Kent Messamore 9/8/2013
 Digital Photography Composition Kent Messamore 9/8/2013 Photography Equipment versus Art Last week we focused on our Cameras Hopefully we have mastered the buttons and dials by now If not, it will come
Introduction to Microsoft Publisher : Tools You May Need
 Introduction to Microsoft Publisher : Tools You May Need 1. Why use Publisher instead of Word for creating fact sheets, brochures, posters, newsletters, etc.? While both Word and Publisher can create documents
Welcome to CorelDRAW, a comprehensive vector-based drawing and graphic-design program for the graphics professional.
 Workspace tour Welcome to CorelDRAW, a comprehensive vector-based drawing and graphic-design program for the graphics professional. In this tutorial, you will become familiar with the terminology and workspace
WELCOME TABLE OF CONTENTS
 Branding Manual WELCOME Maintaining a consistent brand is imperative to building an organizational identity. It is the goal of this manual to clearly establish consistency within the Penn GSE brand so
Microsoft Office Word 2007 Training
 Microsoft Office Word 2007 Training Created & Hosted by: Hagop (Jack) Hadjinian I.A., Information Technology Course Contents: Lesson 1: Get to know the Ribbon Lesson 2: Find everyday commands The lesson
m ac romed ia Fl a s h Curriculum Guide
 m ac romed ia Fl a s h Curriculum Guide 1997 1998 Macromedia, Inc. All rights reserved. Macromedia, the Macromedia logo, Dreamweaver, Director, Fireworks, Flash, Fontographer, FreeHand, and Xtra are trademarks
Divide your material into sections, for example: Abstract, Introduction, Methods, Results, Conclusions
 Creating a Research Poster in PowerPoint Adapted by Libertad Flores from guidelines by the Department of Medical Graphics and Photography, Memorial Sloan-Kettering Cancer Center, July 2011 1) Planning
Optimizing your image with Pixlr on-line photo editor
 Optimizing your image with Pixlr on-line photo editor Nick Dvoracek dvoracek@uwosh.edu In a web browser, go to http://pixlr.com/editor/ Click Open image from computer That will open a standard file dialogue
Self-Portrait Painting
 SUBJECT: VISUAL ART GRADE: 8TH TEACHER: CHRISTINA LOVERING Unit Overview: Self-Portrait Painting Introduction Students will engage in a 2-3 week unit in which the end result will be a self-portrait using
Overview of the Adobe Flash Professional CS6 workspace
 Overview of the Adobe Flash Professional CS6 workspace In this guide, you learn how to do the following: Identify the elements of the Adobe Flash Professional CS6 workspace Customize the layout of the
Tips for optimizing your publications for commercial printing
 Tips for optimizing your publications for commercial printing If you need to print a publication in higher quantities or with better quality than you can get on your desktop printer, you will want to take
Photoshop- Image Editing
 Photoshop- Image Editing Opening a file: File Menu > Open Photoshop Workspace A: Menus B: Application Bar- view options, etc. C: Options bar- controls specific to the tool you are using at the time. D:
Serif PagePlusX4. Group Listing
 File Menu New Startup Wizard New Publication New Book Open File Open Browse Files Browse Revert Close File Save Save As Save As Package Export As Picture Properties Page Setup Layout Guides Print Print
Adobe Illustrator CS6 Tutorial
 Adobe Illustrator CS6 Tutorial GETTING STARTED Adobe Illustrator CS6 is an illustration program that can be used for print, multimedia and online graphics. Whether you plan to design or illustrate multimedia
Fireworks for Graphics and Images
 Fireworks for Graphics and Images Joan Weeks SLIS Computer Labs Mgr. October 2009 Fireworks for Banners and Images Fireworks is a web developer s tool to make banners and graphics, as well as format images
Creating a PowerPoint Poster using Windows
 Creating a PowerPoint Poster using Windows Copyright 2001 Michael Dougherty (michael@nmsu.edu) Purpose The purpose of this tutorial is to illustrate how to create a 3 x 4 ft. poster using PowerPoint. This
Guide To Creating Academic Posters Using Microsoft PowerPoint 2010
 Guide To Creating Academic Posters Using Microsoft PowerPoint 2010 INFORMATION SERVICES Version 3.0 July 2011 Table of Contents Section 1 - Introduction... 1 Section 2 - Initial Preparation... 2 2.1 Overall
Worksheets for Teachers. The Lowry
 Worksheets for Teachers The Lowry Worksheets LS Lowry Worksheets for Primary & Secondary Pupils The following pages contain worksheets for you to use with your class. They can be photocopied for each person
File Folders. To produce a file folder you have the following options:
 File Folders To produce a file folder you have the following options: Option 1: Supply us with the file for the full outside of the file folder and another file for the full inside of the file folder (see
Crop and Frame Your Photos
 Crop and Frame Your Photos Paint Shop Pro s crop tool gives you total control over your photo compositions. Cropping allows you to turn busy portraits into professional prints. And when you have a nicely
Graphic Design for Beginners
 Graphic Design for Beginners Level: Duration: Time: Cost: Introduction 6 Days 9:30 AM - 4:30 PM Call for details Overview Managing the Adobe Photoshop Environment Working with Selections Enhancing an Image
MONDAY. OIL PAINTING 9:00am-noon Sean Bodley 414-334-1799 sabodley@gmail.com
 MONDAY OIL PAINTING Learn to use and enjoy the wonderful medium of oil paint. Students will learn the basics of oil painting materials and methods, including color mixing techniques, and enhance their
USING POWERPOINT 2003 TO PRODUCE POSTERS
 USING POWERPOINT 2003 TO PRODUCE POSTERS Introduction This document provides advice and guidance for those wishing to use PowerPoint to create large-scale posters, particularly those for use at academic
Prep Art Program. Term 2 2015
 Prep Indonesia This term students will develop a range of skills while manipulating two and three-dimensional materials to create series of artworks based on studies of art in Indonesia. The focus for
Welcome to CorelDRAW, a comprehensive vector-based drawing and graphic-design program for the graphics professional.
 Working with layout Welcome to CorelDRAW, a comprehensive vector-based drawing and graphic-design program for the graphics professional. In this tutorial, you will create a poster for an imaginary coffee
Using Kid Pix Deluxe 3 (Windows)
") Using Kid Pix Deluxe 3 (Windows) KidPix Deluxe 3 is a multimedia software program that is especially effective for use with primary level students. Teachers and students can create animated slide presentations
Using Kid Pix Deluxe 3 (Windows) KidPix Deluxe 3 is a multimedia software program that is especially effective for use with primary level students. Teachers and students can create animated slide presentations
Get To Know Paint Shop Pro: Layers
 Get To Know Paint Shop Pro: Layers Layers are the building blocks of most images from photo collages to digital scrapbook layouts. Once you harness this powerful tool, you ll be able to easily create stunning
MICROSOFT WORD TUTORIAL
 MICROSOFT WORD TUTORIAL G E T T I N G S T A R T E D Microsoft Word is one of the most popular word processing programs supported by both Mac and PC platforms. Microsoft Word can be used to create documents,
EPSON SCANNING TIPS AND TROUBLESHOOTING GUIDE Epson Perfection 3170 Scanner
 EPSON SCANNING TIPS AND TROUBLESHOOTING GUIDE Epson Perfection 3170 Scanner SELECT A SUITABLE RESOLUTION The best scanning resolution depends on the purpose of the scan. When you specify a high resolution,
ACADEMIC TECHNOLOGY SUPPORT
 ACADEMIC TECHNOLOGY SUPPORT Adobe Photoshop Introduction Part 1 (Basics- Image Manipulation) ats@etsu.edu 439-8611 www.etsu.edu/ats Table of Contents: Overview... 1 Objectives... 1 Basic Graphic Terminology...
Carrie Schoenborn Molly Switalski. Big Idea: Journeys
 Carrie Schoenborn Molly Switalski Big Idea: Journeys What are types of journeys that people travel in life? Are all journeys physical journeys? What defines a journey? How do we know when a journey is
*Supply students with paper and art materials when necessary.
 Reflections/Refractions: Self-Portraiture in the Twentieth Century A lesson compiled by the National Portrait Gallery, Smithsonian Institution, for the exhibition Reflections/Refractions: Self-Portraiture
Adobe Illustrator CS5
 What is Illustrator? Adobe Illustrator CS5 An Overview Illustrator is a vector drawing program. It is often used to draw illustrations, cartoons, diagrams, charts and logos. Unlike raster images that store
create an alpha channel
 How to create an alpha channel or grayscale mask with Primatteʼs mask settings. a tutorial for : primatte chromakey create an alpha channel make masks in minutes. [ from Digital Anarchy ] f/x tools for
Working With Animation: Introduction to Flash
 Working With Animation: Introduction to Flash With Adobe Flash, you can create artwork and animations that add motion and visual interest to your Web pages. Flash movies can be interactive users can click
Instructions to Create Your Rollup Poster in PowerPoint
 Instructions to Create Your Rollup Poster in PowerPoint THE IDEAL POSTER IS DESIGNED TO... Provide a brief overview of your research Encourage discussion Stand alone when you re not there to provide an
Microsoft Publisher 2010 What s New!
 Microsoft Publisher 2010 What s New! INTRODUCTION Microsoft Publisher 2010 is a desktop publishing program used to create professional looking publications and communication materials for print. A new
User Guide. Ahead Software AG
 User Guide Ahead Software AG Information on copyright and trade marks The Nero Cover Designer user manual and all its contents are protected by copyright and are the property of Ahead Software. All rights
LabelWorks LW-600P User's Guide
 LabelWorks LW-600P User's Guide Contents LabelWorks LW-600P User's Guide... 7 Introduction to Your LabelWorks Printer... 8 Product Box Contents... 8 Notations Used in the Documentation... 9 Label Printer
ELEMENTS AND PRINCIPLES OF DESIGN
 APPENDIX A1 4 T T ELEMENTS AND PRINCIPLES OF DESIGN Groups: 1. Select an advertisement. 2. Examine the advertisement to find examples of a few elements and principles of design that you are familiar with.
VISUAL ARTS VOCABULARY
 VISUAL ARTS VOCABULARY Abstract Artwork in which the subject matter is stated in a brief, simplified manner; little or no attempt is made to represent images realistically, and objects are often simplified
Creating manga-style artwork in Corel Painter X
 Creating manga-style artwork in Corel Painter X Jared Hodges Manga is the Japanese word for comic. Manga-style comic books, graphic novels, and artwork are gaining international popularity. Bronco Boar,
Using PowerPoint To Create Art History Presentations For Macintosh computers running OSX with Microsoft Office 2008
 Using PowerPoint To Create Art History Presentations For Macintosh computers running OSX with Microsoft Office 2008 Adapted by Gretchen Tuchel from the Institute of Fine Arts document by Elizabeth S. Funk
Macros in Word & Excel
 Macros in Word & Excel Description: If you perform a task repeatedly in Word or Excel, you can automate the task by using a macro. A macro is a series of steps that is grouped together as a single step
Microsoft Word 2010 Tutorial
 1 Microsoft Word 2010 Tutorial Microsoft Word 2010 is a word-processing program, designed to help you create professional-quality documents. With the finest documentformatting tools, Word helps you organize
Logo Design. Jacob Mesick. About the author
 Logo Design Jacob Mesick About the author Jacob Mesick has been a CorelDRAW user for the past nine years. He is passionate about both traditional and digital art forms and works to discover new ways of
The complete beginners guide to Adobe Illustrator. Get started
 The complete beginners guide to Adobe Illustrator Get started The complete beginners guide to Adobe Illustrator VISUAL DEMO - What we are going to create on this course Go to page COURSE OVERVIEW - Project
So you say you want something printed...
 So you say you want something printed... Well, that s great! You ve come to the right place. Whether you re having us design and edit your work, or you fancy yourself a designer and plan to hand over your
2012 Ward s Natural Science
 2012 Ward s Natural Science Contents Recommended System Requirements...3 Additional Assistance...3 QUICK START GUIDE Installation Instructions...4 How It Works...5 Your First View...6 Navigating the Library...7
Create A Collage Of Warped Photos
 Create A Collage Of Warped Photos In this Adobe Photoshop tutorial, we re going to learn how to create a collage of warped photos. Now, don t go letting your imagination run wild here. When I say warped,
Creating a Logo in CorelDRAW
 Creating a Logo in CorelDRAW In this tutorial, we will look at creating a logo for an electrical contracting firm. Our goal is to create a logo that is clean and easily recognizable. Lighthouse Electric
WORDPAD TUTORIAL WINDOWS 7
 WORDPAD TUTORIAL WINDOWS 7 Quick Access bar Home Tab Triangles = More Commands Groups on the Home tab Right paragraph margin Left paragraph Margin & Indent Paragraphs Ruler Hover the mouse pointer over
ANNE ARUNDEL COUNTY PUBLIC SCHOOLS GIFTED VISUAL ARTS ENRICHMENT PROGRAM 2015 16 General Information
 ANNE ARUNDEL COUNTY PUBLIC SCHOOLS GIFTED VISUAL ARTS ENRICHMENT PROGRAM 2015 16 General Information The Anne Arundel County Gifted Visual Arts Enrichment Program consists of eligible students identified
Photography (ART221, 222, 225, 226) Curriculum Guide
 Curriculum Guide") Photography (ART221, 222, 225, 226) Curriculum Guide December, 2014 Visual Arts Curriculum, Instruction, and Assessment 2323 Grand Avenue Des Moines, Iowa 50312 P: 515-242-7619 visualarts.dmschools.org
Photography (ART221, 222, 225, 226) Curriculum Guide December, 2014 Visual Arts Curriculum, Instruction, and Assessment 2323 Grand Avenue Des Moines, Iowa 50312 P: 515-242-7619 visualarts.dmschools.org
Studio Art. Introduction and Course Outline
 Studio Art Introduction and Course Outline PACE High School An Independent Ohio Community School Welcome to the Studio Art course. During this semester you will learn to use the basic materials and techniques
S M A R T D R A W U S E R G U I D E : F u n d a m e n t a l s f o r N e w U s e r s
 2016 S M A R T D R A W U S E R G U I D E : F u n d a m e n t a l s f o r N e w U s e r s TABLE OF CONTENTS Introduction... 5 Getting Started in SmartDraw... 6 Home Screen... 6 How to Search for a Template
TUTORIAL 4 Building a Navigation Bar with Fireworks
 TUTORIAL 4 Building a Navigation Bar with Fireworks This tutorial shows you how to build a Macromedia Fireworks MX 2004 navigation bar that you can use on multiple pages of your website. A navigation bar
Scanners and How to Use Them
 Written by Jonathan Sachs Copyright 1996-1999 Digital Light & Color Introduction A scanner is a device that converts images to a digital file you can use with your computer. There are many different types
Contents. Launching FrontPage... 3. Working with the FrontPage Interface... 3 View Options... 4 The Folders List... 5 The Page View Frame...
 Using Microsoft Office 2003 Introduction to FrontPage Handout INFORMATION TECHNOLOGY SERVICES California State University, Los Angeles Version 1.0 Fall 2005 Contents Launching FrontPage... 3 Working with
Keywords for the study of Junior Cert art
 able abstract acrylic activity aesthetic/aesthetics analyze ancient animation applied arch arches architect architectural architecture art art process artist artistic artists arts artwork artworks assemble
Introduction to Microsoft Word 2008
 1. Launch Microsoft Word icon in Applications > Microsoft Office 2008 (or on the Dock). 2. When the Project Gallery opens, view some of the available Word templates by clicking to expand the Groups, and
Word 2007 WOWS of Word Office 2007 brings a whole new basket of bells and whistles for our enjoyment. The whistles turn to wows.
 WOWS of Word Office brings a whole new basket of bells and whistles for our enjoyment. The whistles turn to wows. gfruth@wm.edu Templates Click on the Office Button PDF and select New. You can now change
TCS DIGITAL COLOR WHEEL VERSION 4.1 USER GUIDE
 TCS DIGITAL COLOR WHEEL VERSION 4.1 USER GUIDE We provide this TCS User Guide for our members as well as persons who would like to know more about the functionality before subscribing to TCS Color Match
OVERVIEW GRAPHIC DESIGN ENTRY PORTFOLIO REVIEW. Nine works are required in the portfolio as follows:
 OVERVIEW TO: Art Majors of Sophomore or higher standing with at least 18 studio hours completed or currently enrolled in Intro to Computing for Artists and Designers. FROM: MSU Art Department Faculty 1.