Ariba Frequently Asked Questions (FAQ)
|
|
|
- Earl Stevens
- 10 years ago
- Views:
Transcription
1 Ariba Frequently Asked Questions (FAQ) 1. I am a new user. How do I start using Ariba? 2. How do I update my user profile? 3. How do I verify a vendor is in Ariba? 4. How do I add a new vendor or change an existing vendor s information in Ariba? 5. How does my vendor get paid for purchases made in Ariba? 6. How do I approve/deny a request in Ariba? 7. What do I do with a Goods Receipt notification? 8. What do I do with a Reconciliation notification? 9. Who do I contact regarding s from Workflow? 10. Who can I contact for help? 11. How do I do a Forced Delegation of Authority? 12. How do I order stationery from The Print Shop? 13. How do I order a Non-Catalog item? 14. How do I archive documents from the TO DO box to a Label? 15. How do I find a document that has been archived or assigned to a Label? 16. How do I add attachments to a request

2 1. I m a new user. How do I start using Ariba? If you are a Sony employee, chances are you are already in the system as Ariba 9R1 is updated regularly with HR information. If you have a Novell Login ID, first-time users should login as follows: Username: Novell Login ID Password: ariba If you don t have a Novell Login ID, call the IT Helpdesk at and log a remedy ticket for your username. NEW USERS: Please take the time to update your User Profile in Ariba; make sure your current supervisor and are listed correctly. For further explanation on how to update your user profile, see FAQ #2 How do I Change My User Profile? We strongly recommend first-time Ariba users attend a training class. If you have trouble logging in, or need a list of training class schedules, please call the IT Helpdesk at and log a remedy ticket.

3 2. How do I update my User Profile? Your User Profile is found under the Preferences on the blue Command Bar at the top of the Ariba Home Dashboard. Preferences is also where you can change your password, change your secret question, delegate your approval authority and/or change your Ariba notifications Select to Change your Profile from the Preferences

4 You have the ability to change all fields under Page 1 The Personal Info. Fields with the asterisk (*) next to them are required fields. The following fields require approval if they are changed: o Supervisor Old Supervisor and New Supervisor are required to approve o Groups Permission Approver required to approve, additional approvers to be added. o Approval Authority. Supervisor, Corp. Finance and Corp. Compliance required to approve When you are finished click Next at the top or bottom right.

5 You have the ability to change all fields on Page 2 Account/Ship. This information will be the default on all requests you create in Ariba Contact Corp. Finance if you do not know your Company Code, Purhcase Org or Department Cost Center. When you are finished click Next at the top or bottom right.

6 Any comments can be added to Page 3 Justify Changes. This is a required field if the Approval Authority field on Page 1 has been changed. When you are finished click Next at the top or bottom right The approval flow for the user profile will be displayed on Page 4 Approval Flow

7 Your changes are displayed on Page 5 Review Changes. Fields that were changed are listed on the left The Old value of the field is listed in the center The New value of the field is listed on the right Click Submit to submit the user profile request for approval If you have changed the Approval Authority field on Page 1 and have not supplied a justification on Page 3, an error message will appear and the system will not allow the user profile to be submitted. Once the justification has been provided the system will allow the user profile to be submitted.

8 3. How do I verify a vendor is in Ariba? Vendors can be can found through the Search on the blue Command Bar OR the Search box on the Dashboard. Under either Search select either Requisition or AP Payment Request from the drop down. For this example AP Payment Request for the Category Field is used.

9 Once the document type has been selected, the Search page will be displayed. Make sure Payee/Vendor is part of your Search Criteria. If it is not, click on Search Options and select it from the list. Click select next to Payee/Vendor.

10 A list of vendors will be displayed alphabetically. Type in the name of the vendor in the search above the list or use the scroll bar on the right to see if the vendor exists in Ariba and SAP

11 If the Vendor is in Ariba, the Vendor Name, ID# and address will appear below the search If the Vendor is NOT in the system, the message There are no items to display will appear below the search field. You will need to do a Vendor Maintenance Request to have the vendor added to Ariba (see FAQ #4) Your Vendor Search is complete. You can click done and return to the Ariba Home Dashboard Page. 4. How do I add a new vendor or change an existing vendor s information in Ariba?

12 To have a new vendor added to Ariba and SAP or to make changes to an existing vendor s record, you need to complete a Vendor Maintenance Request Form (VMR) in Ariba. The VMR can be found in two places in Ariba; In the Common Actions box under Create, On the blue command bar at the top of the dashboard under Create. If the VMR is not on the initial list, click More or the to display additional documents. Click on the Vendor Maintenance Request v2 to start your request. All REQUIRED Fields have an * (asterisk) next to them or are highlighted in yellow. If these fields are not filled out, Ariba will not allow you to submit the Vendor Maintenance Request. This example is for creating a NEW vendor. Vendor Changes (Name changes, Address Changes, etc.) are completed in a similar manner.
 next to them or are highlighted in yellow. If these fields are not filled out, Ariba will not allow you to submit the Vendor Maintenance Request.")
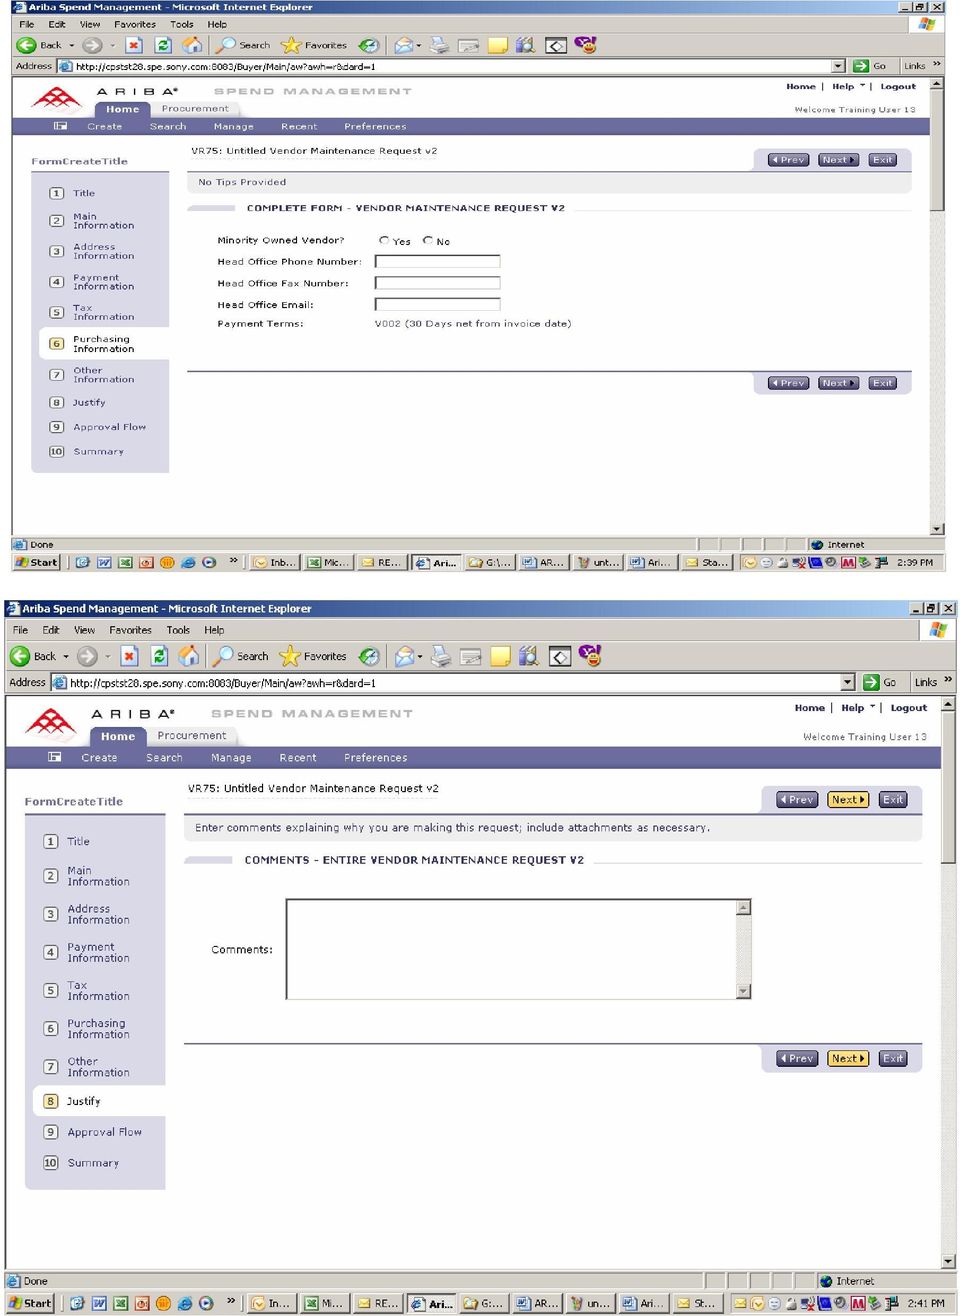
13 The Request Type field is where you select to Create a new vendor or Change an existing vendor. This field also determines the required fields on the form. Fill out info as required. You will need to obtain a W9 or W8 from the Vendor and attach it to the Vendor Maintenance Request. Information for some of the fields can be found on the vendor s W9/W8 Click Next at the bottom of the screen to proceed to page 4. On Page 4 Payment Information Select how you are going to pay the vendor under Payment Type. Additional fields will be displayed once you select the Payment Type. For this example Electronic Funds Transfer has been selected.

14 Fill out info as required. As the fields are populated additional fields may appear (See second screen shot of Page 4) Click Next to proceed to page 5.
 Click")
15 If required fields are left blank a dialogue box will appear at the top of the screen with the number problems on the page. All problems must be resolved before you can move on to the next page. Continue to fill out the fields on the remaining screens. Note that additional fields may appear due to what you populate in other fields.

16
17 You can add additional approvers at the beginning of the approval flow or in parallel with the approval flow. You DO NOT have the ability to delete a hard coded approver. Your request will not be worked on by AP until it is FULLY approved. Review the information from your request on the Summary Page. To add the W9/W8 see FAQ #11 How To Add Attachments If all information is correct, click Submit. If not, edit any fields on this Summary page and then click Submit.

18 5. How does my vendor get paid for purchases made in Ariba? Vendors are only paid when a valid PO has been generated in Ariba. There is one of two ways by which a vendor can be paid: 1. The conventional Accounts Payable (A/P) method by which the vendor sends an invoice to AP and AP processes the invoice for payment. POs paid by A/P start with 45 (e.g., ) and are ten (10) digits in length. Please note that before a payment will be made to a vendor, A/P requires a three-way match between the Ariba PO, the Vendor s invoice (referencing the PO #) and the Goods Receipt. If a three way match is not met, you will receive an notification from SAP Workflow asking you to resolve the issue before payment can be made to the vendor. Any questions regarding payment status on your PO s should be directed to your AP Analyst. The main number for A/P is The vendor gets paid directly by American Express via the Purchasing Card (PCard). POs paid via the PCard start with the letters PCO (stands for Purchase Card Order, e.g., PCO1234) Please note that for a vendor to be paid by PCard they must charge the PCard and reference the PO on the charge. The PCard number and expiration date are located on the PO the vendor receives. For questions regarding Pcard payments please contact Card Services Dept. at
 and the Goods Receipt.")
19 6. How do I Approve/Deny a request from Ariba? There are two ways to approve a request; by or by logging into Ariba. By You will receive an from Ariba System with the subject ACTION REQUIRED: PR # & Title (Approval Request) Open the . Click on the corresponding buttons to Approve, Deny or Open the request. Any attachments to the request will need to be viewed in Ariba. If you choose to APPROVE or DENY the request, the following REPLY appears: You will have to click on SEND in order for the Approval or Denial to take affect. DO NOT type any comments in this reply as it will cause your response to error out.

20 If you choose to OPEN the request from the , click on the OPEN button on the . This will take you directly to the Ariba Login Page. Your User Name will automatically populate. Enter your password and click Login Once you login you are taken directly to the requisition you are opening. Here you can Approve or Deny the request as well as view any attachments and add comments at the bottom of the page (not shown on this screen shot).

21 You will be asked to confirm your action. Comments can also be added on this screen. Click OK for the approval to take effect or Cancel to change your action. Once confirmed, Ariba will archive the request to the Archive Items label. If you have selected the next request requiring approval to be displayed after approving a request, the Ariba will bring up the next request in the queue. If you have selected to return to the Ariba Home Dashboard Page after approving a request or If no other requests need approval you will be taken to the Ariba Home Dashboard Page.
22 7. What do I do with a Goods Receipt Notification? Ariba automatically generates an to remind you to perform a Goods Receipt in Ariba. If you are ready to do a Goods Receipt, follow the steps below. If you are not ready to perform a Goods Receipt no action is required. You will, however, continue to receive these notification s. From the Ariba Home Dashboard go to Manage on the blue Command Bar or under Common actions and click on Receive. Click on the Search button to display the orders that need to be received. If only one order needs to be received the goods receipt for the order will be displayed. If more than one goods receipt needs to be done, a list of the goods receipts will be displayed. Click on the order that you want to receive.
23 There are four options when doing a Good Receipt: 1) fully receive the order; 2) partially receive the order; 3) receive and reject various items of the same order; 4) reject the entire order. All options are shown below: 1) Click on Accept All to except all quantities of the item(s)/services on your order 2 & 3) If the quantity received and accepted is less than the quantity ordered, input the quantity in the Accepted field 3 & 4) If you do not want to accept goods/services, input the quantity you want to reject in the Rejected field. Anytime goods/services are rejected in a Goods Receipt a Rejection Reason needs to be recorded under Page 4 Additional Information Needed. Input your reason for rejecting good(s)/service (s) and then click Next or Summary to proceed.
24 If you have rejected an item and you will not be receiving a replacement for it, choose Yes to Close Order. This will close the order so that nothing else can be received against it. Once on the Summary Page, click the submit button to execute the Goods Receipt. Click Submit for the Goods Receipt to be executed and closed in Ariba. Please note that if you do a Partial Goods Receipt, Ariba will continue to send Receipt Notification s until all goods/services are either accepted or rejected. If a change needs to be done to a closed Goods Receipt or if you have any further questions on performing a Goods Receipt, please call the Ariba Hotline at (310)
25 8. What is a Reconciliation notification and what do I do with it? If a vendor overcharges you on a PO, you will receive an (like the one below) with the subject Notification PCCR Reconciliation for order PCO78910, You will need to go into Ariba to accept the overcharge by the vendor. To reconcile (accept) the charges see below. IF you believe you have received the in error or you are due a credit, call the Ariba Hotline at (310) Click on one of the Open buttons to be taken to the Login Page of Ariba Your User Name will automatically populate. Enter your password and then click Login. NOTE: To access a reconciliation directly in Ariba (i.e., not from an link), login as usual then click on the Reconcile from your TO DO box on Ariba Home Dashboard.
26 Once you enter your password, the charge that needs to be reconciled will automatically be opened. Ariba will show the amount charged and the amount ordered. Choose to Approve Edit the overcharge. The Total Cost is the dollar amount the vendor has charged the PCO. The Description gives the variance between what the total of the PCO was and amount the vendor charged to the PCO. Click Approve. Put a Check Mark in the box to the left of the PO Amount Variance and click Accept to accept the overcharge.
27 Select a Reason for the overcharge from the drop-down. Click OK Ariba has now assigned the overcharge to the PCO. Click Submit to submit the overcharge for approval.
28 9. Who do I contact regarding s from WORKFLOW? This is an generated from SAP, not from Ariba, when Accounts Payable (A/P) has a problem with a three way match between the PO, the vendor invoice and the Goods Receipt. Please contact you re A/P representative or the A/P general number (310) in regards to s from WORKFLOW. 10. Who can I contact for help? Accessing Ariba (i.e network issues, password reset) call the IT Helpdesk at (310) Ariba functionality call the Ariba Hotline at (310) Also see FAQ Section above.
29 11. How do I do A Forced Delegation Go to the Ariba Buyer Login screen and log in to Ariba On the Ariba Home Dashboard Page, the Forced Delegation of Authority can be found in two(2) places: In the Common Actions box under Create or from the blue Command Bar under Create. If the form is not initially displayed, click on more or the to show a more detailed list the documents you can create. Select Click on the Forced Delegation of Authority to open it up.
30 All fields on the Forced Delegation of Authority e-form are required. Title What you want this Forced Delegation of Authority to be titled. o Include the name of the person for whom you are delegating. o This field will be in the Subject line of the Approval s that are sent to the approvers o Must be at least 10 characters Delegate From - Defaults to your Ariba Supervisor. To delegate for someone besides you supervisor: o type the persons name in the field and hit the tab key o OR click on the drop-down arrow and either select the name of the person if it appears in the drop-down or select Search for More. If you select Search for More, the Search Page will be displayed.
31 Type in the first and/or last name of the person you for whom you are doing the delegation and click Search. The results will be displayed. Click the Select button to the right of the person for whom you are doing the delegation. If the results do not display the person s name, the person is not an Ariba User. Call the IT Help Desk (x42188) to request a new Ariba User ID be created. After you select the Delegate From user from the Search Results the Forced Delegation of Authority e-form will be displayed. If an Active delegation exists on the User profile for the Delegate From User, than a forced delegation change cannot be done. An error message at the field level will be displayed to the requester informing them why they can not continue with this forced delegation. If a delegation exists but is not yet Active, the Delegate TO field will be defaulted to the delegate that the Supervisor has delegated to and will become noneditable. A warning message will be displayed to the user informing them that a future delegation exists and will allow the User to override only the delegation dates. Delegate To - Who will be approving requests for the Delegate From person o Someone who reports directly to the Delegate From User. o The same Approval Level as the Delegate From User. o Should higher up in the COFA o The Delegate FROM and Delegate TO can not be the same person. o can not have an Active delegation associated to their profile. An error message at the field level will be displayed to the requester informing them why they can not select this User as the New Delegate. If the Delegate TO User has a future delegation associated to their profile, than Ariba will still allow this User to be a Delegate TO. Delegate Start Date - defaults to the current day and time. Click the Calendar icon to display the calendar. Select the date on which the delegation will begin. Note: the start date can not be in the past. Delegate End Date - cannot be for more than 30 days. Click the Calendar icon to display the calendar. Select on the date on which the delegation will end. Delegate Reason - must be at least 10 characters.
32 Notification If the Delegate From User wants to continue to get approval s while the delegation is in effect put a Checkmark in the box. Requester automatically defaults to the Ariba User submitting the e-form. Once all the fields are populated, click NEXT at the top or bottom right. The Justify Forced Delegation of Authority page will be displayed after clicking NEXT. Because a reason for delegation was provided on the previous page nothing needs to done on the page unless additional comments are needed. Click Next to display the Approval Flow page.
33 Approval Flow Page The following people need to approve the Forced Delegation of Authority request before it take effect in Ariba: The Delegate From user s Supervisor The Delegate To user If the Delegate To user and the Supervisor of the Delegate From are the same Ariba User, He/she will only appear on the approval flow once (as displayed below) If the Delegate To user and the Supervisor of the Delegate From are two different Ariba Users, the Supervisor of the Delegate From will need to approve the request first and then the Delegate To user will need to approve it. The following people are watchers of the Forced Delegation of Authority request. The Delegate From user The Ariba System Administrator Summary Page The entire Forced Delegation of Authority request is displayed. If any changes need to be made, they can be made at this time. Click Submit at the top/bottom right to submit the request for approval.
34
35 13. How do I order from The Print Shop? All requests for Print Shop items must be submitted through Ariba. To get to Ariba, go to the MySPE Home Page, scroll down to Favorites: Common SPE Applications and click on Ariba to login. If you aren t sure how to login, please reference Ariba FAQ s found under Departments>Corporate>Finance>Procurement>Ariba FAQ s on MySPE. There are three places on the Ariba Home Dashboard Page where a requisition can be created. Create located on the blue Command Bar. Click on it to display the various documents you have the ability to create. Click on Requisition to start a requisition. Create located under Common Actions. Click on Requisition to start a requisition. Catalog located in the Search box. Select Warning! You can only create a Print Shop requisition for one person. A separate requisition is required for an additional person. Click Requisition to start a requisition for the Print Shop.
36 The Summary Page Automatically Send Order to Supplier? - Click Yes. Title Required. The name of your request i.e. Business Cards for John Smith. On Behalf Of Defaults to your own behalf. You also have the option to order on behalf of anyone in the company. The approval flow and accounting information for the requisition is taken from the Use Profile of the person in the On Behalf Of field. If you choose this option and the person has not set their User Profile in Ariba, you are responsible for ensuring that charge to and shipping information is correct. Company Code Defaults to the company code of the user in the On Behalf Of field. If ordering for a different company code, change the code on this page before you punch out to The Print Shop. You will encounter problems if you finish a punchout session and try to change the company code afterward. Click either or to be taken to the Catalog page
37 The Catalog Page will be displayed. Select The Print Shop from the Supplier list at the top left of the screen Click on Personalized Stationery and Business Cards to be taken to The Print Shop website.
38 You are now in The Print Shop website. Choose your division name from the Division Name menu and click Select. Scroll through to choose the correct division name and click Select. Note: If you have trouble punching out to The Print Shop, contact the IT Help Desk at (310) After selecting your division name, a warning appears. Please read the warning and click OK. It is mandatory to input all the indicated information on the Stationery Information form even if you are not ordering personalized stationery. You are responsible for inputting the correct information on this site. Orders will be processed according to the information you have input throughout your session at The Print Shop. Both Ariba and The Print Shop give ample opportunity for you to review the information on your stationery before you submit your requisition. If you have put incorrect information, the department you are charging against will eat the costs of the order.
39 Fill out all required fields as indicated on the Stationery Information form. After you re done, click Next to go to the Product Information page. It is mandatory to fill out all the required fields on the Stationery Information form. It will appear only on personalized stationery. Click Next to go to the Product Information page
40 On the Product Information page, check off the items you want to order and select the quantity. Regular orders take 5 business days to process. Rush orders take 48 hours to process. Check off which items you want to order. Select the quantity you want to order for each item. To continue to the next page, click Place an Order. Click Place An Order to continue. Your order will not be sent to The Print Shop until after you submit your requisition for approval in Ariba and it gets fully approved.
41 Click the View button to view a pdf copy (sample image below) of the items you want to order. Make changes to information that appears on your stationery by clicking the Edit Information button. To change quantities or add more Print Shop items, click the Edit Products button. When you are done editing, click the Approved button next to each item. Next, click Accept to close your Print Shop punchout session and return to Ariba. This is a sample pdf image. Orders to The Print Shop need to be approved by a supervisor. To see who will be approving the request, click the Approval Flow tab. To submit your requisition, click Submit. Ariba will automatically notify the approver of your request via . After being fully approved, Ariba will notify you and send your order to The Print Shop. For questions regarding order status, delivery times, or any product information, please contact The Print Shop at (310) Contact the IT Help Desk at (310) for questions about navigating The Print Shop site.
42 Note: To make more changes to your order before you submit, click the line item description to re-punchout to The Print Shop. Click here to see who needs to approve your requisition. When you are ready to submit your order click Submit. If you are not ready, you can click Exit and Save your work. Clicking the line item description will repunch you out to The Print Shop site to add stationery items, change personalized
43 14. How to order a Non-Catalog Item? If an item is NOT found within the Ariba Catalog or the vendor does not have a catalog in Ariba a NON-Catalog Requisition can be done. On the Ariba Home Dashboard page under Common Actions click on Requisition The Summary page will be displayed. To go directly to the Non-Catalog page, Click on the button.
44 Click on the if you want to be taken to the Catalog Page to search for the item by keywords or supplier part #, search for a particular supplier. When an item is not found in the Ariba Catalog the following page will appear. Click on the Create Non-Catalog Item button to be taken to the Non-Catalog page.
45 Once on the Add Non-Catalog Item page the following fields need to be populated. Full Description - Description of the item you want to order. Master Material Group Used to categorize the goods and/or service. To select a Master Material Group click the drop down arrow next to the Master Material Group field and select from the list or select other to do a search (see second screen shot). Type in the description in the Search field OR use the scroll bar on the right to located the material group. To select the Master Material Group click the select button to the right of the Master Material Group.
46 Material Group It is populated with a drop down menu of products or services found within the Master Material Group selected. Choose the material group that best describes the product or services you require. Tax Usage Code (see next page) This field defaults to Materials: Non-Post Production. This is one of three fields that determine the tax for the purchase order. The other choices for Tax Usage Code are: Electronic Delivery, Material: Post Production, Resale and Service. Click on the drop down and select other to display all the choices. Click on the Select button for the Tax Usage Code you want to use. Vendor This field can be left blank or you can select a vendor. If the field is left blank, a buyer for the Material Group selected will be added on as an approver and will select the vendor. There are several ways to select a vendor: o Type the exact name of the vendor and hit Tab o Type in part of the vendor name and hit Enter o Select a vendor from the dropdown o Click on the drop down and select Search for More
47 If you search for a vendor, the vendor search will be displayed. Type all or part of the Vendor s name in the search field. Click on the Select button that corresponds to your vendor. You will then be taken back to the Non-Catalog page. Supplier Part Number If the supplier has a specific part number that corresponds to the item being ordered the number can be put in this field. Please note that some vendors will not fill the order if this field is not populated. Quantity Defaults to 1 but can be changed to the quantity needed. Unit of Measure Defaults to each but can be changed based off how the item being ordered is packaged.
48 Price Needs to be greater than Click OK add the item to the requisition Once the item is added to your requisition you can add additional items clicking on the Back to Catalog or Add from Catalog button. When you have finished adding items to your requisition click on the Submit button
49 On the Summary page an error message(s) for any required field not populated will appear. Non-catalog item will always have a GL account error. Click on the error message to display the Edit Line Item page. o Mass Edit - If more than one non-catalog line item click on the box above the first line item to select all items and then click Edit. Edit Line Item Page. All fields on this page can be edited. The field(s) that needs to be corrected will be highlighted in Yellow. Line Item Details This section includes the information from the Non-Catalog Item page
50 Accounting by Line Item - this section determines the department that gets billed for the purchase. The information defaults from the accounting information in your Ariba User Profile but can be changed. Account Assignment Defaults to K (Cost Center) for Overhead. Other values are: A (asset), F (Order), P (Project), Y (SPE Corp IT). Depending on the value chosen additional accounting fields may be added. GL Account Choose the value from the drop down or, if the value is not in the drop down, select other and do a search for the value. Cost Center Defaults to what is set in the User s Profile. An additional field for WBS Element will appear if P (Project) is chosen for Account Assignment. In such a case a cost center is not needed. *Any questions regarding accounting information should be directed to your finance department. Split Accounting To assign the charges of the requisition to more than accounting click on the Split Accounting button. a. Split By - The requisition can be split by either Percentage or Quantity. Percentage is the default. To change to Quantity click on the down arrow on the right side of the filed and select Quantity. b. Accounting Information A second set of accounting fields is added to the line item. Select the additional department(s) accounting information
51 c. Add Split To add additional splits in accounting click the Add Split button d. Split Amount Choose the percentage/quantity to be billed to the corresponding accounting string. If splitting by percentage the split amount must equal 100%. If splitting by quantity the split must add up to the total quantity of item ordered. Click OK to be taken back to the Edit Line Item Page. Click Cancel to cancel accounting split. Once back on the Edit Line Item Page the new accounting split will appear under Accounting by Line Item.
52 Shipping by Line Item Where User wants goods/service delivered to. Only the Employee, Bldg, & Room for entire requisition appears on the Checkout page. a. Plant - Physical address of Sony Location. Defaults to what is set in User s Profile but can be changed for each line item. To change click on the drop down arrow and select other. Select the address from the addresses list on the Search page or create a drop ship address. b. Employee, Bldg, & Room Free test field. Make sure that this field includes all three things Employee name, Bldg & Room. The mailroom will not deliver the goods if one of these three is missing. Comments - Optional can be added at the line item level or at the requisition level (see below. Click Ok to return to the CHECKOUT page
53 Shipping of Entire Requisition The employee name, bldg and room number from User s Profile default in. Can be changed. Comments - Any comments to the approvers and/or the supplier/vendor go in the Comments field. Check the box below the Comments field if you want the comments to be included in the purchase order to the supplier/vendor. Add Attachment Click to add a document to the requisition. Approval Flow Tab Click this tab to see the approval flow and to add additional approvers. Click Submit to submit the requisition for approval.
54 14. How do I archive requests from my TO DO box to a Label? To archive requests in the TO DO box, click on View List at the bottom right of the To Do box. Click on the type of request you want to archive. Once the type of request has been selected, the View Request page is displayed. Select the request(s) you would like to archive by placing a check mark in the box to the left of the request(s). Place a check mark in the top box to select all requests. Click Archive to Label to move request(s) to Archive Items or to a New Label.
55 For a New Label, create a name for the label and click OK. The new label is created and the request(s) is moved to the new label. The new label will now appear in the chooser.
56 15. How do I find a request that I have Archived or Assigned to a Label? A Request(s) that has been archived or has a label assigned to it can be found under the SEARCH section of the Dashboard. If the document type (i.e. requisition, AP payment request, etc.) you are looking for has request(s) that has been assigned a label, the labels will appear under Saved Searches/Labels. Select the document type on the left and then the label. The Search page will display the requests, of the document type selected, that were assigned to that particular label.
57 16. How do I Add Attachments to an Ariba Request Complete the e-form and Submit it for approval. Once submitted choose to View the request The Approval Flow tab will be displayed. Click on the Summary tab. Scroll down to the bottom of the Summary Page to the Add Attachment button. Click on the button to display the Add Attachment page.
58 Click on Browse to locate and select the file to attach Click OK to attach the file The file is now added as an attachment to the request. Please note that if you choose to Withdraw and Edit the request before and/or after you have added an attachment, you will not see the Add Attachments button. If editing the request after you ve add the attachment the attachment will still be there BUT you will NOT be able to see it while in editing mode. It will reappear once the request has been Submitted or Saved.
59 ADDING AN ATTACHMENT THROUGH SAVING THE REQUEST Complete the e-form and Exit out of the request. Confirm Exit by choosing to Save this request Go to Recently Viewed. Click on the request that was just saved to open it back up.
60 The Summary page will be displayed. DO NOT choose to edit the request. Scroll down to the bottom of the Summary Page to the Add Attachment button. Click on the button to display the Add Attachment page. Click on Browse to locate and select the file to attach
61 Click OK to attach the file The file is now added as an attachment to the request. Please note that if you choose to Withdraw and Edit the request before and/or after you have added an attachment, you will not see the Add Attachments button. If editing the request after you ve add the attachment the attachment will still be there BUT you will NOT be able to see it while in editing mode. It will reappear once the request has been Submitted or Saved.
Online Requesting and Receiving. Training Manual
 Online Requesting and Receiving Training Manual 1 Table of Contents Introduction 3 Logging In.3 Creating a Profile...3 Modifying a Ship to Address...3 FOAPAL and Commodity Codes 3 Code Favorites...3 Understanding
GATEWAY DESK MANUAL. January 2014
 GATEWAY DESK MANUAL January 2014 University of California, Santa Barbara 3203 Student Affairs and Administrative Services Building (SAASB) Santa Barbara, CA 93106-1150 Vol.1 Christine Griffin and Hannah
ARIBA Contract Management System. User Guide to Accompany Training
 ARIBA Contract Management System User Guide to Accompany Training Technical Training Team 6/29/2010 Table of Contents How to use this Guide... 4 Contract Management Process... 5 ARIBA- Getting Started...
Buyer s Guide Contents
 Buyer s Guide Contents Buyer s Guide... 1 Logging In... 2 Key Concepts... 2 Searching... 3 Product Searching... 3 Supplier Searching... 4 Filling your Shopping Cart... 4 Shopping by Catalog... 4 Shopping
CREATING NON-PO BASED INVOICES IN AGGIEBUY. Click on the Settlement tab in the menu bar to get to the invoice entry screen.
 CREATING NON-PO BASED INVOICES IN AGGIEBUY Click on the Settlement tab in the menu bar to get to the invoice entry screen. 1 Invoice Creation: This is where invoices will begin to be entered. For non-po
Standard Operating Procedure. 1. Purpose
 Division of Financial Affairs Financial Transaction SOP: Purchasing, e-shop SOP Owner: Cornell Procurement Services Version Number, Date Revised: #3, 09/15/2014 Updates: Date Section Change 3/5/2012 Purpose,
State of Connecticut Core-CT Continuing Education Initiative. Introduction to eprocurement
 State of Connecticut Core-CT Continuing Education Initiative Introduction to eprocurement 1 Handout The handout has the same screen shots as the in-class presentation, but has been designed as a Step by
PURCHASING FROM OFFICE SUPPLY QPA 10516
 PURCHASING FROM OFFICE SUPPLY QPA 10516 Menu Navigation: eprocurement Create Requisition Upon navigation you will come to the screen shown below. Notice that the step of process of creating a requisition
eva Purchasing & Banner Receiving Manual
 eva Purchasing & Banner Receiving Manual Compliance Employees are responsible for knowing and complying with established University and State policies and procedures when creating/approving requisitions
Charleston Southern University Procurement Card (P-card) User Guide
 User Guide") Charleston Southern University Procurement Card (P-card) User Guide Index Overview. 3 Concepts. 3 Terms.. 4 Processing cycle... 4 Contacts... 4 Logging in 5 Home Page.. 6 Customizing Columns 7 Email Notification
Charleston Southern University Procurement Card (P-card) User Guide Index Overview. 3 Concepts. 3 Terms.. 4 Processing cycle... 4 Contacts... 4 Logging in 5 Home Page.. 6 Customizing Columns 7 Email Notification
Introduction... 4. Purpose... 4 Scope... 4 Manitoba ehealth Change Management... 4 Icons... 4. RFC Procedures... 5
 Remedy Change Management Version 3.0 Modified: 10/27/2015 Table of Contents Introduction... 4 Purpose... 4 Scope... 4 Manitoba ehealth Change Management... 4 Icons... 4 RFC Procedures... 5 Process Flow
How To Order From A Purdue Shopping Cart
 SRM Purchasing Handbook for Physical Facilities Staff Effective: July 10, 2012 (revised by Daniel Dehn) Table of Contents User Settings (Change my settings) Page 1 Go Shopping Default Settings (Ship to
Approver User Guide. Virginia Tech Electronic Business System. November 8, 2010. Help Line: 540-231-2020 Help Desk: hokiemart @vt.
 Help Line: 540-231-2020 Help Desk: hokiemart @vt.edu Virginia Tech Electronic Business System Approver User Guide November 8, 2010 1 Invent the Future Table of Contents Page Introduction...3 Contact Information...5
Purchase Requisitions Customizing Your Desktop Settings
 Procurement Page 1 Table of Contents Table of Contents... 1 Purchase Requisitions Customizing Your Desktop Settings... 2 Favorite Settings Importing Favorites... 2 Personal Settings... 2 Default Settings
How To Shop In Yomart
 Yo-Mart Training Manual Requestor/Shopper Login url: http://www.appleap.appstate.edu/yomart_home.html You may also access Yo Mart on the Appleap website by clicking on System Access and then Yo Mart Shopping.
Document Services Online Customer Guide
 Document Services Online Customer Guide Logging in... 3 Registering an Account... 3 Navigating DSO... 4 Basic Orders... 5 Getting Started... 5 Attaching Files & Print Options... 7 Advanced Print Options
Table of Contents INTRODUCTION... 2 HOME PAGE... 3. Announcements... 7 Personalize & Change Password... 8 Reminders... 9 SERVICE CATALOG...
 Table of Contents INTRODUCTION... 2 HOME PAGE... 3 Announcements... 7 Personalize & Change Password... 8 Reminders... 9 SERVICE CATALOG... 11 Raising a Service Request... 12 Edit the Service Request...
PEP 4 Georgia First Marketplace (Sciquest)
") This course covers the following objectives 1) Reviewing PEP1-PEP3. 2) Introduction to GA First Marketplace. 3) Marketplace Shopper. 4) Marketplace User/Requester. 5) Enhanced Automatic Approval Workflow.
This course covers the following objectives 1) Reviewing PEP1-PEP3. 2) Introduction to GA First Marketplace. 3) Marketplace Shopper. 4) Marketplace User/Requester. 5) Enhanced Automatic Approval Workflow.
Creating an Expense Report from a Blank Report Form. These instructions are designed for those who do NOT need a Travel Authorization.
 Creating an Expense Report from a Blank Report Form These instructions are designed for those who do NOT need a Travel Authorization. Expense Reports are required for the following reasons: Document all
Steps for Entering an OnBase Purchase Requisition (PR)
") Steps for Entering an OnBase Purchase Requisition (PR) 1. Login to OnBase from BuzzIn. (or Click the Digital Purchase Order link on the InfoPath Forms page and skip to step 5) 2. Click on the drop down
Steps for Entering an OnBase Purchase Requisition (PR) 1. Login to OnBase from BuzzIn. (or Click the Digital Purchase Order link on the InfoPath Forms page and skip to step 5) 2. Click on the drop down
The United States Office Of Personnel Management eopf System Administrator Training Manual for eopf Version 4.0.
 The United States Office Of Personnel Management eopf System Administrator Training Manual for eopf Version 4.0. Copyright 1994-2007 by Northrop Grumman. All rights reserved. Northrop Grumman, the Northrop
University of Alaska Statewide Financial Systems User Documentation. BANNER TRAVEL AND EXPENSE MANAGEMENT TEM (Quick)
") University of Alaska Statewide Financial Systems User Documentation BANNER TRAVEL AND EXPENSE MANAGEMENT TEM (Quick) Travel and Expense Management Table of Contents 2 Table of Contents Table of Contents...
University of Alaska Statewide Financial Systems User Documentation BANNER TRAVEL AND EXPENSE MANAGEMENT TEM (Quick) Travel and Expense Management Table of Contents 2 Table of Contents Table of Contents...
WWW.OFFICEMAXSOLUTIONS.COM Shopping Application Overview
 WWW.OFFICEMAXSOLUTIONS.COM Shopping Application Overview 1. LOGIN... 3 2. GETTING STARTED WITH MANAGE ORDERS... 3 2.1 Creating an order using Create New Order... 4 2.1. Creating an order using Repeat Orders...
Introduction to epro and the GeorgiaFIRST Marketplace
 Introduction to epro and the GeorgiaFIRST Marketplace The content of this presentation was the most up-to-date information available at the revision date. However, policies, procedures and guidelines may
Sole Source Procurement
 Sole Source Procurement A Sole Source Procurement is a purchase made over $5000 without competition when competition is normally required. A Sole Source purchase is justified when there is only one good
eshop Approver Manual
 eshop Approver Manual Table of Contents eshop Overview... 1 What is eshop?... 1 eshop Definitions... 1 eshop Roles... 2 The eshop Procure to Pay Process... 3 eshop Suppliers... 3 Getting Started in eshop...
Claimants and Delegates
 User Guide Contents Chapter 1: Signing In... 1 Chapter 2: My Profile... 4 Chapter 3: Expense Reimbursements... 9 Chapter 4: Submitting Your Receipts... 17 Chapter 5: Advance Requests... 21 Chapter 6: Acting
Kuali Requisition Training
 Kuali Requisition Training From the Kuali Main Menu, click Requisition to start the process of creating a requisition. This Guide covers the tabs that are needed to create a requisition. When creating
IFAS 7i Department Accounts Payable
 IFAS 7i Department Accounts Payable User Guide Version 1.0 October 15, 2009 This document is published by the Harris County Information Technology Center, Education & Career Development Division. Copyright
Invoices arriving into school should be stamped and sent off to Accounts Payable, where they will be scanned into SAP
 SAP Vendor Invoice Management - Guidance for Coders Invoices arriving into school should be stamped and sent off to Accounts Payable, where they will be scanned into SAP You will be notified of invoices
Accounts Payable Invoice Entry Monroe County, WI
 2014 Accounts Payable Invoice Entry Invoice scanners are responsible for entering vendor invoice data and documentation into Munis. This document outlines the procedure of invoice entry and batch scanning.
Table of Contents INTRODUCTION...2 HOME PAGE...3. Announcements... 6 Personalize... 7 Reminders... 9 Recent Items... 11 SERVICE CATALOG...
 Table of Contents INTRODUCTION...2 HOME PAGE...3 Announcements... 6 Personalize... 7 Reminders... 9 Recent Items... 11 SERVICE CATALOG...12 REQUEST...14 Request List View... 15 Creating a New Incident...
eprocurement Training
 eprocurement Training eprocurement Help Desk 206-685-3558 http://www.washington.edu/admin/stores/eprocurement eprocurement Training Guide Ver. 9r1 1 UW eprocurement Website Do the following to access the
3. Windows will automatically select the destination folder for the download. Click Next to proceed with the installation.
 Welcome to the Banner online purchasing system! The Banner Purchasing module allows users to create purchase orders online. This manual will provide you with the information necessary to process and approve
SAP Business Intelligence ( BI ) Financial and Budget Reporting. 2nd Edition. (Best Seller Over 1,000,000 copies sold)
 Financial and Budget Reporting. 2nd Edition. (Best Seller Over 1,000,000 copies sold)") SAP Business Intelligence ( BI ) Financial and Budget Reporting 2nd Edition (Best Seller Over 1,000,000 copies sold) August 2009 Table of Contents Log In... 1 Initial Variable Screen... 4 Fund Center Hierarchy
SAP Business Intelligence ( BI ) Financial and Budget Reporting 2nd Edition (Best Seller Over 1,000,000 copies sold) August 2009 Table of Contents Log In... 1 Initial Variable Screen... 4 Fund Center Hierarchy
eopf Release E Administrator Training Manual
 eopf Release E Administrator Training Manual i The United States Office Of Personnel Management eopf Administrator Training Manual for eopf v5 eopf Version 4.1, July 2007, March 2008, March 2009; eopf
Copyright 2011 Business Management Systems. Web Based ERP/CRM Software
 Web Based ERP/CRM Software INTRODUCTION... 7 Features... 8 Services... 9 INSTALLATION... 10 CUSTOMER FILE... 11 Add Customer... 11 Modify Customer... 13 Add Ship To... 14 Modify Ship To... 15 Reports...
End User Training Guide
 End User Training Guide October 2013 2005-2013 ExpenseWire LLC. All rights reserved. 1 expensewire.com Use of this user documentation is subject to the terms and conditions of the applicable End- User
Studio Designer 80 Guide
 Table Of Contents Introduction... 1 Installation... 3 Installation... 3 Getting started... 5 Enter your company information... 5 Enter employees... 6 Enter clients... 7 Enter vendors... 8 Customize the
Oracle RIFANS. Rhode Island Financial/Accounting System. Agency Payables Version 12 Training Guide
 Oracle RIFANS Rhode Island Financial/Accounting System Agency Payables Version 12 Training Guide TABLE OF CONTENTS 1 Navigation... 3 1.1 Keyboard Shortcuts... 3 1.2 Toolbar Icons... 5 1.3 Navigation Notations...
How To Add Security Roles On Banner Har Account On A Pc Orca (For A Free Download) On A Microsoft Powerbook (For Free) On An Ipa 2.5 (For An Ipad) On Pc Ora (For
 On A Microsoft Powerbook (For Free) On An Ipa 2.5 (For An Ipad) On Pc Ora (For") Banner HR Account Request System Login and Usage: Login: 1. Go to http://accounts.unh.edu 2. Click on the IT Accounts Management System button 3. Login Adding Security Roles After logging in the Home screen
Banner HR Account Request System Login and Usage: Login: 1. Go to http://accounts.unh.edu 2. Click on the IT Accounts Management System button 3. Login Adding Security Roles After logging in the Home screen
MMP QUICK REFERENCE Table of Content
 MMP QUICK REFERENCE Table of Content Glossary.. 2 Accessing MMP... 3 Personalize Your Shopping Profile.. 4 Quick Steps for Creating Shopping Carts & Adding Products Creating and Renaming a Cart.. 4 Adding
University of Alaska Statewide Financial Systems User Documentation. BANNER TRAVEL AND EXPENSE MANAGEMENT TEM (Detail)
") University of Alaska Statewide Financial Systems User Documentation BANNER TRAVEL AND EXPENSE MANAGEMENT TEM (Detail) Travel and Expense Management Table of Contents 2 Table of Contents Table of Contents...
University of Alaska Statewide Financial Systems User Documentation BANNER TRAVEL AND EXPENSE MANAGEMENT TEM (Detail) Travel and Expense Management Table of Contents 2 Table of Contents Table of Contents...
Supply Chain Finance WinFinance
 Supply Chain Finance WinFinance Customer User Guide Westpac Banking Corporation 2009 This document is copyright protected. Apart from any fair dealing for the purpose of private study, research criticism
System Overview Training. MyFloridaMarketPlace System Overview
 System Overview Training MyFloridaMarketPlace System Overview Agenda What is MyFloridaMarketPlace (MFMP)? Logging in to Buyer Dashboard & Navigation User Profile Management Searches Procure to Pay Process
Council of Ontario Universities. COFO Online Reporting System. User Manual
 Council of Ontario Universities COFO Online Reporting System User Manual Updated September 2014 Page 1 Updated September 2014 Page 2 Table of Contents 1. Security... 5 Security Roles Defined in the Application...
Recruiter s Resource Guide
 Recruiter s Resource Guide First Edition 1.29.2015 Contents Section One Recruiting... 3 Accessing Team Georgia Careers... 4 My Setup Preferences... 5 Creating a Requisition... 6 Approving a Requisition...
UW- Green Bay QuickBooks Accounts Receivable User Manual
 UW- Green Bay QuickBooks Accounts Receivable User Manual Table of Contents Topic Page Number Logging into QuickBooks 2 Changing your password. 3 Creating Invoices. 4 Customer Entry/Search. 5-7 Entering
How To Register For A Course Online
 How to Register and Pay for BEST Center Classes Online Welcome to our new online registration system for The BEST Center at Genesee Community College! All of our scheduled noncredit classes are listed
Dell E-Commerce guide for Skyward Users 1
 Dell E-Commerce guide for Skyward Users 1 This document contains instructions on how to use the e-commerce application running on Skyward s Business Suite to purchase from your Dell Premier Page. E-Commerce
Federal Program Office (FPO) User Manual
 User Manual") Federal Program Office (FPO) User Manual System Navigation NOAA Grants Online Program Management Office August 2015 Table of Contents Overview... 5 Accessing Grants Online... 5 Grants Online Navigation
Federal Program Office (FPO) User Manual System Navigation NOAA Grants Online Program Management Office August 2015 Table of Contents Overview... 5 Accessing Grants Online... 5 Grants Online Navigation
NEW USER REGISTRATION AND EMAIL VERIFICATION
 NEW USER REGISTRATION AND EMAIL VERIFICATION The Children s Treatment (CT) or Residential Treatment (RT) organization must have an assigned Departmental Vendor Number (DVN), a PIN number issued to the
MANAGER SELF SERVICE USER GUIDE
 MANAGER SELF SERVICE USER GUIDE FEBRUARY 2016 Contents Note: If using this guide electronically the contents are hyperlinked to each section. Introduction... 2 Using This Manual... 2 Signing in to Workday...
MySupplier Portal. MySupplier Portal is the new standard method for contacting Pitney Bowes Accounts Payable. https://ap.mysupplierportal.
 MySupplier Portal Pitney Bowes is pleased to announce a new service for our suppliers. Our new Supplier Portal enables companies who supply Pitney Bowes with goods or services to view invoice status over
AdventNet ManageEngine SupportCenter Plus :: User Guide. Table Of Contents INTRODUCTION... 3 REQUEST... 4. Creating a New Request...
 Table Of Contents INTRODUCTION... 3 REQUEST... 4 Creating a New Request... 5 Quick Create...5 Contact Details...5 Classifying Request Category...5 Prioritizing Request...6 Describe Request...6 Add Attachments
Finance Office. Related Website: https://www.wellsfargo.com/com/
 Finance Office Related Website: https://www.wellsfargo.com/com/ Table of Contents Introduction... 3 Cardholder Responsibility... 3 Getting Started... 3 Login... 3 Creating a New Pass Phrase... 4 Answering
OSP User Guide. 1 P a g e
 Online School Payments (OSP) User Guide February, 2014 OSP User Guide Table of Contents Overview...3 Site Information...3 Login to Portal...4 Activity Setup...6 OSP Activity Setup Form...6 Add Activity...7
Requisitioner User Guide
 Requisitioner User Guide Document Last Updated March 25, 2013 1 Table of Contents Requisitioner... 1 Objectives... 3 Overview of BEN... 4 Glossary of Terms... 6 Requisition vs. Purchase Order... 10 Hierarchies...
SAP User Guide Create Purchase Orders
 IT Services Leicester Learning Institute Partnership SAP User Guide Create Purchase Orders Document Purpose This guide explains how to create a Purchase Order on SAP. This guide is not for staff in Chemistry
Government buyer user manual System Requirements and Administration Version 2.0
 Queensland Government etendering website Government buyer user manual System Requirements and Administration Version 2.0 July 2011 etender Help Desk phone 07 3836 0141 Table of contents 1 Introduction...
Reference Document. SedonaOnline Support
 Document Overview This document is being provided to explain how to request a SedonaOnline password and how to use SedonaOnline to submit and view Support Tickets. Our company utilizes the SedonaOffice
2013 EDITION. V-Camp Student. Guide. INTERACTIVE GUIDE Use the buttons shown below to navigate throughout this interactive PDF BACK
 V-Camp Student Guide INTERACTIVE GUIDE Use the buttons shown below to navigate throughout this interactive PDF BACK 03 EDITION V-Camp Student Guide Table of Contents Unit : Table of Contents...iii How
BW Reporting Rev. December, 2013
 BW Reporting 0 Rev. December, 2013 1 Logistics Course Length Breaks Restrooms Cell Phone Etiquette Emergency Evacuation Procedures 2 Course Contents Objectives Course Overview BW Reporting & Exercises
Paper handouts of the SRM Shoppers presentation will not be provided. Downloads are available @ www.uky.edu/purchasing
 Supplier Relationship Management Shopper MM_SRM_SHO_300 SRM Goes GREEN Paper handouts of the SRM Shoppers presentation will not be provided. Downloads are available @ www.uky.edu/purchasing 2 Definition
Wrightstown School District
 Wrightstown School District Overview E-help desk gives you the ability to create your own Help Desk tickets. It also allows you to be able to check the status of your requests, and add updates (comments)
eprocurement Training
 eprocurement Training eprocurement Help Desk 206-543-4500 https://f2.washington.edu/fm/ps/ 1 Access eprocurement Do the following to access the Ariba system: 1. Login into the UW eprocurement website at
CONTRACT MANAGEMENT SYSTEM USER S GUIDE VERSION 2.7 (REVISED JULY 2012)
") CONTRACT MANAGEMENT SYSTEM USER S GUIDE VERSION 2.7 (REVISED JULY 2012) VERSION 2.6 (REVISED APRIL 2012)... I INTRODUCTION... 5 Helpful Hints... 5 Pop-Up Blockers... 5 Users... 6 CPUC Staff Administrator...
CONTRACT MANAGEMENT SYSTEM USER S GUIDE VERSION 2.7 (REVISED JULY 2012) VERSION 2.6 (REVISED APRIL 2012)... I INTRODUCTION... 5 Helpful Hints... 5 Pop-Up Blockers... 5 Users... 6 CPUC Staff Administrator...
ACCELLOS HELPDESK CUSTOMER GUIDE
 ACCELLOS HELPDESK CUSTOMER GUIDE Version: 2.0 Date: December 2011 Copyright Accellos, Inc. All rights reserved The information contained in this document is confidential and is intended only for the persons
Helpdesk manual. Version: 1.1
 Version: 1.1 Date: 06-May-2014 Introduction Once a new system has been delivered, or an update has taken place, issues could occur, questions raised and new functionality needed. You can register these
I Expense Online Expense submissions For fulltime Faculty & Staff Revised: Sept 2013
 I Expense Online Expense submissions For fulltime Faculty & Staff Revised: Sept 2013 Table of Contents I-EXPENSE PROCESS... 1 IEXPENSE - LOGIN... 3 NAVIGATING THE I-EXPENSE HOME PAGE... 5 Expenses Home
Procurement Card System User's Guide
 Procurement Card System User's Guide The Dartmouth Procurement Card (P-Card) System is a Web-based application that is accessed through the Internet. Roxanne Zola is the primary contact for P-Card questions
In partnership with. PO Convert User Guide - Service-Type Purchase Orders
 In partnership with PO Convert User Guide - Service-Type Purchase Orders Imperial College phases out paper invoices with electronic invoicing Imperial College London has implemented a series of changes
University of Rochester LISTSERV. List Owner s Guide: Instructions for Self Service
 University of Rochester LISTSERV List Owner s Guide: Instructions for Self Service University of Rochester LISTSERV Access via: https://lists.rochester.edu Revised June 2014 TABLE OF CONTENTS About this
Welcome to PowerClaim Net Services!
 Welcome to PowerClaim Net Services! PowerClaim Net Services provides a convenient means to manage your claims over the internet and provides detailed reporting services. You can access PowerClaim Net Services
USER GUIDE - May 2010
 USER GUIDE - May 2010 Login...2 Browse.................................................................. 3 By Product Type By Manufacturer Search....4 By Keyword Via Quick Find Via Quick Order Search Results
Big Lots Vendor Compliance Web Portal User Guide - Vendor
 Big Lots Vendor Compliance Web Portal User Guide - Vendor https://visibility.inovis.com/dataquality/xclient/biglots 1. To login to the system for the first time: Open the New User Notification Invite e-mail
Frequently Asked Questions About Applying for a Job at. Georgia Transmission Corporation
 Frequently Asked Questions About Applying for a Job at Georgia Transmission Corporation Searching/Reviewing Jobs What if the system returns no results when I do a keyword search or select a specific job
Working with Purchase Orders
 Ariba Network Working with Purchase Orders Document Version: April 2013 Copyright 1996 2013 Ariba, Inc. All rights reserved. This documentation, as well as the Ariba software and/or services described
User Manual for Web. Help Desk Authority 9.0
 User Manual for Web Help Desk Authority 9.0 2011ScriptLogic Corporation ALL RIGHTS RESERVED. ScriptLogic, the ScriptLogic logo and Point,Click,Done! are trademarks and registered trademarks of ScriptLogic
Ariba Network Quick Start Guide for Suppliers
 Ariba Network Quick Start Guide for Suppliers Table of Contents Managing Roles and Users...3 Creating a Role... 3 Creating a User... 5 Modifying a User... 7 Account Configuration...8 Company Profile...
Sanford B2B Samples. Online Order Process www.sanfordb2bsamples.com. December 30, 2010
 Sanford B2B Samples Online Order Process www.sanfordb2bsamples.com December 30, 2010 Welcome to SanfordB2BSamples.com 2 Opening a new account 1. Enter the email address you would like to use for your account.
Contents INDEX...61 ECRM...1
 ecrm Guide 111011 2011 Blackbaud, Inc. This publication, or any part thereof, may not be reproduced or transmitted in any form or by any means, electronic, or mechanical, including photocopying, recording,
Online Scheduling Instructions
 Online Scheduling Instructions 1. First, you will need to create a user account. Go to: https://emsweb.ad.siu.edu/virtualems/ a. Click on My Account, then scroll down to create an account. b. Fill out
Tully-Wihr Online User Guide
 Tully-Wihr Online User Guide Version 2.1 Revised 7/06/2011 Questions: [email protected] Contents Tully-Wihr s Web Page / Login...3 New User Registration...4 Shipping Specifications...5 Search Features...6-7
Document Information, Statuses & Exceptions in Ariba
 This document will provide information that explains each screen view in Ariba based upon the document type accessed. Within each document type there are different tabs that can be accessed that give you
DarwiNet Client Level
 DarwiNet Client Level Table Of Contents Welcome to the Help area for your online payroll system.... 1 Getting Started... 3 Welcome to the Help area for your online payroll system.... 3 Logging In... 4
Connect Ticket Entry. Quick Reference Guide
 Connect Ticket Entry Quick Reference Guide Davisware 514 Market Loop West Dundee, IL 60118 Phone: (847) 426-6000 Fax: (847) 426-6027 Contents are the exclusive property of Davisware. Copyright 2015. All
Intellect Platform - The Workflow Engine Basic HelpDesk Troubleticket System - A102
 Intellect Platform - The Workflow Engine Basic HelpDesk Troubleticket System - A102 Interneer, Inc. Updated on 2/22/2012 Created by Erika Keresztyen Fahey 2 Workflow - A102 - Basic HelpDesk Ticketing System
Ariba Network Invoice Guide
 Ariba Network Invoice Guide Content Introduction Invoice Practices Before you Begin Invoicing Customer Invoicing Rules Electronic Invoice Routing Configure Remittance Configure Invoice Notifications Creating
CPSM MEDITECH 5.67. Inventory Inquiries
 CPSM MEDITECH 5.67 Inventory Inquiries Contents CPSM Inventory Inquires... 2 Stock Inquiry... 2 Select... 11 Item Inquiry... 16 Purchase Order Inquiry... 32 Check Purchase Order Number... 38 View Vendor
How To Log On To The Help Desk On Manageengine Service Desk Plus On Pc Or Mac Or Macbook Or Ipad (For Pc Or Ipa) On Pc/ Mac Or Ipo (For Mac) On A Pc Or Pc Or Mp
 On Pc/ Mac Or Ipo (For Mac) On A Pc Or Pc Or Mp") Service Desk Plus: User Guide Introduction ManageEngine ServiceDesk Plus is comprehensive help desk and asset management software that provides help desk agents and IT managers, an integrated console to
Service Desk Plus: User Guide Introduction ManageEngine ServiceDesk Plus is comprehensive help desk and asset management software that provides help desk agents and IT managers, an integrated console to
Student Manager s Guide to the Talent Management System
 Department of Human Resources 50 Student Manager s Guide to the Talent Management System 1 Table of Contents Topic Page SYSTEM INTRODUCTION... 3 GETTING STARTED... 4 NAVIGATION WITHIN THE TALENT MANAGEMENT
AP WORKLIST END USER GUIDE
 AP WORKLIST END USER GUIDE Initial release June 2007 Version 1.1 (released December 2007) Link to Purchase Order information E-mail notification Profile option Version 1.2 (released May 2008) Comments
Step-by-Step Guide Using Hosted Catalogs for Shopping in CU Marketplace
 In This Guide This guide discusses the hosted catalog shopping process. Topics covered are: Hosted catalog definition Procedure for hosted catalog shopping Hosted catalog shopping process cycles Procedure
The United States Office Of Personnel Management eopf Human Resources Specialist Training Manual for eopf Version 4.0.
 The United States Office Of Personnel Management eopf Human Resources Specialist Training Manual for eopf Version 4.0. Copyright 1994-2007 by Northrop Grumman. All rights reserved. Northrop Grumman, the
Table of Contents 1. Contents...1
 Table of Contents 1. Contents...1 1.1 Introduction/Getting Started...1 1.1.1 Creating an Account...1 1.1.2 Logging In...2 1.1.3 Forgotten Password...2 1.1.4 Creating a New Project...3 1.2 My Projects...3