CATIA Team PDM. Preface Getting Started Basic Tasks Advanced Tasks Index. Dassault Systèmes All rights reserved.
|
|
|
- Clifton Nichols
- 10 years ago
- Views:
Transcription
1 CATIA Team PDM Preface Getting Started Basic Tasks Advanced Tasks Index Dassault Systèmes All rights reserved.

2 Preface Overview of PDM The Need Next to people, information is your company's most important resource. However, many companies are realizing that they have become so overwhelmed with the volume of data that need to be stored and managed that they need to find comprehensive solutions to overcome their data disorganization. This problem is particularly acute in CAD design shops, where many complex designs and documents undergo several stages of revision as part of their development cycle. Incorrect revision of outdated designs results in the need for additional changes later in the design process. As your company grows, so do the number of designs, specifications and proposals that are created in the course of project development, and over a project's entire life cycle. Organizing and managing these designs in a secure database is of primary importance. In addition, designers and engineers need to ensure that the correct revision of a part is correctly identified and used during the design stages of a project. What are the designer's Design Tasks? The Design Engineer tasks are varied and manifold. The high-pressure world of marketplace deadlines requires the design engineer to work efficiently and effectively in accomplishing his or her engineering goals. CATIA is a mechanical CAD application that provides the means to accomplish the design engineer's primary tasks: To create new parts To assemble component parts into a complete assembly To create drawings What are the basic Data Management tasks? The engineer designs, redesigns, and ultimately releases documents during the life cycle process. All of these documents must be managed during all stages of their development and undergo three basic Data Management tasks: File Management: Any file transaction where you save or retrieve any information from a library, a file manager or a database. Revision Management: The tracking of the change process and maintenance of versions during the document's lifetime. Acceptance and Release: Accepting a design and authorizing its use for production. The Solution: PDM Product Data Management (PDM) enables engineers to manage their documents during all stages of their development. Using PDM, you should be able to manage your documents electronically to maintain, access and modify designs and technical related documents quickly, securely and cost effectively. A PDM should include the following requirements: Electronic data storage and management Flexible file organization Support of multiple file formats

3 Document security Timely access to information Workflow automation CATIA - TeamPDM is a product data management solution that aids the engineer in integrating and synthesizing the multitude of process events into two fundamental tasks: Design Tasks Data Management Tasks Design Tasks As the engineer designs Parts, Products, Drawings, the engineer can use the CATIA - TeamPDM options to enhance the CATIA capabilities. For example: The Insert Component option enables the engineer to insert an existing Part or Product into a new Assembly as a component. Data Management Tasks During the Data Management Process, the designer is required to perform activities such as searching, copying, linking, or viewing documents. These sub-tasks are supported in CATIA - TeamPDM. The example below illustrates CATIA - TeamPDM' convenient support for the various data management sub-tasks. A designer can view, check revisions, and perform many other activities by clicking one of the tabs provided. He can then evoke the dropdown menu to begin the editing process. Using CATIA - TeamPDM, the engineer functions within an open environment, that is, being able to manage all engineering data within the CATIA environment. The CATIA - TeamPDM functionality is deeply integrated and eliminates the time-consuming and bureaucratic process of opening and closing external software in order to perform design and data management tasks. The example below demonstrates the power of CATIA - TeamPDM functionality:

4 FIND SELECT OPERATION

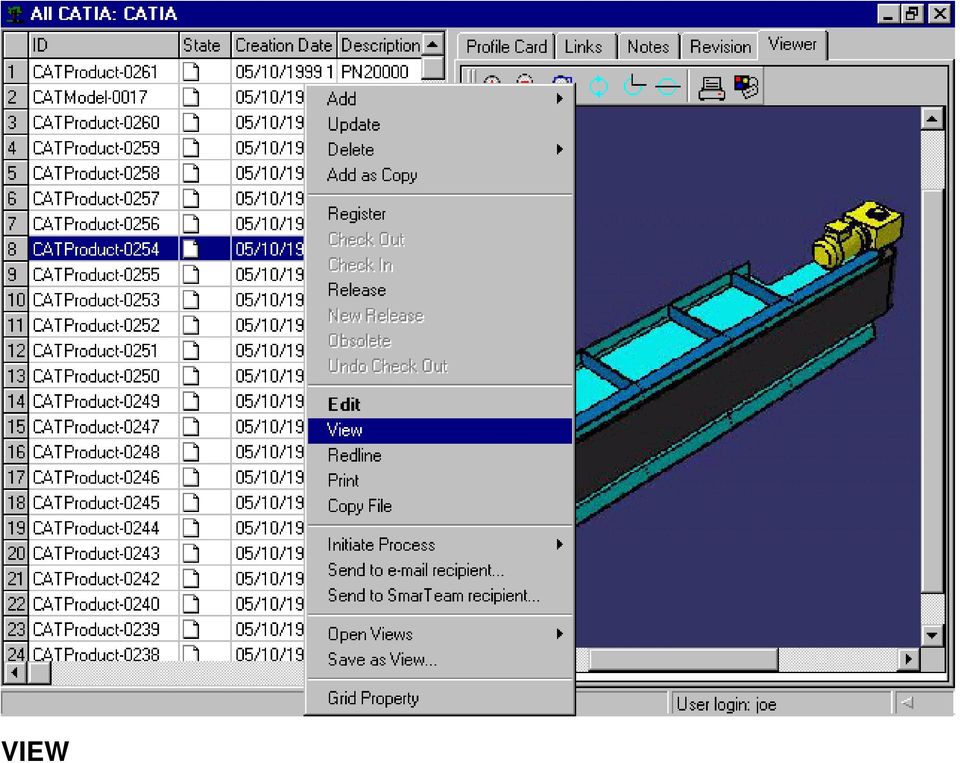
5 VIEW
6 What Is CATIA - TeamPDM? CATIA - TeamPDM is a seamless, integrated, "rapidly implementable" drawing and document management tool for users of CATIA. It gives you the power to manage your Parts, Products and Drawings easily, effectively and affordably, and provides powerful functions to assist you in building Assemblies. The CATIA - TeamPDM product data management solution (PDM) is designed to give you the tools to create, edit, view and control CATIA documents, in an intuitive and friendly way. CATIA - TeamPDM is a revolutionary "rapidly implementable" PDM solution. This philosophy stands behind the product and enables users to install, set up and implement a full fledged Product Data Management solution very easily and rapidly, while maintaining a broad spectrum of functionality. CATIA - TeamPDM streamlines the flow of documents through an organization's business process, thereby promoting communication, cooperation and teamwork. CATIA - TeamPDM provides a process-oriented approach which enables individuals to work together as a team throughout a product's life cycle. CATIA - TeamPDM comes with a complete database structure designed specifically for CATIA. It also provides CATIA users with the ability to perform advanced searches, maintain revisions and preview documents without opening the application that created them.

7 Features and Benefits The seamless integration between CATIA and CATIA - TeamPDM enables the CATIA users to streamline their workflow in the following manner: Browse through any CATIA - TeamPDM window to view a hierarchical listing of CATIA - TeamPDM documents. View the Profile Card of any document. The Profile Card displays file information, revision information, linked documents as well as thumbnail images of the Part, Product or Drawing. Perform searches to locate any document saved in the CATIA - TeamPDM database Create and save Assemblies. Links are automatically created between the components of an Assembly to reflect their composition in CATIA. During revision management, the integrity of the Assembly and its components is easily maintained. You can view and access these links in the Links page of the Profile card. Where Used links list all the parents of a document. These links are extremely useful in locating all the Assemblies in which a specific Part is used. Composed of links list all the children of a document. For example, it lists all the sub-assemblies (Parts and Drawings) of an Assembly. Create and save Drawings. Links are automatically created between the Drawing and the Part/Product on which it is based. During revision management, the integrity of the revisions is easily maintained. CATIA - TeamPDM Design Environment The CATIA - TeamPDM design environment provides engineers with quick and easy access to the powerful CATIA - TeamPDM tools. The SmarTeam menu provides powerful functionality and enables you to perform the following CATIA - TeamPDM operations. Locate Component Displays the Profile Card of the selected component. Where Used Displays a list of the parents of the document. Check Out Enables you to check out the document from the vault. Check In Enables you to check in the document to the vault. A copy of the document remains at your desktop (in read-only mode). Release Enables you to release your document, thereby checking it into the Released vault. A copy of the document remains at your desktop (in read-only mode). New Release Enables you to check out a new release version of your document from the Released vault. Open Opens the selected Part or Product in a CATIA single Part/Product window. CATIA - TeamPDM icons are displayed in various CATIA - TeamPDM windows. Each icon displays the state of the document and additional information as follows:

8 The following table describes the CATIA - TeamPDM icons: Icon Name Description New New By Other Checked Out Checked Out By Other Checked In Checked In, Not Latest Checked In, Under Operation Released Released, Not Latest Released, Under Operation Obsolete A document has been saved but not yet registered. A document has been saved, and it has not yet been registered. The document is currently being modified A document has been checked out. Its current state is Being Modified A document has been checked out. Another user has copied it to his or her desktop A document has been checked in to the vault. Its current status is Being Modified A document has been checked in to the vault, but a later version of the document exists A document has been checked in to the vault. Another version of the document is being modified A document has been checked in to the Released vault. Its current status is Released A document has been checked in to the Released vault, but a later version of the document exists. A document has been checked in to the Released vault. Another version of the document is being modified. A document has been moved to the Obsolete vault.

9 Preferred Road Maps This book is intended to the user who needs to become quickly familiar with CATIA - TeamPDM product. The user should be familiar with basic CATIA Version 5 concepts such as document windows, standard and view toolbars. To get the most out of this guide, we suggest you start reading Getting Started. Then we suggest you reading the Basic Tasks.

10 Where to Find More Information Prior to reading this book, we recommend that you read the CATIA - Infrastructure User's Guide

11 Getting Started CATIA - TeamPDM provides the tools that allow the engineer to effortlessly add Parts and Products to the engineering database. These tools are in-process and keep you in the design environment at all times. This chapter provides brief instructions for adding Parts and Products to the CATIA - TeamPDM database, locating documents and launching them into CATIA. In order to use the CATIA - TeamPDM features, don't forget to log in using your login name and password as registered by the system administrator. Demo users should log in as joe (case sensitive) with no password.. Task

12 Quick Overview Each time you create a Part or Product in CATIA, the Part or Product should then be saved in the CATIA - TeamPDM database. After the Part or Product is saved in CATIA - TeamPDM, you can use all the CATIA - TeamPDM features to store and control the documents. The CATIA - TeamPDM (SmarTeam)integrated menu provides two methods for saving documents: Save: Saves the document into the CATIA - TeamPDM database. Save As: Saves the document into the CATIA - TeamPDM database. and Defines the project and the parent folder of the document. For example, you can save the new Part as a child of the Standard Parts folder in the Convoyer project. After you save a new Part or Product: A CATIA - TeamPDM window is automatically displayed which shows the new document that has been added to the CATIA - TeamPDM database.

13 Adding Parts and Products to the CATIA - TeamPDM Database This section provides brief instructions for adding new and existing Parts/Products to the CATIA - TeamPDM database. The first time a Part/Product is added to the database, a Profile Card for the Part/Product is created, and you can fill in the attributes of the document. Each subsequent time that you save the Part/Product, the Profile Card is updated accordingly. In order to use the CATIA - TeamPDM features, don't forget to log in using your login name and password as registered by the system administrator. Demo users should log in as joe (case sensitive) with no password. After a Part/Product is added to the CATIA - TeamPDM database, you can use the many CATIA - TeamPDM features to manage your documents.

14 Adding a New Part to CATIA - TeamPDM After you create a new Part in CATIA V5, you should save it to the CATIA - TeamPDM database. 1. Create a new Part in CATIA. 2. From the SmarTeam menu, choose Save. 3. A CATIA Save As window appears. Name the file and click Save. 4. A CATIA - TeamPDM Save As window appears. In this window you can define the project and the parent to which the document belongs. If this window is not displayed, your administrator has disabled it. You can define a project and parent for the document by choosing the Save As option. Choose a project. The Part will be saved as a document in the selected project. Choose a parent folder. The Part will be saved as a child of the selected folder in the selected project. The CATIA file name is displayed. Click Save. 5. A Part Profile Card is displayed in which you can add relevant information. Enter a name for the Part in the Description attribute. Select the tabs to review default information about the file. 6. Click OK. CATIA - TeamPDM automatically saves your file into the database, giving it a unique identity, where it can be easily found for later use. 7. If you want to register the document: From the SmarTeam menu, choose Register. The Register window is displayed. Fill in the fields (optional) and click OK.

15 The CATIA window is closed and the document is registered and placed into the SmarTeam vault. To check the document out or copy its file to your desktop, refer to "Checking Out and Checking In a Document".

16 Checking Out and Checking In a Document After a Part is registered, you must check it out in order to modify it. You may then check it back into the vault for safekeeping. You also have the option of copying the file to your desktop. You can view the Part, but you cannot modify it. You may then check it out at a later time (Refer to "Copying Documents To Your Project Desktop" for details). 1. From the SmarTeam menu, run a search to locate the document (Refer to "Where's the Right document?" for details). 2. Right-click on the document and click Edit. A window is displayed prompting you to check out the document. Click OK. 3. In the displayed Check Out window, fill in the fields and click OK. The document is then displayed at your desktop and you may modify it. 4. When you have completed your modifications, choose the Save option from the SmarTeam menu. 5. Then, check the document back into the vault for safekeeping: From the SmarTeam menu, choose Check In. Fill in the fields and click OK. Your document is checked in to the vault and a copy of it remains at your desktop. 6. If you wish to check out the document again, choose Check Out item from the SmarTeam menu.
. 2. Right-click on the document and click Edit.")
17 Copying Documents To Your Project Desktop Instead of checking a document out of the vault, you can copy it to your project desktop. The document is then displayed at your desktop in read-only mode. 1. Run a search to locate your document. (Refer to "Where's the Right Document?" for details). 2. Right-click on the document and choose Copy File. The file is copied to your desktop in read-only mode. 3. You can then check out the document in order to modify it, as follows: Select Check Out item from the SmarTeam menu. Fill in the fields in the Copy File window (optional) and click OK. The desktop is refreshed and you can now modify the document.

18 Adding an Existing Part to CATIA - TeamPDM You may just want to add a file that already exists in CATIA Open a Part into CATIA using the CATIA File menu or the folder icon on the tool bar. The Part is displayed in the CATIA V5 window. From the SmarTeam menu, choose Save. A CATIA - TeamPDM Save As window appears. In this window you can define the project and the parent to which the document belongs. A Part Profile Card is displayed in which you can add relevant information. It is recommended to enter a name for the Part in the Description attribute. Select the tabs to review default information about the file. Click OK. CATIA - TeamPDM automatically saves your file into the database, giving it a unique identity where it can be easily found for later use.

19 Saving a Part Again Each time you modify a Part in CATIA, you should save the Part using the CATIA - TeamPDM Save (or Save As) option: Click Save: The Part is saved in the CATIA - TeamPDM database, with all its modifications. Its Profile Card is not displayed at this time. Click Save As: The CATIA - TeamPDM Save As window is displayed. In this window, you can define hierarchical links for the Part, namely the project and parent to which the Part belongs. The Part (together with its new hierarchical links) is saved in the CATIA - TeamPDM database. 1. Open an existing Part in CATIA. 2. You can run a search to locate the Part and then launch it directly into CATIA V5, as described in "Launching a Document". From the SmarTeam menu, choose Save. The Part is saved in CATIA - TeamPDM and its Profile Card is updated accordingly. or Choose Save As. The CATIA - TeamPDM Save As window is displayed. Choose a project. The Part will be saved as a document in the selected project. Choose a parent folder. The Part will be saved as a child of the selected folder. Click Save. The Part (together with its hierarchical links) is saved in CATIA - TeamPDM and its Profile Card is updated accordingly.
 is saved in the CATIA - TeamPDM database. 1. Open an existing Part in CATIA. 2.")
20 Adding a New Assembly to CATIA - TeamPDM Adding an Assembly to the CATIA - TeamPDM database is similar to adding a Part. 1. Display the Assembly in CATIA. 2. From the SmarTeam menu, choose Save A CATIA Save As window appears. Name the file and click Save. A CATIA - TeamPDM Save As window appears. In this window you can define the project and the parent to which the document belongs. Choose a project. The Assembly will be saved as a document in the selected project. Choose a parent folder. The Assembly will be saved as a child of the selected folder The CATIA file name is displayed. Click Save. A Product Profile Card is displayed in which you can add relevant information. Enter a name for the Product in the Description attribute. By default, this attribute is displayed in the Data Manager tree along with the ID number. Select the tabs to review default information about the file. Click OK. CATIA - TeamPDM automatically saves your Product into the database, giving it a unique identity where it can be easily found for later use. In the CATIA - TeamPDM tree hierarchy, all the components of the Assembly are linked as components (children) of the Product. This

21 7. hierarchical link reflects the structure of the Assembly as designed in CATIA. If the components of the Assembly have not yet been saved into CATIA - TeamPDM, a Profile Card for each component is displayed, one by one. In each Profile Card, name the component (in the Description field) and click Add to save the new Parts/Products into the CATIA - TeamPDM database. For example: If a Product has 3 Parts as its components, and these components have not yet been saved in CATIA - TeamPDM, a Profile Card for each Part is displayed.
22 Adding a Product Using the Batch Method The above method could be very time consuming when saving large assemblies. For this reason, CATIA - TeamPDM provides you with a batch method for saving assemblies. The Batch Mode Save does not display a Profile Card during a SmarTeam Save operation. Instead, each component is saved in the CATIA - TeamPDM database with a unique ID number. At a later time, you can open a Profile Card for a component and enter information in the attribute fields. 1. Display the Assembly in CATIA. 2. From the SmarTeam menu, choose Batch Mode Save. A checkmark is displayed to the left of the Batch Mode Save option. This action toggles between a Batch Mode Save and a regular Save. 3. From the SmarTeam menu, choose Save. The Assembly and its components are saved into the CATIA - TeamPDM database.
23 Modifying CATIA Parts and Products As you design Parts and Products in CATIA, you often need to modify an object again and again. It is essential to locate the right document; often a time-consuming task. CATIA - TeamPDM enables you to locate a document and launch it into CATIA quickly and easily. The following steps illustrate how CATIA - TeamPDM can assist you in locating and launching documents: In addition, CATIA - TeamPDM enables you to locate all the parents of any document (using the Where Used option). Refer to "Where Has This Part/Product Been Used?" for details. This is particularly helpful when working with large Assemblies with many components.
24
25 Where's the Right Document? Finding a Document CATIA - TeamPDM search tools enable you to find the exact Part or Product that you wish to modify From the SmarTeam menu, point to Find and choose Find Document... The Search Editor window is displayed. Select one of the predefined searches or create a new search. To create a new search: Point to Add and choose By Attribute. In the displayed Search Details window: Choose a class of documents In the right side of the window, define search words in one or more attribute fields. Click Save As... Enter a name for the search. 4. Click Run. CATIA - TeamPDM searches for the documents that match the search criteria and displays these documents in a list.
26 Launching a Document Now that you've located the documents that match the search criteria, you can browse through the list of documents. You can view the Profile Card for each document as well as a thumbnail image of each. When you locate the exact document that you wish to modify, launch it into CATIA. Modify the Part/Product in CATIA and then save it again (using the SmarTeam Save option). 1. In the search results list, select a document to view its Profile Card. 2. Right-click on a document to display a dropdown list of options and choose Edit. The document is launched into CATIA If the document is checked into a vault, you must check it out of the vault in order to open it in CATIA V5. A message is displayed prompting you to check out the document. Click OK. In the displayed Check Out window, click OK to check the document out of the vault. The document is then launched into CATIA. Modify the Part/Product in CATIA. From the SmarTeam menu, choose Save to update the Profile Card and save the document in the CATIA - TeamPDM database.
27 Where Has This Part/Product Been Used? When you open a Part or Product in CATIA, it is essential to keep track of all the Assemblies that use this particular document as a component before you begin to modify the Part/Product. CATIA - TeamPDM enables you to locate all the parents of any document (using the Where Used option). This is particularly helpful when working with large Assemblies with many sub-products and Parts as components. When you choose the Where Used option, CATIA - TeamPDM displays a window which lists all the parents of the document. You can then browse through the list to view the parents (Assemblies) of the Part/Product, and you can launch any of these documents into CATIA. 1. Display a Part/Product in CATIA. Remember you can launch any document using the CATIA - TeamPDM Edit option. 2. Choose Where Used item in the SmarTeam menu. A Where Used window is displayed listing all the parents of the Part. 3. You can browse through the list to view the Profile Card of each document. You can also right-click on a document and choose Edit to launch the document into CATIA.
28 Basic Tasks Theme
29 Working with Projects The CATIA - TeamPDM data structure organizes all data around projects in order to assist you to browse through the data and locate specific Parts, Drawings or Products. Projects are the highest class in the CATIA - TeamPDM data structure and are used to represent a product idea or concept. Each project has its own Documents tree browser which displays all the documents associated with the project in a hierarchical structure, including the CATIA documents and related documentation (such as spreadsheets and Word files).
30 Organizing Projects In general, projects are organized into folders to organize the documentation. When you begin a project, you create folders and link these folders directly to the project. When you save CATIA Parts and Products, you can save these documents into specific folders. The CATIA - TeamPDM Documents tree displays a visual representation of the hierarchy, as shown below: In the example above, the folders are the highest level in the hierarchy, directly linked to a project. The CATIA documents and associated documentation are linked as children of the folders. Each document is represented by an icon. As you save Parts, Products and Drawings into the CATIA - TeamPDM database, you can save each document as a child of a specific folder. In this manner, all your documents are organized into folders and all the folders are linked to a project.
31 Viewing Documents in a Project CATIA - TeamPDM enables you to save documents into a project desktop, thereby linking these documents to the selected project. Note: When you choose the SmarTeam Save option (or Save As option) check the Link to project desktop checkbox in the Object Attributes window. When you choose the Locate Active Document option from the SmarTeam menu, the document is displayed in a Data Manager window. The Project Desktop icon displayed to the left of the document name shows you that the document is linked to a project, as shown below. You can then view the projects to which the document is linked by clicking the Projects tab in the Links page of the displayed Profile Card.
32
33 Saving Documents Each time you create a new CATIA Part or Product, the document should be saved into the CATIA - TeamPDM database. You can then use the many powerful tools offered by CATIA - TeamPDM to properly manage your documents.
34 CATIA - TeamPDM Save Options The CATIA - TeamPDM integrated menu provides two methods for saving documents: Save: Saves the document into the CATIA - TeamPDM database. Save As: Saves the document into the CATIA - TeamPDM database. and Defines the project and the parent folder of the document. For example, you can save a new Part as a child of the Standard Parts folder in the Convoyer project. After you save a new Part or Product: A CATIA - TeamPDM window is automatically displayed showing the new document that has been added to the CATIA - TeamPDM database. You do not need to fill in the description field in the Profile Card : by default, CATIA - TeamPDM will use the current name of the document.
35 Saving Assemblies When you save an Assembly into the CATIA - TeamPDM database, its components are automatically saved as children of the parent Product. The tree hierarchy changes to reflect the new documents and the hierarchical links between them. Thus, the inherent relationship between a Product and its components is automatically maintained in CATIA - TeamPDM. A Products structure within CATIA V and the corresponding documents tree within CATIA - TeamPDM
36
37 Data Structure CATIA - TeamPDM organizes all documents into classes. Each time you save a CATIA document, it is saved into a specific class. Each class of documents has its own Profile Card to accurately represent the attributes of the class. For example, when you save a CATIA drawing, it is saved into the CATIA Drawing Class. The Profile Card for the Drawing Class displays attributes of importance to drawings. CATIA - TeamPDM provides a fixed database structure: Note: In addition to the CAD files class, some of the classes displayed above may have sub-classes. By default, when you save CATIA documents, they are saved into the following classes:
38 When you save a new CATIA Part, the Part will be saved into the CATIA Part Class. When you save a new CATIA Drawing, the Drawing will be saved into the CATIA Drawing Class. When you save a new CATIA Product, the Product is saved into the CATIA Product Class.
39 Working with Classes Your administrator may modify the class structure to suit the needs of your organization, as follows: Your administrator can create additional classes (along with appropriate Profile Cards). For example, your administrator can create a class called Beta Parts. When you save a document, you can choose a class from a dropdown list of classes displayed in the Profile Card. A new Profile Card for the selected class is displayed, and the document is saved into the appropriate class. The following scenario illustrates how you can work with several classes: 1. Your administrator defines a new class called Beta Parts. 2. You then create a new Part in CATIA V5 and save it by clicking the SmarTeam Save option. 3. By default, the CATIA Part Profile Card is displayed. In this Profile Card, you can select a different class. 4. If you select the Beta Parts class, the window refreshes to display a Beta Parts Profile Card. When you click OK, the new Part is saved into the Beta Parts class. Each time you create a search, you must select a CATIA - TeamPDM class. When you run the search, CATIA - TeamPDM locates the documents that meet the search criteria from the specified CATIA - TeamPDM class. For example: You create a search from the CATIA Parts class, and you define search criteria for the search. When you run the search, CATIA - TeamPDM will locate all the CATIA Parts which meet the specified search criteria.
40 Finding and Working With Your Documents Locating Parts, Products and Drawings is an essential task, but it can be time-consuming when creating complex Assemblies. CATIA - TeamPDM provides a number of powerful functions which enable you to locate a document in the CATIA - TeamPDM data structure. The following CATIA - TeamPDM tools work together to help you find and modify any CATIA V5 document: Find Browse View Edit Save Use the Find options to run a search and locate specific documents that match the search criteria. These documents are listed in a search results list. Browse through each document in the list. Each time you select a document, its Profile Card is displayed. You can view general attributes of the document as well as its revision history. In addition, you can view a thumbnail image of the document in the Viewer page. When you locate the exact document that you were searching for, you can launch it directly into CATIA V5, for viewing and inspection. When you locate the exact document that you were searching for, you can launch it directly into CATIA V5, and modify it accordingly. When you finish your modifications, save the document. The Profile Card (and appropriate revision history) is updated accordingly.
41
42 Finding Your Documents CATIA - TeamPDM provides several searching tools: Find Object: This option enables you to view the previously defined searches. From the Search Editor window, you can: Run a previously defined search. Modify a search. Create a new search. Each search may contain numerous search criteria. The results of the search are listed in a search results list. You can browse through the displayed list and view the Profile Card for each one. You can also select a document and launch it into CATIA V5. Find Object By Attribute option: This option enables you to create a new search. You must choose a CATIA - TeamPDM class and enter search criteria for it. You can then run the search to locate the documents in the selected class that match the search criteria. Find Object By Example option: This option enables you to create an advanced search based on numerous search attributes. You can select two CATIA - TeamPDM classes and define search criteria based on the class attributes (and their link attributes). You can then run the search to locate the documents in the selected classes that match the search criteria.
43
44 Browsing After you run a search, the search results are listed in a search results list. You can then browse through the list to identify a specific document. CATIA - TeamPDM enables you to view CATIA Parts, Drawings and Products in the Viewer page. This enables you to browse through the database and view the most recent image of a document, as it is displayed in CATIA V5. Browsing through the Viewer page provides a means of searching and identifying a specific document. For example, after you run a search, the search results are displayed in a list. You can view the image of each of these documents and launch one into CATIA V5, if you wish.
45 Editing After you locate a document, you can quickly launch it into CATIA V5, as described below: To launch a document: 1. From any CATIA - TeamPDM window, select a document. 2. Right-click to display a drop-down menu and choose Edit. Shortcut: Double-click on the document to launch it into CATIA V5.. If the document is checked into the vault, you must check it out to launch it in CATIA V5. If the document is not saved in the vault, it is immediately launched into CATIA V5.
46 Saving Make your modifications in CATIA V5 and choose one of the Save options from the SmarTeam menu. The document is saved into the CATIA - TeamPDM database, and the Profile Card is updated accordingly.
47 Safekeeping: Securing Documents in a Vault CATIA - TeamPDM enables you to maintain and manage any information related to a document throughout its life cycle. By mirroring the physical process of document management, CATIA - TeamPDM uses vaults, check in, check out, and approval functions to manage the life cycle of your Product, Part or Drawing. It creates new versions of a document and protects it from unauthorized modifications.
48 Maintaining security and control over documents Maintaining security and control over documents is of the utmost importance and CATIA - TeamPDM provides an electronic vault for this purpose. The electronic vault ensures that only those persons with access permission may access a document, and that a document cannot be accessed by more than one person at a time. The illustration below displays the life cycle flow of a document: CATIA - TeamPDM revision management features enables you to: Automate the flow of documents through different stages of development. Control and access the many revisions of a document. Save and restrict access to documents through the use of an electronic vault. As you revise a Part, Product or Drawing, you can: Check out the document from the vault (using the Check Out option) in order to modify it and launch it in CATIA - TeamPDM. When a document is checked out of the vault, it can only be modified by the current user. You can also copy a file to your desktop in order to view it. In this case, you cannot modify the document, and the document remains in the vault. This option is helpful when another user is modifying a document, but you wish to view it in CATIA V5 at your desktop.
49 Check in the document to the vault for safekeeping (using the Check In option). When a document is checked into the vault, it is made publicly available. Release the document by placing the document into the Released vault (using the Release option). The document can then be checked out for modification, (using the New Release option) but only as a new revision. CATIA - TeamPDM ensures that the integrity of the Product and its children is not jeopardized by disabling life cycle operations. The following examples show how CATIA - TeamPDM protects the integrity of a Product. When you Release a Product, its children must be released as well. For example, if a document has 10 children, each of these child documents must be assigned the Released status. You can only move a sub-product to the Obsolete vault if its parent Product is also Obsolete. For example, if a Cog is a sub-product of a Watch, you can only move the Cog to the Obsolete vault if the Watch (and all its parents) are also obsolete. You can perform a revision operation on a Product and all its children simultaneously, using the Propagate Operation option. For example, if you wish to check out a Watch and all its 10 sub-products, you can check them all out simultaneously. You have the option to perform a revision operation on a Product and not on its children, or perform a revision operation on a child and not on the parent Product. You can check out a Watch Product from the vault and leave the children in the vault. You can copy the children of a Product to your desktop so that you can view them but not modify them. The status of the children remains Checked In, while the status of the Product is Being Modified. You can check a sub-product out of the vault independently and leave the parent Product in the vault.
50 Life Cycle Menu Options The Life Cycle menu contains the life cycle options which enable you to manage a Part, Product and Drawing as new revisions are created. From the Life Cycle menu, choose the appropriate operation in accordance with its status in the product life cycle. All life cycle operations are controlled and managed by CATIA - TeamPDM, by enabling and disabling different life cycle options in the Life Cycle menu. This provides for a logical flow of a Part, Product or Drawing through its life cycle.
51 When a new document is first saved into the CATIA - TeamPDM database, it has the New status. The document is not placed into a vault. When you perform the Register operation on the document, it is placed in a vault and cannot be launched into CATIA V5 until it is checked out of the vault. The table below lists the different life cycle operations, the status of the document resulting from each operation, and a description of each status. Life Cycle Option Selected Resultant Status Description Click Register to check a new document into the vault. or Click Check In to place a document that is being modified back in the vault. Checked In The document is placed in the vault, and it cannot be launched into CATIA V5. In order to launch it into CATIA V5, the document must be checked out of the vault. You can copy the file to your desktop in order to view (but not modify) the document in CATIA V5. Click Check Out to check out a document from the vault. or Click New Release to make a new copy of a Released document that was placed in the Released vault. The resultant document is a new revision of the source document. Being Modified This is a temporary state assigned to a document that has been checked out. The document can be launched into CATIA V5 in order to modify it. No other user can currently modify it, but other users can view it or copy the file to their desktop. After the document is checked back in or released, the status is replaced by Checked In or Released. Click Release to transfer a document to the Released status. Released After a stage of development is completed, the document is saved in the vault of released documents.
52 Click Obsolete to transfer a document to the Obsolete status. Obsolete The document can be accessed by any CATIA - TeamPDM user but cannot be modified. The document is saved in the vault for inactive documents.
53 Document Associations and Dependencies
54 Dependencies/Reverse Dependencies CATIA V5 enables you to create a Drawing based on a Part or a Product. When you save the Drawing into the CATIA - TeamPDM database, a general link is automatically created between the Drawing and the Part/Product on which it was based. This enables you to manage the Drawing together with the Part/Product as you create revisions. The Drawing and its associated Part/Product are called Associated Objects. CATIA - TeamPDM creates the following relationship between the two documents: Dependency: The Part/Product is a dependency of the Drawing. Reverse Dependency: The Drawing is a reverse dependency of the Part/Product. For example: In CATIA V5, you create a Drawing named Circuit Drawing based on a Part named Metallic Circuit. CATIA - TeamPDM creates a link between these two documents as follows: The Metallic Circuit Part is a Dependency of the Circuit Drawing (since the Drawing is dependent on the Part). The Circuit Drawing is a Reverse Dependency of the Metallic Circuit Part.
55 Revising Associated Objects As you revise your documents, CATIA - TeamPDM protects the relationship between Associated Objects: A Drawing and its associated Part/Product. When you perform a life cycle operation on a document (such as Check In or Check Out), you can display and manage the document's Associated Objects. Each Associated Object is color-coded for easy recognition. To display Associated Objects: 1. From any life cycle window, right-click to display a dropdown menu. 2. Point to Associated Objects and choose the type of object you wish to display: Each Associated Object is color-coded as follows: Dependencies are displayed in red. Reverse dependencies are displayed in blue. CATIA - TeamPDM protects the relationship between these Associated Objects as you make revisions: Each time you check out a Drawing from a vault in order to revise it, its dependency (Part/Product) is automatically checked out together with it. When you check out a Part/Product from a vault in order to revise it, you have the option of viewing and checking out its associated Drawing. Before you can work with associated documents (dependencies, reverse dependencies), an administrator must enable them. The administrator can define dependencies based on a customized class structure.
56 Advanced Tasks
57 Managing Parts After you create a Part in CATIA V5, save it into the CATIA - TeamPDM database by choosing one of the SmarTeam Save options. This enables you to manage all your Parts using the CATIA - TeamPDM tools. After you save the Part, check the Part into the SmarTeam vault by choosing the Life Cycle/Register option. The Part is placed into the Checked In vault. In order to modify this Part in CATIA V5, you must launch the Part into CATIA V5 (by double-clicking on the Part name or choosing the Edit option). You are prompted to check the Part out of the vault, thereby creating a new version of the Part. When you wish to place the Part into the vault for safekeeping, you can check it back into the vault (using the Life Cycle/Check In option). In this manner, CATIA - TeamPDM manages and protects all revisions of a Part. This section provides the following instructions:
58 Saving a Part Every CATIA Part should be saved into the CATIA - TeamPDM database. After you create a new Part or modify an existing Part, choose one of the SmarTeam Save options. The CATIA - TeamPDM integrated menu provides two methods for saving documents: Save: Saves the document into the CATIA - TeamPDM database. Save As: Saves the document into the CATIA - TeamPDM database. and Defines the project and the parent folder of the document. For example, you can save the new Part as a child of the Beta Parts Folder in the Drive Shaft project. After you choose a SmarTeam Save option, a CATIA Part Profile Card is displayed in the Object Attributes window, as shown below. After you fill in the attribute fields and click OK, the Part is saved to the CATIA - TeamPDM database. Your administrator may customize the Profile Card. This window will reflect the appearance of the Profile Card used in your CATIA - TeamPDM application. If you choose to work in Batch Mode Save mode (by checking the Batch Mode Save option from the SmarTeam menu), a new Profile Card is not displayed. Instead, the Part is saved to the CATIA - TeamPDM database with the default attributes. You can update the Profile Card attributes at any time. In the Profile Card, the following information is displayed automatically: ID number: This number is assigned by CATIA - TeamPDM and it must be unique. Values may be entered in some attributes, if your administrator defined default values for this class of Profile Cards. These attributes may be changed. If a file name already exists in CATIA V5, a thumbnail image is displayed. In the Details tab, CATIA file information is displayed.
59 CATIA - TeamPDM enables you to define the following information in the Profile Card: You can save the Part to a different CATIA - TeamPDM class. A new Profile Card for the selected class is displayed. You can link the Part directly to the CATIA - TeamPDM project desktop. You can define attributes for the Part. Saving a Part for the First Time This process describes how to save a Part to the CATIA - TeamPDM database for the first time. Subsequent saves are
60 described below. To save a Part to the CATIA - TeamPDM database: In CATIA V5, create or open a Part. From the SmarTeam menu, choose Save. The CATIA V5 Save As window is displayed. Enter CATIA file information and click Save. the CATIA V5 Save As window is not displayed if the Part has already a file name. A SmarTeam Save As window appears. In this window you can define the project and the parent folder to which the document belongs. You can define the level of sub-branches displayed in the project selection tree and/or the object selection tree.
61 Choose a project from the Project Tree. The Part will be saved as a document in the selected project. Choose a parent folder from the Object Tree. The Part will be saved as a child of the selected parent folder. For example, you can save the new Part as a child of the Beta Parts folder. The CATIA file name is displayed (if you already named the file in the CATIA V5 Save As window as described in step 3). 5. Click Save. The Object Attributes window is displayed with a CATIA Parts Profile Card, as shown above. If you wish to save the Part to a different class, click the arrow to the right of the Select class box and choose a class. A new Profile Card is displayed in the Object Attributes window. The classes displayed in the dropdown list are defined by your administrator. 6. Check the Save in Desktop checkbox to link the Part directly to a project: This option is not displayed in the Object Attributes window if you selected a project and parent link in step Fill in attributes for the Part and click OK. By default, the text entered in the Description field is displayed in the tree browser next to the ID number. It is useful to assign a meaningful name to the document in the Description field.
62 Saving a Part After Modifications After a Part is added to the CATIA - TeamPDM database, you are likely to modify the Part in CATIA many times. Each time you modify the Part, you must save it using one of the SmarTeam Save options. Click Save: The Part is saved in the CATIA - TeamPDM database, with all its modifications. Its Profile Card is not displayed at this time. Click Save As: The SmarTeam Save As window is displayed. In this window, you can define hierarchical links for the Part, namely the project and parent to which the Part belongs. The Part (together with its new hierarchical links) is saved in the CATIA - TeamPDM database. To save a Part after modifications: 1. Open an existing Part in CATIA V5. You can run a search to locate the Part and then launch it directly into CATIA V5 2. From the SmarTeam menu, choose Save. The Part is saved in CATIA - TeamPDM and its Profile Card is updated accordingly. or Choose Save As. The SmarTeam Save As window is displayed. You can define the level of sub-branches displayed in the project selection tree and/or the object selection tree. Click Options to display the Save Options window and click the Tree Setting tab. Check the appropriate checkboxes. Choose a project from the Project Tree. The Part will be saved as a document in the selected project. Choose a parent folder from the Object Tree. The Part will be saved as a child of the selected parent. For example, you can save the new Part as a child of the Beta Parts folder. Click Save. The Part (together with its hierarchical links) is saved in CATIA - TeamPDM and its Profile Card is updated accordingly.
63
64 Managing the Revisions of a Part This section provides operating instructions for managing the revisions of a Part as follows:
65 Registering a Part When a Part is first saved into the CATIA - TeamPDM database, it is automatically assigned the New status. This means that the Part has not yet been checked into a SmarTeam vault. To protect the Part from modifications, place the Part into the SmarTeam vault by registering it. After the Part is registered, its status is changed to Checked In. What happens next? To launch the Part into CATIA V5 and modify it, the Part must be checked out. When it is checked out, a new revision number is assigned to it. The Part can be copied to your desktop in read-only mode. To register a Part 1. From the SmarTeam menu, point to Life Cycle and choose Register.
66 2. The Register window is then displayed, as shown below.
67 3. 4. In the left side of the window, the Register icon appears to the left of the selected document. In the right side of the window, the Register window is displayed. Fill in the fields in the Register window, as described in the table below. These fields are optional, and you may keep the default. Click OK to register the Part and exit the Register view, or click Apply to perform the operation and remain in the view. The Part is now placed in the Checked In vault. Note that the status of the document is now Checked In. The following describes the attributes in the Register window: Attribute Description
68 Revision The left revision field is the source revision identifier and the right field is the new revision. You may enter a different revision identifier in this field although it is not mandatory. Application Automatically displays the file name as it was created in a CAD system. Reference File Name File Name You may enter another file name that will be assigned to the file in the vault. Directory The directory path of the vault in which the document will be located is automatically displayed. If you are using the vault server, the name of the generic server is displayed and the destination vault dropdown menu enables you to specify the generic destination vault in which the document will be located. Phase Click an option from the dropdown list to define the phase of this revision. This field is descriptive only and does not affect revision status. Effective Click the Date button to enter dates in these fields. From/Effective Until Notes You may enter a comment in this field. Click this option to assign the same registration information for all document revisions such as phase, Set As Default effective dates, and notes. If you wish to modify the Part and launch it into CATIA, it must be checked out, as described on the following page. If you wish to copy the Part to your desktop in order to view it in CATIA as a read-only file, refer to "Copying Documents To Your Project Desktop" for instructions
69 Checking Out a Part In order to modify a Part in CATIA, the Part must be checked out of the vault. CATIA - TeamPDM also enables you to copy a file to your desktop without checking it out of the vault. This is useful when another user is working with the Part (and has checked it out of the vault), but you wish to view the document at your desktop. Instructions for copying a file are provided in section "Copying a File". CATIA - TeamPDM provides two methods for checking a Part out of the vault, as summarized below. Check out a Part (from CATIA): If the Part is currently displayed at your desktop (in read-only mode), you can perform the speedy Check Out operation. Check out a Part (from a CATIA - TeamPDM window): If the Part is not currently displayed at your desktop, you must find the Part by running a search. From the displayed search results list, select the Part and choose Edit. Since the Part is currently checked in, a message is displayed prompting you to check out the document. Click Yes to display the Check Out window and then check out the document. The Part is immediately launched into CATIA. Each of these procedures are described on the pages that follow. Checking Out a Part (from CATIA) If a Part is displayed at your desktop in read-only mode, you can check it out in order to modify the Part. When is a Part displayed at your desktop in read-only mode? You previously checked in the Part, and a copy or the Part remained at your desktop in read-only mode, as described in section "Checking In a Part". You previously copied a file to your desktop (using the Copy File option). To check out a Part from the vault (when the Part is displayed at your desktop in read-only mode): 1. Activate the document containing the Part 2. From the SmarTeam menu, select Check Out item. 3. Fill in the attributes, as described below, or accept the default attributes. 4. Click OK. The Part is re-displayed at your desktop and it can now be modified. Checking Out a Part from a CATIA - TeamPDM window If a Part is checked in to a vault, and it is not currently displayed at your project desktop, you must locate the Part and then check it out in order to modify it in CATIA. To check out a Part: 1. Run a search to locate the document that you wish to check out: From the SmarTeam menu, point to Find and choose Find Document. Select a search and click Run. The search results are displayed in a search results list.
70 2. Browse through the list to locate the document you wish to modify. Select the document, and right-click to display a dropdown menu. Choose Edit. 3. A message is displayed prompting you to check out the document.
71 Click OK to continue. 4. The Check Out window is then displayed, as shown below:
72 This window is also displayed when you choose the Life Cycle/Check Out option from the SmarTeam menu. In the left side of the window, the Check Out icon appears to the left of the selected document. In the right side of the window, the revision number is automatically proposed by CATIA - TeamPDM although you can assign a new revision to the document. 5. Fill in the fields in the Check Out window (optional) and click OK. The status of the document is automatically changed to Being Modified. You may now work with the Part in CATIA V5 and modify it. Remember to choose the SmarTeam Save option to save these changes and update the Profile Card. To check the document back into the vault for safekeeping, follow the instructions provided in section "Checking In a Part". The following describes the fields in the Check Out window: Revision New Branch Attribute Application Reference File Name File Name Directory Phase Notes Copy General links on Check Out/New Release Copy links to children on Check out Description The left revision field is the source revision identifier and the right field is the new revision. You may enter a different revision identifier in this field although it is not mandatory. Click this option to enable you to create parallel branches of a revision based on the same file. Each branch will be assigned a different revision number consisting of 3 characters (a.0.1 and a.0.2 for example) instead of the standard revision number consisting of 2 character (a.0 for example). For example: You may have a document named Pump*55. If the Branching value is Yes, two separate users may check out the file and each can create a new revision of this file. Two different revision numbers will be assigned to these files respectively (a.0.1 and a.0.2) and they can both be modified simultaneously. Note: This field may be disabled according to the life cycle preferences defined by your administrator Automatically displays the file name as it was created in a CAD system You may enter another file name that will be assigned to the file in the vault The directory path of the vault in which the document will be located is automatically displayed. If you are using the vault server, the name of the generic server is displayed and the destination vault dropdown menu enables you to specify the generic destination vault in which the document will be located Click an option from the dropdown list to define the phase of this revision. This field is descriptive only and does not affect revision status You may enter a comment in this field Choose Yes from the dropdown list to copy general links from the previous to the newly created revision Choose Yes from the dropdown list to copy all the links to children in the current revision to the new revision
73 Replace local files on Check Out from vault Set As Default Choose an option from the dropdown list: Yes - to replace all local files that were copied during the Check Out operation. Yes for copied files - to replace the file if a copy was made of this file during an earlier operation. Ask - to prompt the user before making a copy of the file. Click this option to assign the same check out information for all document revisions such as phase, effective dates, and notes.
74 Copying a File You may choose to copy a file to your desktop rather than checking it out of the vault for a number of reasons: Another user may be modifying it and you wish to work with it at your desktop as well. You may wish to view it so that you can see how it works together with other documents at your desktop. For example, you might copy the file of a Product to your desktop in order to view how it works together with various Parts. You can then check the Part out from the SmarTeam menu. To copy a file: 1. You can run a search to locate the document that you wish to copy to your desktop. The search results list displays the documents that match the search criteria. 2. From any CATIA - TeamPDM window, right-click on the document and choose Copy File.
75 3. The Copy File window is displayed.
76 Fill in the fields in the window and click OK to copy the file to your desktop. The status of the drawing remains Checked In.
77 Checking In a Part After a Part has been checked out and perhaps modified, it must be placed back into the vault. At this point, you can check the document back into the vault in one of two ways: Check In, as described below, simply places the document back in the Check In vault. You can later apply the Check Out operation on the document to make further changes. Release, as described in section "Releasing a Part", moves the document to the Released vault. Thereafter, you can apply the New Release operation on the document to carry out additional changes. To check in a Part: 1. Activate the document containing the Part you want to check-in 2. In the SmarTeam, select Check In item. The Check In window is displayed, as shown below. You may add comments that will be linked to the part or change conditions in the life cycle operations. 3. Fill in the fields and click OK. The status of the document is automatically changed to Checked In. The Part is now checked into the vault for safekeeping. A copy of the file remains at your desktop in read-only mode. You can check it out again in order to edit the Part, as described in section "Checking Out a Part".
78 Releasing a Part When a Part is ready to be moved to the next phase of development, choose the Release option in order to place it in the Released vault. This is generally done when a supervisor releases a stage of development of the document. The Part is then assigned the Released status. A Part can be Released from the Checked In status or the Being Modified status. Once a Part is placed in the Released vault, it can only be released as a new revision to ensure the safekeeping of this version of the document. The Part can be checked out as a New Release with a new revision number. To release a Part: 1. Display the Part in CATIA. 2. In the SmarTeam menu, select Release item. The Release window is then displayed. The fields in the Release window are the same as those in the Check In window. 3. Fill in the fields and click OK. The status of the document is automatically changed to Released in the State field. To check a Part out of the Released vault, you must use the New Release option, as described in section "Checking Out a New Release". A new revision of the document is created and the previously released revision remains in the vault.
79 Checking Out a New Release When a document has the Released status it can only be taken out of the vault by clicking the New Release option. This option automatically creates a new revision of the document, thereby saving the previously Released revision. CATIA - TeamPDM also enables you to copy a file to your desktop without checking it out of the vault. This is useful when another user is working with the Part (and has checked it out of the vault), but you wish to view the Part at your desktop. Instructions for copying a file are provided in section "Copying Documents To Your Project Desktop". CATIA - TeamPDM provides two methods for checking a New Release out of the vault: Check out a New Release from CATIA: If the Part is currently displayed at your desktop (in read-only mode), you can perform the New Release operation from the SmarTeam menu. Check out a New Release (from a CATIA - TeamPDM menu): If the Part is not currently displayed at your desktop, you must find the Part by running a search. From the displayed search results window, select the Part and choose Edit. Since the Part is currently checked in, a message is displayed prompting you to check out the document. Click Yes to display the New Release window and then check out the document. The Part is immediately launched into CATIA.
80 Moving a document to the Obsolete Vault When a document becomes obsolete or inactive, you may move it to the Obsolete section of the vault. An Obsolete document cannot be changed or released. To move a document to the Obsolete vault: 1. Select the Part document as active document 2. In the SmarTeam menu, select Obsolete item. The Obsolete window is displayed. The fields in the Obsolete window are identical to the fields in the Check In window. 3. Fill in the fields and click OK. The status of the document is automatically changed to Obsolete.
81 Managing Assemblies Building Assemblies can be very time-consuming, since much of your time is spent in searching for existing components and placing them in Assemblies. CATIA - TeamPDM provides powerful tools to assist you in building your assemblies: Find options: Use the SmarTeam Find options to locate Parts and Products. Copy File option: As you build your Assembly, you can copy Parts/Products to your desktop to view how they fit together with the current Assembly. Insert Component options: When you wish to insert an existing Part or Product as a component of the current Product, use the Insert Component option. CATIA - TeamPDM inserts the component into the current Product. When you save the Assembly, the components are saved as children of the Assembly. In this way, CATIA - TeamPDM accurately reflects the structure of your Assembly. Save option: If you created new Parts as components of the Assembly, CATIA - TeamPDM will save each of these Parts/Products into the CATIA - TeamPDM database when you save the Assembly. A Profile Card for each document is displayed. After these components are saved, the Profile Card for the Product is displayed. In this manner, you can save the Product and its components. Batch Mode Save option: CATIA - TeamPDM provides you with a batch method for saving assemblies. The Batch Mode Save does not display a Profile Card during a SmarTeam Save operation. Instead, each component is saved in the CATIA - TeamPDM database with a unique ID number. At a later time, you can open a Profile Card for a component and enter information in the attribute fields. This section provides the following instructions:
82
83 Building an Assembly The Insert Component option enables you to insert existing Parts/Assemblies as components of the current Assembly. To insert a component: 1. Display an Assembly structure in CATIA V5. 2. From the SmarTeam menu, choose Insert Component and point to Find Document. 3. The Search Editor window is displayed, as shown below:
84 4. Choose a search and click Run. You can also modify a search or define a new search. Refer to "Searching for Documents" for instructions
85 5. In the displayed window, choose a document and click OK. 6. The document is inserted into the assembly structure.
86 Saving a Product Every CATIA Assembly should be saved into the CATIA-TeamPDM database. After you create a new Assembly or modify an existing one, choose one of the SmarTeam Save options. Then, register the Assembly by choosing the Life Cycle/Register option. The Assembly is then placed into the Checked In vault. The CATIA-TeamPDM integrated menu provides two methods for saving Assemblies: Save: Saves the Assembly into the CATIA-TeamPDM database. Refer to section "Saving a Part" for details. Save As: Saves the Assembly into the CATIA-TeamPDM database. and Defines the project and the parent folder of the document. For example, you can save the new Assembly as a child of the Technical Assemblies folder in the Drive Shaft project. After you choose a SmarTeam Save option, a CATIA Product Profile Card is displayed in the Object Attributes window. After you fill in the attribute fields, click OK. The Assembly is saved to the CATIA-TeamPDM database. Since the process of saving a Part is identical to that of saving an Assembly, refer to the following pages for detailed instructions: To save a document for the first time, section "Saving a Part for the First Time" To save a document for subsequent saves, section "Saving a Part After Modifications" Saving the Components of an Assembly When you save an Assembly, CATIA-TeamPDM automatically saves the components of the Assembly as well: If the components of the Assembly are already saved into the CATIA-TeamPDM database, then the Save option updates the Profile Cards for all the components to reflect any modifications that were made to the components as well as the hierarchical link between the Assembly and its components.
87 If the components of the Assembly are new and have not yet been saved to the CATIA-TeamPDM database, then each of these components will be saved to CATIA-TeamPDM one by one. A Profile Card for each component is displayed (in the Object Attributes window). Fill in the Profile Cards, and click OK. After each component is saved, a Profile Card for the Assembly is displayed (in the Object Attributes window). Fill in the Profile Card, and click OK. CATIA-TeamPDM enables you to save the components of an Assembly without displaying each Profile Card. This can save you a great deal of time. CATIA-TeamPDM provides two methods for batch saving components: From the SmarTeam menu, choose Batch Mode Save. Then, save the Assembly using the Save or Save As option. CATIA-TeamPDM saves all the components but does not display a Profile Card for each one. From the SmarTeam menu, choose Save As. In the Save As window, click the Options tab to display the Save Option window. In the Save tab, check the checkboxes and click OK.
88 Managing the Revisions of a Product This section provides operating instructions for managing the revisions of an Assembly as follows:
89 Overview As you work with an Assembly, you can make continuous revisions to it. CATIA-TeamPDM protects and manages these revisions in the same manner as a Part. However, an Assembly is more complex than a Part since it consists of many components. It is essential to maintain the integrity of an Assembly by performing life cycle operations on the Assembly and its children, in coordination with each other. CATIA-TeamPDM ensures that the integrity of the Assembly and its children is not jeopardized by disabling life cycle operations. In addition, CATIA-TeamPDM provides several life cycle options which can help you manage your Assembly. These life cycle options are described in section "Life Cycle Options for Managing an Assembly". For example: You can choose the Propagate Operation option to check in or check out the Assembly and its components at the same time. You can choose the Relatives Being Modified option to view the parents or children of the document that are currently being modified. You can choose the Show Parents option to display the parents of a document. You can then select parents and check them out as well These life cycle options are only available when you choose Check Out or Check In from the SmarTeam menu. They are not available when you check out/in a document from the CATIA menu. The following examples show how CATIA-TeamPDM protects the integrity of an Assembly. When you Release an Assembly, its children must be Released as well. For example, if an Assembly has 10 sub-assemblies, each of the sub-assemblies must be assigned the Released status. You can only move a sub-assembly to the Obsolete vault if its parent Assembly is also Obsolete. To perform a revision operation on an Assembly and all its children simultaneously, CATIA-TeamPDM provides the Propagate Operation option. For example, if you wish to check out a Stump Preacher Guitar and all its 10 sub-assemblies, you can check them all out simultaneously. You have the option to perform a revision operation on an Assembly and not on its children, or perform a revision operation on a child and not on the parent Assembly. For example, you can check out a Stump Preacher Guitar Assembly from the vault and leave the children in the vault. You can copy the children of an Assembly to your desktop so that you can view them but not modify them. The status of the children remains Checked In, while the status of the Assembly is Checked Out. You can check a sub-assembly out of the vault independently and leave the parent Assembly in the vault.
90
91 Registering a Product When a Product is first saved into the CATIA-TeamPDM database, it is automatically assigned the New status. This means that the Product has not yet been checked into a SmarTeam vault. To protect the Product from modifications, place the Product into the SmarTeam vault by registering it. After the Productis registered, its status is changed to Checked In. When you register the Assembly, you can register the Product and all its components simultaneously using the Propagate Operation option. Refer to section "Propagate Operation" for details. To register an Assembly: 1. From the SmarTeam menu, point to Life Cycle and choose Register. The Register window is then displayed, as shown below.
92 2. In the left side of the window, the Assembly and its components are displayed with the Register icon to the left of the selected document. In the right side of the window, the Register window is displayed. To register the Assembly and all its components together, right-click on the Assembly to display a dropdown menu and choose Propagate Operation. 3. Fill in the fields in the Register window (optional) and click OK. Refer to section "Registering a Part" for a description of these fields. The Assembly is now placed in the Checked In vault. Note that the status of the Assembly is now Checked In.
93
94 Checking In/Checking Out/Releasing a Product Since the process of checking in and checking out an Assembly is quite similar to the life cycle operations on a Part, we will only provide a brief description of each life cycle operation. Instead, we will describe the unique features provided by CATIA-TeamPDM which enable you to manage the Assembly, together with its components, as you create revisions. For each life cycle operation, you can: Check out/in an Assembly and all its components together. For example, you can check out the Ski Draft Assembly and its 10 components. You can check out/in an Assembly and handle each component individually. For example, you can check out an Assembly and copy all its components to your desktop. Handling Components CATIA-TeamPDM enables you to manage an Assembly and its components. You can: Check out an Assembly and copy all its components to the desktop. Perform the same life cycle operation (Check Out, Check In, Release) on the Assembly and all its children, by choosing the Propagate Operation option, as described in section "Propagate Operation". Handle each component individually. For each component, you can: Check in or check out the component together with its parent Assembly. Copy the component to the desktop. The child remains in its current state. Choose No Operation for the component. The No Operation option enables you to maintain a sub-assembly in its present state while performing a revision operation on the Assembly (or vice versa). For example: You wish to insert a new Part into an Assembly to replace an existing Part. You can check out the Assembly, and copy all the Parts to your desktop, except the Part you wish to replace. For that Part, choose the No Operation icon. When you click OK, the Assembly will be checked out of the vault, and all the children except one will be copied to your desktop. In CATIA-TeamPDM, you can replace the old Part with a new Part at your desktop to see how it affects the Assembly as a whole. Checking Out an Assembly (from CATIA) If an Assembly is displayed at your desktop in read-only mode, you can choose to check it out in order to modify it. CATIA-TeamPDM enables you to do so. To check out an Assembly: 1. Display the Assembly in SolidWorks (in read-only mode).
95 2. To check out a document: Select a document (Assembly or Part), in SmarTeam menu, select Life-Cycle then choose Check Out. In the displayed Check Out window, fill in the fields and click OK. At your desktop, you can view the assembly and its components. Those documents that were checked out may be modified. After you modify the document, remember to choose a SmarTeam Save option. Checking Out an Assembly from a CATIA-TeamPDM window. If an Assembly is checked in to a vault, and it is not currently displayed at your desktop (in read-only mode), you must locate the Assembly and then choose Edit in order to launch it into CATIA and modify it. In the displayed Check Out window, you can right-click to display a dropdown menu which provides several life cycle options. These life cycle options can assist you in managing your Assembly. Refer to section "Life Cycle Options for Managing an Assembly" for details. To check out an Assembly: 1. Run a search to locate the Assembly that you wish to check out. 2. Select the document, and right-click to display a dropdown menu. Choose Edit.
96 3. A message is displayed prompting you to check out the document. Click Yes to continue. 4. The Check Out window is then displayed, as shown below:
97 This window is also displayed when you choose the Life Cycle/Check Out option from the SmarTeam menu. In the left side of the window, the Check Out icon appears next to the Assembly and the Copy File icon appears next to the components. The default operation for the components (Check Out or Copy File) is determined by the administrator.
98 5. You can define an operation for each component as follows: Click on the icon of a document to display a list of options. This list differs for each life cycle operation, as shown below: Or Click on the icon of the document to choose an operation. The icon toggles between three states: 6. Fill in the fields in the displayed revision window, and click OK. The following example shows how sub-assemblies are handled individually during the Check Out operation:
99 Checking In/ Releasing an Assembly CATIA-TeamPDM provides two methods for checking in or releasing an Assembly: Check in the Assembly and its components from any SmarTeam window. You must select each document one by one and check it in (or Release it). This method is identical to the checking in a Part as described in section "Checking In a Part". Below is a quick summary. 1. Select the Part or Assembly and choose SmarTeam/Check In or Release. The Check In (Release) window is displayed, as shown in section "Checking In a Part". 2. Fill in the fields and click OK. The status of the document is automatically changed to Checked In. The Assembly is now checked into the vault for safekeeping. A copy of the file remains at your desktop in read-only mode.
100 Check in the Assembly using the Life Cycle/Check In (or Life Cycle/Release) option (from the SmarTeam menu). Instructions are provided on the following page. When you choose the Life Cycle/Check In (or Release) option from the SmarTeam menu, a Check In (Release) window is displayed. In this window you can check in the Assembly and its components at the same time. In addition, you can view life cycle options which help you manage your Assembly, as described in section "Life Cycle Options for Managing an Assembly". To check in an Assembly: From the SmarTeam menu, point to Life Cycle and choose Check In. The Check In window is displayed as shown below:
101 On the left side of the window, the Assembly and its components are displayed. You can Check in all the documents together: 1. Right-click and choose Propagate Operation. 2. The Check In icon is displayed next to each component in the tree. 3. Fill in the fields in the Check In window (optional) and click OK. 4. The Assembly and its components are checked in to the vault. A copy of these documents does not remain at your desktop. Handle each component individually: 1. Click on the icon of a document to display a list of options. This list differs for each life cycle operation, as shown below: Or Click on the icon of the document to choose an operation. The icon toggles between three states: 2. Fill in the fields in the displayed window and click OK.
102 Life Cycle Options for Managing an Assembly Your Assemblies are often complex with numerous sub-assemblies. As you manage the revisions of the Assembly, you must keep track of the status of the revisions of the parents and children of each Assembly. CATIA-TeamPDM provides several life cycle options that can assist you in this task. Overview From the SmarTeam menu, point to Life Cycle and choose a life cycle operation (Check Out for example). In the displayed window, right-click on a document to display a dropdown menu. A list of life cycle options is displayed. This list differs according to the life cycle window being displayed, as shown below: These life cycle options are displayed in the Check Out/New Release Window.
103 These life cycle options are displayed in the Check In/Approve window.
104 These life cycle options are displayed in the Register window. The life cycle menus include the following life cycle options: Feature Description Example Associated Objects Propagate Operation Relatives Checked Out Show Parents Switch to Latest Revision Replace Revision Link Parents of Previous Revision Enables you to view those documents that are linked as dependencies or reverse dependencies to the selected document. You can then perform life cycle operations on these Associated Objects. Refer to the "Managing the Revisions of a Drawing" section for a complete description. Performs the same life cycle operation on the Assembly and all its children. Refer to section "Propagate Operation" for operating instructions. a document that are currently Checked Out. Refer to section "Relatives Being Modified" for instructions. Displays the parents of a document in a separate window. You can then select the parents that you wish to check out as well. Refer to section "Show Parents" for instructions. Enables you to check out the latest revision of a document. Refer to section "Switch to Latest Revision" for instructions. Enables you to choose a different revision of a document and perform a life cycle operation on it. This option also enables you to link the latest revision of the sub-assemblies to the Assembly being checked out. Refer to section "Replace Revision" for instructions. Enables you to link the current Part/Assembly to a different Parent (with a previous revision number). Each of these life cycle options is described below. In CATIA-TeamPDM, a Drawing (Stump Preacher Guitar Drawing) was created based on a Stump Preacher Guitar Drawing. When you check out the Stump Preacher Guitar Drawing you can view and manage its dependency (the Stump Preacher Guitar Drawing). When you register an Assembly, you can register all the children simultaneously. When you manage an Assembly, you can view a list of its parents or children that are currently being modified (checked out) in the Relatives Being Modified window. This is particularly helpful when you wish to release an Assembly, since all its documents must first be checked in. When you check out a Part that is a child of a few different Assemblies, the Show Parent window displays the parents of the selected document and their revision status. You can then choose the Assemblies that you wish to check out together with the Part. When you check out a Part that has numerous revisions, the Switch to Latest Revision option automatically checks out the most recent revision. When you check out a Part that has three revisions, you can replace the displayed revision with a different one. Also, when you check out an Assembly, you can link it to the latest public revision of each of its sub-assemblies. When you check in a Part after modifying it, you can link the Part to a previous revision of the parent Assembly (rather than the current revision of the parent Assembly). Propagate Operation: Performs the same life cycle operation on the Assembly and all its children. To propagate an operation: 1. In any life cycle window, right-click on an Assembly and choose Propagate Operation. The icons of all the children change to reflect the revision operation to be performed. 2. Fill in the fields in the revision window (optional). Click Apply to perform the operation and remain in the view, or click OK to perform the operation and exit the view. Relatives Being Modified: Displays the parents or children of a document that are currently Checked Out. To show the relatives being modified:
105 From the Check Out/New Release window, right-click on a document (not its icon) to display a dropdown menu, and choose the Relatives Being Modified option. The relatives (parents or children) that are currently in the Checked Out state are displayed. The The icon represents a parent. icon represents a child. Show Parents: Displays the parents of a document in a separate window. You can then select the parents that you wish to check out as well. To show (and check out) the parents of a document: 1. From any Check Out/New Release window, right-click on a document (not its icon) to display a dropdown menu, and choose the Show Parents option. The Select Parents window displays the parents of the selected document. 2. To check out the parents, select the parents in the Select Parents window and click OK. Use the Shift Key to select multiple parents. The parents are added to the list in the Check Out window and will be checked out together with the source document. Switch to Latest Revision: Checks out the latest revision of a document. To switch to the latest revision: In the Check Out/New Release window, the Switch to the Latest Revision option enables you to check out the latest revision of a document. A window opens displaying the newly created revision. Replace Revision: Enables you to choose a different revision of a document and perform a life cycle operation on it. Enables you to link the latest revision of the sub-assemblies to the Assembly being checked out A document can have several revisions as it is checked in and checked out of the vault. If you are currently performing a life cycle operation, such as Check Out, on one of the revisions, you can check out a different revision of the document in its place. During the development of an Assembly, its children may undergo several revisions. When you check out the Assembly, you can check out the latest revision of its children. The Replace Revision option enables you to replace the following: Replace the document selected for the Check Out/New Release operation, using the Replace Revision/Select option. For example, if you selected to check out the Part phone b.1, and then choose Replace Revision/Select, you can check out a different revision of the Part, such as b.2 or b.3. Replace the children of the Assembly being checked out, using the Replace Revision/Revert to Last option. For example, if you selected to check out the Stump Preacher Guitar Assembly, and then choose Replace Revision/Revert to Last, all the children of the Assembly switch to the last public revision. The newly created revision of the Assembly will be linked to the last public revision of the children. This option is particularly helpful when you wish to work with the latest revision of all the children of an Assembly. To replace a revision: 1. From the Check Out/New Release window, right-click on a document (not its icon) to display a dropdown menu and choose Replace Revision. 2. To replace the document selected for the current Check Out/New Release operation: Choose Select to display a list of revisions. Choose a revision and click OK. In the Check Out window, the selected revision will replace the original revision. or Choose Revert to Last to check out the last public revision of the children of the Assembly currently being checked out. The newly created revision of the Assembly will be linked to the latest public revision of all its children. Link Parent of Previous Revision: Enables you to link the current Part/Assembly to a different Parent (with a
106 previous revision number). To link a Part to a previous revision of its parent: 1. From the Check In/Release window, right-click on a document (not its icon) to display a dropdown menu and choose Link Parent of Previous Revision. 2. A window is displayed with a list of the previous revisions of the parent Assembly for the Part current being checked in. Select a parent and click OK. The Check In window is refreshed to display the selected parent Assembly. When you check in the Part, it will be linked to the selected parent Assembly.
107 Managing Drawings CATIA - TeamPDM provides powerful tools to assist you in creating, saving and managing your Drawings. When you save the Drawing into the CATIA - TeamPDM database, a general link is automatically created between the Drawing and the Part/Product. This enables you to manage the Drawing together with the Part/Product as you create revisions. In this manner, the status of the Drawing remains parallel with the status of the document on which it was based and CATIA - TeamPDM protects the integrity of the Drawing. This section provides the following instructions:
108 Saving a Drawing When you save the Drawing, a general link is created between the Drawing and the Part/Assembly on which it was based: 1. From the SmarTeam menu, choose Save (or Save As). Refer to section "Saving a Part for the First Time" for detailed instructions on using the Save option, or to section "Saving a Part After Modifications" for detailed instructions on using the Save As option. This process is identical to saving a Part. 2. A CATIA Drawing Profile Card is displayed (in the Object Attributes window). 3. Fill in the fields in the Profile Card and click OK. The Drawing is saved to the CATIA-TeamPDM database, and a general link is created linking the Drawing to the Part/Assembly on which it was based. In this way, CATIA-TeamPDM reflects the nature of the Drawing. As you manage the revisions of the Part/Assembly, you can manage the revisions of the Drawing in parallel.
109 Managing the Revisions of a Drawing CATIA-TeamPDM manages the special relationship between a Drawing and the Part/Assembly on which it was based. When you create a Drawing by inserting a Part/Assembly and you then save it using the SmarTeam Save option, a link is created between these two documents in CATIA-TeamPDM. These linked documents are called Associated Objects. CATIA-TeamPDM provides three types of Associated Objects: Dependency: A CATIA-TeamPDM Part or a Product is a dependency of a CATIA-TeamPDM Drawing (since the Drawing is based on the Part/Assembly). Reverse Dependency: A CATIA-TeamPDM drawing is a reverse dependency of a CATIA-TeamPDM Part/Product. As you create revisions, you can view and manage these Associated Objects (dependencies or reverse dependencies), using the Associated Objects/Dependencies or Reverse Dependencies option. In addition, CATIA-TeamPDM color indicates each of the Associated Objects, so that you can clearly identify a document's dependencies and reverse dependencies. The default color settings are: Dependencies are displayed in red. Reverse dependencies are displayed in blue. Working with Dependencies and Reverse Dependencies Each time you perform a life cycle operation on a document, you can view its Associated Objects, meaning its dependencies and reverse dependencies. You can then manage the revisions of these Associated Objects by checking the Associated Objects in or out of the vault or copying their files to your desktop. When you check out (or check in) a Drawing, its dependency (the Part/Assembly) is automatically checked out together with the Drawing. If the administrator set the default to Copy File, then the dependencies will be copied to the desktop, not checked out.
110 You can view the dependencies of a document and choose a life cycle operation for each dependency. If you do not view the dependencies of a Drawing, the dependencies will automatically be checked out/in together with the Drawing (if that is the default setting). You can view the reverse dependencies of a document and choose a life cycle operation for them. If you do not view the reverse dependencies of a document, then no life cycle operation is performed on them. For example: A Stump Preacher Explode A4 Drawing was created based on a Stump Preacher Guitar Assembly. When you check out the Stump Preacher Explode A4 Drawing, its dependency, the Stump Preacher Guitar Assembly will be checked out with it (unless you display the dependency and choose a different life cycle operation). When you check out the Stump Preacher Guitar Assembly, you may view and check out its reverse dependency, the Stump Preacher Explode A4 Drawing. To view Associated Objects: 1. From any life cycle window (such as Register or Check Out), right-click on a document to display the dropdown menu. 2. Point to Associated Objects to display the list of view options. A checkmark to the left of the option shows that the Associated Object is already displayed in the tree. 3. Click on an option to add or remove the checkmark. Removing the checkmark will remove the display of the Associated Object from the tree. Adding a checkmark will display the Associated Objects in the tree.
111 The default color settings can be changed, as described in section "To customize color settings for Associated Objects". To manage Associated Objects: When the Associated Objects are displayed in the tree browser, you can manage them in the same manner as any Assembly and its children. You can: Copy the Associated Objects to the desktop, as shown above. Check Out/Check In all the Associated Objects, by choosing the Propagate Operation option. Handle each Associated Object individually. For each Associated Object, you can: Check out or check in the document. Copy its file to the desktop. The state of the document is not changed. Choose No Operation for the document. Life cycle operations are always performed on dependencies, even if you do not display them. This is not the case for reverse dependencies: You must choose to display reverse dependencies in order to perform life cycle operations on them. To customize color settings for Associated Objects: CATIA-TeamPDM color indicates each of the Associated Objects, so that you can clearly view a document's dependencies and reverse dependencies. The default color settings are: Dependencies are displayed in red. Reverse dependencies are displayed in blue. You can change these default settings, as described below. 1. In any life cycle window, right-click to display a dropdown menu and choose Tree Properties. 2. Click the Visual Settings tab to display the following window:
112 3. Click the button to the right of the color that you wish to change. A color selection window is displayed, as shown below:
113 4. Choose a new color and click OK. 5. In the Visual Settings window, click OK.
114 Searching for Documents Locating Parts, Products and Drawings is an essential task, but it can be time-consuming when creating complex Assemblies. CATIA - TeamPDM provides a number of powerful functions which enable you to locate and retrieve a document from the CATIA - TeamPDM data structure. CATIA - TeamPDM provides several searching tools: Find Document option: This option enables you to view the previously defined searches. From the Search Editor window, you can: Run a previously defined search. Modify a search. Create a new search. Each search may contain numerous search criteria. The results of the search are displayed in a search results list. You can browse through the displayed list and view the Profile Card for each one. You can also select a document and launch it into CATIA. Find Document By Attributes option: This option enables you to create a new search. You must choose a CATIA - TeamPDM class and enter search criteria for it. You can then run the search to locate the documents in the selected class that match the search criteria.
115 Find Document By Example option: This option enables you to create an advanced search from multiple classes, based on the attributes in these classes as well as the attributes in the relationship (link) between these classes. You must choose CATIA - TeamPDM classes, select attributes and define search criteria. You can then run the search to locate the documents in the selected classes that match the search criteria. This section provides the following instructions:
116 Running a Predefined Search Once a search is defined and saved, you can run it over and over again. This powerful search tool can help you find your documents quickly and efficiently. For example, you may have a search called New Parts whose search criteria is based on a specific Creation Date. Each time you run the search, you can locate the newest CATIA Parts. After you run a search, the search results are displayed in a search results list. You can browse through the list to locate a specific document. You can then launch the document right into CATIA (by right-clicking on the document and choosing Edit). To run a search: 1. From the SmarTeam menu, point to Find and choose Find Document. The Search Editor window is displayed, as shown below:
117 2. From the Search Editor window, you can modify, delete or run a previous search, or create a new search. Click Run to run the selected search and display the search results, as described in step 2. Click Modify to modify the attributes of a previously defined search, as described in Modifying a Search. Click Add to create a new search, and point to By Attributes or By Example to define a new search. Refer to Creating a New Search for details. Click Delete to delete a previously created search. Choose a search and click Run. The results are displayed in a search results list, as shown below:
118 You can browse through the document displayed in the list. Each time you select a document, its Profile Card is shown on the right.
119 Modifying a Search You can modify a search by changing the search criteria. This enables you to customize searches to help you narrow down a search and find the exact documents that you need. For example: A predefined search displayed in the Search Editor window is called All CATIA Parts. You can modify this search to locate all CATIA Parts with the word Cog in the Description attribute or that are Approved. In this manner, you can narrow the search to locate the documents that you need. To modify a search: 1. From the SmarTeam menu, point to Find and choose Find Document. The Search Editor window displays the previously defined searches. 2. Choose a search and click Modify. The Search by Attribute window appears with the current search attributes. 3. Modify the search attributes and click Run. You can save the modified search as a new search: In the Search by Attribute window, select the Save As button name, then enter the new search in the Search name field and click Save.
120 Creating a New Search CATIA - TeamPDM enables you to create your own search by defining search attributes for a specific class of documents. CATIA - TeamPDM provides two options for creating new searches: Find Document By Attributes option: This option enables you to create a search from one class of documents. You must define search criteria for it by entering search information in the attributes fields. You can then run the search to locate the documents in the selected class that match the search criteria. Find Document By Example option: This option enables you to create an advanced search from multiple classes, based on the attributes in these classes as well as the attributes in the relationship (link) between these classes. You must choose CATIA - TeamPDM classes, select attributes and define search criteria. You can then run the search to locate the documents in the selected classes that match the search criteria.
121 Creating a Search by Attribute To create a search (by attribute): 1. From the SmarTeam menu, point to Find and choose Find Document By Attributes. The Search Details window is displayed, as shown below: The Search Details window is also displayed when you click the Add button in the Search Editor window and choose By Attribute.
122 2. Select a class. When you run the search, CATIA-TeamPDM will locate the documents that match the search criteria from the selected class. The window opens to display the Profile Card of the selected class, as shown below: 3. Define search options by checking the appropriate checkboxes. In the Match Case field, check the checkbox if you want the search results to match cases (lower or upper case) with the information provided in the search criteria fields. This is important since database items are case sensitive. In the Retrieve Only Last Public field, check the checkbox if you want the search to display only the last pubic revision of the documents that meet the search criteria (the latest documents that are checked in or released).
123 4. 5. In the Make a Search Public for All Users field, check the checkbox if you wish to make this search public. All users can view and run this search from the Search Editor window. If you do not check this checkbox, the search will only appear in the Search Editor window for the user who created it. Enter the properties of the search in the displayed Attributes fields. Follow these guidelines: If you enter information in two or more fields, the search will locate those documents that satisfy the entered criteria. You can enter multi-field search conditions, enabling more than one value per field. For example, you can enter in the Project ID field , which means that the search will find the project IDs that range from 1 to 6 or 12 to 18. You can choose to leave these fields blank. The search will then display all the documents in the selected class. Click to choose those attributes that will be displayed in the resulting Search Results window. The following window is displayed: The Attributes List box shows all the attributes for the class.
124 The Selected Attributes box shows the selected attributes that will be displayed in the search results list. Use the arrow buttons to move attributes into the Selected Attributes list. Use the Move Up/Move Down buttons to determine the order in which these fields will be displayed Click OK. Click Run to run the search. The results are displayed in a Search Results window. However, the search definition has not yet been saved. To save the search: Click Save to save the search. This search (as it was named in step 2) will subsequently be displayed in the Search Editor window. Click Close to exit without saving.
125 Creating a Search by Example To create a search (by example): 1. From the SmarTeam menu, point to Find and choose Find Document By Example. The Search By Example window is displayed, as shown below:
126 2. Name the search in the Search Name field. 3. Define search options by checking the appropriate checkboxes: In the Match case field, check the checkbox if you want the search results to match cases (lower or upper case) with the information provided in the search criteria fields. This is important since database items are case sensitive. In the Retrieve only last public revisions field, check the checkbox if you want the search to display only the last pubic revision of the documents that meet the search criteria (the latest documents that are checked in or released). In the Make search public for All users field, check the checkbox if you wish to make this search public. All users can view and run this search from the Search Editor window. If you do not check this checkbox, the search will only appear in the Search Editor window for the user who created it. 4. From the tree on the left side of the window, choose a class. 5. Drag the class to the work area, located at the top, right area of the window. The attributes of the class are displayed in a list.
127 6. You can select a second class as follows: From the tree on the left side of the window, choose a second class, and drag it to the work area. The attributes of the second class are displayed in the work area as well as the attributes of the link between the two classes.
128 7. In the Link Attribute list, you can display general link attributes or the hierarchical link attributes: Right-click on the list and choose the appropriate option. From an attribute list, select an attribute and drag it to the grid at the bottom, right area of the window.
129 8. 9. The selected attribute is displayed in the Field row. Define search conditions for the attribute as follows: Place a checkmark in the Sort row to sort the search results list according the selected attribute. Place a checkmark in the Show row to show the selected attribute in the search results list. Place a checkmark in the Unique row to filter the search results so that only unique documents are displayed: If more than one document meets the specified conditions, only the first document is displayed. Enter search criteria in the Condition row for the selected attribute. For example: For the CATIA Product class, the State attribute is dragged to the grid. In the Condition field, you enter Released. The search will find the Products whose state is Released. Enter additional search criteria in the Or field. For example: Enter Checked In in the Or field. The search will find those Products whose state is Released or Checked In. Select additional attributes and define search conditions for them. When you run the search, CATIA-TeamPDM will find those documents that meet the search criteria for all the attributes displayed in the grid (meaning an And condition exists between each column of attributes). For example: From the CATIA Product class, the State attribute is selected and dragged to the grid. In the Condition field, you enter Released. In the Or field, you enter Checked In. From the CATIA Product class, the Description attribute is selected and dragged to the grid. In the Condition field, you enter *cog. When the search is run, the search results list will display those documents from the CATIA Product class whose state is Released or whose state is Checked In and whose description includes the word cog. If you select attributes from more than one class, the search will locate only those documents that meet the search conditions for both classes. For example: From the CATIA Product class, you drag the State attribute to the grid and define the Condition as Checked In. In the Or field, you enter Released. From the CATIA Part class, you drag the State attribute to the grid and define the Condition as Checked In. In the Or field, you enter Released.
130 10. When the search is run, the search results list will display those Products that are released or checked in whose Parts are also released or checked in. After the search is defined:
131 Click Run to run the search. The results are displayed in a search results list. You can browse through the documents in the list to display the Profile Card for each document. You can also launch a document directly into CATIA. Click Save to save the search. This search (as it was named in step 2) will subsequently be displayed in the Search Editor window. Click Close to exit without saving.
132 Creating and Viewing Links CATIA-TeamPDM enables you to create links between Parts, Drawings and Products. You can view these links in the Links page and access the linked documents. These links enable you to: Define the hierarchical structure of a Part, Drawing or Product by linking it to a project or parent. Locate related documents in order to view or modify them. For example, if you modify a Part, you can locate and modify all its parents as well as other documents linked to it (such as a spreadsheet or a proposal). Check a Product into and out of the vault for modification together with its sub-products. The hierarchical links protect the integrity of the Assembly by reflecting the hierarchical CATIA structure. Check a Drawing into and out of the vault for modifications together with the Part or Product on which it was based (and vice versa). CATIA-TeamPDM automatically creates the following links: When you create a Product (using the Insert Component option) and save it (using the SmarTeam/Save option), the Product and all its children are saved in a hierarchical structure. A parent-child link is created between the Product and each of its components. When you create a Drawing based on a specific Part or Product, the Drawing is linked to the Part or Product on which it was based.
133 Creating Links You can create general links between documents, regardless of their class or hierarchical structure. These links provide a quick tool for finding related documents. For example, you may wish to link an Assembly to a marketing document. The general links are displayed in the Documents tab of the Links page. Refer to Creating General Links for instructions. CATIA-TeamPDM enables you to link any document to a project or a parent in the Save As window. This window is displayed: When you first save a document (using the Save or Save As option). and When you choose the Save As option for subsequent saves. A Project Tree is displayed when you click the dropdown arrow to the right of the Project box. In this tree, you can select a project. The Object Tree is displayed in the middle of the window. You can expand and collapse the tree to display its branches. In this tree, you can select a parent for the document, such as an Assembly or a Folder.
134 CATIA-TeamPDM enables you to modify the displayed view of these trees in several ways: Define the level of sub-branches displayed in the trees, as described below. Define the general tree properties, such as whether to display all revisions or the last public revisions. These properties are defined in the Documents tree of a project when you right-click and choose Tree Properties. From the SmarTeam menu, choose Switch to SmarTeam and locate the Documents Tree for a specific project. For example, in the Tree Filter tab of the Tree Property window, you can define whether to display all revisions of the documents in a tree, or only the last public revisions of the documents in a tree. To define the level of sub-branches displayed in the Save As window: 1. From the SmarTeam menu, choose Save As to display the Save As window. 2. Click the Options menu to display the Save Options window. Click the Tree settings tab. 3. Define the level of branches that will be displayed in the Project Tree and the Object Tree. Creating General Links You can create general links between documents, regardless of their class or hierarchical structure. These links provide a quick tool for finding related documents. For example, you may wish to link a Product to a marketing document. The general links are displayed in the Document tabs of the Links page.
135 To create a general link: 1. Display the document in a CATIA-TeamPDM window: From CATIA, click on the SmarTeam menu and choose Locate Active Document. or Run a search to locate the document. 2. Open the Links page of the document to which you want to link another document. 3. In the Links page, select a tab (Projects or Documents for example) from the bottom of the window to display a specific Links sub-page. This Links sub-page must display the same class as the document that you will choose in step Open any CATIA-TeamPDM window, and select the document that you wish to link to the document selected in step Drag and drop the selected document (selected in step 3) to the Links page of the document selected in step 1 to create a link. A message confirming the link is displayed. Click Yes to confirm a single link. Click All to confirm multiple links. The Links page is automatically updated to reflect these additional links.
136 Viewing and Accessing Links CATIA-TeamPDM enables you to view the various links of a document by clicking through the Links sub-pages. You can then access a linked document, view its Profile card and launch it into CATIA. The Composed Of sub-page lists all the children (components) of a document. The Where Used sub-page for the Product lists all the parents (folders and Products) of a document. The Where Used list is also displayed when you select the SmarTeam menu and then choose the Where Used option. The various class tabs display the general links of a document (according to classes). To view links: In the Links page, you can view the links of any CATIA-TeamPDM document as follows: 1. Select a document from any CATIA-TeamPDM window. If the document is currently displayed in a CATIA window, you can choose the Locate Active Document option from the SmarTeam menu 2. Click the Links tab at the top of the Profile Card to display the Links page. 3. Click the appropriate tab at the bottom of the page to display a sub-page of links: The Composed of sub-page lists all the children of a document.
137 The Documents sub-page lists the link between a Drawing and a Part or Product. It also lists the general links for the Part, Drawing or Product classes. The remaining sub-pages list the links according to classes. The Where Used sub-page lists all the parents of a document. These links are extremely useful in locating all the documents to which a specific document is linked as a child. For example, if you have modified a Part, you can quickly access all the Products which contain this Part as a sub-assembly, and modify them accordingly. You can also view the parents of a document by selecting the SmarTeam menu, then choosing the Where Used option, as shown below.
138 To access linked documents: CATIA-TeamPDM enables you to browse through and launch into CATIA any of the documents listed on the Links page. 1. In the Links page, right click to display a drop-down menu. 2. Point to Open Views and then click Separate View. A window is displayed which lists all the links of the selected Part on the left and displays pages on the right.
Fairfield University Using Xythos for File Sharing
 Fairfield University Using Xythos for File Sharing Version 7.0 Table of Contents I: Manage your Department Folder...2 Your Department Folder... 2 II: Sharing Folders and Files Inside of Fairfield U...3
SMARTEAM Fundamentals
 SMARTEAM Training Foils SMARTEAM Fundamentals Version 5 Release 14 September 2004 EDU-SMT-E-SFL-FF-V5R14 SMARTEAM Fundamentals Objectives of the course This course explains the various principles and procedures
Decision Support AITS University Administration. Web Intelligence Rich Client 4.1 User Guide
 Decision Support AITS University Administration Web Intelligence Rich Client 4.1 User Guide 2 P age Web Intelligence 4.1 User Guide Web Intelligence 4.1 User Guide Contents Getting Started in Web Intelligence
Using SSH Secure Shell Client for FTP
 Using SSH Secure Shell Client for FTP The SSH Secure Shell for Workstations Windows client application features this secure file transfer protocol that s easy to use. Access the SSH Secure FTP by double-clicking
ArcGIS Business Analyst Premium* ~ Help Guide ~ Revised October 3, 2012
 ArcGIS Business Analyst Premium* ~ Help Guide ~ Revised October 3, 2012 ArcGIS Business Analyst Premium is an Esri software package that combines GIS analysis and visualization with data to provide a better
Section 1: Preface... 1. Introduction... 1 Users... 1 Assumptions... 2 Other Resources... 2 Conventions... 2 Icons... 2 Text... 2
 Table of Contents Section 1: Preface........................................... 1 Introduction............................................................. 1 Users...................................................................
USING STUFFIT DELUXE THE STUFFIT START PAGE CREATING ARCHIVES (COMPRESSED FILES)
") USING STUFFIT DELUXE StuffIt Deluxe provides many ways for you to create zipped file or archives. The benefit of using the New Archive Wizard is that it provides a way to access some of the more powerful
USING STUFFIT DELUXE StuffIt Deluxe provides many ways for you to create zipped file or archives. The benefit of using the New Archive Wizard is that it provides a way to access some of the more powerful
Affiliated Provider Billing/Coding
 Affiliated Provider Billing/Coding ED BILLING USING FIRSTNET Table of Contents Affiliated Provider ED Billing...2 icentra FirstNet...2 Accessing FirstNet...2 To access FirstNet:...2 Checking In as a Provider...2
Virtual Office Remote Installation Guide
 Virtual Office Remote Installation Guide Table of Contents VIRTUAL OFFICE REMOTE INSTALLATION GUIDE... 3 UNIVERSAL PRINTER CONFIGURATION INSTRUCTIONS... 12 CHANGING DEFAULT PRINTERS ON LOCAL SYSTEM...
Identity Finder Setup
 Identity Finder Information Sheet for MAC This document will walk you through how to install, scan, and secure any SI found on your computer, or storage devices using the Identity Finder Software. This
Interact for Microsoft Office
 Interact for Microsoft Office Installation and Setup Guide Perceptive Content Version: 7.0.x Written by: Product Knowledge, R&D Date: October 2014 2014 Perceptive Software. All rights reserved Perceptive
TAMUS Terminal Server Setup BPP SQL/Alva
 We have a new method of connecting to the databases that does not involve using the Texas A&M campus VPN. The new way of gaining access is via Remote Desktop software to a terminal server running here
How to set up HotFolders and Workflows
 How to set up HotFolders and Workflows HotFolders 1 The basis: HotFolders acting like a FileManager 1 An example: HotFolders and the Images bar 2 Printing from a Windows client 4 Workflows 5 Printing Workflow
Colligo Email Manager 6.0. Offline Mode - User Guide
 6.0 Offline Mode - User Guide Contents Colligo Email Manager 1 Key Features 1 Benefits 1 Installing and Activating Colligo Email Manager 2 Checking for Updates 3 Updating Your License Key 3 Managing SharePoint
Content Author's Reference and Cookbook
 Sitecore CMS 6.2 Content Author's Reference and Cookbook Rev. 091019 Sitecore CMS 6.2 Content Author's Reference and Cookbook A Conceptual Overview and Practical Guide to Using Sitecore Table of Contents
User guide. Tax & Accounting. Version 4.1. Last updated April 16, 2010. Copyright 2010 Thomson Reuters/ONESOURCE. All Rights Reserved
 Onesource Fileroom User guide Version 4.1 Last updated April 16, 2010 Tax & Accounting Copyright 2010 Thomson Reuters/ONESOURCE. Proprietary Materials No use of these Proprietary materials is permitted
CRM Migration Manager 3.1.1 for Microsoft Dynamics CRM. User Guide
 CRM Migration Manager 3.1.1 for Microsoft Dynamics CRM User Guide Revision D Issued July 2014 Table of Contents About CRM Migration Manager... 4 System Requirements... 5 Operating Systems... 5 Dynamics
User s Guide For Department of Facility Services
 Doc s File Server User s Guide For Department of Facility Services For Ver : 7.2.88.1020 Rev : 1_05-27-2011 Created by : Elliott Jeyaseelan 2 Table of Contents SERVER LOGIN & AUTHENTICATION REQUIREMENTS
Using SSH Secure FTP Client INFORMATION TECHNOLOGY SERVICES California State University, Los Angeles Version 2.0 Fall 2008.
 Using SSH Secure FTP Client INFORMATION TECHNOLOGY SERVICES California State University, Los Angeles Version 2.0 Fall 2008 Contents Starting SSH Secure FTP Client... 2 Exploring SSH Secure FTP Client...
DI SHAREPOINT PORTAL. User Guide
 DI SHAREPOINT PORTAL User Guide -1- TABLE OF CONTENTS PREFACE... 3 SECTION 1: DI PORTAL ACCESS... 4 REQUEST USER ACCESS... 4 To register... 4 SIGNING IN TO THE PORTAL... 8 To sign in to the DI Portal...
Olathe District Schools 1 of 11 GroupWise 7
 Olathe District Schools 1 of 11 GroupWise 7 Creating an email group To create and save a personal group: 1. Click on the toolbar. 2. Click the personal address book you want to add this group to. 3. Click
SQ TRADING STATION User Guide & Installation
 SQ TRADING STATION User Guide & Installation Table of content 1. Downloading the SQ Trading Station 2 2. Launching the SQ Trading Station 3 3. The SQ Trading Station User Interface 4 4. How to place a
Online Statements. About this guide. Important information
 Online Statements About this guide This guide shows you how to: View online statements, including CommBiz Activity Statements (Billing summaries) and online statements for Transaction Accounts, Credit
Changing Your Cameleon Server IP
 1.1 Overview Technical Note Cameleon requires that you have a static IP address defined for the server PC the Cameleon server application runs on. Even if the server PC has a static IP address, you may
Virtual Desktop on any computer (incl. Desktop Bar Guide)
") Viewpoint School Virtual Desktop on any computer (incl. Desktop Bar Guide) 091214 Accessing Your Viewpoint Virtual Desktop on any Computer We are pleased to announce the availability of Viewpoint s new
Viewpoint School Virtual Desktop on any computer (incl. Desktop Bar Guide) 091214 Accessing Your Viewpoint Virtual Desktop on any Computer We are pleased to announce the availability of Viewpoint s new
Colligo Email Manager 6.0. Connected Mode - User Guide
 6.0 Connected Mode - User Guide Contents Colligo Email Manager 1 Benefits 1 Key Features 1 Platforms Supported 1 Installing and Activating Colligo Email Manager 2 Checking for Updates 3 Updating Your License
Figure 1: Restore Tab
 Apptix Online Backup by Mozy Restore How do I restore my data? There are five ways of restoring your data: 1) Performing a Restore Using the Restore Tab You can restore files from the Apptix Online Backup
Outlook Web Access (OWA) User Guide
 User Guide") Outlook Web Access (OWA) User Guide September 2010 TABLE OF CONTENTS TABLE OF CONTENTS... 2 1.0 INTRODUCTION... 4 1.1 OUTLOOK WEB ACCESS SECURITY CONSIDERATIONS... 4 2.0 GETTING STARTED... 5 2.1 LOGGING
Outlook Web Access (OWA) User Guide September 2010 TABLE OF CONTENTS TABLE OF CONTENTS... 2 1.0 INTRODUCTION... 4 1.1 OUTLOOK WEB ACCESS SECURITY CONSIDERATIONS... 4 2.0 GETTING STARTED... 5 2.1 LOGGING
Cascade Server CMS Quick Start Guide
 Cascade Server CMS Quick Start Guide 1. How to log in 2. How to open page 3. How to edit a page 4. How to create a new page 5. How to publish a page 6. How to change settings to view publish status page
Decision Support AITS University Administration. EDDIE 4.1 User Guide
 Decision Support AITS University Administration EDDIE 4.1 User Guide 2 P a g e EDDIE (BI Launch Pad) 4.1 User Guide Contents Introduction to EDDIE... 4 Log into EDDIE... 4 Overview of EDDIE Homepage...
User s Guide. Version 2.1
 Content Management System User s Guide Version 2.1 Page 1 of 51 OVERVIEW CMS organizes all content in a tree hierarchy similar to folder structure in your computer. The structure is typically predefined
Roth IRA Conversion Evaluator
 Roth IRA Conversion Evaluator Quick Start Guide 2009, WoltersKluwer. All Rights Reserved. Page 1 of 36 Table of Contents Roth IRA Conversion Evaluator Quick Start Guide Getting Started... 3 About the Roth
Business Online. Quick Reference Guide
 Business Online Quick Reference Guide . All rights reserved. This work is confidential and its use is strictly limited. Use is permitted only in accordance with the terms of the agreement under which it
OWA - Outlook Web App
 OWA - Outlook Web App Olathe Public Schools 0 Page MS Outlook Web App OPS Technology Department Last Revised: May 1, 2011 Table of Contents MS Outlook Web App... 1 How to Access the MS Outlook Web App...
Backup Assistant. User Guide. NEC NEC Unified Solutions, Inc. March 2008 NDA-30282, Revision 6
 Backup Assistant User Guide NEC NEC Unified Solutions, Inc. March 2008 NDA-30282, Revision 6 Liability Disclaimer NEC Unified Solutions, Inc. reserves the right to change the specifications, functions,
Does the GC have an online document management solution?
 This FAQ contains: Web File Services definition Access web file services Create a WFS folder Upload a document Email a link to a document folder Create WFS subscription Cancel existing subscription Create
Table of Contents. 1. Content Approval...1 EVALUATION COPY
 Table of Contents Table of Contents 1. Content Approval...1 Enabling Content Approval...1 Content Approval Workflows...4 Exercise 1: Enabling and Using SharePoint Content Approval...9 Exercise 2: Enabling
How To Write A Cq5 Authoring Manual On An Ubuntu Cq 5.2.2 (Windows) (Windows 5) (Mac) (Apple) (Amd) (Powerbook) (Html) (Web) (Font
 (Windows 5) (Mac) (Apple) (Amd) (Powerbook) (Html) (Web) (Font") Adobe CQ5 Authoring Basics Print Manual SFU s Content Management System SFU IT Services CMS Team ABSTRACT A summary of CQ5 Authoring Basics including: Setup and Login, CQ Interface Tour, Versioning, Uploading
Adobe CQ5 Authoring Basics Print Manual SFU s Content Management System SFU IT Services CMS Team ABSTRACT A summary of CQ5 Authoring Basics including: Setup and Login, CQ Interface Tour, Versioning, Uploading
Document Management User Guide
 IBM TRIRIGA Version 10.3.2 Document Management User Guide Copyright IBM Corp. 2011 i Note Before using this information and the product it supports, read the information in Notices on page 37. This edition
Chapter 15: Forms. User Guide. 1 P a g e
 User Guide Chapter 15 Forms Engine 1 P a g e Table of Contents Introduction... 3 Form Building Basics... 4 1) About Form Templates... 4 2) About Form Instances... 4 Key Information... 4 Accessing the Form
Getting Started Guide for WebEx Hosts and Presenters. Scheduling a Meeting in Outlook
 Getting Started Guide for WebEx Hosts and Presenters Scheduling a Meeting in Outlook First, install the WebEx Productivity Tools. Then you can schedule your online Meeting using Outlook just like you schedule
General Product Questions... 3. Q. What is the Bell Personal Vault Vault?...4. Q. What is Bell Personal Vault Backup Manager?...4
 Frequently Asked Questions to be posted at: /faqs/ Table of Contents General Product Questions... 3 Q. What is the Bell Personal Vault Vault?...4 Q. What is Bell Personal Vault Backup Manager?...4 Q. What
Getting Started with Access 2007
 Getting Started with Access 2007 Table of Contents Getting Started with Access 2007... 1 Plan an Access 2007 Database... 2 Learning Objective... 2 1. Introduction to databases... 2 2. Planning a database...
One step login. Solutions:
 Many Lotus customers use Lotus messaging and/or applications on Windows and manage Microsoft server/client environment via Microsoft Active Directory. There are two important business requirements in this
ApplicationXtender 7.0 Upgrade on 23 September 2015
 ApplicationXtender 7.0 Upgrade on 23 September 2015 After the Banner Document Management (BDM) 8.5 upgrade is performed, if you have previously installed ApplicationXtender 6.5 or its components on your
TimeValue Software Due Date Tracking and Task Management Software
 User s Guide TM TimeValue Software Due Date Tracking and Task Management Software File In Time Software User s Guide Copyright TimeValue Software, Inc. (a California Corporation) 1992-2010. All rights
DCA. Document Control & Archiving USER S GUIDE
 DCA Document Control & Archiving USER S GUIDE Decision Management International, Inc. 1111 Third Street West Suite 250 Bradenton, FL 34205 Phone 800-530-0803 FAX 941-744-0314 www.dmius.com Copyright 2002,
State of Ohio DMS Solution for Personnel Records Training
 State of Ohio DMS Solution for Personnel Records Training 1 Contents LOGGING IN AND THE BASICS... 3 LOGGING INTO THE DMS... 3 NAVIGATING THE UNITY CLIENT... 4 CREATING PERSONAL PAGES... 6 ADDING WEB LINKS
Load testing with. WAPT Cloud. Quick Start Guide
 Load testing with WAPT Cloud Quick Start Guide This document describes step by step how to create a simple typical test for a web application, execute it and interpret the results. 2007-2015 SoftLogica
NYS OCFS CMS Contractor Manual
 NYS OCFS CMS Contractor Manual C O N T E N T S CHAPTER 1... 1-1 Chapter 1: Introduction to the Contract Management System... 1-2 CHAPTER 2... 2-1 Accessing the Contract Management System... 2-2 Shortcuts
Publishing with Adobe Presenter 10 (Detailed)
") Publishing with Adobe Presenter 10 (Detailed) Open PowerPoint Find PowerPoint and open it by clicking its icon. The PowerPoint icon may be found in one of the following locations: 1. Desktop 2. Start Menu
Publishing with Adobe Presenter 10 (Detailed) Open PowerPoint Find PowerPoint and open it by clicking its icon. The PowerPoint icon may be found in one of the following locations: 1. Desktop 2. Start Menu
Colligo Email Manager 6.2. Offline Mode - User Guide
 6.2 Offline Mode - User Guide Contents Colligo Email Manager 1 Benefits 1 Key Features 1 Platforms Supported 1 Installing and Activating Colligo Email Manager 3 Checking for Updates 4 Updating Your License
Timeless Time and Expense Version 3.0. Copyright 1997-2009 MAG Softwrx, Inc.
 Timeless Time and Expense Version 3.0 Timeless Time and Expense All rights reserved. No parts of this work may be reproduced in any form or by any means - graphic, electronic, or mechanical, including
HDAccess Administrators User Manual. Help Desk Authority 9.0
 HDAccess Administrators User Manual Help Desk Authority 9.0 2011ScriptLogic Corporation ALL RIGHTS RESERVED. ScriptLogic, the ScriptLogic logo and Point,Click,Done! are trademarks and registered trademarks
Web Content Management Training Manualv3
 City & County of San Francisco Powered by Innovation DT City & County of Sa Departme Techno Powered by Innova DEPARTMENT OF TECHNOLOGYDT Web Content Management Training Manualv3 Department of Technology
eopf Release E Administrator Training Manual
 eopf Release E Administrator Training Manual i The United States Office Of Personnel Management eopf Administrator Training Manual for eopf v5 eopf Version 4.1, July 2007, March 2008, March 2009; eopf
Site Maintenance Using Dreamweaver
 Site Maintenance Using Dreamweaver As you know, it is possible to transfer the files that make up your web site from your local computer to the remote server using FTP (file transfer protocol) or some
Content Author's Reference and Cookbook
 Sitecore CMS 6.5 Content Author's Reference and Cookbook Rev. 110621 Sitecore CMS 6.5 Content Author's Reference and Cookbook A Conceptual Overview and Practical Guide to Using Sitecore Table of Contents
Colligo Email Manager 5.1. User Guide
 5.1 User Guide Contents Enterprise Email Management for SharePoint 2010 1 Benefits 1 Key Features 1 Platforms Supported 1 Installing and Activating Colligo Email Manager 2 Managing SharePoint Sites 5 Adding
NetOp: Teacher Program Creating and Setting up Your Class
 NetOp: Teacher Program Creating and Setting up Your Class Before you can use NetOp to manage a computer classroom, you must create and set up your class on the tech cart in the classroom you will be using.
Working with Calendars
 Working with Calendars Add an Appointment or Meeting to a Calendar You can add appointments and meetings to your calendar. Appointments are those items that you schedule only for yourself. For example,
BillQuick Agent 2010 Getting Started Guide
 Time Billing and Project Management Software Built With Your Industry Knowledge BillQuick Agent 2010 Getting Started Guide BQE Software, Inc. 2601 Airport Drive Suite 380 Torrance CA 90505 Support: (310)
SHAREPOINT 2010 FOUNDATION FOR END USERS
 SHAREPOINT 2010 FOUNDATION FOR END USERS WWP Training Limited Page i SharePoint Foundation 2010 for End Users Fundamentals of SharePoint... 6 Accessing SharePoint Foundation 2010... 6 Logging in to your
Installation and Troubleshooting Guide for SSL-VPN CONNECTIONS Access
 Installation and Troubleshooting Guide for SSL-VPN CONNECTIONS Access Version 1 Revised 11/29/2007 Table of Contents Java Installation:...4 Browser Configuration:...4 Citrix Client Installation:...8 Attempting
Outlook Web App User Guide
 Outlook Web App Table of Contents QUICK REFERENCE... 2 OUTLOOK WEB APP URL... 2 Imagine! Help Desk...... 2 OUTLOOK WEB APP MAIN WINDOW... 2 KEY NEW FEATURES... 3 GETTING STARTED WITH OUTLOOK... 4 LOGGING
Search help. More on Office.com: images templates
 Page 1 of 14 Access 2010 Home > Access 2010 Help and How-to > Getting started Search help More on Office.com: images templates Access 2010: database tasks Here are some basic database tasks that you can
How To Use Senior Systems Cloud Services
 Senior Systems Cloud Services In this guide... Senior Systems Cloud Services 1 Cloud Services User Guide 2 Working In Your Cloud Environment 3 Cloud Profile Management Tool 6 How To Save Files 8 How To
Configuration Manager
 After you have installed Unified Intelligent Contact Management (Unified ICM) and have it running, use the to view and update the configuration information in the Unified ICM database. The configuration
Quote to Cloud Connecting QuoteWerks and Xero
 Quote to Cloud Connecting QuoteWerks and Xero Contents Setup Guide... 3 Pre-requisite:... 3 Quote to Cloud Installation and Configuration... 3 Xero Application Setup... 5 QuoteWerks Configuration... 7
https://weboffice.edu.pe.ca/
 NETSTORAGE MANUAL INTRODUCTION Virtual Office will provide you with access to NetStorage, a simple and convenient way to access your network drives through a Web browser. You can access the files on your
Avaya Network Configuration Manager User Guide
 Avaya Network Configuration Manager User Guide May 2004 Avaya Network Configuration Manager User Guide Copyright Avaya Inc. 2004 ALL RIGHTS RESERVED The products, specifications, and other technical information
A-PDF Password Security Change pdf file password security. User Documentation
 Note: This product is distributed on a try-before-you-buy basis. All features described in this documentation are enabled. The unregistered version disallows you change the passwords. About A-PDF Password
Richmond SupportDesk Web Reports Module For Richmond SupportDesk v6.72. User Guide
 Richmond SupportDesk Web Reports Module For Richmond SupportDesk v6.72 User Guide Contents 1 Introduction... 4 2 Requirements... 5 3 Important Note for Customers Upgrading... 5 4 Installing the Web Reports
Lepide Event Log Manager. Users Help Manual. Lepide Event Log Manager. Lepide Software Private Limited. Page 1
 Users Help Manual Lepide Event Log Manager Lepide Software Private Limited. Page 1 Users Help Manual for Lepide Event Log Manager Lepide Software Private Limited, All Rights Reserved This User Guide and
UF Health SharePoint 2010 Document Libraries
 UF Health SharePoint 2010 Document Libraries Email: [email protected] Web Page: http://training.health.ufl.edu Last Updated 2/7/2014 SharePoint 2010 Document Libraries 1.5 Hours 1.0 Shared Network
FileCruiser. Desktop Agent Guide
 FileCruiser Desktop Agent Guide FileCruiser Desktop Agent Guide Contents Contents Getting Started with FileCruiser 1 Using the FileCruiser Agent 2 Desktop Shortcut 2 Log in to FileCruiser Agent 3 Using
Vodafone PC SMS 2010. (Software version 4.7.1) User Manual
 User Manual") Vodafone PC SMS 2010 (Software version 4.7.1) User Manual July 19, 2010 Table of contents 1. Introduction...4 1.1 System Requirements... 4 1.2 Reply-to-Inbox... 4 1.3 What s new?... 4 2. Installation...6
Vodafone PC SMS 2010 (Software version 4.7.1) User Manual July 19, 2010 Table of contents 1. Introduction...4 1.1 System Requirements... 4 1.2 Reply-to-Inbox... 4 1.3 What s new?... 4 2. Installation...6
account multiple solutions
 Quick Start Guide 1 Our easy to use guide will get you up and running in no time! The guide will assist you with: Generating your Sage Pay login Navigation Creating contacts Creating system users Setting
MadCap Software. Upgrading Guide. Pulse
 MadCap Software Upgrading Guide Pulse Copyright 2014 MadCap Software. All rights reserved. Information in this document is subject to change without notice. The software described in this document is furnished
Getting started with OneDrive
 Getting started with OneDrive What is OneDrive? OneDrive is an online storage area intended for business purposes. Your OneDrive library is managed by the University. You can use it to share documents
Remote Desktop Services
 Remote Desktop Services AMERICAN INSTITUTES FOR RESEARCH AIR REMOTE DESKTOP SERVICES (RDS) GUIDE Overview Welcome to AIR Remote Desktop Services! AIR Remote Desktop Services can be accessed from a Windows
Working with SQL Server Integration Services
 SQL Server Integration Services (SSIS) is a set of tools that let you transfer data to and from SQL Server 2005. In this lab, you ll work with the SQL Server Business Intelligence Development Studio to
PaperStream Connect. Setup Guide. Version 1.0.0.0. Copyright Fujitsu
 PaperStream Connect Setup Guide Version 1.0.0.0 Copyright Fujitsu 2014 Contents Introduction to PaperStream Connect... 2 Setting up PaperStream Capture to Release to Cloud Services... 3 Selecting a Cloud
Cox Business Premium Online Backup USER'S GUIDE. Cox Business VERSION 1.0
 Cox Business Premium Online Backup USER'S GUIDE Cox Business VERSION 1.0 Table of Contents ABOUT THIS GUIDE... 4 DOWNLOADING COX BUSINESS PREMIUM ONLINE BACKUP... 5 INSTALLING COX BUSINESS PREMIUM ONLINE
EM L18 Managing ios and Android Mobile Devices with Symantec Mobile Management Hands-On Lab
 EM L18 Managing ios and Android Mobile Devices with Symantec Mobile Management Hands-On Lab Description The Symantec Mobile Management platform continues to expand it s offering with new support for native
Install FileZilla Client. Connecting to an FTP server
 Install FileZilla Client Secure FTP is Middle Georgia State College s supported sftp client for accessing your Web folder on Webdav howeve you may use FileZilla or other FTP clients so long as they support
QUICK START GUIDE. Welcome to EDGAR Pro, your access to SEC filings and more! We ve created this user guide to facilitate your use of this service.
 Welcome to EDGAR Pro, your access to SEC filings and more! We ve created this user guide to facilitate your use of this service. If at any point you need additional assistance, contact our Customer Support
ShoreTel Enterprise Contact Center Using Agent Toolbar
 ShoreTel Enterprise Contact Center Using Agent Toolbar USER GUIDES RELEASE 7 Document and Software Copyrights Copyright 1998 2011 ShoreTel, Inc. All rights reserved. Printed in the United States of America.
Training Manual Version 1.0
 State of Indiana Content Management System Open Text v.11.2 Training Manual Version 1.0 Developed by Table of Contents 1. Getting Started... 4 1.1 Logging In... 4 1.2 OpenText Menu...5 1.3 Selecting a
Zoom Plug-ins for Adobe
 = Zoom Plug-ins for Adobe User Guide Copyright 2010 Evolphin Software. All rights reserved. Table of Contents Table of Contents Chapter 1 Preface... 4 1.1 Document Revision... 4 1.2 Audience... 4 1.3 Pre-requisite...
Content Management System Help. basic tutorial on Evergreen s CMS
 Content Management System Help cms.evergreen.edu Tips, tricks and basic tutorial on Evergreen s CMS Contents Vocabulary Login Opening a page Editing a page Creating a new page Inserting internal and external
Mapping ITS s File Server Folder to Mosaic Windows to Publish a Website
 Mapping ITS s File Server Folder to Mosaic Windows to Publish a Website April 16 2012 The following instructions are to show you how to map your Home drive using ITS s Network in order to publish a website
Crystal Reports Installation Guide
 Crystal Reports Installation Guide Version XI Infor Global Solutions, Inc. Copyright 2006 Infor IP Holdings C.V. and/or its affiliates or licensors. All rights reserved. The Infor word and design marks
Rational Quality Manager. Quick Start Tutorial
 Rational Quality Manager Quick Start Tutorial 1 Contents 1. Introduction... 2 2. Terminology... 3 3. Project Area Preparation... 4 3.1 Adding Users and specifying Roles... 4 3.2 Managing Tool Associations...
Banner Document Management Suite (BDMS) Web Access Help
 Web Access Help") May 10 th, 2011 Banner Document Management Suite (BDMS) Web Access Help Division of Information Technology AppXtender Web Access Help: For questions regarding AppXtender Web Access, please contact the
May 10 th, 2011 Banner Document Management Suite (BDMS) Web Access Help Division of Information Technology AppXtender Web Access Help: For questions regarding AppXtender Web Access, please contact the
INTRODUCTION TO ATRIUM... 2 SYSTEM REQUIREMENTS... 2 TECHNICAL DETAILS... 2 LOGGING INTO ATRIUM... 3 SETTINGS... 4 NAVIGATION PANEL...
 INTRODUCTION TO ATRIUM... 2 SYSTEM REQUIREMENTS... 2 TECHNICAL DETAILS... 2 LOGGING INTO ATRIUM... 3 SETTINGS... 4 CONTROL PANEL... 4 ADDING GROUPS... 6 APPEARANCE... 7 BANNER URL:... 7 NAVIGATION... 8
Uni Sales Analysis CRM Extension for Sage Accpac ERP 5.5
 SAGE ACCPAC OPTIONS Sage Accpac Options Uni Sales Analysis CRM Extension for Sage Accpac ERP 5.5 User Guide 2008 Sage Software, Inc. All rights reserved. Sage Software, Sage Software logos, and all Sage
F9 Integration Manager
 F9 Integration Manager User Guide for use with QuickBooks This guide outlines the integration steps and processes supported for the purposes of financial reporting with F9 Professional and F9 Integration
Table of Contents. Welcome... 2. Login... 3. Password Assistance... 4. Self Registration... 5. Secure Mail... 7. Compose... 8. Drafts...
 Table of Contents Welcome... 2 Login... 3 Password Assistance... 4 Self Registration... 5 Secure Mail... 7 Compose... 8 Drafts... 10 Outbox... 11 Sent Items... 12 View Package Details... 12 File Manager...
NETWORK PRINT MONITOR User Guide
 NETWORK PRINT MONITOR User Guide Legal Notes Unauthorized reproduction of all or part of this guide is prohibited. The information in this guide is subject to change without notice. We cannot be held liable