Make any home a castle.
|
|
|
- Sibyl Lucas
- 10 years ago
- Views:
Transcription
1 Dealer Manual
2 1 Make any home a castle. Introducing Castle Combe Floor & Wall from USFloors. Castle Combe provides the look and feel of an ancient, reclaimed floor and combines it with the modern performance features of a 21st century engineered floor. These inspiring, beautifully aged, handcrafted FSC-certified floors may be the most interesting, unique, head-turning floor covering AND wall panelling you ve seen in many years. Table of Contents Why Castle Combe?... 2 Why an Oil Finish?... 5 Colham Mill... 8 Malmesbury... 9 Sodbury Bristol Chippenham Avon Worcester Gloucester Cotswolds Sevington Molding Specifications Maintenance Guidelines Repair & Protection Guidelines Flooring Installation Instructions Wall Installation Instructions Warranties How to Make a Claim Promotional Materials Floor: Sevington with square peg inlays Wall: Sodbury

3 Why Castle Combe? Castle Combe s beautifully aged, hand crafted visuals are characterized by smooth, raised knots, deep fissures, and a look that, until now, was only available in reclaimed floors. 2 Castle Combe s aging is achieved using a process called Thermo-Modification, subjecting each plank to extreme environmental conditions to darken the wood through a heating process, creating a deep, textured surface and color. Castle Combe Floor & Wall is 100% FSC Pure meaning that the entirety of the plank is from managed forest resources as certified by the Forest Stewardship Council. FSC certification contributes to satisfying LEED Credit MR 7.0 Certified Wood. As is typical with all hardwood floors, Castle Combe may darken over time with continued exposure to light. If a portion of the floor is covered and the area under the covering appears lighter, remove the covering to allow the floor to equalize. It may take a few months for the covered area to darken to an equal color as rest of the flooring. Castle Combe planks are finished with our proprietary Natural-E Natural Oil Finish to saturate and enhance the grain of the wood. These floors will actually become more beautiful with time and use, as each plank develops a rich and saturated patina. Immediately after Castle Combe is installed on the floor, a coating of Woca Refresher is required. A 1 liter bottle (2000 sq. ft. coverager) of Woca Refresher is included with each order of Castle Combe. Castle Combe floors are easy to maintain and can be easily spot repaired without disrupting the entire floor or room. Castle Combe planks are designed for application on floor or wall. USFloors provides easy-to-follow instructions on wall application. Castle Combe is an upmarket product line that commands higher price points and higher margins. Castle Combe is not price sensitive and will appeal to the discriminating consumer who is motivated by perfecting her decor, regardless of cost. Castle Combe is divided into three distinct series: Market Cross: Thermo-modified antiquing with deep fissures and wire brushed grain. Manor House: Smooth handscraping with raised knots, antiqued and wire brushed grain. Relics: Thermo-modified antiquing, wire brushed grain, and random insertions of wooden peg inlays. Castle Combe Specifications Plank size: 7 1 /2 x 75 x 5/8 Sq. ft. per carton: sq. ft. Finish: Natural-E Natural Oil Finish with zero VOC s FSC Installation: Glue, Staple, Nail, Float C Installation Areas: Below, On, or Above Grade Warranties: Lifetime Residential Wear and Structure FSC C Year Light/Medium Commercial Wear Certification: FSC 100% Compliance: Lacey Act and CARB 2012 Compliant The mark of responsible forestry Why Castle Combe?

4 3 Floor: Malmesbury Island: Worcester

5 Floor: Avon Wall: Cotswalds with bowtie peg inlays 4

6 5 Why a Castle Combe Oil Finished Floor? Inspired by the 19th century Arts & Crafts movement, Castle Combe marries the craftsmanship of Olde World artisans and 21st century manufacturing technologies to create heirloom quality oak hardwood flooring. The distinctive character of each Castle Combe plank is achieved using a variety of antiquing and aging techniques and finished with natural oils to preserve the original beauty of the wood. Castle Combe s natural oil process provides a warmth and refinement to the floor that cannot be achieved with modern day acrylic or polyurethane coatings. The rich patina of each Castle Combe floor is only enhanced with age and use - the more it is walked on, the more beautiful it gets. The natural oils in Castle Combe floors penetrate the grain and become part of the floor, while the surface film of acrylic and polyurethane detracts from the natural beauty of hardwood and degrades with age and use. Castle Combe floors feature a distinctive and sophisticated range of distressed, sculpted, and antiqued visuals. Each Castle Combe floor is meticulously crafted to ensure lasting beauty for generations to come. A solid oak hardwood top layer rests on a multi-layered, dimensionally stable core giving each Castle Combe floor the strength to withstand decades of use. The Oil Finish Difference A natural oil finish cannot be compared with today s more popular acrylic, polyurethane, and aluminum oxide finishes. These finishes protect the floor by forming a wear layer, in effect, a plastic film on the surface of the floor. They scratch and get dull over time and cannot be spot repaired. A costly recoating of the entire floor is necessary every so often for complete rejuvenation. An oil finish penetrates the wood fibers to harden them while not altering the natural beauty of the wood. With no visual film on the surface, oiled floors are distinguishable by their elegant patina. They are easy to care for and are repairable. An oiled floor never needs to be sanded - only regular applications of a maintenance oil are necessary to nourish the wood and bring the luster back. Zero VOC vs. Low VOCs Rejuvenating 325 sq. ft. of a Castle Combe floor project will require approximately 1/5 of a liter of Woca Refresher maintenance oil, which will emit zero VOCs and leave you without that harsh chemical scent. A typical polyurethane floor will require three gallons of finish - one gallon for the sealer coat and two more gallons of the top wear layers. VOCs from polyurethane evaporate into your home at the rate of about 4 lbs. per gallon, which means that 3 gallons of polyurethane used to coat 325 sq. ft. equals 12 pounds of VOCs floating around in your home. Bond and Strengthen vs. Surface Coatings The natural oil used to finish Castle Combe oiled floors is not a surface coating but is designed to become part of the wood by penetrating, bonding with, and hardening the fibers of wood. When wood is finished with natural oil, it may dent or scratch, but it can easily be repaired. To bring your Castle Combe floor back to a fresh state, first, lightly sand the desired area of the floor, and apply a coat of Woca Refresher maintenance oil. It is not necessary to treat the entire floor, only the affected area. Typically, only spot sanding on extreme wear marks and scratches would be necessary, and a total wall-to-wall sanding is normally avoided. Repairing a floor coated with polyurethane or aluminum oxide is a much more laborious and disruptive process. Polyurethane is a plastic coating that sits on top of the wood, and acts as surface coating. The purpose of a surface coating is to protect the wood from wear and tear. However, a polyurethane floor will never look better then the day of the final finish application. Immediately, polyurethane finishes begin picking up small and large scratches - abrasions that defuse the light and pick up dirt - and quickly become visible Why an Oil Finish?

7 6 from all angles. The end of the life of a polyurethane floor is not because it is worn out - it just becomes ugly. This process is accelerated when the floor is damaged by scratches that penetrate the surface coating and expose wood, which happens when dents penetrate the soft wood (NOTE: all wood is soft enough to dent and scratch). Unfortunately, all too often polyurethane floors must be maintained by sanding again and again, a costly, disruptive, and often messy process. Recoating the entire floor is the recommended maintenance option for a floor finished with polyurethane or other synthetic surface coatings. When should this be done? It has to be a joint effort, as soon as you have a scar that penetrates the surface coating, or when the floor looks dirty after you wash the floor. This dirty look means there is an abundance of surface scratches holding dirt. Living With vs. Living On The vast majority of polyurethane customers live on their floors. They take off their shoes at the door, they have floor protectors under all furniture and care to have nothing foul left on the surface. A normal expectation of a polyurethane floor is that it is maintenance free. Homeowners with natural oil finished floors live with their floors. They seem to recognize that wood expands and contracts with the seasons. Some believe this movement is a sign the wood still thinks of itself as being a tree. Feeding wood natural oils supports the notion that you are living with your wood floor and, in turn, the wood responds to appropriate care that s given. Reparability vs. Durability Wood is very durable on its own. Natural oils enhance the durable nature of wood and allow the floor to be easily repaired if damaged. While polyurethanes provide a durable barrier, this barrier also consumes a layer of wood each and every time it is applied. At best there are three to four sandings in a floor s life before the floor must be replaced. Over time, repairability is more important than durability. Maintenance Products USFloors offers a complete line of maintenance products for Castle Combe oil finished floors, from cleaners for everyday maintenance to rejuvenating natural oils for extensive maintenance. Compare and a Natural Oil Finish to a UV-Cured Urethane Finish Natural Oil Finish UV-Cured Urethane Finish Less time to maintain Yes No Less expensive to maintain Yes No Can be spot repaired without disrupting entire room Yes No Plastic film on wood surface No Yes Penetrates and nourishes wood Yes No Provides natural visual Yes No Enhances natural grain of wood Yes No Wood develops patina Yes No Appearace dulls over time No Yes Looks better with time and use Yes No Minimizes appearance of surface scratches Yes No Refinishing creates excessive dust No Yes Why an Oil Finish?

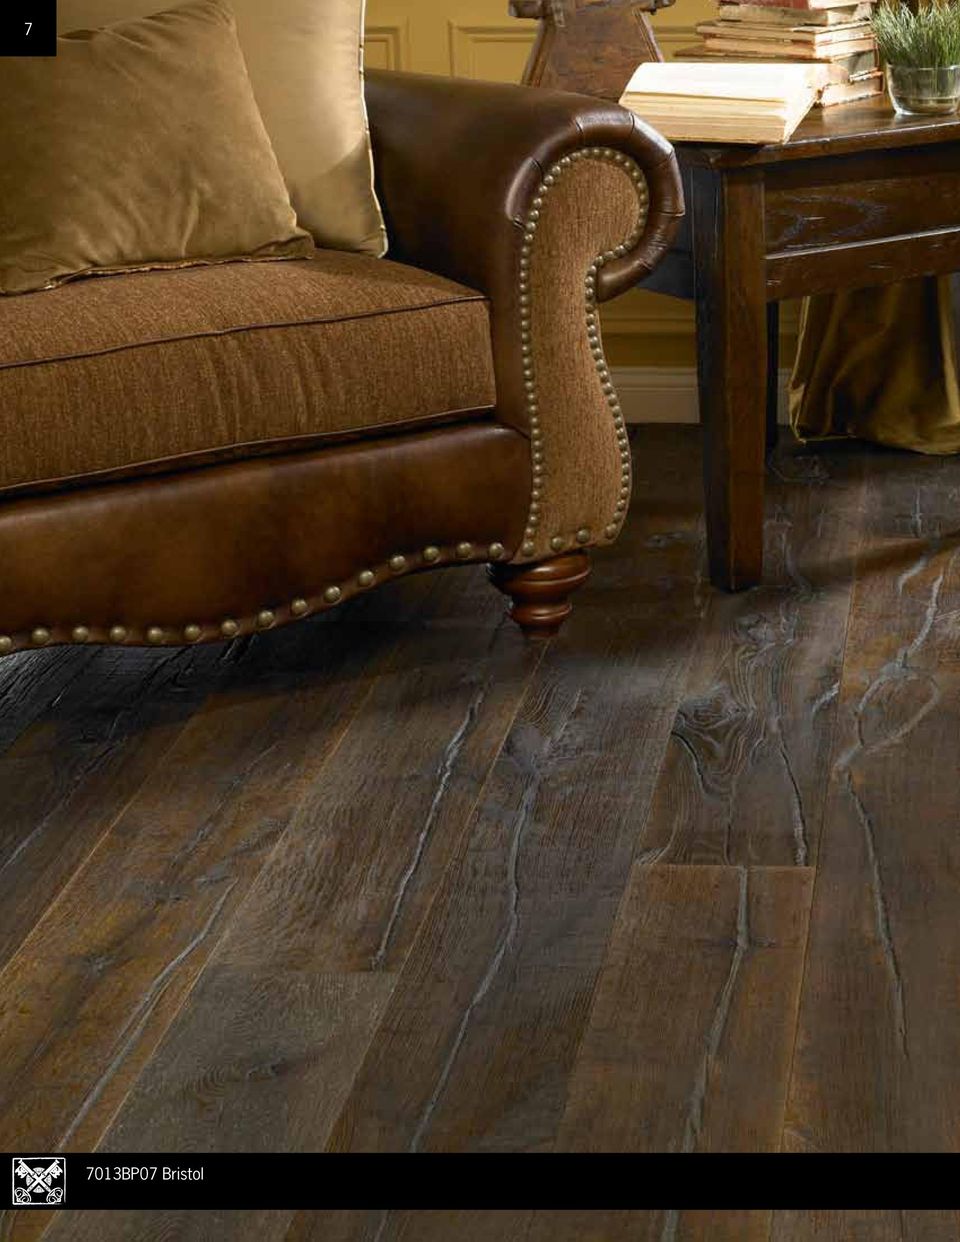
8 7 7013BP07 Bristol
9 7013BP02 Colham Mill Market Cross Series: Thermo-Modified Antiqued Brushed Whitewash 8

10 9 7013BP03 Malmesbury Market Cross Series: Thermo-Modified Antiqued Brushed

11 7013BP05 Sodbury Market Cross Series: Thermo-Modified Antiqued Brushed 10

12 BP07 Bristol Market Cross Series: Thermo-Modified Antiqued Brushed

13 7013BP08 Chippenham Market Cross Series: Thermo-Modified Antiqued Brushed 12

14 BP01 Avon Manor House Series: Handscraped Antiqued Brushed Whitewash

15 7013BP04 Worcester Manor House Series: Handscraped Antiqued Brushed 14

16 BP06 Gloucester Manor House Series: Handscraped Antiqued Brushed

17 7013BP09 Cotswolds Relics Series: Thermo-Modified Antiqued Brushed Bowtie Peg Inlays 16

18 BP10 Sevington Relics Series: Thermo-Modified Antiqued Brushed Square Peg Inlays

19 18 Castle Combe Moldings Coordinating molding and trim pieces are available in the profiles illustrated below for Castle Combe. Quarter Round T-Molding Baby Threshold A A B B C A B C Stair Nose Reducer A A B B C Trim in Inches A B C Length Oak Quarter Round NA 78 T-Molding Baby Threshold Reducer NA 78 Stair Nose Note: Molding profiles are subject to change and availability without prior notice from USFloors. 7013BP09 Cotswolds Molding Specifications

20 19 Castle Combe Maintenance Guidelines Natural oil finished floors like Castle Combe have a very different appearance from traditional synthetic finished or polyurethaned floors. Over time, as applications of oil and maintenance occur, the floor will tend to look better as it ages and develops a rich patina. A natural plank floor system expands and contracts in response to fluctuations in temperature and humidity. By controlling the environment, maintaining an adequate temperature and relative humidity, you will minimize the visible effects of the seasonal contraction and expansion of your floor. Optimum recommended temperature is 68 F - 72 F and relative humidity is 30% - 50%. In very dry climates, the use of a humidifier IS necessary. AFTER INSTALLATION Vacuum the floor. Clean the floor thoroughly with WOCA REFRESHER diluted in water using 1 CUP of WOCA REFRESHER per 5 QUARTS of warm water In a bucket, add 1 cup of WOCA REFRESHER to 5 quarts of warm water. Damp mop only Make sure you rinse the cloth in another bucket of clean water, as you do not want to reincorporate the dirt back onto the floor. Let dry for 2 hours minimum before resuming traffic WOCA REFRESHER is available in natural (for natural and colors other than white) and white (for white oiled floors). Perform normal daily or weekly cleaning by vacuuming or dry mopping grit, dust etc. ROUTINE MAINTENANCE WITH WOCA REFRESHER To prevent damages never use any other cleaner on your oiled floor. In a bucket, add 1/2 CUP of WOCA REFRESHER per 5 QUARTS of warm water. Damp mop only. Make sure you rinse the cloth in another bucket of clean water, as you do not want to reincorporate the dirt back onto the floor. After cleaning with WOCA REFRESHER, a thin nourishing and protective layer remains on the floor. RENOVATING THE FLOOR When the floor becomes dull or starts to show wear patterns, it is possible to rejuvenate the appearance by using WOCA REFRESHER in a more concentrated form with the following ratio 1 CUP of WOCA REFRESHER per 5 QUARTS of warm water. Maintenance Guidelines

21 20 Castle Combe Repair & General Protection Guidelines REMOVING STAINS, SCRATCHES AND BURNS Light scratches are best repaired by hand rubbing WOCA Master Oil or the Color Oil on your floor on the affected areas using a cloth. If necessary, first clean the area to be repaired with lukewarm water. Be sure area is dry before applying oil. It is very important to let the floor dry completely before any Master Oil or Color Oil is applied. Any trapped moisture under the oil may cause mildew to develop, which causes black or dark blotches in the floor. It may also greatly increase drying time of the oil. Leave the oil to absorb for a short period of time before thoroughly buffing with a cloth and then removing the oil from the surrounding area with a clean, dry cloth. Deeper scratches or gouges should be sanded until they are no longer visible. Do not use a sand paper that is too fine. An grit sandpaper will usually suffice, then clean the spot with lukewarm water and let dry completely. Then follow directions for light scratches above. Whenever an area of the floor has been cleaned or repaired with new oil, it is important to remove all new oil from the surrounding area. This is easily done using a polishing cloth or a cotton rag, which then allows both areas to blend by having approximately the same sheen level. If necessary, steel wool can also be used to eliminate the halo effect of a slightly higher gloss level in the area around the repair. GENERAL FLOOR PROTECTION GUIDELINES To help eliminate fine particles of dirt/grit that act like sandpaper and will scratch any floor, vacuum or sweep as needed. Wipe up spills immediately. Use walk-off mats at entrance doors and in front of kitchen sink. Avoid rubber backed or other nonventilated mats or rugs. In possible re-occurring wet spill areas, such as a sink, use a rug in front of those working areas to prevent local premature wear. Install proper protectors under feet of furniture. Furniture will require different types of protectors in order to achieve maximum weight distribution. Resilient pads such as those made of felt, flexible rubber, and saucer-shaped plastic glides will work for most furniture. Caster wheeled chairs should have wide casters. A protective mat should be used under office chairs. Maintain a minimum humidity level in the room. If necessary, use a humidifier. Never use tape or other adhesive products on this surface. Periodically check floor for signs of wear. When signs of wear are visible, it is time to renovate your floors following USFloors maintenance guidelines. 7013BP08 Chippenham Repair & Protection Guidelines
22 21 Castle Combe Flooring Installation Instructions READ BEFORE INSTALLING! COLOR VARIATION This flooring is a natural product and color variations are to be expected. For best visual effect, shuffle planks from several cartons and do not install boards varying greatly in color next to one another. ACCLIMATION As relative humidity varies in different parts of the country, acclimation of the flooring prior to installation is the most important precaution to take in order to ensure a successful installation. Proper acclimation is necessary to adapt the moisture content of the flooring to the conditions of your environment. Improper acclimation can cause the floor to buckle and/or the boards to shrink or cup after installation. SUBFLOOR PREPARATION Subfloor must be level, dry, and free of imperfections. An uneven subfloor will make the floor feel unstable and cause premature damage. READ THESE INSTRUCTIONS THOROUGHLY BEFORE BEGINNING INSTALLATION. IN ADDITION TO THESE INSTRUCTIONS, WE RECOM- MEND THAT THE INSTALLER FOLLOWs ALL INSTALLATION GUIDELINES AS SET FORTH BY THE NATIONAL WOOD FLOORING ASSOCIA- TION. If the following instructions leave any unanswered questions or if additional information is required, please call USFloors toll free at ( ). FLOORING MATERIAL SHOULD BE INSPECTED PRIOR TO INSTALLATION Responsibility for the suitability of USFloors flooring and accompanying products for each individual installation cannot be assumed by USFloors, since USFloors has no control over the installer s proper application. Should an individual plank be doubtful as to appearance or dimension, the installer should not use this piece. USFloors will send replacement in a timely fashion. PRE-INSTALLATION JOBSITE REQUIREMENTS USFLOORS cannot be held responsible for site conditions. Carefully examine the flooring prior to installation for grade, color, finish and quality. Ensure adequate lighting for proper inspection. If flooring is not acceptable, contact your supplier immediately and arrange for replacement. USFLOORS cannot accept responsibility for flooring installed with visible defects. Prior to installation of any flooring, the installer must ensure that the job site and subfloor meet the requirements of these instructions. USFLOORS is not responsible for flooring failure resulting from unsatisfactory jobsite and/or subfloor conditions. Flooring should be one of the last items installed in any new construction or remodel project. All work involving water or moisture should be completed before flooring installation. Water and wood do not mix. Installing flooring onto a wet subfloor will most likely cause cupping, tip and edge raising, telegraphing of core, and subsequent gapping. Room temperature and humidity of installation area should be consistent with normal, year-round living conditions for at least one week before installation of flooring. Optimum room temperature of 70 F and a humidity range of 30% - 50% is recommended during installation. Humidity levels below 30% will most likely cause movement in the flooring, including gapping between pieces and possible cuppin and checking in the face. Store the flooring in the installation area for 72 hours before installation to allow flooring to adjust to room temperature. Do not store the boxes of flooring directly on concrete. These floors need adequate acclimation for moisture equalization prior to installation and should not be installed from just-opened boxes. Shuffle the boards for best visual mix of lengths and color. PRE-INSTALLATION SUBFLOOR REQUIREMENTS All Subfloors must be: Dry and will remain dry: Subfloor must remain dry year-round. Moisture content of wood subfloors must not exceed 11%.Concrete must be tested for moisture content using the Andydrous Calcium Chloride test method, a non-invasive moisture meter, or a pin/ probe moisture meter. Structurally sound. Clean: Thoroughly swept and free of all debris (If being glued down, subfloor must be free of wax, grease, paint, sealers, and old adhesives, etc., which can be removed by sanding). Level: Flat to 3/16 per 10-foot radius. Wood subfloors must be dry and well secured. Nail or screw every 6 along joists to avoid squeaking. If not level, sand down high spots and fill low spots with a Portland Based leveling patch. Concrete subfloors must be fully cured, at least 60 days old, and should have minimum 6-mil polyfilm between concrete and ground. Subfloor should be flat and level within 3/16 per 10 radius. If necessary, grind high spots down and level low spots with a Portland leveling compound. All concrete should be tested for moisture prior to installation using the Andydrous Calcium Chloride test method, a non-invasive moisture meter, or a pin/probe meter. When using a Calcium Chloride Test, the result must not exceed 3 lbs per 1000 sq. ft. in a 24 hour period. Ceramic tile, resilient tile and sheet vinyl must be well bonded to subfloor, in good condition, clean, and level. Do not sand existing vinyl floors, as they may contain asbestos. Flooring Installation Instructions
23 22 If gluing down on concrete, a moisture test must be performed to ensure that the slab is dry. Remember, a concrete slab on/below grade that measures dry today may become moist in the future due to rising groundwater. Installing a moisture barrier now may be viewed as an insurance policy against concrete becoming wet in the future. USFLOORS is not responsible for site-related moisture issues. For additional protection, you may want to consider applying a moisture barrier compound system. INSTALLATION TOOLS For all installation methods: Tape measure Tapping block (trimmed piece of flooring) Pencil Pry bar or pull bar Chalk line Wood or plastic spacers (3/8 ) Crosscut power saw 3M Blue Tape For glue-down installation method (recommended), you will also need: USFloors recommended flooring adhesive Trowel per flooring adhesive manufacturer s recommendations For nail-down installation, you will also need: Air stapler/nailer compatible with profile of the flooring material 1 ½ 2 nail, cleat, or staple that is compatible with the profile of the flooring material Air compressor Acceptable subfloor types: CDX underlayment grade plywood (at least ½ thick) Underlayment grade particleboard (floating/glue-down only) OSB (at least ¾ thick) Concrete slab (floating/glue-down only) Existing wood floor Ceramic tile (floating/glue-down only) Resilient tile and sheet vinyl (floating/glue-down only) STARTING YOUR INSTALLATION Make sure subfloor is tested for moisture first and is properly prepared. Since natural flooring expands with any increase in moisture content, always leave at least a 3/8 expansion space between flooring and all walls and any other permanent vertical obstructions, such as pipes and cabinets. This space will be covered up once you reapply base moldings around the room. Use wood or plastic spacers during installation to maintain this 3/8 expansion space. Work from several open boxes of flooring and dry lay the floor before permanently laying the floor. This will allow you to select the varying grains and colors and to arrange them in a harmonious pattern. It also allows you the opportunity to cull out very dark/light pieces for use in hidden areas in order to create a more uniform floor. Remember, it is the installer s responsibility to determine the expectations of what the finished floor will look like with the end user first and then to cull out pieces that do not meet those expectations. Begin installation next to an outside wall. This is usually the straightest and best reference for establishing a straight working line. Establish this line by measuring an equal distance from the wall at both ends and snapping a chalk line. The distance you measure from the wall should be the width of a plank plus about 3/8 for expansion space. You may need to scribe cut the first row of planks to match the wall in order to make a straight working line if the wall is out of straight. You may want to dry lay a few rows, no glue or nails, before starting installation to confirm your layout decision and working line. When laying flooring, stagger end joints from row to row by at least 8. When cutting the last plank in a row to fit, you can use the cut-off end to begin the next row. If cut-off end is 8 in length or less, discard it and instead cut a new plank at a random length and use it to start the next row. Always begin each row from the same side of the room. To draw planks together, always use a tapping block, a short piece of flooring, as tapping the flooring itself will result in edge damage. For best results, flip the tapping block upside down and use the groove edge to tap the tongue edge of the plank being installed. Fit end joints tightly together before tapping long edges together. When near a wall, you can use a pry bar to pry close the side and end joints. Take care not to damage edge of flooring. For glue down and floating applications, secure the planks with wedging, weights, or sandbags until the adhesive sets up. Flooring Installation Instructions
24 23 GLUE DOWN INSTALLATION Make sure subfloor is first tested for moisture content first and is properly prepared. On concrete subfloors, which are on or above grade (ground level), always assume the worst even if they measure dry. We recommend taking the following installation steps to ensure a trouble-free installation: Test and document moisture content prior to installation Apply a sealer to the subfloor as needed Follow adhesive manufacturer s instructions for proper trowel size, minimum temperature, adhesive set time and open times before beginning installation of flooring. If gluing down over cork underlayment, USFloors suggests using a double glue-down method. This type of installation requires the use of a USFloors recommended flooring adhesive for adhering both the cork to the subfloor and for installing the flooring to the cork underlayment. Once the spread adhesive has set sufficiently per adhesive manufacturer s instructions, lay the first row of flooring with groove facing the wall and continue laying flooring. Always check your working lines to be sure the floor is still aligned. Use tapping block to fit planks together, but be careful not to let installed floor move on the wet adhesive while you are working. Always leave at least a 3/8 expansion space between flooring and all walls and vertical objects (such as pipes and cabinets). Use wood or plastic spacers during installation to maintain this expansion space. Remember to stagger end joints from row to row at least 8 apart. When first section is finished, continue to spread adhesive and lay flooring section by section until installation is complete. Use a damp cloth to IMMEDIATELY REMOVE ANY ADHESIVE that gets on the flooring surface. If adhesive cannot be completely removed with a damp cloth, use the manufacturer s recommended adhesive remover. Never let flooring adhesive dry completely on the finished surface. Walk each section of flooring in order to make sure it is well bonded to the subfloor with the adhesive working time. Flooring planks on the perimeter of the room may require weight on them until adhesive cures enough to hold them down. STAPLE/NAIL DOWN INSTALLATION Make sure subfloor is first tested for moisture content first and is properly prepared. Use an air stapler/nailer compatible with profile of flooring material or a stapler/nailer of your choice. Test on a sample to make sure that stapling/nailing will not cause dimpling (localized raised edges) in the finished floor. (Note: Be sure to look at the face of the installed flooring at a low angle from a distance to see if dimpling is occurring as it is hard to see when directly above the floor.) If dimpling does occur, STOP and adjust the stapler/nailer shoe and angle/place of staple entry in order to avoid it. USFLOORS is not responsible for dimpling. For the first and second starting rows: Lay first plank inside chalk line with grooved edge toward wall. Install entire first row in the same manner. Always leave at least a 3/8 expansion space between flooring and all walls and vertical objects (such as pipes and cabinets). Use wood or plastic spacers during installation to maintain this expansion space. In order to affix the first rows, as it is difficult to get the nail gun in place next to the wall, you may wish to set these rows in mastic and glue them down rather than face nailing them and leaving unsightly nail holes, which must be filled with putty to match the wood floor. After gluing down these starting rows with manufacturer s recommended adhesive, set weight on top of these rows and allow them to set before commencing stapling/nailing the additional rows, as nailing the adjacent rows may cause the starting rows to subsequently move. Make sure the starting rows are straight and drawn tight. Subsequent rows: Lay by using floor nailer/stapler to blind-nail top inside edge of tongue at a 45 degree angle. Nail each board every 8 and within 2 of each end. Remember to stagger end joints from row to row at least 8 apart and use a tapping block to fit boards together. It may be necessary to face-nail in doorways or tight areas where the nailer/stapler can t fit, (or glue down in these areas and weight them while the mastic sets). The last two rows will need to be face-nailed, (or glued down), in the same manner as the first two rows. Always make sure to visually check the installed floor as you go to ensure that the stapling/nailing is not causing dimpling on the face. (Note: Be sure to look at the face of the installed flooring at a low angle from a distance to see if dimpling is occurring as it is hard to see when directly above the floor.) If dimpling does occur, STOP and adjust the stapler/nailer shoe and angle/place of staple entry in order to avoid it. USFLOORS is not responsible for dimpling. FLOATING INSTALLATION Make sure subfloor is first tested for moisture content and is properly prepared. Floating installation method should only be used on engineered floors measuring at least 5 in plank width. When using Natural Cork CorkShield underlayment, no additional moisture barrier is necessary. If using an alternative 1/8 thick pad and installing below or on grade, polyfilm is required. Laying polyfilm: Lay 6-mil polyfilm with seams overlapped 8. Fasten seams every with duct tape. Run the outside edges of film up perimeter of each wall 4. Trim after flooring installation is complete. Laying pad: Lay Natural Cork CorkShield or equivalent underlayment by butting edges, not overlapping. Tape full length of the seam with duct tape. Leave ½ space between pad and all walls and permanent vertical fixtures. Flooring Installation Instructions
25 24 Installing the floor: Start first row with groove toward wall. Glue end joints of first row by applying a small but continuous bead tongue and groove adhesive or PVAC glue to bottom side of the groove. Always leave at least a 3/8 expansion space between flooring and all walls and vertical objects, such as pipes and cabinets. Use wood or plastic spacers during installation to maintain this expansion space. Lay subsequent rows of flooring by applying glue to side and end joints and fitting planks together with a tapping block. Remember to stagger end joints from row to row at least 8 apart. Clean up any adhesive that is on the face of the floor by using a damp rag DO NOT allow adhesive to dry on the flooring face as it is difficult to remove without damaging the finish. INSTALLATION OVER IN-FLOOR RADIANT HEAT Use only USFloors recommended flooring adhesive over adhesive manufacturer s recommended plywood substrate. Turn the heat off for 24 hours before, during and 24 hours after installation when installing over radiant heated subfloors. Failure to turn the heat off may result in shortened working time of the adhesive. Floor temperature must not exceed 85 F (30 C). Failure to strictly follow adhesive manufacturer s guidelines may result in failure and void warranty. Engineered flooring is best suited for installation over floors with in-floor radiant heat. * This type of installation requires a specific construction of the plywood subfloor and the installer for such must be familiar with the NWFA recommendations. NWFA (National Wood Flooring Association) can be reached at U.S, or Canada. GENERAL RADIANT HEAT INSTALLATION GUIDELINES Radiant systems work effectively and with less trauma to the wood floor if the heating process is gradual, based on small incremental increases in relation to the outside temperature. Subfloors should have proper moisture tests according to testing procedures outlined by the NWFA. Avoid penetration of the heating element, tubing. Concrete subfloors should be fully cured. With water-heated radiant-heat systems, a pressure test should be performed by a qualified plumber or the system installer prior to beginning the installation of the wood flooring. Radiant heat is dry heat and a humidification system may be necessary to maintain wood flooring in its comfort zone. IMMEDIATELY AFTER INSTALLING OIL FINISHED FLOORS Vacuum the floor Clean the floor thoroughly with WOCA REFRESHER diluted in water using 1 CUP of WOCA REFRESHER per 5 QUARTS of warm water In a bucket, add 1 cup of WOCA REFRESHER to 5 quarts of warm water. Damp mop only Make sure you rinse the cloth in another bucket of clean water, as you do not want to reincorporate the dirt back onto the floor. Let dry for 2 hours minimum before resuming traffic WOCA REFRESHER is available in natural (for natural and colors other than white) and white (for white oiled floors). Perform normal daily or weekly cleaning by vacuuming or dry mopping grit, dust etc. AFTER INSTALLATION Flooring should be one of the last items installed in a project. In order to protect the floors while other trades are finishing their work prior to final cleanup and turnover to the owner, use rosin paper and only use 3M Blue Tape to tape the pieces of rosin paper together (Do not adher tape directly to floor. Taping on surface of the plank may damage the oil finish). Clean the floor thoroughly before laying the rosin paper to ensure that no debris is trapped underneath. DO NOT USE plastic film or other non-breathing coverings as this can cause the floor to become damaged from humidity buildups. Remove expansion spacers and reinstall base and/or quarter round moldings to cover moldings to cover the expansion space. Dust mop or vacuum your floor to remove any dirt or debris. Install any transition pieces that may be needed (reducers, T-moldings, nosing, etc.). If using glue-down method, do not allow foot traffic or heavy furniture on floor for 24 hours. PROTECTION AND MAINTENANCE OF FLOOR Lasting beauty can be achieved through purchasing a quality floor covering and providing proper on-going maintenance. Fading: Natural floors contain organic pigments and are subject to fading when exposed to direct sunlight. Where possible, use drapes or other systems to protect your floor from excessive light. Joints: Natural flooring reacts to the conditions in the environment. Natural flooring plank systems expand and contract in response to fluctuations in temperature and humidity. Controlling the environment and maintaining an adequate temperature and relative humidity will minimize the visible effects of normal contraction and expansion. Optimum recommended temperature is 70 F and relative humidity is 30% - 50%. In very dry climates, the use of a humidifier might be necessary. Flooring Installation Instructions
26 25 Castle Combe Wall Application Installation Instructions READ BEFORE INSTALLING! COLOR VARIATION This is a natural product and color variations are to be expected. For best visual effect, shuffle planks from several cartons and do not install boards varying greatly in color next to one another. ACCLIMATION As relative humidity varies in different parts of the country, acclimation of planks prior to installation is the most important precaution to take in order to e nsure a successful installation. Proper acclimation is necessary to adapt the moisture content of the wall panelling to the conditions of your environment. Improper acclimation can cause the wall panelling to buckle and/or the boards to shrink or cup after installation. WALL PREPARATION Wall should be smooth, in good condition, and relatively straight and plumb with minimal bowing or curving of wall. Masonry walls and exterior walls should be moisture proofed prior to applying planks to walls. READ THESE INSTRUCTIONS THOROUGHLY BEFORE BEGINNING INSTALLATION. If the following instructions leave any unanswered questions or if additional information is required, please call USFloors toll free at ( ). MATERIAL SHOULD BE INSPECTED PRIOR TO INSTALLATION Responsibility for the suitability of USFloors products for each individual installation cannot be assumed by USFloors since USFloors has no control over the installer s proper application. Should an individual plank be doubtful as to appearance or dimension the installer should not use this piece. USFloors will send replacement in a timely fashion. PRE-INSTALLATION JOBSITE REQUIREMENTS USFloors cannot be held responsible for site conditions. Carefully examine the material prior to installation for grade, color, finish, and quality. Ensure adequate lighting for proper inspection. If material is not acceptable, contact your supplier immediately and arrange for replacement. USFloors cannot accept responsibility for material installed with visible defects. Prior to installation of any material, the installer must ensure that the job site and walls meet the requirements of these instructions. USFloors is not responsible for material failure resulting from unsatisfactory jobsite and/or subfloor conditions. Wall paneling/planks should be one of the last items installed in any new construction or remodel project. All work involving water or moisture should be completed before material installation. Room temperature and humidity of installation area should be consistent with normal, year-round living conditions for at least one week before installation of material. Optimum room temperature of 70 F and a humidity range of 30% - 50% is recommended during installation. Humidity levels below 30% will most likely cause movement in the material, including gapping between pieces and possible cupping and checking in the face. Store the material in the installation area for 72 hours before installation to allow material to adjust to room temperature. Do not store the boxes of material directly on concrete. Material needs adequate acclimation for moisture equalization prior to installation and should not be installed from just-opened boxes. Shuffle the boards for best visual mix of lengths and color. INSTALLATION TOOLS For all installation methods: Tape measure Tapping block (trimmed piece of flooring) Pencil Pry bar or pull bar Chalk line Crosscut power saw Air stapler/nailer compatible with profile of the flooring material 1 ½ 2 nail, cleat, or staple that is compatible with the profile of the flooring material Air compressor Construction mastic for glue installation Wall Installation Instructions
27 26 GLUE INSTALLATION If walls are in moderately good condition, construction mastic is usually the easiest, fastest way to install solid wood paneling over drywall, plaster, hardboard even old paneling. To apply, follow the adhesive manufacturer s directions. To help tighten joints while gluing, tack through tongue into drywall or plaster every two to three feet. Use small nails to hold paneling in place until mastic sets. NAIL INSTALLATION NOTE: If installing in a horizontal or diagonal orientation, planks can be nailed directly on to wall with wood stud framing as long as nails are placed in studs. Planks installed in a vertical orientation will require furring strips be nailed to the wall. Since natural wood planks expand with any increase in moisture content, always leave at least a 3/8 expansion space between walls and any other permanent obstructions, (such as pipes and cabinets). This space will be covered up once you reapply base moldings around the room. Use wood or plastic spacers during installation to maintain this 3/8 expansion space. Nail 1 x 4 furring strips to the wall with a maximum spread of 36 or a minimum spread of 18. If installing planks vertically to the wall the furring strips must be nailed horizontally across wall (Figure 1). If installing planks horizontally to the wall, the furring strips must be nailed vertically across wall. Begin installation at corner with groove facing perpendicular wall if installing in a vertical orientation or with the groove facing the floor if installing in a horizontal orientation. This is usually the straightest and best reference for establishing a straight working line. Establish this line by measuring an equal distance from the wall at both ends and snapping a chalk line. The distance you measure from the wall should be the width of a plank plus about 3/8 for expansion space. 1 x 4 Furring Strips 36 Maximum 18 Minimum Match end joints and nail over furring strips Figure 1 You may need to scribe cut the first row of planks to match the wall in order to make a straight working line if the wall is out of square. Use a flooring air stapler/nailer compatible with profile of material or a stapler/nailer of your choice. Test on a sample to make sure that stapling/nailing will not cause dimpling (localized raised edges) in the finished NAILS plank. (Note: Be sure to look at the face of the installed flooring at a low angle from a distance to see if dimpling is occurring as it is hard to see when directly above the plank.) If dimpling does occur, STOP and adjust the stapler/nailer shoe and angle/ FURRING STRIP place of staple entry in order to avoid it. USFloors is not responsible for dimpling. Figure 2 Wall Installation Instructions
28 27 Castle Combe Warranties Lifetime Residential Limited Wear Warranty The finish of the Castle Combe plank (referred to below and on subsequent pages as the material ) is warranted by USFloors, Inc. not to wear through under normal use for the life of the product. Finish wear-through is defined as 100% finish removal over a minimum of 3% of the total installation. (Gloss reduction or surface scratches are not considered surface wear.) Dull finish can be corrected with spot or overall recoating care systems. This warranty is non-transferable and applies only to the original purchaser. This lifetime limited residential wear warranty is made subject to the following conditions: 1. The material must be installed properly and according to USFloors installation instructions. Proper flooring installation includes, but is not limited to the following: a. A moisture test must be performed to determine if excessive moisture exists in the subfloor. b. When installing over concrete, concrete should be tested for moisture prior to installation using the Andydrous Calcium Chloride test method, a non-invasive moisture meter, or a pin/probe meter. When using a Calcium Chloride Test, the result must not exceed 3 lbs per 1000 sq. ft. in a 24 hour period. c. A polyethylene film vapor barrier must not be used over wood subfloors. Moisture readings of wood subfloors must not exceed 11% thoughout the entire installation. d. If glue is used, glue entire floor with glue that meets or exceeds PVAC dispersion with a viscosity of / cpc spindle 6/20 at 20 degrees centigrade density of 1.11 =/ g/cm on a dry content of 48 =/- 1% (weight). Upon completion of glued installation, the floor must be allowed to set overnight for 24 hours before resuming normal usage of the room. 2. The material must be used only indoors in a dry, climate controlled area. 3. The material must be maintained in accordance with USFloors maintenance instructions. 4. This limited warranty does not apply to water damage of any kind. 5. This limited warranty does not apply to damage caused by water or moisture in the subfloor, walls, or underneath the material, including but not limited to damage from subfloor hydrostatic pressure (water or moisture under the floor that is transmitted to the surface through exerted pressure) or other conditions that result in water or moisture being under the floor or invading through the walls. 6. This limited warranty does not apply to USFloors moldings and trims. 7. Installation of material that contains any manufacturing defect is not covered by this limited warranty. 5 Year Light/Medium Commercial Limited Wear Warranty The finish of the floor plank is warranted by USFloors, Inc. not to wear through under normal light and medium commercial use for a period of five (5) years from the date of purchase. Finish wear-through is defined as 100% finish removal over a minimum of 3% of the total installation. (Gloss reduction or surface scratches are not considered surface wear.) Dull finish can be corrected with spot or overall recoating care systems. This warranty is non-transferable and applies only to the original purchaser and only if used in the following commercial areas: Retail: Novelty Shops/Boutiques, Product Display Areas, Sales Floors, Showrooms, Hair Salons Medical Offices: Waiting Rooms, Patient Rooms, Examination Rooms, Storage Rooms Hotels: Guest Rooms, Conference/Meeting Rooms Offices and Restaurants: Offices, Conference/Meeting Rooms, Showrooms, Restaurant Floor, Break Rooms Institutional and Light Industrial: Classrooms, Training Rooms, Meeting Rooms, Commons Areas, Residence Halls This 5 year limited light/medium commercial wear warranty is made subject to the following conditions: 1. The floor must be installed properly and according to USFloors installation instructions. Proper installation includes, but is not limited to the following: a. A moisture test must be performed to determine if excessive moisture exists in the subfloor. b. When installing over concrete, concrete should be tested for moisture prior to installation using the Andydrous Calcium Chloride test method, a non-invasive moisture meter, or a pin/probe meter. When using a Calcium Chloride Test, the result must not exceed 3 lbs per 1000 sq. ft. in a 24 hour period. c. A polyethylene film vapor barrier must not be used over wood subfloors. Moisture readings of wood subfloors must not exceed 11% thoughout the entire installation. d. If glue is used, glue entire floor with glue that meets or exceeds PVAC dispersion with a viscosity of / cpc spindle 6/20 at 20 degrees centigrade density of 1.11 =/ g/cm on a dry content of 48 =/- 1% (weight). Upon completion of glued installation, the floor must be allowed to set overnight for 24 hours before resuming normal usage of the room. 2. The flooring must be used only indoors in a dry, climate controlled area. 3. The flooring must be maintained in accordance with USFloors maintenance instructions. Warranties
29 28 4. This limited warranty does not apply to water damage of any kind. 5. This limited warranty does not apply to damage caused by water or moisture in the subfloor or underneath the flooring, including but not limited to damage from subfloor hydrostatic pressure (water or moisture under the floor that is transmitted to the surface through exerted pressure) or other conditions that result in water or moisture being under the floor. 6. This limited warranty does not apply to USFloors moldings and trims. 7. Installation of flooring that contains any manufacturing defect is not covered by this limited warranty. Lifetime Limited Structure Warranty The Castle Combe plank is warranted to be free from manufacturing or material defects for the life of the product. Should a defect occur, USFloors will arrange a credit based on the original purchase of the product. This warranty is not transferable by the purchaser of the material. Should a defect occur, we will arrange a refund based on the original purchase of the product. This warranty is not transferable by the purchaser of the material. Should a problem attributable as a manufacturing defect develop after the material is installed, the cost of labor for repair will be covered by this warranty. Warranty Coverage: Upon determination of a valid manufacturing defect or finish wear through amounting to 100%, credit will be issued to the dealer and will be good toward the purchase of a replacement. When defective product is installed, credit applies to material only and does not include labor since it is the responsibility of the installer to determine suitability of material prior to installation. Should a problem attributable as a manufacturing defect develop after material is installed, the cost of labor for repair will be covered by this warranty. The Limited Wear Warranty does not cover: 1. Damage due to adhesives or tape, scratches, gouges, scuffs, punctures, cuts, indentations, burns, accidents, lack of proper furniture rests, or any intentional misuse of the product. Loss of finish gloss over time is consistent with normal wear and tear and is not a product flaw. 2. Problems due to moisture, mildew, alkaline substances, hydrostatic pressure, expansion and contraction between planks, or humidity levels above or below those recommended. 3. It is normal and expected for there to be color variations due to use of natural components, exposure to UV light and/or sunlight, and age of material. Therefore, color inconsistency between samples, replacement product or illustrations and actual product is not a manufacturing flaw. 4. Manufacturer makes no guarantee that USFloors products will match or coordinate with customer furnishings, trim, cabinetry, railings, etc. 5. Inherent variations that are consistent with those of a natural product to include pattern, color, and granule size do not indicate defective material. 6. Noncompliance with installation instructions and maintenance guidelines as recommended by USFloors. Manufacturer cannot assume responsibility for the suitability of flooring material and accompanying products for each individual installation as manufacturer has no control over the installer s proper application. Should an individual piece be doubtful as to appearance or dimension the installer should not use this piece. Failure to apply protective coatings in accordance with manufacturer s guidelines may result in irreparable damage to the floor. Such damage is not covered. 7. Cracking, warping, soiling, fading, improper maintenance, or abuse caused by items such as roller skates, golf shoes or pets. 8. Floor covering installed in inappropriate locations is excluded from this warranty. 9. Exposure to UV light and sunlight will cause discoloration to natural wood products. This is normal and is not a manufacturing flaw. Area rugs and large furniture will block light exposure and cause uneven coloration. To minimize this, furnishings and floor coverings should be moved periodically. How to Make a Claim Any claim made under either of these limited warranties must be made by contacting your retailer within 30 days after the basis of the claim is detected. In addition, any claim under either of these limited warranties must be made before the end of the applicable limited warranty period. Proof of purchase, including the date of purchase, must be presented to make a claim. How to Make a Claim
30 29 Rustic Chic.pdf 1 4/28/11 5:35 PM Home castle.pdf 1 4/28/11 5:33 PM C M Y CM MY CY CMY K C M Y CM MY CY CMY K USFloors is providing you with the promotional materials you need to market Castle Combe Floor & Wall products to your local customer base. Castle Combe is targeted for the upscale customer, and we provide you with ad slicks that target an emerging style category call Rustic Chic. Rustic chic style is evident in magazines like Garden & Gun, Mountain Living, and more. The Rustic Chic consumer can be country, urban, or a little mix of both. Either way, we ve got you covered with a mix of ads, photography, and videos that you can use to promote Castle Combe Floor & Wall in your local market. The enclosed DVD includes: Castle Combe Ad Slicks Castle Combe Photography Castle Combe Video Promotional Materials
31 30 DVD Pouch Here 7013BP04 Worcester Promotional Materials
32 usfloorsllc.com Photo: 7013BP05 Sodbury 10CCFW USFloors Inc.
INSTALLATION INSTRUCTIONS
 INSTALLER/OWNER RESPONSIBILITIES Hardwood flooring is a product of nature and its inherent beauty stems from the fact that each piece is unique with no two pieces the same. Due to the fact that this flooring
Bella Cera Engineered Hardwood Flooring Installation Instructions. Check for Proper Color Selection Prior to Installation
 Bella Cera Engineered Hardwood Flooring Installation Instructions Check for Proper Color Selection Prior to Installation 1 Important Information before You Begin 1.1 Installer/Owner Responsibility Carefully
How to Install Hardwood Flooring Over a Sub Floor
 How to Install Hardwood Flooring Over a Sub Floor Installation Preparation Instructions Read the entire instructions before starting your project. 1) INSPECT EACH PLANK (see fig. a) Wood is a natural product
Prefinished 3/4 Solid (including various widths such as 3 1/4, 3 5/8, 4 3/4, 5 ) Nail-Down Installation Instructions
 Nail-Down Installation Instructions") Prefinished 3/4 Solid (including various widths such as 3 1/4, 3 5/8, 4 3/4, 5 ) Nail-Down Installation Instructions Thank you for choosing ARK Floors Exotic Hardwood Flooring. In order to meet warranty
Prefinished 3/4 Solid (including various widths such as 3 1/4, 3 5/8, 4 3/4, 5 ) Nail-Down Installation Instructions Thank you for choosing ARK Floors Exotic Hardwood Flooring. In order to meet warranty
WATER AND WOOD DON T MIX KEEPING YOUR TRIÂNGULO HARDWOOD FLOOR BEAUTIFUL SCRATCHES, INDENTATIONS AND GOUGES
 WATER AND WOOD DON T MIX Using any of the following items to maintain your wood floor will void all manufacturer warranties! Water Oil Soap Vinegar, Ammonia Household Detergent Wax Furniture Polish Dust
Engineered Hardwood Flooring Installation Instructions
 Engineered Hardwood Flooring Installation Instructions Tip: Check for proper color selection and style prior to Installation. No claims will be accepted after installation Important Information before
RESIDENTIAL HARDWOOD WARRANTIES
 RESIDENTIAL HARDWOOD WARRANTIES Limited Warranties for Prefinished Solid and Engineered Hardwood Floors Manufacturing Defects Century Flooring* ("Century") hereby warrants to the original buyer ("Buyer"),
INSTALLATION IMPORTANT INSTALLER/OWNER RESPONSIBILITY TOOLS & EQUIPMENT NEEDED FOR INSTALLATION PRE-INSTALLATION PROCEDURES & JOBSITE CONDITIONS
 IMPORTANT It is important that you read & understand the following information and instructions in their entirety before proceeding with installation. Please thoroughly inspect all Flooring products in
ENGINEERED FLOORING INSTALLATION
 ENGINEERED FLOORING INSTALLATION ATTENTION! INSTALLER/OWNER RESPONSIBILITIES Beautiful hardwood floors are a product of nature and, therefore, they will show variations in color, grain, texture, and appearance.
Please calculate with around 5% more square meters than needed because you will have material loss due to cutting and sorting.
 1. TEKA Soft Loc Installation Guide Thank you for having chosen TEKA Parquet. To guarantee a constant quality product TEKA engineered hardwood flooring is made out of selected wood species and runs only
Columbia flooring will resist fading from exposure to sunlight or artificial light.
 LIMITED LIFETIME WARRANTY AND MAINTENANCE FOR RESIDENTIAL USE Columbia is so confident in the design and durability of our Columbia flooring products and accessories, that we back them with a Limited Lifetime
FLOOR MAINTENANCE GUIDE EXPECTATIONS AVOIDING PROBLEMS
 No. 8 Brands Hatch Close Kyalami Business Park Kyalami Tel: 011 466 0701 Fax: 011 466 2919 Email: [email protected] FLOOR MAINTENANCE GUIDE EXPECTATIONS AVOIDING PROBLEMS Please keep this folder
INSTALLATION INSTRUCTIONS FOR LAMINATE FLOORING
 INSTALLATION INSTRUCTIONS FOR LAMINATE FLOORING Introduction Laminate flooring is designed to be a floating floor that may be installed over virtually any type of sub floor. It is not nailed or glued to
The length of this warranty varies by product. Please see product sample or your retailer for duration of this warranty on specific products.
 RESIDENTIAL ENGINEERED HARDWOOD LIMITED WARRANTY Limited Warranties for Q Wood Brand Locking Engineered Hardwood Floors with Opulux Performance Enhanced Finish Manufacturing Defects Q Wood by Quick Step
HARDWOOD WARRANTIES Limited Warranty for Prefinished Solid, Engineered, and Longstrip Floors Manufacturing Defects Finish Warranty
 HARDWOOD WARRANTIES Limited Warranty for Prefinished Solid, Engineered, and Longstrip Floors Manufacturing Defects Mohawk* ("Mohawk") hereby warrants to the original buyer ("Buyer"), the goods to be free
Staple-Down, Glue-Down and Floating Installation IndusParquet 1/2" Engineered
 Staple-Down, Glue-Down and Floating Installation IndusParquet 1/2" Engineered Thank you for choosing IndusParquet ½" Engineered Hardwood Flooring. Protect your investment; review and adhere to the flooring
SCHWARTZ WATER-BASE WOOD FLOOR SEALER AND WATER-BASE PREMIIUM WOOD FLOOR FINISH
 !! SCHWARTZ WATER-BASE WOOD FLOOR SEALER AND WATER-BASE PREMIIUM WOOD FLOOR FINISH A Complete Guide for Preparation, Application, Curing and Maintenance for use with Schwartz H 2 O Water-base Floor Finish
Grand Mesa Plus LAMINATE - WIRE BRUSHED. GAGVGM81012A Prairie. GAGVGM80012NA Colorado. GAGVGM84012A Pecan Rustic. GAGVGM85012A Saddle Walnut
 MARCH 2015 Grand Mesa Plus LAMINATE - WIRE BRUSHED Specifications 12.3mm 6.5 wide x 47-13/16 long 19.42 sf/ctn 48 ctn/plt Triple Plate Embossing Wire Brushed Texture Micro-Bevel & Waxed Edges Warranty
Installation Instructions, Care and Maintenance Guide & Warranty Information for Engineered Woods
 Installation Instructions, Care and Maintenance Guide & Warranty Information for Engineered Woods We thank you very much for selecting EarthWerks Hardwood Flooring. We sincerely hope your new environment
How To Install Hardwood Flooring
 phone: 1.855.Ludaire e-mail: [email protected] Solid Flooring Installation Instructions These Instructions and Guidelines are for the typical installation of ¾ Pre-finished Solid Hardwood Flooring manufactured
Engineered T&G Hardwood Flooring. Installation, Care and Warranty Guide
 Engineered T&G Hardwood Flooring Installation, Care and Warranty Guide Warranty coverage may be voided due to failure to strictly abide by all the installation instructions and recommendations in this
INSTALLATION GUIDE. Imago Installation Guide - January 2008 1
 INSTALLATION GUIDE IMAGO Floors are very sensitive to ambient humidity conditions, since all wood flooring will expand and contract as relative humidity varies. In order to keep the flooring manufacturer
Euro Oak Installation
 STYLE TIMBER FLOOR Bring your life in style Euro Oak Installation Before Starting Installation Your floor has been manufactured with the best possible care. However we would still advise you to check the
Daybreak Acacia. 25yr Residential Wear Warranty
 - Wide Leaf Acacia - Handsculpted - Tongue & Groove - Random Lengths - 8 Layer Urethane Finish - High Color Variation JANUARY 2013 HARDWOOD - WIDE LEAF SOLID Daybreak Acacia 3/4 Solid Handsculpted, Tongue
Engineered Installation Instructions
 Engineered Installation Instructions Please read all instructions carefully before attempting installation. Improper installation may void the warranty. PRODUCT USE DIVINE Flooring Engineered products
Country Series. 12.3mm V-Groove Edge Engineered Laminate Flooring. Laminate Flooring Care and Maintenance. Routine Cleaning
 Country Series 12.3mm V-Groove Edge Engineered Laminate Flooring Laminate Flooring Care and Maintenance Routine Cleaning Simply dust mop or vacuum with a soft brush or wood-floor accessory to keep your
VINYL CLICK FLOORING INSTALLATION GUIDE
 VINYL CLICK FLOORING INSTALLATION GUIDE Owner/Installer Responsibility Prior to installing a single board, you or the installer must determine that the job-site environment and the sub-surfaces meet the
How To Warranty Shawfloors
 HARD SURFACE WARRANTIES, CARE & MAINTENANCE LAMINATE shawfloors.com 1 CONTENTS LAMINATE Care & Maintenance 3 Warranty 4 Shaw represents a promise of outstanding performance, unique styling and overall
Engineered Hardwood Flooring. Installation, Care and Warranty Guide
 Engineered Hardwood Flooring Installation, Care and Warranty Guide Warranty coverage may be lost due to failure to strictly abide by all the installation instructions and recommendations in this manual.
INSTALLATION INSTRUCTIONS Pre finished Solid plank "INSTALLATION IMPLIES ACCEPTANCE"
 INSTALLATION INSTRUCTIONS Pre finished Solid plank IMPORTANT: PROCEED WITH A VISUAL INSPECTION OF THE STRIPS BEFORE INSTALLATION. ONCE INSTALLED, THE STRIPS ARE CONSIDERED ACCEPTED BY THE INSTALLER AND
Hardwood Flooring. Urbania Flooring
 Engineered Hardwood Flooring Installation Guide for Urbania Flooring BEFORE STARTING THE INSTALATION - Please take the time to read and ensure that you understand the information contained in this document.
Care and Maintenance for Wood Flooring
 Care and Maintenance for Wood Flooring The finishing technology used for Tarkett wood floorings makes them the best choice for easy maintenance. To preserve all the beauty of your Tarkett wood flooring,
Herringbone Pattern Flooring
 Herringbone Pattern Flooring If it s not marked NOFMA, it s not certified. Handling, Storage, Installation and Tips Herringbone is generally manufactured from 3/4 x 2 ¼ or ¾ x 1-1/2 standard tongue & groove
Annapolis Valley - Engineered Floors - Installation Instructions
 Annapolis Valley - Engineered Floors - Installation Instructions OWNER/INSTALLATION TECHNICIAN RESPONSIBILITIES: Order Quantity: When the flooring is ordered, a minimum of 5% (recommended 7% - 10%) must
Installation for Wood Flooring
 Installation for Wood Flooring Tarkett wood flooring offers a beautiful variety of options from species and colour, to plank widths and finishes. We developed enhanced locking system, T-lock, and the best
Care and Warranty Guide
 Care and Warranty Guide Keeping Your Olive Wood Floor Beautiful for Generations C a r i ng Fo r Yo u r T u s c a n y Olive Wo o d Fl o o r Tuscany Olive Wood flooring can last for generations with minimal
Maintenance Guide. for your Mercier prefinished floor. 1-866-448-1785 www.mercierwoodflooring.com PRINTED IN CANADA SP-CAREGUBIL 10-12
 PRINTED IN CANADA SP-CAREGUBIL 10-12 Maintenance Guide for your Mercier prefinished floor 1-866-448-1785 www.mercierwoodflooring.com For lasting satisfaction You have chosen the best prefinished flooring
LAMINATE LAMINATE FLOOR CARE AND MAINTENANCE. Routine Maintenance. Minor Repair Instructions: Glueless Laminate Board Replacement Repairs
 LAMINATE FLOOR CARE AND MAINTENANCE Routine Maintenance 1. Use a damp cloth to blot up spills as soon as they happen. Never allow liquids to stand on your floor. 2. For tough spots, such as oil, paint,
Congratulations! Quality products for quality floors
 Congratulations! By choosing Mirage hardwood flooring, you have made the best decision for your home. Thanks to Mirage s unparalleled quality, unique finishing process and your proper care, the beauty
Cupped Floor STEP 1. Flooring absorbing excessive moisture on the underside causes expansion and cupping with the edges raised.
 BEHAVIOR OF FLOORING If it s not marked NOFMA, it s not certified. Cupping and Crowning Cupped Floor STEP 1. Flooring absorbing excessive moisture on the underside causes expansion and cupping with the
Shower Walls and Tub Surrounds
 Reverso en español TEC Skill Set How-To Project Guide Shower Walls and Tub Surrounds 3 Steps to a Beautiful Tile Surface! 1. Prepare the surface 2. Set the tile 3. Grout and caulk H.B. Fuller Construction
Laminate Flooring T-Lock Angle-Drop Installation Instructions
 TECHNICAL SERVICE Laminate Flooring T-Lock Angle-Drop Installation Instructions March 23, 2012 Read all instructions carefully before beginning installation. Make sure that the instructions are the most
installation Mannington Works. 800 241 2262 manningtoncommercial.com Mannington Commercial Hardwood
 General recommendations Product inspection All of the General Installation Guidelines regarding storage, job site conditions, including climatic and structural requirements found in Mannington s Professional
LIMITED RESIDENTIAL FLOORING WARRANTIES
 LIMITED RESIDENTIAL FLOORING WARRANTIES The true essence of the American home is captured in the time-honored choice of quality hardwood flooring. While jobsite-finished floors may be beautiful for a while,
0800 30 50 90 www.bamboodirect.co.nz
 Guide To Bamboo Flooring 1. Frequently Asked Questions 2. Installation Tips 3. Maintaining your Bamboo Floor 4. Why Bamboo Direct? COPYRIGHT 2009 BAMBOO DIRECT Frequently Asked Questions 1. Are Bamboo
BENTLEY ELEMENTS COLLECTION LVT
 This document refers to the following products: Product Size Installation direction Seams treatment Elements Tiles See specifications 90 None Elements Planks See specifications Stair Step None Note: This
Minor Cracks in Horizontal Surfaces
 Cracks, chips and broken or flaking areas in concrete are not only unsightly, they can lead to further deterioration of the surface. The result is a costly replacement project as opposed to a simple repair.
APPENDIX C MOISTURE GUIDELINES & MOISTURE TESTING
 APPENDIX C MOISTURE GUIDELINES & MOISTURE TESTING Appendix C Moisture Guidelines Determining moisture content is an essential part of quality control within the flooring installation process. Flooring
SIENA HARDWOOD FLOORING 6 COLLECTION FINISH WARRANTY
 SIENA HARDWOOD FLOORING 6 COLLECTION FINISH WARRANTY LIFETIME FINISH WARRANTY - WOCA Oil Finish Issued by: WoodCareUSA LLC Lifetime Warranty WoodCareUSA protects the original purchaser with an encompassing
How To Level A Subfloor
 Skill Level: INTERMEDIATE Give these projects a try if you're a confident DIYer with a good working knowledge of a variety of tools. They can take a day or more to complete. If you can build a birdhouse
Installation Instructions for staple/nail down applications
 Installation Instructions for staple/nail down applications General Notes Inspect all materials carefully before installation. Warranties do not cover materials with visible defects once they are installed.
KERNS CARPETS FLOOR CARE & WARRANTY GUIDE HARD SUR FA CE
 KERNS CARPETS FLOOR CARE & WARRANTY GUIDE HARD SUR FA CE TABLE OF CONTENTS TABLE OF CONTENTS... 4-14 NOTES... 15 WARRANTY INFORMATION... 16 2 3 Hardwood Frequently Asked Questions About Hardwood Q. How
Amtico and Spacia Commercial Maintenance Guidelines
 Amtico and Spacia Commercial Maintenance Guidelines Amtico flooring along with all types of floor coverings require appropriate cleaning and maintenance in order to provide long term durability, safety
3/8 and 1/2 Engineered Installation Instructions & Lifetime Warranty
 Thank you for choosing Lifescapes Engineered Flooring. You have made a wonderful investment and it is important to protect it. In order to meet warranty requirements and to ensure a successful installation,
Installation Instructions. BR-111 Solid Collection 5/16"
 Installation Instructions installation guidelines Installation In addition to these guidelines, follow the specific installation instructions provided in this manual for each BR-111 product line. Nailing
Guide Specifications for Maple Flooring Systems
 Guide Specifications for Maple Flooring Systems MFMA Guide Specification for Resilient Pre-Engineered Fixed Panel System Purpose This Guide Specification is designed to assist in the production of actual
Engineered Hardwood Flooring Installation Instructions
 Engineered Hardwood Flooring Installation Instructions Glue: All profiles Nail: 3/8", 1/2", 3/4" Staple: 3/8", 1/2" Float: 1/2" Engineered Planks and Strips can be installed over most subfloors, and are
Cleaning guide for senior living facilities
 Cleaning guide for senior living facilities Altro s recommended cleaning and maintenance guidelines for senior living facilities. Introduction Most senior living facilities require commercial cleaning
Installation System. Existing Resilient Sheet Floors
 Vinyl Composition Tile Installation System Product Adhesive/Full Spread Adhesive/Tile-On Comment Imperial Texture MultiColor RAVE Stonetex Companion Square Feature Tile/Strips ARTEFFECTS SAFETY ZONE Vinyl
How To Install Hardwood Flooring
 3/4" Solid Plank & Strip Products For Nail-Down Installation INSTALLER/OWNER RESPONSIBILITY Beautiful hardwood floors are a product of nature and therefore, not perfect. Our wood floors are manufactured
INSTALLATION RECOMMENDATIONS. Outdoor Rubber Tiles
 INSTALLATION RECOMMENDATIONS Outdoor Rubber Tiles Prior to Installation: The Outdoor Rubber Tiles and accessory transition pieces intended for this installation have been shipped to you via a freight carrier
WOOD FLOORING MAINTENANCE MANUAL
 10026 Talley Lane, Houston, TX 77041 Phone: 713-939-0157 Fax: 713-939-9621 WOOD FLOORING MAINTENANCE MANUAL REMEMBER: Your wood floor is new and is still acclimating to its new environment; HVAC controls
10 Ways to Prolong the Life of your Carpet
 10 Ways to Prolong the Life of your Carpet Clean Carpet Lasts Longer Your carpets represent a sizable investment. It would make sense to take measures that would extend their life. Today's carpet is designed
Armstrong Do-It-Yourself Tile Installation System
 Armstrong Do-It-Yourself Tile Installation System What tools will I need to install my tile floor? You'll need just the basics: - floor tile (make sure you have enough tile to finish the job) - adhesive
Selecting Vinyl Flooring
 extension.usu.edu Smart Shopping for Home Furnishings Selecting Vinyl Flooring Dr. Leona Hawks Home Furnishings & Housing Specialist 1987 HI 03 Shopping for vinyl? There are many different varieties of
www.maplefloor.org INDUSTRY RECOMMENDATIONS for Sanding, Sealing Court Lining, Finishing & Resurfacing of Maple Gym Floors
 www.maplefloor.org www.maplefloor.org INDUSTRY RECOMMENDATIONS for Sanding, Sealing Court Lining, Finishing & Resurfacing of Maple Gym Floors Introduction These recommendations are general in nature and
INSTALLING PREFINISHED HARDWOOD FLOORING
 INSTALLING PREFINISHED HARDWOOD FLOORING Congratulations on choosing prefinished hardwood flooring for your home or office! When it comes to installing hardwood flooring, you have a number of different
Eucaboard / Eucaplac/ Eucatile paneling is intended for dry interior use only and requires care in handling.
 i This instruction sheet describes the proper methods for installing Eucatex decorative wall paneling. Eucaboard / Eucaplac/ Eucatile paneling is intended for dry interior use only and requires care in
CHAPTER 3 MOISTURE TESTING
 CHAPTER 3 MOISTURE TESTING Part I - Moisture Testing for Wood Subfloors A. Testing Requirements 1. Test for moisture at several locations in the room a minimum of 20 per 1,000 square feet and average the
SOLID FLOORING 3/4 INSTALLATION GUIDELINES
 SOLID FLOORING 3/4 INSTALLATION GUIDELINES Thank you for choosing Cikel Exotic Hardwood Flooring, a responsible choice. Please thoroughly review and adhere to the following installation instructions to
If you hire a Professional Wood Fitter. If fitting the Wood Floor yourself (DIY)
") WOOD FLOORING GUIDE WHILE A REASONABLY COMPETENT DIY ENTHUSIAST CAN SUCCESSFULLY FIT BOTH LAMINATED AND ENGINEERED CROSS-PLY FLOORING, TILE GIANT RECOMMEND THAT ONLY AN EXPERIENCED PROFESSIONAL WOOD FITTER
WOOD FLOORING GUIDE WHILE A REASONABLY COMPETENT DIY ENTHUSIAST CAN SUCCESSFULLY FIT BOTH LAMINATED AND ENGINEERED CROSS-PLY FLOORING, TILE GIANT RECOMMEND THAT ONLY AN EXPERIENCED PROFESSIONAL WOOD FITTER
Vinyl Composition Tile Installation System
 Vinyl Composition Tile Installation System Product Gauge Size Vinyl No-Wax (Dry Back) Urethane No-Wax (Dry Back) 0.045" (1.1 mm) 0.080" (2.0 mm) IMPERIAL TEXTURE 0.094" (2.4 mm) STONETEX ChromaSpin COMPANION
Sun Windows General Information Sun New Construction Window Installation Instructions
 Sun Windows General Information Section 1 G F H H H A. Apply Weather Resistive Barrier B. Apply Sill Flashing Tape C. Place Waterproof Sill Shims D. Caulk Back of Nail Fin Sides & Top, Set Window, Fasten
Above Parr Hardwood Floors, Inc. www.aboveparr.com 303.333.PARR (7277) Serving Colorado since 1987. New Floor Installation. Sand, Fill and Refinish
 Serving Colorado since 1987. New Floor Installation. Sand, Fill and Refinish") Above Parr Hardwood Floors, Inc. www.aboveparr.com 303.333.PARR (7277) Serving Colorado since 1987 New Floor Installation Sand, Fill and Refinish Screen & Coat Water Damage & Repairs Stairs, Trim and Vents
Above Parr Hardwood Floors, Inc. www.aboveparr.com 303.333.PARR (7277) Serving Colorado since 1987 New Floor Installation Sand, Fill and Refinish Screen & Coat Water Damage & Repairs Stairs, Trim and Vents
Aspect Metal Peel & Stick Tile Installation Guide
 Aspect Metal Peel & Stick Tile Installation Guide Proper surface preparation is essential for a successful project Failure to follow recommended surface preparation instructions may void the warranty Read
Fiberglass-Reinforced Sheet Flooring Installation System
 Fiberglass-Reinforced Sheet Flooring Installation System Product Adhesive Comments Residential Use Only CushionStep Value Good Better Best FlexStep Duality Premium Premium Plus Modified loose lay method
www.gaylordhardwoodflooring.com
 Chapter 16 Problems, Causes, and Cures Problem: Cupping Cause: Flooring absorbing excessive moisture on underside, causing expansion with raised edges. / Not leaving enough expansion space around perimeter.
INSTALLATION INSTRUCTIONS
 HAWA Bamboo & Wood Products Corp. INSTALLATION INSTRUCTIONS FOR ALL HAWA BAMBOO & WOOD FLOORING PRODUCTS Please read and review the entire Installation Instruction Guide before proceeding with the actual
FLOOR CARE & WARRANTY GUIDE HARD SURFACE
 FLOOR CARE & WARRANTY GUIDE HARD SURFACE TABLE OF CONTENTS LAMINATE... 5 TABLE OF CONTENTS HARDWOOD... 15 RESILIENT... 26 LUXURY VINYL FLOORING... 36 TILE... 44 WARRANTY INFORMATION... 55 2 3 LAMINATE
ARMSTRONG RESIDENTIAL VINYL TILE FLOORING WARRANTY: Professionally Installed & Do It Yourself (DIY)
") ARMSTRONG RESIDENTIAL VINYL TILE FLOORING WARRANTY: Professionally Installed & Do It Yourself (DIY) THE ARMSTRONG LIFETIME LIMITED RESIDENTIAL WARRANTY FOR: Abingdon Adiamo Clear Creek Caliber Granville
ARMSTRONG RESIDENTIAL VINYL TILE FLOORING WARRANTY: Professionally Installed & Do It Yourself (DIY) THE ARMSTRONG LIFETIME LIMITED RESIDENTIAL WARRANTY FOR: Abingdon Adiamo Clear Creek Caliber Granville
Engineered Oak Flooring
 Engineered Oak Flooring Installation, Care and Warranty Guide Warranty coverage may be lost due to failure to strictly abide by all the installation instructions and recommendations in this manual. This
Repairing Drywall Techniques for fixing everything from popped screws to big holes
 Repairing Drywall Techniques for fixing everything from popped screws to big holes BY MYRON R. FERGUSON C racks or holes in drywall, wet or stained drywall, peeling joint tape, popped nails or screws.
Hardwood Maintenance. WORKBOOK and TIPS of the TRADE. 800.441.1934 www.basiccoatings.com
 Professional Hardwood Maintenance WORKBOOK and TIPS of the TRADE 1 Table of Contents Wood Flooring Knowledge...3 System Descriptions... 4 Option 1 - Intensive Cleaning... 5 Option 2 - Clean and Refinish...
ECOfit Interlocking Tile
 ECOfit Interlocking Tile INSTALLATION AND MAINTENANCE MANUAL Manufactured in the U.S.A. by: Revised 09/04/2014 Supersedes all previous versions. Check website for updates. 877-258-0843 www.ecorecommercialflooring.com
Wood Floor Maintenance
 Wood Floor Maintenance We change the face of hard wood-flooring. Wir verändern die Welt der Holzfußböden. Transformamos el mundo de los suelos de madera. for oiled surfaces WOCA Wood is a natural product.
Never use oil soap products or ammonia based cleaners on Tarkett wood flooring.
 Limited Residential Warranty, Floor Care Guide, & Product Registration Effective March 1, 2005 Tarkett Wood installation Whether you are a professional installer or installing wood floors in your own home,
Engineered Hardwood Flooring Installation Instructions
 Engineered Hardwood Flooring Installation Instructions Glue Down / Float Engineered Planks can be installed over most subfloors, and are constructed to be dimensionally stable, making them suitable for
The Stonefield Collection. Wood Flooring International s Engineered MultiLayer Warranty
 Wood Flooring International s Engineered MultiLayer Warranty Section 1: Forward to Warranty Warranties - How about the Truth... 2-4 Section 2: Wood Flooring International s Engineered Multi-Layer Limited
Division 9. SignaFlor Pad and Pour Flooring System
 Division 9 SignaFlor Pad and Pour Flooring System SPECIFICATIONS Page 1. General... 2 1.1 Description 2 1.2 Quality Assurance 2 1.3 Submittals 2 1.4 Delivery and Storage 3 1.5 Warranty 3 1.6 Working Conditions
Engineered Hardwood Flooring Installation Instructions
 Engineered Hardwood Flooring Installation Instructions Glue: All profiles Nail: 3/8", 1/2", 3/4" Staple: 3/8", 1/2" Float: 1/2" Engineered Planks and Strips can be installed over most subfloors, and are
WOODLINE PARQUETRY 25 Year Warranty
 WOODLINE PARQUETRY 25 Year Warranty LIFE TIME STRUCTURAL WARRANTY WOODLINE PARQUETRY offers you a Lifetime Structural Warranty. WOODLINE PARQUETRY warrants that, under normal residential conditions and
TARKETT WOOD COLLECTIONS Products Specification
 TARKETT WOOD COLLECTIONS Products Specification 1. PROPRIETARY PRODUCT/MANUFACTURER 1.1. Proprietary Product: Wood flooring products with multilayer construction are designed for durability and residential
TOLL FREE: (866) 591-7792. E-Mail: [email protected]. www.vigoindustries.com VANITY SPECIFICATIONS. VANITY COMPONENTS Model VG09042K1
 591-7792. E-Mail: techmail@vigoindustries.com. www.vigoindustries.com VANITY SPECIFICATIONS. VANITY COMPONENTS Model VG09042K1") VANITY SPECIFICATIONS VANITY COMPONENTS Model VG09042K1 MODEL VG09042K1 FEATURES Freestanding cabinet Soft closing sliding cabinet drawer hardware White, single hole ceramic sink Cabinet ships assembled
VANITY SPECIFICATIONS VANITY COMPONENTS Model VG09042K1 MODEL VG09042K1 FEATURES Freestanding cabinet Soft closing sliding cabinet drawer hardware White, single hole ceramic sink Cabinet ships assembled
VC 104+ Rigid Grade / Rigid Grade Imagine VC 104 Rigid Grade Commercial Customised
 Page 1 of 6 instructions VC 104+ Rigid Grade / VC 104+ Rigid Grade Imagine / (for the rest of this document referred to as VC 104) can be applied to new and used trucks and trailers with painted rigid
ARMSTRONG RESIDENTIAL VINYL TILE FLOORING WARRANTY: Professionally Installed & Do It Yourself (DIY) Menards Products
 Menards Products") ARMSTRONG RESIDENTIAL VINYL TILE FLOORING WARRANTY: Professionally Installed & Do It Yourself (DIY) Menards Products THE ARMSTRONG LIFETIME LIMITED RESIDENTIAL WARRANTY FOR: Abingdon Adiamo Clear Creek
ARMSTRONG RESIDENTIAL VINYL TILE FLOORING WARRANTY: Professionally Installed & Do It Yourself (DIY) Menards Products THE ARMSTRONG LIFETIME LIMITED RESIDENTIAL WARRANTY FOR: Abingdon Adiamo Clear Creek
Installation guide. ENGINEERED and LOC. 1/2 in and 3/4 in (13 mm and 19 mm) INNOVATION TRADITION PERFECTION
 INNOVATION TRADITION PERFECTION") Installation guide ENGINEERED and LOC 1/2 in and 3/4 in (13 mm and 19 mm) INNOVATION TRADITION PERFECTION It is important to read the installation instructions, maintenance guide and warranty document
Installation guide ENGINEERED and LOC 1/2 in and 3/4 in (13 mm and 19 mm) INNOVATION TRADITION PERFECTION It is important to read the installation instructions, maintenance guide and warranty document