Page 1
|
|
|
- Bethanie Clarke
- 7 years ago
- Views:
Transcription

1 Page 1

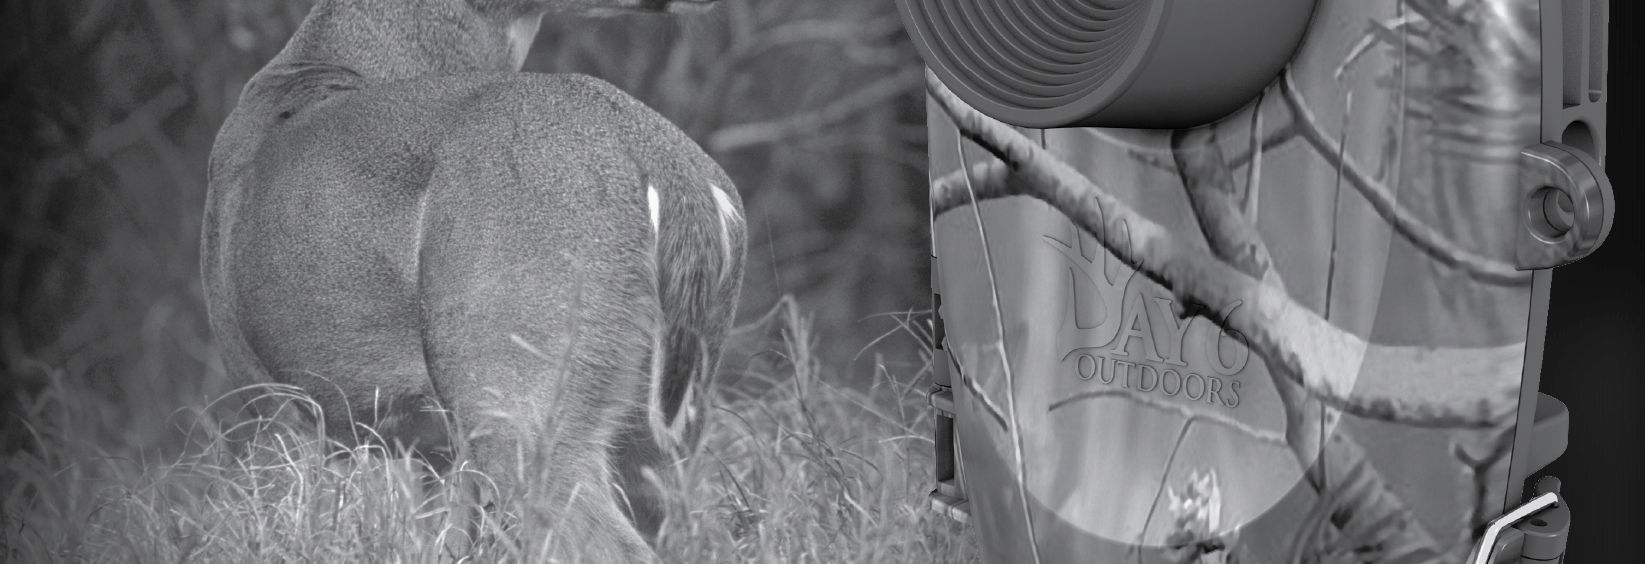
2 Introduction Thank you for purchasing the Day6 PlotWatcher Pro Game Surveillance System. This camera continues the tradition of technological breakthrough started by the original PlotWatcher Time-Lapse HD video camera. Mounted at your potential hunting locations, it records HD video of all the activity that happens in the days before you hunt, so you will know precisely when and where to hunt. Images are captured and stored as video frames, typically every 5 or 10 seconds, from dawn until dusk, creating a time-compressed HD video of each day s activity. The video file for each day can then be reviewed in just a few minutes using the included GameFinder video player software. The Game Surveillance innovation will dramatically increase your effectiveness as a hunter. Because you will know when and where to hunt, and have an accurate record of recent activity, your choices will enable you to see more animals, minimize wasted hunts, and better understand your chances for a true trophy. The PlotWatcher Pro breaks through battery life limitations by recording up to 120 days of activity onto an SDHC memory card. This is 20 times more video frames than the original PlotWatcher, and 40 to 100 times more frames than trail cameras. The PlotWatcher Pro includes a large, easy to read LCD status screen that tells you exactly what you need to know about the camera and allows you to take a preview picture for aiming. It also includes 3 slide switches for the main settings, making it quick and easy to setup. Page 2

3 The PlotWatcher Pro gives you more flexibility, with time intervals as short as 1 second or as long as 60 minutes. You also have the option of using interchangeable Day6 accessory lenses for greater zoom or wide angle capabilities. These are available at the website. Thank you for putting your confidence in Day 6 Outdoors with your purchase of the PlotWatcher Pro. We re excited about what this time-lapse camera can do for you and we d love to hear from you. Please register your PlotWatcher Pro at, and as always, let us know what you think! Thank You from your team at Day 6 Outdoors! Page 3

4 Contents Introduction...2 Package Contents...5 What You Will Need...5 Camera Quick Start...6 Checking Your First Video...7 GameFinder Software...8 PC Installation...8 Apple Computer Installation...9 Using the GameFinder Software...9 Mounting the PlotWatcher Pro...12 Collecting Video...12 Preview Image for Aiming...13 User Interface...14 Screen Based Setting Pages...16 Light Based...17 Time Based...17 Always On...17 Mid-day Skip Options...18 None am 2pm...18 Custom...18 Interval Options Sec Sec...19 Custom...19 Start Delay...20 Display Preferences...21 Setting Time and Date...21 About TLV Files...22 Batteries...23 Memory Cards...24 Using External Power...25 Specifications:...29 Page 4

5 Package Contents PlotWatcher Pro Camera Unit User Manual Tree Strap Installation CD What You Will Need 4 or 8 AA batteries PlotWatcher Pro supports two banks of four batteries. You can fill one or both. Alkalines are recommended if average daily temperatures are above freezing. Lithiums are recommended if average daily temperatures are below freezing. Rechargeable NiMh batteries (Low Self-Discharge type) can be used in the same temperature range as alkalines. However, we recommend gaining experience with alkalines first, as a benchmark, because of the wide variety of energy capacity, self-discharge behavior, and temperature sensitivity of rechargeable batteries. Visit for specific recommendations. SD or SDHC Memory Card Supports from 1 Gb up to 32 Gb memory card. 8 Gb or larger recommended. Memory Card Reader Note that memory cards of 4 GB or greater are SD-High Capacity ( ) and require readers that are SDHC compatible. PC or MAC Computer For PC: Windows XP (Service Pack 3), Vista, or Windows 7. For Mac: or later Operating System (Intel based versions) Page 5

6 Camera Quick Start 1. Unpack your PlotWatcher Pro and remove all protective film. 2. Insert 4 or 8 AA batteries into the upper, lower, or both compartments. Do not mix battery types in a given compartment. 3. Insert your SDHC memory card into the memory card slot. 4. Put the setting switches into the upper positions as shown below. Start/Stop: Light Based Midday Skip: None Interval: 5 Seconds Page 6

7 Camera Interface: Status Screen, Navigation Buttons, and Selector Switches 5. Power on the camera by sliding the Power switch to the center position. 6. Set the Time and Date. Press the PAGE button to step through the settings pages to Set Time and Date. Press the SELECT button to step through the fields on the page. Use the UP and DOWN buttons to change values. After setting the Time and Date, press PAGE until you return to the status screen. 7. That s it! It s a good idea to take some test video before putting the camera in the field, to ensure everything is working correctly. With the camera ON, shut and latch the door and aim the camera at a well illuminated scene to collect some time-lapse video! Checking Your First Video 1. Install the GameFinder software which is on the included CD. (See next section, GameFinder Software, for detailed install instructions.) 2. View the test video. A. Open the camera, wait for the status to display, and then power it off. B. Remove the memory card and place it into your PC or MAC computer. C. View the files on the memory card: If Autoplay opens in Windows, choose Open folder to view files. Otherwise, use My Computer to click on the drive letter. On an Apple computer, you can use Finder to navigate to your memory card. D. Double click on the DCIM folder, and then the 100D6OPR sub folder. Page 7

8 E. You should then see the file name of the sample video. Double click on this file. This will launch the GameFinder time-lapse video player software. 3. When you finish watching the test video, delete the test video files from the memory card and return it to the PlotWatcher camera. Note: You generally will not want to copy your Time-Lapse Videos to your computer because they are so large. They should play directly from the memory card. You can save any individual pictures or short video snippets you wish to keep to your hard drive with the Export feature inside the FILE button. Special note for Apple users: After deleting files on a memory card, you must then empty the trash folder to actually free the space on the memory card. GameFinder Software PC Installation 1. Insert the PlotWatcher TLV CD into your computer. 2. If Windows does not auto-open the CD to reveal the GameFinder_Setup icon, then browse to the CD drive using My Computer. Once you see GameFinder_Setup in the Explorer window, proceed to the next step. 3. Double Click on GameFinder_Setup to start the setup program. 4. Click NEXT for each of the steps of the GameFinder Installer Wizard. 5. Installation is complete. The GameFinder video player software is installed under All Programs in the Day6 folder, and a shortcut is also placed on the desktop. Page 8

9 Apple Computer Installation 1. Insert the PlotWatcher TLV CD into your Apple computer. 2. Double click on the GameFinderDisk file package to mount the disk image onto the desktop. 3. Drag the GameFinder program into the Applications folder. 4. Double-Click on the GameFinder program in the Applications folder to verify that it has been installed. Using the GameFinder Software Page 9

10 The GameFinder player is an easy, fast, and fun way to view time-lapse video files. To open a file, navigate to the \DCIM\100D6OPR folder on your memory card and double click on the file of interest. You will see one file per day when not using Mid-day Skip, or two files per day when using the Mid-day Skip feature. Note that files are named based on the camera date on which they were created. The quickest and easiest way to get an overview of a time-lapse video file is to use your mouse to drag the Position Arrow across the play bar (this is the triangular indicator with the frame number displayed in it). This will preview, in a very short time, what is contained in the file. You can drag to the right to move forward in time, or to the left to move backward in time. When you see an interesting portion of the file, stop dragging the Position Arrow and use the scroll wheel on your mouse to move forward or backward one frame at a time. If you don t have a scroll wheel on your mouse, you can use the arrow keys or just click on the back or forward STEP button. To see every single picture, and ensure you do not miss any frames, you can play the file like a traditional video. Just click on the back or forward PLAY button to begin. Clicking again will speed up the play, up to 5x by clicking several times. (After 3x, some frames may be skipped). At any point if you see something of interest, click on the video screen or scroll the mouse wheel to pause the video and enter step/scroll mode. SEARCH will cause GameFinder to search in the direction of interest (forward or backward) for motion and will move the Position Arrow to the frame in the video file where movement is detected. A vertical line is drawn on the play bar at each point where movement is detected. If the search feature is too sensitive, and you are finding shadows or trees that are moving, use the SETTINGS button to limit the region of the field of view that is searched, and/or Page 10
. This will preview, in a very short time, what is contained in the file. You can drag to the right to move forward in time, or to the left to move backward in time.")
11 limit the sensitivity. The settings for the motion search can be found under the SETTINGS button. On the FILE button, you can choose to export a single video frame as a JPEG image, or a sequence of 50, 100, or 200 video frames as a short TLV file (best resolution) or a compressed WMV file (best for YouTube uploads). For additional tips, to check for the most recent updates, and to get the latest information on the GameFinder player, visit. Page 11

12 Mounting the PlotWatcher Pro A tree strap is included for mounting your PlotWatcher Pro to a tree. The strap should be snug, but not too tight. The larger the tree you choose, the less wind sway you will have in your time-lapse video. It is sometimes helpful to use a small stick between the top of the camera and the tree to adjust the angle of the camera. Many game camera mounting accessories that work with the PlotWatcher Pro are available, such as tripods, stakes, and adjustable treemount devices. If you wish to use a mounting accessory, select one that uses ¼-20 thread to mount into the base of the camera. If theft is a concern, note that you can place the PlotWatcher Pro high into a tree, generally out of sight, because it does not rely on motion triggering. You can also use a padlock on the access door of your PlotWatcher, and/or a security cable such as the Masterlock Python brand can be passed through the housing to secure your camera to a tree. Check for these and other PlotWatcher Pro accessories. Collecting Video To start your camera, insert your memory card, slide the POWER switch to ON, and wait for the status screen to display. Select your preferred settings with the slide switches, and/or the screen-based settings pages. (See User Interface section for more details.) When the camera says Close to Start in the top line of the status display, you can shut and latch the door to being capturing time-lapse video. Page 12

13 Preview Image for Aiming To inspect the aim of the camera, slide the POWER switch from ON to PREVIEW. You will see the following screen: Close the door and hold it shut for 5 seconds while an image is taken. Then open the door to preview your image on the screen. Adjust the aim if necessary, and close the door again for 5 seconds to take another image. Repeat until you are satisfied with the aim. Then slide the POWER switch back to ON before proceeding to capture time-lapse video by closing and latching the door. Page 13

14 User Interface When you power on your PlotWatcher Pro, you will notice the Day6 logo and a version number displays while the camera is starting. The status page screen indicates the settings of the camera. Status page screen The top line of the status page indicates that the camera is ready to begin, ( Close to Start ) and instructs you to close the camera to start operation. A small door switch is located just below the Interval switch that automatically senses the door closing and begins the time-lapse video recording. The camera will stop recording to the current file when the camera is opened, and will begin a new file when it is closed again. Page 14

15 If the camera is not ready to record, the status line will give one of the following messages: Message Start on MM/DD/YYYY Skip until HH:MM AM/PM Start at Dawn Start at HH:MM AM/PM Disk Full Cannot Start Condition Camera is waiting on a user specified start delay to expire, and will begin recording on the date shown. Camera is in a Mid-day Skip period and indicates the time of day it will restart recording. Camera is in Light Based mode and has detected that it is too dark to operate. Camera is in Time Based mode and is not currently schedule to run. Shown when the camera initializes with less than 0.1 Gb of free space. The bottom two lines of the status page show the amount of remaining storage (7.4 Gb Free in the example) on your memory card, the proportion of battery life remaining in the active battery bank, and the time and date. Note that when the storage space falls to 0.1 Gb, the oldest TLV file, (even if it is the only one), will be deleted, and a new file created. Page 15

16 Screen Based Setting Pages The screen-based setting pages are where you can set the time and date, special features, and custom setting values. Press PAGE button to cycle to the next page. Press SELECT button to cycle to the next field on a page. Press UP or DOWN button to change values in a field. Page 16

17 Start / Stop Options Light Based In Light based start /stop mode, the camera will come on as soon as there is enough light for an image to be captured, and will cut off when there is no longer enough light to do so. During darkness, the camera is in night mode and takes a picture every 5 minutes to determine if it is bright enough to resume capturing time-lapse video. Time Based In Time based start/stop mode, you specify the specific time you want the camera to power on and power off. These are set on the screen-based settings page shown at right: Always On Always On mode is typically used in security situations where continuous monitoring is desired, and some external form of light will be available, such as parking lots, offices, etc. Note that operation at night will deplete the batteries slightly more quickly because of longer exposures during the image capture. Page 17

18 Mid-day Skip Options None The camera will run for dawn until dusk (in Light based mode) or from Start Time until Stop Time (in Time based mode). 10am 2pm The camera will shut down from 10am until 2pm in the middle of the day to conserve batteries and storage space. A separate file is created after the Midday Skip period, with an incremented ending letter in the file name to differentiate it. For example, on April 8, 2011, AA.TLV would be the file name for the file created that morning, and AB.TLV would be the file name for the file created that afternoon. Custom The camera will shut down from a user-specified OFF time until a user-specified ON time to conserve batteries and storage space. These are set on the screenbased settings page shown below: Page 18

19 Interval Options 5 Sec The interval between video frames will be 5 seconds. This is a good setting for small areas where the game may pass through the field of view more quickly than in larger areas. This will consume more memory storage space and battery power than the 10 second setting, with a 12 hour video file using.8 to 1.2 Gb, depending on scene detail. See Specifications for more detail. 10 Sec The interval between video frames will be 10 seconds. This is a good setting for larger areas where the game will not pass through the field of view quickly. This will consume less storage space and battery power than 5 second interval, with a 12 hour video file using.4 to.6 Gb, depending on scene detail. See Specifications for more detail. Custom The interval between frames can be selected from the following values: 1 sec, 2 sec, 3 sec, 5 sec, 10 sec, 20 sec, 30 sec, 1 min, 3 min, 5 min, 10 min, 20 min, 30 min, 60 min. These are set on the screen-based Custom Interval settings page shown at right: Settings Picture Interval Seconds Seconds Page 19

20 Start Delay If you are departing from a hunting site for an extended period of time, you may want to schedule your PlotWatcher Pro to begin capturing video only 1 or 2 weeks before you return in order to conserve memory storage space and batteries. This can be easily done by specifying the # of days of Start Delay, up to 45 days into the future. The calculated start date will then be shown on the screen based settings page, as well as on the main status page. Page 20

21 Display Preferences The display preferences are selected on the following screen-based settings page: Time formats are: Date formats are: AM/PM 24Hr MM/DD/YYYY DD-Mmm-YY, DD/MM/YYYY YYYY/MM/DD Preferences AM/PM Time: AM/PM Date: MM/DD/YYYY (04/08/2011) Site: CAMERA 1 The Site field is an 8 character string that you can use to identify the site where you are placing your PlotWatcher Pro. You can change each letter by using the Up and Down buttons to scroll through the alphabet. Once you find the letter you are looking for, move to the next letter by pressing the Select button. Setting Time and Date Time and Date are set on the following screen-based settings page: Page 21
22 About TLV Files The PlotWatcher Pro normally records one video file per day. When using the Mid-day Skip feature, it records two files per day one before the skip period and a second afterwards. Anytime the camera door is opened, the current file will be closed, and a new one will be created. The new file will have an incremented letter code (last two characters) as described in the naming convention below. If the memory card runs low on storage space (0.1 Gb or less), the current file will be closed, the oldest file deleted, and a new file begun. The files are stored on the memory card, in the \DCIM\100D6OPR\ folder. The files are named according to date: YYMMDDAA.TLV, where YY = Year, MM = Month, DD = Date, and AA is a letter code that is incremented in a sequence (AA, AB, AC, etc.) when multiple files are created on the same date. An example of an actual file name would be AA.TLV. TLV files utilize the industry standard AVI format. The TLV files can be played in Windows Media Player, Apple QuickTime player, and most video editors if opened manually. In some cases, it may be necessary to rename the file to end in *.AVI. Page 22
23 Batteries We recommend that you begin with 8 AA alkaline batteries, unless the daily average temperatures are below freezing, or the night time lows are below 20⁰ F / -6⁰ C. In that case, you should use 8 lithium AA batteries, which work particularly well in cold weather. You may wish to transition to rechargeable Low Self-Discharge NiMh batteries after you have benchmarked the operating life in your preferred mode, on regular alkaline batteries. The PlotWatcher Pro utilizes two battery banks: an upper bank of 4 batteries, and a lower bank of 4 batteries. You can populate one or both banks with batteries. Battery types should not be mixed in a given bank. The camera will always operate on the bank with the higher voltage. In practice, this means they will fall off in voltage equally, as the camera automatically switches back and forth between the higher of the two banks. However, if you load used batteries into one bank, and new batteries in another, then the new batteries will be used until they reach the level of the used batteries. The Battery % indicator on the main status page registers 100% for anything above 6 volts, and 0% for anything below 4 volts, and a proportional percentage for any voltage in between. This is based on the voltage characteristics of alkaline batteries, so keep this in mind if you are using a different type. Different types of batteries have different voltage characteristics. Four new alkaline batteries are 4 x 1.6v = 6.4 volts. Four new lithium batteries are 4 x 1.8v = 7.2 volts. Four new, fully charged NiMh batteries are 4 x 1.25v = 5 volts. NiMh rechargeable batteries may show 50% battery when first installed, yet operate for many days at that level. Lithium batteries may show 100% for most of their life, and then fall rapidly. Page 23
24 After you have used the camera a few times with alkaline or lithium batteries, you will have a good benchmark on battery life and might want to consider rechargeable NiMh batteries as an alternative. Their tolerance for low temperature is similar to alkaline batteries (average temperature above freezing, lows above 20⁰ F / -6⁰ C) but they can save you money over time. Look for the newer Low Self-Discharge NiMh batteries, sometimes referred to as pre-charged, because the ordinary NiMh batteries lose their charge over time, even when not being used. You can expect to get about 50% to 70% of the runtime you would get with alkaline batteries, but with the very long battery life of the PlotWatcher Pro, they can be an effective, economical choice. Memory Cards We recommend you start out with a new 8, 16, or 32 GB SDHC memory card. You might prefer to purchase two cards so that you can swap them in the field. Note that many older computers have SD card readers that will not read the higher capacity SDHC cards. (Cards from 2Gb to 32Gb are typically SDHC.) If your computer will not read the SDHC cards, you can obtain an SDHC card reader that will enable you to read SDHC cards on any computer with a USB port. These SDHC card readers are typically available on the Accessories section of the website. If you are not starting with a brand new SDHC card, we recommend that you ensure all other files have been deleted from the card. A large number of files, such as music collections or photo collections will take up space and also cause the PlotWatcher to take more time to read from and write to the disk, thus reducing battery life. SanDisk is a widely available and reliable brand of SDHC memory card. You may check the Frequently Asked Questions (FAQ) at Page 24
25 to see if we have found particularly good or bad performance with any certain brand of card. NOTE: Your SDHC must be formatted with FAT32, and all cards of 32Gb or less usually come with this format. Windows 7 will not format using FAT32, so do not reformat your SDHC cards with Windows 7. If you use Windows 7, and have a need to reformat your card, you will need a third-party utility software. See the FAQ at for more information, including the possibility of using 64Gb and 128Gb SDXC cards formatted with FAT32. Using External Power The PlotWatcher Pro has exceptionally long battery life - up to 120 days when using both battery banks and capturing 8 hours per day on a 10 second interval. Service time will be shorter with shorter time intervals or more hours of video per day. If you wish to extend the operating time, or eliminate the reliance upon AA batteries, you may use the external power port. The external power port in the PlotWatcher Pro is 12v, with the center pin positive and the outer shell negative polarity. It uses a 5.5mm x 2.1mm connector DC power plug common to many trail cameras accessory devices, such as cables with clips, solar devices, battery packs, etc. Be sure the plug fits securely into the receptacle to avoid moisture entering the camera. If your plug is not large enough to fit securely, you may want to enlarge the diameter with tape. See for compatible devices and accessory cables. Note that although the PlotWatcher Pro internally operates on 6 volts, the external power port utilizes nominal 12 volts (10v 15v) because this is the most widely available voltage for external power sources. Examples include sealed lead-acid (SLA) batteries, deep cycle RV/Marine batteries, and solar panel accessories. Page 25
26 If you wish to use a solar panel accessory, be sure it is a 12v model. It is a good idea to select one that has an integrated battery or a battery charging circuit connected to an external battery which is connected to the PlotWatcher Pro. If your solar panel is not used in conjunction with an integrated or external battery, it can still prolong the life of your camera by providing the operating power during sunlight hours. The internal batteries will be automatically selected to power the camera when the output of the solar panel is not present. Note that the Battery % indicator will show 100% as long as the external battery power is above 10v. It will not be an accurate indicator of the life remaining in the external power supply. Page 26
27 Specifications: Image Detector: 720P HD Video (1280 x 720) File Format: AVI format with TLV extension Per Frame Storage: 100k 200k (depending on scene detail) Batteries: Dual banks of (4) AA each Operating Temperature: -20 F to 110 F External Power Voltage: 10v 15v External Power Connector: 5.5mm x 2.1mm DC Power Plug Storage Media: SD or SDHC Memory Card (2 32 Gb) Accessory Lenses: Zoom and Wide Angle Image Intervals: 1, 2, 3, 5, 10, 20, 30 seconds 1, 3, 5, 10, 20, 30, 60 minutes Display: 2.7 TFT LCD Start/Stop Modes: Light-based, Time-based, Always On Mounting Options: ¼-20 threads for tripod (not included), tree strap Features: Preview for Aim, Mid-day Skip, & Start Delay Image Embedded Data: Camera Name, Temperature, & Moon Phase Page 27
28 Typical Memory Card Capacity, expressed in DAYS The camera will not stop recording when the card is full, but will delete the oldest file and resume recording. The range of days expected varies with the per frame storage size, which is affected by scene detail. Actual experience could be above or below these guideline ranges. Typical battery life, expressed in DAYS For 8 Alkaline batteries in non-freezing conditions, or 8 Lithium batteries in freezing conditions. Actual experience could be above or below these guidelines, due to variables such as SDHC card efficiency, scene detail (larger file sizes consume more power), temperature, battery quality, average level of illumination, etc. Page 28
Canon Vixia HFS10 High Definition Camcorder Quick Start Guide
 School of Communications Design Media Lab Canon Vixia HFS10 High Definition Camcorder Quick Start Guide The Canon HFS10 is a Hard Drive/Flash Memory camera. This means the footage can be recorded to a
Leaf River Outdoor Products Vibrashine, Inc. P.O. Box 557 Taylorsville, MS 39168 (601) 785-9854 FAX (601) 785-9874 www.vibrashine.
 785-9854 FAX (601) 785-9874 www.vibrashine.") MULTI-CARD PICTURE VIEWER Model PV-2.5 Leaf River Outdoor Products Vibrashine, Inc. P.O. Box 557 Taylorsville, MS 39168 (601) 785-9854 FAX (601) 785-9874 www.vibrashine.com 2 THANKS and WELCOME What does
MULTI-CARD PICTURE VIEWER Model PV-2.5 Leaf River Outdoor Products Vibrashine, Inc. P.O. Box 557 Taylorsville, MS 39168 (601) 785-9854 FAX (601) 785-9874 www.vibrashine.com 2 THANKS and WELCOME What does
DVR 785HD Action Camcorder
 DVR 785HD Action Camcorder User Manual 2009-2012 Sakar International, Inc. All rights reserved. Windows and the Windows logo are registered trademarks of Microsoft Corporation. All other trademarks are
Instructions for A-5 Digital Game Camera
 I CAMERA OVERVIEW Instructions for A-5 Digital Game Camera THANK YOU for your purchase of. Please read this booklet before using unit. If you should have any questions about this product or any or Moultrie
Watch Your Garden Grow
 Watch Your Garden Grow The Brinno GardenWatchCam is a low cost, light weight, weather resistant, battery operated time-lapse camera that captures the entire lifecycle of any garden season by taking photos
DVR 480 Digital Helmet Camcorder
 DVR 480 Digital Helmet Camcorder User Manual 2009-2011 Sakar International, Inc. All rights reserved. Windows and the Windows logo are registered trademarks of Microsoft Corporation. All other trademarks
MVS - Mini Video Speaker
 MVS - Mini Video Speaker Mini Clock Radio Night Vision Hidden Camera User Manual Spy Tec www.spytecinc.com GETTING STARTED Components Features Powering Up the Device Micro SD Memory Card for Data Storage
Motion Activated Camera User Manual
 Brinno MAC200 User Manual Last Modified on 12/23/2015 7:51 pm EST Motion Activated Camera User Manual www.brinno.com Register@online http://www.brinno.com/support/register.html contact us: customerservice@brinno.com
User Manual. www.thescorpionstore.com
 User Manual www.thescorpionstore.com Table Of Contents Packing Contents...2 Overview...3 Features...3 Product Structure...4 Installation...5 Operation Guide...6-7 Saving and Playing Files...8 PC Camera...9
USER S MANUAL Kodiak Series Wireless Trail Camera
 USER S MANUAL Kodiak Series Wireless Trail Camera Contents 1. Introduction... 0 1.1 Functionality Introduction... Error! Bookmark not defined. 1.2 Applications... 0 1.3 Power Supply... 1 1.4 Attention...
ViviCam 25 Digital Camera User s Manual
 ViviCam 25 Digital Camera User s Manual 2010 Sakar International, Inc. All rights reserved. Windows and the Windows logo are registered trademarks of Microsoft Corporation. All other trademarks are the
Renewable Energy Monitor User Manual And Software Reference Guide. sales@fuelcellstore.com (979) 703-1925
 703-1925") Renewable Energy Monitor User Manual And Software Reference Guide sales@fuelcellstore.com (979) 703-1925 1 Introducing the Horizon Renewable Energy Monitor The Renewable Energy Monitor is an educational
Renewable Energy Monitor User Manual And Software Reference Guide sales@fuelcellstore.com (979) 703-1925 1 Introducing the Horizon Renewable Energy Monitor The Renewable Energy Monitor is an educational
Digital Photo Bank / Portable HDD Pan Ocean E350 User Manual
 Digital Photo Bank / Portable HDD Pan Ocean E350 User Manual Installing a hard disk 1. Power off the unit. 2. Remove the bottom cover from the unit by removing four screws. 3. Insert the 2.5 HDD to the
Maxtor OneTouch User's Guide
 EXTERNAL HARD DRIVE Maxtor OneTouch User's Guide TM II P/N:20259600 i Contents 1 Introduction................................................. 1 Maxtor OneTouch II Drive Components............................
1. Open the battery compartment as shown in the image.
 This Quick User Guide helps you get started with the IRIScan Book 3 scanner. This scanner is supplied with the software applications Readiris Pro 12, IRIScan Direct and IRISCompressor. Corresponding Quick
ViviCam 46 Digital Camera
 ViviCam 46 Digital Camera User Manual 2009-2012 Sakar International, Inc. All rights reserved. Windows and the Windows logo are registered trademarks of Microsoft Corporation. All other trademarks are
GPSMAP 62 series quick start manual. For use with the GPSMAP 62, 62s, 62st, 62sc, and 62stc
 GPSMAP 62 series quick start manual For use with the GPSMAP 62, 62s, 62st, 62sc, and 62stc Getting Started warning See the Important Safety and Product Information guide in the product box for product
SOFTWARE MANUAL. Please ensure that you read the instruction manual carefully before use. About software
 SOFTWARE MANUAL Please ensure that you read the instruction manual carefully before use Software Notes The attached software is a camera driver and image editing software tool for Windows. Under no circumstances
Lenovo Miix 2 8. User Guide. Read the safety notices and important tips in the included manuals before using your computer.
 Lenovo Miix 2 8 User Guide Read the safety notices and important tips in the included manuals before using your computer. Notes Before using the product, be sure to read Lenovo Safety and General Information
TimelapseCam User s Guide
 TimelapseCam User s Guide For Models: WCT-00122 TimelapseCam wingscapes.com 888.811.WING 2013 Ebsco Industries, Inc. All Rights Reserved. Made in China This product is covered by one or more of the following
VHS2DVD Wizard User's Manual
 VHS2DVD Wizard User's Manual Table of Contents 1. Installation Instructions a. Installation Package Contents b. Installation Instructions c. Setting Up the Computer for Video Capturing i. Adjust the Screen
Description: It is an 8.0 mega pixel digital camcorder that is capable of recording in high definition and takes digital pictures.
 Canon Vixia HF S100 Digital Camcorder Description: It is an 8.0 mega pixel digital camcorder that is capable of recording in high definition and takes digital pictures. Operating Controls: Camera Mode
English Table of Contents
 Table of Contents FaceCam 1020 Features 1 Set up the device 2 I.P.M(Image Protection Mechanism) setting 3 Using Instant Messenger Application 4-5 CrazyTalk CamSuite PRO 6-16 CrazyTalk CamSuite PRO with
user guide Consult Safety Instructions Before Use.
 user guide Consult Safety Instructions Before Use. Install Battery Pack Welcome to Flip UltraHD 1 Slide battery latch to unlock. 2 Slide front panel down. 3 Position rechargeable Lithium-ion battery pack
DVR 410 Digital Video Camera User s Manual
 DVR 410 Digital Video Camera User s Manual 2009 Sakar International, Inc. All rights reserved. Windows and the Windows logo are registered trademarks of Microsoft Corporation. All other trademarks are
7. Computer System Minimum Requirement. 31 8. Troubleshooting. 32. PortableCapture Pro Software Introductions...33
 Table of Contents EN 1. Precaution. 3 2. Preparation..6 Standard Accessories 6 Part Names & Functions..7 3. key features..... 8 4. Use the Microscope.....9 Install Battery... 9 Insert a MicroSD Card...
Point of view HDMI Smart TV dongle Mini RF Keyboard
 Point of view HDMI Smart TV dongle Mini RF Keyboard English Contents Contents... 1 General notices for use... 2 Disclaimer... 2 Box Contents... 2 1. HDMI TV dongle... 3 1.1. Product display... 3 1.2. Instructions
Getting to Know Xsight... 3. Home Screen and Everyday Use... 9. Settings... 11. PC Setup... 17. 2 www.oneforall.com
 User Manual English English Getting to Know Xsight........................................ 3 Unpacking and Setting Up Xsight............................................................. 3 Using Xsight
GPSMAP 78 series. quick start manual. for use with the GPSMAP 78, GPSMAP 78s, and GPSMAP 78sc
 GPSMAP 78 series quick start manual for use with the GPSMAP 78, GPSMAP 78s, and GPSMAP 78sc Getting Started warning See the Important Safety and Product Information guide in the product box for product
GPRS/MMS/SMS Digital Infrared Trail Camera User s Manual WCM-3004
 GPRS/MMS/SMS Digital Infrared Trail Camera User s Manual WCM-3004 1 Table of Contents 1. Instructions... 1 1.1 General Description... 1 1.2 Camera Body Interface... 1 1.3 Camera components and features...
ViviCam 5022 Digital Camera
 ViviCam 5022 Digital Camera User s Manual 2009 Sakar International, Inc. All rights reserved. Windows and the Windows logo are registered trademarks of Microsoft Corporation. All other trademarks are the
Windows XP Home Edition / Windows XP Professional
 Windows XP Home Edition / Windows XP Professional COOLPIX5000/995/885/775 This manual is for those users of the COOLPIX5000/995/885/ 775 who are running Nikon View 4 (Version4.3.1) under Windows XP Home
Action Camcorder Rollei Youngstar USER MANUAL
 Action Camcorder Rollei Youngstar USER MANUAL Mounting Accessories 1 Functions This user's manual has referred to the latest information we had when this user s manual was made. The screen display and
ImageMate USB 3.0 Reader/Writer
 ImageMate USB 3.0 Reader/Writer User Guide Version 1.0 SDDR-289 All-in-One Reader/Writer CompactFlash, SD, SDHC, SDXC, minisd, minisdhc, microsd, microsdhc, microsdxc, MultiMediaCard, MMCplus, MMCmobile,
Table of Contents. Use. Troubleshooting. Setup. Welcome. 11 How to arm/disarm system/camera(s) 19 Sync Module setup issues. 3 Installing the Blink app
 19 Sync Module setup issues. 3 Installing the Blink app") User Guide Table of Contents Welcome Setup Use Troubleshooting 2 What s in the box 2 What you need 3 Installing the Blink app 4 Setting up the Sync Module 5 Connecting the Sync Module to Your Wi-Fi 7 Adding
User Guide Table of Contents Welcome Setup Use Troubleshooting 2 What s in the box 2 What you need 3 Installing the Blink app 4 Setting up the Sync Module 5 Connecting the Sync Module to Your Wi-Fi 7 Adding
Photo Loader. CASIO LCD Digital Camera Image Loading Software Macintosh version. Version 1.1. Instruction manual B K851PSM4DMX-E
 Photo Loader Version 1.1 CASIO LCD Digital Camera Image Loading Software Macintosh version Instruction manual B K851PSM4DMX-E Macintosh is a trademark of Apple Computer Inc. CompactFlash and the logo are
Chapter 1 Downloading Images to Your Computer (Windows)
") Software User Guide For the safe use of your camera, be sure to read the Safety Precautions thoroughly before use. Types of software installed on your computer varies depending on the method of installation
Software User Guide For the safe use of your camera, be sure to read the Safety Precautions thoroughly before use. Types of software installed on your computer varies depending on the method of installation
INSTRUCTION MANUAL All-In-One GSM Home Alarm System SB-SP7200-GSM
 INSTRUCTION MANUAL All-In-One GSM Home Alarm System SB-SP7200-GSM Revised: August 28, 2014 PRODUCT REFERENCE MOUNTING ACCESSORIES PIR / MOTION DETECTION UNIT MAIN UNIT POWER ADAPTER MOUNTING ACCESSORIES
Windows Movie Maker 2 Video Task Guide
 Windows Movie Maker 2 Video Task Guide This guide will instruct you how to get video footage from a DV camcorder to your computer. It will also give basic instructions for trimming footage and adding transitions.
Windows XP Pro: Basics 1
 NORTHWEST MISSOURI STATE UNIVERSITY ONLINE USER S GUIDE 2004 Windows XP Pro: Basics 1 Getting on the Northwest Network Getting on the Northwest network is easy with a university-provided PC, which has
1. Check the Accessories
 This Quick User Guide helps you get started with the IRIScan Book Executive 3 scanner. This scanner is supplied with the software applications Readiris Pro 14 (Windows and Mac ), IRIScan Direct and IRISCompressor
Windows XP Home Edition / Windows XP Professional
 Windows XP Home Edition / Windows XP Professional COOLPIX990/880 This manual is for those users of the COOLPIX 990/880 who are running Nikon View 4 (Version4.3.1) under Windows XP Home Edition / Professional.
Using These Manuals. How to Use the. Software User Guide. Display examples: 1. Understanding How to Use Your Camera.
 Software User Guide For the safe use of your camera, be sure to read the Safety Precautions thoroughly before use. Types of software installed on your computer varies depending on the method of installation
Ultra Dashcam. with Smartphone app control INSTRUCTION MANUAL
 Ultra Dashcam with Smartphone app control EN INSTRUCTION MANUAL 1 Getting to know the Dashcam GPS Receiver Slot 1 Camera Lens Micro HDMI Port 2 Speaker 1 For future application 2 Requires Micro HDMI to
LW2702/2902: FREQUENTLY ASKED QUESTIONS
 LW2702/2902: FREQUENTLY ASKED QUESTIONS Version 3.0 Topics: General Questions Screen Saver (Picture Frame Simulation) SD (Secure Digital) Memory Card Recording Recording Tips Viewing AV Ouputs System Settings
BIGPOND ONLINE STORAGE USER GUIDE Issue 1.1.0-18 August 2005
 BIGPOND ONLINE STORAGE USER GUIDE Issue 1.1.0-18 August 2005 PLEASE NOTE: The contents of this publication, and any associated documentation provided to you, must not be disclosed to any third party without
LOREX CLIENT 2.2 Integrated Remote Agent Software
 LOREX CLIENT 2.2 Integrated Remote Agent Software Instruction Manual English Version 1.0 MODEL: L15LD420 / L17LD420 Series Copyright 2008 LOREX Technology Inc. www.lorexcctv.com Table of Contents Table
ActiView. Visual Presenter Image Software User Manual - English
 ActiView Visual Presenter Image Software User Manual - English Date: 05/02/2013 Table of Contents 1. Introduction... 3 2. System Requirements... 3 3. Install ActiView - Windows OS... 4 4. Install ActiView
USB POWER PRO BANK HIDDEN CAMERA
 USB POWER PRO BANK HIDDEN CAMERA SKU: HCPOWERBANKPRO THANK YOU FOR PURCHASING THE USB POWER PRO BANK HIDDEN CAMERA Please read this manual before operating the USB power pro bank hidden camera and keep
DVR 426HDv2. Digital Camcorder
 DVR 426HDv2 Digital Camcorder with camera User Manual 2009-2012 Sakar International, Inc. All rights reserved. Windows and the Windows logo are registered trademarks of Microsoft Corporation. All other
Caplio Utility for Windows
 Caplio Utility for Windows Operation Manual English To ensure correct use of the product, read this manual carefully before use. Keep the manual handy for future use. Introduction Thank you for purchasing
Windows Live Movie Maker Tutorial
 Introduction Welcome to the Windows Live Movie Maker (WLMM) Tutorial. This tutorial will help you create, edit, and finalize your WLMM video project. Table of Contents Creating and Saving a Project.. Importing
SOFTWARE INSTALLATION AND USB/i.LINK CONNECTION GUIDE
 SOFTWARE INSTALLATION AND USB/i.LINK CONNECTION GUIDE ENGLISH LYT1155-001A COPYRIGHT 2003 VICTOR COMPANY OF JAPAN, LTD. M3D8 Printed in Japan 0403-FO-ID-VP This document explains the basic information
USB 2.0 Video Grabber TX 20
 USB 2.0 Video Grabber TX 20 User Manual The Declaration of Conformity for this device is under: www.technaxx.de/ (in bottom bar Konformitätserklärung ) Before using the device the first time, read the
Central Management Software CV3-M1024
 Table of Contents Chapter 1. User Interface Overview...5 Chapter 2. Installation...6 2.1 Beginning Installation...6 2.2 Starting the CMS software...10 2.3 Starting it from the Start menu...10 2.4 Starting
DIGICLIENT 8.0 Remote Agent Software
 DIGICLIENT 8.0 Remote Agent Software MODEL: D17800 Series Instruction Manual English Version 1.0 Copyright 2007 Digimerge Technologies Inc Table of Contents Table of Contents About the DigiClient 8.0...
Video Baby Monitor System. User Guide
 Video Baby Monitor System User Guide What s inside Welcome!... 2 Getting started... 3 Tour of the system... 7 Everyday use...13 Cameras... 14 Motion/Alerts... 18 Recording... 21 Playing Back Pictures and
MEDIA SHARE Set Up Guide for PCs with Windows 7
 MEDIA SHARE Set Up Guide for PCs with Windows 7 AT&T Media Share allows you to view photos and listen to music files that are stored on your PC on your U-verse-connected TV. In order to share photo and
SMART BOARD USER GUIDE FOR PC TABLE OF CONTENTS I. BEFORE YOU USE THE SMART BOARD. What is it?
 SMART BOARD USER GUIDE FOR PC What is it? SMART Board is an interactive whiteboard available in an increasing number of classrooms at the University of Tennessee. While your laptop image is projected on
Digital Video Capture and Edit with imovie HD 6.0.2
 RESEARCH AND INSTRUCTIONAL SUPPORT REVISED: AUGUST 2006 Project Management Digital Video Capture and Edit with imovie HD 6.0.2 Plan out your time and process before beginning the capture and edit. A few
DVR GUIDE. Using your DVR/Multi-Room DVR. 1-866-WAVE-123 wavebroadband.com
 DVR GUIDE Using your DVR/Multi-Room DVR 1-866-WAVE-123 wavebroadband.com Table of Contents Control Live TV... 4 Playback Controls... 5 Remote Control Arrow Buttons... 5 Status Bar... 5 Pause... 6 Rewind...
SD Call Recorder and Desktop Software Reference Guide Version 2.0
 SD Call Recorder and Desktop Software Reference Guide Version 2.0 May 2011 Downloads Available at www.usbcallrecord.com UK Office +44 (0) 1909-512148 US Office +1(0) 949.587.1226 This guide is Copyright
Micro Cam Software. User Manual V1.3
 Micro Cam Software User Manual V1.3 CONTENT CHAPTER 1: MICRO CAM SOFTWARE INSTALLATION AND CONNECTION... - 1-1.1 SOFTWARE MICRO CAM INSTALLATION... - 1-1.2 WIRED DEVICE CONNECTION... - 4-1.3 SOFTWARE OPERATION
1 ImageBrowser Software User Guide
 1 ImageBrowser Software User Guide Table of Contents (1/2) Chapter 1 Try It! ImageBrowser Chapter 2 What is ImageBrowser? Chapter 3 Starting ImageBrowser... 4 Downloading Images to Your Computer... 9 Printing
Infrared Scouting Camera. Ltl 5210(5MP) & Ltl 5210A(12MP) USER S MANUAL
 & Ltl 5210A(12MP) USER S MANUAL") Infrared Scouting Camera Ltl 5210(5MP) & Ltl 5210A(12MP) USER S MANUAL 2 Contents I. Quick Introduction Front Bottom Part and Switch Battery Cover Function Switch Preview Testing Mode Automatic Infrared
Infrared Scouting Camera Ltl 5210(5MP) & Ltl 5210A(12MP) USER S MANUAL 2 Contents I. Quick Introduction Front Bottom Part and Switch Battery Cover Function Switch Preview Testing Mode Automatic Infrared
IT Quick Reference Guides Using Windows 7
 IT Quick Reference Guides Using Windows 7 Windows Guides This sheet covers many of the basic commands for using the Windows 7 operating system. WELCOME TO WINDOWS 7 After you log into your machine, the
Infrared Digital Scouting Camera. User s Manual Pocket Camera
 Infrared Digital Scouting Camera User s Manual Pocket Camera Content 1 Instruction... 1 1.1 General Description... 1 1.2 Camera Body Interfaces... 1 1.3 Shooting Information Display... 2 1.4 Supported
EasyCAP Video Capture with Audio Quick Installation Guide
 Overview EasyCAP Video Capture with Audio Quick Installation Guide The EasyCAP USB 2.0 Video Capture with Audio, it can capture High-quality video and audio file direct by USB 2.0 interface without sound
Digital Learner MacBook Air Quick Start Student User Guide
 2014 2015 Digital Learner MacBook Air Quick Start Student User Guide Howell Township Public Schools Digital Learner MacBook Air Quick Start Student User Guide The Digital Learner MacBook Air Quick Start
Working with Windows Movie Maker
 518 442-3608 Working with Windows Movie Maker Windows Movie Maker allows you to make movies and slide shows that can be saved to your computer, put on a CD, uploaded to a Web service (such as YouTube)
Portable External Hard Drive. Quick Start Guide
 Portable External Hard Drive Quick Start Guide Contents Seagate external hard drive with a USB 2.0 interface USB 2.0 Y cable Quick Start Guide Seagate Extra Value CD Requirements Your new Seagate portable
Magic Wand Portable Scanner
 Magic Wand Portable Scanner PDS-ST470-VP User Manual Table of Contents 1. Key Features... 3 2. Functional Parts... 3 3. Explanation of the Status Icons... 5 4. Using the Scanner... 5 4.1. Charging up the
Cassette2CD Wizard User's Manual
 Cassette2CD Wizard User's Manual Table of Contents 1. Installation Instructions a. Connecting tape-deck to the computer b. Installing the Software 2. Using Cassette2CD Wizard a. Setting up and Testing
Creating a Time-lapse Effect in Corel VideoStudio Pro
 Creating a Time-lapse Effect in Corel VideoStudio Pro Mesmerize your audience by adding some drama to your movie using the Time-lapse effect in Corel VideoStudio Pro. This technique makes your video project
How To Set Up Flir Cloud Client For Pc Or Mac Or Mac (For Pc Or Ipad) On A Pc Or Pc Or Mouse (For Mac) On An Iphone Or Ipa) On Pc Or Tv (For Ipa
 On A Pc Or Pc Or Mouse (For Mac) On An Iphone Or Ipa) On Pc Or Tv (For Ipa") Instruction Manual FLIR Cloud Services Client Instruction Manual FLIR Cloud Services Client #LX400018; r. 2.0/14567/14568; en-us iii Table of contents 1 Setting up FLIR Cloud Client for PC or Mac...1
Instruction Manual FLIR Cloud Services Client Instruction Manual FLIR Cloud Services Client #LX400018; r. 2.0/14567/14568; en-us iii Table of contents 1 Setting up FLIR Cloud Client for PC or Mac...1
USING WINDOWS MOVIE MAKER TO CREATE THE MOMENT BEHIND THE PHOTO STORY PART 1
 PART 1 Windows Movie Maker lets you assemble a range of video, pictures, and sound elements to create a story. It is an application that comes with most PC computers. This tip sheet was created using Windows
DVR 940HD Digital Video Camera
 DVR 940HD Digital Video Camera User Manual 2010 Sakar International, Inc. All rights reserved. Windows and the Windows logo are registered trademarks of Microsoft Corporation. All other trademarks are
Instructions for PREMISE Digital Surveillance Camera
 Instructions for PREMISE Digital Surveillance Camera Important Battery lnformation - Only use Alkaline or Lithium batteries. We recommend the use of Duracell or Energizer batteries. - Do not mix old and
Inuktun Digital Video Recorder (DVR) Start Guide and Manual
 Start Guide and Manual") Inuktun Digital Video Recorder (DVR) Start Guide and Manual Version 1.6 June 2012 CONTENTS INTRODUCTION... 3 What s Included...3 Supported Devices and Protocols...3 Connecting your DVR...4 Installation
Inuktun Digital Video Recorder (DVR) Start Guide and Manual Version 1.6 June 2012 CONTENTS INTRODUCTION... 3 What s Included...3 Supported Devices and Protocols...3 Connecting your DVR...4 Installation
STB- 2. Installation and Operation Manual
 STB- 2 Installation and Operation Manual Index 1 Unpacking your STB- 2 2 Installation 3 WIFI connectivity 4 Remote Control 5 Selecting Video Mode 6 Start Page 7 Watching TV / TV Guide 8 Recording & Playing
WARNING. Getting to know your camera
 Thank you for purchasing this Kogan HD sports action camera. You should read these instructions thorough before use. The camera has no internal memory, so prior to taking photographs or footage, you should
Verizon Cloud Desktop Application Help Guide Version 4.1 72
 Verizon Cloud Desktop Application Help Guide Version 4.1 72 CONTENTS I. Getting started... 4 A. Verizon Cloud... 4 B. Main navigation... 5 C. System requirements... 5 D. Installing the application... 6
Digital Camera. LCD Screen. Canon Power Shot A530. Features: Features:
 Digital Camera Canon Power Shot A530 Features: Special Note: The cameras have been configured for 1600 x 1200 pixels with Normal resolution. This is more than adequate for all classroom projects and will
Fit Clip Plus Portable Media Player
 Fit Clip Plus Portable Media Player User Guide BL 8GB Thank you for purchasing a Fit Clip Plus Portable Media Player! To get the most out of your Fit Clip Plus, please read this entire user guide carefully.
GPSMAP 62 series quick start manual. For use with the GPSMAP 62, 62s, 62st, 62sc, and 62stc
 GPSMAP 62 series quick start manual For use with the GPSMAP 62, 62s, 62st, 62sc, and 62stc Getting Started warning See the Important Safety and Product Information guide in the product box for product
Firmware Update Instruction Manual
 Firmware Update Instruction Manual This manual explains the procedures for downloading the CX2 firmware from the Ricoh website and updating the camera s firmware. Perform the following operations to update
Moxi Whole Home HD DVR QUICK REFERENCE GUIDE
 Moxi Whole Home HD DVR QUICK REFERENCE GUIDE Let s get started with learning more about what your Moxi System can do. This is a quick reference guide to get you up and running. Contents: Menu Quick Look
System Preferences is chock full of controls that let you tweak your system to how you see fit.
 Set My Preferences Besides changing the look and feel of your Mac interface, you can also let your Mac know how you prefer to work. This is done through Your Mac has a system-wide set of user-configurable
DVR 508 Digital Video Camcorder User s Manual
 DVR 508 Digital Video Camcorder User s Manual 2010 Sakar International, Inc. All rights reserved. Windows and the Windows logo are registered trademarks of Microsoft Corporation. All other trademarks are
PLUS TV ANALOG USB STICK Installation Manual
 PLUS TV ANALOG USB STICK Installation Manual Contents V1.2 Chapter 1 : PLUS TV ANALOG USB STICK Hardware Installation...2 1.1 Package Contents...2 1.2 System Requirements...2 1.3 Hardware Installation...2
Windows XP Home Edition / Windows XP Professional
 Windows XP Home Edition / Windows XP Professional D1 Series This manual is for those users of D1 Series cameras who are running Nikon View 4 (Version4.3.1) under Windows XP Home Edition / Professional.
Point of View SmartTV HDMI 210 dongle - Android 4.2. General notices for use... 2 Disclaimer... 2 Box Contents... 2
 Table of Contents General notices for use... 2 Disclaimer... 2 Box Contents... 2 1.0 Product basics... 3 1.1 Connecting your device for the first time... 3 1.2 Connections... 4 1.3 Using the remote control
300K Pixels Digital Camera
 300K Pixels Digital Camera Owner s Manual v2.0 Warning: 1. Do not connect the camera to the computer before the driver and software is installed. 2. Download images from the camera before the battery runs
ViviCam X018 Digital Camera
 ViviCam X018 Digital Camera User Manual 2010 Sakar International, Inc. All rights reserved. Windows and the Windows logo are registered trademarks of Microsoft Corporation. All other trademarks are the
CatCam User Manual. Revision: 26. August 2008. Check for updates on: www.mr-lee-catcam.de
 CatCam User Manual Revision: 26. August 2008 Check for updates on: www.mr-lee-catcam.de Mr. Lee CatCam and CatCam are trademarks of Juergen Perthold. Index Index...1 Change History...2 1. Overview...3
VMware Horizon FLEX User Guide
 Horizon FLEX 1.5 This document supports the version of each product listed and supports all subsequent versions until the document is replaced by a new edition. To check for more recent editions of this
BLU Vivo 4.3 User Manual
 BLU Vivo 4.3 User Manual 1 Table of Contents Phone Safety Information... 3 Appearance and Key Functions... 4 Installation and Charging... 5 Phone Operation... 7 Communication... 10 Camera... 11 Gallery...
CD/DVD Disc Duplicator Controller
 CD/DVD Disc Duplicator Controller USERS MANUAL Introduction Features Model & Specification Control Panel Menu Overview Operation Guide 1. Copy 2. Test 3. Copy & Verify 4. Copy & compare 5. Verify 6. Compare
Digital Video Tutorial
 Digital Video Tutorial TABLE OF CONTENTS 1. Getting Started Pg. 3 2. Digital Video FAQ Pg. 3 3. Borrowing Equipment Pg. 4 4. How to Borrow a Kit & Accesories Pg. 4 5. Digital Video Policies Pg. 5 6. What
File Management Windows
 File Management Windows : Explorer Navigating the Windows File Structure 1. The Windows Explorer can be opened from the Start Button, Programs menu and clicking on the Windows Explorer application OR by