polymer clay. by Jill Erickson
|
|
|
- Amy Skinner
- 9 years ago
- Views:
Transcription
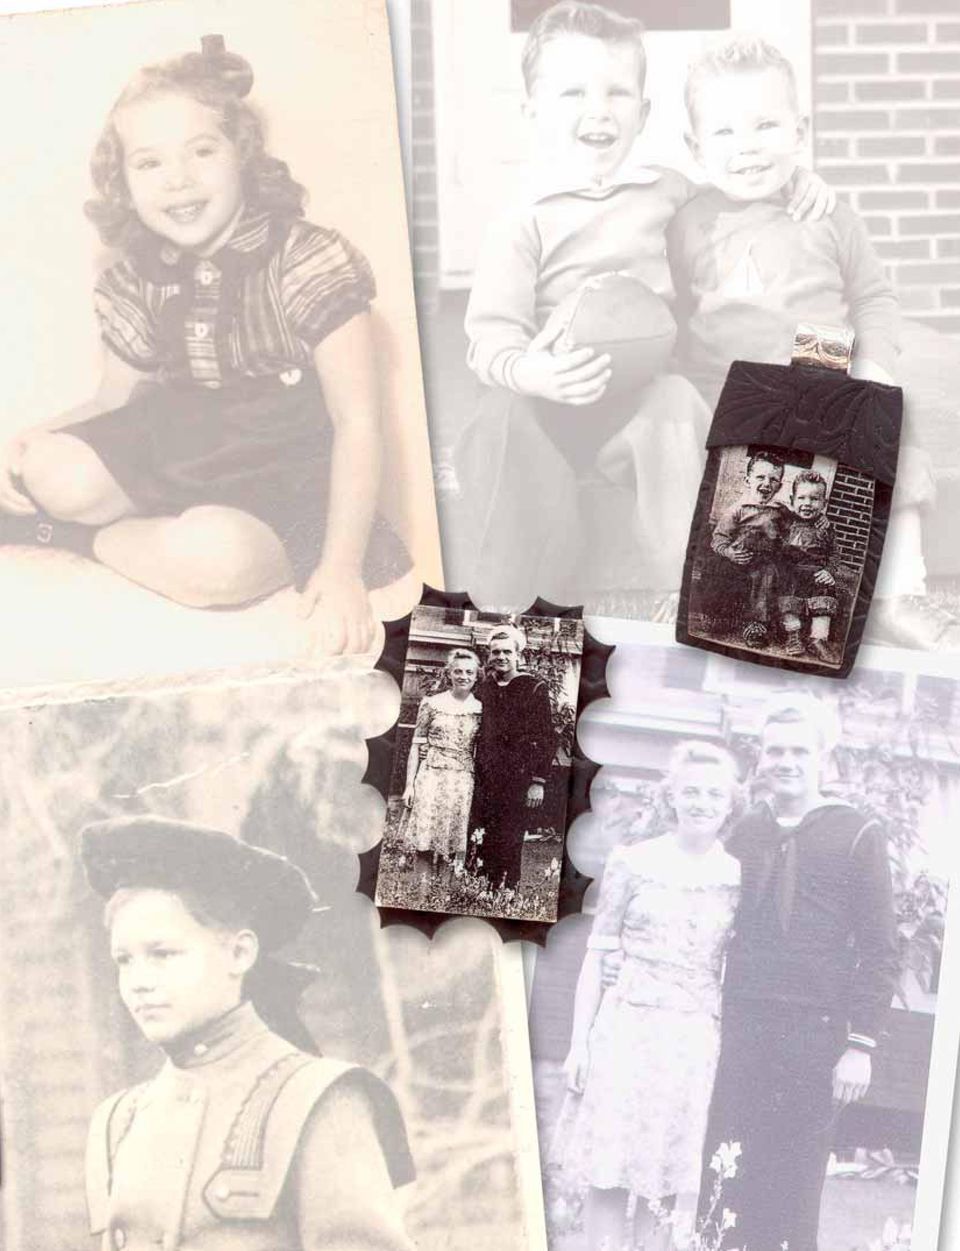
1 intermediate polymer clay You ought to be in pictures... Transfer your favorite photographs to jewelry using polymer clay. by Jill Erickson This direct image-transfer technique is easy to master and does not require special papers or transfer gels. This versatile method can be used to transfer copies of drawings, copyright-free images, text, and original color or black-and-white photographs. Using a high-contrast black-and-white photocopy of an image, you can personalize your jewelry without damaging the cherished original. To complete this project, you ll learn to use simple cold-connection techniques to mount your polymer piece in a sterling silver frame. The brooch and pendants shown here were all made using the photocopy image transfer technique. They average 1 x in. (25.5 x 38mm) in actual size. The original photos used to create the photocopies range in size from 3 x 5 in. (76 x 127mm) to 8 x 10 in. (20.3 x 25.4cm). 36 Art Jewelry January 2007

2
3 Enhance your polymer image panel with a sterling silver mounting. The easy corner-tab prongs on this frame mimic the nostalgic look of photo corners. Make photocopies. Gather photographs, line drawings, captions of text, or copyright-free artworks that appeal to you. It is important that these images still look good when reduced in size to in. (29mm) or smaller. Rectangular compositions work well, and for this project, the longest sides of my reduced image will be in. (29mm). The original images can be either black-and-white or color, but you must make a black-andwhite photocopy on a photocopier that uses carbon-based toner. Fresh photocopies work best, so make a few extra photocopies to practice with while you get the knack for achieving a successful transfer. For tips on making copies from your original images, see Photocopy FAQs, opposite. [1] Trim the photocopied image. Cut the photocopy, leaving a 1 4-in. (6.5mm) border of plain paper around the image. [2] Condition the polymer clay, and position the photocopy. Condition lightcolored polymer clay (see Basics, page 84), and roll it out to 1 8 in. (3mm) thick, or run it through the second-thickest setting of a pasta machine. Use a craft knife or tissue blade to cut a shape out of the clay that is slightly larger than the trimmed photocopy. Lay the photocopy image-side down on the clay. [3 4] Apply astringent and burnish the paper. Moisten a cotton swab with a lowalcohol-content astringent. Rub the back of the photocopy with the moistened swab, being careful to moisten the entire image [3]. Roll the dry end of the swab over the paper to absorb any excess astringent. Place a sheet of parchment paper over the photocopy, and use a stationery burnisher to burnish the paper for 30 seconds [4]. When the astringent has evaporated, repeat steps 3 and 4 twice. Since there are variations in astringents, papers, and photocopy toners, you may need to experiment. Altering how many times you moisten the paper, how long the paper dries between applications of astringent, or how much pressure you use while burnishing may improve your results. 38 Art Jewelry January 2007

4 5 6 photocopy FAQs What size should I make the final photocopied image? If you want to retain a lot of detail in the reproduced image, start with an original photo that is 3 x 5 in. (76 x 127mm) or smaller. Reduce the original image to approximately x in. (29 x 29mm) for a jewelry-sized project. If you use original images that are 4 x 7 in. (10.2 x 17.8cm) or larger, make a reduced copy, and then reduce that copy again. Alternatively, you could reduce the image in Adobe Photoshop prior to making your photocopy or focus on a smaller detail of the image. 7 [5] Remoisten the paper, and peel it from the clay. Very lightly remoisten the paper one last time with astringent, and dry it with a clean swab. While the paper is just barely damp, grip it at one corner and peel the paper from the clay in one steady motion. The astringent should have transferred the toner from the photocopy to the clay to create your image panel. Remove the image panel from the work surface. Gently slide a tissue blade under the image panel to lift the image panel from your work surface. Be careful not to stretch the clay, or the image will distort. [6] Crop the image panel. Use a craft knife or tissue blade to crop the image panel to the desired shape for your brooch or pendant. Make a polymer clay back panel, and attach the image panel. Condition clay for the back panel. Run the clay through the pasta machine on the second-thickest setting, or roll it out to 1 8 in. (3mm) thick. To give the back panel a texture, reroll the clay on a texture plate or impress the clay with a rubber stamp. Use a fine-tip paintbrush to apply a thin layer of liquid polymer clay to the center of the back panel and to the back of the image panel. Position the image panel on the back panel, lay a piece of parchment paper over the image panel, and then use a burnisher with light pressure to fuse the two pieces of clay. Gently remove the parchment paper from the image panel. [7] Trim the back panel, and bake the piece. How you trim the back panel depends on whether you re making a pendant or brooch. To make a pendant, see Make a Polymer Pendant, page 40. To make a brooch, you ll need to mount your piece into a sterling silver frame. First, use your tissue blade to trim the back panel, beveling the edge so that the back panel extends 1 8 in. (3mm) beyond the edge of the image panel. Use a rigid tissue blade to create a straight border or a flexible tissue blade to create a curve. Bake the piece according to the manufacturer s instructions, and then allow it to cool. What kind of photos should I choose? For best results, select images that are in sharp focus and that have a fair amount of contrast distinct dark and light areas. Avoid photos that are made up entirely of gray tones. If you must select a photo with gray tones, use Adobe Photoshop to increase the contrast. Is it okay to make black-and-white copies from a color original? Sure, but make sure there s enough contrast. What kind of photocopier should I use? This process requires black-andwhite photocopies made from a copier that uses carbon-based toner. Do not use ink-jet copies. Can I make good copies at my local copy shop? Absolutely. Many copiers today have programmable settings to sharpen, adjust contrast, and make a mirror image. All of these settings can help when making a copy of your original. Hey, he wasn t left-handed in the original photo! The photocopy must be made as a mirror image of the original photo in order for the transferred image to have the same orientation as the original. This is especially important if you have text in your photograph, and this is where the programmable copier at a copy shop would come in handy. What happens to my original photo? Nothing. This process uses a photocopy, not your original photo, to transfer the image to the clay. artjewelrymag.com 39

5 Template 8 9 make a polymer pendant a b Use your tissue blade to trim the top of the back panel so that it extends 5 8 in. (16mm) above the top of the image panel. Trim the remaining three sides as desired [a]. Cut a 5 8 x 1¼-in. (16 x 32mm) strip of clay, and set it aside. Center a bail above the image panel, lightly pressing the bail into the front of the back panel. Trim the clay strip to fit above the image panel. Apply a thin layer of liquid polymer clay to the top of the back panel [b] and to the back of the clay strip. Press the clay strip over the bail, securing the bail between the two layers of clay. Place a piece of parchment paper over the clay strip, and lightly burnish the strip to seal it to the back panel. Trim excess clay from the sides and bottom of the pendant. Check that the bail is secure. If necessary, use light pressure to squeeze the clay strip to the back panel to confirm the seal. Bake the pendant according to the manufacturer s instructions. 10 [8] Make a template for a sterling silver frame mounting. Make a photocopy of the Template, above left, and lay the polymer piece on the photocopy, centering it over the pattern for the pierced findings. Trace the outline of the polymer piece onto the template. Use a ruler to draw four evenly sized corner-tab prongs emanating from the outline of the polymer piece. These tabs will hold your polymer piece in place and will be visible on the front of the brooch, so make them symmetrical. Also, make them long enough that you will be able to bend them around the back panel. If you d like to leave some of the silver mounting showing so that it frames the polymer piece, draw on the template to indicate where you want the silver to show. Use a glue stick to adhere the template to 22-gauge (0.6mm) sterling silver sheet. [9] Saw out the frame mounting and refine it. Saw out your frame mounting using a jeweler s saw with a 2/0 blade. Use a center punch to make five dimples as indicated on the template. Drill 0.5mm holes at the dimples. 40 Art Jewelry January 2007

6 materials Polymer clay: White or pearl, 2 oz. (56g) Contrasting color, 2 oz. (56g) Bail (optional) Sterling silver sheet: 22-gauge (0.6mm), half-hard, 2 x 2 in. (51 x 51mm) Pin stem: 1 2 in. (38mm) Release one end of the saw blade from the saw frame, and then thread the saw blade through a hole. Re-tighten the saw blade in the saw frame, and pierce the findings by following the saw path on the template. Repeat for each of the remaining saw paths. Saw to remove the extra metal along the edges of the frame. If you intentionally left some frame showing around the polymer piece, you will need to saw a 1.5mm ( 1 16-in.) slit on each side of each corner-tab prong so that the prong can be bent in the right place to secure the polymer piece. Leaving the paper template in place to protect the metal from scratches, file and sand the edges smooth. Remove the paper template, and finish the frame mounting as desired (Basics). [10 12] Bend the corner-tab prongs and findings to make the brooch. Use chainnose or flatnose pliers to grasp each corner-tab prong at its base, and bend it so it s perpendicular to the sheet [10]. Use the tips of your chainnose pliers to push the two hinge tabs outward, opposite the corner-tab prongs [11]. Grasp each hinge tab at its base, and bend it perpendicular to the sheet. Repeat for the catch hook. The side of the sheet with the pierced findings is the back of the brooch. Place the polymer piece in the frame mounting, and bend the tabs over the back panel [12]. Gently squeeze the corner-tab prongs down onto the back panel to tighten it into the mounting. [13 14] Attach the pin stem, and complete the finishing. Position the base of a pin stem between the two hinge tabs. Squeeze the two hinge tabs onto the pin stem s rivet wire [13]. Use either an abrasive rubber wheel with a flex shaft or needle files and a sanding stick to even and smooth the edges of the pin-back finding [14]. tools & supplies Photocopies: black-and-white, carbon-based toner Acrylic roller or pasta machine* Nonstick work surface Tissue blade: rigid and/or flexible; or craft knife Cotton swabs Astringent: low alcohol content, cosmetic liquid Parchment paper Stationery burnisher Texture plate or rubber stamp (optional) Paintbrush: fine-tip Liquid polymer clay Oven* Glue stick Jeweler s saw, 2/0 blade Center punch Flex shaft, 0.5mm drill bit Chainnose pliers Flatnose pliers (optional) Finishing items (choose from): needle files, sanding stick, abrasive rubber wheel *Dedicated to nonfood use. See Suppliers, page 87 artjewelrymag.com 41

FREEBIRD THE ORIGINAL D.I.Y. ORNITHOPTER! Tools and Glue. Required Materials
 Do not try to make your ornithopter using "household materials". If you want it to fly, you have to build it right. FREEBIRD THE ORIGINAL D.I.Y. ORNITHOPTER! Wingspan: 16 inches Weight: 1/4 ounce The Ornithopter
DIY CABINET REFACING INSTALLATION GUIDE
 DIY CABINET REFACING INSTALLATION GUIDE CABINET REFACING INSTALLATION Are you ready to reface your outdated cabinets? This guide will show you how to install your new Facelifters Cabinet Refacing Products
Build Your Own Solar Car Teach build learn renewable Energy! Page 1 of 1
 Solar Car Teach build learn renewable Energy! Page 1 of 1 Background Not only is the sun a source of heat and light, it s a source of electricity too! Solar cells, also called photovoltaic cells, are used
Gear PEPSI CAN STOVE INSTRUCTIONS
 Gear PEPSI CAN STOVE INSTRUCTIONS [NOTE: Updated Instructions are now available. The new stove is less likely to develop flame leaks and the fuel/air mixture is improved. Instructions for a simmer ring
bonus tutorial How to Make a Miniature Ice Cream Cone from Polymer Clay Access more fun tutorials at www.themousemarket.com.
 bonus tutorial How to Make a Miniature Ice Cream Cone from Polymer Clay Access more fun tutorials at www.themousemarket.com. Build your miniature food-sculpting skills with easy-to-follow, step-by-step
BUILDINGA 1/10 SCALE FLATBED TRAILER
 VOLUME 1, ISSUE 1 BUILDINGA 1/10 SCALE FLATBED TRAILER BUILT, DESIGNED & WRITTEN BY NATHAN MYERS MATERIALS: FEATURES: While the design was kept simple to allow anyone to be able to build their own trailer,
Contents. Introduction 6. History and types of clay 8. Crafting tools and materials 12. Basic techniques 18. Caning 24. Millefiori canes 40
 Contents Introduction 6 History and types of clay 8 Crafting tools and materials 12 Basic techniques 18 Caning 24 Millefiori canes 40 Projects 52 Suppliers 128 Caning Making a beautiful clay cane is very
Go-kart for little race-drivers
 Go-kart for little race-drivers Drill and drive. Go-kart What it lacks in speed, it more than makes up for in fun: the go-kart will excite little race-drivers. 1 Introduction It s only a go-kart, but it
COMPACT ELITE MAT CUTTER
 INSTRUCTION MANUAL MODEL 350-1 COMPACT ELITE MAT CUTTER INSTRUCTIONS AND OPERATION MANUAL 32in (81cm) mat cutting system with bevel & straight cutters, production stops and 20 in (51 cm) squaring bar.
FRAMED & MOUNTED TILE MURAL
 Page 1 of 5 There is no denying that tile murals have taken the sublimation industry by storm. The unique ability to take a customer s artwork or high resolution photograph, tile it using your software
Speed-Mat Rectangle Cutter
 Speed-Mat Rectangle Cutter 1 Honeycomb baseboard. 2 Left hold down. 14 3 Bottom hold down. 4 4 Left / right rule. 8 5 8 5 Left / right rule pointer. 1 6 Top / bottom rule. 7 Top / bottom rule pointer.
Gate Leg Drop Leaf Table Plans
 Preparing the table top blanks: Cut and glue enough 3/4 stock to make three panels 40 long by 24 wide (they will be cut to final size at a later time). While the glue dries we will work on the legs. Preparing
Translucent Liquid Sculpey
 Translucent Liquid Sculpey Thanks to Karen and Ann Mitchell of "AnKara Designs" for their pioneering experiments with Liquid Sculpey and their willingness to share the examples that are included in this
Mini Wire Jewelry Tutorials for Beginners Created by XQ Designs www.handmade-jewelry-club.com,
 Mini Wire Jewelry Tutorials for Beginners Created by XQ Designs www.handmade-jewelry-club.com, www.diylessons.org Please do not distribute, lend or copy. Do not mass produce. Copyrights 2010 XQ Designs
How to Build Your Own CornHole Game
 How to Build Your Own CornHole Game DIMENSIONS Here is a diagram with the basic measurements for the Cornhole board game. SUPPLIES 1/2 thick sheet of plywood one 4 x4 or two 2 x4 s 8 long 2 4 s (4) 4 1/2
1958-64 WINDOW CHANNEL, WEATHERSTRIP & WHISKER STRIP REPLACEMENT FOR 2-DOOR SEDANS
 By Denny Williams Photos by Denny Williams 1958-64 WINDOW CHANNEL, WEATHERSTRIP & WHISKER STRIP REPLACEMENT FOR 2-DOOR SEDANS Denny Williams - Technical Writer Denny is first and foremost a dyed-in-thewool
Alfa Romeo 147 On board instruments installation guide
 Alfa Romeo 147 On board instruments installation guide Alfa Romeo 147 On board instruments installation guide This guide is describing how I installed oil temperature and oil pressure gauges to my Alfa
Circles Galore Quilt. Sewing supplies: Approximate size: 60 (152cm)
") Sewing supplies: PFAFF creative 3.0 sewing and embroidery machine PFAFF creative QUILTERS HOOP 200x200 (820940096) PFAFF Extension Table with Adjustable Guide (821031096) PFAFF 0A Standard Foot for IDT
Sewing supplies: PFAFF creative 3.0 sewing and embroidery machine PFAFF creative QUILTERS HOOP 200x200 (820940096) PFAFF Extension Table with Adjustable Guide (821031096) PFAFF 0A Standard Foot for IDT
How to Build a Poker Table
 How to Build a Poker Table www.pokertablematerials.com 10-Person Poker Table- 96 x 48 These are step by step instructions for building a poker table. The table will measure 48" x 96" and have a 4" wide
Installation instructions, accessories - Handsfree for cellular phone, system B, entry level
 XC90 Section Group Weight(Kg/Pounds) Year Month 3 39 0.5/1.1 2006 07 XC90 2003, XC90 2004 IMG-249663 Page 1 of 18 Required tools A0000162 A0000163 IMG-239664 M0000232 IMG-253123 IMG-252223 Page 2 of 18
Finishing Fired Metal Clay
 Hadar Jacobson Art in Metal Clay [email protected] www.hadarjacobson.com Finishing Fired Metal Clay Preparing a piece for firing (pre-finishing) makes it easier to finish after firing, but does not
Polymer Clay Blanks. Contributed by: Fred & Tina Wissen. A.K.A PTownSubbie & MrsPTownSubbie. This tutorial was downloaded from
 Polymer Clay Blanks Contributed by: Fred & Tina Wissen A.K.A PTownSubbie & MrsPTownSubbie This tutorial was downloaded from http://www.penturners.org The International Association of Penturners - 2013
FLEXIBLE CIRCUITS MANUFACTURING
 IPC-DVD-37 FLEXIBLE CIRCUITS MANUFACTURING Below is a copy of the narration for DVD-37. The contents of this script were developed by a review group of industry experts and were based on the best available
Rockets: Taking Off! Racing Balloon
 Rockets: Taking Off! For every action there is an equal and opposite reaction. Rockets and Balloons What happens when you blow up a balloon then let it go? Does the balloon move through the air? Did you
DIRECTIONS FOR ASSEMBLING BASE & WALL CABINETS
 DIRECTIONS FOR ASSEMBLING BASE & WALL CABINETS TheRTAStore.com STEP 1: CLEAR A WORK SPACE Place your RTA cabinet panels on a smooth, scratch resistant surface in a large, open area. (Some people like to
HOW TO BUILD A LOU-VEE-AIRCAR
 HOW TO BUILD A LOU-VEE-AIRCAR MATERIALS (PER CAR) 1. One sheet of legal-sized paper 2. Three standard paper clips 3. One butterfly paper clip 4. One plastic soda straw 5. Two large index cards 6. Narrow
VC 104+ Rigid Grade / Rigid Grade Imagine VC 104 Rigid Grade Commercial Customised
 Page 1 of 6 instructions VC 104+ Rigid Grade / VC 104+ Rigid Grade Imagine / (for the rest of this document referred to as VC 104) can be applied to new and used trucks and trailers with painted rigid
How to Build a Printed Circuit Board. Advanced Circuits Inc 2004
 How to Build a Printed Circuit Board 1 This presentation is a work in progress. As methods and processes change it will be updated accordingly. It is intended only as an introduction to the production
THE CANON 106 TONER CARTRIDGE
 THE CANON 106 TONER CARTRIDGE DOC# 0381 By Mike Josiah and the Technical Staff at Summit Technologies CANON 106 TONER CARTRIDGE REMANUFACTURING INSTRUCTIONS Page 1 Remanufacturing the Canon ImageClass
Craft and Design Application of Injection Moulding (Mobile Phone)
") Craft and Design Application of Injection Moulding (Mobile Phone) 5700 Summer 1999 HIGHER STILL Craft and Design Application of Injection Moulding (Mobile Phone) Support Materials This Support Material
Craft and Design Application of Injection Moulding (Mobile Phone) 5700 Summer 1999 HIGHER STILL Craft and Design Application of Injection Moulding (Mobile Phone) Support Materials This Support Material
Modular Locomotive System Instruction Manual for HBK8 George Body Kit
 Modular Locomotive System Instruction Manual for HBK8 George Body Kit Roundhouse Engineering Co. Ltd. Units 6-10 Churchill Business Park. Churchill Road, Wheatley. Doncaster. DN1 2TF. England. Tel. 01302
Gripper Kit for the Boe-Bot Robot (#28202)
") 599 Menlo Drive, Suite 100 Rocklin, California 95765, USA Office: (916) 624-8333 Fax: (916) 624-8003 General: [email protected] Technical: [email protected] Web Site: www.parallax.com Educational: www.stampsinclass.com
599 Menlo Drive, Suite 100 Rocklin, California 95765, USA Office: (916) 624-8333 Fax: (916) 624-8003 General: [email protected] Technical: [email protected] Web Site: www.parallax.com Educational: www.stampsinclass.com
Fading Red Tones on Color LaserJet 2600s
 Procedures Fading Red Tones on Color LaserJet 2600s HP Color LaserJets 2600n, 1600, and 2605 share the same basic Canon engine design. One aspect of the design brings the common problem of scanner optic
HP Laser Jet 4200/4240/4250/4300/4350 Swing Plate
 HP Laser Jet 4200/4240/4250/4300/4350 Swing Plate 1 Swing Plate Assembly-RM1-0043 1 Swing Plate Kit-5851-2766 (RM1-0043 plus RM1-1091 gear) CAUTION: Fuser may be hot. Turn off printer, unplug it and allow
How to become an Operation Christmas Child Shoe Box Character
 How to become an Operation Christmas Child Shoe Box Character SUPPLIES A large rectangular box (to look like a shoe box) Cardboard or foam strips, 2 wide, for the lid Large printed Boy or Girl shoe box
Clay Looms elements principles
 Name: Clay Looms Archeologists believe that weaving was an integral part of all developing civilizations. Because woven items are perishable (they decay or disintegrate over time), it is unknown how old
Surface Decoration. Design techniques used to put on the surface of the pottery. Slip Oxides Glaze Embossed Incised Wax on wet Altered from the wheel
 Surface Decoration Design techniques used to put on the surface of the pottery. Slip Oxides Glaze Embossed Incised Wax on wet Altered from the wheel Slip How to apply slip Colored slip is intended to add
MGB Chrome Bumper Conversion
 MGB Chrome Bumper Conversion Installation Instructions For 1974 1/2-1980 MGB This kit requires cutting, welding, and painting. Professional installation recommended. Note: Every MGB body is slightly different
Children s Furniture Projects
 This is an excerpt from the book Children s Furniture Projects by Jeff Miller Copyright 2002 by The Taunton Press www.taunton.com CHILD S ROCKER KIDS ARE ALWAYS IN MOTION. It s not easy to get them even
Apr 17, 2000 LAB MANUAL 1811.0
 Apr 17, 2000 LAB MANUAL 1811.0 1811 BULK SPECIFIC GRAVITY (GMB) AND DENSITY OF COMPACTED BITUMINOUS SPECIMENS USING PARAFFIN OR PARAFILM ASTM Designation D 1188 (MN/DOT Modified) 1811.1 SCOPE This test
DIP Online Designs Ink Publishing Article Archive and Reference Library Articles by Chris A. Paschke, CPF GCF
 DIP Online Designs Ink Publishing Article Archive and Reference Library Articles by Chris A. Paschke, CPF GCF "Contemporary Brocade Mats" June 2008 When visiting the far east, European influence on Asian
SAFETY & OPERATING INSTRUCTIONS
 SAFETY & OPERATING INSTRUCTIONS EDLUND TOMATO LASER, Models ETL -316, -140 & -380 READ AND UNDERSTAND THIS MANUAL AND ALL INSTRUCTIONS BEFORE OPERATING THIS SLICER. 159 Industrial Parkway, Burlington,
Copyright 2008 OLYMPUS CORPORATION All Rights Reserved. Paper Craft Assembly Manual
 Paper Craft Assembly Manual Before assembly: 1/9 Tips on assembly: Print all the parts (Photo-quality paper is recommended for ink-jet printers and paper of medium thickness (0.20 mm) for laser printers.)
Dave s Sheet Metal Bending Brake
 Dave s Sheet Metal Bending Brake I started building a Zenith CH601XL from plans in mid January 2006. After several failed attempts to bend the rudder spar I ended up going to a local sheet metal shop for
Build a Junior Solar Sprint Model Car Kit Materials: 1 PITSCO Ray Catcher Sprint Kit or Solar Made Junior Solar Sprint Kit 1 White Sheet of Plastic
 Build a Junior Solar Sprint Model Car Kit Materials: 1 PITSCO Ray Catcher Sprint Kit or Solar Made Junior Solar Sprint Kit 1 White Sheet of Plastic Coated Paper 2 Balsa Sheets (10-1/2 x4 x3/16 ) 2 Alligator
HONING LATHE DUPLICATOR CUTTERS
 Lay the flat face of the cutter or bit on the flat top surface of the hone with the rest of the cutter overhanging the edge. Rub the cutter or bit up and down the hone (Figure 24-44). Be sure to hold the
How to Install UnderDeck The Original.
 How to Install UnderDeck The Original. TOOLS: Chalk Line Caulk Gun Garden hose or water bucket Gloves Hammer or Screw Gun Power Mitre Saw with OSB Blade Pencil Pliers Safety Glasses Straight Edge / Carpenter
Happy Endings: Turning Kumi Braids Into Necklaces and Bracelets. Preparation. by A.G. Lindsay ([email protected])
") Happy Endings: Turning Kumi Braids Into Necklaces and Bracelets by A.G. Lindsay ([email protected]) When I started to learn the craft of Kumihimo, I produced many thin braids of between 8 and 16 strands,
Happy Endings: Turning Kumi Braids Into Necklaces and Bracelets by A.G. Lindsay ([email protected]) When I started to learn the craft of Kumihimo, I produced many thin braids of between 8 and 16 strands,
Composite Stone Veneer
 Composite Stone Veneer Installation Guide Ver 1 Jun 2015 www.compstone.com Composite Stone Veneer Installation Guide Contents Introduction & Overview 3 Required Tools 4 Optional Tools 4 Attachment Guidelines:
2. This is a close up of a typical area where the rocker is rusted out leaving holes under where the rocker moulding would be..
 ROCKER PANELS 55,56,57 CHEVY REPLACEMENT Do not throw away any pieces when you first remove them. There are many supports that are not reproduced and will need to be used again. When disassembling try
Flex Circuit Design and Manufacture.
 Flex Circuit Design and Manufacture. Hawarden Industrial Park, Manor Lane, Deeside, Flintshire, CH5 3QZ Tel 01244 520510 Fax 01244 520721 [email protected] www.merlincircuit.co.uk Flex Circuit
TOOLS FOR SELF RELIANCE REFURBISHING SHEET No 2. Registered Charity No 280437. Saws for Woodworking
 Registered Charity No 280437 Saws for Woodworking Issued December 2002 Registered Charity No 280437 page no 1 SAW TYPES Rip saw For cutting along the grain Crosscut saw [A smaller version is known as a
All seam allowances are 1/2 unless otherwise noted. All pattern pieces include the seam allowance. Please read all instructions before beginning.
 This structured bag has lots of pretty detailing. It s large enough to carry all of your essentials as well. Make it in a great patchwork, or stick to a single fabric! All seam allowances are 1/2 unless
Figure 2 The fan and shroud also needs to be removed for access to the four a/c compressor bolts and removal of the compressor from the top.
 Here are some pictures to show what s required when replacing the A/C compressor, expansion valve and receiver/drier on a 2001 Volvo V70. Even if you don t replace these A/C parts these pictures can help
Rebuild Instructions for 70001 and 70010 Transmission
 Rebuild Instructions for 70001 and 70010 Transmission Brinn, Incorporated 1615 Tech Drive Bay City, MI 48706 Telephone 989.686.8920 Fax 989.686.6520 www.brinninc.com Notice Read all instructions before
SHELVES. www.tedswoodworking.com
 SHELVES It's rare that bookshelves look as interesting as the objects you display on them. After all, how much can you decorate the edges of your shelves and sides? This unit is unusual because the shelves
INSTRUCTIONS: LocknCharge Laptop Carts
 INSTRUCTIONS: LocknCharge Laptop Carts www.lockncharge.com Extra Tools required: Hammer, Philips head screwdriver, medium adjustable spanner. (Allen key supplied) (Panel colours for illustration purposes
Clay Feature Tutorial
 Clay Feature Tutorial This tutorial can be used to apply any type of feature to a vinyl doll. Keep in mind that baked clay will be NON-flexible whereas, vinyl will remain flexible. In the following photos,
30a. 31a. 30b 12. 31b. 29a 28a 1/48SCALEHEMSDAUPHIN PAGE2/10
 9 11 10 43 42 49 50 32 7 51 52 48 58 5 6 8 59 2 3 4 1 24 30a 31a 30 30b 12 31b 31 28 13 29 29a 28a 1/48SCALEHEMSDAUPHIN PAGE2/10 38 82 38f 85 84 86 83 37d 35 38a 37 60 17 21 20 16 15 87 27 34 40c 36b 36a
Cosmetics Case with Vinyl Interior Skill Level: Intermediate
 Cosmetics Case with Vinyl Interior Skill Level: Intermediate Designed By Lindsey Rhodes Sewn By Lindsey Rhodes http://lrstitched.com Use this step by step tutorial to create a roll-up cosmetics case with
Basic Millefiori Spiral Flower by Iris Mishly Photos Daniel Layla Published in may 2006, "New Life" Magazine, Israel
 Basic Millefiori Spiral Flower by Iris Mishly Photos Daniel Layla Published in may 2006, "New Life" Magazine, Israel Polymer clay is, as the name implies, a pliable, bendable polymer compound for artists
Black Wolf POCKET BILLIARD TABLE INSTALLATION MANUAL. SERVICE DEPARTMENT P.O. BOX 68 BRISTOL, WI 53104
 Black Wolf TM POCKET BILLIARD TABLE INSTALLATION MANUAL www.brunswickbilliards.com SERVICE DEPARTMENT P.O. BOX 68 BRISTOL, WI 53104 51-905710-000 SEPTEMBER 2010 NOTE: Please use the instructions in this
Wall Mount Installation and Use
 Wall Mount Installation and Use 1. Introduction The Wall Mount works the same way for all Touchfire cases - the one or two row magnet strip on the back of the case is magnetically attracted to the Wall
Reasons for reissue are in Section 6, REVISION SUMMARY.
 Figure 1 This instruction sheet covers the application of OPTIMATE FSMA Fiber Optic Connector Types 905 and 906 for data and telecommunications applications. Base part numbers which apply to each type
tidesmarine Smart Seal Temperature Alarm System Generation II Installation Instructions Starboard side cable
 tidesmarine Smart Seal Temperature Alarm System Generation II Installation Instructions Starboard side cable Port side cable (with black cable tie attached) Power cable Preparing for Installation 1 Overall
Screen Melts. Introduction. Selecting Screen Material. Prefire Before Using. Spalling. Kiln Shelf
 Introduction There are two terrific reasons for melting glass through screens. First because screen melts produce uniquely intricate patterns not possible any other way and second because it does it using
DL50 Discus Launch Glider
 DL50 Discus Launch Glider DL50 Specifications Length: 39 in. (99 cm.) Wingspan: 50in. (127 cm.) Wing Area: 275in 2 (1774 cm 2 ) Weight: 8oz. (227 g.) Revision History Date Revision Notes/Comments 6/12/2004
LONDON JUBILEE AND OLYMPIC CELEBRATION ITEMS BY HILARY GOODING FOR MAKOWER UK
 LONDON JUBILEE AND OLYMPIC CELEBRATION ITEMS BY HILARY GOODING FOR MAKOWER UK 118 Grey s Road, Henley on Thames, Oxon RG9 1QW www.makoweruk.com Email: [email protected] www.andoverfabrics.com LONDON Designed
STEADYfast Stabilizer Installation Notes Fifth Wheel and Travel Trailers 11/23/13
 STEADYfast Stabilizer Installation Notes Fifth Wheel and Travel Trailers 11/23/13 (See Supplemental Instructions for trailers with heavy duty round footplates and/or Power Leveling Systems) PHONE SUPPORT
www.cornholesupplies.com
 www.cornholesupplies.com How To Build Regulation Cornhole Boards Home of the Original Cornhole Bags and Boards Supply List: 1-4' X 8' Piece of Plywood (pre sanded) 4-2" X 4" X 8' Studs (2 by 4s make sure
Simple Party Clutch. Use interfacing and a magnetic snap to turn your favorite fat quarter into a smart little party bag with a convertible strap.
 Simple Party Clutch Use interfacing and a magnetic snap to turn your favorite fat quarter into a smart little party bag with a convertible strap. Finished bag measures 8 wide x 4 ¼ high x ½ deep. Strap
Lay blocks with mortar
 Student Lay blocks with mortar What you will learn When you have fi nished this section, you should be able to: Mix mortar Lay blocks with correct mortar joints. How do I mix mortar? Mortar is a wet paste
Adafruit Pi Box Plus. Created by Phillip Burgess. Last updated on 2014-07-24 08:45:08 PM EDT
 Adafruit Pi Box Plus Created by Phillip Burgess Last updated on 2014-07-24 08:45:08 PM EDT Guide Contents Guide Contents Assembly Instructions Preparation Parts List Assembly Opening the Lid If Using a
Navico-Northstar 2kW JRC Radar Package, Scanner Cable Removal and Replacement
 Navico-Northstar 2kW JRC Radar Package, Scanner Cable Removal and Replacement This work instruction describes the methods and means for which to remove and reinstall optional scanner cable configurations
FRONT BUMPER INSTALLATION INSTRUCTIONS 2007-2011 DODGE / MERCEDES SPRINTER
 Aluminess Products Inc 9402 Wheatlands Ct. #A Santee, CA 92071 619-449-9930 FRONT BUMPER INSTALLATION INSTRUCTIONS 2007-2011 DODGE / MERCEDES SPRINTER Please read before beginning Stainless steel hardware
Intaglio Collagraph. Scrim and plaster Leaf skeleton Gloss varnish, torn card and carborundum
 Intaglio Collagraph Introduction Although relatively new, nowadays collagraph is amongst the more established printmaking processes and is widely used by artists and printmakers the world over. The process
making Wire & Bead jewelry
 Learn Visually with 500 How-To Photos making Wire & Bead jewelry A r t f u l W i r e w o r k T e c h n i q u e s LARK JEWELRY & BEADING Janice Berkebile & Tracy Stanley Contents 30 Tools and Materials
ASSEMBLY AND USE INSTRUCTION BOOKLET
 ASSEMBLY AND USE INSTRUCTION BOOKLET Congratulations on choosing the Top Flite Smart Stripe, the professional way to cut MonoKote stripes for trimming film-covered models. Once you assemble and use the
Inventory of Parts. American Stirling Company
 MM-5 American Stirling Company Low Temperature Differential Stirling Engine Kit Inventory of Parts Setscrews (1of 2) Short Reducer (Looks like one of the brass nuts) Crankshaft Upper Piston Rod (longer)
THE HP LASERJET 5200 TONER CARTRIDGE
 THE HP LASERJET 5200 TONER CARTRIDGE DOC# 0344 By Mike Josiah and the Technical Staff at Summit Technologies HP LASERJET 5200 TONER CARTRIDGE REMANUFACTURING INSTRUCTIONS Page 1 Remanufacturing the HP
1998-2002 Suzuki Katana Fender Eliminator
 1998-2002 Suzuki Katana Fender Eliminator The following are instructions and illustrations on the installation of the custom fender elimination. 1 Begin by removing seat, both rear fairings, and tail light
You will need Guinevere knot pattern
 Guinevere s Necklace This lovely knot has inspired quite a number of people to start making Celtic knots. I received the design from Todd and Sherry Greer in Austin, Texas, who make hand-tied Celtic knotwork.
KITCHENS. Tip PAGE 1 FITTING YOUR KITCHEN GUIDE. How to mark out a kitchen. Tools required for installing a kitchen STEP ONE STEP TWO STEP THREE
 FITTING YOUR KITCHEN GUIDE How to mark out a kitchen PAGE 1 Before starting on the installation, measure 870mm from the lowest point of the floor and mark a datum line around the room to indicate where
Modular Locomotive System Instruction Manual for HBK5 Billy Body Kit
 Modular Locomotive System Instruction Manual for HBK5 Billy Body Kit Roundhouse Engineering Co. Ltd. Units 6-10 Churchill Business Park. Churchill Road, Wheatley. Doncaster. DN1 2TF. England. Tel. 01302
Low Cost Heliostat Assembly Kit for High Schools
 Low Cost Heliostat Assembly Kit for High Schools Phillip Daniel Supervisor: Rockwell International Assistant Professor Alexander Mitsos Department of Mechanical Engineering Massachusetts Institute of Technology
SPRITE and BIGFOOT DESKTOP CNC MACHINE KIT ASSEMBLY INSTRUCTIONS
 SPRITE and BIGFOOT DESKTOP CNC MACHINE KIT ASSEMBLY INSTRUCTIONS README FIRST: Thank you for purchasing your MyDIYCNC Desktop CNC Machine Kit. We hope this versatile and innovative machine brings you many
BLADE REPAIR INSTRUCTION BOOKLET
 BLADE REPAIR INSTRUCTION BOOKLET Contents Section I: Section II: Section III: Section IV: Section V: Section VI: Removing a Blade Refer to this section if you need to remove the blade from an oar shaft.
MAT CUTTER MODEL 850, 855, 860
 P R O F E S S I O N A L S E R I E S MODEL 850, 855, 860 MAT CUTTER INSTRUCTION AND OPERATION MANUAL Professional mat cutting system with aluminum baseboard, magnetic production stop, 32 in (81 cm) removable
RECLINE IN THE SUMMERTIME Get comfortable on the patio or deck with this sturdy reclining lounge chair
 RECLINE IN THE SUMMERTIME Get comfortable on the patio or deck with this sturdy reclining lounge chair As early as the eighth century B.C., the Greeks used a piece of furniture called the kline, for lounging
TopSky DLG Installation Manual
 TopSky DLG Installation Manual Attention: Because after the compound materials solidify, there will be ammonia iris on the surface, which affect the bonding strength afterwards. Please polish with sandpaper
QWALL 4 ACRYLIC SHOWER WALL INSTALLATION INSTRUCTIONS
 QWALL 4 ACRYLIC SHOWER WALL INSTALLATION INSTRUCTIONS IMPORTANT DreamLine TM reserves the right to alter, modify or redesign products at any time without prior notice. For the latest up-to-date technical
Used to join the withies together. Don t use low tac tape, it s not strong enough! Tear or cut strips ready for use.
 Lantern Making You will need: Withies Buff willow withies are strong, light and bendable and are used for making the structure of the lantern. They come in bundles of various lengths, the shorter withies
apple Service Source PowerBook G4 (DVI) Updated 4 December 2003 2003 Apple Computer, Inc. All rights reserved.
 Updated 4 December 2003 2003 Apple Computer, Inc. All rights reserved.") apple Service Source PowerBook G4 (DVI) Updated 4 December 2003 2003 Apple Computer, Inc. All rights reserved. apple Service Source Upgrades PowerBook G4 (DVI) 2003 Apple Computer, Inc. All rights reserved.
apple Service Source PowerBook G4 (DVI) Updated 4 December 2003 2003 Apple Computer, Inc. All rights reserved. apple Service Source Upgrades PowerBook G4 (DVI) 2003 Apple Computer, Inc. All rights reserved.
CHARISMA SHOWER/TUB DOOR INSTALLATION INSTRUCTIONS
 CHARISMA SHOWER/TUB DOOR INSTALLATION INSTRUCTIONS IMPORTANT DreamLine reserves the right to alter, modify or redesign products at any time without prior notice. For the latest up-to-date technical drawings,
Making A Mirror Grinding Tool By Allen Malsburry
 Making A Mirror Grinding Tool By Allen Malsburry The average person would never think, I can make my own telescope. Most amateur astronomers believe, I can buy a better telescope than I can build. Neither
Lunette 2 Series. Curved Fixed Frame Projection Screen. User s Guide
 Lunette 2 Series Curved Fixed Frame Projection Screen User s Guide Important Safety and Warning Precautions Please follow these instructions carefully to ensure proper maintenance and safety with your
Build a Trade-Show Booth for Under $200!
 Build a Trade-Show Booth for Under $200! This corner booth, with a seven foot front and sweeping 4x8 backdrop, assembles in less than 20 minutes and can be built in one weekend. Materials Tools 4 x8 x3/4
Installation Instructions For Slider Casement Air Conditioners
 Installation Instructions For Slider Casement Air Conditioners NOTE: These instructions describe installation in a typical wood framed window with a wood SLIDE-BY sash, or installation in a metal CASEMENT
BOBBIN WINDER - TYPES & FUNCTION
 BOBBIN WINDER - TYPES & FUNCTION 13.1.006 The bobbin winder is a separate unit screwed on to the machine, adjacent to the balance wheel. Its function is to wind a reserve of cotton evenly onto an empty
AM/FM ANTENNA KIT (TOUR-PAK MOUNT)
") -J077 REV. 008-0-0 AM/FM ANTENNA KIT (TOUR-PAK MOUNT) GENERAL Kit Number 7-98A Models For model fitment information, see the P&A Retail Catalog or the Parts and Accessories section of www.harley-davidson.com
-J077 REV. 008-0-0 AM/FM ANTENNA KIT (TOUR-PAK MOUNT) GENERAL Kit Number 7-98A Models For model fitment information, see the P&A Retail Catalog or the Parts and Accessories section of www.harley-davidson.com