Instructions for using Eastpointe s Electronic Systems (Waiver Version)
|
|
|
- Lilian Rich
- 9 years ago
- Views:
Transcription
1 Instructions for using Eastpointe s Electronic Systems (Waiver Version) Updated 11/05/2012 Instruction Manual on the MCO and Service Provider Electronic System Processes Eastpointe - 1 -

2 Contents ProviderConnect Connectivity Requirements... 3 Getting to the Eastpointe ProviderConnect Website... 4 Main Menu Options... 9 Change Your Password At Any Time Working with a Consumer Already Enrolled With Your Agency Enrolling a Medicaid Member into ProviderConnect After you click the Add New Client/Client Search option enter the members Medicaid ID number and click on the search button Once you click on Create Admission you will need to fill out all the appropriate information for the member so that an MCO/LME number can be assigned to the member and you can begin requesting services for him/her Once all the admission/enrollment information is entered into the system make sure to click the red save button at the bottom of the form. This process enrolls the member into your ProviderConnect system and gives the member an MCO number You can now go to Look up client option and find the member by searching for him/her by name Navigating the Client Profile Screen Demographic Requesting and Receiving Authorization of Services for Members Creating an Authorization for a Member Attaching Supporting Clinical Documentation (Files) to Authorizations Entering Coordination of Benefits Data Providers are responsible for adding and maintaining all primary insurance payers in the ProviderConnect system for members. All claims will be edited and checked to ensure that billing from primary insurance payers is complete prior to billing Medicaid or IPRS. Failure to document this information will result in payback of funds to the MCO To enter the Coordination of Benefits information into the system click on the Financial Eligibility option on the member s navigation bar Click on the blue link under the section called Cross-Episode Financial Eligibility Billing for Services through ProviderConnect ProviderConnect Billing Process LME Contacts for Support Establishing a Consumers Target Population Category for IPRS/State Funded Consumers Eastpointe Website Eastpointe Website CALCIUM Electronic Appointment Scheduling System Secure Instructions Eastpointe - 2 -

3 ProviderConnect Connectivity Requirements The ProviderConnect system is a web-based system that requires an Internet connection. Although it is not required, a high speed connection is preferable. Internet Explorer 5.5 or greater is required to run the site. Each user is required to have a user id and password before using the Eastpointe ProviderConnect system. Passwords will only be given to trained users. You can request passwords from the LME by e- mailing [email protected]. Contact and phone numbers are at the end of this document. Passwords for the ProviderConnect system will expire every 90 days. Please make sure to reset your password when the system prompts you to do so. If you get locked out of the system you will need to [email protected] to get your password reset. Eastpointe - 3 -

4 Getting to the Eastpointe ProviderConnect Website Website Address: Below is the main home page of ProviderConnect. Logging in to the system Enter your unique username and password given to you by your Security Representative for our agency. o Once your agency is contracted with Eastpointe the agency is asked to provider a Security Representative that will be responsible for managing accounts for your agency. Please contact the security rep at your agency to obtain access to the ProviderConnect System. This user id and password will be assigned by the Management Information System Department at Eastpointe. If you are unsure who your security representative is please contact [email protected] o Please review the trainings on our website on how to use ProviderConnect before requesting a user id and password. Trainings can be located at: click on For Providers, and then click on Meeting/Training Documents/Choose system trainings in the drop down. Download and view the training. Press the Login button. Eastpointe - 4 -

5 Eastpointe - 5 -

6 If you are logging in for the first time into the system you will be prompted to immediately change your password. Please make sure that you change it as shown in the screen below. Eastpointe - 6 -


7 Notes: Your password is case sensitive. Make sure you enter your password exactly in the format it was created. If you incorrectly enter your username and password 3 times, the system will lock your user account. After 15 minutes, you may attempt to log in again. If your password expires please [email protected] to have it reset. Your password will expire every 90 days. Please make sure to create a new password when the system prompts you to change it to avoid being locked out of the system. Security Page The security screen provides information on HIPAA confidentiality and security. Please abide by the rules of HIPAA and make sure that you DO NOT share your password with anyone. If you feel that there is a breach in your account please contact [email protected] immediately to have it reset. Click on Continue to pass through the security statement. Eastpointe - 7 -

8 News Screen The News Screen is very important. It will document all updates that you will need to know about ProviderConnect or changes in system processes. We will document any maintenance or down time in this area so that you will be aware of times when the system will not be available for use. Click on Skip to Main Menu to move to the next screen. Eastpointe - 8 -

9 Main Menu Options Navigating the Main Menu This screen is the main menu. From this screen you can do several things. Add New Client/Client Search this option will allow you to search to see if a member is Medicaid eligible. If the person is not currently active with the MCO you will be allowed to enroll the member into the MCO. Look up client this allows you to search for a client that has been assigned to you in the system and already has an MCO record number. Change password this allows you to change your password. If you feel that there may be a security threat you should always change your password. Billing this option will allow you to bill for all the services you have entered through ProviderConnect. o Note: only 1 person in your agency needs to be responsible for using this option. News this option takes you back to the news page. Reports this option will allow you to pull specific types of reports. Logout/Exit logs you out of the system when you are done. Eastpointe - 9 -


10 Change Your Password At Any Time If you need to change your password at anytime you can click on Change Password from the main menu. You will see the following screen. The screen will ask you to enter your old password and then enter your new one. You will need to enter your new password twice for system verification. ProviderConnect requires users to change their password every 90 days. Users may change their password at any time. Passwords are case sensitive, so when creating a new password carefully note how you are entering it into the system. Eastpointe

11 Working with a Consumer Already Enrolled With Your Agency Look Up Client Option In order to work with a member that is already active with your agency you would use this option. You will be able to pull up the member by the MCO Member ID number or you can search by Social Security Number, Name, or Date of Birth and then click the search by criteria button. To see all members that are available under your agency you can just click the search by criteria button without entering any data elements at the search screen. You can then see an alphabetical list of members and can choose the one you want from the list. Choose Lookup Client at the main menu to get to this screen. You may enter the consumer s LME consumer record number or you may look the consumer up by name. If you want to view all the consumers you can just click on Search by Criteria. The system will then give you a list of all the consumers for your agency. You can click on the LME record number to pull up the consumers profile screen. Eastpointe

12 Eastpointe


13 Enrolling a Medicaid Member into ProviderConnect In order to enroll a Medicaid member within your agency in ProviderConnect you will click on the option called Add New Client/Client Search option on the main menu. Eastpointe

14 After you click the Add New Client/Client Search option enter the members Medicaid ID number and click on the search button. If the Medicaid member is currently within the Eastpointe catchment area, has active Medicaid and has a Medicaid Aid Category acceptable for the MCO to process then the system will show the member and give you the option to create the admission record so that the enrollment process can begin. If the client is not currently admitted the system will allow you to click on the button called Create Admission Once you click on Create Admission you will need to fill out all the appropriate information for the member so that an MCO/LME number can be assigned to the member and you can begin requesting services for him/her. *Note: the system will populate as much of the demographic information on the member as possible based on the Medicaid member eligibility data. Make sure to fill out the rest of the required fields that are in red in order to file the entire enrollment record. If the client is already admitted then you can choose the client id number and move forward. Eastpointe


15 Once all the admission/enrollment information is entered into the system make sure to click the red save button at the bottom of the form. This process enrolls the member into your ProviderConnect system and gives the member an MCO number. You can now go to Look up client option and find the member by searching for him/her by name. Eastpointe

16 If a member is already enrolled and active your agency when you enter the Medicaid ID number in the Add New Client/Client Search option you will see the system populate as listed below. Just choose the MCO number beside the member name and you will be able to work with the member. Eastpointe

17 Reviewing the Status of Authorizations An authorization request can have one of six different status options. 1 Approve UM has approved your authorization. Please check the start and end dates and the units of your authorization to ensure proper billing. 2 Pend UM has pended your request and is waiting on the provider to submit more information to the care manager to review. Please check the comments section of the authorization for further clarification. 3 Deny UM has denied your request. Review comments section for reasons why the authorization was denied. 4 Unable to process this means that the authorization was received with missing required information and cannot be processed. 5 Waiting for Review this means that the LME has not reviewed the authorization yet. 6 Void this means that there was an error with the authorization and it has been voided. The LME Care Manager will always respond to the provider using the comments section listed at the end of the TAR. Providers should read these notes carefully for further clarification of the request. Any authorization that has been denied or reduced will have a letter attached to the authorization indicating the decision and noting appeal rights for the member/guardian. Eastpointe


18 Navigating the Client Profile Screen On the left side of the client profile screen you will see several options. The profile screen automatically defaults you to the demographic page when you pull up the consumer for the first time. Demographic Eastpointe


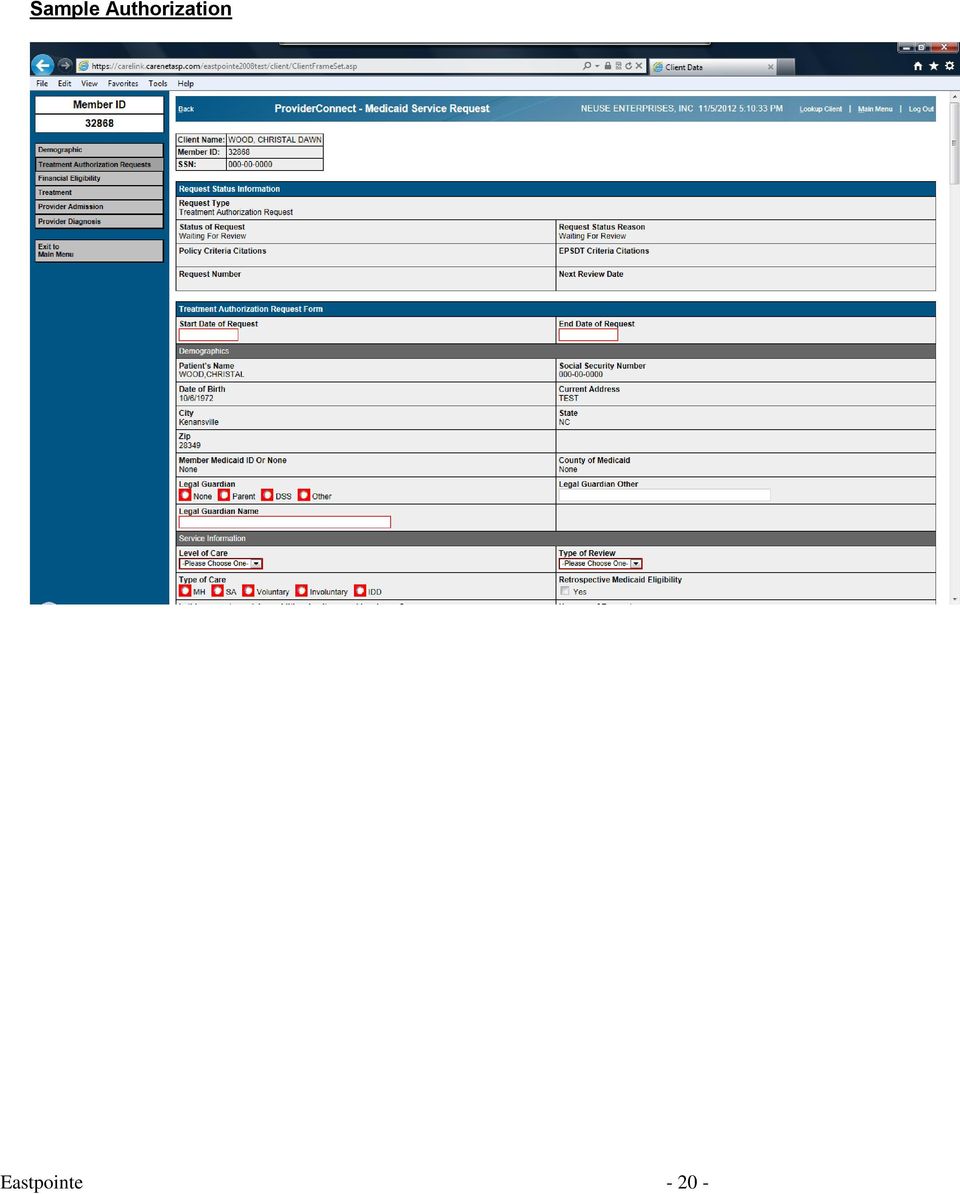
19 Requesting and Receiving Authorization of Services for Members Treatment Authorization Requests (TAR) Menu The Treatment Authorization Requests menu contains a list of all authorizations currently in place for the client or authorizations waiting to be approved for the client. This screen also allows you to request a new TAR by selecting the red button labeled Add Treatment Authorization Request. The status of the authorization will show in the column labeled Request status. If you would like to review or print an authorization you should click the word Request Type. This will take you to the detail authorization screen and allow you to view the documentation on the authorization. You can print the authorization by selecting print under your file menu. Eastpointe


20 Sample Authorization Eastpointe

21 Creating an Authorization for a Member To enter authorization requests for members into the system choose the Treatment Authorization Requests from the navigation menu. Click on the red button labeled Add Treatment Authorization Request Fill out all the necessary information for the request. All red fields or have stars denoted in red are required fields and have to be filled out before the authorization can be saved in the system. At the end of the request make sure to click on the Save button in order for the request to be processed by the MCO. After the TAR is saved it will show up on the display with a status labeled as waiting for review. You must upload all documentation to the request that will prove medical necessity for the services that are being requested. o **Note: go to section in this manual labeled Attaching Files in ProviderConnect for instructions on how to attach files. Eastpointe
22 Attaching Supporting Clinical Documentation (Files) to Authorizations When you request an authorization through ProviderConnect you will then be required to attach appropriate clinical documentation to show/prove medical necessity. To attach documents to an authorization do the following: At the Treatment Authorization Requests screen click on View/Add New beside the authorization that you need to attach your documents to. Click here to add documents to your authorization request Eastpointe

23 At the next screen click on the button labeled Browse Click here to look for file to attach Eastpointe

24 Find the file you are attaching on your computer in the choose file screen and then click open. Eastpointe
25 The file path and name should default in for you. Make sure to choose the Type of Document you are uploading. When you see the path and filename in the box click Attach New Files. You can go back and use this same process to attach more files if necessary to the same authorization. Information defaults in here. Eastpointe
26 After the file(s) are attached you will be able to see a disk show up beside the authorization. This lets you know that the files are attached. Disk icon shows attachments Eastpointe
27 Entering Coordination of Benefits Data (Other Insurance Information) Providers are responsible for adding and maintaining all primary insurance payers in the ProviderConnect system for members. All claims will be edited and checked to ensure that billing from primary insurance payers is complete prior to billing Medicaid or IPRS. Failure to document this information will result in payback of funds to the MCO. To enter the Coordination of Benefits information into the system click on the Financial Eligibility option on the member s navigation bar. Click on the blue link under the section called Cross-Episode Financial Eligibility Eastpointe
28 Under Guarantors choose the correct financial payer source. If you do not see the name of the payer source choose other third party health plan Click on Add Guarantor Eastpointe

29 Fill out all the information in the form that you have available. All items in red are required and you will not be able to file without the information. Eastpointe

30 Click Save at bottom of form. Once saved you will then see the primary payer stored on the screen. Eastpointe
31 Choose the up arrow beside the payer you entered in order to make it first in the list. Eastpointe
32 Click on Submit Eastpointe

33 Billing for Services through ProviderConnect Billing can be done in two ways through Eastpointe: Option 1: Through an 837P or 837I format. For more information on getting setup for EDI transaction processing please go to the following link: Option 2: Through the ProviderConnect system (the instructions below are for ProviderConnect billing Click on the Treatment link. You will see a history of the treatment that has been entered for this consumer. To add treatment for a consumer, the provider should click on the Add New Treatment Service button at the top of the Treatment page. Eastpointe

34 Choose the code you are billing from the drop-down box. o Note: if you are billing for a pass thru service that does not require an authorization you should see that service in the drop down. There will not be an authorization number associated with the service. Enter the correct clinician/agency that rendered the service. You will need to select the appropriate clinician name based on the type of service being billed. Enter the units that you are billing. o Note: make sure you enter the correct units based on the type of code that you are billing. Example: if a code is a 15 minute code and you provided 60 minutes then you would enter 4 units. Enter the date of service. This can be added as a single date, date range or you can click on calendar and select multiple days. Click Set Treatment Date button to continue. Eastpointe

35 On the following page you will need to enter the duration in minutes that was done for that particular service and the place of service in the location field in which that service was actually provided. Enter the primary and secondary diagnosis that will be billed on the claim. Under Private pay amount you would enter the amount of money that was collected on this service from the consumer, if any. Under button labeled Add Additional Payer records you would enter the amount paid by any third party insurance. Enter the actual billed amount (this is the amount that you are actually billing the MCO). Click on Add Treatment to save your service into the system. Eastpointe

36 Once the unit of treatment or unit of service has been added/saved to ProviderConnect, it will appear in the Treatment History on the Treatment page. Until the unit is billed by the provider; the unit of treatment may be edited or deleted by clicking on the blue Edit or blue Delete Above link under the unit of treatment. Once the unit is billed by the provider; the unit of treatment is no longer editable and also cannot be deleted. If the unit of treatment is billed by the provider, the Bill Date column will contain the date on which the unit of treatment was placed on a bill to be sent to MSO. Much like authorizations, the Billing Status column will say Not Reviewed until MSO determines to pay or deny payment of the unit of treatment. The Expected Disbursement column will remain blank until the LME has approved payment for the services. Eastpointe

37 ProviderConnect Billing Process Step 1: Go to the Billing section in ProviderConnect Once you enter the services into the treatment screen for all your consumers the services are saved but are not submitted to the LME. In order to submit the services to the LME you will go back to the main menu and click on the Billing option. *Note: You should not bill services daily. You should bill weekly or monthly. This will make the process for billing much easier for your agency and for Eastpointe. Eastpointe

38 Step 2: Generate the Bill Click on the Generate New Bill button under the Bill Generation heading. This button will pull all services that have been added to the system on the Treatment page that have not been associated with a bill. Step 3: Select a Bill Status Eastpointe

39 Option 1: Cancel/Delete Bill After generating the bill and the provider decides they need to remove the bill, the provider can click on the Cancel/Delete Bill button and the services listed on the newly generated bill will remain in an unbilled state. Option 2: Save, But Not Submit Save, But Not Submit allows the provider to place the bill in a holding status. They have not yet submitted the bill to be a part of the batch process that sends the services to MSO for payment. If the provider selects this option, they can view the bill at a later time by clicking the link in the Unsubmitted Bills list. Treatment services associated with bills in the state of Save but Not Submit cannot be re-billed. The provider must choose to Cancel/Delete the bill for the units to be re-billed or continue to submit the bill. Option 3: View Bill Summary View Bill Summary is the next step to submit the bill. The provider will be shown a summary of what is being submitted to MSO for payment. If they decide to not submit the bill, the provider can select the Edit Bill option, which will take them back to the previous page. In order to finalize the submission of the bill, the provider must choose the Submit Bill option. o Note: Billing should be sent to the LME weekly. Daily processing is not accepted. Eastpointe
40 Step 4: Adjudication of Bills Once the provider has submitted a bill, the bill will appear on the list of Submitted Bills and the billed treatment data is put in the queue to be sent to the LME for adjudication. Once the bill has been adjudicated; the status of each service (paid or denied) will be displayed on the Billing page and in the client's Treatment record. Un-submitted Bills Section If you save but not submit bills the bill will show up under the Un-submitted Bills section. Please make sure to keep this section checked. If there is billing under this section it means that the billing was not submitted to the LME and is waiting for the provider to submit it. To submit the un-submitted bills you should click on the blue link under the column called Submission Date. You will then be able to go through the process of submitting the bills to the LME. Eastpointe
41 LME Contacts for Support ProviderConnect Issues/Questions ProviderConnect Password Issues/Computer Technical Support Medicaid and IPRS Authorization Questions Customer Services Option 2 General Billing Questions/Payments Option 4 ask for Claims Department Eastpointe

42 Establishing a Consumers Target Population Category for IPRS/State Funded Consumers Before any state funded consumer can receive any paid services, the Division of MH/DD/SA Services requires that a Target Population Category is established for that consumer. This category determines which disability category in which the person falls and also helps determine funding for that consumers service. The Target Population is required to come in on the consumers Admission Assessment through the ProviderConnect system. To determine which category the person falls into you have to utilize the Divisions category listings as well as determine if the service array and the diagnosis for that consumer will be covered under that category. To access this determination information go to the following website: Eastpointe
43 Step 1: On the left hand side of the website you should click on the Target Population drop down list print all the MH/DD/SA population group lists. Step 2: On the left hand side of the website you should click on the Diagnosis/Target Population Crosswalk and then print Step 3: On the right hand side of the website you should click on the Service Array link and then print. Step 4: Read each population category and determine which category is right for your consumer. Step 5: After determining the population category review the Service Array and the Diagnosis documents to ensure that the client s diagnosis and the services that you will be providing are covered under that pop. **Note: if the diagnosis and/or services are not covered under the consumers target population category the service will be denied and the provider will not be paid for that service. Eastpointe
44 Eastpointe Website The Eastpointe website is the tool in which Eastpointe will communicate with its provider network. Any important state or LME related updates or changes will be added to the Eastpointe website. Please make sure to review the Eastpointe website frequently so that you are up to date with processes. Website address is: Important Items on the website are: Home page This page contains the LME 24/7 Access to Care Phone numbers as well as the Walk In Crisis Clinics in each county. Announcements this item is updated frequently and is the sole communication method used by Eastpointe to communicate to its provider network. Training Calendar Eastpointe publishes all trainings (internal and external) via the training calendar. In order to attend trainings you must utilize this calendar to sign up/register. About Us Access to Care brochures can be printed Needs Assessment information for our catchment area Board of Directors and contact information How to Contact LME staff For Consumers News/announcements that relate to consumers Automated Complaint/Concern process Access to Care brochures Community Resources Directory Consumer Newsletters Consumer Rights Information Provider Choice Database IPRS Benefit Service Package For Provider Community Becoming a Provider with Eastpointe News/announcements that relate to providers Suggestion Box Provider Choice Database Community Resources Directory IPRS Benefit Service Package Eastpointe Policies and Procedures Web-Submission Forms Forms NC-TOPPS Information Important links: DMA, DMH, DFS, State IPRS Website, Eastpointe Secure System, ProviderConnect, Calcium Medicaid UR Documentation Eastpointe
45 CALCIUM Electronic Appointment Scheduling System Eastpointe supplies providers with a free appointment scheduling system to allow them to block out times for Eastpointe to send referrals to their agency. When consumers are given choice of providers during the Screening, Triage and Referral process the LME clinician will access the Calcium system to determine first available appointment with the consumer s provider of choice and will utilize that system to schedule the appointment. Instructions for using the Calcium system are below. Step 1: Login to your agency s provider calendar by going to the Internet and typing the following URL: Step 2: Click the word Login and then type in the username and password given to you by Eastpointe and then click login. Step 3: Provider Calendar will be shown. Choose the month by clicking the link at the top of the page. Choose the day by clicking the number of the day. This will allow you to block appointments for your agency. (Also known as events in this system). **Note: if your agency has more than 1 site you will see each calendar for those sites and you would click on the site name that you wish to review. Step 4: Choose the time of the appointment. Remember to choose am or pm. **Note: if you want more than 1 appointment blocked for 1 day please enter each appointment separate so that Eastpointe can see each appointment time available at your agency. **Note: the text field will automatically contain the word BLOCKED. Do not change this word. This will allow Eastpointe to search to find appointments open for your agency. Step 5: Choose the payer sources that your agency will accept for this particular appointment time. If you need to choose more than 1 hold down your CTRL button and click on each payer. Step 6: Choose the age/disability category(ies) that your agency will accept during this appointment. If you need to choose more than 1 hold down your CTRL button and click on each age/disability. Step 7: Choose the county in which the services for this consumer will be provided. **Note: this helps the STR department locate a provider that is closest to the consumer. Step 8: Choose the appropriate response so that STR will know if a doctor will be available during that appointment time. Step 9: Choose the service(s) that can be provided for this appointment. If you need to choose more than 1 hold down your CTRL button and click on each service that can be provided. Step 10: Please let the LME know which type of codes to authorize for the initial package. If you have providers that cannot bill CPT codes then you should choose H Codes only. If you have providers that bill only CPT codes then you should choose CPT codes only. If you have both types of providers in your agency and you are not sure which type of staff will be seeing the consumer choose Both H and CPT Codes. Eastpointe
46 Step 11: Enter the address of the person at your agency who should receive the STR Referral Form from the LME. Step 12: (OPTIONAL) Recurring Appointments You can create recurring appointments so that you don t have to enter each appointment one at a time. Click show beside Repeat Information. This will allow you to set up recurring appointments automatically without having to rekey each one separately. When you are finished entering the information for the appointment (event) click on Create Event. This will save the appointment in the system. Step 13: When you are finished working with the calendar make sure to logout. (See the link at the bottom of the screen). Changing Your Password Make sure that once you are given your user id and password by Eastpointe that you change your password. This is very important for security purposes. Once you login to your calendar go to the link called home at the bottom of the calendar. Click User Options and then put in the password given to you by Eastpointe and then enter your new password. Enter it again to confirm and then click Change Password. Eastpointe Scheduling Eastpointe Access/STR department will screen all consumers and provide them with provider choice. Once a provider is chosen, Eastpointe will find the appropriate BLOCKED time and will change the name of the appointment from BLOCKED to the client s LME record number. THIS WILL BE THE WAY THAT YOUR AGENCY WILL KNOW THAT AN APPOINTMENT HAS BEEN SCHEDULED. Access will continue to (securely) the Screening Referral Form to the provider so they will know the consumer will be coming for the appointment. NOTE: APPOINTMENTS CAN ONLY BE SCHEUDLED WITH PROVIDERS WHO HAVE SUPPLIED BLOCKED TIMES FOR SCHEDULING. Appointment Notification You will know that a consumer has been added to your calendar when the provider s contact person receives the STR Referral Form via . Follow Up It is extremely important AND REQUIRED for providers to follow up with clients who NO SHOW for their appointments. Please make sure to log back into the calendar and document the consumers that do not show up for their appointments by clicking on the follow up link within the appointment. Once you submit this data it will securely send the data to the LME. Eastpointe
47 Secure Instructions In order to send and receive protected health information (PHI) on consumers between Eastpointe and your provider agency you will need to do the following. Retrieving a secure message (New Users) Step 1: Eastpointe will be submitting a secure to the provide addresses that are currently on file within our Eastpointe provider network database. **Note: If we do not have your address and you wish to open a secure account you can create your own account by going to our Secure login portal and following the instructions for first time users. Step 2: When you receive the secure from Eastpointe it should look something like this: Step 3: Click on the link in the to view your secure message. The actual line of text in the reads, To view the secure message, click here. Clicking this link will take you to the registration page for the secure system. The screen should look like the following image. Eastpointe

48 Step 4: Complete the registration form as indicated. Note that all the form fields are required. In order to successfully create a password for your account, you must follow the Password Rules listed to the right of the form fields, as shown in the above image. Once you have completed filling out the form, click Submit Password to continue. Step 5: Your account has been successfully created. You will then be able to see the that was submitted to you by Eastpointe. See screen shot below: Step 6: At this point, you can then reply to the message, compose a new message, etc. **Note: You can only use this system to send secure documents to Eastpointe staff. Step 7: Make sure to click the sign out tab when you are finished in the system. Eastpointe

49 Step 8: When you sign out you will be sent to the main page (see screen shot below). This page will be where you will need to go to sign back in to the system to submit more s in the future to Eastpointe. Make sure to book mark the link so that you will be able to get back to it easy. Retrieving a secure message(existing Users) The following instructions outline the steps you should follow to retrieve a secure message, if you have already completed the above steps and have a user account for our system. Step1: Click on the link in the notification to retrieve your secure message, see image above for example. When you click the link, you will be taken to the login screen for our secure system, see image below. Here you need to enter the password that you created for your account. Once you have entered your password, click the sign-in button to continue. Eastpointe
50 **Note: Your address should be filled in for you automatically. If it is not, then you should enter the address at which you received the notification . Step 2: At this point, you can then reply to the message, compose a new message, etc. **Note: You can only use this system to send secure documents to Eastpointe staff. Step 3: Make sure to click the sign out tab when you are finished in the system. Step 4: When you sign out you will be sent to the main page (see screen shot below). This page will be where you will need to go to sign back in to the system to submit more s in the future to Eastpointe. Make sure to book mark the link so that you will be able to get back to it easy. What to do if you forget your password Step 1: Click on the Forgot your password? link to the right of the password box on the login page, see image above. When you click this link, you will be taken to a page and asked to enter your password. See image below: Eastpointe
51 Step 2: Enter your address in the box provided and click the Submit button. After a short period of time, you should receive an , at the address you provided, which contains the password reminder that you entered when you created your account. Hopefully, this will refresh your memory and allow you to access your secure message. If not then you need to follow the instructions below. Changing your password Step 1: Click on the Change your password link below the Sign-in button on the login page. See image below. Step 2: You should now be looking at the screen shown in the image below. You will notice that this screen is very similar to the screen you used to create your account. In order to change your password, you will need to complete all the fields shown on the form. Be sure to follow the Password Rules which Eastpointe

52 are listed to the right of the form fields. Once you have completed entering the information, click the Submit Password button. Once you have submitted your password change request, you will see a message indicating that a confirmation has been sent to your address. You will need to follow the instructions in the confirmation in order to complete your password change request. **Note: This system maintains a history of the last 5 passwords used, so you will need to create an entirely new password. Step 3: The password change confirmation message should look like the example in below. You simply need to follow the instructions in the and click on the indicated link to activate your new password. Once this has been done, you should be able to return to the login screen and login using your new password to retrieve your message. Sample Your Eastpointe Human Services Secure password is pending. To ACTIVATE your new password, click the link below: This is the last step in this one-time process. To DECLINE your new password, click the link below: If your program does not support active links, please copy and paste the link displayed above into the "Address" or "Location" field of your browser and press "Enter" or "Go". Locked Accounts Eastpointe
53 Your secure account is locked after 3 failed login attempts. Once an account has been locked, you will receive an at the address associated with you account that indicates that you account has been locked and will remain locked until a certain time. Eastpointe s IT department cannot unlock accounts. If you receive an indicating that you account has been locked, then you must wait until after the lockout time period has expired and then attempt to login again or change your password. Eastpointe
EASTPOINTE SECURE E MAIL SYSTEM SETUP INSTRUCTIONS
 EASTPOINTE SECURE E MAIL SYSTEM SETUP INSTRUCTIONS In order to send and receive protected health information (PHI) on consumers between Eastpointe and your provider agency you will need to do the following.
U.S. Bank Secure Mail
 U.S. Bank Secure Mail @ Table of Contents Getting Started 3 Logging into Secure Mail 5 Opening Your Messages 7 Replying to a Message 8 Composing a New Message 8 1750-All Introduction: The use of email
For further support information, refer to the Help Resources appendix. To comment on the documentation, send an email to [email protected].
 Technical Support and Product Information tk20.com Tk20 Corporate Headquarters 10801 MoPac Expressway, Suite 740, Austin, Texas 78759 USA Tel: 512-401-2000 For further support information, refer to the
Colorado Medical Assistance Program Web Portal. Frequently Asked Questions
 Colorado Medical Assistance Program Web Portal Frequently Asked Questions Trading Partner Administrator I have my HCPF Welcome Letter, and am going to be the Trading Partner Administrator. Now what? What
NEW USER REGISTRATION AND EMAIL VERIFICATION
 NEW USER REGISTRATION AND EMAIL VERIFICATION The Children s Treatment (CT) or Residential Treatment (RT) organization must have an assigned Departmental Vendor Number (DVN), a PIN number issued to the
Directory and Messaging Services Enterprise Secure Mail Services
 Title: Directory and Messaging Services Enterprise Secure Mail Services Enterprise Secure Mail Services for End Users Attention: Receivers of Secure Mail Retrieval of Secure Mail by the Recipient Once
How to Use Boston Private Bank s Secure Mail Service
 1. ONE-TIME REGISTRATION PROCESS Prior to using the Secure Mail service for the first time, a user must initially register with the service by completing steps A thru E below: A. When a Secure Mail encrypted
Welcome to HomeTown Bank s Secure E-mail! User Guide
 Welcome to HomeTown Bank s Secure E-mail! User Guide To access the secure email message center, click the Secure Email link on the www.htbmn.com main web page. Select whether you are a new user of the
out of the availity web portal
 get the most out of the availity web portal Quick reference guide Availity s Web Portal gives you the tools you need to drive measurable and meaningful organizational improvements, to enjoy the vitality
https://weboffice.edu.pe.ca/
 NETSTORAGE MANUAL INTRODUCTION Virtual Office will provide you with access to NetStorage, a simple and convenient way to access your network drives through a Web browser. You can access the files on your
External Account Creation and Upload Instructions for the Local Government (LG) Audit Report Collection System
 Audit Report Collection System") External Account Creation and Upload Instructions for the Local Government (LG) Audit Report Collection System In order to submit data for any Department of Audits and Accounts (DOAA) web application,
External Account Creation and Upload Instructions for the Local Government (LG) Audit Report Collection System In order to submit data for any Department of Audits and Accounts (DOAA) web application,
EDI Insight Manual. Training Manual. Presented By
 EDI Insight Manual Training Manual Presented By EDI Insight Manual 2 Step 1 Upload File: Select the file to transmit on the eceno claims transmission screen and click connect. Login to EDI Insight, when
Beacon Health Strategies. eservices. Provider Manual
 eservices Provider Manual Revised: February 2, 2009 eservices Provider Manual Table of Contents INTRODUCTION... 3 BEACON HEALTH STRATEGIES... 3 BEACON ESERVICES... 3 ELECTRONIC DATA INTERCHANGE... 4 EDI
TPA-Trading Partner Account User Guide. for. State of Idaho MMIS
 TPA-Trading Partner Account User Guide for State of Idaho MMIS Date of Publication: 4/8/2016 Document Number: RF019 Version: 11.0 This document and information contains proprietary information and copyrighted
How To Use Thecontinuus Provider Portal
 PROVIDER PORTAL USER GUIDE OCTOBER 13, 2014 TOGETHER ADMINISTRATION OFFICE phone: 608-647-4729 toll free: 1-877-376-6113 fax: 608-647-4754 web: www.continuus.org email: [email protected] CONTENTS System
Virtual Communities Operations Manual
 Virtual Communities Operations Manual The Chapter Virtual Communities (VC) have been developed to improve communication among chapter leaders and members, to facilitate networking and communication among
DarwiNet Client Level
 DarwiNet Client Level Table Of Contents Welcome to the Help area for your online payroll system.... 1 Getting Started... 3 Welcome to the Help area for your online payroll system.... 3 Logging In... 4
Campus Solutions Self Service: Student Quick Reference Guide
 Campus Solutions Self Service: Student Table of Contents Introduction to Step Sheets... 4 Getting Started in CUNYfirst... 5 Activate My CUNYfirst Account... 6 Log into My CUNYfirst Account... 10 Sign Out
UCB erequest IIS Requestor - Quick Reference Guide
 UCB erequest - CONTENTS 1 INTRODUCTION... 3 2 HOW TO REGISTER AND LOG-IN... 3 2.1 REGISTER TO RECEIVE AN EXTERNAL REQUESTOR USER ID AND PASSWORD... 3 2.2 LOGIN WITH USER ID AND PASSWORD... 5 3 HOW TO SUBMIT
Patient Portal Users Guide
 e-mds Solution Series Patient Portal Users Guide Version 7.0 How to Use the Patient Portal CHARTING THE FUTURE OF HEALTHCARE e-mds 9900 Spectrum Drive. Austin, TX 78717 Phone 512.257.5200 Fax 512.335.4375
Proofpoint provides the capability for external users to send secure/encrypted emails to EBS-RMSCO employees.
 Proofpoint provides the capability for external users to send secure/encrypted emails to EBS-RMSCO employees. To create a new email message to be sent securely to an EBS-RMSCO employee: 1. Click on the
Stewart Secure Email User Guide. March 13, 2015
 Stewart Secure Email User Guide March 13, 2015 Table of Contents Introduction... 1 What is secure email?... 1 Why secure email?... 1 What is personal, non-public information?... 1 How is my data protected?...
The Virtual Desktop. User s Guide
 The Virtual Desktop User s Guide Version 1.0 18 April, 2000 Table of contents 1. Registration... 2 2. Logging In... 4 3. Main Desktop... 5 3.1. Changing Information... 6 3.2. Selecting a File... 8 3.3.
EXPRESSPATH PROVIDER PORTAL USER GUIDE AUGUST 2013
 EXPRESSPATH PROVIDER PORTAL USER GUIDE AUGUST 2013 2013-2020 Express Scripts, Inc. All rights reserved. No part of this publication may be reproduced or transmitted in any form or by any means, electronic
DIRECT MESSAGING END USER GUIDE ALABAMA ONE HEALTH RECORD. Unify Data Management Platform 2012/2013 Software Build 5.15
 DIRECT MESSAGING END USER GUIDE ALABAMA ONE HEALTH RECORD Unify Data Management Platform 2012/2013 Software Build 5.15 April 2015 Proprietary and Confidential Property of Truven Health Analytics Inc.
College Faculty Salary & Credentialing System User Document 1
 WELCOME! The College Faculty Salary and Credentialing System has been developed to streamline the process of Salary Placement and Credentialing submission, review, and approval. Features include: Secure
TELPAS Rater s User Guide for Online Holistic Rating Training
 TELPAS Rater s User Guide for Online Holistic Rating Training New User Registration TrainingCenter Site Code You will need a TrainingCenter site code from your district or campus testing coordinator in
ACT State Testing Online Services Tutorial
 ACT State Testing Online Services Tutorial Back-up Test Supervisor Version Released July, 2009 2009 by ACT, Inc., All rights reserved. Back-up Test Supervisor Online Profile Form Introduction The Back-up
AdventNet ManageEngine SupportCenter Plus :: User Guide. Table Of Contents INTRODUCTION... 3 REQUEST... 4. Creating a New Request...
 Table Of Contents INTRODUCTION... 3 REQUEST... 4 Creating a New Request... 5 Quick Create...5 Contact Details...5 Classifying Request Category...5 Prioritizing Request...6 Describe Request...6 Add Attachments
Access and Login. Single Sign On Reference. Signoff
 Access and Login To access single sign on, here are the steps: Step 1: type in the URL: postone.onelogin.com Step 2: Enter your Post student email in the username field Step 3: Enter your Post student
Provider Electronic Solutions Software User s Guide
 Vermont Title XIX Provider Electronic Solutions Software User s Guide HP ENTERPRISE SERVICES 312 HURRICANE LANE, STE 101 PO BOX 888 WILLISTON VT 05495 Table of Contents 1 Introduction... 2 1.1 Provider
Web Payroll. User Guide. 2013 Payroll Solutions, Inc & www.payrollmadeeasy.com
 Web Payroll User Guide 2013 Payroll Solutions, Inc & www.payrollmadeeasy.com Overview Introduction This web-based system was designed to give our clients more access and control of their payroll operations
EDI Support Services
 EDI Support Services Iowa Medicaid Web Portal The web portal uses the Internet to transport transactions for the Iowa Medicaid line of business only. The web portal provides access to submit and receive
PowerSchool Parent Portal User Guide. PowerSchool 7.x Student Information System
 PowerSchool 7.x Student Information System Released December 2011 Document Owner: Documentation Services This edition applies to Release 7.1 of the [product name] software and to all subsequent releases
Health Services provider user guide
 Health Services provider user guide online claims submission... convenient service, delivered through an easy-to-use secure web site http://provider.ab.bluecross.ca/health... convenient service, delivered
Bahamas Tax Information Exchange Portal Documentation
 Bahamas Tax Information Exchange Portal Documentation This sub section of the Portal Documentation covers the following Topics: Portal Overview Portal Login Account Status Reportable Account File Processing
!"#$ Stonington Public Schools Parents Guide for InfoSnap Online Enrollment. for Returning. Students. August. Online Enrollment.
 Stonington Public Schools Parents Guide for InfoSnap Online Enrollment for Returning Students August!"#$ Explains how to complete Returning Student Enrollment forms Online through the PowerSchool Parent
TELPAS Rater s User Guide for Online Holistic Rating Training
 TELPAS Rater s User Guide for Online Holistic Rating Training New User Registration TrainingCenter Site Code If you do not already have a TrainingCenter account used during previous training, including
Beacon Health Strategies Provider eservices Manual
 Provider eservices Manual Elizabeth Pattullo, Chief Executive Officer Timothy Murphy, President Beacon Health Strategies Electronic Data Interchange and eservices User Manual INTRODUCTION... 2 Beacon Health
Health Indicators Advancing Healthy Aging in Your Community. Database Instructions for Managers
 Health Indicators Advancing Healthy Aging in Your Community Database Instructions for Managers Getting to the Database Website You can access the Health Indicators online database in two different ways.
Secure Provider Website. Instructional Guide
 Secure Provider Website Instructional Guide Operational Training 2 12/12/2012 Table of Contents Introduction... 4 How to Use the Manual... 4 Registration... 5 Update Account... 8 User Management... 10
Secure Message Center User Guide
 Secure Message Center User Guide Using the Department of Banking Secure Email Message Center 2 Receiving and Replying to Messages 3 Initiating New Messages 7 Using the Address Book 9 Managing Your Account
SYSTEM REQUIREMENTS... 5 FREE RESOURCES... 6 GETTING STARTED...
 Table of Contents ABOUT... 4 Authorized Use... 4 Questions and Contact Information... 4 SYSTEM REQUIREMENTS... 5 FREE RESOURCES... 6 GETTING STARTED... 7 Account Creation Overview and Types of Accounts...
INTRODUCTION... 2 FEATURES... 2 CONFIGURING THE PATIENT PORTAL... 2 GETTING STARTED... 4 APPROVAL... 8 UPLOAD... 10 PROFILE... 11 CHK.CONN...
 Contents INTRODUCTION... 2 FEATURES... 2 CONFIGURING THE PATIENT PORTAL... 2 GETTING STARTED... 4 SETTINGS... 4 PATIENT ACCESS CONTROL... 4 DEMOGRAPHICS AND FORMS... 5 MAIL... 6 ONLINE PAYMENT CONFIGURATION...
HealthInfoNet CLINICAL PORTAL USER REFERENCE GUIDE. Revised: 2.12.2015 Page 1 of 32
 HealthInfoNet CLINICAL PORTAL USER REFERENCE GUIDE Revised: 2.12.2015 Page 1 of 32 HealthInfoNet User Reference Guide INSIDE: Clinical Portal 3-12 Notifications and Worklists 13-21 Prescription Monitoring
Rochester Institute of Technology. Finance and Administration. Drupal 7 Training Documentation
 Rochester Institute of Technology Finance and Administration Drupal 7 Training Documentation Written by: Enterprise Web Applications Team CONTENTS Workflow... 4 Example of how the workflow works... 4 Login
ValueOptions Provider Guide to using Direct Claim Submission
 ValueOptions Provider Guide to using Direct Claim Submission www.valueoptions.com Table of Contents Introduction 1 Submitting a New Claim 3 Searching for Claims 9 Changing or Re-processing a claim 13 Submitting
QUICK START GUIDE EDI Claims Link for Windows version 3.1
 QUICK START GUIDE EDI Claims Link for Windows version 3.1 System Requirements - Operating system: Windows 98 or later - Computer/Processor: Pentium 2, 233 MHz or greater - Memory: 64MB Ram - Initial application
The Wells Fargo Payment Gateway Business Center. User Guide
 The Wells Fargo Payment Gateway Business Center User Guide Contents 1 Introduction 1 About the Wells Fargo Payment Gateway service Business Center 1 About this guide 2 Access the Business Center 2 Log
Guide for Setting Up Your Multi-Factor Authentication Account and Using Multi-Factor Authentication. Mobile App Activation
 Guide for Setting Up Your Multi-Factor Authentication Account and Using Multi-Factor Authentication Mobile App Activation Before you can activate the mobile app you must download it. You can have up to
O UTLOOK 2003 HELP SHEET MAIL. Opening the program. Mail
 O UTLOOK 2003 HELP SHEET MAIL Opening the program At Work Double-click the icon on your desktop. Or click the Start button. If this icon is displayed, click on it. If it is not displayed, click Start,
HertSFX. User Guide V2.04. Hertfordshire s Secure File Exchange Portal. (Jan 2014) HertSFX User Guide V2.04 Jan 2014 Page 1 of 17
 HertSFX User Guide V2.04 Jan 2014 Page 1 of 17") Hertfordshire s Secure File Exchange Portal User Guide V2.04 (Jan 2014) HertSFX User Guide V2.04 Jan 2014 Page 1 of 17 CONTENTS 1. About HertSFX... 3 2. HertSFX Limitations... 3 3. Getting Started... 3
Hertfordshire s Secure File Exchange Portal User Guide V2.04 (Jan 2014) HertSFX User Guide V2.04 Jan 2014 Page 1 of 17 CONTENTS 1. About HertSFX... 3 2. HertSFX Limitations... 3 3. Getting Started... 3
User manual for the visitors of Interreg Danube Programme website
 User manual for the visitors of Interreg Danube Programme website Table of contents National contact points... 2 Newsletter subscription... 2 Subscribe... 2 Unsubscribe... 2 Forum... 2 Approved projects...
NextGen Patient Portal User Guide. Version 2.0
 NextGen Patient Portal User Guide Version 2.0 Copyright 2014 NextGen Healthcare Information Systems, LLC. All Rights Reserved. NextGen and the registered trademarks listed at http://www.nextgen.com/about-nextgen/legalnotices.aspx
DI SHAREPOINT PORTAL. User Guide
 DI SHAREPOINT PORTAL User Guide -1- TABLE OF CONTENTS PREFACE... 3 SECTION 1: DI PORTAL ACCESS... 4 REQUEST USER ACCESS... 4 To register... 4 SIGNING IN TO THE PORTAL... 8 To sign in to the DI Portal...
Council of Ontario Universities. COFO Online Reporting System. User Manual
 Council of Ontario Universities COFO Online Reporting System User Manual Updated September 2014 Page 1 Updated September 2014 Page 2 Table of Contents 1. Security... 5 Security Roles Defined in the Application...
Getting Started. Getting Started with Time Warner Cable Business Class. Voice Manager. A Guide for Administrators and Users
 Getting Started Getting Started with Time Warner Cable Business Class Voice Manager A Guide for Administrators and Users Table of Contents Table of Contents... 2 How to Use This Guide... 3 Administrators...
ewebextra OfficeMate Integration User s Guide
 ewebextra OfficeMate Integration User s Guide September 2013 2013 Eyefinity, Inc. All rights reserved. Eyefinity, OfficeMate, ewebextra, and ExamWRITER are registered trademarks of Eyefinity, Inc. All
D&B SafeTransPort Tutorial YOUR MANAGED FILE TRANSFER SOLUTION FOR SECURE FILE TRANSFERS WITH D&B
 Tutorial YOUR MANAGED FILE TRANSFER SOLUTION FOR SECURE FILE TRANSFERS WITH D&B Overview Overview Topics Covered overview, features and benefits Account activation and password maintenance Using the User
Egnyte App for Android Quick Start Guide
 Egnyte App for Android Quick Start Guide Introduction Welcome to the Quick Start Guide for the Egnyte App for Android. This guide will explain how to: Access files. Download content for offline access.
MINAP Web-portal Guide
 MINAP Web-portal Guide Version 1.0 June 2014 Contents 1. Scope... 1 2. Getting started... 2 i. 2.1 Introduction... 2 2.2 Access requirements... 2 2.3 Requesting access... 3 3. How to create a record...
Your Archiving Service
 It s as simple as 1, 2, 3 This email archiving setup guide provides you with easy to follow instructions on how to setup your new archiving service as well as how to create archiving users and assign archiving
Wisconsin Medicaid Electronic Health Record Incentive Program for Eligible Professionals
 P- Wisconsin Medicaid Electronic Health Record Incentive Program for Eligible Professionals June 15,2015 User Guide i Table of Contents 1 Introduction... 1 2 Before You Begin... 2 2.1 Register
FDIC Secure Email Procedures for External Users April 23, 2010
 FDIC Secure Email Procedures for External Users April 23, 2010 This document contains information proprietary to the Federal Deposit Insurance Corporation. Table of Contents 1. Introduction...2 2. Receiving
NextGen Patient Portal User Guide. Version 2.0
 NextGen Patient Portal User Guide Version 2.0 Copyright 2014 NextGen Healthcare Information Systems, LLC. All Rights Reserved. NextGen and the registered trademarks listed at http://www.nextgen.com/about-nextgen/legalnotices.aspx
Schools CPD Online General User Guide Contents
 Schools CPD Online General User Guide Contents New user?...2 Access the Site...6 Managing your account in My CPD...8 Searching for events...14 Making a Booking on an Event...20 Tracking events you are
ITS ebilling. User s Training Manual
 ITS ebilling User s Training Manual Version 1.0 November 3, 2008 Page 1 of 85 Table of Contents ebilling Training URL --------------------------------------------------------------------------- 3 ebilling
Lotus Notes Client Version 8.5 Reference Guide
 Lotus Notes Client Version 8.5 Reference Guide rev. 11/19/2009 1 Lotus Notes Client Version 8.5 Reference Guide Accessing the Lotus Notes Client From your desktop, double click the Lotus Notes icon. Logging
USERS MANUAL FOR OWL A DOCUMENT REPOSITORY SYSTEM
 USERS MANUAL FOR OWL A DOCUMENT REPOSITORY SYSTEM User Manual Table of Contents Introducing OWL...3 Starting to use Owl...4 The Logging in page...4 Using the browser...6 Folder structure...6 Title Bar...6
TriCore Secure Web Email Gateway User Guide 1
 TriCore Secure Web Email Gateway User Guide This document provides information about TriCore Secure Web Email Gateway. This document is for users who are authorized to send and receive encrypted email
How To Use The Grants Management System
 Grants Management Online Information System (GMIS Online) http://grants.dcjs.virginia.gov/index.cfm Web-based access to the Grants Application and Report Processing System. Department Of Criminal Justice
Online Services through My Direct Care www.mydirectcare.com
 Online Services through My Direct Care www.mydirectcare.com WEB PORTAL Employers and Employees associated with Consumer Direct have access to online services available through a secure website www.mydirectcare.com.
External End User Training Guide: Secure Email Extract
 External End User Training Guide: Secure Email Extract Version 6 August 12, 2013 Prepared by 7/29/2013: Kris Chromey, Training Coordinator Michelle Tuscher, Vault Implementation Coordinator Edited for
. NOTE: See Chapter 5 - Medical Management System for conditions that must be met in CHAPTER 6. ELECTRONIC CLAIMS PROCESSING MODULE
 Electronic Claims Processing Module 6-1 CHAPTER 6. ELECTRONIC CLAIMS PROCESSING MODULE Processing claims electronically is an option that may be selected in place of or in conjunction with the processing
Welcome to PowerClaim Net Services!
 Welcome to PowerClaim Net Services! PowerClaim Net Services provides a convenient means to manage your claims over the internet and provides detailed reporting services. You can access PowerClaim Net Services
End User Training Guide
 End User Training Guide October 2013 2005-2013 ExpenseWire LLC. All rights reserved. 1 expensewire.com Use of this user documentation is subject to the terms and conditions of the applicable End- User
ClinicAid Ontario - Getting Started Guide
 ClinicAid Ontario - Getting Started Guide Welcome to ClinicAid Setting up your provider record Connecting your account to the MC EDT system Adding your first patients Doing a demographic import of patient
Quick Step Guide for Internal Applicants
 Quick Step Guide for Internal Applicants Logging Into PeopleSoft/Search the Job Bank 1 Double click the Internet Explorer icon on the desktop to open the Internet. 2 When the Internet window opens, click
1. What practices does Raleigh Medical Group, P.A. include? 2. Is my health information secure? Who has access to this information?
 Troubleshooting and Frequently Asked Questions FollowMyHealth Patient Portal 1. What practices does Raleigh Medical Group, P.A. include? 2. Is my health information secure? Who has access to this information?
Provider OnLine. Log-In Guide
 Provider OnLine Log-In Guide Table of Contents 1 LOG-IN ACCESS... 3 1.1 ENTERING THE USER ID AND PASSWORD... 4 1.2 OVERVIEW AND PURPOSE OF TRICIPHER... 5 1.2.1 Log-in for Users Who Are Active, But Not
Introduction to Client Online. Factoring Guide
 Introduction to Client Online Factoring Guide Contents Introduction 3 Preparing for Go live 3 If you have any questions 4 Logging In 5 Welcome Screen 6 Navigation 7 Navigation continued 8 Viewing Your
GMS Applicant Procedures Applicant - OJP Grants Management System Welcome Page (AP-1)
") Applicant - OJP Grants Management System Welcome Page (AP-) Welcome to the Applicant Procedures (AP) for the OJP Grants Management System. These Job Aids will guide you through the procedures for using
Applicant - OJP Grants Management System Welcome Page (AP-) Welcome to the Applicant Procedures (AP) for the OJP Grants Management System. These Job Aids will guide you through the procedures for using
A Quick and Easy Guide to PERSONAL ONLINE BANKING
 A Quick and Easy Guide to PERSONAL ONLINE BANKING WELCOME Whether you re at home, at work or on the road, BancFirst is available 4 hours a day, 7 days a week with Personal Online Banking. These services
ewebextra OfficeMate Integration User s Guide
 ewebextra OfficeMate Integration User s Guide April 2014 2014 Eyefinity, Inc. All rights reserved. Eyefinity, OfficeMate, ewebextra, and ExamWRITER are registered trademarks of Eyefinity, Inc. All other
Encrypted Email Users Guide. Revised 6/8/2015
 Encrypted Email Users Guide Revised 6/8/2015 Contents Encrypted email service overview Registering, activating and maintaining an account Online Help Accessing the encrypted email portal screens Downloading
OHIO DEPARTMENT OF EDUCATION Connected Ohio Records for Educators (CORE) My Educator Profile User Manual
 My Educator Profile User Manual") OHIO DEPARTMENT OF EDUCATION Connected Ohio Records for Educators (CORE) My Educator Profile User Manual CON N E C T E D O H I O R E C O R D S F O R E D U C A T O R S My Educator Profile User Manual September
OHIO DEPARTMENT OF EDUCATION Connected Ohio Records for Educators (CORE) My Educator Profile User Manual CON N E C T E D O H I O R E C O R D S F O R E D U C A T O R S My Educator Profile User Manual September
BUSINESS SERVICES ONLINE. Registration and Access to Services. Handbook
 If you are navigating using only the keyboard or using an assistive device and need help, visit our Navigation Instructional page for alternative views and navigation. Warning: If you select this link,
How to Create a Broker Account
 How to Create a Broker Account 1. Once you have created your NY.gov ID and set your password (see the guide, How to Create a NY.gov ID ), return to the Broker tab from the NYSOH home page and select CLICK
Does the GC have an online document management solution?
 This FAQ contains: Web File Services definition Access web file services Create a WFS folder Upload a document Email a link to a document folder Create WFS subscription Cancel existing subscription Create
Provider Services Portal (PSP) Enrollment & Functionality Manual Provider Services Portal (PSP) Enrollment & Functionality Manual
 Enrollment & Functionality Manual Provider Services Portal (PSP) Enrollment & Functionality Manual") Provider Services Portal (PSP) Enrollment & Functionality Manual 1 Table of Contents PSP Website Home page... 3 PSP Enrollment... 3 E-Authentication Identity Proofing... 3 User Password Security and Protection...
Provider Services Portal (PSP) Enrollment & Functionality Manual 1 Table of Contents PSP Website Home page... 3 PSP Enrollment... 3 E-Authentication Identity Proofing... 3 User Password Security and Protection...
efiletexas.gov Court Administrator User Guide
 efiletexas.gov Court Administrator User Guide EFS-TX-200-3191 v.4 February 2014 Copyright and Confidentiality Copyright 2014 Tyler Technologies, Inc. All rights reserved. All documentation, source programs,
NYS OCFS CMS Contractor Manual
 NYS OCFS CMS Contractor Manual C O N T E N T S CHAPTER 1... 1-1 Chapter 1: Introduction to the Contract Management System... 1-2 CHAPTER 2... 2-1 Accessing the Contract Management System... 2-2 Shortcuts
Emdeon ecashiering Manual. February 22, 2010
 Emdeon ecashiering Manual February 22, 2010 Purpose... 4 Objectives... 4 Special Symbol... 4 Introduction to Emdeon ecashiering... 5 ecashiering Access... 5 Suggested ecashiering System Roles... 5 ecashiering
Table of Contents. Welcome... 2. Login... 3. Password Assistance... 4. Self Registration... 5. Secure Mail... 7. Compose... 8. Drafts...
 Table of Contents Welcome... 2 Login... 3 Password Assistance... 4 Self Registration... 5 Secure Mail... 7 Compose... 8 Drafts... 10 Outbox... 11 Sent Items... 12 View Package Details... 12 File Manager...
IBM/Softlayer Object Storage for Offsite Backup
 IBM/Softlayer Object Storage for Offsite Backup How to use IBM/Softlayer Object Storage for Offsite Backup How to use IBM/Softlayer Object Storage for Offsite Backup IBM/Softlayer Object Storage is a redundant
Secure Email A Guide for Users
 Secure Email A Guide for Users October 14, 2013 10/13 TABLE OF CONTENTS USING THE SYSTEM FOR THE FIRST TIME... 3 EMAIL NOTIFICATION OF SECURE INFORMATION... 3 GETTING REGISTERED ON THE SYSTEM... 4 ACCOUNT
FUNDS ADMINISTRATIVE SERVICE INC.
 FUNDS ADMINISTRATIVE SERVICE INC. CLIENT PORTAL UNION MEMBER USER GUIDE Table of Contents INTRODUCTION... 1 OUR WEBSITE... 1 ACCESSING INFORMATION SPECIFIC TO YOU AND YOUR FAMILY... 2 ACCOUNT INFORMATION...
WorkKeys Internet Version Test Administration and User Guide
 WorkKeys Internet Version Test Administration and User Guide ACT endorses the Code of Fair Testing Practices in Education and the Code of Professional Responsibilities in Educational Measurement, guides
Payco, Inc. Evolution and Employee Portal. Payco Services, Inc.., 2013. 1 Home
 Payco, Inc. Evolution and Employee Portal Payco Services, Inc.., 2013 1 Table of Contents Payco Services, Inc.., 2013 Table of Contents Installing Evolution... 4 Commonly Used Buttons... 5 Employee Information...