User Manual. Table of Contents
|
|
|
- Cori Owens
- 9 years ago
- Views:
Transcription
1 V3.07
2 Table of Contents Chapter I Introduction Milesight VMS Pro Introduction Key Features... 2 Chapter II Installation Software Overview System Operating Environment Installation Guide... 3 Chapter III Operations and Settings How to execute the Milesight VMS Pro Configration Camera Management General Settings Schedule Motion Detection Network User Management Log Management Settings File Tools Help Toolbar Chapter IV Live view Camera Tree Window Live toolbar Live view workspace PTZ control Chapter V Playback Chapter VI Map Toolbar Pop-up Menu Add the hot Chapter VII Milesight VMS Server Chapter Ⅷ Service
3 Chapter I Introduction User Manual 1.1 Milesight VMS Pro Introduction Milesight VMS Pro (Video Management System) is one of the most innovative and most powerful video management software systems on the market and it will fulfill your highest requirements and expectations. The simple and intuitive design requires little training while providing easy access to live and recorded video, facility maps and alarms. The user who has the authority can configure all server and cameras settings from a central location. Utilize the left panel navigation tree structure to navigate the server and cameras as well as to access features like search out the online server and cameras automatically, check the information of the server and camera. Use Client/Server architecture, it is a future-proof network video solution for large projects and can manage unlimited network cameras via unlimited working servers in different locations. It s able to integrate with other cameras over ONVIF. This manual describes how to use and manage the Milesight VMS Pro in your networking environment. Some knowledge of networking environments would be beneficial to the reader. Should you require any technical assistance, please contract authorized service center. 1.2 Key Features Support 1/ 2/4/ 6/8/ 9/ 13/ 16/ 20/24/30/36/49/ 64 channels playing synchronously H.264/MPEG-4 /MJPEG video compression Client/Server Architecture, support add multiple-server Record locally or to network storage Customizable User Access Levels Notification Support dual-stream 4 ch Synchronized Playback and up to 16 ch Asynchronous Playback Alarm or scheduled recording Integrated Motion-Detection from camera Multiple monitors support Human-oriented Milesight UI Support ONVIF Supprt D3D display mode 2
4 Chapter II Installation User Manual 2.1 Software Overview An installation of Milesight VMS Pro has two components: server software and client software. The Milesight VMS Server as the intelligence management system forward the RTSP stream. And the client software is used to log in the server and provides the user interface for all tasks including monitoring, searching, reporting and configuration. The Milesight VMS Client allows users in different locations to log in to the server, if have the right, it s able to change the system configuration. 2.2 System Operating Environment OS: Windows XP/7/Vista/Server 2000/Server 2008 CPU: 2.4GHZ or faster Memory: 2G MB or more Graphic memory: 1G or more Internet protocol: TCP/IP 2.3 Installation Guide Run the Milesight VMS Pro Installation file and install the programs on your computer by following the on-screen instructions. After finishing installation, you will find the programs on the start menu or on the desk. Step1: Select the preferred language for this installation. Step2: Click Next to go on. Figure 2.1 3

5 Figure 2.2 Step3: Read the information to know about Milesight VMS Pro and go on. Figure 2.3 Step4: Choose the destination. 4

6 Figure 2.4 Step5: Here you need to install the Milesight VMS Client and Milesight VMS Server to complete the installation. Figure 2.5 Step6: Finish the installation. 5

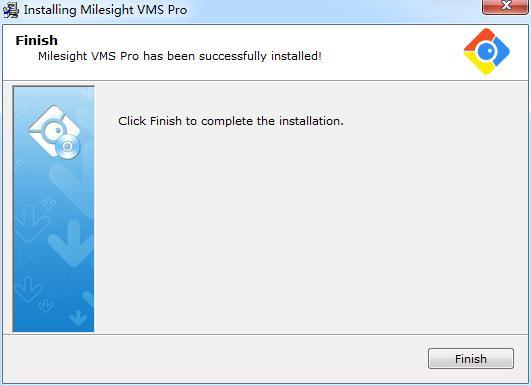
7 Figure 2.6 6
 Start Milesight VMS Server first After installation, you can find it on Go to ->Start All Programs-> Milesight VMS Pro -> Milesight VMS Server, then all the")
8 Chapter III Operations and Settings User Manual 3.1 How to execute the Milesight VMS Pro (1) Start Milesight VMS Server first After installation, you can find it on Go to ->Start All Programs-> Milesight VMS Pro -> Milesight VMS Server, then all the cameras on the server will load automatically. (2)Then, start Milesight VMS Client After installation, you can find it on Go to ->Start All Programs-> Milesight VMS Pro -> Milesight VMS Client. When login Milesight VMS Client, a window will pop up as below. Enter the Username, Password. The default user name and password is admin and password. You can also choose which language to be used for the Client. If the [Auto Login] is selected, Milesight VMS Client will login without keying in the Username and Password next time. Figure 3.1 After clicking on the Login button, the window will pop up as follow. Please wait for a few seconds, when load the cameras successfully, the Milesight VMS Client will come into view. Figure 3.2 7

9 After login successfully the window will pop as follow.it will search online server automatically,the users can add servers according to themselves need. Figure Configration Before using the Milesight VMS Client for liveview, you need to add the server first. Then you are able to add the cameras via different servers. Only after adding the server and cameras, can you use functions like liveview, playback, E-map etc. How to add server? There are two ways to add servers via Milesight VMS Client : one way is searching online automatically, the other is adding manually. After adding successfully, you can see the name of the server under Default Group. Right-click the Default Group and select Server Management option, windows will pop up as follow. Click on the Search server button to search automatically, while click on the Add Server button to add manually. Details will be showed in the following figures. 8
10 Figure Search Server Click the button, the window will show as below. You can search servers automatically. Figure 3.5 Item Stop/Rescan Select All Clear All Set Password OK Cancel Description When searching the servers, you can stop it and rescan by clicking again. All the servers will be selected at a time. All the servers will be unchecked at a time. Enter the password at a time. Click [OK] button to confirm the settings. Exit quit. 2. Add Server When the button is clicked, the window will show as below. You can add the server manually. 9

11 Figure 3.6 Item Server Type Name Port User Name IP SQL port Password Enable Description Choose the VMS Server you use The name of server. The port of the server. The user name of the server. IP address of the server. SQL port. Password of the server. Enable or unable the server. 3. Edit Server When the button is clicked, the window will show as below. Edit the information of the camera. 4. Delete Server Figure

12 Remove the server from Milesight VMS Client. User Manual 5. Configure Server Here you can do the settings for the server. Including General Settings, Camera Management, Schedule Settings, Motion Detection, Network Settings, User Management, Log Management and Record File Management. For more details, please refer to the below option How to add the IP camera. How to add IP camera? Figure 3.8 After adding the server successfully, you need to configure the server further. Including search cameras, add them to the live view window, set motion detections, set recording schedule, etc. Adding, modifying, removing users, SMTP for the server could be also set here. Details are as below. Figure 3.9 When click on the Config Server button, window pops up as below. Including General Settings, Camera Management, Schedule Settings, Motion Detection, Network Settings, User Management, 11

13 and Log Management. User Manual Figure Camera Management Click Camera Management button, the pop out window is as below. Figure Search Camera 12

14 Figure 3.12 Item Description Stop/Rescan When searching the cameras, you can stop it and rescan by clicking again. Select All All the cameras will be selected at a time. Clear All All the cameras will be unchecked at a time. Set Password Enter the password at a time. OK Click [OK] button to confirm the settings. Cancel Exit quit. Note: Before you register the Milesight VMS Pro, you can only add up to 8 cameras. For more information, please refer to Chapter VII Milesight VMS Server. 2. Add Camera When the button is clicked, the window will show as below. You can add the camera manually. 1) Through IP address you can add Milesight's cameras and other cameras supporting ONVIF. 2) Through RTSP stream you can add cameras supporting RTSP. Note: Those with * options are required. Including Name, IP, Port, User Name, Password. 13

15 Figure Edit Camera When the button is clicked, the window will show as below. Edit the information of the camera. Figure 3.14 Click on Video Settings button, you can change the video parameters here. Item Video Stream Video Codec Frame Size Maximum Frame Rate Bit Rate Description Choose the main stream or 2 nd stream to play. Including H.264, MPEG-4, MJPEG. The resolution. Maximum refresh frame rate of per second Transmitting bits of data per second 14
, Server name and Server Port.")
16 Figure Delete Camera Remove the camera from Milesight CMS Client. 5. Browsing Web Browse the web of the camera. 6. Modify IP address Modify the IP address General Settings Click General button, the pop out window is as below. Here you can set the recording Path (support multiple disks at the same time), Server name and Server Port. It s also able to decide how long to scheduled recording time length keep the recording files and Event/Alarm Log. At the same time, you can decide whether to delete these files automatically and when. Figure

17 3.2.3 Schedule Set the time schedule. When the button is clicked, the window will show as below. Here you can choose the schedule which is going to use as an auto recording schedule or as an alarm schedule. Figure 3.17 Step1: Click Add button to add a new schedule as a time templet. You can draw the timeline for each day. Here you can choose the schedule is going to use as an auto recording schedule or as an alarm schedule. Make sure the [Enable] button is checked. The schedule settings include: Figure 3.18 Item Name Description The schedule name. 16
18 Enable Enable or disable the schedule. Date from/date to Begin or stop to put in the schedule. Record Type Including alarm or continuous Trigger Motion Detection from the Milesight VMS Client or IPC itself. Capture Image Capture how many pictures per second when alarm is triggered. Pre record Setting the length of the pre-alarm recording file.setting range:0-9s. Post record Setting length of the post-alarm recording file.setting range:1-1800s. SMTP Enable to use the SMTP. Step3: Choose a type under the Record Type. Note: If you choose the Alarm type as the record type, you can also do some settings including trigger condition, action when alarm is triggered. Figure 3.19 If you choose the Alarm type as the record type,the timeline is red.if you choose the Record type as the recore type,the timeline is blue. Figure

19 Note:Left-click to draw the timeline and right-click to cancel again. Step4: Select the cameras on the left camera list and move them to the right camera list. Step5: Click [Apply] or [OK] to confirm the settings Motion Detection Do the alarm settings here. When the button is clicked, the window will show as below. Draw the areas where to be motion detection. Figure 3.21 Step 1: Select the camera on the left tree which you want to set as motion detection. Make sure the Enable button is checked. Draw certain areas by mouse. Item Select All Clear All Level Description Select all the area to be detected Clear all the area Different levels to trigger alarm Detection Interval How often to trigger alarm Step 2: Select the cameras on the left camera list and move them to the right camera list. Step 3: Click [Apply] or [OK] to confirm the settings Network Here you can do the settings for SMTP. Click on the Network button and the window will pop up as below. 18
. If you are not sure, contact with the connection provider or the network administrator.")
20 Figure 3.22 SMTP: Enter the SMTP server, port, SMTP sender, password and the SMTP receiver, then when the alarm is triggered, the server will send u an to inform you what happened.now we can support three kinds of encryption types(no_security,use_ssl,use_tls). If you are not sure, contact with the connection provider or the network administrator. If you want to send a test , click Test. DDNS:Chooce different types of provider,enter the Host name,user name and password.the DDNS can translate constant hostnames into changing IP address. This is used to provide a persistent domain name for a resource that may change location on the network User Management Users are managed in the User Management dialog box. Users can be created, modified, and deleted from the User Management dialog box in Milesight VMS Client. Several properties for a user, including user name and password can be changed here. When the button is clicked, it shows as below. Note: Different users have different permission to access the server. User Type: Administrator: Full access to do any settings. Operator: Do anything except to creating a new user. Viewer: Can t change any settings but view. 19


21 Figure 3.23 When the Add button is clicked, it will show as below. Figure Log Management When the button is clicked, it will show as below. You can change the different log under the option, including Event Log and Alarm Log. 20

22 Figure Settings Local Settings This part is mainly used for local settings. Select a disk to store the recorded files and images. You can also set how long to keep the operation logs and alarm logs here. (Mainly used in the local recording and snapshoot) Note: The default disk is the destination disk where you install the Milesight VMS Pro. When click Settings->Local Settings button, the window will show as below. Figure
23 Better Image Quality Better image quality use YUV(traditional is RGB)display mode,can make the whole effect of video image more clear. Carousel Settings Choose an interval between each other. After settings, the cameras in the liveview mode will alternates with different cameras at a time within an interval. Connect IPC stream directly Decrease the load of the server when connect IPC stream directly and the server needn t to forward the video stream. Note: Don t recommend to check this opinion on when several servers connect the same IPC at the same time. Figure Audio Alarm Play audio when alarm triggered.the Live will appear alarm logo. Alarm action Enable alarm pop up: Check on this option, so If the camera is offscreen, it also going to record. If not, the camera will not going to record. Windows always on top,when alarm: Check on this option, if the Milesight VMS Pro program was minimized, it ll restore to the original size when alarm triggered. Change Password Here you can change the password of the Milesight VMS Client. 3.4 File File->Lock When click the [Lock] button, the GPI page will be locked. Then click it again, the window will show as below. 22

24 Figure 3.28 You have to key in Username and Password to unlock it. File->Exit Username and Password are required when logging out Milesight VMS Client. And if the [Auto Login] is checked, Milesight VMS Client will login without keying in the Username and Password next time. Figure Tools Tool-> Mutil Monitor Now the Milesight VMS Client support multiple monitors. Here you can do these settings. When click on the Mutil Monitor button, windows pop up as follow. Milesight VMS Client support to use up to 4 monitors now. There are 3 modes you can choose to use in each monitor. Including Live screen mode, Fullscreen mode and alarm screen mode. What you need to do is to drag the 23

25 cameras to the position of the monitor you want to show. Live screen mode: For this mode, you can add any cameras which you want to show on the screen. Just drag the camera and move it into the specified monitor. Fullscreen mode: Click on the main console monitor, double click on the individual position of the camera, then the livevideo will be showed with Fullscreen on the specified monitor. Alarm screen mode: When the camera is triggered, the livevideo will play on the monitor. (Now only support to display 16 channels at the same time) Figure 3.30 Tools->Log Management Please refer to Tools-> Change Language Select the language for Milesight VMS Client. 3.5 Help Help->Online Help Here you can feedback any questions to Milesight and seek any help from Milesight. Help->About Milesight VMS Pro Milesight VMS Client information can be checked here. 24

26 Figure Toolbar Add short cut icons for toolbar as below. Figure 3.32 Num Item Description 1 Server Settings Please refer to Server/Client Settings. 2 Lock/Unlock Lock/Unlock the Milesight VMS Client. For details, please refer to 3.3File. 3 Display play toolbar Display or hide play toolbar. 4 Hide the PTZ Display or hide PTZ interface. 5 Fullscreen You can view the live window in full screen mode. To return to the normal screen, press [Esc] button on the keyboard. 6 Live view modes Support 1/ 2/4/ 6/8/ 9/ 13/ 16/ 20/24/30/36/49/ 64 channels playing synchronously. 7 Synchronous Playback In the playback mode, choose to playback 4 cameras synchronously. 8 Previous Page Switch to the previous group cameras when in carousel mode. 9 Next Page Switch to the next group cameras when in carousel mode. 10 Start/Stop Carousel Start or stop the carousel mode. 25

27 Chapter IV Live view User Manual The Milesight VMS Client software provides the user interface for all tasks including monitoring, searching, reporting and configuration. The interface seems as below. Figure 4.1 This part is mainly used for real-time video preview and polling mode setting. The first time Milesight VMS Client is started, you should add some cameras to it. You can add the camera manually or by searching cameras. For details please refer to Camera Settings->Add Camera and Camera Settings->Search Camera. After adding the camera, you have to drag it to the live window to display the video. How to connect the camera Step1: Select a camera at 1 window. Step2: Double-click on the camera or drag and drop the camera to the individual position. The camera is connected automatically and live videos will show in the selected window. Step3: Repeat step1 to 2 to connect other cameras. Note: Please make sure the camera is available. How to disconnect the camera Step1: Select a camera at 1 window. Step2: Right click the camera name. Select [Enable], the camera will be disconnected. If you want to connect again, click it again. Step3: Repeat step 1 to 3 to disconnect other cameras. 4.1 Camera Tree Window This part is to display the added camera name. There are 3 types when click the right mouse button will show as follow. 26
 Right-click on the group Pop-up Menu: Server Management Server Online Play All Stop All Manage the server. Search out the online-server Play all the livevideo. Stop all the livevideo. Figure 4.")
28 (1) Right-click on the view list User Manual Pop-up Menu: New View View Management Create a new view to save the camera Manage all the saved view Figure 4.2 (2) Right-click on the group Pop-up Menu: Server Management Server Online Play All Stop All Manage the server. Search out the online-server Play all the livevideo. Stop all the livevideo. Figure 4.3 Note: The status of server like follow means the server is out of connection. Figure 4.4 (3) Right-click on the server Pop-up Menu: Config Server Search Camera Server Information Enable Enable All Unable All Play All Stop All Configure the server. Search out the online-camera. Server information. Enable/Unable the server. Enable all the cameras under the server. Unable all the cameras under the server. Play all the livevideo. Stop all the livevideo. Figure 4.5 (4) Right-click on the camera Pop-up Menu: Camera Information Figure 4.6 Browsing Web Enable Play Stop Please refer to Camera Settings->Edit Camera. Please refer to Camera Settings->Browsing Web. Connect or Disconnect the camera. Start the live video. Stop showing all the videos. Item Description Item Description 27
29 available unusable failed to connect alarm status Note:When the camera is failed to connect successfully the first time, it will try to reconnect at an increasing intervals until it succeed. If it is failed to connect for a long time, drag it into the view to play again. You can also click the camera and enable it, and then enable it again, it will connect successfully again. 4.2 Live toolbar Figure 4.7 Icon Item Description Record Record manually. And this icon will turn into. Audio Play Audio or stop it.(audio is unusable in the polling live view window) Snapshot Take a snapshot when live-preview. Display Display. Stop Display Stop showing the videos. Zoom In Enable to zoom in on a specific area of video image with mouse wheel. Fullscreen You can view the live window in full screen mode. To return to the normal screen, press [Esc] button on the keyboard. 4.3 Live view workspace This part is use for displaying the live view.click the right mouse button will show as follow. Pop-up Menu: Play Stop Remove Remove All Display. Stop showing the videos. Remove the camera from the live window. Remove all cameras from the live window. 16:9 The original screen size can adjust to 16:9. 4:3 The original screen size can adjust to 4:3. Resize Mute Mute All Mute Other Exit Fullscreen The original screen size. Stop audio. Stop playing all the audio. Stop playing other audio. Return to the normal screen. 28

30 Figure 4.8 Fullscreen User Manual You can view the live window in fullscreen mode. 4.4 PTZ control This part is for flexibility of remote pan/tilt/zoom through operator control. It is possible to zoom in on small distant objects with exceptional clarity. The user can easily track objects with high precision by using a mouse or joystick. Figure 4.9 Item Speed Brightness Contrast Saturation Default Description PTZ rotation speed control. A brighter scene appears if a higher level of brightness has been selected. The difference in color and light between parts of an image. A vivid scene appears if a higher level of saturation has been selected. The default values of Brightness/Contrast/Saturation. 29
![Chapter V Playback User Manual In this part, you can search and play back the recorded files of a selected IP camera. When click [Playback] button, the window will show as below.](/docs-images/34/17107073/images/31-0.png "How to replay the recorded files Figure 5.1 Way1: Asynchronous Playback Step1: Select which camera to replay on the left, and then check it. Step2: Select a date and the file type you want to search.")
![The File Type includes: All / Manual / Motion / Schedule. Step3: Click [Search] button. Step4: Choose a playback mode, 1/2/4/6/9/13/16 is able to use without synchronously playback.](/docs-images/34/17107073/images/31-0.jpg "Note: Synchronously playback only supports for 4 panes mode. Step4: Click the file on the list and it will begin to play the recorded files.")
31 Chapter V Playback User Manual In this part, you can search and play back the recorded files of a selected IP camera. When click [Playback] button, the window will show as below. How to replay the recorded files Figure 5.1 Way1: Asynchronous Playback Step1: Select which camera to replay on the left, and then check it. Step2: Select a date and the file type you want to search. The File Type includes: All / Manual / Motion / Schedule. Step3: Click [Search] button. Step4: Choose a playback mode, 1/2/4/6/9/13/16 is able to use without synchronously playback. Note: Synchronously playback only supports for 4 panes mode. Step4: Click the file on the list and it will begin to play the recorded files. Play toolbar Icon Item Description Play Pause Stop Step forward Slow Fast Mute Zoom Capture Record Play the video. Pause the video. Stop the video. Step forward the video. Slow down to catch details. Speed up to skip some details. Play or stop audio.(the default state is to play audio) Enable to zoom in on a specific area of video image with mouse wheel. Take a snapshot when playing the file. Record the video. 30
32 Download FullScreen Download the recording file. Fullscreen User Manual Color of recorded files on the list. Red Refer to those alarm type recorded files. Blue Refer to those schedules recorded files. Operative Skills Timelines will help you find the correct videos when there are too many files on the list. It's easy to zoom out the area by scrolling the mouse wheel to find exactly the incident you are looking for. Take a file near 10:00 for example, when the position of mouse is between 08:00 and 10:00, then scroll up the mouse wheel, the position of this file will show as follow. Scroll down to turn back. You can hold down the left mouse and drag the mouse left or right (between the intervals from 00:00 to 24:00) to get the exact recorded files. Begin: Scroll up 1: Figure 5.2 Scroll up 2: Figure 5.3 Scroll up 3: Figure 5.4 Scroll up 4: Figure 5.5 Figure
33 Method 2: Synchronous Playback Figure 5.7 Step1: Click on the Sync palyback button. Step2: Select which camera to replay on the left, and then check it. Step3: Select a date and the file type you want to search. The File Type includes: All / Manual / Motion / Schedule. Step4: Click [Search] button. Step4: Click the file on the list and it will begin to play the recorded files. Note: Synchronously playback only supports for 4 panes mode. If you want to change the camera in different pane, just right click on the window and choose the Remove option. Play toolbar Icon Item Description Play Begin to play the video. Pause Pause to play the video. Stop Stop play the video. Slow Slow down to catch details. Fast Zoom Download Fullscreen Speed up to skip some details. Enable to zoom in on a specific area of video image with mouse wheel. Download the recording file. Fullscreen How to export the recorded files Here is for the exporting the recording files from the Milesight VMS Client. Over the Milesight VMS Client, you can export the recording files to your local pc. Choose the start time and the stop time for the recording files, then select the file type, including alarm type 32

34 and schedule type. Then choose a destination where to save the files on your local PC. Right-Click on the file list, select the Export option to export the recording files. Figure 5.8 How to import the recorded files Here is for the importing the existed export files in PC to the Milesight VMS Client. Over the Milesight VMS Client, you can import the exported files in your local PC to the Milesight VMS Client.Click Local file and choose import,find the adestination of exported files you what to import in you PC,select the Confirm option to import the recording files. Figure


35 Chapter VI Map User Manual In this part, you can add an electronic map and different cameras to the map. The display of map graphics in the Map window can be controlled. The size of the map can be selected, and the map moved in the window to show the required area. Use the zoom in / zoom out buttons or with the mouse wheel to adjust map size. Right-click on the map and choose the Lock option, this would prevent the accidental deleting of the map. It is easy to navigate between different layers of maps, and to show the maps for cameras in various locations. Here you can add different maps for each server. Note: Only on the layers of the server, you can drag the cameras to the server map. When click [Map] button, the window will show as below. Figure Toolbar Modify When [Modify] button is clicked, the window will show as below. Different image formats such as bmp / gif / png /jpg are supported. Figure
. A menu will pop-up as figure 6.3.")

36 Icon Item Description Delete Map Zoom In Zoom Out Reset Delete Hot Remove the map from the Milesight VMS Client. Enlarge the picture to see more details. Zoom out of the map. Return the map to its original size. Remove the camera from the map. 6.2 Pop-up Menu Right-click the map (anywhere except the cameras). A menu will pop-up as figure 6.3. Lock If the map is locked, you can do nothing with the map but zoom in or zoom out. Unlock You can do anything if the map is unlocked. Right-click the camera. A menu will pop-up as figure 6.4. Figure 6.3 Delete Remove the camera from the map. Play Live preview. Figure Add the hot Click the camera and drag it to the E-map, then it will be added successfully. After the camera has been added on the E-map, you can double click on the hot to play. Figure

37 Chapter VII Milesight VMS Server User Manual An installation of Milesight VMS Pro has two components: server software and client software. The server functions as the intelligence management system forward the rtsp stream. After log on the Milesight VMS Server, it will appear on the right-button like this. Right-Click on the icon, the window shows as below. Figure 7.1 Item Stop/Start Online Help Help About Us Run When Startup Register now Exit Description Stop/Start running the Milesight VMS Server. Feedback any questions to Milesight. About Milesight VMS Server version information. Running the program when computer startup. Active the Milesight VMS Pro. Exit the Milesight VMS Server Figure 7.2 Note: Before active the Milesight VMS Pro, you can add up to 8 cameras. If you want to use more cameras, please contact with Milesight to active the Milesight VMS Pro via Milesight VMS Server. 36
38 Chapter Ⅷ Service User Manual Milesight Technology Co., Ltd provides customers with timely and comprehensive technical support services. End-users can contact your local dealer to obtain technical support. Distributors and resellers can contact directly with Milesight for technical support. Technical Support Mailbox: Web: Online Problem Submission System: Address: Room 202, No.23 Wanghai Road, 2nd Software Park, Xiamen, China Zip Code: TEL: FAX: Milesight More in Sight 37
ImagineWorldClient Client Management Software. User s Manual. (Revision-2)
") ImagineWorldClient Client Management Software User s Manual (Revision-2) (888) 379-2666 US Toll Free (905) 336-9665 Phone (905) 336-9662 Fax www.videotransmitters.com 1 Contents 1. CMS SOFTWARE FEATURES...4
ImagineWorldClient Client Management Software User s Manual (Revision-2) (888) 379-2666 US Toll Free (905) 336-9665 Phone (905) 336-9662 Fax www.videotransmitters.com 1 Contents 1. CMS SOFTWARE FEATURES...4
NVMS-1200. User Manual
 NVMS-1200 User Manual Contents 1 Software Introduction... 1 1.1 Summary... 1 1.2 Install and Uninstall... 1 1.2.1 Install the Software... 1 2 Login Software... 3 2.1 Login... 3 2.2 Control Panel Instruction...
How To Set Up Flir Cloud Client For Pc Or Mac Or Mac (For Pc Or Ipad) On A Pc Or Pc Or Mouse (For Mac) On An Iphone Or Ipa) On Pc Or Tv (For Ipa
 On A Pc Or Pc Or Mouse (For Mac) On An Iphone Or Ipa) On Pc Or Tv (For Ipa") Instruction Manual FLIR Cloud Services Client Instruction Manual FLIR Cloud Services Client #LX400018; r. 2.0/14567/14568; en-us iii Table of contents 1 Setting up FLIR Cloud Client for PC or Mac...1
Instruction Manual FLIR Cloud Services Client Instruction Manual FLIR Cloud Services Client #LX400018; r. 2.0/14567/14568; en-us iii Table of contents 1 Setting up FLIR Cloud Client for PC or Mac...1
KViewCenter Software User Manual 2012 / 04 / 20 Version 2.2.1.0
 KViewCenter Software User Manual 2012 / 04 / 20 Version 2.2.1.0 Table of Contents Chapter 1. KViewCenter Interface... 5 1.1. Log in.... 5 1.2. Log out... 5 1.3. Control Panel... 6 1.4. Control Panel (Preview
Contents. Introduction 3. Installation 4
 VMS User Manual Contents Introduction 3 Installation 4 Minimum Recommended Requirements 4 Login 4 Main Window 5 Menu Items 5 Toolbar Items 6 Play Bar Items 7 Configuration 8 Add network cameras/ digital
NVMS - 1000 USER MANUAL. Version 2.1.0
 NVMS - 1000 USER MANUAL Version 2.1.0 Contents 1 Software Introduction... 1 1.1 Summary... 1 1.2 Operation Environment... 1 1.3 Install and Uninstall... 2 1.3.1 Install the Software... 2 1.3.2 Uninstall
Network Video Monitor Software
 Network Video Monitor Software V1.0.0.0 Operation menu Chapter 1 Product Overview 1.1 Performance instruction Network video monitoring software is a centralized management tool for I8 protocol surveillance
Multi-Site 4200. Remote Viewing Software. User Guide
 Multi-Site 4200 Remote Viewing Software User Guide Document 800-12064V1 Rev A 09/2012 User Guide Revisions Issue Date Revisions A 07/2012 New document. V1 Rev A 09/2012 Updated the description of the
E-Map Application CHAPTER. The E-Map Editor
 CHAPTER 7 E-Map Application E-Map displays the monitoring area on an electronic map, by which the operator can easily locate the cameras, sensors and alarms triggered by motion or I/O devices. Topics discussed
ivms-4200 Client Software Quick Start Guide V1.02
 ivms-4200 Client Software Quick Start Guide V1.02 Contents 1 Description... 2 1.1 Running Environment... 2 1.2 Surveillance System Architecture with an Performance of ivms-4200... 3 2 Starting ivms-4200...
Surveillance Manager REV: 1.0.0 1910010755
 Surveillance Manager REV: 1.0.0 1910010755 Contents Chapter 1 System Requirement... 1 Chapter 2 Installation... 2 2.1 Before Installing the Software...2 2.2 Starting the Installation...2 Chapter 3 Quick
VMS A1 Client Software. User Manual (V2.0)
") VMS A1 Client Software User Manual (V2.0) Contents Chapter 1 Overview...4 1.1 Description...4 1.2 Running Environment...4 1.3 Function Modules...5 Chapter 2 Live View...7 2.1 User Registration and Login...7
VMS A1 Client Software User Manual (V2.0) Contents Chapter 1 Overview...4 1.1 Description...4 1.2 Running Environment...4 1.3 Function Modules...5 Chapter 2 Live View...7 2.1 User Registration and Login...7
ACS CLIENT SOFTWARE USER MANUAL
 ACS CLIENT SOFTWARE USER MANUAL 1 ACS USER GUIDE 1.1 System Requirement Recommended System Requirement OS CPU VGA RAM HDD WindowXP, Vista Pentium 4, 2Ghz 1024*768, 64MB 24bit color graphic card 1GB 20MB
i -CEN S USER S Manual 2007. 08. 13.
 i -CEN S i -CEN'S USER S Manual 2007. 08. 13. i -CEN S Table of Contents Overview of i-cen S software... 4 1 Introduction of i-cen S... 4 2 Key Features... 5 3 Key Benefits... 5 4 System Specification...
Professional Surveillance System User s Manual
 Professional Surveillance System User s Manual \ 1 Content Welcome...4 1 Feature...5 2 Installation...6 2.1 Environment...6 2.2 Installation...6 2.3 Un-installation...8 3 Main Window...9 3.1 Interface...9
Digital Sentry DS ControlPoint
 O P E R A T I O N Digital Sentry DS ControlPoint C3674M-I (5/11) 2 C3674M-I (5/11) C3674M-I (5/11) 3 Contents Description...........................................................................................................
Access to remote DVR from IE USER S MANUAL CONTENT
 Access to remote DVR from IE CONTENT... 2 Preface... 2 1. Introduction... 2 2. System requirement and executing environment... 2 2.1. Supported operating System:... 2 2.2. Hardware requirement (recommend):...
DVS Net (Integration)
") DVS Net (Integration) Installation and User s Guide Ver 11.10.x Digital Video Security System Digital Video Recorder www.tuniss.com PLEASE CALL TUNISS COMPUTER AT: 650-401-6138 FOR ANY QUASTIONS REGARDING
DVS Net (Integration) Installation and User s Guide Ver 11.10.x Digital Video Security System Digital Video Recorder www.tuniss.com PLEASE CALL TUNISS COMPUTER AT: 650-401-6138 FOR ANY QUASTIONS REGARDING
How To Use A Pew V.V.V (Windows) V.A.1.1 (Windows 8) (Windows 7) (Powerpoint) (For Windows) (Win Xp) (V.A) (Amd)
 V.A.1.1 (Windows 8) (Windows 7) (Powerpoint) (For Windows) (Win Xp) (V.A) (Amd)") VIDEO VIEWER USER MANUAL Please read instructions thoroughly before operation and retain it for future reference. Video_viewer_V1.0 LEGAL INFORMATION Reproduction, transfer, distribution or storage of
VIDEO VIEWER USER MANUAL Please read instructions thoroughly before operation and retain it for future reference. Video_viewer_V1.0 LEGAL INFORMATION Reproduction, transfer, distribution or storage of
Central Management System (CMS) USER MANUAL
 USER MANUAL") Central Management System (CMS) USER MANUAL LEGAL INFORMATION Reproduction, transfer, distribution or storage of part or all of the contents in this document in any form without the prior written permission
Central Management System (CMS) USER MANUAL LEGAL INFORMATION Reproduction, transfer, distribution or storage of part or all of the contents in this document in any form without the prior written permission
Network Video Monitor Software
 Network Video Monitor Software V2.0.0.7 Operation menu Chapter 1 Product Overview 1.1 Performance instruction Network video monitoring software is a centralized management software for I8 protocol surveillance
CDVS-7000 Series Remote Software Users Guide
 CDVS-7000 Series Remote Software Users Guide Crest Electronics, Inc. Version 12.1005 Remote Surveillance Program The remote surveillance program enables users of the Crest 7000 series DVRs to connect remotely
1. Central Monitoring System Software
 1. Central Monitoring System Software 1-1. General information CMS program is an application with which users not only watch and control remote DVRs, but also receive video/audio data or alarm signals
Central Management Software CV3-M1024
 Table of Contents Chapter 1. User Interface Overview...5 Chapter 2. Installation...6 2.1 Beginning Installation...6 2.2 Starting the CMS software...10 2.3 Starting it from the Start menu...10 2.4 Starting
Manual Client Management Software HDR50-CMS
 Manual Client Management Software HDR50-CMS HDR50-CMS (Client Management Software) A-1. Install HDR50-CMS for Windows PC HDR50-CMS is a program for communication between DVR and PC to control signal and
Contents. 1.2 Software Installation... 1
 Software Manual Contents 1 Software Installation... 1 1.1 Overview...1 1.2 Software Installation... 1 2 Introduction To Basic Function...5 2.1 Login System... 5 2.2 CMS Operating Interface...5 2.2.1 Operating
Professional Surveillance System User s Manual
 Professional Surveillance System User s Manual Version 4.06 Table of Contents 1 OVERVIEW AND ENVIRONMENT... 1 1.1 Overview... 1 1.2 Environment... 1 2 INSTALLATION AND UPGRADE... 2 2.1 Installation...
ivms-4200 Client Software User Manual Version 1.02
 ivms-4200 Client Software User Manual Version 1.02 Contents Chapter 1. Overview... 3 1.1 Description... 3 1.2 Running Environment... 3 Chapter 2. Starting ivms-4200... 4 2.1 User Registration... 4 2.2
MJPEG Camera Client User Manual
 MJPEG Camera Client User Manual CONTENTS User Manual 1 WELCOME... 3 1.1Features... 3 1.2Installation Requirements... 3 1.3 Software Installation... 3 2 Software Operation... 5 2.1 Tab bar... 6 2.2 Device
ivms-4500 (Android) Mobile Client Software User Manual (V3.1)
 Mobile Client Software User Manual (V3.1)") ivms-4500 (Android) Mobile Client Software User Manual (V3.1) UD.6L0202D1111A01 Thank you for purchasing our product. This manual applies to ivms-4500 (Android) V3.1 mobile client software; please read
ivms-4500 (Android) Mobile Client Software User Manual (V3.1) UD.6L0202D1111A01 Thank you for purchasing our product. This manual applies to ivms-4500 (Android) V3.1 mobile client software; please read
Professional Surveillance System User s Manual
 Professional Surveillance System User s Manual Version 4.06 Table of Contents 1 OVERVIEW AND ENVIRONMENT... 1 1.1 Overview...1 1.2 Environment...1 2 INSTALLATION AND UPGRADE... 2 2.1 Installation...2 2.2
Multi Client (Integration)
") Multi Client (Integration) Installation and User s Guide Ver 12.10.x *All contents of this document may change without prior notice. INDEX 1. Index 01 2. Introduction 02 3. Installation 03 4. Using Multi
Multi Client (Integration) Installation and User s Guide Ver 12.10.x *All contents of this document may change without prior notice. INDEX 1. Index 01 2. Introduction 02 3. Installation 03 4. Using Multi
1. Central Monitoring System Software
 1. Central Monitoring System Software 1-1. General information CMS program is an application with which users not only watch and control remote DVRs, but also receive video/audio data or alarm signals
LOREX CLIENT Remote Software 4.0
 LOREX CLIENT Remote Software 4.0 Instruction Manual English Version 2.0 MODEL: L20WD800 Series www.lorexcctv.com Copyright 2008 LOREX Technology Inc. Table of Contents Table of Contents Software Installation...
User s Manual of DVR DVS Remote Client Software V 4.0.1
 User s Manual of DVR DVS Remote Client Software V 4.0.1 Index Version description...4 1 Introduction...8 2 Software Install, Uninstall and use...9 2.1 Install remote client software ver4.0.1...9 2.2 Uninstall
ivms-4500 (Android Tablet) Mobile Client Software User Manual (V3.0)
 Mobile Client Software User Manual (V3.0)") ivms-4500 (Android Tablet) Mobile Client Software User Manual (V3.0) Thank you for purchasing our product. This manual applies to ivms-4500 (Android Tablet) mobile client software; please read it carefully
ivms-4500 (Android Tablet) Mobile Client Software User Manual (V3.0) Thank you for purchasing our product. This manual applies to ivms-4500 (Android Tablet) mobile client software; please read it carefully
PowerVideo Plus. EverFocus Central Management Software. for Networked Video Devices Management. User s Manual
 EverFocus Central Management Software for Networked Video Devices Management User s Manual Copyright EverFocus Electronics Corp. Release Date: January, 2013 Copyright 2012 EverFocus Electronics Corp. All
NetClient software user manual
 NetClient software user manual 1-1. General information Net Client is an application which provides users not only viewing and controling remote DVRs, but also receiving realtime event data or alarm signals
Remote Client Program... 3. Web Client... 39
 Remote Client / Web Client USER MANUAL T Series Digital Video Recorder Remote Client Program... 3 Remote Client Program Installation... 4 Remote Client... 6 Main Window... 6 Site Registration... 7 Group
Instruction for IE network monitor
 Instruction for IE network monitor This system features a built-in browser-based software that allows you to access your system remotely over your local area network (LAN) or over the Internet (WAN) using
Guarding Expert (Android Tablet) Mobile Client Software User Manual (V3.1)
 Mobile Client Software User Manual (V3.1)") Guarding Expert (Android Tablet) Mobile Client Software User Manual (V3.1) UD.6L0202D1080A01 Thank you for purchasing our product. This manual applies to Guarding Expert (Android Tablet) mobile client
Guarding Expert (Android Tablet) Mobile Client Software User Manual (V3.1) UD.6L0202D1080A01 Thank you for purchasing our product. This manual applies to Guarding Expert (Android Tablet) mobile client
SMS (Server Management Software) Digital Video Recorder. User s Manual
 Digital Video Recorder. User s Manual") SMS (Server Management Software) Digital Video Recorder User s Manual 1 Table of Contents Chapter 1 Overview.....03 1.1 In This Manual..03 1.2 Overview 03 1.3 SMS Features...03 1.4 Product Information..03
SMS (Server Management Software) Digital Video Recorder User s Manual 1 Table of Contents Chapter 1 Overview.....03 1.1 In This Manual..03 1.2 Overview 03 1.3 SMS Features...03 1.4 Product Information..03
User Manual V1.0. Remote Software
 User Manual V1.0 Notice: The information in this manual was current when published. The manufacturer reserves the right to revise and improve its products. All specifications are therefore subject to change
PC-ZViewer User Manual
 PC-ZViewer User Manual For further help, please visit www.zmodo.com Contents Preface... 3 Statement... 3 Intended Reader... 3 Terms in this Manual... 3 Software Introduction... 3 Operating Environment...
Pro Surveillance System 4.0. Quick Start Reference Guide
 Pro Surveillance System 4.0 Quick Start Reference Guide 1 Table of Contents 1) Overview 3 2) Initial Setup Adding a Connection..4 3) Viewing Live Cameras...6 4) Single or Multi Channel Playback..8 5) Predetermined
Avigilon Control Center Web Client User Guide
 Avigilon Control Center Web Client User Guide Version: 4.12 Enterprise OLH-WEBCLIENT-E-E-Rev2 Copyright 2013 Avigilon. All rights reserved. The information presented is subject to change without notice.
CamGuard Security System CamGuard Security System Manual
 CamGuard Security System Manual JMC Electron Co.,LTD Brief Introduction... 3 Features... 3 System Requirements... 3 Configuration... 4 Add Camera... 4 Device Options... 4 About Alarm... 5 Alarm Actions...
User Manual. IP Camera Recorder. www.allthings.com.au
 User Manual IP Camera Recorder I. Preface IP Camera Recorder is a 36 Channel Camera recording software which supports IP Camera, and Camera Server. Users use this software to monitor real-time Camera,
SMS (Server Management Software) Digital Video Recorder. User s Manual
 Digital Video Recorder. User s Manual") SMS (Server Management Software) Digital Video Recorder User s Manual Contents 1 - Introduction 2 1.1 About this manual 2 1.2 Configuration 2 1.3 SMS Functions 2 1.4 Product Information 2 1.5 System Requirements
SMS (Server Management Software) Digital Video Recorder User s Manual Contents 1 - Introduction 2 1.1 About this manual 2 1.2 Configuration 2 1.3 SMS Functions 2 1.4 Product Information 2 1.5 System Requirements
Appendix A. CMS(Client Management Software)
") Appendix A. CMS(Client Management Software) A-1. Install CMS for Windows PC CMS is a program for communication between DVR and PC to control signal and video. Insert the enclosed CD, and go to CD-ROM Drive
Appendix A. CMS(Client Management Software) A-1. Install CMS for Windows PC CMS is a program for communication between DVR and PC to control signal and video. Insert the enclosed CD, and go to CD-ROM Drive
UC2 Video Surveillance Client. User Manual V1.0.6
 UC2 Video Surveillance Client User Manual V1.0.6 MODIFY STEPS VERSION WRITER STATUS DESCRIPTION DATE V1.0.3 BRIAN A Add access mode function 2011-4-11 V1.0.4 BRIAN A Add PTZ and user role and so on 2011-4-23
Integrated Intelligent Video Surveillance Management System. User's Manual V2.0
 Integrated Intelligent Video Surveillance Management System User's Manual V2.0 1 Contents 1. Product Description... 4 1.1. General Information... 4 1.2. System Topology... 5 1.3. Operating Environment...
User Manual ivms-4200 Client Software. Version 1.02
 User Manual ivms-4200 Client Software Version 1.02 TABLE OF CONTENTS Chapter 1. Overview... 3 Chapter 2. Starting ivms-4200... 3 2.1 User Registration... 3 2.2 Wizard for Importing Device... 3 2.3 User
MAC CMS User Manual 1
 1 TABLE OF CONTENTS Chapter 1. Overview... 4 Chapter 2. Starting CMS Client... 4 2.1 User Registration... 4 2.2 Wizard for Importing Device... 4 2.3 User Login... 9 2.4 Control Panel and Main Menu Bar
Network Video Recorder. Operation Manual
 Network Video Recorder Operation Manual Content 1 Product Description... 1 1.1 Product Overview... 1 1.2 Specification... 1 2 Product Structure Introduction... 2 2.1 Back Interface... 2 2.2 Front Panel...
CMS Client Software. Instruction
 CMS Client Software Instruction Version:1.0 CONTENTS 1 Introduction & operation of CMS Client software... 3 1.1 DVR Network Remote Client... 3 1.1.1 Login... 3 1.1.2 Introduction of main interface... 3
CONTENTS WWW.FOSCAM.COM
 CMS User Manual CMS User Manual CONTENTS 1 WELCOME... 3 1.1Features... 3 1.2 Minimum System Requirements... 3 1.3 Software Installation... 4 2 The software operation... 5 2.1 Login and Exit the client...
MDMS Multiple Device Monitor System v1.0 User Manual
 MDMS Multiple Device Monitor System v1.0 User Manual Copyright 2014 All rights reserved. No part of this document may be reproduced, republished, or retransmitted in any form or by any means whatsoever,
User Manual (V1.03) UD.6L0201D1056A01
 UD.6L0201D1056A01") ivms-4200 PCNVR User Manual (V1.03) UD.6L0201D1056A01 Thank you for purchasing our product. If there is any question or request, please do not hesitate to contact the dealer. This manual applies to ivms-4200
ivms-4200 PCNVR User Manual (V1.03) UD.6L0201D1056A01 Thank you for purchasing our product. If there is any question or request, please do not hesitate to contact the dealer. This manual applies to ivms-4200
ivms-4200 Client Software Quick Start Guide
 ivms-4200 Client Software Quick Start Guide UD.6L0202B1538A01 Thank you for purchasing our product. If there is any question or request, please do not hesitate to contact the dealer. This manual applies
ivms-4200 Client Software User Manual (V2.0.0)
") ivms-4200 Client Software User Manual (V2.0.0) UD.6L0201D1034A01 Contents Chapter 1 Overview... 3 1.1 Description... 3 1.2 Running Environment... 3 1.3 Function Modules... 3 1.4 Updates Instruction...
ivms-4200 Client Software User Manual (V2.0.0) UD.6L0201D1034A01 Contents Chapter 1 Overview... 3 1.1 Description... 3 1.2 Running Environment... 3 1.3 Function Modules... 3 1.4 Updates Instruction...
How To Use Vs.Org Video Storage Server (Vs)
") Video Storage Server VSS User s Manual Version 3.10.0 Table of Contents 1. Overview... 3 1.1 Recommended Operation System... 4 2. Software Installation... 5 3. Software Upgrade... 7 3.1 Automatic Software
Video Storage Server VSS User s Manual Version 3.10.0 Table of Contents 1. Overview... 3 1.1 Recommended Operation System... 4 2. Software Installation... 5 3. Software Upgrade... 7 3.1 Automatic Software
SMS (Server Management Software) Digital Video Recorder. User s Manual
 Digital Video Recorder. User s Manual") SMS (Server Management Software) Digital Video Recorder User s Manual 1 SMS User s Guide Table of Contents Chapter 1 Overview.....03 1.1 In This Manual..03 1.2 Overview 03 1.3 SMS Features...03 1.4 Product
SMS (Server Management Software) Digital Video Recorder User s Manual 1 SMS User s Guide Table of Contents Chapter 1 Overview.....03 1.1 In This Manual..03 1.2 Overview 03 1.3 SMS Features...03 1.4 Product
IP Surveillance System. User s manual
 IP Surveillance System User s manual IP Surveillance system Table of Contents TABLE OF CONTENTS TABLE OF CONTENTS...1 SYSTEM REQUIREMENT...3 INSTALLATION...4 1. MAIN CONSOLE...12 1.1 Start...14 1.2 Information
DVR4C Remote Viewer Operation Manual Table of Contents EN 3 1. OVERVIEW...5 1.1 MINIMUM PC REQUIREMENTS...5 2. INSTALLING THE PROGRAM...
 DVR4x4RemoteViewer.book Page 3 Tuesday, February 15, 2005 9:19 AM DVR4C Remote Viewer Operation Manual Table of Contents EN 3 1. OVERVIEW...5 1.1 MINIMUM PC REQUIREMENTS...5 2. INSTALLING THE PROGRAM...5
This document is aimed at users of the Milestone XProtect Professional s Monitor application, including users of the Monitor application s Viewer.
 milestone XProtect Professional 4.6 Monitor & Viewer User s Manual Target Audience for this Document This document is aimed at users of the Milestone XProtect Professional s Monitor application, including
CompleteView Admin Console Users Guide. Version 3.0.0 Revised: 02/15/2008
 CompleteView Admin Console Users Guide Version 3.0.0 Revised: 02/15/2008 Table Of Contents Configuration... 3 Starting the Admin Console... 3 Adding a Server... 4 Monitoring Server Status... 6 Menus...
Chapter 4 Control Center
 Chapter 4 Control Center Control Center is a central monitoring station solution (CMS) that provides the CMS operator with these major features: Access to client DVRs (See Remote DVR) Access to remote
1. Central Monitoring System Software
 1. Central Monitoring System Software 1-1. General information CMS program is an application with which users not only watch and control remote DVRs, but also receive video/audio data or alarm signals
www.digiever.org DIGIEVER CMS logiciel de gestion de super-vision et mur d image
 DIGIEVER CMS logiciel de gestion de super-vision et mur d image DIGIEVER Central Management System (DIGIEVER CMS) is an open platform solution to centrally manage different sites of DIGIEVER NVRs in diverse
Quick Start Guide NVR DS-7104NI-SL/W NVR. www.hikvision.com. First Choice For Security Professionals
 Quick Start Guide NVR DS-7104NI-SL/W NVR NOTE: For more detailed information, refer to the User s Manual on the CD-ROM. You must use your PC or MAC to access the files. www.hikvision.com Quick Start 1.
How To Use The Workstation Program On A Pc Or Mac Or Macbook Or Macintosh (Aero) With A Computer Or Ipa (A2) With An Ipa Or Ipad (A3) With The Powerpoint 2.
 With A Computer Or Ipa (A2) With An Ipa Or Ipad (A3) With The Powerpoint 2.") Mirasys NVR 6.1 User s Guide CONTENTS Contents... 2 Before you start... 3 Introduction... 6 Logging in... 9 User interface... 13 Navigator... 16 Cameras... 25 Video outputs... 41 Digital outputs... 46
Mirasys NVR 6.1 User s Guide CONTENTS Contents... 2 Before you start... 3 Introduction... 6 Logging in... 9 User interface... 13 Navigator... 16 Cameras... 25 Video outputs... 41 Digital outputs... 46
How To Use Hvs Pc Client Software On A Pc Or Mac Or Ipa (For Acedo) With A Tvc (For Mac) Or Ipc (Fordee) (For An Ipc) (Powerbook) (Windows
 With A Tvc (For Mac) Or Ipc (Fordee) (For An Ipc) (Powerbook) (Windows") Hills Video Security CCTV PC Client User Manual V1.1 Contents Chapter 1 Overview... 3 1.1 Description... 3 1.2 Running Environment... 3 1.3 Function Modules... 4 1.4 Updates Instruction... 6 Chapter 2
Hills Video Security CCTV PC Client User Manual V1.1 Contents Chapter 1 Overview... 3 1.1 Description... 3 1.2 Running Environment... 3 1.3 Function Modules... 4 1.4 Updates Instruction... 6 Chapter 2
SecuGuard. Basic 5.0. User s manual. Jun. 2010 Version: 5.0.2.xxx
 SecuGuard Basic 5.0 User s manual Jun. 2010 Version: 5.0.2.xxx SecuGuard Basic System Requirement...6 Installation...7 Before Installing the Software... 7 Starting the Installation... 7 Quick Start...10
A quick user guide for your LX Apollo DVR
 A quick user guide for your LX Apollo DVR The LX Apollo series of DVR s is designed specially for the security and surveillance field and is an outstanding digital surveillance product. It has an embedded
IP Camera Centralization Management. Client Application. (IPCMonitor) Feb, 2013 Version 1.9. User Manual
 Feb, 2013 Version 1.9. User Manual") IP Camera Centralization Management Client Application (IPCMonitor) Feb, 2013 Version 1.9 User Manual INDEX 1 Introduction...3 2 Computer Requirement...3 3 Installation...4 4 Devices list...4 4.1 Adding
IP Camera Centralization Management Client Application (IPCMonitor) Feb, 2013 Version 1.9 User Manual INDEX 1 Introduction...3 2 Computer Requirement...3 3 Installation...4 4 Devices list...4 4.1 Adding
ivms-4500(windows Mobile) Mobile Client Software User Manual Version 1.0
 Mobile Client Software User Manual Version 1.0") ivms-4500(windows Mobile) Mobile Client Software User Manual Version 1.0 Thank you for purchasing our product. This manual applies to ivms-4500 (Windows Mobile) mobile client software, please read it carefully
ivms-4500(windows Mobile) Mobile Client Software User Manual Version 1.0 Thank you for purchasing our product. This manual applies to ivms-4500 (Windows Mobile) mobile client software, please read it carefully
IPC Video Surveillance Client. User Manual V1.1.2
 IPC Video Surveillance Client User Manual V1.1.2 Statement Thank you for purchasing our products! If you have any questions or need, please contact the customer department at any time. This manual applies
CMS Basic User s Manual
 CMS Basic User s Manual Central Management Solution For Multi-sites Applications V1.0.0 2 CMS Basic User s Manual Table of Contents User Interface Overview... 4 CMS UI Overview... 4 Installation... 6 Begin
ACTi Central Management System
 ACTi Central Management System User s Manual Version 1.1.05.06 2012/10/12 Table of Contents 1 Overview 5 Software Architecture... 5 2 Installation 6 Requirements... 6 Operating System... 6 Hardware System
IPCam Client User Manual For X10 IP Camera models XX34A, XX36A, XX39A, XX40A
 IPCam Client User Manual For X10 IP Camera models XX34A, XX36A, XX39A, XX40A Contents 1. INSTALLATION... 3 2. SOFTWARE OPERATION... 5 2.1. Login... 5 2.2. For Multi-windows... 6 2.3. System Settings...
idvr-pro Viewer Software for Mac User Manual ver 0.1
 idvr-pro Viewer Software for Mac User Manual ver 0.1 1 Contents 1. Introduction... Error! Bookmark not defined. 1.1 Summary... Error! Bookmark not defined. 2. Install... Error! Bookmark not defined. 2.1
Local Playback Software User Manual (V2.0)
") User Manual (V2.0) Thank you for purchasing our product. This manual applies to Local Playback software, please read it carefully for the better use of this software. The contents in this manual are subject
User Manual (V2.0) Thank you for purchasing our product. This manual applies to Local Playback software, please read it carefully for the better use of this software. The contents in this manual are subject
CMS-DH CENTRAL MANAGEMENT SOFTWARE
 CMS-DH CENTRAL MANAGEMENT SOFTWARE CMS-DH is a central management software that allows you to view and manage up to 300 DH200 series DVRs. System Requirements Your system must meet the system requirements
Remote Backup Software User Manual V 2.0
 Remote Backup Software User Manual V 2.0 Table of Contents Chapter 1 Welcome to Remote Backup Software... 2 1.1 Overview... 2 1.2 Computer Disposition Request... 2 1.3 Convention... 2 Chapter 2 Installing
SMS Remote Software User Manual. Pro Series & Contender Series DVRs
 SMS Remote Software User Manual Pro Series & Contender Series DVRs Table of Contents Chapter 1 Overview 1 1.1 In This Manual 1 1.2 Overview 1 1.3 SMS Features 1 1.4 Product Information 1 1.5 System Requirements
Remote Backup Software
 Remote Backup Software User Manual UD.6L0202D1044A01 Thank you for purchasing our product. This manual applies to Remote Backup software, please read it carefully for the better use of this software. The
NVMS Network Video Monitor System Standard Edition. Users Manual
 Network Video Monitor System Standard Edition Users Manual Contents Contents... 1 1. Introduction... 2 1.1. Brief Introduction... 2 1.2. Definition... 3 1.3. System Features... 3 1.4. System operating
ivms-4200 Client Software Quick Start Guide
 ivms-4200 Client Software Quick Start Guide Notices The information in this documentation is subject to change without notice and does not represent any commitment on behalf of HIKVISION. HIKVISION disclaims
4CH/8CH Full D1 Full real-time USB DVR USER GUIDE
 4CH/8CH Full D1 Full real-time USB DVR USER GUIDE Default User Name: admin Default Password: admin Main UI: 1 System info window 2 PTZ panel button 3 Alarm panel button 4 PTZ panel 5 Logon info panel 6
ivms-4200 Intelligent Video Management System Quick Start Guide
 ivms-4200 Intelligent Video Management System Quick Start Guide Notices The information in this documentation is subject to change without notice and does not represent any commitment on behalf of HIKVISION.
Camera Control for Windows
 Camera Control for Windows 1910011253 REV1.0.0 Contents Chapter 1 Introduction... 1 1.1 Overview... 1 1.2 System Requirement... 1 Chapter 2 Software Installation... 2 Chapter 3 Quick Start... 5 3.1 Create
Central Management System
 Central Management System NCS System Installation User Manual Ver. 1.7.0.130326.001 Table of Contents Table of Contents Table of Contents... ii Part 1: NCS Overview... 4 System Introduction... 5 Client/Server
ivms-4500(android) Mobile Client Software User Manual (V1.0)
 Mobile Client Software User Manual (V1.0)") ivms-4500(android) Mobile Client Software User Manual (V1.0) Thank you for purchasing our product. This manual applies to ivms-4500 (Android) mobile client software, please read it carefully for the better
ivms-4500(android) Mobile Client Software User Manual (V1.0) Thank you for purchasing our product. This manual applies to ivms-4500 (Android) mobile client software, please read it carefully for the better
REMOTE AGENT USER S MANUAL
 REMOTE AGENT USER S MANUAL Revision Date : 2006.10.02. 0 INDEX CHAPTER 1. Installation-------------------------------------------------------- 2 CHAPTER 2. Function introduction------------------------------------------------
CMS Pro. User`s Manual. Professional Central Monitoring Software. Full-featured Enterprise Class Surveillance Solution MADE IN KOREA
 Professional Central Monitoring Software CMS Pro Full-featured Enterprise Class Surveillance Solution User`s Manual MADE IN KOREA M11131CMSProDR This document contains preliminary information and is subject
ZKiVision Client Software User Manual
 Document version: 6.2 Software version: Pro V5.1 Date: May 2014 Overview This document describes the installation, functions, user interface and operations of ZKiVision Client Software. General Instructions
ivms-4200 Client Software User Manual UD.6L0202D1939A01
 ivms-4200 Client Software User Manual UD.6L0202D1939A01 User Manual COPYRIGHT 2015 Hangzhou Hikvision Digital Technology Co., Ltd. ALL RIGHTS RESERVED. Any and all information, including, among others,
Server Application. ACTi NVR v2.1. User s Manual
 Server Application ACTi NVR v2.1 User s Manual ACTi APP-2000 This document is copyrighted, 2003-2008 by ACTi Corporation. All rights are reserved. ACTi Corporation reserves the right to make improvements
CMS PROFESSIONAL user's manual
 CMS PROFESSIONAL user's manual User's manual version 3.0 (January 2012) This manual applies to program version CMS PROFFESIONAL 3.0.0.600 Page 1 Contents 1. Introduction... 4 1.1 System description...