WINDOW TO THE SOUL HAPI QUILT
|
|
|
- Dylan Bradford
- 9 years ago
- Views:
Transcription
1
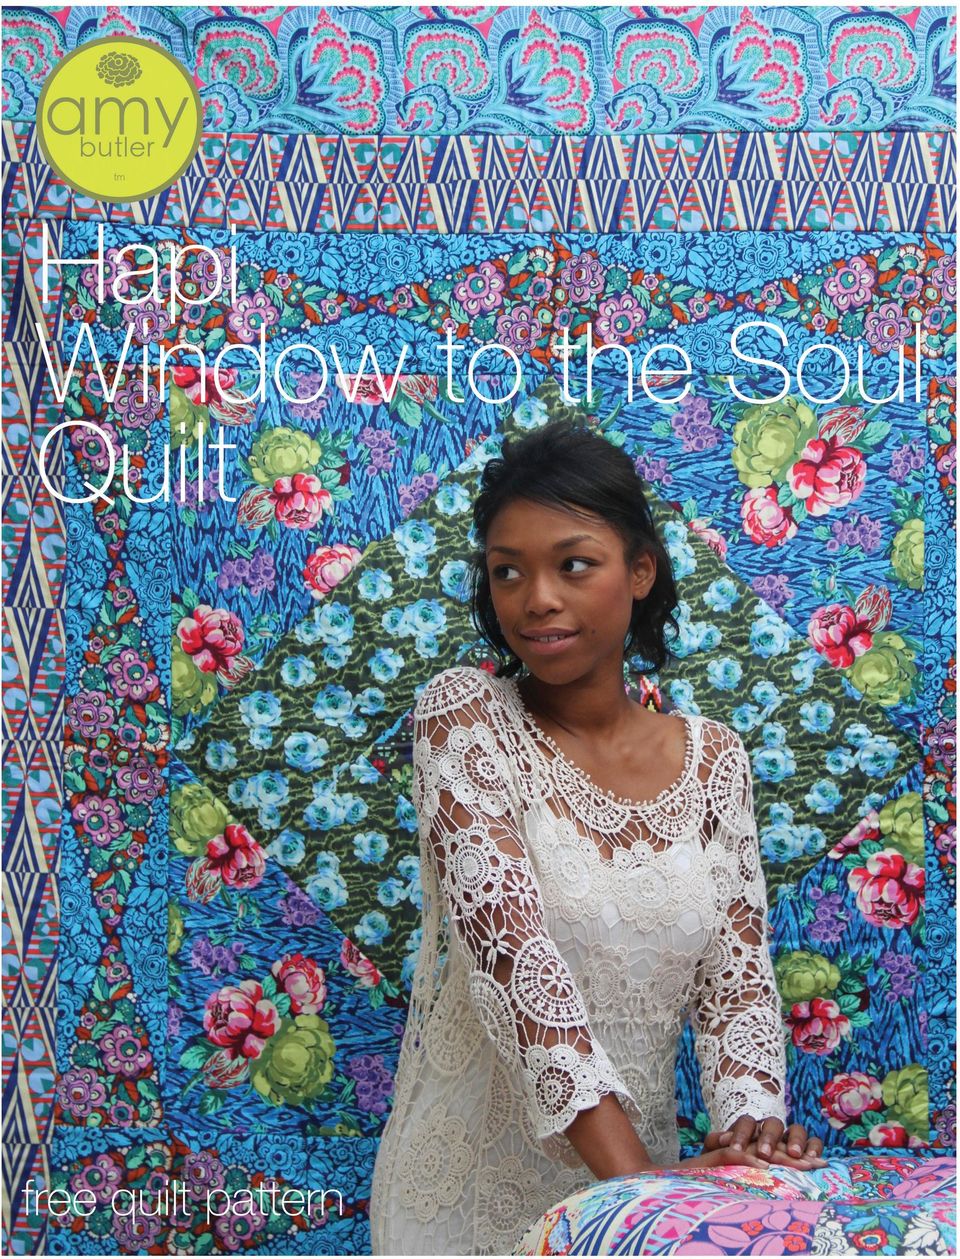
2 PAGE 2 WINDOW TO THE SOUL HAPI QUILT To highlight the richness and depth of my Hapi fabrics I redesigned my Window to the Soul stained-glass motif to capture the great play between the prints and patterns moving from cool turquoise & blue into the deep, rich, warm hues of the central diamond. Enjoy creating your own Window to the Soul! Happy Quilting. Amy SEWING PATTERN INCLUDES: Instructions and measurements included to create your own Window to the Soul Quilt with my Hapi fabrics. Fabrics designed by Amy Butler for Rowan. All prints are from Amy s Hapi Collection Quilt design by Amy Butler. Construction by Mary Dugan. Instructions by Anita Peluso and Mary Dugan Finished size: 64 wide x 74 long Amy s Fabrics used in this quilt Center Square & Quilt Back Setting Rectangles Setting Triangles celestial/dusk PWAB125 flowering buds/emerald PWAB119 tapestry rose//sapphire PWAB117 First Border Second Border Third Border trapeze/ink PWAB115 glow/melon PWAB118 oasis/azure PWAB124 Fourth Border Binding Backing glow/sapphire PWAB118 camel blanket/cloud PWAB120 celestial/dusk PWAB125

3 WINDOW TO THE SOUL HAPI QUILT PAGE 3 Window to the Soul Quilt (Front) GENERAL NOTES: - All seam allowances are 1/4 unless otherwise stated. - Before you get started, please read through all of the instructions. - Preshrink your fabric by washing, drying and pressing it. TIP: Make a small diagonal clip in the corners of each of the fabrics before washing to help prevent fraying and tangling /2 yards for the First Border - 1 1/2 yards for the Second Border - 1 3/4 yards for the Third Border - 2 yards for the Fourth Border - 2/3 yard for the Binding - 5 yards for the Quilt Back BATTING/NOTIONS NEEDED: - The first time a term is mentioned and followed by an asterisk (*) it is defined in the Techniques & Terminology section on Amy s website at amybutlerdesign.com - 1 pkg of cotton batting (100 x 116 ) I use Fairfield 60/40 Blend - 2 large spools of a coordinating all-purpose thread - 3 yards of 18 wide Freezer paper - This quilt is made with the design on each fabric facing the same direction. To do this you ll cut the Setting Rectangles on the bias. TOOLS NEEDED: - For this Hapi version of my Window to the Soul Quilt the Center Square and the Backing are cut from the same print but the yardages are listed separately below. MATERIALS LIST: Note: I have allowed extra yardage for matching and centering the designs. From 44 wide quilting cotton fabric - 1/2 yard for the Center Square - 1 yard for the Setting Rectangles - 1 yard for the Setting Triangles - 24 Quilting Ruler - Straight Pins - Chalk pencil or fabric marking pen - Scissors - 2 pkgs of Quilters Safety pins (large size) - Hand-sewing needle - Marker - Rotary cutter and mat - Measuring tape - Iron and ironing board - Walking Foot (for your sewing machine) - Machine Quilting Foot (for your sewing machine)

4 WINDOW TO THE SOUL HAPI QUILT PAGE 4 Step 1. MAKE THE TEMPLATES FOR THE QUILT CENTER. Note: You ll use freezer paper to make the templates to fussy cut the desired designs on your fabric. These shapes do not include the seam allowances*, you ll add them on your fabric as you cut out each piece. E. Measure and cut 1/4 past each edge of the templates to make the seam allowances. A. Using your ruler and marker, measure and mark the following dimensions directly onto the dull side of your freezer paper. - Cut 1 square 12 x 12 - Cut 2 rectangles 6 3/8 x 12 - Cut 2 rectangles 6 3/8 x 24 3/4 - Cut 2 squares 17 1/2 x 17 1/2 B. Next, cut both of the 17 1/2 square templates in half diagonally making 4 triangles. Step 2. CUT OUT THE FABRIC PIECES. Note: : Please keep the freezer paper templates in place until after the Quilt Center is sewn in Step 4E. A. As you work with each fabric, lay it in a single layer with the WRONG side facing up. Center Square B. Center the 12 square template shiny side down over the desired design on your fabric. Line up one edge of the template with the bias* and press it in place. Tip: If you draw a line across the center of the template square on both diagonals, it is easier to center. C. Use your ruler, rotary cutter and mat to measure and cut 1/4 past each edge of the template to make the seam allowances. Setting Rectangles Note: Remember to leave enough space between the templates to cut the seam allowances. D. Place each of the 6 3/8 x 24 3/4 rectangle templates shiny side down on the bias of the fabric and press them in place. Then place the 6 3/8 x 12 rectangle templates on the opposite bias and press them in place. (See the diagram at the top of the next column) Setting Triangles F. Center the 17 1/2 triangle templates shiny side down over the desired design on your fabric and press them in place. G. Measure and cut 1/4 past each edge of the templates to make the seam allowances. First Border Note: Fussy cut the strips with the fabric design centered down the middle. - Cut 2 strips down the length of your fabric (LOF) 5 1/2 wide x 35 1/2 long (right & left sides) - Cut 2 strips from the remaining fabric (LOF) 7 wide x 45 1/2 long (top & bottom strips)

5 WINDOW TO THE SOUL HAPI QUILT PAGE 5 Second Border - Cut 2 strips down the LOF 4 wide x 48 1/2 long. (right & left sides) - Cut 4 strips from the remaining fabric 5 x WOF. (top & bottom strips) H. Sew the 4 strips together with a 1/4 seam and backstitch at each end. Press the seam allowances to one side. - Cut 2 pieces from this strip each measuring 5 wide x 52 1/2 long. Step 4. MAKE THE QUILT TOP. Note: While making the Quilt Center, set the seams with an iron and then finger press open. This will help with sewing the bias edges. Diagram of the Quilt Center Third Border - Cut 2 strips down the LOF 5 wide x 57 1/2 long. (right & left sides) - Cut 2 strips from the remaining fabric 6 1/2 x LOF. (top & bottom strips) Cut 2 pieces from these strips each measuring 6 1/2 wide x 61 1/2 long. Fourth Border Note: Fussy cut the strips with the fabric design centered down the middle. - Cut 2 strips 2 x 68 LOF (right & left sides) - Cut 2 strips 3 x 64 1/2 LOF. (top & bottom strips) Binding - Cut 8 strips 3 x WOF Step 3. CUT AND MAKE THE QUILT BACK. A. Fold the Backing fabric in half across the width matching the cut edges. Press a crease across the fold and open up the panel. Cut along the crease. B. Trim off the selvage edges from each of the two panels. C. Now place both panels RIGHT sides together matching two long sides and pin. Stitch a 1/2 seam along the pinned edges and backstitch at each end. Press the seam allowances open. D. Please set the Quilt Back aside while you construct the Quilt Top Note: Starting with the Center Square, attach each piece in order, 1st through 8th to make the Quilt Center. A. First sew a 6 3/8 x 12 Setting Rectangle on 2 opposite edges of the Center Square. Then sew a 6 3/8 x 24 3/4 Setting Rectangle on the top and bottom of the Center Square. (See the Diagram of the Quilt Center.) B. Before adding the Setting Triangles, fold each triangle in half and lightly press a crease in the center of each long edge. Then fold the Quilt Center in half each direction and lightly press a crease along each fold. C. Next pin the long edge of one Setting Triangle to one side of the Quilt Center, matching the center creases, and pin. The triangle ends will hang over the edges of the Setting Rectangle. D. Now sew the edges together backstitching at each end. Repeat on the opposite side of the Quilt Center. Then sew the other 2 triangles on the top and bottom edges matching the center creases and backstitching at each end. (See the Diagram of the Quilt Center.) E. Gently remove the freezer paper from the WRONG side of the fabric. Note: If the paper doesn t come off easily, just get it wet.
 - Cut 2 strips from the remaining fabric 6 1/2 x LOF.")
6 WINDOW TO THE SOUL HAPI QUILT PAGE 6 Diagram of the Finished Quilt Top Setting Triangle Setting Rectangle Binding Fourth Border Third Border Second Border First Border Center Square Note: Be sure to backstitch as you re sewing the borders and press all seam allowances toward the outside. F. Sew a 5 1/2 x 35 1/2 First Border strip onto the right and left sides of the Quilt Center, backstitching at each end and press. Then sew a 7 x 45 1/2 strip onto the top and bottom edges of the Quilt Center, backstitching at each end and press. G. Next sew a 4 x 48 1/2 Second Border strip onto the right and left sides, and then sew a 5 x 52 1/2 strip onto the top and bottom edges. H. Then sew a 5 x 57 1/2 Third Border strip onto the right and left sides, and then sew a 6 1/2 x 61 1/2 strip onto the top and bottom edges. I. Finally sew a 2 x 68 Fourth Border strip onto the right and left sides, and then sew a 3 x 64 1/2 strip onto the top and bottom edges. Your Quilt Top is complete. Turn it RIGHT side up and press flat. Step 5. QUILT THE LAYERS. A. Lay the Quilt Back open on a large flat surface with the WRONG side facing up. Smooth out any wrinkles. B. Open your batting and center it on top of the Quilt Back. Smooth out any wrinkles. C. Center the Quilt Top on the batting with the RIGHT side up, creating a sandwich with the Quilt Back, batting and Top; smooth wrinkles. D. Starting at the center of the Quilt Top and working out, pin all three layers together, using quilter s safety pins; pin about every 8. E. Now, attach your Machine Quilting Foot to your sewing machine. Set your machine for free-motion quilting by lowering/covering your feed teeth and removing the pressure off your presser foot. F. Working from the center out, free-motion stitch around each of the designs in the pattern on the Center Square. Remove the pins as you approach them. G. Next attach your Walking Foot on your sewing machine. Set the stitch length to a slightly longer setting than normal. Reengage your feed teeth and set the pressure setting back to normal. Working from the inside of the quilt to the outside edges, continue to quilt through the layers by stitching in the ditch* between the Setting Rectangles, Setting Triangles and the Borders. H. After you complete your quilting, lay your quilt on a large, flat surface. Using your ruler rotary mat and rotary cutter, trim the Quilt Back and batting to be even with the Quilt Top. Step 6. CUT AND ATTACH THE BINDING. A. Replace your Walking Foot with your Standard Presser Foot. B. Trim off the selvage edges from each of the Binding strips. Then with the RIGHT sides together, match the short 3 ends of the 8 binding strips and sew them together with a 1/4 seam allowance, backstitching at each end. Press the seam allowances open. C. Next fold this strip in half lengthwise with the WRONG side together. Match the long edges and press a crease along the fold.

7 WINDOW TO THE SOUL HAPI QUILT PAGE 7 D. Now you are ready to sew the binding to the quilt. Begin in the bottom center by placing the raw edges of the strip onto the RIGHT side of the quilt. Pin them in place along the bottom. E. Begin sewing a couple of inches in from the first end and stitch a 3/8 seam stopping 3/8 in from the first corner. Backstitch at each end. Miter the corners Remove the quilt from the sewing machine. To form a neat mitered corner, fold the binding straight up, away from the corner forming a 45 angle. Now fold it straight down even with the next edge to be sewn and pin it in place. Leave the fold on the binding even with the first edge that was sewn. H. Sew the binding on the back to complete the quilt Turn the quilt over so the back is facing up. Flip the binding over from front to back. Line up the folded edge so it just covers the stitching line that attached it to the front. Adjust the mitered corners and pin them in place. Slipstitch* along the inner folded edge. Nice job! Your quilt is complete. You have made a beautiful keepsake. Be sure to add a fabric label to the back of the Quilt, hand stitching it in place to document your name, address, date and any information you may want to include (perhaps a dedication or a name for the Quilt). Future generations will thank you for this. F. Backstitch and begin stitching again at the corner. Sew along the pinned edge, stopping 3/8 in from the next corner and backstitch again. Continue this process to pin, sew and miter the remaining edges and corners. G. Finish the ends of the binding Stop stitching about 4 in from the first end of the binding. Cut the binding so it overlaps the beginning by 1 1/2. Then fold the first end 1/2 back and press. Place the other end over the first and pin it in place. Stitch 3/8 seam across the unstitched edges and backstitch at each end. Note: Once the binding is turned to the other side of the project, the beginning fold will hide the raw edge. I hope you enjoyed creating your own Window to the Soul! If you liked this pattern, please be sure to check out my other pdf patterns like Gumdrop Pillows and Diamond Quilt & Pillow. Happy Sewing! Amy

WINDOW TO THE SOUL GYPSY CARAVAN QUILT
 WINDOW TO THE SOUL GYPSY CARAVAN QUILT I ve remade my Window to the Soul quilt to highlight the rich, warm hues of my Gypsy Caravan fabrics. The stained-glass window motif deepens as it tumbles towards
Cosmetics Case with Vinyl Interior Skill Level: Intermediate
 Cosmetics Case with Vinyl Interior Skill Level: Intermediate Designed By Lindsey Rhodes Sewn By Lindsey Rhodes http://lrstitched.com Use this step by step tutorial to create a roll-up cosmetics case with
Pardon My Garden Quilt
 Pardon My Garden Quilt ~ ~ ~ ~ ~ ~ ~ ~ ~ ~ A classic quilt made up of diamonds looks wonderful in any setting and this one will be a favourite for many years to come. The diamonds are framed by narrow
1 ½ yds or one queen size package Hobbs Heirloom Fusible
 Supply List Fabric Seminole bands Front borders Back borders Backing fabric Binding Batting 6-8 completed Seminole bands 1 yd 1 ¼ yds 3 yds total (see notes) ½ yd 1 ½ yds or one queen size package Hobbs
Please refer to the pack Design Tutorial for direction on how to embroider the blocks and sew them together.
 The Following is a tutorial on how to Back and Bind your Quilt. This is the way to do, however, there are other ways to finish your quilt. If you prefer a different method, do what works for you, it s
Geishas & Ginkgos. About Geishas & Ginkgos BY LONNI ROSSI. Free Pattern Download Available. Barbara Lisa Mari
 Geishas & Ginkgos BY LONNI ROSSI Barbara Lisa Mari Three Geishas Quilts designed by: Lonni Rossi Panel Sizes: 13" x 3 andoverfabrics.com About Geishas & Ginkgos THE GIRLS ARE BACK! Andover Fabrics and
Ambrosia Bag. 2010 Amanda Murphy
 Ambrosia Bag This complimentary bag design features fabrics in the "Ambrosia" collection by Amanda Murphy for Robert Kaufman Fabrics. It is a great way to practice your free-motion quilting! 2010 Amanda
Circles Galore Quilt. Sewing supplies: Approximate size: 60 (152cm)
") Sewing supplies: PFAFF creative 3.0 sewing and embroidery machine PFAFF creative QUILTERS HOOP 200x200 (820940096) PFAFF Extension Table with Adjustable Guide (821031096) PFAFF 0A Standard Foot for IDT
Sewing supplies: PFAFF creative 3.0 sewing and embroidery machine PFAFF creative QUILTERS HOOP 200x200 (820940096) PFAFF Extension Table with Adjustable Guide (821031096) PFAFF 0A Standard Foot for IDT
Edgy Hexagons Quilt THROUGH THE NEEDLE LIVE. BERNINA Through The Needle Live. Written by: Nina McVeigh, BERNINA Educator
 BERNINA Through The Needle Live THROUGH THE NEEDLE LIVE Edgy Hexagons Quilt Written by: Nina McVeigh, BERNINA Educator SUPPLIES 1 Layer Cake Fabrics or an assortment of fat quarters 2 yds Solid 2 yds of
Throw Pillow Cover Instructions
 Throw Pillow Cover Instructions Materials Required: (Fabric listed is for pillows up to 18! x 18!. Can be made to fit any dimensions) 1 yard of medium to heavy weight cotton 1 button (optional) 4 of! elastic
Original Recipe. Dancing Daisies Quilt
 Original Recipe Dancing Daisies Quilt Hi, It's Cathy Victor from "Me and My Mum Quilting" and I'm very pleased and excited to be posting my very first Moda Bake Shop tutorial. This tutorial is for all
Chess on the Steps by Krista Hennebury Vancouver MQG Member. Pattern of the Month. September 2014 For Members of the MQG
 Pattern of the Month September 2014 For Members of the MQG Chess on the Steps by Krista Hennebury Vancouver MQG Member The Modern Quilt Guild s mission is to support and encourage the growth and development
Original Recipe. Clermont Farms Quilted Tote Bag by Glenn Dragone
 Original Recipe Clermont Farms Quilted Tote Bag by Glenn Dragone This Americana themed, multipurpose tote is suitable for the pool, the green market, or a fun day trip. 1 Clermont Farms Jelly Roll by Minick
LONDON JUBILEE AND OLYMPIC CELEBRATION ITEMS BY HILARY GOODING FOR MAKOWER UK
 LONDON JUBILEE AND OLYMPIC CELEBRATION ITEMS BY HILARY GOODING FOR MAKOWER UK 118 Grey s Road, Henley on Thames, Oxon RG9 1QW www.makoweruk.com Email: [email protected] www.andoverfabrics.com LONDON Designed
Emily s Artful Days - Orange Peel Quilt Emily s Artful Days Fabric Requirements: Cutting Directions: black floral blue floral yellow floral
 Quilt Designed by Lucy A. Fazely Finished Quilt Approx. 74 x 82 - Finished Block Size: 8 x 8 Emily s Artful Days fabrics by Exclusively Quilters - Style #4026 Fabric Requirements: Based on 42 wide fabric
Vera Cruz. Vera Cruz fabric collection from Paintbrush Studio Quilt Designed by Pine Tree Country Quilts. 57" x 73"
 Vera Cruz Vera Cruz fabric collection from Paintbrush Studio Quilt Designed by Pine Tree Country Quilts 57" x 73" 901 E. 14th Avenue North Kansas City, MO 64116 (816) 421-2000 www.fabri-quilt.com Quilt
Jinny Beyer Border Prints. Creative Ideas & Tips for Quilters
 Jinny Beyer Border Prints Creative Ideas & Tips for Quilters Border Prints the Jinny Beyer Way W hile living in India in the early 1970s, I became fascinated with block-printed Indian cotton fabrics. These
Simple Party Clutch. Use interfacing and a magnetic snap to turn your favorite fat quarter into a smart little party bag with a convertible strap.
 Simple Party Clutch Use interfacing and a magnetic snap to turn your favorite fat quarter into a smart little party bag with a convertible strap. Finished bag measures 8 wide x 4 ¼ high x ½ deep. Strap
Original Recipe. Sunkissed by Spring by Melissa Corry
 Original Recipe Sunkissed by Spring by Melissa Corry Who is ready for spring??? I can sure say I am. It's me, Melissa Corry and I am so excited to bring you this tutorial. I just loved working with the
Interesting Point Quilt
 The A Quilting Happiness Companion Pattern 2008-2013 Christina Lane The Sometimes Crafter www.thesometimescrafter.com www.quiltinghappiness.com The A Quilting Happiness Companion Pattern Finished Size:
How to Make and Apply Bias Binding by Alisa at Making More with Less (Busy Quilt Mom) for Sew Mama Sew
 for Sew Mama Sew") How to Make and Apply Bias Binding by Alisa at Making More with Less (Busy Quilt Mom) for Sew Mama Sew Bias Binding is an easy way to finish off edges and add interesting detail and colour to your sewing
How to Make and Apply Bias Binding by Alisa at Making More with Less (Busy Quilt Mom) for Sew Mama Sew Bias Binding is an easy way to finish off edges and add interesting detail and colour to your sewing
1 N o t e p a d P o r t f o l i o P a t t e r n
 Mrs. Langley s Notepad Cover Pattern 1 N o t e p a d P o r t f o l i o P a t t e r n Notepad Cover Pattern By The Hip Home Ec Teacher and Tamara Morris Langley Materials needed: Fabric see #1 under sewing
All seam allowances are 1/2 unless otherwise noted. All pattern pieces include the seam allowance. Please read all instructions before beginning.
 This structured bag has lots of pretty detailing. It s large enough to carry all of your essentials as well. Make it in a great patchwork, or stick to a single fabric! All seam allowances are 1/2 unless
This is an original pattern not intended for sale.
 Hi! My name is Sterling LaBosky, owner of Sterling Quilt Company, and I am so excited to be back on the Moda Bake Shop! Quilts are made to be used and loved, and this layer cake friendly quilt makes it
Weighted Pincushion Organizer
 Weighted Pincushion Organizer This sturdy pincushion has plenty of space to store pins and a wool felt strip for your needles. The hanging pocket is a perfect place for storing easily-misplaced tools like
Black Tie. Quilt Designed by Pine Tree Country Quilts. 66" x 66" 901 E. 14th Avenue North Kansas City, MO 64116 (816) 421-2000 www.fabri-quilt.
 421-2000 www.fabri-quilt.") Black Tie Quilt Designed by Pine Tree Country Quilts 66" x 66" 901 E. 14th Avenue North Kansas City, MO 64116 (816) 421-2000 www.fabri-quilt.com Quilt designed by Sue Harvey and Sandy Boobar of Pine Tree
Black Tie Quilt Designed by Pine Tree Country Quilts 66" x 66" 901 E. 14th Avenue North Kansas City, MO 64116 (816) 421-2000 www.fabri-quilt.com Quilt designed by Sue Harvey and Sandy Boobar of Pine Tree
Easter Table Topper. www.amandamurphydesign.blogspot.com. A complimentary design sewn on a Bernina 580e, by Amanda Murphy.
 Easter Table Topper A complimentary design sewn on a Bernina 580e, by Amanda Murphy. www.amandamurphydesign.blogspot.com 2012 Amanda Murphy Feet: Patchwork Foot with Guide #57 Open Embroidery Feet #20
Rosa Quilt. Design by Janice Averill Skill Level: Experienced Quilt Center Block Size (finished): 8" Border Block Size (finished): 15"
: 8 Border Block Size (finished): 15") Design by Janice Averill Skill Level: Experienced Center Block Size (finished): 8" Border Block Size (finished): 15" 1 Approximate Size: 87½" x 102½" Kensington Studio 23632 E 23633 E 23633 H 23633 P 23634
Design by Janice Averill Skill Level: Experienced Center Block Size (finished): 8" Border Block Size (finished): 15" 1 Approximate Size: 87½" x 102½" Kensington Studio 23632 E 23633 E 23633 H 23633 P 23634
Quick n Easy Coin Purse
 Quick n Easy Coin Purse itäxü x VâáàÉÅ dâ Äà Çz 13375 SW Sandridge Drive, Tigard, OR 97223 http://www.valeriecustomquilting.com Quick n Easy Coin Purse This quilted coin purse is very simple to create
Sew Knit Dolly Tees with Ease
 Sew Knit Dolly Tees with Ease A free pattern and tutorial by Carla Hegeman Crim Make a stylish long or short sleeved T-shirt for your favorite dolly! All you need are a few notions and just a bit of knit
Traditional Bias-bound Cheongsam
 FOLKWEAR Traditional Bias-bound Cheongsam While our printed Cheongsam pattern uses facings along the neckline and slit edges, vintage garments often have double rows of bias binding to emphasize the neck,
Red Hot Flash. Cutting Instructions: Sewing Instructions:
 Red Hot Flash Red Hot Fabrications Strips by Blank Quilting Quilt designed by Debby Kratovil for Blank Quilting Block Size: 11-3/8" Quilt Size: 59" x 70-3/8" Materials: One pack of 40 strips (2-1/2" width)
Original Recipe. Simply Modern Quilts by Angela Yosten
 Original Recipe Simply Modern Quilts by Angela Yosten Ingredients: Boy (Route 66) Quilt... 1 Moda Jelly Roll Basics in Milk 1 Authentic Jelly Roll by Sweetwater 3 1/4 yards of coordinating fabric for backing,
Dolman Dress Women s PDF Pattern. Sizes XSmall thru XLarge. www.sewingrabbit.com
 Dolman Dress Women s PDF Pattern Sizes XSmall thru XLarge www.sewingrabbit.com The Dolman Dress Extra large, extra comfy, and extra stylish. The Dolman Dress is perfect for throwing on with your favorite
QUILTS, BLANKETS AND AFGHANS
 QUILTS, BLANKETS AND AFGHANS Community volunteers can help craft blankets, sew quilts or knit/crochet afghans. This project is a wonderful way to provide warmth and comfort for our patients worldwide.
CREATING A SPRING CHICKEN. A creative tutorial brought to you by:
 A creative tutorial brought to you by: SUPPLIES MATERIALS Fabric sizes are approximate. If you are new to sewing, you may want to use larger pieces to make turning curves easier. body fabric 10 x20 beak
Snappy Mani Pouch 2. Designed by Noodlehead. www.noodle-head.com. Featuring. Finished project measures: 8 x 5 x 1
 Snappy Mani Pouch 2 Designed by Noodlehead Featuring www.noodle-head.com Finished project measures: 8 x 5 x 1 Pattern Level: Experienced Intermediate I know the ropes and would like to test my skills!
SINGER Notepad Case. Sew up this simple case to carry your notepad, e-reader, tablet and writing tools in style! Shopping List:
 SINGER Notepad Case Sew up this simple case to carry your notepad, e-reader, tablet and writing tools in style! Shopping List: One fat quarter quilting cotton for exterior of pouch One fat quarter quilting
Back(pack) to School Bag Skill Level: Intermediate
 to School Bag Skill Level: Intermediate") Back(pack) to School Bag Skill Level: Intermediate Designed By Cassie Williams Sewn By Cassie Williams elegantitus.com An intermediate to challenging project, this versatile backpack has everything a grade
Back(pack) to School Bag Skill Level: Intermediate Designed By Cassie Williams Sewn By Cassie Williams elegantitus.com An intermediate to challenging project, this versatile backpack has everything a grade
Pillow is 30" x 20". Quilt is 50" x 70".
 Pillow is 0" x 0". Quilt is 50" x 70". Use ¼" seams and press in the direction of the arrows. Pillow Case is 0" x 0". Quilt is 50" x 70". Note: The templates pages need to be printed on " x 7" paper. Fabric
Interlocking Seasons Quilt Block Tutorial Version 1.1
 Interlocking Seasons Quilt Block Tutorial Version 1.1 This 12.5 x 12.5 block will require 6 different fabrics; 4 for the outer rings, 1 for center ring, and 1 for background. Outer Rings (For each of the
Original Recipe. Original Recipe can be found at www.modabakeshop.com. Hi everyone and thank you so much for checking out my pattern!
 Original Recipe Hi everyone and thank you so much for checking out my pattern! I would like to introduce myself, because I am a newbie here at the Moda Bake Shop. My name is Karen Ackva, and I am a Carolina
Marking Scallop or Waved Edges
 Magic Vine Marking Scallop or Waved Edges Wave Outside Edge These two outside edges are made easily with the help of the Scallop, Wave, and Vine Template from Quilt in a Day. Waved Edge Gentle curves make
SERJEANT-AT-ARMS GOWN
 You will need: 1 2 m of black fabric Key: cut here 2 black cotton 3 sewing needle 4 sewing machine 5 scissors 6 tape measure fold here wrong side of fabric right side of fabric centre point stitching 7
Pattern Co. Monkey Trouble Wall Quilt. Size: 48" x 58"
 .............................................................................................................................................. Pattern Co..........................................................................................
Mystery. God s. Dwelling. the. Banner #3
 Banner #1 O, Banner #2 the of Banner #3 O, the Mystery of God s Dwelling Advent 2013 Fabric Banner instructions These instructions will help worship planners create a banner from fabrics and other materials
Snowmen Tree Skirt Featuring Snow Day, a Shannon Studio Collection Designed and written by Heidi Pridemore
 Intermediate Skill Level Suggested Snowmen Tree Skirt Featuring Snow Day, a Shannon Studio Collection Designed and written by Heidi Pridemore Tree Skirt Approx. Finished Size: 70 diameter This pattern
Heirloom Baby Quilt: A Beginner s Project
 Heirloom Baby Quilt: A Beginner s Project Designed by Sue Pennington Stewart 72 Sew Beautiful 2005 Sew Beautiful Magazine Create an heirloom baby quilt over the course of the next several issues of Sew
Stuffed Fabric Wreath
 Stuffed Fabric Wreath It's a fabulous Fabric Wreath -- stuffed, and full of good old country style! On your front door, this fabric wreath will softly welcome neighbors, friends, and family to your home
SIZE The heart template in this pattern is about 8in x 8 in. Hearts as small as 5 inches are also needed for the tiniest baby.
 of Minnesota A Partnership between Allina Health and The Children s Hospital and Clinics of Minnesota This idea was first developed by the Preemie Project in Iowa (ThePreemieProject.com). The pattern was
Seams to Me Tag File
 Seams to Me Tag File Created by Susan Beck This mixed media tag file is a fun way to organize technique swatches. It makes a great visual reference so you can remember what you ve learned and incorporate
Secret Garden Coat A Sewing Pattern and Tutorial by FooFoo Threads Sizes 6-9 Months through 8
 Secret Garden Coat A Sewing Pattern and Tutorial by FooFoo Threads Sizes 6-9 Months through 8 This retro style coat is modeled after one of my best selling dress patterns, Ruthie s Picnic Dress. The sweet
Q.U.I.L.T.S. 30th Anniversary Block of the Month
 Amish Diamond Block Pieced 12 x 12 finished size The Amish Diamond block is an uneven 9-patch block. The center unit is a square-in-a-square. Alternate Names and History Diamond in the Square A history
Review VIDEO WORKSHEET #3533. Name: Hour:
 #3533 Name: Hour: VIDEO WORKSHEET Review Directions: After watching Sew Cool, answer the following questions. SEWING ESSENTIALS Match the sewing tool to the description. 1. Pins 2. Marking pens 3. Ruler
How to Make A Quick & Easy Tabard or T-Tunic by Vaargard Malorius v1.0
 You will need the following supplies to create a single tabard or t-tunic that hangs approximately to mid-thigh on a person about 6 tall. 2 1/2 yards material 1 Spool of thread that matches material color
Neonatal Quilt Designs Finished Size: 17 x 25 By Wendy Stone. Allover quilt designs: Machine Applique
 Neonatal Quilt Designs Finished Size: 17 x 25 By Wendy Stone Allover quilt designs: 17 x 25 inch piece of fabric sandwich with batting and backing. Hand or machine quilt as desired. This could be a quick
Simple Laptop Sleeve
 You will need the following materials: Fabric of your choice for the exterior Fusible fleece for the interlining Flannel for the lining Simple Laptop Sleeve Each material will be cut into two Main Panels
3 cases in two fat quarters? Yes, it can be done! Here is how!
 3 cases in two fat quarters? Yes, it can be done! Here is how! Materials: 2 fat Quarters 1 piece of interfacing measuring 18 X 22 3-9 multipurpose zippers (plastic teeth) invisible ink marker Step 1: Iron
Happy Scrappy Houses!
 Quiltville Custom Quilting http://www.quiltville.com Happy Scrappy Houses! These fun house blocks finish at 7.5" square (before triangle sashings) and are made completely from 2" strips,bricks and scrap
18 U. S. C. 707. 4-H Apparel and Textiles SEWING. 4-H Member Project Guide and Practice Projects. Junior Level
 COOPERATIVE EXTENSION SERVICE UNIVERSITY OF KENTUCKY COLLEGE OF AGRICULTURE, LEXINGTON, KY, 40546 4JD-01PB 4-H Apparel and Textiles SEWING 4-H Member Project Guide and Practice Projects Junior Level State
Just Kisses. Designed by Robert Kaufman Fabrics www.robertkaufman.com. Featuring
 Just Kisses GRND GRDENS Designed by Robert Kaufman Fabrics www.robertkaufman.com Featuring Finished quilt measures: 70 x 80 Quilt shown in SPRING colorstory. For alternate colorstories see pages 9-13.
How to Build Your Own CornHole Game
 How to Build Your Own CornHole Game DIMENSIONS Here is a diagram with the basic measurements for the Cornhole board game. SUPPLIES 1/2 thick sheet of plywood one 4 x4 or two 2 x4 s 8 long 2 4 s (4) 4 1/2
Original Recipe. Original Recipe can be found at www.modabakeshop.com
 Original Recipe Hi Everyone! I'm Rhonda from Patchwork Sampler and I'm thrilled to be sharing my first Moda Bake Shop project with you. This is an easy project that's perfect for a baby quilt, throw or
Ruffle Towel. Project Needs & Notes
 Ruffle Towel Decorate the heart of your home with a delicious dish towel adorned in ruffled fabric! Bright patterns and gorgeous embroidery give this fun kitchen towel extra personality and pizzazz. Project
The Tank Infant/Toddler Sizes
 The Tank Infant/Toddler Sizes Copyright 2011 Fabrics: Cotton knits and cotton blend knits Yardage: ¾ yard of print or solid interlock, ribbed knit or jersey for body of tees ribbing (cotton/lycra or cotton/spandex)
Sewing and Textiles. Basic Supplies: Advanced Project Supplies: Needed: Optional:
 Sewing and Textiles November 2008 FL/ST/Construction/2008-101pr Project Skill: Organizing sewing tools Life Skill: Learning to learn and decision making Level: 1A Basic Sewing Supplies Debra Proctor, M.S.,
The Jeans Collection
 The Jeans Collection Video 4 - Cutting out the panels The tools that you will need to cut out your cloth: 1. Commercial jeans pattern 1. Measurement sheet 2. Tailors chalk. 3. Tape measure 4. Pattern cutting
Time for Tea Collection
 Time for Tea Collection F70264 Time for Tea Collection Project Instructions Apron Luncheon Mats & Napkins Coaster Drip Catcher Tea Cozy Click on Photo for Project Instructions Frame & Fabric Mat Tea Pot
Free Instructions. Finished Cape Size: Fits sizes 2 6, but may be modified as desired to fit other sizes. Fabric: Handy Notions: Instructions:
 Free Instructions Super Hero Cape Send hope, faith, and love to children living in shelters across the country. Capes for Kids represents hope. Since every cape is unique and handmade with love, each child
COLLARS TERMS TO KNOW
 CT-LMH.185 COLLARS Collars are an important part of a garment because they serve as the frame for your face. Since we tend to focus on the face, the styling and application of a collar is important to
Embroidered Mason Jar Wrap
 Embroidered Mason Jar Wrap Light up the night with an embroidered organza Mason jar wrap! A string of battery-operated fairy lights shine through this beautiful organza wrap to make a beautiful light.
Original Recipe. Ingredients: Original Recipe can be found at www.modabakeshop.com
 Original Recipe I've had this idea running around in my head for a few years now and I'm just getting around to making a Valentine Sweetheart Mailbox for the back of my chairs. I thought it would be a
Sewing Technique: Patch Pockets
 Sewing Technique: Patch Pockets Two styles of pockets are most commonly used in clothing construction, patch pockets and inside pockets. Patch pockets are shaped pieces of fabric that are finished on all
Original Recipe. Cathedral Window Baby Playmat by Amy Gibson
 Original Recipe Cathedral Window Baby Playmat by Amy Gibson Hi! I'm Amy Gibson of Stitchery Dickory Dock {stitcherydickorydock.com} and I'm so excited to share a recipe with you today! If you're like me,
Santa Hat Purse. 'Tis the season to be stylish with this Santa Hat Purse!
 Santa Hat Purse 'Tis the season to be stylish with this Santa Hat Purse! The bottom section of a Santa hat is turned upside down to become the body of this purse. The point, with the pom-pom, becomes the
Simply Eclectic. Cutting (Read all instructions and make a test block before cutting all the fabric.)
") Simply Eclectic Quilt design and pattern by Sharon McConnell of, featuring Hoffman Fabrics Simply Eclectic signature collection designed by KariAnne Wood of Thistlewood Farms. Copyright 2015. Finished
Simply Eclectic Quilt design and pattern by Sharon McConnell of, featuring Hoffman Fabrics Simply Eclectic signature collection designed by KariAnne Wood of Thistlewood Farms. Copyright 2015. Finished
Stitch a "Star-Struck" Quilt!
 Quiltville Custom Quilting http://quiltville.com Stitch a "Star-Struck" Quilt! This quilt is Sew Fun and Sew Easy to whip up in co-ordinated fabrics, or in scraps! This plaid version was made using a variety
T-Shirt Tote Bag. Project Needs & Notes
 T-Shirt Tote Bag A simple T-shirt gets a big makeover with this tote bag tutorial! In just a few steps, you can rework an old, unused tee into a terrific carry-all -- perfect for farmers markets, or a
3 Pocket Purse by Sherry Titzer - http://www.atimetostitch.com
 3 Pocket Purse by Sherry Titzer - http://www.atimetostitch.com Purse size - 10 H x 12 ½ W (3 1/2 wide flat bottom) See text file for supply list & cutting instructions Both Front curved side pockets designs
2015 BLOCK OF THE MONTH 12 ½ x 12 ½
 2015 BLOCK OF THE MONTH 12 ½ x 12 ½ January- Orphan Blocks (Check your stash and pull out any unused blocks.) Any Size Any Color (These will be donated to the Charity Quilts) February- Dark Blue, Medium
Oh-Oh the Owl Cushion. Oh-Oh the Owl Cushion Softie. Page 1 2009 One Red Robin/Jhoanna Monte Aranez. All rights reserved.
 Oh-Oh the Owl Cushion Softie Page 1 By Jhoanna Monte Aranez Finished Size Approximately 37cm/14.6 tall Oh-Oh the Owl Cushion Materials Plain or printed cotton or linen blend fabric measuring 48cm/19 wide
DIY Advanced Dry Bags
 DIY Advanced Dry Bags You can make dry bags to fit specific items, such as sleep pads, chairs, etc., by taking a few measurements and making allowances for seams, the bottom pleat and the roll-down closure.
How To Work With Beads. By Rowan
 R O W A N How To Work With Beads By Rowan HOW TO WORK WITH BEADS Adding beads to a knitted or crocheted design gives it a really special touch especially when the beads added are as stunning as those in
Alofi, Niue 2007. Dinghy Chaps. by Marsha Petersen. Edited by Jim Grant & Cassie Jarrard
 Alofi, Niue 2007 Dinghy Chaps by Marsha Petersen Edited by Jim Grant & Cassie Jarrard Dinghy Chaps Assembly Instructions by Marsha Petersen Materials Needed: Sunbrella Outdoor Fabric Phifertex (vinyl mesh
CLASSIC QUILTS Using the AccuQuilt GO!
 Ready, Set, GO! LSSI QUILTS Using the ccuquilt GO! R s inside visit us @ accuquilt.com apple core-6 1 4" apple core to GO! QUILT finished size 41" x 50" apple core-6 1 4" 55036 Use 6" x 12" mat (55112)
Tour of the Pantograph Planner
 (714) 989-6891 Instructions for PANTOGRAPH PLANNER The Pantograph Planner helps to free the quilter from the frustrations of positioning the rows for edge to edge quilting. This document provides step
Camisole & Underwear or Tankini Swimsuit
 Camisole & Underwear or Tankini Swimsuit For 18 dolls such as Springfield Collection or American Girl From http://springfielddolls.blogspot.com/ Supplies Scraps of white fabric or 1 fat-quarter Matching
KNIT MITTENS PATTERN CHART (for Kids and Teens) Knit on 2 needles with the thumbs on the sides (Provided to Knitting4Peace by Carrie Epps)
 Knit on 2 needles with the thumbs on the sides (Provided to Knitting4Peace by Carrie Epps)") KNIT MITTENS PATTERN CHART (for Kids and Teens) Knit on 2 needles with the thumbs on the sides (Provided to Knitting4Peace by Carrie Epps) SIZES: (It may be helpful to highlight the size mitten you are
KNIT MITTENS PATTERN CHART (for Kids and Teens) Knit on 2 needles with the thumbs on the sides (Provided to Knitting4Peace by Carrie Epps) SIZES: (It may be helpful to highlight the size mitten you are
Original Recipe. Original Recipe can be found at www.modabakeshop.com
 Original Recipe Hi everyone, my name is Pauline Francis and I blog over at Quilt n Queen. I'm happy to be back to share with you my second recipe for the Moda Bake Shop. This recipe is super fast and easy
Original Recipe. Oopsie the Octopus by Melanie Hurlston
 Original Recipe Oopsie the Octopus by Melanie Hurlston G'day all! So nice to be here with you, all the way from Australia, on the Moda Bake Shop! My name is Melanie Hurlston of Melly & Me and I would love
Star Cakes Quilt Pattern
 Star akes Quilt Pattern Shortcut Pattern Quilt enter Use ¼ seams and press as arrows indicate throughout. With right sides facing, layer a Fabric B square with a Fabric A square. Using the reative Grids
WORLD KITCHEN OLFA OMBRE TABLE RUNNER
 Page 1 of 8 WORLD KITCHEN OLFA OMBRE TABLE RUNNER Jun 2, 2015 Varied shades of aqua and subtle shifts in whites and creams add a playful, yet sophisticated quality to this table runner, Patty Sloniger.
MINI ELECTRIC SEWING MACHINE OPERATION MANUAL
 MINI ELECTRIC SEWING MACHINE OPERATION MANUAL 1 Parts & Accessories Takeup Lever(D) Spindle(C) Spool(E) MAIN UNIT Bobbin Holder(V) Bobbin winder Spool(T) Needle Clamp Screw(O) Adjusting Screw(Q) Needle
Note. One - point Advice. To begin. Basic working method and markings. Fold along these lines. The printed surface should be
 Note To begin Basic working method and markings Tools and materials needed -Ruler - scissors - blade cutter or "Exacto-knife" - awl or other pointed tool (for making a folding crease) - felt pen - pin
2014 Cherry Guidry for Benartex, LLC THE QUILT SHOWN IS A DIGITAL REPRESENTATION. ACTUAL FABRIC REPEATS WILL VARY FROM DESIGN SHOWN.
 2014 Cherry Guidry for Benartex, LLC What a fun way to celebrate the season - a whimsical panel surrounded by Frosty snowball blocks! It s a bright and happy addition to your holidays. Uses Benartex s
Per fection star ts here ṬM. Sewing. My Passion. per formance 5.2
 Per fection star ts here ṬM Sewing. My Passion. per formance 5.2 per formance 5.2 Through my passion for sewing I reveal my true self. Beautiful fabrics inspire me to let my imagination run free. My creations
PAPER CRAFT. Assembly Instructions. Assembly instructions: Fifteen A4-sized sheets. Paper craft: Sixteen A4-sized sheets with 174 parts in all
 PAPER CRAFT Assembly Instructions Thank you for downloading the "VMAX" paper craft model. By simply following this manual while referring to the names and numbers shown on the parts sheets, you can assemble
Rowley project list: Contemporary Layered Ripplefold Window Treatment
 Rowley project list: Contemporary Layered Ripplefold Window Treatment Ripplefold panels are gaining popularity in the residential market. This style of panel takes less fabric length than a traditional