Quick Installation Guide
|
|
|
- Reynard Carr
- 8 years ago
- Views:
Transcription
1
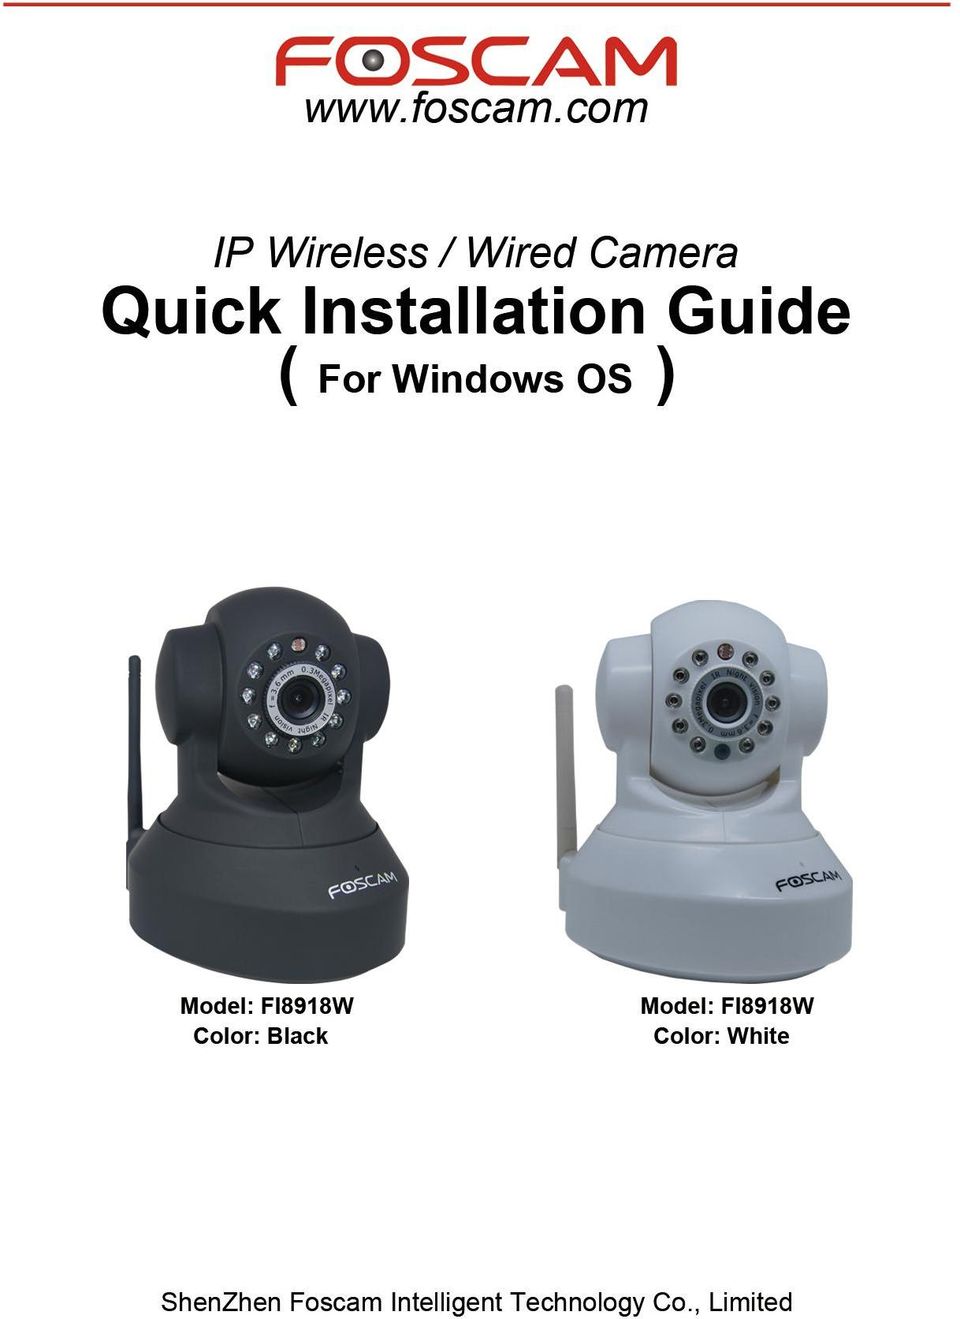
2 Packing List Quick Installation Guide FI8918W Quick Installation Guide 1) IP CAMERA X 1 2) Wi-Fi Antenna (only available for wireless model) 3) DC Power Supply X 1 4) Network Cable X 1 5) Mounting bracket 1 6) CD X 1 (Include user manual IP camera tool) 7) Quick Installation Guide X 1 Quick Installation Guide Flow Chart Hardware Installation Software Installation Login the camera Wireless LAN Settings DDNS Service Settings 1 Hardware Installation (1) Open the package
 Open the package www.")
3 Figure 1.0 (2) Connect the Antenna. Screw the antenna to the back of the camera, make it attached well. Figure 1.1 (3) Plug the network cable and power. Use network cable connects with the camera and your router. Plug in the power. The network light will blink and the camera will pan/tilt. Power light will turn on too. Figure

4 2 Software Installation Quick Installation Guide FI8918W Put the small CD in your CD driver of your computer and find the folder For Windows, open it and choose IP Camera Tool. Double click IPCamSetup.exe and install the software as instruction. Figure 1.3 Only click Next, you will complete the software installation. Figure

5 Figure 1.5 You can find the icon on the desktop after you install the IP camera tool. 3 Login the camera Dbclick the IP Camera Tool and you could see the following picture. Figure 1.6 The IP camera tool could find the cam s IP automatically after you plug the network cable. If not, Please make sure that DHCP is enabled in your router. Don t enable MAC address filter. Or disable firewall or antivirus on your computer

6 to try. Dbclick the IP address on the IP camera tool and you will enter the login UI. Figure 1.7 Note: If you use IE browser, please choose the first login mode (ActiveX Mode) to login. If you use other browsers, such as Firefox, safari or Google chrome, Please choose the second login mode (Server Push Mode) to login. You can see living video after click login. Figure 1.8 If you could not see living video, Please make sure allow the activex running when it prompts you. (details: see user manual)

7 If you only see a black screen with a red cross in the center, Please change a port number to try, do not use port 80. Use port 85, 8005.etc. Or shut down firewall or anti-virus software on your computer to try again. 4 Wireless LAN Settings (1) Please choose For Administrator and click Wireless LAN Settings. Then choose Using Wireless LAN. Click scan button and the camera will detect WIFI device around it. It could also find your router and show it in the list. (Figure 1.9) If the camera could not find some WIFI device, please click the scan button again. Make sure that the time between the first scan and the second is more than 1~2 minute. Figure 1.9 (2) Click the SSID of your router in the list, the corresponding information (SSID & Encryption) will be filled in the following boxes automatically. You only need fill in share key. Make sure that SSID, Encryption and share key you filled in for the camera are exactly the same with your router. Figure
 If the camera could not find some WIFI device, please click the scan button again. Make sure that the time between the first scan and the second is more than 1~2 minute. Figure 1.")
8 Figure 2.1 Figure 2.2 Please click Submit after finish these settings, the camera will reboot. Plug out the network cable after you click submit about 10 seconds. The camera will work on WIFI after reboot. Note: If your camera could not connect WIFI, please see FAQ in user manual. 5 DDNS Service Settings

9 5.1 Static IP user Quick Installation Guide FI8918W Static IP users need not set DDNS service settings for remote access. When finished the connection of Camera in LAN and port forwarding. (Figure 3.6/3.7) You can access the camera directly from Internet by the WAN IP and port number. There are two ways to obtain your WAN IP. Obtain the WAN IP from Website Please enter these strings in your browser: webpage at this address will show you the current WAN IP. Figure 2.3 Obtain the WAN IP address from the router You can find the WAN IP in your router. Normally, it is in system status. Take the WRT54G router of LINKSYS for example, 1) Obtain the IP address of the router(lan gateway address),user name and password for login the router from the network administrator, 2) Enter the LAN IP address of the router (LINKSYS WRT54G, such as: default LAN IP is ) in the address bar of the IE to login the router; Open the Status page to find out the WAN address of the router. In this example, the address is Access the IP Camera from the Internet You can access the IP Camera from the Internet. (remote access) Enter WAN IP address and port number in IE browser or other browsers you use. For example,

10 :85 Note: Make sure the Port mapping is success. You can do port mapping by two ways. 1) Enter setting page of the router which camera connect with to enable UPNP function. Then login the camera as administrator, choose UPnP Settings to enable UPNP and make sure the state is UPnP success. 2) Do port forwarding manually. (details: Figure 3.6/3.7) If your router has Virtual server, it is used to do port mapping. Please add the camera s LAN IP and port which you set in basic network settings to the Virtual map list. Note: If you plug the camera in a router, it will have dynamic IP address and you need set DDNS service settings to view it remotely. 5.2 How to do DDNS Service Settings (For dynamic IP user) (1) Please first visit to get an account. Choose Sign up FREE to get a free account. Next, choose Sign Up under free. Figure

11 Figure 2.5 Please set as the following picture. Figure 2.6 Then choose Add To Cart

12 Figure 2.7 Set the following information as the picture below. Figure 2.8 The website will send you an to your mailbox just set

13 Figure 2.9 Please click the link in your to activate your account. Or copy the link and paste it to IE or other browser you use to activate the account. Make sure that your account was activated or DDNS settings will be failed. Figure 3.0 You will see the following picture. Click Activate services>>

14 Figure 3.1 All the settings are finished until you see the following picture. (Figure 3.2) You can see your host name in the list. Please remember the host name, user name and password; they are needed when you set DDNS service settings of your camera. Figure 3.2 (2) Basic Network Settings We need set a static IP for the camera when do DDNS service settings. Login your camera and set basic network settings as the picture below

15 Figure 3.3 Here make sure that your camera is in the same subnet as your router. In other words, keep the first three sections the same with your router or your computer. Gateway is your router s LAN IP. You can find DNS server in your router, if you don t know the DNS server; you can also find it in local area connection of your computer. (details: see user manual Basic network settings) Normally, it contains your computer s LAN IP, gateway, DNS server. Please click submit after finish these settings, the camera will reboot. (3) DDNS service settings Please set DDNS service settings as follows. Use the DDNS domain name you get from the dyndns website. Figure 3.4 Please click submit after fill in all the information. The camera will reboot. Please login in the camera again to check if DDNS settings is succeed
 DDNS service settings Please set DDNS service settings as follows. Use the DDNS domain name you get from the dyndns website. Figure 3.4 Please click submit after fill in all the information.")
16 Figure 3.5 (4) How to do port forwarding. Login your router; find the right place to do port forwarding. Here use a Linksys router for example. You can do single port forwarding. Set as the following picture. (Figure 3.3) Figure 3.6 You can also choose port range forwarding. In order to forward the port successfully, we recommend you can set both of the start port and end port as the same port number. Add the camera s LAN IP and port (Figure 3.3) in the list of port forwarding page

17 Figure 3.7 Please do not forget to save these settings when you finish them. (5) After finish all these settings above, you can use DDNS domain name and port number to login your camera at any place. For example, use strings to login the camera. Here foscamipcamera.dyndns.org is the DDNS Host, 8100 is camera s port. Figure

18 Conclusion Other detail settings, please consult user manual. Quick Installation Guide FI8918W

19
20 Quick Installation Guide-For MAC users Packing List 1) IP CAMERA X 1 2) Wi-Fi Antenna (only available for wireless model) 3) DC Power Supply X 1 4) Network Cable X 1 5) Mounting bracket 1 6) CD X 1 (Include user manual IP camera tool) 7) Quick Installation Guide X 1 Quick Installation Guide Flow Chart Hardware Installation Software Installation Login the camera Wireless LAN Settings DDNS Service Settings 1 Hardware Installation (1) Open the package
 Open the package www.foscam.")
21 Figure 1.0 (2) Connect the Antenna. Screw the antenna to the back of the camera, make it attached well. Figure 1.1 (3) Plug the network cable and power. Use network cable connects with the camera and your router. Plug in the power. The network light will blink and the camera will pan/tilt. Power light will turn on too. Figure
22 2 Software Installation Quick Installation Guide FI8918W Please put the small CD in your CD driver of your laptop and find the folder For MAC, then open the folder IP Camera Tool. Copy the IP camera tool to your MAC and you can use the tool. 3 Login the camera Dbclick the IP Camera Tool and you could see the following picture. Figure 1.3 The IP camera tool could find the cam s IP automatically after you plug the network cable. If not, Please make sure that DHCP is enabled in your router. Don t enable MAC address filter. Or disable firewall or antivirus to try again. Dbclick the IP address on the IP camera tool and you will enter the login UI
23 Figure 1.4 Fill in user name and password and choose the second login. Figure 1.5 The browser will prompt you enter the camera s user name and password. Please fill in admin and choose Log in. You can see the device status
24 Figure 1.6 Click Live Video. You can see living video. 4 Wireless LAN Settings Figure 1.7 (1) Please choose Device Management and click Wireless LAN Settings. Then choose Using Wireless LAN. Click Scan button and the camera will detect WIFI device around it. It could also find your router and show it in the list. (Figure 1.9)
25 Figure 1.8 If the camera could not find some WIFI device, please click the scan button again. Make sure that the time between the first scan and the second scan is more than 1~2 minute. Figure 1.9 (2) Click the SSID of your router in the list, the corresponding information (SSID & Encryption) will be filled in the following boxes automatically. You only need fill in share key. Figure
26 Make sure that SSID, Encryption and share key are exactly the same with your router. Figure 2.1 Figure 2.2 Please click Submit after finish these settings, the camera will reboot
27 Plug out the network cable after you click submit about 10 seconds. The camera will work on WIFI after reboot. Note: If your camera could not connect WIFI, please see FAQ in user manual. 5 DDNS Service Settings 5.1 Static IP user Static IP users need not set DDNS service settings for remote access. When finished the connection of camera in LAN and port forwarding. (Figure 3.6/3.7) You can access the camera directly from Internet by the WAN IP and port number. There are two ways to obtain your WAN IP. Obtain the WAN IP from Website Please enter these strings in your browser: webpage at this address will show you the current WAN IP. Figure 2.3 Obtain the WAN IP address from the router You can find the WAN IP in your router. Normally, it is in system status. Take the WRT54G router of LINKSYS for example, 1) Obtain the IP address of the router(lan gateway address),user name and password for login the router from the network administrator, 2) Enter the LAN IP address of the router (LINKSYS WRT54G, such as: default LAN IP is ) in the address bar of the IE to login the router; Open the Status page to find out the WAN address of the router. In this example, the address is Access the IP Camera from the Internet You can access the IP Camera from the Internet. (remote access) Enter WAN IP address and port number in the browser to login the camera. For example: :
28 Note: Make sure the Port mapping is success. You can do port mapping by two ways. 1) Enter setting page of the router which camera connect with to enable UPNP function. Then login the camera as administrator, choose UPnP Settings to enable UPNP and make sure the state is UPnP success. 2) Do port forwarding manually. (details: Figure 3.6/3.7) If your router has Virtual server, it is used to do port mapping. Please add the camera s LAN IP and port which you set in basic network settings to the Virtual map list. Note: If you plug the camera in a router, the camera will have dynamic IP address, you need set DDNS service settings to view it remotely. 5.2 How to set DDNS Service Settings (For dynamic IP user) (1) Please first visit to get an account. Choose Sign up FREE to get a free account. Next, choose Sign Up under free. Figure
29 Figure 2.5 Please set as the following picture. Figure 2.6 Then choose Add To Cart
30 Figure 2.7 Set the following information as the picture below. Figure 2.8 The website will send you an to your mailbox just set
31 Figure 2.9 Please click the link in your to activate your account. Or copy the link and paste it to the browser to activate the account. Make sure that your account was activated or DDNS settings will be failed. Figure 3.0 You will see the following picture. Click Activate services>>
32 Figure 3.1 All the settings are finished until you see the following picture. (Figure 3.2) You can see your host name in the list. Please remember the host name, user name and password; they are needed when you set DDNS service settings of your camera. Figure 3.2 (2) Basic Network Settings
33 We need set a static IP for the camera when do DDNS service settings. Login your camera and set basic network settings as the picture below. Figure 3.3 Here make sure that your camera is in the same subnet as your router. In other words, keep the first three sections the same with your router or your computer. Gateway is your router s LAN IP. You can find DNS server in your router, if you don t know the DNS server; you can also find it in local area connection of your computer. (details: see user manual Basic network settings) Normally, it contains your computer s LAN IP, gateway, DNS server. Please click submit after finish these settings, the camera will reboot. (3) DDNS service settings Please set DDNS service settings as follows. Use the DDNS domain name you get from the dyndns website. Figure 3.4 Please click submit after fill in all the information. The camera will reboot. Please login in the camera again to check if DDNS settings is succeed
34 Figure 3.5 (4) How to do port forwarding. Login your router; find the right place to do port forwarding. Here use a Linksys router for example. You can do single port forwarding. Set as the following picture. (Figure 3.6) Figure 3.6 You can also choose port range forwarding. In order to forward the port successfully, we recommend you can set both of the start port and end port as the same port number. Add the camera s LAN IP and port (Figure 3.3) in the list of port forwarding page
35 Figure 3.7 Please do not forget to save these settings when you finish them. (5) After finish all these settings above, you can use DDNS domain name and port number to login your camera at any place. For example, use strings to login the camera. Here foscamipcamera.dyndns.org is the DDNS Host, 8100 is camera s port. Conclusion Figure 3.8 Other detail settings, please consult user manual
36 Ser i al NO. Model : ShenZhen Resul t sof Mai nt enance I nt el l i genttechnol ogyco., Lt d Room 112, T3BBui l di ng, ShenZhenSof t war epar k, Hi ghtec hi ndpar k, Nans handi s t r i c t Tel : , Fax : Emai l :s al os c am. c om Webs i t e:www. f os c am. c om ShenZhenFoscam I nt el l i genttecnol ogyco., Lt d Cus t omeraddr es s : Fax : Tel ephone: Us ername: Us ercompany : ONEYEARLI MI TEDWARRANTY Fai l ur econdi t i ons Dat eofpur c has e: Mai nt ai ndat e Remar k : Not e:pl eas ef i l l t hec ar dandof f eri twi t hpr oduc t si fguar ant eeofr epai r
Quick Installation Guide
 IP Wireless / Wired Camera Quick Installation Guide (For Windows OS) Model:FI8908W Color: Black Model:FI8908W Color: White ShenZhen Foscam Intelligent Technology Co., Ltd Packing List FI8908W Quick Installation
Quick Installation Guide
 Packing List Quick Installation Guide Quick Installation Guide 1) IP CAMERA X 1 2) Wi-Fi Antenna (only available for wireless model) 3) DC Power Supply X 1 4) Network Cable X 1 5) Mounting bracket 1 6)
Quick Installation Guide-For MAC users
 Quick Installation Guide-For MAC users Packing List 1) IP CAMERA X 1 2) Wi-Fi Antenna (only available for wireless model) 3) DC Power Supply X 1 4) Network Cable X 1 5) Mounting bracket 1 6) CD X 1 (Include
Quick Installation Guide For Mac users
 Quick Installation Guide For Mac users Packing List 1) IP CAMERA X 1 2) Wi-Fi Antenna (only available for wireless model) 3) DC Power Supply X 1 4) Network Cable X 1 5) Mounting bracket 1 6) CD X 1 (Include
Quick Installation Guide
 IP Wireless / Wired Camera Quick Installation Guide (For Mac OS) Model:FI8908W Color: Black Model:FI8908W Color: White ShenZhen Foscam Intelligent Technology Co., Ltd Quick Installation Guide-For MAC users
Quick Installation Guide
 V2.01 IP Wired / Wireless Camera Quick Installation Guide (For Windows OS) Model: FI8602/FI8602W ShenZhen Foscam Intelligent Technology Co., Ltd Packing List Quick Installation Guide 1) IP CAMERA X 1 2)
Quick Installation Guide
 V46.01 Model: FI8918W Quick Installation Guide Indoor Pan/Tilt Wireless IP Camera Black White For Windows OS ------- Page 1 For MAC OS ------- Page 11 ShenZhen Foscam Intelligent Technology Co., Ltd Quick
Quick Installation Guide
 V48.01 Model: FI8919W Quick Installation Guide Outdoor Pan/Tilt Wireless IP Camera For Windows OS ------- Page 1 For MAC OS ------- Page 15 ShenZhen Foscam Intelligent Technology Co., Ltd Quick Installation
Quick Installation Guide
 V2.01 Model: FI9821W Quick Installation Guide Indoor HD Pan/Tilt Wireless IP Camera Black White For Windows OS ------- Page 1 For MAC OS ------- Page 16 ShenZhen Foscam Intelligent Technology Co., Ltd
Quick Installation Guide
 V2.01 Wired Camera Quick Installation Guide (For Windows OS) FI8620 ShenZhen Foscam Intelligent Technology Co., Ltd Packing List Quick Installation Guide FI8620 Quick Installation Guide 1) IP CAMERA X
FI8910W Quick Installation Guide. Indoor MJPEG Pan/Tilt Wireless IP Camera
 Model: FI8910W Quick Installation Guide (For Windows OS) (For MAC OS please go to page 17) Indoor MJPEG Pan/Tilt Wireless IP Camera Black White Package Contents IP Camera FI8910W with IR-Cut.x 1 DC Power
Quick Installation Guide
 Quick Installation Guide (For Windows & Mac OS) Outdoor Wireless IP Camera Package Contents V1.1 IP Camera Power Adapter Resource CD Ethernet Cable Mounting Bracket(except FI8919) Wi-Fi Antenna Quick Installation
Quick Installation Guide
 Wired/Wireless IP Camera Quick Installation Guide (IE Browser) Model: APM-J803-WS Black White Shenzhen Apexis Electronic Co., Ltd. Step 1: Hardware Installation. 1. Install the Wi-Fi antenna. 2. Plug the
Quick Installation Guide
 Model: FI8905E Quick Installation Guide Ourdoor POE Network Camera For Windows OS ------- Page 1 For MAC OS ------- Page 14 ShenZhen Foscam Intelligent Technology Co., Ltd Quick Installation Guide - For
Wireless IP Camera. Quick Installation Guide
 Wireless IP Camera Quick Installation Guide 1 Packing List IP Camera X1 DC Power Supply X1 CD X1 Certificate of Quality X1 Warranty Card X1 Mounting bracket X1 Mounting screw X1 Key Features 1.720P HD
CONTENTS. 1. Outline of how to use.1 2. How to setup each step...1
 CONTENTS 1. Outline of how to use.1 2. How to setup each step...1 2.1 Connect your IP Camera to the LAN..1 2.2 Install the following software before view video.....2 2.3 Basic configuration setting...2
 1 I have forgotten the administrator username and/or password. To reset the administrator username and password, Press and hold down the RESET BUTTON for 5 seconds. Release the power button and the username
Quick Installation Guide
 Wired/Wireless IP Camera Quick Installation Guide Model: AJ-C2WA-C118 0 Step 1: Hardware Installation 1. Install the Wi-Fi antenna. 2. Plug the power adaptor into camera. 3. Plug the network cable into
7 6.2 Windows Vista / Windows 7. 10 8.2 IP Address Syntax. 12 9.2 Mobile Port. 13 10.2 Windows Vista / Windows 7. 17 13.2 Apply Rules To Your Device
 TABLE OF CONTENTS ADDRESS CHECKLIST 3 INTRODUCTION 4 WHAT IS PORT FORWARDING? 4 PROCEDURE OVERVIEW 5 PHYSICAL CONNECTION 6 FIND YOUR ROUTER S LOCAL NETWORK IP ADDRESS 7 6.1 Windows XP 7 6.2 Windows Vista
Network Setup Guide. 1 Glossary. 2 Operation. 1.1 Static IP. 1.2 Point-to-Point Protocol over Ethernet (PPPoE)
") Network Setup Guide 1 Glossary 1.1 Static IP Computers are communicated and recognized by their own unique IP addresses over the Internet. Static IP provided by your ISP (Internet Service Provider) means
Network Setup Guide 1 Glossary 1.1 Static IP Computers are communicated and recognized by their own unique IP addresses over the Internet. Static IP provided by your ISP (Internet Service Provider) means
Wifi Pan/Tilt IP Camera User Manual
 Wifi Pan/Tilt IP Camera User Manual Rev. 3.0 Software Version 3.00 May. 25 th.2009 Table of Contents 1. PRODUCT VIEWS...3 1.1. PRONT PANEL...3 1.2. BACK PANEL...3 1.3. ACCESSORIES...4 2. SETUP AND STARTUP...5
Steltronic Focus. Main Desk Internet connection
 Steltronic Focus Main Desk Steltronic S.p.A. Via Artigianale 34, 25082 Botticino Sera Brescia - Italy Tel: +39 030 2190811 fax: +39 030 2190798 Service: + 39 030 2190830 http: www.steltronic.com Service:
Third Party Domain Name Settings
 Validity Queries: Check the validity of embedded domain name. Now you can use http:// Domain name + HTTP Port to access the camera via internet. Take hostname camera.myfoscam.org and HTTP Port no. 88 for
MJPEG INDOOR SERIES B E F OR E Y OU B E GIN. WiFi indoor IP Camera
 MJPEG INDOOR SERIES WiFi indoor IP Camera B E F OR E Y OU B E GIN Please unpack the box carefully and identify that all the parts are present. The Camera is suitable for indoor use. Check the voltage of
Connecting EWS using DDNS
 Application Note 013 a Visual Plus Corporation Company Connecting EWS using DDNS ver.1.0 This application note explains how to establish communication between PROS and EWS over internet, in case EWS is
NIGHT VISION & REMOTE PAN / TILT ROTATE/ TWO WAY AUDIO
 Model: FI8908/FI8908W IP Wireless / Wired Camera NIGHT VISION & REMOTE PAN / TILT ROTATE/ TWO WAY AUDIO User Manual Color: Black Color: White CONTENTS 1 WELCOME...1 1.1 Features...1 1.2 Packing List...2
From a Finder window choose Applications (shown circled in red) and then double click the Tether icon (shown circled in green).
 and then double click the Tether icon (shown circled in green).") From a Finder window choose Applications (shown circled in red) and then double click the Tether icon (shown circled in green). You will be presented with a dialog box asking for you to enter an ad-hoc
From a Finder window choose Applications (shown circled in red) and then double click the Tether icon (shown circled in green). You will be presented with a dialog box asking for you to enter an ad-hoc
IP Wireless / Wired Camera WATERPROOF. User Manual
 IP Wireless / Wired Camera WATERPROOF User Manual Model 1 Model 2 Model 3 CONTENTS 1 WELCOME...3 1.1 FEATURES... 3 1.2 PACKING LIST... 3 1.3 PRODUCT VIEWS... 4 1.4 PC SYSTEM REQUIREMENTS... 5 1.5 HARDWARE
SETTING UP REMOTE ACCESS FOR Q-SEE DVR SYSTEMS MODEL NUMBER: QC40198
 Accessing the DVR from a Computer Attached to the Same Router: If you are only going to access the DVR from a computer that is attached to the same router as the DVR you only need to setup the information
How to Remotely Access Hikvision Devices User Manual
 HIKVISION EUROPE B.V. How to Remotely Access Hikvision Devices User Manual (Use to remotely access Hikvision DVR s, NVR s and IP Cameras) Name: Remote Access Publisher: HIKVISION EUROPE B.V. Type: Information
Configuring Routers and Their Settings
 Configuring Routers and Their Settings When installing a router on your home network the routers settings are usually defaulted to automatically protect your home, and simplify setup. This is done because
How to configure your Thomson SpeedTouch 780WL for ADSL2+
 How to configure your Thomson SpeedTouch 780WL for ADSL2+ Connecting up your router This guide assumes that you have successfully: unpacked your router connected it up to your phone socket using the DSL
Quick Guide of HiDDNS Settings (with UPnP)
") Quick Guide of HiDDNS Settings (with UPnP) Solution 1: With the development of surveillance systems, more and more users want to use ADSL to realize video surveillance through network. But ADSL gives dynamic
Quick Guide of HiDDNS Settings (with UPnP) Solution 1: With the development of surveillance systems, more and more users want to use ADSL to realize video surveillance through network. But ADSL gives dynamic
NIGHT VISION & REMOTE
 User Manual Model: FI8909W Indoor Wireless IP Camera NIGHT VISION & REMOTE Black White CONTENTS 1 WELCOME... 1 1.1 Features... 1 1.2 Packing List... 2 1.3 Product views... 2 1.4 Preparations before use...
TENVIS Technology Co., Ltd. User Manual. For H.264 Cameras. Version 2.0.0
 TENVIS Technology Co., Ltd User Manual For H.264 Cameras Version 2.0.0 Catalogue Basic Operation... 3 Hardware Installation... 3 Search Camera... 3 Get live video... 5 Camera Settings... 8 System... 8
TENVIS Technology Co., LTD. User Manual. For MJPEG Cameras. Version 1.0.2
 TENVIS Technology Co., LTD User Manual For MJPEG Cameras Version 1.0.2 Catalogue Basic Setup... 4 Hardware Installation... 4 For Windows... 4 Advanced Mode... 4 LAN View... 6 For Mac... 10 Basic Operation...
NIGHT VISION & REMOTE PAN / TILT ROTATE/ TWO WAY AUDIO
 User Manual Model: FI8910W Indoor Pan/Tilt Wireless IP Camera NIGHT VISION & REMOTE PAN / TILT ROTATE/ TWO WAY AUDIO Color: Black Color: White CONTENTS 1 WELCOME... 1 1.1 Features... 1 1.2 Packing List...
IP Wireless / Wired Camera NIGHT VISION & REMOTE PAN/TILT ROTATE. User Manual
 IP Wireless / Wired Camera NIGHT VISION & REMOTE PAN/TILT ROTATE User Manual WELCOME This model IP Camera is an integrated wireless IP Camera solution. It combines a high quality digital Video Camera with
This section will focus on basic operation of the interface including pan/tilt, video, audio, etc.
 Catalogue Basic Operation... 2 For Internet Explorer... 2 For Other Non-IE Web Browsers... 5 Camera Settings... 6 System... 6 About... 6 PT Setting... 7 Backup and Restore Setup... 8 NTP Setting... 8 System
Foscam Digital Technologies LLC FI8910W User Manual IP Wired / Wireless Camera www.foscam.us support@foscam.us Page 0 1-800-930-0949
 Foscam Digital Technologies LLC FI8910W User Manual IP Wired / Wireless Camera www.foscam.us support@foscam.us Page 0 1-800-930-0949 Thank You for Your Purchase! Foscam IP Cameras are designed and equipped
IP Camera (L series) User manual 2013-05 V1.1
 User manual 2013-05 V1.1") Dear users, the configuration for this camera is professional, so please read the user manual carefully before using the camera. IP Camera (L series) User manual 2013-05 V1.1 Statement If the user manual
Dear users, the configuration for this camera is professional, so please read the user manual carefully before using the camera. IP Camera (L series) User manual 2013-05 V1.1 Statement If the user manual
How To. Simply Connected. XWR-1750 Basic Configuration INTRODUCTION
 XWR-1750 Basic Configuration How To DOCUMENT INTRODUCTION This document will guide you through the initial setup of the XWR-1750 for basic functionality. What should I do? We recommend, you change your
Chapter 1 Installing the Gateway
 Chapter 1 Installing the Gateway This chapter describes how to set up the wireless voice gateway on your Local Area Network (LAN), connect to the Internet, and perform basic configuration. For information
Basics of Port Forwarding on a Router for Security DVR s
 Basics of Port Forwarding on a Router for Security DVR s The basic concept of setting up your router to allow for Off Site access to your DVR involves setting up the two necessary ports the Security DVR
SATO Network Interface Card Configuration Instructions
 SATO Network Interface Card Configuration Instructions Table of Contents 1. Reset of wired/wireless interface card... 3 2. Installing the All-In-One Utility (recommended)... 4 3. Configuring wired/wireless
Model: FI8906W. Ourdoor Wireless IP Camera
 User Manual Model: FI8906W Ourdoor Wireless IP Camera Table of Contents 1 Overviews... 2 1.1 Key Features... 3 1.2 Read Before Use... 3 1.3 Packing Contents... 4 1.4 Physical Description... 4 2 Surveillance
How To Remotely View Your Security Cameras Through An Ezwatch Pro Dvr/Camera Server On A Pc Or Ipod (For A Small Charge) On A Network (For An Extra $20) On Your Computer Or Ipo (For Free
 On A Network (For An Extra $20) On Your Computer Or Ipo (For Free") How to Remotely View Security Cameras Using the Internet Introduction: The ability to remotely view security cameras is one of the most useful features of your EZWatch Pro system. It provides the ability
How to Remotely View Security Cameras Using the Internet Introduction: The ability to remotely view security cameras is one of the most useful features of your EZWatch Pro system. It provides the ability
MJPEG Camera Client User Manual
 MJPEG Camera Client User Manual CONTENTS User Manual 1 WELCOME... 3 1.1Features... 3 1.2Installation Requirements... 3 1.3 Software Installation... 3 2 Software Operation... 5 2.1 Tab bar... 6 2.2 Device
10/2011 - English Edition 1. Quick Start Guide. NWA1100N-CE CloudEnabled Business N Wireless Access Point
 10/2011 - English Edition 1 Quick Start Guide NWA1100N-CE CloudEnabled Business N Wireless Access Point Package Contents - 1 x ZyXEL NWA1100N-CE Access Point - 2 x Detachable Antennas - 1 x Power Adapter
Model: FI8904W/FI8905W. Ourdoor Wireless IP Camera
 User Manual Model: FI8904W/FI8905W Ourdoor Wireless IP Camera FI8904W FI8905W Table of Contents 1 Overviews... 2 1.1 Key Features... 3 1.2 Read Before Use... 3 1.3 Packing Contents... 4 1.4 Physical Description...
Connecting to the Internet. LAN Hardware Requirements. Computer Requirements. LAN Configuration Requirements
 Connecting to the Internet LAN Hardware Requirements Computer Requirements LAN Configuration Requirements Installation Performed by Time Warner Cable Technician Connecting via Ethernet Connecting via USB
Model: FI8909W. Indoor Wireless IP Camera
 User Manual Model: FI8909W Indoor Wireless IP Camera Color: Black Color: White Table of Contents 1 Overviews...2 1.1 Key Features...3 1.2 Read Before Use...3 1.3 Packing Contents...4 1.4 Physical Description...4
IP Night/Day Camera USER MANUAL
 IP Night/Day Camera USER MANUAL Table Of Contents 1. INITIAL INSTALLATION... 4 2. IP CAMERA FINDER... 8 3. IP CAMERA MANAGER... 11 3.4 Camera Software Navigation Buttons... 12 3.5 Adding Another Camera...
NETWORK SETUP INSTRUCTIONS
 NETWORK SETUP INSTRUCTIONS How to Connect AVTECH Product to Internet To connect AVTECH DVR or network camera to Internet, you need to: 1). Figure out your network environment, and have related IP information
CIPCAM720PTIWL,CIPCAM720OD,CIPCAM720ODWDR,CIPDC AM720OD
 Wireless Network Camera User Manual CIPCAM720PTIWL,CIPCAM720OD,CIPCAM720ODWDR,CIPDC AM720OD V1.0 Default DEFAULT SETTINGS IP Address 192.168.1.58 User/Password admin/123456 Notice 1 Installation Environment
INSTEON Wireless IP Camera
 Owner s Manual Model No. 75790WH (White) / 75790 (Black) Rev. 08.27.12 CONTENTS 1.0 WELCOME... 2 1.1 Features... 2 1.2 What s in the Box?... 2 1.3 Product views... 3 1.4 Before Camera Use... 4 2.0 SOFTWARE
Quick Installation Guide DAP-1360. Wireless N 300 Access Point & Router
 DAP-1360 Wireless N 300 Access Point & Router BEFORE YOU BEGIN Delivery Package Access point DAP-1360 Power adapter DC 12V Ethernet cable (CAT 5E) (brochure). If any of the items are missing, please contact
Manual Wireless Extender Setup Instructions. Before you start, there are two things you will need. 1. Laptop computer 2. Router s security key
 1 Manual Wireless Extender Setup Instructions Before you start, there are two things you will need. 1. Laptop computer 2. Router s security key Setting up LAN Static IP on PC We need to set up a Static
How to Remotely View Security Cameras Using the Internet
 How to Remotely View Security Cameras Using the Internet Introduction: The ability to remotely view security cameras is one of the most useful features of your EZWatch Pro system. It provides the ability
Remote Desktop How-To. How to log into your computer remotely using Windows XP, etc.
 Remote Desktop How-To How to log into your computer remotely using Windows XP, etc. Overview How XP Remote Desktop works, its features Unattended usage, drag n drop between computers How to set it all
Model: FI8918W. Indoor Pan/Tilt Wireless IP Camera
 User Manual Model: FI8918W Indoor Pan/Tilt Wireless IP Camera Color: Black Color: White Table of Contents 1 Overviews... 2 1.1 Key Features... 3 1.2 Read Before Use... 3 1.3 Packing Contents... 4 1.4 Physical
PePWave Surf Series PePWave Surf Indoor Series: Surf 200, AP 200, AP 400
 PePWave Surf Series PePWave Surf Indoor Series: Surf 200, AP 200, AP 400 PePWave Surf Outdoor Series: Surf AP 200/400-X, PolePoint 400-X, Surf 400-DX User Manual Document Rev. 1.2 July 07 COPYRIGHT & TRADEMARKS
User Manual. Model: FI8919W. Outdoor Pan/Tilt Wireless IP Camera
 User Manual Model: FI8919W Outdoor Pan/Tilt Wireless IP Camera Table of Contents 1 Overviews... 2 1.1 Key Features...3 1.2 Read Before Use...3 1.3 Packing Contents...4 1.4 Physical Description... 4 2 Surveillance
Wireless Pan&Tilt Network Camera. User Manual CIPCAMPTIWL V2.0
 Wireless Pan&Tilt Network Camera User Manual CIPCAMPTIWL V2.0 1 Installation Environment Keep away from the places for high-temperature, heat source and direct sunlight; Keep away from water and when get
Quick Installation Guide DIR-620. Multifunction Wireless Router Supporting GSM, CDMA, WiMAX with Built-in 4-port Switch
 DIR-620 Multifunction Wireless Router Supporting GSM, CDMA, WiMAX with Built-in 4-port Switch BEFORE YOU BEGIN Delivery Package Multifunction wireless router DIR-620 Power adapter DC 5V/2.5A Ethernet cable
DDNS Management System User Manual V1.0
 DDNS Management System User Manual V1.0 1 03/01/2012 Table of Contents 1. Introduction.3 2. Network Configuration 3 2.1. Configuring DDNS locally through DVR Menu..3 2.2. Configuring DDNS through Internet
User Manual. Model: FI8909W. Indoor Wireless IP Camera
 User Manual Model: FI8909W Indoor Wireless IP Camera Color: Black Color: White Table of Contents 1 Overviews... 1 1.1 Key Features...1 1.2 Read Before Use...2 1.3 Packing Contents... 2 1.4 Physical Description...
Indoor Wireless/Wired P2P IP Network Camera Models XX51A. User Manual
 Indoor Wireless/Wired P2P IP Network Camera Models XX51A User Manual 1. INTRODUCTION... 3 1.1 FEATURES...3 1.2 PACKING LIST... 3 1.3 PRODUCT VIEWS... 4 1.4 PC SYSTEM REQUIREMENTS... 6 1.5 HARDWARE INSTALLATION...
WiFi-SB-L3 300M WiFi Router WiFi Bridge WiFi Repeater. WiFi Router WiFi Repeater WiFi Bridge WiFi-SB-L3 Quick Setting Guide
 300M WiFi Router WiFi Repeater WiFi Bridge WiFi-SB-L3 Quick Setting Guide 1 Chapter 1 Router Mode Quick Setup Guide 1. Let WiFi-SB-L3 be powered on. 2.Turn on wireless network connection, disabled local
Multifunctional Broadband Router User Guide. Copyright Statement
 Copyright Statement is the registered trademark of Shenzhen Tenda Technology Co., Ltd. Other trademark or trade name mentioned herein are the trademark or registered trademark of above company. Copyright
IP Wireless / Wired Camera REMOTE PAN/TILT ROTATE. User Manual
 IP Wireless / Wired Camera REMOTE PAN/TILT ROTATE User Manual Black White CONTENTS 1 WELCOME...3 1.1 FEATURES... 3 1.2 PACKING LIST... 3 1.3 PRODUCT VIEWS... 4 1.4 PC SYSTEM REQUIREMENTS... 5 1.5 HARDWARE
Outdoor IP Camera with Night Vision IPV58
 Outdoor IP Camera with Night Vision IPV58 User Manual User guide 3 Bedienungsanleitung. Gebruiksaanwijzing. Användarmanual. Guide utilisateur. Guía del usuario. Manual do utilizador. Manuale per l utente.
EM6230 e-camview HD outdoor IP camera
 EM6230 e-camview HD outdoor IP camera 2 ENGLISH EM6230 e-camview HD outdoor IP camera Table of contents 1.0 Introduction... 3 1.1 Packing contents... 3 1.2 Requirements to access the camera.... 3 1.3 Major
WLAN Outdoor CPE For 2.4G. Quick Installation Guide
 WLAN Outdoor CPE For 2.4G Quick Installation Guide Part I: External Installation Direction A. Check the parts in your box CPE SET 1 DC 12V/1.5A Power Adapter 1 PoE DC Injector 1 Hose Clamps 2 Manual &
User Manual. Model: FI8910W. Indoor Pan/Tilt Wireless IP Camera
 User Manual Model: FI8910W Indoor Pan/Tilt Wireless IP Camera Color: Black Color: White Table of Contents 1 Overviews...1 1.1 Key Features...1 1.2 Read Before Use...2 1.3 Packing Contents... 3 1.4 Physical
User Manual. Model: FI8916W. Indoor Pan/Tilt Wireless IP Camera
 User Manual Model: FI8916W Indoor Pan/Tilt Wireless IP Camera Color: Black Color: White Table of Contents 1 Overviews...1 1.1 Key Features...1 1.2 Read Before Use...2 1.3 Packing Contents... 2 1.4 Physical
User Manual. Model: FI8918W. Indoor Pan/Tilt Wireless IP Camera
 User Manual Model: FI8918W Indoor Pan/Tilt Wireless IP Camera Color: Black Color: White Table of Contents 1 Overviews... 1 1.1 Key Features...1 1.2 Read Before Use...2 1.3 Packing Contents... 2 1.4 Physical
Please use only wired network connections to configure the router.
 Note Please use only wired network connections to configure the router. Connect the WAN port on your Router to the Modem s LAN port with an Ethernet cable. Note If connecting the TL-WR543G to the WISP
UBIQUITI BRIDGE CONFIGURATION PROCEDURE (PowerStation & NanoStation Units ONLY)
") UBIQUITI BRIDGE CONFIGURATION PROCEDURE (PowerStation & NanoStation Units ONLY) Hardware Installation 1. Initial placement for programming and configuration purposes should be performed in an indoor environment.
UBIQUITI BRIDGE CONFIGURATION PROCEDURE (PowerStation & NanoStation Units ONLY) Hardware Installation 1. Initial placement for programming and configuration purposes should be performed in an indoor environment.
NIGHT VISION & REMOTE PAN / TILT ROTATE/ TWO WAY AUDIO
 IP Wireless / Wired Camera NIGHT VISION & REMOTE PAN / TILT ROTATE/ TWO WAY AUDIO User Manual Color: Black FI8918W CONTENTS 1 WELCOME...- 1-1.1 FEATURES...- 1-1.2 PACKING LIST...- 1-1.3 PRODUCT VIEWS...-
Port forwarding and viewing your IP camera from the internet
 Spy On A Bird TM Port forwarding and viewing your IP camera from the internet IP206W IP207W 12201 N NC Hwy 150 Suite 22 PMB 244 Winston Salem, NC 27127 Phone: 800-606-6428 www.spyonabird.com E-mail: info@spyonabird.com
Assign a static IP address 192.168.1.100 for your computer. Please refer to the T3 in Troubleshooting guide if you need assistance.
 Assign a static IP address 192.168.1.100 for your computer. Please refer to the T3 in Troubleshooting guide if you need assistance. Connect to the Access Point with the Ethernet cable or via wireless.the
Assign a static IP address 192.168.1.100 for your computer. Please refer to the T3 in Troubleshooting guide if you need assistance.
 Note The product model shown in this QIG is TL-WA701ND, as an example. Assign a static IP address 192.168.1.100 for your computer. Please refer to the T3 in Troubleshooting guide if you need assistance.
Live Streaming Camera GV-LS2 / GV-LS1. Connection Guide. Other information can be found in the Reference Manual.
 C2N LYT2644-002A 0513YHM-YH-OT Live Streaming Camera GV-LS2 / GV-LS1 Connection Guide This PDF will give you the steps in order to connect the Live Streaming Camera to your network and digital devices.
Wireless Router Quick Start Guide Rev. 1.0a Model: WR300NQ
 Wireless Router Quick Start Guide Rev. 1.0a Model: WR300NQ 1 Step One: Hardware Connection 1. If you have xdsl Broadband internet access, connect your hardware as shown in the following diagram: 2. If
NETWORK SETUP GLOSSARY
 GLOSSARY NETWORK SETUP Static IP PPPoE DHCP DDNS Static IP Computers are communicated and recognized by their own unique IP addresses over the Internet. Static IP provided by your ISP (Internet Service
3.5 EXTERNAL NETWORK HDD. User s Manual
 3.5 EXTERNAL NETWORK HDD User s Manual Table of Content Before You Use Key Features H/W Installation Illustration of Product LED Definition NETWORK HDD Assembly Setup the Network HDD Home Disk Utility
How To Use A Wireless Pan & Tilt Camera On A Pc Or Mac Or Ipad (For Pc) For Free (For Mac) For A Week (For A Week) For $99.99) For Two Weeks (For Ipad)
 For Free (For Mac) For A Week (For A Week) For $99.99) For Two Weeks (For Ipad)") User Manual Wireless Pan & Tilt Camera CIPCAMPTIWL v1.0 Index 1 INTRODUCTION... 4 1.1 THE PACKAGE INCLUDES... 4 1.2 FUNCTION AND FEATURES... 4 1.3 TECHNICAL SPECIFICATIONS... 4 2 APPEARANCE AND INTERFACE...
User Manual Wireless Pan & Tilt Camera CIPCAMPTIWL v1.0 Index 1 INTRODUCTION... 4 1.1 THE PACKAGE INCLUDES... 4 1.2 FUNCTION AND FEATURES... 4 1.3 TECHNICAL SPECIFICATIONS... 4 2 APPEARANCE AND INTERFACE...
4-441-095-12 (1) Network Camera
 Network Camera") 4-441-095-12 (1) Network Camera SNC easy IP setup Guide Software Version 1.0 Before operating the unit, please read this manual thoroughly and retain it for future reference. 2012 Sony Corporation Table
4-441-095-12 (1) Network Camera SNC easy IP setup Guide Software Version 1.0 Before operating the unit, please read this manual thoroughly and retain it for future reference. 2012 Sony Corporation Table
B Series Robot Model. IP Camera 2013-7 V4.18. User Manual
 B Series Robot Model IP Camera 2013-7 V4.18 User Manual Index 1 INTRODUCTION... 3 2 APPEARANCE AND INTERFACE... 5 3 VISIT IP CAMERA FROM LAN... 6 4 VISIT IP CAMERA FROM WAN... 10 5 OTHER SETTINGS... 12
Step-by-Step Setup Guide Wireless File Transmitter FTP Mode
 EOS Step-by-Step Setup Guide Wireless File Transmitter FTP Mode Infrastructure & Ad Hoc Networks Mac OS X 10.5-10.6 2012 Canon U.S.A., Inc. All Rights Reserved. Reproduction in whole or in part without
CM1-Mini Wi Drive. Setup Guide Ver 0.1
 CM1-Mini Wi Drive Setup Guide Ver 0.1 Please read the following safety information prior to using CM1. Only qualified personnel should service CM1. Faulty installation or service may invalidate any warranty
Chapter1. Interface Introduction
 Robustel GoRugged R3000 Quick Guide Chapter1. Interface Introduction 1.1 LED Indicators After inserting the SIM card into the router and power on, the LED indicators status should be as follow when work
720P AP Series Network IP Camera (For PC View)
") 720P AP Series Network IP Camera (For PC View) User Manual 0 Thank you for buying our products This security camera can offer you the freedom to get your home or business surveillance via network anytime
720P AP Series Network IP Camera (For PC View) User Manual 0 Thank you for buying our products This security camera can offer you the freedom to get your home or business surveillance via network anytime
How To Set Up Dataprotect
 How To Set Up Dataprotect This document will show you how to install and configure your computer for a Typical installation. If you have questions about configuring a Custom installation please contact
AXIS Camera Companion Internet access
 AXIS Camera Companion AXIS Camera Companion Internet access AXIS Camera Companion 2.0 introduces a new way to access sites and cameras remotely. When installing AXIS Camera Companion on a PC with internet
How To Set Up A Computer With A Network Connection On A Cdrom 2.5 (For A Pc) Or Ipad (For Mac) On A Pc Or Mac Or Ipa (For Pc) On An Ipad Or Ipro (
 Or Ipad (For Mac) On A Pc Or Mac Or Ipa (For Pc) On An Ipad Or Ipro (") Connect the supplied power-adapter to the power inlet port and connect it to a wall outlet. Then, the router automatically enters the self-test phase. During self-test phase, RNX-EasyN400 s Power LED will
Connect the supplied power-adapter to the power inlet port and connect it to a wall outlet. Then, the router automatically enters the self-test phase. During self-test phase, RNX-EasyN400 s Power LED will
Acellus Lab Cart. User s Manual. Version 4B. Acellus Corporation www.acellus.com. Copyright 2010 Acellus Corporation. All Rights Reserved.
 Acellus Lab Cart User s Manual Version 4B Acellus Corporation www.acellus.com 1 Table of Contents Using Acellus... 3 Acellus Lab Cart and Server... 3 Acellus Laptops... 3 Acellus Updates... 4 Accessing
Initial Access and Basic IPv4 Internet Configuration
 Initial Access and Basic IPv4 Internet Configuration This quick start guide provides initial and basic Internet (WAN) configuration information for the ProSafe Wireless-N 8-Port Gigabit VPN Firewall FVS318N
WIRED/WIRELESS IP CAMERA USER MANUAL V1.0
 WIRED/WIRELESS IP CAMERA USER MANUAL V1.0 CATALOGUE 1.DESCRIPTION OF PRODUCT -------------------------------------------------------------------------1 1.1 Packing ------------------------------------------------------------------------------------------------------2