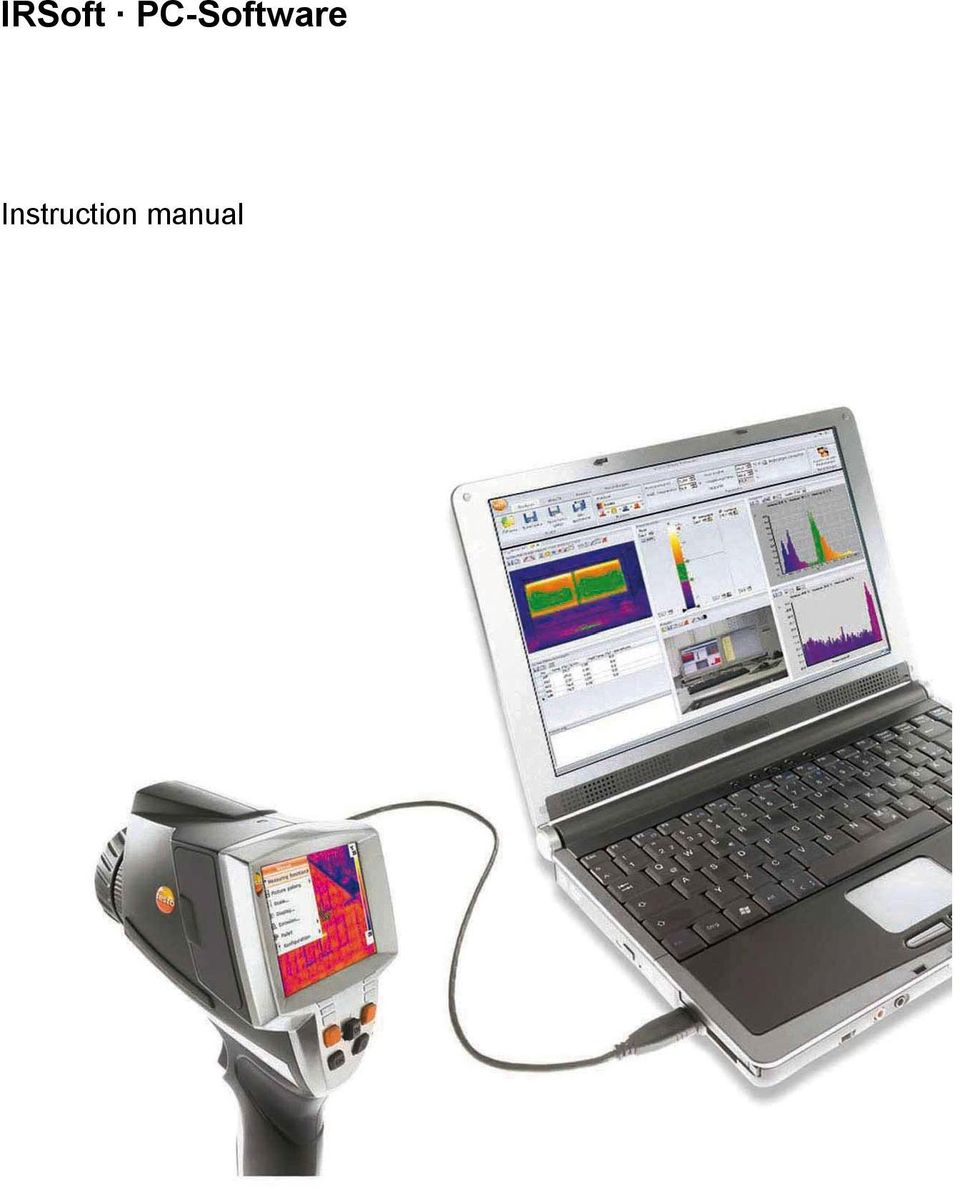
IRSoft PC-Software. Instruction manual
|
|
|
- Felix Bradford
- 9 years ago
- Views:
Transcription
1 IRSoft PC-Software Instruction manual
2 2

3 1 Contents 1 Contents 1 Contents About this document Specifications Use System requirements First steps Installing the software/driver Starting the software Product description User interface Functions and commands Using the product Selecting images Modifying the work space view Edit image properties Colors Parameter Accepting settings for multiple images Evaluating images Thermal image document window Temperature scale document window Histogram document window Thermal image markers document window Real image document window Profile document window Comments document window Creating a report Modifying the report Report Designer User interface Functions and commands Editing a report template Configuring the instrument

4 1 Contents 7 Tips and assistance Questions and answers Index

5 2 About this document 2 About this document Use > Please read this documentation through carefully and familiarize yourself with the product before putting it to use. Pay particular attention to the safety instructions and warning advice in order to prevent injuries and damage to the products. > Keep this document to hand so that you can refer to it when necessary. > Hand this documentation on to any subsequent users of the product. Knowledge of Windows operating systems is required when working with the software. The description in this instruction manual relates to Windows XP. Symbols and writing standards Representation Explanation Note: Basic or further information Action: more steps, the sequence must be followed. >... Action: a step or an optional step Result of an action. Menu [OK] Elements of the program interface. Buttons of the program interface Functions/paths within a menu.... Example entries 5

6 3 Specifications 3 Specifications 3.1. Use The IRSoft software is used for the analysis, processing and archiving of the images recorded by the testo 880 thermal imager (hereafter referred to as 'instrument'). It also has integrated reporting for the clear presentation of the data. The settings can be performed on the connected thermal imager via the instrument control System requirements Operating system The software can be run on the following operating systems: Windows XP ServicePack 2 (SP2) Windows Vista With a limited scope of functions: Windows 2000 SP4 (no instrument control) Windows XP without SP2 Computer For smooth work with the software, the following requirements should be met: Pentium processor of at least 1.2 GHz or equivalent 256 MB RAM 100 MB unused hard drive capacity CD-ROM drive USB 2.0 interface Internet Explorer 5.5 Service Pack 1 or higher 6
 Windows Vista With a limited scope of functions: Windows 2000 SP4 (no")
7 4 First steps 4 First steps 4.1. Installing the software/driver Administrator rights are required for installation. 1. Insert the program CD in the CD-ROM drive of the computer. If the installation program does not start automatically: > Open My Computer, select the CD drive and start the Setup.exe file. 2. Follow the instructions of the installation wizard. When installing under Vista, please note the following steps during the installation procedure: The User Account Control window opens. > Click on [Continue]. The Windows Security window opens. > Click on Install this driver software anyway. 3. To finish the software installation, click on [Finish]. After completion of the software installation, the instrument must be connected to the PC to continue with the driver installation. 4. Switch on the instrument: [ ]. 5. Connect the instrument to the PC using the USB cable. - The connection is established. - The driver installation is performed automatically. In some cases, the instrument driver may not be automatically recognized. In this case, continue as follows: Windows XP: - The Found New Hardware window is opened. 1. Select No, not this time and click on [Next]. 2. Select Install the software automatically and click on [Next]. If the driver is not automatically found: > Enter the driver path in the CD directory: Driver folder: 3. Click on [Finish]. 7
![When installing under Vista, please note the following steps during the installation procedure: The User Account Control window opens. > Click on [Continue]. The Windows Security window opens.](/docs-images/42/22802081/images/page_7.jpg "> Click on Install this driver software anyway. 3. To finish the software installation, click on [Finish].")
8 4 First steps Windows Vista: - The Found New Hardware window is opened. 1. Click on Locate and install driver software and then on [Continue]. If the driver is not automatically found: > Click on Browse my computer for driver software and then click on [Browse]. Enter the driver path in the CD directory: Driver folder: - The Windows Security window opens: 2. Click on Install this driver software anyway. 3. Click on [Close] Starting the software Start IRSoft The user interface of the software is opened in the language of the operating system if this is supported. If the operating system language is not supported, the user interface is in English. > Click on [Start] Programs (Windows XP) or All Programs (Windows Vista) Testo IRSoft. Under Windows Vista, the User Account Control window is opened during the initial start of the software. > Click on Allow. Establishing a connection with the instrument 1. Press the [ ] button to switch on the instrument. 2. Connect the instrument to the PC using the USB cable. - The connection is established. - The instrument switches into slave mode, where all control keys of the instrument are deactivated except the [ ] button. - The instrument is identified by the PC as a USB memory device. The operating system automatically assigns the memory of the instrument (SD card) a drive letter. This is displayed in Windows Explorer. 8

9 4 First steps Depending on the settings in the operating system, the Devices with Removable Storage (Windows XP) or AutoPlay (Windows Vista) window may be opened when the instrument is connected. This can be ignored or closed. Using the Import Wizard The Import Wizard supports you when transferring images from the thermal imager to the PC. The Import Wizard is only opened when the IRSoft software was started before connecting the thermal imager. Only.bmt and.bmp files and folder structures are transferred. 1. Click on [Continue]. 2. In your folder list, mark the folders that are to be transferred. When a folder is marked, all subfolders are automatically included. To import files that are saved on the top level (not in folders), the Devices with Removable Storage must be marked. 3. Click on [Continue]. 4. Enter the target directory and activate the optional functions Set target directory as default and Delete data in the device after copying as required. 5. Click on [Continue]. - In the selected target directory, a folder is created with the date of the data transfer to prevent the overwriting of previous folders with the same designation. The folders and the images are saved in this directory. 6. Click on [Finish]. - The Import Wizard is closed. Activating/deactivating the Import Wizard > In IRSoft click on the Imager tab and carry out the desired change in the Import Wizard group. 9
![The Import Wizard is only opened when the IRSoft software was started before connecting the thermal imager. Only.bmt and.bmp files and folder structures are transferred. 1. Click on [Continue]. 2.](/docs-images/42/22802081/images/page_9.jpg "In your folder list, mark the folders that are to be transferred. When a folder is marked, all subfolders are automatically included.")
10 5 Product description 5 Product description 5.1. User interface Ribbon The ribbon helps you to carry out modifications and settings and to find the relevant functions and commands quickly. The functions are divided into different groups on four tabs: Analysis, Report, Imager and Settings. The functions/commands vary depending on the tab selected. Each tab contains its own functions/commands to perform actions. The tab Analysis contains function/commands for: Opening and saving infrared images Setting and copying image properties The tab Report contains function/commands for: Creating reports Editing reports The tab Imager contains function/commands for: Configuring the thermal imager Activating/deactivating the Import Wizard The tab Settings contains function/commands for: Setting the work space view Setting the infrared image presentation Setting the temperature unit Setting the user interface view (color scheme) Activating/deactivating the tips Activating/deactivating the automatic program updates Creating user-generated report templates 10

11 5 Product description Work space Information is shown and editing performed in the work space. The work space display varies depending on the page layout selected. The work space is divided into different document windows: 1 Thermal image 2 Temperature scale 3 Histogram 4 Thermal image markings 5 Real image 6 Profile 7 Comments Depending on the work space view selected and the size of the screen, not all document windows are visible. If necessary, use the scroll bars. 11

12 5 Product description 5.2. Functions and commands All of the functions and commands available in this software are described in more detail in tips (tool hints) in IRSoft. > Move the mouse pointer over the functions/command in IRSoft. - Tips (tool hints) are displayed. Activate/deactivate tips (tool hints) 1. Click on the Settings tab. 2. In the group Tips select the option Display/Hide. 12
 are displayed.")
13 6 Using the product 6.1. Selecting images During the image selection of IRSoft, the following images are shown: Infrared images without attached real image (IR). Infrared images with attached real imageiv). Real images alone (VI) are not displayed. > Please use Windows Explorer for access to the real images. Opening infrared images 1. To open infrared images: > In the ribbon, click on the testo logo and select Open or > Click on the Analysis tab and select Open. > If the Windows dialogue with the infrared images does not open: navigate to the directory with the infrared images. > If you wish to display preview images: In the Windows dialogue Menu View select Thumb view. 2. Highlight one or several infrared images. > If you wish to highlight several images: Hold down the Ctrlkey and click on the images. 3. Click on [Open]. - The selected infrared image will be displayed in the Thermal image document window. - If you have opened an infrared image with an attached real image: the real image will be displayed in the Real image document window. - If several images were highlighted: Depending on the work space view selected, the rest of the infrared images will be displayed in individual tabs or in individual windows. 13

14 Alternatively, you can also select an infrared image when IRSoft is not open. In this case, multiple infrared images cannot be selected. Importing real images See Real image document window page Modifying the work space view The work space view can be modified in the Settings tab. 1. In the ribbon, click on the Settings tab. 2. Modify the work space view in the Work space view group. > For quick changes to the work space view: On the right bottom edge of the screen, click on Layout as windows with tabs or Layout as free floating and cascading windows. Comparing infrared images Requirement: at least 2 infrared images must be open. 1. In the ribbon, click on the Settings tab. 2. In the group Work space view select the option Tabbed windows. 3. Right-click on the tab of an infrared image that you wish to compare with another infrared image. - A context menu is opened. 4. From the context menu, select the option New Horizontal / New Vertical Tab Group. - The infrared image can be compared with the other infrared image. > If you wish to compare more than 2 images: Repeat the procedure starting with step 3. 14

15 6.3. Edit image properties Colors Image properties can be edited in the Analysis tab. Changes to the image properties will only be accepted for the currently selected infrared image in the Thermal image document window. To transfer image properties to other open infrared images, see page 15. Changes in the Parameter group can affect the measurement result. The functions in the Colors group are for editing the visual presentation of the thermal image and have no influence on the measurement results. 1. In the ribbon, click on the Analysis tab. 2. Edit the infrared image properties with the functions and commands in the ribbon. Selecting a palette You can choose between 8 existing color palettes for the infrared image. > Click on and select a color palette from the drop-down list. Selecting color temperature markers, profiles and histograms > Click on Color temperature markers, profile and histogram and select a color. Selecting color for temperature correction Changes the marker color with the temperature correction in the Thermal image document window. > Click on Color region markers and select a color for infrared image area markers. Select color for coldspots/hotspots > Click on Color coldspot / Color hotspot and select a color. 15

16 Parameter The settings from the recording of the thermal image can be corrected. Changes to the settings influence the measurement result. The settings should therefore only be changed with the utmost caution. Function Set Emissivity, Reflected temperature, Humidity, Ambient temperature 1 Dewpoint Discarding changes Procedure > Click on the number and change it by means of input via the keyboard or via. You can find more information on the individual properties in the instruction manual of the thermal imager. Dewpoint temperature: The value is calculated from the humidity and the ambient temperature and cannot be changed manually. > If you wish to reset the changes back to the most recently saved parameters: Click on Discard changes Accepting settings for multiple images Copies the image settings of the currently selected thermal image into all open thermal images. 1. Click on Thermal image settings. - A dialogue box with the parameters is opened. 2. Select the parameters that you wish to accept for the other infrared images and click on [OK]. - The settings are accepted for all open infrared images. 1 The humidity and ambient temperature are transmitted by the thermal imager and can be changed in the IRSoft. The values have no effect on the measurement result, they are only there for information. 16

17 6.4. Evaluating images IR images can be edited and evaluated in the individual document windows below the work space Thermal image document window The following functions are available in the Thermal image document window: Saving/exporting the infrared image Copying the infrared image to the clipboard Rotating the infrared image Specifying the readings for one pixel in an infrared image Temperature correction in an infrared image area (adjust emissivity and reflected temperature for the area) Specifying a hotspot/coldspot for an infrared image area Creating a histogram of an infrared image area Creating a temperature profile for a line Moving/deleting measuring points/range Saving/exporting the infrared image When exporting infrared images in BMP, JPG and PNG format only the image data is exported, no readings. If you wish to create a temperature table for the infrared image, the infrared image must be saved in XLS format (Excel). In this case the temperature values contained are organized in an Excel spreadsheet in 120 lines with 160 values each. 1. Click on Save thermal image. - The Windows dialogue for saving files is opened. 2. Enter a file name. > If you wish to export the temperature values of the infrared image: Select the XLS file format. > If you wish to export the image data of the infrared image: Select file format BMP, JPG or PNG. 3. Select a storage location and click on [Save]. 17

18 Copying an infrared image to the clipboard If you copy the infrared image to the clipboard, both an infrared image file and the temperature value of each individual pixel in the thermal image can be inserted into other programs. 1. Click on Copy to clipboard. 2. To insert an image file/text file into Excel, Powerpoint or Word: 1 Open the desired program. 2. In the program toolbar, click on the Edit tab. 3. From the context menu, select the option Paste content. > If you wish to insert an infrared image file: Select the option Bitmap and click on [OK]. > If you wish to insert the temperature of each individual pixel in the infrared image: Select the option Text and click on [OK]. Rotating the infrared image > Click on Rotate left or Rotate right. Specifying the readings for one pixel in an infrared image For specifying the temperature, the emissivity and the reflected temperature for one pixel in an infrared image. If you wish to specify the temperature within one infrared image area (temperature correction), you should first highlight the infrared image area and then position the measuring points on it. Otherwise, the correctness of the temperature displayed for the measuring point cannot be guaranteed. 1. Click on Temperature. 2. Click on one point in the infrared image. - Temperature, emissivity and reflected temperature of the measured point set here will be displayed in the Thermal image markers document window. For further information about editing measurement results (e.g. changing emissivity), see Thermal image markers document window page
![3. From the context menu, select the option Paste content. > If you wish to insert an infrared image file: Select the option Bitmap and click on [OK].](/docs-images/42/22802081/images/page_18.jpg "> If you wish to insert the temperature of each individual pixel in the infrared image: Select the option Text and click on [OK]. Rotating the infrared image > Click on Rotate left or Rotate right.")
19 Correcting temperature in an infrared image area For specifying emissivity and a reflected temperature within an infrared image area. Infrared images areas with temperature corrections should not overlap each other because only one emissivity and one reflected temperature is correct per pixel. However, if two infrared image areas do overlap, the parameters (emissivity and reflected temperature) of the most recently entered infrared image area will be used to specify the temperature. 1. Click on Temperature correction. 2. Select a marking form from the drop-down menu (rectangle, circle, ellipse, free form shape) 3. Drag the mouse with the mouse button pressed to highlight an infrared image area in the thermal image. - The measurement results of the selected infrared image area will be displayed in the Thermal image markers document window. For further information about editing measurement results see Thermal image markers document window page 24. Specifying a hotspot/coldspot For specifying the hottest/coldest point within an infrared image area. 1. Click on Coldspot / Hotspot. 2. Select a marking form from the drop-down menu (rectangle, circle, ellipse, free form shape) 3. Drag the mouse with the mouse button pressed to highlight an infrared image area in the thermal image. - The hotspot/coldspot of the selected infrared image area will be displayed in the Thermal image markers document window. Creating a histogram For displaying the frequency of a temperature within an infrared image area. 1. Click on Histogram. 2. Select a marking form from the drop-down menu (rectangle, circle, ellipse, free form shape) 19
 3.")
20 3. Drag the mouse with the mouse button pressed to highlight an infrared image area in the thermal image. - The temperature distribution in the selected infrared image area will be displayed in the Histogram document window. Creating a new histogram deletes the existing one. For further information about editing the histogram see Histogram document window page 23. Creating a temperature profile For displaying a temperature progression over a line. 1. Click on Temperature profile. 2. Select the characteristics of the line from the drop-down menu (horizontal, vertical, diagonal) 3. Drag the mouse with the mouse button pressed to draw a line in the the infrared image. - The temperature profile will be displayed in the Profile document window. Creating a new profile line deletes the existing one. For further information about editing the temperature profile see Profile document window page 27. Moving/deleting image markers in the infrared image If infrared image areas are moved, the set measurement markers should be moved along with them. If the measurement point remains in the same position or if infrared image areas are deleted, the parameters (emissivity and reflected temperature) of the measurement points must be checked. > Click on the measurement markers in the infrared image (not possible if the Temperature tool is activated) or > Click on the Edit mode and drag the mouse with the mouse button pressed to create a frame around the measurement points/range that you wish to delete/move. > If you wish to delete measurement points/ranges: Click on Delete. - The measurement markers in the infrared image are deleted. - The measurement results will be removed from the Thermal image markers, Histogram and Profile document windows. 20
 3.")
21 > If you wish to move measurement markers: Hold down the mouse button and move the measuring points/range. - The measurement results will be adjusted according to the movement in the Thermal image markers, Histogram and Profile document windows Temperature scale document window The following functions are available in the Temperature scale document window: Setting the scale Setting the limits Setting the isotherm area Setting the scale You can choose between automatic scaling (adjustment to the min./max. values) and manual scaling. The scale limits can be set within the measuring range that is valid for the image. All temperatures that are greater or less than the min./max. value are shown in the min./max. value color (depending on the color palette set). Temperature ranges that are not relevant can thus be hidden. Function Setting min./max. values Carrying out Automatic scaling Procedure > Click on the number and change it by means of input via the keyboard or via or > Click on the arrowhead of the min./max. value on the scale. Hold the mouse button down and move the arrow. > To carry out automatic scaling: Click on [ Auto]. - The scaling limits are adjusted to the min./max. values. 21
22 Setting the limits A lower and an upper limit value can be defined. Temperatures below the lower limit value or above the upper limit value can be marked with one color. The transparency of the limit value colors can be set. Function Procedure Activating the limits > Activate the limits. Setting the upper/lower limit (only available with activated limit values) Selecting the upper/lower limit color (only available with activated limit values) Setting Transparency (only available with activated limit values) > Click on the number and change it by means of input via the keyboard or via. or > Click on the arrowhead of the lower/upper limit on the scale. Hold the mouse button down and move the arrow. > Click on Color upper/lower limit and select a color. 1. Click on Color upper/lower limit. 2 Click on the number next to Transparency and change it by means of input via the keyboard or via. Setting isotherms (temperature range) A lower and an upper area limit can be defined. Temperatures between the lower and upper area limits are marked with one color. Function Activating the isotherms Setting the upper/lower area limit (only available with activated isotherms) Procedure > Activate the isotherms. > Click on the number and change it by means of input via the keyboard or via. or > Click on the arrowhead of the lower/upper area limit on the scale. Hold the mouse button down and move the arrow. 22
23 Function Selecting the isotherm color (only available with activated isotherms) Setting Transparency (only available with activated limit values) Procedure > Click on Color isotherms and select a color. 1. Click on Color isotherms. 2 Click on the number next to Transparency and change it by means of input via the keyboard or via Histogram document window The following functions are available in the Histogram document window: Saving a histogram as an image file Copying a histogram to the clipboard Choosing between absolute (number of the measurement points) and relative (percent of the measurement points) scaling: Setting the background color for the histogram Switching grid lines in the histogram on/off Setting the number of columns over the temperature range being assessed Changes can only be seen if a histogram had already been created in the Thermal image document window for the infrared image currently open, see Creating a histogram page 19. Function Saving a histogram as an image file Procedure 1. Click on Save file. - The Windows dialogue for saving files is opened. 2. Enter a file name. 3. Select a file format (BMP, JPG, PNG). 4. Select a storage location and click on [Save]. 23
24 Function Copying a histogram to the clipboard Procedure 1. Click on Clipboard. - Image files from the histogram can be inserted in other programs (e.g. Microsoft Word). Selecting scaling Choosing between absolute (number of the measurement points) and relative (percent of the measurement points) scaling. > Click on absolute scaling or relative scaling. Selecting background color > Click on Background color and select a color. Switching grid lines on/off > Click on Grid lines. Specifying number of columns Set the number of columns over the temperature range being assessed (settings between 10 and 100 columns are possible): > Click on the number and change it by means of input via the keyboard or via Thermal image markers document window Shows the measurement results of the image markers performed in the Thermal image document window. The emissivity and the reflected temperature of the inserted image marker can be changed at the same time here as well. Additional comments can be entered for each individual image marker. The following functions are available in the Thermal image markers document window: Saving/exporting measurement results for the image markers in Excel Copying measurement results to the clipboard Deleting measurement results for the image markers Modifying emissivity and reflected temperature for image markers at specific points/ranges Entering comments 24
25 Function Saving/exporting measurement results in Excel Copying measurement results to the clipboard Deleting image markers Modifying emissivity and reflected temperature for image markers at specific points/ranges Entering comments Procedure The measurement results for the image markers are saved in an Excel table. 1. Click on Save file. - The Windows dialogue for saving files is opened. 2. Enter a file name. 3. Select the file format XLS. 4. Select a storage location and click on [Save]. The data cannot be inserted into other programs as an image file. > Click on Clipboard. - Measurement results can be inserted in other programs (e.g. Microsoft Word, Powerpoint). 1. Highlight the line to be deleted. 2. Click on Delete. Changes to the settings influence the measurement result. The settings should only be changed with the utmost caution! > In the table, click on the value (emissivity or reflected temperature) and modify it via the keyboard or. - The temperature of the measurement point adjusts to the set emissivity/reflected temperature. - Changes can be seen in the Thermal image document window. > Click in the comment field and use the keyboard to enter the text. 25
26 Real image document window The following functions are available in the Real image document window: Importing real images Exporting real images Copying a real image to the clipboard Inserting a real image from the clipboard Deleting a real image Rotating a real image Modifying the brightness of a real image Function Procedure Importing real images 1. Click on Open. - The folder containing the real images opens. 2. Highlight a real image and click on [Open]. - The real image selected will be displayed in the Real image document window. Exporting real images 1. Click on Save file. - The Windows dialogue for saving files is opened. 2. Enter a file name. 3. Select a file format (BMP, JPG, PNG). 4. Select a storage location and click on [Save]. Copying a real image to the clipboard > Click on Clipboard. - The real image can be inserted in other programs (e.g. Microsoft Word, Powerpoint). 26
27 Function Inserting a real image from the clipboard Procedure > Click on Clipboard Insert. - The confirmation request is opened. > If you wish to insert the real image from the clipboard: Click on [Yes]. - The real image is inserted from the clipboard. > If you wish to cancel the process: Click on [No]. Deleting a real image 1. Click on Delete. - The confirmation request is opened. 2. Click on [OK]. - The real image is deleted. Rotating a real image > Click on Rotate left or Rotate right. Modifying the brightness of a real image 1. Click on Brightness. - The dialogue box is opened. 2. Use the scroll bar to modify the brightness of the real image. 3. Click on [OK] Profile document window Displays the temperature profile created in the Thermal image document window. The following functions are available in the Profile document window: Saving a temperature profile as an image file Copying a temperature profile to the clipboard Selecting the presentation of the temperature profile Changing the background color of the temperature profile Switching grid lines on/off 27
28 Function Saving a temperature profile as an image file Copying a temperature profile to the clipboard Selecting the presentation of the temperature profile Changing the background color of the temperature profile Procedure 1. Click on Save file. - The Windows dialogue for saving files is opened. 2. Enter a file name. 3. Select a file format (BMP, JPG, PNG). 4. Select a storage location and click on [Save]. > Click on Clipboard. - Data can be inserted in other programs (e.g. Microsoft Word, Powerpoint). > To select filled out profile: Click on. > To select a line profile: Click on. > Click on Background color and select a color. Switching grid lines on/off > Click on Grid lines Comments document window > Use the keyboard to enter the comments about the currently selected infrared image in the text field Creating a report You can create a report with one or more infrared image(s). A Report Wizard will guide you through the process. Several report templates are available for creating simple reports: Thermal bridges in buildings in accordance with EN (comprehensive) Thermal bridges in buildings in accordance with EN (simplified test) Industrial thermography Short report Standard 28
29 1. In the ribbon, click on the Report tab. 2. Click on Report Wizard. - The Report Wizard is opened. Report tab Depending on the report template selected, the Report Wizard is divided into the following tabs: Template Image selection Company address / Logo Address / Location Job description Ambient conditions Conclusion Preview > Work through the individual tabs from left to right and note the respective tips at the bottom of the window. - The data entered appear automatically in the report. Saving a report 1. Click on the Preview tab. - A preview of the report is opened. 2. Click on Save report. - The Windows dialogue for saving files is opened. 3. Enter the file name and select a file format. 4. Select a storage location and click on [Save]. - The report will be saved in TIR file format. This will create a file with the images and the report data entered. Saving a report as a PDF 1. Click on the Preview tab. - A preview of the report is opened. 2. Click on PDF. - The Windows dialogue for saving files is opened. 3. Enter a file name, select a storage location and click on [Save]. - The report will be saved as a PDF. 29
30 Print report 1. Click on Print. - The Windows dialogue for printing a report is opened. 2. Complete the print settings if necessary and click on [Print]. - The report is printed Modifying the report Data in a saved report can be modified. 1. In the Report tab, click on Restore saved report. - The Windows dialogue is opened. 2. Navigate to the directory where the report is stored. 3. Select a report and click on [Open]. - The Report Wizard is opened. - Report texts can be modified in the Report Wizard. > To edit images afterward: 1. Click on the Report Wizard. - The report data are displayed in the work space in individual document windows. - Report texts remain in the Report Wizard. 2. Carry out the desired image edits. 3. In the Report tab, click on Report Wizard. - The edited image is inserted in the Report Wizard. - The existing texts are displayed. 4. Saved the report with the changes. 30
31 6.7. Report Designer With the Report Designer you can create your own report template by changing an existing template to meet your needs. There are tools available to help you design and edit the report template to your liking. The Report Designer is used exclusively for creating individualised report templates. The reports themselves are created by selecting the report template in the Report Wizard. Opening the Report Designer Requirement: at least one infrared image must be open. 1. Select the Settings tab and click on Report Designer. - The dialogue box is opened. 2. Select the report template that you would like to edit and click on [OK]. - The Report Designer is opened User interface Ribbon The ribbon helps you to carry out modifications and settings in the Report Designer and to find the relevant functions and commands quickly. The functions and commands are divided into different groups on two tabs: Report Designer and Preview. The functions/commands and the work space vary depending on the tab selected. Each tab contains its own functions/commands to perform actions. The tab Report Designer contains function/commands for: Saving the report template Editing the report template Changing the report template view 31
32 The tab Preview contains function/commands for: Printing a report Editing and aligning the page layout Changing the report template view Work space Modifications are carried out in the work space in the Report Designer tab. It consists of the file directory tree and the open report template. The file directory tree contains prescribed fields that you can pull into the report template. When the Preview tab is selected, the work space view changes Functions and commands All of the functions/commands in the ribbon are described in more detail in tips (tool hints). > Move the mouse pointer over the functions/command in the ribbon. - Tips (tool hints) are displayed. 32
33 Editing a report template Report template areas The open report template consists of various areas. Fields can be inserted into or removed from each area. Report Header: contains fields with general information that appear once in the report template (e.g. company, instrument, client, etc.). When the report is created later, this information appears at the beginning of the report. Page Header: contains fields with information that appears on each page in the header. Bottom Margin: contains fields with information that appears on each page in the footer. Detail: contains fields with information about the corresponding measurements (e.g. location, ambient conditions, etc.) Detail Report "Picture": contains placeholders for image and text fields with information about the infrared images (emissivity and reflected temperature, comments about the individual infrared images, histogram, temperature profile, etc.). The Detail Report "Picture" area is repeated in the report depending on the number of infrared images. Report Footer: contains fields with information that appears at the end of the report template (e.g. general comments, conclusion, date and signature, etc.) Dragging prescribed fields into the report template You can integrate data, images, tables and tools from the file directory tree into the report template to modify it to meet your needs. Note the report template areas into which you drag the fields. For example, image fields should only be integrated into the Detail Report "Picture" area. Because the image fields serve as placeholders, each may only be dragged once into the Detail Report "Picture" area. 1. Click on the Report Designer tab. 2. In the file directory tree, click on the desired option. 3. Hold down the mouse buttons and drag the field into the desired position in the report template. - The field is aligned to the grid. 33
34 Modifying fields Font, font size and text alignment can be changed for the fields. 1. Click on the Report Designer tab. 2. In the report template, click on the field that you wish to adjust. 3. To highlight several fields: > Hold down the Ctrl-key and click on the fields or > Drag the mouse to create a marker frame around the fields. 4. Use the editing functions in the ribbon to modify the fields. - The changes will be applied to all highlighted fields. Aligning fields Requirement: at least two fields must be highlighted. 1. Click on the Report Designer tab. 2. To highlight several fields: > Hold down the Ctrl-key and click on the fields or > Drag the mouse to create a marker frame around the fields. 3. Use the editing functions in the ribbon to align the fields. - The changes will be applied to all highlighted fields. Moving field(s) 1. Click on the Report Designer tab. 2. In the report template, click on the field(s) that you wish to move. 3. Hold down the mouse button and drag the field(s) to the desired position. - The field(s) align to the grid. Modifying field size(s) 1. Click on the Report Designer tab. 2. In the report template, click on the field(s) where you wish to adjust the size. 3. Click on one of the black contact points of the field(s) and change the size of the field(s) by dragging with the mouse button pressed. 34
35 Deleting field(s) 1. Click on the Report Designer tab. 2. In the report template, click on the field(s) that you wish to delete. 3. To delete fields: > On the keyboard, press the [Del] key or > Right-click with the mouse and select Delete. Deleting a field has no effect on the size and position of other fields. Empty spaces between fields can be prevented by moving fields or changing their size. Entering text in the text field 1. Click on the Report Designer tab. 2. Double-click on a text field in the report template and enter the text via the keyboard. - Text appears as a fixed block if the report template is selected in the Report Wizard. Saving a report template 1. Click on the Report Designer tab. 2. Click on Save. - The Windows dialogue for saving files is opened. 3. Enter a file name and click on [Save]. - The report templates are saved in a folder based on the operating system and operating system language. > To find the report templates: Select the search function in Explorer and search for the *.repx file. - Report templates (file format.repx) will be displayed. Deleting a report template Note that report templates are deleted permanently. After they are deleted, report templates cannot be restored. Only "User" type report templates can be deleted. Requirement: the Report Designer must be closed. 1. In IRSoft, in the ribbon, click on the Settings tab. 35
36 36 2. In the ribbon, click on the Report Designer. - The dialogue box is opened. 3. Select the report template that you wish to delete. 4. Click on [Delete]. - The confirmation request is opened. > If you wish to permanently delete the report template: Click on [Yes]. > If you wish to cancel the process: Click on [No]. Modifying page layout 1. Click on the Preview tab. 2. Use the editing functions in the ribbon to adjust the page layout Configuring the instrument The configuration makes it possible to perform settings on the testo 880 thermal imager using IRSoft. In both tabs Picture settings and Instrument settings, all settings can be performed that can also be performed using the instrument menu of the thermal imager. For this, please also observe the instruction manual for the thermal imager. In addition, you have the option of applying a user-defined set of existing materials (including the corresponding emissivity) to the thermal imager. Requirement: Thermal imager is connected to the PC Thermal imager is switched on and recognised by the PC 1. In the ribbon, click on the Imager tab. 2. Click on Configuration Testo The Characteristics of t880 dialogue window is opened. 3. Choose between image and instrument settings. 4. Complete the settings (see Picture settings page 37 and Instrument settings page 38). > If you wish to transfer the settings to the thermal imager: Click on [Apply]. > If you wish to discard the settings: Click on [Cancel]. 5. Click on [OK]. - The dialogue window is closed.
37 Picture settings Function Selecting the temperature scale Setting the palette, temperature unit, LCD brightness, measuring range Transferring materials Settings Choose between automatic and manual scaling: > Select the desired option. > With the selection of manual: Enter the min. and max. value. Select required settings: > Click on and select the desired value from the drop-down list. Transfer the desired materials with the corresponding emissivity to the thermal imager or IRSoft: The language of the materials to be chosen from depends on the language of the operating system. The language of the materials present in the thermal imager depends on the setting of the instrument language during commissioning. It is therefore possible that materials are displayed in different languages. Activating Active, User-defined emissivity 1. Click on the materials in the Materials in thermal imager list that are not required and remove these by clicking on. 2. Click on the required materials in the For selection of stationary materials list and copy these by clicking on in the thermal imager. A maximum of 8 materials can be saved in the thermal imager. Activate desired material: > Click on and select the desired material from the drop-down list. > With the selection of User-defined: Enter the value of the emissivity. 37
38 Instrument settings Function Settings Setting Language Activate the desired language: > Click on and select the desired language from the drop-down list. Switching the Power save function on/off Automatically hide (function keys, cursor, scale) Carrying out factory reset Synchronizing with PC clock Select the desired setting (Switch off imager or Switch off LCD): > Click on and select the desired function from the drop-down list. Activate the desired function: > Click on the desired functions to activate them ( ). Carry out a factory reset: 1. Click on [Factory reset]. - A confirmation request will follow. 2. Click on [Yes]. Synchronize the date and time of the instrument with the PC: > Click on [Synchronize with PC clock]. 38
39 7 Tips and assistance 7 Tips and assistance 7.1. Questions and answers Question/problem How can the software be uninstalled? How can I get information about software updates? How can a software update be performed? Then imager cannot be configured. The Import Wizard does not start up. Possible causes/solution > To uninstall the software, insert the program CD and follow the instructions of the Uninstall Wizard. If the process does not begin automatically, start the Setup.exe file. > Make sure that in the Settings tab in the Program updates group, the Automatic check function is activated. If this function is activated, you will regularly receive information as soon as a new update is available. When performing a software update, the existing version does not have to be uninstalled. 1. Download the software update from the Internet to your PC. 2. Perform the installation of the new version, see Installing the software/driver page 7. > Check if the instrument is recognised by the PC. > Check the connection between the instrument and the PC. > Start up IRSoft before connecting the thermal imager. > Check whether the Import Wizard is active: Imager tab Import Wizard. 39
40 7 Tips and assistance Question/problem --- or +++ is shown instead of the reading. xxx is shown instead of the reading. Possible causes/solution The reading was outside of the measurement range when the infrared image was recorded. No reading is available for the selected measurement point. Reading cannot be calculated. > Check parameter settings for plausibility. If we could not answer your question, please contact your dealer or Testo Customer Service. For contact details see the rear side of this document or the web page 40
41 8 Index 8 Index A Activate/deactivate tips (tool hints)...12 Activating/deactivating the Import Wizard...9 Aligning fields...34 C Comparing infrared images...14 Copying an infrared image to the clipboard...18 Correcting temperature in an infrared image area...19 Creating a histogram...19, 23 Creating a temperature profile...20 D Deleting a real image...27 Deleting a report template...35 Deleting field(s)...35 Dragging fields into the report template...33 E Entering comments...25 Entering text in the text field...35 Establishing a connection with the instrument...8 Excel...18, 25 Exporting real images...26 I Importing real images...26 Instrument settings...36, 38 M Modifying emissivity and reflected temperature for image markers at specific points/ranges Modifying field size(s) Modifying fields Modifying page layout Modifying the brightness of a real image Moving field(s) Moving/deleting image markers in the infrared image O Opening infrared images Opening the Report Designer P Picture settings... 36, 37 Powerpoint... 18, 26, 28 Print report R Report tab Report template areas Ribbon Rotating a real image Rotating the infrared image S Saving a histogram as an image file Saving a report Saving a report as a PDF Saving a report template
42 8 Index Saving a temperature profile as an Setting the scale image file Specifying a hotspot/coldspot Saving/exporting measurement Specifying number of columns results in Excel Specifying the readings for one Saving/exporting the infrared image... pixel in an 17 infrared image Selecting scaling U Selecting the presentation of the temperature profile Using the Import Wizard...9 Setting isotherms (temperature W range) Word... 18, 24, 25, 26, 28 Setting the limits Work space
43
44 en-us 01 V
testo EasyClimate Software Instruction manual
 testo EasyClimate Software Instruction manual 2 1 Contents 1 Contents 1 Contents... 3 1.1. About this document... 5 2 Specifications... 5 2.1. Use... 5 2.2. System requirements... 6 3 First steps... 6
Instruction manual. testo easyheat Configuration and Analysis software
 Instruction manual testo easyheat Configuration and Analysis software en 2 General Information General Information This documentation includes important information about the features and application of
Model 288B Charge Plate Graphing Software Operators Guide
 Monroe Electronics, Inc. Model 288B Charge Plate Graphing Software Operators Guide P/N 0340175 288BGraph (80207) Software V2.01 100 Housel Ave PO Box 535 Lyndonville NY 14098 1-800-821-6001 585-765-2254
Software User's Guide
 Software User's Guide Brother QL-series The contents of this guide and the specifications of this product are subject to change without notice. Brother reserves the right to make changes without notice
WHAT S NEW IN WORD 2010 & HOW TO CUSTOMIZE IT
 WHAT S NEW IN WORD 2010 & HOW TO CUSTOMIZE IT The Ribbon... 2 Default Tabs... 2 Contextual Tabs... 2 Minimizing and Restoring the Ribbon... 3 Customizing the Ribbon... 3 A New Graphic Interface... 5 Live
New Features in Microsoft Office 2007
 New Features in Microsoft Office 2007 TABLE OF CONTENTS The Microsoft Office Button... 2 The Quick Access Toolbar... 2 Adding buttons to the Quick Access Toolbar... 2 Removing buttons from the Quick Access
Embroidery Fonts Plus ( EFP ) Tutorial Guide Version 1.0505
 Tutorial Guide Version 1.0505") Embroidery Fonts Plus ( EFP ) Tutorial Guide Version 1.0505 1 Contents Chapter 1 System Requirements.................. 3 Chapter 2 Quick Start Installation.................. 4 System Requirements................
Embroidery Fonts Plus ( EFP ) Tutorial Guide Version 1.0505 1 Contents Chapter 1 System Requirements.................. 3 Chapter 2 Quick Start Installation.................. 4 System Requirements................
Excel 2007 Basic knowledge
 Ribbon menu The Ribbon menu system with tabs for various Excel commands. This Ribbon system replaces the traditional menus used with Excel 2003. Above the Ribbon in the upper-left corner is the Microsoft
PowerPoint 2007 Basics Website: http://etc.usf.edu/te/
 Website: http://etc.usf.edu/te/ PowerPoint is the presentation program included in the Microsoft Office suite. With PowerPoint, you can create engaging presentations that can be presented in person, online,
Handout: Word 2010 Tips and Shortcuts
 Word 2010: Tips and Shortcuts Table of Contents EXPORT A CUSTOMIZED QUICK ACCESS TOOLBAR... 2 IMPORT A CUSTOMIZED QUICK ACCESS TOOLBAR... 2 USE THE FORMAT PAINTER... 3 REPEAT THE LAST ACTION... 3 SHOW
testo easyheat Configuration and Analysis software Instruction manual
 testo easyheat Configuration and Analysis software Instruction manual en 2 General Information General Information This documentation includes important information about the features and application of
Word basics. Before you begin. What you'll learn. Requirements. Estimated time to complete:
 Word basics Word is a powerful word processing and layout application, but to use it most effectively, you first have to understand the basics. This tutorial introduces some of the tasks and features that
Introduction to Word 2007
 Introduction to Word 2007 You will notice some obvious changes immediately after starting Word 2007. For starters, the top bar has a completely new look, consisting of new features, buttons and naming
Microsoft Word 2010. Quick Reference Guide. Union Institute & University
 Microsoft Word 2010 Quick Reference Guide Union Institute & University Contents Using Word Help (F1)... 4 Window Contents:... 4 File tab... 4 Quick Access Toolbar... 5 Backstage View... 5 The Ribbon...
PowerPoint 2013: Basic Skills
 PowerPoint 2013: Basic Skills Information Technology September 1, 2014 1 P a g e Getting Started There are a variety of ways to start using PowerPoint software. You can click on a shortcut on your desktop
StrikeRisk v6.0 IEC/EN 62305-2 Risk Management Software Getting Started
 StrikeRisk v6.0 IEC/EN 62305-2 Risk Management Software Getting Started Contents StrikeRisk v6.0 Introduction 1/1 1 Installing StrikeRisk System requirements Installing StrikeRisk Installation troubleshooting
Sharing Files and Whiteboards
 Your user role in a meeting determines your level of file sharing. The type of files you can share include documents, presentations, and videos. About Sharing Files, page 1 Changing Views in a File or
3D Viewer. user's manual 10017352_2
 EN 3D Viewer user's manual 10017352_2 TABLE OF CONTENTS 1 SYSTEM REQUIREMENTS...1 2 STARTING PLANMECA 3D VIEWER...2 3 PLANMECA 3D VIEWER INTRODUCTION...3 3.1 Menu Toolbar... 4 4 EXPLORER...6 4.1 3D Volume
ActiView. Visual Presenter Image Software User Manual - English
 ActiView Visual Presenter Image Software User Manual - English Date: 05/02/2013 Table of Contents 1. Introduction... 3 2. System Requirements... 3 3. Install ActiView - Windows OS... 4 4. Install ActiView
Introduction to Microsoft Excel 2010
 Introduction to Microsoft Excel 2010 Screen Elements Quick Access Toolbar The Ribbon Formula Bar Expand Formula Bar Button File Menu Vertical Scroll Worksheet Navigation Tabs Horizontal Scroll Bar Zoom
Microsoft Access 2010 handout
 Microsoft Access 2010 handout Access 2010 is a relational database program you can use to create and manage large quantities of data. You can use Access to manage anything from a home inventory to a giant
PN-L702B LCD MONITOR TOUCH PANEL DRIVER OPERATION MANUAL. Version 2.1
 PN-L702B LCD MONITOR TOUCH PANEL DRIVER OPERATION MANUAL Version 2.1 Contents Setting up the PC...3 Installing the touch panel driver...3 Touch Panel Settings...4 How to configure settings...4 Calibration...5
Microsoft Office Excel 2007 Key Features. Office of Enterprise Development and Support Applications Support Group
 Microsoft Office Excel 2007 Key Features Office of Enterprise Development and Support Applications Support Group 2011 TABLE OF CONTENTS Office of Enterprise Development & Support Acknowledgment. 3 Introduction.
Legal Notes. Regarding Trademarks. Model supported by the KX printer driver. 2010 KYOCERA MITA Corporation
 Legal Notes Unauthorized reproduction of all or part of this guide is prohibited. The information in this guide is subject to change for improvement without notice. We cannot be held liable for any problems
Excel 2003 Tutorial I
 This tutorial was adapted from a tutorial by see its complete version at http://www.fgcu.edu/support/office2000/excel/index.html Excel 2003 Tutorial I Spreadsheet Basics Screen Layout Title bar Menu bar
Instruction manual. testo easyemission Software
 Instruction manual testo easyemission Software en 2 General Information General Information This documentation includes important information about the features and application of the product. Please read
Sartorius ProControl@Informer
 Operating Instructions Sartorius ProControl@Informer Evaluation Software for SPCfWin (Sartorius ProControl for Windows) 98646-002-87 Intended Use Sartorius ProControl@Informer (SPC@Informer) is a software
MICROSOFT ACCESS 2007 BOOK 2
 MICROSOFT ACCESS 2007 BOOK 2 4.1 INTRODUCTION TO ACCESS FIRST ENCOUNTER WITH ACCESS 2007 P 205 Access is activated by means of Start, Programs, Microsoft Access or clicking on the icon. The window opened
Software for Producing Rack Layouts and Purchase Orders
 1 Software for Producing Rack Layouts and Purchase Orders Welcome to RackTools: software that makes it simple and quick to specify Middle Atlantic Products. RackTools has been designed with one purpose
PTPhoneManager II. User guide
 COMMUNICATION AT ITS BEST PTPhoneManager II User guide Communications A member of PEIKER group DOCUMENT PEI TEL Communications GmbH - PTPhoneManager II - 2 - T ABLE OF CONTENTS Table of contents Table
for Sage 100 ERP Business Insights Overview Document
 for Sage 100 ERP Business Insights Document 2012 Sage Software, Inc. All rights reserved. Sage Software, Sage Software logos, and the Sage Software product and service names mentioned herein are registered
PowerPoint 2007: Basics Learning Guide
 PowerPoint 2007: Basics Learning Guide What s a PowerPoint Slide? PowerPoint presentations are composed of slides, just like conventional presentations. Like a 35mm film-based slide, each PowerPoint slide
Plotting: Customizing the Graph
 Plotting: Customizing the Graph Data Plots: General Tips Making a Data Plot Active Within a graph layer, only one data plot can be active. A data plot must be set active before you can use the Data Selector
Basic Microsoft Excel 2007
 Basic Microsoft Excel 2007 The biggest difference between Excel 2007 and its predecessors is the new layout. All of the old functions are still there (with some new additions), but they are now located
Instruction manual. testo easyemission Software
 Instruction manual testo easyemission Software en 2 General Information General Information This documentation includes important information about the features and application of the product. Please read
Microsoft Migrating to Word 2010 from Word 2003
 In This Guide Microsoft Word 2010 looks very different, so we created this guide to help you minimize the learning curve. Read on to learn key parts of the new interface, discover free Word 2010 training,
Microsoft Outlook 2010. Reference Guide for Lotus Notes Users
 Microsoft Outlook 2010 Reference Guide for Lotus Notes Users ContentsWelcome to Office Outlook 2010... 2 Mail... 3 Viewing Messages... 4 Working with Messages... 7 Responding to Messages... 11 Organizing
Appointment Scheduler
 EZClaim Appointment Scheduler User Guide Last Update: 11/19/2008 Copyright 2008 EZClaim This page intentionally left blank Contents Contents... iii Getting Started... 5 System Requirements... 5 Installing
Maximizing the Use of Slide Masters to Make Global Changes in PowerPoint
 Maximizing the Use of Slide Masters to Make Global Changes in PowerPoint This document provides instructions for using slide masters in Microsoft PowerPoint. Slide masters allow you to make a change just
PowerPoint 2013 Basics for Windows Training Objective
 PowerPoint 2013 Basics for Windows PowerPoint 2013 Basics for Windows Training Objective To learn the tools and features to get started using PowerPoint more efficiently and effectively. What you can expect
The serial port is another kind of transmission mode in some outdated PC as a supplementary in failure of USB transmission.
 Page 1 of 21 OWON Oscilloscope Installation and Use Guide Welcome to use Oscilloscope analysis software. The kind of communication software is use to acquire, store, analyze and display the data. The instruction
S PT-E550W ELECTRONIC E C LABELING L SYSTEM
 ELECTRONIC E C LABELING L SYSTEM S PT-E0W In order to use your P-touch labeling system safely, read the included Quick Setup Guide first. Read this guide before you start using your P-touch labeling system.
OPERATION MANUAL. MV-410RGB Layout Editor. Version 2.1- higher
 OPERATION MANUAL MV-410RGB Layout Editor Version 2.1- higher Table of Contents 1. Setup... 1 1-1. Overview... 1 1-2. System Requirements... 1 1-3. Operation Flow... 1 1-4. Installing MV-410RGB Layout
Quick Start Guide. Microsoft Publisher 2013 looks different from previous versions, so we created this guide to help you minimize the learning curve.
 Quick Start Guide Microsoft Publisher 2013 looks different from previous versions, so we created this guide to help you minimize the learning curve. Quick Access Toolbar Add your favorite commands to the
ADMINISTRATORS GUIDE EPISUITE 6
 ADMINISTRATORS GUIDE EPISUITE 6 A quick tutorial on how to set up and implement Episuite Software created by IDentiphoto Specialists in IDentification 1810 Joseph Lloyd Pkwy. Willoughby, OH 44094 Phone:
Migrating to Excel 2010 from Excel 2003 - Excel - Microsoft Office 1 of 1
 Migrating to Excel 2010 - Excel - Microsoft Office 1 of 1 In This Guide Microsoft Excel 2010 looks very different, so we created this guide to help you minimize the learning curve. Read on to learn key
Microsoft Office PowerPoint 2013
 Microsoft Office PowerPoint 2013 Navigating the PowerPoint 2013 Environment The Ribbon: The ribbon is where you will access a majority of the commands you will use to create and develop your presentation.
Microsoft Office PowerPoint 2003. Creating a new presentation from a design template. Creating a new presentation from a design template
 Microsoft Office PowerPoint 2003 Tutorial 2 Applying and Modifying Text and Graphic Objects 1 Creating a new presentation from a design template Click File on the menu bar, and then click New Click the
Microsoft Migrating to PowerPoint 2010 from PowerPoint 2003
 In This Guide Microsoft PowerPoint 2010 looks very different, so we created this guide to help you minimize the learning curve. Read on to learn key parts of the new interface, discover free PowerPoint
Sage Abra SQL HRMS Reports. User Guide
 Sage Abra SQL HRMS Reports User Guide 2010 Sage Software, Inc. All rights reserved. Sage, the Sage logos, and the Sage product and service names mentioned herein are registered trademarks or trademarks
Excel 2007: Basics Learning Guide
 Excel 2007: Basics Learning Guide Exploring Excel At first glance, the new Excel 2007 interface may seem a bit unsettling, with fat bands called Ribbons replacing cascading text menus and task bars. This
Merging Labels, Letters, and Envelopes Word 2013
 Merging Labels, Letters, and Envelopes Word 2013 Merging... 1 Types of Merges... 1 The Merging Process... 2 Labels - A Page of the Same... 2 Labels - A Blank Page... 3 Creating Custom Labels... 3 Merged
Microsoft Publisher 2010 What s New!
 Microsoft Publisher 2010 What s New! INTRODUCTION Microsoft Publisher 2010 is a desktop publishing program used to create professional looking publications and communication materials for print. A new
Serif PagePlusX4. Group Listing
 File Menu New Startup Wizard New Publication New Book Open File Open Browse Files Browse Revert Close File Save Save As Save As Package Export As Picture Properties Page Setup Layout Guides Print Print
BIGPOND ONLINE STORAGE USER GUIDE Issue 1.1.0-18 August 2005
 BIGPOND ONLINE STORAGE USER GUIDE Issue 1.1.0-18 August 2005 PLEASE NOTE: The contents of this publication, and any associated documentation provided to you, must not be disclosed to any third party without
ACS Version 10.6 - Check Layout Design
 ACS Version 10.6 - Check Layout Design Table Of Contents 1. Check Designer... 1 About the Check Design Feature... 1 Selecting a Check Template... 2 Adding a Check Template... 2 Modify a Check Template...
User Guide. DYMO Label TM v.8
 User Guide DYMO Label TM v.8 Copyright 2009 Sanford, L.P. All rights reserved. Revised 6/12/09. No part of this document or the software may be reproduced or transmitted in any form or by any means or
Windows 8.1 Update 1 Supplement
 Illustrated Series Guide to Windows 8.1 Update 1 Changes June 2014 Table of Contents (CTRL+Click a link to navigate directly to Part 1, 2, 3, or 4.) Part 1: What Version of Windows Am I Using? Part 2:
Legal Notes. Regarding Trademarks. 2012 KYOCERA Document Solutions Inc.
 Legal Notes Unauthorized reproduction of all or part of this guide is prohibited. The information in this guide is subject to change without notice. We cannot be held liable for any problems arising from
In this session, we will explain some of the basics of word processing. 1. Start Microsoft Word 11. Edit the Document cut & move
 WORD PROCESSING In this session, we will explain some of the basics of word processing. The following are the outlines: 1. Start Microsoft Word 11. Edit the Document cut & move 2. Describe the Word Screen
Windows XP Pro: Basics 1
 NORTHWEST MISSOURI STATE UNIVERSITY ONLINE USER S GUIDE 2004 Windows XP Pro: Basics 1 Getting on the Northwest Network Getting on the Northwest network is easy with a university-provided PC, which has
Microsoft PowerPoint 2010
 Microsoft PowerPoint 2010 Starting PowerPoint... 2 PowerPoint Window Properties... 2 The Ribbon... 3 Default Tabs... 3 Contextual Tabs... 3 Minimizing and Restoring the Ribbon... 4 The Backstage View...
SW43W. Users Manual. FlukeView Power Quality Analyzer Software Version 3.20 onwards
 SW43W FlukeView Power Quality Analyzer Software Version 3.20 onwards Users Manual 4822 872 30778 December 2005, Rev.1, 04/06 2005 Fluke Corporation, All rights reserved. All product names are trademarks
TEMP MONITOR_S2 Software operation instructions
 Tu Sitio de Automatización! TEMP MONITOR_S2 Software operation instructions 1. Installation / Remove 1.1 The minimum hardware requirements for Temp Monitor_S2 software is: Windows 98 / 2000 / XP / Vista
Welcome to CorelDRAW, a comprehensive vector-based drawing and graphic-design program for the graphics professional.
 Workspace tour Welcome to CorelDRAW, a comprehensive vector-based drawing and graphic-design program for the graphics professional. In this tutorial, you will become familiar with the terminology and workspace
Customizing forms and writing QuickBooks Letters
 LESSON 15 Customizing forms and writing QuickBooks Letters 15 Lesson objectives, 398 Supporting materials, 398 Instructor preparation, 398 To start this lesson, 398 About QuickBooks forms, 399 Customizing
Password Memory 6 User s Guide
 C O D E : A E R O T E C H N O L O G I E S Password Memory 6 User s Guide 2007-2015 by code:aero technologies Phone: +1 (321) 285.7447 E-mail: [email protected] Table of Contents Password Memory 6... 1
Acer LCD Monitor Driver Installation Guide
 1 Contents 1 Contents... 1 2 Introduction... 2 3 Installation Guide... 2 3.1 PC requirements... 2 3.2 Installing the Acer LCD Monitor Driver on Windows Vista... 3 3.2.1 Hardware first install... 3 3.2.2
National RTAP Marketing Transit Toolkit Customizing Templates in Microsoft Publisher
 National RTAP Marketing Transit Toolkit Customizing Templates in Microsoft Publisher Customizing the Templates in Microsoft Publisher Microsoft Publisher is part of the Microsoft Office Suite, so most
Internet Explorer 7. Getting Started The Internet Explorer Window. Tabs NEW! Working with the Tab Row. Microsoft QUICK Source
 Microsoft QUICK Source Internet Explorer 7 Getting Started The Internet Explorer Window u v w x y { Using the Command Bar The Command Bar contains shortcut buttons for Internet Explorer tools. To expand
Podium View TM 2.0 Visual Presenter Image Software User Manual - English (WINDOWS)
") Podium View TM 2.0 Visual Presenter Image Software User Manual - English (WINDOWS) Table of Contents 1. Introduction... 2 2. System Requirements... 2 3. Installing Podium View... 3 4. Connection to the
Podium View TM 2.0 Visual Presenter Image Software User Manual - English (WINDOWS) Table of Contents 1. Introduction... 2 2. System Requirements... 2 3. Installing Podium View... 3 4. Connection to the
Microsoft PowerPoint 2008
 Microsoft PowerPoint 2008 Starting PowerPoint... 2 Creating Slides in Your Presentation... 3 Beginning with the Title Slide... 3 Inserting a New Slide... 3 Slide Layouts... 3 Adding an Image to a Slide...
Sample- for evaluation purposes only! Introductory OneNote. teachucomp, inc. A publication of TeachUcomp Incorporated. Copyright TeachUcomp, Inc.
 A publication of TeachUcomp Incorporated. Copyright TeachUcomp, Inc. 2015 Introductory OneNote teachucomp, inc. it s all about you Copyright: Copyright 2015 by TeachUcomp, Inc. All rights reserved. This
OPTAC Fleet Viewer. Instruction Manual
 OPTAC Fleet Viewer Instruction Manual Stoneridge Limited Claverhouse Industrial Park Dundee DD4 9UB Help-line Telephone Number: 0870 887 9256 E-Mail: [email protected] Document version 4.0 Part Number:
Navigator Software. Contents 1. NAVIGATOR SOFTWARE 2. INSTALLATION 3. USING NAVIGATOR SOFTWARE 3.1 STARTING THE PROGRAM 3.
 Navigator Software Contents 1. NAVIGATOR SOFTWARE 2. INSTALLATION 3. USING NAVIGATOR SOFTWARE 3.1 STARTING THE PROGRAM 3.2 SYSTEM SET UP 3.3 LOAD DATA FILE 3.3.1 LOADING PARTIAL FILES 3.4 DATA TABLE WINDOW
SMART Ink 1.5. Windows operating systems. Scan the following QR code to view the SMART Ink Help on your smart phone or other mobile device.
 SMART Ink 1.5 Windows operating systems User s guide Scan the following QR code to view the SMART Ink Help on your smart phone or other mobile device. Trademark notice SMART Ink, SMART Notebook, SMART
Sharing Presentations, Documents, and Whiteboards
 Chapter 19 19 Sharing Presentations, Documents, and Whiteboards Your user role in an event determines your level of sharing. Whichever role you take, the following table describes the basic tasks associated
Publisher 2010 Cheat Sheet
 April 20, 2012 Publisher 2010 Cheat Sheet Toolbar customize click on arrow and then check the ones you want a shortcut for File Tab (has new, open save, print, and shows recent documents, and has choices
Table of Contents. 1. Overview... 3. 1.1 Materials Required. 3 1.2 System Requirements. 3 1.3 User Mode 3. 2. Installation Instructions..
 Table of Contents 1. Overview..... 3 1.1 Materials Required. 3 1.2 System Requirements. 3 1.3 User Mode 3 2. Installation Instructions.. 4 2.1 Installing the On Call Diabetes Management Software. 4 2.2
SnagIt Add-Ins User Guide
 Version 8.1 User Guide By TechSmith Corp. User Guide User Guide Contents User s Guide 1 Overview...1 Word, PowerPoint, and Excel Add-Ins...2 Outlook Add-In...2 Internet Explorer / Windows Explorer Add-In...2
Creating Forms with Acrobat 10
 Creating Forms with Acrobat 10 Copyright 2013, Software Application Training, West Chester University. A member of the Pennsylvania State Systems of Higher Education. No portion of this document may be
Software User's Guide
 BROTHER QL-500/550/650TD/1050/1050N Software User's Guide QL-500 QL-650TD QL-550 QL-1050/1050N 1 Contents Contents....................................................................................2................................................................................4
Creating a Poster in PowerPoint 2010. A. Set Up Your Poster
 View the Best Practices in Poster Design located at http://www.emich.edu/training/poster before you begin creating a poster. Then in PowerPoint: (A) set up the poster size and orientation, (B) add and
SMART BOARD USER GUIDE FOR PC TABLE OF CONTENTS I. BEFORE YOU USE THE SMART BOARD. What is it?
 SMART BOARD USER GUIDE FOR PC What is it? SMART Board is an interactive whiteboard available in an increasing number of classrooms at the University of Tennessee. While your laptop image is projected on
Power Log PC Application Software
 Power Log PC Application Software Users Manual May 2007 Rev. 1, 5/08 2007-2008 Fluke Corporation. All rights reserved. Specifications are subject to change without notice. All product names are trademarks
User Manual. LG EzSign TV Editor. Version 1.0 - Nov. 10, 2010. www.lge.co.kr
 User Manual LG EzSign TV Editor Version 1.0 - Nov. 10, 2010 www.lge.co.kr 2 Contents Contents 3 Before Using 3 What is LG EzSign TV Editor? 3 Installing LG EzSign TV Editor 3 System Requirements 4 Installing
How to create and personalize a PDF portfolio
 How to create and personalize a PDF portfolio Creating and organizing a PDF portfolio is a simple process as simple as dragging and dropping files from one folder to another. To drag files into an empty
Advanced Presentation Features and Animation
 There are three features that you should remember as you work within PowerPoint 2007: the Microsoft Office Button, the Quick Access Toolbar, and the Ribbon. The function of these features will be more
Operating Instructions (For Document Manager and Document Viewer)
") Operating Instructions (For Document Manager and Document Viewer) Software Model No. DP-C262/C322 Editing Documents General Description System Requirements Document Management Menus Explanation Basic Operations
Operating Instructions (For Document Manager and Document Viewer) Software Model No. DP-C262/C322 Editing Documents General Description System Requirements Document Management Menus Explanation Basic Operations
Digital Pen & USB Flash Drive. User Guide. December 2006 1
 Digital Pen & USB Flash Drive User Guide December 2006 1 Table of Contents Introduction...4 The Digital Pen Up Close...5 The Pen...5 Installing Your Digital Pen's Batteries...6 The USB F lash Receiver...7
QIAsymphony Management Console User Manual
 April 2012 QIAsymphony Management Console User Manual For use with software version 4.0 Sample & Assay Technologies Trademarks QIAGEN, QIAsymphony, Rotor-Gene (QIAGEN Group). InstallShield (Informer Technologies,
NDSU Technology Learning & Media Center
 1 NDSU Technology Learning & Media Center QBB 150C 231-5130 www.ndsu.edu/its/tlmc Creating a Large Format Poster (Plot) Using PowerPoint 2013 Posters should be designed and created in a manner that best
13 Managing Devices. Your computer is an assembly of many components from different manufacturers. LESSON OBJECTIVES
 LESSON 13 Managing Devices OBJECTIVES After completing this lesson, you will be able to: 1. Open System Properties. 2. Use Device Manager. 3. Understand hardware profiles. 4. Set performance options. Estimated
Outlook Email. User Guide IS TRAINING CENTER. 833 Chestnut St, Suite 600. Philadelphia, PA 19107 215-503-7500
 Outlook Email User Guide IS TRAINING CENTER 833 Chestnut St, Suite 600 Philadelphia, PA 19107 215-503-7500 This page intentionally left blank. TABLE OF CONTENTS Getting Started... 3 Opening Outlook...
6. If you want to enter specific formats, click the Format Tab to auto format the information that is entered into the field.
 Adobe Acrobat Professional X Part 3 - Creating Fillable Forms Preparing the Form Create the form in Word, including underlines, images and any other text you would like showing on the form. Convert the
Contents. Microsoft Office 2010 Tutorial... 1
 Microsoft Office 2010 Tutorial Contents Microsoft Office 2010 Tutorial... 1 Find your way through long documents with the new Document Navigation pane and Search... 4 Adjust the spaces between lines or
Generative Drafting. Page 1 1997 2001 DASSAULT SYSTEMES. IBM Product Lifecycle Management Solutions / Dassault Systemes
 Generative Drafting Page 1 Tutorial Objectives Description This Tutorial is an introduction to Generative Drafting. Message To show how CATIA V5 allows the user to automatically generate associative drafting
Korosi Monitoring System (KMS) Software Manual
 Software Manual") PT. KOROSI SPECINDO Corrosion Monitoring System Eng. Doc. No.: KS-MNL-KMS Korosi Monitoring System (KMS) Software Manual Revision Date Prepared Approved Description 0 23/05/2008 ES JH Issued for approval
PT. KOROSI SPECINDO Corrosion Monitoring System Eng. Doc. No.: KS-MNL-KMS Korosi Monitoring System (KMS) Software Manual Revision Date Prepared Approved Description 0 23/05/2008 ES JH Issued for approval
Trace.Net OTDR Test Management Software User s guide
 Trace.Net OTDR Test Management Software User s guide 2007-2009, AFL Telecommunications, all rights reserved. TRAC-01-1000 Revision B, 2009-06-10 Specifications are subject to change without notice. I Contents
User Guide Win7Zilla
 User Guide Win7Zilla Table of contents Section 1: Installation... 3 1.1 System Requirements... 3 1.2 Software Installation... 3 1.3 Uninstalling Win7Zilla software... 3 Section 2: Navigation... 4 2.1 Main