Clinical Photography Manual
|
|
|
- Sheila Francis
- 9 years ago
- Views:
Transcription
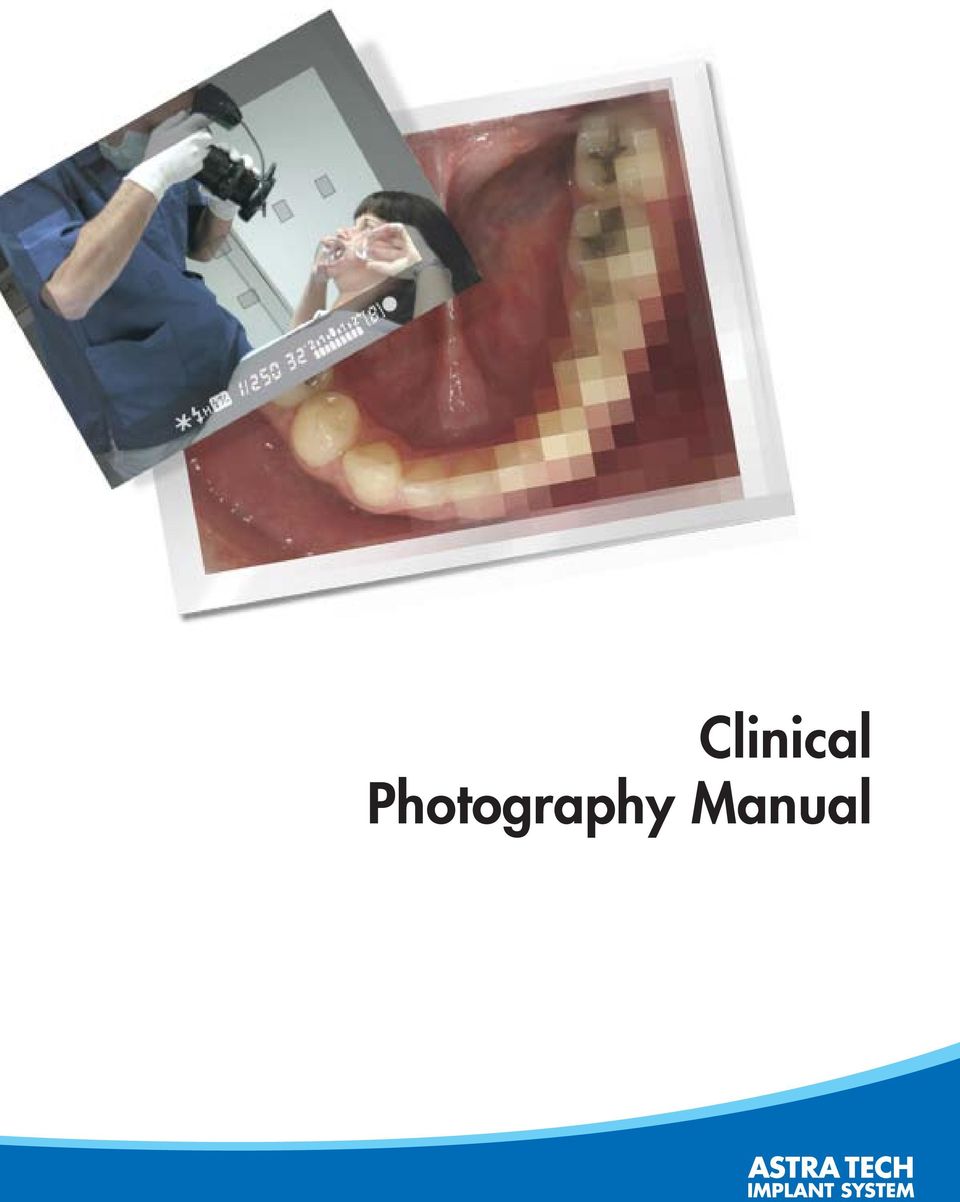
1 Clinical Photography Manual
2 Introduction At some time in our lives we have all used a camera, but clinical dental photography doesn t lend itself well to the concept of point and shoot. The nature of the environment, the small sizes and distances involved, and the difficulty of access make dental photography an art as well as a science. And like science, there are rules that have to be obeyed, such as focus, exposure and composition. But as with art, results improve with practice and experience. As an adjunct to the practice of dentistry, clinical photography brings rewards such as a sense of satisfaction in a job well done, the ability to share one s work with colleagues and patients, and a great opportunity to advance your dental practice. Good luck with your clinical photography! Special thanks to Per Rehnberg D.D.S. contributor and photographer 2

3 Content The right equipment for the job 4 Frontal view 6 Occlusal view 7 Lateral views 8 Pre- and post-operative comparisons 9 Full face images 10 Publishing your images 11 3

4 The right equipment for the job By its very nature, this brochure cannot be comprehensive, but good results are much easier to achieve with the right equipment. Here are our recommendations. A digital SLR-camera used for extraand intra-oral photographs. Digital images Digital cameras are improving continually. We recommend a digital camera system (one in which the lenses can be exchanged) with a macro lens and ring flash (or point flashes for macro photography). Digital images have a number of advantages, such as immediate access to any shot and the possibility to re-shoot if necessary. It is also easier to process digital images (for example to change color balance, rotate and crop any images). Today, more and more administrative clinical software can process and safely store images pertaining to patient data. Optical viewfinder vs. LCD displays (digital cameras) To guarantee consistent excellent quality, an SLR (single-lens reflex camera) should always be used. With this type of camera, one can see the image being composed through the optical viewfinder. Other types of viewfinders may not be so precise when focusing and with reproductions. A digital camera with an LCD display may seem like a tempting option, but this type of camera is difficult to use in a clinical environment when it comes to accuracy in positioning and focusing. Another important aspect is to choose a camera where you can set the aperture yourself, as the depth of field (the distance in front of and behind the point of maximum clarity that is in focus) is very limited at the ranges involved when executing macro photography. Depending on the power of the flash and the distance from the subject, you should always choose the minimum size aperture possible, such as F22 or F32 (the higher the F-stop number, the smaller the lens opening). This reduces the risk of distortions and blurred shots. Flash Always use a ring or point flash that is intended for close-up photography. Choose a flash/camera combination that permits TTL (Through The Lens) control of the flash, which will make perfect exposure easier to achieve. If you are using automatic focus, the autofocus may not work accurately at certain light thresholds, especially in low-light situations. Modern close-up flashes usually have auxiliary lights that simplify focusing. You can also use the dental operating lights if additional light is required. Lens It is a good idea to buy the best lenses available. Choose lenses that are specially designed for macro photography (close-ups). Macro lenses with a focal length between 55 and 110 mm are the best and most widely used with 35 mm cameras. Note that the digital system models available today have smaller image sensors than a camera designed for 35 mm film. A 60 mm lens on a 35 mm camera, for example, can often be compared to a 90 mm lens on a digital camera. 4

5 Under certain conditions, autofocus can simplify photography, but may cause problems when taking close-up shots. One option is to turn off the autofocus function and use the fixed focus set-up on the lens for a more uniform composition, such as 1:2 or 1:1, then move the camera toward or away from the subject to find the right focus and composition. Transferring images The ideal solution for maintaining orderly records is to transfer images from the memory card after each patient. These can be transferred using a card reader or directly from the camera via a cable (e.g. USB) into the clinic s image storage program that should preferably be connected to the clinic s administrative software. Wireless electronic transmission is another option. Lip retractors There are two types of lip retractors commonly in use: the type which has to be held in place by the subject or an assistant, and the type which has a spring incorporated to keep it in position. The latter often means that the lips rest against the buccal surface of the teeth, which is why this type might not be the optimal choice. Mouth mirrors The mouth mirrors that should be used in clinical photography are the metal film plated glass mirrors. When purchasing mouth mirrors, buy the best you can afford to ensure good optical properties and freedom from distortion. Treat your mouth mirrors as precision optical instruments when handling them, avoid finger marks and ensure that your dental surgery assistant realizes that they need to be handled carefully to avoid scratching. Most situations that arise in clinical photography can be handled with retractors (A). Retractors that are adjusted and cut down will add flexibility in photographing occlusal views (B). Remember that cold metal placed in a warm mouth will almost certainly cause the surface of the mirror to mist up. This can be remedied by warming the mirror before use. A steady stream of air from the syringe blown gently across the surface of the mirror can help, but only if it is gentle enough to avoid the production of excess saliva. Asking the subject to hold his/her breath just before taking the shot can also help avoid misting. Using mirrors 1 and 2 will cover most clinical situations. 5
 into the clinic s image storage program that should preferably be connected to the clinic s administrative software.")
6 Frontal view Although the subject can be asked to hold their own lip retractor while photos are taken, an assistant who understands the needs of clinical photography can be a great asset in positioning the retractors optimally and in achieving the best results for publication or education. Lift the soft tissue upwards and outwards from the buccal surface of the teeth using a lip retractor. Focusing on the lateral incisor helps ensure an adequate depth of field that will have all teeth with an acceptable focus range. Try to keep the occlusal plane horizontal, lined up with the top or bottom edge of the viewfinder. Remember that with digital images alignment errors can often be corrected afterwards. Viewed from the front, the assistant should be asked to pull the retractors (i.e. retractor A) not only outwards, but also forwards towards the camera. This ensures that the buccal surfaces of the posterior teeth are not obstructed by the soft tissue of lips and cheeks. Focus here Take one shot of the intercuspal position and complement this with a second shot with the patient in a resting position showing free space. Remember to use suction and syringe to dry the teeth and remove pooled saliva before each shot. 6

7 Occlusal view The occlusal view requires the use of a mouth mirror. Use lip retractors to lift the soft tissue away from buccal tooth surfaces and focus on one premolar. Focus here For optimal results with the occlusal view, the lips should be retracted before positioning the mirror. Ordinary lip retractors will put too much strain on the oral tissue to allow correct insertion and positioning of the mirror. The best solution is either to use two mouth mirrors, held by an assistant, or to use two specially adapted lip retractors (i.e. retractor B), cut down and rounded for safety, as shown here in the upper and lower arch. The images below show preparations for photographing the upper and lower mandibles in which a mirror is positioned at the correct angle. Establishing a 45 degree angle between the mirror and the camera for occlusal shots is recommended although this may not always be achievable. Retractor B positioned for an occlusal view of the upper mandible. Retractor B positioned for an occlusal view of the lower mandible. Upper mandible occlusal image Lower mandible occlusal image Positioning the mirror far enough back in the mouth to capture the upper second and third molars can elicit the gag response, so be prepared to use the same techniques you might use when taking radiographs or impressions. If this is a problem, the mirror can be positioned to highlight the region of interest and rest on the occlusal area of, for instance, the first molar. When photographing the lower mandible, the patient should be encouraged to relax the tongue and if possible, to keep it behind the mirror, pressing upwards toward the palate. 7
, cut down and rounded for safety, as shown here in the upper and lower arch.")
8 Lateral views Lateral images can be taken either with or without a mirror. When taking images without a mirror, it is better to use a lip retractor with a narrow (acute) angle between the upper and lower sections (i.e. lip retractor A). This puts less tension on the lip musculature and helps ensure that the lip can be drawn backwards as far towards the ear as possible. It will show buccal surface of the teeth clearly as far back as the second or third molars. Lateral image taken using only a lip retractor. This often works well as a standard method as it is quick and easy. Other variations are possible, such as with a more anterior direction when keeping an esthetic record of the front (with or without a retractor). For the best esthetic result, watch for the lower lip escaping back over the cervical area of the lower incisors, marked with arrows in the first image on the left. By asking the patient to relax and at the same time releasing the pressure on the lip retractors slightly, it is usually possible to prevent this from happening. When using a mirror for lateral photos (i.e. mirror no 2), ask the patient to try to relax once the mirror has been inserted. This creates space for the cheek to be lifted outwards and permits a better angle between mirror and camera. Remember that a lingual positioning of the mirror can trigger the gag reflex. Asking the subject to keep his/her tongue relaxed and in the middle of the mouth will create more space for the mirror in the sulcus than if the subject, trying to be helpful, moves his/her tongue from one side to the other and in doing so raises the floor of the mouth. Lateral images taken with a mirror may sometimes produce better views, but are more difficult for both the patient and the photographer. Note how the flash produces different lighting effects on the two cropped images above. The mirror image needs to be rotated horizontally (as in the image below it) in order to get an accurate view. 8

9 Pre- and post-operative comparisons One of the most compelling reasons for taking intra-oral photographs is to provide a before and after comparison, or to demonstrate the stages in a surgical or restorative procedure. To make such comparisons effective and easy to follow, it is important that the viewer can move from one image to the next in the sequence without having to re-orientate themselves. This generally means that all images in the series should be taken from the same angle and with the same exterior limitations. The two sets of images below show how the photographer has successfully used the same content and angle in consecutive shots. Look at the sequence of images below, in which perfect continuity is marred to some extent by the appearance of the lower incisors in the first photo of the sequence and their exclusion in the subsequent photos. A useful technique for emphasizing the foreground in these anterior shots is to hold an opaque piece of matte (i.e. non-reflective) plastic or oxidized alumina behind the teeth, thereby removing the confusion of the background. Images used to illustrate a procedure in progress have the specific problem that the act of taking photographs can interfere with or delay the procedure. However, as with almost all professional photography, it is up to the photographer to dictate both the composition and angle of the image required in order to achieve satisfactory results. Taking a little more time to stage manage each photograph and taking a number of shots of each stage if necessary is preferable to being rushed and ending up with images that are of no use for the purpose intended. 9

10 Full face images Full-face images should be taken against some type of background. A blue background is very popular, but the results can be that the facial skin tone takes on a yellowish hue. A grey or black background is more neutral. Make sure that extra-oral shots are taken before the intra-oral shots to avoid the risk of redness and marking from lip retractors. Positioning the subject (the patient) against a background and taking a shot with a flash will give what is called a projected shadow. Projected shadows can be eliminated by using a darker background (as in the image below). To record the subject s resting position, ask them to say Emma or Mississippi just before taking the picture. Smiling and laughing views can be very useful in showing how the lip line relates to the tips of the teeth and gingiva (smile line). In the case above, a black matt blind was hung as a backdrop. The ring flash on a modern camera can be removed so that the camera can be held in one hand and the flash in the other. By angling the flash so that it casts its light diagonally from the front of the subject and by taking an image with a lower aperture (< 18), it is easy to achieve results such as these. The red eyes effect will be minimized as well. Ask the patient, for the purpose of variation, to turn sideways or to turn his/her head in order to give the shot more depth. If you would like your facial images to be of a more professional standard, better quality lighting is required, such as for slave flash photography. In such a case, you should seek the advice of a professional photographer to make more individual upgrades and adjustments. 10
. To record the subject s resting position, ask them to say Emma or Mississippi just before taking the picture.")
11 Publishing your images The following guidelines will be useful when submitting your photographs for publication. Before submitting photographs, contact the publisher to check their exact requirements, the financial and copyright terms on which they accept images and, if appropriate, the arrangements for returning your material after publication. Obtaining a written statement from the publisher which clarifies these matters before you submit your work can save a lot of time and trouble should a dispute arise. Requirements also differ in terms of the type and quality of material which publishers will accept. Digital images To ensure the highest possible quality of the original digital image, the camera must be set up for high resolution (which will reduce the number of images you can capture in memory). Remember that an image that looks fine on your PC screen may not be of high enough quality for print reproduction. If you are manipulating original digital images on your computer (e.g. cropping, rotating, amending color balance), make sure that the image quality is maintained when you re-save the amended file and that you do not overwrite the original files. Certain types of files compress or otherwise degrade the data to save space, but in doing so sacrifice quality. Before submitting, check with the publisher what types of files they will accept, what size files they will allow and what type of image compression they will be happy with. Also check whether they prefer to receive your files by or CD/DVD. Transparencies The rapid evolution of digital photography reduces the importance of transparencies. When submit ting transparencies, ensure that they are in glassless mounts and are well protected. Ensure that your name and address are marked clearly on the mount using a small sticky label, and spot the slide to show which way the image should be viewed (especially important with some dental subjects shot using a mirror). To spot a slide, hold it in front of you the right way round and right side up and apply a small round sticker or equivalent felt pen mark to the bottom left corner of the slide mount. Prints Improvements in print technology have meant that an increasing number of publishers accept prints for publication. Quality of reproduction is not as good as when starting with a transparency, but could be acceptable for some purposes. Remember that not all film processing laboratories work to the same high standards, so have the film processed by a reputable laboratory. Photography magazines routinely run laboratory comparisons, and the difference can be staggering. A note on copyright The fact that you have treated and photographed a patient does not give you the right to use those photographs. Your patient may be grateful, impressed and very pleased with the work you have done for them, but you should respect his/her rights. To do so, make it a habit to get a model release signed by each subject, even if you do not think at the time that those particular images will be published or shown in public. There are many variations on the Model Release document, and an Internet search will reveal many, which you can adapt to your own requirements, language and local laws. 11

12 BioManagement Complex A successful implant system cannot be determined by one single feature alone. Just as in nature, there must be several interdependent features working together. The following combination of key features is unique to the ASTRA TECH Implant System : OsseoSpeed USX DENTSPLY IH AB OsseoSpeed more bone more rapidly MicroThread biomechanical bone stimulation Conical Seal Design a strong and stable fit Connective Contour increased soft tissue contact zone and volume MicroThread Conical Seal Design Connective Contour

Digital Photography Composition. Kent Messamore 9/8/2013
 Digital Photography Composition Kent Messamore 9/8/2013 Photography Equipment versus Art Last week we focused on our Cameras Hopefully we have mastered the buttons and dials by now If not, it will come
SP AF 300mm F/2.8 LD [IF] for Canon (Model 360EE)
![SP AF 300mm F/2.8 LD [IF] for Canon (Model 360EE)](/thumbs/40/21493790.jpg "SP AF 300mm F/2.8 LD [IF] for Canon (Model 360EE)") SP AF 300mm F/2.8 LD [IF] for Canon (Model 360EE) We greatly appreciate your purchase of this Tamron lens. The Tamron SP AF 300mm F/2.8 LD [IF] is a fast telephoto lens developed for Canon AF single-reflex
SP AF 300mm F/2.8 LD [IF] for Canon (Model 360EE) We greatly appreciate your purchase of this Tamron lens. The Tamron SP AF 300mm F/2.8 LD [IF] is a fast telephoto lens developed for Canon AF single-reflex
SP AF 90mm F/2.8 Di Macro 1:1 (Model 272E)
") SP AF 90mm F/2.8 Di Macro 1:1 (Model 272E) Thank you for purchasing this Tamron lens as the latest addition to your photographic equipment. Before using your new lens, please read the contents of this
SP AF 90mm F/2.8 Di Macro 1:1 (Model 272E) Thank you for purchasing this Tamron lens as the latest addition to your photographic equipment. Before using your new lens, please read the contents of this
18-270mm F/3.5-6.3 Di II VC PZD for Canon, Nikon (Model B008) 18-270mm F/3.5-6.3 Di II PZD for Sony (Model B008)
 18-270mm F/3.5-6.3 Di II PZD for Sony (Model B008)") R 18-270mm F/3.5-6.3 Di II VC PZD for Canon, Nikon (Model B008) 18-270mm F/3.5-6.3 Di II PZD for Sony (Model B008) Thank you for purchasing the Tamron lens as the latest addition to your photographic equipment.
R 18-270mm F/3.5-6.3 Di II VC PZD for Canon, Nikon (Model B008) 18-270mm F/3.5-6.3 Di II PZD for Sony (Model B008) Thank you for purchasing the Tamron lens as the latest addition to your photographic equipment.
picture real beauty Capture real beauty with the one you love
 picture real beauty Capture real beauty with the one you love Lina Dove invites you to experience photography for yourself and capture images of beauty that live around you. To help, we ve taken the principles
AF 70~300 mm F/4-5.6 Di LD Macro 1:2 (Model A17)
") AF 70~300 mm F/4-5.6 Di LD Macro 1:2 (Model A17) Thank you for purchasing the Tamron lens as the latest addition to your photographic equipment. Di II lens (Digitally Integrated) series are designed for
AF 70~300 mm F/4-5.6 Di LD Macro 1:2 (Model A17) Thank you for purchasing the Tamron lens as the latest addition to your photographic equipment. Di II lens (Digitally Integrated) series are designed for
TS-E24mm f/3.5l TS-E45mm f/2.8 TS-E90mm f/2.8 Instructions
 TS-E24mm f/3.5l TS-E45mm f/2.8 TS-E90mm f/2.8 ENG Instructions Thank you for purchasing a Canon product. Canon s TS-E lenses are tilt-shift lenses designed for EOS cameras. The tilt-shift mechanism enables
MACRO PHOTO LENS. MP-E 65mm f/2.8 1-5 ENG. Instruction
 MACRO PHOTO LENS MP-E 65mm f/2.8 1-5 ENG Instruction Thank you for purchasing a Canon product. Canon Macro Photo Lens MP-E 65mm f/2.8 1-5 is a high-magnification macro lens that can magnify the subject
Basic Manual Control of a DSLR Camera
 Basic Manual Control of a DSLR Camera Naixn 2008 Photographers don t just take photographs - they make them! Produced by Yon Ankersmit for curious-eye.com 2009 Digital Single Lens Reflex Camera The basic
SP AF 17~50 mm F/2.8 XR Di-II LD Aspherical [IF] (Model A16)
![SP AF 17~50 mm F/2.8 XR Di-II LD Aspherical [IF] (Model A16)](/thumbs/40/20837175.jpg "SP AF 17~50 mm F/2.8 XR Di-II LD Aspherical [IF] (Model A16)") SP AF 17~50 mm F/2.8 XR Di-II LD Aspherical [IF] (Model A16) Thank you for purchasing the Tamron lens as the latest addition to your photographic equipment. Di II lens (Digitally Intigrated) series are
SP AF 17~50 mm F/2.8 XR Di-II LD Aspherical [IF] (Model A16) Thank you for purchasing the Tamron lens as the latest addition to your photographic equipment. Di II lens (Digitally Intigrated) series are
The Basics of Digital Photography and How to Take Better Pictures. Instructor: Kate Key Kate Key Photography
 The Basics of Digital Photography and How to Take Better Pictures Instructor: Kate Key Kate Key Photography Digital Point and Shoot Cameras (Digital Compact Cameras)-Lower budget lighter camera that allow
Single Lens Reflex (SLR) Camera
 Camera") 690 Single Lens Reflex (SLR) Camera User Guide 690 Single Lens Reflex (SLR) Camera User Guide Contents IMPORTANT SAFEGUARDS: FCC Notice 1 Camera Features 1 Camera Parts 1 Opening the Camera 2 Closing the
690 Single Lens Reflex (SLR) Camera User Guide 690 Single Lens Reflex (SLR) Camera User Guide Contents IMPORTANT SAFEGUARDS: FCC Notice 1 Camera Features 1 Camera Parts 1 Opening the Camera 2 Closing the
User's Manual Dental Camera Evolution M-Series Document ID: PUB-113 Revision B
 User's Manual Dental Camera Evolution M-Series Document ID: PUB-113 Revision B The names of any providers and patients used in illustrations or examples in this document are fictitious. Every effort has
Rodenstock Photo Optics
 Rogonar Rogonar-S Rodagon Apo-Rodagon N Rodagon-WA Apo-Rodagon-D Accessories: Modular-Focus Lenses for Enlarging, CCD Photos and Video To reproduce analog photographs as pictures on paper requires two
Why pinhole? Long exposure times. Timeless quality. Depth of field. Limitations lead to freedom
 Why pinhole? One of the best things about pinhole photography is its simplicity. Almost any container that can be made light-tight can be turned into a pinhole camera. Building your own camera is not only
Dental Radiography collimator Ionising radiation image radiolucent area radiopaque area controlled zone scatter radiation intraoral
 Dental Radiography X-rays for dental radiography are produced by high voltages of electricity within an x-ray head and come out through a metal tube called a collimator. This ensures the x-rays only come
Photography Workshop
 Photography Workshop Lesson plans This is designed to explain the power- point presentations and to give guidelines as to how to structure the lessons. Moses Stevens 7/29/2008 Teaching Schedule: Day 1
Denture Trouble Shooting Guide
 Denture Trouble Shooting Guide Comfort Sore spot in vestibuleupper or lower denture 1. Overextended borders 2. Rough spot in base 1. Shorten borders and polish. 2. Refinish borders. Sore spot in upper
COMMERCIAL PHOTOGRAPHY Basic Digital Photography
 COMMERCIAL PHOTOGRAPHY Basic Digital Photography This course is part of a sequence of courses that prepares individuals to use artistic techniques combined with a commercial perspective to effectively
EF70-300mm f/4-5.6 IS USM
 EF70-300mm f/4-5.6 IS USM ENG Instruction Thank you for purchasing a Canon product. Dedicated to EOS cameras, the Canon EF70-300mm f/4-5.6 IS USM lens is a highperformance telephoto zoom lens equipped
Colorado State University. Guide for 4-H Photography Judges
 Colorado State University Guide for 4-H Photography Judges Photography Criteria Use the following criteria to help you judge 4-H photography. TECHNICAL FOCUS Adjustments of the distance setting on a lens
600 Series Camera. User Guide
 600 Series Camera User Guide IMPORTANT SAFEGUARDS Note: This product is listed by Underwriters Laboratories, Inc. (UL). As a condition of listing, UL requires that basic safety information be provided.
EF-S18-55mm f/3.5-5.6 IS II COPY ENG. Instruction
 EF-S18-55mm f/3.5-5.6 IS II ENG Instruction Thank you for purchasing a Canon product. The Canon EF-S18-55mm f/3.5-5.6 IS II lens is a high-performance standard zoom lens developed for digital SLRs compatible
EF-S18-135mm f/3.5-5.6 IS
 EF-S18-135mm f/3.5-5.6 IS ENG Instruction Thank you for purchasing a Canon product. The Canon EF-S18-135mm f/3.5-5.6 IS lens is a high-performance high-magnification zoom lens equipped with an Image Stabilizer,
stone model bonding tray improve the accuracy
 indirectbonding Bonding brackets to the patient s stone model and transferring the bonding tray to the patient s mouth Developed to improve the accuracy of bracket placement (especially premolars) advantagesdisadvantages
What is a DSLR and what is a compact camera? And newer versions of DSLR are now mirrorless
 1 2 What is a DSLR and what is a compact camera? And newer versions of DSLR are now mirrorless 3 The Parts Your camera is made up of many parts, but there are a few in particular that we want to look at
Photography. in Dentistry. Theory and Techniques in Modern Documentation. Pasquale Loiacono, Private Practice, Tropea, Italy
 Photography in Dentistry Theory and Techniques in Modern Documentation Pasquale Loiacono, Private Practice, Tropea, Italy Luca Pascoletti, Private Practice, Udine, Italy Contents Contents Foreword...11
35mm Twin-Lens Reflex Camera
 How to assemble and use the supplement 5mm Twin- Reflex Camera Assembly time: Approx. one hour Assembled Product and Part Names Sports viewfinder hood Tripod socket Parts in the Kit Front Bottom Black
Beyond Built-in: Why a Better Webcam Matters
 Whitepaper: Beyond Built-in: Why a Better Webcam Matters How to Uplevel Your Ability to Connect, Communicate and Collaborate Using Your Laptop or PC Introduction The ability to virtually communicate and
PlaneWave CDK Telescope Instructions CDK12.5, 17, 20 and 24
 PlaneWave CDK Telescope Instructions CDK12.5, 17, 20 and 24 V112712 1 Collimation and Secondary Spacing Procedure The CDK optical design has four optical elements shown in Figure 1. The primary mirror
Requirement of Photograph for Indian Passport
 Requirement of Photograph for Indian Passport Sample Photo Requirements The photograph should be in colour and of the size of 2 inch x 2 inch 51 mm x 51 mm. The photo print should be clear and with a continuous
Bitewing Radiography B.E. DIXON. B.D.S., M.Sc., D.P.D.S.
 Bitewing Radiography B.E. DIXON B.D.S., M.Sc., D.P.D.S. Main Indications Detection of Dental Caries Monitoring progression of caries Assessment of existing restorations Assessment of Periodontal status
!Financial agreement COST / RISK / BENEFIT
 COMPLETE DENTURES 1 2 Oral Examination, Diagnosis and Treatment Planning Initial Appointment! Get to know your patient! Personally, experiences, expectations! Past medical history! Past dental history!
ZEISS Education Program Price Information
 ZEISS Education Program Price Information ZEISS Education Program Discount Program for Students and Educators Camera lenses from ZEISS are used by millions of photographers all over the world: in SLR or
CHAPTER 10 RESTS AND PREPARATIONS. 4. Serve as a reference point for evaluating the fit of the framework to the teeth.
 CHAPTER 10 RESTS AND DEFINITIONS A REST is any rigid part of an RPD framework which contacts a properly prepared surface of a tooth. A REST PREPARATION or REST SEAT is any portion of a tooth or restoration
Understanding Exposure for Better Photos Now
 Understanding Exposure for Better Photos Now Beginner Photography Tutorials Created exclusively for Craftsy by Nicholas Donner TABLE OF CONTENTS 01 02 05 07 10 12 Meet the Expert Shutter Speed Aperture
V-500-PRE. 500mm F/8.0 Telephoto Lens INSTRUCTION MANUAL
 V-500-PRE 500mm F/8.0 Telephoto Lens INSTRUCTION MANUAL Limited Five Year Warranty Vivitar warrants this quality product to be free of defects in material and workmanship for a period of five years from
Headgear Appliances. Dentofacial Orthopedics and Orthodontics. A Common Misconception. What is Headgear? Ideal Orthodontic Treatment Sequence
 Ideal Orthodontic Treatment Sequence Headgear Appliances Natalie A. Capan, D.M.D. 580 Sylvan Avenue, Suite 1M Englewood Cliffs, New Jersey 07632 (201)569-9055 www.capanorthodontics.com [email protected]
A Beginner's Guide to Simple Photography Concepts: ISO, Aperture, Shutter Speed Depth of Field (DOF) and Exposure Compensation
 and Exposure Compensation") A Beginner's Guide to Simple Photography Concepts: ISO, Aperture, Shutter Speed Depth of Field (DOF) and Exposure Compensation There are 3 things that affect your image quality in photography; ISO, Aperture
A Beginner's Guide to Simple Photography Concepts: ISO, Aperture, Shutter Speed Depth of Field (DOF) and Exposure Compensation There are 3 things that affect your image quality in photography; ISO, Aperture
1051-232 Imaging Systems Laboratory II. Laboratory 4: Basic Lens Design in OSLO April 2 & 4, 2002
 05-232 Imaging Systems Laboratory II Laboratory 4: Basic Lens Design in OSLO April 2 & 4, 2002 Abstract: For designing the optics of an imaging system, one of the main types of tools used today is optical
Molar Uprighting Dr. Margherita Santoro Division of Orthodontics School of Dental and Oral surgery. Consequences of tooth loss.
 Molar Uprighting Dr. Margherita Santoro Division of Orthodontics School of Dental and Oral surgery Molars The wide occlusal surface is designed for food grinding. The surface needs to be aligned with the
ATLANTIS abutments as individual as your patients
 ATLANTIS abutments as individual as your patients ATLANTIS the freedom of unlimited possibilities Discover why ATLANTIS CAD/CAM abutments are the natural choice for patientspecific, cement-retained implant
Taking the Mystique out of Implant Dentistry. Dr. Michael Weinberg B.Sc., DDS, FICOI
 Taking the Mystique out of Implant Dentistry Dr. Michael Weinberg B.Sc., DDS, FICOI What is Restorative Implant Dentistry? Restorative implant dentistry involves taking a few simple mechanical principles
Rodenstock Photo Optics
 Apo-Sironar-S Apo-Macro-Sironar Apo-Grandagon Grandagon-N Accessories: Center filters Accessories: Focus-Mount Lenses for Analog Professional Photography Even in the age of digital photography, the professional
EF24-105mm f/4l IS USM
 EF24-105mm f/4l IS USM ENG Instruction Thank you for purchasing a Canon product. The Canon EF24-105mm f/4l IS USM lens is a high-performance standard zoom lens developed for EOS cameras. It is equipped
Nobel Clinician - Quick Guide
 1220 E. Birch St. #201 Brea, CA 92821 (800)750-5004 Haupt Dental Lab Inc. Nobel Clinician - Quick Guide Step #1 - Diagnostics Make impressions of both the upper and lower arches using custom trays. Care
ACTION AND PEOPLE PHOTOGRAPHY
 ACTION AND PEOPLE PHOTOGRAPHY These notes are written to complement the material presented in the Nikon School of Photography Action and People Photography class. Helpful websites: Nikon USA Nikon Learn
Introduction to Dental Anatomy
 Introduction to Dental Anatomy Vickie P. Overman, RDH, MEd Continuing Education Units: N/A This continuing education course is intended for dental students and dental hygiene students. Maintaining the
Scanners and How to Use Them
 Written by Jonathan Sachs Copyright 1996-1999 Digital Light & Color Introduction A scanner is a device that converts images to a digital file you can use with your computer. There are many different types
Contents OVERVIEW WORKFLOW PROBLEM. SOLUTION. FEATURE. BENEFIT 4 5 EASY STEPS TO CALIBRATE YOUR LENSES 5
 User Guide Contents OVERVIEW PROBLEM. SOLUTION. FEATURE. BENEFIT 4 EASY STEPS TO CALIBRATE YOUR LENSES WORKFLOW 1. SETUP SPYDERLENSCAL 6 2. SETUP CAMERA 6 3. DISTANCE SETTING 7 4. SHOOTING ENVIRONMENT
Periapical radiography
 8 Periapical radiography Periapical radiography describes intraoral techniques designed to show individual teeth and the tissues around the apices. Each film usually shows two to four teeth and provides
There When You Need Them: 10 Principles of Successful RPD Treatment
 There When You Need Them: 10 Principles of Successful RPD Treatment Jeff Scott, DMD [email protected] 239 2 nd Ave South Suite 100 St. Petersburg, FL 33701 The West Coast District Dental
Understanding Depth Of Field, Aperture, and Shutter Speed Supplement to Mastering the Nikon D7000
 Understanding Depth Of Field, Aperture, and Shutter Speed Supplement to Mastering the Nikon D7000 This supplemental information is intended for readers of Mastering the Nikon 7000 only. Please do not distribute
IMPLANT DENTISTRY EXAM BANK
 IMPLANT DENTISTRY EXAM BANK 1. Define osseointegration. (4 points, 1/4 2. What are the critical components of an acceptable clinical trial? (10 points) 3. Compare the masticatory performance of individuals
7tipsforsofter. lookinglight. Beginners Digital Photography - Tutorial 03. Making Photography Easier. www. DIGITAL Beginners.com
 7tipsforsofter lookinglight Beginners Digital Photography - Tutorial 03 Tel: 00353 1 620 5156 Email: [email protected] www.digitalbeginners.com All text, photographs and illustrations David McKane
TELEPHOTO TECHNIQUE. Shutter Release, January 2006
 TELEPHOTO TECHNIQUE Shutter Release, January 2006 Zooming in to enlarge a distant subject is revealing and aesthetically satisfying photography liberating seeing in the classic sense. Magnification further
Protocol for Microscope Calibration
 Protocol for Microscope Calibration A properly calibrated system is essential for successful and efficient software use. The following are step by step instructions on how to calibrate the hardware using
ATLANTIS crown abutment. Patient-specific CAD/CAM abutments for single-tooth, screw-retained restorations
 ATLANTIS crown abutment Patient-specific CAD/CAM abutments for single-tooth, screw-retained restorations Excellent results every time For all major implant systems DENTSPLY Implants now offers the appreciated
Prosthodontist s Perspective
 Unless otherwise noted, the content of this course material is licensed under a Creative Commons Attribution - Non-Commercial - Share Alike 3.0 License. Copyright 2008, Dr. Jeff Shotwell. The following
Basics to Using the View Camera
 Walker Evans at work Using the View Camera Basics to Using the View Camera Because of the large-scale nature of the view camera, it is necessary to follow basic steps in setting-up the camera in order
Filters for Digital Photography
 Filters for Digital Photography LICHTFILTER Whether for analog or Digital Photography: The best results are achieved by using correction filters - not by digitally enhancing in a software program as once
Table of Contents. 10 Drawing Portraits: Fundamentals. Introduction and how this book is organized 13
 10 Drawing Portraits: Fundamentals Table of Contents Introduction and how this book is organized 13 Section One: 15 Drawing fundamentals for the new artist. 15 Some introductory words for the newbie artist
Histograms& Light Meters HOW THEY WORK TOGETHER
 Histograms& Light Meters HOW THEY WORK TOGETHER WHAT IS A HISTOGRAM? Frequency* 0 Darker to Lighter Steps 255 Shadow Midtones Highlights Figure 1 Anatomy of a Photographic Histogram *Frequency indicates
Part 1: Physiology. Below is a cut-through view of a human head:
 The Frenzel Technique, Step-by-Step by Eric Fattah, Copyright 2001 [email protected] This document should be in electronic form at: http://www.ericfattah.com/equalizing.html Feel free to distribute
Lunette 2 Series. Curved Fixed Frame Projection Screen. User s Guide
 Lunette 2 Series Curved Fixed Frame Projection Screen User s Guide Important Safety and Warning Precautions Please follow these instructions carefully to ensure proper maintenance and safety with your
EF70-200mm F2.8L IS USM. Instruction
 EF70-200mm F2.8L IS USM Instruction Thank you for purchasing a Canon USM lens. The Canon EF 70-200mm f/2.8l IS USM is a high-performance, telephoto zoom lens dedicated to Canon EOS cameras. It is equipped
BASIC EXPOSURE APERTURES, SHUTTER SPEEDS AND PHOTO TERMINOLOGY
 BASIC EXPOSURE APERTURES, SHUTTER SPEEDS AND PHOTO TERMINOLOGY EXPOSURE Exposure is the response of a photographic emulsion to light. The emulsion is made of a material (silver) that is sensitive to light.
Care and Use of the Compound Microscope
 Revised Fall 2011 Care and Use of the Compound Microscope Objectives After completing this lab students should be able to 1. properly clean and carry a compound and dissecting microscope. 2. focus a specimen
Producing a realistic drawing with CorelDRAW
 Producing a realistic drawing with CorelDRAW Hugo Hansen In this tutorial, I show you some of the tools I used to create the many effects in the drawing of my son resting on a motorcycle. The idea to make
PROPORTIONS. The new Golden Rules in dentistry. History. Abstract
 M PROPORTIONS The new Golden Rules in dentistry Dr. Alain Méthot Abstract Since the beginning Cosmetic Dentistry has been using the principles of Golden Proportion (1: 0.618) as a guideline for smile design...
EVIDENCE PHOTOGRAPHY TEST SPECIFICATIONS MODULE 1: CAMERA SYSTEMS & LIGHT THEORY (37)
") EVIDENCE PHOTOGRAPHY TEST SPECIFICATIONS The exam will cover evidence photography involving crime scenes, fire scenes, accident scenes, aircraft incident scenes, surveillances and hazardous materials scenes.
EVIDENCE PHOTOGRAPHY TEST SPECIFICATIONS The exam will cover evidence photography involving crime scenes, fire scenes, accident scenes, aircraft incident scenes, surveillances and hazardous materials scenes.
Written By: Walter Galan
 ipad 2 GSM Front Panel Replacement Replace the front panel in your ipad 2 GSM. Written By: Walter Galan INTRODUCTION Note: this is a complete guide for replacing a plain front panel. If you have a Front
SHOW MORE SELL MORE. Top tips for taking great photos
 SHOW MORE SELL MORE Top tips for taking great photos TAKE BETTER PICTURES. SELL MORE STUFF. The more clear, crisp, quality pictures you show, the easier it is for buyers to find your listings and make
EPSON SCANNING TIPS AND TROUBLESHOOTING GUIDE Epson Perfection 3170 Scanner
 EPSON SCANNING TIPS AND TROUBLESHOOTING GUIDE Epson Perfection 3170 Scanner SELECT A SUITABLE RESOLUTION The best scanning resolution depends on the purpose of the scan. When you specify a high resolution,
1 Laboratory #5: Grating Spectrometer
 SIMG-215-20061: LABORATORY #5 1 Laboratory #5: Grating Spectrometer 1.1 Objective: To observe and measure the spectra of different light sources. 1.2 Materials: 1. OSA optics kit. 2. Nikon digital camera
4. CAMERA ADJUSTMENTS
 4. CAMERA ADJUSTMENTS Only by the possibility of displacing lens and rear standard all advantages of a view camera are fully utilized. These displacements serve for control of perspective, positioning
Dr. Little received his doctorate degree in dentistry from UT Health at San Antonio Dental
 Implant Solutions for the Implant Patient: Diagnosis and Treatment Planning for Predictable Results David Little, DDS 6961 U.S. Highway 87 East San Antonio, TX 78263 Phone: (210)648-4411 Fax: (210) 648-6498
ATLANTIS abutments design guide CAD/CAM patient-specific abutments
 ATLANTIS abutments design guide CAD/CAM patient-specific abutments Contents Introduction 4 This manual helps you to explore all the benefits of ATLANTIS CAD/CAM patient-specific abutments. It gives you
CALIBRATION FOR LAL20X & LAL24X
 CALIBRATION AND FAULT FINDING FOR LAL20X & LAL24X DUMPY LEVELS MEASURING EXPERTS SINCE 1869 How The LAL20X & LAL24X Works The Automatic level is called Automatic because it requires only a simple basic
Preventive Pediatric Dental Care. Lawrence A. Kotlow DDS Practice Limited to Pediatric Dental Care 340 Fuller Road Albany, New York 12203
 Preventive Pediatric Dental Care Lawrence A. Kotlow DDS Practice Limited to Pediatric Dental Care 340 Fuller Road Albany, New York 12203 Patient comfort and safety 1. All children are treated using the
Digital for Beginners.
 Digital for Beginners. The following information will hopefully give you an insight into digital photography and help you to understand how to get the most from your camera. Setting up your camera may
EF-S55-250mm f/4-5.6 IS STM COPY ENG. Instructions
 EF-S55-250mm f/4-5.6 IS STM ENG Instructions Thank you for purchasing a Canon product. The Canon EF-S55-250mm f/4-5.6 IS STM is a high-performance telephoto zoom lens that makes movie shooting comfortable.
The Photosynth Photography Guide
 The Photosynth Photography Guide Creating the best synth starts with the right photos. This guide will help you understand how to take photos that Photosynth can use to best advantage. Reading it could
Get started. Hang a green screen. Set up your lighting
 Excerpted from Adobe Premiere Pro Studio Techniques by Jacob Rosenberg. Using green screen keying techniques, you can make a person appear in different locations or environments. In the Lord of the Rings
Alignement of a ring cavity laser
 Alignement of a ring cavity laser 1 Introduction This manual describes a procedure to align the cavity of our Ti:Sapphire ring laser and its injection with an Argon-Ion pump laser beam. The setup is shown
VISM CQB Scope Series
 1 VISM CQB Scope Series Congratulations on the purchase of your new VISM CQB Scope! The CQB Series of Scopes give you many great options so you can choose the scope that best fits your needs. Backed by
FABRICATING CUSTOM ABUTMENTS
 FABRICATING CUSTOM ABUTMENTS LUC AND PATRICK RUTTEN How much should a Dental Technician know about the clinical aspects of implantology? The answer is clear: as much as possible. This is the distinction
Clinical Practice Guideline For Orthodontics
 Clinical Practice Guideline For Orthodontics MOH- Oral Health CSN -Orthodontics -2010 Page 1 of 15 Orthodontic Management Guidelines 1. Definitions: Orthodontics is the branch of dentistry concerned with
Shutter Speed in Digital Photography
 Shutter Speed in Digital Photography [Notes from Alan Aldrich as presented to the Hawkesbury Camera Club in April 2014] Light is a form of energy and as such behaves as formulated in the general power
Projecting a new smile from a facial photograph:
 I special _ digital smile design Projecting a new smile from a facial photograph: A new way to plan multidisciplinarydental treatments Authors_ Drs Marco Del Corso, Italy, & Alain Méthot, Canada without
VISM Evolution Scope Series
 1 VISM Evolution Scope Series Congratulations on the purchase of your New VISM Evolution (EVO) Series Scope! The EVO Series of Scopes give you many great high end features and various magnification ranges
PHOTOGRAPHY CURRICULUM
 PHOTOGRAPHY CURRICULUM NEWTOWN SCHOOLS NEWTOWN, CT. September, 2001 PHILOSOPHY Business and Technology The philosophy of business and technology education is to assist students in becoming productive and
Underwater Housing for Sony RX100 III, RX100 IV
 Underwater Housing for Sony RX100 III, RX100 IV Product Number 6215.04 Product Registration Please register your product at ikelite.com within 15 days of purchase. Our product registration database is
Beginners Guide to Digital Camera Settings
 2008 Beginners Guide to Digital Camera Settings Phil Maznyk & Matthew Mannell Kitchener Waterloo Aquarium Society 3/11/2008 Hi folks, well finally here is the beginners guide to some of the more basic
Classification of Malocclusion
 Classification of Malocclusion What s going on here? How would you describe this? Dr. Robert Gallois REFERENCE: Where Do We Begin? ESSENTIALS FOR ORTHODONTIC PRACTICE By Riolo and Avery Chapter 6 pages
Digital Photography. Digital Cameras and Digital Photography. Your camera. Topics Your Camera Exposure Shutter speed and f-stop Image Size Editing
 Digital Cameras and Digital Photography Topics Your Camera Exposure Shutter speed and f-stop Image Size Editing Faculty Innovating with Technology Program Aug 15, 2006 Digital Photography Your camera Virtually
How to create a newsletter
 How to create a newsletter Why? Creating a newsletter is a valuable way of communicating with a specific audience group. However, its production does take time, energy and resources so it s important to
Full Crown Module: Learner Level 1
 Full Crown Module Restoration / Tooth # Full Gold Crown (FGC) / 30 Extensions: Porcelain Fused to Metal (PFM) / 12 All Ceramic / 8 Learner Level 1 Mastery of Tooth Preparation Estimated Set Up Time: 30
Introduction to Charting. Tooth Surfaces: M = mesial D = distal O = Occlusal B = buccal F = facial I = incisal L = lingual
 Tooth Surfaces: M = mesial D = distal O = Occlusal B = buccal F = facial I = incisal L = lingual When combining tooth surfaces, as in defining cavity preparations or restorations, there are some spelling