Access Control Software Manual
|
|
|
- Ruth Bell
- 8 years ago
- Views:
Transcription
1

2 CONTENTS 1. Function overview Installation environment Concept description Installation and Uninstallation Installation Uninstallation Function instroduction Add device Department management Add department Modify department s name Modify administrative subordination relationship Delete department User management Add user Modify employee s information Enroll fingerprint through fingerprint device Enroll the fingerprint through fingerprint reader Upload & download user s information and fingerprint Data import & export through U disk Privilege management Time zone setting Management of access control group Group setting...45

3 5.4.4 Unlocking combination setting Holiday setting User s specified privilege Report Monitor record report Alarm report Device management Read information from fingerprint reader Communication setting Wiegand Verification Power management Access control Mifare Other settings System management Build database Set database Database management Operator management System parameter setting...76 MSDE installation Appendix Connection of access control machine and system Connection through RS Connection through RS Connection through TCP/IP Real-time monitor...94

4 6.3 Map License to detect the fingerprint device Solution to problem SOFTWARE USE LICENSE AGREEMENT...104

5 1. Function overview Access control is a device system supervises in-and-out passage. It is mainly used to authorize in-and-out personnel and record their process. Access control software can set in-and-out privilege easily and manage the personnel effectively. Access control software is applicable for access control machines of various modes. It can connect a number of access control machines working at the same time and monitor in-an-out personnel at the real time. Refer to the following for detailed functions: Manage personnel s basic files and record personnel s basic information Provide various database interfaces. Upload and download personnel s information Control personnel s in-and-out time zone. Monitor in-and-out state with machines connected with network. Download records from fingerprint reader regularly. Operator sets up the system to ensure security. Query in-and-out record & alarm record and export the data in various formats. Detect the positions where access control devices lie in the way of map. Control access control machine remotely, initializing machine and operating machine synchronously. Group the devices or carry out subarea management. Manage personnel s privileges in group. 1

6 2. Installation environment Computer:above Pentium l66,more than 64M Memory,at least100m hard disk space Operation system: Microsoft Windows 2000 or Microsoft Windows XP Windows2000 operation system is suggested and PentiumIII M computer is the least requirement. 2

7 3. Concept description Machines connected with network, and real time monitor: either connected with Ethernet or 485, fingerprint reader can be added to the management software to execute management. After adding all the fingerprint readers, click Monitor, and the monitor starts in turns. Record the monitoring information at the real time: able to monitor the fingerprint identification records and going-out button records on each fingerprint reader and save these records to the database for later query. Query record: able to query the records when they are enough. While querying, a variety of conditions are specified, such as fingerprint reader identification, time zone, and department and so on. Privilege management: add and modify user s privilege on each fingerprint reader and upload the information to the reader. Department management: add and modify departments information. User management: download user and his fingerprint. Modify user s information and privilege. Add code for user. Add user and upload user and his fingerprint by using U are U. Open the door remotely: press Open button to open the selected door remotely. Synchronous time: reader s time agrees with computer s time. Upgrade firmware: upgrade reader s running program. Initialize fingerprint reader: able to initialize the fingerprint reader during device management 3

8 4. Installation and Uninstallation 4.1 Installation Before installation, other running programs are suggested to be closed to avoid conflict. Notice: The displayed picture may seem different from the actual content in the compact disk. If so, the contents in the compact disk prevail. Put compact disk into CD driver, and the installation program will run automatically. Picture 4-1 Select using method Tip: Select Cancel button in the window of installation program, installation can be cancelled. 4

9 1) A dialogue box of End User Software License Agreement will be shown later, as in picture 4-2. Select Agree,and click Next. Picture 4-2 End User Software License Agreement 2) The installation path will be shown in later dialogue box, as in picture 4-3. You can select your desired path and click Next. 5

10 Picture 4-3 Select installation position 3) You will be asked to install what kinds of components in the next window, as shown in picture 4-4. All components are suggested to be installed. Then click Next 6

11 Picture 4-4 Select installation components 4) The position where shortcut is created will be shown later, as in picture 4-5. You can select your desired position and name and click Next. 7

12 Picture 4-5 Select shortcuts position Then installation path and mode will be shown, as in picture 4-6. Click Installation to start copying files. In the end, a dialogue box indicating installation completed appears, as shown in picture 4-7. Click Finish, and the whole installation is over. 8

13 Picture 4-6 Installation path and components show Picture 4-7 Installation complete 9

14 4.2 Uninstallation If you don t want to preserve this software in Window, you can operate as the following steps: 1) Close access control software. 2) Enter My Computer,enter Control Panel with double clicks. 3) Enter add/delete program window with double clicks, select Fingerprint Access Control Management System, and click delete, then start uninstallation according to the tips. 4) The above processes cannot delete all the files related with this software. It is necessary to enter the installation catalog to delete access control s folders. 10
 The above processes cannot delete all the files related with this software.")
15 5. Function instroduction 5.1 Add device Function Introduction To achieve real time monitor, data upload & download, remote open and other functions, the software needs communication connection between fingerprint and software. It only needs to add and save the device communication parameters to the system during the first employment. Operation Steps 1. Two methods to enter access control system: 1)doubly click shortcut Fingerprint Access Control Management System 2 ) Click menu: start->program->fingerprint access control management system->fingerprint access control management system 2. Method to enter device management and add machine: Click menu: access control management->equipment management. Shortcut key F2 11
doubly click shortcut Fingerprint Access Control Management System 2 ) Click menu: start->program->fingerprint access control")
16 3. Click add device,a window will appear, as shown in the following picture. The system supports RS232/485 and Ethernet communication. Refer to the appendix for specific connecting methods. After setting connecting parameters, click test connection to verify the connection. If you want to add a number of devices once, please click batch add. 12

17 4. Click OK, the machine will be listed in the form of machine name. The privilege side shows the machine s communication parameters. 5. After exit from the device management window, you can catch sight of the device s icon shown on the program s main interface, as in the following picture. The device s connecting parameters will be preserved in the system. If you want to operate the device, you can only click its icon. Tip: Click the right key of the mouse, and you can see a shortcut menu which shows the related operation items. 6. Device classification: Device classification means setting up subarea of the device or carrying out group management. Click add classification on the main interface of the device management, open the window to add classification, input related names, save and exit. Then drag the device to the related groups 13

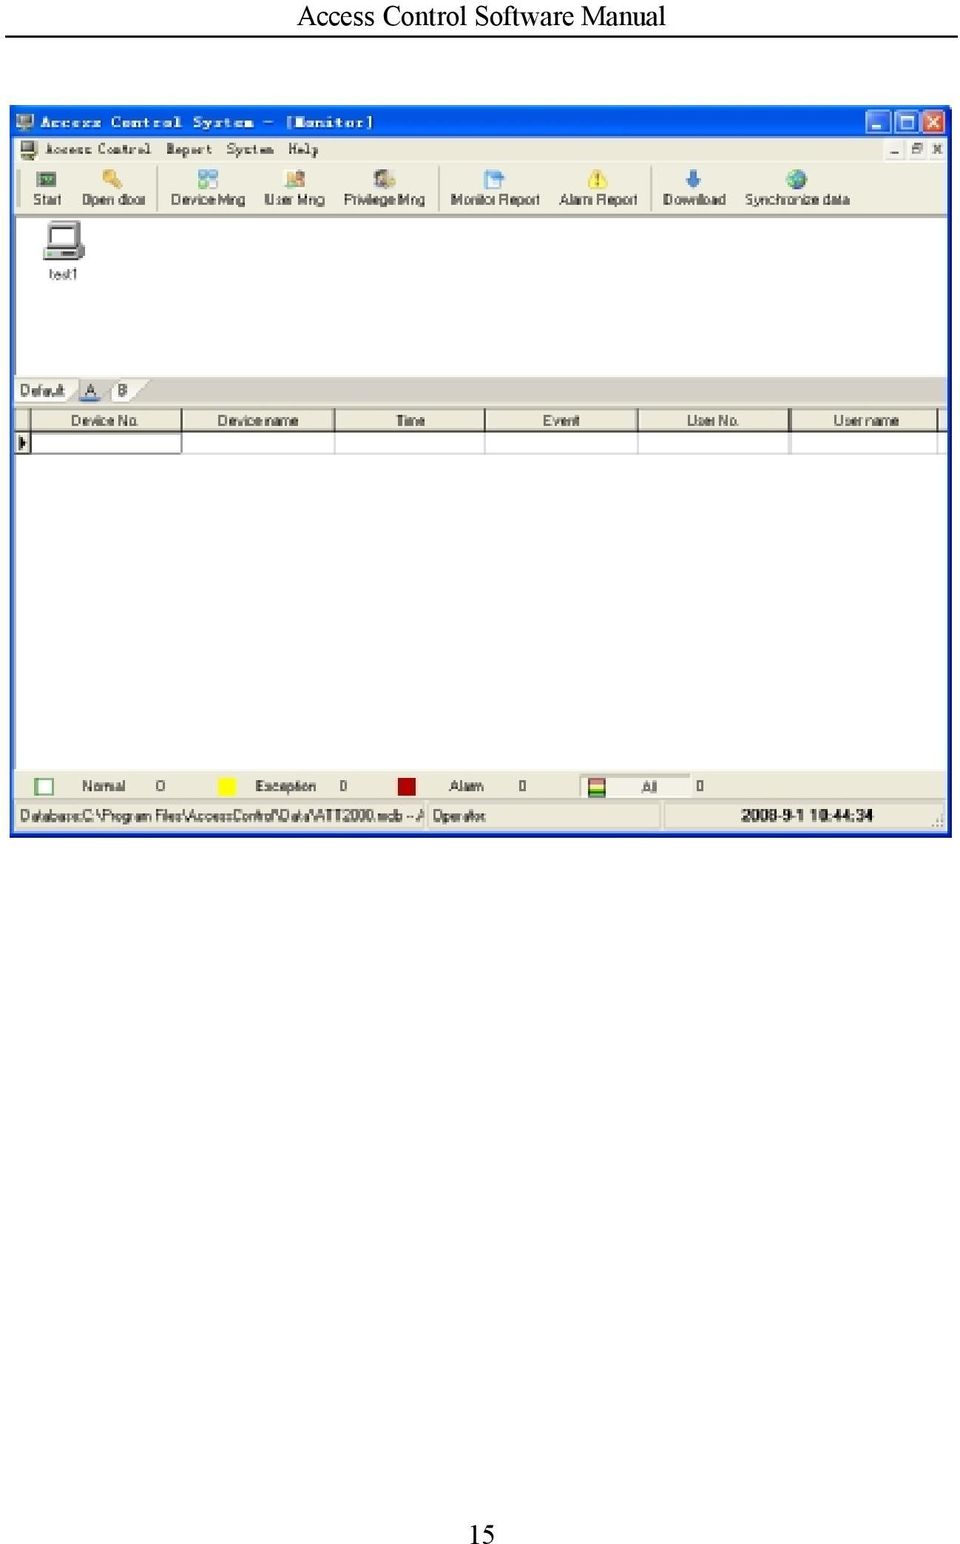
18 on the management interface. Different classifications and their devices can be seen on the interface of monitor center, as shown in the following picture. 14

19 15
20 5.2 Department management Add department Operation Steps 1. Enter department management interface, click menu: access control management->department management,as shown below: 2. The company s name can enter: system management->system parameter setting, to modify company s information. 3. Click add to add department,and input the department s name, as shown below: 16

21 4. If a number of departments need to be added once, input one department s name, click save and add, and input another department s name, as shown below: 5. After inputting department s name, click save and exit, thus the department is added to the list, as shown below: 17
22 5.2.2 Modify department s name Operation Steps 1 Select the department which needs modification and click modify, modify the name on the modification interface. 2 After modification, click save and exit, as shown below: Overseas Department has been changed into Technical Department. 18
23 5.2.3 Modify administrative subordination relationship Operation Steps 1 Select the department which is to be dragged by clicking left key of the mouse, as shown below: 2 Drag the department to target position, as shown below: 19
24 5.2.4 Delete department Operation Steps Select the name of the department which is to be deleted, click delete, and select yes or no, as shown below: Notice: If a department has recruited employees, or there is subordination department under a department, then the department cannot be deleted. 20
25 5.3 User management Add user Operation Steps 1.Method to enter interface of user management : Click menu:: access control management->user management shortcut key F4 2.Click add, add new user, as shown below. Input user s number, name and so on, click save and exit, or click save and add to add another employee s information. 3. Then the added user s information will be shown on the management interface. 21
26 5.3.2 Modify employee s information Function introduction Set user s photos, subordination department, fingerprint enrollment and so on. The fingerprint reader supports Chinese display but does not support Chinese input. If you need to display the name on the reader, you can download user s information from the reader to the software. After the name has been changed into Chinese, upload it to the reader. Operation Steps 1.Method to enter user management : Click menu: Access control management->user management Select employee: select user in user list, click modification, and modify user s information on the pop-up interface,as shown below: 22
27 3. Add picture: the system support directly selecting photos from files. Click obtain from files, enter the dialogue box of image file select, select an image file, click open, and the image file will be added successfully, as shown below: 23
28 5.3.3 Enroll fingerprint through fingerprint device Function Introduction Collect user s fingerprint and preserve it in the database. After fingerprint enrollment, please upload fingerprint information to the specified reader. Operation Steps 1.Method to enroll fingerprint through fingerprint device: Click menu: access control management->user management 2.Click add, add new user or select user in user list and click modification. 24
29 3.Select enrollment with sensor, click enroll, and enter the fingerprint enrollment interface, as shown below: 4.Click the finger whose fingerprint is to be enrolled, and the system enters a state to receive enrollment, as shown below: 25
30 5.After the finger finishes its press on the fingerprint collecting device, the system enters the following state shown in the picture: 6. Press 3 times with the same finger according to the tips, click yes after successful enrollment, return to user s information editing interface, and click save and exit as shown below: 26
31 7.Fingerpring verification: select enrollment with sensor ->click verification, the following interface will appear to check if the fingerprint enrollment is done or not. 9.Press the finger on the device, if the following dialogue box appears, then the enrollment failed, please return to step 3-6 for another enrollment. 27
32 10.The enrollment succeeds if the following dialogue box appears. 11.After enrollment, click upload user s information on user management interface, and upload the user s information and fingerprint to specified device after entering the following interface: 28
33 12.You can select Cache Mode to upload user s information. In this way, if the transmission fails, the entire user s information won t be uploaded to the device, or the user s information will be uploaded to the device before the transmission fails Enroll the fingerprint through fingerprint reader Function Introduction Enroll fingerprint directly on the specified fingerprint reader. After enrollment, the information has been preserved into the reader and the local database. Therefore, there is no need to upload fingerprint data to the enrolling fingerprint reader. Operation Steps 1.Method to enroll fingerprint on fingerprint reader Click menu: access control management->user management 2.Click add in user list, add new user or select user in user list and click modification, then enter user s information editing 29
34 interface. 3.Select reader s name, as shown below: 4.Click connect device to connect fingerprint reader, as shown below: 5.Click enrollment to enter fingerprint enrollment interface, as shown below: 30
35 6.Click the finger whose fingerprint is to be enrolled, and the system enters a state to receive enrollment, as shown below: 7.Place your finger on the reader according to the tips, as shown below: 31
36 8.Press 3 times with the same finger according to the tips. If the enrollment is successful, the following picture will appear. If failed, please repeat the operation of step 6-8 until successful Upload & download user s information and fingerprint Download user from device Function Introduction Download user s information and fingerprint data in reader to the computer. The information modification can be done through this way. Operation Steps 1.Method to enter download user from device : Click menu:: access control management->user management, and select download from device 2.Enter download user s information interface as shown below. All the readers in this system will be shown in the device information form. Select the target reader, as shown in the following picture: Notice: Select user s information and fingerprint information 32
37 3.Download user s data. Click download to download user and fingerprint data. The system will automatically preserve user s information and fingerprint data to the database. 33
38 Upload user s information Function Introduction Upload user s information and fingerprint data in computer to the fingerprint reader. The modification of user s information in reader or uploading user s fingerprint to the reader can be achieved in this way. Operation Steps 1.Method to enter upload user s information : 1)Click menu: access control management->user management, select upload user s information 2.Ener upload user s information interface, as shown below: 34
39 3.Select employee and fingerprint reader, and click upload to upload information. You can select high speed mode to upload user s information. In this way, the user s information can be uploaded wholly. If transmission fails, the entire user s information won t be uploaded to the device, or the user s information will be uploaded to the device before the transmission fails. Notice: Select user s information or fingerprint data to upload user s information or fingerprint data. Tips:While uploading or downloading user s information, device monitor must be stopped first if the communication method between PC machine and fingerprint reader is RS485/232. However, there is no need to stop device monitor first if the communication method is Ethernet and the user s information can be directly uploaded and downloaded. 35
40 5.3.6 Data import & export through U disk Import user s data through U disk Function Introduction Import user s data preserved in U disk to the system. Operation Steps 1.Method to enter import through U disk Click right key of the mouse on user management interface, and select import through U disk 2. Enter import through U disk interface, as shown below: 3.Click detect U disk user to detect user s data in U disk. Click add new user to computer to add new user or select the user that is to be added to the database in the list and click cover computer data. Close the window after operation, then you can see the imported user s data in user list. 36
41 Export data to U disk Function Introduction Export the selected user to U disk and save there. Operation Steps 1.Select the user to be exported to U disk 2.Method to enter export to U disk Click right key of the mouse on user management interface, and select export to U disk. 3.The system will give tips after selection of export to U disk. 4.Verify the exported data, and the operation will be completed after export successfully appears. 37
42 5.4 Privilege management Function Introduction Privilege management is to set unlocking time of enrolled user and access control. Every user s privilege setting consists of three time zone setting and a grouping setting. or exists among time zones. There are three time zone in grouping too, and or exists among them as well. Simply speaking, to make enrolled user in unlocking state: firstly, the subgroup user belongs to must exist in unlocking combination (it is allowed to be in a combination with other subgroups); secondly, the present unlocking time should be during the user s time zone or any effective time of group s time zone. The system default the unlocking combination as well as the new enrolled user as the first group. Therefore, it is normal to default the new enrolled user as unlocking state. If there is no subgroup user belongs to in unlocking combination settings, the user cannot unlock. All the users must be in one subgroup which can be : subgroup 1, subgroup 2, subgroup 3, subgroup 4, and subgroup 5. Assign group information to the users to execute management of unlocking combination privilege. The following passage will describe how to set time zone, grouping, unlocking combination, etc. and how to upload the information to the fingerprint reader. Relationship diagram of user defined privilege, access control group and group 38
43 Upload user s information User defined privilege (Y/n) N Access control group (Y/N) Y N Defaulted privilege (Y/N) N Y. Upload user s defined privilege Set access control group in groups (Y/N) Y N. No user verification Y Y. device setting. The time zone of user s Combination of group and access access control agrees with group or user s time zone. Refer to form Set user s privilege Time zone setting Function Introduction Set time zone when unlocking happens if user s fingerprint verification gets done. 39
44 Operation Steps 1.Method to enter time zone setting : Click menu: access control management->time zone option to enter the interface of time zone setting. 2.Enter time zone settings interface, as shown below: 3.Add time zone. Select add to enter time zone setting interface and set time zone that can be used by users. 4.After setting, click save and exit, the setting will be saved and displayed synchronously in the list, as shown below: 40
45 5.Modify time zone. If it is necessary to modify some time zones which have been specified, select the time zone in the list, as shown below: 6.Click modification to enter time zone setting interface and modify the time zone. 41
46 7.After modification, click save and exit, the new one will be saved and synchronously displayed in the list, as shown below: Notice: Set a day s starting time bigger than ending time, then only fingerprint verification can be done. For example, the starting time of Sunday is 12:00, and the ending time is 11:00. After setting, please upload the time zone to the device. 42
47 5.4.2 Management of access control group Function Introduction Access control group is to make users into groups. It is convenient for the management of access control with many devices. For example: a factory has many access control machines. User s access control time differs on different machines. Therefore, a number of access control groups can be set to define user s time on different machines. The setting can be uploaded to the access control machine once, then the machine will work effectively. Operation Steps 1.Method to enter access control group management : Click menu: access control management->access control group management 2.Enter access control group management interface, as shown below: 3.Build access control group. Click add and input name and select time zone in the editing interface. Then click save and exit or click save and add to add new access control group, as shown below: 43
48 4.Then the added access control group will be shown on the management interface. For access control group modification, please click modification 5.Personnel distribution: the personnel will be distributed to different access group to execute management. Click personnel distribution on the management interface, as shown below: 44
49 Tips: 1. The access control group is to manage the users in groups. It is different from the group setting in privilege management. 2. Group in group setting means group in devices. One device can own 5 groups. 3. Group in access control group is subordinate to group. To make user employ time zone of access control group, please select access control group in menu: privilege management -> group setting and upload access control privilege Group setting Function Introduction Set time zone when fingerprint verification gets done for user s subgroup. Operation Steps 1.Method to enter group setting : Click menu: access control management-> privilege management and select group setting interface. 45
50 2.Enter group setting interface as shown below: 3.Edit the groups. Select the group needing editing and click modification, as shown below: 46
51 4.Select time zone when fingerprint verification gets done in the drop-down list, click save and exit and the data gets saved Unlocking combination setting Function Introduction Set user s unlocking combination: one or more than one (5 persons at most) person s fingerprint verification can lead to unlocking. Operation Steps 1.Method to enter unlocking combination Click menu: access control management-> privilege management, and select unlocking combination setting interface. 2.Enter unlocking combination setting interface, as shown below 47
52 3.Edit unlocking combination. Select an unlocking combination record and click modification, or click unlocking combination record twice to enter modification interface, as shown below: Select subgroup in the drop-down list. Select unlocking 48
53 combination subgroup from group 1 to group 5. Click save and exit to save the setting. Tips: 1. If you select subgroup 2 & 3 in group 1&2, employees in subgroup 2&3 are the ones whose fingerprint verification can lead to the unlocking. 2. It is the same with subgroup 2&3 in group 1 &3. 3. If you select subgroup 1 in group 1 &2, two persons in one group can lead to unlocking after their fingerprint verifications get done. 4. No order needs when a number of people engaged in fingerprint verifications Holiday setting Function Introduction Access control time in holiday may be different from usual access control time. In order to make operation easy, the system provides holiday setting to solve the problem of the special access control time in holiday. Operation Steps Click menu: access control management-> privilege management and select holiday setting interface. 2.Click add to add holiday. 49
54 3.Input the starting date and ending date of the holiday, and select the access control time zone during the holiday. 4.Click save and exit and the set holiday will be shown. 50
55 5.4.6 User s specified privilege 1) Set the access control privilege used by user during group time zone Operation Steps 1.Method to enter user defined privilege setting Click menu: access control management-> privilege management, and select user defined privilege interface. 2.Enter user defined privilege and edit user defined privilege. Click add, enter user s access control privilege setting guide interface to select user that needs editing privilege or select all the users, as shown below: 51
56 3.Users belong to group 1. If users need to be distributed to other groups, it is necessary to redistribute users to different groups. For example: to distribute User 1 to group 2, User 1 should be selected. After the selection, click next. 4.Click group number, and select group 2. Click save to save the set privilege. 52
57 5.After the above steps, User 1 is distributed to group 2, as shown below: 6.According to step 3-4, set the subgroup users belong to. Then click upload setting to upload user s access control privilege. Select the device and the privilege item that needs to be uploaded in the window, and click upload. 53
58 2)Set the privilege under the condition that user will not use group time zone. Operation Steps 1.To make user belong to a group but not use group time zone, use group privilege is ignored in the privilege setting interface. But he can select his needed time zone. 2.Then click save and enter privilege management interface. User defined information is shown synchronously in the list, as shown below: User 1 employs group privilege while User 2 does not employ group privilege. 54
59 3) Delete user defined privilege Operation Steps 1.Select the user that need deleting privilege on user defined privilege setting interface, and click delete. Tips: 1. The access control privilege distributed to the fingerprint reader cannot be deleted while deleting user defined privilege. 55
60 2. If you want to forbid user unlocking, click modification to enter user defined privilege editing window, select forbid user. After saving the privilege, click upload setting to upload access control privilege. 56
61 5.5 Report Monitor record report Function Introduction Query all the employees in-and-out record during some time zone. There are two ways to query records: one is inputting the starting & ending time and clicking refresh to get all records during some period. The other is clicking query and inputting detailed query conditions to get the records. Operation Steps 1 Click menu: report -> monitor record report and monitor record report window will pop up, as shown below: 2.Input refreshed time zone in starting & ending time, and click refresh 57
62 3.Click query, and set querying conditions in the pop-up window. As shown below: user can query record through setting all kinds of conditions Alarm report 1) Query alarm record Function Introduction Detect fingerprint that does not pass verification, menace fingerprint, tear-down alarm, unexpected open and so on. 58
63 Operation Steps 1.Click alarm record report in the drop-down menu, and alarm record report window will pop up, as shown in the following picture: 2.Click query to set querying conditions according to different demands. Select various abnormal events in events to query alarm records, as shown below: 59
64 5.6 Device management Read information from fingerprint reader Operation Steps 1.Click device management in the access control management list, users number, fingerprints number and other information can be seen on fingerprint reader information interface. Select fingerprint reader and click read setting. The access control software will connect the selected devices automatically and read their information, as shown below: Communication setting Operation Steps 1.Click communication setting to see its interface. 2.Click read setting to read the communication setting of the selected device. Then modify the device communication manner 60
65 and communication method, such as baud rate, communications password, network rate and so on. Later, click application setting to upload the modified setting to the selected device. 3.After parameter modification, click application setting, then operations complete will appear, as shown below: Wiegand Operation Steps 1.Click wiegand item on device management interface. 2.Read setting: 4 choices will be shown in the drop-down list whose format is specified. According to your demands, 26 bit or 34 bit can be set. 61
66 3.The meanings of various choices: Specified format refers to the specified format built-in system. It is no longer necessary for user to define the total bit length and the position where information locates. System default 4 specified formats: wiegand26 with device ID. wiegand34 with device ID. wiegand26 without device ID. wiegand34 without device ID Wiegand26 with device ID refers to W26 (with device ID) format export. Wiegand26 without device ID refers to export of W26 (with no device ID) format. Device ID is specified as the following: the export is fingerprint reader ID if there is no zone bit code setting, and the export is the set zone bit code (similar to machine ID, but specified by user, able to be repeated by different machines, ranging from 0 to 255) if zone bit code is set. Failed ID: the failed ID (0~ 65534) exported after failed verification won t be exported if you don t select it. Zone bit code (0~255): it is similar to machine ID, but specified by user. It can be repeated by different machines. 62
67 User defined format: user defines the exporting format of Wiegand. Total bit: the length exported by present format ID start: the position where ID starts in total bit ID bit digit: bit length that ID occupies Pulse Width : pulse (generated by Wiegand) width defaults 100 microseconds. It can be adjusted between 20 and 800 if the administrator can not receive Wiegand. Pulse interval s default value is 900 microseconds, and can be adjusted between 200 and Verification Operation Steps 1.Click verification main interface of device management interface, as shown below, click read setting to read the verification information from fingerprint reader. 2.You can change your selection to achieve best effect. 63
68 3.Definitions of various choices 1:1 Verification only: 1:1 verification only can be set yes for a user who has fingerprint and ID card or Mifare card. While verifying, the user has to use his card, then press fingerprint. If the card is not used, there will be no result while pressing finger. ID card verification only: it is set aimed at ID card. When selecting yes, the user can be verified with ID card only. When selecting no, the user has to use ID card and press finger to get verification Power management Operation Steps 1.Click power management on device management interface, then click read setting, as shown below: 3.Idleness setting: set the state during idle period---shutdown or dormant. The idleness setting will be inefficient if there is no idle period. 64
69 5.6.6 Access control Operation Steps 1.Click access control on device management interface, and read setting as shown below. Lock control delay (its least unit is 20ms, with general setting of 100~200ms) is used to control the unlocking time Mifare Operation Steps 1.Click Mifare on device management interface to read setting as shown below: 65
70 2.Definitions of various choices: Fingerprint number:the fingerprint number stored in Mifare card Fingerprint starting sector: the first sector for fingerprint storage in Mifare card Sector number: the number of sectors where fingerprints are stored Card password: password to read and write card, only to be set, not able to be read Other settings This part is mainly for the convenience of device setting. Operation Steps 1.Click other settings on device management interface to read setting, as shown below: 66
71 2.Definitons of various choices: Restart device: click machine s name in the list, and click restart device to restart the device. Shutdown: click shutdown to stop working of this device. Upgrade firmware: To avoid abnormal process, it is not suggested for user to upgrade the firmware without consulting dealers or getting informed from dealers. Clean out administrator s privilege: select the machine name that administrator belongs to in the list, and clean it out. Initialize device: click initialize device to initialzie the device. Synchronous time: make device s time and computer s time synchronous. Grasp fingerprint image: click it and you can see your recent fingerprint image(except for F4 plus). Date format: select data format in the drop-down list. The date format here means the format displayed on the starting interface of fingerprint reader. 67
72 Voice function: you can select open or close to decide whether the reader will use voice or not. 68
73 5.7 System management Build database Operation Steps 1.Click build database in the drop-down list of system management, and its window will pop up, as shown below: Click next after inputting the information. 2.Select database type to input database s name, click finish, and the system starts building database. 69
74 Notice: Only English letters or numbers are acceptable. Don t input special symbols. If SAL Server is selected by database type, please install SQL Server of MSDE before building database Set database Operation Steps 1 Click set database in the drop-down list of system management to get the window as shown below. Select database type to input database information, then click test connection. If test connection succeeds, click yes 70
75 Notice: If SQL SERVER database is needed by the system, please select mixed verification mode when you are installing it Database management Function Introduction Prepare back-up, recovery, and compression for database, delete out-of-date data, set database password and so on Prepare back-up Operation Steps 1.Prepare back-up: click system management -> database management -> database back-up to get a dialogue box, name and save the database under the safe directory, then click back-up, as shown below: 71
76 Recover database Operation Steps 1.Click system management -> database management -> recover database to get the window, select the back-up file and click recover Compress database Operation Steps 1.Click system management -> database management -> compress database to compress the database. Notice: This function only works for Access database. 72
77 Delete out-of-date data Operation Steps 1. The out of date data can be deleted. Click system management -> database management -> delete out-of-date, as shown below: Notice: Records on the expired day will not be deleted Set database password Operation Steps 1.Click system management -> database management -> set database password to input the password in the window as shown below, then click set. 73
78 5.7.4 Operator management Operation Steps 1.Click operator management in the drop-down list of system management to get the interface as shown below: 2.Click add, input operator s number, name and password in the pop-up window. You can select the super administrator, as shown below: 74
79 3.Click save and exit, and set privilege of the new-added administrator on operation administrator interface, as shown below. You can select set all privileges or cancel all privileges. 4. To modify password, select the employee on the operation administrator interface, click modification, then save and exit, as shown below: 75
80 5.7.5 System parameter setting Operation Steps 1.Access control setting 1)Click system management -> system parameter setting to enter system setting interface, as shown below: 2)Parameter setting 1.1 Parameter [automatic start control ] Automatic start control refers to whether the program is under control automatically when access control software is working. If you select it, the program will start monitor over fingerprint reader when your access control software is working. 1.2 Parameter [monitor display in animation] Monitor display in animation refers to whether the software s icon is displayed in green & white alternately when reader monitor is normal. 76
81 If you select this parameter, the software s icon will be displayed in green & white alternately, or it will be displayed in green. 1.3 Parameter [There will be no connection with device any more if repeated connection fails.] This parameter refers to whether the connection between software and fingerprint reader is broken or not during the specified period. If you select detect all along, the software will try to connect with reader all along after the connection is broken. Or the software will try to connect with the reader during the specified times, and the software will stop connecting with the reader when it fails in the specified times. For example: when the software fails to connect with the reader in the first floor, the software will try to connect with the reader for 50 times with 2 seconds interval. If the software fails 50 times, then it won t connect with reader any more. 1.4 Parameter [Default privilege is employed when there is no specified access control privilege to upload user (use time zone of group 1)] It refers to default privilege is employed as user s access control privilege when user uploads his information without privilege specified in privilege management. While using default access control privilege, all users belong to access control group 1. The default time zone of group 1 is time zone 1. Using access control time zone 1 means that all the users can open the door through fingerprint verification in 24 hours. 1.5 Parameter [access control group combined with group time zone] We can manage the user in subgroups, and set time zone for user s subgroup. Three time zones can be set in access control group and limitless access control groups can be set in the software. The group seen in privilege management is group in the device. There are 77
82 only 5 groups in the device, and 3 time zones can be set in each group. Please distinguish access control group from the group in privilege management. When access control group is employed to combine with group time, add access control group to a user and set 3 time zones for access control group. The group in group setting is also set with 3 time zones. At this time, user will employ the group time zone in group setting firstly. If only one time zone is set in group setting, while selecting [ access control group combined with group time zone], the time zone in access control group will combine with time zone in group setting. After user s information is uploaded, there will be 3 time zones in user s access control privilege. They are group time zone 1 in group setting, time zone 2 &3 in access control group, as shown in form Form Access Name control group combined with group Time zone 1 Time zone 2 Time period 3 time zone Access control group Group 2 yes
83 no Parameter [download frequency] It is to control download: periodic download, download in the specified time, or no download. 1.7 Parameter [Delete device s record after download] Delete the record stored in the device automatically after download of device s record. 1.8 Parameter [digit used to number user] It refers to display user s number in digits. For example: if user s number is 1, 1 can be displayed automatically, while its five digits display is and for nine digits. 1.9 Parameter [device s inquiry period] It refers to the interval while software is examining the device. 2.Company s information Set company s information on the page. Input and modify company s information, as shown below: 79
84 3.Alarm voice setting Set voices of various alarm 80
85 MSDE installation 1. Download free MSDE install from Microsoft Web site. 2. Start installation. Click: start->operation, input cmd in operation window and press enter to get command line window. Enter MSDE install directory, input setup securitymode=sql sapwd= 1 then press enter, and MSDE start installing. Employ securitymode=sql to express the installing example specified by SQLServer with mixed mode used. Under the mixed mode, the example supports identity verification enrollment both through windows and SQL. Sapwd= 1 means specify a powerful password for administrator s entry. Here, 1 can be changed into your own password. After the installation, restart the computer. 81
86 6. Appendix 6.1 Connection of access control machine and system The system provides three connection methods: RS232.RS485.TCP/IP Connection through RS232 Operation Steps 1.Connect machine and computer through RS232 according to the following picture of signal lines connection. 2.Click menu->setting->communication setting to Set RS232 communication manner for the machine. The following picture displays the set result. Please pay attention to baud rate, machine ID, Ethernet, RS232 and the setting of connection password. Notice: Connection with Ethernet must be broken when RS232 connection is open. 82
87 3.After setting, press ESC to enter save interface, as shown below, select OK to save the above settings and select ESC to cancel saving the settings. Notice: After saving the settings, the machine needs to be shut down and restarted. 4.Open the software, enter device management menu to add machine. There are 2 ways: Click menu: basic setting- device management Select device management directly through shortcut 5.Click add in device management window to start connection of system and machine. 83
88 6.This interface is the communication interface which connects software and machine. The information input here must agree with the communication setting of Step 2 machine. Fingerprint ID must agree with machine ID setting of access control machine s communication setting. If the reader s setting is 1, input 1 here. Port: Select the communication port number to connect PC and reader, and default COM1. It can be other ports, please select it carefully. Baud rate: It is connected through RS (whose value agrees with the baud rate of access control machine s communication setting is suggested. Communication password can be ignored under the condition of default. If communication password is set, input the corresponding password(5 digits at most) Name: Input name which is easy to remember according to device s purpose. Later, while using this software, the reader can be 84
89 selected by selecting this name. 7.After setting, click test connection. 8.If the dialogue box of test connection fail appears, as shown below, please check the settings in Step 2 & 6, and repeat setting in Step 7. 9.If dialogue box of test connection succeeds appears, as shown below, then the connection between access control machine and system has been done. 85
90 10.Through the above operation, the access control machine can be added to the system Connection through RS485 Operation Steps 1. Use RS485 to connect fingerprint reader and computer. Refer to INSTALLATION GUIDE for detailed connection methods. Notice: RS232/RS485 converter is not contained in the standard configuration. 2.Enter menu->setting->communication setting to set RS485 communication method for the machine. Refer to the following picture for set result. Please pay attention to baud rate, machine ID, Ethernet, RS485 and the setting of connection password. Notice: Connection with Ethernet must be broken when RS485 connection is open. 86
91 3.After setting, press ESC to enter save interface, as shown below, select OK to save the above settings and select ESC to cancel saving the settings. Notice: After saving the settings, the machine needs to be shut down and restarted. 4.Open the software, enter device management menu to add machine. There are 2 ways: Click menu: basic setting- device management Select device management directly through shortcut 5.Click add in device management window to start connection of system and machine. 87
92 6.This interface is the communication interface which connects software and machine. The information input here must agree with the communication setting of Step 2 machine. Fingerprint ID must agree with machine ID setting of access control machine s communication setting. If the reader s setting is 1, input 1 here. Port: Select the communication port number to connect PC and reader, and default COM1. It can be other ports, please select it carefully. Baud rate: It is connected through RS (whose value agrees with the baud rate of access control machine s communication setting ) is suggested.. Communication password can be ignored under the condition of default. If communication password is set, input the corresponding password(5 digits at most) Name: Input name which is easy to remember according to device s purpose. Later, while using this software, the reader can be 88
93 selected by selecting this name. 7.After setting, click test connection. 8.If the dialogue box of test connection fail appears, as shown below, please check the settings in Step 2 & 6, and repeat setting in Step 7. 9.If dialogue box of test connection succeeds appears, as shown below, then the connection between access control machine and system has been done. 89
94 10.Through the above operation, the access control machine can be added to the system Connection through TCP/IP Operation Steps 1.Use Ethernet to connect fingerprint reader and computer. Refer to INSTALLATION GUIDE for detailed connection methods. 2.Enter menu->setting->communication setting to set TCP/IP communication method for the machine. Refer to the following picture for set result. Please pay attention to IP address, network speed, Ethernet, and the setting of connection password. Notice: When RS232, RS485 and Ethernet are open together, only connection with Ethernet is employed. The connections with RS232 and RS485 must be broken. 90
95 3.After setting, press ESC to enter save interface, as shown below, select OK to save the above settings and select ESC to cancel saving the settings. Notice: After saving the settings, the machine needs to be shut down and restarted. 4.Open the software, enter device management menu to add machine. There are 2 ways: Click menu: basic setting- device management Select device management directly through shortcut 5.Click add in device management window to start connection of system and machine. 91
96 6.This interface is the communication interface which connects software and machine. The information input here must agree with the communication setting of Step 2 machine. Fingerprint ID address: the default value is IP address can be modified according to your LAN network segment. But it cannot bring conflict with any terminal address. Port: default value is 4370, which need not modify. Communication password can be ignored under the condition of default. If communication password is set, input the corresponding password (5 digits at most) Name: Input name which is easy to remember according to device s purpose. Later, while using this software, the reader can be selected by selecting this name. 92
97 7.After setting, click test connection. 8.If the dialogue box of test connection fail appears, as shown below, please check the settings in Step 2 & 6, and repeat setting in Step 7. 9.If dialogue box of test connection succeeds appears, as shown below, then the connection between access control machine and system has been done. 93
98 10.Through the above operation, the access control machine can be added to the system. 6.2 Real-time monitor Function introduction Monitor personnel s in-and-out at the real time and discover various abnormal state in time to ensure security. Operation Steps 1.Please refer to system parameter settings for parameter setting of real time monitor 2.Open real time monitor and the software will connect all the access control machines listed in the device form automatically 3.The monitoring state can be queried in monitor center. Device of connected access control machine will glitter in red and white. 94
99 Device of unconnected access control machine will display Red Cross in the middle. All the in-and-out states and alarm events will be recorded and displayed in the report form. 95
100 6.3 Map Function Introduction In order to make the operator get well known in the position where various access control machines locate rapidly and clearly, electronic map function is provided by this version. The distribution of the machines is displayed in the way of map. Operation Steps 1.Click system management -> system parameter setting,and select [use electronic map mode]. 2.Click the right key of the mouse in the blank area of the device list to select [set map]. 3.Click the right key of the mouse in the blank area of the device list to select [set map] again and import the source file of the map. 96
101 Lock the map: save the edited map and exit edition. Set the map: import the source file of the map. Delete the map: delete the imported source file of the map. Auto-align: align the devices icons. Set pictures: set the pictures in various states. 4.Click the right key on device and select properties, you can detect the device s information. 5.Move the device to the corresponding position on the map, and click the right key to select [lock the map]. 97
ZKTime5.0 Attendance Management Software User Manual
 ZKTime5.0 Attendance Management Software User Manual Version: 1.4 Date: April. 2013 Software version: Build 149 About this Manual: This manual provides ZKTime5.0 software operation instruction, for example
Enrollment & Management Software. User Manual
 Enrollment & Management Software User Manual Version: 2.4.3.1037 Date: November 2010 About This Manual This document introduces the interface and menu operations of the Enrollment & Management Software.
Attendance Management Software User Manual Version: 1.8 Date: May 2011
 Attendance Management Software User Manual Version: 1.8 Date: May 2011 About this Manual: This manual provides software operation instruction, for example install and uninstall program, collect data, assign
User s Manual for Fingerprint Door Control Software
 User s Manual for Fingerprint Door Control Software Foreword The naissance of F7 indicated that fingerprint reader enters into professional door control domain. That s why we developed this software to
Attendance Management Software User Manual
 Attendance Management Software User Manual Version: 1.2 Date: Feb. 2012 Software version: build 143 About this Manual: This manual provides Attendance Management software operation instruction, for example
ZKAccess User Manual. Version: 1.1 Software Version: For ZKAccess 4.1.8/5.0.8 and above Version Date: June, 2011
 ZKAccess User Manual Version: 1.1 Software Version: For ZKAccess 4.1.8/5.0.8 and above Version Date: June, 2011 About This Manual This document introduces the main functions, the user interface and operations
Access Control Software. Instruction
 Access Control Software Instruction Contents Copyright owns by 2006 PEGASUS Software Inc. All right reserved Information in this document is subject to change without notice. PEGASUS Software Inc. is a
Operating Instruction of Attendance Management System. Operating Instruction of Checking Attendance Management System
 Operating Instruction of Checking Attendance Management System Chapter I System introduction... 3 Chapter II system installation... 3 Chapter III How to use... 7 Preparation before using the system...
A0 Time & Attendance. Management System. Software Manual
 A0 Time & Attendance Management System Software Manual Application: Fingerprint terminal, Fingerprint access control terminal, Fingerprint terminal with access control and visible walky-talky system, IC/ID
V2.0 Attendance System Hardware Suite Guide Instructions Manual
 CONTENTS TA920 V2.0 Attendance System Hardware Suite Guide Instructions Manual Chapter One - Introduction 1.1 Communication Port 5 1.2 Power Source Control. 5 1.3 Attendance Users. 6 1.4 Registering Ways..
SoMac 2.2 User Manual (Access Control)
") SoMac 2.2 User Manual (Access Control) Document revision date: June/7th/2013 Based on firmware version SoMac 2.2.1.28 Content SoMac introduction... 1 Installation and Un-installation... 1 SoMac Function
SoMac 2.2 User Manual (Access Control) Document revision date: June/7th/2013 Based on firmware version SoMac 2.2.1.28 Content SoMac introduction... 1 Installation and Un-installation... 1 SoMac Function
ViewPower. User s Manual. Management Software for Uninterruptible Power Supply Systems
 ViewPower User s Manual Management Software for Uninterruptible Power Supply Systems Table of Contents 1. ViewPower Overview... 2 1.1. Introduction...2 1.2. Structure...2 1.3. Applications...2 1.4. Features...2
Time Attendance Management System
 Time Attendance Management System User Manual Version 1.5 Last edited on 8 September 2008-1 - Table of Contents 1 Software Installation... 4 2 Login and Interface Preview... 7 2.1 Login... 7 2.2 Main Window...
Partizan Access Control Management User Manual. Version 2.0.0, 14 August 2015
 Partizan Access Control Management User Manual Version 2.0.0, 14 August 2015 Abstract This document is the Software User Manual (SUM) for the Partizan Access Control Management project and was made according
NVMS-1200. User Manual
 NVMS-1200 User Manual Contents 1 Software Introduction... 1 1.1 Summary... 1 1.2 Install and Uninstall... 1 1.2.1 Install the Software... 1 2 Login Software... 3 2.1 Login... 3 2.2 Control Panel Instruction...
Volume. EverAccess. User s Manual
 Volume 1 EverAccess User s Manual FLEX Series Access Control Management Software Flex1.0 EVERFOCUS ELECTRONICS CORPORATION Flex1.0 Instruction Guide 2004 Everfocus Electronics Corp 1801 Highland Ave Duarte
National Fire Incident Reporting System (NFIRS 5.0) Configuration Tool User's Guide
 Configuration Tool User's Guide") National Fire Incident Reporting System (NFIRS 5.0) Configuration Tool User's Guide NFIRS 5.0 Software Version 5.6 1/7/2009 Department of Homeland Security Federal Emergency Management Agency United States
National Fire Incident Reporting System (NFIRS 5.0) Configuration Tool User's Guide NFIRS 5.0 Software Version 5.6 1/7/2009 Department of Homeland Security Federal Emergency Management Agency United States
ProVisual AC-8000P. User Manual. For the optimal use and maintenance of the product, Please read the manual carefully before using it.
 ProVisual AC-8000P User Manual For the optimal use and maintenance of the product, Please read the manual carefully before using it. Table of Content Chapter One Handling Instruction... 3 1.1 Operation
Professional Surveillance System User s Manual
 Professional Surveillance System User s Manual \ 1 Content Welcome...4 1 Feature...5 2 Installation...6 2.1 Environment...6 2.2 Installation...6 2.3 Un-installation...8 3 Main Window...9 3.1 Interface...9
OA101 Fingerprint Time attendance system Preface
 Preface Honorable customers, Thanks for choosing products of this company. OA101, with world cutting edge technologies fingerprint recognition, computer communication, as well as microelectronics, is considered
SMS Database System Quick Start. [Version 1.0.3]
![SMS Database System Quick Start. [Version 1.0.3]](/thumbs/27/10030198.jpg "SMS Database System Quick Start. [Version 1.0.3]") SMS Database System Quick Start [Version 1.0.3] Warning ICP DAS Inc., LTD. assumes no liability for damages consequent to the use of this product. ICP DAS Inc., LTD. reserves the right to change this manual
SMS Database System Quick Start [Version 1.0.3] Warning ICP DAS Inc., LTD. assumes no liability for damages consequent to the use of this product. ICP DAS Inc., LTD. reserves the right to change this manual
Config software for D2 systems USER S MANUAL
 DT-CONFIG SOFTWARE Config software for D2 systems USER S MANUAL CONTENTS 1. Introductions ------------------------------------------------------------------- 3 2. System Requirement and Connection ----------------------------------------
Table Of Contents. System Monitoring... 14 System Monitoring Display...14 Monitoring Zones...15 About Areas (partitions)...15 Area Status Display...
...15 Area Status Display...") Quick Start Table Of Contents Getting Started... 2 NEware Editions...2 Installing NEware...3 Installing Languages...3 Connecting to NEware...3 Changing Your IP100 Password...4 User Codes... 5 Master Feature...5
Quick Start Table Of Contents Getting Started... 2 NEware Editions...2 Installing NEware...3 Installing Languages...3 Connecting to NEware...3 Changing Your IP100 Password...4 User Codes... 5 Master Feature...5
http://downloadcenter.trendmicro.com/
 Trend Micro Incorporated reserves the right to make changes to this document and to the product described herein without notice. Before installing and using the product, review the readme files, release
Attendance System User Manual
 Attendance System User Manual Version 2.0 Last edited on 18 October2012 Table of Contents 1 Software Installation... 5 2 Login and Interface Preview... 8 2.1 Login... 8 2.2 Main Window... 8 2.3 Child Window...
NVMS - 1000 USER MANUAL. Version 2.1.0
 NVMS - 1000 USER MANUAL Version 2.1.0 Contents 1 Software Introduction... 1 1.1 Summary... 1 1.2 Operation Environment... 1 1.3 Install and Uninstall... 2 1.3.1 Install the Software... 2 1.3.2 Uninstall
Maintaining the Content Server
 CHAPTER 7 This chapter includes the following Content Server maintenance procedures: Backing Up the Content Server, page 7-1 Restoring Files, page 7-3 Upgrading the Content Server, page 7-5 Shutting Down
TCMS V2 WITH OFIS SCANNER
 1 TCMS V2 WITH OFIS SCANNER SUGGESTIONS & SOLUTIONS FOR TCMS V2 2 A FINGERTEC OFIS SCANNER DRIVER INSTALLATION 3 Installing FingerTec Ofis Scanner Software 3 B FINGERTEC OFIS SCANNER ACTIVATION STEP 8
Hosting Users Guide 2011
 Hosting Users Guide 2011 eofficemgr technology support for small business Celebrating a decade of providing innovative cloud computing services to small business. Table of Contents Overview... 3 Configure
Upgrading from MSDE to SQL Server 2005 Express Edition with Advanced Services SP2
 Upgrading from MSDE to SQL Server 2005 Express Edition with Advanced Services SP2 Installation and Configuration Introduction This document will walk you step by step in removing MSDE and the setup and
Access Control Management System User s Manual
 Access Control Management System User s Manual V1.0.0 Table of Contents 1 Product Overview... 3 1.1 Overview... 3 1.2 System Requirement... 3 2 Client Installation... 4 3 Login System... 7 3.1 Login...
System Integration Software
 System Integration Software Release Notes for Version 6.0.5 1.0 Compatibility Currently, PC9000 is compatible with the following Radionics control/communicators: D7212, D7412, D7412G D9112, D9412 and D9412G
FrontDesk Installation And Configuration
 Chapter 2 FrontDesk Installation And Configuration FrontDesk v4.1.25 FrontDesk Software Install Online Software Activation Installing State Related Databases Setting up a Workstation Internet Transfer
ivms-4200 Client Software Quick Start Guide V1.02
 ivms-4200 Client Software Quick Start Guide V1.02 Contents 1 Description... 2 1.1 Running Environment... 2 1.2 Surveillance System Architecture with an Performance of ivms-4200... 3 2 Starting ivms-4200...
K1 Access Control Management System User s Manual
 Table of contents K1 Access Control Management System User s Manual Aug 2010 1 Table of contents Table of Contents Chapter 1 System Installation and Configuration 1.1 System Operation Flow Chart... 1 1.2
STATISTICA VERSION 9 STATISTICA ENTERPRISE INSTALLATION INSTRUCTIONS FOR USE WITH TERMINAL SERVER
 Notes: STATISTICA VERSION 9 STATISTICA ENTERPRISE INSTALLATION INSTRUCTIONS FOR USE WITH TERMINAL SERVER 1. These instructions focus on installation on Windows Terminal Server (WTS), but are applicable
CipherLab 5100 Time Attendance Utility Manual
 CipherLab 5100 Time Attendance Utility Manual K:\Products\Product Technical\BI\BI-PC5100T\CipherLab5100TimeAttendnaceUtilityManual0707-process.doc Page 1 / 13 1 Login A popup form as follows will appear
Mobile Device Management Platform Operation Manual V1.4 RECODA
 Mobile Device Management Platform Operation Manual V1.4 Shenzhen Technologies Limited All rights reserved Contents 1. Overview... 4 2. Preparations for Installation... 5 3. Installation Guide... 6 3.1.
ImagineWorldClient Client Management Software. User s Manual. (Revision-2)
") ImagineWorldClient Client Management Software User s Manual (Revision-2) (888) 379-2666 US Toll Free (905) 336-9665 Phone (905) 336-9662 Fax www.videotransmitters.com 1 Contents 1. CMS SOFTWARE FEATURES...4
ImagineWorldClient Client Management Software User s Manual (Revision-2) (888) 379-2666 US Toll Free (905) 336-9665 Phone (905) 336-9662 Fax www.videotransmitters.com 1 Contents 1. CMS SOFTWARE FEATURES...4
SC-T35/SC-T45/SC-T46/SC-T47 ViewSonic Device Manager User Guide
 SC-T35/SC-T45/SC-T46/SC-T47 ViewSonic Device Manager User Guide Copyright and Trademark Statements 2014 ViewSonic Computer Corp. All rights reserved. This document contains proprietary information that
User s Manual. Management Software for ATS
 ATS Monitor User s Manual Management Software for ATS Table of Contents 1. ATS Monitor Overview... 2 2. ATS Monitor Install and Uninstall... 2 2.1. System Requirement... 2 2.2. Software Install... 2 2.3.
Middle East Software User Manual
 Middle East Software User Manual Version: 2.0 Date: July 2012 About this Manual: This software is only applicable to all machines developed by ZKTeco for Middle East. provides software operation instruction,
National Fire Incident Reporting System (NFIRS 5.0) NFIRS Data Entry/Validation Tool Users Guide
 NFIRS Data Entry/Validation Tool Users Guide") National Fire Incident Reporting System (NFIRS 5.0) NFIRS Data Entry/Validation Tool Users Guide NFIRS 5.0 Software Version 5.3 Prepared for: Directorate of Preparedness and Response (FEMA) Prepared by:
National Fire Incident Reporting System (NFIRS 5.0) NFIRS Data Entry/Validation Tool Users Guide NFIRS 5.0 Software Version 5.3 Prepared for: Directorate of Preparedness and Response (FEMA) Prepared by:
PMS. Energy management and monitoring software. Installation and operation instructions. BMR trading Horní lán 17 77900 Olomouc Czech Republic
 PMS Energy management and monitoring software Installation and operation instructions version 1.5 77900 Olomouc 1 Content 1. PMS introduction...3 1.1. PMS structure...3 1.2. System requirements...3 2.
KCU-02 Monitor. Software Installation User Manual. For Windows XP and Windows 7
 KCU-02 Monitor Software Installation User Manual For Windows XP and Windows 7 Headquarters : No.3, Lane 201, Chien Fu ST., Chyan Jenn Dist., Kaohsiung, TAIWAN Tel : + 886-7-8121771 Fax : + 886-7-8121775
USB DATA Link Cable USER MANUAL. (Model: DA-70010-1) GO! Suite Quick Start Guide
 GO! Suite Quick Start Guide") USB DATA Link Cable USER MANUAL (Model: DA-70010-1) GO! Suite Quick Start Guide - GO! Suite Introduction - GO! Bridge Introduction - Remote Share Introduction - Folder Sync - Outlook Sync GO! Suite Quick
USB DATA Link Cable USER MANUAL (Model: DA-70010-1) GO! Suite Quick Start Guide - GO! Suite Introduction - GO! Bridge Introduction - Remote Share Introduction - Folder Sync - Outlook Sync GO! Suite Quick
From Sales to Support All-in-one Stand Alone Solution Covering Customer Service, Call Tracking, HelpDesk, Knowledgebase and Built in Contacts Database
 From Sales to Support All-in-one Stand Alone Solution Covering Customer Service, Call Tracking, HelpDesk, Knowledgebase and Built in Contacts Database and more.. Thank you for your interest in Resource
Doors in a Network Environment
 in a Network Environment 1.0 Purpose of this Document Doors is designed for use in stand-alone computer applications; no network functionality has been built into the program. However, with the prevalence
Chapter7 Setting the Receiving PC for Direct Upload. Setting the Receiving PC for Direct Upload... 148 For Windows... 148 For Macintosh...
 Chapter7 Setting the Receiving PC for Direct Upload Setting the Receiving PC for Direct Upload... 148 For Windows... 148 For Macintosh... 153 Setting the Receiving PC for Direct Upload This section explains
File Management Utility. T u t o r i a l
 File Management Utility T u t o r i a l Contents System Requirements... 2 Preparing Files for Transfer to GlobalMark... 2 Application Launch... 2 Printer Setup... 2 Communication Status... 4 Communication
Install MS SQL Server 2012 Express Edition
 Install MS SQL Server 2012 Express Edition Sohodox now works with SQL Server Express Edition. Earlier versions of Sohodox created and used a MS Access based database for storing indexing data and other
64-Bit Compatibility with Micromeritics Applications
 Tech Tip 7 64-Bit Compatibility with Micromeritics Applications Micromeritics products are designed to operate in most Microsoft Windows environments. However, more current versions of Microsoft Windows,
Centurion PLUS CPC4 Download Guide
 Centurion PLUS CPC4 Download Guide using C4 File Transfer Utility. 1010537 03 01 10 Section 50 1.0 Background: 1.1 The Centurion PLUS Control system consists of a Centurion PLUS Core (CPC4 1) and Color
Table of Contents. CHAPTER 1 About This Guide... 9. CHAPTER 2 Introduction... 11. CHAPTER 3 Database Backup and Restoration... 15
 Table of Contents CHAPTER 1 About This Guide......................... 9 The Installation Guides....................................... 10 CHAPTER 2 Introduction............................ 11 Required
ZKTime 8.0 User Manual
 ZKTime 8.0 User Manual Version: 1.2 Software Version: ZKTime 8.0.5 Date: Jan. 2011 About This Manual This document introduces the main function, the user interface and operations of the system. For installation,
SMS (Server Management Software) Digital Video Recorder. User s Manual
 Digital Video Recorder. User s Manual") SMS (Server Management Software) Digital Video Recorder User s Manual Contents 1 - Introduction 2 1.1 About this manual 2 1.2 Configuration 2 1.3 SMS Functions 2 1.4 Product Information 2 1.5 System Requirements
SMS (Server Management Software) Digital Video Recorder User s Manual Contents 1 - Introduction 2 1.1 About this manual 2 1.2 Configuration 2 1.3 SMS Functions 2 1.4 Product Information 2 1.5 System Requirements
SOP085 - HELLER OVEN SOFTWARE INSTALLATION PROCEDURE. For version 6.2.x.x
 SOP085 - HELLER OVEN SOFTWARE INSTALLATION PROCEDURE For version 6.2.x.x DATE REV ECN - DESCRIPTION OF CHANGE Initials 02/20/2014 INT ECN 140003-001 TP For version 6.2.x.x Rev. INT Page 1 of 16 Basic PC
Preface. technologies fingerprint recognition, computer communication, as well as
 Preface Honorable customers, Thanks for choosing products of this company. OA200, with world cutting edge technologies fingerprint recognition, computer communication, as well as microelectronics, is considered
USB DATA Link Cable USER MANUAL. (Model: DA-70011-1) GO! Suite Quick Start Guide
 GO! Suite Quick Start Guide") USB DATA Link Cable USER MANUAL (Model: DA-70011-1) GO! Suite Quick Start Guide - GO! Suite Introduction - GO! Bridge Introduction - Remote Share Introduction - Folder Sync - Outlook Sync GO! Bridge for
USB DATA Link Cable USER MANUAL (Model: DA-70011-1) GO! Suite Quick Start Guide - GO! Suite Introduction - GO! Bridge Introduction - Remote Share Introduction - Folder Sync - Outlook Sync GO! Bridge for
Contents Chapter One Chapter Two Chapter Three Chapter Four Chapter Five
 Contents Chapter One System Function Instruction.. (3) Chapter Two System Requirement (4) Chapter Three Software Installation &Database Connection.. (5) 3.1 Installing Single-machine Edition... (5) 3.2
@ptitude Observer. Installation Manual. Part No. 32170700 Revision G
 Part No. 32170700 Revision G Installation Manual Copyright 2012 by SKF Reliability Systems All rights reserved. Aurorum 30, 977 75 Lulea Sweden Telephone: +46 (0) 31 337 10 00, Fax: +46 (0) 920 134 40
User Manual WatchPower
 User Manual WatchPower Management Software for Inverter Table of Contents 1. WatchPower Overview... 1 1.1. Introduction... 1 1.2. Features... 1 2. WatchPower Install and Uninstall... 1 2.1. System Requirement...
USER MANUAL ZKTime.Net 3.0. Version: 1.0 Date: February, 2015
 USER MANUAL ZKTime.Net 3.0 Version: 1.0 Date: February, 2015 About This Manual This document introduces the installation and uninstallation of the ZKTime.Net 3.0, and describes the user interface and menu
Reborn Card NET. User s Manual
 Reborn Card NET User s Manual Table of Contents Notice Before Installation:... 2 System Requirements... 3 1. First Installation... 4 2. Hardware Setup... 4 3. Express Installation... 6 4. How to setup
Short Manual Intellect v.4.7.6 SP2 module Unipos Contents:
 Short Manual Intellect v.4.7.6 SP2 module Unipos Contents: 1. Software Installation... 2 2. Hardware Configuration... 12 3. System Dispatching... 14 3.1. Create dispatching objects... 14 3.2. Graphical
User s Manual. Management Software for Inverter
 WatchPower User s Manual Management Software for Inverter Table of Contents 1. WatchPower Overview... 2 1.1. Introduction... 2 1.2. Features... 2 2. WatchPower Install and Uninstall... 2 2.1. System Requirement...
ACS CLIENT SOFTWARE USER MANUAL
 ACS CLIENT SOFTWARE USER MANUAL 1 ACS USER GUIDE 1.1 System Requirement Recommended System Requirement OS CPU VGA RAM HDD WindowXP, Vista Pentium 4, 2Ghz 1024*768, 64MB 24bit color graphic card 1GB 20MB
User s Manual. Management Software for Uninterruptible Power Supply Systems
 PowerShield NetGuard User s Manual Management Software for Uninterruptible Power Supply Systems Table of Contents 1. NetGuard Overview...2 1.1. Introduction...2 1.2. Structure...2 1.3. Applications...3
CENTAUR. Access Control Software Version 4.2 REFERENCE MANUAL
 CENTAUR Access Control Software Version 4.2 REFERENCE MANUAL Copyright (C) 2006-2008 CDVI Americas LTD. All rights reserved. Centaur access control system software is protected by copyright law and international
Time & Attendance System user manual. Version 3.17 BFLEX Attendance Software User Manual. Page 1 of 51
 Version 3.17 BFLEX Attendance Software User Manual Page 1 of 51 Catalog Catalog... 2 1, How to installation... 4 2, How to login... 7 3, About the main window... 9 4, About the employee Profiles... 10
KCU Communication. PC Software Installation and User s Guide For KCU-30 / KCU-40 / KCU-50 modules. System requirement: Windows XP or above
 KCU Communication PC Software Installation and User s Guide For KCU-30 / KCU-40 / KCU-50 modules System requirement: Windows XP or above KCU Communication PC Software User Guide TABLE OF CONTENTS SECTION
Driver Updater Manual
 Driver Updater Manual Keep your drivers up-to-date! Improve your system performance and stability by keeping your drivers updated. Automatically find, update and fix the drivers on your computer and turn
Net Protector Admin Console
 Net Protector Admin Console USER MANUAL www.indiaantivirus.com -1. Introduction Admin Console is a Centralized Anti-Virus Control and Management. It helps the administrators of small and large office networks
How To Create An Easybelle History Database On A Microsoft Powerbook 2.5.2 (Windows)
") Introduction EASYLABEL 6 has several new features for saving the history of label formats. This history can include information about when label formats were edited and printed. In order to save this history,
Introduction EASYLABEL 6 has several new features for saving the history of label formats. This history can include information about when label formats were edited and printed. In order to save this history,
1 Minimum system requirements
 Metrohm AG CH-9101 Herisau Switzerland Phone +41 71 353 85 85 Fax +41 71 353 89 01 info@metrohm.com www.metrohm.com Installation MagIC Net 2.x 1 Minimum system requirements Operating system RAM Memory
PMS. Energy management and monitoring software. Installation and operation instructions
 PMS Energy management and monitoring software Installation and operation instructions version 1.0 Czech Republic Czech Republic 1 Content 1. PMS introduction... 3 1.1. PMS structure... 3 1.2. System requirements...
Installation Instructions Release Version 15.0 January 30 th, 2011
 Release Version 15.0 January 30 th, 2011 ARGUS Software: ARGUS Valuation - DCF The contents of this document are considered proprietary by ARGUS Software, the information enclosed and any portion thereof
PTPhoneManager II. User guide
 COMMUNICATION AT ITS BEST PTPhoneManager II User guide Communications A member of PEIKER group DOCUMENT PEI TEL Communications GmbH - PTPhoneManager II - 2 - T ABLE OF CONTENTS Table of contents Table
Docufide Client Installation Guide for Windows
 Docufide Client Installation Guide for Windows This document describes the installation and operation of the Docufide Client application at the sending school installation site. The intended audience is
Installation Instruction STATISTICA Enterprise Small Business
 Installation Instruction STATISTICA Enterprise Small Business Notes: ❶ The installation of STATISTICA Enterprise Small Business entails two parts: a) a server installation, and b) workstation installations
1. Installing The Monitoring Software
 SD7000 Digital Microphone Monitor Software manual Table of Contents 1. Installing The Monitor Software 1.1 Setting Up Receivers For Monitoring 1.2 Running The Application 1.3 Shutdown 2. The Detail Monitoring
GUARD1 PLUS SE Administrator's Manual
 GUARD1 PLUS SE Administrator's Manual Version 4.4 30700 Bainbridge Road Solon, Ohio 44139 Phone 216-595-0890 Fax 216-595-0991 info@guard1.com www.guard1.com i 2010 TimeKeeping Systems, Inc. GUARD1 PLUS
Changing Your Cameleon Server IP
 1.1 Overview Technical Note Cameleon requires that you have a static IP address defined for the server PC the Cameleon server application runs on. Even if the server PC has a static IP address, you may
3.5 EXTERNAL NETWORK HDD. User s Manual
 3.5 EXTERNAL NETWORK HDD User s Manual Table of Content Before You Use Key Features H/W Installation Illustration of Product LED Definition NETWORK HDD Assembly Setup the Network HDD Home Disk Utility
ViewPower User Manual
 ViewPower User Manual Management Software for Uninterruptible Power Supply Systems Table of Contents 1. ViewPower Overview... 1 1.1. Introduction... 1 1.2. Structure... 1 1.3. Applications... 1 1.4. Features...
SOS SO S O n O lin n e lin e Bac Ba kup cku ck p u USER MANUAL
 SOS Online Backup USER MANUAL HOW TO INSTALL THE SOFTWARE 1. Download the software from the website: http://www.sosonlinebackup.com/download_the_software.htm 2. Click Run to install when promoted, or alternatively,
Fingerprint Time Attendance Software Manual
 Fingerprint Time Attendance Software Manual User Manual Rev: E2.1.0-1 - Content Software Installation Wizard...4 Chapter 1: System Functional Properties...5 Chapter 2: System Requirements...6 2.1. Hardware
PART 1 CONFIGURATION 1.1 Installing Dashboard Software Dashboardxxx.exe Administration Rights Prerequisite Wizard
 Omega Dashboard 1 PART 1 CONFIGURATION 1.1 Installing Dashboard Software Find the Dashboardxxx.exe in the accompanying CD or on the web. Double click that to install it. The setup process is typical to
WhatsUp Gold v16.1 Installation and Configuration Guide
 WhatsUp Gold v16.1 Installation and Configuration Guide Contents Installing and Configuring Ipswitch WhatsUp Gold v16.1 using WhatsUp Setup Installing WhatsUp Gold using WhatsUp Setup... 1 Security guidelines
NVMS Network Video Monitor System Standard Edition. Users Manual
 Network Video Monitor System Standard Edition Users Manual Contents Contents... 1 1. Introduction... 2 1.1. Brief Introduction... 2 1.2. Definition... 3 1.3. System Features... 3 1.4. System operating
EaseUS Todo Backup user guide. EaseUS Todo Backup. Central Management Console. User guide - 1 -
 EaseUS Todo Backup Central Management Console User guide - 1 - Table of Contents Welcome... - 3 - Overview... - 3 - How to use this manual... - 3 - Getting started... - 4 - Hardware requirements... - 4
Remote Management System
 RMS Copyright and Distribution Notice November 2009 Copyright 2009 ARTROMICK International, Inc. ALL RIGHTS RESERVED. Published 2009. Printed in the United States of America WARNING: ANY UNAUTHORIZED
Crystal Reports Installation Guide
 Crystal Reports Installation Guide Version XI Infor Global Solutions, Inc. Copyright 2006 Infor IP Holdings C.V. and/or its affiliates or licensors. All rights reserved. The Infor word and design marks
mark for special model function Specific function subject to actual attendance If there is an update are subject to change without notice
 mark for special model function Specific function subject to actual attendance If there is an update are subject to change without notice 1 Preface Honorable customers, Thanks for choosing products of
Getting Started with Vision 6
 Getting Started with Vision 6 Version 6.9 Notice Copyright 1981-2009 Netop Business Solutions A/S. All Rights Reserved. Portions used under license from third parties. Please send any comments to: Netop
Liebert Nform Infrastructure Monitoring Software. User Manual - Version 4
 Liebert Nform Infrastructure Monitoring Software User Manual - Version 4 TABLE OF CONTENTS 1.0 ABOUT LIEBERT NFORM................................................1 1.1 How Do You Contact Emerson Network
Installation / Migration Guide for Windows 2000/2003 Servers
 PSQL v9 SP1 (9.1) & Installation / Migration Guide for Windows 2000/2003 Servers Ebix, Inc. Corporate Headquarters Concourse Parkway, Suite 3200 Atlanta, GA 30328 USA Phone: 678-281-2020 Fax: 678-281-2019
LOREX CLIENT Remote Software 4.0
 LOREX CLIENT Remote Software 4.0 Instruction Manual English Version 2.0 MODEL: L20WD800 Series www.lorexcctv.com Copyright 2008 LOREX Technology Inc. Table of Contents Table of Contents Software Installation...
Installing LearningBay Enterprise Part 2
 Installing LearningBay Enterprise Part 2 Support Document Copyright 2012 Axiom. All Rights Reserved. Page 1 Please note that this document is one of three that details the process for installing LearningBay
EasySuite. User Guide V1.0
 EasySuite User Guide V1.0 1 Launch EasySuite...3 Stop the EasySuite:...4 System Requirements...5 EasyCopy...6 Function Description...7 File Transfer...9 EasyMover...12 Function Descriptions of EasyMover...12