SAVE THESE INSTRUCTIONS SERVICING OF DOUBLE INSULATED PRODUCTS
|
|
|
- Kellie Lawson
- 9 years ago
- Views:
Transcription
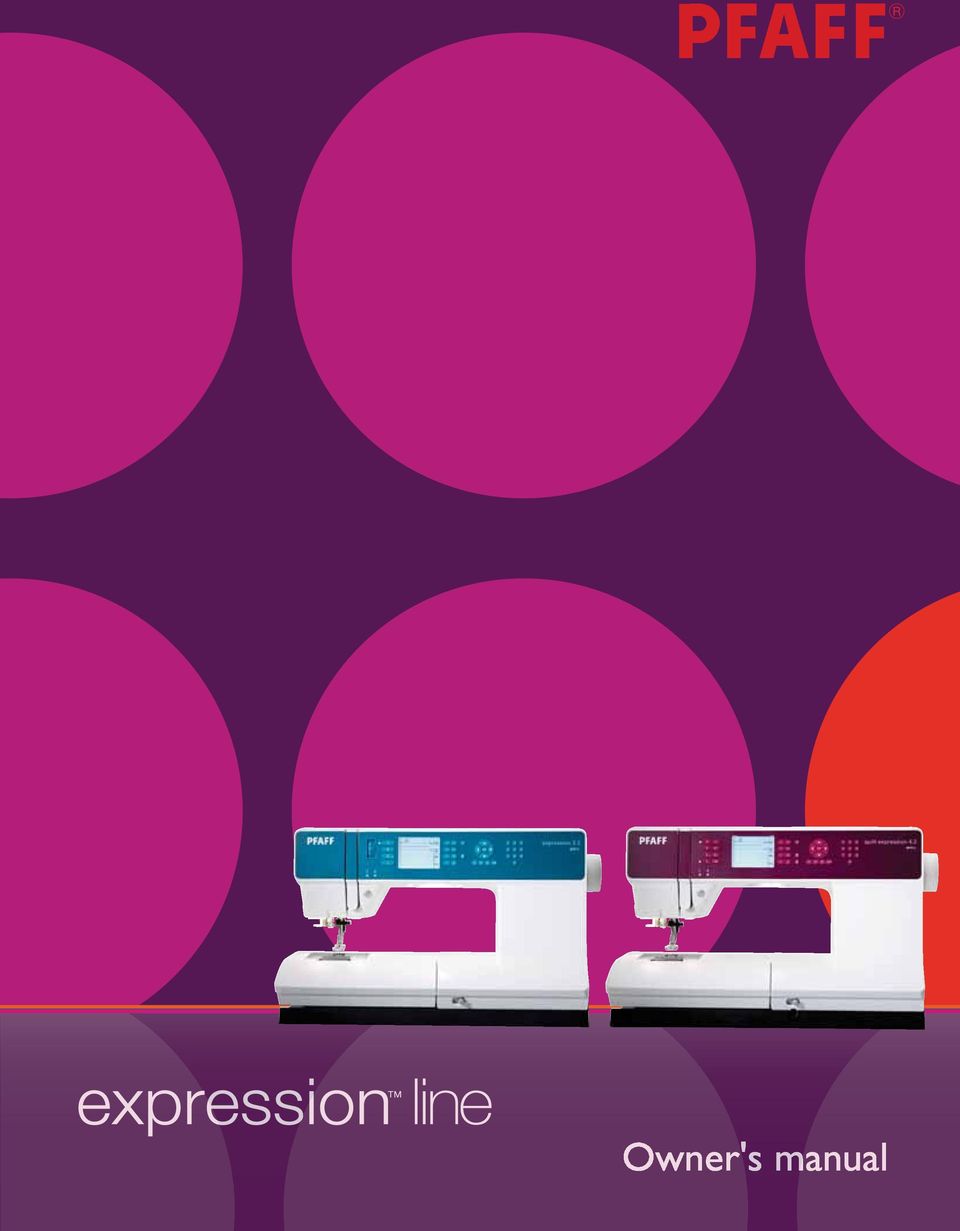
1 Owner's manual
2 This household sewing machine is designed to comply with IEC/EN and UL1594. IMPORTANT SAFETY INSTRUCTIONS When using an electrical appliance, basic safety precautions should always be followed, including the following: Read all instructions before using this household sewing machine. DANGER To reduce the risk of electric shock: machine from the electric outlet immediately after using and before cleaning. WARNING shock, or injury to person: safety. recommended by the manufacturer as contained in this manual. it has been dropped or damaged, or dropped into water. Return the sewing machine to the nearest sewing machine and foot controller free from the accumulation of lint, dust, and loose cloth. needle, changing needle, threading bobbin, or changing presser foot, etc. SAVE THESE INSTRUCTIONS SERVICING OF DOUBLE INSULATED PRODUCTS

3 Congratulations! sewing ideas into reality. dealer will of course also be pleased to help you at any time. expression you to experience a totally new dimension of sewing!

4 Table of contents 1 Introduction 1:5... 1:6 Front side... 1:6 Top parts... 1:6... 1:7 Included accessories... 1:7 Presser feet... 1:8... 1:9 Utility stitches... 1:9 Quilt stitches... 1:11 Needle art stitches... 1: : :12 2 Preparations 2:1 Unpacking... 2:2 Connect to the power supply... 2:2 Pack away after sewing... 2:3... 2:3 Free arm... 2:3 Thread cutter... 2:3... 2:3 Threading the machine... 2:4... 2:6 Inserting the bobbin... 2:7 TM... 2:7... 2:8 Needles... 2:8 Changing the needle... 2:9 Lowering feed dogs... 2:9 Changing the presser foot quilt expression :11 expression : :15 3 Sewing 3:1... 3:2... 3:2... 3:2... 3:3 Mirroring... 3:4 Tie-off options... 3:4 Tapering program... 3:5... 3:5 Personal stitches... 3:6... 3:7... 3:7... 3:7... 3:8... 3:8 Common sewing pop-ups... 3:10 4 Sequencing 4:1... 4: Using the alphabet... 4:3... 4:4... 4:4 5 Maintenance 5:1 Cleaning the machine... 5:2 Replacing the stitch plate... 5:2 Troubleshooting... 5:3 Note: The machine models will be referred to as simply 4.2 and 3.2 in this manual.

5 Introduction1

6 Machine overview Introduction 1 PFAFF quilt expression inch mm OK Front side 2. Threading slots 3. Thread cutter 7. Needle bar 8. Needle thread guide 11. Free arm 12. Presser foot 14. Presser foot bar and presser foot holder 15. Needle screw 18. Handwheel 19. Main switch, connectors for power cord and foot control 1:6 Top parts 22. Pre-tension disk for threading and bobbin winding 24. Thread guide 31. Thread tension disk

7 Accessory tray The accessory tray features special compartments for presser feet and bobbins, plus space for needles tray so they are easily accessible Introduction Included accessories 36. Thread net 37. Edge guide 38. Felt pad 45. Multi-purpose tool Included accessories not in picture :7

8 Presser feet Introduction This foot is used mainly for straight stitching and zigzag stitching with a stitch length longer than 1.0 mm. This foot is used for blindhem stitches. The toe on the foot guides the fabric. The red guide on the foot is designed to ride along the fold of the hem edge. This foot can be snapped on either the right or the left of the needle, making it easy to sew closer to zipper teeth. When connected to the machine, the buttonhole is sewn in a suitable length to the button size that has been entered into the machine. Manual buttonhole foot 5M This foot is used for sewing manual buttonholes. Use the markings on the foot to position This foot is used for sensormatic free-motion sewing. This foot can also be used for darning. the straight stitch needle plate. The clearance between the needle and the outer edge of Insert the pin of the foot as far as it will go into the hole at the back of the presser foot arm must be behind the needle bar. Tighten the screw. Important: Make sure that the IDT is disengaged when using presser foot 2A, 5A, 5M, 6A and the free-motion/darning foot. 1:8

9 Stitch overview Utility stitches Stitch Stitch number Name Description Straight stitch For seaming and topstitching. Select from 37 different needle positions. Note: This stitch makes a stronger tie-off than stitch 52 (4.2) / 43 (3.2). Introduction 2 2 Stretch triple straight stitch Reinforced seam. Topstitching. 3 3 Straight stitch reverse Sew continuous reverse. 4 4 Basting stitch For basting projects together. Single stitch used for basting. You determine the length of stitch manually. 5 5 Zig Zag stitch 6 6 Zig Zag stitch 7 7 Z-Zig Zag stitch Appliqué, couching, eyelets. 8 8 Stretch triple Zig Zag stitch Elastic stitch for decorative hems or topstitching. 9 9 Three-step Zig Zag stitch Sewing elastic, darning, patching and decorative sewing Elastic stitch Sewing elastic, darning, patching Triple stretch stitch Sewing elastic, darning, patching and decorative sewing Honeycomb stitch Decorative stitch for stretch fabrics and hems. Also used with elastic thread in the bobbin Bridging stitch Joining fabrics and quilt batting, decorative stitch for quilting, hemstitching Foundation elastic stitch Joining stitch for undergarments, terry cloth, leather, bulky fabrics where overlapping the seams Crosshem stitch Elastic decorative hem for stretch fabrics Blindhem stitch Sewing blindhems on woven fabrics Elastic blindhem stitch Sewing blindhems on stretch fabrics Stretch tricot stitch Sewing seams on stretch fabrics Closed overlock Seam and overcast stretch fabrics in one step. 20 Closed overlock Seam and overcast in one step Closed overlock Seam and overcast in one step with reinforced edge Standard overcast Seam and overcast stretch fabrics in one step with reinforced edge. 23 Overlock Seam and overcast stretch fabrics in one step. 1:9

10 Introduction Stitch Stitch number Name Description Overlock Elastic decorative hem for stretch fabrics Closed overlock Seam and overcast in one step, patch, hem Stretch knit overlock Seam and overcast stretch fabrics in one step. 27 Reinforced overlock Seam and overcast stretch fabrics in one step and reinforce. 28 Finished edge overlock Seam and overcast stretch fabrics in one step with reinforced edge Mock cover hem Create the look of a serger cover hem for stretch fabrics Open overlock blindhem Create decorative overlock blindhem for woven fabrics. 31 Closed overlock blindhem Create decorative overlock blindhem for woven fabrics Linen buttonhole Buttonhole for blouses, shirts and linen Standard buttonhole Basic buttonhole for blouses, shirts and jackets. Also for pillowcases Rounded buttonhole with pointed tack Rounded buttonhole with lengthwise tack Eyelet buttonhole with pointed tack Eyelet buttonhole with lengthwise tack Buttonhole for garments. Buttonhole for garments. Tailors buttonhole or decorative buttonhole. Tailors buttonhole for jackets and trousers Rounded buttonhole Buttonhole for light garments or jackets Stretch buttonhole Buttonhole for stretch fabrics. 40 Cross stitch buttonhole Decorative buttonhole. 41 Decorative eyelet buttonhole Decorative buttonhole for jackets. 42 Heirloom round buttonhole with pointed tack Decorative heirloom buttonhole Bound buttonhole With extra cutting space for bound buttonhole (straight stitch) Button sewing Sew on buttons or tacking Eyelet Heirloom sewing decorative trim Programmable darning stitch Darning holes or damaged fabric Programmable reinforced darning stitch Reinforced darning holes or damaged fabric. 1:10

11 Stitch Stitch number Name Description Bartack Automatically reinforce seams and pockets Denim bartack Automatically reinforce seams and pockets decoratively. Introduction Decorative bartack Automatically reinforce seams and pockets decoratively. 51 Cross bartack Automatically reinforce seams and pockets. Quilt stitches Stitch * * Stitch Needle art stitches Stitch Stitch Decorative stitches Stitch Stitch Stitch * This stitch makes a more decorative tie-off than stitch 1. 1:11

12 Introduction Stitch Stitch Requires optional Candlewicking Foot w/idt system (Part number ). 2 Requires optional Beading Foot 6mm (Part number ). 3 Requires optional Beading Foot 4mm (Part number ). 4 Requires optional Bi-level Topstitch Foot w/idt system (Part number ). 5 Requires optional Three Hole yarn Foot w/ IDT system (Part number ). 6 Requires optional Join and Fold Edging Foot w/idt system (Part number ). Alphabets Comic (3.2 & 4.2) Cyrillic (3.2 & 4.2*) Outline (4.2**) * Only in russian quilt expression 4.2 sewing machine. ** Not included in russian quilt expression 4.2 sewing machine. 1:12
.")
13 Preparations2

14 Preparations Unpacking packaging and lift off the machine carrying case. plastic bag. styrofoam inside. Note: Styrofoam left in the accessory tray while sewing may affect stitch quality. The styrofoam is for packing purposes only and should be removed. Note: Your PFAFF Expression sewing machine is adjusted to provide the best stitch result at normal room temperature. Extreme hot and cold temperatures can affect the sewn result. Connect to the power supply cord and the foot control. Note: Before plugging in the foot control, check to ensure that it is type FR5 (see underside of foot control). 1. Take out the foot control cord. Turn the foot to make sure it is properly connected. Lay the cord in the slot on the underside of the foot control. Note: Connecting the foot control cord to the foot going to use the machine. 2. Connect the foot control cord to the front socket on the bottom right side of the machine 3. Connect the power cord to the rear socket on the cord into the wall socket. C A B For the USA and Canada polarized outlet only one way. If the plug does not 2:2
. 1. Take out the foot control cord. Turn the foot to make sure it is properly connected.")
15 Pack away after sewing 2. Unplug the cord from the wall socket and then from the machine. 3. Unplug the foot control cord from the machine. Wind the cord around the foot control for easy storage. the tray on to the machine around the free arm. free arm. LED lights shadows. Preparations Free arm To use the free arm, slide off the accessory tray. When attached, a hook keeps the accessory tray it to the left. A Thread cutter To use the thread cutter, pull the thread from back Spool pins pin and an auxiliary spool pin. The spool pins are designed for all types of thread. The main Use the horizontal position for normal threads and threads. Horizontal position Place a spool cap and the thread spool on the spool and slide on a second spool cap. Use a spool cap slightly larger than the thread spool. For narrow thread spools, use a smaller spool cap in front of the spool. For large thread spools, use a larger spool cap in front of the spool. between the spool cap and the thread spool. Small spool cap Large spool cap 2:3

16 Vertical position on the large spool cap and place a felt pad under reeling off too fast. Preparations Auxiliary spool pin The auxiliary spool pin is used when winding a bobbin thread from a second spool of thread or for a second spool when sewing with a twin needle. cap and place a felt pad under the thread spool. Main spool pin in vertical position Auxiliary spool pin and main spool pin in vertical position. Threading the machine Make sure that the presser foot is raised and the needle is in the up position. cap of the right size. the front to the back. Pull the thread from the right underneath the bobbin winder thread 3. Thread down through the right-hand threading slot and then upwards through the left-hand threading slot. 5. Thread the needle. PFA D C B A B E C quilt expression 4.2 2:4

17 Needle threader The needle threader allows you to thread the needle automatically. The needle must be in the up position to use the built-in needle threader. We also recommend lowering the presser foot. 1. Use the handle to pull the needle threader all through the needle eye. 3. Let the needle threader gently swing back. The hook pulls the thread through the needle eye and forms a loop behind the needle. Pull the thread loop out behind the needle. Note: The needle threader is designed to be used for size needles. You cannot use the needle threader for size 60 needles or smaller, a wing needle, twin needle or triple needle. There are also some optional accessories that require manual threading of the needle. G H Preparations Threading for twin needle Replace the sewing needle with a twin needle. Make sure that the presser foot is raised and the needle is in the up position. spool cap of the right size. Raise the auxiliary pad. Place the second thread on the spool pin. the front to the back. Pull both threads from the right underneath the bobbin winder thread 3. Thread down through the right-hand threading slot and then upwards through the left-hand threading slot. Make sure that you pass one thread to the left and one thread to threading slot. Make sure that one thread is other one outside. Make sure that the threads do not become twisted together. 5. Thread the needles. PFA E F quilt expression 4.2 C B D A Note: If using specialty threads (such as metallic threads) its weight and irreglular surface increases the thread tension. By reducing the tension, the risk of needle breakage is prevented. B C 2:5

18 C C E Preparations Bobbin winding Winding from horizontal position 1. Place an empty bobbin on the bobbin spindle, with the logo facing up. Use only the original 2. Place the thread spool on the spool pin in against the spool. front to back. Pull the thread counter-clockwise the rear. Note: Make sure the thread is pulled securely inside the pre-tension device for correct thread tension. the inside to the outside. pop-up appears on the screen to inform you control to start winding the bobbin. When the bobbin is full, the bobbin winding will slow down and stop automatically. The B A C D Winding through the needle Make sure that the presser foot and the needle are using a metal presser foot. the presser foot, upward through the left-hand threading slot and through the bobbin thread B A C 2:6

19 Inserting the bobbin you. 2. Place the bobbin in the bobbin case with the logo facing up and the thread unreeling from the left of the bobbin. The bobbin will then rotate counter-clockwise when you pull out the thread. right and then to the left into the tension spring the thread to the left to cut. Note: The bobbin cover can be used as a magnifying glass B A C Preparations D IDT system (Integrated dual feed) expression the fabric from the top and bottom at the same time. The material is fed precisely, eliminating puckering on seams in light weight fabrics such as perfect match when sewing plaid or striped fabrics. Engaging the IDT system Important: For all work with the IDT system use presser feet with the center back cut-out (D). down until it engages. Disengaging the IDT system system down, then pull it away from you to release 2:7

20 Preparations Electronic knee-lift (4.2) for regulating the presser foot height. for you. If you press the knee-lift to the right, the presser both hands. the hole. A Needles The sewing machine needle plays an important We recommend needles of system 130/705H. The needle package included with your machine Universal needle (B) Stretch needle (C) leathers. Marked with a yellow band. Embroidery needle (D) damage to thread and materials. Use with metallic and other specialty threads for embroidery and Denim needle (E) band. Wing needles (F) The Wing Needle has wide wings on the side of the needle to poke holes in the fabric when sewing 2:8 G H I B C D E F Note: Change the needle often. Always use a straight needle with a sharp point (G). A damaged needle (H) can cause skipped stitches, breakage or snapping of the thread. A damaged needle can also damage the stitch plate. Do not use asymmetrical twin needles (I), since it may damage your sewing machine.
 The Wing Needle has wide wings on the side of the needle to poke holes in the fabric when sewing 2:8 G H I B C D E F Note: Change the needle often.")
21 Changing the needle 1. Use the hole in the multi-purpose tool to hold the needle. if necessary. 4. Insert the new needle, using the multi-purpose tool. Push the new needle upwards with the further. 5. Tighten the needle screw as tight as it will go. Lowering feed dogs on the front of the sewing machine to the left. feed dogs. Preparations Changing the presser foot Remove presser foot Press the presser foot downwards until it disengages from the presser foot holder. Attach presser foot Place the presser foot under the presser foot holder, so that when the presser foot is lowered, the pins of the foot engage in the presser foot holder. Note: Check that the presser foot is properly attached by raising the presser foot. 2:9
22 Buttons for quilt expression OK Preparations Needle stop up/down with indicator (1) The setting of the needle stop position is changed the indicator is lit, the needle will stop in the down height. the needle. Stitch restart (2) stitch, press restart to start sewing at the beginning If pressing the stitch restart button while sewing, stop. Speed control (3) icon on the graphic display will indicate how slow your machine will sew. Long press the speed button Note: You cannot select a higher speed than the default speed. Thread snips with indicator (4) Press the button when you are not sewing and your sewing machine cuts the top and bobbin threads and raises the presser foot and the needle. of the next stitch, press the thread snips button while sewing. The thread snips indicator will be lit. 2:10 Reverse (7) with indicator (5) you press the button again to cancel. programmed tie-off end, darning stitches and tapering stitches to step between the parts of the stitch. Programmed tie-off indicator (6) The programmed tie-off indicator is lit to indicate indicator stays lit until the tie-off options are no longer in use. Immediate tie-off (8) Press the tie-off button while sewing and your machine sews a few tie-off stitches and stops automatically. Presser foot up and extra lift toggle (9) Raises the presser foot and needle to the up position. Press the button once more and the presser foot will raise to extra lift.
23 Presser foot down and pivot toggle (10) Lower the presser foot completely. Press the button The presser foot is lowered automatically when you start sewing. Direct selection (17) buttons, you select the stitch represented by that number immediately. Start/stop (11) Press this button to start or stop the machine without using the foot control. Press the button once to start and press it again to stop. Graphic display (12) size. Stitch width or stitch positioning (13) Increase or decrease the stitch width using the + and - buttons. positioning for the selected stitch. Use the + and - buttons to change the stitch position. F1 - Function 1 (18) The F1 button is used to set the tapering program. It is also used to repeat buttonholes and to will be shown on the graphic display. character set. F2 - Function 2 (19) The F2 button is used to set the tie-off and thread display. Info button (20) Press this button to toggle the recommendations Preparations Stitch length or stitch density (14) Increase or decrease the stitch length using the + and - buttons. density setting for satin stitches. Use the + and - buttons to change the density for the selected stitch. Settings menu (21) Press this button to open the menu for machine settings. Mirror end to end (22) Alternatives (15) and length settings will be shown on the graphic stitch positioning will be shown instead of the stitch width setting and the density will be shown instead of the length setting. Wheel (16) display. The wheel has up and down arrow buttons, left and right arrow buttons and the wheel stepping between stitches, setting the size of a settings menu. Mirror side to side (23) Load personal stitch or sequence (24) Press this button to load a personal stitch or Save personal stitch or sequence (25) Clear (26) Sequencing (27) 2:11
24 Buttons for expression OK Preparations Thread tension dial (1) markings on the tension dial. Needle stop up/down with indicator (2) The setting of the needle stop position is changed the indicator is lit, the needle will stop in the down position. the needle. Stitch restart (3) stitch, press restart to start sewing at the beginning If pressing the stitch restart button while sewing, then stop. Speed control (4) Press the speed button to sew at a slower speed. slow your machine will sew. Long press the speed speed. Note: You cannot select a higher speed than the default speed. Reverse (7) with indicator (5) you press the button again to cancel. programmed tie-off end, darning stitches and tapering stitches to step between the parts of the stitch. Programmed tie-off indicator (6) The programmed tie-off indicator is lit to indicate indicator stays lit until the tie-off options are no longer in use. Immediate tie-off (8) Press the tie-off button while sewing and your machine sews a few tie-off stitches and stops automatically. Graphic display (9) size. 2:12
25 Stitch width or stitch positioning (10) Increase or decrease the stitch width using the + and - buttons. positioning for the selected stitch. Use the + and - buttons to change the stitch position. Stitch length or stitch density (11) Increase or decrease the stitch length using the + and - buttons. density setting for satin stitches. Use the + and - buttons to change the density for the selected stitch. Alternatives (12) and length settings will be shown on the graphic stitch positioning will be shown instead of the stitch width setting and the density will be shown instead of the length setting. Wheel (13) display. The wheel has up and down arrow buttons, left and right arrow buttons and the wheel between stitches, setting the size of a buttonhole F2 - Function 2 (16) The F2 button is used to set the tie-off options and will be shown on the graphic display. Info button (17) Press this button to toggle the recommendations Settings menu (18) Press this button to open the menu for machine settings. Mirror side to side (19) For mirroring stitches side to side. Load personal stitch or sequence (20) Press this button to load a personal stitch or Save personal stitch or sequence (21) Clear (22) Sequencing (23) Preparations Direct selection (14) buttons, you select the stitch represented by that number immediately. F1 - Function 1 (15) The F1 button is used to set the tapering program. It is also used to repeat buttonholes and to will be shown on the graphic display. character set. 2:13
26 Preparations 2:14
27 Settings menu settings, sound settings and screen settings. pressing the up and down arrow buttons on the wheel. Note: If a setting cannot be combined with a previously selected setting, the outlines of that box will be dashed. There are two icons which are shown next to some This icon shows you that the setting will be kept until you select another stitch. This icon shows you that the setting will be kept until you switch your machine off. No icon means that this setting is kept until you settings menu. Preparations Thread tension (4.2) on the fabric, batting, thread etc, the tension may The changes only affect the selected stitch. The setting will go back to default when you select another stitch. In sewing mode, press the info button to see the current selected thread tension. For 3.2: the thread tension. Twin needle and right arrow buttons on the wheel to set the twin needle width. When a twin needle size is selected, the width of all stitches is limited for that In sewing mode, press the info button. The twin needle recommendation icon will be shown. The setting is kept until you deselect the twin needle setting. Note: Twin needle and stitch width safety cannot be used at the same time. A warning pop-up will be shown if you select a stitch that is too wide for the set twin needle size. Stitch width safety needle plate or a straight stitch presser foot to lock damage to the needle, presser foot or needle plate. In sewing mode, press the info button. The stitch width safety icon will be shown. When turning on the machine with this setting a straight stitch, a pop-up informs you that it is set back to normal sewing. Note: Twin needle and stitch width safety cannot be used at the same time. Dynamic spring foot 6D (4.2) and will raise and lower with each stitch to hold the fabric on the needle plate while the stitch is being formed. Note: The Dynamic spring foot 6D is recommended for use with straight stitch. Activate Stitch width safety. 2:15
28 Preparations Spring foot free-motion (4.2) will raise and lower with each stitch to hold the fabric on the stitch plate while the stitch is being formed. In sewing mode, press the info button. The spring foot free-motion icon will be shown instead of the presser foot recommendation. Note: The open toe free-motion foot is optional and can be purchased at your local authorized PFAFF dealer. Do not use if sensormatic free-motion is activated, since the needle might damage the presser foot. The open toe free-motion foot, or any spring foot with light grey plastic housing, can also be used for freemotion embroidery. Sensormatic free-motion (4.2) dogs. In sewing mode, press the info button. The sensormatic free-motion icon will be shown instead of the presser foot recommendation. in free-motion at low speed the presser foot will raise and lower with each stitch to hold the fabric on the stitch plate while the stitch is being formed. fabric while sewing. When turning on the machine, a pop-up informs Pivot height (4.2) machine is set for free-motion. up and down with the needle as you are stitching. between the presser foot and the fabric and eliminate the skipped stitches. Note: Be careful not to reduce the pivot height too much. The fabric must still move freely under the presser foot. Presser foot pressure (4.2) Use the left and right arrow buttons on the wheel manual setting will be cancelled when you turn the machine off. Note: If you want to change the presser foot pressure for an entire sequence, bring the sequence to sewing mode and change the setting there. Automatic presser foot lift (4.2) When selected, the automatic presser foot lift is for example when stopping with the needle in the down position. When deselected, the presser foot the needle in down position. Balance When sewing on special fabrics or doing a special Use the left and right arrow buttons to balance the stitch between -7 and 7. When you sew again, the The changes only affect the selected stitch. The setting will go back to default when you select another stitch. Language Use the left and right arrow buttons to change the language of all text in your machine. Audible alarm Turn all alarm sounds of the machine on or off. Contrast set between -20 to 20 in steps of 1. Software version machine. 2:16
29 Sewing 3
30 default. Sewing mode - overview 5. Tapering program 6. Tie-off options Sewing Select a stitch select that stitch number immediately. Press two from 10 and up. If the stitch number does not exist, be selected as a stitch. Use the up and down arrow buttons on the wheel to step between stitches. Sewing recommendations Press the info button to show sewing recommendations for the current stitch. Press the button again to hide the information. 7. Needle recommendation/setting Wing needle recommended 8. Presserfoot recommendation Note: All symbols and options will not be shown at the same time :2
31 Stitch adjustments The setting changes only affect the selected stitch. selecting another stitch. The changed settings are not The set stitch width and the stitch length are shown to exceed minimum or maximum settings for width and length, a warning sound will be heard. Note: The numbers are highlighted when the setting is changed. the fabric, the needle thread tension is too tight. Reduce the needle thread tension. fabric, the needle thread tension is too loose. Increase the needle thread tension. fabric. For 4.2: page 2:15 for instructions on how to change the setting manually. Stitch width (1) Increase or decrease the stitch width using + and -. Stitch length (2) Increase or decrease the stitch length using + and stitch, the entire stitch will be longer. If lengthening the entire stitch will be longer but the density will remain the same. For 3.2: Press the info button. Use the dial to set the tension. Sewing Stitch positioning (3) positioning instead of the stitch width. Use the + Note: This is only possible when using a stitch that is narrower than 9 mm. You can decrease the stitch width to make the stitch narrower if necessary. 1 2 Stitch density (4) setting instead of the stitch length for satin stitches. density. The stitch density does not affect the actual length of the entire stitch. Note: This is often used with specialty threads and when a less dense satin stitch is desired. If you have selected a buttonhole, the graphic display will by default show the density setting instead of the stitch length setting. Thread tension (5) For the best stitch appearance and durability, make between the two fabric layers. Press the alternatives button to view stitch positioning and density :3
32 Mirroring the mirror side to side button. For 4.2: To mirror end to end, press the mirror end to end button. Sewing Tie-off options The tie-off options let you program tie-offs both at 1. Press the F2 button to open the tie-off options 2. Use the wheel to step between the options and use. display, indicating which tie-off functions are selected. The selections will remain until you deselect them. Note: For immediate tie-off, use the tie-off button, found on the front of the machine. D Sewing with tie-off options selected soon as you start to sew. tie-off. For 4.2: the machine will automatically cut the threads after performing the tie-off end. The needle and presser foot will raise. Note: Stop sewing and press the reverse button twice to activate reverse sewing. The reverse indicator will be lit. No tie-off will be performed. Press the reverse button when sewing in reverse to activate tie-off end. Both the reverse indicator and the programmed tie-off indicator will be lit. To go back to sewing forward, stop sewing in reverse and press the reverse button. No indicators will be lit and no tie-off will be performed. each one to deselect. A B C 3:4
33 Tapering program Tapering increases or decreases the width of the stitch during sewing to create symmetrical or asymmetrical tapers. the F1 button. 2. Use the left and right arrow buttons on the wheel to select beginning or end tapering. angle choices for either beginning or end taper by using the arrow buttons, and press 4. Press the F1 button again to close the tapering graphic display that will show you if beginning beginning and at the end and you start to sew, the stitch width will start at 0 mm. It becomes wider until the selected stitch width is reached. button. The width is reduced until the width is 0 mm. Note: Almost all stitches can be tapered. When you try to open the tapering program view for a stitch that cannot be tapered, a warning sound will be heard. A Sewing Speed control 1. Long press the speed button to open a popup where you can use the left and right arrow buttons on the wheel to change the sewing speed. Note: You cannot select a higher speed than the default speed. 2. Press the speed button again to close the popup. display will indicate the speed your machine is speed button. Press the speed button again to B 3:5
34 Personal stitches Save personal stitch pop-up message will appear asking if you mode. Note: Some special stitches, such as buttonholes, cannot be saved. A pop-up will inform you of this when you try to save such a stitch. Sewing Load personal stitch 1. Load your personal stitches by pressing the load button. This will open the load personal stitch option in the pop-up with the arrow 2. Use the arrow buttons to select the stitch you appear in sewing mode ready to be sewn out. The number of the loaded stitch will be shown Delete personal stitch 3:6
35 Sewing techniques Handlook quilting of fabric with a layer of batting sandwiched between. backing. matching rayon or cotton thread in the bobbin. 5. When you sew the stitch you should only see your bobbin thread. Increase the needle tension as needed to produce the desired effect. Note: Use needle size 90 and lightweight, soft cotton bobbin thread when sewing handlook quilt stitches. You might need to adjust the thread tension depending on which fabric, thread and batting that are used. Make a few tests on a scrap piece of the fabric you are going to sew and check the tension. Recommended stitches for a handlook quilt Sewing Stitch Darning thread in a color as close to your garment as possible. 1. Place your garment with stabilizer in position under the presser foot. complete the stitch. sewing. The repeat icon will be highlighted, 3:7
36 Sewing Free-motion position (3.2) When using the free-motion/darning foot, the presser foot needs to be in the free-motion position. dogs. stitch. underside of the lift, towards you until it snaps into place. Release the lift and it will be set in the freemotion position. 4. Test sew on a scrap piece of the fabric with the batting or stabilizer you will use. If necessary, increase thread tension for your desired result. 6. To disengage the position, push the lift slightly snaps into place. For 4.2: motion sew with the 4.2. Buttonholes system is disengaged. To ensure good results, start by sewing a test sample on a scrap piece of the fabric with the stabilizer you will use. The direction of the stitches being sewn will be indicated on the screen by an arrow next to the buttonhole. A B Sensormatic buttonhole When you sew a buttonhole with the sensormatic it is slightly larger than the size of the button. the slit length using the left and right arrow buttons on the wheel. 4. Make sure that the red arrow lines up with the 6. The arrows on the graphic display will show when each part of the buttonhole is sewn and in which direction. The columns will be sewn in the same direction. 7. The buttonhole will be completed automatically. 3:8 you wish by pressing the foot control. C
37 Manual buttonhole 1. To sew a manual buttonhole in four steps, use presser foot 5M. buttonhole. The graphic display will show the part and sewing direction of the buttonhole that is being sewn. the bartack and the second column. When the again to sew the second bartack. Note: The repeat icon will be highlighted, showing you that repeat is activated. You can repeat the buttonhole as many times as you wish by pressing the foot control. The machine will stop automatically when the buttonhole is complete. Sewing Sew on a button and select the button sewing stitch. 2. Lower the feed dogs. 3. Place the button under the presser foot holder. Use the mirroring function to make sure the holes in the button are aligned with the swing of the needle and the width is appropriate for the actual button. If necessary change the width between holes with the width + and - buttons. stitches that will fasten the button on the fabric in steps of two, using the left and right arrow buttons on the wheel. program for you and then tie-off and stop. Note: Use the multi-purpose tool to create a thread shank for your button. You can also use the Sew-on Button Foot, available as an optional accessory. 3:9
38 Common sewing pop-ups Bobbin thread low (4.2) When the bobbin is almost empty, the machine stops automatically and a pop-up appears on the screen. Replace the empty bobbin with a full one Mainmotor overload machine is blocked when sewing, the mainmotor sewing. The pop-up message will close when the mainmotor and power supply are secure. Sewing Remove thread jam (4.2) Clean the area under the stitch plate from thread up. 3:10
39 Sequencing 4
40 reload and sew them any time you like. stitches, button sewing and bartacks. Sequencing - overview 1. Current stitch number 8. Font selection Sequencing Create a sequence 2. Press the number of the stitch you wish to use. 3. Press the number of the next stitch and it will stitch. marked by a cursor. Inserted stitches will be placed at the cursor position. Move the cursor through the sequence using the left and right arrow buttons on the wheel. Sequence commands buttons on the wheel to select a command and position. Inserted commands will be included when you when sewing it. Note: You can insert up to 3 commands in each sequence. 4:2
41 Using the alphabet with the left and right arrow buttons on the wheel to where you want to add a letter. 2. Use the down arrow button to step through Note: The selected letter in the alphabet will be highlighted Select character set and font between upper or lower case, normal or special letters and symbols. Adjust text and stitches or change the density and stitch position of the highlighted on the graphic display to show that the Note: The adjustments will only affect the stitch at the cursor position. If you return to sewing mode, all adjustments made there will affect the entire sequence and will not be saved. Delete a stitch or letter in a sequence the stitch you want to delete and press the clear button. press the clear button. Sequencing 4:3
42 Manage your sequences Save sequence Load sequence the load pop-up. Note: When loading a sequence into sewing mode, the an M. Delete sequence Sequencing Sewing a sequence programmed. Note: Adjustments made in sewing mode will affect the whole sequence. However, these adjustments will not be saved if you return to sequencing. 4:4
43 Maintenance 5
44 Cleaning the machine To keep your sewing machine operating well, clean Wipe the exterior surface of your machine with a Wipe the graphic display with a clean, soft and damp cloth. Cleaning the bobbin area Note: Lower the feed dogs and turn off the machine. plate as shown on the picture, and gently turn the feed dogs with the brush found with the accessories. B Maintenance Cleaning under the bobbin area Clean the area under the bobbin case after accumulation of lint in the bobbin case area. the front part of the bobbin case, by lifting it up. with the brush. For 4.2: Use caution when cleaning around the thread snips knife. Put the bobbin case and the bobbin case holder back in place. Note: Do not blow air into the bobbin case area. The dust and lint will be blown into your machine. Replacing the stitch plate With the feed dogs lowered, place the stitch plate Press the stitch plate down until it clicks into place. A C 5:2
45 Troubleshooting you. Problem/cause General problems Remedy Enable automatic thread snips in the settings menu. Make sure that machine is not set in free-motion mode in the settings menu. Make sure that the feed dogs are not lowered. Wrong stitch, irregular or narrow stitch? settings menu. The needle breaks? Insert needle correctly as described in chapter 2. The machine will not sew? Check that all plugs are securely plugged into the machine and into the wall socket. Check that the foot control cord is securely plugged into the foot control. The sewing machine function buttons do not respond to touch? The sockets and function buttons on the machine can The machine skips stitches Insert needle correctly as described in chapter 2. Use needle system 130/750 H. Is the needle bent or blunt? Insert a new needle. Check how the machine is threaded. Is the correct presser foot used? Is the needle too small for the thread? Make sure the needle is correct for the thread and fabric. menu. Needle thread breaks Insert needle correctly as described in chapter 2. Use needle system 130/750 H. Is the needle bent or blunt? Insert a new needle. Check how the machine is threaded. Is the needle too small for the thread? Change the needle to the proper size for the thread. which has become dry? Maintenance 5:3
46 Is a correct spool cap used? Is the best spool pin position used? Is the stitch plate hole damaged? thread spool. Change the stitch plate. Bobbin thread breaks Is the stitch plate hole damaged? Is the bobbin area clean? Is the bobbin wound correctly? Check the bobbin thread. Change the stitch plate. Clean lint from bobbin area and use only the original Wind a new bobbin. The seam has uneven stitches Is the thread tension correct? Is a correct needle used? Check needle thread tension and the threading. Change the thread. Check bobbin winding. Insert a proper needle correctly as described in chapter 2. The machine does not feed or feeds irregularly Check how the machine is threaded. Has sewing lint collected between the feed dogs? brush. Have your sewing machine serviced regularly by your local authorized PFAFF dealer! than words. Non-original parts and accessories Maintenance 5:4
47 to the performance or design. and the product. Intellectual Property Patents protecting this product are listed on a label positioned Please note that on disposal, this product must be safely relating to electrical/electronic products. If in doubt please contact your retailer for guidance. CE - Authorised Representative SVP Worldwide
48 C
This household sewing machine is designed to comply with IEC/EN 60335-2-28 and UL1594.
 Owner s manual This household sewing machine is designed to comply with IEC/EN 60335-2-28 and UL1594. IMPORTANT SAFETY INSTRUCTIONS When using an electrical appliance, basic safety precautions should always
Reinforced seam. Topstitching. 1.1.3 Straight stitch reverse Sew continuous reverse with strong tie-off.
 Stitch overview Utility es Stitch Stitch number Name Description 1.1.1 Straight For seaming and toping. Select from 37 different needle positions. Note: This makes a stronger tie-off than 2.1.1. 1.1.2
This household sewing machine is designed to comply with IEC/EN 60335-2-28 and UL1594.
 Owner s manual This household sewing machine is designed to comply with IEC/EN 60335-2-28 and UL1594. IMPORTANT SAFETY INSTRUCTIONS When using an electrical appliance, basic safety precautions should always
User s Guide KEEPING THE WORLD SEWING
 User s Guide KEEPING THE WORLD SEWING This household sewing machine is designed to comply with IEC/EN 60335-2-28 and UL1594 IMPORTANT SAFETY INSTRUCTIONS When using an electrical appliance, basic safety
Per fection star ts here ṬM. Sewing. My Passion. per formance 5.2
 Per fection star ts here ṬM Sewing. My Passion. per formance 5.2 per formance 5.2 Through my passion for sewing I reveal my true self. Beautiful fabrics inspire me to let my imagination run free. My creations
Mini multi-purpose sewing machine
 TROUBLESHOOTING Problem Problem cause Amendment No power or the machine runs slowly Batteries are installed incorrectly Batteries are low Reinstall the batteries making sure they are the correct way around
Accessories. Elna UK sewing machines. Cool Collection SewFun - 2100-2300 - 2600-2800. Super Cool 3210-5100. Quilter s Touch 6200-6600 - 7300
 Accessories Elna UK sewing machines Cool Collection SewFun - 2100-2300 - 2600-2800 Super Cool 3210-5100 Quilter s Touch 6200-6600 - 7300 Elna UK Southside, Bredbury, Stockport, Cheshire SK6 2SP Elna Sew
Includes e info on th. Value Mod. Horizon Memory Craft 8900 QCP / 8200 QC Come Away With Me
 Includes e info on th 0 QC MC0 ntial Esse el Value Mod Horizon Memory Craft 00 QCP / 00 QC Come Away With Me When you re doing something you truly love, you reach a point where you re in the zone. You
SEWING MACHINE OPERATION MANUAL
 SEWING MACHINE OPERATION MANUAL IMPOR TANT SAFETY INSTRUCTIONS When using a sewing machine, basic safety precautions should always be taken, including the following: Read all instructions before using.
Operation Manual KNOWING YOUR SEWING MACHINE STRAIGHT AND ZIGZAG STITCHING BUILT-IN STITCHES SEWING BUTTONHOLES AND BUTTONS
 5 6 KNOWING YOUR SEWING MACHINE STRAIGHT AND ZIGZAG STITCHING BUILT-IN STITCHES SEWING BUTTONHOLES AND BUTTONS USING ATTACHMENTS AND APPLICATIONS APPENDIX Operation Manual IMPORTANT SAFETY INSTRUCTIONS
SEWING MAINTENANCE CHECKLIST
 SEWING MAINTENANCE CHECKLIST Many Retail, Brand-name Marketing, Mail Order and Sourcing Companies are visiting existing and potential Contractor sewing facilities and evaluating their sewing capabilities
Per fection starts here. Artful evolution. ActivStitch TECHNOLOGY
 Per fection starts here. TM Artful evolution ActivStitch TECHNOLOGY Artful evolution When it comes to the art of sewing and embroidery, only the PFAFF brand can deliver state of the art engineering combined
The 600. A superbly equipped computerised sewing machine with easy to use touch-button controls and luxury features.
 The 600 A superbly equipped computerised sewing machine with easy to use touch-button controls and luxury features. 429 Stitches Fully automatic thread tension Automatic thread trimming Side way feed Advanced
Kids Woven - Minimum Construction Standards
 Kids Woven - Minimum Construction Standards NOTE All construction standards will be followed except when specified otherwise Must use Bon-Ton approved suppliers Vendor must meet all applicable Bon-Ton
Circles Galore Quilt. Sewing supplies: Approximate size: 60 (152cm)
") Sewing supplies: PFAFF creative 3.0 sewing and embroidery machine PFAFF creative QUILTERS HOOP 200x200 (820940096) PFAFF Extension Table with Adjustable Guide (821031096) PFAFF 0A Standard Foot for IDT
Sewing supplies: PFAFF creative 3.0 sewing and embroidery machine PFAFF creative QUILTERS HOOP 200x200 (820940096) PFAFF Extension Table with Adjustable Guide (821031096) PFAFF 0A Standard Foot for IDT
Model label When calling for service, please note the MODEL and SERIES numbers that are inscribed on the back of your sewing machine.
 Type designation RS series has several types. The types are shown on the model label as follows: MODEL/MODELE(MODEL NAME) SERIES/SERIE RS SERIES/SERIE RS2000 SERIES/SERIE RS2000A SERIES/SERIE RS2000B SERIES/SERIE
DESIGNER DIAMOND deluxe Techniques #1 - Design Positioning
 DESIGNER DIAMOND deluxe Techniques #1 - Design Positioning 1 2 3 4 5 6 7 8 9 10 11 12 13 14 Select Embroidery Mode Slide on the embroidery unit Touch Ok to Calibrate Touch the Start Menu to open the Extended
Power Performance Precision
 Power Performance Precision Owner s manual 1 IMPORTANT SAFETY INSTRUCTIONS When using an electrical appliance, basic safety precautions should always be followed, including the following: Read all instructions
Tips and Techniques on the PR-620
 Techniques and Tips on the PR-620 Learn how to demonstrate the PR-620 and make it look as easy as it really is. Topics to be covered will be: basic operation, machine threading, screen icons, merging patterns,
O w n e r s M a n u a l
 Owner s Manual This household sewing machine is designed to comply with IEC/EN 60335-2-28 and UL594 IMPORTANT SAFETY INSTRUCTIONS When using an electrical appliance, basic safety precautions should always
18974 (736) Singer No. 20-2. SINGER No. 20-2 ELECTRIC SEWING MACHINE INSTRUCTION MANUAL
 Singer No. 20-2. SINGER No. 20-2 ELECTRIC SEWING MACHINE INSTRUCTION MANUAL") SINGER No. 20-2 ELECTRIC SEWING MACHINE INSTRUCTION MANUAL Next Page Main Parts Accessories To start the Motor To Stop the Motor To Change the Speed Needles and Thread Relative Sizes of Needle and Thread
SINGER No. 20-2 ELECTRIC SEWING MACHINE INSTRUCTION MANUAL Next Page Main Parts Accessories To start the Motor To Stop the Motor To Change the Speed Needles and Thread Relative Sizes of Needle and Thread
All seam allowances are 1/2 unless otherwise noted. All pattern pieces include the seam allowance. Please read all instructions before beginning.
 This structured bag has lots of pretty detailing. It s large enough to carry all of your essentials as well. Make it in a great patchwork, or stick to a single fabric! All seam allowances are 1/2 unless
The finest in sewing and embroidery
 4000 The finest in sewing and embroidery 4000 Create high quality embroidery designs and sewing projects quickly and easily. 300mm x 180mm embroidery area 282 built-in embroidery motifs Large sewing area
Go from. Good to Great sewing. Built-in assistance when you need it
 Go from Good to Great sewing Built-in assistance when you need it Behind the seams I m Sophie busy mother of two with a lengthy to-do list. For me, any day spent sewing is a good day. I grew up with a
MINI ELECTRIC SEWING MACHINE OPERATION MANUAL
 MINI ELECTRIC SEWING MACHINE OPERATION MANUAL 1 Parts & Accessories Takeup Lever(D) Spindle(C) Spool(E) MAIN UNIT Bobbin Holder(V) Bobbin winder Spool(T) Needle Clamp Screw(O) Adjusting Screw(Q) Needle
DESIGNER series Comparison Chart
 DESIGNER series Comparison Chart KEY FEATURES Exclusive SEWING ADVISOR EMBROIDERY ADVISOR Yes, extended with JoyOS ADVISOR Feature Yes, extended with JoyOS ADVISOR Feature deluxe Stitch System EXCLUSIVE
2 days without the kids
 BERNINA 580 I 560 1 fairy & 1 magician 2 patterns and many embroidery motifs 1 well-rounded machine that sews + embroiders 2 days without the kids 12 glasses of lemonade 7 pancakes with maple syrup 2 costumes
BERNINA 1100 Series BERNINA BERNINA. 1100 Series OWNER S WORKBOOK. MASTERING YOUR BERNINA 1/04/02 1100 Series/1
 1100 Series MASTERING 1100 Series OWNER S WORKBOOK MASTERING 1/04/02 1100 Series/1 1100 Series Table of Contents SECTION A Pages 3-17 Let s Start With The Basics SECTION B Pages 18-37 4-Thread Techniques
"Welcome to. the BERNINA. family"
 "Welcome to the BERNINA family" In choosing BERNINA, you are assured of years of rewarding sewing. For over 100 years my family has concentrated on providing complete satisfaction to our customers. And
Cutting instructions to finish THREAD VELVET Embroidery:
 Cutting instructions to finish THREAD VELVET Embroidery: To create the THREAD VELVET effect, cut the satin stitch down the middle from the right side. Avoid cutting the very last underlay of stitches for
Snappy Mani Pouch 2. Designed by Noodlehead. www.noodle-head.com. Featuring. Finished project measures: 8 x 5 x 1
 Snappy Mani Pouch 2 Designed by Noodlehead Featuring www.noodle-head.com Finished project measures: 8 x 5 x 1 Pattern Level: Experienced Intermediate I know the ropes and would like to test my skills!
COLLARS TERMS TO KNOW
 CT-LMH.185 COLLARS Collars are an important part of a garment because they serve as the frame for your face. Since we tend to focus on the face, the styling and application of a collar is important to
Dolman Dress Women s PDF Pattern. Sizes XSmall thru XLarge. www.sewingrabbit.com
 Dolman Dress Women s PDF Pattern Sizes XSmall thru XLarge www.sewingrabbit.com The Dolman Dress Extra large, extra comfy, and extra stylish. The Dolman Dress is perfect for throwing on with your favorite
82387 No. 66 Singer Sewing Machine No. 66 Oscillating Hook, For Family Use INSTRUCTION MANUAL
 Singer Sewing Machine No. 66 Oscillating Hook, For Family Use INSTRUCTION MANUAL Next Page Main Parts Parts of the Machine Stand Instructions for Operating the Machine To Ensure Perfect Action of the Machine
DMSG_0152_0112_V4 Mamas & Papas (Holdings) Ltd. 2012 Dream Swing - 1 -
 Ltd. 2012 Dream Swing - 1 -") DMSG_0152_0112_V4 Mamas & Papas (Holdings) Ltd. 2012 Dream Swing - 1 - DREAM SWING THESE INSTRUCTIONS ARE IMPORTANT. PLEASE READ CAREFULLY AND RETAIN FOR FUTURE REFERENCE. Read the entire instruction before
DMSG_0152_0112_V4 Mamas & Papas (Holdings) Ltd. 2012 Dream Swing - 1 - DREAM SWING THESE INSTRUCTIONS ARE IMPORTANT. PLEASE READ CAREFULLY AND RETAIN FOR FUTURE REFERENCE. Read the entire instruction before
Seams to Me Tag File
 Seams to Me Tag File Created by Susan Beck This mixed media tag file is a fun way to organize technique swatches. It makes a great visual reference so you can remember what you ve learned and incorporate
Sewingcontract.com. Stitch Guide. Most Common Stitch Types in ASTM D-6193 and ISO 4915:1991 Standards
 Stitch Guide Most Common Stitch Types in ASTM D-6193 and ISO 4915:1991 Standards This quick reference guide is to help communication between designers, production managers and sewing contractors. The guide
UPLIFT Height Adjustable Standing Desk (T-Frame) DIRECTIONS FOR ASSEMBLY AND USE - - ALSO - - Watch our assembly video
 DIRECTIONS FOR ASSEMBLY AND USE - - ALSO - - Watch our assembly video") UPLIFT Height Adjustable Standing Desk (T-Frame) DIRECTIONS FOR ASSEMBLY AND USE - - ALSO - - Watch our assembly video http://bit.ly/9ywwh! CAUTION MAKE SURE NO OBSTACLES ARE IN THE DESK S PATH AND ALL
UPLIFT Height Adjustable Standing Desk (T-Frame) DIRECTIONS FOR ASSEMBLY AND USE - - ALSO - - Watch our assembly video http://bit.ly/9ywwh! CAUTION MAKE SURE NO OBSTACLES ARE IN THE DESK S PATH AND ALL
Thread Tensions All Machines
 Below are items related to thread tensions and tension problems as found on Brother embroidery equipment. They are listed in the order that they most often occur. Use this form only as a guide. Following
Review VIDEO WORKSHEET #3533. Name: Hour:
 #3533 Name: Hour: VIDEO WORKSHEET Review Directions: After watching Sew Cool, answer the following questions. SEWING ESSENTIALS Match the sewing tool to the description. 1. Pins 2. Marking pens 3. Ruler
Time for Tea Collection
 Time for Tea Collection F70264 Time for Tea Collection Project Instructions Apron Luncheon Mats & Napkins Coaster Drip Catcher Tea Cozy Click on Photo for Project Instructions Frame & Fabric Mat Tea Pot
Free Instructions. Finished Cape Size: Fits sizes 2 6, but may be modified as desired to fit other sizes. Fabric: Handy Notions: Instructions:
 Free Instructions Super Hero Cape Send hope, faith, and love to children living in shelters across the country. Capes for Kids represents hope. Since every cape is unique and handmade with love, each child
HAND STITCHES. Standards CT-MMB.002
 CT-MMB.002 HAND STITCHES Hand stitches have many uses. Before the sewing machine, garment-making was done exclusively by hand. However, in today s home sewing world of sophisticated sewing machines and
Embroidery Software Version 1. BERNINA Art Design Quick Start Guide
 Embroidery Software Version 1 BERNINA Art Design Quick Start Guide 1 1 Installation Art Design 1. Art Design installation requires administrator authorisation. 2. Close all programs before installing the
Auto Sentry-eXP Maintenance
 Auto Sentry-eXP Maintenance Maintenance Procedures for Auto Sentry exp Bill Dispenser Credit Card Reader Bill Acceptor Bill Dispenser Maintenance Bill Dispenser Problem / Cause Bill Dispenser Error Codes
No more loose buttons. Service & Technology Information for the sewing industry
 No more loose buttons Service & Technology Information for the sewing industry No more loose buttons Everybody knows the bothersome issue of loose buttons. Even with high-quality products, loose buttons
IMPORTANT SAFETY RULES TO FOLLOW
 WARNING FLOOR & CARPET CLEANER Any piece of equipment can be dangerous if not operated properly. YOU are responsible for the safe operation of this equipment. The operator must carefully read and follow
Creative. color me. Join us! www.janome.com
 Creative www.janome.com Join us! Enjoy Sewing & Embroidery On The Machine As Unique As You I m In The Mood For... To really be creative, you have to be in the right frame of mind. Your MC9900 comes with
ROTOR LOADER OWNER S MANUAL
 ROTOR LOADER OWNER S MANUAL ROTOR LOADER OWNER S MANUAL WARNING IMPORTANT SAFETY INSTRUCTIONS AND GUIDELINES. Misuse of paintball equipment may cause serious injury or death. QUICK SET-UP GUIDE BATTERY
Basic Spring Motor Roller Shades
 Comprehensive Roller Shade Installation Guide Basic Spring Motor Roller Shades ATTENTION!!! READ CAREFULLY! This shade has a reliable long-lasting Spring Motor. The Spring Motor must have proper tension
1 ½ yds or one queen size package Hobbs Heirloom Fusible
 Supply List Fabric Seminole bands Front borders Back borders Backing fabric Binding Batting 6-8 completed Seminole bands 1 yd 1 ¼ yds 3 yds total (see notes) ½ yd 1 ½ yds or one queen size package Hobbs
Cosmetics Case with Vinyl Interior Skill Level: Intermediate
 Cosmetics Case with Vinyl Interior Skill Level: Intermediate Designed By Lindsey Rhodes Sewn By Lindsey Rhodes http://lrstitched.com Use this step by step tutorial to create a roll-up cosmetics case with
My Custom Design ver.1.0
 My Custom Design ver.1.0 Embroidery Data Creation Software Instruction Manual Before using this software, be sure to read this Instruction Manual for information on the correct use of the software. Keep
Quick Start Guide See Inside for Use and Safety Information
 3 rd Generation Personal 3D Printer Quick Start Guide See Inside for Use and Safety Information The USB Mass Storage Device Contains the User Guide and Quick Start Guide in other Languages Congratulations
18 U. S. C. 707. 4-H Apparel and Textiles SEWING. 4-H Member Project Guide and Practice Projects. Junior Level
 COOPERATIVE EXTENSION SERVICE UNIVERSITY OF KENTUCKY COLLEGE OF AGRICULTURE, LEXINGTON, KY, 40546 4JD-01PB 4-H Apparel and Textiles SEWING 4-H Member Project Guide and Practice Projects Junior Level State
Portable Air Conditioner
 Portable Air Conditioner Owner's Manual Model:3 in 1 12,000 Btu/h Series 3 Please read this owner s manual carefully before operation and retain it for future reference. CONTENTS 1. SUMMARY...1 2. PORTABLE
Table of Contents. www.hunterfan.com. What to Expect with. Preparation. Tools Needed. Wiring. Hanging the Fan. Blades. Motor Housing.
 www.hunterfan.com Table of Contents What to Expect with Your Installation 30 inches Hanging the Fan Wiring 8 Maintenance, Operation & Cleaning Light Kit 13??? 14 1 9 Troubleshooting 11 5 Blades Motor Housing
MGB Chrome Bumper Conversion
 MGB Chrome Bumper Conversion Installation Instructions For 1974 1/2-1980 MGB This kit requires cutting, welding, and painting. Professional installation recommended. Note: Every MGB body is slightly different
KE-430FX KE-430FS BE-438FX
 KE-430FX KE-430FS BE-438FX INSTRUCTION MANUAL Please read this manual before using the machine. Please keep this manual within easy reach for quick reference. ELECTRONIC DIRECT DRIVE LOCKSTITCH BAR TACKER
Computer Lane Monitor HOW TO MAKE A TAPE AND HOW TO READ A TAPE
 Computer Lane Monitor T M HOW TO MAKE A TAPE AND HOW TO READ A TAPE April, 2003 SP03-8 General Description The Brunswick Lane Monitor System is designed to permanently record and read the amount of dressing
Express5800/120Ed. Rack Mount Kit Installation Procedures PN: 455-01607-001
 Express5800/120Ed Rack Mount Kit Installation Procedures PN: 455-01607-001 Proprietary Notice and Liability Disclaimer The information disclosed in this document, including all designs and related materials,
Vertical Display and Storage B1350-2. SKOPE Gen2: Three Door Chiller
 Vertical Display and Storage User Manual MAN1227 Rev. 3.0 March 2008 edition CONTACT ADDRESSES Designed and Manufactured by New Zealand SKOPE INDUSTRIES LIMITED PO Box 1091, Christchurch New Zealand Freephone:
User Guide. LabelManager
 User Guide LabelManager 160 Copyright 2011 Sanford, L.P. All rights reserved. No part of this document may be reproduced or transmitted in any form or by any means or translated into another language without
42U/45U 28" Wide Rack Installation & Service Guide
 42U/45U 28" Wide Rack Installation & Service Guide 96-00171-005 Rev B Important Information Information in this document is subject to change without notice and does not represent a commitment on the part
INSTRUCTION MANUAL 127-3 & 128-3. with VIBRATING SHUTTLE. *A Trade Mark of THE SINGER MANUFACTURING CO.
 * 127-3 & 128-3 with VIBRATING SHUTTLE Copyright, U. S. A., 1915, 1923, 1929, 1932, 1935 and 1940, by The Singer Manufacturing Company All Rights Reserved for all Countries *A Trade Mark of THE SINGER
Edgy Hexagons Quilt THROUGH THE NEEDLE LIVE. BERNINA Through The Needle Live. Written by: Nina McVeigh, BERNINA Educator
 BERNINA Through The Needle Live THROUGH THE NEEDLE LIVE Edgy Hexagons Quilt Written by: Nina McVeigh, BERNINA Educator SUPPLIES 1 Layer Cake Fabrics or an assortment of fat quarters 2 yds Solid 2 yds of
Packard Bell Easy Repair
 Your digital playground Packard Bell Easy Repair EasyNote MX Series Hard Disk Drive Repair Instructions www.packardbell.com Your digital playground Important Safety Check Instructions You must read all
National Optical & Scientific Instruments Inc. 11113 Landmark 35 Drive San Antonio, Texas 78233 Phone (210) 590-9010 Fax (210) 590-1104
 590-9010 Fax (210) 590-1104") National Optical & Scientific Instruments Inc. 11113 Landmark 35 Drive San Antonio, Texas 78233 Phone (210) 590-9010 Fax (210) 590-1104 INSTRUCTIONS FOR MODELS 106, 106-L 107, 107-L 108, 108-L 109-L ELEMENTARY
National Optical & Scientific Instruments Inc. 11113 Landmark 35 Drive San Antonio, Texas 78233 Phone (210) 590-9010 Fax (210) 590-1104 INSTRUCTIONS FOR MODELS 106, 106-L 107, 107-L 108, 108-L 109-L ELEMENTARY
Owner s Guide and Installation Manual. Vancouver Model Name. 21321, 21328 Model No. English Español
 For Your Records and Warranty Assistance For reference, also attach your receipt or a copy of your receipt to the manual. Vancouver Model Name 21321, 21328 Model No. Type A Models Owner s Guide and Installation
Owners & Installation Manual for the Sheridan, Mountainair, Pine Valley and Old Forge Ceiling Fan Family
 Owners & Installation Manual for the Sheridan, Mountainair, Pine Valley and Old Forge Ceiling Fan Family Part of the Kiva Lighting Family Custom Lighting and Fans Since 1992 1312 12th St NW Albuquerque,
GNOME PELLET E.I. Pellet Heater Owner's Manual Installation and Operating Instructions. Please read this entire manual before installation.
 Pellet Heater Owner's Manual Installation and Operating Instructions Please read this entire manual before installation. Save these instructions. SAFETY NOTICE HEATER MUST BE PROPERLY INSTALLED AND MAINTAINED
LONDON JUBILEE AND OLYMPIC CELEBRATION ITEMS BY HILARY GOODING FOR MAKOWER UK
 LONDON JUBILEE AND OLYMPIC CELEBRATION ITEMS BY HILARY GOODING FOR MAKOWER UK 118 Grey s Road, Henley on Thames, Oxon RG9 1QW www.makoweruk.com Email: [email protected] www.andoverfabrics.com LONDON Designed
INSTRUCTION. Industrial Sewing Machines. No. 010012. First published : June 1997 Second edition : March 2001
 INSTRUCTION Industrial Sewing Machines First published : June 1997 Second edition : March 2001 No. 010012 INTRODUCTION Thank you for your purchasing Kansai Special's DLR Series. Read and study this instruction
Contents About Your New Label Maker... 5 Getting Started... 5 Using the Label Maker for the First Time... 8 Getting to Know the Label Maker...
 Contents About Your New Label Maker... 5 Product Registration... 5 Getting Started... 5 Connecting the Power... 5 Inserting the Battery Pack... 6 Recharging the Battery Pack... 6 Inserting the Label Cassette...
Congratulations on your purchase of the Great Planes SLOT MACHINE, the first truly easy way to cut hinge slots in your model airplanes.
 INSTRUCTION MANUAL Congratulations on your purchase of the Great Planes SLOT MACHINE, the first truly easy way to cut hinge slots in your model airplanes. The Slot Machine you have purchased is equipped
How To : Sweater Coat
 How To : Sweater Coat The CASUAL FIT Sweater coat features : A modified narrow shawl collar with a band effect down center front. a no dart sleeve with wide cuff, a nice shaped curve to the hem finish
Imagine Create Shine BUILT-IN ASSISTANCE FOR EXPERT SEWING AND EMBROIDERY
 Imagine Create Shine BUILT-IN ASSISTANCE FOR EXPERT SEWING AND EMBROIDERY Let your imagination take the lead! I m Lara and I just discovered embroidery. I had no idea how fast and easy it was until I saw
National Optical & Scientific Instrument Inc. 11113 Landmark 35 Drive San Antonio, Texas 78233 Phone (210) 590-9010 Fax (210) 590-1104
 590-9010 Fax (210) 590-1104") National Optical & Scientific Instrument Inc. 11113 Landmark 35 Drive San Antonio, Texas 78233 Phone (210) 590-9010 Fax (210) 590-1104 INSTRUCTIONS FOR STEREOSCOPIC MICROSCOPES MODEL NUMBERS 400 400TL
National Optical & Scientific Instrument Inc. 11113 Landmark 35 Drive San Antonio, Texas 78233 Phone (210) 590-9010 Fax (210) 590-1104 INSTRUCTIONS FOR STEREOSCOPIC MICROSCOPES MODEL NUMBERS 400 400TL
UB1 AIR CONDITIONING UNIT INSTALLATION INSTRUCTIONS
 UB1 AIR CONDITIONING UNIT INSTALLATION INSTRUCTIONS INSTALLATION INSTRUCTIONS: Carefully read these instructions before installing your new air-conditioner. AUSTRALIAN AUTOMOTIVE AIR AL00500054E 1 Table
Economy Combo Heat Press Manual Model No.: ECH-800
 Economy Combo Heat Press Manual Model No.: ECH-800 CONTENTS I. Assembly Drawing -----------------------------------------------------------------------------------2 II. Technical Parameters ------------------------------------------------------------------------------2
Internal Modem Installation with Windows 95
 Internal Modem Installation with Windows 95 You will need these items from your U.S. Robotics modem box: modem phone cord Plus: a screwdriver (not included) Determining Available Resources Your U.S. Robotics
QUILTS, BLANKETS AND AFGHANS
 QUILTS, BLANKETS AND AFGHANS Community volunteers can help craft blankets, sew quilts or knit/crochet afghans. This project is a wonderful way to provide warmth and comfort for our patients worldwide.
How To Work With Beads. By Rowan
 R O W A N How To Work With Beads By Rowan HOW TO WORK WITH BEADS Adding beads to a knitted or crocheted design gives it a really special touch especially when the beads added are as stunning as those in
Cable Drum Machine. Operation Manual BC260 SERIES. Cleans 1 1/4" to 3" lines up to 50'
 Cable Drum Machine Operation Manual BC260 SERIES Cleans 1 1/4" to 3" lines up to 50' Used For: Sink, Shower & Floor Drains 42FM " WARNING - Read All Instructions, When Using Electric Tools, Basic Safety
Speed-Mat Rectangle Cutter
 Speed-Mat Rectangle Cutter 1 Honeycomb baseboard. 2 Left hold down. 14 3 Bottom hold down. 4 4 Left / right rule. 8 5 8 5 Left / right rule pointer. 1 6 Top / bottom rule. 7 Top / bottom rule pointer.
PatternMaker Software Men/Young Men s Collection Designer: Leena Lahteenmaki
 PatternMaker Software Men/Young Men s Collection Designer: Leena Lahteenmaki INTRODUCTION Welcome to the PatternMaker Men/Young Men s Collection! This collection contains four basic garments to use as
Pet hair clipper. Model 96822. Diagrams within this manual may not be drawn proportionally.
 Pet hair clipper Model 96822 Cleaning And Operation Instructions Diagrams within this manual may not be drawn proportionally. Due to continuing improvements, actual product may differ slightly from the
UNPACKING AND ASSEMBLY
 UNPACKING AND ASSEMBLY Assembly Instructions Step 1. Open the two boxes and remove all the parts. Lay out the parts as shown below and read through the assembly instructions before beginning assembly.
Repairing a Day/Night Shade made by Specialty Window Coverings. Introduction
 Repairing a Day/Night Shade made by Specialty Window Coverings Introduction Restringing a pleated shade can be exasperating hopefully the changes I made to the manufacturer s instructions will make the
INSTALLATION INSTRUCTIONS for Bifold Doors (JII103)
") Thank you for selecting JELD-WEN products. Attached are JELD-WEN s recommended installation instructions for premium composite, hollow and solid core molded Bifold Doors. Bifolds are designed for fast
Thank you for selecting JELD-WEN products. Attached are JELD-WEN s recommended installation instructions for premium composite, hollow and solid core molded Bifold Doors. Bifolds are designed for fast
5, 8, 10, 16 & 22 PATTERN SEWING MACHINES. Instruction Manual
 5, 8, 10, 16 & 22 PATTERN SEWING MACHINES Instruction Manual TABLE OF CONTENTS Important Safeguards 1. Getting to Know Your Machine Principal Parts Accessories 2. Getting Ready to Sew Connecting the Machine/Running
Original Assembly Guide
 TCT Multipurpose Single Bevel Sliding Compound Mitre Saw Original Assembly Guide Read instructions before assembling this tool. Table of Contents GB Assembly Guide Read instructions before assembling this
How To Use A Brother Ql700
 User's Guide QL-700 Be sure to read and understand this guide before using the machine. We recommend that you keep this guide nearby for future reference. www.brother.com US ENG ver.0 Thank you for purchasing
Secret Garden Coat A Sewing Pattern and Tutorial by FooFoo Threads Sizes 6-9 Months through 8
 Secret Garden Coat A Sewing Pattern and Tutorial by FooFoo Threads Sizes 6-9 Months through 8 This retro style coat is modeled after one of my best selling dress patterns, Ruthie s Picnic Dress. The sweet
SpaceClaim Introduction Training Session. A SpaceClaim Support Document
 SpaceClaim Introduction Training Session A SpaceClaim Support Document In this class we will walk through the basic tools used to create and modify models in SpaceClaim. Introduction We will focus on:
KNIT MITTENS PATTERN CHART (for Kids and Teens) Knit on 2 needles with the thumbs on the sides (Provided to Knitting4Peace by Carrie Epps)
 Knit on 2 needles with the thumbs on the sides (Provided to Knitting4Peace by Carrie Epps)") KNIT MITTENS PATTERN CHART (for Kids and Teens) Knit on 2 needles with the thumbs on the sides (Provided to Knitting4Peace by Carrie Epps) SIZES: (It may be helpful to highlight the size mitten you are
KNIT MITTENS PATTERN CHART (for Kids and Teens) Knit on 2 needles with the thumbs on the sides (Provided to Knitting4Peace by Carrie Epps) SIZES: (It may be helpful to highlight the size mitten you are
Back(pack) to School Bag Skill Level: Intermediate
 to School Bag Skill Level: Intermediate") Back(pack) to School Bag Skill Level: Intermediate Designed By Cassie Williams Sewn By Cassie Williams elegantitus.com An intermediate to challenging project, this versatile backpack has everything a grade
Back(pack) to School Bag Skill Level: Intermediate Designed By Cassie Williams Sewn By Cassie Williams elegantitus.com An intermediate to challenging project, this versatile backpack has everything a grade
DIGITAL WARMING CABINETS
 DIGITAL WARMING CABINETS INSTALLATION-OPERATION-MAINTENANCE USER MANUAL Mac Medical 820 S Mulberry St. Millstadt, IL 62260 California OSHPD Pre-approved (618) 476-3550 phone (618) 476-3337 fax December
Ingenico. User Guide 5100M. Secure transaction and payment solutions
 User Guide Ingenico 5100M Secure transaction and payment solutions Ingenico 5100 M Contents 1 Presentation... 5 1.1 Overview of Ingenico 5100... 6 1.2 Keyboard details and functionality... 7 2 Use...