WorkForce Pro WP-4590 User's Guide
|
|
|
- Bruce Cunningham
- 7 years ago
- Views:
Transcription
1 WorkForce Pro WP-4590 User's Guide
2
3 Contents WorkForce Pro WP-4590 User's Guide Product Basics Setting Up the Control Panel Printer Parts - Control Panel Buttons and Lights Changing LCD Screen Language Turning Off Control Panel Sounds Product Parts Locations Printer Parts - Paper Path Printer Parts - Front Printer Parts - Inside Printer Parts - Back Two-Sided Printing, Scanning, Copying, and Faxing Using EPSON Connect Print Installing the PCL or PostScript Printer Software Installing the PCL or PostScript Printer Software - Windows 7/Windows Vista Installing the PCL or PostScript Printer Software - Windows XP Installing the PostScript (PS3) Printer Software - Mac OS X Loading Paper Loading Paper in the Cassette Loading Paper in the Rear MP (Multipurpose) Tray Loading Envelopes Paper Loading Capacity Available EPSON Papers Paper or Media Type Settings Setting the Paper Size for Each Source Setting the Paper Size for Each Source - Control Panel Setting the Paper Size for Each Source - Standard Epson Printer Software Setting the Paper Size for Each Source - Standard Epson Printer Software - Windows Setting the Paper Size for Each Source - Standard Epson Printer Software - Mac OS X Setting the Paper Size and Source - PCL Printer Software - Windows
4 Setting the Paper Size and Source - PostScript Printer Software Setting the Paper Size and Source - PostScript Printer Software - Windows Setting the Paper Size - PostScript Printer Software - Mac OS X Setting Additional Paper Options Installing and Enabling the Optional Second Paper Cassette Installing the Optional Second Paper Cassette Enabling the Optional Second Paper Cassette - PCL Printer Software - Windows Enabling the Optional Second Paper Cassette - PostScript (PS3) Printer Software - Windows Enabling the Optional Second Paper Cassette - PostScript (PS3) Printer Software - Mac OS X.. 63 Placing Originals on the Product Placing Originals on the Scanner Glass Placing Originals in the Automatic Document Feeder Copying Copying Documents or Photos Paper Type Settings - Copying Paper Size Settings - Copying Copying Options Printing From a Computer Printing with the Standard Epson Printer Software - Windows Selecting Basic Print Settings - Standard EPSON Printer Software - Windows Paper Source Options - Standard EPSON Printer Software - Windows Print Quality Options - Standard EPSON Printer Software - Windows Multi-Page Printing Options - Standard EPSON Printer Software - Windows Selecting Double-sided Printing Settings - Standard EPSON Printer Software - Windows Double-sided Printing Options - Standard EPSON Printer Software - Windows Print Density Adjustments - Standard EPSON Printer Software - Windows Selecting Additional Layout and Print Options - Standard EPSON Printer Software - Windows Custom Color Correction Options - Standard EPSON Printer Software - Windows Additional Settings Options - Standard EPSON Printer Software - Windows Selecting a Printing Preset - Standard EPSON Printer Software - Windows Printing Your Document or Photo - Standard EPSON Printer Software - Windows Selecting Default Print Settings - Standard EPSON Printer Software - Windows
5 Changing the Language of the Printer Software Screens - Standard EPSON Printer Software - Windows Changing Automatic Update Options - Standard EPSON Printer Software - Windows Printing with the Standard EPSON Printer Software - Mac OS X Selecting Basic Print Settings - Standard EPSON Printer Software - Mac OS X Paper Source Options - Standard EPSON Printer Software - Mac OS X Print Quality Options - Standard EPSON Printer Software - Mac OS X Print Options - Standard EPSON Printer Software - Mac OS X Selecting Page Setup Settings - Standard EPSON Printer Software - Mac OS X Selecting Print Layout Options - Standard EPSON Printer Software - Mac OS X Sizing Printed Images - Standard EPSON Printer Software - Mac OS X Selecting Double-sided Printing Settings - Standard EPSON Printer Software - Mac OS X Double-sided Printing Options and Adjustments - Standard EPSON Printer Software - Mac OS X Managing Color - Standard EPSON Printer Software - Mac OS X Color Matching and Color Options - Standard EPSON Printer Software - Mac OS X Printing Your Document or Photo - Standard EPSON Printer Software - Mac OS X Checking Print Status - Standard EPSON Printer Software - Mac OS X Selecting Printing Preferences - Standard EPSON Printer Software - Mac OS X Printing Preferences - Standard EPSON Printer Software - Mac OS X Printing with the PCL Printer Software - Windows Selecting the Product - PCL Printer Software - Windows Selecting Basic Print Settings - PCL Printer Software - Windows Selecting Output and Graphics Options - PCL Printer Software - Windows Selecting Finishing Options - PCL Printer Software - Windows Selecting Default Print Settings - PCL Printer Software - Windows Printing with the PostScript (PS3) Printer Software - Windows Selecting Basic Print Settings - PostScript Printer Software - Windows Selecting Additional Layout and Print Options - PostScript Printer Software - Windows Selecting Default Print Settings - PostScript Printer Software - Windows Printing with the PostScript (PS3) Printer Software - Mac OS X Selecting Basic Print Settings - PostScript Printer Software - Mac OS X Selecting Page Setup Settings - PostScript Printer Software - Mac OS X Selecting Print Layout Options - PostScript Printer Software - Mac OS X
6 Sizing Printed Images - PostScript Printer Software - Mac OS X Managing Color - PostScript Printer Software - Mac OS X Printing Your Document or Photo - PostScript Printer Software - Mac OS X Checking Print Status - PostScript Printer Software - Mac OS X Cancelling Printing Using a Product Button Scanning Connecting a USB Thumb Drive or External Device Starting a Scan Starting a Scan Using the Product Control Panel Scan to USB Device Options Changing Default Scan Button Settings Starting a Scan Using the Epson Scan Icon Starting a Scan from a Scanning Program Selecting Epson Scan Settings Scan Modes Selecting the Scan Mode Scanning in Home Mode Selecting a Scan Area - Home Mode Available Image Adjustments - Home Mode Selecting a Scan Size - Home Mode Scanning in Office Mode Selecting a Scan Area - Office Mode Available Image Adjustments - Office Mode Scanning in Professional Mode Available Image Types - Professional Mode Selecting a Scan Area - Professional Mode Available Image Adjustments - Professional Mode Selecting a Scan Size - Professional Mode Image Preview Guidelines Scan Resolution Guidelines Selecting Scan File Settings Available Scanned File Types and Optional Settings Scanning with Mac OS X 10.6/10.7/10.8 Using Image Capture
7 Available Scan Settings - Mac OS X Image Capture Scanning Special Projects Scanning to a PDF File Restoring Photo Colors as You Scan Convert Scanned Documents to Editable Text (OCR) Scanning Using OCR - Windows Scanning Using OCR - Mac OS X Faxing Connecting a Telephone or Answering Machine Setting Up Fax Features Setting Up Fax Features Using the Product Control Panel Selecting Your Country or Region Selecting the Date and Time Entering Fax Header Information Entering Numbers and Characters for Faxing Selecting Fax Send and Receive Settings Selecting Fax Communication Settings Printing Fax Reports Restoring Default Fax Settings Fax Sending Options Fax Receive Options Fax Communications Options Fax Report Options Restore Default Settings Options Setting Up Fax Features Using the Fax Utility - Windows Setting Up Fax Features Using the Fax Utility - Mac OS X Setting Up Speed Dial and Group Dial Lists Setting Up Speed/Group Dial Lists Using the Product Control Panel Creating Speed Dial List Entries Printing Your Speed Dial List Creating Group Dial List Entries Printing Your Group Dial List Setting Up Speed/Group Dial Lists Using the Fax Utility - Windows
8 Setting Up Speed/Group Dial Lists Using the Fax Utility - Mac OS X Sending Faxes Sending Faxes from the Product Control Panel Manually Dialing or Redialing Fax Numbers Selecting Fax Numbers From Speed or Group Dial Lists Dialing Fax Numbers from a Connected Telephone Broadcasting a Fax Sending a Fax at a Specified Time Fax Send Options Sending Faxes Using the Fax Utility - Windows Sending Faxes Using the Fax Utility - Mac OS X Receiving Faxes Fax Reception Receiving Faxes Automatically (Auto Answer) Receiving Faxes Manually Replacing Ink Cartridges and Maintenance Boxes Check Cartridge and Maintenance Box Status Checking Cartridge Status on the LCD Screen Checking Cartridge and Maintenance Box Status With Windows Checking Cartridge and Maintenance Box Status With Mac OS X Purchase Epson Ink Cartridges and Maintenance Box Ink Cartridge and Maintenance Box Part Numbers Removing and Installing Ink Cartridges Replacing the Maintenance Box Adjusting Print Quality Print Head Maintenance Print Head Nozzle Check Checking the Nozzles Using the Product Control Panel Checking the Nozzles Using a Computer Utility Print Head Cleaning Cleaning the Print Head Using the Product Control Panel Cleaning the Print Head Using a Computer Utility Print Head Alignment
9 Aligning the Print Head Using the Product Control Panel Aligning the Print Head Using a Computer Utility Cleaning the Paper Path Cleaning and Transporting Your Product Cleaning Your Product Transporting Your Product Solving Problems Checking for Software Updates Product Status Messages Running a Product Check Resetting Control Panel Defaults Solving Setup Problems Noise After Ink Installation Software Installation Problems Control Panel Setup Problems Solving Network Problems Network Software Cannot Find Product on a Network Product Does Not Appear in Mac OS X Printer Window Cannot Print Over a Network Cannot Scan Over a Network Printing a Network Status Sheet Solving Copying Problems Product Makes Noise, But Nothing Copies Product Makes Noise When It Sits for a While Solving Paper Problems Paper Feeding Problems Paper Jam Problems Inside the Product Paper Jam Problems in the Cassette Paper Jam Problems in the Duplexer Document Jams in the Automatic Document Feeder Paper Ejection Problems Solving PCL/PostScript Problems Nothing Prints
10 Settings Are Missing from the PCL or PostScript Printer Software Printing a PS3 (PostScript) Status Sheet Solving Problems Printing from a Computer Nothing Prints Product Icon Does Not Appear in Windows Taskbar Error After Cartridge Replacement Printing is Slow Solving Page Layout and Content Problems Inverted Image Too Many Copies Print Blank Pages Print Incorrect Margins on Printout Incorrect Characters Print Incorrect Image Size or Position Slanted Printout Solving Print Quality Problems White or Dark Lines in Printout Blurry or Smeared Printout Faint Printout or Printout Has Gaps Grainy Printout Incorrect Colors Solving Scanning Problems Scanning Software Does Not Operate Correctly Cannot Start Epson Scan Scanning Does Not Function Correctly Using the PCL or PostScript Software Solving Scanned Image Quality Problems Image Consists of a Few Dots Only Line of Dots Appears in All Scanned Images Straight Lines in an Image Appear Crooked Image is Distorted or Blurry Image Colors are Patchy at the Edges Image is Too Dark Back of Original Image Appears in Scanned Image
11 Ripple Patterns Appear in an Image Scanned Image Colors Do Not Match Original Colors Scan Area is Not Adjustable in Thumbnail Preview Scanned Image Edges are Cropped Solving Faxing Problems Cannot Send or Receive Faxes Cannot Receive Faxes with a Telephone Connected to Your Product When to Uninstall Your Product Software Uninstalling Product Software - Windows Uninstalling Product Software - PCL Printer Software - Windows Uninstalling Product Software - Mac OS X Where to Get Help Technical Specifications EPEAT Registration Windows System Requirements Mac System Requirements Printing Specifications Scanning Specifications Automatic Document Feeder (ADF) Specifications Fax Specifications Paper Specifications Printable Area Specifications Ink Cartridge Specifications Dimension Specifications Electrical Specifications Environmental Specifications Interface Specifications External USB Device Specifications Network Interface Specifications Safety and Approvals Specifications PS3 Mode Fonts PCL5 Mode Fonts PCL6 Mode Fonts
12 Symbol Sets Notices Telephone Equipment Safety Instructions FCC Compliance Statement Software Notices Trademarks Copyright Notice libtiff Software Acknowledgment A Note Concerning Responsible Use of Copyrighted Materials Default Delay Times for Power Management for Epson Products Copyright Attribution
13 WorkForce Pro WP-4590 User's Guide Welcome to the WorkForce Pro WP-4590 User's Guide. 13
14 Product Basics See these sections to learn about the basic features of your product. Note: Software instructions in this manual are intended for use with the standard Epson printer software. For more information on using the Printer Command Language (PCL) or PostScript (PS3) printer software, please see the appropriate sections. Setting Up the Control Panel Product Parts Locations Two-Sided Printing, Scanning, Copying, and Faxing Using EPSON Connect Print Setting Up the Control Panel See these sections to set up the control panel for use. Printer Parts - Control Panel Buttons and Lights Changing LCD Screen Language Turning Off Control Panel Sounds Parent topic: Product Basics Printer Parts - Control Panel Buttons and Lights 14
15 1 The power light 2 The power button 3 The Fax button 4 The Scan button 5 The Copy button 6 The Auto Answer button 7 The LCD screen 8 The arrow buttons 9 The OK button 10 The number pad 11 The Stop/Reset button 12 The Error light 13 The Speed Dial button 14 The Redial/Pause button 15 The Setup button 16 The Help button 17 The Menu button 18 The Back button 19 The B&W Start button 20 The Color Start button Parent topic: Setting Up the Control Panel Changing LCD Screen Language You can change the language used on the LCD screen. 1. Press the Setup button. 2. Press the arrow buttons to select Printer Setup and press the OK button. 3. Select Language and press the OK button. 4. Select a language and press the OK button. 15
16 5. Press the Copy button to exit. Parent topic: Setting Up the Control Panel Turning Off Control Panel Sounds You can turn off the sound heard when you press buttons on the control panel. 1. Press the Setup button. 2. Press the arrow buttons to select Printer Setup and press the OK button. 3. Select Sound and press the OK button. 4. Select the Off setting and press the OK button. 5. Press the Copy button to exit. Parent topic: Setting Up the Control Panel Product Parts Locations See these sections to identify the parts on your product. Printer Parts - Paper Path Printer Parts - Front Printer Parts - Inside Printer Parts - Back Parent topic: Product Basics 16
17 Printer Parts - Paper Path 1 Edge guides on paper cassette 2 Paper stopper 3 Output tray extension 4 Output tray 5 Edge guides on rear MP tray 6 Rear MP (multipurpose) tray 7 Feeder guard 17
18 1 Automatic document feeder (ADF) cover 2 Edge guide 3 Automatic document feeder 4 Paper cassette Parent topic: Product Parts Locations 18
19 Printer Parts - Front 1 Document cover 2 Scanner glass 3 Control panel 4 USB port for external devices Parent topic: Product Parts Locations 19
20 Printer Parts - Inside 1 Ink cartridge slots 2 Front cover 3 Print head Parent topic: Product Parts Locations 20
21 Printer Parts - Back 1 LINE port 2 EXT port 3 USB port 4 Ethernet LAN port 5 Maintenance box 6 Duplexer (rear unit) 7 AC inlet Parent topic: Product Parts Locations Two-Sided Printing, Scanning, Copying, and Faxing You can print on both sides of the page automatically, using the product's built-in duplexer. By loading your pages in the automatic document feeder (ADF), you can also scan, copy, and fax double-sided documents on plain paper in these sizes: Letter ( inches [ mm]) and A4 ( inches [ mm]). 21
22 Note: When printing with the PCL printer software, automatic double-sided printing is available when Plain paper is selected as the Paper Type. To print on both sides of the page from your computer, select 2-Sided Printing (Windows) or one of the Two-sided Printing Settings (Mac OS X). To scan a double-sided document in the ADF, press the Scan button, select your scanning method, then press the Menu button. Select Scan Settings > 2-Sided Scanning. If you are using the Epson Scan software, select ADF - Double-sided as the Document Source (Office or Professional Modes only). To copy a double-sided document in the ADF, press the Copy button, then press the Menu button. Select Paper and Copy Settings, then select one of the 2-Sided Copying settings. To fax a double-sided document in the ADF, press the Fax button, then press the Menu button. Select Send Settings > 2-Sided Faxing. Parent topic: Product Basics Related references Copying Options Scan to USB Device Options Fax Sending Options Fax Send Options Related tasks Selecting Double-sided Printing Settings - Standard EPSON Printer Software - Windows Selecting Double-sided Printing Settings - Standard EPSON Printer Software - Mac OS X Selecting Basic Print Settings - PCL Printer Software - Windows Selecting Basic Print Settings - PostScript Printer Software - Windows Placing Originals in the Automatic Document Feeder Scanning in Office Mode Scanning in Professional Mode Using EPSON Connect Print With EPSON Connect Print, you can print from any device that can send , such as your smartphone, tablet, or laptop. Print features a unique address assigned to your EPSON product, similar to having a dedicated fax number. When you want to print, just send an with attachments to your product's address. 1. Set up your product for network printing as described on the Start Here sheet. 22
23 2. If you did not already set up Print when you installed your product software, visit to learn more about Print, check compatibility, and get detailed setup instructions. 3. Send an with attachments to your product's Print address. Note: Both the and any attachments print by default. You can change these printing options by logging into your EPSON Connect account. Parent topic: Product Basics 23
24 Installing the PCL or PostScript Printer Software Before installing any printer software, make sure you have set up your product as described on the Start Here sheet. Installing the PCL or PostScript Printer Software - Windows 7/Windows Vista Installing the PCL or PostScript Printer Software - Windows XP Installing the PostScript (PS3) Printer Software - Mac OS X Installing the PCL or PostScript Printer Software - Windows 7/Windows Vista If you did not install the standard EPSON printer software, you need to install either the PCL or PostScript (PS3) printer software before you can adjust the print settings and print to your network printer. Note: Make sure your product is turned on and connected to the same network as your computer before installing the printer software. 1. Double-click the Download WP-4590 Driver shortcut on your desktop and download the latest PCL or PS3 printer software. 2. Extract the zipped folder that you downloaded in the previous step. 3. Do one of the following: Windows 7: Click, select Devices and Printers then select Add Printer. Windows Vista: Click Printer. You see this window: and select Control Panel. Double-click Printers, then select Add 24


25 4. Click Add a network, wireless or Bluetooth printer. You see a window like this: 25

26 5. Select your product from the list of network printers and click Next. Do not select any product with (WSD) in its name. Note: If your product does not appear on the list, make sure it is turned on and connected to your network, and click Search again. 6. Click Have disk. You see this window: 7. Click Browse. 8. Locate and open the folder you unzipped in a previous step. 9. Do one of the following: If you are installing the PCL printer software, select EPUP6SETUP.inf and click OK. If you are installing the PS3 printer software, select eppsnt.inf and click OK. You see a window like this: 26

27 10. Select the name of your product and click Next. Note: If you are installing the PCL printer software, select Epson Universal Laser P6 from the Printers list. 11. Enter the name of your product as the Printer name and click Next. 12. Click Print a test page to confirm that your product is installed. 13. Click Finish to close the window and complete setup. Your product is now installed. Note: If you are using the PCL printer software, you need to select your product in the printer software before you can adjust your print settings. Parent topic: Installing the PCL or PostScript Printer Software Related tasks Selecting the Product - PCL Printer Software - Windows Related topics Printing with the PCL Printer Software - Windows 27
 printer software before you can adjust the print settings and print to your network printer.")
28 Printing with the PostScript (PS3) Printer Software - Windows Installing the PCL or PostScript Printer Software - Windows XP If you did not install the standard EPSON printer software, you need to install either the PCL or PostScript (PS3) printer software before you can adjust the print settings and print to your network printer. Note: Make sure your product is turned on and connected to the same network as your computer before installing the printer software. 1. Double-click the Download WP-4590 Driver shortcut on your desktop and download the latest PCL or PS3 printer software. 2. Extract the zipped folder that you downloaded in the previous step. 3. Click Start and select Printers and Faxes. 4. Click Add Printer. You see this window: 28

29 5. Select Local printer attached to this computer and click Next. Note: Make sure the Automatically detect and install my Plug and Play printer box is not checked. You see this window: 6. Select Create a new port. 7. Select Standard TCP/IP Port as the Type of port setting and click Next. You see this window: 29


30 8. Click Next. You see this window: 30
 10.")
31 9. To determine the network information you need to enter, print a network status sheet. Press the Setup button on the control panel, select Network Settings, and press the OK button. Select Confirm Network Settings and press the OK button. Press either of the Start buttons to print a status sheet. (Press the Stop/Reset button if you want to cancel the operation.) 10. Locate the IP address on the network status sheet you just printed and enter it as the Printer Name or IP Address in the Add Printer Wizard window. Click Next. 11. Click Finish. You see this window: 12. Click Have disk. 13. Click Browse. 14. Locate and open the folder you unzipped in a previous step. 15. Do one of the following: If you are installing the PCL printer software, select EPUP6SETUP.inf and click OK. If you are installing the PostScript printer software, select eppsnt.inf and click OK. You see a window like this: 31

32 16. Select the name of your product and click Next. Note: If you are installing the PCL printer software, select Epson Universal Laser P6 from the Printers list. 17. Enter the name of your product as the Printer name and click Next. 18. Select Yes to print a test page and confirm that your product is installed or select No to skip this step, then click Next. 19. Click Finish to close the window and complete setup. Your product is now installed. Note: If you are using the PCL printer software, you need to select your product in the printer software before you can adjust your print settings. Parent topic: Installing the PCL or PostScript Printer Software Related tasks Selecting the Product - PCL Printer Software - Windows 32
33 Related topics Printing with the PCL Printer Software - Windows Printing with the PostScript (PS3) Printer Software - Windows Installing the PostScript (PS3) Printer Software - Mac OS X If you did not install the standard EPSON printer software, you need to install the PostScript (PS3) printer software before you can adjust the print settings and print to your network printer. Note: Make sure your product is turned on and connected to the same network as your computer before installing the printer software. 1. Double-click the Download WP-4590 Driver shortcut on your desktop and download the latest PS3 printer software. 2. Extract the zipped folder that you downloaded in the previous step. 3. Run the PS3 printer software installer. 4. Follow the on-screen instructions to install the PS3 printer software. When the install process is completed, click Finish. 5. In the Apple menu or the Dock, select System Preferences. 6. Select Print & Fax or Print & Scan. 7. Click the + button. 8. Select your EPSON product and click Add. Note: Make sure the PostScript printer software is selected as the Print Using: setting. Your product is now installed. Parent topic: Installing the PCL or PostScript Printer Software Related topics Printing with the PostScript (PS3) Printer Software - Mac OS X 33
34 Loading Paper Before you print, load paper for the type of printing you will do. Note: Load only plain paper when printing with the PCL or PostScript (PS3) printer software. Loading Paper in the Cassette Loading Paper in the Rear MP (Multipurpose) Tray Loading Envelopes Paper Loading Capacity Available EPSON Papers Paper or Media Type Settings Setting the Paper Size for Each Source Setting Additional Paper Options Installing and Enabling the Optional Second Paper Cassette Loading Paper in the Cassette You can load Letter ( inches [ mm]), A4 ( inches [ mm]), and Legal ( inches [ mm]) plain paper in the paper cassette. 1. Close the output tray, if necessary. 34
35 2. Pull out the paper cassette. 3. Slide the edge guides outward. Note: If you are using legal-size paper, squeeze the tab to extend the paper cassette. 35
36 4. Load a stack of paper, printable side down, in the cassette as shown. 36
37 5. Slide the edge guides against the paper, but not too tightly. Note: Make sure the paper fits beneath the top edges of the guide, and is not sticking out from the end of the cassette. 37
38 Caution: To prevent paper feeding problems, make sure you do not load too much paper in the cassette. 6. Gently replace the paper cassette. 7. Extend the output tray and open the paper stopper. 38
39 Note: If you are using legal-size or longer paper, do not open the paper stopper. Do not remove or insert the paper cassette during printing. Parent topic: Loading Paper Related references Paper Loading Capacity Related tasks Loading Paper in the Rear MP (Multipurpose) Tray Loading Envelopes Loading Paper in the Rear MP (Multipurpose) Tray You can print documents on a variety of paper types and sizes. 1. Extend the output tray and open the paper stopper. Note: If you are using legal-size or longer paper, do not open the paper stopper. 39
40 2. Pull up the rear MP tray. 3. Flip the feeder guard forward, then slide the edge guides outward. 40
41 4. Insert paper, glossy or printable side up and short edge first, in the center of the tray. If you are inserting a stack of paper, fan the sheets first and tap the stack on a flat surface to even the edges. Caution: To prevent paper feeding problems, make sure you do not load too much paper in the tray. 5. Slide the edge guides against the paper, but not too tightly. Always follow these paper loading guidelines: Load only the recommended number of sheets. Load paper short edge first, no matter which way your document faces. Load letterhead or pre-printed paper top edge first. Do not load paper above the arrow mark inside the edge guides. Check the paper package for any additional loading instructions. 41
42 Note: You can load binder paper with holes in the rear MP tray. The paper must be one of the following sizes: Letter ( inches [ mm]), A4 ( inches [ mm]), or Legal ( inches [ mm]). The holes must be within 0.74 inch (19 mm) of the left edge of the page. Parent topic: Loading Paper Related references Paper Loading Capacity Related tasks Loading Paper in the Cassette Loading Envelopes Loading Envelopes You can print on plain paper envelopes in this size: No. 10 ( inches [ mm]). 1. Extend the output tray and open the paper stopper. 42
43 2. Pull up the rear MP tray. 3. Flip the feeder guard forward, then slide the edge guides outward. 43
44 4. Insert envelopes, short edge first and with the flap facing down, in the center of the tray. 5. Slide the edge guides against the envelopes, but not too tightly. Always follow these envelope loading guidelines: If you have trouble loading a stack of envelopes, press each envelope flat before loading it or load one envelope at a time. If print quality declines when printing multiple envelopes, try loading one envelope at a time. Do not load envelopes that are curled, folded, or too thin. Parent topic: Loading Paper Related references Paper Loading Capacity Related tasks Loading Paper in the Cassette Loading Paper in the Rear MP (Multipurpose) Tray 44
45 Paper Loading Capacity Paper type Loading capacity - paper Loading capacity - rear MP cassette tray Plain paper 250 sheets 80 sheets (Letter ( inches [ mm])) 250 sheets 1 sheet (Legal ( inches [ mm])) Epson Bright White Paper 200 sheets 50 sheets Epson Presentation Paper Matte 80 sheets Thick paper (cardstock up to 68 lb) 10 sheets 20 sheets for manual two-sided printing (Letter ( inches [ mm]) and A4 ( inches [ mm])) 5 sheets for manual two-sided printing 45
46 Paper type Loading capacity - paper Loading capacity - rear MP cassette tray Epson Premium Presentation Paper Matte Epson Premium Presentation Paper Matte Double-sided Epson Ultra Premium Presentation Paper Matte Epson Brochure & Flyer Paper Matte Double-sided Epson Photo Paper Glossy Epson Premium Photo Paper Glossy Epson Ultra Premium Photo Paper Glossy Epson Premium Photo Paper Semigloss 20 sheets Envelopes 10 envelopes Parent topic: Loading Paper Available EPSON Papers You can purchase genuine Epson ink and paper at Epson Supplies Central at (U.S. sales) or (Canadian sales). You can also purchase supplies from an Epson authorized reseller. To find the nearest one, call 800-GO-EPSON ( ). Paper Type Size Part number Sheet count Epson Bright White Paper Letter ( inches S [ mm]) Epson Brochure & Flyer Paper Letter ( inches S Matte Double-sided [ mm]) 46
47 Paper Type Size Part number Sheet count Epson Presentation Paper Matte Letter ( inches S [ mm]) Legal ( inches S [ mm]) Epson Premium Presentation 8 10 inches ( mm) S Paper Matte Letter ( inches S [ mm]) S Epson Premium Presentation Letter ( inches S Paper Matte Double-sided [ mm]) Epson Ultra Premium Presentation Letter ( inches S Paper Matte [ mm]) Epson Photo Paper Glossy 4 6 inches ( mm) S S Letter ( inches S [ mm]) S S Epson Premium Photo Paper 4 6 inches ( mm) S Glossy S inches ( mm) S inches ( mm) S Letter ( inches S [ mm]) S Epson Ultra Premium Photo Paper 4 6 inches ( mm) S Glossy S inches ( mm) S inches ( mm) S Letter ( inches S [ mm]) S
48 Paper Type Size Part number Sheet count Epson Premium Photo Paper 4 6 inches ( mm) S Semi-gloss Letter ( inches S [ mm]) Parent topic: Loading Paper Paper or Media Type Settings Standard Epson Printer Software For this paper Plain paper Epson Bright White Paper Epson Presentation Paper Matte Epson Premium Presentation Paper Matte Epson Premium Presentation Paper Matte Doublesided Epson Ultra Premium Presentation Paper Matte Epson Brochure & Flyer Paper Matte Double-sided Epson Ultra Premium Photo Paper Glossy Epson Premium Photo Paper Glossy Epson Photo Paper Glossy Epson Premium Photo Paper Semi-gloss Envelopes Cardstock up to 68 lb Select this paper Type or Media Type setting Plain Paper/Bright White Paper Premium Presentation Paper Matte Ultra Premium Photo Paper Glossy Premium Photo Paper Glossy Photo Paper Glossy Premium Photo Paper Semi-Gloss Envelope Thick-Paper PCL and Postscript (PS3) Printer Software PCL and PostSript (PS3) printer software support plain paper and envelope printing. Parent topic: Loading Paper 48
49 Setting the Paper Size for Each Source You can set the paper size for each paper source using the control panel or your printer software (when using the product with the standard Epson printer software). The settings apply to all print jobs sent to the product. Note: If you are using the PCL or PostScript (PS3) printer software with the optional second paper cassette installed, you need to enable it in the printer software before changing the settings. Setting the Paper Size for Each Source - Control Panel Setting the Paper Size for Each Source - Standard Epson Printer Software Setting the Paper Size and Source - PCL Printer Software - Windows Setting the Paper Size and Source - PostScript Printer Software Parent topic: Loading Paper Setting the Paper Size for Each Source - Control Panel You can change the default paper size for each source using the control panel on the product. 1. Press the Setup button. 2. Select Printer Setup and press the OK button. 3. Select Paper Size Loaded and press the OK button. You see this screen: 49
50 4. Select the paper source you want to change and press the OK button. 5. Select the paper size you loaded and press the OK button. 6. Select Paper Size Notice and press the OK button. 7. Select Yes if you want the printer to prevent you from printing with the wrong paper size settings. Note: If you choose No and you try to print with the wrong settings, the printer will print even if the image size exceeds the printable area, and your printout may be smudged. 8. Press the Copy button to exit. Parent topic: Setting the Paper Size for Each Source Setting the Paper Size for Each Source - Standard Epson Printer Software You can set the paper size for each paper source using your standard Epson printer software. Setting the Paper Size for Each Source - Standard Epson Printer Software - Windows Setting the Paper Size for Each Source - Standard Epson Printer Software - Mac OS X Parent topic: Setting the Paper Size for Each Source Setting the Paper Size for Each Source - Standard Epson Printer Software - Windows You can change the default paper size for each source in Windows. 1. Do one of the following: Windows 7: Click Printer properties. and select Devices and Printers. Right-click your product name, and select Windows Vista: Click and select Control Panel. Click Printer under Hardware and Sound, right-click your product name, and select Properties. Windows XP: Click Start and select Printers and Faxes. (Or open the Control Panel, select Printers and Other Hardware if necessary, and select Printers and Faxes.) Right-click your product name and select Properties. 2. Click the Optional Settings tab. 3. Click Printer Settings. You see this window: 50

51 4. Select the paper size you loaded in each paper source as the Paper Size Loaded. If your paper doesn't match any of the sizes listed for the rear MP tray, select Others. Note: If you have not installed a second paper cassette, you cannot change the settings for Cassette If you want the printer software to warn you if you try to print with the wrong paper size, select the Paper Size Notice checkbox. Note: If you turn on Paper Size Notice, the printer will prevent you from printing with the wrong paper size settings. If you turn this option off and you try to print with the wrong settings, the printer will print even if the image size exceeds the printable area, and your printout may be smudged. 6. Click Apply. 7. When you see the confirmation message, click Yes. 51

52 8. Close the Printer Settings window. Parent topic: Setting the Paper Size for Each Source - Standard Epson Printer Software Setting the Paper Size for Each Source - Standard Epson Printer Software - Mac OS X You can change the default paper size for each source in Mac OS X. 1. Do one of the following: Mac OS X 10.6/10.7: In the Apple menu or the Dock, select System Preferences. Select Print & Fax or Print & Scan, select your product, and select Options & Supplies. Select Utility and select Open Printer Utility. Mac OS X 10.5: In the Apple menu or the Dock, select System Preferences. Select Print & Fax, select your product, and select Open Print Queue. Select Utility. 2. Click the Printer Settings button. You see this window: 3. Select the paper size you loaded in each paper source as the Paper Size Loaded. If your paper doesn't match any of the sizes listed for the rear MP tray, select Others. 52
53 4. If you want the printer software to warn you if you try to print with the wrong paper size, select the Paper Size Notice checkbox. Note: If you turn on Paper Size Notice, the printer will prevent you from printing with the wrong paper size settings. If you turn this option off and you try to print with the wrong settings, the printer will print even if the image size exceeds the printable area, and your printout may be smudged. 5. Click Apply. 6. Close the Printer Settings window. Parent topic: Setting the Paper Size for Each Source - Standard Epson Printer Software Setting the Paper Size and Source - PCL Printer Software - Windows You can change the default paper size and source in Windows using the PCL printer software. 1. Do one of the following: Windows 7: Click and select Devices and Printers. Right-click your product name, and select Printing preferences. Windows Vista: Click and select Control Panel. Click Printer under Hardware and Sound, right-click your product name, and select Printing Preferences. Windows XP: Click Start and select Printers and Faxes. (Or open the Control Panel, select Printers and Other Hardware if necessary, and select Printers and Faxes.) Right-click your product name and select Printing Preferences. You see the this window: 53
54 2. Select the Paper Source. 3. Select the paper size you loaded in the selected paper source as the Paper Size setting. If your paper doesn't match any of the sizes listed for the rear MP tray, click the Custom button and choose the settings that match your paper size. Note: The PCL printer software supports plain paper in A4, letter, and envelope sizes. 4. Click Apply. 5. Close the Printing Preferences window. Parent topic: Setting the Paper Size for Each Source Setting the Paper Size and Source - PostScript Printer Software You can set the paper size and source using your PostScript (PS3) printer software. Setting the Paper Size and Source - PostScript Printer Software - Windows Setting the Paper Size - PostScript Printer Software - Mac OS X Parent topic: Setting the Paper Size for Each Source 54
55 Setting the Paper Size and Source - PostScript Printer Software - Windows You can change the default paper size and source in Windows using the PostScript (PS3) printer software. 1. Do one of the following: Windows 7: Click and select Devices and Printers. Right-click your product name, and select Printing preferences. Windows Vista: Click and select Control Panel. Click Printer under Hardware and Sound, right-click your product name, and select Printing Preferences. Windows XP: Click Start and select Printers and Faxes. (Or open the Control Panel, select Printers and Other Hardware if necessary, and select Printers and Faxes.) Right-click your product name and select Printing Preferences. 2. Click the Paper/Quality tab. You see this window: 3. Select the Paper Source. 55
56 4. Click the Advanced button. You see this window: 5. Select the paper size you loaded in the selected paper source as the Paper Size. Note: The PostScript printer software supports plain paper in A4, letter, and envelope sizes. 6. Click OK. 7. Close the Printing Preferences window. Parent topic: Setting the Paper Size and Source - PostScript Printer Software Setting the Paper Size - PostScript Printer Software - Mac OS X You can change the default paper size in Mac OS X using the PostScript (PS3) printer software. 56
57 1. Do one of the following: Mac OS X 10.6/10.7: In the Apple menu or the Dock, select System Preferences. Select Print & Fax or Print & Scan and select your product. Mac OS X 10.5: In the Apple menu or the Dock, select System Preferences. Select Print & Fax and select your product. 2. Select the desired paper size as the Default paper size (Mac OS X 10.6/10.7) or Default Paper Size in Page Setup (Mac OS X 10.5). Note: The PostScript printer software supports plain paper in A4, letter, and envelope sizes. 3. Close the Printer Settings window. Parent topic: Setting the Paper Size and Source - PostScript Printer Software Setting Additional Paper Options When printing or copying on special paper, you can adjust these options to ensure your documents print correctly. 1. Press the Setup button. 2. Select Printer Setup and press the OK button. You see this screen: 57
58 3. Select one of the following: Select Thick Paper and press the OK button to print on heavyweight paper. Select Dry Time, then choose Long or Longer and press the OK button to increase ink drying time when you print double-sided on special paper. 4. Press the Copy button to exit. Parent topic: Loading Paper Installing and Enabling the Optional Second Paper Cassette Follow these instructions to add the optional paper cassette to your product. Note: If you are using the optional paper cassette with the PCL or PostScript (PS3) printer software, you must enable the second cassette in the printer software. Installing the Optional Second Paper Cassette Enabling the Optional Second Paper Cassette - PCL Printer Software - Windows Enabling the Optional Second Paper Cassette - PostScript (PS3) Printer Software - Windows Enabling the Optional Second Paper Cassette - PostScript (PS3) Printer Software - Mac OS X Parent topic: Loading Paper Installing the Optional Second Paper Cassette You can install the optional paper cassette to provide more paper capacity. 1. Turn off the product and unplug the power cord and any connected cables. Caution: To avoid electric shock, make sure you unplug the power cord. 2. Remove the paper cassette from its carton and place it where you want to set up the product. 58
59 3. Carefully lift the product as shown, then gently lower it onto the paper cassette. Make sure the connectors and pins align correctly. 4. Reconnect the power cord and other connection cables, and plug in the product. 5. Turn on the product. Parent topic: Installing and Enabling the Optional Second Paper Cassette Enabling the Optional Second Paper Cassette - PCL Printer Software - Windows You need to enable the optional second paper cassette before you can use it with the PCL printer software. 59
60 1. Do one of the following: Windows 7: Click and select Devices and Printers. Right-click your printer name and select Printing Preferences, then click the Printer tab. Windows Vista: Click and select Control Panel. Click Printer under Hardware and Sound, then right-click your printer name and select Printing Preferences. Click the Printer tab. Windows XP: Click Start and select Printers and Faxes. Right-click your product name and select Printing Preferences, then click the Printer tab. You see this window: 2. Select Cassette 1 in the Optional Paper Sources box and click Yes. 3. Click OK. The optional second paper cassette is now enabled. Parent topic: Installing and Enabling the Optional Second Paper Cassette 60
61 Enabling the Optional Second Paper Cassette - PostScript (PS3) Printer Software - Windows You need to enable the optional second paper cassette before you can use it with the PS3 printer software. 1. Do one of the following: Windows 7: Click and select Devices and Printers. Right-click your printer name and select Printer Properties, then click the Device Settings tab. Windows Vista: Click and select Control Panel. Click Printer under Hardware and Sound, then right-click your printer name, and select Properties. Click the Devices Settings tab. Windows XP: Click Start and select Printers and Faxes. Right-click your product name and select Properties, then click the Device Settings tab. You see this window: 61
62 62
 Printer Software - Mac OS X You need to enable the optional")
63 2. Select 1 Cassette Unit as the Lower Cassette Unit setting. 3. Click OK. The optional second paper cassette is now enabled. Parent topic: Installing and Enabling the Optional Second Paper Cassette Enabling the Optional Second Paper Cassette - PostScript (PS3) Printer Software - Mac OS X You need to enable the optional paper cassette before you can use it with the PS3 printer software. 1. In the Apple menu or the Dock, select System Preferences. Select Print & Fax or Print & Scan, select your product, then select Options & Supplies. Click the Driver tab. You see this window: 63

64 2. Select 1 Cassette Unit as the Lower Cassette Unit setting. 3. Click OK. The optional second paper cassette is now enabled. Parent topic: Installing and Enabling the Optional Second Paper Cassette 64
65 Placing Originals on the Product Follow the instructions here to place your original documents or photos on the product. Caution: Do not place anything on top of your product or use its cover as a writing surface to avoid damaging it. Placing Originals on the Scanner Glass Placing Originals in the Automatic Document Feeder Placing Originals on the Scanner Glass You can place originals up to this size on the scanner glass: Letter ( inches [ mm]) or A4 ( inches [ mm]). 1. Open the document cover. 2. Place your original facedown on the scanner glass with the top facing as shown. Slide the original to the edges of the indicated corner. Note: You can place multiple originals on the scanner glass. Just make sure they are at least 0.8 inch (20 mm) away from each other. 3. Close the document cover gently to keep your original in place. Parent topic: Placing Originals on the Product 65
66 Related topics Copying Scanning Faxing Placing Originals in the Automatic Document Feeder You can place multi-page original documents in the Automatic Document Feeder (ADF). Make sure the originals meet the Automatic Document Feeder specifications before loading them. Caution: Make sure your originals are not creased or folded, and do not contain holes, staples, tape, or other materials that could obstruct the feeder. 1. Slide the ADF edge guide outward. 2. Fan your stack of originals and tap them gently on a flat surface to even the edges. 66
67 3. Insert the originals into the ADF faceup and top-edge first. 4. Slide the ADF edge guide against the originals, but not too tightly. Note: If you are copying two originals onto one sheet, make sure the originals are loaded as shown: 67
68 Parent topic: Placing Originals on the Product 68
69 Related references Automatic Document Feeder (ADF) Specifications Related topics Copying Scanning Faxing 69
70 Copying See the information here to copy documents or photos using your product. Note: Copies may not be exactly the same size as your originals. Copying Documents or Photos Paper Type Settings - Copying Paper Size Settings - Copying Copying Options Related references Paper Type Settings - Copying Paper Size Settings - Copying Copying Options Related topics Placing Originals on the Product Loading Paper Copying Documents or Photos You can copy documents or photos onto various sizes and types of paper, including Epson special papers. 1. Place your original document or photo on the scanner glass, or place multi-page documents in the ADF. 2. Load the paper you want to print on. 3. Press the Copy button. You see this screen: 70

71 4. To print more than one copy, press the up or down arrow buttons to select the number (up to 99). 5. If you need to adjust the darkness of your copy, press the left or right arrow buttons to change the Density setting. 6. To change any of the print settings displayed on the LCD screen, press the Menu button, select Paper and Copy Settings, press the OK button, and select the necessary settings. 7. When you are ready to copy, press either of the Start buttons. Note: To cancel printing, press the Stop/Reset button. Parent topic: Copying Paper Type Settings - Copying Select a Paper Type setting that matches the paper you loaded. Paper type loaded Plain paper Epson Bright White Paper Epson Presentation Paper Matte Paper Type setting Plain Paper 71
72 Paper type loaded Epson Premium Presentation Paper Matte Epson Ultra Premium Presentation Paper Matte Epson High Quality Ink Jet Paper Epson Premium Photo Paper Glossy Epson Premium Photo Paper Semi-gloss Epson Ultra Premium Photo Paper Luster Epson Ultra Premium Photo Paper Glossy Epson Photo Paper Glossy Paper Type setting Matte Prem. Glossy Ultra Glossy Glossy Parent topic: Copying Paper Size Settings - Copying Copying Options Select the Paper Size setting that matches the paper you loaded. 4 6 inches ( mm) 5 7 inches ( mm) 8 10 inches ( mm) Letter ( inches [ mm]) Legal ( inches [ mm]) A4 ( inches [ mm]) Parent topic: Copying Select the copying options you want to use for your copies. Note: Not all options or settings may be available, depending on other copying settings. 72
73 Copying option Available settings Description 2-Sided Copying 1>1-Sided Uses the duplexer and ADF to make 2-sided copies 1>2-Sided 2>1-Sided 2>2-Sided Collate Copying On Specifies the page order for multiple copies of Off documents Layout With Border Leaves a small margin around the image 2-up Copy Copies 2 originals on a single sheet Reduce/Enlarge Custom Size Automatically sizes the image by the percentage you select Actual Size Auto Fit Page Legal->Letter and other conversions Copies at 100% size, unless you select a different percentage as the Custom Size setting Automatically sizes the image to fit the selected paper size setting Automatically converts from one size to another Quality Standard Quality Provides good quality for most copies Best Provides the highest quality for special copies Document Portrait Specifies the orientaton of your originals (only available Orientation Landscape when 2>1-Sided or 1>2-Sided is selected) Binding Direction Left Specifies the orientation of your originals (only available Top when 2>1-Sided is selected) Binding Margin Left Edge Specifies the orientation of 2-sided copies (only Top Edge available when 1>2-Sided is selected) Parent topic: Copying 73
74 Printing From a Computer Before printing from your computer, make sure you have set up your product and installed its software as described on the Start Here sheet. Note: If you have an Internet connection, it is a good idea to check for updates to your product software on Epson's support website. If you see a Software Update screen, select Enable automatic checking and click OK. The update scans your system to see if you have the latest product software. Follow the on-screen instructions. Printing with the Standard Epson Printer Software - Windows Printing with the Standard EPSON Printer Software - Mac OS X Printing with the PCL Printer Software - Windows Printing with the PostScript (PS3) Printer Software - Windows Printing with the PostScript (PS3) Printer Software - Mac OS X Cancelling Printing Using a Product Button Related tasks Checking for Software Updates Printing with the Standard Epson Printer Software - Windows You can print with the standard Epson printer software using any Windows printing program, as described in these sections. Selecting Basic Print Settings - Standard EPSON Printer Software - Windows Selecting Double-sided Printing Settings - Standard EPSON Printer Software - Windows Selecting Additional Layout and Print Options - Standard EPSON Printer Software - Windows Selecting a Printing Preset - Standard EPSON Printer Software - Windows Printing Your Document or Photo - Standard EPSON Printer Software - Windows Selecting Default Print Settings - Standard EPSON Printer Software - Windows Changing Automatic Update Options - Standard EPSON Printer Software - Windows Parent topic: Printing From a Computer Selecting Basic Print Settings - Standard EPSON Printer Software - Windows Select the basic settings for the document or photo you want to print. 74

75 1. Open a photo or document for printing. 2. Select the print command in your application. Note: You may need to select a print icon on your screen, the Print option in the File menu, or another command. See your application's help utility for details. 3. If necessary, select your product name as the printer you want to use. Note: You may also need to select Properties or Preferences to view your print settings. You see the Main tab of your printer settings window: 4. Select the Paper Source setting that indicates where you loaded the paper you want to print on. 75
76 5. Select the size of the paper you loaded as the Document Size setting. Note: You can also select the User Defined setting to create a custom paper size. 6. Select the orientation of your document. Note: If you are printing an envelope, select Landscape. 7. Select the type of paper you loaded as the Paper Type setting. Note: Check the paper type settings list for details. 8. Select the Quality setting that matches the print quality you want to use. 9. Select a Color option: To print a color document or photo, select the Color setting. To print text and graphics in black or shades of gray, select the Black/Grayscale setting. 10. To print on both sides of the paper, select the 2-Sided Printing checkbox and select the options you want. 11. To print multiple pages on one sheet of paper, or print one image on multiple sheets of paper, select one of the settings in the Multi-Page menu and select the printing options you want. 12. To print multiple copies and arrange their print order, select the Copies options. 13. To preview your job before printing, select Print Preview. 14. To save your print job as a project that can be modified and combined with other print jobs, select Job Arranger Lite. 15. To reduce noise during printing when you select Plain Paper/Bright White Paper, select Quiet Mode. Paper Source Options - Standard EPSON Printer Software - Windows Print Quality Options - Standard EPSON Printer Software - Windows Multi-Page Printing Options - Standard EPSON Printer Software - Windows Parent topic: Printing with the Standard Epson Printer Software - Windows Related references Paper or Media Type Settings 76
77 Related tasks Selecting Double-sided Printing Settings - Standard EPSON Printer Software - Windows Printing Your Document or Photo - Standard EPSON Printer Software - Windows Paper Source Options - Standard EPSON Printer Software - Windows You can select any of the available options in the Paper Source menu to print from paper loaded in that source. Auto Select Automatically selects the paper source based on the selected paper size. Rear MP Tray Selects the paper in the rear MP tray as the paper source. Paper Cassette 1 Selects the paper in cassette 1 as the paper source. Paper Cassette 2 Selects the paper in cassette 2 as the paper source. Note: If your product only has one paper cassette, the Paper Cassette 2 option will not be available. Parent topic: Selecting Basic Print Settings - Standard EPSON Printer Software - Windows Print Quality Options - Standard EPSON Printer Software - Windows You can select any of the available Quality options to fine-tune the quality of your print. Some settings may be unavailable, depending on the paper type you have chosen. Economy For fast printing with reduced quality. Normal For everyday text and image printing. Fine For text and graphics with good quality and print speed. Quality For photos and graphics with good quality and print speed. High Quality For photos and graphics with high print quality. Best Quality For the best print quality, but the slowest print speed. 77
78 Parent topic: Selecting Basic Print Settings - Standard EPSON Printer Software - Windows Multi-Page Printing Options - Standard EPSON Printer Software - Windows You can select any of the available options in the Multi-Page menu to set up your multi-page print job. 2-Up and 4-Up Prints 2 or 4 pages on one sheet of paper. Click the Page Order button to select page layout and border options. 2 1 Poster, 2 2 Poster, 3 3 Poster, 4 4 Poster Prints one image on multiple sheets of paper to create a larger poster. Click the Settings button to select image layout and guideline options. Parent topic: Selecting Basic Print Settings - Standard EPSON Printer Software - Windows Selecting Double-sided Printing Settings - Standard EPSON Printer Software - Windows You can print on both sides of the paper by selecting the 2-Sided Printing checkbox on the Main tab. Automatic double-sided printing is only available if you have loaded plain paper in these sizes: Letter ( inches [ mm]) and A4 ( inches [ mm]). Note: Some options may be pre-selected or unavailable, depending on other settings you have chosen or if you are accessing the product over a network. 1. Select the 2-Sided Printing checkbox. 2. If the Auto checkbox is not automatically selected, do one of the following: Select the Auto checkbox to automatically print your double-sided print job. Deselect the Auto checkbox to print your double-sided print job manually by printing one side and flipping the paper over to print the other side (recommended for paper types that do not support automatic duplexing). 3. Click the Settings button. You see this window: 78

79 4. Select the double-sided printing options you want to use. 5. Click OK to return to the Main tab. 6. Click the Print Density button. You see this window: 79

80 7. Select the type of document you are printing as the Document Type setting. The software automatically sets the Adjustments options for that document type. 8. If you selected the User-Defined document type, select the Adjustments options you want to use. 9. Click OK to return to the Main tab. 10. Print a test copy of your double-sided document to test the selected settings. 11. Follow any instructions displayed on the screen during printing. Double-sided Printing Options - Standard EPSON Printer Software - Windows Print Density Adjustments - Standard EPSON Printer Software - Windows Parent topic: Printing with the Standard Epson Printer Software - Windows Double-sided Printing Options - Standard EPSON Printer Software - Windows You can select any of the available options on the 2-Sided Printing Settings window to set up your double-sided print job. Binding Edge Options Select a setting that orients double-sided print binding in the desired direction. Binding Margin Options Select options that define a wider margin to allow for binding. Create Folded Booklet Options Select the Booklet checkbox and a binding option to print double-sided pages as a booklet. Parent topic: Selecting Double-sided Printing Settings - Standard EPSON Printer Software - Windows 80

81 Print Density Adjustments - Standard EPSON Printer Software - Windows When you select the User-Defined setting, you can select any of the available options on the Print Density Adjustment window to adjust the print quality of your double-sided print job. Print Density Sets the level of ink coverage for double-sided printing. Increased Ink Drying Time Sets the amount of time required for drying ink after printing on one side of the paper before printing the other side in double-sided printing to prevent ink smearing. Parent topic: Selecting Double-sided Printing Settings - Standard EPSON Printer Software - Windows Selecting Additional Layout and Print Options - Standard EPSON Printer Software - Windows You can select a variety of additional layout and printing options for your document or photo on the More Options tab. 81
82 1. To change the size of your printed document or photo, select the Reduce/Enlarge Document checkbox and select one of these sizing options: Select the Fit to Page option to size your image to fit the paper you loaded. Select the size of the your document or photo as the Document Size setting, and the size of your paper as the Output Paper setting. Select the Zoom to option to reduce or enlarge your document or photo by a specific percentage. Select the percentage in the % menu. 2. Select one of the following Color Correction options: Select Automatic to automatically adjust the sharpness, brightness, contrast, and color saturation for your image. Select Custom and click the Advanced button to manually adjust the color correction settings or turn off color management in your printer software. 3. To add a watermark to your printout, select Watermark settings. 4. Select any of the Additional Settings options to customize your print. Custom Color Correction Options - Standard EPSON Printer Software - Windows Additional Settings Options - Standard EPSON Printer Software - Windows Parent topic: Printing with the Standard Epson Printer Software - Windows Related tasks Printing Your Document or Photo - Standard EPSON Printer Software - Windows Custom Color Correction Options - Standard EPSON Printer Software - Windows You can select any of the available options in the Color Correction window to customize the image colors for your print job. 82

83 Color Controls Lets you select a Color Mode setting, individual settings for Brightness, Contrast, Saturation, and Density, and individual color tones. If you select the Adobe RGB color mode, you can also adjust the midtone density using the Gamma setting. Fix Photo Improves the color, contrast, and sharpness of flawed photos. Note: Fix Photo uses a sophisticated face recognition technology to optimize photos that include faces. For this to work, both eyes and the nose must be visible in the subject's face. If your photo includes a face with an intentional color cast, such as a statue, you may want to turn off Fix Photo to retain the special color effects. ICM Lets you manage color using installed color printing profiles. No Color Adjustment Turns off color management in your printer software so you can manage color using only your application software. 83
84 Parent topic: Selecting Additional Layout and Print Options - Standard EPSON Printer Software - Windows Additional Settings Options - Standard EPSON Printer Software - Windows You can select any of the Additional Settings options to customize your print. Some options may be preselected or unavailable, depending on other settings you have chosen. Rotate 180º Prints the image rotated 180º from its original orientation. High Speed Speeds up printing, but may reduce print quality. Mirror Image Flips the printed image left to right. Edge Smoothing Smooths jagged edges in low-resolution images such as screen captures or images from the Web. Fix Red-Eye Reduces or removes red-eye in photos. Parent topic: Selecting Additional Layout and Print Options - Standard EPSON Printer Software - Windows Selecting a Printing Preset - Standard EPSON Printer Software - Windows For quick access to common groups of print settings, you can select a printing preset on the Main or More Options tab. Note: You can create your own preset by clicking the Add/Remove Presets button. 1. Click the Main or More Options tab. You see the available Printing Presets on the left: 84

85 2. Place your cursor over one of the Printing Presets to view its list of settings. 3. Use any of the available options on the screen to control your printing presets. 4. To choose an option for printing, select it. 5. Click OK. Parent topic: Printing with the Standard Epson Printer Software - Windows Printing Your Document or Photo - Standard EPSON Printer Software - Windows Once you have selected your print settings, you are ready to save your settings and print. 1. Click OK to save your settings. You see your application's Print window, such as this one: 85

86 2. Click OK or Print to start printing. Parent topic: Printing with the Standard Epson Printer Software - Windows Selecting Default Print Settings - Standard EPSON Printer Software - Windows When you change your print settings in a program, the changes apply only while you are printing in that program session. If you want to change the print settings you use in all your Windows programs, you can select new default print settings. 1. Right-click the product icon in the Windows taskbar. 2. Select Printer Settings. You see the printer settings window: 86
87 3. Select the print settings you want to use as defaults in all your Windows programs. 4. Click OK. These settings are now the defaults selected for printing. You can still change them as needed for printing in any program session. Changing the Language of the Printer Software Screens - Standard EPSON Printer Software - Windows Parent topic: Printing with the Standard Epson Printer Software - Windows Changing the Language of the Printer Software Screens - Standard EPSON Printer Software - Windows You can change the language used on the Windows printer software screens. 1. Right-click the product icon in the Windows taskbar. 2. Select Printer Settings. You see the printer settings window. 3. Click the Maintenance tab. 87

88 You see the maintenance options: 4. Select the language you want to use as the Language setting. 5. Click OK to close the printer software window. The printer software screens appear in the language you selected the next time you access them. Parent topic: Selecting Default Print Settings - Standard EPSON Printer Software - Windows Changing Automatic Update Options - Standard EPSON Printer Software - Windows Your printer software for Windows automatically checks for updates to the product driver. You can change how often the software checks for updates or disable this feature. 1. Right-click the product icon in the Windows taskbar. 2. Select Auto Update Settings. You see a window like this: 88

89 3. Do one of the following: To change how often the software checks for updates, select a setting in the Check every menu. To disable the automatic update feature, select the Never option. 4. Click Apply. 5. Click OK to exit. Note: If you choose to disable the automatic update feature, it's a good idea to periodically check for updates. Parent topic: Printing with the Standard Epson Printer Software - Windows Related tasks Checking for Software Updates 89

90 Printing with the Standard EPSON Printer Software - Mac OS X You can print with the standard EPSON printer software using any Mac OS X printing program, as described in these sections. Selecting Basic Print Settings - Standard EPSON Printer Software - Mac OS X Selecting Page Setup Settings - Standard EPSON Printer Software - Mac OS X Selecting Print Layout Options - Standard EPSON Printer Software - Mac OS X Sizing Printed Images - Standard EPSON Printer Software - Mac OS X Selecting Double-sided Printing Settings - Standard EPSON Printer Software - Mac OS X Managing Color - Standard EPSON Printer Software - Mac OS X Printing Your Document or Photo - Standard EPSON Printer Software - Mac OS X Selecting Printing Preferences - Standard EPSON Printer Software - Mac OS X Parent topic: Printing From a Computer Selecting Basic Print Settings - Standard EPSON Printer Software - Mac OS X Select the basic settings for the document or photo you want to print. 1. Open a photo or document for printing. 2. Select the print command in your application. Note: You may need to select a print icon on your screen, the Print option in the File menu, or another command. See your application's help utility for details. 3. Select your product as the Printer setting. 4. If necessary, click the arrow next to the Printer setting or the Show Details button to expand the print window. You see the expanded printer settings window for your product: 90

91 Note: The print window may look different, depending on the version of Mac OS X and the application you are using. 5. Select the Copies and Pages settings as necessary. Note: If you do not see these settings in the print window, check for them in your application before printing. 91

92 6. Select the page setup options: Paper Size and Orientation. Note: If you do not see these settings in the print window, check for them in your application before printing. They may be accessible by selecting Page Setup from the File menu. 7. Select any application-specific settings that appear on the screen, such as those shown in the image above for the Preview application. 8. Select Print Settings from the pop-up menu. You see these settings: 92
93 9. Select the type of paper you loaded as the Media Type setting. Note: Check the paper type settings list for details. 10. Select the Print Quality setting you want to use. 11. Select any of the available print options. Paper Source Options - Standard EPSON Printer Software - Mac OS X Print Quality Options - Standard EPSON Printer Software - Mac OS X Print Options - Standard EPSON Printer Software - Mac OS X Parent topic: Printing with the Standard EPSON Printer Software - Mac OS X Related references Paper or Media Type Settings Related tasks Selecting Page Setup Settings - Standard EPSON Printer Software - Mac OS X Printing Your Document or Photo - Standard EPSON Printer Software - Mac OS X 93
94 Paper Source Options - Standard EPSON Printer Software - Mac OS X You can select any of the available options in the Paper Source menu to print from paper loaded in that source. Auto Select Automatically selects the paper source based on the selected paper size. Rear MP Tray Selects the paper in the rear MP tray as the paper source. Paper Cassette 1 Selects the paper in cassette 1 as the paper source. Paper Cassette 2 Selects the paper in cassette 2 as the paper source. Note: If your product only has one paper cassette, the Paper Cassette 2 option will not be available. Parent topic: Selecting Basic Print Settings - Standard EPSON Printer Software - Mac OS X Print Quality Options - Standard EPSON Printer Software - Mac OS X You can select any of the available Print Quality options to fine-tune the quality of your print. Some settings may be unavailable, depending on the paper type and border setting you have chosen. Economy For fast printing with reduced quality. Normal For everyday text and image printing. Fine For text and graphics with good quality and print speed. Quality For photos and graphics with good quality and print speed. High Quality For photos and graphics with high print quality. Best Quality For the best print quality, but the slowest print speed. Parent topic: Selecting Basic Print Settings - Standard EPSON Printer Software - Mac OS X 94
95 Print Options - Standard EPSON Printer Software - Mac OS X You can select any of the print options to customize your print. Some options may be unavailable, depending on other settings you have chosen. Grayscale Prints text and graphics in black or shades of gray. Mirror Image Flips the printed image left to right. Parent topic: Selecting Basic Print Settings - Standard EPSON Printer Software - Mac OS X Selecting Page Setup Settings - Standard EPSON Printer Software - Mac OS X Depending on your application, you may be able to select the paper size and orientation settings from the print window. Note: If you do not see these settings in the print window, check for them in your application before printing. They may be accessible by selecting Page Setup from the File menu. 1. Select the size of the paper you loaded as the Paper Size setting. You can also select a custom setting to create a custom paper size. 2. Select the orientation of your document or photo as shown in the print window. Note: If you are printing an envelope, select the icon. Note: You can reduce or enlarge the size of the printed image by selecting Paper Handling from the pop-up menu and selecting a scaling option. Parent topic: Printing with the Standard EPSON Printer Software - Mac OS X Selecting Print Layout Options - Standard EPSON Printer Software - Mac OS X You can select a variety of layout options for your document or photo by selecting Layout from the popup menu on the print window. 95
96 To print multiple pages on one sheet of paper, select the number of pages in the Pages per Sheet pop-up menu. To arrange the print order of the pages, select a Layout Direction setting. To print borders around each page on the sheet, select a line setting from the Border pop-up menu. To rotate the printed image, select the Reverse page orientation setting. Parent topic: Printing with the Standard EPSON Printer Software - Mac OS X Sizing Printed Images - Standard EPSON Printer Software - Mac OS X You can adjust the size of the image as you print it by selecting Paper Handling from the pop-up menu on the Print window. 96
97 To print only selected pages in a multi-page document, select an option from the Pages to Print popup menu. To adjust the order in which pages are printed, select an option from the Page Order pop-up menu. To scale the image to fit on a specific paper size, select the Scale to fit paper size checkbox and select a paper size from the Destination Paper Size pop-up menu. Parent topic: Printing with the Standard EPSON Printer Software - Mac OS X Selecting Double-sided Printing Settings - Standard EPSON Printer Software - Mac OS X You can print on both sides of the paper by selecting Two-sided Printing Settings from the pop-up menu on the print window. 97


98 Note: Some options may be pre-selected or unavailable, depending on other settings you have chosen or if you are accessing the product over a network. This screen may be different, depending on the version of Mac OS X you are using. 1. Select one of the Two-sided Printing options. 2. Select the type of document you are printing as the Document Type setting. The software automatically sets the Adjustments options for that document type. 98
99 3. If necessary, customize the Adjustments settings as instructed on the screen. 4. Print a test copy of your double-sided document to test the selected settings. 5. Follow any instructions displayed on the screen during printing. Double-sided Printing Options and Adjustments - Standard EPSON Printer Software - Mac OS X Parent topic: Printing with the Standard EPSON Printer Software - Mac OS X Double-sided Printing Options and Adjustments - Standard EPSON Printer Software - Mac OS X You can select any of the available options in the Two-sided Printing Settings or Output Settings pop-up menu to set up your double-sided print job. Two-sided Printing Options Long-Edge binding Orients double-sided printed pages to be bound on the long edge of the paper. Short-Edge binding Orients double-sided printed pages to be bound on the short edge of the paper. Adjustments Print Density Sets the level of ink coverage for double-sided printing. Increased Ink Drying Time Sets the amount of time required for drying ink after printing on one side of the paper before printing the other side in double-sided printing. Parent topic: Selecting Double-sided Printing Settings - Standard EPSON Printer Software - Mac OS X Managing Color - Standard EPSON Printer Software - Mac OS X You can adjust the Color Matching and Color Options settings to fine-tune the colors in your printout, or turn off color management in your printer software. 1. Select Color Matching from the pop-up menu in the print window. 2. Select one of the available options. 99
100 3. Select Color Options from the pop-up menu in the print window. Note: The available settings on the Color Options menu depend on the option you selected on the Color Matching menu. 4. Select one of the available options. Color Matching and Color Options - Standard EPSON Printer Software - Mac OS X Parent topic: Printing with the Standard EPSON Printer Software - Mac OS X Color Matching and Color Options - Standard EPSON Printer Software - Mac OS X You can select from these settings on the Color Matching and Color Options menus. Color Matching Settings EPSON Color Controls Lets you manage color using controls in your printer software, or turn off color management. ColorSync Prints using standard color profiles for your product and paper to help match image colors. You can customize the conversion method and filter settings on the ColorSync pop-up menu in the print window. Color Options Settings Manual Settings Lets you select manual color adjustments. Click the arrow next to Advanced Settings and select settings for Brightness, Contrast, Saturation, and individual color tones. You can also select a color Mode setting for printing photos and graphics. If you select the Adobe RGB color mode, you can also adjust the midtone density using the Gamma setting. Fix Photo Improves the color, contrast, and sharpness of flawed photos. 100

101 Note: Fix Photo uses a sophisticated face recognition technology to optimize photos that include faces. For this to work, both eyes and the nose must be visible in the subject's face. If your photo includes a face with an intentional color cast, such as a statue, you may want to turn off Fix Photo to retain the special color effects. Fix Red-Eye Reduces or removes red-eye in photos. Off (No Color Adjustment) Turns off color management in your printer software so you can manage color using only your application software. Parent topic: Managing Color - Standard EPSON Printer Software - Mac OS X Printing Your Document or Photo - Standard EPSON Printer Software - Mac OS X Once you have selected your print settings, you are ready to print. Click Print at the bottom of the print window. Checking Print Status - Standard EPSON Printer Software - Mac OS X 101
102 Parent topic: Printing with the Standard EPSON Printer Software - Mac OS X Checking Print Status - Standard EPSON Printer Software - Mac OS X During printing, you can view the progress of your print job, control printing, and check ink cartridge status. 1. Click the printer icon when it appears in the Dock. You see the print status window: 2. Select the following options as necessary: To cancel printing, click the print job and click Delete. To pause printing, click the print job and click Hold. To resume printing, click the print job marked "Hold" and click Resume. To pause printing for all queued print jobs, click Pause Printer. To check ink status, click Supply Levels. Parent topic: Printing Your Document or Photo - Standard EPSON Printer Software - Mac OS X Selecting Printing Preferences - Standard EPSON Printer Software - Mac OS X You can select printing preferences that apply to all the print jobs you send to your product. 102

103 1. In the Apple menu or the Dock, select System Preferences. 2. Select Print & Fax or Print & Scan, select your product, and select Options & Supplies. 3. Select Driver. You see this screen: 4. Select any of the available printing preferences. 5. Click OK. Printing Preferences - Standard EPSON Printer Software - Mac OS X Parent topic: Printing with the Standard EPSON Printer Software - Mac OS X Printing Preferences - Standard EPSON Printer Software - Mac OS X You can select from these settings on the Driver tab. Thick paper and envelopes Prevents ink from smearing when you print on envelopes or other thick paper. Skip Blank Page Ensures that your product does not print pages that contain no text or images. 103
104 Quiet Mode Lessens noise during printing when you select Plain Paper/Bright White Paper as the paper Type or Media Type setting. High Speed Printing Speeds up printing, but may reduce print quality. Parent topic: Selecting Printing Preferences - Standard EPSON Printer Software - Mac OS X Printing with the PCL Printer Software - Windows You can print with the PCL printer software using any Windows printing program, as described in these sections. Note: The PCL printer software supports products that are connected via Ethernet. If your product is connected via USB, you will need to install the standard Epson printer software. To download the standard Epson printer software, go to Selecting the Product - PCL Printer Software - Windows Selecting Basic Print Settings - PCL Printer Software - Windows Selecting Output and Graphics Options - PCL Printer Software - Windows Selecting Finishing Options - PCL Printer Software - Windows Selecting Default Print Settings - PCL Printer Software - Windows Parent topic: Printing From a Computer Selecting the Product - PCL Printer Software - Windows You need to select the product in the PCL printer software before you can adjust your printer settings. 1. Do one of the following: Windows 7: Click and select Devices and Printers. Right-click your printer name and select Printing Preferences, then click the Printer tab. Windows Vista: Click and select Control Panel. Click Printer under Hardware and Sound, then right-click your printer name and select Printing Preferences. Click the Printer tab. Windows XP: Click Start and select Printers and Faxes. Right-click your product name and select Printing Preferences, then click the Printer tab. You see this window: 104
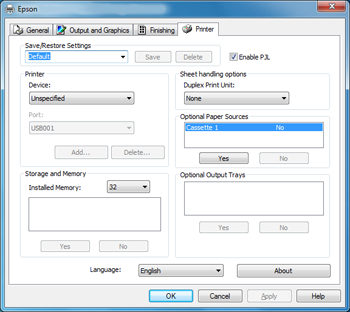
105 105

106 2. Select WP-459x as the Device setting. 3. Click OK. Parent topic: Printing with the PCL Printer Software - Windows Selecting Basic Print Settings - PCL Printer Software - Windows Select the basic settings for the document or photo you want to print. 1. Open a photo or document for printing. 2. Select the print command in your application. Note: You may need to select a print icon on your screen, the Print option in the File menu, or another command. See your application's help utility for details. 3. If necessary, select your product name as the printer you want to use. Note: You may also need to select Properties or Preferences to view your print settings. 106
107 You see the General tab of your printer settings window: 4. Select from the following Color Options settings: To print a color document or photo, select the Print in Full Color checkbox. To print only text in black or shades of gray, select the Print all Text as Black checkbox. To print all content in black or shades of gray, leave both of the checkboxes unselected. 5. Select the orientation of your document. Note: If you are printing an envelope, select Landscape. 6. Select the size of the paper you loaded as the Paper Size setting. Note: You can also click Custom button to create a custom paper size. 107

108 7. Select Plain as the Paper Type setting. Note: The PCL printer software only supports plain paper in A4, letter, and envelope sizes. 8. Select the Paper Source setting that indicates where you loaded the paper you want to print on. 9. To print on both sides of the paper, select one of the Duplex options. Note: Duplex printing is only available if you select Plain as the Paper Type. 10. To print multiple copies, select the Copies options. 11. Click the Advanced button to rotate the image 180 from its original orientation or adjust the print order. Parent topic: Printing with the PCL Printer Software - Windows Selecting Output and Graphics Options - PCL Printer Software - Windows You can select a variety of additional print quality options for your document or photo on the Output and Graphics tab. 108
109 1. Select one of the following Print Quality options: For fast printing with reduced quality, select Fast. For text and graphics with good quality and print speed, select Fine. 2. To print using less ink, set the Toner Save setting to On. Note: Print quality may be significantly reduced when the Toner Save setting is enabled. 3. Select one of the following as the Enhancement Mode setting: For text or simple graphics, such as charts or presentations, select the Vivid or Vivid Accent setting. For photos or detailed graphics, select the Photo-Realistic or Photo-Realistic Accent setting. 4. To adjust additional TrueType and font settings, click the Advanced button and select the options as necessary. Parent topic: Printing with the PCL Printer Software - Windows Selecting Finishing Options - PCL Printer Software - Windows You can select a variety of finishing options for your document or photo on the Finishing tab. 109

110 1. Select one of the following Finishing Mode options: To print multiple pages on each sheet of paper, select the N-Up option. To create a booklet that can be folded or bound, select the Booklet option. To adjust the printed size of your document or photo, select the Scaled option. To print your document or photo across multiple sheets of paper, select the Poster option. 2. Adjust the various options that appear in the Settings box as necessary. 3. To create or load a text or graphic overlay, click the Manage Overlays button and select the options as necessary. 4. To add a watermark to your document or photo, click the Watermarks button and select the options as necessary. Parent topic: Printing with the PCL Printer Software - Windows 110

111 Selecting Default Print Settings - PCL Printer Software - Windows When you change your print settings in a program, the changes apply only while you are printing in that program session. If you want to change the print settings you use in all your Windows programs, you can select new default print settings. 1. Do one of the following: Windows 7: Click and select Devices and Printers. Right-click your product name and select Printing Preferences. Windows Vista: Click and select Control Panel. Click Printer under Hardware and Sound, then right-click your product name, and select Printing Preferences Windows XP: Click Start and select Printers and Faxes. Right-click your product name and select Printing Preferences. You see the printer settings window: 2. Select the print settings you want to use as defaults in all your Windows programs. 3. Click OK. 111
112 These settings are now the defaults selected for printing. You can still change them as needed for printing in any program session. Parent topic: Printing with the PCL Printer Software - Windows Printing with the PostScript (PS3) Printer Software - Windows You can print with the PostScript (PS3) printer software using any Windows printing program, as described in these sections. Note: The PostScript printer software supports products that are connected via Ethernet. If your product is connected via USB, you will need to install the standard Epson printer software. To download the standard Epson printer software, go to Selecting Basic Print Settings - PostScript Printer Software - Windows Selecting Additional Layout and Print Options - PostScript Printer Software - Windows Selecting Default Print Settings - PostScript Printer Software - Windows Parent topic: Printing From a Computer Selecting Basic Print Settings - PostScript Printer Software - Windows Select the basic settings for the document or photo you want to print. 1. Open a photo or document for printing. 2. Select the print command in your application. Note: You may need to select a print icon on your screen, the Print option in the File menu, or another command. See your application's help utility for details. 3. If necessary, select your product name as the printer you want to use, and then click the Preferences button. You see the Layout tab of your printer settings window: 112
113 4. Select the orientation of your document. 5. To print on both sides of the paper, select one of the Print on Both Sides settings. 6. To change the printing order of the pages, select one of the Page Order settings. 7. To print multiple pages on one sheet of paper, adjust the Pages per Sheet setting. 8. To create a folded booklet out of your photo or document, select the Booklet option. 9. Click the Paper/Quality tab. You see this window: 113

114 10. Select the Paper Source that matches where you loaded the paper you want to print on. 11. Select Plain as the Media setting. Note: The PostScript printer software supports plain paper printing in A4, letter, and envelope sizes. 12. Select one of the following as the Color setting: To print a color document or photo, select the Color setting. To print text and graphics in black only, select the Black & White setting. Parent topic: Printing with the PostScript (PS3) Printer Software - Windows Selecting Additional Layout and Print Options - PostScript Printer Software - Windows You can select a variety of additional layout and printing options for your document or photo by clicking the Advanced button. 114

115 1. Select the size of the paper you loaded as the Paper Size setting. 2. Select the Print Quality option that matches the print quality you want to use. 3. Adjust the Scaling setting to reduce or enlarge your document or photo by a specific percentage. 4. To utilize the Windows Image Color Management system, set the ICM Method option to one of the ICM Handling options and select the ICM Intent setting you want to use. 5. Adjust the Pages Per Sheet Layout setting to change the order of multiple pages on a single sheet of paper when you have adjusted the Pages Per Sheet setting on the Layout tab. 6. Adjust the Booklet Binding Edge setting to change the orientation of your printed booklet. 7. Expand the PostScript Options heading to access the advanced PostScript printer software features. 8. Select any of the remaining Printer Features options to customize your printouts. Parent topic: Printing with the PostScript (PS3) Printer Software - Windows 115

116 Selecting Default Print Settings - PostScript Printer Software - Windows When you change your print settings in a program, the changes apply only while you are printing in that program session. If you want to change the print settings you use in all your Windows programs, you can select new default print settings. 1. Do one of the following: Windows 7: Click and select Devices and Printers. Right-click your printer name and select Printing Preferences. Windows Vista: Click and select Control Panel. Click Printer under Hardware and Sound then right-click your printer name and select Printing Preferences Windows XP: Click Start and select Printers and Faxes. Right-click your product name and select Printing Preferences. You see the printer settings window: 2. Select the print settings you want to use as defaults in all your Windows programs. 3. Click OK. 116
117 These settings are now the defaults selected for printing. You can still change them as needed for printing in any program session. Parent topic: Printing with the PostScript (PS3) Printer Software - Windows Printing with the PostScript (PS3) Printer Software - Mac OS X You can print with the PostScript (PS3) printer software using any Mac OS X printing program, as described in these sections. Note: The PostScript printer software supports products that are connected via Ethernet. If your product is connected via USB, you will need to install the standard EPSON printer software. To download the standard EPSON printer software, go to Selecting Basic Print Settings - PostScript Printer Software - Mac OS X Selecting Page Setup Settings - PostScript Printer Software - Mac OS X Selecting Print Layout Options - PostScript Printer Software - Mac OS X Sizing Printed Images - PostScript Printer Software - Mac OS X Managing Color - PostScript Printer Software - Mac OS X Printing Your Document or Photo - PostScript Printer Software - Mac OS X Parent topic: Printing From a Computer Selecting Basic Print Settings - PostScript Printer Software - Mac OS X Select the basic settings for the document or photo you want to print. 1. Open a photo or document for printing. 2. Select the print command in your application. Note: You may need to select a print icon on your screen, the Print option in the File menu, or another command. See your application's help utility for details. 3. Select your product as the Printer setting. 117

118 4. If necessary, click the arrow next to the Printer setting or the Show Details button to expand the print window. You see the expanded printer settings window for your product: Note: The print window may look different, depending on the version of Mac OS X and the application you are using. 5. Select the Two-Sided, Copies and Pages settings as necessary. Note: If you do not see these settings in the print window, check for them in your application before printing. 118


119 6. Select the page setup options: Paper Size and Orientation. Note: If you do not see these settings in the print window, check for them in your application before printing. They may be accessible by selecting Page Setup from the File menu. 7. Select any application-specific settings that appear on the screen, such as those shown in the image above for the Preview application. 8. Select Paper Feed from the pop-up menu. You see these settings: 9. Select All Pages From or First Page From and select the paper source you want to print from. 119

120 10. Select Printer Features from the pop-up menu. You see these settings: 11. Select Plain as the MediaType setting. Note: The PostScript printer software supports plain paper printing in A4, letter, and envelope sizes. 12. Select one of the following Print Quality options: For fast printing with reduced quality, select Fast. 120

121 For printing text and graphics with good quality and print speed, select Fine. 13. Select Color from the Feature Sets pop-up menu. You see these settings: 14. Select a Color Mode option: To print a color document or photo, select the Color setting. To print text and graphics in black only, select the Monochrome setting. 15. Select any of the available print options. Parent topic: Printing with the PostScript (PS3) Printer Software - Mac OS X Selecting Page Setup Settings - PostScript Printer Software - Mac OS X Depending on your application, you may be able to select the paper size and orientation settings from the print window. 121

122 Note: If you do not see these settings in the print window, check for them in your application before printing. They may be accessible by selecting Page Setup from the File menu. 1. Select the size of the paper you loaded as the Paper Size setting. You can also select a custom setting to create a custom paper size. 2. Select the orientation of your document or photo as shown in the print window. Note: You can reduce or enlarge the size of the printed image by selecting Paper Handling from the pop-up menu and selecting a scaling option. Parent topic: Printing with the PostScript (PS3) Printer Software - Mac OS X Selecting Print Layout Options - PostScript Printer Software - Mac OS X You can select a variety of layout options for your document or photo by selecting Layout from the popup menu on the print window. To print multiple pages on one sheet of paper, select the number of pages in the Pages per Sheet pop-up menu. To arrange the print order of the pages, select a Layout Direction setting. To print borders around each page on the sheet, select a line setting from the Border pop-up menu. To rotate the printed image, select the Reverse page orientation setting. 122

123 Parent topic: Printing with the PostScript (PS3) Printer Software - Mac OS X Sizing Printed Images - PostScript Printer Software - Mac OS X You can adjust the size of the image as you print it by selecting Paper Handling from the pop-up menu on the Print window. To print only selected pages in a multi-page document, select an option from the Pages to Print popup menu. To adjust the order in which pages are printed, select an option from the Page Order pop-up menu. To scale the image to fit on a specific paper size, select the Scale to fit paper size checkbox and select a paper size from the Destination Paper Size pop-up menu. Parent topic: Printing with the PostScript (PS3) Printer Software - Mac OS X Managing Color - PostScript Printer Software - Mac OS X You can adjust the Color Matching settings to fine-tune the colors in your printout. 123

 Printer Software - Mac OS X Printing Your Document or Photo - PostScript Printer Software - Mac OS X Once")
124 1. Select Color Matching from the pop-up menu in the print window. 2. Do one of the following: To print using standard color profiles for your product and paper to help match image colors, select ColorSync. Select one of the available Profile options to change the active color profile. To use the product's default color matching, select In printer. Parent topic: Printing with the PostScript (PS3) Printer Software - Mac OS X Printing Your Document or Photo - PostScript Printer Software - Mac OS X Once you have selected your print settings, you are ready to print. Click Print at the bottom of the print window. 124

125 Checking Print Status - PostScript Printer Software - Mac OS X Parent topic: Printing with the PostScript (PS3) Printer Software - Mac OS X Checking Print Status - PostScript Printer Software - Mac OS X During printing, you can view the progress of your print job, control printing, and check ink cartridge status. 1. Click the printer icon when it appears in the Dock. You see the print status window: 2. Select the following options as necessary: To cancel printing, click the print job and click Delete. To pause printing, click the print job and click Hold. To resume printing, click the print job marked "Hold" and click Resume. To pause printing for all queued print jobs, click Pause Printer. To check ink status, click Supply Levels. Parent topic: Printing Your Document or Photo - PostScript Printer Software - Mac OS X 125
126 Cancelling Printing Using a Product Button If you need to cancel a print job, you can press the Stop/Reset button on your product. Parent topic: Printing From a Computer 126
127 Scanning You can scan original documents or photos and save them as digital files on your computer or on a thumb drive or other USB device. Connecting a USB Thumb Drive or External Device Starting a Scan Selecting Epson Scan Settings Scanning with Mac OS X 10.6/10.7/10.8 Using Image Capture Scanning Special Projects Connecting a USB Thumb Drive or External Device To save scanned images on a USB thumb drive or other USB device, you must first connect the device to your product. Note: Epson cannot guarantee the compatibility of your drive. 1. Make sure the product is turned on but not printing. 2. Insert your USB thumb drive or the USB cable that came with your device into the USB port on the front of your product. 127
128 Starting a Scan When you finish scanning, make sure the access light on the drive is not flashing, then remove or disconnect it from the product. Caution: Do not remove the USB thumb drive or cable when the access light is flashing, or you may lose data on the drive. Parent topic: Scanning Related references External USB Device Specifications After placing your original documents or photos on your product for scanning, start scanning using one of these methods. Starting a Scan Using the Product Control Panel Starting a Scan Using the Epson Scan Icon Starting a Scan from a Scanning Program Parent topic: Scanning Starting a Scan Using the Product Control Panel You can scan an image to your computer or to a USB device using your product's control panel buttons. Your product automatically selects suitable default scan settings, but you can view or change them as necessary. 1. Make sure you installed the product software and connected the product to your computer or network. Note: With Mac OS X 10.6/10.7/10.8, you must connect your product with a USB cable to scan using the buttons. 2. Press the Scan button. The scan options are displayed: 128

129 3. Press the arrow buttons to select a scan option and press the OK button. Scan to USB Device saves your scan file on a USB flash drive or other device and lets you select the file format, resolution, and other settings. Scan to PC saves your scan as a JPEG file to your computer or as an image capture in Mac OS X 10.6/10.7. Scan to PC (PDF) saves your scan as a PDF file to your computer or as an image capture in Mac OS X 10.6/10.7. Scan to PC ( ) scans your original and attaches it to a message in your program. You can select the program you want to use and resize your image, if necessary, from an option screen on your computer. Note: This works with MAPI-type such as Microsoft Outlook, Windows Live Mail, Mac Mail, and Entourage, but not web-based such as Gmail. Scan to PC (WSD) lets you manage network scanning in Windows 7 or Windows Vista (English only). Note: To use this feature, you must first set up WSD (Web Services for Devices) on the computer you want to scan to. 4. To scan to your computer, you first need to select how you connected your product to your computer: If your product is connected directly to your computer with a USB cable, select USB Connection. 129
130 If your product is connected to your computer over a network, select the computer name from the list. 5. To select 2-sided scanning to your computer (for documents in the ADF), press the Menu button, press the OK button to select Scan Settings, then press the OK button to select 2-Sided Scanning. Select On, then press the OK button. Press the Menu button to exit. 6. Press the Start Color button to start scanning. Scan to USB Device Options Changing Default Scan Button Settings Parent topic: Starting a Scan Scan to USB Device Options Select the Scan to USB Device options you want to use. Scan to USB Device Available options Description setting Format JPEG JPEG: for photos PDF PDF: for documents 2-Sided Scanning Off Automatic 2-sided scanning for On documents in the ADF Scan Area Letter Selects the page size for documents Legal or special settings for photos. A4 Auto Cropping: for photos with dark edges Auto Cropping Max Area: for most photos Max Area Document Text Selects the type of original you are Photograph scanning Resolution 200 dpi 200 dpi: for ing or posting on 300 dpi the web 600 dpi 300 dpi: for printing or OCR 600 dpi: for highest quality printing 130
131 Scan to USB Device Available options Description setting Contrast 4 to +4 Press the arrow buttons to decrease or increase image contrast Document Orientation Portrait For PDF documents Landscape Binding Direction Left For 2-sided PDF documents Top Parent topic: Starting a Scan Using the Product Control Panel Changing Default Scan Button Settings You can view or change the default scan settings your product uses when you scan to your computer using the product buttons. You do this using the Event Manager program. 1. Do one of the following to open Event Manager: Windows 8: Navigate to the Start screen and select Event Manager. Windows (other versions): Click > Event Manager. or Start > All Programs or Programs > EPSON Software Mac OS X: Open the Applications folder, click Epson Software, and click Event Manager. 2. Open the Scanner (Windows) or Select Scanner (Mac OS X) drop-down list and select your product, if necessary. 3. Click Make Job Settings. 4. Open the Edit Job Settings drop-down list and select the scan button settings you want to view or change. 5. Change the settings as necessary. 6. Click OK. 7. Click Close to close the Event Manager window. Parent topic: Starting a Scan Using the Product Control Panel Starting a Scan Using the Epson Scan Icon You can start the Epson Scan program to select scan settings, scan, and save the scanned image to a file. 131
132 Windows: Double-click the EPSON Scan icon on your computer desktop. Mac OS X: Open the Applications folder, open the Epson Software folder, and double-click the EPSON Scan icon. Note: With Mac OS X 10.6, 10.7, or 10.8, in addition to scanning with Image Capture, you can download and install Epson Scan scanning software. Epson Scan provides additional image adjustment and photo correction features for enhancing scanned images, and provides an interface for TWAIN-compliant OCR scanning software, such as ABBYY FineReader. To download Epson Scan, visit Epson's driver download site (U.S. downloads or Canadian downloads). You see an Epson Scan window like this: 132
133 Parent topic: Starting a Scan Related tasks Scanning with Mac OS X 10.6/10.7/10.8 Using Image Capture Related topics Selecting Epson Scan Settings 133
134 Starting a Scan from a Scanning Program You can start Epson Scan from a scanning program to select scan settings, scan, and open the scanned image in the program. Note: With Mac OS X 10.6, 10.7, or 10.8, in addition to scanning with Image Capture, you can download and install Epson Scan scanning software. Epson Scan provides additional image adjustment and photo correction features for enhancing scanned images, and provides an interface for TWAIN-compliant OCR scanning software, such as ABBYY FineReader. To download Epson Scan, visit Epson's driver download site (U.S. downloads or Canadian downloads). 1. Open your scanning program and select its scanning option. (See your scanning program help for instructions.) 2. Select your product. Note: In certain programs, you may need to select your product as the "source" first. If you see a Select Source option, choose it and select your product. With Windows, do not select a WIA option for your product; it will not work correctly. You see an Epson Scan window like this: 134
135 Parent topic: Starting a Scan Related tasks Scanning with Mac OS X 10.6/10.7/10.8 Using Image Capture Related topics Selecting Epson Scan Settings 135
136 Selecting Epson Scan Settings Scan Modes After starting Epson Scan, you can select settings in various modes to customize your scan. Scan Modes Selecting the Scan Mode Scanning in Home Mode Scanning in Office Mode Scanning in Professional Mode Image Preview Guidelines Scan Resolution Guidelines Selecting Scan File Settings Parent topic: Scanning Epson Scan provides a choice of scan modes with different levels of control over your settings. Office Mode You can quickly scan text documents and adjust them on a preview screen. You can also select various image adjustment options and preview your scanned image. Home Mode You can select setting groups based on the type of content you are scanning. You can also select various image adjustment options, and preview and size your scanned image. Professional Mode You can manually customize all available settings, and preview and size your scanned image. Note: You have to place your original on the scanner glass when using Home Mode. Parent topic: Selecting Epson Scan Settings Related tasks Selecting the Scan Mode Selecting the Scan Mode Select the Epson Scan mode you want to use from the Mode box in the upper right corner of the Epson Scan window: 136

137 Parent topic: Selecting Epson Scan Settings Related tasks Scanning in Home Mode Scanning in Office Mode Scanning in Professional Mode Scanning in Home Mode When you scan in Home Mode, Epson Scan automatically saves your scanned file in JPEG format in your operating system's Pictures or My Pictures folder, or opens it in your scanning program. You can select settings, preview, and change the scanned file settings as necessary. Note: You must place your original on the scanner glass when using Home Mode. 1. Start Epson Scan and select Home Mode as the Mode setting. You see this window: 137

138 2. Select the Document Type setting that matches your original, such as Photograph or Text/Line Art. 3. Select the Image Type setting that matches your original. 138
139 4. Select the way you plan to use your scanned image as the Destination setting. (The Resolution setting is selected automatically based on the Destination setting you choose.) Screen/Web: Select this option for images you will , view on a computer screen, or post on the web. Printer: Select this option for images you will print or documents you will convert to editable text using OCR (Optical Character Recognition) software. Other: Select this option if you want to select a custom resolution for your image. 5. If you selected Other in the last step, select the Resolution setting you want to use for your scan. 6. Click the Preview button. Epson Scan previews your original and displays the result in a separate Preview window. 7. If desired, select the area in your preview image that you want to scan (scan area). 8. Select any of the image adjustment settings you want to use. Before making adjustments, click the image or scan area in the Preview window. 9. If you want to reduce or enlarge your image as you scan, select the Target Size setting you want to use. 10. Click Scan. You see the File Save Settings window. 11. Change any of the necessary file save settings and click OK. Epson Scan scans your original, and saves the file in the selected folder or opens it in your scanning program. If the file was saved directly to your computer, you see the file in the Windows Explorer or Mac OS X Finder, where you can view and print the image, if desired. Selecting a Scan Area - Home Mode Available Image Adjustments - Home Mode Selecting a Scan Size - Home Mode Parent topic: Selecting Epson Scan Settings Related concepts Scan Resolution Guidelines Image Preview Guidelines Related tasks Selecting Scan File Settings 139
140 Selecting a Scan Area - Home Mode You can select a specific area in your preview image to include in your scanned image. You can select the entire image area or a portion of it. You can even select multiple scan areas to create multiple scanned images of different areas (Normal Preview mode only). You can also use the scan area to select specific Image Adjustments settings for a scanned image. Just be sure to click inside the scan area before selecting the settings. 1. Do one of the following to select your scan area in the Preview image: Thumbnail preview: Your scan area is selected automatically, but you can change it. Place your cursor in one corner of the desired scan area, then click and drag the cursor to the opposite corner to create a marquee (dotted line) on the preview image. 140
141 Normal preview: Click the image. Auto Locate icon to create a marquee (dotted line) on the preview 141
142 2. Do the following, as necessary, to work with the selected scan area: If the marquee is correct, continue with the next step. To move the marquee, click inside the scan area and drag the marquee where you want it. To resize the scan area, place your cursor over the edge or corner of the marquee, then click and drag the edges where you want them. (Hold down the Shift key as you resize the marquee to retain the same width/height proportions.) 142

143 Normal preview: To create additional marquees (up to 50), click the copy the existing marquee and paste it on the preview image. Copy Marquee icon to Note: If you draw multiple marquees, make sure you select the All button in the Preview window before you scan. Otherwise, only the area inside the currently selected marquee will be scanned. To delete a marquee, click the marquee, then click the Delete Marquee icon. 3. Click inside the scan area and make any necessary settings in the Epson Scan window. Parent topic: Scanning in Home Mode Related concepts Image Preview Guidelines Available Image Adjustments - Home Mode You can select these Image Adjustments options in Epson Scan Home Mode. Note: Select the Image Option checkbox if you need to set any of the grayed-out image adjustments. Not all adjustment settings may be available, depending on the Document Type and Image Type setting. Click the Brightness button to access additional settings. Descreening Removes the ripple pattern that might appear in subtly shaded image areas, such as skin tones. This option improves results when scanning magazines or newspapers. (The results of descreening do not appear in the preview image, only in your scanned image.) Color Restoration Restores the colors in faded photos automatically. 143
144 Backlight Correction Removes shadows from photos that have too much background light. Dust Removal Removes dust marks from your originals automatically. Text Enhancement Sharpens the appearance of letters in text documents. Auto Area Segmentation Makes grayscale images clearer and text recognition more accurate by separating the text from the graphics. Brightness Adjusts the overall lightness and darkness of the scanned image. Contrast Adjusts the difference between the light and dark areas of the overall scanned image. Threshold Adjusts the level at which black areas in text and line art are delineated, improving text recognition in OCR (Optical Character Recognition) programs. Parent topic: Scanning in Home Mode Selecting a Scan Size - Home Mode You can reduce or enlarge the size of your image as you scan. You can also select a specific scan size, such as a common photo size like 4 6 inches ( mm). This places a scan area of that size on the preview image so you can use it to help crop the image in the correct proportions. 1. Click the Preview button to preview your image. 2. In the Epson Scan window, select the size you want your scanned image to be from the Target Size list. Note: If you need to rotate the orientation of the target size for your image, click the icon. Orientation A marquee (dotted line) appears on your preview image proportioned for the size you selected. 144
145 3. Do the following, as necessary, to work with the selected scan area: To move the marquee, click inside the scan area and drag the marquee where you want it. To resize the scan area, place your cursor over the edge or corner of the marquee, then click and drag the edge where you want it. Note: Manually adjusting the marquee will not change the size of the scanned file. The marquee only indicates the area of the image that will be scanned. 145
146 4. To create a scanned image size that is not available in the Target Size list, click the Customize option. 5. Name the custom size, enter the size, click Save, and click OK. Then create a scan area on the preview image. The marquee is automatically proportioned for your custom scan size. Parent topic: Scanning in Home Mode Scanning in Office Mode When you scan in Office Mode, Epson Scan automatically saves your scanned file in JPEG format in your operating system's Pictures or My Pictures folder, or opens it in your scanning program. You can select settings, preview, and change the scanned file settings as necessary. 1. Start Epson Scan and select Office Mode as the Mode setting. You see this window: 146

147 2. Select the Image Type setting that matches your original. 3. Select the Document Source setting indicating where you placed your original. Note: If you are using the ADF, remove any documents from the scanner glass. 4. Select the Size and Orientation settings that match your original. 147
148 5. Select the Resolution setting you want to use for your scan. 6. Click the Preview button. Epson Scan previews your original and displays the result in a separate Preview window. 7. If you are using the ADF, reinsert your original into the ADF. 8. If desired, select the area in your preview image that you want to scan (scanned image area). Note: You cannot select a scan area if you chose ADF-Double-sided as the Document Source setting. 9. Select any of the image adjustment settings you want to use. Before making adjustments, click the image or scanned image area in the Preview window. 10. Click Scan. You see the File Save Settings window. 11. Change any of the necessary file save settings and click OK. Epson Scan scans your original, and saves the file in the selected folder or opens it in your scanning program. If the file was saved directly to your computer, you see the file in the Windows Explorer or Mac OS X Finder, where you can view and print the image, if desired. Selecting a Scan Area - Office Mode Available Image Adjustments - Office Mode Parent topic: Selecting Epson Scan Settings Related concepts Scan Resolution Guidelines Related tasks Selecting Scan File Settings Selecting a Scan Area - Office Mode You can select a specific area in your preview image to include in your scanned image. You can select the entire image area or a portion of it. You can even select multiple scan areas to create multiple scanned images of different areas. You can also use the scan area to select specific Image Adjustments settings for a scanned image. Just be sure to click inside the scan area before selecting the settings. 148

149 1. In the Preview window, click the Auto Locate icon to create a marquee (dotted line) on the preview image. 2. Do the following, as necessary, to work with the selected scan area: If the marquee is correct, continue with the next step. To move the marquee, click inside the scan area and drag the marquee where you want it. 149

150 To resize the scan area, place your cursor over the edge or corner of the marquee, then click and drag the edges where you want them. (Hold down the Shift key as you resize the marquee to retain the same width/height proportions.) To create additional marquees (up to 50, if available), click the existing marquee and paste it on the preview image. Copy Marquee icon to copy the Note: If you draw multiple marquees, make sure you select the All button in the Preview window before you scan. Otherwise, only the area inside the currently selected marquee will be scanned. To delete a marquee, click the marquee, then click the Delete Marquee icon. 3. Click inside each scan area and make any necessary settings in the Epson Scan window. Parent topic: Scanning in Office Mode Available Image Adjustments - Office Mode You can select these Image Adjustments options in Epson Scan Office Mode. Note: Select the Image Option checkbox if you need to set any of the grayed-out image adjustments. Not all adjustment settings may be available, depending on the Image Type setting. Unsharp Mask Makes the edges of certain image areas clearer. Turn off this option to leave softer edges. 150
151 Descreening Removes the ripple pattern that might appear in subtly shaded image areas, such as skin tones. This option improves results when scanning magazines or newspapers. (The results of descreening do not appear in the preview image, only in your scanned image.) Text Enhancement Sharpens the appearance of letters in text documents. Auto Area Segmentation Makes grayscale images clearer and text recognition more accurate by separating the text from the graphics. Color Enhance Enhances the red, green, or blue shades in the scanned image. Brightness Adjusts the overall lightness and darkness of the scanned image. Contrast Adjusts the difference between the light and dark areas of the overall scanned image. Threshold Adjusts the level at which black areas in text and line art are delineated, improving text recognition in OCR (Optical Character Recognition) programs. Parent topic: Scanning in Office Mode Scanning in Professional Mode When you scan in Professional Mode, Epson Scan automatically saves your scanned file in JPEG format in your operating system's Pictures or My Pictures folder, or opens it in your scanning program. You can select settings, preview, and change the scanned file settings as necessary. 1. Start Epson Scan and select Professional Mode as the Mode setting. You see this window: 151
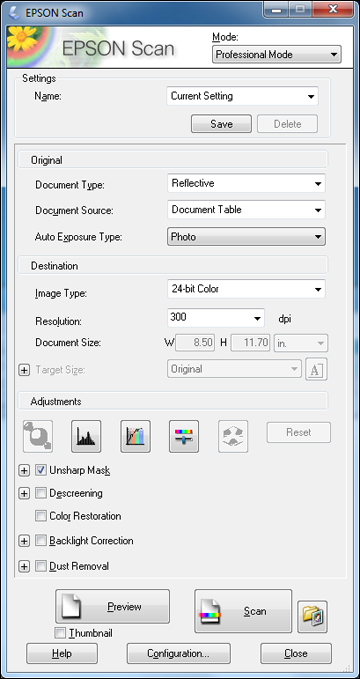
152 152
153 2. Select the Document Type setting that matches your original, such as Reflective for documents or photos. 3. Select the Document Source setting indicating where you placed your original. To scan a 2-sided document in the ADF, select ADF - Double-sided. Note: If you are using the ADF, remove any documents from the scanner glass. 4. Select the specific type of original you are scanning as the Auto Exposure Type setting: Document or Photo. 5. Select the details of your original and how you want it scanned as the Image Type setting. 6. Select the Resolution setting you want to use for your scan. 7. Click the Preview button. Epson Scan previews your original and displays the result in a separate Preview window. 8. If you are using the ADF, reinsert your original into the ADF. 9. If desired, select the area in your preview image that you want to scan (scan area). Note: You cannot select a scan area if you chose ADF-Double-sided as the Document Source setting. 10. Select any of the image adjustment settings you want to use. Before making adjustments, click the image or scanned image area in the Preview window. 11. If you want to reduce or enlarge your image as you scan, select the Target Size setting you want to use. Note: You cannot select a target size if you chose ADF-Double-sided as the Document Source setting. 12. Click Scan. You see the File Save Settings window. 13. Change any of the necessary file save settings and click OK. Epson Scan scans your original, and saves the file in the selected folder or opens it in your scanning program. If the file was saved directly to your computer, you see the file in the Windows Explorer or Mac OS X Finder, where you can view and print the image, if desired. Available Image Types - Professional Mode 153
154 Selecting a Scan Area - Professional Mode Available Image Adjustments - Professional Mode Selecting a Scan Size - Professional Mode Parent topic: Selecting Epson Scan Settings Related concepts Scan Resolution Guidelines Image Preview Guidelines Related tasks Selecting Scan File Settings Available Image Types - Professional Mode You can select these Image Type options in Epson Scan Professional Mode. 24-bit Color Select this setting for color photos. Color Smoothing Select this setting for color graphic images, such as charts or graphs. 8-bit Grayscale Select this setting for black-and-white photos. Black & White Select this setting for black text documents or line art. Parent topic: Scanning in Professional Mode Selecting a Scan Area - Professional Mode You can select a specific area in your preview image to include in your scanned image. You can select the entire image area or a portion of it. You can even select multiple scan areas to create multiple scanned images of different areas (Normal Preview mode only). You can also use the scan area to select specific Image Adjustments settings for a scanned image. Just be sure to click inside the scan area before selecting the settings. Note: In Professional Mode, the default Preview mode is Normal mode. To use Thumbnail Preview mode instead, select the Thumbnail checkbox beneath the Preview button (if available), then click the Preview button to preview your image again. 154
 on the preview Thumbnail preview: Your scan area is selected automatically, but you can change it.")
155 1. Do one of the following to select your scan area in the Preview image: Normal preview: Click the image. Auto Locate icon to create a marquee (dotted line) on the preview Thumbnail preview: Your scan area is selected automatically, but you can change it. Place your cursor in one corner of the desired scan area, then click and drag the cursor to the opposite corner to create a marquee (dotted line) on the preview image. 155

156 2. Do the following, as necessary, to work with the selected scan area: If the marquee is correct, continue with the next step. To move the marquee, click inside the scan area and drag the marquee where you want it. To resize the scan area, place your cursor over the edge or corner of the marquee, then click and drag the edges where you want them. (Hold down the Shift key as you resize the marquee to retain the same width/height proportions.) 156

157 Normal preview: To create additional marquees (up to 50, if available), click the Marquee icon to copy the existing marquee and paste it on the preview image. Copy To delete a marquee, click the marquee, then click the Delete Marquee icon. Note: If you draw multiple marquees, make sure you select the All button in the Preview window before you scan. Otherwise, only the area inside the currently selected marquee will be scanned. 3. Click inside the scan area and make any necessary settings in the Epson Scan window. Parent topic: Scanning in Professional Mode Related concepts Image Preview Guidelines Available Image Adjustments - Professional Mode You can select these Adjustments options in Epson Scan Professional Mode. Note: Not all adjustment settings may be available, depending on the Image Type setting. Click the Click the + (Windows) or image adjustment icon to access additional settings. (Mac OS X) icon next to a setting to change the level of adjustment. Unsharp Mask Makes the edges of certain image areas clearer. Turn off this option to leave softer edges. 157
158 Descreening Removes the ripple pattern that might appear in subtly shaded image areas, such as skin tones. This option improves results when scanning magazines or newspapers. (The results of descreening do not appear in the preview image, only in your scanned image.) Color Restoration Restores the colors in faded photos automatically. Backlight Correction Removes shadows from photos that have too much background light. Dust Removal Removes dust marks from your originals automatically. Auto Exposure Automatically adjusts the image exposure settings when you click the Auto Exposure icon. To automatically adjust image exposure settings continuously, click the Configuration button, click the Color tab, and select Continuous auto exposure. You can adjust the level of auto exposure using a slider. Histogram Adjustment Provides a graphical interface for adjusting highlight, shadow, and gamma levels individually. (For advanced users only.) Click the histogram icon to access the settings. Tone Correction Provides a graphical interface for adjusting tone levels individually. (For advanced users only.) Click the tone correction icon to access the settings. Brightness Adjusts the overall lightness and darkness of the scanned image. Contrast Adjusts the difference between the light and dark areas of the overall scanned image. Saturation Adjusts the density of colors in the overall image. Color Balance Adjusts the balance of colors in the overall image. Color Palette Provides a graphical interface for adjusting mid-tone levels, such as skin tones, without affecting the highlight and shadow areas of the image. (For advanced users only.) Click the to access the settings. Color Palette icon 158
159 Threshold Adjusts the level at which black areas in text and line art are delineated, improving text recognition in OCR (Optical Character Recognition) programs. Parent topic: Scanning in Professional Mode Selecting a Scan Size - Professional Mode You can reduce or enlarge the size of your image as you scan. You can also select a specific scan size, such as a common photo size like 4 6 inches ( mm). This places a scan area of that size on the preview image so you can use it to help crop the image in the correct proportions. 1. Click the Preview button to preview your image. 2. In the Epson Scan window, select the size you want your scanned image to be from the Target Size list. Note: If you need to rotate the orientation of the target size for your image, click the icon. orientation A marquee (dotted line) appears on your preview image proportioned for the size you selected. 159
160 3. Do the following, as necessary, to work with the selected scan area: To move the marquee, click inside the scan area and drag the marquee where you want it. To resize the scan area, place your cursor over the edge or corner of the marquee, then click and drag the edge where you want it. Note: Manually adjusting the marquee will not change the size of the scanned file. The marquee only indicates the area of the image that will be scanned. 160

 or (Mac OS X) icon next to the Target Size setting and select options as desired.")
161 4. To create a scanned image size that is not available in the Target Size list, click the Customize option. 5. Name the custom size, enter the size, click Save, and click OK. Then create a scan area on the preview image. The marquee is automatically proportioned for your custom scan size. 6. To use additional sizing tools, click the + (Windows) or (Mac OS X) icon next to the Target Size setting and select options as desired. Scale: Reduces or enlarges your image by the percentage you enter. Trimming: Turns automatic image cropping on or off. 161
162 Unlock icon: Unlocks the width/height proportions of the scanned image size so you can adjust it without constraint. Parent topic: Scanning in Professional Mode Image Preview Guidelines You can preview your scanned image so you can adjust the scan settings using the preview as a guide. There are two types of preview available, depending on the scan mode and selected settings: Thumbnail preview A thumbnail preview displays your previewed images as thumbnails with the scanned image area and exposure automatically selected. If the Thumbnail checkbox is selected, clicking the Preview button opens a thumbnail preview. Normal preview A normal preview displays your previewed images in their entirety so you can select the scanned image area and other settings manually. If the Thumbnail checkbox is deselected, clicking the Preview button opens a normal preview. Parent topic: Selecting Epson Scan Settings Scan Resolution Guidelines If you plan to enlarge a scanned image so you can print it at a larger size, you may need to increase the resolution from the default resolution set by Epson Scan. Follow these guidelines to determine the resolution setting you need: You will enlarge the image as you scan it. If you will enlarge the image using Epson Scan's Target Size setting (Home and Professional modes only), you do not need to increase the Resolution setting. You will scan the image at its original size, but enlarge it later in an image-editing program. Increase Epson Scan's Resolution setting in your scan. Increase the resolution by the same amount you will increase the image size to retain a high image quality. For example, if the resolution is 300 dpi (dots per inch) and you will double the image size later, change the Resolution setting to 600 dpi. You will scan the image at 100% or smaller size. Select Epson Scan's Resolution setting based on how you will use the scanned image: /view on a computer screen/post on the web: 96 to 150 dpi Print/convert to editable text (OCR): 300 dpi Fax: 200 dpi 162

163 Parent topic: Selecting Epson Scan Settings Selecting Scan File Settings You can select the location, name, and format of your scan file on the File Save Settings window. You can also select various optional settings that control how Epson Scan behaves when you scan and save files. The File Save Settings window may appear after you click Scan on the Epson Scan window. You may also be able to access the window by clicking the icon on the Epson Scan window. 163
164 1. Do one of the following to select the folder in which you want to save your scanned image: Click the button for one of the displayed folders. Click the Other button, click the Browse or Choose button, and select a folder. 2. Type in a stem file name in the Prefix field. This name is used along with numbers to automatically name your scanned files. 3. Select a different number as the Start Number setting, if you like. 4. Select the file format you want to use in the Image Format Type menu. 5. If your file format provides optional settings, click the Options button to select them. 6. Choose any of the optional settings you want to use by selecting their checkboxes. 7. Click OK. Available Scanned File Types and Optional Settings Parent topic: Selecting Epson Scan Settings Available Scanned File Types and Optional Settings You can select from a variety scanned file types and optional settings on the File Save Settings window in Epson Scan. File Formats Bitmap (*.bmp) A standard image file format for most Windows programs. JPEG (*.jpg) An image format that lets you highly compress image data. However, the higher the compression, the lower the image quality. (The Tiff format is recommended when you need to modify or retouch your scanned image.) Multi-TIFF (*.tif) A Tiff file format when multiple pages are saved to the same file, allowing you to edit the images using a compatible program. PDF (*.pdf) A document format that is readable by Windows and Mac OS X systems using Adobe Reader, Acrobat, or other programs. You can save multi-page documents in one PDF file. PICT (*.pct) A standard image file format for most Mac OS X programs. 164
165 PRINT Image Matching II (*.jpg or *.tif) File formats that include Epson PRINT Image Matching II data for enhanced quality and a wider color range (does not affect the way the image displays on the screen). TIFF (*.tif) A file format created for exchanging data between many programs, such as graphic and DTP software. Optional Settings Overwrite any files with the same name Select to overwrite previous files with the same names. Show this dialog box before next scan Select to have the File Save Settings window appear automatically before you scan. Open image folder after scanning Select to have Windows Explorer or Mac OS X Finder automatically open to the folder where your scanned image is saved after scanning. Show Add Page dialog after scanning If you are scanning a multi-page document using the PDF or Multi-Tiff format, select to display a prompt for scanning additional pages after the first page is scanned. Parent topic: Selecting Scan File Settings Scanning with Mac OS X 10.6/10.7/10.8 Using Image Capture With Mac OS X 10.6/10.7/10.8, you can scan with your product using an image-editing application such as Image Capture. Note: With Mac OS X 10.6, 10.7, or 10.8, in addition to scanning with Image Capture, you can download and install Epson Scan scanning software. Epson Scan provides additional image adjustment and photo correction features for enhancing scanned images, and provides an interface for TWAIN-compliant OCR scanning software, such as ABBYY FineReader. To download Epson Scan, visit Epson's driver download site (U.S. downloads or Canadian downloads). 1. Open an image editing application, such as Image Capture. 2. Select your Epson product from the DEVICES or SHARED list, if necessary. 3. If you see the Show Details button, click it. If you are scanning an item on the scanner glass, your product begins a preview scan. 165
166 4. Select the Scan Mode setting indicating where you placed your original (if available). Select any other scan settings as necessary. 5. Select the folder in which you want to save your scanned file in the Scan To pop-up menu. 6. Click Scan. Your scanned file is saved in the folder you selected. Available Scan Settings - Mac OS X Image Capture Parent topic: Scanning Available Scan Settings - Mac OS X Image Capture You can select these scan settings in your imaging editing application for Mac OS X. Unsharp Mask Makes the edges of certain image areas clearer. Turn off this option to leave softer edges. Descreening Removes the ripple pattern that might appear in subtly shaded image areas, such as skin tones. This option improves results when scanning magazines or newspapers. (The results of descreening do not appear in the preview image, only in your scanned image.) Backlight Correction Removes shadows from photos that have too much background light. Dust Removal Removes dust marks from your originals automatically. Color Restoration Restores the colors in faded photos automatically. Parent topic: Scanning with Mac OS X 10.6/10.7/10.8 Using Image Capture Scanning Special Projects Your product's scanning software offers various options to help you quickly complete special scan projects. Scanning to a PDF File Restoring Photo Colors as You Scan Convert Scanned Documents to Editable Text (OCR) Parent topic: Scanning 166
167 Scanning to a PDF File Using Epson Scan, you can scan a multi-page document and save it in one PDF (Portable Document Format) file on your computer. 1. Place your original on your product for scanning. 2. Start Epson Scan. 3. Select the scan mode you want to use. 4. Select the scan settings for your scan. 5. Preview your image. 6. When you finish selecting all your settings, click Scan. You see the File Save Settings window. 167

168 7. Select PDF as the Type setting. 8. Select any other settings you want to use on the File Save Settings window. Click the Options button to access additional settings. 9. Click OK. Epson Scan scans your document and you see this window: 168

169 10. Choose one of the following options on the screen: If you are scanning only one page, click Save File. If you need to scan additional pages in a document, click Add page. Place additional pages on the product for scanning, click Scan, and repeat until you have scanned all the pages. When you are finished, click Save File. If you need to delete or reorder the scanned pages, click Edit page. Delete or reorder the pages using the icons that appear on the bottom of the editing window. When you are finished, click OK. Note: If you installed an OCR (Optical Character Recognition) program, you may see a screen indicating the program is converting your page to text. Wait until the program re-scans the page and close the program, if necessary. 11. Click Close to exit the Epson Scan window, if necessary. Epson Scan scans your original, and saves the PDF file in the selected folder or opens it in your scanning program. If the file was saved directly to your computer, you see the file in the Windows Explorer or Mac OS X Finder, where you can view and print the document, if desired. Parent topic: Scanning Special Projects Related tasks Selecting the Scan Mode Selecting Scan File Settings 169
170 Related topics Starting a Scan Selecting Epson Scan Settings Restoring Photo Colors as You Scan You can restore the colors in faded photos as you scan them using Epson Scan's Color Restoration setting. You can select this setting in any of the available scan modes. Note: Color restoration is not available in Office Mode, if Epson Scan offers that mode. 1. Place your original on your product for scanning. 2. Start Epson Scan. 3. Select the scan mode you want to use. 4. Select the scan settings for your scan. 5. Preview your image. 6. Locate or access the image adjustment settings. 7. Select the Color Restoration checkbox. 8. When you finish selecting all your settings, click Scan. 9. Click Close to exit the Epson Scan window, if necessary. Epson Scan scans your original, and saves the color-restored file in the selected folder or opens it in your scanning program. If the file was saved directly to your computer, you see the file in the Windows Explorer or Mac OS X Finder, where you can view and print the image, if desired. Parent topic: Scanning Special Projects Related tasks Selecting the Scan Mode Related topics Starting a Scan Selecting Epson Scan Settings 170
171 Convert Scanned Documents to Editable Text (OCR) You can scan a document and convert the text into data that you can edit with a word processing, spreadsheet, or HTML-editing program. This process is called OCR (Optical Character Recognition). To scan and use OCR, you need to install an OCR program, such as ABBYY FineReader. In Mac OS X 10.6/10.7/10.8, you can use ABBYY FineReader to convert scanned documents to editable text by first using an application such as Image Capture. Scan and save your document in Image Capture, then open ABBYY FineReader, open the Get Images From pop-up menu, and select File. Select the conversion option you want to use, then select your scanned file and follow the instructions on the screen. Note: With Mac OS X 10.6, 10.7, or 10.8, in addition to scanning with Image Capture, you can download and install Epson Scan scanning software. Epson Scan provides additional image adjustment and photo correction features for enhancing scanned images, and provides an interface for TWAIN-compliant OCR scanning software, such as ABBYY FineReader. To download Epson Scan, visit Epson's driver download site (U.S. downloads or Canadian downloads). Scanning Using OCR - Windows Scanning Using OCR - Mac OS X Parent topic: Scanning Special Projects Scanning Using OCR - Windows You can use the ABBYY FineReader OCR program to convert scanned documents to editable text. 1. Place your original on your product for scanning. 2. Do one of the following to open ABBYY FineReader: Windows 8: Navigate to the Start screen and select ABBYY FineReader 9.0 Sprint. Windows (other versions): Click or Start > All Programs or Programs > ABBYY FineReader 9.0 Sprint > ABBYY FineReader 9.0 Sprint. You see this window: 171

172 3. Select the language used in the document you are going to scan as the Document Language setting. 4. Click either the Scan to Other Formats icon or the icon that corresponds with the program you want to scan to. 5. If you see the Select Scanner window, select your product and click OK. Note: Do not select a WIA option for your product; it will not work correctly. You see the scan settings window. 6. Select your scan settings. 7. Click Preview and adjust the area you want to scan, if necessary. 8. Click Scan. Note: To scan a multi-page document, select settings in the Multi-Page Scanning section and click Scan for each page. 9. When you are finished scanning, click Close. 172
173 Your document is scanned and processed into editable text, then you see the Save As window. 10. Select a name and a file format for your document and click Save. The file is saved and then opened in an application associated with the file type you selected, if available on your system. Parent topic: Convert Scanned Documents to Editable Text (OCR) Scanning Using OCR - Mac OS X You can use the ABBYY FineReader OCR program to convert scanned documents to editable text. In Mac OS X 10.6/10.7/10.8, you can use ABBYY FineReader to convert scanned documents to editable text by first using an application such as Image Capture. Scan and save your document in Image Capture, then open ABBYY FineReader, open the Get Images From pop-up menu, and select File. Select the conversion option you want to use, then select your scanned file and follow the instructions on the screen. Note: With Mac OS X 10.6, 10.7, or 10.8, in addition to scanning with Image Capture, you can download and install Epson Scan scanning software. Epson Scan provides additional image adjustment and photo correction features for enhancing scanned images, and provides an interface for TWAIN-compliant OCR scanning software, such as ABBYY FineReader. To download Epson Scan, visit Epson's driver download site (U.S. downloads or Canadian downloads). 1. Place your original on your product for scanning. 2. Open the Applications folder and click the ABBYY FineReader Sprint icon. You see this window: 173

174 3. Open the Get Images From pop-up menu and select your product. 4. Select the language used in the document you are going to scan as the Document Language setting. 5. Select the type of document you are going to scan. Epson Scan starts in the last scan mode you used. 6. Select your scan settings and click Scan. Your document is scanned and you see the Epson Scan window while your document is converted to editable text. 7. Click Close to close the Epson Scan window and Preview window, if necessary. 174

175 You see the Save Converted File As window: 8. Click the Save button. The file is saved and then opened in an application associated with the file type you selected, if available on your system. Parent topic: Convert Scanned Documents to Editable Text (OCR) 175
176 Faxing See these sections to fax using your product. Note: This product allows you to store names, telephone numbers, and fax data in its memory even when the power is turned off. Make sure you restore all of the default settings if you give away or dispose of the product. This will erase all of your network settings and fax data. Note: When using the PCL or PostScript (PS3) printer software with the product, you can fax using the printer buttons or the utilities included with the standard Epson printer software. To download the standard Epson printer software, go to Connecting a Telephone or Answering Machine Setting Up Fax Features Setting Up Speed Dial and Group Dial Lists Sending Faxes Receiving Faxes Connecting a Telephone or Answering Machine You must connect your product to a telephone wall jack to send or receive faxes. If you want to use the same telephone line to receive calls, you can connect a telephone or answering machine to your product using an additional phone cable. Note: If you do not connect a telephone to your product, make sure to turn on Auto Answer. Otherwise, you cannot receive faxes. 176
177 1. Connect the phone cable to your telephone wall jack and to the LINE port on your product. Note: If your telephone line included a DSL Internet connection, you must connect a DSL filter to the wall jack to be able to use the line for faxing or voice calls using your product. Contact your DSL provider for the necessary filter. 177
178 1 Telephone wall jack 2 DSL filter 3 DSL modem 2. If you are connecting a telephone or answering machine to your product using a second phone cable, remove the cap from the EXT port on your product. 178
179 3. Connect the second phone cable to your telephone or answering machine and to the EXT port on your product. Note: If you connect an answering machine and Auto Answer is turned on, make sure the product's Rings to Answer setting is set higher than the number of rings your answering machine is set to answer a call. Any phone or answering machine must be connected to the EXT port for your product to detect an incoming fax call when the phone is picked up. Epson cannot guarantee compatibility with VoIP, cable phone systems, or fiberoptic digital services such as FIOS. Parent topic: Faxing Setting Up Fax Features Before faxing with your product, set up your fax header and select the fax features you want to use. Note: If you leave your product unplugged for a long period of time, you may need to reset the date and time settings for faxes. Setting Up Fax Features Using the Product Control Panel Setting Up Fax Features Using the Fax Utility - Windows Setting Up Fax Features Using the Fax Utility - Mac OS X 179
180 Parent topic: Faxing Setting Up Fax Features Using the Product Control Panel See these sections to set up fax features using the product control panel. Selecting Your Country or Region Selecting the Date and Time Entering Fax Header Information Entering Numbers and Characters for Faxing Selecting Fax Send and Receive Settings Selecting Fax Communication Settings Printing Fax Reports Restoring Default Fax Settings Fax Sending Options Fax Receive Options Fax Communications Options Fax Report Options Restore Default Settings Options Parent topic: Setting Up Fax Features Selecting Your Country or Region Before faxing, select the country or region in which you are using your product. Note: If you change the country or region, your fax settings return to their defaults and you must select them again. 1. Press the Setup button. 2. Press the arrow buttons to select Printer Setup and press the OK button. You see this screen: 180
181 3. Select Country/Region and press the OK button. 4. Select your country or region and press the OK button. You see a confirmation screen. 5. If the setting is correct, select Yes and press the OK button. (If not, select No and retry.) Note: Changing the country or region will restore the fax settings to the default settings. Parent topic: Setting Up Fax Features Using the Product Control Panel Selecting the Date and Time Before faxing, select the current date, time, and daylight saving phase in your area, and choose your preferred date and time format. 1. Press the Setup button. 2. Press the arrow buttons to select Printer Setup and press the OK button. You see this screen: 181


182 3. Select Date/Time and press the OK button. You see this screen: 4. Select the date format you want to use and press the OK button. 5. Use the number buttons on the control panel to enter the current date, then press the OK button. 6. Select the time format you want to use and press the OK button. 7. Use the number buttons on the control panel to enter the current time, select AM or PM if you selected a 12-hour time format, then press the OK button. 8. Select Daylight Saving Time and press the OK button. 182
183 9. Select the setting that applies to your area and press the OK button: Summer: it is spring or summer and your region uses Daylight Saving Time (DST) Winter: it is fall or winter or your region does not use Daylight Saving Time (DST) After making a selection, you return to the Printer Setup screen. Note: If your region uses Daylight Saving Time (DST), you must change this setting to match the season. When you change from Winter to Summer, your product automatically sets its clock ahead one hour. When you change from Summer to Winter, it sets the clock back one hour. Parent topic: Setting Up Fax Features Using the Product Control Panel Entering Fax Header Information Before faxing, add your sender name and fax number to the fax header to identify the source of the faxes you send. 1. Press the Setup button. 2. Press the arrow buttons to select Fax Settings and press the OK button. You see this screen: 3. Select Communication and press the OK button. 4. Select Header and press the OK button. 5. Select Fax Header and press the OK button. You see this screen: 183
184 6. Use the keypad to enter the sender name for your fax source, such as your name or a business name. You can enter up to 40 characters. 7. Select Done and press the OK button to return to the Header menu. 8. Select Your Phone Number and press the OK button. 9. Use the numeric buttons on the control panel to enter your fax number, up to 20 characters. You do not need to use dashes. 10. Press the OK button to return to the Header menu. 11. Press the Copy button to exit. Parent topic: Setting Up Fax Features Using the Product Control Panel Related tasks Entering Numbers and Characters for Faxing Entering Numbers and Characters for Faxing Follow these guidelines to enter numbers and characters for setting up your fax settings. You can use the LCD keypad described here or the numeric buttons on the product control panel. 184
, ab12 (lowercase), or Symbol and press the OK button. Then highlight an option and press the OK button to select it.")
185 Press the arrow buttons to highlight a character or a function button displayed on the keypad. Then press the OK button to select it. To change the case of letters or select symbols, select AB12 (uppercase), ab12 (lowercase), or Symbol and press the OK button. Then highlight an option and press the OK button to select it. To enter a space, select Space and press the OK button. To delete characters, select the back arrow and press the OK button. When you finish entering characters, select Done and press the OK button. Parent topic: Setting Up Fax Features Using the Product Control Panel Selecting Fax Send and Receive Settings You can select the paper source, fax quality, and other settings for incoming and outgoing faxes. Note: You can also select settings for faxing by pressing the Fax button, then pressing the Menu button. 1. Press the Setup button. 2. Press the arrow buttons to select Fax Settings and press the OK button. You see this screen: 185
186 3. Select Send Settings or Receive Settings and press the OK button. 4. Change any of the available settings. 5. Press the Copy button to exit. Parent topic: Setting Up Fax Features Using the Product Control Panel Related references Fax Send Options Fax Sending Options Fax Receive Options Selecting Fax Communication Settings You can customize how your product sends and receives faxes over your phone line. 1. Press the Setup button. 2. Press the arrow buttons to select Fax Settings and press the OK button. You see this screen: 186

187 Printing Fax Reports 3. Select Communication and press the OK button. 4. Change any of the available settings. 5. Press the Copy button to exit. Parent topic: Setting Up Fax Features Using the Product Control Panel Related references Fax Communications Options You can run a variety of reports on your fax transmissions and print your speed and group dial lists. Note: You can also select to print a report automatically after a fax is sent by pressing the button and selecting Fax Settings > Send Settings > Last Transmission Report. Setup 1. Make sure you loaded letter-size or larger paper in your product. 187
188 2. Press the Fax button. 3. Press the Menu button. 4. Press the arrow buttons to select Fax Report and press the OK button. You see this screen: 5. Select one of the available reports and press the OK button. 6. Press either of the Start buttons to print the report. Parent topic: Setting Up Fax Features Using the Product Control Panel 188
189 Restoring Default Fax Settings You can restore your fax settings to their default options, if necessary. 1. Press the Setup button. 2. Press the arrow buttons to select Restore Default Settings and press the OK button. You see this screen: Fax Sending Options 3. Select one of the available options and press the OK button. You see a confirmation screen. 4. Select Yes or No and press the OK button. Parent topic: Setting Up Fax Features Using the Product Control Panel Set the options you want to use for outgoing faxes. Setting Options Description Quality Standard Provides good scan resolution and print quality for most faxes. Fine Photo Provides best scan resolution and print quality for faxes of small print and line art. Provides best scan resolution and print quality for faxed photos. 189
190 Fax Receive Options Setting Options Description Contrast 4 to +4 Adjusts the contrast for faxes; negative settings make faxes lighter and positive settings make faxes darker. 2-Sided Faxing Off Lets you fax 2-sided originals placed in the ADF. On Last Transmission Off Does not print a report on the last transmitted fax after Report you send a fax. On Error On Send Parent topic: Setting Up Fax Features Using the Product Control Panel Set the printing options you want to use for incoming faxes. Setting Options Description Prints a report on the last transmitted fax only if a fax error occurs (default setting). Prints a report on the last transmitted fax after every fax you send. Paper Source to Print Cassette 1 Sets the paper source for incoming faxes. Rear MP Tray Auto Reduction On Reduces size of incoming faxes to fit on the paper in the selected Paper Source to Print. Off Prints incoming faxes in original size or on multiple sheets, if loaded paper size is smaller. Fax Output Print Use the FAX Utility on your computer if you want to save incoming faxes instead of printing them. Parent topic: Setting Up Fax Features Using the Product Control Panel Fax Communications Options Set the communication options you want to use for faxing over your phone line. 190
191 Fax Report Options Setting Options Description DRD All If you are using a Distinctive Ring Service on your Single phone line, your telephone company can assign two or more phone numbers to the same line and assign Double different ring patterns to each. If you use this service, Triple select the number of rings for your fax number as the DRD setting so your product can receive faxes on the Double & Triple correct number of rings. All is the default setting and works for phone lines that do not use this service. ECM On Turns on Error Correction Mode (ECM) to automatically request retransmission of faxes received with detected errors (default setting). Off Turns off Error Correction Mode (ECM). V.34 On Transmits faxes at 33.6 Kbps (default setting) Off Transmits faxes at 14.4 Kbps Rings to Answer 1 to 9 Sets the number of rings before your product receives a fax. The default setting is 4. If Auto Answer is turned on and an answering machine is connected to the product, make sure this setting is set higher than the number of rings your answering machine is set to answer a call. Dial Tone Detection On Automatically dials the phone number you enter to send a fax when the product detects a dial tone on the line. Off Turns off automatic dial tone detection. This is necessary if you connected your product to a phone line on a Private Branch Exchange (PBX) or Terminal Adapter (TA) system. Header Fax Header Lets you set up the header information for outgoing Your Phone faxes. Number Parent topic: Setting Up Fax Features Using the Product Control Panel Select the fax report or list you want to print. 191
192 Fax Log View or print a report on recent fax transmissions. Last Transmission Print a report on your last fax transmission. Speed Dial List Print a list of your speed dial entries. Group Dial List Print a list of your group dial entries. Reprint Faxes Reprint the most recent incoming fax. Protocol Trace Print a protocol trace of your last fax transmission. Parent topic: Setting Up Fax Features Using the Product Control Panel Restore Default Settings Options Select the product settings you want to restore. Fax Send/Receive Settings Restores all of the default fax settings on the Send Settings, Receive Settings, and Communication screens. Fax Data Settings Erases the speed dial list, group dial list, header, and fax log. Network Setting Restores all of the default network settings. All except Network & Fax Settings Restores all of the default settings on the control panel, except for the network and fax settings. All Settings Restores all of the default settings on the control panel. Parent topic: Setting Up Fax Features Using the Product Control Panel Setting Up Fax Features Using the Fax Utility - Windows You can set up your fax header and select your fax settings using the FAX Utility for Windows. 1. Do one of the following: Windows 8: Navigate to the Start screen. 192
193 Windows (other versions): Click 2. Select FAX Utility. You see this window: or Start > Programs or All Programs > EPSON Software. 3. Select Fax Settings for Printer. (Select your product, if prompted.) You see this window: 193
194 4. Select Fax Settings. 5. Follow the prompts that appear on the screen to enter your fax header information and select your fax settings. Note: For detailed information, select the FAX Utility Help option. Parent topic: Setting Up Fax Features Setting Up Fax Features Using the Fax Utility - Mac OS X You can set up your fax header and select your fax settings using the FAX Utility for Mac OS X. 1. Do one of the following: Mac OS X 10.6/10.7/10.8: In the Apple menu or the Dock, select System Preferences. Select Print & Fax or Print & Scan, select the FAX option for your product, and select Options & Supplies. Select Utility and select Open Printer Utility. Mac OS X 10.5: In the Apple menu or the Dock, select System Preferences. Select Print & Fax, select the FAX option for your product, and select Open Print Queue. Select Utility. 2. Double-click FAX Utility, if necessary. 194
195 You see this window: 3. Select your FAX product in the Printer list. 4. Select Fax Settings. 5. Follow the prompts that appear on the screen to enter your fax header information and select your fax settings. Note: For detailed information, select the FAX Utility? icon. Parent topic: Setting Up Fax Features Setting Up Speed Dial and Group Dial Lists You can set up a speed dial list of fax numbers so you can quickly select them for faxing. You can also set up a group dial list to send a fax message to multiple speed dial numbers. See these sections to set up speed dial and group dial lists. Setting Up Speed/Group Dial Lists Using the Product Control Panel Setting Up Speed/Group Dial Lists Using the Fax Utility - Windows Setting Up Speed/Group Dial Lists Using the Fax Utility - Mac OS X Parent topic: Faxing 195
196 Setting Up Speed/Group Dial Lists Using the Product Control Panel You can set up your speed dial and group dial lists using the control panel on your product. Creating Speed Dial List Entries Printing Your Speed Dial List Creating Group Dial List Entries Printing Your Group Dial List Parent topic: Setting Up Speed Dial and Group Dial Lists Creating Speed Dial List Entries You can create a speed dial list of fax numbers to help you quickly send faxes. Note: You can create up to 60 speed dial and group dial entries combined. 1. Press the Fax button. 2. Press the Menu button. You see this screen: 196
197 3. Press the arrow buttons to select Speed Dial Setup and press the OK button. 4. Select Create and press the OK button. You see this screen: 5. Select the number you want to use for the fax number you are adding and press the OK button. 6. Use the numeric buttons on the control panel to enter the fax number. You can enter up to 64 characters. 7. Press the OK button. You see this screen: 197
198 8. Use the keypad to enter a name for the speed dial entry. You can enter up to 30 characters. 9. Select Done and press the OK button. You return to the Speed Dial Setup screen. 10. Do the following as necessary: To create additional entries, select Create and repeat the steps above. To edit an existing entry, select Edit, select the entry, and change the information. To delete an entry, select Delete, select the entry, press the OK button, and confirm the deletion. Parent topic: Setting Up Speed/Group Dial Lists Using the Product Control Panel Related tasks Entering Numbers and Characters for Faxing Printing Your Speed Dial List You can print your speed dial list for easy reference. 1. Make sure you loaded letter-size or larger paper in your product. 198
199 2. Press the Fax button. 3. Press the Menu button. You see this screen: 4. Press the arrow buttons to select Fax Report and press the OK button. You see this screen: 199
200 5. Select Speed Dial List and press the OK button. 6. Press either of the Start buttons to print the report. Parent topic: Setting Up Speed/Group Dial Lists Using the Product Control Panel Creating Group Dial List Entries You can create a group dial list after creating a speed dial list. Each group dial list can include up to 30 fax numbers. Note: You can create up to 60 speed dial and group dial entries combined. 1. Press the Fax button. 200
201 2. Press the Menu button. You see this screen: 3. Select Group Dial Setup. 4. Select Create and press the OK button. You see this screen: 5. Select the number you want to use for the group dial entry you are adding and press the OK button. You see this screen: 201

202 6. Use the keypad to enter a name for the group dial entry. You can enter up to 30 characters. 7. Select Done and press the OK button. You see a screen similar to this: 8. Highlight the speed dial entry you want to add to the group and press the right arrow to select it. 9. Continue selecting speed dial entries as necessary. 10. When you are finished, press the OK button. You return to the group dial setup screen. 202
203 11. Do the following as necessary: To create additional entries, select Create and repeat the steps above. To edit an existing entry, select Edit, select the entry, and change the information. To delete an entry, select Delete, select the entry, press the OK button, and confirm the deletion. Parent topic: Setting Up Speed/Group Dial Lists Using the Product Control Panel Related tasks Entering Numbers and Characters for Faxing Printing Your Group Dial List You can print your group dial list for easy reference. 1. Make sure you loaded letter-size or larger paper in your product. 2. Press the Fax button. 3. Press the Menu button. 4. Press the arrow buttons to select Fax Report and press the OK button. You see this screen: 203

204 5. Select Group Dial List and press the OK button. 6. Press either of the Start buttons to print the report. Parent topic: Setting Up Speed/Group Dial Lists Using the Product Control Panel Setting Up Speed/Group Dial Lists Using the Fax Utility - Windows You can set up your speed dial and group dial lists using the FAX Utility for Windows. The utility also lets you import fax numbers from the Windows Address Book and back up fax numbers stored in your product's memory. Note: You can create up to 60 speed dial and group dial entries combined. 1. Do one of the following: Windows 8: Navigate to the Start screen. Windows (other versions): Click 2. Select FAX Utility. You see this window: or Start > Programs or All Programs > EPSON Software. 204

205 3. Select Fax Settings for Printer. (Select your product, if prompted.) You see this window: 205

206 4. Select Speed Dial/Group Dial List. You see this window: 206

207 5. Select an empty entry and click the icon. Note: To edit an entry, select it and click the icon. icon. To delete an entry, select it and click the 6. Do one of the following: To create a speed dial entry, select Speed Dial, enter a name and fax number, and click OK. To create a group dial entry, select Group, enter a name, select your desired fax numbers, and click OK. 7. Repeat the previous steps as necessary to add all your speed dial or group dial entries. 8. When you are finished, click the icon to save the entries to your product's memory. Parent topic: Setting Up Speed Dial and Group Dial Lists 207

208 Setting Up Speed/Group Dial Lists Using the Fax Utility - Mac OS X You can set up your speed dial and group dial lists using the FAX Utility. The utility also lets you import fax numbers from the MacAddress Book and back up fax numbers to your product's memory. Note: You can create up to 60 speed dial and group dial entries combined. 1. Do one of the following: Mac OS X 10.6/10.7/10.8: In the Apple menu or the Dock, select System Preferences. Select Print & Fax or Print & Scan, select the FAX option for your product, and select Options & Supplies. Select Utility and select Open Printer Utility. Mac OS X 10.5: In the Apple menu or the Dock, select System Preferences. Select Print & Fax, select the FAX option for your product, and select Open Print Queue. Select Utility. 2. Double-click FAX Utility, if necessary. You see this window: 3. Select your FAX product in the Printer list. 4. Select Speed Dial/Group Dial List. You see this window: 208

209 Sending Faxes 5. To add an entry, double-click an empty entry. Note: To edit an entry, select it and change the information. To delete an entry, select it and press the Delete key on your keyboard. 6. Do one of the following: To create a speed dial entry, select Speed Dial, enter a name and fax number, and click OK. To create a group dial entry, select Group Dial, enter a name, select your desired fax numbers, and click OK. 7. Repeat the previous steps as necessary to add all your speed dial or group dial entries. 8. To import entries from your MacAddress book, click the icon. 9. When you are finished, click the icon to save the entries to your product's memory. Parent topic: Setting Up Speed Dial and Group Dial Lists See these sections to send faxes using your product. Sending Faxes from the Product Control Panel 209
210 Sending Faxes Using the Fax Utility - Windows Sending Faxes Using the Fax Utility - Mac OS X Parent topic: Faxing Sending Faxes from the Product Control Panel See these sections to send faxes using the product's control panel. Manually Dialing or Redialing Fax Numbers Selecting Fax Numbers From Speed or Group Dial Lists Dialing Fax Numbers from a Connected Telephone Broadcasting a Fax Sending a Fax at a Specified Time Fax Send Options Parent topic: Sending Faxes Manually Dialing or Redialing Fax Numbers You can send a fax from your product control panel by manually dialing the fax number or redialing the last dialed fax number. 1. Place your original on the product for faxing. 2. Press the Fax button. 210
211 3. Do one of the following: Use the numeric keypad to enter the fax number. You can enter up to 64 characters. Press the Redial/Pause button to redial the last dialed fax number. 4. If you need to change any fax settings, press the Menu button, select Send Settings, press the OK button, and select your settings. When you finish selecting settings, press the Menu button. 5. Press either of the Start buttons. Note: If your recipient's fax machine does not print in color, your fax is automatically sent in blackand-white. To cancel faxing, press the Stop/Reset button. Your product scans your original and prompts you to place additional pages, if necessary. After scanning your originals, your product dials the number and sends the fax. Note: If the number is busy or there is a communication problem, your product displays a redialing message and will redial the number in a few minutes. Parent topic: Sending Faxes from the Product Control Panel Selecting Fax Numbers From Speed or Group Dial Lists You can send a fax from your product control panel by selecting a speed dial or group dial entry from the list. 1. Place your original on the product for faxing. 2. Press the Fax button. 211
212 3. Press the Speed Dial button. 4. If you want to select a group dial entry, press the Menu button. 5. Select the speed dial or group dial entry you want to use, then press the OK button. 6. If you need to change any fax settings, press the Menu button, select Send Settings, press the OK button, and select your settings. When you finish selecting settings, press the Menu button. 7. Press either of the Start buttons. Note: If your recipient's fax machine does not print in color, your fax is automatically sent in blackand-white. To cancel faxing, press the Stop/Reset button. Your product scans your original and prompts you to place additional pages, if necessary. After scanning your originals, your product dials the number and sends the fax. Note: If the number is busy or there is a communication problem, your product displays a redialing message and will redial the number in a few minutes. Parent topic: Sending Faxes from the Product Control Panel Dialing Fax Numbers from a Connected Telephone If you have connected a telephone to the EXT. port on your product, you can send a fax by dialing the fax number from the connected telephone. 1. Place your original on the product for faxing. 2. Press the Fax button. 212
213 3. Dial the fax number from the connected telephone. You see this screen: Broadcasting a Fax 4. Using your product control panel, select Send and press the OK button. Note: Your product now communicates with the recipient's fax machine. 5. If you need to change any fax settings, press the Menu button, select Send Settings, press the OK button, and select your settings. When you finish selecting settings, press the Menu button. 6. Press either of the Start buttons. Note: If your recipient's fax machine does not print in color, your fax is automatically sent in blackand-white. To cancel faxing, press the Stop/Reset button. Your product scans your original and prompts you to place additional pages, if necessary. 7. Hang up the telephone. After scanning your originals, your product sends the fax. Parent topic: Sending Faxes from the Product Control Panel You can easily send a fax to several recipients at the same time using your speed dial list or group dial list, or by entering phone numbers. You can send the same fax to up to 30 phone numbers. 213
214 Note: You can only send faxes in black-and-white when you use this option. 1. Place your original on the product for faxing. 2. Press the Fax button. 3. Press the Menu button, press the arrow buttons to select Broadcast Fax, and press the OK button. 4. Do the following as necessary: Use the numeric keypad to manually enter fax numbers. Press the down arrow button to add additional fax numbers. To select a speed or group dial entry, press the Menu button. Use the up and down arrows to highlight an entry, the right arrow button to select an entry, and the left arrow button to deselect an entry. 5. When you have finished selecting your recipients, press the OK button. 6. Press the Start B&W button. If prompted, select where you placed your document (Automatic Document Feeder or scanner glass). Note: To cancel faxing, press the Stop/Reset button. Your product scans your original and prompts you to place additional pages, if necessary. After scanning your originals, your product dials the number and sends the fax. 214

215 Note: If the number is busy or there is a communication problem, your product displays a redialing message and will redial the number in a few minutes. Parent topic: Sending Faxes from the Product Control Panel Sending a Fax at a Specified Time You can send a fax at a time of your choice. Note: You can only send faxes in black-and-white when you use this option. 1. Place your original on the product for faxing. 2. Press the Fax button. 3. Enter a phone number or select a number from a speed or group dial list. 4. Press the Menu button, press the arrow buttons to select Send Fax Later, and press the OK button. 5. Select On, use the number pad to enter your desired time, press the OK button, then press the Back button. 6. Press the Start B&W button. If prompted, select where you placed your document (Automatic Document Feeder or scanner glass). Note: To cancel faxing, press the Stop/Reset button. 215
216 Fax Send Options Your product scans your original and prompts you to place additional pages, if necessary. After scanning your originals, your product dials the number and sends the fax at the specified time. You cannot send additional faxes until the timed fax has been sent. Note: If the number is busy or there is a communication problem, your product displays a redialing message and will redial the number in a few minutes. Parent topic: Sending Faxes from the Product Control Panel While sending a fax, you can select these options. Setting Options Description Quality Standard Provides good scan resolution and print quality for most faxes. Fine Photo Provides best scan resolution and print quality for faxes of small print and line art. Provides best scan resolution and print quality for faxed photos. Contrast 4 to +4 Adjusts the contrast for faxes; negative settings make faxes lighter and positive settings make faxes darker. 2-Sided Faxing Off Lets you fax 2-sided originals placed in the ADF. On Parent topic: Sending Faxes from the Product Control Panel Sending Faxes Using the Fax Utility - Windows You can send a fax from a printing program in Windows. You can fax up to 100 pages at a time, including a cover sheet. 1. Open the file you want to fax and select the print command. You see a window like this: 216

217 2. Select your product with the FAX option as the printer. 3. To change the Paper Size, Orientation, Color, Image Quality, or Character Density settings, click the Preferences or Properties button. Note: If you see a Setup, Printer, or Options button, click it. Then click Preferences or Properties on the next screen. For more information about selecting fax print settings, click Help. 4. Select the Page Range as necessary. (Leave the Number of copies set to 1.) 5. Click Print. If you re faxing for the first time, you see a window like this one: 217

218 6. Enter your sender information so that recipients can identify the origin of the fax. Then click OK to save the sender information. 7. Add a cover sheet, input a fax number, or set up a phone book of numbers for future use, then click Next. Note: For detailed instructions on using the Epson FAX Utility, click Help. 8. If you added a cover sheet to your fax, select a cover sheet style, enter your subject and comment information, then click Next. 9. Click Send to transmit your fax. Parent topic: Sending Faxes Sending Faxes Using the Fax Utility - Mac OS X You can send a fax from a Mac OS X printing program using the FAX Utility. You can fax up to 100 pages at a time, including a cover sheet. 218

219 1. Open the file you want to fax. 2. Select the print command in your application. Note: You may need to select a print icon on your screen, the Print option in the File menu, or another command. See your application's help utility for details. 3. Select your product FAX option as the Printer setting. 4. If necessary, click the arrow next to the Printer setting or the Show Details button to expand the print window. 5. Select the number of pages you are faxing as the Pages setting. Note: Leave the Copies setting set to Select Recipient Settings from the pop-up menu. You see this window: 219

220 7. Do one of the following to choose your recipient: Select a name or group from the Recipient List. Enter a name, company, and fax number and click the + button. Click the icon and select a recipient from your address book. 8. Select Fax Settings from the pop-up menu. You see this window: 220
221 9. Select the Color and Image Quality settings you want to use for your fax. 10. Click Fax. Receiving Faxes Fax Reception Parent topic: Sending Faxes See these sections to receive faxes with your product. Fax Reception Receiving Faxes Automatically (Auto Answer) Receiving Faxes Manually Parent topic: Faxing Your product will automatically receive and print faxes when you set fax reception to Auto Answer mode. If you connected a telephone to your product so you can use the same phone line for faxes and voice calls, you can also set your product to receive faxes manually. This allows you to check for a fax tone using the telephone and press a button on your product to receive the fax. Make sure to load paper in your product and select your fax settings before receiving a fax. Note: If you run out of paper during fax printing, load more paper and press the button indicated on your product's LCD screen to continue. Parent topic: Receiving Faxes 221

222 Receiving Faxes Automatically (Auto Answer) To receive and print faxes automatically, you can turn on Auto Answer mode. Check the Auto Answer light on your product to see if Auto Answer mode is turned on or not. To turn Auto Answer mode on or off, press the Auto Answer button. If an answering machine is connected, make sure the product's Rings to Answer setting is set higher than the number of rings your answering machine is set to answer a call. For example, if the answering machine is set to pick up on the fourth ring, set the product to pick up on the fifth ring or later. If a telephone is connected, and you use it to answer a call that turns out to be a fax, wait until the product's LCD screen displays a message that a connection has been made before hanging up. Parent topic: Receiving Faxes Related tasks Connecting a Telephone or Answering Machine Receiving Faxes Manually You can set up your product to receive faxes manually by turning off Auto Answer mode. This lets you check for a fax tone on the connected telephone before receiving a fax. 1. When the connected telephone rings, answer the call. You see this message on your product's LCD screen: 222
223 2. If you hear a fax tone, select the Receive option and press the OK button. Note: Leave the answered call active as you receive the fax transmission. 3. Follow the instructions on the screen to receive the fax. When fax transmission is finished, you see the previous LCD screen. 4. Press the OK button to print the fax. 5. Hang up the phone. Parent topic: Receiving Faxes 223
224 Replacing Ink Cartridges and Maintenance Boxes The maintenance box stores ink that gets flushed from the system during print head cleaning. When an ink cartridge is expended or the maintenance box is at the end of its service life, you need to replace it. You may also need to replace a cartridge that is more than six months old if your printouts do not look their best, even after cleaning and aligning the print head. Note: Please dispose of your used Epson branded ink cartridges and maintenance boxes responsibly and in accordance with local requirements. If you would like to return your used ink cartridges and maintenance boxes to Epson for proper disposal, please go to for more information. Check Cartridge and Maintenance Box Status Purchase Epson Ink Cartridges and Maintenance Box Removing and Installing Ink Cartridges Replacing the Maintenance Box Check Cartridge and Maintenance Box Status Your printer and its software will let you know when an ink cartridge is low or expended, or when the maintenance box needs to be replaced. Note: When using the PCL or PostScript (PS3) printer software with the product, you can check ink cartridge and maintenance box status by using the printer buttons or the utilities included with the standard Epson printer software. To download the standard Epson printer software, go to Checking Cartridge Status on the LCD Screen Checking Cartridge and Maintenance Box Status With Windows Checking Cartridge and Maintenance Box Status With Mac OS X Parent topic: Replacing Ink Cartridges and Maintenance Boxes Checking Cartridge Status on the LCD Screen You can check the status of your ink cartridges using your product's LCD screen. 1. Press the Setup button. 2. Select Ink Levels and press the OK button. 224

225 You see a screen like this: Note: The display is different depending on which ink cartridges are low or expended, if any. Displayed ink levels are approximate. 3. Press the Copy button to exit. Parent topic: Check Cartridge and Maintenance Box Status Checking Cartridge and Maintenance Box Status With Windows A low ink reminder appears if you try to print when ink is low, and you can check your cartridge or maintenance box status at any time using a utility on your Windows computer. 1. To check your status, double-click the product icon in the Windows taskbar, then click Details. You see this window: 225

226 2. Replace or reinstall the maintenance box or any ink cartridge as indicated on the screen. Note: If any of the cartridges installed in the product is broken, incompatible with the product model, or improperly installed, Epson Status Monitor will not display an accurate cartridge status. 3. To disable the low ink reminder, right-click the product icon in the Windows taskbar and select Monitoring Preferences. You see this window: 226

227 4. Deselect the See Low Ink Reminder alerts checkbox at the bottom of the screen. 5. To disable promotional offers, deselect the Display Epson Offers checkbox. Parent topic: Check Cartridge and Maintenance Box Status Related tasks Removing and Installing Ink Cartridges 227
228 Replacing the Maintenance Box Checking Cartridge and Maintenance Box Status With Mac OS X You can check the status of your ink cartridges and maintenance box using a utility on your Mac. 1. Do one of the following: Mac OS X 10.6/10.7/10.8: In the Apple menu or the Dock, select System Preferences. Select Print & Fax or Print & Scan, select your product, and select Options & Supplies. Select Utility and select Open Printer Utility. Mac OS X 10.5: In the Apple menu or the Dock, select System Preferences. Select Print & Fax, select your product, and select Open Print Queue. Select Utility. 2. Select EPSON Status Monitor. You see this window: 228

229 3. Do the following as necessary: You can update the ink cartridge and maintenance box status by clicking Update. Replace or reinstall the maintenance box or any ink cartridge as indicated on the screen. Note: If any of the cartridges installed in the product is broken, incompatible with the product model, or improperly installed, Epson Status Monitor will not display an accurate cartridge status. Parent topic: Check Cartridge and Maintenance Box Status Related tasks Removing and Installing Ink Cartridges 229
230 Replacing the Maintenance Box Purchase Epson Ink Cartridges and Maintenance Box You can purchase genuine Epson ink, maintenance boxes, and paper at Epson Supplies Central at (U.S. sales) or (Canadian sales). You can also purchase supplies from an Epson authorized reseller. To find the nearest one, call 800-GO-EPSON ( ). Note: We recommend that you use genuine Epson maintenance boxes and cartridges and do not refill them. The use of other products may affect your print quality and could result in printer damage. Part of the ink from the included set of cartridges is used for priming the printer. Yields vary considerably based on images printed, print settings, paper type, frequency of use, and temperature. For print quality, a variable amount of ink remains in the cartridge after the "replace cartridge" indicator comes on. Ink Cartridge and Maintenance Box Part Numbers Parent topic: Replacing Ink Cartridges and Maintenance Boxes Ink Cartridge and Maintenance Box Part Numbers Use these part numbers when you order or purchase a new maintenance box or ink cartridges, and use the cartridges within six months of installing them. Ink color Part number (High-capacity) Part number (Super High-capacity) Black cartridge 676XL 711XXL Cyan cartridge 676XL 711XXL Magenta cartridge 676XL 711XXL Yellow cartridge 676XL 711XXL Part Maintenance box Part number T Parent topic: Purchase Epson Ink Cartridges and Maintenance Box Removing and Installing Ink Cartridges Make sure you have your replacement cartridges handy before you begin. You must install new cartridges immediately after removing the old ones. 230
231 Caution: Leave your old cartridges in the printer until you are ready to replace them to prevent the print head nozzles from drying out. Do not open ink cartridge packages until you are ready to install the ink. Cartridges are vacuum packed to maintain reliability. 1. Turn on your product. 2. Note which cartridges need to be replaced. 3. Open the front cover. 4. Push the ink cartridge in, then pull it out of the slot. 231
232 Note: Dispose of used cartridges carefully. Do not take the used cartridge apart or try to refill it. Warning: If ink gets on your skin, wash it thoroughly with soap and water. If ink gets into your eyes, flush them immediately with water. If ink gets into your mouth, spit it out and see a doctor right away. Keep ink cartridges out of the reach of children. 5. Remove the cartridge from the package. Caution: Do not touch the green chip on the cartridge. Install the new cartridge immediately after removing the old one; if you do not, the print head may dry out and be unable to print. 6. Gently shake the ink cartridge horizontally for about five seconds as shown. 232
233 Caution: Do not remove any labels or seals, or ink will leak. 7. Insert the new cartridge into the holder and push it in until it clicks into place. 8. When you are finished, close the front cover. After the product checks the cartridges, ink replacement is complete. Remove the ink cartridge and reinstall it to clear the error. 233
234 Note: Do not turn off the printer during ink replacement. If you remove a low or expended ink cartridge, you cannot re-install and use the cartridge. Caution: If you remove an ink cartridge for later use, protect the ink supply area from dirt and dust and store it in the same environment as the printer. The valve in the ink supply port is designed to contain any excess ink, but do not touch the ink supply port or surrounding area. Always store ink cartridges with the label facing up; do not store cartridges upside-down. Parent topic: Replacing Ink Cartridges and Maintenance Boxes Related concepts Purchase Epson Ink Cartridges and Maintenance Box Replacing the Maintenance Box Make sure you have a new maintenance box before you begin. Caution: Do not reuse a maintenance box that has been removed and left uninstalled for more than a week. Keep the maintenance box away from direct sunlight. 1. Make sure the product is not printing. 2. Remove the new maintenance box from its package. Caution: Do not touch the green chip on the maintenance box. 234
235 3. Press the buttons on the sides of the duplexer (rear unit) and remove it. 4. Grasp the maintenance box as shown and pull it out of its holder. Note: Do not tilt the used maintenance box or take it apart. 235
236 Warning: If ink gets on your skin, wash it thoroughly with soap and water. If ink gets into your eyes, flush them immediately with water. If ink gets into your mouth, spit it out and see a doctor right away. Keep the maintenance box out of the reach of children and do not drink the ink. 5. Place the used maintenance box in the plastic bag that came with the new maintenance box. Seal the bag and dispose of it carefully. 6. Insert the new maintenance box into the holder and push it all the way in. 236
237 7. Press the buttons on the sides of the duplexer (rear unit) and reattach it. Parent topic: Replacing Ink Cartridges and Maintenance Boxes Related concepts Purchase Epson Ink Cartridges and Maintenance Box 237
238 Adjusting Print Quality If your print quality declines, you may need to run a utility to clean or align the print head. Note: When using the PCL or PostScript (PS3) printer software with the product, you can clean and align the print head and run a nozzle check by using the printer buttons or the utilities included with the standard Epson printer software. To download the standard Epson printer software, go to If running these utilities does not solve the problem, you may need to replace the ink cartridges. Print Head Maintenance Print Head Alignment Cleaning the Paper Path Print Head Maintenance If your printouts become too light, or you see dark or light bands across them, you may need to clean the print head nozzles. Cleaning uses ink, so clean the nozzles only if print quality declines. You can check for clogged nozzles before you clean them so you don t clean them unnecessarily. Note: You cannot clean the print head if an ink cartridge is expended, and may not be able to clean it when a cartridge is low. You must replace the cartridge first. Print Head Nozzle Check Print Head Cleaning Parent topic: Adjusting Print Quality Related topics Replacing Ink Cartridges and Maintenance Boxes Print Head Nozzle Check You can print a nozzle check pattern to check for clogged nozzles. Checking the Nozzles Using the Product Control Panel Checking the Nozzles Using a Computer Utility Parent topic: Print Head Maintenance 238
239 Checking the Nozzles Using the Product Control Panel You can check the print head nozzles using the control panel on your product. 1. Make sure plain paper is loaded in the product. 2. Press the Setup button. 3. Press the arrow buttons to select Maintenance and press the OK button. You see this screen: 4. Press the OK button. You see this screen: 239
240 5. Press either of the Start buttons. After the nozzle pattern prints, you see this screen: 6. Check the printed pattern to see if there are gaps in the lines. Print head is clean Print head needs cleaning 7. Do one of the following: If there are no gaps, select Finish Nozzle Check and press the OK button. Press the button to exit. If there are gaps or the pattern is faint, select Head Cleaning and press the OK button to continue. 8. Follow the instructions on the screen to clean the print head, check the nozzles, and repeat the process as necessary. 240 Copy

241 If you don t see any improvement after cleaning the print head up to 4 times, wait at least 6 hours. Then try cleaning the print head again. If quality still does not improve, one of the ink cartridges may be old or damaged and needs to be replaced. Parent topic: Print Head Nozzle Check Checking the Nozzles Using a Computer Utility You can check the print head nozzles using a utility on your Windows or Mac computer. 1. Load a few sheets of plain paper in the product. 2. Do one of the following: Windows: Right-click the product icon in the Windows taskbar. Mac OS X 10.6/10.7/10.8: In the Apple menu or the Dock, select System Preferences. Select Print & Fax or Print & Scan, select your product, and select Options & Supplies. Select Utility and select Open Printer Utility. Mac OS X 10.5: In the Apple menu or the Dock, select System Preferences. Select Print & Fax, select your product, and select Open Print Queue. Select Utility. 3. Select Nozzle Check. You see a window like this: 241
242 4. Click Print. 5. Check the printed pattern to see if there are gaps in the lines. Print head is clean Print head needs cleaning 6. If there are no gaps, click Finish. If there are gaps or the pattern is faint, clean the print head. Parent topic: Print Head Nozzle Check Related concepts Print Head Cleaning Print Head Cleaning If print quality has declined and the nozzle check pattern indicates clogged nozzles, you can clean the print head. Note: You cannot clean the print head if an ink cartridge is expended, and may not be able to clean it when a cartridge is low. You must replace the cartridge first. Cleaning the Print Head Using the Product Control Panel Cleaning the Print Head Using a Computer Utility Parent topic: Print Head Maintenance Related topics Replacing Ink Cartridges and Maintenance Boxes Cleaning the Print Head Using the Product Control Panel You can clean the print head using the control panel on your product. 242

243 1. Make sure plain paper is loaded in the product. 2. Press the Setup button. 3. Press the arrow buttons to select Maintenance and press the OK button. You see this screen: 4. Select Head Cleaning and press the OK button. You see this screen: 5. Press the OK button. 243

244 6. Select the cleaning cycle you want to run, then press either of the Start buttons to clean the print head. You see a message on the LCD screen during the cleaning cycle. Caution: Never turn off the product during a cleaning cycle or you may damage it. When the cleaning cycle is finished, you see this screen: 7. Select Nozzle Check and press the OK button. 8. Press either of the Start buttons to confirm that the print head is clean. If you don t see any improvement after cleaning the print head up to 4 times, wait at least 6 hours. Then try cleaning the print head again. If quality still does not improve, one of the ink cartridges may be old or damaged and needs to be replaced. Parent topic: Print Head Cleaning Related topics Replacing Ink Cartridges and Maintenance Boxes Cleaning the Print Head Using a Computer Utility You can clean the print head using a utility on your Windows computer or Mac. 1. Load a few sheets of plain paper in the product. 2. Do one of the following: Windows: Right-click the product icon in the Windows taskbar. 244

245 Mac OS X 10.6/10.7/10.8: In the Apple menu or the Dock, select System Preferences. Select Print & Fax or Print & Scan, select your product, and select Options & Supplies. Select Utility and select Open Printer Utility. Mac OS X 10.5: In the Apple menu or the Dock, select System Preferences. Select Print & Fax, select your product, and select Open Print Queue. Select Utility. 3. Select Head Cleaning. You see a window like this: 4. Select the cleaning cycle you want to run, based on the nozzle check pattern. 5. Click Start to begin the cleaning cycle. The power light flashes throughout the cleaning cycle and stays on when the cleaning cycle is finished. Caution: Never turn off the product during a cleaning cycle or you may damage it. 245
246 6. When the power light stops flashing and remains on, you can check to see if the nozzles are clean; click Print Nozzle Check Pattern and click Print. 7. Check the printed pattern to see if there are gaps in the lines. Print head is clean Print head needs cleaning If there are no gaps, click Finish. If there are gaps or the pattern is faint, click Clean to clean the print head again. Parent topic: Print Head Cleaning Related topics Replacing Ink Cartridges and Maintenance Boxes Print Head Alignment If your printouts become grainy or blurry, you notice misalignment of vertical lines, or you see dark or light horizontal bands, you may need to align the print head. Note: Banding may also occur if your print head nozzles need cleaning. Aligning the Print Head Using the Product Control Panel Aligning the Print Head Using a Computer Utility Parent topic: Adjusting Print Quality Related concepts Print Head Cleaning 246
247 Aligning the Print Head Using the Product Control Panel You can align the print head using the control panel on your product. 1. Make sure plain paper is loaded in the product. 2. Press the Setup button. 3. Press the arrow buttons to select Maintenance and press the OK button. You see this screen: 4. Select Head Alignment and press the OK button. You see this screen: 247

248 5. Press either of the Start buttons to print an alignment sheet. Note: Do not cancel printing while you are printing a head alignment pattern. You see this screen: 6. Check the printed pattern and press the arrow buttons to choose the number representing the best printed pattern for each set. Press the OK button after each selection, then press the OK button when you are done. Parent topic: Print Head Alignment Aligning the Print Head Using a Computer Utility You can align the print head using a utility on your Windows computer or Mac. 1. Load a few sheets of plain paper in the product. 2. Do one of the following: Windows: Right-click the product icon in the Windows taskbar. Mac OS X 10.6/10.7/10.8: In the Apple menu or the Dock, select System Preferences. Select Print & Fax or Print & Scan, select your product, and select Options & Supplies. Select Utility and select Open Printer Utility. Mac OS X 10.5: In the Apple menu or the Dock, select System Preferences. Select Print & Fax, select your product, and select Open Print Queue. Select Utility. 3. Select Print Head Alignment. 248

249 4. Click Next, then click Print to print an alignment sheet. Note: Do not cancel printing while you are printing a head alignment pattern. You see a window like this: 5. Check the printed pattern and follow the instructions on the screen to choose the number representing the best printed pattern for each set. After choosing each pattern number, click Next. If no patterns are aligned in one or more of the sets, choose the closest one in each set and click Realignment. Then print another alignment sheet and check it. Note: Click Skip (where available) if you want to skip a particular alignment sheet. 6. When you are done, click Finish. Parent topic: Print Head Alignment 249
250 Cleaning the Paper Path If you see ink on the back of a printout, you can clean the paper path to remove any excess ink. 1. Load a few sheets of plain paper in the product. 2. Use the product control panel to make a copy, but without placing a document on the scanner glass. 3. Check the back of the ejected paper to see if it is clean. 4. Repeat as necessary until the paper comes out clean. Parent topic: Adjusting Print Quality Related topics Copying 250
251 Cleaning and Transporting Your Product See these sections if you need to clean or transport your product. Cleaning Your Product Transporting Your Product Cleaning Your Product To keep your product working at its best, you should clean it several times a year. Caution: Do not use a hard brush, alcohol, or paint thinner to clean the product or you may damage it. Do not use oil or other lubricants inside the product or let water get inside it. 1. Turn off the product. 2. Unplug the power cable. 3. Disconnect any connected cables. 4. Remove all the paper from the rear MP tray. 5. Clean the rear MP tray using a soft brush. 6. Clean the scanner glass with a soft, lint-free cloth (microfiber is recommended), moistened with a little glass cleaner. Caution: Do not spray glass cleaner directly on the glass and do not press the glass surface with any force. 7. Open the ADF cover and use a soft, dry, lint-free cloth (microfiber is recommended), to clean the rollers and the interior of the ADF. 251
252 8. Clean the outer case and control panel with a soft, dry cloth. Do not use liquid or chemical cleansers. Parent topic: Cleaning and Transporting Your Product Transporting Your Product If you need to ship your product or transport it a long distance, prepare it for transportation as described here. Caution: During transportation and storage, follow these guidelines: Avoid tilting the product, placing it vertically, or turning it upside down; otherwise ink may leak. Leave the ink cartridges installed. Removing the cartridges can dry out the print head and may prevent the product from printing. 1. Turn off the product. 2. Remove all the paper from the product. 3. Unplug the power cable. 4. Disconnect any connected cables. 5. Close the paper support, feeder guard, and output tray as shown. 252
253 6. Place the product in its original packing materials, if possible, or use equivalent materials with cushioning around the product. Make sure the box adequately protects the product control panel. Keep the product level during transportation. If print quality has declined when you print again, clean and align the print head. Parent topic: Cleaning and Transporting Your Product Related concepts Print Head Cleaning Print Head Alignment 253
254 Solving Problems Check these sections for solutions to problems you may have using your product. Checking for Software Updates Product Status Messages Running a Product Check Resetting Control Panel Defaults Solving Setup Problems Solving Network Problems Solving Copying Problems Solving Paper Problems Solving PCL/PostScript Problems Solving Problems Printing from a Computer Solving Page Layout and Content Problems Solving Print Quality Problems Solving Scanning Problems Solving Scanned Image Quality Problems Solving Faxing Problems When to Uninstall Your Product Software Where to Get Help Checking for Software Updates Periodically, it's a good idea to check Epson's support website for free updates to your product software. Visit the driver download site at (U.S. downloads or Canadian downloads). With Windows, your standard Epson printer software automatically checks for updates. You can also manually update the software by selecting Software Update here: Right-clicking the product icon in the Windows taskbar On the Maintenance tab in the printer settings window On the Start screen (Windows 8) or in the EPSON program group under your product name (other Windows versions) Parent topic: Solving Problems 254
255 Related tasks Changing Automatic Update Options - Standard EPSON Printer Software - Windows Product Status Messages You can often diagnose problems with your product by checking the messages on its LCD screen. You can also press the Help button to view help topics. LCD screen message Paper out or paper jam Paper jam No paper source matches paper size setting. Communication error Recovery mode Cannot recognize USB device No dial tone detected. Try Check Fax Connection. Printer error Condition/solution Follow the instructions on the screen to load paper in the indicated paper source or check for paper jams. Follow the instructions on the screen to see how to remove the jammed paper from the area indicated. Then press either of the Start buttons. Load the paper you want to print on, or select the size loaded in the product. Make sure the computer is connected to your product and your software is installed correctly. An error has occurred during firmware updating. Connect your product using a USB cable and try updating the firmware again. If you still receive this error message, contact Epson for support. Make sure the USB thumb drive or other device has been inserted correctly. Make sure the phone cable is connected correctly and the phone line works. If you connected the product to a PBX (Private Branch Exchange) phone line or Terminal Adapter, turn off the Dial Tone Detection setting. Turn the product off and then back on again. If the error continues, make sure you removed the foam and plastic protective materials from inside the product. One side will be printed. Cancel printing and load a paper size that supports 2-sided printing or press You can only use either of the Start buttons to continue printing on one side of the currently Letter/A4 size plain loaded paper. paper for 2-sided print. Data error. Document was not printed. A problem with the print data such as the inclusion of compressed data has occurred. Check the print data. 255
256 LCD screen message Condition/solution Cannot print because Press either of the Start buttons to cancel the current job and print the next memory is full job. Memory is full. Data was If the quality of the printout is not acceptable, try simplifying the print job by printed with low reducing the number of graphics or the number and type of fonts. resolution. Memory is full. Only one copy of documents was printed. Parent topic: Solving Problems Related references Paper Jam Problems Inside the Product Paper Jam Problems in the Cassette Paper Jam Problems in the Duplexer Document Jams in the Automatic Document Feeder Where to Get Help Related tasks Connecting a USB Thumb Drive or External Device Related topics Loading Paper Placing Originals on the Product Solving Network Problems Setting Up Fax Features Running a Product Check To print multiple copies of a document, try simplifying the print job by reducing the number of graphics or the number and type of fonts. Running a product check helps you determine if your product is operating properly. 1. Disconnect any interface cables connected to your product. 2. Load plain paper in the product. 3. Press the Setup button. 4. Press the arrow buttons to select Maintenance and press the OK button. You see this screen: 256

257 5. Press the OK button. You see this screen: 6. Press either of the Start buttons. After the nozzle pattern prints, you see this screen: 257
258 7. Do the following, depending on the results of the product check: If the page prints and the nozzle check pattern is complete, the product is operating properly. Any operation problem you may have could be caused by your computer, cable, software, or selected settings. Check the other solutions in this book or try uninstalling and reinstalling your printer software. If the page prints but the nozzle check pattern has gaps, clean or align the print head. If the page does not print, the product may have a problem. Check the other solutions in this manual. If they do not work, contact Epson. Parent topic: Solving Problems Related concepts Print Head Cleaning Print Head Alignment When to Uninstall Your Product Software Related references Where to Get Help Resetting Control Panel Defaults If you have a problem with settings on the product control panel, you can reset them to their factory defaults. You can choose which settings to reset or reset them all. 1. Press the Setup button. 2. Press the arrow buttons to select Restore Default Settings and press the OK button. 258

259 You see this screen: 3. Select one of these options and press the OK button: Fax Send/Receive Settings: Resets all settings for sending and receiving faxes Fax Data Settings: Deletes the speed and group dial lists, header, and fax log Network Setting: Resets all network settings. All except Network & Fax Setting: Resets all control panel settings, except for network and fax settings. All Settings: Resets all control panel settings. You see a confirmation screen. 4. Select Yes and press the OK button to reset the selected settings. (Select No and press the OK button if you want to cancel the operation.) Parent topic: Solving Problems Solving Setup Problems Check these sections if you have problems while setting up your product. Noise After Ink Installation Software Installation Problems Control Panel Setup Problems Parent topic: Solving Problems 259
260 Noise After Ink Installation If you hear noises from your product after installing ink, try these solutions: Make sure you removed the foam and plastic protective materials from inside the product. The first time you install ink cartridges, the product must prime its print head. Wait until priming finishes before you turn off the product, or it may prime improperly and use excess ink the next time you turn it on. Your product is finished priming the print head when the power light stops flashing. If the product's print head stops moving or making noise, and the charging process has not finished after 15 minutes, turn off your product. Turn it back on and check to see if charging is still in progress. If it is still in progress, contact Epson for help. Parent topic: Solving Setup Problems Software Installation Problems If you have problems while installing your product software, try these solutions: Make sure your product is turned on and any necessary cables are securely connected at both ends. If you still have problems installing software, disconnect the cable and carefully follow the instructions on the Start Here sheet. Also make sure your system meets the requirements for your operating system. Close any other programs, including screen savers and virus protection software, and install your product software again. In Windows, make sure your product is selected as the default printer and the correct port is shown in the printer properties. If you see any error message or your software does not install correctly in Windows, you may not have software installation privileges. Contact your System Administrator. Parent topic: Solving Setup Problems Related concepts When to Uninstall Your Product Software Related references Windows System Requirements Mac System Requirements Control Panel Setup Problems If you have problems setting up the control panel, try these solutions: To view LCD screen text in a different language, select a different language setting for the panel. 260
261 To turn off the beep heard when you press a button, turn off the panel's sound setting. This also turns off the dialing sound for sending faxes. Parent topic: Solving Setup Problems Related tasks Changing LCD Screen Language Turning Off Control Panel Sounds Solving Network Problems Check these solutions if you have problems setting up or using your product on a network. Network Software Cannot Find Product on a Network Product Does Not Appear in Mac OS X Printer Window Cannot Print Over a Network Cannot Scan Over a Network Printing a Network Status Sheet Parent topic: Solving Problems Network Software Cannot Find Product on a Network If EpsonNet Setup cannot find your product on a network, try these solutions: Make sure your product is turned on and connected to your network. Verify connection using your product control panel. If necessary, reinstall your product software and try running EpsonNet Setup again. Parent topic: Solving Network Problems Related concepts When to Uninstall Your Product Software Product Does Not Appear in Mac OS X Printer Window If your product does not appear in the Mac OS X printer window, try these solutions: Turn your product off, wait 30 seconds, then turn it back on again. If you are connecting the product via EpsonNet Setup, make sure your product software was installed correctly. If necessary, reinstall your software. Parent topic: Solving Network Problems 261
262 Cannot Print Over a Network If you cannot print over a network, try these solutions: Make sure that your product is turned on. Make sure you install your product's network software as described in your product documentation. Print a network status sheet and verify that the network settings are correct. If the network status is Disconnected, check any cable connections and turn your product off and then on again. If you are using TCP/IP, make sure the product's IP address is set correctly for your network. If your network does not assign IP addresses using DHCP, set the IP address manually. If network printing is slow, print a network status sheet and check the signal strength. If it is poor, place your product closer to your router or access point. Note: Avoid placing your product near a microwave oven, 2.4 GHz cordless phone, or large metal object, such as a filing cabinet. Check your wired LAN router or access point to see if the LED for the port to which your product is connected is on or flashing. If the link LED is off, try the following: Make sure the Ethernet cable is securely connected to your product and to your router, access point, switch, or hub. Try connecting your product to a different port or a different router, access point, switch, or hub. Try connecting with a different Ethernet cable. Try printing to your product from another computer on the network. Parent topic: Solving Network Problems Cannot Scan Over a Network If you cannot start Epson Scan for scanning over a network, try these solutions: If you are scanning a large original at a high resolution, a network communication error may occur. Try scanning again at a lower resolution. If network communication was interrupted while starting Epson Scan, exit Epson Scan, wait a few seconds, and restart it. If Epson Scan cannot restart, turn off your product, turn it back on, and try restarting Epson Scan again. Check the connection setting and test the connection using Epson Scan Settings: 262
263 Windows: Click or Start > All Programs or Programs > EPSON > EPSON Scan > EPSON Scan Settings. Make sure the Connection setting is set to Network, then click the Test button. Mac OS X: Open the Applications folder, click Epson Software, and click EPSON Scan Settings. Make sure the Connection setting is set to Network, then click the Test button. Make sure the option selected as the Timeout Setting in the Epson Scan Settings program is long enough to complete scanning over a network. You may need to disable the firewall and any anti-virus software on your wireless router or access point. Note: With Mac OS X 10.6, 10.7, or 10.8, in addition to scanning with Image Capture, you can download and install Epson Scan scanning software. Epson Scan provides additional image adjustment and photo correction features for enhancing scanned images, and provides an interface for TWAIN-compliant OCR scanning software, such as ABBYY FineReader. To download Epson Scan, visit Epson's driver download site (U.S. downloads or Canadian downloads). Parent topic: Solving Network Problems Related topics Scanning Printing a Network Status Sheet You can print a network status sheet to help you determine the causes of any problems you may have using your product on a network. 1. Press the Setup button. 2. Select Network Settings and press the OK button. You see this screen: 263
 Examine the settings shown on the network status sheet to diagnose any problems you have.")
264 3. Select Confirm Network Settings and press the OK button. 4. Press either of the Start buttons to print the network status sheet. (Press the Stop/Reset button if you want to cancel the operation.) Examine the settings shown on the network status sheet to diagnose any problems you have. Parent topic: Solving Network Problems Solving Copying Problems Check these solutions if you have problems copying with your product. Product Makes Noise, But Nothing Copies Product Makes Noise When It Sits for a While Parent topic: Solving Problems Product Makes Noise, But Nothing Copies If your product makes a noise, but nothing copies, try these solutions: Run a nozzle check to see if any of the print head nozzles are clogged. Then clean the print head, if necessary. If the nozzle check page does not print, but the product's power is on, make sure your product software is installed correctly. Make sure your product is level (not tilted). Parent topic: Solving Copying Problems 264
265 Related concepts Print Head Nozzle Check Print Head Cleaning Product Makes Noise When It Sits for a While Your product is performing routine maintenance. This is normal. Parent topic: Solving Copying Problems Solving Paper Problems Check these sections if you have problems using paper with your product. Paper Feeding Problems Paper Jam Problems Inside the Product Paper Jam Problems in the Cassette Paper Jam Problems in the Duplexer Document Jams in the Automatic Document Feeder Paper Ejection Problems Parent topic: Solving Problems Paper Feeding Problems If you have problems feeding paper, try these solutions: If paper does not feed for printing, remove it from the tray or cassette. Reload it against the right side, then adjust the edge guides. Make sure the paper stack is not above the tab on the edge guides inside the cassette. If multiple pages feed at once, remove the paper, fan the edges to separate the sheets, and reload it. Do not load more than the recommended number of sheets. If paper jams when you print on both sides of the paper, try loading fewer sheets. For best results, follow these guidelines: Use new, smooth, high-quality paper that is not curled, creased, old, too thin, or too thick. Load paper in the cassette printable side down. Do not load binder paper with holes in the cassette. Follow any special loading instructions that came with the paper. 265
266 Parent topic: Solving Paper Problems Related references Paper Jam Problems Inside the Product Paper Jam Problems in the Cassette Paper Jam Problems in the Duplexer Document Jams in the Automatic Document Feeder Paper Loading Capacity Related topics Loading Paper Paper Jam Problems Inside the Product If paper has jammed inside the product, try these solutions: 1. Cancel the print job from your computer, if necessary. 2. Open the front cover. 3. Remove any paper inside, including torn pieces. 266
267 4. Close the front cover. 5. If any jammed paper remains near the output tray, carefully remove it. 6. Press either of the Start buttons to resume printing. Parent topic: Solving Paper Problems 267
268 Related references Paper Jam Problems in the Cassette Paper Jam Problems in the Duplexer Paper Jam Problems in the Cassette If paper has jammed in the cassette, try this solution: 1. Close the output tray. 2. Pull out the paper cassette. 3. Remove any jammed paper inside the cassette. 4. Remove any paper jammed inside the paper cassette slot. 268
269 5. Carefully follow all paper loading instructions when you load new paper. 6. Replace the paper cassette. 269
270 7. Press either of the Start buttons to resume printing. Parent topic: Solving Paper Problems Related references Paper Jam Problems Inside the Product Paper Jam Problems in the Duplexer Paper Jam Problems in the Duplexer If paper has jammed in the duplexer (rear unit), try these solutions: 1. Cancel the print job from your computer, if necessary. 2. Press the buttons on the sides of the duplexer and remove it. 270
271 3. Carefully remove the jammed paper. 4. If paper is jammed in the duplexer, remove the paper as shown. 271
272 5. Press the buttons on the duplexer as you press it into place on your product. 6. Press either of the Start buttons to resume printing. Parent topic: Solving Paper Problems Related references Paper Jam Problems Inside the Product Paper Jam Problems in the Cassette 272
273 Related tasks Placing Originals in the Automatic Document Feeder Document Jams in the Automatic Document Feeder If you have problems with document jams in the automatic document feeder (ADF), try these solutions: 1. Remove your originals from the ADF. 2. Open the ADF cover. 3. Remove any jammed pages. 273
274 Caution: Do not remove pages jammed inside the ADF without opening the cover or you could damage the ADF. 4. Leave the ADF cover open, then raise the document cover. 5. Remove any jammed pages. 274
275 6. Lower the document cover. 7. Raise the ADF input tray. 8. Carefully remove the jammed pages. 275
276 9. Lower the ADF input tray and reload your originals. Caution: Make sure you do not load the ADF beyond its capacity for your paper size. Also make sure the originals you load are not bent, folded, or curled and do not have tape, staples, or other materials that could obstruct the feeder. 10. Follow the prompts on the LCD screen to clear any error messages. Parent topic: Solving Paper Problems Related tasks Placing Originals in the Automatic Document Feeder Paper Ejection Problems If you have problems with paper ejecting properly, try these solutions: If paper does not eject fully, you may have set the wrong paper size. Cancel printing to eject the paper. Select the correct paper size when you reprint. If paper is wrinkled when it ejects, it may be damp or too thin. Load new paper and be sure to select the correct paper type setting when you reprint. 276
277 Parent topic: Solving Paper Problems Related references Paper Jam Problems Inside the Product Paper Jam Problems in the Cassette Paper Jam Problems in the Duplexer Paper or Media Type Settings Related tasks Cancelling Printing Using a Product Button Related topics Loading Paper Solving PCL/PostScript Problems Nothing Prints Check these sections if you have problems with the PCL or PostScript printer software. Nothing Prints Settings Are Missing from the PCL or PostScript Printer Software Printing a PS3 (PostScript) Status Sheet Parent topic: Solving Problems If your document doesn't print, try these solutions: Make sure your product is turned on and properly connected. Check your product's control panel for error messages. The PCL and PostScript printing software will not display any error messages on your computer screen if a printing error occurs. Make sure your product is selected as the printer in your printing program. Parent topic: Solving PCL/PostScript Problems Settings Are Missing from the PCL or PostScript Printer Software If certain settings are missing or incorrect in the PCL or PostScript printer software, try these solutions: Make sure your product is selected in the PCL printer software. If you are using the product as a laser printer replacement and have not installed Epson printer software, certain options and functions may not be available. Install the standard Epson, PCL, or PostScript printer software to access additional settings and features. 277

278 Parent topic: Solving PCL/PostScript Problems Related tasks Selecting the Product - PCL Printer Software - Windows Printing a PS3 (PostScript) Status Sheet You can print a PS3 (PostScript) status sheet to confirm the current font information and PostScript printer software version. 1. Press the Setup button. You see this screen: 2. Select Print PS3 Status Sheet and press the OK button. 3. Press either of the Start buttons to print the PS3 status sheet. (Press the Stop/Reset button if you want to cancel the operation.) Examine the settings shown on the network status sheet to diagnose any problems you have. Parent topic: Solving PCL/PostScript Problems Solving Problems Printing from a Computer Check these sections if you have problems while printing from your computer. Note: For problems while printing with the PCL or PostScript (PS3) printer software, see the sections covering that software in this manual. 278
WorkForce Pro WP-4530 User's Guide
 WorkForce Pro WP-4530 User's Guide Contents WorkForce Pro WP-4530 User's Guide... 13 Product Basics... 14 Setting Up the Control Panel... 14 Printer Parts - Control Panel Buttons and Lights... 14 Changing
WF-3520/WF-3530 User's Guide
 WF-3520/WF-3530 User's Guide Contents WF-3520/WF-3530 User's Guide... 13 Product Basics... 14 Setting Up the Control Panel... 14 Control Panel Buttons and Lights... 14 Changing LCD Screen Language...
WF-2650 User's Guide
 WF-2650 User's Guide Contents WF-2650 User's Guide... 13 Product Basics... 14 Using the Control Panel... 14 Control Panel Buttons and Lights... 14 Status Icons... 15 Entering Characters on the LCD Screen...
WF-4630/WF-4640 User's Guide
 WF-4630/WF-4640 User's Guide Contents WF-4630/WF-4640 User's Guide... 13 Product Basics... 14 Using the Control Panel... 14 Control Panel Buttons and Lights... 15 Status Icon Information... 16 Status
Contents XP-610 User's Guide... 13 Product Basics... 14 Wi-Fi Networking... 30
 XP-610 User's Guide Contents XP-610 User's Guide... 13 Product Basics... 14 Setting Up the Control Panel... 14 Control Panel Buttons and Lights... 14 Adjusting Control Panel Position... 15 Changing LCD
WF-2630 User's Guide
 WF-2630 User's Guide Contents WF-2630 User's Guide... 13 Product Basics... 14 Using the Control Panel... 14 Control Panel Buttons and Lights... 14 Status Icons... 15 Entering Characters on the LCD Screen...
Contents XP-410 User's Guide... 11 Product Basics... 12 Wi-Fi Networking... 25
 XP-410 User's Guide Contents XP-410 User's Guide... 11 Product Basics... 12 Setting Up the Control Panel... 12 Control Panel Buttons and Lights... 12 Adjusting Control Panel Position... 13 Changing LCD
WF-2540 User's Guide
 WF-2540 User's Guide Contents WF-2540 User's Guide... 13 Product Basics... 14 Setting Up the Control Panel... 14 Control Panel Buttons and Lights... 14 Changing LCD Screen Language... 15 Turning Off Control
Contents XP-860 User's Guide... 15 Product Basics... 16 Wi-Fi or Wired Networking... 37
 XP-860 User's Guide Contents XP-860 User's Guide... 15 Product Basics... 16 Using the Control Panel... 16 Control Panel Buttons and Lights... 16 Using the LCD Screen... 17 Adjusting Control Panel Position...
WF-2520/WF-2530 User's Guide
 WF-2520/WF-2530 User's Guide Contents WF-2520/WF-2530 User's Guide... 13 Product Basics... 14 Setting Up the Control Panel... 14 Control Panel Buttons and Lights... 14 Changing LCD Screen Language...
WF-3620/WF-3640 User's Guide
 WF-3620/WF-3640 User's Guide Contents WF-3620/WF-3640 User's Guide... 13 Product Basics... 14 Setting Up the Control Panel... 14 Control Panel Buttons and Lights... 15 Status Icons... 16 Status Button...
XP-420/XP-424 User's Guide
 XP-420/XP-424 User's Guide Contents XP-420/XP-424 User's Guide... 13 Product Basics... 14 Using the Control Panel... 14 Control Panel Buttons and Lights... 14 Adjusting Control Panel Position... 15 Changing
Contents XP-620 User's Guide... 13 Product Basics... 14 Wi-Fi Networking... 32
 XP-620 User's Guide Contents XP-620 User's Guide... 13 Product Basics... 14 Using the Control Panel... 14 Control Panel Buttons and Lights... 14 Using the LCD Screen... 15 Adjusting Control Panel Position...
WF-3540 User's Guide
 WF-3540 User's Guide Contents WF-3540 User's Guide... 13 Product Basics... 14 Setting Up the Control Panel... 14 Control Panel Buttons and Lights... 14 Changing LCD Screen Language... 15 Turning Off Touch
Contents XP-310 User's Guide... 11 Product Basics... 12 Wi-Fi Networking... 25
 XP-310 User's Guide Contents XP-310 User's Guide... 11 Product Basics... 12 Using the Control Panel... 12 Control Panel Buttons and Lights... 12 Adjusting Control Panel Position... 13 Changing LCD Screen
WF-R5690 User's Guide
 WF-R5690 User's Guide Contents WF-R5690 User's Guide... 15 Product Basics... 16 Using the Control Panel... 16 Control Panel Buttons and Lights... 17 Status Icon Information... 18 Status Button Information...
Artisan 1430 User's Guide
 Artisan 1430 User's Guide Contents Artisan 1430 User's Guide... 9 Product Basics... 10 Printer Parts Locations... 10 Printer Parts - Top... 10 Printer Parts - Back... 11 Printer Parts - Inside... 12 Printer
Contents XP-400 User's Guide... 11 Product Basics... 12 Selecting Wireless Network Settings From the Control Panel... 26 Loading Paper...
 XP-400 User's Guide Contents XP-400 User's Guide... 11 Product Basics... 12 Using the Control Panel... 12 Control Panel Buttons and Lights... 12 Adjusting Control Panel Position... 13 Changing LCD Screen
WorkForce 520/525 Series Quick Guide
 WorkForce 520/525 Series Quick Guide Network Setup Basic Copying, Printing, Scanning, and Faxing Maintenance Solving Problems Contents Network Setup........................................ 4 Wireless Network
Quick Guide. WorkForce 630 Series. Basic Copying, Printing, Scanning, and Faxing Maintenance Network Setup Solving Problems
 WorkForce 630 Series Includes WorkForce 630/632/633/635 Quick Guide Basic Copying, Printing, Scanning, and Faxing Maintenance Network Setup Solving Problems Contents Loading Paper.........................................
WorkForce 610 Series Quick Guide
 WorkForce 610 Series Quick Guide Basic Printing, Copying, Scanning, and Faxing Maintenance Solving Problems Contents Using the Control Panel................................ 4 Adjusting the Control Panel...................................
Artisan 725 Series Quick Guide
 Artisan 725 Series Quick Guide Basic Copying, Printing, and Scanning Maintenance Network Setup Solving Problems Contents Using the Control Panel................................ 4 Adjusting the Control
Epson Stylus Photo R1900 Series. Printer Parts. Accessories. Ink Cartridges. 11/07 Epson Stylus Photo R1900 Series - 1. Edge guide
 Printer Parts Edge guide Paper support and extensions Control panel buttons CD/DVD tray guide Roll paper holders Output tray and extensions CD/DVD tray 8-cm CD/DVD adapter USB port (for camera cable) Printer
EPSON Stylus. Start Here
 EPSON Stylus C84 EPSON Stylus Start Here C84 CPD-16675R1 4043482-00 XXX 1 Unpack 1 Remove everything from the box. Paper support Printer Manual Power cord Ink cartridges CD-ROM 2 Remove all the blue tape
Understanding the home screen
 Quick Reference Learning about the printer Using the printer control panel 1 2 3 4 5 6 Understanding the home screen When the printer is turned on, the display shows a basic screen, referred to as the
MG2400 series. Online Manual. Troubleshooting. English
 MG2400 series Online Manual Troubleshooting English Contents Troubleshooting................................................... 5 Problems with Printing.....................................................
Contents DS-510 User's Guide... 7 Scanner Basics... 8 Placing Originals on the Scanner... 15 Using the Network Interface Unit... 30 Scanning...
 DS-510 User's Guide Contents DS-510 User's Guide... 7 Scanner Basics... 8 Scanner Parts Locations... 8 Scanner Parts... 8 Scanner Buttons and Lights... 10 Page Separation Lever... 12 User Replaceable
2500 Series All-In-One
 2500 Series All-In-One User's Guide December 2006 www.lexmark.com Lexmark and Lexmark with diamond design are trademarks of Lexmark International, Inc., registered in the United States and/or other countries.
Understanding the home screen
 Quick Reference Learning about the printer Using the printer control panel 1 2 3 4 5 6 Understanding the home screen When the printer is turned on, the display shows a basic screen, referred to as the
WorkForce 545/645 Series Quick Guide
 WorkForce 545/645 Series Quick Guide Your WorkForce 545/645 Series.................................... 2 Using Special Papers............................................ 4 Placing Originals for Copying,
EPSON Stylus C66. Printer Parts. Printer Specifications. Accessories. User Replaceable Parts. Printing. Ink Cartridges. Mechanical.
 Printer Parts support Left edge guide Ink button and light button and light Power button and light Printer cover Epson paper name PremierArt Matte Scrapbook Photo User Replaceable Parts Letter SCR1002
Xerox DocuPrint P12 Print Driver User Guide
 Xerox DocuPrint P12 Print Driver User Guide Xerox Corporation 800 Phillips Road Webster, New York 14580 1998 Xerox Corporation. Xerox, The Document Company, the stylized X, and the identifying product
Epson Stylus NX620/625 Series Quick Guide
 Epson Stylus NX620/625 Series Quick Guide Basic Copying, Printing, and Scanning Maintenance Network Setup Solving Problems Contents Loading Paper......................................... 4 Using Special
Version 1.0 November 2010. Xerox Phaser 4600/4620 User Guide
 Version 1.0 November 2010 Xerox Phaser 4600/4620 2010 Xerox Corporation. XEROX and XEROX and Design are trademarks of Xerox Corporation in the United States and/or other countries. Changes are periodically
Star t Here. Epson Stylus Photo RX620. Unpack and Assemble. 1 Make sure you have all the parts shown here. If any parts are missing,
 Star t Here Epson Stylus Photo RX0 Unpack and Assemble Make sure you have all the parts shown here. If any parts are missing, contact Epson as described on the back of this sheet. Epson Stylus Photo RX0
Checking the Package Contents. Installing the Printer Software. Connecting. Unpacking the. the Printer. Printer. Attaching
 Installing the Printer Software Checking the Package Contents Connecting the Printer Unpacking the Printer Installing the Ink Cartridges Plugging in the Printer Attaching the Printer Parts 4032216-00 EUL
Epson Stylus NX420 Series Quick Guide
 Epson Stylus NX420 Series Quick Guide Wireless Network Setup Basic Copying, Printing, and Scanning Maintenance Solving Problems Contents Wireless Network Setup................................ 4 Installing
Lexmark T64x Troubleshooting Guide
 Lexmark T64x Troubleshooting Guide Online technical support Technical support is available on our Lexmark Web site at www.lexmark.com. Checking an unresponsive printer If the printer is not responding,
Epson Stylus NX510 Series Quick Guide
 Epson Stylus NX510 Series Quick Guide Basic Copying, Printing, and Scanning Maintenance Solving Problems Contents Introduction........................................... 4 Loading Paper.........................................
Contents DS-520 User's Guide... 7 Scanner Basics... 8 Placing Originals on the Scanner... 15 Using the Network Interface Unit... 30 Scanning...
 DS-520 User's Guide Contents DS-520 User's Guide... 7 Scanner Basics... 8 Scanner Parts Locations... 8 Scanner Parts... 8 Scanner Buttons and Lights... 10 Page Separation Lever... 12 User Replaceable
SOFTWARE USER S GUIDE
 SOFTWARE USER S GUIDE MFC-8220 Table of contents 1 Using the MFC as a printer...1-1 Using the Brother MFC printer driver...1-1 How to print your original document...1-2 Manual Duplex Printing... 1-2 Face-down
How To Use An Epson Scanner On A Pc Or Mac Or Macbook
 Perfection V550 Photo User's Guide Contents Perfection V550 Photo User's Guide... 7 Scanner Basics... 8 Scanner Parts Locations... 8 Scanner Parts... 8 Scanner Buttons and Lights... 12 Changing the Power
Learning about your All-In-One on page 9. Information about the printer parts and software. How to use your All-In-One in a network environment.
 X6100 Series User s Guide for Windows Learning about your All-In-One on page 9 Information about the printer parts and software. Networking on page 75 How to use your All-In-One in a network environment.
PostScript User Guide 604P17454_EN
 CopyCentre C118 WorkCentre M118/M118i PostScript User Guide 604P17454_EN Prepared by: The Document Company Xerox GKLS European Operations Bessemer Road Welwyn Garden City Hertfordshire AL7 1HE ENGLAND
User s Guide NPD4893-03 EN
 NPD4893-03 EN Copyright and Trademarks Copyright and Trademarks Copyright and Trademarks No part of this publication may be reproduced, stored in a retrieval system, or transmitted in any form or by any
2600 Series User's Guide
 2600 Series User's Guide 2008 www.lexmark.com Contents Safety information...7 Introduction...8 Finding information about the printer...8 Setting up the printer...10 Bypassing security warnings during
User s Guide NPD4966-00 EN
 NPD4966-00 EN Copyright and Trademarks Copyright and Trademarks Copyright and Trademarks No part of this publication may be reproduced, stored in a retrieval system, or transmitted in any form or by any
LASERJET PRO 400. User Guide M401
 LASERJET PRO 400 User Guide M401 HP LaserJet Pro 400 M401 Printer Series User Guide Copyright and License 2012 Copyright Hewlett-Packard Development Company, L.P. Reproduction, adaptation, or translation
Epson Stylus Pro 7900/9900 QUICK REFERENCE GUIDE
 Epson Stylus Pro 7900/9900 QUICK REFERENCE GUIDE Printer Parts Front Roll paper cover Roll paper holder Front cover Control panel Ink bay Ink bay Paper basket Casters Back Interface connector for optional
C510. Setup Guide. December 2003. www.lexmark.com
 C510 Setup Guide December 2003 www.lexmark.com Edition: December 2003 The following paragraph does not apply to any country where such provisions are inconsistent with local law: LEXMARK INTERNATIONAL,
Epson Stylus CX9475Fax. Start Here
 Epson Stylus CX9475Fax Start Here Unpack Caution: Do not open ink cartridge packages until you are ready to install the ink. Cartridges are vacuum packed to maintain reliability. If anything is missing,
Start Here USB. (802.11) (Ethernet)
 (Ethernet)") Start Here 1 USB 802.11 Ethernet USB cable users: Do not connect the USB cable until Section A. USB A USB Wireless (802.11) or wired (Ethernet) network users : you must follow the instructions in this
Start Here 1 USB 802.11 Ethernet USB cable users: Do not connect the USB cable until Section A. USB A USB Wireless (802.11) or wired (Ethernet) network users : you must follow the instructions in this
Contents DS-560 User's Guide... 7 Scanner Basics... 8 Loading Originals... 15 Wi-Fi Networking... 33
 DS-560 User's Guide Contents DS-560 User's Guide... 7 Scanner Basics... 8 Scanner Parts Locations... 8 Scanner Parts... 8 Scanner Buttons and Lights... 10 Page Separation Lever... 12 User Replaceable
WF-3520. Quick Guide
 WF-3520 Quick Guide Your WF-3520.................................................. 2 Using Special Papers............................................ 4 Placing Originals for Copying, Scanning, or Faxing......................
Pro710 Series User's Guide
 Pro710 Series User's Guide November 2011 www.lexmark.com Machine type(s): 4449 Model(s): 701, 70E Contents 2 Contents Safety information...6 About your printer...7 Thank you for choosing this printer!...7
Epson Stylus CX3700 Series User s Guide 4 About Your Epson Stylus CX3700 Series 6 About Exif Print 6 About Your Software 7 Loading Paper 9 Single
 Epson Stylus CX3700 Series User s Guide 4 About Your Epson Stylus CX3700 Series 6 About Exif Print 6 About Your Software 7 Loading Paper 9 Single Sheets 9 Envelopes 12 Special Papers 14 Printing in Windows
Using PictureMate Without a Computer
 Using PictureMate Without a Computer Get to Know Your PictureMate LCD menu screen Turn PictureMate on or off Use these buttons to move through menu options Press to print Save your photos to an external
Preview monitor Control panel. Memory card cover EXT I/F USB port. LCD screen. Save custom Advanced. Paper. Save photos to external disk or CD-R
 Printer Parts EPSON s Printer support support extension Printer cover Preview monitor Control panel When printing from your computer using the Epson printer driver, you can choose from any of the following
Printer Reference. Operating Instructions
 Operating Instructions Printer Reference 1 2 3 4 5 Preparing the Machine Setting Up the Printer Driver Other Print Operations Direct Printing from a Digital Camera (PictBridge) Appendix Read this manual
Quick Setup Guide DCP-8040
 Quick Setup Guide DCP-8040 DCP-8045D Before you can use the DCP, you must set up the hardware and install the driver. To help you get started in setting up the machine and installing the driver and software,
Epson Stylus Photo R3000 Series. Basics
 Epson Stylus Photo R3000 Series Basics Copyright Notice All rights reserved. No part of this publication may be reproduced, stored in a retrieval system, or transmitted in any form or by any means, electronic,
Epson WorkForce 30 Series Quick Guide
 Epson WorkForce 30 Series Quick Guide Basic Printing Maintaining Your Printer Solving Problems Contents Introduction........................................... 3 Loading Paper.........................................
HP Officejet 4630 e-all-in-one series
 HP Officejet 4630 e-all-in-one series Table of contents 1 HP Officejet 4630 e-all-in-one series Help... 1 2 Get to know the HP Officejet 4630 series... 3 Printer parts... 4 Control panel and status lights...
Basic Guide. Advanced Guide. Troubleshooting. How to Use This Manual Printing This Manual. Describes the summary of this product.
 Canon ip4800 series On-screen Manual Page 1 of 468 pages How to Use This Manual Printing This Manual MC-5240-V1.00 Basic Guide Describes the summary of this product. Advanced Guide Describes the detailed
HP LaserJet M1522 MFP Series Fax
 Schedule a fax Send a delayed fax 1 Load the document into the automatic document feeder (ADF) input tray or onto the flatbed scanner. NOTE: This example shows setting the time for 7:00 pm, using 12-hour
SOFTWARE MANUAL. Please ensure that you read the instruction manual carefully before use. About software
 SOFTWARE MANUAL Please ensure that you read the instruction manual carefully before use Software Notes The attached software is a camera driver and image editing software tool for Windows. Under no circumstances
HP Deskjet 2640 series
 HP Deskjet 2640 series Table of contents 1 HP Deskjet 2640 series Help... 1 2 Get to know the HP Deskjet 2640 series... 3 Printer parts... 4 Control panel and status lights... 6 3 Print... 7 Print documents...
HP DeskJet Ink Advantage 3830 All-in-One series
 HP DeskJet Ink Advantage 3830 All-in-One series Table of contents 1 HP DeskJet 3830 series Help... 1 2 Get started... 3 Printer parts... 4 Control panel and status lights... 5 Load media... 7 Load original...
Epson Stylus Photo RX580. Product Parts. 11/06 Epson Stylus Photo RX580-1. AC inlet. Feeder guard. Sheet feeder. Paper support.
 Product Parts AC inlet Sheet feeder Feeder guard Paper support Document cover Edge guide LCD screen Control panel Tray lever USB port Front tray Front tray extensions Document table EXT. I/F USB port (for
DIGITAL MULTIFUNCTIONAL SYSTEM
 MODEL: MX-M283N MX-M363N MX-M453N MX-M503N DIGITAL MULTIFUNCTIONAL SYSTEM Software Setup Guide BEFORE INSTALLING THE SOFTWARE SETUP IN A WINDOWS ENVIRONMENT SETUP IN A MACINTOSH ENVIRONMENT TROUBLESHOOTING
Basic User s Guide MFC-J4620DW MFC-J4625DW. Version 0
 Basic User s Guide MFC-J4620DW MFC-J4625DW Version 0 UK If you must contact Customer Service Please complete this information for future reference: Model Number: MFC-J4620DW and MFC-J4625DW (Circle your
In addition to information on preventing jams and what causes a paper jam, this section includes instructions for clearing the following jams:
 Phaser 4400 Laser Printer Paper Jams In addition to information on preventing jams and what causes a paper jam, this section includes instructions for clearing the following jams: Paper size jam see page
Xerox 700 Digital Color Press with Integrated Fiery Color Server. Utilities
 Xerox 700 Digital Color Press with Integrated Fiery Color Server Utilities 2008 Electronics for Imaging, Inc. The information in this publication is covered under Legal Notices for this product. 45072726
SOFTWARE USER S GUIDE
 SOFTWARE USER S GUIDE DCP-7020 MFC-7220 MFC-7225N MFC-7420 MFC-7820N Version A Table of Contents 1 Using the machine as a printer Using the Brother printer driver...1-1 How to print your document...1-1
Control panel. Memory card cover. Paper. LCD screen. Save custom Advanced. Paper. Save photos to external disk or CD-R
 Printer Parts Printer support support extension EPSON s When printing from your computer using the EPSON printer driver, you can choose from any of the following EPSON papers. When printing without a computer
Xerox EX Print Server, Powered by Fiery, for the Xerox 700 Digital Color Press. Printing from Windows
 Xerox EX Print Server, Powered by Fiery, for the Xerox 700 Digital Color Press Printing from Windows 2008 Electronics for Imaging, Inc. The information in this publication is covered under Legal Notices
Epson Stylus C86. Printer Parts. User Replaceable Parts. Printer Specifications. Accessories. Paper. Printing. Ink Cartridges
 Printer Parts Ink button Left edge guide button Power button support Printer cover User Replaceable Parts Right edge guide Output tray Output tray extension Parallel port USB port Part Part number support
Legal Notes. Regarding Trademarks. Model supported by the KX printer driver. 2010 KYOCERA MITA Corporation
 Legal Notes Unauthorized reproduction of all or part of this guide is prohibited. The information in this guide is subject to change for improvement without notice. We cannot be held liable for any problems
Lexmark 8300 Series All-In-One
 Lexmark 8300 Series All-In-One User's Guide August 2005 www.lexmark.com Lexmark and Lexmark with diamond design are trademarks of Lexmark International, Inc., registered in the United States and/or other
Perfection V800 Photo/V850 Pro User's Guide
 Perfection V800 Photo/V850 Pro User's Guide Contents Perfection V800 Photo/V850 Pro User's Guide... 7 Scanner Basics... 8 Scanner Parts Locations... 8 Scanner Parts... 8 Scanner Buttons and Lights...
Basic User s Guide MFC-J5620DW MFC-J5625DW MFC-J5720DW. Version 0
 Basic User s Guide MFC-J5620DW MFC-J5625DW MFC-J5720DW Version 0 UK If you must contact Customer Service Please complete this information for future reference: Model Number: MFC-J5620DW, MFC-J5625DW and
SOFTWARE USER S GUIDE
 SOFTWARE USER S GUIDE MFC-7840W MFC-7440N MFC-7340 MFC-7345N DCP-7040 DCP-7030 Not all models are available in all countries. Version B USA Trademarks The Brother logo is a registered trademark of Brother
Lenovo Miix 2 8. User Guide. Read the safety notices and important tips in the included manuals before using your computer.
 Lenovo Miix 2 8 User Guide Read the safety notices and important tips in the included manuals before using your computer. Notes Before using the product, be sure to read Lenovo Safety and General Information
HP OfficeJet 4650 All-in-One series
 HP OfficeJet 4650 All-in-One series Table of contents 1 How do I?... 1 2 Get started... 2 Accessibility... 2 Printer parts... 3 Control panel and status lights... 4 Paper basics... 6 Load media... 8 Load
Using Web Services for scanning on your network (Windows Vista SP2 or greater, Windows 7 and Windows 8)
") Using Web Services for scanning on your network (Windows Vista SP2 or greater, Windows 7 and Windows 8) The Web Services protocol allows Windows Vista (SP2 or greater), Windows 7 and Windows 8 users to
Using Web Services for scanning on your network (Windows Vista SP2 or greater, Windows 7 and Windows 8) The Web Services protocol allows Windows Vista (SP2 or greater), Windows 7 and Windows 8 users to
Dell V725w User's Guide
 Dell V725w User's Guide January 2012 www.dell.com support.dell.com Machine type(s): 4449 Model(s): 7d1, 7dE Contents 2 Contents Safety information...6 About your printer...7 Thank you for choosing this
Prospect Pro200 Series User's Guide
 Prospect Pro200 Series User's Guide November 2010 www.lexmark.com Machine type(s): 4443 Model(s): 2W2, 2WE, 2Wn, 2nE Contents Safety information...5 About your printer...6 Thank you for choosing this printer!...6
Chapter 2 Printing... 2-1 Printing Procedure...2-1
 imageprograf HDI Driver Guide Contents Before You Begin...ii Compatible Printers...ii Applicable AutoCAD Versions...ii How to Use This Guide...ii Conventions...ii Button Notations...ii Trademarks...ii
How do I monitor the ink levels on my EPSON Stylus printer using Windows 2000 or XP?
 Faulty analysis Error indicators Status Monitor PrintJet Doesn't Print Mats are not drawn in or transported Mats are not delivered correctly The statusmonitor caused an error message Maintenance of PrintJet
HP LaserJet P2050 Series Printer Print tasks
 Cancel a print job Stop the current print job from the control panel Press the Cancel button on the control panel. OK Stop the current print job from the software program When you send the print job, a
SOFTWARE USER S GUIDE
 SOFTWARE USER S GUIDE Not all models are available in all countries. For DCP users; This documentation is for both MFC and DCP models. Where it says MFC in this user s guide, please read MFC as DCP. Version
Epson Stylus Pro 3880 USER S GUIDE
 Epson Stylus Pro 3880 USER S GUIDE All rights reserved. No part of this publication may be reproduced, stored in a retrieval system, or transmitted in any form or by any means, electronic, mechanical,
fi-7160/ fi-7260/ fi-7180/ fi-7280 Getting Started Image Scanner Checking the Components P3PC-4252-01EN
 P3PC-4252-01EN fi-7160/ fi-7260/ fi-7180/ fi-7280 Getting Started Image Scanner Thank you for purchasing the fi-7160/fi-7260/fi-7180/fi-7280 color image scanner. This manual describes the preparation required
Solving printing problems 1
 Solving printing problems 1 Some printer problems are very easy to solve. If your printer is not responding, first make sure: The printer cable is securely attached to the printer and the host computer.
Version 1.1 December 2013. Xerox Phaser 3320DN/3320DNI User Guide
 Version 1.1 December 2013 Xerox Phaser 3320DN/3320DNI 2013 Xerox Corporation. All rights reserved, Xerox and Xerox and Design are trademarks of Xerox Corporation in the United States and/or other countries.
Quick Setup Guide MFC-240C STEP 1 STEP 2. Setup is Complete! Setting Up the Machine. Installing the Driver & Software
 MFC-240C Quick Setup Guide Before you can use the machine, you must set up the hardware and install the software. Please read this Quick Setup Guide for the correct setup procedure and installation instructions.
HP Officejet 5740 e-all-in-one series
 HP Officejet 5740 e-all-in-one series Table of contents 1 How do I?... 1 2 Get started... 2 Printer parts... 3 Control panel and status lights... 5 Paper basics... 8 Load media... 11 Load original...
www.ricoh-usa.com Ricoh Product Line Segment 2 thru 6 MP/5000/5001, MP C5000/C6000/C6501, MP7000/8000, MP6001/7001, MP8001/9001, MP907EX
 www.ricoh-usa.com Ricoh Product Line Segment 2 thru 6 MP/5000/5001, MP C5000/C6000/C6501, MP7000/8000, MP6001/7001, MP8001/9001, MP907EX Understanding Your Ricoh Control Panel To access system administrator
SOFTWARE USER S GUIDE
 SOFTWARE USER S GUIDE DCP-8080DN DCP-8085DN MFC-8480DN MFC-8680DN MFC-8690DW MFC-8890DW Not all models are available in all countries. Version B USA Trademarks The Brother logo is a registered trademark
User's Guide NPD5235-00 EN
 NPD5235-00 EN Copyright Copyright No part of this publication may be reproduced, stored in a retrieval system, or transmitted in any form or by any means, electronic, mechanical, photocopying, recording,