Instruction Manual. Quad Line Self-Leveling Cross-Line Laser with Plumb Beam Model No
|
|
|
- Milo Watts
- 7 years ago
- Views:
Transcription

1 4386H-English_Manuals 2/24/11 3:04 PM Page 1 Quad Line Self-Leveling Cross-Line Laser with Plumb Beam Model No Instruction Manual Congratulations on your choice of this Quad Line Self-Leveling Cross-Line Laser with Plumb Beam. We suggest you read this instruction manual thoroughly before using the instrument. Save this instruction manual for future use. This tool emits four cross line laser beams and one down plumb beam. Beam visibility depends upon lighting conditions in the work area. This is a Class IIIa laser tool and is manufactured to comply with CFR 21, parts and as well as international safety rule IEC Johnson Level & Tool - Rev. 1 1
2 4386H-English_Manuals 2/24/11 3:04 PM Page 2 Table of Contents 1. Kit Contents 2. Features and Functions 3. Safety Instructions 4. Location/Content of Warning Labels 5. Location of Parts/Components 6. Operating Instructions 7. Using the Product 8. Self-Check & Fine Calibration 9. Technical Specifications 10. Application Demonstrations 11. Care and Handling 12. Product Warranty 13. Warranty Registration 14. Accessories 1. Kit Contents Description for Model Qty. Quad-Line Self-Leveling Cross-Line Laser 1 Tripodic Base 1 NiMH Rechargeable Battery Pack 1 Alkaline Battery Compartment (batteries not included) 1 6.4V Battery Adapter 1 Tinted Glasses 1 Magnetic Target 1 Instruction Manual with Warranty Card 1 Hard-Shell Carrying Case Johnson Level & Tool - Rev.1
3 4386H-English_Manuals 2/24/11 3:04 PM Page 3 2. Features and Functions Indoor and outdoor use (for outdoor use must use detector-not included) Simultaneously projects four self-leveling cross lines plus one plumb down dot Locking mechanism protects inner pendulum during transportation Self-leveling with visual and audible alarms when beyond leveling range Emits continuously both a solid or pulse beam (pulse beam for use with detector) Manual mode allows unit to tilt for extreme angles 3. Safety Instructions Please read and understand all of the following instructions, prior to using this tool. Failure to do so, may void the warranty. DANGER! Class IIIa Laser Product Max. Power Output: 5mW Wavelength: nm THIS TOOL EMITS LASER RADIATION. DO NOT STARE INTO BEAM. AVOID DIRECT EYE EXPOSURE Johnson Level & Tool - Rev. 1 3
4 4386H-English_Manuals 2/24/11 3:04 PM Page 4 ATTENTION IMPORTANT Read all instructions prior to operating this laser tool. Do not remove any labels from tool. Do not stare directly at the laser beam. Do not project the laser beam directly into the eyes of others. Do not set up laser tool at eye level or operate the tool near a reflective surface as the laser beam could be projected into your eyes or into the eyes of others. Do not place the laser tool in a manner that may cause someone to unintentionally look into the laser beam. Serious eye injury may result. Do not operate the tool in explosive environments, i.e. in the presence of gases or flammable liquids. Keep the laser tool out of the reach of children and other untrained persons. Do not attempt to view the laser beam through optical tools such as telescopes as serious eye injury may result. Always turn the laser tool off when not in use or left unattended for a period of time. Remove the batteries when storing the tool for an extended time (more than 3 months) to avoid damage to the tool should the batteries deteriorate. Do not attempt to repair or disassemble the laser tool. If unqualified persons attempt to repair this tool, warranty will be void. Use only original Johnson parts and accessories purchased from your Johnson authorized dealer. Use of non-johnson parts and accessories will void warranty Johnson Level & Tool - Rev.1
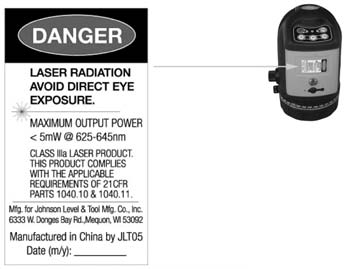


5 4386H-English_Manuals 2/24/11 3:04 PM Page 5 4. Location/Content of Warning Labels 2011 Johnson Level & Tool - Rev. 1 5


6 4386H-English_Manuals 2/24/11 3:04 PM Page 6 5. Location of Part/Components Laser Output Windows Circular Level Transportation Locking Knob Fine-adjustment knob Horizontal Circle Indication Horizontal Circle Keypad Battery Door Tripodic Base 5/8 Screw Thread Adjustable Foot Screws Johnson Level & Tool - Rev.1


7 4386H-English_Manuals 2/24/11 3:04 PM Page 7 6. Operating Instructions IMPORTANT: It is the responsibility of the user to verify the calibration of the instrument before each use. Battery Installation Note: Always check to be sure that the on/off switch is in the off position before removing and replacing batteries. Alkaline batteries installation Put 4 AA alkaline batteries into the battery compartment according to the polarity indication shown in the battery compartment. Put the battery compartment on the laser and tighten the locking screw. Rechargeable battery compartment installation Put the rechargeable battery compartment on the laser and tighten the locking screw Johnson Level & Tool - Rev. 1 7


8 4386H-English_Manuals 2/24/11 3:04 PM Page 8 Adapter Usage The rechargeable battery compartment can be charged off the laser or connected to the laser. If the rechargeable battery compartment is on the laser and plugged into the adapter, the battery pack will charge and the laser will also operate. The DC power LED is red during charging and will turn green after the rechargeable battery pack is fully charged. The power LED operates the same when recharging the battery pack when it is off the laser. Adjustable Foot Screws Adjust the three adjustable foot screws on the tripodic base, to put the bubble in the bullseye of the vial (the bubble centered means the instrument is in its self-leveling range) Johnson Level & Tool - Rev.1


9 4386H-English_Manuals 2/24/11 3:04 PM Page 9 360º Rotation and Fine Adjustment This laser can turn 360º and can also make angle fine-adjustments using the fine-adjustment knobs. 360º rotation Fine adjustment Connecting to the Tripod This instrument can be connected to a tripod using the 5/8 screw thread hole located either on the tripodic base or on the bottom of the instrument. Connecting to a tripod with the tripodic base. Connecting to a tripod with just the instrument Johnson Level & Tool - Rev. 1 9

10 4386H-English_Manuals 2/24/11 3:04 PM Page Using the Product Keypad Power LED Pulse mode LED Manual mode LED Pulse mode button Manual mode button Vertical laser line 1 button Power LED: Light On: Power on Light Off: Power off Light Flashing: Low Battery Vertical laser line 2 button Horizontal laser line button Pulse mode LED: Light On: Pulse mode is on and the laser can be used with the detector (not included) Light Off: Pulse mode is off Manual mode LED: Light Flashing: Manual mode is on and laser can be turned on with compensator locked Light Off: Manual mode is off Note: When manual mode is on, the laser does not self-level and no out-of-level alarm is indicated Johnson Level & Tool - Rev.1

11 4386H-English_Manuals 2/24/11 3:04 PM Page 11 Compensator Transportation Lock Set the locking knob to Unlock/On position When the locking knob is in the Unlock/On position, the top bubble will illuminate and the power LED will be on. When the locking knob is in the Lock/Off position, the top bubble will not be illuminated and power LED will be off. Output of the laser line Set the locking knob to Lock/Off position 2011 Johnson Level & Tool - Rev. 1 11
12 4386H-English_Manuals 2/24/11 3:04 PM Page 12 Pulse Mode: Unlock the transportation lock and press the horizontal and/or vertical laser line buttons. Press the pulse mode button to turn on the pulse mode, the pulse mode LED will turn on and the laser beam line will dim. The laser line can now be located by a detector (not included). Press the pulse mode button again to switch off the pulse mode, the pulse mode LED will turn off. The laser line now can not be located with a detector. Manual Mode: Press the manual mode button with the transportation lock knob in the Lock/Off position. The manual mode LED will flash and the top bubble light will go on. The output of the laser lines are the same as in the self-leveling mode. Press the manual mode button again to turn the laser power off. Note: When manual mode is on, the laser does not self-level and no out-of-level alarm is indicated Johnson Level & Tool - Rev.1
13 4386H-English_Manuals 2/24/11 3:04 PM Page Self-Check & Fine Calibration IMPORTANT: It is the responsibility of the user to verify the calibration of the instrument before each use. Horizontal Line for Level 1. Set the laser unit on a tripod or flat surface approximately 10 away from a reference wall. 2. Unlock the transportation lock on the unit. 3. Press the horizontal laser line button (H) and the vertical laser line button (V1). 4. Point the cross line at the reference wall (It is important to see the laser line very clearly. This test should be preformed indoors and in low light conditions). 5. Mark the intersection of the cross line as point A. 6. Rotate the laser unit counter clockwise until the laser cross line is 8 feet away from point A (to the left of point A). Mark the laser line at point A as point B. 7. Rotate the laser unit clockwise until the cross line is 8 feet to the right of point A. 8. Mark the laser line a point A as point C. 9. If the distance between point B & C is greater then 1/16 the unit needs to be recalibrated. (See calibration information). 3 Vertical Lines for Plumb 1. Use a plumb line or known vertical reference point. 2. Turn the laser unit on following the instructions above. 3. Rotate the laser unit so the vertical laser line intersects the plumb line. 4. Check all three vertical lines. 5. If the vertical laser line is not parallel with the plumb line (i.e. intersects at the top and bottom), the unit needs to be recalibrated. (See calibration information) Johnson Level & Tool - Rev. 1 13


14 4386H-English_Manuals 2/24/11 3:04 PM Page 14 Self-Calibration Adjustment Self-Calibrating the side vertical laser lines (not the front vertical laser line) for plumb 1. Locate the calibration port inside the battery compartment. 2. Remove the rubber plug. 3. Unlock the compensator. 4. Use a 3mm hex head wrench. 5. Turn the calibration screw counter clockwise to move the top of the side vertical lines to the back of the unit (towards the battery compartment). Do not rotate the screw more than 4 rotations. 6. If the side vertical lines can not be brought into plumb after 4 rotations of the screw, send the instrument to an authorized repair facility for repairs. Self-Calibrating the horizontal laser line and front vertical laser line 1. Locate calibration port on the side of the laser unit. 2. Remove the plastic screw. 3. Unlock the compensator. 4. Use a 3mm hex head wrench. 5. Rotate the screw counter clockwise to raise the left side of the horizontal line and to adjust the top of the front vertical line to the right. Do not rotate the screw more than 4 rotations. 6. If the laser lines can not be brought into calibration after 4 rotations, send the instrument to an authorized repair facility for repairs Johnson Level & Tool - Rev.1
15 4386H-English_Manuals 2/24/11 3:04 PM Page Technical Specifications Laser Wavelength 635nm±10nm Laser Classification Class IIIa Maximum Power Output Accuracy Interior Range Exterior Range 5mW ±1/8"/50 ft. (±1mm/5m) Up to 200 ft. (60m) depending upon light conditions Up to 300 ft. (90m) with detector (not included) Self-leveling Range ±3 Power Supply Rechargeable battery pack (included) or 4 AA alkaline batteries (not included) Battery Life Approx. battery life 8 hours continuous use Dimensions 4.73" x 4.96" x 7.09" (120 x 126 x 180mm) Weight 4 lbs (1.8 Kg) Working Temperature 14 F to 113 F (-10 C to +45 C) Center Screw Thread 5/8" Johnson Level & Tool - Rev. 1 15

16 4386H-English_Manuals 2/24/11 3:04 PM Page Application Demonstrations Horizontal line Vertical line Front vertical and plumb point Laser cross lines on right and left sides Plumb reference formed by the laser cross line on ceiling and plumb down point Front laser cross line Simultaneously supply four laser crosslines on the front, left, right, and top Operate with detector to extend working distance Johnson Level & Tool - Rev.1
17 4386H-English_Manuals 2/24/11 3:04 PM Page Care and Handling This laser unit is a precision tool that must be handled with care. Avoid exposing unit to shock vibrations and extreme temperatures. Before moving or transporting the unit, make sure that the unit is turned off. Remove the batteries when storing the unit for an extended time (more than three months) to avoid damage to the unit should the batteries deteriorate. Always store the unit in its case when not in use. Avoid getting the unit wet. Keep the laser unit dry and clean, especially the laser output window. Remove any moisture or dirt with a soft, dry cloth. Do not use harsh chemicals, strong detergents or cleaning solvents to clean the laser unit. 12. Product Warranty Johnson Level & Tool offers a three year limited warranty on each of its products. You can obtain a copy of the limited warranty for a Johnson Level & Tool product by contacting Johnson Level & Tool's Customer Service Department, as provided below, or by visiting our web site at The limited warranty for each product contains various limitations and exclusions. Do not return this product to the store/retailer or place of purchase. Non-warranty repairs and course calibration must be done by an authorized Johnson service center or Johnson Level & Tool's limited warranty, if applicable, will be void and there will be NO WARRANTY. Contact one of our service centers for all non-warranty repairs. A list of service centers can be found on our web site at or by calling our Customer Service Department. Contact our Customer Service Department for Return Material Authorization (RMA) for warranty repairs (manufacturing defects only). Proof of purchase is required Johnson Level & Tool - Rev. 1 17
18 4386H-English_Manuals 2/24/11 3:04 PM Page 18 NOTE: The user is responsible for the proper use and care of the product. It is the responsibility of the user to verify the calibration of the instrument before each use. For further assistance, or if you experience problems with this product that are not addressed in this instruction manual, please contact our Customer Service Dept. In the U.S., contact Johnson Level & Tool s Customer Service Department at LEVELS. In Canada, contact Johnson Level & Tool s Customer Service Department at Warranty Registration Enclosed with this instruction manual you will find a warranty registration card to be completed for your product. You will need to locate the serial number for your product that is located on the bottom of the unit. PLEASE NOTE THAT IN ADDITION TO ANY OTHER LIMITATIONS OR CONDITIONS OF JOHNSON LEVEL & TOOL'S LIMITED WARRANTY, JOHNSON LEVEL & TOOL MUST HAVE RECEIVED YOUR PROPERLY COMPLETED WARRANTY CARD AND PROOF OF PURCHASE WITHIN 30 DAYS OF YOUR PURCHASE OF THE PRODUCT OR ANY LIMITED WARRANTY THAT MAY APPLY SHALL NOT APPLY AND THERE SHALL BE NO WARRANTY Johnson Level & Tool - Rev.1
19 4386H-English_Manuals 2/24/11 3:04 PM Page Accessories Johnson accessories are available for purchase through authorized Johnson dealers. Use of non-johnson accessories will void any applicable limited warranty and there will be NO WARRANTY. If you need any assistance in locating any accessories, please contact our Customer Service Department. In the U.S., contact Johnson Level & Tool s Customer Service Department at LEVELS. In Canada, contact Johnson Level & Tool s Customer Service Department at Johnson Level & Tool - Rev. 1 19
20 4386H-English_Manuals 2/24/11 3:04 PM Page Johnson Level & Tool - Rev.1
Instruction Manual. Self-Leveling Rotary Laser Level Model Nos. 40-6515, 40-6516 and 40-6517
 3515H_Manuals 6/2/10 9:00 AM Page 1 Self-Leveling Rotary Laser Level Model Nos. 40-6515, 40-6516 and 40-6517 Instruction Manual Congratulations on your choice of this Self-Leveling Rotary Laser Level.
CL90i. 77-021 Please read these instructions before operating the product. 3 - Beam Self-Leveling Cross Line Laser
 3 - Beam Self-Leveling Cross Line Laser CL90i 77-01 Please read these instructions before operating the product Self-Leveling GB D F I E PT NL DK SE FIN NO PL GR CZ RU HU SK SI BG RO EE LV LT Contents
RL HW / RL HW+ / RL HGW / RL HV / RL HVPW/RL HVPW-G
 Auto-Levelling Rotary Laser Level RL HW / RL HW+ / RL HGW / RL HV / RL HVPW/RL HVPW-G 77-496 / 77-429 / 77-439 / 77-497 / 77-427/ 77-441 Please read these instructions before operating the product Auto-Levelling
e 1 0 0 I N S T RUC TION M ANU A L
 e 1 0 0 I N S T RUC TION M ANU A L The Empire Digital Level Accuracy, Readability, Durability one FEATURES: Easy to read back light Display reads right side up even if the level is upside down Audio beep
40-6680 5 Beam Laser Pointer Service Manual
 40-6680 5 Beam Laser Pointer Service Manual Contents Item Description Pages 1.0 Introduction 2 2.0 Overall Instrument Dis-assembly 2 2.1 Body module Dis-assembly 3 2.2 Core Module Dis-Assembly 4-5 2.3
Laserlyte-Flex Alignment System
 Laserlyte-Flex Alignment System LaserLyte-Flex The LaserLyte-Flex Alignment System is a unique, interchangeable, low cost plug and play laser system. Designed specifically for aligning and positioning
MEASURING AND LEVELING TOOLS
 MEASURING AND LEVELING TOOLS LASER LEVELING FAST AND ACCURATE LEVELING Earth moving, laying of floors, interior design and set up; all applications for our laser and optical levels to prove their accuracy,
Features: Mounting the Optic
 MICRO GREEN DOT with INTEGRATED RED LASER The Patented Micro Green Dot with Integrated Red Laser is a compact optical system packed with many features. The Green Dot is designed as the primary targeting
Table of Contents. Stanley TLM330 1
 Table of Contents EN Instrument Set-up - - - - - - - - - - - - - - - - - - - - - - - Introduction- - - - - - - - - - - - - - - - - - - - - - - - - - - - - - - Overview - - - - - - - - - - - - - - - - -
el-720 Carbon Dioxide Gas Leak Detector User s Guide
 el-720 Carbon Dioxide Gas Leak Detector User s Guide Congratulations on the purchase of the AccuTools el-720 Carbon Dioxide Gas Leak Detector, the most technologically advanced instrument of its kind.
PowerLine Magnetic-Laser Sheave Alignment System Instructions
 PowerLine Magnetic-Laser Sheave Alignment System Instructions The PowerLine Magnetic-Laser Sheave Alignment System laser aligns belts, pulleys, sheaves, sprockets, gear trains, rollers, platforms, conveyors,
Hygro-Thermometer + InfraRed Thermometer Model RH101
 User's Guide Hygro-Thermometer + InfraRed Thermometer Model RH101 Introduction Congratulations on your purchase of the Extech Hygro-Thermometer plus InfraRed Thermometer. This device measures relative
DSM155 Digital LED Light Meter User s Manual DSM155
 DSM155 Digital LED Light Meter User s Manual DSM155 CONTENTS TABLE OF CONTENTS......3 LIMITED WARRANTY AND LIMITATION OF LIABILITY......3 Out of Box....3 Accessories....3 Safety Information....3 Certification....5
Microwave Meter. Instruction Manual
 Microwave Meter 840046 Instruction Manual Microwave Meter 840046 Copyright 2009 by Sper Scientific ALL RIGHTS RESERVED Printed in the USA The contents of this manual may not be reproduced or transmitted
Infrared Viewers. Manual
 Infrared Viewers Manual Contents Introduction 3 How it works 3 IR viewer in comparison with a CCD camera 4 Visualization of infrared laser beam in mid-air 4 Power Density 5 Spectral sensitivity 6 Operation
Self-leveling Rotary Laser. Operating Manual. surface. Emitting direction of rotary laser-beam illustrated as follows:
 Self-leveling Rotary Laser Operating Manual 1. Functions This instrument is equipped with the semiconductor diode with wavelength of 635nm(green:532nm), which the laser beam has supreme visibility. And
National- Spencer Inc.
 9-27-2010 National- Spencer Inc. 19.2V HEAVY DUTY GREASE GUN PRODUCT SPECIFICATION Charger Input Power 110 VAC Battery Output Power 19.2V Battery Capacity 1500 MAH Battery Pack Charge Time 1 Hour Maximum
Leica DISTO TM D210 The original laser distance meter
 Leica DISTO TM D0 The original laser distance meter Table of Contents Instrument Set-up - - - - - - - - - - - - - - - - - - - - - - - - - - Overview - - - - - - - - - - - - - - - - - - - - - - - - - -
Ultrasonic Distance Meter. Operation Manual
 XPROTEC Ultrasonic Distance Meter Operation Manual About XProTec Pro-Installer Tools The XProTec line from XFTP is a comprehensive lineup of professionalgrade technical tools. These full-featured, field-proven,
INSTRUCTION MANUAL PLEASE READ ALL THE INSTRUCTIONS COMPLETELY BEFORE USE AND SAVE THIS MANUAL FOR FUTURE REFERENCE
 INSTRUCTION MANUAL PLEASE READ ALL THE INSTRUCTIONS COMPLETELY BEFORE USE AND SAVE THIS MANUAL FOR FUTURE REFERENCE m Before Use Please read IMPORTANT SAFETY INSTRUCTIONS on page 10 before use. It is important
Laser Distance Meter Laser-Distanzmesser Laser distance-mètre Metro di distanza laser Medidor Láser de Distancia User Manual
 Laser Distance Meter Laser-Distanzmesser Laser distance-mètre Metro di distanza laser Medidor Láser de Distancia User Manual PPl lleeaassee read this manual before switching the unit on. Important safety
3 WATT LED SPOTLIGHT Model No. SLM - 3801
 3 WATT LED SPOTLIGHT Model No. SLM - 3801 OWNER'S MANUAL Customer Service Tel: 1-800-268-3319 Superex Canada Ltd, Toronto,M2H 3B8 Made in China Table of Contents A). Important Safety Instructions B). Charging
GreenWay Solar LED Path and Trail Lighting System. Installation and Owner s Manual
 GreenWay Solar LED Path and Trail Lighting System Installation and Owner s Manual Important Notes and Warnings This installation and instruction manual provides installation, operation, and maintenance
WARNING: This product contains chemicals known to the state of California to cause cancer, or birth defects or other reproductive harm.
 WARNING: This product contains chemicals known to the state of California to cause cancer, or birth defects or other reproductive harm. 9780 SW Freeman Drive Wilsonville, OR 97070 USA Tel: 800-442-2406
How To Use A Meter
 Table of Contents Title I UT391 Product Introduction II Unpacking Inspection III Safety Instruction IV Meter Structure V Setting and Operation of Meter VI Technical specifications VII Maintenance 3 4 5
Pocket Tach 99 (PT99) Non-Contact Tachometer
 Non-Contact Tachometer") CE DECLARATION OF CONFORMITY As Manufacturer: Monarch Instrument Division of Monarch International Inc. 15 Columbia Drive, Amherst NH 03031 USA declares under Monarch s sole responsibility that the product:
CE DECLARATION OF CONFORMITY As Manufacturer: Monarch Instrument Division of Monarch International Inc. 15 Columbia Drive, Amherst NH 03031 USA declares under Monarch s sole responsibility that the product:
WS-9005TWC 915MHz WIRELESS RAIN GAUGE INSTRUCTION MANUAL
 WS-9005TWC 915MHz WIRELESS RAIN GAUGE INSTRUCTION MANUAL CONTENTS 03 introduction 03 features 04 setting up 06 function keys 06 operations 07 mounting 08 maintenance 09 specifications 09 liability disclaimer
SETTING UP YOUR 6000 SERIES TIME RECORDER
 INTRODUCTION The Pyramid 6000 Series Time Recorder is an electronic time recorder designed to make payroll processing easier and more efficient. The 6000 series will meet your business needs whether your
Manual for Fire Suppression & Methane Detection System
 Manual for Fire Suppression & Methane Detection System Fogmaker North America Post address: 150 Gordon Dr Exton, PA 19341 Delivery address: 150 Gordon Dr Exton, PA 19341 Tel: 610-265-3610 Fax: 610-265-8327
MAINTENANCE & TROUBLESHOOTING
 MAINTENANCE & TROUBLESHOOTING This section describes how to: clean the lens replace the projection lamp replace the batteries in the remote use the security lock feature troubleshoot the projector Cleaning
Leica DISTO TM X310 The original laser distance meter
 Leica DISTO TM X30 The original laser distance meter Table of Contents Instrument Set-up - - - - - - - - - - - - - - - - - - - - - - - - - - Introduction - - - - - - - - - - - - - - - - - - - - - - - -
FIRERAY 2000 Installation Guide
 FIRERAY 2000 Installation Guide Features Range 33ft to 330 ft. 24Vdc operation Selectable alarm thresholds Low current consumption Ground level electronics Manual or Automatic reset System Description
Wireless Indoor/ Outdoor Thermometer
 Wireless Indoor/ Outdoor Thermometer Owner s Manual Please read before using this equipment. ˆ Contents FCC Information... 3 FCC Declaration of Conformity... 5 Preparation... 5 Installing Batteries...
Model: 308-1412 Manual DC: 080215 WIRELESS COLOR FORECAST STATION
 Model: 308-1412 Manual DC: 080215 WIRELESS COLOR FORECAST STATION FRONT VIEW SENSOR TX141TH-Bv2 LED TX Sensor Battery Cover Sensor Battery Compartment 2 AA Buttons Battery Compartment 3 AAA BACK VIEW Battery
How To Use The Visifault Visual Fault Locator
 VisiFault Visual Fault Locator Instruction Sheet The VisiFault Visual Fault Locator (VFL) is a visible light source that helps you trace optical fibers, check fiber continuity, and find faults such as
Mini-led spotlight with magnetic base
 Mini-led spotlight with magnetic base Model 95799 Assembly And Operation Instructions Due to continuing improvements, actual product may differ slightly from the product described herein. 3491 Mission
LASER DIAGRAM TABLE OF CONTENTS. SKY Technologies Inc. www.skytechlasers.com. Laser Diagram. Technical Specifications. Laser Operation.
 TABLE OF CONTENTS LASER DIAGRAM Laser Diagram 1 Technical Specifications 2 Laser Operation 3 Laser Safety 5 Maintanence 6 Limitation of Liability 7 Warranty 8 Laser Pointer Series Operations Manual Page
MAINTENANCE & TROUBLESHOOTING
 MAINTENANCE & TROUBLESHOOTING This section describes how to: clean the lens clean the fan intake filter replace the projection lamp replace the batteries in the remote control use the Kensington lock feature
12 Volt 30 Amp Digital Solar Charge Controller
 12 Volt 30 Amp Digital Solar Charge Controller User s Manual WARNING Read carefully and understand all INSTRUCTIONS before operating. Failure to follow the safety rules and other basic safety precautions
EUROPE S LARGEST SELECTION OF TEST & MEASUREMENT EQUIPMENT FOR HIRE INLEC.COM. Nationwide Low Call 0333 6000 600
 EUROPE S LARGEST SELECTION OF TEST & MEASUREMENT EQUIPMENT FOR HIRE INLEC.COM Nationwide Low Call 0333 6000 600 WHY BUY WHEN YOU CAN HIRE SlopeView TLL-90 User Guide V20100426 1 CONTENT Title Page 1 Introduction
TRIMBLE TX5 3D LASER SCANNER QUICK START GUIDE
 TRIMBLE TX5 3D LASER SCANNER QUICK START GUIDE Equipment 1 8 9 5 6 7 4 3 2 The TX5 laser scanner ships with the following equipment: 1 Scanner transport and carry case 6 USB memory card reader 2 AC power
Innovative measurement technology for real professionals.
 New: the LAX 200 crossed line laser, the 300 and laser distance measurers Innovative measurement technology for real professionals. ACCURATE. TOUGH. RELIABLE. EASY-TO-USE. Three new measuring LAX 200/
CALIBRATION FOR LAL20X & LAL24X
 CALIBRATION AND FAULT FINDING FOR LAL20X & LAL24X DUMPY LEVELS MEASURING EXPERTS SINCE 1869 How The LAL20X & LAL24X Works The Automatic level is called Automatic because it requires only a simple basic
Laser Calibration Check
 Laser Calibration Check Checking Calibration of the Y- and X-Axes 1. Set up the tripod 30 m (100 ft) from a wall and make sure the tripod head is leveled. 2. Attach the laser to the tripod with the handle
User s Manual. for. Tote-Remote
 User s Manual for Tote-Remote Remote Control & Laser Pointer for Laptop Computers TABLE OF CONTENTS Important Safety & Health Information 2 Special Notice Regarding Carrying Laser Pointers On Commercial
Indoor/Outdoor Color Camera with Built-in 2.4 GHz Wireless Transmitter, plus X10 controlled power supply, and Video Receiver.
 Indoor/Outdoor Color Camera with Built-in 2.4 GHz Wireless Transmitter, plus X10 controlled power supply, and Video Receiver. OWNER'S MANUAL VR36A XC18A XM13A MODEL VK69A (INCLUDES XC18A CAMERA, XM13A
Table of Contents. Dewalt DW03101 1. Delete Memory - - - - - - - - - - - - - - - - - - - - - - - - - - -15
 Table of Contents EN Instrument Set-up - - - - - - - - - - - - - - - - - - - - - - - Introduction- - - - - - - - - - - - - - - - - - - - - - - - - - - - - - - Overview - - - - - - - - - - - - - - - - -
Digital Fingerprint safe
 Digital Fingerprint safe Model 96846 Operation Instructions Diagrams within this manual may not be drawn proportionally. Due to continuing improvements, actual product may differ slightly from the product
ER102. Emergency Crank Weather Radio Owner s Manual. www.midlandradio.com
 ER102 Emergency Crank Weather Radio Owner s Manual Table of Contents Welcome to the World of Midland Electronics Major ER102 Features ER102 Controls and Functions ER102 Power Sources - Built-in Rechargeble
Mold Alert... Operation Manual P0270
 Mold Alert... Operation Manual P0270 introduction Congratulations on your purchase of the P0270 Mold Alert! Mold is as old as the Earth and it s everywhere. Under the right set of conditions, it can actually
Dual Laser InfraRed (IR) Thermometer with Color Alert
 Thermometer with Color Alert") User Manual Dual Laser InfraRed (IR) Thermometer with Color Alert MODEL 42509 Introduction Congratulations on your purchase of the Model 42509 IR Thermometer with Color Alert. This Infrared thermometer
User Manual Dual Laser InfraRed (IR) Thermometer with Color Alert MODEL 42509 Introduction Congratulations on your purchase of the Model 42509 IR Thermometer with Color Alert. This Infrared thermometer
Targus Wireless Remote Presenter USER S GUIDE. Making Your Mobile Life Easier. Making Your Mobile Life Easier.
 Targus Wireless Remote Presenter Making Your Mobile Life Easier. Visit our Web site at: www.targus.com Features and specifications are subject to change without notice. 2003 Targus Corp. 400-0110-001B
MAVO-MONITOR / MAVO-SPOT Instrument Set for Contact or Distant Measurements of Luminances
 Operating Instructions MAVO-MONITOR / MAVO-SPOT Instrument Set for Contact or Distant Measurements of Luminances 15043 1/1.00 10 9 8 1 7 6 1 Display 2 Slider switch cd/m² segment test 3 ON/OFF switch 4
Installation and Operation Manual. Digital Remote Meter for Monitoring System Performance. Version: RM-1
 REMOTE METER TM Installation and Operation Manual. Digital Remote Meter for Monitoring System Performance. Version: RM-1 1098 Washington Crossing Road Washington Crossing, PA 18977 USA www.morningstarcorp.com
User s manual FLIR VP50/VP52 Non-contact AC voltage detector
 User s manual FLIR VP50/VP52 Non-contact AC voltage detector User s manual FLIR VP50/VP52 #T559851; r. AD/ 9134/9134; en-us Table of contents 1 Disclaimers... 1 1.1 Copyright... 1 1.2 Quality assurance...
Detector transparent with Color Inserts. FAA 500 TR P Trim Ring transparent with Color Inserts. FCA 500 / FCA 500 E Detector Bases
 Detector Color Detector transparent with Color Inserts FAA 500 TR W Trim Ring FAA 500 TR P Trim Ring transparent with Color Inserts FAA 500 BB Ceiling Mount Back Box FCA 500 / FCA 500 E Detector Bases
MAKING MODERN LIVING POSSIBLE. living connect. Installation and User Guide. Danfoss heating
 MAKING MORN LIVING POSSIBLE Danfoss heating living connect Installation and User Guide Contents 1.0 System overview... 3 2.0 Overview of display and control buttons... 3 3.0 Installation - step by step...
Operating Instructions Bedienungsanleitung Mode d emploi
 Operating Instructions Bedienungsanleitung Mode d emploi DW 400 www.bron-kobold.com Operating instructions DW 400 Before use Please read all the information contained in these operating instructions carefully.
FT-100 Fire Training Fog Machine User Manual English
 FT-100 Fire Training Fog Machine User Manual English 2015 Antari Lighting and Effects Ltd. User Manual - English Safety Information Please read the following safety information carefully before operating
Instructions For SF 6 Refill Kit
 S&C Vista Underground Distribution Switchgear UnderCover, Vault-Mounted, and Pad-Mounted Styles Instructions For SF 6 Refill Kit TABLE OF CONTENTS Section Page Section Page INTRODUCTION..................................
Dual Laser InfraRed (IR) Thermometer
 Thermometer") User s Manual Dual Laser InfraRed (IR) Thermometer MODEL 42511 Introduction Congratulations on your purchase of the Model 42511 IR Thermometer. This Infrared thermometer measures and displays non-contact
User s Manual Dual Laser InfraRed (IR) Thermometer MODEL 42511 Introduction Congratulations on your purchase of the Model 42511 IR Thermometer. This Infrared thermometer measures and displays non-contact
SBC90. Abrasive Blast Cabinet Assembly & Operating Instructions
 SBC90 Abrasive Blast Cabinet Assembly & Operating Instructions READ ALL INSTRUCTIONS AND WARNINGS BEFORE USING THIS PRODUCT. SAVE THESE INSTRUCTIONS FOR FUTURE REFERENCE. This manual provides important
High Performance Visible Laser Diode Scanners
 A B ALLEN-BRADLEY High Performance Visible Laser Diode Scanners (Catalog No. 27-LD4z1, -LD4z4 27-LD8z1, -LD8z4) Product Data These high performance, fixed-mount scanners use a Visible Laser Diode (VLD)
Model: 616-146v2 Quick Setup Guide DC: 071015 Atomic Projection Alarm with Indoor and Outdoor Temperature
 Model: 616-146v2 Quick Setup Guide DC: 071015 Atomic Projection Alarm with Indoor and Outdoor Temperature Snooze/Backlight BUTTONS Time, Alarm with Snooze, & Calendar Projection Arm Rotates 180 Indoor/Outdoor
Single Day Alarm Clock with. Bluetooth and USB Play-through
 Single Day Alarm Clock with Bluetooth and USB Play-through MODEL : BSC 200 READ THIS INSTRUCTION MANUAL BEFORE OPERATING THE APPLIANCE. SAVE THIS MANUAL FOR FUTURE REFERENCE. TABLE OF CONTENTS IMPORTANT
24 Wide Screen LED Monitor with HDMI
 24 Wide Screen LED Monitor with HDMI USER MANUAL L24LE11B_MANUAL_EN_R1 Please read this manual carefully before using, and keep it for future reference. TABLE OF CONTENTS GETTING STARTED Monitor Stand
ITA3D 710. RGB DMX laser with 3D effect. User manual
 ITA3D 710 RGB DMX laser with 3D effect User manual 1 Safety precautions WARNING: This unit may cause serious injury to eyesight when used incorrect. It therefore is strongly advised to read this user manual
INSTRUCTION MANUAL PLEASE READ ALL THE INSTRUCTIONS COMPLETELY BEFORE USE AND SAVE THIS MANUAL FOR FUTURE REFERENCE
 INSTRUCTION MANUAL PLEASE READ ALL THE INSTRUCTIONS COMPLETELY BEFORE USE Ver. 2.0 AND SAVE THIS MANUAL FOR FUTURE REFERENCE Table of Contents Unpacking... 3 About the CCRadio-EP... 4 Quick Start Guide...
BILLET HEADLAMP WITH SHORT/TALL MOUNTS
 -J099 REV. 00-0- BILLET HEADLAMP WITH SHORT/TALL MOUNTS GENERAL Kit Number 9-0, 9-0 Models Kit 9-0 is a -/ inch headlamp and kit 9-0 is a -/ inch headlamp. Both kits will fit the models listed in Table.
Owner s Manual & Safety Instructions
 Owner s Manual & Safety Instructions Save This Manual Keep this manual for the safety warnings and precautions, assembly, operating, inspection, maintenance and cleaning procedures. Write the product s
M A R C O. CP-670 AUTOMATIC CHART PROJECTOR Instruction Manual
 M A R C O CP-670 AUTOMATIC CHART PROJECTOR Instruction Manual CONTENTS GENERAL DESCRIPTION............... 1 INSTALLATION...................... 2 Mounting the Projector Positioning the Projector Positioning
OWNER S MANUAL Table Tennis Table Patent Pending
 OWNER S MANUAL Table Tennis Table Patent Pending Be sure to write your model number and serial number here for future reference. You can find these numbers printed on the bottom of the table. MODEL # T8179
Wireless Alarm System. Window/Door Sensor. User s Manual. Choice ALERT. Control all Sensors & accessories from one location
 45131 Wireless Alarm System Window/Door Sensor User s Manual Choice ALERT Control all Sensors & accessories from one location Table of Contents Important Safeguards 4 Introduction 5 Installation 6 Assigning
ClearView+ User Manual
 ClearView+ ClearView+ User Manual Rev. 2.0, December 2005 All rights, in particular the rights of reproduction as well as translation, are reserved. No parts of this manual may be copied, in any form whatsoever,
User s Manual. Copyright 2014 Trick Technologies Oy
 User s Manual Copyright 2014 Trick Technologies Oy Catchbox Pro Module Catchbox Cover Contents 1 Safety Instructions...4-5 2 Quick Start... 6-15 3 Product Description... 16-18 Overview...16 Compatibility...17
Combustible Gas Leak Detector 720b
 Combustible Gas Leak Detector 720b The Value Leader TM Contents Specifications Product Features Standard Accessories Optional Accessories General Description Operating Instructions Battery Replacement
www.blackanddecker.co.uk Ireland Australia New Zealand
 www.blackanddecker.co.uk 3 2 4 5 5 6 1 7 UK Ireland Australia New Zealand 1 8 9 10 11 12 13 1 A 14 15 B 7 18 19 16 18 19 21 17 20 C D E 2 Intended use Your Black & Decker distance and space measurer has
TWIN EAGLES ALL WEATHER ELECTRIC RADIANT HEATER
 TWIN EAGLES, INC. Defining the Art of Outdoor Cooking TWIN EAGLES ALL WEATHER ELECTRIC RADIANT HEATER OWNER S MANUAL MODEL TEEH-1512 TEEH-2524 TEEH-3524 NEED ASSISTANCE? PLEASE CALL: (562) 802-3488 This
Indoor Remote Controlled Power Points
 Indoor Remote Controlled Power Points Model Number: HE214039 INSTRUCTION MANUAL Description goes here Indoor Remote Controlled Power Points Warranty Details The product is guaranteed to be free from defects
CAUTION RISK OF ELECTRIC SHOCK DO NOT OPEN
 BeoLab 4000 Guide CAUTION RISK OF ELECTRIC SHOCK DO NOT OPEN CAUTION: To reduce the risk of electric shock, do not remove cover (or back). No User-serviceable parts inside. Refer servicing to qualified
149mm. Walk-Thru Assembly Gate. MODEL NO: 1161, 1167 Owner s Manual. www.regalo-baby.com
 149mm 210mm Walk-Thru Assembly Gate MODEL NO: 1161, 1167 Owner s Manual READ ALL INSTRUCTIONS BEFORE ASSEMBLY AND USE OF GATE. KEEP INSTRUCTIONS FOR FUTURE USE. www.regalo-baby.com... Regalo International,
19 LED Tube Controller ORDERCODE 41003
 19 LED Tube Controller ORDERCODE 41003 Congratulations! You have bought a great, innovative product from Showtec. The Showtec 19 LED Tube Controller brings excitement to any venue. Whether you want simple
Model 349KLX Remote Display Digital Scale User Instructions
 Model 349KLX Remote Display Digital Scale User Instructions P/N UM349KLX Rev 3-080713 1 Model 349KLX Thank you for your purchase of this Health o meter Professional product. Please read this manual carefully,
NFC Communication Tray Model: HHX-IT3-Z
 INSTRUCTION MANUAL NFC Communication Tray Model: HHX-IT3-Z ENGLISH CONTENTS Introduction...3 Important safety information...4 Know your unit...6 Transferring data to the PC...7 Care and maintenance...8
LIFESTYLE V35/V25 HOME ENTERTAINMENT SYSTEMS T20/ T10 HOME THEATER SYSTEMS. Setup Guide Guía de instalación Guide d'installation
 LIFESTYLE LIFESTYLE V35/V25 HOME ENTERTAINMENT SYSTEMS T20/ T10 HOME THEATER SYSTEMS Setup Guide Guía de instalación Guide d'installation TAB 8 TAB 7 TAB 6 TAB 5 TAB 4 TAB 3 TAB 2 English SAFETY INFORMATION
LUCCI AIRFUSION QUEST II CEILING FAN
 LUCCI AIRFUSION QUEST II CEILING FAN WITH IR REMOTE INSTALLATION OPERATION MAINTENANCE WARRANTY INFORMATION CAUTION READ INSTRUCTIONS CAREFULLY FOR SAFE INSTALLATION AND FAN OPERATION. V1.0 QUEST II IR
TS-E24mm f/3.5l TS-E45mm f/2.8 TS-E90mm f/2.8 Instructions
 TS-E24mm f/3.5l TS-E45mm f/2.8 TS-E90mm f/2.8 ENG Instructions Thank you for purchasing a Canon product. Canon s TS-E lenses are tilt-shift lenses designed for EOS cameras. The tilt-shift mechanism enables
SP1790JK 900MHz Wireless Indoor/Outdoor Speakers. User Manual INTRODUCTION FEATURES IMPORTANT SAFETY INFORMATION
 SP1790JK 900MHz Wireless Indoor/Outdoor Speakers INTRODUCTION This 900 MHz digital hybrid wireless speaker system uses the latest wireless technology that enables you to enjoy music and TV sound anywhere
DX-395. FM/AM/SW1/SW2 PLL Synthesized Receiver OWNER S MANUAL. Cat. No. 20-225. Please read before using this equipment.
 20-225.fm Page 1 Wednesday, August 4, 1999 10:07 AM Cat. No. 20-225 OWNER S MANUAL Please read before using this equipment. DX-395 FM/AM/SW1/SW2 PLL Synthesized Receiver 20-225.fm Page 2 Wednesday, August
SP AF 300mm F/2.8 LD [IF] for Canon (Model 360EE)
![SP AF 300mm F/2.8 LD [IF] for Canon (Model 360EE)](/thumbs/40/21493790.jpg "SP AF 300mm F/2.8 LD [IF] for Canon (Model 360EE)") SP AF 300mm F/2.8 LD [IF] for Canon (Model 360EE) We greatly appreciate your purchase of this Tamron lens. The Tamron SP AF 300mm F/2.8 LD [IF] is a fast telephoto lens developed for Canon AF single-reflex
SP AF 300mm F/2.8 LD [IF] for Canon (Model 360EE) We greatly appreciate your purchase of this Tamron lens. The Tamron SP AF 300mm F/2.8 LD [IF] is a fast telephoto lens developed for Canon AF single-reflex
User Guide. Soft-Touch TM Bluetooth Laser Mouse N2953
 Soft-Touch TM Bluetooth Laser Mouse 410-XXXXXXXXXXX 1 YEAR LIMITED WARRANTY: We pride ourselves on the quality of our products. For complete warranty details and a list of our worldwide offices, please
Dual Laser InfraRed (IR) Thermometer
 Thermometer") User Manual Dual Laser InfraRed (IR) Thermometer MODEL 42512 Introduction Congratulations on your purchase of the Model 42512 IR Thermometer. This Infrared thermometer measures and displays non-contact
User Manual Dual Laser InfraRed (IR) Thermometer MODEL 42512 Introduction Congratulations on your purchase of the Model 42512 IR Thermometer. This Infrared thermometer measures and displays non-contact
Model ATD-36750 Refrigerant Gas Leak Detector. User Manual. Detects all CFC, HFC, HCFC, HFO Refrigerants including blends
 Model ATD-36750 Refrigerant Gas Leak Detector Detects all CFC, HFC, HCFC, HFO Refrigerants including blends User Manual Design certified by ASCI and Intertek to meet SAE J2791, J2913 & EN14624 INTRODUCTION
Day / Night IR Color Camera User Manual V2.1.0
 Day / Night IR Color Camera User Manual V2.1.0 1 Thank you for purchasing our product. If there is any question or request, please do not hesitate to contact dealer. This manual is applicable to DS-2CC102P(N)-IR1(IR3)(IR5),
D/N VANDAL RESISTANT 700TVL VARI-FOCAL IR DOME CAMERA CMR6082X/6082MX3.6 N/P CMR6086X/6086MX3.6 N/P
 D/N VANDAL RESISTANT 700TVL VARI-FOCAL IR DOME CAMERA CMR6082X/6082MX3.6 N/P CMR6086X/6086MX3.6 N/P INSTRUCTION MANUAL IMPORTANT SAFEGUARDS CAUTION RISK OF ELECTRIC SHOCK DO NOT OPEN CAUTION TO REDUCE
PowerLine Magnetic-Laser Pulley Alignment System Instructions
 MONARCH INSTRUMENT 15 COLUMBIA DRIVE AMHERST, NEW HAMPSHIRE 03031 PHONE: 603-883-3390 FAX: 603-886-3300 E-mail: sales@monarchinstrument.com Web site: www.monarchinstrument.com PowerLine Magnetic-Laser
Hand Held Metal Detector
 Hand Held Metal Detector Model 97245 Set up And Operating Instructions Diagrams within this manual may not be drawn proportionally. Due to continuing improvements, actual product may differ slightly from
SOLAR POWER - THE NEW WAY TO RV!
 IMPORTANT! - YOU'RE SOLAR READY SOLAR POWER - THE NEW WAY TO RV! Your RV is PRE-WIRED for SOLAR POWER! Benefits of Solar Zamp Solar Portable Solar Kit Maximize Battery Life Electrical Independence Green,
Quick Start Guide. Model #s: 360050 / 360051 / 360052 / 360053 / 360055 Lit# 98-1572/02-10
 Quick Start Guide Model #s: 360050 / 360051 / 360052 / 360053 / 360055 Lit# 98-1572/02-10 Full Instruction Manual available online at: http://www.bushnell.com/manuals/gps Control & Display Guide MARK/Backlight
OPERATOR S MANUAL 18 VOLT, 1 HOUR CHARGER
 OPERATOR S MANUAL 18 VOLT, 1 HOUR CHARGER P110 Your battery charger has been engineered and manufactured to Ryobi s high standard for dependability, ease of operation, and operator safety. When properly