Version 2.4. » Administrator Manual. March 2016 Author Tecnoteca srl ENG.
|
|
|
- Thomas Bennett
- 9 years ago
- Views:
Transcription
1 Version 2.4» March 2016 Author Tecnoteca srl ENG

2 No part of this document may be reproduced, in whole or in part, without the express written permission of Tecnoteca s.r.l. CMDBuild uses many great technologies from the open source community: PostgreSQL, Apache, Tomcat, Eclipse, Ext JS, JasperReports, IReport, Enhydra Shark, TWE, OCS Inventory, Liferay, Alfresco, GeoServer, OpenLayers, Prefuse, Quartz, BiMserver. We are thankful for the great contributions that led to the creation of these products. CMDBuild is a project of Tecnoteca Srl. Tecnoteca is responsible of software design and development, it's the official maintainer and has registered the CMDBuild logo. In the project also the Municipality of Udine was involved as the initial customer. CMDBuild is released under AGPL open source license ( CMDBuild is a registered trademark of Tecnoteca Srl. Everytime the CMDBuild logo is used, the official maintainer "Tecnoteca srl" must be mentioned; in addition, there must be a link to the official website: CMDBuild logo: cannot be modified (color, proportion, shape, font) in any way, and cannot be integrated into other logos cannot be used as a corporate logo, nor the company that uses it may appear as author / owner / maintainer of the project cannot be removed from the application, and in particular from the header at the top of each page The official website is Page 2

3 Contents Introduction... 6 CMDBuild modules... 6 Available documentation... 7 Getting Started... 8 CMDBuild philosophy... 8 Design criteria... 9 Working methodology Technical Information User Interface General design criteria Control elements Filling in forms for data editing Menu Simplified user interface Accessing the application PC Requirements Authentication Classes management Properties tab Attributes tab Domains tab Widget tab Layers tab Geographic attributes tab Process management General Information Representation modes Properties tab Task Manager tab Manage Domains Properties tab TAB Enabled classes Attributes tab Views Views based on filters Views based on SQL Search filters Navigation trees Properties tab Tree tab Lookup Properties tab Lookup list Dashboard Page 3

4 Properties tab Chart TAB Layout TAB Report JasperReports Menu Custom menus User groups Properties tab Permissions tab Users tab TAB UI setup TAB default filters Users Task Manager Basic functions Inbox management Synchronous events Asynchronous events Workflow Wizard Connector management Account template queue GIS Icons management External services Layer order Geoserver layer GIS Navigation BIM Projects Layer Localization Configuration Localization Import / Export Configuration Setup page Workflow page Relations graph page DMS Page GIS page BIM page Server management page APPENDIX: CQL language Page 4

5 How to use CMDBuild Examples of usage APPENDIX: Glossary Page 5

6 Introduction Introduction CMDBuild is an Open Source web application designed to model and manage assets and services controlled by the ICT Department, therefore it handles the related workflow operations, if necessary according to ITIL best practices. The management of a Configuration Database (CMDB) means keeping up-to-date, and available to other processes, the database related to the components in use, their relations and their changes over time. With CMDBuild, the system administrator can build and extend its own CMDB (hence the project name), modeling the CMDB according to the company needs; the administration module allows you to progressively add new classes of items, new attributes and new relations. You can also define filters, "views" and access permissions limited to rows and columns of every class. CMDBuild provides complete support for ITIL best practices, which have become a "standard de facto" by now, a non-proprietary system for services management with process-oriented criteria. Thanks to the integrated workflow engine, you can create new workflow processes with external visual editors, and import / execute them inside the CMDBuild application according to the configured automatisms. A task manager integrated in the user interface of the Administration Module is also available. It allows to manage different operations (process starts, receiving and sending, connector executions) and data controls on the CMDB (synchronous and asynchronous events). Based on their findings, it sends notifications, starts workflows and executes scripts. CMDBuild includes also JasperReports, an open source report engine that allows you to create reports; you can design (with an external editor), import and run custom reports inside CMDBuild. Then it is possible to define some dashboards made up of charts which immediately show the situation of some indicators in the current system (KPI). CMDBuild integrates Alfresco, the popular open source document management system. You can attach documents, pictures and other files. Moreover, you can use GIS features to georeference and display assets on a geographical map (external map services) and / or an office plan (local GeoServer) and BIM features to view 3D models (IFC format). The system includes also a SOAP and a REST webservice, to implement interoperability solutions with SOA. CMDBuild includes two frameworks called Basic Connector and Advanced Connector, which are able - through the SOAP webservice - to sync the information recorded in the CMDB with external data sources, for example through automatic inventory systems (such as the open source OCS Inventory) or through virtualization or monitoring systems. Through the REST webservice, CMDBuild GUI Framework allows to issue custom webpages on external portals able to interact with the CMDB. A user interface for mobile tools (smartphones and tablets) is also available. It is implemented as multi-platform app (ios, Android) and linked to the CMDB through the REST webservice. CMDBuild modules The CMDBuild application includes two main modules: Page 6
, modeling the CMDB according to the company needs; the administration module allows you to")
7 Introduction the Administration Module for the initial definition and the next changes of the data model and the base configuration (relation classes and typologies, users and authorization, dashboards, upload report and workflows, options and parameters) the Management Module, used to manage cards and relations, add attachments, run workflow processes, visualize dashboards and execute reports The Administration Module is available only to the users with the "administrator" role; the Management Module is used by all the users who view and edit data. Available documentation This manual is dedicated to the Administration Module, through which the administrator can configure data, define users and permissions, and perform other tasks. You can find all the manuals on the official website ( system overview ("Overview Manual") system usage ( User Manual ) installation and system management ("Technical Manual") workflow configuration ("Workflow Manual") webservice details and configuration ( Webservice Manual ) connectors to sync data through external systems ( ConnectorsManual ) Page 7

8 Getting Started Getting Started CMDBuild philosophy A CMDB is a storage and consultation system that handles the information assets of a company. It is the official central repository and provides a consistent view of IT services. It is a dynamic system that represents the current situation and knowledge of information technology assets and related entities: hardware (computers, peripherals, networking, telephone equipment), software (basic, environment, application software), documents (projects, contracts, manuals) and other resources, internal and external. It is a monitoring system for the processes executed, described and managed through the workflow functions. CMDBuild is a robust, customizable and extensible CMDB solution. Providing an extensible solution means providing an open and dynamic system that can be easily designed, configured and extended by the system administrator in different phases in terms of types of objects to manage, attributes and relations. Since there are not two organizations that operate exactly on the same set of objects (assets) and, for each object, on the same information, we decided to set, as the primary CMDBuild feature, the system flexibility, developing features to configure the whole system: data model, processes, reports, external systems connectors, etc. In particular configuration mechanisms implemented in CMDBuild and managed with the Administration Module allow to: add on your own new "classes", i.e. new items or processes typologies (both corresponding to DB charts) add / edit the "attributes" of a class, also geometric (DB column) define and import custom workflows both for IT process management and data management wizards add / edit the widgets to be placed on the card management of a class, through which application functions - useful for that type of object - can be performed add "domains", or "relations" between classes (N:M association tables) add / edit the "attributes" of a "domain" create predefined filters used during the data reference on the various classes create "views", both through filters and through SQL queries, which can be used in a way that is similar to the classes define navigation tree (subsets of the "domain" graph) create tablelists (lookup) to manage attributes with predefined values print data model details set up dashboards define and import custom reports configure custom menus for different user groups define roles and authorizations for various "classes" categories configure the various operations executed by the Task Manager in the background Page 8
, documents (projects, contracts, manuals) and other resources, internal and external.")
9 define notification templates configure georeferenced GIS and BIM classes localization of CMDBuild into other languages define options and system parameters Getting Started Here is a diagram that explains terms and concepts introduced above in relation to the configuration of the data model. Design criteria At first, it's important to: choose a detail level proportional to the available organization needs, human resources, financial, information and technology identify and involve the staff who will set up (Administrator) and update (Operator) information in the system; an outdated system produces costs and no results introduce the new application in an organizational system based on procedures, roles and responsibilities that help the IT structure to correctly manage the information consider ITIL "best practice" model, a model that has become, in a short time, a "standard de facto" for services management A successful CMDB project must consider impact and changes introduced by the system and must Page 9
 and update (Operator) information in the system; an outdated system produces costs and no results introduce the new application in an organizational system based")
10 Getting Started acquire the explicit approval of organization's managers. Working methodology Enabling CMDBuild requires a preliminary design to manage the initial schema, ie identify main interests and options; then, the system can be easily extended as needed at a later date. We recommend you to start by managing a complete and accurate set of objects and relationships, and then extend the system once you've become more familiar with CMDBuild rules and usage. In particular, you should identify: types of objects ("classes"): hardware (computers, printers, monitors, etc.), software (operating systems, business applications, productivity softwares), services (help desk, licenses, etc.), entities (suppliers, locations, etc.) "attributes": useful to define each class (code, description, monitor type, hard disk size, etc.) - each attribute has a specific data type (string, long text, integer, decimal, floating point, date, "lookup" list, reference) and might be a geographical attribute relations between classes "attributes" are useful to describe each "domain" (dependency between two software applications, number of a switch port connected to a server, relations between a system administrator and servers, etc.) - each attribute has a specific data type (string, long text, integer, decimal, floating point, date, "lookup") organizational processes that the system has to manage, described in terms of activities, transition rules and "attributes" involved user accounts Another thing to consider is the hierarchy of classes since, in CMDBuild, it's possible to define generic classes ("superclass", for example "Computer") and then derive subclasses (for example, Page 10
: hardware (computers, printers, monitors, etc.")
11 Getting Started "Desktop", "Laptop", "Server"). These subclasses will share some common information (attributes of the superclass) and define some specific attributes that the superclass doesn't have. It's important to identify a hierarchy that meets the needs of the organization since a class can not be automatically converted into a superclass. Once the entity-relationship model has been defined, you have to define classes and related attributes / data types. At the end of this operation you should: use the Administration Module to model the system you've designed using E-R tools use the Management Module to insert, update and display cards Technical Information For more technical information about the mapping between CMDBuild logical data model and database physical model, see the "Technical Manual". The same manual also describes how to install the application. Page 11

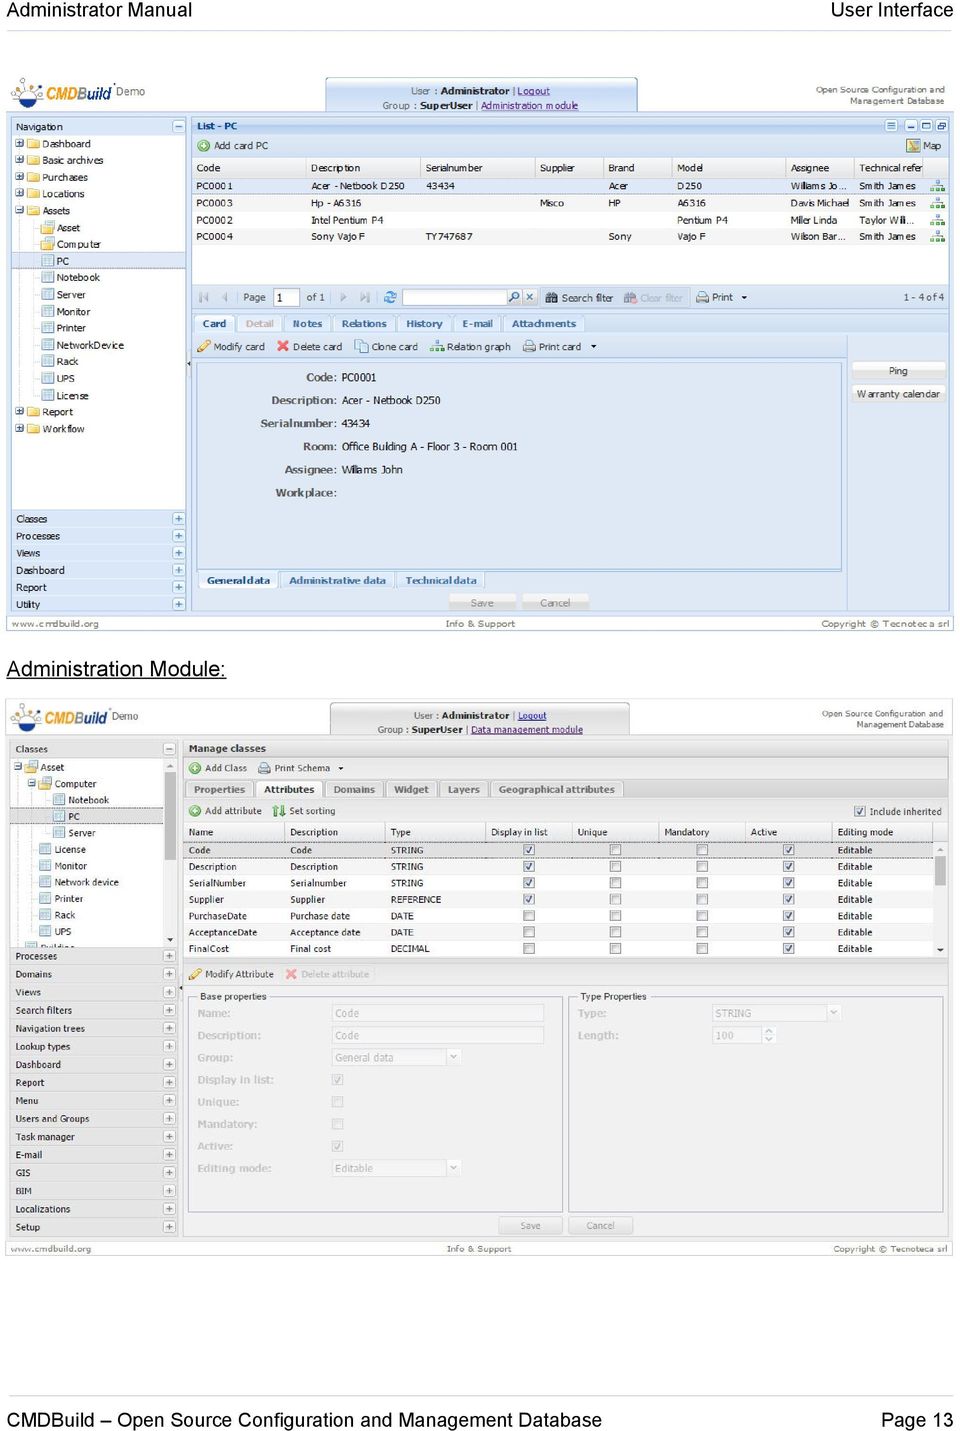
12 User Interface User Interface The CMDBuild user interface uses Ajax technology. This solution, part of the new Web 2.0 paradigm, provides a more intuitive application, improves interaction and gets faster responses from the system. General design criteria The user interface includes the following main elements: left side menu - "accordion" style - to access menus of Management and Administration modules data area in the top right corner, containing: add new card button sort options and column list (limited to the Management Module) Page functions, basic and advanced filters, print and export grid data (only for the Management Module) data area in the bottom right corner, containing: dedicated TAB to access specific card sections buttons to manage the selected item in the grid complete card - information and labels buttons to confirm or cancel the current operation links to related cards with the ability to insert, modify and delete (logical delete) data buttons on the right side corresponding to the widgets configured for the card On top of the page, in the header: CMDBuild logo (registered trademark Tecnoteca Ltd) on the left a clickable central panel with the current user and group; the panel shows the link to the Administration Module (only to system administrators) and Management Module button to logout (center panel) application name on the right A footer, containing: Official website URL application credits the copyright notice The details above are part of a standard setup but may differ in case of specific installations. We present now the details of the Management Module since the Administration Module has a dedicated manual. Here are two screenshots of the Management Module (blue shades) and Administration Module (shades of gray). Management Module: Page 12
 Page functions, basic and advanced filters, print and export grid data (only for the")


13 User Interface Administration Module: Page 13
14 User Interface Control elements Navigation chronology Top right there is an icon to access the chronology of those actions performed in the system starting from the last login and to enter a card you have already visited: navigation chronology This list shows the sequence of actions and the related type, function and detail. It allows even to return to the same position of the chosen row. Resizing the main areas The three main areas described above can be resized by clicking and dragging the layout borders. On pages with a standard layout (divided into upper and lower area) you can (only in Management Module) act more quickly using buttons located on the top right to: expand to full-height card details area expand to full-height the data grid restore standard layout Accordion menu The menu on the left side is accordion-style and allows the user to open / close each item of the first level with a simple click. Opening / closing a menu entry toggles the sub-elements of the selected entry. Grid management The standard data grid management (Management Module only) permits to: sort on a specific column with a mouse click see additional columns in the grid (among available ones) In some cases you can call special features associated with a row of the grid simply by double clicking on the item (open relations, open document in the attachments tab, etc.). There is also a button to print (PDF or CSV) data (rows and columns) that's currently displayed in the grid. Finally, using the "Map" button it is possible to switch between textual and geographical modes. Quick action on grid elements In some cases you can call special features associated with a row of the grid simply by double clicking on the item (open relations, open document in the attachments tab, etc.). Selection filter The selection filter, if defined, is available in two modes: quick search on all card attributes (not just those shown on the grid) Page 14
 you can (only in Management Module) act more quickly using buttons located on the top right to: expand to full-height card details")
15 User Interface advanced search filter, which provides advanced filtering (included the storing and the filter reuse) and will be described in individual use cases Interactive help In some cards (in particular in the process management) there is a button in the lower right corner that displays a panel with some compilation tips. Filling in forms for data editing Data cards compilation requires different fields: numeric or string type with simple content multiline text date type, with interactive calendar simple list select advanced list select (with filtering options) formatted text (with editor) you can then use the widgets (buttons) configured for the card. Every insert operation includes confirmation and cancellation buttons Menu Both Administration and Management modules work on the same objects, the first to set configuration options (data structures), the second to manage the information stored in these objects (cards). Both modules have an "Accordion" style menu and include the same entries, however for each entry there are different options in the two modules: lookup tables, definition of filters and views, users and groups, definition of menu, GIS configuration, configuration of base parameters in the Administration Module navigation menu (list of items available to the current user, ordered in folders in a coherent and organized way) views, dashboards and utilities in the Management Module Simplified user interface Through proper configuration parameters set in the Administration Module (Groups Management Page 15
 formatted text (with editor) you can then use the widgets (buttons) configured for the card.")

16 User Interface Configuration User Interface), you can define a simplified interface for those users' Groups that demand it. In particular, you can: hide one by one the headings of the accordion Menu placed in the left side of the page hide one by one all TABs of the cards and of the processes hide the accordion Menu itself when opening the page set an alternative display mode of the cards / processes list and of the insertion or update form of a card / process Page 16

17 User Interface Page 17

18 Accessing the application Accessing the application The Administration Module is available only to the administrator and can be used to perform operations on CMDBuild model and to make changes and extensions to the existing structure. The changes made will be immediately available within the Management Module. PC Requirements CMDBuild is a web-based application, so both modules are available using a standard web browser. The system user has to arrange on his/her processor only an updated web browser (Firefox up to version 43, Chrome up to version 48, Microsoft Explorer 8 or more recent up to version 10). The web architecture ensures complete usability to any IT organization that operates in multiple locations (ie collaborative workflow); any entrusted client can connect and interact with the system using a standard web browser. Authentication You must login to use the application. The login form requires a username, a password and eventually a language selection (if the application has been configured to handle multiple languages) Once the user has logged in, the system starts with the Management Module and only the users that have the required role can switch to Administration Module by clicking on the link on top of the page (visible by clicking on the information panel located in the center) Page 18
.")
19 Classes management Classes management Properties tab The first tab, "Properties", allows you to create new classes / superclasses and edit some options. A class represents objects to be stored in the CMDB (computers, monitors, etc.). The system creates automatically all the forms to manage cards data. The input fields match the attributes defined in the class, and cards data is stored in the related database table (automatically created). There is the possibility of performing the following operations: add a new class print data model schema (PDF or ODT) edit an existing class by selecting it from the menu delete an existing class (logical deletion) print current class details Page 19
 edit an existing class by selecting it from the menu")
20 Classes management To create a new class you need to specify the following information: "Name" - the name of the table in the database (ie "Contract") "Description" - the class name used in the application "Type" - can be "Standard" (normal CMDBuild class), "Simple" (class without inheritance, history, relations, with "foreign key" attributes but not "reference" attributes - see note below) "Inherit from" - name of the superclass (by default all classes inherit from the superclass "Class", anyway you can select a specific superclass, for example "Monitor" is derived from the superclass "Item") "Superclass", this flag indicates whether the class will contain data (superclass = no) or will define some common attributes for subclasses (superclass = yes) "Active", indicates whether the class is active or has been deleted (logical deletion) Then, you can associate an icon to the class used for the relations graph. Note: The "Simple" class type can be used to store data streams coming from other systems, useful for example to store electricity consumption data, alert notifications on services availability, server logs, etc. Localization: In CMDBuild there are two localization typologies: first-level localization, related to the only base CMDBuild interface (menu texts and standard buttons, headers, footers, etc.) second-level localization, related to all application elements (class names, attributes, domains, lookups, etc.) The first-level localization is managed through external system files (jason format). The second-level localization is: managed through popup windows through a proper button set in every form requiring it filed in a new system table ( _Translation ) in the CMDBuild database In case of class management, near the "Description" field there is the following icon: Translation into other languages The icon allows to access the following pop-up window where you can specify the translation of the class name into other languages, which can be selected among those supported by CMDBuild: Page 20
 \"Superclass\", this flag indicates whether the class will contain data (superclass = no) or will define some common attributes for subclasses (superclass = yes) \"Active\", indicates whether the")

21 Classes management By selecting a language the name will be translated into the desired language. The same mechanism occurs for those elements with the description of a possible translation: class description attribute description description, direct description, inverse domain description domain attribute description view description filter description lookup heading description dashboard description report description menu heading description Otherwise, you can work on all elements, by accessing the menu dedicated to the localization functions (see the specific chapter) In the manual you can refer to this description wherever you find the translation icon. Page 21
; please note that it's not possible to")
22 Classes management Attributes tab The second tab, "Attributes", allows you to manage the class attributes. This tab is used to add information to a new class, or update an existing class. In the example the attributes of the "Monitor" class include: the attributes inherited from the "Asset" superclass ("Monitor" class inherits from "Asset"); please note that it's not possible to modify inherited attributes some other specific attributes, for example, "Type" and "Size" There is the possibility of performing the following operations: create a new attribute select the attributes on which you'd like to sort cards edit an existing attribute (edit available fields) delete an existing attribute (if the class contains no data) The attributes order can be modified by moving the lines in the grid (drag and drop). For each attribute you have to specify: "Name" - the column name in database "Description", - the attribute name in the application "Group" - used to group together attributes and organize them in tabs (for example, the Page 22
23 Classes management "Monitor" class has several attributes tab: "General", "Administrative data" and "Technical data" ) Data types available Boolean, Char Date, Decimal, Double (double precision floating point) "Foreign Key" (link to another class, only for "Simple" classes type) Inet (IP V4 or IP V6 address, with possibility of specifying the mask value) Integer LookUp (predefined list of values - could be set in Settings / LookUp ) "Reference" (reference to another class through a "domain", only for "Normal" classes type) String Text Time TimeStamp Display in list - to select if the attribute has to appear in the defaul list of attributes used in the management grid "Unique" - to indicate that the field represents a unique key "Mandatory", to enable a mandatory field "Active", to reactivate attributes logically deleted "Editing mode", that can be: Editable: normal editable attribute Read Only: visible but not editable Hidden: attribute not visible Some attributes have more fields, here are the details. Decimal attributes For "decimal" attributes these additional information are required: "Precision", indicates the total number of digits "Scale", indicates the number of digits in the decimal part String attributes For the "string" attributes, a further information is required: "Length", indicates the maximum amount of characters allowed Text type attributes For the "text" attributes a further information is requested: "Editor type", might be Plain text or Html Page 23
24 Classes management Lookup attributes "Lookup" attributes allow you to select the value of the attribute from a predefined list of values; this list is created and modified using the "Lookup Types" menu in the Administration Module (see specific chapter). Hence, when you select a "Lookup" attribute you're asked to select the list of values you want to use. Note: multilevel lookup lists are also available. Reference attributes Reference attributes allow you to link the attribute to a card of another class via a 1:N domain (where the "N" side is the current class) In the Management Module it will be possible to select values from the list of available references (which contains the attribute Description ). A reference attribute, in the Management Module, creates or modifies the relation between two cards. Therefore, when defining a "Reference" attribute, you're asked to choose the "domain" you want to apply. An advanced feature of reference attributes is the CQL (CMDBuild Query Language) filter, that permits to define a filter for the list. The filter could use variables set in the metadata popup window, visible by clicking the "Edit metadata" button (see the appendix). Page 24
25 Classes management Domains tab This feature allows you to define relations ("domains") between classes, and involves the following steps: overview of domains already configured creation of a new domain modification of an existing domain deletion of an existing domain Just like for attributes, it's possible to display in the grid: only the domains defined on the current class the domains defined on the current class plus the domains defined for the superclass By selecting the editing functions (insert, modify, delete) the system will change the menu ("accordion" menu on the left) from classes management to domains management, therefore you'll be able to change domain information and domain attributes. The description of the "Properties" and "Attributes" tabs is available in the Domains chapter. Page 25
26 Classes management Widget tab This feature allows you to configure some default features that will be available as "buttons" in the Management Module. Currently the following widgets are available: Create report: it allows to print a report Calendar: it shows the specified deadlines on a calendar Navigation tree: it allows to select one or more datacards through an interface based on a preconfigured navigation tree (subset of the domain graph) Start workflow: it allows to start the specified workflow by using a popup window (the workflow will then go ahead with the common CMDBuild functions) Ping: it performs a ping on the specified host Create or modify card: it allows to insert / edit a data card into a class that is different to the current one Further widgets can be used just within the workflows (see the Workflow Manual). There is the possibility of performing the following operations: display widgets already configured configure a new widget edit an existing widget delete an existing widget Page 26
27 Classes management The following parameters are common to all widgets (others are related to widget type): Button text Active: when a widget is deleted this is set to false Always on: this means that the widget is available also in view mode (no edit mode required) Print report widget The specific parameters for this widget are: Report: select a report from the list of available reports Force format: force output type (PDF or CSV) Parameters list: set input values for required report parameters Calendar widget The specific parameters for this widget are: Reference class: in this class you read the information which will be transferred on the calendar (this is optional if there is the CQL filter) Starting date: name of the attribute which contains the starting date of the event Ending date: name of the attribute which contains the ending date of the event (this is optional, if the event is omitted it will be considered punctual, i.e. it starts and ends at the same time) Default date: default calendar date Event's title: name of the attribute which contains the event's title CQL filter: selection filter of the charts which you have to treat (this is optional, if specified it has the right over "Reference class") Selection widget from tree diagram The specific parameters for this widget are: Selection tree, selected among the ones configured as subsets in the "domains" graph of the proper function "Navigation trees" Workflow launch widget The specific parameters for this widget are: Selection type (by name or through CQL query) Process (only in case of by name ): name of the starting process Process attributes (only in case of by name ): setting of the default value for each parameter which starts the process Page 27
28 Classes management CQL filter (only in case of "through CQL query ): you can define a list of workflows in order to choose dynamically which one you will start, creating a faked application class with the workflow names and defining a selection CQL filter in this field Widget to perform a ping on an IP address The specific parameters for this widget are: IP address: the IP to check Number of ping packets Custom parameters concatenated to the ping command Widget entry / modify card The specific parameters for this widget are: Reference class: this class belongs to the card which you have to work on CQL filter: selection filter of the card you have to manage, like the phrase {client:nome_field_del_form} (if the filter does not extract any cards, the widget will create a new one) Page 28
 and allows you to select the ones to show as background for the current class.")
29 Classes management Layers tab The "Layers" tab displays the list of geographical attributes available (each one on a separate layer) and allows you to select the ones to show as background for the current class. Page 29
 delete an existing geographic attribute (if the")
30 Classes management Geographic attributes tab The "geographical attributes" tab allows you to manage the geographic attributes of the selected class. There is the possibility of performing the following operations: create a new geographic attribute edit an existing attribute (edit available fields) delete an existing geographic attribute (if the class contains no data) The attributes order can be modified by moving the lines in the grid (drag and drop). For each attribute you have to specify: "Name" - the column name in database "Description", - the attribute name in the application "Minimum zoom", the minimum zoom level required to display the attribute (for example, if we have the whole Italy in the viewport it makes no sense to show cities buildings since they will appear overlapped) "Maximum zoom", the maximum zoom level required to display the attribute Page 30
31 Classes management Data types available "Point", "Line" "Polygon" Some geographical attributes have more fields, here are the details. "Point" attributes For "Point" attributes this additional information is required: "Icon" - the name of the icon (which should be loaded using GIS pages in the Administration Module) to display on the map Point radius - the size of the icon Fill color "Fill Opacity" "Stroke color" Stroke opacity "Stroke width", from 1 to 10 "Stroke dashstyle" (dot, dash, dashdot, longdash, longdashdot, solid) "Line" attributes For "Line" attributes this additional information is required: "Stroke color" Stroke opacity "Stroke width", from 1 to 10 "Stroke dashstyle" (dot, dash, dashdot, longdash, longdashdot, solid) "Polygon" attributes For "Polygon" attributes this additional information is required: "Icon" - the name of the icon (which should be loaded using GIS pages in the Administration Module) to display on the map Fill color "Fill Opacity" "Stroke color" Stroke opacity "Stroke width", from 1 to 10 "Stroke dashstyle" (dot, dash, dashdot, longdash, longdashdot, solid) Page 31
32 Process management Process management General Information CMDBuild is a management system for the IT department and supports ITIL "best practices"; CMDBuild models and manages the configuration management database and supports related processes. Given the amount of processes options, the organizational procedures and the flexibility pursued by the CMDBuild project, we chose not to implement a series of rigid and predefined processes, but a generic workflow engine to model processes case-by-case. The workflow management system is an important feature of CMDBuild and provides: a standard interface for users a secure update of the CMDB a tool to monitor provided services a repository for activities data, useful to check SLA Representation modes In CMDBuild each workflow contains information about: activities sequence, with conditional flows information to be displayed or to be filled by user on each step tasks to be performed (start process, update DB, send mail etc.) roles authorized to perform each step of the workflow Workflows are designed using the JPEd visual editor, an external open source tool that uses XPDL standard, and then imported into CMDBuild and executed with the Enhydra Shark engine. The "glossary" used in CMDBuild includes the following terms: process (or workflow): sequence of steps ("activities") to perform a specific action in compliance of specific rules, using a wizard activity: a workflow step process instance: active process created executing the first step activity instance: creation of an activity, accomplished automatically or by an operator The above terms are arranged into CMDBuild as follows: each process is represented by a special class configured using the "Processes" menu in the Administration Module; the class includes all the attributes of scheduled activities each process instance corresponds to the current card, plus the list of its versions (ended activities) each activity instance corresponds to a card (current activity) or to a historicized version (ended activity) Modeling a new process in CMDBuild requires the configuration of a new "process" class that includes all the attributes of scheduled activities. For all the details about workflow configuration, check out the "Workflow Tutorial" manual. This manual only describes how to configure a "process" class, describing in particular how to use the "XPDL" and "Planning" tabs; these tabs represent the main difference between a standard class Page 32

33 Process management and a process class. Page 33
34 Process management Properties tab The TAB Process Properties differs from the Class Properties one because it provides another data section that allows the upload/download of the XPDL file; you can use this tab to download the initial XPDL definition and, once designed the process, upload your file. Upload XPDL This function allows you to import the XPDL file that you've designed and configured using the external editor TWE (or JPEd). The information managed by CMDBuild is: user stoppable process (enabled / disabled) XPDL file process sketch (image) Once concluded the import operations described above, the new process is included in the Management Module, thus the process can be executed using the workflow engine "Enhydra Shark". You can edit a process you've already Download XPDL template This feature allows you to export the XPDL template to start working on the process structure using an external editor (JPed). The exported file includes: Page 34
35 Process management process name the list of process attributes (corresponding to the list of attributes defined in the class) the list of methods available (for the CMDBuild application) the list of "actors" (users) that interact with the process (the "System" role is automatically created to identify system activities); the list corresponds to the user groups defined in CMDBuild data type description for custom Lookup and Reference attributes The information managed for this function are: process class name (read only mode) user stoppable process (enabled / disabled) The same function can be used to download the current process and edit workflow steps using an external editor. Page 35
36 Process management Task Manager tab The Task Manager TAB allows you to access the functions of the Menu heading in order to schedule the execution of the current process. By the order "Add process", you will shift to the Task Manager function with the wizard for the scheduling of the current started process. Please see the chapter about Task Manager for more details about it. Page 36
37 Manage Domains Manage Domains Properties tab The first tab, "Properties", allows you to create new domains and edit domains' details. A domain represents relations to be stored in the CMDB (supplier provides asset, user uses computer, computer has software, etc.). The domain is represented by a list of relations and related attributes using a table created CMDBuild automatically in the database to store the reports added. This feature allows you to define relations ("domains") between classes, and involves the following steps: visualization of configured domains creation of a new domain modification of an existing domain deletion of an existing domain For each domain you must define: "Name" - the name of the table in the database Description - the mater-detail button (if applicable) in the Management Module Page 37
38 Manage Domains "Origin" - such as "supplier" "Destination" - such as "assets" "Direct description" - for example, the asset "has been provided by" a supplier "Inverse description" - for example, the supplier "has provided" the asset "Cardinality" - a constraint on the number of times an entity can appear in a relation (1:1,1:N, N:1, N:N), used by the application to validate new relations "Master Detail" - activate master-detail feature, ie elements of the detail class ("N" side) presented as rows of the main class ("1" side) "Active", indicates whether the domain is active or has been deleted (logical deletion) Page 38
39 Manage Domains TAB Enabled classes The second TAB Enabled classes allows you to disable a domain defined on a superclass on one or more subclasses. Page 39
40 Manage Domains Attributes tab The third TAB Attributes allows you to manage the domain attributes. This tab is used to add information to a new domain, or update an existing domain. There is the possibility of performing the following operations: create a new attribute edit an existing attribute (edit available fields) delete an existing attribute (if the class contains no data) The attributes order can be modified by moving the lines in the grid (drag and drop). For each attribute you have to specify: "Name" - the column name in database "Description", - the attribute name in the application Data types available Boolean, Char Date, Decimal, Page 40
41 Manage Domains Double (double precision floating point) "Inet" (IP address) Integer LookUp (predefined list of values - could be set in Settings / LookUp ) String Text Time TimeStamp "Display in list", to show the attribute in reference's details, in the Management Module "Unique" - to indicate that the field represents a unique key "Mandatory", to enable a mandatory field "Active", to reactivate attributes logically deleted "Editing mode", that can be: Editable: normal editable attribute Read Only: visible but not editable Hidden: attribute not visible Each attribute might have more fields, according to the same rules described for class attributes. Page 41
42 Views Views Through the views mechanism, not-corresponding groups of cards of a class can be provided to users. Views can be defined as subsets of cards of the same class (based on filters) or as groups of data cards made up by information filed in different classes (based on SQL queries). In the first case they keep their common functionalities of the class management, in the second one they are Read Only. This views mechanism recalls the restriction functionality of access permissions to a class keeping out some rows or columns. While the restrictions in the access permissions keep out definitively the consultation of certain information, for a single user group there is the possibility to define a view that shows a certain data group and another view that show other data (additional or separated). For instance, when using a "State" attribute or an "Assignee" one, you can create for the same group of operators an "Asset in use" view and an "Available assets" view from the "Assets" class. Views based on filters The system administrator can create a view based on filters: by reusing and cloning a filter defined by a user by defining a new search filter, i.e. by setting search criteria on attributes of the specified source class It's possible to perform the following operations: initiating the creation of a new view editing a pre-existing view deleting a pre-existing view opening a popup window where you can choose a user filter or create a new filter deleting the current filter criteria To create or modify a search filter, the following information is required: Name - name of the view (e.g. AssetInUse ) Description - description of the filter (e.g. Asset in use ) Source Class - class which the filter can be applied to (e.g. Asset) A new view can not be used if the access permissions are not defined, specifying which user group(s) can use them. Such operation should be carried out by using the function "Users and Groups" / Permissions / Views. Page 42
43 Views Below you will find two screenshots that describe the user interface provided for the management of views based on a filter. Page 43
44 Views Views based on SQL Operators can be provided with data cards obtained by collecting attributes present on different classes. These views typologies can be Read Only, limited to the main card (but relations and history) From a technical point of view, the SQL query should be encapsulated in a PostgreSQL function, defined within some criteria that will allow to CMDBuild its identification and use. For a description of these criteria, see the paragraph related to the definition of Dashboard charts (Definition of data source - PostgreSQL function). It's possible to perform the following operations: initiating the creation of a new view editing a pre-existing view deleting a pre-existing view To create or modify an SQL view, the following information is required: Name - name of the view (e.g. AssetInUse ) Description - description of the filter (e.g. Asset in use ) Data source - PostgreSQL function which the SQL query is defined in Page 44
45 Views Please note that the PostgreSQL function should satisfy the limitations described in the chapter related to Dashboards, in particular in those pages that carry examples of SQL functions Also in this case, a new view can not be used if the access permissions are not defined, specifying which user group(s) can use them. Such operation should be carried out by using the function "Users and Groups" / Permissions / Views. Page 45
46 Search filters Search filters Search filters can be used in the Management Module in order to display only those data cards that comply with the defined criteria. In the Management Module, every user can autonomously save those search filters used to refer to the data cards of a class and find them when accessing to the application. This function of the Administration Module lets the system administrator to create search filters which can be enabled to one or more user groups (they will be then found among those filters available in the Management Module) in one of the following modalities: by reusing and cloning a filter defined by a user by defining a new search filter, i.e. by setting search criteria on attributes of the specified source class It's possible to perform the following operations: initiating the creation of a new filter edit a pre-existing filter delete a pre-existing filter opening a popup window where you can choose a user filter or create a new filter deleting the current filter criteria To create or modify a search filter, the following information is required: Name - name of the filter (e.g. PCBrandDell ) Description - description of the filter (e.g. PC brand Dell ) Source class - class which the filter can be applied to (e.g. PC) Default for groups, field multiselect which allows you to specify that the current filter is applied as default filter onto the above mentioned class for the selected groups (see also the TAB "Default filters" of Users and Groups) A new search filter can not be used if the access permissions are not defined, specifying which user group(s) can use them. Such operation should be carried out by using the function "Users and Groups" / Permissions / Search filters. Below you will find two screenshots that describe the user interface provided for the management of search filters. Page 46
47 Search filters Page 47
48 Navigation trees Navigation trees Properties tab The navigation trees in CMDBuild are used to make available a hierarchical view of the information in certain management functions, among these: the selection of an element through tree interface in the widget Navigation tree Relations Graph GIS navigation BIM navigation The navigation trees will be also used in the following versions of CMDBuild in order to extend the functions of the Relation Graph. The Properties tab allows to create new navigation trees and modify the description of a preexisting tree. It's possible to perform the following operations: initiating the creation of a new navigation tree modifying a preexisting navigation tree deleting a preexisting navigation tree Page 48
49 Navigation trees In order to create a new navigation tree, the following information is required: Name, name of the navigation tree Description, description of the navigation tree Origin, root class of the tree Active, if the tree is active Page 49
50 Navigation trees Tree tab Through the Tree tab you can visually build the current navigation tree. For each node you can also: define a possible CQL filter in order to limit the number of selectable children specify that another domain on the same class must be followed with a recursive approach Page 50
51 Lookup Lookup As previously described, one of the data types available in CMDBuild is the "lookup" type, ie an attribute that shows up as a select field with predefined options. Therefore, the user must select an option from the list of options available (for example, monitor type could be "CRT", "LCD" or "Plasma" - monitor brand could be "HP", "Dell", "Philips" etc.) You can also create multi-level lookup attributes (for example: macrocategory => category) Properties tab Using the "Properties" tab you can manage the Lookup lists. It's possible to perform the following operations: add a new lookup list edit an existing lookup (description only) To create or modify a Lookup list, the following information is required: "Description" - the name of the list (for example, "Monitor Type" or "Brand") Parent - the parent of the current list (can be set only at creation) Lookup list With the "Lookup list" tab you can create new entries in the list or edit existing ones. It's possible to perform the following operations: Page 51
52 create a new entry edit an existing entry delete an entry Lookup To define a new entry you need to specify the following information: "Code" of the new entry "Description" of the new entry "Parent description" - select an entry of the parent list, if available "Notes"- any additional information about the entry "Active" - indicates whether the item is active or has been deleted (logical deletion) The entries order can be modified by moving the lines in the grid (drag and drop). Page 52
53 Dashboard Dashboard CMDBuild allows you to configure in the system "dashboards" pages, which singularly contain more charts of different typologies; then they will be consulted in the Management Module (both in a new specific accordion menu and in the Navigation Menu). Every dashboard can be addressed to a different typology of aspects which should be controlled: asset situation, service desk performances, cost allocation, etc. Every dashboard is made up of a number of charts which can adopt different typologies: pie, bar, line, gauge chart. The data shown in the charts are extracted from the system performing suitable PostgreSQL functions defined by the administrator according to a particular template described below. Properties tab The "Properties" tab allows you to create a new dashboard showing names and groups able to display it. There is the possibility of performing the following operations: create a new dashboard edit a pre-existing dashboard delete a pre-existing dashboard Page 53
54 Dashboard To create a new dashboard you need to specify the following information: Name "Description" "Enabled groups" - the groups (along with the system administrator) allowed to display the dashboard Page 54

55 Dashboard Chart TAB The "Charts" TAB allows you to set up the charts you want to display in the selected dashboard. There is the possibility of performing the following operations: add a new chart edit a pre-existing chart delete a pre-existing chart show a preview of the chart To set up each chart you have to: show some basic information highlight the data source (a PostgreSQL function which must have already been created in the database with the instructions shown below), in which the system will read the data in order to populate the chart set up the mapping among the output parameters of the PostgreSQL function and the input parameters provided by the chart typology (showing also whether it can be input by keyboard and the possible widgets that should be used) specify the chart typology (pie, bar, line, gauge), which determines the request of further specific parameters Page 55


56 Dashboard The following example (divided into two screenshot) defines an histogram chart: Page 56
57 Dashboard Here's an output sample of the "Preview" function: The detailed information required for the configuration of a chart include: Name of the new chart Description of the new chart Active, indicates whether the chart is active has been disabled Load automatically, indicates whether it can be immediately shown without the input of parameters through keyboard Data source shows the list of PostgreSQL functions available in the definition of the chart list of data source parameters, with the possibility for each of them to indicate: if it is mandatory type (string, integer, decimal, data) in case of string parameters a subtype is requested among: free string, name of a CMDBuild class, current user, current group in case of integer parameters a subtype is requested among: free integer, "Id" of a CMDBuild class, "Id" of a lookup with choice of the concerning lookup, "Id" of a card with choice of the concerning class the default value (free value or value from the list, according to the type of the datum) Chart type, that can adopt one among the following values: pie, bar, line, gauge Show legend (if necessary it will be located under the chart) Page 57
58 Dashboard other parameters specific to each type of chart: for pie charts: value field (for the dimensioning of the areas) label field (cited in the areas) for bar charts: orientation (horizontal or vertical) title of category board (label) value of category board (information represented by each bar) title of value board (label) value / values value board (for the bar dimensioning, perhaps with more overlapping series) for line charts: orientation (horizontal or vertical) title of category board (label) value of category board (information represented by each point on the line) title of value board (label) value / values value board (for the line height, perhaps with more overlapping series) for gauge charts: the maximum scale value the minimum scale value (zero if not specified) number of discretization intervals foreground color background color value field (in order to define the indicator shown) Definition of the data source (PostgreSQL function) In order for the system configuration of charts described above to work accurately, you have to consider in particular the definition of the PostgreSQL function which represents the data source. In particular: the function must report the comment "TYPE: function the definition of the function has to include the input and output parameters, clearly showing the name of each of them the input and output parameters have to be chosen among the following ones: character varying, boolean, integer, numeric, double precision, date, time, timestamp, text (not bigint ) Page 58
59 Dashboard in case that the function becomes more "tuple" than the output values, you should use the syntax "Returns setof record At the end of the operation, you have to perform the function "Setup > Server management > Clear Cache, or to reboot Tomcat. Here below there are two samples of right PostgreSQL functions, used in the demo database: CREATE OR REPLACE FUNCTION cmf_active_cards_for_class(in "ClassName" character varying, OUT "Class" character varying, OUT "Number" integer) RETURNS SETOF record AS $BODY$ BEGIN RETURN QUERY EXECUTE 'SELECT _cmf_class_description("idclass") AS "ClassDescription", COUNT(*)::integer AS "CardCount"' ' FROM ' quote_ident($1) ' WHERE "Status" = ' quote_literal('a') ' AND _cmf_is_displayable("idclass")' ' AND "IdClass" not IN (SELECT _cm_subtables_and_itself(_cm_table_id(' quote_literal('activity') ')))' ' GROUP BY "IdClass"' ' ORDER BY "ClassDescription"'; END $BODY$ LANGUAGE plpgsql VOLATILE COST 100 ROWS 1000; ALTER FUNCTION cmf_active_cards_for_class(character varying) OWNER TO postgres; COMMENT ON FUNCTION cmf_active_cards_for_class(character varying) IS 'TYPE: function'; CREATE OR REPLACE FUNCTION cmf_count_active_cards(in "ClassName" character varying, OUT "Count" integer) RETURNS integer AS $BODY$ BEGIN EXECUTE 'SELECT count(*) FROM ' quote_ident("classname") ' WHERE "Status" = ' quote_literal('a') INTO "Count"; END $BODY$ LANGUAGE plpgsql VOLATILE COST 100; ALTER FUNCTION cmf_count_active_cards(character varying) OWNER TO postgres; COMMENT ON FUNCTION cmf_count_active_cards(character varying) IS 'TYPE: function'; Page 59
60 Dashboard Layout TAB When the charts of the dashboard are defined, it will be possible to set their layout. In particular you can choose whether to distribute them on one, two or three columns, and to move the present charts among the columns (using the drag and drop method). It is also possible to move a chart from a dashboard to another by selecting it and dragging it on the name of its new dashboard (in the accordion menu on the left). The available functions are as follows: add a new column remove a column, if it is empty personalize the distribution of the room among the provided columns Here's a sample of a 3-column layout: Page 60
61 Report Report CMDBuild allows you to import custom reports designed with external tools, and then to include them in the Management Module. JasperReports CMDBuild is able to import reports created with ireport (visual editor) which is part of the JasperReports open source project. ireport features include: text formatting options (font, text alignment, space, colour, etc.) standard elements definition (header, footer, column headings, summary, etc.) data grouping expressions evaluation computed fields advanced subreports management images and graphics PDF, HTML, XLS and CSV formats The import function handles also reports containing subreports and images, whose upload is managed using a wizard. Page 61
62 Report To create a new report you have to insert the following information: "Report name" - the name will appear in the list of available reports "Report description" - the description will appear in the list of available reports "Enabled groups" - the groups (along with the system administrator) allowed to execute the report "Master report" - the template file created with ireport If the master report contains subreports or images (both managed by ireport as external files), the administrator will be asked to upload the required files. The report you find in the demo instance includes two logos whose images are required: Once completed the import, the report can be executed using the Management Module at the Report menu. Each report can also be inserted into the navigation menu of the groups qualified to use it. Then it can be executed directly from that menu. Page 62
63 Menu Menu Custom menus The system allows you to define custom menus for all groups or for specific groups. Each menu consists of system elements (classes, processes, views, reports) and custom folders (used to organize entries). These menus are available in the Management Module as the main navigation menu (the one configured for the login group, the "default" otherwise). Users with no custom navigation menu can still access the Management Module, but the system will show only classes for which they have read or write permissions. It's possible to perform the following operations: edit the menu for the selected user group delete the menu for the selected user group The setup of a menu includes the following operations: add a new folder drag and drop menu items from a list of available elements delete items from the menu Page 63
64 Menu localization of an element in the menu With a single operation you can insert a superclass containing subclasses. Once confirmed the changes, the menu will be available in the Management Module (logout / login to refresh). Page 64
65 User groups User groups CMDBuild permissions are based on: user groups group permissions on classes, views and search filters (permissions on dashboards and reports are instead managed in the related sections) user - group associations Therefore it's possible to: set user groups with specific permissions for each class defined in the system, also in rows and columns add users to one or more groups; the user inherits permissions from the group Further functions, gathered in the TAB "UI Setup", allow the definition of personalized setups of the user interface, removing some standard functionalities of CMDBuild and simplifying the interaction interface for some users' groups with less technical skills. This chapter describes the groups management, the placement in the pre-existent users' group included, while the next deals with the users management. Properties tab The Properties tab allows you to create and edit groups. There is the possibility of performing the following operations: add a new group edit an existing group disable a group To create a new group you have to insert the following information: "Group name" "Description" Is administrator - indicates whether the group is an administrative group, ie has full system access Starting page at - the default startup page when entering the Management Module Is active, indicates whether the group is active or has been deleted (logical deletion) Here's an example of screenshot. Page 65
66 User groups Page 66
67 User groups Permissions tab The Permissions tab allows you to define permissions for each class / view / filter. There is the possibility of performing the following operations: for each kind of element (class / view / search filter), set / modify the kind of permission that accepts the values: none / read / write only for classes, open a popup window where you can define a filter on the class rows (if necessary choosing a user filter) or columns only for classes, delete the current filter criteria TAB Classes Here's the page related to the management of class permissions (class tab): You can change permissions by clicking on none / read / write checkboxes. If for the current group you want to reduce the access permissions to rows or columns of a class, you have to use the first icon placed at the end of every row in the scheme. In this way you will access a popup window that presents two TABs called "Privileges on rows" and "Privileges on columns". Classes: Privileges on rows The management of Privileges in rows can be carried out in two ways: Page 67
68 User groups by reusing and cloning a pre-existing filter defined by the administrator or by a user (after ticking off the check) by defining a new search filter A new search filter, in turn, can be defined in three ways: by setting search criteria on the attributes of the specified source class (Attributes tab) by setting search criteria on the relations of the specified source class (Attributes tab) by using a predefined PostgreSQL function, that should be created according to the criteria described in the chapter related to Dashboards (Function tab) Attributes tab Relations TAB Page 68
69 User groups Functions tab Page 69
70 User groups Classes: privileges on columns Users belonging to the group under configuration are able to select the permissions of the class attributes: not-visible attribute only-visible attribute even-editable attribute Classes: disabling GUI buttons On the CMDBuild UI you can disable the permissions related to the insertion / modification / cloning / deleting of a card. This option is only related to the CMDBuild GUI. It has no consequences outside it (e.g. by quering the permissions of a class through webservice). Here's the screenshot of the pop-up window provided by the system. Page 70
71 User groups Processes TAB Here's the page related to the definition of process permissions, similar to the class one. Page 71
72 User groups Only the available permissions are different: none, if the process cannot be visible default, if permissions derived from the XPDL descriptor of the process must prevail (a group of users can edit / advance a process if the current activity is in the "lane" of the current group, they can view a process if they edited / advanced it in a previous step) default + read, if the possibility of viewing the process is enabled in addition to the permissions derived from the XPDL descriptor TAB Views Here's the page related to the definition of views permissions. TAB Search filters Here's the page related to the definition of search filter permissions. Page 72
73 User groups TAB Custom pages Here's the page related to the definition of permissions for the custom pages. Page 73
74 User groups Users tab The Users tab allows you to associate a user to one or more groups. You can drag and drop users from the list of available user (on the left) to the list of users in the group (on the right). Page 74
75 User groups TAB UI setup The TAB "UI setup" allows the personalization of the user interface of a specific users's group, excluding some examples or simplifying their global working. In particular, you can work on: the elements shown in the accordion menu on the left, with an additional detail for the utility functions the available TABs for the card management the available TABs for the process management further options Accordion menu With the buttons available in the first box you can disable some components of the main menu of the application (accordion menu on the left) for the current group, in particular: Cards accordion Processes accordion Views accordion Dashboards accordion Report accordion Accordion Custom pages Utility - change password Utility - multiple update Utility - import CSV file Utility - export CSV file TAB cards With the buttons in the second box you can disable some TABs available for the cards management for the current group: Details TAB Notes TAB Relations TAB History TAB TAB Attachments TAB Processes TAB With the buttons in the third box you can disable some TABs available for the process management for the current group: Page 75
76 Notes TAB Relations TAB History TAB TAB Attachments TAB User groups Further options With the buttons in the last box you can: hide the whole accordion menu in the left side of the screen (which you can restore with the proper graphic control), widescreen display the cards management (the entry of a new card and the change of a card selected in the list will temporarily hide the list) demand the simplified display of a card history (reducing the summary information shown and blocking the entry of the complete historicized card) demand the simplified display of a process history (reducing the summary information shown and blocking the entry of the complete historicized card) always keep active the widgets provided for the current state In the previous section related to permissions there is further info about the possibility of disabling the permissions related to the insertion / modification / cloning / deleting of a card on the standard CMDBuild UI. Page 76
77 User groups TAB default filters The TAB Defult filters allows you to specify a possible filter applied into the Module for the data Management, when a user of a specific group opens a class of a process In particular, you can: view the application filters, from this interface or from the menu for the filter management add or edit a default filter which was already set Page 77
78 Users Users This feature allows you to create and edit system accounts. There is the possibility of performing the following operations: add a new user edit properties of an existing user change user password disable a user To create a new user you have to insert the following information: "Username" - login username "Description" "Default group": if you select the empty option, the user will be prompted to choose a group (among the ones he belongs to) at login time, hence the user will inherit specific group permissions ; otherwise the user permissions will be the sum of all groups the user belongs to. The default group, on the other hand, is used to identify the group that starts the processes (in case of multiple starts) and set navigation menu (if defined). "Active", indicates whether the user is active or has been deleted (logical deletion) Service, it shows that it is a faked user used by an automatic service Page 78
79 Privileged, it shows that it is a service user, with additional privileges Password - login password Confirmation - confirm login password Users Page 79
80 Task Manager Task Manager Basic functions The Task Manager gathers all CMDBuild functions carried out in the background. In this way you can have a general view on the active tasks and the related parameters. At the moment, the kinds of tasks taken into consideration are as follows: management of incoming s management of asynchronous events management of synchronous events workflow schedule Wizard Connector schedule There is the possibility of performing the following operations: starting a non active task suspend a started task configure a new task according to the provided typologies modify the configuration of an existing task remove an existing task clone an existing task Page 80
81 Task Manager Before the modification of a started task, we suggest you to suspend it and then restart it. The current configuration of the Task Manager is filed in the DB and every time CMDBuild restarts the active tasks are automatically restarted. For each task typology there is a specific wizard that supports its configuration. It is described in detail in the following paragraphs. Page 81
82 Task Manager Inbox management For this specific task you have to wait for an incoming into a specific folder of a specific account, verify if it coincides with any prearranged filter criteria and carry out the recommended instructions. Such activities include also: sending notifications saving attachments in Alfresco, starting workflows For example you can start this function in order to start Incident Management processes when you receive an from users, you can also manage any replies from users in a following step of the same workflow, etc. The wizard includes four pages described below. Page 1 of the wizard The following information is required: "Description" Start on save : the task starts when the configuration is saved account : post account to control the incoming s (please see the related section of this manual) Page 82

83 Task Manager Kind of filter: None, Regex (filter with regular expression), PostgreSQL Function Filter on sender : it includes a possible Regex filter set on the sender in order to exclude less interested s; it is expressed as regular expression and can be set through a proper pop-up window (in the screenshot over the filter, it will take into consideration just those s containing the string example1.com or example2.com ) Filter on the subject : it includes any Regex filter set on the subject of the in order to exclude less interested ; it is expressed as regular expression and can be set through a proper pop-up window Example of screenshot with PostgreSQL Function filter: Page 83
84 Task Manager Page 2 of the wizard The information related to the scheduling ways of the control task of the incoming is required: Simple mode, with the options every hour, every day, every month, every year Advanced mode, with the same options and the same syntax as the schedule tool cron available in Linux Page 84

85 Task Manager Page 3 of the wizard The following information is required in groups: Body parsing Key start delimeter : it allows to specify the initial delimeter of the possible key field available in the Key end delimeter : it allows to specify the final delimeter of the possible key field available in the Value start delimeter : it allows to specify the initial delimiter value field available in the Value end delimeter : it allows to specify the final delimiter of the value filed available in the Send notification template : it requires to select one of the templates preconfigured with the proper function ( management menu) Save attachment to Alfresco Category : it requires to select the category that should be associated with the attachment (that will be saved in the DMS, associated with the card) Page 85
86 Task Manager Note: The Body parsing mechanism allows you to recognize and manage in the workflow any attributes whose value was inserted in the body, for example: body [key]requester[/key]<value>john Smith</value> [key]description[/key]<value>the printer will not turn on</value> [key]priority[/key]<value>medium</value> Page 4 of the wizard It includes only the test useful to require the instant task starting. Page 86
87 Task Manager Synchronous events For this specific task you have to check certain conditions on the CMDB data by applying a predefined filter and carry out the recommended instructions. Such activities include also: sending notifications starting of workflows script execution This function can be used to configure the starting if the warranty of an asset is going to expire or to start a solicit workflow if a ticket is exceeding the period permitted for its resolution, etc. At the moment you can configure events on standard classes, not on workflows. The wizard includes three pages, described below. Page 1 of the wizard The following information is required: "Description" Start on save : the task starts when the configuration is saved Target class : in this class you have to control its data in order to evaluate if the following conditions are verified Page 87
88 Task Manager Page 2 of the wizard The second page of the wizard allows you to define a control filter with the same mechanisms available for the configuration of the CMDBuild standard filters. For a complete description of the configuration mode, please see the related section of this manual. Page 3 of the wizard The information related to the task schedule mode is required. The task will periodically control the data to evaluate if the filter conditions are verified: Simple mode, with the options every hour, every day, every month, every year Advanced mode, with the same options and the same syntax as the schedule tool cron available in Linux Page 4 of the wizard It includes only the test useful to require the notification sending by specifying the account and template. Page 88
89 Task Manager Asynchronous events For this specific task you have to intercept the CMDB operations and carry out the recommended instructions. Such activities include also: sending notifications starting workflows script execution This function can be used to configure the starting in case that a new employee was inserted in CMDBuild, to start a deprovisioning workflow (removing the account, recovering the job role, transfering the tasks to a collegues, etc.) if an employee resigns, etc. At the moment you can configure events on standard classes, not on workflows. The wizard includes three pages, described below. Page 1 of the wizard The following information is required: "Description" Start on save : the task starts when the configuration is saved Step : it shows the data for the control (as soon as a card is inserted, before a card is modified, as soon as a card is modified, before a card is deleted) Group : to limit the control to the modifications of certain predefined groups Page 89
90 Task Manager Class : to control the carried out operations Page 2 of the wizard The second page of the wizard allows you to define a control filter with the same mechanisms available for the configuration of the CMDBuild standard filters. For a complete description of the configuration mode, please see the related section of this manual. Page 3 of the wizard It includes the test useful to require the notification sending by specifying the account and template. It allows also the automatic starting of a Change management workflow, specifying Process : starting workflow List of attributes conformity, to initialize one or more starting process attributes Page 90

91 Task Manager Page 91

92 Task Manager Workflow This function allows you to schedule a workflow configured in CMDBuild. The wizard includes two pages described below. Page 1 of the wizard The following information is required: Description of the new task Start on save : the task starts when the configuration is saved Process List of attributes conformity, to initialize one or more starting process attributes Page 2 of the wizard The information related to the scheduling ways of the task is required: Simple mode, with the options every hour, every day, every month, every year Advanced mode, with the same options and the same syntax as the schedule tool cron available in Linux Page 92
93 Task Manager Wizard Connector This function allows you to schedule a data synhronizer connector between external sources and CMDBuild. The management of IT services by large and medium-sized institutions and companies is necessarily carried out through more specialized information systems that must be able to cooperate in the management of their activities and information. Gathering and checking manually the information managed in the CMDB can cause delay issues or create inaccuracies when updating data. Therefore it is better to update it automatically. Therefore the configuration of connectors through external systems becomes important in order to sync in CMDBuild (the central CMDB system) data that are mainly managed on other specialist applications, (inventory, monitoring systems, LDAP repository, ERP and HR applications, etc.). The Wizard Connector allows you to resolve the simplest cases in which the "mapping" rules do not require a specific application logic. For more complex needs you can use the Basic Connector and the Advanced Connector. We are describing below the configuration forms of the Wizard Connector. Please see the CMDBuild Connectors Manual for a more detailed comparison of the three solutions. Page 1 of the wizard Page 93

94 Task Manager The following information is required: Description of the new task Start on save : the task starts when the configuration is saved Send an notification, specifying if necessary: account template of the Page 2 of the wizard The information related to the task schedule mode is required. The task will periodically control the data to evaluate if the filter conditions are verified: Simple mode, with the options every hour, every day, every month, every year Advanced mode, with the same options and the same syntax as the schedule tool cron available in Linux Page 3 of the wizard Page 94
 Address of the source database Port of the source database Name of the source database Username for the access Password for the access Entity filter, you can select the")
95 Task Manager The following information related to the data source is required: Type of the origin database (databases PostgreSQL, MySQL, Oracle and SQLServer are supported, having installed the proper access drivers) Address of the source database Port of the source database Name of the source database Username for the access Password for the access Entity filter, you can select the entities you want to show in the mapping criteria definition (e.g. some views with the same prefix, prearranged for connector query) Page 4 of the wizard For each entity of the external data source involved in the synchronization activities, the following info is required: External entity : name of the table, view or other entity CMDBuild class : CMDBuild class for the data synchronization Creation : if enabled, it creates in CMDBuild any data card available in the external system and not in CMDBuild Modification : if enabled, it updates in CMDBuild any data cards available in the external Page 95
96 Task Manager system with information different from CMDBuild Cancellation : if enabled, it deletes any data cards not available in the external system and available in CMDBuild Page 5 of the wizard For every attribute of each entity to synchronize, the following info is required: External entity : name of the table, view or other entity External attribute : the name of the column / information of the external entity CMDBuild class : CMDBuild class to sync CMDBuild attribute : CMDBuild attribute to sync Key : it states the key attribute of each entity (necessary to compare data and decide the kind of synchronization) Page 96

97 management management In CMDBuild, s are controlled from the core for a better control and a simpler updating of parameters. This function allows you to register the information related to each account and to preconfigure certain templates of s used in the CMDBuild mechanisms: Workflow system widget Task Manager Account You can preconfigure the accounts used to send s It's possible to perform the following operations: create a new account modify an account remove an account set an account as default Page 97
98 management In order to create a new account, the following information is required: Account Name, account name Credentials Username Password Sent s Address SMTP server SMTP port SSL activation StartTLS Activation Folder Sent s Inbox IMAP server IMAP port SSL activation StartTLS Activation Page 98

99 management template You can create preconfigured templates, which can be reused in the CMDBuild functions that use it. It's possible to perform the following operations: create a new template modify a template remove an account In order to create a new account, the following information is required: Basic properties Name, name of the template "Description" Keep sync, it shows you that the text of the is automatically updated when attributes used like parameters vary Confirm sync, it shows you that you have to confirm every time the text varies when attributes used like parameters vary Delay, it requires that the is sent later (after hours, days, 1-2 weeks, 1 month) Page 99
100 management Template Default Account To, addressee (or list of several addresses separated by comma) Cc, copy carbon address (or list of several addresses separated by comma) Bcc, blind copy carbon address (or list of several addresses separated by comma) Subject, subject (it can include parametric fields expressed through CQL) Body, body (it can include parametric fields expressed through CQL) Through CQL expressions you can customise your in each template field with information available in the current context (i.e. workflow variables used to send s) Page 100
101 management queue The created by CMDBuild pass through a "queue", which is periodically controlled. After that, the s are sent through the server. Thanks to this function, you can set the frequency for the "queue" control (1-10 minutes) Page 101
102 GIS GIS Icons management This feature allows you to create and update icons that are used to represent markers. There is the possibility of performing the following operations: uploading a new icon editing properties of an existing icon deleting an icon Page 102
103 GIS External services This feature allows you to activate the external services necessary for the map representation. The external services currently supported are: Open Street Map, Google Maps and Yahoo! Maps) GIS Server (GeoServer) to upload and display raster and vector data (plans, etc.) For the map services it's possible to set max and min zoom levels available in CMDBuild. To use GeoServer you have to specify: URL workspace name admin username admin password Page 103
104 GIS Layer order This feature allows you to set layers order (there's a layer for every geographical attribute defined). The layers order can be modified by moving the lines in the grid (drag and drop). Page 104
105 GIS Geoserver layer This feature allows you to: upload to GeoServer the layers you want to display in CMDBuild edit layers order To upload a new layer you have to insert: name description layer file file type (GeoTiff, WorldImage, Shape) min zoom level max zoom level the possible class and the CMDBuild card associated to that layer, useful in the Management Module to insert the layer into the list of the items contained in an element of the hierarchical GIS navigation menu, which is described in the next paragraph (e.g. to find the Geoserver layer among the items related to a "Floor" card) The layers order can be modified by moving the lines into the grid (drag and drop). Page 105
106 GIS GIS Navigation The function allows the definition of the domain tree, which will be then provided to the user in the Management Module in order to help him/her with the navigation among the various class / card types georefered on the map. In other words, this function defines the structure of the hierarchical menu in order to move from a class to the contained ones (in term of space). A higher class can include more lower classes, for example a room can include information assets, jobs (understood as assignees or logic grouping of assets), furnishing (tables, chairs, cupboards, technical equipment, pictures), etc. Providing the necessary domains, please find below a sample of configuration made up of the following classes: Building => Floor => Room => Item Through the "Default level" check, you are required to mark the "vertical development" layer, which is the one capable of overlapping and needs to be displayed selectively (usually related to the "Floors" layer). Page 106
107 BIM BIM Projects This function allows to manage BIM projects managed in CMDBuild. Every project is usually associated to a building or to a built up area. A BIM project coincides to a IFC file in various versions. For IFC files, CMDBuild uses as embedded repository the open source tool BiMserver, which contains files uploaded from CMDBuild. It's possible to perform the following operations: create a new project modify a project disable a project export an integrated project containing information managed / edited in CMDBuild In order to create a new project, the following information is required: Name, name of the project Description, description of the project Page 107
108 BIM IFC file, it requires the uploading of the IFC file to in order to file in into BiMserver Active, if the project is active "Card connection", it requires to select the card of the CMDBuild class for the project connection; it is usually a building or a built up area (it must coincide with the CMDBuild class indicated as "Root" in the following function of the layer management) Page 108

109 BIM Layer The UI shows the list of CMDBuild classes and "check" columns as follows: Active, where you can select those CMDBuild classes having a correspondence with the entities in the IFC file Root, where you can select a CMDBuild class corresponding to the "root" class of the IFC file, e.g. the "building" class (single selection) "Export", where you can select the exportable classes of CMDBuild, so that all the modifications executed in CMDBuild will be reported in the architectural designing external tool (they differ from other classes due to the inclusion of the geometrical coordinates management) Container, where you can select the CMDBuild class used as "container" of objects included in the IFC file, e.g. the class "room" (single selection) Page 109
110 Localization Localization In CMDBuild there are two localization typologies: first-level localization, related to the only base CMDBuild interface (menu texts and standard buttons, headers, footers, etc.) second-level localization, related to all application elements (class names, attributes, domains, lookups, etc.) The first-level localization is managed through external system files (jason format) and it is supplied by external contributors. The second-level localization is managed in this Administration Manual, by working on single texts and directly in the function for the element definition, or through the features available in this menu. The official releases of CMDBuild include all first-level localizations supplied by contributors, while for the second-level localizations there is a repository where contributors can upload additional languages for CMDBuild Ready2Use and openmaint. Configuration In the configuration page you can select: the default language of the CMDBuild instance (among the available ones) the introduction of the default language when logging in (in this case, you will still have the possibility to access then with another language) Then you can select the languages enabled for the localization, among those ones with the firstlevel localization. Here's a sample of interface screenshot. Page 110
111 Localization Page 111
112 Localization Localization The localization interface offers a single intervention point in order to work on every translation: Classes: description of classes, description of attribute groups, description of attributes Processes: description of processes, description of attribute groups, description of attributes Domains: domain description, direct description, inverse description Views: view description Search filters: search filter description Lookup: lookup list heading description Report: report description Menu: folder description, description of element inserted into the menu Each kind of element is managed in a proper TAB of the interface. In every TAB you can: expand all headings reduce all headings For each language enabled to the localization, there is a column where you can view, add and change the translation of that element. Here's a sample of interface screenshot for the TAB Classes, the management of other TABs is similar. Page 112
113 Localization Page 113
114 Localization Import / Export The import / export feature allows you to import a localization provided by other contributors, or to export your own localization. There two features are available in two different TABs. In the page from where you can import there are the following fields: Format (CSV, not-editable) File Separator (it can be selected among the symbols ;,, and ) Here's a sample of interface screenshot. In the page from where you can export there are the following fields: Section (chosen among All, Classes, Processes, Domains, Views, Search filters, Lookups, Reports, Menu) Languages ( multiselect field where you can choose one or more enabled languages) Format (CSV, not-editable) Separator (it can be selected among the symbols ;,, and ) Only active (to export only localizations of active elements) Page 114
115 Localization Here's a sample of interface screenshot. Page 115
116 Configuration Configuration Setup page This page contains main application settings. In the "General" tab you can set: Instance name - a name (string) to recognize an instance (such as "Test" to distinguish production and test installations) "Default class" - the class loaded on startup Row limit, it shows the number of rows shown in the top grid on every class or process References and lookup combobox limit - indicates the maximum number of options shown in a combobox; if exceeded, the options are displayed in a popup window with pagination and filters Relation limit, indicates the maximum number of relations shown separately; if exceeded, the relations are grouped together "Height of card panel in percentiles", indicates the space management between grid and data sheet areas (50 by default, set for example to 65 to give priority to the data sheet area) "Sub-panel tab position in card's panel" allows you to specify whether sub-panels titles should Page 116
117 Configuration appear on the top or bottom Session timeout (seconds) In the "Popup windows" section you can set: Popup percentage height - the percentage height of the popup window Popup percentage width - the percentage width of the popup window In the Lock cards and processes in edit section you can set: Enabled, to enable (default) or disabled the lock management of those data cards and processes in edit "Show the name of the user who locked the card", to exclude such information (possible privacy needs) from the message shown by the system when asking for the editing of a card reserved for that purpose by another operator Lock time-limit, to specify the time reserved to an operator before releasing the card in edit Page 117
118 Configuration Workflow page The page contains the workflow configuration options. In the "General" tab you can set: "Enabled" - enable or disable the workflow "Server URL" - workflow service url Enable 'Add attachment' when the activities are closed Disable sync of missing variables, useful to manage irregular cases where the XPDL descriptor of a workflow refers to variables that are not defined in the CMDBuild process definition In the Credentials section you can set: Username Password Engine name Scope Page 118
119 Configuration Relations graph page The page contains the relation graph settings. You can set: "Enabled" - enable or disable the graph visualization "Default level" - the default number of levels automatically expanded "Threshold for clustering nodes" - the maximum number of distinct nodes which can be shown in relation to another node (beside this limit, they are shown as a single different node) Enable tooltip nodes Enable tooltip archi View tooltip nodes, with possibility of choosing between "None", "All", "Selected Viewpoint high, in the 3D chart Viewpoint distance, in the 3D chart Nodes distance, useful to view closer or further nodes in the chart Sprite dimensions, useful to state the dimension of the icons representing the different kinds of nodes in the chart Archi colours Some above-mentioned configuration settings can be modified within the current work session Page 119
120 Configuration through the function "Setup" available in the visualization interface of the Relations Graph. Page 120

121 Configuration DMS Page CMDBuild uses Alfresco DMS as repository, interacting through the protocols SOAP and FTP. Thanks to the contribution of the University of Bologna, the system has been then extended to other document repositories, integrating the support of the standard protocol CMIS (Content Management Interoperability Services). So, you can choose to work with the native interface of Alfresco (for the version 3.4) or to work with the CMIS protocol. In both cases you need: "Enabled" - enable or disable the interface "CMDBuild category" - the Lookup list used to classify the documents stored in the DMS In case you opt for working with the native interface of Alfresco, you need then to specify further settings, divided in four blocks: Alfresco FTP Web services In the Alfresco section you can set: Page 121
122 "Username" - Alfresco username "Password" - Alfresco password Configuration In the FTP section you can set: "Host" - Alfresco FTP server host "Port" - Alfresco FTP server port File server path "Operations delay " - delay to ensure that the upload is concluded before calling a grid refresh In the Webservice section you can set: "Host" - Alfresco webservice host "Port" - Alfresco webservice port Application On the other side, if you opt for working with the CMIS protocol, the interface will be as follows. The required settings are as follows: "Host" - Alfresco DMS server host Page 122
123 Username DMS username Password to access the DMS Preset, to select the "aspect" system to use Configuration Page 123
124 Configuration GIS page The page contains GIS settings You can set: "Enable" - the database must be configured to support the PostGIS extension "Initial latitude" - map latitude at startup "Initial longitude" - map longitude at startup "Initial zoom level" - zoom level at startup Page 124
125 Configuration BIM page It includes settings used in the system for the management of 3D BIM models (standard IFC), and in particular the connection account to the BiMserver repository used by CMDBuild. You can set: Enabled (it requires a configured BimServer instance) URL of the BiMserver instance Username of the BiMserver instance "Password of the BiMserver instance Page 125
126 Configuration Server management page Contains two utility functions: "Clear cache" - clear CMDBuild cache; useful when elements of the Postgres database are modified outside the application (database views, system functions, etc.) and you don't want to restart Tomcat to refresh "Delete inconsistent processes" - this function resets Shark tables; useful when processes have been manually deleted from the database. "Unlock all cards", to unlock the locked cards. CMDBuild allows the operator to use the card in edit (this is useful to anticipate the lock release in case an operator with an open card in edit breaks the operation) Page 126
127 APPENDIX: CQL language APPENDIX: CQL language CMDBuild provides the possibility of defining some filter conditions evaluated by the system, in order to give the user less choice in some specific cases provided by the application. Such filter conditions should be expressed with CQL language (CMDBuild Query Language) and can be used to: filter some cards in the selection list presented in order to set a Reference attribute filter some cards in the linkcards widget set some selections in the manage widget (addresses, authorization to send s, filtration of some system parameters) How to use CMDBuild Hereunder you will find the three main directions for use, comparing the SQL syntax with the CQL one. Simple filter The simple filter allows to filter on a constant value: SQL: SELECT * FROM ClassName WHERE Attribute =Value CQL: from ClassName where Attribute=Value EXAMPLE: Select the from the group GroupName in the extended attribute manage . In the definition of extended attribute the parameter ToAddresses is defined as follows: ToAddresses={cql:QueryCQLname. } so you can define the following CQL query: QueryCQLname= select from Role where Code='GroupName' Simple filter with server-side variable This mode allows to perform the filter on a server-side variable: SQL: SELECT * FROM ClassName WHERE Attribute =ServerVariable CQL: from ClassName where Attribute={server:VariableName} NOTES: Page 127
128 APPENDIX: CQL language In order to identify the variable VariableName (which can be displayed in the form) we used the simple form: {server:variablename} For attributes such LookUp or Reference you have to specify, with the bullet list, whether you want the Id or the Description: {server:variablename.id} {server:variablename.description} EXAMPLE: Select the of the selected user through the attribute Requester, reference type, in the extended attribute manage . In the definition of extended attribute the parameter ToAddresses is defined as follows: ToAddresses={cql:QueryCQLname. } so you can define the following CQL query: nomequerycql="select from Employees where Id={server:Requester.Id} & Status='A'" Simple filter with client-side variable This mode allows to filter on a client-side variable, i.e. completed on the form but not sent to the server. As you can see, if the field in the form is not set, the simple query with client-side variable reports an error since the value of the side-client variable has not been already defined. SQL: SELECT * FROM ClassName WHERE Attribute =ClientVariable CQL: from ClassName where Attribute={client:VariableName} NOTES: In order to identify the variable VariableName (which can be displayed in the form) we use the simple form: {client:variablename} For attributes such LookUp or Reference you have to specify, with the bullet list, whether you want the Id or the Description: {client:variablename.id} {client:variablename.description} EXAMPLE: The most common example is similar to the one of the server-side variable (replacing client to the server). Page 128
129 APPENDIX: CQL language Examples of usage Here below there are some further examples of CQL use. It filters the floors of the selected building (filter on Reference) CQL: from Floor where [BuildingFloor].objects(Id=0{client.Building.Id}) NOTES: [BuildingFloor] is the domain between the class Building and the class Floor (type 1:N). It filters the active processes (filter on Reference) CQL: from workorder where FlowStatus='Started' It recovers the of the user that starts a Ticket (server-side) CQL: ToAddresses={cql:queryRequester. } queryrequester="select from Employees where Id={server:Requester.Id} & Status='A'" NOTES: [Requester] is the Reference type attribute of the Ticketing workflow which contains the indication of who started the Ticket. It recovers the of the user that starts a Ticket (client-side) CQL: ToAddresses={cql:queryRequester. } queryrequester="select from Employees where Id={client:Requester.Id} & Status='A'" NOTES: [Requester] is the Reference type attribute of the Ticketing workflow which contains the indication of who started the Ticket. Page 129
130 APPENDIX: Glossary APPENDIX: Glossary ATTACHMENT An attachment is a file associated to a card. Attachments containing text (PDF, Open Office, Microsoft Word, etc.) are indexed in full text mode so that they can appear in search results. WORKFLOW STEP "Activity" means one of the steps of which the process consists. An activity has a name, an executor, a type, possible attributes and methods with statements (CMDBuild API) to be executed. A process instance is a single process that has been activated automatically by the application or manually by an operator. See also: Process ATTRIBUTE The term refers to an attribute of a CMDBuild class. CMDBuild allows you to create new attributes (in classes and domains) or edit existing ones. For example, in "supplier" class the attributes are: name, address, phone number, etc.. Each attribute corresponds, in the Management Module, to a form field and to a column in the database. See also: Class, Domain, Report, Superclass, Attribute Type BIM Method with the aim to support the whole life cycle of a building: from its construction, use and maintenance, to its demolition, if any. The BIM method (Building Information Modeling) is supported by several IT programs that can interact through an open format for data exchange, called IFC (Industry Foundation Classes). See also: GIS CI We define CI (Configuration Item) each item that provides IT service to the user and has a sufficient detail level for its technical management. CI examples include: server, workstation, software, operating system, printer, etc. See also: Configuration CLASS A Class is a complex data type having a set of attributes that describe that kind of data. A Class models an object that has to be managed in the CMDB, such as a computer, a software, a service provider, etc. Page 130
131 APPENDIX: Glossary CMDBuild allows the administrator - with the Administration Module - to define new classes or delete / edit existing ones. Classes are represented by cards and, in the database, by tables automatically created at the definition time. See also: Card, Attribute CONFIGURATION The configuration management process is designed to keep updated and available to other processes the items (CI) information, their relations and their history. It is one of the major ITIL processes managed by the application. See also: CI, ITIL DASHBOARD In CMDBuild, a dashboard corresponds to a collection of different charts, in this way you can immediately hold in evidence some key parameters (KPI) related to a particular management aspect of the IT service. See also: Report DATABASE The term refers to a structured collection of information, hosted on a server, as well as utility software that handle this information for tasks such as initialization, allocation, optimization, backup, etc.. CMDBuild relies on PostgreSQL, the most powerful, reliable, professional and open source database, and uses its advanced features and object-oriented structure. DOMAIN A domain is a relation between two classes. A domain has a name, two descriptions (direct and inverse), classes codes, cardinality and attributes. The system administrator, using the Administration Module, is able to define new domains or delete / edit existing ones. It is possible to define custom attributes for each domain. See also: Class, Relation DATA FILTER A data filter is a restriction of the list of those elements contained in a class, obtained by specifying boolean conditions (equal, not equal, contains, begins with, etc.) on those possible values that can be accepted by every class attribute. Data filters can be defined and used exceptionally, otherwise they can be stored by the operator and then recalled (by the same operator or by operators of other user groups, which get the permission to use them by the system Administrator) See also: Class, View Page 131
132 APPENDIX: Glossary GIS A GIS is a system able to produce, manage and analyse spatial data by associating geographic elements to one or more alphanumeric descriptions. GIS functionalities in CMDBuild allow you to create geometric attributes (in addition to standard attributes) that represent, on plans / maps, markers position (assets), polylines (cable lines) and polygons (floors, rooms, etc.). See also: BIM GUI FRAMEWORK It is a user interface you can completely customise. It is advised to supply a simplified access to the application. It can be issued onto any webportals and can be used with CMDBuild through the standard REST webservice. See also: Mobile, Webservice ITIL "Best practices" system that established a "standard de facto"; it is a nonproprietary system for the management of IT services, following a process-oriented schema (Information Technology Infrastructure Library). ITIL processes include: Service Support, Incident Management, Problem Management, Change Management, Configuration Management and Release Management. For each process, ITIL handles description, basic components, criteria and tools for quality management, roles and responsibilities of the resources involved, integration points with other processes (to avoid duplications and inefficiencies). See also: Configuration LOOKUP The term "Lookup" refers to a pair of values (Code, Description) set by the administrator in the Administration Module. These values are used to bind the user's choice (at the form filling time) to one of the preset values. With the Administration Module it is possible to define new "LookUp" tables according to organization needs. MOBILE It is a user interface for mobile tools (smartphones and tablets). It is implemented as multi-platform app (ios, Android) and can be used with the CMDB through the REST webservice. See also: GUI Framework, Webservice PROCESS The term "process" (or workflow) refers to a sequence of steps that realize an action. Each process will take place on specific assets and will be performed by specific users. A process is activated by starting a new process (filling related form) and ends when the last workflow step is executed. Page 132
133 APPENDIX: Glossary See also: Workflow step RELATION A relation is a link between two CMDBuild cards or, in other words, an instance of a given domain. A relation is defined by a pair of unique card identifiers, a domain and attributes (if any). CMDBuild allows users, through the Management Module, to define new relations among the cards stored in the database. See also: Class, Domain REPORT The term refers to a document (PDF or CSV) containing information extracted from one or more classes and related domains. CMDBuild users run reports by using the Management Module; reports definitions are stored in the database. See also: Class, Domain, Database CARD The term "card" refers to an element stored in a class. A card is defined by a set of values, i.e. the attributes defined for its class. CMDBuild users, through the Management Module, are able to store new cards and update / delete existing ones. Card information is stored in the database and, more exactly, in the table/columns created for that class (Administration Module). See also: Class, Attribute SUPERCLASS A superclass is an abstract class used to define attributes shared between classes. From the abstract class you can derive real classes that contain data and include both shared attributes (specified in the superclass) and specific subclass attributes. For example, you can define the superclass "Computer" with some basic attributes (RAM, HD, etc.) and then define derived subclasses "Desktop", "Notebook", "Server", each one with some specific attributes. See also: Class, Attribute ATTRIBUTE TYPE Each attribute has a data type that represents attribute information and management. The attribute type is defined using the Administration Module and can be modified within some limitations, depending on the data already stored in the system. CMDBuild manages the following attribute types: "Boolean", "Date", "Decimal", "Double", "Inet" (IP address), "Integer", "Lookup" (lists set in "Settings" / "LookUp"), "Reference" (foreign key), "String", "Text", "Timestamp". See also: Attribute Page 133
134 APPENDIX: Glossary VIEW A view not only includes the whole content of a CMDB class, it is a group of cards defined in a logical way. In particular, a view can be defined in CMDBuild by applying a filter to a class (so it will contain a reduced set of the same rows) or specifying an SQL function which extracts attributes from one or more related classes. The first view type maintains all functionalities available for a class, the second one allows the sole display and search with fast filter. See also: Class, Filter WEBSERVICE A webservice is an interface that describes a collection of methods, available over a network and working using XML messages. With webservices, an application allows other applications to interact with its methods. CMDBuild includes a SOAP and a REST webservice. WIDGET A widget is a component of a GUI that improves user interaction with the application. CMDBuild uses widgets (presented as "buttons") that can be placed on cards or processes. The buttons open popup windows that allow you to insert additional information, and then display the output of the selected function. Page 134
The open source solution for IT Asset Management: CMDB, workflow, interoperability www.cmdbuild.org
 1 The open source solution for IT Asset Management: CMDB, workflow, interoperability www.cmdbuild.org Tecnoteca Srl [email protected] www.tecnoteca.com The CMDBuild project CMDBuild was born in 2005,
Novell ZENworks Asset Management 7.5
 Novell ZENworks Asset Management 7.5 w w w. n o v e l l. c o m October 2006 USING THE WEB CONSOLE Table Of Contents Getting Started with ZENworks Asset Management Web Console... 1 How to Get Started...
WatchDox Administrator's Guide. Application Version 3.7.5
 Application Version 3.7.5 Confidentiality This document contains confidential material that is proprietary WatchDox. The information and ideas herein may not be disclosed to any unauthorized individuals
The open source solution for the Property & Facility Management www.openmaint.org
 1 The open source solution for the Property & Facility Management www.openmaint.org www.openmaint.org www.tecnoteca.com 2 What is openmaint openmaint is an enterprise solution for the Property & Facility
August 2014 Release Notes Version 14.0.72.6
 August 2014 Release Notes Version 14.0.72.6 i NOTICES ServicePRO Release Notes August 2014 HelpSTAR and ServicePRO are registered trademarks of Help Desk Technology International Corporation. This publication
Salesforce Customer Portal Implementation Guide
 Salesforce Customer Portal Implementation Guide Salesforce, Winter 16 @salesforcedocs Last updated: December 10, 2015 Copyright 2000 2015 salesforce.com, inc. All rights reserved. Salesforce is a registered
SelectSurvey.NET User Manual
 SelectSurvey.NET User Manual Creating Surveys 2 Designing Surveys 2 Templates 3 Libraries 4 Item Types 4 Scored Surveys 5 Page Conditions 5 Piping Answers 6 Previewing Surveys 7 Managing Surveys 7 Survey
EMC Documentum Webtop
 EMC Documentum Webtop Version 6.5 User Guide P/N 300 007 239 A01 EMC Corporation Corporate Headquarters: Hopkinton, MA 01748 9103 1 508 435 1000 www.emc.com Copyright 1994 2008 EMC Corporation. All rights
This Readme includes information pertaining to Novell Service Desk 7.0.
 Novell Service Desk 7.0 November 14, 2012 Novell Novell Service Desk is a complete service management solution that allows you to easily monitor and solve services issues so that there is minimal disruption
ServerView Inventory Manager
 User Guide - English FUJITSU Software ServerView Suite ServerView Inventory Manager ServerView Operations Manager V6.21 Edition October 2013 Comments Suggestions Corrections The User Documentation Department
OpenIMS 4.2. Document Management Server. User manual
 OpenIMS 4.2 Document Management Server User manual OpenSesame ICT BV Index 1 INTRODUCTION...4 1.1 Client specifications...4 2 INTRODUCTION OPENIMS DMS...5 2.1 Login...5 2.2 Language choice...5 3 OPENIMS
SAS Business Data Network 3.1
 SAS Business Data Network 3.1 User s Guide SAS Documentation The correct bibliographic citation for this manual is as follows: SAS Institute Inc. 2014. SAS Business Data Network 3.1: User's Guide. Cary,
PORTAL ADMINISTRATION
 1 Portal Administration User s Guide PORTAL ADMINISTRATION GUIDE Page 1 2 Portal Administration User s Guide Table of Contents Introduction...5 Core Portal Framework Concepts...5 Key Items...5 Layouts...5
Infoview XIR3. User Guide. 1 of 20
 Infoview XIR3 User Guide 1 of 20 1. WHAT IS INFOVIEW?...3 2. LOGGING IN TO INFOVIEW...4 3. NAVIGATING THE INFOVIEW ENVIRONMENT...5 3.1. Home Page... 5 3.2. The Header Panel... 5 3.3. Workspace Panel...
Fixes for CrossTec ResQDesk
 Fixes for CrossTec ResQDesk Fixes in CrossTec ResQDesk 5.00.0006 December 2, 2014 Resolved issue where the list of Operators on Category was not saving correctly when adding multiple Operators. Fixed issue
ORACLE BUSINESS INTELLIGENCE WORKSHOP
 ORACLE BUSINESS INTELLIGENCE WORKSHOP Integration of Oracle BI Publisher with Oracle Business Intelligence Enterprise Edition Purpose This tutorial mainly covers how Oracle BI Publisher is integrated with
Aras Corporation. 2005 Aras Corporation. All rights reserved. Notice of Rights. Notice of Liability
 Aras Corporation 2005 Aras Corporation. All rights reserved Notice of Rights All rights reserved. Aras Corporation (Aras) owns this document. No part of this document may be reproduced or transmitted in
M-Files Gantt View. User Guide. App Version: 1.1.0 Author: Joel Heinrich
 M-Files Gantt View User Guide App Version: 1.1.0 Author: Joel Heinrich Date: 02-Jan-2013 Contents 1 Introduction... 1 1.1 Requirements... 1 2 Basic Use... 1 2.1 Activation... 1 2.2 Layout... 1 2.3 Navigation...
Bitrix Site Manager 4.1. User Guide
 Bitrix Site Manager 4.1 User Guide 2 Contents REGISTRATION AND AUTHORISATION...3 SITE SECTIONS...5 Creating a section...6 Changing the section properties...8 SITE PAGES...9 Creating a page...10 Editing
Hamline University Administrative Computing Page 1
 User Guide Banner Handout: BUSINESS OBJECTS ENTERPRISE (InfoView) Document: boxi31sp3-infoview.docx Created: 5/11/2011 1:24 PM by Chris Berry; Last Modified: 8/31/2011 1:53 PM Purpose:... 2 Introduction:...
ADP Workforce Now V3.0
 ADP Workforce Now V3.0 Manual What s New Checks in and Custom ADP Reporting Grids V12 Instructor Handout Manual Guide V10171180230WFN3 V09171280269ADPR12 2011 2012 ADP, Inc. ADP s Trademarks The ADP Logo
Asset Track Getting Started Guide. An Introduction to Asset Track
 Asset Track Getting Started Guide An Introduction to Asset Track Contents Introducing Asset Track... 3 Overview... 3 A Quick Start... 6 Quick Start Option 1... 6 Getting to Configuration... 7 Changing
DataPA OpenAnalytics End User Training
 DataPA OpenAnalytics End User Training DataPA End User Training Lesson 1 Course Overview DataPA Chapter 1 Course Overview Introduction This course covers the skills required to use DataPA OpenAnalytics
Business Portal for Microsoft Dynamics GP 2010. User s Guide Release 5.1
 Business Portal for Microsoft Dynamics GP 2010 User s Guide Release 5.1 Copyright Copyright 2011 Microsoft. All rights reserved. Limitation of liability This document is provided as-is. Information and
Vector HelpDesk - Administrator s Guide
 Vector HelpDesk - Administrator s Guide Vector HelpDesk - Administrator s Guide Configuring and Maintaining Vector HelpDesk version 5.6 Vector HelpDesk - Administrator s Guide Copyright Vector Networks
ADMINISTRATOR GUIDE VERSION
 ADMINISTRATOR GUIDE VERSION 4.0 2014 Copyright 2008 2014. All rights reserved. No part of this document may be reproduced or transmitted in any form or by any means electronic or mechanical, for any purpose
Legal Notes. Regarding Trademarks. 2012 KYOCERA Document Solutions Inc.
 Legal Notes Unauthorized reproduction of all or part of this guide is prohibited. The information in this guide is subject to change without notice. We cannot be held liable for any problems arising from
Evaluator s Guide. PC-Duo Enterprise HelpDesk v5.0. Copyright 2006 Vector Networks Ltd and MetaQuest Software Inc. All rights reserved.
 Evaluator s Guide PC-Duo Enterprise HelpDesk v5.0 Copyright 2006 Vector Networks Ltd and MetaQuest Software Inc. All rights reserved. All third-party trademarks are the property of their respective owners.
ER/Studio Enterprise Portal 1.0.2 User Guide
 ER/Studio Enterprise Portal 1.0.2 User Guide Copyright 1994-2008 Embarcadero Technologies, Inc. Embarcadero Technologies, Inc. 100 California Street, 12th Floor San Francisco, CA 94111 U.S.A. All rights
Custom Reporting System User Guide
 Citibank Custom Reporting System User Guide April 2012 Version 8.1.1 Transaction Services Citibank Custom Reporting System User Guide Table of Contents Table of Contents User Guide Overview...2 Subscribe
Connecting Software Connect Bridge - Mobile CRM Android User Manual
 Connect Bridge - Mobile CRM Android User Manual Summary This document describes the Android app Mobile CRM, its functionality and features available. The document is intended for end users as user manual
Business Objects Version 5 : Introduction
 Business Objects Version 5 : Introduction Page 1 TABLE OF CONTENTS Introduction About Business Objects Changing Your Password Retrieving Pre-Defined Reports Formatting Your Report Using the Slice and Dice
MyOra 3.0. User Guide. SQL Tool for Oracle. Jayam Systems, LLC
 MyOra 3.0 SQL Tool for Oracle User Guide Jayam Systems, LLC Contents Features... 4 Connecting to the Database... 5 Login... 5 Login History... 6 Connection Indicator... 6 Closing the Connection... 7 SQL
NMS300 Network Management System
 NMS300 Network Management System User Manual June 2013 202-11289-01 350 East Plumeria Drive San Jose, CA 95134 USA Support Thank you for purchasing this NETGEAR product. After installing your device, locate
Logi Ad Hoc Reporting System Administration Guide
 Logi Ad Hoc Reporting System Administration Guide Version 11.2 Last Updated: March 2014 Page 2 Table of Contents INTRODUCTION... 4 Target Audience... 4 Application Architecture... 5 Document Overview...
BI 4.1 Quick Start Guide
 BI 4.1 Quick Start Guide BI 4.1 Quick Start Guide... 1 Introduction... 4 Logging in... 4 Home Screen... 5 Documents... 6 Preferences... 8 Setting Up Preferences to Display Public Folders... 10 Web Intelligence...
Business Insight Report Authoring Getting Started Guide
 Business Insight Report Authoring Getting Started Guide Version: 6.6 Written by: Product Documentation, R&D Date: February 2011 ImageNow and CaptureNow are registered trademarks of Perceptive Software,
EBOX Digital Content Management System (CMS) User Guide For Site Owners & Administrators
 User Guide For Site Owners & Administrators") EBOX Digital Content Management System (CMS) User Guide For Site Owners & Administrators Version 1.0 Last Updated on 15 th October 2011 Table of Contents Introduction... 3 File Manager... 5 Site Log...
EBOX Digital Content Management System (CMS) User Guide For Site Owners & Administrators Version 1.0 Last Updated on 15 th October 2011 Table of Contents Introduction... 3 File Manager... 5 Site Log...
Information Server Documentation SIMATIC. Information Server V8.0 Update 1 Information Server Documentation. Introduction 1. Web application basics 2
 Introduction 1 Web application basics 2 SIMATIC Information Server V8.0 Update 1 System Manual Office add-ins basics 3 Time specifications 4 Report templates 5 Working with the Web application 6 Working
Administrator Operations Guide
 Administrator Operations Guide 1 What You Can Do with Remote Communication Gate S 2 Login and Logout 3 Settings 4 Printer Management 5 Log Management 6 Firmware Management 7 Installation Support 8 Maintenance
InfoView User s Guide. BusinessObjects Enterprise XI Release 2
 BusinessObjects Enterprise XI Release 2 InfoView User s Guide BusinessObjects Enterprise XI Release 2 Patents Trademarks Copyright Third-party contributors Business Objects owns the following U.S. patents,
User Guide QAD Customer Relationship Management. Introduction Sales Management Marketing Management Customer Service Reference
 User Guide QAD Customer Relationship Management Introduction Sales Management Marketing Management Customer Service Reference 70-3192-6.6.3 QAD CRM 6.6.3 September 2014 This document contains proprietary
INTRODUCTION TO ATRIUM... 2 SYSTEM REQUIREMENTS... 2 TECHNICAL DETAILS... 2 LOGGING INTO ATRIUM... 3 SETTINGS... 4 NAVIGATION PANEL...
 INTRODUCTION TO ATRIUM... 2 SYSTEM REQUIREMENTS... 2 TECHNICAL DETAILS... 2 LOGGING INTO ATRIUM... 3 SETTINGS... 4 CONTROL PANEL... 4 ADDING GROUPS... 6 APPEARANCE... 7 BANNER URL:... 7 NAVIGATION... 8
Salesforce Classic Guide for iphone
 Salesforce Classic Guide for iphone Version 37.0, Summer 16 @salesforcedocs Last updated: July 12, 2016 Copyright 2000 2016 salesforce.com, inc. All rights reserved. Salesforce is a registered trademark
MERLIN. The Quick Start Guide to professional project management. 2013 ProjectWizards GmbH, Melle, Germany. All rights reserved.
 MERLIN The Quick Start Guide to professional project management 2013 ProjectWizards GmbH, Melle, Germany. All rights reserved. INTRODUCTION Welcome to the quick start guide to Merlin! Thank you for choosing
The Power Loader GUI
 The Power Loader GUI (212) 405.1010 [email protected] Follow: @1010data www.1010data.com The Power Loader GUI Contents 2 Contents Pre-Load To-Do List... 3 Login to Power Loader... 4 Upload Data Files to
GUIDE. Web Client Application. Model: ER 4.0. Release 4.0.00 / Version No.: 1.01
 8e6R Enterprise Reporter USER GUIDE Web Client Application Model: ER 4.0 Release 4.0.00 / Version No.: 1.01 ii 8E6 TECHNOLOGIES, ENTERPRISE REPORTER WEB CLIENT USER GUIDE 8E6 ENTERPRISE REPORTER WEB CLIENT
Oracle Business Intelligence 11g OPN Advanced Workshop
 Oracle Business Intelligence 11g OPN Advanced Workshop Lab Book OPN: Oracle Business Intelligence 11g Advanced Workshop OPN Workshop: BI 11g Advanced Seite 1 Authors Revision Jignesh Mehta Naresh Nemani
Sisense. Product Highlights. www.sisense.com
 Sisense Product Highlights Introduction Sisense is a business intelligence solution that simplifies analytics for complex data by offering an end-to-end platform that lets users easily prepare and analyze
Microsoft Word 2010 Prepared by Computing Services at the Eastman School of Music July 2010
 Microsoft Word 2010 Prepared by Computing Services at the Eastman School of Music July 2010 Contents Microsoft Office Interface... 4 File Ribbon Tab... 5 Microsoft Office Quick Access Toolbar... 6 Appearance
BusinessObjects Enterprise InfoView User's Guide
 BusinessObjects Enterprise InfoView User's Guide BusinessObjects Enterprise XI 3.1 Copyright 2009 SAP BusinessObjects. All rights reserved. SAP BusinessObjects and its logos, BusinessObjects, Crystal Reports,
WebSpy Vantage Ultimate 2.2 Web Module Administrators Guide
 WebSpy Vantage Ultimate 2.2 Web Module Administrators Guide This document is intended to help you get started using WebSpy Vantage Ultimate and the Web Module. For more detailed information, please see
1. Application Overview... 3. 2. System Requirements... 3. 3. Installation... 3. 4. Splash Screen... 4. 5. Registration Screen...
 1 P a g e Table of Contents 1. Application Overview... 3 2. System Requirements... 3 3. Installation... 3 4. Splash Screen... 4 5. Registration Screen... 5 5.1 Registration... 5 6. Login Screen... 7 6.1
CCC Report Center Overview... 3. Accessing the CCC Report Center... 4. Accessing, Working With, and Running Reports... 6. Customizing Reports...
 CCC Report Center Contents 2 Contents CCC Report Center Overview... 3 Accessing the CCC Report Center... 4 Accessing, Working With, and Running Reports... 6 Customizing Reports... 11 Creating Ad Hoc Views
Introduction to Business Reporting Using IBM Cognos
 Introduction to Business Reporting Using IBM Cognos Table of Contents Introducing Reporting... 1 Objectives... 1 Terminology... 2 Cognos Users... 2 Frequently Used Terms... 3 Getting Started... 4 Gaining
Web Portal User Guide. Version 6.0
 Web Portal User Guide Version 6.0 2013 Pitney Bowes Software Inc. All rights reserved. This document may contain confidential and proprietary information belonging to Pitney Bowes Inc. and/or its subsidiaries
IBM Information Server
 IBM Information Server Version 8 Release 1 IBM Information Server Administration Guide SC18-9929-01 IBM Information Server Version 8 Release 1 IBM Information Server Administration Guide SC18-9929-01
HP Service Manager. Software Version: 9.40 For the supported Windows and Linux operating systems. Application Setup help topics for printing
 HP Service Manager Software Version: 9.40 For the supported Windows and Linux operating systems Application Setup help topics for printing Document Release Date: December 2014 Software Release Date: December
User Guide QAD Customer Relationship Management. Introduction Sales Management Marketing Management Customer Service
 User Guide QAD Customer Relationship Management Introduction Sales Management Marketing Management Customer Service 78-0707B QAD CRM 6.1 September 2008 This document contains proprietary information that
IBM Unica emessage Version 8 Release 6 February 13, 2015. User's Guide
 IBM Unica emessage Version 8 Release 6 February 13, 2015 User's Guide Note Before using this information and the product it supports, read the information in Notices on page 403. This edition applies to
v7.1 SP2 What s New Guide
 v7.1 SP2 What s New Guide Copyright 2012 Sage Technologies Limited, publisher of this work. All rights reserved. No part of this documentation may be copied, photocopied, reproduced, translated, microfilmed,
Build Your First Web-based Report Using the SAS 9.2 Business Intelligence Clients
 Technical Paper Build Your First Web-based Report Using the SAS 9.2 Business Intelligence Clients A practical introduction to SAS Information Map Studio and SAS Web Report Studio for new and experienced
Richmond Systems. Self Service Portal
 Richmond Systems Self Service Portal Contents Introduction... 4 Product Overview... 4 What s New... 4 Configuring the Self Service Portal... 6 Web Admin... 6 Launching the Web Admin Application... 6 Setup
Toad for Data Analysts, Tips n Tricks
 Toad for Data Analysts, Tips n Tricks or Things Everyone Should Know about TDA Just what is Toad for Data Analysts? Toad is a brand at Quest. We have several tools that have been built explicitly for developers
Connecting Software. CB Mobile CRM Windows Phone 8. User Manual
 CB Mobile CRM Windows Phone 8 User Manual Summary This document describes the Windows Phone 8 Mobile CRM app functionality and available features. The document is intended for end users as user manual
How To Write A Cq5 Authoring Manual On An Ubuntu Cq 5.2.2 (Windows) (Windows 5) (Mac) (Apple) (Amd) (Powerbook) (Html) (Web) (Font
 (Windows 5) (Mac) (Apple) (Amd) (Powerbook) (Html) (Web) (Font") Adobe CQ5 Authoring Basics Print Manual SFU s Content Management System SFU IT Services CMS Team ABSTRACT A summary of CQ5 Authoring Basics including: Setup and Login, CQ Interface Tour, Versioning, Uploading
Adobe CQ5 Authoring Basics Print Manual SFU s Content Management System SFU IT Services CMS Team ABSTRACT A summary of CQ5 Authoring Basics including: Setup and Login, CQ Interface Tour, Versioning, Uploading
Personal Portfolios on Blackboard
 Personal Portfolios on Blackboard This handout has four parts: 1. Creating Personal Portfolios p. 2-11 2. Creating Personal Artifacts p. 12-17 3. Sharing Personal Portfolios p. 18-22 4. Downloading Personal
The Reporting Console
 Chapter 1 The Reporting Console This chapter provides a tour of the WebTrends Reporting Console and describes how you can use it to view WebTrends reports. It also provides information about how to customize
SAS BI Dashboard 4.4. User's Guide Second Edition. SAS Documentation
 SAS BI Dashboard 4.4 User's Guide Second Edition SAS Documentation The correct bibliographic citation for this manual is as follows: SAS Institute Inc. 2013. SAS BI Dashboard 4.4: User's Guide, Second
Strategic Asset Tracking System User Guide
 Strategic Asset Tracking System User Guide Contents 1 Overview 2 Web Application 2.1 Logging In 2.2 Navigation 2.3 Assets 2.3.1 Favorites 2.3.3 Purchasing 2.3.4 User Fields 2.3.5 History 2.3.6 Import Data
DiskPulse DISK CHANGE MONITOR
 DiskPulse DISK CHANGE MONITOR User Manual Version 7.9 Oct 2015 www.diskpulse.com [email protected] 1 1 DiskPulse Overview...3 2 DiskPulse Product Versions...5 3 Using Desktop Product Version...6 3.1 Product
Sage CRM. Sage CRM 7.3 Mobile Guide
 Sage CRM Sage CRM 7.3 Mobile Guide Copyright 2014 Sage Technologies Limited, publisher of this work. All rights reserved. No part of this documentation may be copied, photocopied, reproduced, translated,
Abstract. For notes detailing the changes in each release, see the MySQL for Excel Release Notes. For legal information, see the Legal Notices.
 MySQL for Excel Abstract This is the MySQL for Excel Reference Manual. It documents MySQL for Excel 1.3 through 1.3.6. Much of the documentation also applies to the previous 1.2 series. For notes detailing
Manual English KOI Desktop App 2.0.x
 Manual English KOI Desktop App 2.0.x KOI Kommunikation, Organisation, Information Comm-Unity EDV GmbH 2010 Contents Introduction... 3 Information on how to use the documentation... 3 System requirements:...
Database Studio is the new tool to administrate SAP MaxDB database instances as of version 7.5.
 1 2 3 4 Database Studio is the new tool to administrate SAP MaxDB database instances as of version 7.5. It replaces the previous tools Database Manager GUI and SQL Studio from SAP MaxDB version 7.7 onwards
User s manual 1. Introduction 2. Installation & Requirements 3. Your Tom s Planner account & login 4. Open & Save 5. Grid 6. Blue timeline 7.
 User s manual 1. Introduction 3 2. Installation & Requirements 3 3. Your Tom s Planner account & login 4 4. Open & Save 4 5. Grid 6 Rows and groups 6 Columns 7 Time blocks 10 Icons 10 Comments 11 Dependencies
SAS BI Dashboard 4.3. User's Guide. SAS Documentation
 SAS BI Dashboard 4.3 User's Guide SAS Documentation The correct bibliographic citation for this manual is as follows: SAS Institute Inc. 2010. SAS BI Dashboard 4.3: User s Guide. Cary, NC: SAS Institute
Set Up and Maintain Customer Support Tools
 Set Up and Maintain Customer Support Tools Salesforce, Winter 16 @salesforcedocs Last updated: December 10, 2015 Copyright 2000 2015 salesforce.com, inc. All rights reserved. Salesforce is a registered
Kaldeera Workflow Designer 2010 User's Guide
 Kaldeera Workflow Designer 2010 User's Guide Version 1.0 Generated May 18, 2011 Index 1 Chapter 1: Using Kaldeera Workflow Designer 2010... 3 1.1 Getting Started with Kaldeera... 3 1.2 Importing and exporting
Community Edition 3.3. Getting Started with Alfresco Explorer Document Management
 Community Edition 3.3 Getting Started with Alfresco Explorer Document Management Contents Copyright... 3 Introduction... 4 Important notes...4 Starting with Explorer... 5 Toolbar... 5 Sidebar...6 Working
LICENSE4J LICENSE MANAGER USER GUIDE
 LICENSE4J LICENSE MANAGER USER GUIDE VERSION 4.5.5 LICENSE4J www.license4j.com Table of Contents Getting Started... 4 Managing Products... 6 Create Product... 6 Edit Product... 7 Refresh, Delete Product...
Managing your Joomla! 3 Content Management System (CMS) Website Websites For Small Business
 Website Websites For Small Business") 2015 Managing your Joomla! 3 Content Management System (CMS) Website Websites For Small Business This manual will take you through all the areas that you are likely to use in order to maintain, update
2015 Managing your Joomla! 3 Content Management System (CMS) Website Websites For Small Business This manual will take you through all the areas that you are likely to use in order to maintain, update
Manage. Help Documentation. This document was auto-created from web content and is subject to change at any time. Copyright (c) 2016 SmarterTools Inc.
 2016 SmarterTools Inc.") Help Documentation This document was auto-created from web content and is subject to change at any time. Copyright (c) 2016 SmarterTools Inc. Manage Email Users An email user account represents a person's
Help Documentation This document was auto-created from web content and is subject to change at any time. Copyright (c) 2016 SmarterTools Inc. Manage Email Users An email user account represents a person's
ithenticate User Manual
 ithenticate User Manual Version: 2.0.8 Updated February 4, 2014 Contents Introduction 4 New Users 4 Logging In 4 Resetting Your Password 5 Changing Your Password or Username 6 The ithenticate Account Homepage
COGNOS Query Studio Ad Hoc Reporting
 COGNOS Query Studio Ad Hoc Reporting Copyright 2008, the California Institute of Technology. All rights reserved. This documentation contains proprietary information of the California Institute of Technology
Intellect Platform - The Workflow Engine Basic HelpDesk Troubleticket System - A102
 Intellect Platform - The Workflow Engine Basic HelpDesk Troubleticket System - A102 Interneer, Inc. Updated on 2/22/2012 Created by Erika Keresztyen Fahey 2 Workflow - A102 - Basic HelpDesk Ticketing System
How to create and personalize a PDF portfolio
 How to create and personalize a PDF portfolio Creating and organizing a PDF portfolio is a simple process as simple as dragging and dropping files from one folder to another. To drag files into an empty
CorreLog. Security Correlation Server Screen Reference Manual
 CorreLog Security Correlation Server Screen Reference Manual http://www.correlog.com mailto:[email protected] CorreLog, Screen Reference Manual Copyright 2008-2016, CorreLog, Inc. All rights reserved.
Rosetta Course. Rosetta Stone Manager Administrator's Guide Copyright 2012 Rosetta Stone Ltd. All rights reserved. 7000712 1.0.
 7000712 1.0.1 en-us AG_CRS_ONL Rosetta Course Rosetta Stone Manager Administrator's Guide Copyright 2012 Rosetta Stone Ltd. All rights reserved. This document is provided for informational purposes only,
Decision Support AITS University Administration. Web Intelligence Rich Client 4.1 User Guide
 Decision Support AITS University Administration Web Intelligence Rich Client 4.1 User Guide 2 P age Web Intelligence 4.1 User Guide Web Intelligence 4.1 User Guide Contents Getting Started in Web Intelligence
Web Dashboard User Guide
 Web Dashboard User Guide Version 10.2 The software supplied with this document is the property of RadView Software and is furnished under a licensing agreement. Neither the software nor this document may
for Sage 100 ERP Business Insights Overview Document
 for Sage 100 ERP Business Insights Document 2012 Sage Software, Inc. All rights reserved. Sage Software, Sage Software logos, and the Sage Software product and service names mentioned herein are registered
Advanced Event Viewer Manual
 Advanced Event Viewer Manual Document version: 2.2944.01 Download Advanced Event Viewer at: http://www.advancedeventviewer.com Page 1 Introduction Advanced Event Viewer is an award winning application
Module One: Getting Started... 6. Opening Outlook... 6. Setting Up Outlook for the First Time... 7. Understanding the Interface...
 2 CONTENTS Module One: Getting Started... 6 Opening Outlook... 6 Setting Up Outlook for the First Time... 7 Understanding the Interface...12 Using Backstage View...14 Viewing Your Inbox...15 Closing Outlook...17
Getting Started - The Control Panel
 Table of Contents 1. Getting Started - the Control Panel Login Navigation Bar Domain Limits Domain User Account Properties Session Management 2. FTP Management Creating and Editing Users Accessing FTP
EMC Smarts Network Configuration Manager
 EMC Smarts Network Configuration Manager Version 9.4.1 Advisors User Guide P/N 302-002-279 REV 01 Copyright 2013-2015 EMC Corporation. All rights reserved. Published in the USA. Published October, 2015
WatchDox for Windows. User Guide. Version 3.9.5
 WatchDox for Windows User Guide Version 3.9.5 Notice Confidentiality This document contains confidential material that is proprietary WatchDox. The information and ideas herein may not be disclosed to
WebSphere Business Monitor V7.0 Business space dashboards
 Copyright IBM Corporation 2010 All rights reserved IBM WEBSPHERE BUSINESS MONITOR 7.0 LAB EXERCISE WebSphere Business Monitor V7.0 What this exercise is about... 2 Lab requirements... 2 What you should
ORACLE BUSINESS INTELLIGENCE WORKSHOP
 ORACLE BUSINESS INTELLIGENCE WORKSHOP Creating Interactive Dashboards and Using Oracle Business Intelligence Answers Purpose This tutorial shows you how to build, format, and customize Oracle Business
Mail Chimp Basics. Glossary
 Mail Chimp Basics Mail Chimp is a web-based application that allows you to create newsletters and send them to others via email. While there are higher-level versions of Mail Chimp, the basic application