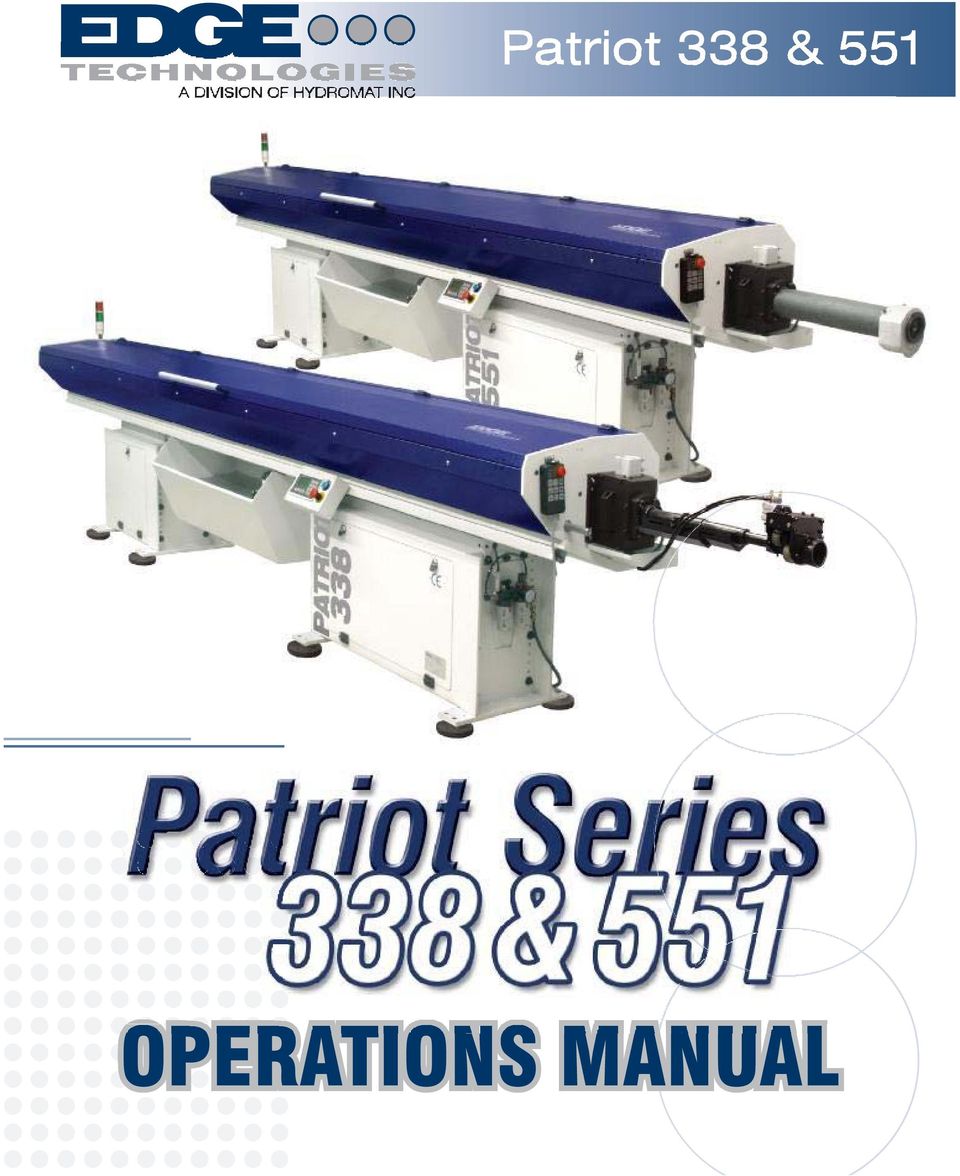
Patriot 338 & 551 OPERATIONS MANUAL
|
|
|
- Chester Gaines
- 10 years ago
- Views:
Transcription
1 Patriot 338 & 551 OPERATIONS MANUAL
2 PATRIOT HYDRODYNAMIC AUTOMATIC BAR FEEDER PATRIOT MANUAL FOR USE AND MAINTENANCE REV. 3 DATE:2012/08/15 COD:PATB20100 S/H

3 Table Of Contents Patriot Series 1. General Information Section Page 1.1 Contents of the Manual Machine Data Plate Technical Assistance and Parts Technical Information 2.1 Description of the Machine Machine Footprint Capacities and Requirements Compressed Air Supply Electrical Supply Guide Channel Specifications Bar Stock Straightness Requirements Procedure for Checking Bar Stock Straightness Bar Stock Preparation RPM Limiting Factors Transportation and Handling 3.1 Packaging of the Bar Feeder Transporting the Bar Feeder Installation Area Installation 4.1 Lathe Preparation Distance From Lathe Height Adjustment I

4 Table Of Contents Patriot Series 4. Installation (continued) 4.4 Leveling Alignment Preparing the Bar Feeder Aligning the Center Lines Anchoring the Bar Feeder Installation of Accessories Moveable Anti-Vibration Device (MAVD) Fixed Front Nose Telescoping Front Nose Synchronization Device Oil for Guide Channel Adjustments and Settings 5.1 Structure of the Bar Feeder Adjustment of the Loading Device Chain Adjustment and Lubrication Moveable Anti-Vibration Device Setting Control Operations and Descriptions 6.1 Sequence to Manually Change Bars Start Up Clearing an Alarm Resetting the Zero Position Description of the Manual Screen Description of the Automatic Screen II
 ----------------------------------------------------------- 16 4.")
5 Table Of Contents Patriot Series 6.7 Loading With the Bar On and Bar Off Buttons Entering a New Program Selecting and Editing an Existing Program General Maintenance 7.1 Periodic Maintenance Rotating Tip and Collet Air Filter/Regulator/Lubrication Unit Parameters 8. User Parameters Factory Parameters Service Technician Parameters Alarms 11. Error Alarms Electrical Schematic 12. Machine Electrical Drawings Parts 13. Parts List III

6 1. General Information Patriot Series 1. General Information Please read and understand the Manual before operating the bar feeder 1.1 Contents of this Manual The bar feeder manufacturer has provided this manual as an integral part of the machine. Adherence to the instructions of the manual will help prevent injury to the operator and damage to the machine as well as helping to realize the maximum potential of the bar feeder and machine tool. Particularly important points of information are preceded by the following symbols and text: Warning Indicates a potential danger to life or risk of personal injury. Exercise extreme caution. Caution Indicates a possible hazardous condition. Take precautions according to the instructions following these warnings to help prevent injury to personnel or damage to the equipment. Important Information precedes special or technical information. Additional information can be located by using the table of contents of this manual. Skilled Denotes operations that must be carried out by qualified and skilled personnel. Other operations may be performed by qualified personnel or trained operators. 1

7 1. General Information Patriot Series 1.2 Machine Data Plate A. Name of manufacturer B. Model(Type) C. Serial Number D. Manufacture Date E. Weight of Machine F. Pneumatic Pressure G. Rated Voltage H. Control Voltage I. Full Load Current J. Power K. Short Circuit Rating L. Wiring Drawing Number Important information When inquiring about or ordering parts please have the machine model (type) and serial number on hand. Refer to the machine data plate for this information. 1.3 Technical Support For technical support please contact the Edge Technologies Service Department by phone at of by Important information When calling for technical support please have the machine model (type) and serial number on hand. Refer to the machine data plate for this information. 2

8 2. Technical Information Patriot Series 2. Technical Information 2.1 Description of the Machine The Patriot is a PLC controlled automatic bar feeder designed for both Swiss style and fixed headstock lathes. The bar feeder is constructed to handle a wide variety of material profiles from round to hex and square stocks and can be adapted to feed materials with a more unique shape. The bar feeder uses hydrodynamic design to dampen vibrations caused by bar stock rotation. The bar stock spins within a polyurethane channel which is flooded with a high viscosity circulating oil. This creates turbulence within the channel that serves to steady the material and control vibration. The end of the bar stock is supported by a bearing unit on the end of the bar pusher and the work holding system of the lathe. An anti-vibration device is located at the front of the bar feeder. Polyurethane bushings surround the bar, leaving a few millimeters clearance between the bar and the bushings. This void is filled with oil to help further stabilize and support the stock. For Swiss style sliding headstock lathes a moveable anti-vibration device is mounted on the rear of the lathe headstock to provide even more support and vibration dampening. Our touch screen control panel gives access to parameters that allow easy set up and operation. Most job changeovers require only one or two parameter settings. While in the automatic mode the screen displays helpful information. 3

9 2. Technical Information Patriot Series 2.2 Machine Footprint L A H C B Model L A (Max Bar Length) B C H 850mm to 1300mm Weight 900kg 950kg 2.3 Capacities and Requirements Bar Diameter Capability 5mm (.196 ) to 32mm (1.260 ) Available Channel Diameters 13, 21, 26, 28, 33, 36 Magazine Capacity (12 plane) Ø5 60 bars, ø32 9 bars Oil Requirement 60 liters ISO CB 150 Electrical Requirement Air Requirement 3 phase 220VAC, 16A 50/620Hz 6 Bar (85 PSI) 4
 Available Channel Diameters 13, 21, 26, 28, 33, 36 Magazine Capacity (12 plane) Ø5 60 bars, ø32 9 bars Oil Requirement")
10 2. Technical Information Patriot Series 2.4 Compressed Air Supply Air supply to the bar feeder must be supplied through a line having a minimum inside diameter of 8mm. Pressure must be maintained at a minimum of 6 bar (85 PSI) for the bar feeder to operate properly. An air pressure safety switch connected to the filter/regulator unit monitors air pressure. A fault will be displayed on the bar feeder operator panel if the air pressure falls below 6 bar. Air consumption is approximately 50L per hour Connect the air supply line to the fitting A. Pull the regulator control knob up and turn the knob to set the air pressure to 6 bar (85 PSI) The filter/regulator unit supplies lubricating oil to the various pneumatic system components. The lubricator unit should be set at the factory but it may be adjusted as needed. To adjust turn knob C. The proper setting supplies 1-2 drops of oil per 1000 liters of air used. The lubricator oil level should be maintained between the high and low level marks on the container. To fill the unit, first disconnect the air supply from fitting A. Remove the filler screw D and fill the reservoir with one of the oils from the chart below or an equivalent. Air Unit Lubricating Oil ISO VG32 BP Castrol Chevron Mobil Shell Energol HLP 32 Hyspin VG32 Regal R&O 32 DTE 24 or Light Tellus 32 C D B 5
. 2.4.2 The filter/regulator unit supplies lubricating oil to the various pneumatic system components.")
11 2. Technical Information Patriot Series 2.5 Electrical Supply The Patriot draws electrical voltage from the lathe through the interface cable. Standard power input is 220VAC 3 Phase, 16 Amps. The transformer in the bar feeder cabinet has multiple input voltage taps to accommodate most lathe configurations without using an additional external transformer. 2.6 Guide Channel Specifications Guide Channel Bar Pusher Permissible Diameter of Bar Stock Diameter Diameter Minimum ¹ Maximum Max. Special ² ø13mm 12.5mm 5mm (.196 ) 10mm (.393 ) 12mm (.472 ) ø21mm 20.5mm 8mm (.315 ) 16mm (.630 ) 20mm (.787 ) ø26mm 25.5mm 8mm (.315 ) 21mm (.827 ) 25mm (.984 ) ø28mm 27.5mm 10mm (.393 ) 25.4mm (1.00 ) 27mm (1.062 ) ø33mm 32.5mm 10mm (.393 ) 28.5mm (1.125 ) 32mm (1.259 ) ø36mm 35.5mm 12.7mm (.500 ) 32mm (1.260 ) 35mm (1.377 ) ø38mm 37.0mm 15.8mm (.625 ) 33.3mm (1.312 ) 37mm (1.456 ) Channel sizes below can be used ONLY with the Patriot 551 ø39mm 38.0mm 15.8mm (.625 ) 33.3mm (1.312 ) 38mm (1.500 ) ø43mm 42.5mm 19mm (.750 ) 38mm (1.500 ) 42mm (1.653 ) ø46mm 45.5mm 22.2mm(.875 ) 41.2mm (1.625 ) 44.5mm (1.750 ) ø52mm 51.0mm 25.4mm (1.00 ) 44.5mm (1.750 ) 50.5mm (2.0 )³ ¹ Although the guide channel is capable of running the minimum diameter listed, the increasing difference between the stock OD and channel ID allows greater potential for vibration. Spindle RPM may need to be reduced accordingly. ² Bar stock larger than the standard maximum diameter up to the collet diameter may be used if the bar end diameter is reduced to fit a standard collet. An ejection collet may also be used if the end of the material is chamfered to match the angle of the ejection collet. ³Diameter can only be run with a front ejection collet Important Information The outer diameter of the bar collet must be at least 0.5mm smaller than the bar pusher outer diameter. 6
 ø21mm 20.5mm 8mm (.315 ) 16mm (.630 ) 20mm (.787 ) ø26mm 25.5mm 8mm (.315 ) 21mm (.827 ) 25mm (.984 ) ø28mm 27.5mm 10mm (.393 ) 25.4mm (1.00 ) 27mm (1.062 ) ø33mm 32.5mm 10mm (.393 ) 28.5mm (1.")
12 2. Technical Information Patriot Series 2.7 Bar Stock Preparation and Straightness Requirements Straightness Requirements Optimum performance of the bar feeder can only be achieved if the material to be run meets specifications for straightness. The maximum allowable bend in a bar is 0.5mm T.I.R. in a 1 meter section (.02 T.I.R per 3 foot section). This tolerance assumes a curvature over the length of the section and not a short kink in the bar. This tolerance is not accumulative. The tolerance for the entire length of the bar is 1.7mm TIR Procedure for checking bar straightness (Reference ASTM B249) 1. Find a suitable surface to allow the bar to rest on V-blocks without any rocking movement. 2. Rotate the bar 360. Record the dial indicator readings at each location. 3. Calculate both the tolerance for each meter increment and also the tolerance over the entire length of bar. Compare the recorded values to the required tolerances to determine the bar suitability for operation with a bar feeder. 0.5mm TOLERANCE ZONE FOR EACH METER INCREMENT INCREMENTS 1.7mm GEOMETRIC TOLERANCE ZONE OVER TOTAL LENGTH ROTATE BAR 360?.7MM / 3800MM?.5MM / METER?.070" / 12 FT?.020" / 36" 7
 1. Find a suitable surface to allow the bar to rest on V-blocks without any rocking movement. 2. Rotate the bar 360.")
13 2. Technical Information Patriot Series Bar Stock Preparation The bar stock must be free of burrs, chips and excessive dirt. Clean bars will extend the life of the channel guides and bearing unit of the pusher as well as the oil pump impeller. The bar ends should be relatively square to the length of the bar. Chamfers on the bar ends are generally not needed except when the stock OD is close to the bar pusher OD. In this case the wall of the pusher collet is thin and has only a small lead-in chamfer. Profiled material such as hex and square stock should have a generous chamfer on the bar feeder end of the bar. This chamfer will help negate the offset of the bar centerline to that of the bar pusher when the stock falls differently into the channel (corners up versus flats up). Chamfers on the lathe end of the bar are not usually required, only an edge break to ensure no burrs remain to snag on the lathe collet RPM Limiting Factors Certain conditions may limit the lathe to less than full speed rotation of the spindle. Among these conditions are the following: Bent bars (bar stock with straightness of less than.5mm/1 meter. Bars with an irregular profile or shaped material. Improperly sized guide channel in relation to the bar stock diameter. Incorrect sizing of guide blocks or incorrect adjustment of steady rollers. Lack of support in the lathe spindle for the bar pusher. Characteristics of the bar stock (copper, brass, plastic ect.). Improper viscosity lubricant in the oil tank of the bar feeder. Unbalanced bar stock. Sheared bar ends. Non-concentric chamfered bar end when using an ejection collet. These factors may work alone or in combination to cause a vibration that requires a reduction in the lathe spindle speed. 8

14 3. Transportation and Handling Patriot Series 3. Transportation and Handling Warning The weight of the bar feeder without packaging is approximately 2100 lbs. Verify the equipment to be used for moving the bar feeder is rated to safely lift the weight of the bar feeder plus the packaging material. Make special note that the bar feeder is top heavy and take proper precautions. 3.1 Packaging of the Bar Feeder The bar feeder will arrive in one of three ways: A: Without packaging. B: Attached to a skid or pallet. C: Crated in a wooden box. A. B. C. 3.2 Transporting the Bar Feeder The bar feeder will usually arrive in configuration B, on a skid. In configurations B and C the machine may be lifted by a fork truck having suitable capacity. The forks must be spread as far as possible, ideally under the stands of the bar feeder. Lifting straps may also be used to move machines in the B and C configurations. 9

15 3. Transportation and Handling Patriot Series Machines in configuration A may be lifted only by the two 25mm eyebolts found under the hood on the bar plane. These eyebolts must also be used to remove the bar feeder from the skid. Caution Lifting the bar feeder under the magazine with a lift truck or slings may cause damage to the machine. Use the provided eyebolts with lifting straps or chains to prevent damage to the bar feeder. 3.3 Installation Area The bar feeder must be bolted to a sound, reasonably level floor using anchor bolts. The area surrounding the machine must provide sufficient clearance the operator access to both sides and the rear of the machine as shown in the diagram below. Other necessities are suitable lighting and a compressed air supply. The bar feeder is not suitable for and can not be adapted to use in an explosive surrounding. E A = 4400mm D = Operator area E = Material supply area F = Remnant removal area 10 F D

16 4. Installation Patriot Series 4. Installation Caution The following instructions should be carried out only by skilled, trained personnel. Proper alignment and installation is crucial to achieve optimal performance of the bar feeder. Improper alignment can cause poor finish quality and out of tolerance conditions on machined parts, damage to the bar feeder channels, pusher and collet and damage to the actuator and spindle bearings on the lathe. 4.1 Lathe Preparation Prior to beginning the bar feeder installation the lathe must be properly leveled. It is strongly recommended that the lathe be anchored to the floor to prevent it from shifting. 4.2 Distance From Lathe The bar feeder must be set the proper distance from the lathe. This distance is measured from the front of the anti-vibration device to the face of the lathe collet. In the case of a Swiss style lathe the measurement is taken from the face of the lathe collet when the sliding headstock is in over-travel condition nearest the guide bushing. Please refer to the diagram and chart below for the correct dimension for bar feeder placement. The bar feeder is available in two pusher length configurations, designated L for the shorter version and LL for the longer version. A B Maximum Extension Fixed Headstock Sliding Headstock A Dimension B Dimension L B Dimension LL Max Extension L Max Extension LL

17 4. Installation Patriot Series 4.3 Height Adjustment Determine the distance from the floor to the center of the spindle of the lathe. Compare this dimension to the distance from the bottom of the bar feeder stand to the center of the opening of the steady device plus 75mm. If this distance is not within 25mm ± of the lathe center height the bar feeder stands must be adjusted by repositioning the legs on the bar feeder stands. The spacing between the holes of the legs are 35mm. The legs can be adjusted without use of a crane or lift truck by supporting the stand with one set of legs while moving the opposite set. The height adjustment need not be exact at this point. The final adjustment will be made during the alignment to the lathe. 4.4 Leveling Place steel anchor plates and spacers under the four outside corners of the bar feeder. Thread the leveling bolt into the stand so the ball of the tip is in the matching socket of the spacer. Assemble the 10mm hold down rod as shown below, nut lock washer flat washer. Be careful not to extend the rod past the bottom of the anchor plate. Tighten the nut at the anchor plate. Do not tighten the nuts on the top and bottom of the stand at this time. Leave sufficient clearance to allow for height adjustment and leveling. Place a machine level on the leveling bracket. Level the bar feeder side to side at the front stand. Move to the rear stand and level from side to side, then adjust for level front to rear. The front to rear level is only a coarse adjustment at this time. Raise or 12

18 4. Installation Patriot Series lower the bar feeder to match the lathe center height while maintaining the side to side level while performing this step. Once the center height is roughly the same as that of the lathe you are ready to align the bar feeder. 4.5 Alignment The bar feeder is aligned to the lathe spindle by use of a nylon string which is stretched between the lathe collet/chuck and the alignment fitting at the rear plate of the bar feeder. This string indicates the centerline of the two machines. The procedure is detailed in the following steps Prepare the bar feeder The bar feeder should be at the proper distance from the lathe, leveled from side to side and adjusted to the approximate center height of the lathe as detailed in steps Open the guide channel and remove the bar pusher and pre-feed pusher. 2. Insert the nylon string through the hole in the supplied stepped plug and insert the plug into the lathe collet. 3. Pull the string through the lathe spindle and the bar feeder and through the hole in the alignment fitting in the rear plate of the bar feeder. Stretch the string as tightly as possible and secure it to prevent slippage that would loosen the string. 13

19 4. Installation Patriot Series B A C D Aligning the center lines The bar feeder is aligned by moving the front and rear stands so that the distance from the string to the centerline of the lathe spindle and the centerline of the opening of the anti-vibration device is equal on all sides to within 0.15mm (approx..005 inch). 1. Beginning with the rear stand, adjust the elevation by using the leveling screws so the rear of the spindle is centered over the string between the 6 and 12 o clock positions. A piece of magnetic stock, such as that used in flat advertising magnets, attached to the spindle face and positioned closely to the string will allow the spindle to be rotated 14

20 4. Installation Patriot Series 180 degrees to check the position relative to the spindle bore. Once the string is centered to the spindle, move to the front stands and repeat the procedure. To check the centering for the front of the bar feeder check the position of the string relative to the bore of the anti-vibration device. It may be necessary to alternate between the front and rear adjustments until both are centered. When centered, tighten the jam nuts on the leveling screws. 2. Starting with the rear stand align the bar feeder to the lathe spindle from side to by using a pry bar to shift the feeder. Small adjustments in position may be made by striking the anchor plate with a soft faced hammer. When the string is centered to the spindle move to the front stand and repeat the procedure, aligning the string to the bore of the anti-vibration device. As with the elevation adjustment it may be necessary to alternate between the front and rear adjustments until both are centered. Important Information The bar feeder must be properly affixed to the floor to be able to maintain alignment to the lathe. Bar feeders not anchored to the floor are subject to damage to bar pushers, collets, anti-vibration blocks and guide channels as well as possible damage to the machine tool Anchoring the bar feeder The bar feeder is secured to the floor through hold down rods attached to the four leveling plates which are bolted to the floor with concrete anchors. Please refer to the drawing in section 4.4. The anchor plates have 4 through holes for securing the plate to the floor. Only three holes are used per plate. 1. Drill one hole through each of the four anchor plates using a rotary percussion hammer drill equipped with a ½ inch diameter bit capable of drilling at least 8 inches deep, preferably capable of drilling completely through the concrete. Drilling through the concrete will make driving the anchors below flush possible if the machine is to be relocated. 2. Drive an anchor bolt into each hole and tighten securely. Recheck the alignment to verify that the feeder has not shifted (a small amount of shift is normal and may be corrected later in the procedure). 3. Drill the remaining 2 holes per plate, insert and tighten the anchor bolts as above. 15

21 4. Installation Patriot Series 4. Tighten the top nut on each hold down rod. 5. Recheck the alignment. If the feeder has shifted loosen the hold down nut and adjust the leveling screw as required. Once the alignment is verified tighten the middle hold down nut against the bottom of the bar feeder stand on all four hold down rods. 6. Place a plastic pad under each of the four inside leveling screws. Tighten the leveling screws firmly by hand making sure the ball of the leveling screw is fully in the socket of the pad. Using a wrench, tighten each leveling screw an additional ½ turn and tighten the jam nut. 4.6 Installation of accessories Movable anti-vibration device The anti-vibration device (MAVD) is mounted at the end of the lathe spindle with the supplied mounting hardware. The MAVD is pre-aligned and assembled at the factory according to lathe model. The lathe adapter plate (A), rollers (B), and nose plate (C) are aligned along line (D) to ensure the rollers hold the bar stock on center to the spindle. Due the many different lathe designs the lathe adapters to connect the MAVD to the lathe may not allow for an exact fit. This will require the installer to align the MAVD on center to the lathe spindle with the alignment string. Install the string in the same manner as described in section after the MAVD is attached to the lathe. Align the adapter plate (A) using a scale or alignment tool. Do not alter the alignment of the rollers and nose plate to the adapter plate as they are pre-aligned. 16
22 4. Installation Patriot Series Fixed front nose For installations with fixed headstock lathes a fixed nose is supplied to fill the distance between the bushing device and the back of the lathe spindle or coolant collector. The flange of the fixed nose bolts to the face of the bushing device. A liner sleeve to match the diameter of the guide channel is fitted into the nose. A coolant collector attaches to the end of the fixed nose to catch excess oil from the bar feeder. The nose should be cut to a length approximately 25mm less than the distance between the face of the bushing device and the lathe coolant collector. This space is to allow the oil to drain into the bar feeder coolant collector Telescoping front nose For installations with sliding headstock lathes a telescoping nose is supplied to fill the distance between the bushing device and the moveable anti-vibration device. The nose extends and collapses with the movement of the headstock to keep the material contained and provide support for the bar pusher. 17
23 4. Installation Patriot Series Synchronization device For installations on sliding headstock lathes a synchronization device may be used. A rod is linked to the moveable anti-vibration device mounted to the lathe spindle. This rod passes through the front plate of the bar feeder. Inside the bar feeder a piston assembly is attached to the rod. A timing belt passes through the piston assembly. The timing belt runs between two pulleys, one of which is attached to the same shaft as the front pulley of the bar pusher drive belt. When the lathe collet is closed an air solenoid valve turns on to supply pressure to the piston assembly. The piston assembly grips the timing belt. In this condition, every move made by the headstock Z axis is transferred through the synchronization device to the bar pusher to keep the bar pusher in sync with the lathe headstock. 18
24 4. Installation Patriot Series 4.7 Oil for guide channel lubrication and dampening The bar feeder pumps oil into the guide channel for dampening vibration and lubrication of the revolving tip of the pusher. The oil tank should be filled with 60 liters (approx.16 gallons) of ISO 100 oil of the type listed in the cross reference below. The oil used must not be chlorinated or sulfured as these materials will damage the guide channels. BP Energol CS 100 Castrol Magna 100 Chevron Circulating Oil 100 Esso Nuto 100 Nuray 100 Gulf Security 100 McMaster Carr 3025K K37 Mobil Vactra Oil Extra Heavy DTE Oil Extra Heavy Shell Vitrea 100 Tellus C 100 Texaco Omnis 100 Industrial Oil L 19
25 5. Adjustments and Setting Patriot Series 5. Adjustments and Setting 5.1 Structure of the bar feeder Frame Gripper Loading/Unloading Control Bases and Beam Feed Motor Drive Cutting Device Guide Channel Bar Pusher Support First Anti-Vibration Device Synchronization Device Telescoping / Fixed Nose Oil Collector Electrical Cabinet Oil Pump Oil Tank Tool Box 20
26 5. Adjustments and Setting Patriot Series 5.2 Adjustment of the loading device Loosen the locking lever for the support plate (1) and lift the plate to the highest position. Tighten the lever (1) Place one of the bars to be machined on the magazine Rotate the knob (2) to adjust the bar stop so that only the first bar on the magazine is lifted into the guide channel Loosen the lever (1) and slide the support plate down to 1mm over the bar to be machined. Tighten the lever (1)
27 5. Adjustments and Setting Patriot Series 5.3 Chain adjustment and lubrication Remove the sheet metal side cover of the bar feeder. Loosen the two screws (1). Adjust the chain by tightening equally the two flathead screws (2) that extend from the block through the rear plate of the machine. Tighten the two screws (1). The feeding chain should periodically be lubricated with a suitable oil. 22
28 5. Adjustments and Setting Patriot Series Moveable Anti-Vibration Device (MAVD) adjustment Load a bar into the lathe headstock and close the collet. Press the Pre-Auto button, the MAVD will close. Back the screw A off counterclockwise until no tension is felt on the screw. Press the Manual button, then the Pre-Auto button. This will make sure the rollers are closed onto the bar. Rotate screw A clockwise until tension is felt, then rotate clockwise ¼ turn further. Tighten the jam nut on screw A. Press the manual button to release the rollers. 23
29 6. Control Operation and Descriptions Patriot Series Patriot Series Remote Control Panel Manual Automatic Bar Separators ALARM BAR END BACK START START OPEN TORQUE STOP Pre-Auto Grippers Reverse Jog Forward Jog Shuttle Channel Open / Close 6.1 Sequence to manually change bars Retract the bar stock from the lathe guide bushing and open the lathe collet. Make sure the lathe tools are clear of the guide bushing for the new bar to come in. 1. Press and hold the Reverse Jog button until the pusher is fully retracted. 2. Press the Grippers button to close the grippers on the bar stock. 3. Press the Shuttle button to activate the air cylinder to pull the pusher off the material. The LED on the button will light when the shuttle is pulled back to the rear limit. 4. Press the Grippers button to open the grippers. 5. Press the Channel Open / Close button to open the guide channels. The LED on the button will light when the channels are fully opened. 6. Press the Pre-Auto button. 7. Press the Automatic button. At this point the bar separators will drop a bar into the guide channel. The pre-feed pusher will move the bar forward to position and the grippers will close on the bar. The pre-feed pusher will retract. The shuttle will pull the pre-feed pusher to the rear limit. The guide channel will close. The shuttle will push the bar pusher forward onto the bar stock. The grippers will open. The bar pusher will advance the bar stock to the facing position and stop. When this is complete close the lathe collet and use the headstock to move the bar through the guide bushing. 24
30 6. Control Operation and Descriptions Patriot Series 6.2 To Power Up and Place the Bar Feeder In Automatic Turn on the main switch on the bar feeder electrical cabinet. Check to make sure the emergency stop buttons on the pendant and the main control panel are released. Press and hold the green on button on the main control cabinet. The green button will light when the bar feeder is on. Close the collet on the lathe. Press the Automatic button on the touch screen to place the bar feeder in automatic mode. (The guide channel must be closed before pressing the Automatic button or the bar feeder will not change to Automatic) 6.3 To Power Up After An Alarm Check the alarm message, it will give details about the alarm. See section 11. Clear the cause of the alarm. Press the green start button on the HMI (main control panel of the bar feeder). It is possible to have more than one alarm at a time. If a second alarm is active it will show on the display after the first alarm is cleared. If the bar feeder experiences a fault during the process of changing bars the guide channels must restored to the fully opened or closed position after the bar feeder is restarted. Before the guide channel can be opened or closed the bar pusher must be at home position and the shuttle must be at the rear limit (LED on the shuttle button ON). When the guide channel is closed the shuttle must be in the forward position (LED on the shuttle button OFF) before the pusher can move forward. 25
31 6. Control Operation and Descriptions Patriot Series 6.4 Resetting the Bar Feeder Home Position All positions to control bar feeder function are referenced from the zero position. Should the zero position shift the bar feeder will not function properly. To reset the zero position follow these steps: Move the bar pusher forward of the home proximity switch (PS2). Simultaneously press and hold the forward and reverse jog buttons on the pendant control. After 8 seconds the pusher will begin to move toward the home proximity switch. There may be a short initial movement either forward or backward when the buttons are first pressed, this will stop as soon as the control recognizes both button inputs. When the pusher begins to move after the 8 second delay, release the jog buttons. The HMI will display a message indicating the zero procedure is in progress. The PS1 switch will turn on and the HMI will display a message indicating the zero position procedure is complete. This procedure should be done anytime the bar feeder fails to properly reach a position or alarms during pusher movement to a specific position. 26
32 6. Control Operation and Descriptions Patriot Series 6.5 Description of the MANUAL Screen The Manual screen has several information items and function buttons. In the upper left corner is the mode status showing if the bar feeder is in Manual or Automatic mode. The current program number is displayed next to the mode status. The Setup button is located in the upper right corner of the screen. This button is used to access individual programs and parameters. Below the mode status is a display of the remaining material that can be machined. The next line has information areas to indicate the channel status and the status of the lathe collet. The dark band below the channel and collet status display is a message banner that shows the current operation of the bar feeder. The bottom row of the screen has buttons for forward and reverse jogging of the bar pusher. The Bar Off and Bar On buttons (described below) are next to the jog buttons. A button to change the bar feeder to Automatic mode is between the Bar On and Bar Off buttons. 27
33 6. Control Operation and Descriptions Patriot Series 6.6 Description of the AUTOMATIC Screen The AUTOMATIC screen has one function button to change to Manual mode and several information screens. The top line shows the bar feeder mode status and the current program number. The next line shows the position of the bar feeder from the zero position. Below the pusher position is the status of the guide channel, the lathe collet and the number of parts remaining before the bar change. The dark line shows the current operation of the bar feeder. 28
34 6. Control Operation and Descriptions Patriot Series 6.7 Loading With the Bar On and Bar Off Buttons A new bar can be loaded by using the BAR ON button. Make sure the guide channel is closed. If there is material in the guide channel it must be short enough to fall through the remnant slot. If not see the BAR OFF instructions below. Press the BAR ON button. The bar pusher will retract to the home position. The grippers will close on the bar (if present, there need not be a bar in the channel at this step). The pusher will retract and the channel will open. A new bar will fall into the guide channel. The pre-feed pusher will move the bar forward ahead of the pusher collet. The pre-feed pusher will retract and the channel will close. The grippers will hold the bar as the pusher collet is forced over the material. The grippers will open and the bar will move forward to the facing position and stop. Manually close the lathe collet. The bar feeder can now be placed in Automatic and machining may begin. If the material in the channel is too long to drop through the remnant slot use the BAR OFF button. Press BAR OFF. The bar pusher will retract to the home position. The grippers will close on the bar and the pusher will pull off the material. The grippers will open. The channel may then be opened with the Pendant control and the stock removed. Close the channel, shuttle the pusher forward and then the BAR ON button may be used to load the machine. 29
35 6. Control Operation and Descriptions Patriot Series 6.8 Entering a New Program The Patriot can store up to 36 individual program setups. Each setup will have a user chosen 4 digit number. This allows the user to repeat jobs on the bar feeder with only a few steps. Should the memory become full an individual job may be deleted to make room for the next or an existing job can be easily altered. A template is made in the bar feeder during the machine installation that is pulled up each time a new setup is started. The template stores information such as the maximum useable travel of the bar pusher and the distance from the bar feeder measuring gate to the face of the lathe chuck. Begin entering a new program by pressing the SETUP button on the Manual screen. The program menu will be displayed. NOTE: See section 8 for parameter descriptions or press the button in the left column and a description of the parameter will be displayed. Press a blank button. The screen for parameter 1 will be displayed. Press the value button for the Part Length 1 parameter and a numeric keypad will be displayed. This number should be equal to the overall part length plus the width of the cut-off tool plus facing stock. The Patriot is capable of pushing and monitoring up to three separate distances per part by entering the individual feed distances in the Feedout 1, 2 and 3 parameters. The total value of the Feedout parameters should match the value in Part Length 1. Each Feedout parameter screen has a short and long feed safety setting to set allowable minimum and maximum pushing distances. Multiple feedouts per part may also be used without monitoring by entering the same value as Part Length 1 in Feedout
36 6. Control Operation and Descriptions Patriot Series Press the value button for Feedout 1-1. Page 1.1 will be displayed. Feedout 1 If using only one feedout per part, enter the same value as Part Length 1. If using more than one feedout per part, enter only the distance of the first feedout on this page and the other feedout distances on the appropriate parameter pages. Short Feed Safety If desired enter the minimum allowable feed distance in the Short Feed Safety parameter. This value should be at least 1mm less than the Feedout Distance. If the bar feeder s encoder indicates travel less than this value the bar feeder will alarm out. The function is disabled if the value is set to zero. Long Feed Safety If required enter the maximum allowable feed distance in the Long Feed Safety parameter. This value should be at least 1mm longer than the Feedout distance. If the bar feeder s encoder indicates travel in excess of this value the feeder will alarm out. The function is disabled if the value is set to zero. Check 1 st Part This parameter allows the long and short feed safety values to be disabled on the first part after switching the bar feeder to Automatic mode or for the first part after a bar change. Press the Back button to return to the previous page when finished with this page. Press the page down button to access parameter Page 3. Bar Diameter Enter the diameter of the bar stock to be run. For hexagonal and square stock enter the diameter as measured across the points of the material. Facing Length This parameter allows adjustment to the stopping position of the new bar at the completion of a bar change. See section 8 for the complete description of the parameter. 31
37 6. Control Operation and Descriptions Patriot Series Page 3 continued Open Collet Speed This parameter allows adjustment to the feeding speed of the bar stock in Automatic mode. Open Collet Torque This parameter allows adjustment of the pushing force of the bar pusher in the Automatic mode. The range is plus or minus 50% of the setting selected through the Bar Diameter parameter. Press the Page Down button to continue. Feeding Type Selects the method of feeding. Selections allow feeding to a hard stop on the lathe or feeding to a distance set by the Feedout parameters on parameter page 1.1. Facing Type Selects the type of control of the bar pusher at the end of the bar change. Choices are facing to a hard stop on the lathe or facing to stop at a set position. Remnant Type Selects the way the remnant is disposed of. Selections are Extraction, Ejection and Return and Wait. See section 8 for complete parameter descriptions. Change Program Number Allows the user to change the number of the current program. Press the Page Down Button to continue. This page allows control of the Moveable Anti-Vibration Device. See section 8 for parameter descriptions. Press the Save All button to exit the parameter screens. NOTE: Not all screens may be visible. Screens may be turned off in the factory parameters per customer request. 32
38 6. Control Operation and Descriptions Patriot Series 6.9 Selecting and Editing an Existing Program Press the SETUP button on the Manual screen. Press the button for a previously entered program. A screen with the program number selected will be displayed. Press the LOAD button to initialize the program. Press the EDIT button to make changes to the existing program, then press Save All to store the changes. 33
39 7. Maintenance Patriot Series 7. General Maintenance Hazard Warning Before doing bar feeder maintenance, turn off 3 phase power and disconnect the air supply. For consistent operation of the bar feeder maintenance checks should be performed regularly. The area around the barfeed should be kept clean to avoid safety issues. Using petroleum or other solvents may damage plastic components. 7.1 Periodic Maintenance The items on the chart below should be performed at the intervals as listed. Frequency Hours Regular Period Component Action Collet Check wear Check wear and Guide channel clean Lubrication Feeding chain Tension Air cleaner Check 7.2 Rotating tip and collet Check the rotating tip for excessive side play. The tip should rotate smoothly. Excessive side play or roughness in the rotation of the unit indicate bearing wear and will cause the unit to fail. The rotating tip is not repairable, it must be replaced. Inspect the collet for cracks or wear. The collet should have sufficient strength to make inserting or extracting a remnant by hand extremely difficult. Replace damaged or loose collets as soon as possible. 7.3 Air filter/regulator/lubrication unit Check the bottle B for collected condensation. Drain the condensation by pressing the valve C. Check the lubricator bowl for adequate oil supply. Adjust the regulator as needed. See section for more information. 34
40 8. User Parameters Patriot Series Parameter Page 1 PART LENGTH 1 Used with Max Feed Position to generate an end of bar signal. Calculate the proper setting by adding the Length of part + Width of cut-off tool + facing stock. End of bar is generated when the encoder reads the position (Max Feed Position Part Length 1). Feedout 1-1 Used when making multiple feed outs per part. Feedout 1-1 is the first of 3 possible feedouts per part. Parameter is disabled if set to zero. Press the Feedout 1-1 dimension button to access page 1.1 and additional options. Feedout 1-2 Used when making multiple feed outs per part. Feedout 1-2 is the second of 3 possible feedouts per part. Parameter is disabled if set to zero. Press the Feedout 1-2 dimension button to access page 1.2 and additional options. Feedout 1-3 Used when making multiple feed outs per part. Feedout 1-3 is the third of 3 possible feedouts per part. Parameter is disabled if set to zero. Press the Feedout 1-3 dimension button to access page 1.3 and additional options. 35
41 8. User Parameters Patriot Series Parameter Page 1.1 Feedout 1 Used when making multiple feedouts per part. Feedout 1-1 is the first of 3 possible feedouts per part. Parameter is disabled if set to zero. Press the dimension button to set the length of the first feedout for fixed headstock lathes, or for the distance of headstock travel before the first re-grip on sliding headstock lathes. Short Feed Safety Sets minimum distance pusher can advance during feedout 1. On sliding headstock lathes the pusher must advance at least this distance before the lathe collet opens. On fixed headstock lathes the pusher must advance at least this distance before the lathe collet closes. The parameter is disabled if set to zero. Long Feed Safety Sets maximum distance pusher can advance during feedout 1. On sliding headstock lathes the pusher must not advance more than this distance before the lathe collet opens. On fixed headstock lathes the pusher must advance more than this distance before the lathe collet closes. The parameter is disabled if set to zero. Check 1 st Part Selects option to check or not check the long and short feed safety distances on the first feedout after machine goes into automatic mode and the first feedout after a bar change. Set to yes to check immediately, no to bypass check until second part. 36
42 8. User Parameters Patriot Series Parameter Page 1.2 Feedout 2 Used when making multiple feedouts per part. Feedout 2 is the 2nd of 3 possible feedouts per part. Parameter is disabled if set to zero. Press the dimension button to set the length of the second feedout for fixed headstock lathes, or for the distance of headstock travel before the first re-grip on sliding headstock lathes. Short Feed Safety Sets minimum distance pusher can advance during feedout 2. On sliding headstock lathes the pusher must advance at least this distance before the lathe collet opens. On fixed headstock lathes the pusher must advance at least this distance before the lathe collet closes. The parameter is disabled if set to zero. Long Feed Safety Sets maximum distance pusher can advance during feedout 2. On sliding headstock lathes the pusher must not advance more than this distance before the lathe collet opens. On fixed headstock lathes the pusher must advance more than this distance before the lathe collet closes. The parameter is disabled if set to zero. Check 1 st Part Selects option to check or not check the long and short feed safety distances on the second feedout after machine goes into automatic mode and the second feedout after a bar change. Set to yes to check immediately, no to bypass check until second part. 37
43 8. User Parameters Patriot Series Parameter Page 1.3 Feedout 3 Used when making multiple feedouts per part. Feedout 3 is the 3rd of 3 possible feedouts per part. Parameter is disabled if set to zero. Press the dimension button to set the length of the third feedout for fixed headstock lathes, or for the distance of headstock travel after the third re-grip on sliding headstock lathes. Short Feed Safety Sets minimum distance pusher can advance during feedout 3. On sliding headstock lathes the pusher must advance at least this distance before the lathe collet opens. On fixed headstock lathes the pusher must advance at least this distance before the lathe collet closes. The parameter is disabled if set to zero. Long Feed Safety Sets maximum distance pusher can advance during feedout 3. On sliding headstock lathes the pusher must not advance more than this distance before the lathe collet opens. On fixed headstock lathes the pusher must advance more than this distance before the lathe collet closes. The parameter is disabled if set to zero. Check 1 st Part Selects option to check or not check the long and short feed safety distances on the third feedout after machine goes into automatic mode and the third feedout after a bar change. Set to yes to check immediately, no to bypass check until second part. 38
44 8. User Parameters Patriot Series Parameter Page 2 (Option) PART LENGTH 2 Used with Max Feed Position to generate second end of bar signal. This makes possible using the remnant to make shorter length parts after the end of bar signal is made. Calculate the proper setting by adding the Length of part + Width of cut-off tool + facing stock. End of bar is generated when the encoder reads the position (Max Feed Position Part Length 2). Feedout 2-1 Used when making multiple feed outs per part. Feedout 2-1 is the first of 3 possible feedouts per part. Parameter is disabled if set to zero. Press the Feedout 2-1 dimension button to access page 2.1 and additional options. Feedout 2-2 Used when making multiple feed outs per part. Feedout 2-2 is the second of 3 possible feedouts per part. Parameter is disabled if set to zero. Press the Feedout 2-2 dimension button to access page 2.2 and additional options. Feedout 2-3 Used when making multiple feed outs per part. Feedout 2-3 is the third of 3 possible feedouts per part. Parameter is disabled if set to zero. Press the Feedout 2-3 dimension button to access page 2.3 and additional options. 39
45 8. User Parameters Patriot Series Parameter Page 2.1 Feedout 1 Used when making multiple feedouts per part. Feedout 1-1 is the first of 3 possible feedouts per part. The parameter is disabled if set to zero. Press the dimension button to set the length of the first feedout for fixed headstock lathes, or for the distance of headstock travel before the first re-grip on sliding headstock lathes. Short Feed Safety Sets minimum distance pusher can advance during feedout 1. On sliding headstock lathes the pusher must advance at least this distance before the lathe collet opens. On fixed headstock lathes the pusher must advance at least this distance before the lathe collet closes. The parameter is disabled if set to zero. Long Feed Safety Sets maximum distance pusher can advance during feedout 1. On sliding headstock lathes the pusher must not advance more than this distance before the lathe collet opens. On fixed headstock lathes the pusher must advance more than this distance before the lathe collet closes. The parameter is disabled if set to zero. Check 1 st Part Selects option to check or not check the long and short feed safety distances on the first feedout after machine goes into automatic mode and the first feedout after a bar change. Set to yes to check immediately, no to bypass check until second part. 40
46 8. User Parameters Patriot Series Parameter Page 2.2 Feedout 2 Used when making multiple feedouts per part. Feedout 2 is the 2nd of 3 possible feedouts per part. The parameter is disabled if set to zero. Press the dimension button to set the length of the second feedout for fixed headstock lathes, or for the distance of headstock travel before the first re-grip on sliding headstock lathes. Short Feed Safety Sets minimum distance pusher can advance during feedout 2. On sliding headstock lathes the pusher must advance at least this distance before the lathe collet opens. On fixed headstock lathes the pusher must advance at least this distance before the lathe collet closes. The parameter is disabled if set to zero. Long Feed Safety Sets maximum distance pusher can advance during feedout 2. On sliding headstock lathes the pusher must not advance more than this distance before the lathe collet opens. On fixed headstock lathes the pusher must advance more than this distance before the lathe collet closes. The parameter is disabled if set to zero. Check 1 st Part Selects option to check or not check the long and short feed safety distances on the second feedout after machine goes into automatic mode and the second feedout after a bar change. Set to yes to check immediately, no to bypass check until second part. 41
47 8. User Parameters Patriot Series Parameter Page 2.3 Feedout 3 Used when making multiple feedouts per part. Feedout 3 is the 3rd of 3 possible feedouts per part. The parameter is disabled if set to zero. Press the dimension button to set the length of the third feedout for fixed headstock lathes, or for the distance of headstock travel after the third re-grip on sliding headstock lathes. Short Feed Safety Sets minimum distance pusher can advance during feedout 3. On sliding headstock lathes the pusher must advance at least this distance before the lathe collet opens. On fixed headstock lathes the pusher must advance at least this distance before the lathe collet closes. The parameter is disabled if set to zero. Long Feed Safety Sets maximum distance pusher can advance during feedout 3. On sliding headstock lathes the pusher must not advance more than this distance before the lathe collet opens. On fixed headstock lathes the pusher must advance more than this distance before the lathe collet closes. The parameter is disabled if set to zero. Check 1 st Part Selects option to check or not check the long and short feed safety distances on the third feedout after machine goes into automatic mode and the third feedout after a bar change. Set to yes to check immediately, no to bypass check until second part. 42
48 8. User Parameters Patriot Series Parameter Page 3 Bar Diameter Diameter of the material to be used. The control uses this information to set default values for the program. Facing Length Stopping point of the material at the end of a bar change and bar on sequence. This dimension is the distance between the measuring flag and the desired stopping point of the material to be loaded. Collet / Chuck There are two options for the facing length setting. Pressing the Collet/Chuck button toggles between the two options. This feature allows for two different facing positions for different chucking systems. Open Collet Speed Sets the speed of the bar pusher advance when in automatic with the lathe collet open. Open Collet Torque Sets the clutch force for the bar pusher when in automatic with the lathe collet open. The setting is expressed as a percentage of the default setting chosen according to the bar diameter parameter. Setting range is +50% to 50%. 43
49 8. User Parameters Patriot Series Parameter Page 4 Open Collet Timeout Allows for the lathe collet to be open when the bar feeder is in automatic for up to the number of seconds set in this parameter. If the length of time is exceeded an alarm is generated. The parameter is disabled if set to zero. Close Collet Timeout Allows for the lathe collet to be closed when the bar feeder is in automatic for up to the number of seconds set in this parameter. If the length of time is exceeded an alarm is generated. The parameter is disabled if set to zero. Open Collet Push Delay Delays the bar feeder from pushing for the set number of seconds when the bar feeder is in automatic and the lathe collet opens. The parameter is disabled if set to zero. Close Collet Push Delay Keeps the bar feeder pushing for the set number of seconds after the lathe collet closes when the bar feeder is in automatic. The parameter is disabled if set to zero. 44
50 8. User Parameters Patriot Series Parameter Page 5 Feeding Type Selects the mode of feeding material in automatic. In feeding to a turret stop the bar feeder begins to push when the lathe collet opens and stops pushing when the lathe collet closes. The bar feeder will use the feedout lengths 1-3 if they are set. Facing Type Selects between modes of bringing a new bar to facing position and restarting the lathe at the end of a bar change. Choices are Position and Turret Stop. In Position mode the bar feeder advances the bar to the position set by parameter Facing Length and stops. In Turret Stop mode the bar feeder advances the bar to the position in Facing Length, then keeps pushing until the lathe collet closes. In both modes the cycle start signal is sent to the lathe when the Facing Length position is reached. Remnant Type Selects between modes of remnant disposal. Choices are Extraction, Ejection and Return & Wait. Extraction: The material is held in a finger collet. The remnant is returned with the bar pusher, the grippers close on the remnant and the pusher pulls the collet off the bar end. The grippers open and the remnant falls into the pan. The grippers close to check for the presence of material. If no material is found the channels open and the bar change continues. Ejection: The material is pushed with an ejection collet. At bar change the pusher retracts to the home position, leaving the remnant in the lathe collet. The grippers close to check that no material is present and the guide channel opens. The bar change continues. Return & Wait: This mode works much as the Ejection mode except that when the lathe collet closes after feeding the last part from the bar stock, the pusher retracts to home position. The channels open, a bar is introduced into the channel and the bar feeder waits for the part to be finished and a signal to begin the bar change sent to the feeder. Change Program Number: Allows change of the present program number. Will not allow duplicating an existing program number. 45
51 8. User Parameters Patriot Series Parameter Page 6 MAVD Close After Opening Position Enables or disables the moveable anti-vibration device from closing on the bar pusher after it has opened to allow the bar pusher collet to pass through. MAVD Opening Position Sets the position for the moveable anti-vibration device open. MAVD Open/Close With Lathe Collet Selects between opening and closing the moveable anti-vibration device each time the lathe collet opens and closes or keeping the unit closed until reaching the MAVD Opening Position. 46
52 9. Factory Parameters Patriot Series Parameter Page 11 Max. End Of Bar - Collet Fixed headstock lathes: Distance of bar pusher with the collet at the back of the gripping surface of the collet pads to the home position. Sliding headstock lathes: Distance of the bar pusher from the gripping surface of the collet pads when the lathe headstock forward to the quide bushing. Facing Distance - Collet Fixed headstock lathes: Distance from the measuring flag (front gate at the end of the guide channel) to the face of the lathe collet. Sliding headstock lathe: Distance from the measuring flag (front gate at the end of the guide channel) to the face of the lathe guide bushing. Max. End Of Bar - Chuck Fixed headstock lathes: Distance of bar pusher with the collet at the back of the gripping surface of the chuck jaws to the home position. Facing Distance - Chuck Fixed headstock lathes: Distance from the measuring flag (front gate at the end of the guide channel) to the face of the chuck jaws. 47
53 9. Factory Parameters Patriot Series Parameter Page 12 First Feeding Distance Sets the stopping point for the pre-feed pusher. Oil Pump Shutoff Distance Sets the position from zero for the oil pump to turn off. MAVD Opening Position Sets the position from zero that the movable anti-vibration device opens to allow the bar pusher to pass through. Headstock Type Selects between different types of lathes: fixed headstock, swiss headstock, sliding bushing. 48
54 9. Factory Parameters Patriot Series Parameter Page 13 1 st Anti-Vibration Opening Position Sets the point of opening for the 1 st Anti-Vibration Device (also called the fixed steady roller). Position should be set 1-2 inches before the pusher collet reaches the steady roller unit. 2nd Anti-Vibration Opening Position Not used on the Patriot Series. 3rd Anti-Vibration Opening Position Not used on the Patriot Series. 4th Anti-Vibration Opening Position Not used on the Patriot Series. 49
55 9. Factory Parameters Patriot Series Parameter Page 14 End of Bar Type Selects between different modes of generating the end of bar signal. Choices are: Off at Bar Change: Signal resets when the command Bar Change is received from the lathe. Pulse: Signal is a pulse for a duration set in the parameter End Of Bar Pulse on page 16. Latch: Signal comes on at the end of bar position and turns off when facing position is reached. Double Pulse: Signal pulses when the end of bar position is reached and again when the facing position is reached. Signal pulses for the duration set in parameter End Of Bar Pulse on page 16. Feed Confirm Signal Type Selects between different modes of generating a confirmation signal for bar pushing. Choices are: Not Used: No signal is output. Finished Feeding: Signal is sent when the pusher finishes moving the distance set in the feed length. Start Feeding: Signal is sent when the pusher begins to move. During Feeding: Signal is sent when the feedout begins and stops when the feed length distance is completed. Pusher Feed Direction Allows direction of operation of the jog buttons on the HMI and Remote Pendant to be reversed to accommodate different lathe configurations. Choices are Left to Right and Right to Left. Inch / Metric Allows the input and display of the user parameters to be in Inch or Metric. 50
56 9. Factory Parameters Patriot Series Parameter Page 15 Bar Change Return Delay Sets a delay in seconds for the pusher to begin the return to home position after the bar change command is received. Cycle Start Delay Sets a delay in seconds for the signal to the lathe that the bar change is complete to be sent. Impulse On Time Sets a length of time for the bar feeder to send a signal to the lathe to rotate the spindle during bar change. This parameter works with Impulse Off Time. Impulse Off Time Sets a length of time for the bar feeder to turn off the Impulse On Timer during the bar change. The combination off these two parameters causes the lathe spindle rotation to pulse as an aid to inserting the new bar through the collet. 51
57 9. Factory Parameters Patriot Series Parameter Page 16 End Of Bar Pulse Sets the length of time in seconds for the signal to remain on when the end of bar signal is set to pulse. Feed Confirm Pulse Sets the length of time in seconds for the signal to remain on when the feed confirmation signal is set to pulse. Cycle Start Pulse Sets the length of time in seconds for the cycle start signal to remain on. Demo Mode Activates or deactivates the demonstration program of the bar feeder. 52
58 9. Factory Parameters Patriot Series Parameter Page 17 Manual/Auto Allows the bar feeder to accept the Manual / Automatic signal from the lathe as either a normally open or normally closed signal. Lathe Door Safety Allows the bar feeder to accept the Lathe Door Open signal from the lathe as either a normally open or normally closed signal. Lathe Alarm Allows the bar feeder to accept the Lathe Alarm signal from the lathe as either a normally open or normally closed signal. Feed Stop Allows the bar feeder to accept the Feed Stop signal from the lathe as either a normally open or normally closed signal. Lathe Specific Special setting for specific lathes that use other than standard interfaces and special software. 53
59 9. Factory Parameters Patriot Series Parameter Page 18 Barfeed Alarm Test button to check the operation of the output for Barfeed Alarm. Pressing the button will turn on output Y24 and relay R1. Barfeed Auto Test button to check the operation of the output for Barfeed in Automatic. Pressing the button will turn on output Y25 and relay R2. Cycle Off Perm Test button to check the operation of the output for Cycle Off Permanent. Pressing the button will turn on output Y26 and relay R3. End Of Bar Test button to check the operation of the output for End Of Bar. Pressing the button will turn on output Y27 and relay R4. Y30 Test button to check the operation of output Y30 and relay R5. Y30 can be used for either a Cycle Stop signal or a Feed Confirmation signal. Y31 Test button to check the operation of output Y31 and relay R6. Y31 can be used for either a 1 st Cycle signal or a second End of Bar (End of Bar 2) signal. Impulses Test button to check the operation of the output for Impulses. Pressing the button will turn on output Y32 and relay R7. Cycle Start Test button to check the operation of the output for Cycle Start. Pressing the button will turn on output Y33 and relay R8. 54
60 9. Factory Parameters Patriot Series Parameter Page 19 Manual Feed Provides visual aid to check the signal Manual Feed from the lathe. Button highlights when the signal is active. Input X16 will also be on. Manual Return Provides visual aid to check the signal Manual Return from the lathe. Button highlights when the signal is active. Input X17 will also be on. Manual / Auto Provides visual aid to check the signal Manual / Automatic from the lathe. Button highlights when the Auto signal is active. Input X33 will also be on. Lathe Door Safety Provides visual aid to check the signal Lathe Door Safety from the lathe. Button highlights when the signal is active. Input X37 will also be on. Lathe Alarm Provides visual aid to check the signal Lathe Alarm from the lathe. Button highlights when the signal is active. Input X34 will also be on. Feed Stop Provides visual aid to check the signal Feed Stop from the lathe. Button highlights when the signal is active. Input X36 will also be on. Bar Change Provides visual aid to check the signal Bar Change from the lathe. Button highlights when the signal is active. Input X35 will also be on. Collet Open Provides visual aid to check the signal Collet Open from the lathe. Button highlights when the signal is active. Input X33 will also be on. 55
61 9. Factory Parameters Patriot Series Parameter Page 20 User New Program Password Sets a password to be required before access to write a new barfeeder program is allowed. Default password is 0. User Load Program Password Sets a password to be required before access to load a new barfeeder program is allowed. Default password is 0. User Edit Program Password Sets a password to be required to allow a program to be edited. Default password is 0. Factory Password Sets a password to be required to access the factory parameters. Default password is 0. 56
62 9. Factory Parameters Patriot Series Parameter Page 21 User Page 2 Allows User Page 2 to be seen and accessed in User parameters when set to ON. User Page 4 Allows User Page 4 to be seen and accessed in User parameters when set to ON. User Page 5 Allows User Page 5 to be seen and accessed in User parameters when set to ON. User Page 6 Allows User Page 6 to be seen and accessed in User parameters when set to ON. Initial User Setup Used to set up the user s template for basic parameters. Max Feeding Position, Facing Position, Feeding Type, Facing Type, Remnant Type. These settings will be the default when the user begins to write a new part program. 57
63 10. Service Technician Parameters Patriot Series Parameter Page 22 Bar Change Return Speed Speed of the bar pusher as it retracts to the home position at the beginning of a bar change. 1 st Feed Speed 1 Speed of the pre-feed pusher as it advances until it reaches the slow down position. 1 st Feed Speed 2 Speed of the pre-feed pusher in the slow down position as it approaches facing position. This is the speed the pre-feed pusher uses in the pecking cycle. 1 st Feed Return Speed Speed of the pre-feed pusher as it retracts to the home position after completing the 1 st feed cycle. 58
64 10. Service Technician Parameters Patriot Series Parameter Page 23 Facing Speed 1 Forward speed of the bar pusher during the facing operation until it reaches the Facing Speed Slowdown Distance. Facing Speed 2 Forward speed of the bar pusher during the distance specified in the Facing Speed Slowdown Distance Parameter. Facing Speed Slowdown Distance Distance for the facing speed 2 and peck cycle to become active. This distance is measured from the facing position back toward the bar feeder. Facing Return Distance Distance the bar pusher backs up when the pecking cycle is active. 59
65 10. Service Technician Parameters Patriot Series Parameter Page 24 Manual Forward Speed Forward speed of the pusher and pre-feed pusher when commanded to move via the jog buttons or through the input for Manual Forward. Manual Forward Torque Sets the amount of force developed by the clutch when moving the bar pusher forward in manual mode via the jog buttons or through the input for Manual Forward. Manual Reverse Speed Speed of the pusher and pre-feed pusher in reverse when commanded to move via the jog buttons or through the input for Manual Reverse. Manual Reverse Torque Sets the amount of force developed by the clutch when moving the bar pusher backward in manual mode via the jog buttons or through the input for Manual Reverse. 60
66 10. Service Technician Parameters Patriot Series Parameter Page 25 Collet Close Speed Speed of the bar pusher motor in automatic mode when the lathe collet is closed. Collet Close Torque Sets the pushing force for the bar pusher when the bar feeder is in automatic mode and the lathe collet is closed. 1 st Anti-vibration Closing When set to on the 1 st Anti-Vibration device (steady rollers) will close as soon as the measuring flag is opened during a bar change. 61
67 10. Service Technician Parameters Patriot Series Parameter Page 26 Pusher Back Off Tolerance Sets an allowable distance for the bar pusher to move backward when the bar feeder is in automatic and the lathe collet is open. If the pusher moves backward in excess of the setting an alarm is generated. 62
68
69 11. Alarms Patriot Series -HMI Cable not attached to PLC - Check the cable from the PLC in the electrical cabinet (round black cable located on the front of the PLC next to the Run/Stop switch) to the back of the control panel (rectangular 9-pin plug connected to the COM 2 port). -Release E-Stop on Lathe - Make sure lathe is not in an alarm other than a bar feeder alarm. -Release E-Stop on Bar Feeder Pendant - The pendant E-Stop button will cause the relay R12 to turn off if the button is pressed. Check the relay. -Release E-Stop on Bar Feeder Control Panel - The e-stop circuit takes 24 volts DC through the Control panel e-stop button, through the R12 relay which is controlled by the Pendant e-stop button, through the JP2 jumper block to the interface, out to the lathe, back through the JP2 jumper block, to the green start button and to the coil of relay MC1. -Check relay K41 62
70 11. Alarms Patriot Series -K41 not energized -Torque setting exceeded - Reduce the Open Collet Torque on User Parameter page 3. -Max torque on time exceeded - Reduce the length of time the lathe collet is open when the bar feeder is in automatic. Inverter Alarm -Reset lathe e-stop -Reset lathe alarm -Check wiring on interface - Check for continuity between the wires for Emergency From Lathe (if used, check the interface drawing specific to the lathe). -Check input on PLC (X34) The input should change state when the lathe alarm is turned on and off (if used, check the interface drawing specific to the lathe). 63
71 11. Alarms Patriot Series -Check Air Pressure 6-8 Bar - If the pressure is low, adjust the regulator to increase setting. -Check the incoming pressure to the bar feeder - Observe the pressure gauge while the bar feeder operates. A rapid decrease in pressure as an air cylinder operates may indicate low volume. -Check Air Pressure Switch (Pressure is correct when red light is on) -Check input at PLC (X23) The X23 LED will be on when the signal from the switch indicates proper air pressure. -Reset Overload - The overload is attached to the MS1 relay. Press the blue button to reset. -Check overload setting - The setting range on the overload is from 1.2 to 1.6 amps. Normal setting is approximately 1.4 amps. -Check input on PLC (X27) The LED should be off when the relay MC1 (Servo Drive) is on. Check for continuity between MC1/1 and MC1/2. -Check collet ID size is correct size - Check the collapsed ID of the collet. 64
72 11. Alarms Patriot Series -Check air cylinder for operation - Operate the pusher shuttle without material in the collet to check for proper operation. -Check air valve for operation - Operate the pusher shuttle without material in the collet to check for proper operation. -Check flow controls on air cylinder - Open the flow control slightly (1/2 to 1 turn). -Check for kinked air lines running to the cylinder from the solenoid valve -Check output Y22 - Operate the shuttle and observe the output to make sure it turns on when commanding the shuttle to pull backward. -Check collet ID size is correct size - Check the collapsed ID of the collet. -Check for minimum chamfer of 3mm on the bar end -Check air cylinder for operation - Operate the pusher shuttle without material in the collet to check for proper operation. -Check air valve for operation - Operate the pusher shuttle without material in the collet to check for proper operation. -Check flow controls on air cylinder - Open the flow control slightly (1/2 to 1 turn) -Check for kinked air lines running to the cylinder from the solenoid valve -Check output Y22 - Operate the shuttle and observe the output to make sure it turns on when commanding the shuttle to pull backward. 65
73 11. Alarms Patriot Series -Not enough air pressure to lift channel Check the air pressure gauge. Increase pressure with the regulator if necessary. -Bind in channel opening mechanism Check for loose channel sections, alignment of pusher flag in opening, attachment of the air cylinder to the upper channel mechanism. -Pusher flag not lined up with opening Cycle the pusher shuttle. Check the attachment of the air cylinder to the shuttle mechanism. -Pusher not at home position Re-zero the bar pusher. -Not enough air pressure to lift channel Check the air pressure gauge. Increase pressure with the regulator if necessary. Open the flow control valves for channel close slightly -Bar interference with pusher hangers Check for material under the bar pusher. Material should be positioned with edge of the bar resting slightly on the edge of the guide channel. -Pusher flag not lined up with opening Cycle the pusher shuttle. Check the attachment of the air cylinder to the shuttle mechanism. -Pusher not at home position Re-zero the bar pusher. -Move material outside of gripper area Before the channel can open the grippers first check for material in the grippers. If a bar is present it must be moved forward so the grippers will not close on it. -Gripper sensor not detected Check the proximity switch on the gripper unit. -Check input on PLC (X7) 66
74 11. Alarms Patriot Series -Flag stuck in down position Manually operate the measuring flag. Check for debris impeding the operation of the flag. Check the flag for damage. -Material impeding flag movement Remove the material from the flag area. -Check flag sensor for operation Manually operate the flag and check to see that the LED on the proximity switch turns on when the flag is in the closed position. -Check input on PLC (X4) This input is operated by the S7 switch. The input should toggle with the opening and closing of the measuring flag. -Rezero barfeed Start with the guide channel closed and the pusher forward about 12 inches. Press and hold the forward and reverse buttons on the pendant. After 8 seconds the pusher will begin to move backward. Release the buttons. The pusher will move back to the proximity switch for zero and then stop. -Check home sensor for operation Move the bar pusher back and forth under the home proximity sensor and watch for the LED to toggle on and off. -Check input on PLC (X2) - Move the bar pusher back and forth under the home proximity sensor and watch for the input X2 to turn on and off. -Adjust max feed parameter position Verify the position -Check parameter collet or chuck mode Check the setting of this parameter, verify it is set correctly as the two parameters can have different max feed positions. -Rezero barfeed Start with the guide channel closed and the pusher forward about 12 inches. Press and hold the forward and reverse buttons on the pendant. After 8 seconds the pusher will begin to move backward. Release the buttons. The pusher will move back to the proximity switch for zero and then stop. 67
75 11. Alarms Patriot Series -Check pusher position The zero proximity switch must be on, the pusher position should read near 0. -Check zero proximity switch Move the pusher back and forward under the zero proximity switch and check that the LED lights, check input X2 - it should light when the proximity switch lights. -Rezero barfeed Start with the guide channel closed and the pusher forward about 12 inches. Press and hold the forward and reverse buttons on the pendant. After 8 seconds the pusher will begin to move backward. Release the buttons. The pusher will move back to the proximity switch for zero and then stop. -Check pusher position The zero proximity switch must be on, the pusher position should read near 0. -Check extraction proximity switch Verify proximity switch PS3 is on, verify input X3 is on. -Check zero proximity switch Move the pusher back and forward under the zero proximity switch and check that the LED lights, check input X2 - it should light when the proximity switch lights. -Rezero barfeed Start with the guide channel closed and the pusher forward about 12 inches. Press and hold the forward and reverse buttons on the pendant. After 8 seconds the pusher will begin to move backward. Release the buttons. The pusher will move back to the proximity switch for zero and then stop. 68
76 11. Alarms Patriot Series -Lathe collet was open longer than set time allowed in collet open timeout parameter -Lathe collet was closed longer than set time allowed in collet close timeout parameter -Pusher could not return to home sensor within the time allotted Check pusher flag for damage, check bar pusher for protruding roll pins. -Check for pusher impedance in channel Verify that channels are free of debris and are securely locked in place. -Remnant was not pulled out of lathe Check the part length parameter and feedout subparameters for correct settings. Part length should equal the actual part length + cutoff tool width + facing stock. Feedout subparameters combined should equal the part length setting. -Check for remnant in lathe or guide channel and remove -Check gripper sensor and PLC input (X7) 69
77 11. Alarms Patriot Series -Verify the Max Feed Position If the max feed position is set to a value higher than the actual position the lathe headstock may push the bar pusher off the material when retracting to re-grip for the last part. -Load bars on magazine -Check gripper sensor and adjust -Check input on PLC (X7) -Check collet position on lathe Verify state of the lathe collet and compare to the bar feeder screen to see if they match. -Check interface See interface drawing specific to the lathe, check connections for the collet open signal. -Check input on PLC (X23) The input should toggle on and off with the opening and closing of the lathe collet. -Check signal for collet close Verify that the lathe collet is not closed. -Check Y33 cycle start signal Output Y33 and relay R8 should turn on briefly when the bar feeder reaches the facing position. -Check input on PLC (X23) The input should toggle on and off with the opening and closing of the lathe collet. 70
78 11. Alarms Patriot Series -Check spindle for steps that catch bar -Check prefeed distance parameter - Setting should place the rear of the bar to rest slightly on the edge of the channel so the pusher collet will clear the bar when the channel closes. -Rotate the lathe spindle during the bar change If possible, rotate the lathe spindle at RPM during the bar change. Most lathes can do this through the bar change program. The bar feeder also has an Impulse relay that can be wired to the lathe to control the spindle revolution during the bar change (the lathe must have a provision for this signal). -Flashing or burrs on bar The front of the bar must be at least burr free and should have a small chamfer. -Steps in spindle A spindle liner may be required to provide a clear path for the material. A larger chamfer on the front end of the bar may help the material past the steps. -Collet too small for material A collet that is too small for the bar stock can cause the front of the collet to expand to a diameter larger than the bar pusher and make it more susceptible to catching on a step in the spindle or telescoping nose. -Material too large for lathe collet Verify the collet diameter versus the OD of the bar stock -Check signal from lathe Switch the lathe from Auto to Manual modes and check the signal to the bar feeder. -Check X32 input on PLC The X32 input changes state with the mode of the lathe. 71
79 11. Alarms Patriot Series -Leave lathe in auto during bar change Some lathes must be left in cycle to maintain the automatic signal. Turn of the single block mode and leave the lathe door closed during bar change. -Material feedout shorter than setting in parameter Check open collet torque setting. Check lathe collet/spindle for debris. Check for impedance to the bar pusher. -Set short feed value shorter than feedout needed for part The value should be set at least 1mm shorter than the part feedout. -Material feedout longer that setting in parameter Tighten the pusher drive chain. Verify the pusher collet is fully seated on the material. -Set long feed value longer than feedout for part The value should be set at least 1mm longer than the part feedout. -Material feedout shorter than setting in parameter Check open collet torque setting. Check lathe collet/spindle for debris. Check for impedance to the bar pusher. -Set short feed value shorter than feedout needed for part The value should be set at least 1mm shorter than the part feedout. 72
80 11. Alarms Patriot Series -Material feedout longer that setting in parameter Tighten the pusher drive chain. Verify the pusher collet is fully seated on the material. -Set long feed value longer than feedout for part The value should be set at least 1mm longer than the part feedout. -Material feedout shorter than setting in parameter Check open collet torque setting. Check lathe collet/spindle for debris. Check for impedance to the bar pusher. -Set short feed value shorter than feedout needed for part The value should be set at least 1mm shorter than the part feedout. -Material feedout longer that setting in parameter Tighten the pusher drive chain. Verify the pusher collet is fully seated on the material. -Set long feed value longer than feedout for part The value should be set at least 1mm longer than the part feedout. 73
81 11. Alarms Patriot Series -Material feedout shorter than setting in parameter Check open collet torque setting. Check lathe collet/spindle for debris. Check for impedance to the bar pusher. -Set short feed value shorter than feedout needed for part The value should be set at least 1mm shorter than the part feedout. -Material feedout longer that setting in parameter Tighten the pusher drive chain. Verify the pusher collet is fully seated on the material. -Set long feed value longer than feedout for part The value should be set at least 1mm longer than the part feedout. -Material feedout shorter than setting in parameter Check open collet torque setting. Check lathe collet/spindle for debris. Check for impedance to the bar pusher. -Set short feed value shorter than feedout needed for part The value should be set at least 1mm shorter than the part feedout. 74
82 11. Alarms Patriot Series -Material feedout longer that setting in parameter Tighten the pusher drive chain. Verify the pusher collet is fully seated on the material. -Set long feed value longer than feedout for part The value should be set at least 1mm longer than the part feedout. -Material feedout shorter than setting in parameter Check open collet torque setting. Check lathe collet/spindle for debris. Check for impedance to the bar pusher. -Set short feed value shorter than feedout needed for part The value should be set at least 1mm shorter than the part feedout. -Material feedout longer that setting in parameter Tighten the pusher drive chain. Verify the pusher collet is fully seated on the material. -Set long feed value longer than feedout for part The value should be set at least 1mm longer than the part feedout. 75
83 11. Alarms Patriot Series -When the bar feeder is in Auto and the lathe collet open, reverse movement in excess of 4mm was detected. -Check lathe is not pushing or pulling material back into barfeed Check the bar feeder synchronization device. Increase the dwell after the collet open before the re-grip. -Check lathe collet is not unclamping or is too tight at collet open Clean and adjust the lathe collet. -Close hood before start of bar change or channel open/close The safety switch on the hood sends a signal to the PLC input X21. Check the switch to make sure it is connected. -Check input on PLC (X21) Observe input X21 while opening and closing the hood. The input should change state with the motion of the hood. -Check speed of prefeed return The speed may be too slow to accomplish the return within the allotted time. -Check zero sensor Verify operation of the sensor by observing the LED on switch PS2 and input X2. -Check input X2 X2 should light when switch PS2 lights and turn off when switch PS2 turns off. -Check for impedance to the bar pusher Check for debris or protrusions in the spindle liner, telescoping nose and guide channel. Check for protruding roll pins on the bar pusher. 76
84 11. Alarms Patriot Series -Open lathe collet Verify that the lathe collet is open. -Check input X33 The input should turn on and off with the collet opening and closing. -Close the lathe door Verify that the lathe door is closed and the safety switches are enabled. -Check input X37 The input should turn on and off with the door opening and closing. -Load bar into barfeed Place material on the bar feeder magazine before the bar change begins. -Check operation and adjustment of the bar separators If the separators are not properly adjusted the bar stock may not fall into the channel. -Check the measuring switch The switch is on the measuring gate assembly. Verify operation of the switch by observing input X4 as the measuring flag is opened and closed. 77
85 11. Alarms Patriot Series -Adjust facing position Alarm occurs when facing mode is set to Turret Stop and the bar travels 5 25mm short of the turret stop or in excess of 250mm past the facing length. -Check S2 switch is on Verify that the LED of the PS2 switch is on when the pusher reaches the home position and that input X2 is on when the LED of PS2 is on. -Rezero Barfeed - Start with the guide channel closed and the pusher forward about 12 inches. Press and hold the forward and reverse buttons on the pendant. After 8 seconds the pusher will begin to move backward. Release the buttons. The pusher will move back to the proximity switch for zero and then stop. -Check S2 switch is on Verify that the LED of the PS2 switch is on when the pusher reaches the home position and that input X2 is on when the LED of PS2 is on. -Check S3 switch is on Verify that the LED of the PS3 switch is on when the pusher is retracted to the remnant extraction position and that input X3 is on when the LED of PS3 is on. -Rezero Barfeed - Start with the guide channel closed and the pusher forward about 12 inches. Press and hold the forward and reverse buttons on the pendant. After 8 seconds the pusher will begin to move backward. Release the buttons. The pusher will move back to the proximity switch for zero and then stop. 78
86
87
88
89
90
91
92
93
94
95
96
97
98
99
100
101
102
103
104
105
106
107
108
109
110
111
112
113
114
115
116
117
118
119
120
121
122
123
124
125
126
127
128
129
130
131
132
133
134
135
136
137
138
139
140
141
142
143
144
145
146
147
148
149
150
151
152
153 OPERATIONS MANUAL Technical data subject to change without notice EDGE TECHNOLOGIES A DIVISION OF HYDROMAT INC ADIE ROAD MARYLAND HEIGHTS, MO f
SECTION G2: CABLE PROCESSOR MODULE MAINTENANCE
 SECTION G2: CABLE PROCESSOR MODULE MAINTENANCE Cable Processor Module overview WARNING! When tipping the Cable Processor Module back, (after removing the toggle arm pin), use extreme caution not to drop
TABLE OF CONTENTS. I. TROUBLESHOOTING... 2 - Section 1.01: Common Problems/Solutions... 2
 BAL Accu-Slide System I. Table of Contents TABLE OF CONTENTS I. TROUBLESHOOTING... 2 - Section 1.01: Common Problems/Solutions... 2 II. GETTING STARTED... 5 - Section 2.01: Tools You Will Need... 5 - Section
INSTALLATION AND OPERATING INSTRUCTIONS For Model GL1 Gate Locks
 Securitron Magnalock Corp. www.securitron.com ASSA ABLOY, the global leader Tel 800.624.5625 [email protected] in door opening solutions INSTALLATION AND OPERATING INSTRUCTIONS For Model GL1 Gate
OPL BASIC. Dosing System for Professional Laundry machines. Contents
 OPL BASIC Dosing System for Professional Laundry machines Contents 1 Getting Started. Page 2 2 Installation. Page 4 3 Set Up & Operation. Page 8 4 Maintenance & Accessories. Page 10 5 Troubleshooting Page
Guidelines for Earthquake Bracing of Residential Water Heaters
 Guidelines for Earthquake Bracing of Residential Water Heaters Department of General Services Division of the State Architect 1102 Q Street, Suite 5100 Sacramento, CA 95814 Phone: (916) 324-7099 Fax: (916)
SELF-STEERING AXLE TABLE OF CONTENTS
 SELF-STEERING AXLE TABLE OF CONTENTS Section 1 - Introduction Section 2 - Pre-Installation Check List Section 3 - Ride Height Adjustments Section 4 - Suspension Mount Section 5 - Axle Mount Section 6 -
STEADYfast Stabilizer Installation Notes Fifth Wheel and Travel Trailers 11/23/13
 STEADYfast Stabilizer Installation Notes Fifth Wheel and Travel Trailers 11/23/13 (See Supplemental Instructions for trailers with heavy duty round footplates and/or Power Leveling Systems) PHONE SUPPORT
Owner s Manual Gantry Cranes
 Owner s Manual Gantry Cranes Fixed Height Gantry Crane MODEL NUMBER: SERIAL NUMBER: CAPACITY IN TONS: Telescoping Gantry Crane Bushman AvonTec 262-790-4200, 800338-7810, Fax 262-790-4200 www.bushmanavontec.com
MGB Chrome Bumper Conversion
 MGB Chrome Bumper Conversion Installation Instructions For 1974 1/2-1980 MGB This kit requires cutting, welding, and painting. Professional installation recommended. Note: Every MGB body is slightly different
2100 AD 015 0009 Mirror Elevator Ball Nut Replacement Procedure
 2100 AD 015 0009 Mirror Elevator Ball Nut Replacement Procedure Derek Guenther 1/28/2015 Rev. Purpose The purpose of this document is to describe the procedure necessary to replace one of the ball nuts
TL-Series Sub-Spindle Operator s Addendum
 3 4 5 11 9 TL-Series Sub-Spindle Operator s Addendum 2 1 12 10 6 7 8 20HP VECTOR DUAL DRIVE LIVE TOOLING SUB SPINDLE 2008 Haas Automation, Inc. 96-0037 rev L 9/08 1 1. Introduction Specific M codes are
Small Flat Panel Lift Arm FSA-1004 and KSA-1004
 I N S T A L L A T I O N I N S T R U C T I O N S Small Flat Panel Lift Arm FSA-1004 and KSA-1004 The Lift Arm is an accessory that can be used with a broad range of Small Flat Panel Displays. The allows
Rebuild Instructions for 70001 and 70010 Transmission
 Rebuild Instructions for 70001 and 70010 Transmission Brinn, Incorporated 1615 Tech Drive Bay City, MI 48706 Telephone 989.686.8920 Fax 989.686.6520 www.brinninc.com Notice Read all instructions before
Service Manual Rol-Lift
 R 2000 Service Manual Rol-Lift Series: T and E Developed by Generic Parts Service This manual is intended for basic service and maintenance of the Rol-Lift pallet jack. The pallet jacks you are servicing
Pump Skid Fabrication for Magnetic Coupling. Rick Soltis Chief Mechanic City of Bedford
 Pump Skid Fabrication for Magnetic Coupling Rick Soltis Chief Mechanic City of Bedford Contents Magnetic Couplings What They Are, How They Work, Where They re Used Fabrication and Manufacturing of Pump
POSEIDON 2-29, 2-25 & 2-22 POSEIDON 2-29, 2-25 & 2-22 XT
 POSEION 2-29, 2-25 & 2-22 POSEION 2-29, 2-25 & 2-22 XT Repair Manual Index A. Safety precautions 3 B. Technical data 4 C. Structure 5-6. Service / Repair 7-23 E. Tools 24 F. Function 25-26 G. Electric
Operating Instructions Parts List Manual Scissor Lift Pallet Truck
 Operating Instructions Parts List Manual Scissor Lift Pallet Truck Note: Operator MUST read and understand this operating instructions before use this Hand Scissor Lift. Thank you for using this hand scissors
Fuel Injection Pump, Rotary (005-014)
") Fuel Injection Pump, Rotary View Related Topic Page 1 of 30 Fuel Injection Pump, Rotary (005-014) Table of Contents Summary General Information Preparatory Steps Remove Front Gear Train Rear Gear Train
Fuel Injection Pump, Rotary View Related Topic Page 1 of 30 Fuel Injection Pump, Rotary (005-014) Table of Contents Summary General Information Preparatory Steps Remove Front Gear Train Rear Gear Train
Pallet Jack. OWNER S MANUAL Model MH1230. Important Safety Instructions Assembly Instructions Parts and Hardware Identification
 OWNER S MANUAL Model MH1230 Important Safety Instructions Assembly Instructions Parts and Hardware Identification Pallet Jack CAUTION: Read, understand and follow ALL instructions before using this product
Elo Touch Solutions Wall-mounting Kit for the 5501L IDS Touchmonitors
 Installation Manual Elo Touch Solutions Wall-mounting Kit for the 5501L IDS Touchmonitors SW602206 Rev B Table of Contents Chapter 1: Safety Warning... 3 Chapter 2: Kit Contents... 4 Included in Kit...
For exploded diagram and part number information, refer to the Spare Parts Catalog available on our website at www.rockshox.com.
 For exploded diagram and part number information, refer to the Spare Parts Catalog available on our website at www.rockshox.com. Information contained in this publication is subject to change at anytime
Vision Engravers and Routers PRE-Installation Guide. 2015 Vision Engraving & Routing Systems
 Vision Engravers and Routers PRE-Installation Guide Revised: 8/19/2015 Vision Engravers and Routers PRE-Installation Guide All rights reserved. No parts of this work may be reproduced in any form or by
SET-UP AND INSTALLATION FOR LEAD SCREW CARTRIDGE ASSEMBLY
 SET-UP AND INSTALLATION FOR LEAD SCREW CARTRIDGE ASSEMBLY 82-13-1 O-Ring (Rear) The Lead Screw Assembly is shipped separately. Note: Install Electrical and Pneumatic Circuitry. Be Sure electrical and pneumatic
Guidelines for Earthquake Bracing Residential Water Heaters
 Guidelines for Earthquake Bracing Residential Water Heaters Department of General Services Division of the State Architect In accordance with the Health and Safety Code Section 19215, the Division of the
HYDRAULIC TABLE CART 500-LB.
 HYDRAULIC TABLE CART 500-LB. OWNER S MANUAL WARNING: Read carefully and understand all MACHINE ADJUSTMENT AND OPERATION INSTRUCTIONS before operating. Failure to follow the safety rules and other basic
TS93 EMR T/PT/TDE. Surface applied door closer
 TS EMR T/PT/TDE Surface applied door closer Installation instructions: Pull side track mount door closer with smoke detector (EMR T) Push side track mount door closer with smoke detector (EMR PT) Double
Char-Lynn Hydraulic Motor. Repair Information. 10 000 Series. October, 1997
 Char-Lynn Hydraulic Motor October, 1997 Repair Information Geroler Motor Two Speed 001 27 Retainer inside bore of valve plate bearingless motors only 4 15 16 3 6 35 Parts Drawing 25 2 2 1 19 17 36 40 47
TECHNICAL INFORMATION
 TECHNICAL INFORMATION Models No. 2012NB Description 304mm (12") Automatic Thickness Planer CONCEPTION AND MAIN APPLICATIONS * Compact and light weight (27 Kg./59 lbs) automatic thickness planer for easier
IMPORTANT DOCUMENTATION DO NOT DISCARD!
 PART NO.: 6441-263C SERIES GRT 3 JAW PARALLEL GRIPPERS INFORMATION SHEET IMPORTANT DOCUMENTATION DO NOT DISCARD! Use this information sheet to assist with gripper installation and setup. File with maintenance
16 April 2012 1032011-F 1994-2002 Dodge Adjustable Track bar with Relocation Bracket 1
 16 April 2012 1032011-F 1994-2002 Dodge Adjustable Track bar with Relocation Bracket 1 BD Adjustable Track Bar w/bracket Dodge 2500-3500 4WD Models 1994-2002 Dodge 1500 4WD Model 1994-2001 P/N# 1032011-F
LU6X-130 Instructions and Parts List (including LU6X Basic) Operating Instructions
 Operating Instructions") LORTONE LU6X-130 Item # 061-092 LU6X Basic Item # 061-090 LU6X-130 Instructions and Parts List (including LU6X Basic) Operating Instructions Introduction The LU6X is one the most versatile pieces of equipment
LORTONE LU6X-130 Item # 061-092 LU6X Basic Item # 061-090 LU6X-130 Instructions and Parts List (including LU6X Basic) Operating Instructions Introduction The LU6X is one the most versatile pieces of equipment
ATS Overhead Table Shelf System INSTRUCTION MANUAL
 ATS Overhead Table Shelf System INSTRUCTION MANUAL ATS Overhead Table Shelf System Instruction Manual Warranty Newport Corporation warrants this product to be free of defects in material and workmanship
DIAMOND Retractable Rodding Robot Model SPRAYROD-R
 2004-12-21 2 1 (23) DIAMOND Retractable Rodding Robot Model SPRAYROD-R 2004-12-21 2 2 (23) Table of contents 1 TECHNICAL DESCRIPTION...4 1.1 MAIN DETAILS...5 1.2 COMPONENTS DESCRIPTION...5 1.2.1 Pneumatic
DUGARD. Machine Tools Since 1939. Dugard 700L Series Heavy Duty CNC Lathes. www.dugard.com
 DUGARD Machine Tools Since 1939 Dugard 700L Series Heavy Duty CNC Lathes www.dugard.com Dugard 700L Heavy Duty CNC Lathe 2000, 3000 or 4000mm bed length Designed for easy and convenient operation The concave
Table of Contents. Overview 1. Pump Disassembly 2. Control Disassembly / Reassembly 7. Pump Reassembly 13. Adjustment Procedures DR Control 19
 Table of Contents Overview 1 Pump Disassembly 2 Control Disassembly / Reassembly 7 Pump Reassembly 13 Adjustment Procedures DR Control 19 Adjustment Procedures DRG Control 20 Adjustment Procedures DFR
MODEL T200-F18 MODEL T125-F18 Finish Nailers
 P MODEL T200-F18 MODEL T125-F18 Finish Nailers IMPORTANT! DO NOT DESTROY It is the customer s responsibility to have all operators and service personnel read and understand this manual. OPERATING MANUAL
For exploded diagram and part number information, refer to the Spare Parts Catalog available on our website at www.rockshox.com.
 For exploded diagram and part number information, refer to the Spare Parts Catalog available on our website at www.rockshox.com. 2 0 0 5 D U K E A I R X C / S L / R A C E S E R V I C E G U I D E Information
Auto-belay Cable Replacement Process
 Auto-belay Cable Replacement Process Version 2.00 WARNING: The air pressure in the auto-belay system is what causes the cable to be retracted when releasing the cable or climbing the wall with the cable
INSTRUCTIONS THOROUGHLY BEFORE BEGINNING***************
 Bill of Materials: RAC0012 Green Wing Aerodynamic Skirt Kit Item Part Number Description Quantity 1 RMC0218 Gen 2 Trailer Skirt Roadside 1 2 RMC0219 Gen 2 Trailer Skirt Curbside 1 3 RMC0041 Trailer Skirt
BUILT-IN DISHWASHER INSTALLATION INSTRUCTIONS
 BUILT-IN DISHWASHER INSTALLATION INSTRUCTIONS PLEASE READ COMPLETE INSTRUCTIONS BEFORE YOU BEGIN LEAVE INSTALLATION INSTRUCTIONS AND USER'S GUIDE WITH OWNER ALL ELECTRIC WIRING AND PLUMBING MUST BE DONE
Lathe Milling Attachment
 Lathe Milling Attachment By L C. MASON BY CLEVERLY stacking cold-rolled flat stock together, T-slots and slide for this lathe milling attachment are made without costly machinery. In fact, only two tools,
SunMaxx Solar Filling Station Operating Instructions
 SunMaxx Solar Filling Operating Instructions Content 1. Declaration of conformity... 2 2. Introduction... 2 3. Transportation and unpacking... 4 4. Mounting and commissioning... 5 5. End of operation...
All-Season Sunroom Sliding Glass Door Installation Instructions
 ASRESGD-08 All-Season Sunroom Sliding Glass Door Installation Instructions Panel Frame Door Frame Left Side Foam Insulator IE241 H Bar Assembly Door Frame Top Track Panel Frame Door Frame Right Side Stationary
Series 30000 Hose Reels
 Operating Instructions and Parts List for Series 30000 Hose Reels - MANUAL DRIVEN - - POWER DRIVEN - SAFETY PRECAUTIONS Personal injury and/or equipment damage may result if proper safety precautions are
PRS X-axis E-chain installation: For tools with a 12 Z-Axis
 PRS X-axis Energy Chain (Echain) Installation Page -1- PRS X-axis E-chain installation: For tools with a 12 Z-Axis This kit is compatible with PRS Shopbots that have an X-axis cutting area of 96 to 144.
Step-by-step instructions:
 Spark plug thread repair for Ford Triton cylinder heads Step-by-step instructions: Identification Installation Verification Specifically designed and tested for 4.6L, 5.4L, and 6.8L 2 and 4 valve heads,
SERVICE MANUAL. Corpus 3G. Seat system for electric wheelchair
 SERVICE MANUAL US Corpus 3G Seat system for electric wheelchair How to contact Permobil Head Office of the Permobil group Produced and published by Permobil AB, Sweden Version 4, 2014-07 Item No.: 205260-US-0
1.8 CRANKSHAFT OIL SEALS
 SERIES 60 SERVICE MANUAL 1.8 CRANKSHAFT OIL SEALS An oil seal is fitted between each end of the crankshaft and the bores of the flywheel housing and gear case cover to retain the lubricating oil in the
GUTTER MACHINE CONTROLS STANDARD
 GUTTER MACHINE CONTROLS STANDARD Note: determine what type of control package is installed on the machine. --more-- All operators should familiarize themselves with the appropriate controls prior to any
Installation Manual. SKU# 21000 series (Base Rails) SKU# 22000 series (Overhead Racks)
 SKU# 22000 series (Overhead Racks)") Installation Manual SKU# 21000 series (Base Rails) SKU# 22000 series (Overhead Racks) Welcome to the world of TracRac! We re delighted that you have chosen TracRac, the ultimate sliding truck rack system.
Installation Manual SKU# 21000 series (Base Rails) SKU# 22000 series (Overhead Racks) Welcome to the world of TracRac! We re delighted that you have chosen TracRac, the ultimate sliding truck rack system.
Operating Manual. Los Angeles Abrasion Machine HM-70A & HM-70AF
 Operating Manual Los Angeles Abrasion Machine HM-70A & HM-70AF Rev: 07/19/2012 PHONE: 800-444-1508 P.O. Box 200, Lewis Center, Ohio 43035-0200 FAX: 800-255-5314 740-548-7298 E-mail: [email protected]
758 Heavy-duty Ratchet Guy Wire Cutter
 INSTRUCTION MANUAL 758 Heavy-duty Ratchet Guy Wire Cutter Read and understand all of the instructions and safety information in this manual before operating or servicing this tool. Register this product
S&G Model 2937 Group 1 Combination Lock
 Installation and Combination Changing Instructions S&G Model 2937 Group 1 Combination Lock NOTE: READ COMPLETE INSTRUCTIONS BEFORE INSTALLATION These instructions should be followed when installing the
C O N V E Y O R C O M P O N E N T S C H A I N S B E L T S B E A R I N G S
 C O N V E Y O R C O M P O N E N T S C H A I N S B E L T S B E A R I N G S January 2009 Issue 6 Valu Guide Brackets The Ultimate in Adjustability and Cost Savings Valu Guide brackets are part of a family
4 in 1 Strength Station
 Revision 0 September 2010 4 in 1 Strength Station Owner s Manual Record Serial Number Here Platinum by Tunturi www.tunturi.com Date www.tunturi.com of Purchase 4 in 1 Strength Station Owner s Manual Instructions
USE &CARE GUIDE. Remote Faucet Pump System. See Important Safeguards on page 2
 Remote Faucet Pump System USE &CARE GUIDE See Important Safeguards on page 2 An exclamation point within an equilateral triangle is intended to alert user to the presence of important operating and maintenance
Volkswagen B3 Passat Manual Transmission 02A 34 Manual Transmission - Controls, Assembly (Page GR-34) 02A 5-speed. Gearshift cable/lever installing
 02A 5-speed. Gearshift cable/lever installing") 34 Manual Transmission - Controls, Assembly (Page GR-34) 02A 5-speed Gearshift cable/lever installing Gearshift housing repairing Gearshift lever repairing lever/relay lever, installing Gearshift mechanism
34 Manual Transmission - Controls, Assembly (Page GR-34) 02A 5-speed Gearshift cable/lever installing Gearshift housing repairing Gearshift lever repairing lever/relay lever, installing Gearshift mechanism
CHIPPING HAMMERS. 9949 Tabor Place, Santa Fe Springs, California, CA 90670, U.S.A.
 CHIPG HAMMERS Website: www.apt-tools.com e-mail: [email protected] TDS-1056 Rev A CHIPG HAMMERS TOOL MAINTENANCE & REPAIR INFORMATION FIELD OPERATION: Before use: 1. On 650 Series tools, tighten the handle
HYDRAULIC LIFT TABLE CART 2200-LB.
 HYDRAULIC LIFT TABLE CART 2200-LB. OWNER S MANUAL WARNING: Read carefully and understand all MACHINE ADJUSTMENT AND OPERATION INSTRUCTIONS before operating. Failure to follow the safety rules and other
INSTALLATION and OPERATION RANGE BALL CONVEYOR MODEL NO: BC-001AN
 Easy Picker Golf Products, Inc. 415 Leonard Blvd. N., Lehigh Acres, FL 33971 PH: 239-368-6600 FAX: 239-369-1579 Service: 800-982-4653 SALES: 800-641-4653 www.easypicker.com [email protected] INSTALLATION
Cooktop Low-Profile Ventilation Hoods
 INSTALLATION GUIDE Cooktop Low-Profile Ventilation Hoods Contents Wolf Cooktop Low-Profile Ventilation Hoods........ 3 Cooktop Low-Profile Hood Specifications.......... 4 Cooktop Low-Profile Hood Installation............
SLACK PERFORMANCE KARTS
 SLACK PERFORMANCE KARTS SET UP GUIDE Thank you for purchasing a 2013 Slack Axiom Chassis. Performance Mfg. strives to provide you with the very best chassis and components on the market today. Your satisfaction
AstroSystems Digital Setting Circles for Zhumell, GSO, Apertura and Astro-Tech
 AstroSystems Digital Setting Circles for Zhumell, GSO, Apertura and Astro-Tech Components 1 Sky Commander Digital Setting Circle Computer 2 Encoders 10,000 step 1 Sky Commander Digital Setting Circle Manual
Daily Operator Checks. Monthly Maintenance
 CUSTOMER DATE OF INSPECTION SERIAL # RSF # UI Rev # PLC Project # SERVICE REPRESENTATIVE Daily Operator Checks Verify that all safety guards are in place. Verify that all safety signs are in proper location
OWNER S MANUAL Table Tennis Table Patent Pending
 OWNER S MANUAL Table Tennis Table Patent Pending Be sure to write your model number and serial number here for future reference. You can find these numbers printed on the bottom of the table. MODEL # T8179
INSTRUCTIONS. FLHR/C/S (Road King) FRONT END LOWERING KIT 1WARNING -J03242 REV. 10-19-04. General. Removal (Left and Right Forks) Kit Number 54614-05
 FRONT END LOWERING KIT 1WARNING -J03242 REV. 10-19-04. General. Removal (Left and Right Forks) Kit Number 54614-05") INSTRUCTIONS -J04 REV. 0-9-04 General FLHR/C/S (Road King) FRONT END LOWERING KIT This kit is designed for installation on 00 and later FLHR/C/S Model Motorcycles. Road King models use the conventional
INSTRUCTIONS -J04 REV. 0-9-04 General FLHR/C/S (Road King) FRONT END LOWERING KIT This kit is designed for installation on 00 and later FLHR/C/S Model Motorcycles. Road King models use the conventional
Speed-Mat Rectangle Cutter
 Speed-Mat Rectangle Cutter 1 Honeycomb baseboard. 2 Left hold down. 14 3 Bottom hold down. 4 4 Left / right rule. 8 5 8 5 Left / right rule pointer. 1 6 Top / bottom rule. 7 Top / bottom rule pointer.
Installation information. METTLER TOLEDO MultiRange Floor scales / Pit scales
 Installation information METTLER TOLEDO MultiRange Floor scales / Pit scales KC300/KCS300 KC600/KCS600 KD600/KD1500 KE1500/KE3000 KES1500/KES3000 KG3000/KG6000 KN1500 Floor scales / Pit scales Contents
Operating, Installation, and Maintenance Instructions
 ELKHART BRASS MFG. CO., INC. 1302 WEST BEARDSLEY AVENUE P.O. BOX 1127 ELKHART IN 46515 (574) 295-8330 FAX (574) 293-9914 Operating, Installation, and Maintenance Instructions RAM Personal Portable Monitor
MODEL E-AF. Drain Cleaning Machine. Operator s Manual
 MODEL E-AF Drain Cleaning Machine Operator s Manual!!!! FOR YOUR SAFETY Before you operate or maintenance this equipment, READ this manual carefully and completely! Purchase Date: Serial Number: ELECTRIC
Char-Lynn Spool Valve Hydraulic Motors. Repair Information. W Series Geroler Motors
 Char-Lynn Spool Valve Hydraulic Motors Repair Information W Series Geroler Motors with Parking Brake 004 Nut Key Ring, Retaining Bearing Ring, Retaining Ring, Retaining Washer (Thick), Pressure Washer,
INSTRUCTION. Industrial Sewing Machines. No. 010012. First published : June 1997 Second edition : March 2001
 INSTRUCTION Industrial Sewing Machines First published : June 1997 Second edition : March 2001 No. 010012 INTRODUCTION Thank you for your purchasing Kansai Special's DLR Series. Read and study this instruction
VCE VET ENGINEERING STUDIES
 Victorian Certificate of Education 2013 SUPERVISOR TO ATTACH PROCESSING LABEL HERE STUDENT NUMBER Letter Figures Words VCE VET ENGINEERING STUDIES Written examination Section Wednesday 20 November 2013
Railgates By THIEMAN IMPORTANT! KEEP IN VEHICLE! PLEASE READ AND UNDERSTAND THE CONTENTS OF THIS MANUAL BEFORE OPERATING THE EQUIPMENT.
 TVL SERIES Railgates By THIEMAN TVL 20, TVL 30, TVL 20A, TVL 30A OWNERS MANUAL/PARTS LIST! IMPORTANT! KEEP IN VEHICLE! PLEASE READ AND UNDERSTAND THE CONTENTS OF THIS MANUAL BEFORE OPERATING THE EQUIPMENT.
Operating Instructions Drill rig DRU160
 Operating Instructions Drill rig DRU160 Index 000 / 001 Original operating instructions 10988825 en / 20.10.2009 Congratulations! With a Hydrostress unit from TYROLIT you have chosen a tried and tested
42U/45U 28" Wide Rack Installation & Service Guide
 42U/45U 28" Wide Rack Installation & Service Guide 96-00171-005 Rev B Important Information Information in this document is subject to change without notice and does not represent a commitment on the part
Table of Contents. www.hunterfan.com. What to Expect with. Preparation. Tools Needed. Wiring. Hanging the Fan. Blades. Motor Housing.
 www.hunterfan.com Table of Contents What to Expect with Your Installation 30 inches Hanging the Fan Wiring 8 Maintenance, Operation & Cleaning Light Kit 13??? 14 1 9 Troubleshooting 11 5 Blades Motor Housing
SE-1200-EI. Operation & Parts Manual
 SE-1200-EI Operation & Parts Manual SE 1200 EI OWNERS MANUAL Table of Contents 1. Installation guide 2. Set-up instructions 3. Operation instructions 4. Cleaning 5. Troubleshooting 6. Parts manual 7. Electrical
INSTALLATION MANUAL. Contents JAPANESE ENGLISH GERMAN FRENCH ITALIAN SPANISH. To the installing technician: CEILING BRACKET
 Be sure to read this installation manual thoroughly prior to installation. If installation methods or non-standard parts not specified in this installation manual are used, accidents or injury may result.
Drive shaft, servicing
 Volkswagen Passat B6 - Drive shaft, servicing Стр. 1 из 41 40-7 Drive shaft, servicing Drive shafts, overview I - Assembly overview: Drive axle with CV joint VL100 40-7, Drive axle with CV joint VL100,
Slide the new steering column shaft through the steering column from the driver compartment.
 Slide the new steering column shaft through the steering column from the driver compartment. Push the column shaft through the steering column until the machined end is out past the column lower bushing.
Fleck 4650. Service Manual INSTALLATION AND START-UP PROCEDURE TABLE OF CONTENTS JOB SPECIFICATION SHEET
 Fleck 4650 Service Manual TABLE OF CONTENTS JOB SPECIFICATION SHEET...1 INSTALLATION AND START-UP PROCEDURE...1 CONTROL VALVE DRIVE ASSEMBLY...2 CONTROL DRIVE ASSEMBLY FOR CLOCK...3 BYPASS VALVE ASSEMBLY...4
Operating instructions. SCORP 220 Plus SCORP 360. Pipe Cutter. Code 790 014 762 Machine-no.:
 precision. power. simplicity. Operating instructions Pipe Cutter SCORP 220 Plus SCORP 360 Code 790 014 762 Machine-no.: All rights reserved, in particular the rights of duplication and distribution as
TRANS-05, Torque Tube Removal, Rebuilding, and Installation
 TRANS-05, Torque Tube Removal, Rebuilding, and Installation Tools Metric Wrench Set Metric Socket Set Jack Stands (6 minimum) Floor Jack 8mm Cheesehead socket (also referred to as 12 point internal socket
MACBlower Model Number: MAC40R MAC60R MAC80R MAC100R. MAC120R MAC150R MAC 200R Serial # www.macblowers.com
 MACBlower Model Number: MAC40R MAC60R MAC80R MAC100R MAC120R MAC150R MAC 200R Serial # Fuji Clean USA 41-2 Greenwood Road Brunswick, Maine 04011 207-406-2729 www.macblowers.com MACBlowers The Intelligent
WARNING! DO NOT ATTEMPT TO INSTALL THIS KIT IN A POWERED CONVEYOR.
 Model: Document Number: 64058111 Kit Number: 64058112 Revision: 02 Description: Release Date: 04/08 Introduction This kit allows a PS90 scale to be integrated into a standard gravity conveyor. The kit
Important: Please read these instructions carefully and completely before starting the installation. TITAN Fuel Tanks
 TITAN pt. no.: 03 0000 0120 Important: Please read these instructions carefully and completely before starting the installation. TITAN Fuel Tanks INSTALLATION INSTRUCTIONS G e n e r a t i o n V Extended
INSTRUCTIONS AND PARTS LIST FOR MODEL 70H & 75H HAND-OPERATED HYDRAULIC PRESS
 INSTRUCTIONS AND PARTS LIST FOR MODEL 70H & 75H HAND-OPERATED HYDRAULIC PRESS SETTING UP THE PRESS FOR OPERATION For shipping convenience, the gauge, pump handle, hoist crank, screw nose and base angles
IMPORTANT SAFETY RULES TO FOLLOW
 WARNING FLOOR & CARPET CLEANER Any piece of equipment can be dangerous if not operated properly. YOU are responsible for the safe operation of this equipment. The operator must carefully read and follow
LUCCI AIRFUSION QUEST II CEILING FAN
 LUCCI AIRFUSION QUEST II CEILING FAN WITH IR REMOTE INSTALLATION OPERATION MAINTENANCE WARRANTY INFORMATION CAUTION READ INSTRUCTIONS CAREFULLY FOR SAFE INSTALLATION AND FAN OPERATION. V1.0 QUEST II IR
Resharpening Companion
 Resharpening Companion 10950 Correct Angles, Pictures, and Step-By-Step Instructions The Resharpening Companion is meant to be a guide and quick reference to help you resharpen. It is not meant to replace
SAFETY & OPERATING INSTRUCTIONS
 SAFETY & OPERATING INSTRUCTIONS EDLUND TOMATO LASER, Models ETL -316, -140 & -380 READ AND UNDERSTAND THIS MANUAL AND ALL INSTRUCTIONS BEFORE OPERATING THIS SLICER. 159 Industrial Parkway, Burlington,
Rear wheel brakes, servicing. Стр. 1 из 45. Note:
 Volkswagen Touareg - Rear wheel brakes, servicing Стр. 1 из 45 46-2 Rear wheel brakes, servicing Rear brakes, FN 44 brake caliper, servicing Note: After replacing brake pads, depress brake pedal firmly
FJ2. 2 Ton Trolley Floor Jack Assembly & Operating Instructions
 FJ2 2 Ton Trolley Floor Jack Assembly & Operating Instructions READ ALL INSTRUCTIONS AND WARNINGS BEFORE USING THIS PRODUCT. This manual provides important information on proper operation & maintenance.
Number Wheeler P/N Description Set Rex P/N Notes 1 603500 Base 1 J001 2 603501 Support, Right 1 J002 3 603502 Support, Left 1 J003 4 600328 Nut (M8)
") 1 603500 Base 1 J001 2 603501 Support, Right 1 J002 3 603502 Support, Left 1 J003 4 600328 Nut (M8) 4 5 600130 Spring Washer (8mm) 4 6 600344 Roll Pin (M6x30) 4 7 600129 Socket Hd Cap Screw (M8x25) 4 8
1 603500 Base 1 J001 2 603501 Support, Right 1 J002 3 603502 Support, Left 1 J003 4 600328 Nut (M8) 4 5 600130 Spring Washer (8mm) 4 6 600344 Roll Pin (M6x30) 4 7 600129 Socket Hd Cap Screw (M8x25) 4 8
GEK-90214B. GE Lift Truck. User s Guide 144D2933G1 144D2912G1 144D2911G5
 g GEK-90214B GE Lift Truck User s Guide 144D2933G1 144D2912G1 144D2911G5 GE LIFT TRUCK EACH USER HAS THE RESPONSIBILITY TO INSTRUCT ALL PERSONNEL ASSOCIATED WITH THIS EQUIPMENT ON ALL SAFETY PRECAUTIONS
Unit 24: Applications of Pneumatics and Hydraulics
 Unit 24: Applications of Pneumatics and Hydraulics Unit code: J/601/1496 QCF level: 4 Credit value: 15 OUTCOME 2 TUTORIAL 4 DIRECTIONAL CONTROL VALVES The material needed for outcome 2 is very extensive
OPERATING INSTRUCTIONS FOR
 OPERATING INSTRUCTIONS FOR MEDECO KEY MACHINES FOR MEDECO ORIGINAL, BIAXIAL, MEDECO 3, KEYMARK CLASSIC & KEYMARK X4 PRODUCTS MEDECO HIGH SECURITY LOCKS ASSUMES NO RESPONSIBILITY FOR INJURY OR PROPERTY
UPLIFT Height Adjustable Standing Desk (T-Frame) DIRECTIONS FOR ASSEMBLY AND USE - - ALSO - - Watch our assembly video
 DIRECTIONS FOR ASSEMBLY AND USE - - ALSO - - Watch our assembly video") UPLIFT Height Adjustable Standing Desk (T-Frame) DIRECTIONS FOR ASSEMBLY AND USE - - ALSO - - Watch our assembly video http://bit.ly/9ywwh! CAUTION MAKE SURE NO OBSTACLES ARE IN THE DESK S PATH AND ALL
UPLIFT Height Adjustable Standing Desk (T-Frame) DIRECTIONS FOR ASSEMBLY AND USE - - ALSO - - Watch our assembly video http://bit.ly/9ywwh! CAUTION MAKE SURE NO OBSTACLES ARE IN THE DESK S PATH AND ALL