USER GUIDE Roomplayer I & II
|
|
|
- Alexina Pope
- 10 years ago
- Views:
Transcription
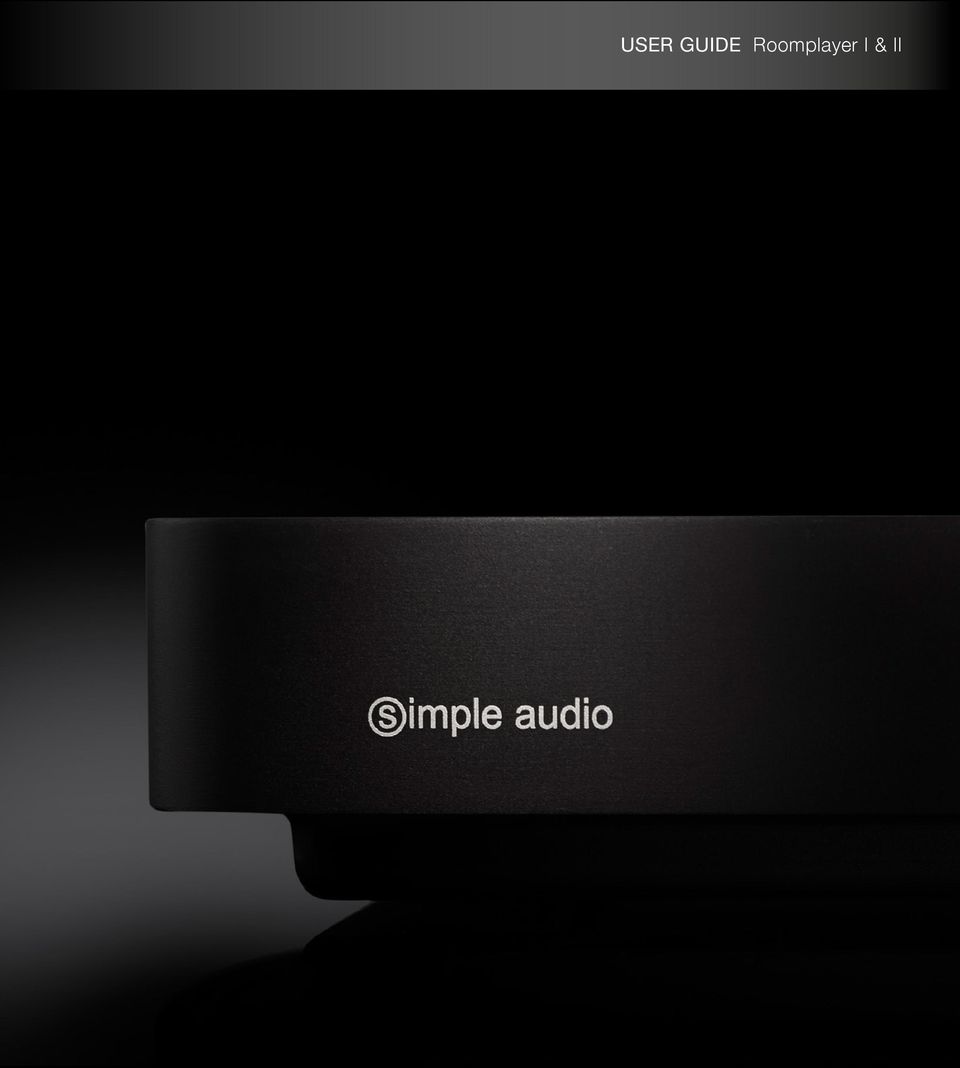
1 USER GUIDE Roomplayer I & II 1
2 Contents Welcome Before you start Unpack your Roomplayer Roomplayer basics Set up your first Roomplayer Set up your Desktop Controller Personalise your Desktop Controller Radio and music streaming services ipod Touch, iphone, ipad Controller Set up additional Roomplayers Troubleshooting Product specifications Environmental information Warranty Additional information Contact

3 Welcome Welcome to Simple Audio. Thank you for choosing our high definition digital music system. We hope it gives you many years of musical delight. Your existing digital music collection will sound great and with 24-bit downloads set to become the future of digital music you ll be able to enjoy the latest high definition sound recordings too. Once you have your new Roomplayer set up: Play music from your itunes library Play music stored on your PC, Mac or NAS device Play music from your ipod Touch, iphone, ipad and more Connect and listen to your TV or other external audio sources Enjoy thousands of internet radio stations Explore new music from Deezer and other streaming services We ve made it easy to extend your system too. If you want to play music in another room, simply add another Roomplayer. The integrated PowerLine connectivity will ensure that your home is wire free. Ready to get started? This manual will tell you everything you need to know to get your Simple Audio system up and running. Enjoy. 3

4 Before you start It s good to make sure that you have all the right things in place before you start. Here s a handy checklist. Essential items Computer Internet access Loudspeakers A PC running Windows 7, XP or Vista or an Apple Mac running OSX 10.5 or above with an Intel processor. A high speed modem/router, as provided by most broadband Internet Service Providers. A pair of loudspeakers for Roomplayer I. Roomplayer II connects to amplified devices like Home Theatre or hi-fi systems. Optional items PowerLine AV HomePlug ipod Touch, iphone or ipad Wireless network If your Roomplayer is not going to be positioned near your router, you can use a Simple Audio HomePlug or an alternative PowerLine AV 200 module. Check for a list of compatible modules. If you wish to control your music remotely, you will need an ipod Touch, iphone or ipad with the Simple Audio Controller app installed. If you are going to use an ipod Touch, iphone or ipad to control your Roomplayer remotely, you will need a wireless router. 4

5 Unpack your Roomplayer When you unpack your Roomplayer, you ll see that we ve included the cables you need to get started. 1. Simple Audio Roomplayer 2. Country Specific Mains Lead 3. Phono to Phono Cable for rear audio in or rear audio out connections. 4. Phono to 3.5mm Jack Lead for connecting an ipod Touch or similar device to the rear audio in connection mm Jack to 3.5mm Jack Lead for connecting an ipod Touch or similar device to the front line in socket. 6. Ethernet Cable for connecting your Roomplayer to your home network via a switch or directly to your router/modem. 7. Product Documentation 5

6 Roomplayer basics Front view Line input socket Play music from your ipod, iphone and more. Connect compatible devices using the 3.5mm jack lead. 2. Headphone socket Plug your headphones in here. Connecting will instantly mute your loudspeakers and lower the sound level to protect your headphones when connected. 3. Factory reset Pressing this will restore your Roomplayer s factory settings. Do not press this button unless advised by our technical support team. 4. Red status LED The red status LED will remain lit when mains power is applied and until the Roomplayer establishes a connection with the network. 5. White power LED The white power LED will remain lit when mains power is applied. 6. Green pairing LED The green pairing LED will flash when you are pairing your Roomplayer with a HomePlug or another Roomplayer. 7. Pairing button Press this button to pair your Roomplayer with a HomePlug or to pair other Roomplayers. 6

7 Roomplayer basics Rear view MAINS IN DIG OUT R L SAFETY INFORMATION OPT OUT AUDIO OUT SUB AUDIO IN Mains in Connect the mains lead supplied. Check that the voltage of your Roomplayer is suitable for your country. If in doubt, contact your local retailer or refer to the safety instructions. We recommend that you make all connections before you apply power. 9. Orange activity LED The orange activity LED will flicker to indicate network activity over the PowerLine when a PowerLine connection is active. 10. Ethernet If you are not using the built in PowerLine technology you can connect to your network using the Ethernet cable provided. Do not use this socket as a means to extending your computer network. 11. Green activity LED The green activity LED will flicker to indicate network activity when connected directly to a router over wired Ethernet. 12. USB The USB port is for service use only. You should not connect any devices here. 13. Opt out (Optical digital out) Connect to an external DAC via the optical output using a fibre optic cable. Using the digital optical output will disable all analogue outputs. Your volume must be controlled via your external device. Cable is not included. 14. Dig out (Digital out) Connect to an external DAC via the digital output socket using a phono cable. Using the digital output will disable all analogue outputs. Your volume must be controlled via your external device. Cable is not included. 15. Loudspeaker outputs Connect to loudspeakers using the combination spring type 4mm sockets (for bare wire terminals) or 4.0mm plugs. Make sure you match red (+) and black (-) to the terminals correctly. If you want to use banana plugs see page 8. Loudspeaker cables are not included. Note: Roomplayer II has no loudspeaker outputs. 16. Audio out Connect to an external power amplifier. If you already have a hi-fi and speaker set up, connect it here using the phono to phono cable. The red connector is right and the white connector is left. 17. Sub (Subwoofer out) Connect to an active subwoofer using a phono cable (not included). This can be useful if you are using small bookshelf type loudspeakers. Your subwoofer will have settings that allow you to balance the sound correctly. 18. Audio in Connect to a TV or CD player using the phono to phono cable. The red connector is right and the white connector is left. 7

8 Set up your first Roomplayer It s easy to get your first Roomplayer up and running. Follow the instructions in Steps 1, 2 and 3. Step 1 Connect your Roomplayer to any audio inputs or outputs. loudspeakers subwoofer television If you have Roomplayer I (with a built-in amplifier) follow the instructions in Option A. If you have Roomplayer II (without an amplifier), follow the instructions in Option B. Do not apply power until you have completed step 2. How to connect bare wire terminals If you are using bare wire terminals, push the spring-loaded speaker connectors on the Roomplayer inward to reveal the connection hole, insert the speaker wire into the hole, then release. Option A Connect Roomplayer I to your loudspeakers and any audio inputs or outputs. Connect your loudspeakers using the bare wire terminals or 4.0mm plugs. To get the best performance, make sure you connect the red (+) and black (-) terminals from each loudspeaker to the corresponding terminals on your Roomplayer. If you incorrectly connect the loudspeakers, no damage will be done but bass performance will be poor. How to connect banana plugs Using a jewelllers screwdriver, remove the central blanking section of the insulation cover. 8

9 Set up your first Roomplayer Option B Connect Roomplayer II to any audio inputs or outputs. MAINS IN DIG OUT SAFETY INFORMATION OPT OUT AUDIO OUT SUB AUDIO IN loudspeakers 3 4 amplifier subwoofer television Connect your Roomplayer to an amplifier or other amplified device. Follow the diagram to see where you should plug in your cables to your Roomplayer. Refer to your other product s manuals for their connection details. Can your loudspeakers handle it? Your Roomplayer s internal amplifier has a 50W output into 4ohms. Please choose speakers that are capable of handling this power. 9

10 Set up your first Roomplayer Step 2 Connect to your network. 6 MAINS IN DIG OUT L SAFETY INFORMATION OPT OUT AUDIO OUT SUB AUDIO IN 2 You can locate your Roomplayer anywhere in your home, but where you place it will influence how you connect to your network. Choose Option A if your Roomplayer is close to your router. Choose Option B if your Roomplayer is not close to your router. Do not apply power until you have completed step 2. Option A Connect using an Ethernet cable. Connect the Roomplayer to your router using the Ethernet cable provided. Now attach the mains lead to your Roomplayer and plug it into a wall socket. You can now apply power. The green activity LED on the rear of your Roomplayer will flicker indicating a network connection has been made. The front red status LED will go out. Where is the on/off switch? There isn t an on/off switch on your Roomplayer. Your Roomplayer will start up as soon as you apply mains power. No free sockets on your router? If so, consult your computer supplier or Simple Audio retailer. You may need to install a network switch. Can I use power strips? We recommend that you do not connect to power strips or filtered sockets because it may affect the performance of your system 10

11 Set up your first Roomplayer Option B Connect using a HomePlug. 6 Connect a Simple Audio HomePlug (sold separately) or any compatible PowerLine AV 200 module to your router using the Ethernet cable provided. Plug your HomePlug into a mains socket and switch on. Now pair your HomePlug with your Roomplayer by following steps 1-6 below. Always apply power to your HomePlug before your Roomplayer. Not using a Simple Audio HomePlug? Refer to the pairing instructions supplied with your unit. Check for a list of all compatible modules. Do you already use a HomePlug? If you are already using a HomePlug, you only need to follow steps 4 and 5 below. Pairing LED Pairing button Pairing button 1. Check that you have completed Option B above and that your HomePlug is switched on. 2. Go to your Roomplayer, attach the mains lead and apply power. Now press and hold the pairing button on the side of your Roomplayer for approximately 10 seconds until the green LED on the front flashes. When you release the button the LED will go out. 3. Go to your HomePlug, now press and hold the pairing button for approximately 10 seconds. Release the button when the pairing LED flashes. Your Roomplayer and HomePlug are now ready to link to each other. Pairing button Pairing LED Pairing button 4. On your HomePlug, press the pairing button for 2 seconds and release. You must complete steps 4 and 5 within 2 minutes, if not switch everything off and start the pairing process again. 5. On your Roomplayer, press the pairing button for 2 seconds and release. The green LED on the front of your Roomplayer will flash for up to 2 minutes, during this time it will pulse twice and go out. 6. The pairing process is complete. 11

12 Set up your first Roomplayer Step 3 Download and install your Desktop Controller. Installing the Desktop Controller is the last step in the setup process. It is available for Microsoft Windows and Apple OSX computers and must be installed on at least one computer on the same network as your Roomplayer/s. To start downloading the software, go to Choose the correct version of the software for your computer then follow the onscreen instructions to complete the setup. Register your Roomplayer online and you will get notification of new software updates. Visit and complete the form. Want to play music from more than one computer? Repeat the download and installation steps for each computer you want to use to play and share music. All computers must be connected to the same network. Is your operating system compatible? Check your computer for the information you need. Select View System Information or System Properties on a PC. If you are using a Mac, select the Apple icon in the top left corner of your desktop and choose About this Mac. 12

13 Set up your Desktop Controller Use the wizard to setup your system, discover music libraries and more. Step 1 Configure your system using the wizard The Wizard will help you set up your Roomplayer/s, create users and find music libraries. It will appear during the installation of your Desktop Controller and will guide you through the process step by step. Don t worry if you don t get everything right first time, you can always change your settings from the System menu. Step 2 Choose a Master The system will automatically detect any Roomplayers that are on your network and switched on. This may take several minutes. If no Roomplayers are detected a message will appear on your computer screen to tell you. This will also be displayed when connected Roomplayers are switched off. You must select a Master, even if you only have one Roomplayer. It is responsible for indexing all your music and takes control of any additional Roomplayers you own. Make sure one Roomplayer is ticked before clicking next. How long does a Roomplayer take to start up? The red LED goes out when your Roomplayer has connected to your network. It takes approx. 1 minute. How do I choose a Master? If you have more than one Roomplayer, choose the one least likely to be switched off. If your Master is switched off, the other Roomplayers will not operate until it is switched back on or a new Master is nominated. You will need to re-index your music libraries if you select a new Master. 13

14 Set up your Desktop Controller Step 3 Setup your Roomplayer Select a Roomplayer from the list and type in a new name. If you have more than one Roomplayer and you haven t named them, you may need to identify them first. If you tick the identify box the white LED of that Roomplayer will flash until another Roomplayer is selected or the Roomplayer Setup window in your Desktop Controller is closed. Want to use an external DAC? If you do, select digital as your audio output. External devices too quiet? Adjust the gain settings for your front and rear line inputs. Step 4 Create a username It s essential to set up a username if you want to create favourites for your libraries, radio stations and more. If you have multiple users on the system, you may want to ensure that everyone has a profile set up. User profiles are not password protected. All libraries are available to everyone, each user may wish to customise how they view these libraries. To create a username, select New User then type in your name. Repeat for each new user. 14

15 Set up your Desktop Controller Step 5 Search for music libraries The Desktop Controller will automatically search for the default itunes library stored on your computer. If your Desktop Controller does not detect a music library automatically, perhaps its default location has changed. If this happens you can search for it manually. If you want to access a library manually, select Access new library then navigate to any folder on your computer where music may be stored. Select the library you wish to access, ensure the check box is ticked and press next to start indexing. Press Finish at any time to complete the setup. Music will appear in your Desktop Controller as it is being indexed. Do we move, copy or change music? It s good to know that your Desktop Controller will never move, copy or change music, wherever it s stored. Instead it creates a list of all the music libraries it can find (this is called indexing). It presents them to you in the main window of your Desktop Controller. What kind of music libraries can I add? You can access itunes libraries, Windows Media Player folder libraries and many other folder-based libraries. Supported music file types We recommend that you use the highest definition files possible for best audio performance. Smaller compressed files can still sound good but contain much less audio data. You will be able to play most file formats including: We do not support WMA or DRM files. Want to know more about music file formats? A full description of file formats and their strengths and weaknesses is available at 15

16 Set up your Desktop Controller Configure your system manually You can manually configure your system at any time. Select System from the main menu, choose the appropriate option from the drop down menu and make your changes. Update your software Your Desktop Controller can be set up to automatically look for software updates. You will be presented with this option when you launch the software a second time. Set your Desktop Controller to automatically search for updates so you don t miss out on anything important. You can also check for updates manually by selecting Help then Check for updates. Want to see a list of system software updates? Visit our website 16

17 Personalise your Desktop Controller Once you have a user profile set up, you can personalise your music libraries, playlists and more. Control where your music plays If you have a multiroom system (more than one Roomplayer) you can control where the music plays from the drop down menu. If you have multiple users make sure you have the correct username selected. Your Roomplayer will always default to playing music through your Master Roomplayer after it has been switched off and on again. Personalise music libraries Use your user profile to select the libraries you want to use and play or to deselect the ones you don t. Go to System, Manage User, select your username and tick the check box next to the libraries you want to display and use, or untick the check box next to the libraries you don t want to display. This won t delete the library. If you add or delete any tracks from your itunes library or other music folder you can either wait for your system to recognise the changes, or you can force your library to re-index. To do this, go to System, Music Libraries and right click on the library you want to re-index. Want to rename a music library? Go to Music Libraries, right click the library you want to rename and type in a new name. What can I do if a music library is unavailable? If a library is marked as unavailable this maybe because the computer or laptop that held the library has been switched off or removed from your network. The library will instantly return when this computer is switched on again. 17

18 Personalise your Desktop Controller Create playlists You can create any number of playlists consisting of tracks or albums in your libraries. Select Music Library, Playlists and Add playlist. You can drag and drop individual tracks or entire albums. How can I see all playlists? Select All Users from the drop down menu to see and play music from any playlist on your system. You cannot edit another users playlist. Set up favourite radio stations TuneIn is integrated into your Simple Audio system. To select an internet radio station select TuneIn Radio then Add favourite stations. Click the save icon beside a station to save it to your radio playlist. It will then appear in your favourite stations in the main menu. We support MP3 and AAC radio stations. We do not support WMA or REAL radio streams. Store music streaming service login details When you register with a music streaming service such as we7 or Deezer (find out how in the next section), you will receive a username and password. You must use these details (not your Simple Audio login details) when you login for the first time via your Desktop Controller. To log in, first check that your username is selected, then sign in with your music service credentials. The Desktop Controller will then save your details under your username so that you do not have to enter them again. If you have multiple users, it s a good idea to set up individual accounts so that everyone can listen to their favourite music. 18

19 Radio and music streaming services Listen to your favourite radio stations and login to music streaming services. Listen to radio stations Listen to thousands of free internet radio stations and programs from all over the world using the TuneIn radio service. This service is free of charge and requires no registration. Having trouble with playback? If a radio station won t play it maybe the wrong format. You can check compatible formats on the TuneIn website. The audio quality you receive is also dependant upon the radio station broadcast quality and your broadband speed. If problems persist, check with the radio broadcaster or contact your Internet Service Provider. Listen to streaming music services The first music streaming services available through Simple Audio are we7 and Deezer. Register with one or both services to access their music. Set up an account with we7 To set up an account with we7, register at The basic service is free to all users, but please check the terms and conditions. Set up an account with Deezer To set up an account with Deezer, register at You will find details of all their services and prices on the Deezer website. Can t find your existing music streaming service? We hope to have more music streaming services on board soon. Why not drop them a note telling them that you would like to see them on the Simple Audio system? 19

20 ipod Touch/iPhone/iPad Controller Download the free Simple Audio app for ipod Touch, iphone or ipad and control your music remotely. You must have a wireless network to use these applications. Download your free app The easiest way to download and install the app for your ipod Touch, iphone or ipad is via the App Store on your device. Search for Simple Audio Ltd and follow the on-screen instructions. Download the app via itunes on your computer. Visit for a link to the app in the itunes Store. Once downloaded you will need to sync it with your device. Compatible devices include iphone 4S, iphone 4, iphone 3GS, iphone 3G, ipod Touch (4th and 3rd generations), ipad, ipad2, new ipad. Launch the app Your ipod Touch, iphone or ipad must be connected to the same network as your Roomplayer. Once you open your app it will automatically detect your Roomplayer/s and show you all your indexed music. Can t connect to your Roomplayer? Check your wireless connectivity. Your app can be affected by your wireless network s performance. If problems persist, check the signal strength on your device or consult your Internet Service Provider. 20
, ipad, ipad2, new ipad.")
21 Set up additional Roomplayers If you want to listen to music throughout your home, add another Roomplayer wherever you want. One Roomplayer will play music through one set of loudspeakers or one amplified device. If you want to play music elsewhere in your home, you will need another Roomplayer connected to loudspeakers or an amplified device this is a multiroom system. Add additional Roomplayers at any time and manage them from your Desktop Controller or your ipod Touch, iphone or ipad. To get started, follow the instructions in step 1 and 2. We recommend that you make all connections before you apply power. Step 1 Connect your loudspeakers and any audio inputs or outputs. Connect your loudspeakers and/or any audio inputs or outputs to your new Roomplayer, then attach the mains lead, plug it into your wall socket and switch on. More information on connecting devices to either Roomplayer I or II can be found on page 6. How many Roomplayers? The integrated PowerLine technology provides you with more bandwidth than other audio networks. You can connect up to 16 rooms, but remember, different music file formats and connectivity methods may affect the quality of the service if you connect this many Roomplayers. 21
22 Set up additional Roomplayers Step 2 Pair your new Roomplayer. You must pair your new Roomplayer with one of your existing Roomplayers. This process will connect it to your existing network using PowerLine communication technology. To start the pairing process, follow these instructions: You should not connect an Ethernet cable to your new Roomplayer. Pairing button Pairing button 1. Make sure your new Roomplayer and your existing Roomplayer are switched on. Pairing LED 2. On your new Roomplayer, press and hold the pairing button on the side of your roomplayer for approximately 10 seconds until the green LED on the front flashes. When you release the button the green LED will go out. Pairing LED 3. On your existing Roomplayer, press the pairing button for 2 seconds and release. The green LED on the front of your Roomplayer will flash for up to 2 minutes. During this time, complete Step 4. Pairing button Pairing LED Pairing button Pairing LED 4. On your new Roomplayer, press the pairing button for 2 seconds and release. The green LED on the front will go out. If you are unable to complete this step within 2 minutes, switch everything off and start the pairing process again. 5. The pairing process is now complete. Repeat the steps for every new Roomplayer. 22
23 Troubleshooting If you just can t get something to work, check this list first. Symptom Possible solution No power indicator No sound from any source No sound from ipod, iphone, TV etc. Check the power outlet and the fuse. If both are working, there may be a fault with the Roomplayer. Speak to your retailer and arrange for the unit to be checked. Check that your Roomplayer is on and appearing in your Desktop Controller software. Check the connections to all components in the system are correct. Check that the volume on your Desktop Controller is turned up. If you have connected headphones, this will mute the sound. Check that your speakers or other external amplifiers are connected and switched on. If you have connected an external device like an ipod, iphone or TV you should make sure that it is playing and that its volume control is set correctly. You may also wish to alter the gain settings via your Desktop Controller found under System, Roomplayer Setup. Can t control Roomplayers using the ios Controller app Music library is unavailable Can t see or save radio stations or playlists Can t see some of my albums Can t see some of my artwork Check that your mobile device is within range of your wireless router. The signal strength indicator at the top of your ipod screen will show the quality of the connection. If you have a signal, check that your device is on the same network as the Roomplayers, it is possible that your device has joined another network Check that the computer that stores the music library is switched on and still on your network. The library will reappear when the computer rejoins your network. Check that you have set up a user profile. If you have, you will need to select your username. If you still can t see radio stations then it is possible that your internet connection is down. Once connected you will be able to see and save radio stations for individual users. Check the R button in Library view. This lists the number of albums that have not been imported. It is often the case that missing albums have incompatible file formats. Your Desktop Controller will show the artwork stored in your original music library. Check that you can see it in your itunes library or your current media player. If not visit our FAQ s for detailed information. Still experiencing problems? Check out the FAQ s on our website support/faqs or contact your Simple Audio retailer. 23
24 Product specifications Want to know your Roomplayer s exact specifications? Size, weight, power... it s all here. Line inputs Nominal Sensitivity Input Impedance 2Vrms 10kΩ Line outputs Output Impedance Nominal Output Level THD + Noise Subwoofer 300Ω 2Vrms -10dBV Headphone output Output Level Minimum Load 3V Peak 16Ω Power Amplifier Peak Output Power THD + Noise 50W/channel into 4Ω 1W Connectivity USB Interface USB 2.0 Ethernet 10/100 10/100 Built in PowerLine Communication Specification PHY Rate Security HomePlugAV Compatible Up to 200 Mbps 128-bit AES Encryption General Mains Input Voltage Size Weight Vac Hz 200 x 200 x 50 mm 1.6Kg Power consumption Roomplayer I 25W Roomplayer II 6.5W 24
25 Environmental information We ve done our best to consider you and the environment. The rest is up to you. Simple Audio products run economically whilst providing the highest levels of performance. The software can easily be upgraded to avoid obsolescence and all our products are made from high quality, durable materials that are easily recyclable. We hope you get many years of enjoyment from your Roomplayer but if the time comes when you no longer need it, think about giving it to someone else. If you really do need to dispose of it for whatever reason, you need to be aware of the following regulations: Disposal This product has to be recycled at the end of its life, according to EU guideline RL2002/96/EG WEEE - Directive on Waste Electrical and Electronic Equipment. This is valid for all European Countries. When disposal is not possible, Simple Audio Ltd can do recycling for you. In this instance the device must be sent, free of all costs* to: Simple Audio Limited Unit 59 Elderpark Workspace 100 Elderpark Street Glasgow G51 3TR Tel: +44(0) *Shipments that are not prepaid will be rejected and returned to sender at the original senders cost. 25
26 Warranty A Two Year EU Warranty is available to the original owner; make sure you hold onto your receipt. A Two Year Warranty is offered exclusively to the original purchaser of a Simple Audio product and is not transferable whether upon the subsequent sale of a Simple Audio product by you or otherwise. No registration is required. You must however present your original, dated Simple Audio sales receipt or other proof of purchase if warranty is required. 1. What is included in this Two Year Warranty? If a Simple Audio product is defective in normal domestic use due to a fault in materials or workmanship Simple Audio ( Simple Audio ) will at its discretion either regulate, adjust, repair or replace it free of charge, within a reasonable time after such product is returned to Simple Audio s address as detailed below. This Two Year Warranty covers the cost of parts and associated labour required to correct such defects in materials and workmanship intimated to your retailer or Simple Audio during a period of Two (2) Years from the original date of purchase. 2. What is excluded from this Two Year Warranty? This Two Year Warranty does NOT cover: a) damage to Simple Audio products while in possession of a shipper, retailer, or consumer and not caused by defects in materials or workmanship; b) damage to Simple Audio products arising due to or from normal wear and tear; c) damage or defects caused by abnormal or unreasonable use (including repairs or alterations of products by a person other than Simple Audio or its nominated repair centres); d) damage, defects, deterioration, malfunction or failure to meet performance specifications resulting from: (i) accident, acts of nature, misuse, abuse, neglect or unauthorised product modification (ii) improper installation, removal or maintenance, or failure to follow instructions supplied with the product (iii) repair or attempted repair by any person not authorised by Simple Audio to repair the product (iv) shipment of the product (claims to be presented to your retailer to be passed on to the carrier) (v) any cause other than a product defect due to a fault in materials or workmanship e) cleaning, initial set-up, check-ups with no defects found, or charges incurred for installation of the product; f) any product on which the serial number has been defaced, modified or removed; g) accessories, including but not limited to cables, mounting hardware and brackets, cleaning accessories, antenna and detachable power cords; h) any Simple Audio product purchased outside the European territories comprising the European Economic Area (ie the member states of the European Union and the European Free Trade Association). 3. What Simple Audio will do and pay for if you qualify for this Two Year Warranty cover and how Simple Audio will provide the required service. Simple Audio will pay for all parts and labour covered by this Two Year Warranty. You must pay all shipping charges if it is necessary to return the product to Simple Audio or your retailer. However, if the required repairs etc. are covered by this Two Year Warranty Simple Audio will pay for the return shipping to any destination within the European territories of the European Economic Area. Whenever warranty service is required you must present the original dated sales receipt or other proof of purchase. 4. How do you get service? If you think that your product needs service, contact your original retailer who will advise you regarding packing your product if return to his shop is required. Most simple faults can be corrected by your retailer so do not return your product to Simple Audio without consulting your retailer or receiving approval from Simple Audio. 5. Legal status This Two Year Warranty is given without prejudice to (and does not affect) your legal or other rights as a consumer applicable in any relevant territory. Nothing herein shall be construed as an express or implied warranty in respect of the future performance of any Simple Audio product (including any product or replacement product which is regulated, adjusted, repaired or replaced by Simple Audio under this Two Year Warranty). 26
27 Additional information It s important to let you know about our license agreements and copyright. Do have a read. Errors Although the contents of this user guide have been checked thoroughly for errors, Simple Audio cannot guarantee that it is correct throughout. Simple Audio does not accept responsibility for any misleading or incorrect information within the guide. Copyright Lending or copying part of this guide or any Simple Audio software, or any commercial exploitation of these media without the express written permission of Simple Audio is prohibited. Simple Audio reserves the right to change specifications at any time without notice. Product names, logos, brands, and other trademarks featured or referred to within the Simple Audio website, applications or user manuals are the property of their respective trademark holders. 27
28 Contact Simple Audio Limited Unit 59 Elderpark Workspace 100 Elderpark Street Glasgow G51 3TR Tel: +44(0) Web: Simple Audio User Guide V1.0 Copyright 2012 Simple Audio Ltd. 28
Welcome. You re watching Apple TV. This guide contains all the information you need to get from setup to your sofa.
 Welcome. You re watching Apple TV. This guide contains all the information you need to get from setup to your sofa. Contents Chapter 1: Connect. 7 What s in the box 8 Apple TV at a glance 10 What you
1 Plug in your extender near your router 2 Wireless connection to router 3 Move extender to optimum location
 User Guide 1 Plug in your extender near your router 2 Wireless connection to router 3 Move extender to optimum location Dual-Band Wi-Fi Extender 600 Follow the steps in this guide to set up your kit. If
Document authored by: Native Instruments GmbH Software version: 2.6.4 (09/2013)
") Setup Guide Disclaimer The information in this document is subject to change without notice and does not represent a commitment on the part of Native Instruments GmbH. The software described by this document
Setup Guide Disclaimer The information in this document is subject to change without notice and does not represent a commitment on the part of Native Instruments GmbH. The software described by this document
Table of Contents. Hardware Installation...7 Push Button Security... 8. Using the Setup Wizard...10. Configuration...11 Main... 12 Security...
 Table of Contents Table of Contents Product Overview...3 Package Contents...3 System Requirements... 3 Introduction...4 Features... 4 Hardware Overview...5 LEDs... 5 Connection... 6 Hardware Installation...7
LabelWriter. Print Server. User Guide
 LabelWriter Print Server User Guide Copyright 2010 Sanford, L.P. All rights reserved. 08/10 No part of this document or the software may be reproduced or transmitted in any form or by any means or translated
Quick Reference Guide
 Welcome to BT Business Total Broadband Quick Reference Guide Read the information in this Quick Reference Guide to help you start using your new BT Business Total Broadband service powered by fibre. The
ShareLink 200 Setup Guide
 ShareLink 00 Setup Guide This guide provides instructions for installing and connecting the Extron ShareLink 00. The ShareLink USB 00 Wireless Collaboration Gateway allows anyone to present content from
Internet User Guide. For the ZTE H298N routers. LAN4 LAN3 LAN2 LAN1 WAN Phone USB2 USB2 WAN WLAN WLAN WLAN
 Internet User Guide For the ZTE H298N routers LAN4 LAN3 LAN2 LAN1 WAN Phone Reset On/Off Power WLAN USB2 LAN4 LAN3 LAN2 LAN1 WAN Phone Power LAN1 Internet LAN3 LAN2 LAN4 WLAN Phone USB1 WAN Reset USB2
User Guide USB 2.0 LAPTOP DOCKING STATION WITH VIDEO N2953
 USB 2.0 LAPTOP DOCKING STATION WITH VIDEO 410-1864-001B / ACP51US 1 YEAR LIMITED WARRANTY: We pride ourselves on the quality of our products. For complete warranty details and a list of our worldwide offices,
LIBRATONE LIVE LOUNGE OWNER S MANUAL
 LIBRATONE LIVE 1 LOUNGE OWNER S MANUAL 2 3 For manuals in other languages please visit www.libratone.com/manual CONGRATULATIONS! 4 FullRoom 5 AirPlay / PlayDirect 6 Placement 8 Button Functions 9 Status
HP-1000 Powerline USB Adapter
 HP-1000 Powerline USB Adapter User s manual BEFORE INSTALLATION Plan ahead the installation of your powerline network. Note: You will need at least two powerline adapters to create a powerline network.
HP-1000 Powerline Ethernet Adapter
 HP-1000 Powerline Ethernet Adapter User s manual BEFORE INSTALLATION Plan ahead the installation of your powerline network. Note: You will need at least two powerline adapters to create a powerline network.
Quick Operation Guide DAB, DAB + und DMB USB Digital Receiver Albrecht DR 403
 Quick Operation Guide DAB, DAB + und DMB USB Digital Receiver Albrecht DR 403. 1 Note Thank you for purchasing the DAB/ DMB receiver. This Quick Guide is to guide you to the software installation of the
Quick Start. Nighthawk X8 AC5300 Tri-Band WiFi Router Model R8500. Package Contents. NETGEAR, Inc. 350 East Plumeria Drive San Jose, CA 95134 USA
 Support Thank you for purchasing this NETGEAR product. You can visit www.netgear.com/support to register your product, get help, access the latest downloads and user manuals, and join our community. We
Quick Reference Guide
 Welcome to BT Business Total Broadband Quick Reference Guide Follow the steps in this Quick Reference Guide to set up and start using your new BT Business Total Broadband service. The CD will help you
Quick Connection and Setup Guide
 3-300-262-13(1) Read this first Quick Connection and Setup Guide Quick start guide to main features GB HDD Network Audio System NAS-SC55PKE 2008 Sony Corporation Printed in Malaysia Table of Contents Checking
Frequently Asked Questions
 FAQs Frequently Asked Questions Connecting your Linksys router to the Internet 1 What computer operating systems does my Linksys router support? 1 Why can t I connect my computer or device to my router?
User Guide. Your first steps to smart monitoring
 User Guide Your first steps to smart monitoring 2 3 Important safety and legal Information We have taken all measures to ensure the BabyPing Video Monitor meets the highest safety standards but it must
Installation & Operation Manual HANDS-FREE BLUETOOTH MEDIA INTEGRATION KIT. Perfect for ANDROID TM
 GET CONNECTED Installation & Operation Manual HANDS-FREE BLUETOOTH MEDIA INTEGRATION KIT TranzIt BLU HF ISFM2351 Perfect for ANDROID TM Note to Readers, The information contained within the following documentation
USING YOUR DMX PROFUSION
 Set Up Guide USING YOUR DMX PROFUSION io FOR 1 Connect 2 Set Up 3 Listen SIMPLE PERSONALIZED UNLIMITED ECONOMICAL LICENSED Welcome Thank you for choosing DMX to provide your Pandora listening experience
Here s your guide to easy installation. Get the most out of Verizon High Speed Internet.
 Here s your guide to easy installation. Get the most out of Verizon High Speed Internet. Congratulations on choosing Verizon High Speed Internet. In this guide, you ll find everything you need to set up
HP Advanced Wireless Docking Station. User Guide
 HP Advanced Wireless Docking Station User Guide Copyright 2014, 2015 Hewlett-Packard Development Company, L.P. Intel is a trademark of Intel Corporation in the U.S. and other countries. Windows and Windows
Hi! Let s get started.
 Hi! Let s get started. What s in the box Roku 2 player Roku 2 enhanced remote Headphones 2 x AA batteries for remote A/V cable (RCA) Power adapter Get to know your Roku 2 A Front view B E C Back view
Installer guide. Release 2.2
 Installer guide Release 2.2 Important safety notice h r j n l s The following safety regulations must be observed at all times. Failure to observe precautions could result in severe injury or death. jj
SwannEye HD Plug & Play Wi-Fi Security Camera Quick Start Guide Welcome! Lets get started.
 EN SwannEye HD Plug & Play Wi-Fi Security Camera Quick Start Guide Welcome! Lets get started. QHADS453080414E Swann 2014 1 1 Introduction Congratulations on your purchase of this SwannEye HD Plug & Play
Figure 1 Sample WiseLink screens, showing MP3 music files (left) and photos (right) available as shared files from your networked PC or media server
 and photos (right) available as shared files from your networked PC or media server") SAMSUNG S GUIDE TO DLNA Welcome to the era of 21 st -century television! Samsung s added a new level of functionality to its HDTVs with DLNA CERTIFIED connectivity. Now, your compatible Samsung HDTV can
SAMSUNG S GUIDE TO DLNA Welcome to the era of 21 st -century television! Samsung s added a new level of functionality to its HDTVs with DLNA CERTIFIED connectivity. Now, your compatible Samsung HDTV can
High Performance Wireless Amplifier. Your old speaker s new best friend. 1. www.polkaudio.com 1
 High Performance Wireless Amplifier. Your old speaker s new best friend. 1. www.polkaudio.com 1 High Performance Wireless Amplifier. Your old speaker s new best friend. Contents What s in the Box... 3
User Guide Vodafone Pocket WiFi Pro. Designed by Vodafone
 User Guide Vodafone Pocket WiFi Pro Designed by Vodafone Welcome to the world of mobile communications 1 Welcome 2 Device overview 3 Getting started: setup 4 Getting started: use 5 Pocket WiFi online dashboard
PLA Series. User s Guide. Quick Start Guide. Powerline Ethernet Adapters. PLA4101, PLA4111, PLA4201, PLA4201 v2, PLA5205, PLA5215, PLA5206, PLA5405
 PLA Series Powerline Ethernet Adapters PLA4101, PLA4111, PLA4201, PLA4201 v2, PLA5205, PLA5215, PLA5206, PLA5405 Utility Version 7.0.1 Edition 1, 05/2014 Default Network Name: HomePlugAV Quick Start Guide
Document authored by: Native Instruments GmbH Software version: 2.7 (01/2015)
") Setup Guide Disclaimer The information in this document is subject to change without notice and does not represent a commitment on the part of Native Instruments GmbH. The software described by this document
Setup Guide Disclaimer The information in this document is subject to change without notice and does not represent a commitment on the part of Native Instruments GmbH. The software described by this document
EM6230 e-camview HD outdoor IP camera
 EM6230 e-camview HD outdoor IP camera 2 ENGLISH EM6230 e-camview HD outdoor IP camera Table of contents 1.0 Introduction... 3 1.1 Packing contents... 3 1.2 Requirements to access the camera.... 3 1.3 Major
WELCOME TO VERIZON HIGH SPEED INTERNET FOR BUSINESS
 WELCOME TO VERIZON HIGH SPEED INTERNET FOR BUSINESS For a better online experience, start here today. YOUR GUIDE TO INSTALLING AND USING VERIZON HIGH SPEED INTERNET. Congratulations on choosing Verizon
Technical Support. Trademarks
 Getting Started Technical Support Thank you for selecting NETGEAR products. After installing your device, locate the serial number on the label of your product and use it to register your product at https://my.netgear.com.
Business Audio System: Music & Messaging MP3 Player. by Grace Digital Audio. User Guide. Model No. GDI-USBM10
 Business Audio System: Music & Messaging MP3 Player by Grace Digital Audio User Guide Model No. GDI-USBM10 User Guide Contents Introduction 2 Safety & General Use Information 2 Features 3 Set Up & Operation
CONTENTS PAGE. c) Our Recommended Settings... 14. d) Overview...7. i. Check Out and Download a book... 27
 Our Recommended Settings... 14. d) Overview...7. i. Check Out and Download a book... 27") USER GUIDE CONTENTS PAGE Top Tip: Hold down the Ctrl key on your keyboard and using your mouse click on the heading below to be taken to the page Introduction... 3 1. How to create a new account... 3 2.
USER GUIDE CONTENTS PAGE Top Tip: Hold down the Ctrl key on your keyboard and using your mouse click on the heading below to be taken to the page Introduction... 3 1. How to create a new account... 3 2.
HDMI or Component Standalone Capture Device 1080p
 HDMI or Component Standalone Capture Device 1080p USB2HDCAPS *actual product may vary from photos DE: Bedienungsanleitung - de.startech.com FR: Guide de l'utilisateur - fr.startech.com ES: Guía del usuario
Hi! Let s get started.
 Hi! Let s get started. What s in the box Roku player Remote control with in-ear headphone jack 2 x AA Alkaline batteries In-ear headphones Power adapter Get to know your Roku B A Front view C D E Back
PLA4201 v2. User s Guide. Quick Start Guide. 500 Mbps Mini Powerline Ethernet Adapter. Version 1.00 Edition 1, 01/2013
 PLA4201 v2 500 Mbps Mini Powerline Ethernet Adapter Version 1.00 Edition 1, 01/2013 Quick Start Guide User s Guide www.zyxel.com Copyright 2013 ZyXEL Communications Corporation IMPORTANT! READ CAREFULLY
Hardware Overview. Ooma Linx devices These are installed around the office and are used to connect phones and other devices to your Ooma Office system
 Quick Start Guide Introduction Installation Overview Setting up the Ooma Office system in your business is easy. You should have your first extensions up and running in about 20 minutes. Ooma Office blends
Home Network. Installation Instructions
 Home Network Installation Instructions TM Installation Instructions Table of Contents Overview...2 Installation Considerations...2 Quick Installation Instructions...2 Identifying and Creating the Home
Product Guide for Windows Home Server
 Product Guide for Windows Home Server Microsoft Corporation Published: January, 2009 Version: 1.1 This his Product Guide provides an overview of the features and functionality of Windows Home Server software.
Let s Get Connected. Getting started with your Wireless Modem.
 Let s Get Connected. Getting started with your Wireless Modem. Contents. Page: 2 What s in this kit? 3 Your computer 3 Connecting the filters 4 Plugging in your modem 5 Connecting your modem to the computer
UK - USER MANUAL. Contents
 1 UK - USER MANUAL Contents Internet Radio Quickstart Guide 7 What you need before you can use your Internet radio 7 Controls 8 Connections 9 Steps for connecting your radio to your wireless network 10
Discover Broadband. A quick guide to your Virgin Broadband service
 Discover Broadband A quick guide to your Virgin Broadband service Contents Discover the internet with Virgin Broadband 2 Getting to know your Super Hub 4 Top tips on getting the best 6 wireless connection
www.bowers-wilkins.com
 English MM- Welcome to Bowers and Wilkins and the MM- Thank you for choosing Bowers & Wilkins. When John Bowers first established our company he did so in the belief that imaginative design, innovative
User Guide FFFA001106. www.focusrite.com
 User Guide FFFA001106 www.focusrite.com TABLE OF CONTENTS OVERVIEW.... 3 Introduction...3 Features.................................................................... 3 Box Contents...3 System Requirements....4
MP3-Digital Audio Player. MP55BK User Manual
 MP3-Digital Audio Player MP55BK User Manual Features: Supports multiple music formats such as: MP1, MP2, MP3, & WMA USB Flash disk function (no driver needed) High-Speed USB 2.0 Data Transmission I. The
Quick Start Guide. RV 120W Wireless-N VPN Firewall. Cisco Small Business
 Quick Start Guide Cisco Small Business RV 120W Wireless-N VPN Firewall Package Contents Wireless-N VPN Firewall Ethernet Cable Power Adapter Quick Start Guide Documentation and Software on CD-ROM Welcome
MANUAL (p. 2) USB Turntable HAV-TT20USB
 USB Turntable HAV-TT20USB") MANUAL (p. 2) USB Turntable HAV-TT20USB ENGLISH How to Replace the Turntable Stylus (Needle) Removing the old stylus 1. Place a screwdriver at the tip of the stylus and push down in direction A. 2. Remove
MANUAL (p. 2) USB Turntable HAV-TT20USB ENGLISH How to Replace the Turntable Stylus (Needle) Removing the old stylus 1. Place a screwdriver at the tip of the stylus and push down in direction A. 2. Remove
1 Plug in extender near your router
 Data Ethernet Broadband Extender Data Ethernet Broadband Extender Mini Wi-Fi Home Hotspot 500 Kit User Guide 1 Plug in extender near your router 1 Plug one end of the ethernet cable into a spare ethernet
PLI-3310 HomePlug Pro Power Bridge
 PLI-3310 HomePlug Pro Power Bridge User Manual Ver. 1.0.0 Safety FCC This equipment has been tested and found to comply with Part 15 Class B of the FCC Rules. Operation is subject to the following two
English version. LW320/LW321 Sweex Wireless 300N Router. Package Contents. Terminology list
 LW320/LW321 Sweex Wireless 300N Router Do not expose the Sweex Wireless 300N Router to extreme temperatures. Do not place the device in direct sunlight or in the direct vicinity of heating elements. Do
GREEN HOUSE DATA. E-Mail Services Guide. Built right. Just for you. greenhousedata.com. Green House Data 340 Progress Circle Cheyenne, WY 82007
 GREEN HOUSE DATA Built right. Just for you. E-Mail Services Guide greenhousedata.com 1 Green House Data 340 Progress Circle Cheyenne, WY 82007 Table of Contents Getting Started on Business Class Email
USER MANUAL ITV101E v.1.0. PlayXtreme INTERNET TV HUB
 USER MANUAL ITV101E v.1.0 PlayXtreme INTERNET TV HUB CONTENTS About the Device... 1 Package Contents... 2 Design... 2 Front Panel... 3 Back Panel... 3 Getting Started... 4 Planning Your Network... 5 Connecting
HYDRA Z Owner s Manual
 HYDRA Z usb audio bridge Thank you for buying the Audiobyte Technologies Hydra Z digital to digital converter. You have now one of the finest USB audio interfaces available on the market. The Hydra Z was
MEDIA CONTROL SERVER 2.0
 MEDIA CONTROL SERVER 2.0 Version 2.0 Getting Started Guide This getting started guide will help you install and configure the Autonomic Controls Media Control Server and Mirage client. Contents OVERVIEW...
2GB MP3 Player USER GUIDE
 DO NOT FORMAT UNIT under FAT. 2GB MP3 Player USER GUIDE Jazwares, Inc. 2010 CONTENTS Please read the instructions along with the MP3 Player carefully before you use it, so that you can operate it conveniently.
NETGEAR genie Apps. User Manual. 350 East Plumeria Drive San Jose, CA 95134 USA. August 2012 202-10933-04 v1.0
 User Manual 350 East Plumeria Drive San Jose, CA 95134 USA August 2012 202-10933-04 v1.0 Support Thank you for choosing NETGEAR. To register your product, get the latest product updates, get support online,
IMPORTANT SAFETY INSTRUCTIONS. When using this electronic device, basic precautions should always be taken, including the following:
 IMPORTANT SAFETY INSTRUCTIONS When using this electronic device, basic precautions should always be taken, including the following: 1. Read all instructions before using the product. 2. Do not use this
Welcome to life on. Get started with this easy Self-Installation Guide.
 Welcome to life on Get started with this easy Self-Installation Guide. Welcome to a network that s light years ahead. Welcome to life on FiOS. Congratulations on choosing Verizon FiOS! You re just a few
Welcome. You re watching Apple TV. This guide contains all the information you need to get from setup to your sofa.
 Welcome. You re watching Apple TV. This guide contains all the information you need to get from setup to your sofa. Contents. 1. Connect 7 What s in the Box 8 What You Need 10 Apple TV at a Glance 12 Setting
Quick Start Guide. Network Your DIRECTV Plus HD DVR
 Quick Start Guide Network Your DIRECTV Plus HD DVR Network Your DIRECTV Plus HD DVR QUICK-START GUIDE Your DIRECTV Plus HD DVR is network-capable, meaning it can connect to your home network and the internet.
BlackArmor NAS 110 User Guide
 BlackArmor NAS 110 User Guide BlackArmor NAS 110 User Guide 2010 Seagate Technology LLC. All rights reserved. Seagate, Seagate Technology, the Wave logo, and FreeAgent are trademarks or registered trademarks
HP MediaSmart Server Software Upgrade from v.2 to v.3
 HP MediaSmart Server Software Upgrade from v.2 to v.3 Table of Contents Table of Contents Upgrade Your Server Software to HP MediaSmart Server v.3 2 Before You Begin 3 What's New 3 Features That Will
Quick Installation Guide
 V2.01 Model: FI9821W Quick Installation Guide Indoor HD Pan/Tilt Wireless IP Camera Black White For Windows OS ------- Page 1 For MAC OS ------- Page 16 ShenZhen Foscam Intelligent Technology Co., Ltd
Installation Guide Wireless 4-Port USB Sharing Station. GUWIP204 Part No. M1172-a
 Installation Guide Wireless 4-Port USB Sharing Station 1 GUWIP204 Part No. M1172-a 2011 IOGEAR. All Rights Reserved. PKG-M1172-a IOGEAR, the IOGEAR logo, MiniView, VSE are trademarks or registered trademarks
A Guide To Getting Connected
 A Guide To Getting Connected Step 1 Step 2 Step 3 Step 4 Step 5 Step 6 About this installation and user guide Preparing the installation Your broadband checklist Installing the microfilters Installing
CDR-100. iphone Spy Recovery (for Win) User Guide. Rev. 1.0. iphone Data Recovery Software for Windows OS
 User Guide. Rev. 1.0. iphone Data Recovery Software for Windows OS") CDR-100 iphone Spy Recovery (for Win) iphone Data Recovery Software for Windows OS User Guide Rev. 1.0 Contents Introduction 1 System Requirements 2 Features 3 Getting Ready for Data Recovery 4 Installation
CDR-100 iphone Spy Recovery (for Win) iphone Data Recovery Software for Windows OS User Guide Rev. 1.0 Contents Introduction 1 System Requirements 2 Features 3 Getting Ready for Data Recovery 4 Installation
Using the enclosed installation diagram, drill three holes in the wall with the lower hole 1150mm from the floor.
 Terminal Installation When choosing the location of the terminal, care should be taken to select an area with consistent light levels throughout the day and avoid areas where the unit may be subjected
Amati.linea Desktop Streaming Player with amplifier
 Embedded Systems SIA, VAT No LV40003411103 47. Katolu str., Riga, LV 1003, LATVIA Phone: +371 67648888, fax: +371 67205036, e-mail: [email protected] Amati.linea Desktop Streaming Player with amplifier
Quick Start Guide. Vonage Device Motorola VT2142
 Quick Start Guide Vonage Device Motorola VT2142 Before you begin 1. If you purchased your Vonage Device from a retail store, you must first activate your Vonage phone service. (You will need to provide
Getting started with
 PART NO. CMA113 MADE IN CHINA 1. Measuring CAT II 2. Max. voltage 250V ~ 3. Max. current 71 Amp Getting started with Electricity consumption monitoring single phase for homes and some smaller light commercial
StarLeaf Cloud Troubleshooter
 StarLeaf Cloud Troubleshooter 02 September 2014 Contents About the troubleshooter 3 The StarLeaf Phone is not powered 3 Phone is powered but displays a blue screen 3 Quick connect screen 5 The screen displays
MixMeister EZ Converter Setup & Troubleshooting Contents:
 MixMeister EZ Converter Setup & Troubleshooting Contents: Windows Vista and Windows 7 Setup Instructions... 2 Windows XP Setup Instructions... 4 Macintosh OSX - Setup Instructions... 6 Troubleshooting...
Chord Limited. Mojo Dac Headphone Amplifier OPERATING INSTRUCTIONS
 Chord Limited Mojo Dac Headphone Amplifier OPERATING INSTRUCTIONS -!1 - Cleaning and care instructions: Mojo requires no special care other than common sense. Spray window cleaner (clear type) may be used
quick reference guide
 quick reference guide / Product Overview Product Overview Wireless (Blue) The Wireless LED lights up when the wireless feature is enabled. It flashes when the Valet sends or receives data over the wireless
Support Package Contents AC1600 WiFi VDSL/ADSL Ethernet cable Trademarks Modem Router Compliance Phone cable Modem router
 Support Thank you for purchasing this NETGEAR product. After installing your device, locate the serial number on the label of your product and use it to register your product at https://my.netgear.com.
Frontier DSL SelfConnect Guide
 Frontier DSL SelfConnect Guide Frontier DSL Self-Installation Guide Table of Contents Getting Started...2 Customer and Computer Requirements...2...3 STEP 1: Install Microfilters...3 STEP 2: Install Your
Quick Start Guide. Internet Conference Station X1-N6. www.ipevo.com
 Quick Start Guide Internet Conference Station X1-N6 www.ipevo.com Contents 1 Product Overview 3 1.1 Introducing the IPEVO X1-N6 Conference Station 3 1.2 IPEVO X1-N6, front to back 4 1.3 IPEVO X1-N6 key
The easy way to accept EFTPOS, Visa and MasterCard payments on the spot. Mobile Users... 2. Charging your PayClip. 2. Downloading the PayClip app.
 PayClip User Guide The easy way to accept EFTPOS, Visa and MasterCard payments on the spot. Contents Getting started made easy 2 Information for Merchants....................................................2
NeoTV Streaming Player (NTV300) Installation Guide
 Installation Guide") NeoTV Streaming Player (NTV300) Installation Guide Technical Support Thank you for selecting NETGEAR products. After installing your device, locate the serial number on the label of your product and use
NeoTV Streaming Player (NTV300) Installation Guide Technical Support Thank you for selecting NETGEAR products. After installing your device, locate the serial number on the label of your product and use
Mobile Broadband Manager Guide Huawei E8278
 Mobile Broadband Manager Guide Huawei E8278 What s mobile broadband? Mobile broadband means you can surf the internet when you re out and about. 4G mobile broadband is the same but using our glorious 4G
User Guide: VirtualMerchant Mobile
 User Guide: VirtualMerchant Mobile Two Concourse Parkway, Suite 800, Atlanta, GA 30328 Elavon, Incorporated 2013. All Rights Reserved Copyright Copyright 2013 Elavon, Incorporated. All rights reserved.
How to register and use our Chat System
 How to register and use our Chat System Why this document? We have a very good chat system and easy to use when you are set up, but getting registered and into the system can be a bit complicated. If you
N600 WiFi USB Adapter
 Model WNDA3100v3 User Manual December 2014 202-11470-01 350 East Plumeria Drive San Jose, CA 95134 USA Support Thank you for selecting NETGEAR products. After installing your device, locate the serial
Powerline 500 WiFi Access Point XWN5001 Installation Guide
 Powerline 500 WiFi Access Point XWN5001 Installation Guide Technical Support Thank you for selecting NETGEAR products. After installing your device, locate the serial number on the label of your product
Seagate NAS OS 4 Reviewers Guide: NAS / NAS Pro / Business Storage Rackmounts
 Seagate NAS OS 4 Reviewers Guide: NAS / NAS Pro / Business Storage Rackmounts Seagate NAS OS 4 Reviewers Guide 2 Purpose of this guide Experience the most common use cases for the product, learn about
The Coast to Coast AM Podcast for itunes 11
 The Coast to Coast AM Podcast for itunes 11 System Requirements In order to run itunes 11, please see the system requirements at http://www.apple.com/itunes/download/. A Note on Downloading Directly to
User Manual. Ver 1.0. Solutions for the Digital Life
 Model #: User Manual Ver 1.0 Solutions for the Digital Life Table of Contents Getting Started 3 Introduction 3 Package Contents 3 System Requirements 3 Installing the Receiver 5 Connecting the Receiver
Technical Support. Package Contents. CENTRIA WNDR4700/WNDR4720 Installation Guide
 Technical Support After installing your device, locate the serial number on the label of your product and use it to register your product at https://my.netgear.com. You must register your product before
User Guide Vodafone Pocket WiFi Extreme. Designed by Vodafone
 User Guide Vodafone Pocket WiFi Extreme Designed by Vodafone Welcome to the world of mobile communications 1 Welcome 2 Device overview 3 Getting started: setup 4 Getting started: use 5 Pocket WiFi online
Wireless Router Setup Manual
 Wireless Router Setup Manual NETGEAR, Inc. 4500 Great America Parkway Santa Clara, CA 95054 USA 208-10082-02 2006-04 2006 by NETGEAR, Inc. All rights reserved. Trademarks NETGEAR is a trademark of Netgear,
User Guide Vodafone Mobile Wi-Fi R212. Designed by Vodafone
 User Guide Vodafone Mobile Wi-Fi R212 Designed by Vodafone Welcome to the world of mobile communications 1 Welcome 2 Device overview 3 Getting started: Step 1 4 Getting started: Step 2 5 Mobile Wi-Fi web
Quick Start Guide. Vonage VWR Device
 Quick Start Guide Vonage VWR Device Before you begin 1. If you purchased your Vonage Device from a retail store, you must first activate your Vonage phone service. (You will need to provide the MAC ID
Breathe. Relax. Here Are the Most Commonly Asked Questions and Concerns About Setting Up and Programming the SurroundBar 3000.
 Breathe. Relax. Here Are the Most Commonly Asked Questions and Concerns About Setting Up and Programming the SurroundBar 3000. Our Customer Service Department has compiled the most commonly asked questions
User Manual I1010Q16DCZ
 User Manual I1010Q16DCZ Explanation, Note and Warning *Explanation: important information, which can help you better use your tablet PC. *Note: indicates that not observing the content may result in hardware
TPG MOBILE BROADBAND QUICK SETUP GUIDE
 TPG MOBILE BROADBAND QUICK SETUP GUIDE TPG USB E1762 Modem Thank you for choosing TPG Mobile Broadband and USB E1762 modem. This User Guide provides step by step instructions that will take you through
Open Source and License Source Information
 BlackArmor NAS 220 BlackArmor NAS 220 User Guide 2010 Seagate Technology LLC. All rights reserved. Seagate, Seagate Technology, the Wave logo, and FreeAgent are trademarks or registered trademarks of Seagate
USER GUIDE AC2600 MU-MIMO GIGABIT ROUTER. Model# EA8500
 USER GUIDE AC2600 MU-MIMO GIGABIT ROUTER Model# EA8500 Table of Contents Product overview EA8500.....................................1 Setting Up Your Router Where to find more help.........................
WELCOME TO VERIZON HIGH SPEED INTERNET. For a better online experience, start here today.
 WELCOME TO VERIZON HIGH SPEED INTERNET. For a better online experience, start here today. Congratulations on choosing Verizon High Speed Internet the best value in broadband. First of all, be sure to retain