Aspire M3. User s Manual
|
|
|
- Della Morris
- 8 years ago
- Views:
Transcription
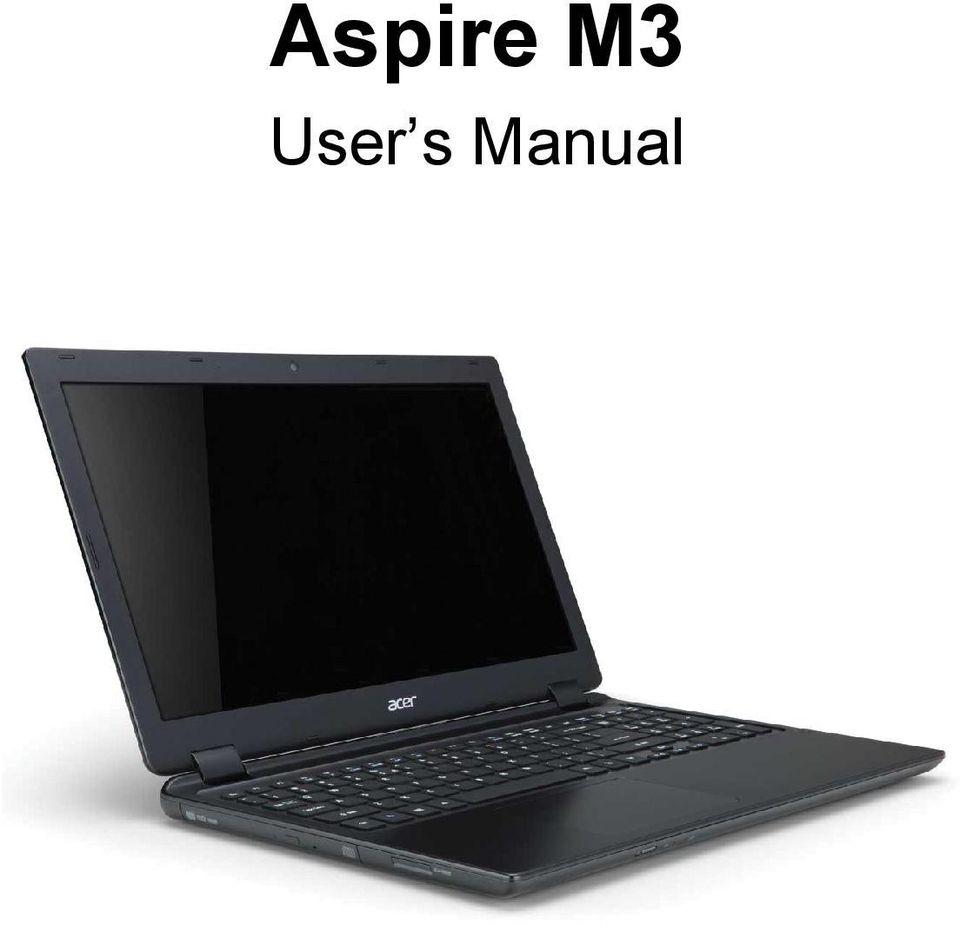
1 Aspire M3 User s Manual
2 2012 All Rights Reserved. Aspire M3 User s Manual This revision: 09/2012 Model number: Serial number: Date of purchase: Place of purchase:

3 TABLE OF CONTENTS Safety and comfort 5 First things first 16 Your guides Basic care and tips for using your computer Turning your computer on and off Taking care of your computer Taking care of your AC adapter Cleaning and servicing Your Acer notebook tour 19 Screen view Keyboard view Front view Rear view Information on USB Left view Right view Base view Touchpad 28 Touchpad basics Using the keyboard 30 Lock keys and embedded numeric keypad Hotkeys Windows keys Recovery 34 Creating a recovery backup Creating a drivers and applications backup Recovering your system Reinstalling drivers and applications Returning to an earlier system snapshot Returning your system to its factory condition Recovering from Windows Recovering from a recovery backup Acer clear.fi 54 Navigating media and photos Shared files Which devices are compatible? Playing to another device Power management 57 Acer Green Instant On Saving power Battery pack 61 Battery pack characteristics Charging the battery Optimizing battery life Checking the battery level Battery-low warning Traveling with your computer 65 Disconnecting from the desktop Moving around Preparing the computer What to bring to meetings Taking the computer home Preparing the computer What to take with you Special considerations Setting up a home office Traveling with the computer Preparing the computer Table of contents - 3

4 What to take with you Special considerations Traveling internationally with the computer Preparing the computer What to bring with you Special considerations Securing your computer 71 Using a computer security lock Using passwords Entering passwords Acer Theft Shield 73 Using Acer Theft Shield General Settings Wireless networks 77 Connecting to the Internet Acer Instant Connect Wireless networks Using a Bluetooth connection 79 Enabling and disabling Bluetooth Adding a Bluetooth device HDMI 85 Universal Serial Bus (USB) 86 BIOS utility 87 Boot sequence Enable disk-to-disk recovery Setting passwords Frequently asked questions 88 Requesting service Troubleshooting Troubleshooting tips Error messages Tips and hints for using Windows Three concepts you might want to keep in mind How do I access the charms? How do I get to Start? How do I jump between apps? How do I turn off my computer? Why is there a new interface? How do I unlock my computer? How do I personalize my computer? I want to use Windows in the way that I'm used to - give me my desktop back! Where are my apps? What is a Microsoft ID (account)? How do I add a favorite to Internet Explorer? How do I check for Windows updates? Where can I get more information? Regulations and safety notices Table of contents
 86 BIOS utility 87 Boot sequence... 87 Enable disk-to-disk recovery... 87 Setting passwords.")
5 SAFETY AND COMFORT SAFETY INSTRUCTIONS Read these instructions carefully. Keep this document for future reference. Follow all warnings and instructions marked on the product. Turning the product off before cleaning Unplug this product from the wall outlet before cleaning. Do not use liquid cleaners or aerosol cleaners. Use a damp cloth for cleaning. WARNINGS Accessing the power cord Be sure that the power outlet you plug the power cord into is easily accessible and located as close to the equipment operator as possible. When you need to disconnect power to the equipment, be sure to unplug the power cord from the electrical outlet. Disconnecting the power source Observe the following guidelines when connecting and disconnecting power to the power supply unit: Install the power supply unit before connecting the power cord to the AC power outlet. Unplug the power cord before removing the power supply unit from the computer. If the system has multiple sources of power, disconnect power from the system by unplugging all power cords from the power supplies. Using electrical power - This product should be operated from the type of power indicated on the marking label. If you are not sure of the type of power available, consult your dealer or local power company. - Do not allow anything to rest on the power cord. Do not locate this product where people will walk on the cord. Safety and comfort - 5

6 - If an extension cord is used with this product, make sure that the total ampere rating of the equipment plugged into the extension cord does not exceed the extension cord ampere rating. Also, make sure that the total rating of all products plugged into the wall outlet does not exceed the fuse rating. - Do not overload a power outlet, strip or receptacle by plugging in too many devices. The overall system load must not exceed 80% of the branch circuit rating. If power strips are used, the load should not exceed 80% of the power strip's input rating. - This product's AC adapter is equipped with a three-wire grounded plug. The plug only fits in a grounded power outlet. Make sure the power outlet is properly grounded before inserting the AC adapter plug. Do not insert the plug into a non-grounded power outlet. Contact your electrician for details. - Warning! The grounding pin is a safety feature. Using a power outlet that is not properly grounded may result in electric shock and/or injury. - Note: The grounding pin also provides good protection from unexpected noise produced by other nearby electrical devices that may interfere with the performance of this product. - The system can be powered using a wide range of voltages; 100 to 120 or 220 to 240 V AC. The power cord included with the system meets the requirements for use in the country/region where the system was purchased. Power cords for use in other countries/regions must meet the requirements for that country/region. For more information on power cord requirements, contact an authorized reseller or service provider. Protecting your hearing - Warning! Permanent hearing loss may occur if earphones or headphones are used at high volume for prolonged periods of time. To protect your hearing, follow these instructions. - Increase the volume gradually until you can hear clearly and comfortably. - Do not increase the volume level after your ears have adjusted. - Do not listen to music at high volumes for extended periods. 6 - Safety and comfort

7 - Do not increase the volume to block out noisy surroundings. - Decrease the volume if you can't hear people speaking near you. Bundled dummy cards - Note: Information in this section may not apply to your computer. Your computer shipped with plastic dummies installed in the card slots. Dummies protect unused slots from dust, metal objects or other particles. Save the dummies for use when no cards are in the slots. General - Do not use this product near water. - Do not place this product on an unstable cart, stand or table. If the product falls, it could be seriously damaged. - Slots and openings are provided for ventilation to ensure reliable operation of the product and to protect it from overheating. These openings must not be blocked or covered. The openings should never be blocked by placing the product on a bed, sofa, rug or other similar surface. This product should never be placed near or over a radiator or heat register, or in a built-in installation unless proper ventilation is provided. - Never push objects of any kind into this product through cabinet slots as they may touch dangerous voltage points or short-out parts that could result in a fire or electric shock. Never spill liquid of any kind onto or into the product. - To avoid damage of internal components and to prevent battery leakage, do not place the product on a vibrating surface. - Never use it under sporting, exercising, or any vibrating environment which will probably cause unexpected short current or damage rotor devices, HDD, Optical drive, and even exposure risk from lithium battery pack. - The bottom surface, areas around ventilation openings and AC adapter may get hot. To avoid injury, ensure they do not come in contact with your skin or body. - Your device and its enhancements may contain small parts. Keep them out of the reach of small children. Safety and comfort - 7

8 Product servicing Do not attempt to service this product yourself, as opening or removing covers may expose you to dangerous voltage points or other risks. Refer all servicing to qualified service personnel. Unplug this product from the wall outlet and refer servicing to qualified service personnel when: - The power cord or plug is damaged, cut or frayed. - Liquid was spilled into the product. - The product was exposed to rain or water. - The product has been dropped or the case has been damaged. - The product exhibits a distinct change in performance, indicating a need for service. - The product does not operate normally after following the operating instructions. - Note: Adjust only those controls that are covered by the operating instructions, since improper adjustment of other controls may result in damage and will often require extensive work by a qualified technician to restore the product to normal condition. Guidelines for safe battery usage This computer uses a Lithium-ion or Lithium-polymer battery. Do not use it in a humid, wet or corrosive environment. Do not put, store or leave your product in or near a heat source, in a high temperature location, in strong direct sunlight, in a microwave oven or in a pressurized container, and do not expose it to temperatures over 60 C (140 F). Failure to follow these guidelines may cause the battery to leak acid, become hot, explode or ignite and cause injury and/or damage. Do not pierce, open or disassemble the computer or battery. If the battery leaks and you come into contact with the leaked fluids, rinse thoroughly with water and seek medical attention immediately. For safety reasons, and to prolong the lifetime of the battery, charging will not occur at temperatures below 0 C (32 F) or above 40 C (104 F). 8 - Safety and comfort

9 The full performance of a new battery is achieved only after two or three complete charge and discharge cycles. The battery can be charged and discharged hundreds of times, but it will eventually wear out. When the operation time becomes noticeably shorter than normal, refer to qualified service personnel. Use only the approved batteries, and recharge your battery only with the approved chargers designated for this device. The capacity and lifetime of the battery will be reduced if the computer is left in hot or cold places, such as in a closed car in summer or winter. Always try to keep the computer between 15 C and 25 C (59 F and 77 F). A device with a hot or cold battery may not work temporarily, even when the battery is fully charged. Battery performance is especially limited in temperatures well below freezing. Do not dispose of batteries in a fire as they may explode. Batteries may also explode if damaged. Dispose of batteries according to local regulations. Please recycle when possible. Do not dispose as household waste. Wireless devices may be susceptible to interference from the battery, which could affect performance. - Note: Please refer to for battery shipping documents. Warning! Batteries may explode if not handled properly. Do not disassemble or dispose of them in fire. Keep them away from children. Follow local regulations when disposing of used batteries. RADIO FREQUENCY INTERFERENCE - Warning! For safety reasons, turn off all wireless or radio transmitting devices when using your laptop under the following conditions. These devices may include, but are not limited to: wireless LAN (WLAN), Bluetooth and/or 3G. Remember to follow any special regulations in force in any area, and always switch off your device when its use is prohibited or when it may cause interference or danger. Use the device only in its normal operating positions. This device meets RF exposure guidelines when used normally, and it and its antenna are positioned at least 1.5 centimeters (5/8 inch) away from your body. It should not contain metal and you should position the device the above-stated distance from your body. To successfully transmit Safety and comfort - 9

10 data files or messages, this device requires a good quality connection to the network. In some cases, transmission of data files or messages may be delayed until such a connection is available. Ensure that the above separation distance instructions are followed until the transmission is completed. Parts of the device are magnetic. Metallic materials may be attracted to the device, and persons with hearing aids should not hold the device to the ear with the hearing aid. Do not place credit cards or other magnetic storage media near the device, because information stored on them may be erased. MEDICAL DEVICES Operation of any radio transmitting equipment, including wireless phones, may interfere with the functionality of inadequately protected medical devices. Consult a physician or the manufacturer of the medical device to determine if they are adequately shielded from external RF energy or if you have any questions. Switch off your device in health care facilities when any regulations posted in these areas instruct you to do so. Hospitals or health care facilities may be using equipment that could be sensitive to external RF transmissions. Pacemakers. Pacemaker manufacturers recommend that a minimum separation of 15.3 centimeters (6 inches) be maintained between wireless devices and a pacemaker to avoid potential interference with the pacemaker. These recommendations are consistent with the independent research by and recommendations of Wireless Technology Research. Persons with pacemakers should do the following: - Always keep the device more than 15.3 centimeters (6 inches) from the pacemaker - Not carry the device near your pacemaker when the device is switched on. If you suspect interference, switch off your device, and move it. Hearing aids. Some digital wireless devices may interfere with some hearing aids. If interference occurs, consult your service provider. VEHICLES RF signals may affect improperly installed or inadequately shielded electronic systems in motor vehicles such as electronic fuel injection systems, electronic anti-skid (anti-lock) braking systems, electronic speed control systems, and air bag systems. For more 10 - Safety and comfort

11 information, check with the manufacturer, or its representative, of your vehicle or any equipment that has been added. Only qualified personnel should service the device, or install the device in a vehicle. Faulty installation or service may be dangerous and may invalidate any warranty that may apply to the device. Check regularly that all wireless equipment in your vehicle is mounted and operating properly. Do not store or carry flammable liquids, gases, or explosive materials in the same compartment as the device, its parts, or enhancements. For vehicles equipped with an air bag, remember that air bags inflate with great force. Do not place objects, including installed or portable wireless equipment in the area over the air bag or in the air bag deployment area. If in-vehicle wireless equipment is improperly installed, and the air bag inflates, serious injury could result. Using your device while flying in aircraft is prohibited. Switch off your device before boarding an aircraft. The use of wireless teledevices in an aircraft may be dangerous to the operation of the aircraft, disrupt the wireless telephone network, and may be illegal. POTENTIALLY EXPLOSIVE ENVIRONMENTS Switch off your device when in any area with a potentially explosive atmosphere and obey all signs and instructions. Potentially explosive atmospheres include areas where you would normally be advised to turn off your vehicle engine. Sparks in such areas could cause an explosion or fire resulting in bodily injury or even death. Switch off the device at refueling points such as near gas pumps at service stations. Observe restrictions on the use of radio equipment in fuel depots, storage, and distribution areas; chemical plants; or where blasting operations are in progress. Areas with a potentially explosive atmosphere are often, but not always, clearly marked. They include below deck on boats, chemical transfer or storage facilities, vehicles using liquefied petroleum gas (such as propane or butane), and areas where the air contains chemicals or particles such as grain, dust or metal powders. Do not switch the computer on when wireless phone use is prohibited or when it may cause interference or danger. EMERGENCY CALLS - Warning! You cannot make emergency calls through this device. To make an emergency call you shall dial out through your mobile phone or other telephone call system. Safety and comfort - 11

12 DISPOSAL INSTRUCTIONS Do not throw this electronic device into the trash when discarding. To minimize pollution and ensure utmost protection of the global environment, please recycle. For more information on the Waste from Electrical and Electronics Equipment (WEEE) regulations, visit Sustainability/sustainability01.htm Mercury advisory For bulb-inside projectors or electronic products containing a non-ledbacklit-lcd/crt monitor or display: Lamp(s) inside this product contain mercury and must be recycled or disposed of according to local, state or federal laws. For more information, contact the Electronic Industries Alliance at For lamp-specific disposal information, check ENERGY STAR Acer's ENERGY STAR qualified products save your money by reducing energy cost and protecting the environment without sacrificing features or performance. Acer is proud to offer our customers products with the ENERGY STAR mark. What is ENERGY STAR? Products that are ENERGY STAR qualified use less energy and prevent greenhouse gas emissions by meeting strict energy efficiency guidelines set by the U.S. Environmental Protection Agency. Acer is committed to offering products and services worldwide that help customers save money, conserve energy and improve the quality of our environment. The more energy we can save through higher energy efficiency, the more we reduce greenhouse gases and the risks of climate change. More information refers to or - Note: Information in this section may not apply to your computer. Acer ENERGY STAR qualified products: - produce less heat and reduce cooling loads in warmer climates Safety and comfort

13 - automatically go into "display Sleep" and "computer Sleep" mode after 10 and 30 minutes of inactivity, respectively. - wake from "Sleep" mode if the keyboard is pressed or mouse is moved. - save more than 80% energy when in "Sleep" mode. ENERGY STAR and the ENERGY STAR mark are registered U.S. marks. TIPS AND INFORMATION FOR COMFORTABLE USE Computer users may complain of eyestrain and headaches after prolonged use. Users are also at risk of physical injury after long hours of working in front of a computer. Long work periods, bad posture, poor work habits, stress, inadequate working conditions, personal health and other factors greatly increase the risk of physical injury. Incorrect computer usage may lead to carpal tunnel syndrome, tendonitis, tenosynovitis or other musculoskeletal disorders. The following symptoms may appear in the hands, wrists, arms, shoulders, neck or back: - Numbness, or a burning or tingling sensation. - Aching, soreness or tenderness. - Pain, swelling or throbbing. - Stiffness or tightness. - Coldness or weakness. If you have these symptoms, or any other recurring or persistent discomfort and/or pain related to computer use, consult a physician immediately and inform your company's health and safety department. The following section provides tips for more comfortable computer use. Finding your comfort zone Find your comfort zone by adjusting the viewing angle of the monitor, using a footrest, or raising your sitting height to achieve maximum comfort. Observe the following tips: - Refrain from staying too long in one fixed posture. - Avoid slouching forward and/or leaning backward. Safety and comfort - 13

14 - Stand up and walk around regularly to remove the strain on your leg muscles. - Take short rests to relax your neck and shoulders. - Avoid tensing your muscles or shrugging your shoulders. - Install the external display, keyboard and mouse properly and within comfortable reach. - If you view your monitor more than your documents, place the display at the center of your desk to minimize neck strain. Taking care of your vision Long viewing hours, wearing incorrect glasses or contact lenses, glare, excessive room lighting, poorly focused screens, very small typefaces and low-contrast displays could stress your eyes. The following sections provide suggestions on how to reduce eyestrain. Eyes - Rest your eyes frequently. - Give your eyes regular breaks by looking away from the monitor and focusing on a distant point. - Blink frequently to keep your eyes from drying out. Display - Keep your display clean. - Keep your head at a higher level than the top edge of the display so your eyes point downward when looking at the middle of the display. - Adjust the display brightness and/or contrast to a comfortable level for enhanced text readability and graphics clarity. - Eliminate glare and reflections by: placing your display in such a way that the side faces the window or any light source, minimizing room light by using drapes, shades or blinds, using a task light, changing the display's viewing angle, 14 - Safety and comfort

15 using a glare-reduction filter, using a display visor, such as a piece of cardboard extended from the display's top front edge. - Avoid adjusting your display to an awkward viewing angle. - Avoid looking at bright light sources for extended periods of time. Developing good work habits The following work habits make computer use more relaxing and productive: - Take short breaks regularly and often. - Perform some stretching exercises. - Breathe fresh air as often as possible. - Exercise regularly and maintain a healthy body. - Warning! We do not recommend using the computer on a couch or bed. If this is unavoidable, work for only short periods, take breaks regularly, and do some stretching exercises. - Note: For more information, please refer to "Regulations and safety notices" on page 101. Safety and comfort - 15

16 FIRST THINGS FIRST We would like to thank you for making an Acer notebook your choice for meeting your mobile computing needs. Your guides To help you use your Acer notebook, we have designed a set of guides: First off, the setup poster helps you get started with setting up your computer. The Quick Guide introduces you to the basic features and functions of your new computer. For more on how your computer can help you to be more productive, please refer to the Aspire M3 User s Manual. This guide contains detailed information on such subjects as system utilities, data recovery, expansion options and troubleshooting. In addition it contains general regulations and safety notices for your notebook. It is available from Start; type "User" and and click Acer User s Manual. Basic care and tips for using your computer Turning your computer on and off To turn the power off, do any of the following: Use the Windows shutdown command: Press the Windows key + <C>, click Settings > Power then click Shut Down First things first

17 If you need to power down the computer for a short while, but don t want to completely shut it down, you can put it into Hibernate by pressing the power button. You can also put the computer in sleep mode by pressing the sleep hotkey <Fn> + <F4>. Note: If you cannot power off the computer normally, press and hold the power button for more than four seconds to shut down the computer. If you turn off the computer and want to turn it on again, wait at least two seconds before powering up. Taking care of your computer Your computer will serve you well if you take care of it. Do not expose the computer to direct sunlight. Do not place it near sources of heat, such as a radiator. Do not expose the computer to temperatures below 0º C (32º F) or above 50º C (122º F). Do not subject the computer to magnetic fields. Do not expose the computer to rain or moisture. Do not spill water or any liquid on the computer. Do not subject the computer to heavy shock or vibration. Do not expose the computer to dust or dirt. Never place objects on top of the computer. Do not slam the computer display when you close it. First things first - 17

18 Never place the computer on uneven surfaces. Taking care of your AC adapter Here are some ways to take care of your AC adapter: Do not connect the adapter to any other device. Do not step on the power cord or place heavy objects on top of it. Carefully route the power cord and any cables away from foot traffic. When unplugging the power cord, do not pull on the cord itself but pull on the plug. The total ampere ratings of the equipment plugged in should not exceed the ampere rating of the cord if you are using an extension cord. Also, the total current rating of all equipment plugged into a single wall outlet should not exceed the fuse rating. Cleaning and servicing When cleaning the computer, follow these steps: 1. Turn off the computer and remove the battery pack. 2. Disconnect the AC adapter. 3. Use a soft, moist cloth. Do not use liquid or aerosol cleaners. If either of the following occurs: The computer has been dropped or the body has been damaged; The computer does not operate normally Please refer to "Frequently asked questions" on page First things first

19 YOUR ACER NOTEBOOK TOUR After setting up your computer as illustrated in the setup poster, let us show you around your new Acer computer. Acer Aspire M3 Your Acer notebook tour - 19

20 Screen view # Icon Item Description 1 Webcam Web camera for video communication. A light next to the webcam indicates that the webcam is active. 2 Microphone Internal microphone for sound recording. 3 Screen Displays computer output Your Acer notebook tour

21 Keyboard view 1 2 # Icon Item Description 1 Keyboard For entering data into your computer. Caution: Do not use a keyboard protector or similar cover as the keyboard includes ventilation intakes for cooling. 2 Touchpad Touch-sensitive pointing device. The touchpad and selection buttons form a single surface. Press down firmly on the touchpad surface to perform a left click. Press down firmly on the lower right corner to perform a right click. Your Acer notebook tour - 21
22 Front view # Icon Item Description 1 Power button Turns the computer on and off. 2 Power indicator Indicates the computer s power status. Battery indicator Indicates battery status. Charging: The light is amber when the battery is charging. Fully charged: The light is blue. Rear view # Icon Item Description 1 Ventilation and cooling fan 22 - Your Acer notebook tour Allows the computer to stay cool. Do not cover or obstruct the openings.
23 # Icon Item Description 2 Headset/speaker jack Connects to audio devices (e.g., speakers, headphones) or a headset with microphone. 3 USB ports Connects to USB 2.0 devices. If a port is black it is USB USB port with poweroff compatible; if it is blue it is also USB charging 3.0 compatible (see below). 5 HDMI port Supports high-definition digital video connections. 6 Ethernet (RJ-45) port Connects to an Ethernet 10/100/ 1000-based network. 7 DC-in jack Connects to an AC adapter. Information on USB 3.0 Supports power-off USB charging, allowing you to charge supported mobile devices while the notebook is switched off. Compatible with USB 3.0 and earlier USB devices. For optimal performance, use USB 3.0-certified devices. Defined by the USB 3.0 (SuperSpeed USB) specification. Your Acer notebook tour - 23
24 Left view # Icon Item Description 1 Optical drive Internal optical drive; accepts CDs or DVDs. 2 Optical disk access indicator 3 Optical drive eject button 4 Emergency eject hole Lights up when the optical drive is active. Ejects the optical disk from the drive. Ejects the optical drive tray when the computer is turned off. Carefully insert a straightened paper clip to eject the optical drive tray. 5 2-in-1 card reader Accepts one Secure Digital (SD or SDHC) card or one MultiMediaCard (MMC). Note: Push to remove/install the card. Only one card can operate at any time Your Acer notebook tour
25 Right view # Icon Item Description 1 Kensington lock slot Connects to a Kensingtoncompatible computer security lock. Wrap the computer security lock cable around an immovable object such as a table or handle of a locked drawer. Insert the lock into the notch and turn the key to secure the lock. Keyless models are also available. Your Acer notebook tour - 25
26 Base view # Icon Item Description 1 Ventilation and cooling fan Allows the computer to stay cool. Do not cover or obstruct the openings. 2 Hard disk bay Houses the computer's hard disk. Memory Houses the computer's main memory. compartment 3 Speakers Deliver stereo audio output Your Acer notebook tour
27 # Icon Item Description 4 Battery reset pinhole Insert a paperclip into the hole and press for four seconds to reset the computer (simulates removing and reinstalling the battery). Your Acer notebook tour - 27
28 TOUCHPAD The built-in touchpad is a pointing device that senses movement on its surface. This means the cursor responds as you move your finger across the surface of the touchpad. The central location on the palmrest provides optimum comfort and support. Touchpad basics The following items show you how to use the touchpad. Move your finger across the touchpad to move the cursor. Press the touchpad down, or tap, to perform a click, which will select or start an item. Place you finger in the bottom right corner of the touchpad and press to perform a right click. The bottom left and bottom right corners of the touchpad are similar to the left and right buttons on a mouse Touchpad
29 Function Open Bottom left corner Quickly press twice Bottom Main touchpad right corner Press or tap twice (at the same speed as doubleclicking a mouse button) Select Press once Press or tap once Drag Press and hold, then use finger on the touchpad to drag the cursor Press or tap twice (at the same speed as doubleclicking a mouse button); rest your finger on the touchpad on the second tap and drag the cursor Access context Press once menu Note: When using the touchpad, keep it and your fingers dry and clean. The touchpad is sensitive to finger movement; hence, the lighter the touch, the better the response. Tapping harder will not increase the touchpad's responsiveness. Touchpad - 29
30 USING THE KEYBOARD The keyboard has full-sized keys and an embedded numeric keypad, separate cursor, lock, Windows, function and special keys. Lock keys and embedded numeric keypad Note: Information in this section may not apply to your computer. The keyboard has three lock keys which you can toggle on and off. Lock key Description When Caps Lock is on, all alphabetic characters typed Caps Lock are in uppercase. Num Lock <Fn> + <F11>* Scroll Lock <Fn> + <F12> When Num Lock is on, the embedded keypad is in numeric mode. The keys function as a calculator (complete with the arithmetic operators +, -, *, and /). Use this mode when you need to do a lot of numeric data entry. A better solution would be to connect an external keypad. When Scroll Lock is on, the screen moves one line up or down when you press the up or down arrow keys respectively. Scroll Lock does not work with some applications. The embedded numeric keypad functions like a desktop numeric keypad. It is indicated by small characters located on the upper right corner of the 30 - Using the keyboard
31 keycaps. To simplify the keyboard legend, cursor-control key symbols are not printed on the keys. Desired access Num Lock on Num Lock off Number keys on embedded keypad Cursor-control keys on embedded keypad Main keyboard keys Hotkeys Type numbers in a normal manner. Hold <Shift> while using cursor-control keys. Hold <Fn> while typing letters on embedded keypad. Hold <Fn> while using cursor-control keys. Type the letters in a normal manner. The computer employs hotkeys or key combinations to access most of the computer's controls like screen brightness and volume output. To activate hotkeys, press and hold the <Fn> key before pressing the other key in the hotkey combination. Hotkey Icon Function Description <Fn> + <F3> Communication key Enables / disables the computer's communication devices. (Communication devices may vary by configuration.) Using the keyboard - 31
32 Hotkey Icon Function Description <Fn> + <F4> Sleep Puts the computer in Sleep mode. <Fn> + <F5> Display toggle Switches display output between the display screen, external monitor (if connected) and both. <Fn> + <F6> Display off Turns the display screen backlight off to save power. Press any key to return. <Fn> + <F7> Turns the built-in touchpad on Touchpad toggle and off. <Fn> + <F8> Speaker toggle Turns the speakers on and off. <Fn> + <F11> NumLk Turns the embedded numeric keypad on or off (only for certain models). <Fn> + < > Brightness up Increases the screen brightness. <Fn> + < > Decreases the screen Brightness down brightness. <Fn> + < > Volume up Increases the sound volume. <Fn> + < > Volume down Decreases the sound volume Using the keyboard
33 Windows keys The keyboard has two keys that perform Windows-specific functions. Key Description Pressed alone it returns to the Start screen. Windows key It can also be used with other keys for special functions, please check Windows Help. Application key This key has the same effect as clicking the right mouse button; it opens the application's context menu. Using the keyboard - 33
34 RECOVERY If you are having trouble with your computer, and the frequently asked questions (see page 88) do not help, you can 'recover' your computer - i.e. return it to an earlier state. This section describes the recovery tools available on your computer. Acer provides Acer Recovery Management, which allows you to create a recovery backup, a drivers and applications backup, and to start recovery options, either using Windows tools, or the recovery backup. Note: Acer Recovery Management is only available with a preinstalled Windows operating system. Important: We recommend that you create a Recovery Backup and Drivers and Applications Backup and as soon as possible. In certain situations a full recovery will require a USB recovery backup. Creating a recovery backup To reinstall from a USB storage drive, you must first create a recovery backup. The recovery backup includes the entire original contents of your computer s hard drive, including Windows and all factory-loaded software and drivers. Using this backup will restore your computer to the same state as when you purchased it, while giving you an option to retain all settings and personal data. Note: Make sure you have a USB drive with a capacity of at least 16 GB Recovery
35 1. From Start, type 'Recovery' and then click Acer Recovery Management in the list of apps. 2. Click Create Factory Default Backup. The Recovery Drive window opens. Recovery - 35
36 Make sure Copy contents from the recovery partition to the recovery drive is selected. This provides the most complete and safest recovery backup. 3. Plug in the USB drive then click Next. Make sure your USB drive has enough capacity before continuing. The recovery backup requires at least 16 GB of storage 4. You will be shown the backup progress on the screen. 5. Follow the process until it completes. 6. After creating the recovery backup, you can choose to delete the recovery information on your computer. If you delete this information, you can only use the USB recovery backup to restore your computer, if you lose or erase the USB drive, you cannot restore your computer Recovery
37 7. Unplug the USB drive and label it clearly. Important: Write a unique, descriptive label on the backup, such as 'Windows Recovery Backup'. Make sure you keep the backup in a safe place that you will remember. Creating a drivers and applications backup To create a Drivers and Applications Backup, that contains the factoryloaded software and drivers needed by your computer, you may use either a USB storage drive or, if your computer features a DVD recorder, one or more blank recordable DVDs. Recovery - 37
38 1. From Start, type 'Recovery' and then click Acer Recovery Management in the list of apps. 2. Click Create Drivers and Applications Backup. Plug in the USB drive or insert a blank DVD into the optical drive, then click Next Recovery
39 If you are using a USB drive, make sure your USB drive has enough capacity before continuing. If using DVDs, it will also show the number of blank, recordable discs you will need to complete the recovery discs. Make sure that you have the required number of identical, blank discs. Recovery - 39
40 3. Click Start to copy files.you will be shown the backup progress on the screen. 4. Follow the process until it completes: If you are using optical discs, the drive ejects each disc as it completes burning it. Remove the disc from the drive and mark it with a permanent marker. If multiple discs are required, insert a new disc when prompted, then click OK. Continue until the process is complete. If you are using a USB drive, unplug the drive and label it clearly. Important: Write a unique, descriptive label on each backup, such as 'Drivers and Applications Backup'. Make sure you keep the backup in a safe place that you will remember. Recovering your system To recover your system: 1. Perform minor fixes. If only one or two items of software or hardware have stopped working correctly, the problem may be solved by reinstalling the software or the device drivers. To reinstall software and drivers that were pre-installed at the factory, see "Reinstalling drivers and applications" on page 41. For instructions on reinstalling software and drivers that were not preinstalled, see that product s documentation or support Web site. 2. Revert to a previous system condition. If reinstalling software or drivers does not help, then the problem may be 40 - Recovery
41 solved by returning your system to a previous state when everything was working correctly. For instructions, see "Returning to an earlier system snapshot" on page Reset your operating system. If nothing else has solved the problem and you want to reset your system, but keep your user information, see "Returning your system to its factory condition" on page Reset your system to its factory condition. If nothing else has solved the problem and you want to reset your system to factory condition, see "Returning your system to its factory condition" on page 45. Reinstalling drivers and applications As a troubleshooting step, you may need to reinstall the applications and device drivers that came pre-installed on your computer from the factory. You can reinstall using either your hard drive or the backup you have created. Other applications - If you need to reinstall software that did not come pre-installed on your computer, you need to follow that software s installation instructions. New device drivers - If you need to reinstall device drivers that did not come pre-installed on your computer, follow the instructions provided with the device. Recovery - 41

42 If you are reinstalling using Windows and the recovery information stored on your computer: From Start, type 'Recovery' and then click Acer Recovery Management in the list of apps. Click Reinstall Drivers or Applications Recovery
43 You should see the Contents section of the Acer Resource Center. Click the install icon for the item you want to install, then follow the onscreen instructions to complete the installation. Repeat this step for each item you want to reinstall. If you are reinstalling from a Drivers and Applications Backup on a DVD or USB drive: 1. Insert the Drivers and Applications Backup into the disc drive or connect it to a free USB port. If you inserted a DVD wait for Acer Resource Center to start. If Acer Resource Center does not start automatically, press the Windows key + <E>, then double-click on the optical drive icon. If you are using a USB drive, press the Windows key + <E>, then double-click on the drive that contains the backup. Double-click on ResourceCenter. Recovery - 43

44 2. You should see the Contents section of the Acer Resource Center. 3. Click the install icon for the item you want to install, then follow the onscreen prompts to complete the installation. Repeat this step for each item you want to reinstall. Returning to an earlier system snapshot Microsoft System Restore periodically takes a 'snapshot' of your system settings and saves them as restore points. In most cases of hard-toresolve software problems, you can return to one of these restore points to get your system running again. Windows automatically creates an additional restore point each day, and also each time you install software or device drivers. Note: For more information about using Microsoft System Restore, from Start, type 'Help' and then click Help and Support in the list of 44 - Recovery
45 apps. Type 'Windows system restore' in the Search Help box, then press Enter. Returning to a restore point 1. From Start, type 'Control Panel' and then click Control Panel in the list of apps. 2. Click System and Security > Action Center, then click Recovery at the bottom of the window. 3. Click Open System Restore, then Next. 4. Click the latest restore point (at a time when your system worked correctly), click Next, then Finish. 5. A confirmation window appears; click Yes. Your system is restored using the restore point you specified. This process may take several minutes, and may restart your computer. Returning your system to its factory condition If your computer experiences problems that are not recoverable by other methods, you may need to reinstall everything to return your system to its factory condition. You can recover from either your hard drive or the recovery backup you have created. If you can still run Windows and have not deleted the recovery partition, see "Recovering from Windows" on page 46. If you cannot run Windows, your original hard drive has been completely re-formatted or you have installed a replacement hard drive, see "Recovering from a recovery backup" on page 50. Recovery - 45
46 Recovering from Windows Start Acer Recovery Management: From Start, type 'Recovery' and then click Acer Recovery Management in the list of apps. Two options are available, Restore Factory Settings (Reset my PC) or Customized Restore (Refresh my PC). Restore Factory Settings deletes everything on your hard drive, then reinstalls Windows and all software and drivers that were pre-installed on your system. If you can access important files on your hard drive, back them up now. See "Restore Factory Settings with Acer Recovery Management" on page 47. Customized Restore will attempt to retain your files (user data) but will reinstall all software and drivers. Software installed since you purchased your PC will be removed (except software installed from the Windows Store). See "Customized Restore with Acer Recovery Management" on page Recovery
47 Restore Factory Settings with Acer Recovery Management 1. Click Restore Factory Settings. Caution: 'Restore Factory Settings' will erase all files on your hard drive. 2. The Reset your PC window opens. Images for reference only. 3. Click Next, then choose how to erase your files: Recovery - 47
48 a. Just remove my files quickly erases all files before restoring your computer and takes about 30 minutes. b. Fully clean the drive completely cleans the drive after each file is erased, so no files can be viewed after the recovery. Cleaning the drive takes much longer, up to 5 hours, but is much more secure as old files are completely removed. 4. Click Reset. 5. The recovery process begins by restarting your computer, then continues by copying files to your hard drive. 6. After the recovery has finished, you can start using your computer by repeating the first-start process Recovery

49 Customized Restore with Acer Recovery Management 1. Click Customized Restore (Retain User Data). 2. The Refresh your PC window opens. 3. Click Next, then Refresh. 4. The recovery process begins by restarting your computer, then continues by copying files to your hard drive. This process takes about 30 minutes. Recovery - 49
50 Recovering from a recovery backup To recover from a recovery backup on a USB drive: 1. Find your recovery backup. 2. Plug in the USB drive and turn on your computer. 3. If it is not already enabled, you must enable the F12 Boot Menu: a. Press <F2> when starting your computer. b. Use the left or right arrow keys to select the Main menu. c. Press the down key until F12 Boot Menu is selected, press <F5> to change this setting to Enabled. d. Use the left or right arrow keys to select the Exit menu. e. Depending on the type of BIOS your computer uses, select Save Changes and Exit or Exit Saving Changes and press Enter. Select OK or Yes to confirm. f. Your computer will restart. 4. During startup, press <F12> to open the boot menu. The boot menu allows you to select which device to start from, select the USB drive. a. Use your arrow keys to select USB Device, then press Enter. b. Windows starts from the recovery backup instead of the normal startup process. 5. Select your keyboard type. 6. Select Troubleshoot and then choose the type of recovery to use: 50 - Recovery
51 a. Click Advanced then System Restore to start Microsoft System Restore: Microsoft System Restore periodically takes a 'snapshot' of your system settings and saves them as restore points. In most cases of hard-to-resolve software problems, you can return to one of these restore points to get your system running again. b. Click Reset your PC to start the reset process: Reset your PC deletes everything on your hard drive, then reinstalls Windows and all software and drivers that were pre-installed on your system. If you can access important files on your hard drive, back them up now. See "Reset your PC from the recovery backup" on page 52. c. Click Refresh your PC to start the refresh process: Refresh your PC will attempt to retain your files (user data) but will reinstall all software and drivers. Software installed since you purchased your PC will be removed (except software installed from the Windows Store). See "Refresh your PC from the recovery backup" on page 53. Recovery - 51
52 Reset your PC from the recovery backup Caution: Reset your PC will erase all files on your hard drive. 1. The Reset your PC window opens. Images for reference only. 2. Click Next. 3. Select the operating system to recover (normally only one option is available). 4. Choose to keep any changes to the hard drive: a. If you have deleted the recovery partition or otherwise changed the partitions on the hard drive and want to keep these changes, select No. b. To completely restore your computer to Factory Settings, select Yes. 5. Choose how to erase your files: a. Just remove my files quickly erases all files before restoring your computer and takes about 30 minutes. b. Fully clean the drive completely cleans the drive after each file is erased, so no files can be viewed after the recovery. Cleaning the 52 - Recovery
53 drive takes much longer, up to 5 hours, but is much more secure as old files are completely removed. 6. Click Reset. 7. After the recovery has finished, you can start using your computer by repeating the first-start process. Refresh your PC from the recovery backup 1. The Refresh your PC window opens. 2. Click Next. 3. Select the operating system to recover (normally only one option is available). 4. Click Refresh. 5. The recovery process begins by restarting your computer, then continues by copying files to your hard drive. This process takes about 30 minutes. Recovery - 53
54 A CER CLEAR. FI Note: Only for certain models. With Acer clear.fi, you can enjoy videos, photos and music. Stream media from, or to, other devices with Acer clear.fi installed. Note: All devices must be connected to the same network. To watch videos or listen to music open clear.fi Media, to browse photos open clear.fi Photo. Important: When you first open a clear.fi application, Windows Firewall will ask for permission to allow clear.fi to access the network. Select Allow Access in each window. Navigating media and photos The list in the left panel shows your computer ( My Library ), then other devices if any are connected to your network ( Home Shared ). To view files on your computer, select one of the categories under My Library, then browse the files and folder on the right Acer clear.fi
55 Shared files Devices connected to your network are shown in the Home Shared section. Select a device, then the select the category to explore. After a short delay, shared files and folders are shown on the right. Browse to the file you want to play, then double-click to start playback. Use the media controls in the bar across the bottom of the screen to control playback. For example, when music is selected, you can play, pause or stop playback, and adjust the volume. Note: You must activate sharing on the device that stores the files. Open clear.fi on the device that stores the files, select Edit then make sure Share my library on local network is active. Which devices are compatible? Certified Acer devices with clear.fi or DLNA software can be used with the clear.fi software. These include DLNA-compliant PCs, smartphones, and NAS (Network Attached Storage) devices. Acer clear.fi - 55

56 Playing to another device If you want to play the media on another device, you need to do the following: 1. In the bottom right corner, select Play to. 2. Select the remote device that will be used to play the file. Note: Only devices optimised for playback are available in this list, certain PCs and storage devices will not appear. To add a Windows PC to this list, open Windows Media Player, select Stream and Allow remote control of my Player Select a file in the main window, then use the media controls in the bar across the bottom of the screen to control the remote device. For more help, go to Acer clear.fi
57 POWER MANAGEMENT This computer has a built-in power management unit that monitors system activity. System activity refers to any activity involving one or more of the following devices: keyboard, mouse, hard disk, peripherals connected to the computer, and video memory. If no activity is detected for a period of time, the computer stops some or all of these devices in order to conserve energy. Acer Green Instant On Note: For selected models only. The Acer Green Instant On feature allows your computer to wake up from Sleep mode in less than the time it takes to open the lid. When you close the lid, or leave your computer for a while, your computer enters Sleep mode. While the computer is in Sleep mode, the power indicator LED will flash orange. Open the lid or press any key to wake the computer from Sleep mode. After a certain amount of time in Sleep mode, the computer will automatically enter Deep Sleep to preserve battery life. When the computer is in Deep Sleep, the power indicator LED will be turned off. In this state, battery remains ready to use for many weeks. Press the power button to wake up from Deep Sleep. Power management - 57
58 Note: Once in Deep Sleep, your PC will consume significantly less power compared with Sleep mode, but it will take a little longer to wake up from Deep Sleep. Deep Sleep and Sleep mode work together to ensure that your computer saves as much power as possible while still enabling quick, instant on access. To save more power, your computer will typically enter and stay in Deep Sleep during times when it will not be frequently accessed, for example, during the middle of the night. To provide quicker access, your computer will enter and stay in Sleep mode during times when it will be frequently accessed, for example, during working hours. Saving power Disable Fast startup Your computer uses Fast startup to start quickly, but also uses a small amount of power to check for signals to start. These checks will slowly drain your computer s battery. If you prefer to reduce your computer s power requirements and environmental impact, turn off Fast startup: Note: If Fast startup is off, your computer will take longer to start from Sleep. If your computer features Acer Instant On or Acer Always Connect, these will also be turned off. Your computer will also not start if it receives an instruction to start over a network (Wake on LAN) Power management


59 1. Open the Desktop. 2. Click Power Options in the Notification area. 3. Select More Power Options. 4. Select Choose what the power buttons do. 5. To access Shutdown Settings, select Change settings that are currently unavailable. Power management - 59
60 6. Scroll down and disable Turn on fast startup. 7. Select Save changes Power management
61 B ATTERY PACK The computer uses an embedded battery pack that gives you long use between charges. Battery pack characteristics The battery pack has the following characteristics: Employs current battery technology standards. Delivers a battery-low warning. The battery is recharged whenever you connect the computer to the AC adapter. Your computer supports charge-in-use, enabling you to recharge the battery while you continue to operate the computer. However, recharging with the computer turned off results in a significantly faster charge time. Charging the battery To charge the battery, plug the AC adapter into the computer, and connect to a mains power outlet. You can continue to operate your computer on AC power while your battery is charging. However, charging the battery with the computer turned off results in a significantly faster charge time. Note: You are advised to charge the battery before retiring for the day. Charging the battery overnight before traveling enables you to start the next day with a fully charged battery. Battery pack - 61
62 Conditioning a new battery pack Before you use a battery pack for the first time, there is a conditioning process that you should follow: 1. Connect the AC adapter and fully charge the battery. 2. Disconnect the AC adapter. 3. Turn on the computer and operate using battery power. 4. Fully deplete the battery until the battery-low warning appears. 5. Reconnect the AC adapter and fully charge the battery again. Follow these steps again until the battery has been charged and discharged three times. Use this conditioning process for all new batteries, or if a battery hasn't been used for a long time. Warning! Do not expose battery packs to temperatures below 0 C (32 F) or above 45 C (113 F). Extreme temperatures may adversely affect the battery pack. By following the battery conditioning process you condition your battery to accept the maximum possible charge. Failure to follow this procedure will prevent you from obtaining the maximum battery charge, and will also shorten the effective lifespan of the battery. In addition, the useful lifespan of the battery is adversely affected by the following usage patterns: Using the computer on constant AC power Battery pack
63 Not discharging and recharging the battery to its extremes, as described above. Frequent use; the more you use the battery, the faster it will reach the end of its effective life. A standard computer battery has a life span of more than 1,000 charges. Optimizing battery life Optimizing battery life helps you get the most out of battery operation, prolonging the charge/recharge cycle and improving recharging efficiency. You are advised to follow the suggestions set out below: Use AC power whenever possible, reserving battery for on-the-go use. Eject a PC Card if it is not being used, as it will continue to draw power (for selected models). Excessive recharging decreases the battery life. Look after your AC adapter and battery. Checking the battery level The Windows power meter indicates the current battery level. Rest the cursor over the battery/power icon on the taskbar to see the battery's present charge level. Battery-low warning When using battery power pay attention to the Windows power meter. Battery pack - 63
64 Warning! Connect the AC adapter as soon as possible after the battery-low warning appears. Data will be lost if the battery to become fully depleted and the computer shuts down. When the battery-low warning appears, the recommended course of action depends on your situation: Situation Recommended Action The AC adapter and a power outlet are available. The AC adapter or a power outlet is unavailable. 1. Plug the AC adapter into the computer, and then connect to the mains power supply. 2. Save all necessary files. 3. Resume work. Turn off the computer if you want to recharge the battery rapidly. 1. Save all necessary files. 2. Close all applications. 3. Turn off the computer Battery pack
65 TRAVELING WITH YOUR COMPUTER This section gives you tips and hints to consider when moving around or traveling with your computer. Disconnecting from the desktop Follow these steps to disconnect your computer from external accessories: 1. Save any open files. 2. Remove discs from optical drive(s). 3. Shut down the computer. 4. Close the display cover. 5. Disconnect the cord from the AC adapter. 6. Disconnect any keyboard, pointing device, printer, external monitor and other external devices. 7. Disconnect the Kensington lock if you are using one to secure the computer. Moving around When you are just moving within short distances, for example, from your office desk to a meeting room. Traveling with your computer - 65
66 Preparing the computer Before moving the computer, close and latch the display cover to place it in Sleep mode. You can now safely take the computer anywhere you go within the building. To bring the computer out of Sleep mode, open the display; then press and release the power button. If you are taking the computer to a client's office or a different building, you may choose to shut down the computer: Press the Windows key + <C>, click Settings > Power then click Shut Down. Or: You can put the computer in Sleep mode by pressing <Fn> + <F4>. Then close the display. When you are ready to use the computer again, open the display; then press and release the power button. Note: The computer may enter Hibernation or Deep Sleep mode after being in Sleep mode for a period of time. What to bring to meetings If your meeting is relatively short, you probably do not need to bring anything with you other than your computer. If your meeting will be longer, or if your battery is not fully charged, you may want to bring the AC adapter with you to plug in your computer in the meeting room Traveling with your computer
67 If the meeting room does not have an electrical outlet, reduce the drain on the battery by putting the computer in Sleep mode. Press <Fn> + <F4> or close the display cover whenever you are not actively using the computer. Taking the computer home When you are moving from your office to your home or vice versa. Preparing the computer After disconnecting the computer from your desktop, follow these steps to prepare the computer for the trip home: Check that you have removed all media and compact discs from the drive(s). Failure to remove the media can damage the drive head. Pack the computer in a protective case that can prevent the computer from sliding around and cushion it if it should fall. Caution: Avoid packing items next to the top cover of the computer. Pressure against the top cover can damage the screen. What to take with you Unless you have some items at home, take the following items with you: AC adapter and power cord. The printed setup poster. Traveling with your computer - 67
68 Special considerations Follow these guidelines to protect your computer while traveling to and from work: Minimize the effects of temperature changes by keeping the computer with you. If you need to stop for an extended period of time and cannot carry the computer with you, leave the computer in the trunk of the car to avoid exposing the computer to excessive heat. Changes in temperature and humidity can cause condensation. Allow the computer to return to room temperature, and inspect the screen for condensation before turning on the computer. If the temperature change is greater than 10 C (18 F), allow the computer to come to room temperature slowly. If possible, leave the computer for 30 minutes in an environment with a temperature between outside and room temperature. Setting up a home office If you frequently work on your computer at home, you may want to purchase a second AC adapter for use at home. With a second AC adapter, you can avoid carrying the extra weight to and from home. If you use your computer at home for significant periods of time, you might also want to add an external keyboard, monitor or mouse Traveling with your computer
69 Traveling with the computer When you are moving within a larger distance, for instance, from your office building to a client's office building or traveling locally. Preparing the computer Prepare the computer as if you were taking it home. Make sure that the battery in the computer is charged. Airport security may require you to turn on your computer when carrying it into the gate area. What to take with you Take the following items with you: AC adapter. Additional printer driver files if you plan to use another printer. Special considerations In addition to the guidelines for taking the computer home, follow these guidelines to protect your computer while traveling: Always take the computer as carry-on luggage. If possible, have the computer inspected by hand. Airport security X-ray machines are safe, but do not put the computer through a metal detector. Traveling internationally with the computer When you are moving from country to country. Traveling with your computer - 69
70 Preparing the computer Prepare the computer as you would normally prepare it for traveling. What to bring with you Bring the following items with you: AC adapter. Power cords that are appropriate for the country to which you are traveling. Additional printer driver files if you plan to use another printer. Proof of purchase, in case you need to show it to customs officials. International Travelers Warranty passport. Special considerations Follow the same special considerations as when traveling with the computer. In addition, these tips are useful when traveling internationally: When traveling in another country, check that the local AC voltage and the AC adapter power cord specifications are compatible. If not, purchase a power cord that is compatible with the local AC voltage. Do not use converter kits sold for appliances to power the computer. If you are using the modem, check if the modem and connector are compatible with the telecommunications system of the country you are traveling in Traveling with your computer
71 SECURING YOUR COMPUTER Your computer is a valuable investment that you need to take care of. Learn how to protect and take care of your computer. Security features include hardware and software locks a security notch and passwords. Using a computer security lock The computer comes with a Kensington-compatible security slot for a security lock. Wrap a computer security lock cable around an immovable object such as a table or handle of a locked drawer. Insert the lock into the notch and turn the key to secure the lock. Some keyless models are also available. Using passwords Passwords protect your computer from unauthorized access. Setting these passwords creates several different levels of protection for your computer and data: Supervisor Password prevents unauthorized entry into the BIOS utility. Once set, you must enter this password to gain access to the BIOS utility. See "BIOS utility" on page 87. User Password secures your computer against unauthorized use. Combine the use of this password with password checkpoints on bootup and resume from Hibernation (if available) for maximum security. Securing your computer - 71
72 Password on Boot secures your computer against unauthorized use. Combine the use of this password with password checkpoints on bootup and resume from Hibernation (if available) for maximum security. Important: Do not forget your Supervisor Password! If you forget your password, please get in touch with your dealer or an authorized service center. Entering passwords When a password is set, a password prompt appears in the center of the display screen. When the Supervisor Password is set, a prompt appears when you press <F2> to enter the BIOS utility at boot-up. Type the Supervisor Password and press <Enter> to access the BIOS utility. If you enter the password incorrectly, a warning message appears. Try again and press <Enter>. When the User Password is set and the password on boot parameter is enabled, a prompt appears at boot-up. Type the User Password and press <Enter> to use the computer. If you enter the password incorrectly, a warning message appears. Try again and press <Enter>. Important: You have three chances to enter a password. If you fail to enter the password correctly after three tries, the system halts. Press and hold the power button for four seconds to shut down the computer. Then turn on the computer again, and try again Securing your computer
73 A CER THEFT SHIELD Note: This feature is only available on certain models. Acer Theft Shield is a tool for your computer that helps prevent theft by alerting you if your computer is moved out of range of your Android cellphone or the selected wireless network. To start Acer Theft Shield, double-click the Acer Theft Shield icon on Desktop, or from Start simply start typing 'Acer Theft Shield' to open Search and list the results. Note: Acer Theft Shield needs a Windows Log On password. If you have not set a password, you will be reminded to set one. Once Acer Theft Shield is running, you will be asked to select the type of detection you wish to use. You may select: Use an Android phone. Acer Theft Shield - 73

74 Use a Wi-Fi network. If you select Use an Android phone, you will be shown a QR (Quick Reference) code that you can scan using your phone. The QR contains a link that will allow you to download the Android app to your phone. Tip: If you do not select to use an Android phone at this stage, you can select to use an Android phone at any time from "Settings" on page Acer Theft Shield
75 Note: If your phone does not have a barcode reader installed, you will need to download one before you can scan the QR code. Once you have downloaded the Android app to your phone, click Next to start setting up Acer Theft Shield. Click Start to turn on your notebook s Wi-Fi hotspot feature, this will allow your phone to detect the notebook. Using Acer Theft Shield General Once you have selected the method to use, you will be shown the General page which allows you to activate Acer Theft Shield and select a hotkey combination to activate Acer Theft Shield. You can press the hotkey combination to protect your computer at any time. Acer Theft Shield - 75
76 Settings The Settings page allows you to change alarm settings and also set up notifications on your Android phone. Tap Edit under Configure your notebook s Wi-Fi hotspot network to change the SSID that your notebook will broadcast while linking to your Android cellphone. You can also change the alarm notification duration from the drop-down menu under Alarm mode settings. Tip: To view the QR code to download the Android app again, click the icon Acer Theft Shield
77 WIRELESS NETWORKS Connecting to the Internet Your computer's wireless connection is turned on by default. Windows will detect and display a list of available networks during setup. Select your network and enter the password if required. Otherwise, open Internet Explorer and follow the instructions. Please refer to your ISP or router documentation. Acer Instant Connect Instant Connect ensures a faster connection to any of the networks that your computer connects to most frequently. Wireless networks A wireless LAN or WLAN is a wireless local area network, which may link two or more computers without using wires. Setting up a wireless network is easy and allows you to share files, peripheral devices and an Internet connection. Wireless networks - 77
78 What are benefits of a wireless network? Mobility Wireless LAN systems allow you and other users of your home network to share access to files and devices connected to the network, for example a printer or scanner. Also you can share an internet connection with other computers in your home. Installation speed and simplicity Installing a wireless LAN system can be fast and easy and eliminates the need to pull cables through walls and ceilings. Components of a wireless LAN To set up your Wireless network at home you need to have the following: Access point (router) Access points (routers) are two-way transceivers that broadcast data into the surrounding environment. Access points act as a mediator between wired and wireless network. Most routers have a built-in DSL modem that will allow you access to a high speed DSL internet connection. The ISP (Internet Service Provider) you have chosen normally supplies a modem/ router with the subscription to their services. Read carefully the documentation supplied with your Access point/router for detailed setup instructions Wireless networks
79 U SING A BLUETOOTH CONNECTION Bluetooth is a technology enabling you to transfer data wirelessly over short distances between many different types of devices. Bluetoothenabled devices include computers, cell phones, tablets, wireless headsets, and keyboards. To use Bluetooth, you must ensure the following: 1. Bluetooth is enabled on both devices. 2. Your devices are "paired" (or connected). Enabling and disabling Bluetooth The Bluetooth adapter must be enabled on both devices. For your computer, this may be an external switch, a software setting, or a separate Bluetooth dongle plugged into the computer s USB port (if no internal Bluetooth adapter is available). Note: Please check your devices owner s manual to determine how to turn on its Bluetooth adapter. Using a Bluetooth connection - 79

80 Then, from the notification area, click the Bluetooth icon, and select Open Settings. Select the Allow Bluetooth devices to find this computer check box, click Apply, and then click OK Using a Bluetooth connection

81 The Bluetooth adapter in your computer is now enabled and ready for you to add Bluetooth devices. To disable your computer s Bluetooth adapter, do the following: 1. Press < > + <W> and then type Wireless. 2. In the results, click on Wireless. 3. Click the toggle under Bluetooth to enable/disable it. Adding a Bluetooth device Every new device must first be "paired" with your computer s Bluetooth adapter. This means it must first be authenticated for security purposes. You only need to pair once. After that, simply turning on the Bluetooth adapter of both devices will connect them. From the notification area, click the Bluetooth icon, and select Add a Bluetooth Device. Using a Bluetooth connection - 81
82 Click on the device you want to add. A code displays on your computer, which should match the code displayed on your device. Select Yes. Then, accept the pairing from your device Using a Bluetooth connection
83 Note: Some devices using older versions of the Bluetooth technology require both devices to enter a PIN. In the case of one of the devices not having any inputs (as in a headset), the passcode is hardcoded into the device (usually "0000" or "1234"). Consult your device s user manual for more information. Your device will show up in the list of devices if it was successfully paired. Open the Control Panel and under Hardware and Sound click on View devices and printers. Right cilck on your device and select Advanced Operations > Connect to operation window. Using a Bluetooth connection - 83

84 The operation window enables you to play music and audio from your device through your computer, send files to your device and change Bluetooth settings Using a Bluetooth connection
Using GIGABYTE Notebook for the First Time
 Congratulations on your purchase of the GIGABYTE Notebook. This manual will help you to get started with setting up your notebook. The final product configuration depends on the model at the point of your
How To Use An Acer Notebook With A Power Button And Power Button On Itunes Powerbook 2.2 (Acer Notebook) With A Usb Power Button (Powerbook) On A Pc Or Ipad (Powerpoint) With Power Button
 With A Usb Power Button (Powerbook) On A Pc Or Ipad (Powerpoint) With Power Button") - 1 Aspire E 14 Series User s Manual 2-2014. All Rights Reserved. Aspire E 14 Series Covers: Aspire E5-471, E5-471G, E5-431, E5-421, E5-421G, E5-411 This revision: June 2014 Sign up for an Acer ID and
- 1 Aspire E 14 Series User s Manual 2-2014. All Rights Reserved. Aspire E 14 Series Covers: Aspire E5-471, E5-471G, E5-431, E5-421, E5-421G, E5-411 This revision: June 2014 Sign up for an Acer ID and
Using GIGABYTE Notebook for the First Time
 Congratulations on your purchase of the GIGABYTE Notebook! This Manual will help you to get started with setting up your notebook. For more detailed information, please visit our website at http://www.gigabyte.com.
TravelMate P2 Series (13") User s Manual - 1
 User s Manual - 1") TravelMate P2 Series (13") User s Manual - 1 2-2014. All Rights Reserved. TravelMate P2 Series (13") Covers: P236-M This revision: November 2014 Sign up for an Acer ID and enjoy great benefits 1. Ensure
TravelMate P2 Series (13") User s Manual - 1 2-2014. All Rights Reserved. TravelMate P2 Series (13") Covers: P236-M This revision: November 2014 Sign up for an Acer ID and enjoy great benefits 1. Ensure
Using GIGABYTE Notebook for the First Time
 Congratulations on your purchase of the GIGABYTE Notebook P7! This Manual will help you to get started with setting up your notebook. For more detailed information, please visit our website at http://www.gigabyte.com.
Using GIGABYTE Notebook for the First Time
 Congratulations on your purchase of the GIGABYTE Notebook. This manual will help you to get started with setting up your notebook. The final product configuration depends on the model at the point of your
Using GIGABYTE Notebook for the First Time
 P34 V6.0 Congratulations on your purchase of the GIGABYTE Notebook. This manual will help you to get started with setting up your notebook. The final product configuration depends on the model at the point
TravelMate Notebook Series
 TravelMate Notebook Series Quick Guide Product registration When using your product for the first time, it is recommended that you immediately register it. This will give you access to some useful benefits,
Sign up for an Acer ID and enable Acer Remote Files
 User s Manual - 1 2-2014. All Rights Reserved. Aspire E 17 Series Covers: Aspire E5-771 / E5-771G / E5-731 / E5-731G / E5-721 This revision: April 2014 Sign up for an Acer ID and enable Acer Remote Files
Using GIGABYTE Notebook for the First Time
 Congratulations on your purchase of the GIGABYTE Notebook. This manual will help you to get started with setting up your notebook. The final product configuration depends on the model at the point of your
Aspire E 15 User s Manual - 1
 Aspire E 15 User s Manual - 1 2-2014. All Rights Reserved. Aspire E 15 Covers: ES1-511 This revision: May 2014 Sign up for an Acer ID and enable Acer Remote Files Open the Acer Portal from the Start screen
Using AORUS Notebook for the First Time
 V2.0 Congratulations on your purchase of the AORUS Notebook! This Manual will help you to get started with setting up your notebook. For more detailed information, please visit our website at http://www.aorus.com.
Using GIGABYTE Notebook for the First Time
 P55 V3.0 Congratulations on your purchase of the GIGABYTE Notebook. This manual will help you to get started with setting up your notebook. The final product configuration depends on the model at the point
Lenovo IdeaPad U510. User Guide V1.0. Read the safety notices and important tips in the included manuals before using your computer.
 Lenovo IdeaPad U510 User Guide V1.0 Read the safety notices and important tips in the included manuals before using your computer. Note Before using the product, be sure to read Lenovo Safety and General
Using GIGABYTE Notebook for the First Time
 Congratulations on your purchase of the GIGABYTE Notebook. This manual will help you to get started with setting up your notebook. The final product configuration depends on the model at the point of your
TravelMate P2 Series (15" non-touch) User s Manual - 1
 User s Manual - 1") TravelMate P2 Series (15" non-touch) User s Manual - 1 2-2013. All Rights Reserved. TravelMate P2 Series (15" non-touch) Covers: TravelMate P255-MG / P255-M This revision: October 2013 Sign up for an Acer
TravelMate P2 Series (15" non-touch) User s Manual - 1 2-2013. All Rights Reserved. TravelMate P2 Series (15" non-touch) Covers: TravelMate P255-MG / P255-M This revision: October 2013 Sign up for an Acer
Sign up for an Acer ID and enjoy great benefits
 User s Manual - 1 2-2014. All Rights Reserved. Aspire E 17 Covers: Aspire ES1-711 This revision: June 2014 Sign up for an Acer ID and enjoy great benefits Open the Acer Portal app from the Start screen
Sign up for an Acer ID and enjoy great benefits
 User s Manual - 1 2-2015. All Rights Reserved. Aspire V 15 Series Covers: V3-575G / V3-575 / V3-574G / V3-574 This revision: April 2015 Sign up for an Acer ID and enjoy great benefits Open the Acer Portal
Sign up for an Acer ID and enable Acer Remote Files
 User s Manual - 1 2-2014. All Rights Reserved. TravelMate P2 Series Covers: TravelMate P276-MG / P276-M This revision: May 2014 Sign up for an Acer ID and enable Acer Remote Files 1. Ensure you are connected
TravelMate P6 Series (14") User s Manual
 User s Manual") TravelMate P6 Series (14") User s Manual 2-2013. All Rights Reserved. TravelMate P6 Covers: TravelMate P645-S This revision: October 2013 Sign up for an Acer ID and enable Acer Remote Files Open the Acer
TravelMate P6 Series (14") User s Manual 2-2013. All Rights Reserved. TravelMate P6 Covers: TravelMate P645-S This revision: October 2013 Sign up for an Acer ID and enable Acer Remote Files Open the Acer
Aspire E 15 Touch Series User s Manual - 1
 Aspire E 15 Touch Series User s Manual - 1 2-2015. All Rights Reserved. Aspire E 15 Touch Series Covers: Aspire E5-574TG / E5-574T / E5-573TG / E5-573T / E5-532TG / E5-532T This revision: March 2015 Sign
Aspire Switch 10 User s Manual - 1
 Aspire Switch 10 User s Manual - 1 2-2014. All Rights Reserved. Aspire Switch 10 Covers: SW5-011 This revision: May 2014 Regulatory model number: P0JAC Sign up for an Acer ID and enable Acer Remote Files
Extensa 15 Series User s Manual - 1
 Extensa 15 Series User s Manual - 1 2-2015. All Rights Reserved. Extensa 15 Series Covers: EX2511 / EX2511G This revision: March 2015 Sign up for an Acer ID and enjoy great benefits 1. Ensure you are connected
How To Take Care Of Your Computer
 Aspire E1-522 User s Manual 2013 All Rights Reserved. Aspire E1-522 User s Manual This revision: 04/2013 AcerCloud frees you to enjoy your digital life anytime, anywhere! This computer comes with AcerCloud
TravelMate Notebook Series
 TravelMate Notebook Series Quick Guide Acer recommends... Productivity Software Work Great with Microsoft Office 2010 - Express your ideas, solve problems and simplify everyday projects with Office 2010.
Lenovo IdeaPad Yoga11
 Lenovo IdeaPad Yoga11 User Guide V1.0 Read the safety notices and important tips in the included manuals before using your computer. Notes Before using the product, be sure to read Lenovo Safety and General
Sign up for an Acer ID and enable Acer Remote Files
 User s Manual - 1 2-2013. All Rights Reserved. Aspire S7 Covers: Aspire S7-392 This revision: October 2013 Sign up for an Acer ID and enable Acer Remote Files Open the Acer Portal from the Start screen
Aspire E 15 Series User s Manual - 1
 Aspire E 15 Series User s Manual - 1 2-2014. All Rights Reserved. Aspire E 15 Series Covers: E5-571 / E5-531 / E5-551 / E5-521 / E5-511 This revision: May 2014 Sign up for an Acer ID and enable Acer Remote
Getting to Know the New Lenovo Safety and General Information Guide
 Lenovo IdeaPad Yoga 13 User Guide V1.0 Read the safety notices and important tips in the included manuals before using your computer. Note Before using the product, be sure to read Lenovo Safety and General
User Manual I1010Q16DCZ
 User Manual I1010Q16DCZ Explanation, Note and Warning *Explanation: important information, which can help you better use your tablet PC. *Note: indicates that not observing the content may result in hardware
How To Use An Easypad On A Pc Or Macbook Or Ipad (For Pc)
") User Guide Congratulations on your new EasyPad 1000. Please follow the instructions in this manual carefully. Statement: If the final version of this product has any differences from the description of
User Guide Congratulations on your new EasyPad 1000. Please follow the instructions in this manual carefully. Statement: If the final version of this product has any differences from the description of
Acer Aspire S3 Series. User's Manual
 Acer Aspire S3 Series User's Manual 2011 All Rights Reserved. Acer Aspire S3 Series User's Manual Original Issue: 09/2011 Model number: Serial number: Date of purchase: Place of purchase: TABLE OF CONTENTS
Lenovo IdeaPad. User Guide. Read the safety notices and important tips in the included manuals before using your computer.
 Lenovo IdeaPad User Guide Read the safety notices and important tips in the included manuals before using your computer. Notes Before using the product, be sure to read Lenovo Safety and General Information
Lenovo Yoga 2 13. User Guide. Read the safety notices and important tips in the included manuals before using your computer.
 Lenovo Yoga 2 13 User Guide Read the safety notices and important tips in the included manuals before using your computer. Notes Before using the product, be sure to read Lenovo Safety and General Information
Lenovo IdeaPad U530 Touch User Guide
 Lenovo IdeaPad U530 Touch User Guide Read the safety notices and important tips in the included manuals before using your computer. Notes Before using the product, be sure to read Lenovo Safety and General
Lenovo Miix 2 8. User Guide. Read the safety notices and important tips in the included manuals before using your computer.
 Lenovo Miix 2 8 User Guide Read the safety notices and important tips in the included manuals before using your computer. Notes Before using the product, be sure to read Lenovo Safety and General Information
Lenovo IdeaPad. User Guide. Read the safety notices and important tips in the included manuals before using your computer.
 Lenovo IdeaPad User Guide Read the safety notices and important tips in the included manuals before using your computer. Notes Before using the product, be sure to read Lenovo Safety and General Information
Quick Start Turning on the Tablet PC for the First Time
 User s Manual DL46 Getting Started Congratulations on your purchase of a Tablet PC. The Tablet PC is a fully functional PC with built-in LAN, and wireless connectivity. With your Tablet PC you will be
Notebook Tour User Guide
 Notebook Tour User Guide Copyright 2007 Hewlett-Packard Development Company, L.P. Microsoft and Windows are U.S. registered trademarks of Microsoft Corporation. Bluetooth is a trademark owned by its proprietor
Aspire V5-123 User s Manual
 Aspire V5-123 User s Manual 2013 All Rights Reserved. Aspire V5-123 User s Manual This revision: 07/2013 AcerCloud frees you to enjoy your digital life anytime, anywhere! This computer comes with AcerCloud
Operating Instructions - Recovery, Backup and Troubleshooting Guide
 Personal Computer Operating Instructions - Recovery, Backup and Troubleshooting Guide Please create your recovery discs immediately after setup. Please read this manual carefully before using your product.
Getting Started. rp5800, rp5700 and rp3000 Models
 Getting Started rp5800, rp5700 and rp3000 Models Copyright 2011 Hewlett-Packard Development Company, L.P. The information contained herein is subject to change without notice. Microsoft, Windows, and Windows
Lenovo IdeaPad Z500/P500
 Lenovo IdeaPad Z500/P500 User Guide V1.0 Read the safety notices and important tips in the included manuals before using your computer. Notes Before using the product, be sure to read Lenovo Safety and
Jarv Nmotion BTHL-201 Bluetooth Stereo Earbuds Users Guide
 Jarv Nmotion BTHL-201 Bluetooth Stereo Earbuds Users Guide Features: Bluetooth wireless technology Comfortable lightweight in-ear design with detachable sports ear hooks for added support High Definition
Lenovo IdeaPad S310/S410/S415/ S400 Touch/ S415 Touch
 Lenovo IdeaPad S310/S410/S415/ S400 Touch/ S415 Touch User Guide Read the safety notices and important tips in the included manuals before using your computer. Note Before using the product, be sure to
Lenovo B70. User Guide B70-80. Read the safety notices and important tips in the included manuals before using your computer.
 Lenovo B70 B70-80 User Guide Read the safety notices and important tips in the included manuals before using your computer. Notes Before using the product, be sure to read Lenovo Safety and General Information
User Guide. Memo S580. www.poshmobile.com
 User Guide Memo S580 www.poshmobile.com Welcome to POSH S580 Memo Quick Guide S580 is designed with Android system, support dual Sim and dual stand-by. Except for the standard communication function, it
Lenovo Flex 3. User Guide. Flex 3-1120/Flex 3-1130. Read the safety notices and important tips in the included manuals before using your computer.
 Lenovo Flex 3 Flex 3-1120/Flex 3-1130 User Guide Read the safety notices and important tips in the included manuals before using your computer. Notes Before using the product, be sure to read Lenovo Safety
Lenovo ideapad 100-14IBY/ 100-15IBY
 Lenovo ideapad 100-14IBY/ 100-15IBY User Guide Read the safety notices and important tips in the included manuals before using your computer. Notes Before using the product, be sure to read Lenovo Safety
Getting Started. HP Retail Systems
 Getting Started HP Retail Systems Copyright 2012, 2013 Hewlett-Packard Development Company, L.P. The information contained herein is subject to change without notice. Microsoft and Windows are U.S. registered
Notebook Tour User Guide
 Notebook Tour User Guide Copyright 2009 Hewlett-Packard Development Company, L.P. Bluetooth is a trademark owned by its proprietor and used by Hewlett-Packard Company under license. Microsoft and Windows
PA500II Enterprise Mobile Computer
 PA500II Enterprise Mobile Computer - PA500II - Quick Reference Guide 400891G Version 1.0 PA500II Product Introduction & Accessory Kit After opening the box, ensure the following accessories for the PA500II
Lenovo G700/G710. Read the safety notices and important tips in the included manuals before using your computer.
 Lenovo G700/G710 User Guide Read the safety notices and important tips in the included manuals before using your computer. Notes Before using the product, be sure to read Lenovo Safety and General Information
Thank you for choosing our mobile phone! Please read this manual before use.
 Thank you for choosing our mobile phone! Please read this manual before use. We reserve the right to upgrade the software and product and/or to make changes to this user manual without prior notice. from
Lenovo FLEX 3. User Guide FLEX 3-1480 FLEX 3-1580. Read the safety notices and important tips in the included manuals before using your computer.
 Lenovo FLEX 3 FLEX 3-1480 FLEX 3-1580 User Guide Read the safety notices and important tips in the included manuals before using your computer. Notes Before using the product, be sure to read Lenovo Safety
Sign up for an Acer ID and enjoy great benefits
 User s Manual - 1 2-2014. All Rights Reserved. Aspire E 13 Covers: Aspire ES1-311 This revision: July 2014 Sign up for an Acer ID and enjoy great benefits Open the Acer Portal app from the Start screen
Aspire E1 Series (14") User s Manual - 1
 User s Manual - 1") Aspire E1 Series (14") User s Manual - 1 2-2013. All Rights Reserved. Aspire E1 Series (14") Covers: Aspire E1-410 / E1-410G This revision: October 2013 Sign up for an Acer ID and enable Acer Remote Files
Aspire E1 Series (14") User s Manual - 1 2-2013. All Rights Reserved. Aspire E1 Series (14") Covers: Aspire E1-410 / E1-410G This revision: October 2013 Sign up for an Acer ID and enable Acer Remote Files
Lenovo IdeaPad Miix 10
 Lenovo IdeaPad Miix 10 User Guide Read the safety notices and important tips in the included manuals before using your computer. Notes Before using the product, be sure to read Lenovo Safety and General
A. FEDERAL COMMUNICATIONS COMMISSION (FCC) STATEMENT
 STATEMENT") A. FEDERAL COMMUNICATIONS COMMISSION (FCC) STATEMENT This equipment has been tested and found to comply with the limits for a Class B digital device, Pursuant to Part 15 the FCC rules. These limits are
A. FEDERAL COMMUNICATIONS COMMISSION (FCC) STATEMENT This equipment has been tested and found to comply with the limits for a Class B digital device, Pursuant to Part 15 the FCC rules. These limits are
Lenovo IdeaPad S200/S206
 Lenovo IdeaPad S200/S206 User Guide V1.0 Read the safety notices and important tips in the included manuals before using your computer. Note Before using the product, be sure to read Lenovo Safety and
Lenovo IdeaPad Flex 14/Flex 14D Flex 15/Flex 15D
 Lenovo IdeaPad Flex 14/Flex 14D Flex 15/Flex 15D User Guide Read the safety notices and important tips in the included manuals before using your computer. Notes Before using the product, be sure to read
Lenovo Yoga 2 Pro 13 inch Display User Guide
 Lenovo Yoga 2 Pro 13 inch Display User Guide Read the safety notices and important tips in the included manuals before using your computer. Notes Before using the product, be sure to read Lenovo Safety
X501H Notebook Computer USER' S MANUAL ENGLISH
 X501H Notebook Computer USER' S MANUAL ENGLISH July 2012 CONTENTS BEFORE YOU START... 5 Make sure you have everything... 5 Familiarize yourself with the computer... 6 OPENING THE DISPLAY PANEL... 6 FRONT
CM1-Mini Wi Drive. Setup Guide Ver 0.1
 CM1-Mini Wi Drive Setup Guide Ver 0.1 Please read the following safety information prior to using CM1. Only qualified personnel should service CM1. Faulty installation or service may invalidate any warranty
Care and Handling of Your VAIO Computer
 Care and Handling of Your VAIO Computer Proper Handling Use your computer on a clean dry, stable surface. Use only specified peripheral equipment and interface cables or you may experience problems. When
Aspire E1 Series (15") User s Manual - 1
 User s Manual - 1") Aspire E1 Series (15") User s Manual - 1 2-2013. All Rights Reserved. Aspire E1 Series (15") Covers: Aspire E1-572G / E1-572 / E1-570G / E1-570 / E1-532G / E1-532 / E1-530G / E1-530 / E1-510 This revision:
Aspire E1 Series (15") User s Manual - 1 2-2013. All Rights Reserved. Aspire E1 Series (15") Covers: Aspire E1-572G / E1-572 / E1-570G / E1-570 / E1-532G / E1-532 / E1-530G / E1-530 / E1-510 This revision:
TABLE OF CONTENTS QUICK START... 1 DIAGRAM OF THE DIGITAL PHOTO FRAME... 2 KEYPAD BUTTON FUNCTIONS... 3 REMOTE CONTROL FUNCTIONS..
 TABLE OF CONTENTS QUICK START........ 1 DIAGRAM OF THE DIGITAL PHOTO FRAME... 2 KEYPAD BUTTON FUNCTIONS..... 3 REMOTE CONTROL FUNCTIONS..4 DIGITAL PHOTO FRAME NAVIGATION........5 OSD MENU FUNCTIONS..6
Notebook Tour User Guide
 Notebook Tour User Guide Copyright 2008 Hewlett-Packard Development Company, L.P. Microsoft and Windows are U.S. registered trademarks of Microsoft Corporation. Bluetooth is a trademark owned by its proprietor
PAR Tablet 10 Quick Start Guide
 ParTech, Inc. 8383 Seneca Turnpike New Hartford, NY 13413 p.800.458.6898 www.partech.com PAR Tablet 10 Quick Start Guide PN 770505503 This material has been created in order to accommodate a wide range
USER MANUAL. 2. Get started 2.1 Overview The headset contains the following parts as shown in the figure:
 1. Introduction Thank you for purchasing our. Together with Bluetooth mobile phones or other Bluetooth embedded devices, Bluetooth headset allows you the freedom to make and receive calls while on the
Aspire E1 Series (17") User s Manual - 1
 User s Manual - 1") Aspire E1 Series (17") User s Manual - 1 2-2013. All Rights Reserved. Aspire E1 Series (17") Covers: Aspire E1-772G / E1-772 / E1-732G / E1-732 This revision: October 2013 Sign up for an Acer ID and enable
Aspire E1 Series (17") User s Manual - 1 2-2013. All Rights Reserved. Aspire E1 Series (17") Covers: Aspire E1-772G / E1-772 / E1-732G / E1-732 This revision: October 2013 Sign up for an Acer ID and enable
BLU Vivo 4.3 User Manual
 BLU Vivo 4.3 User Manual 1 Table of Contents Phone Safety Information... 3 Appearance and Key Functions... 4 Installation and Charging... 5 Phone Operation... 7 Communication... 10 Camera... 11 Gallery...
Lenovo Z410/Z510/ Z510 Touch
 Lenovo Z410/Z510/ Z510 Touch User Guide Read the safety notices and important tips in the included manuals before using your computer. Notes Before using the product, be sure to read Lenovo Safety and
Lenovo IdeaPad Y410p/Y510p User Guide
 Lenovo IdeaPad Y410p/Y510p User Guide Read the safety notices and important tips in the included manuals before using your computer. Notes Before using the product, be sure to read Lenovo Safety and General
Lenovo ideapad Y700. User Guide. Read the safety notices and important tips in the included manuals before using your computer.
 Lenovo ideapad Y700 User Guide Read the safety notices and important tips in the included manuals before using your computer. Notes Before using the product, be sure to read Lenovo Safety and General Information
How To Use A U.S. Cell Phone At Home
 U.S. Cellular Home Phone 1 Contents Getting to Know Your Device...5 Appearance... 5 LED Indicators... 6 Device Installation...7 Before You Begin... 7 Installing the Battery... 7 Installing the Power Adapter...
Lenovo IdeaPad U330p/U330 Touch U430p/U430 Touch
 Lenovo IdeaPad U330p/U330 Touch U430p/U430 Touch User Guide Read the safety notices and important tips in the included manuals before using your computer. Notes Before using the product, be sure to read
Jarv Joggerz BT-301 Bluetooth Stereo Headphones Users Guide
 Jarv Joggerz BT-301 Bluetooth Stereo Headphones Users Guide Features: Bluetooth Wireless technology Compact design fits in the palm of your hand and weighs less than 2 oz. Comfortable Behind the Neck design
Using GIGABYTE Notebook for the First Time
 Congratulations on your purchase of the GIGABYTE Notebook. This Manual will help you to get started with setting up your notebook. For more detailed information, please visit our website at http://www.gigabyte.com.
Tablet PC User Manual
 Tablet PC User Manual Please read all instructions carefully before use to get the most out of your Time2Touch Tablet PC. The design and features are subject to change without notice. Contents Important
Lenovo IdeaPad U310/U410 U310/U410 Touch
 Lenovo IdeaPad U310/U410 U310/U410 Touch User Guide V1.0 Read the safety notices and important tips in the included manuals before using your computer. Note Before using the product, be sure to read Lenovo
THE NEW GENERATION IN TECHNOLOGY. NI-3103A Alarm Clock w/fm Radio ipod & iphone Docking. Operating Instructions
 THE NEW GENERATION IN TECHNOLOGY NI-3103A Alarm Clock w/fm Radio ipod & iphone Docking Operating Instructions Table of Contents Important Safeguards... 3 Parts... 6 Controls... 6 To Set Up... 7 ipod/iphone
Nokia Bluetooth Headset BH-604 User Guide
 Nokia Bluetooth Headset BH-604 User Guide Issue 1 EN DECLARATION OF CONFORMITY Hereby, NOKIA CORPORATION declares that this HS-96W product is in compliance with the essential requirements and other relevant
Single Day Alarm Clock with. Bluetooth and USB Play-through
 Single Day Alarm Clock with Bluetooth and USB Play-through MODEL : BSC 200 READ THIS INSTRUCTION MANUAL BEFORE OPERATING THE APPLIANCE. SAVE THIS MANUAL FOR FUTURE REFERENCE. TABLE OF CONTENTS IMPORTANT
System Handbook. Table of contents. Welcome
 System Handbook Table of contents Welcome...1 CE Labelling...2 Delivery Scope...2 General Safety Instructions...2 Assembly and Startup...3 Problem Handling...5 Shuttle Mini-PC Complete System...6 Connectors
Otium Gear S Smart Watch User Guide Please read the manual before use. * For further information, please visit www.otiumobile.com
 Otium Gear S Smart Watch User Guide Please read the manual before use. * For further information, please visit www.otiumobile.com 1 About this manual You can use this Gear S as a companion device to some
Lenovo IdeaCentre Q180 Series
 Machine type: 10087/3110 Lenovo IdeaCentre Q180 Series User Guide Version 1.0 2011.09 31500665 Important Safety Information Before using this manual, it is important that you read and understand all of
Register your product and get support at. www.philips.com/welcome AS111. User manual
 Register your product and get support at www.philips.com/welcome AS111 User manual Contents 1 Important 4 Safety 4 English 2 Your docking speaker for AndroidTM 5 Introduction 5 What's in the box 5 Overview
Nokia USB Modem. Issue 1.1
 Nokia USB Modem Issue 1.1 2 Contents About your USB modem 3 Get started 3 Parts 3 Insert the SIM card 4 Insert a memory card 4 Install the connection manager 6 Uninstall from your computer 6 Internet connection
User Guide. BlackBerry Remote Stereo Gateway
 User Guide BlackBerry Remote Stereo Gateway MAT-17698-001 PRINTSPEC-021 SWD-324580-0416090732-001 Contents Basics...3 About the BlackBerry Remote Stereo Gateway...3 Components...4 LED notification...5
Point of view HDMI Smart TV dongle Mini RF Keyboard
 Point of view HDMI Smart TV dongle Mini RF Keyboard English Contents Contents... 1 General notices for use... 2 Disclaimer... 2 Box Contents... 2 1. HDMI TV dongle... 3 1.1. Product display... 3 1.2. Instructions
Lenovo Ideapad 300-14IBR/ Ideapad 300-15IBR User Guide
 Lenovo Ideapad 300-14IBR/ Ideapad 300-15IBR User Guide Read the safety notices and important tips in the included manuals before using your computer. Notes Before using the product, be sure to read Lenovo
User Guide Nokia Portable Wireless Charging Plate DC-50
 User Guide Nokia Portable Wireless Charging Plate DC-50 Issue 1.1 EN User Guide Nokia Portable Wireless Charging Plate DC-50 Contents For your safety 3 About your accessory 4 Keys and parts 5 Top up your
Introduction Configuring Your HP Mouse Batteries Replacing the Batteries Mouse Sensor Technology Navigating the HP Mouse Control Center
 Introduction Congratulations on your purchase of an HP mouse. This mouse is the latest in a wide range of computer peripherals manufactured by HP. It is designed to provide you with the highest level of
HP EliteBook and ProBook Notebook PCs - Upgrading from Windows 7 to Windows 8
 HP EliteBook and ProBook Notebook PCs - Upgrading from Windows 7 to Windows 8 This document pertains to HP business notebook computers to be upgraded from Windows 7 using a digital copy of Windows 8. You
Android Dongle. User Manual TL869
 Android Dongle User Manual TL869 2 User Manual Android TV Dongle Before using the product, please read this manual thoroughly. The specifications and software in this manual are subject to change without
Windows 10.1 Tablet (UB-15MS10 and UB-15MS10SA) FAQ December 2014
 FAQ December 2014") Windows 10.1 Tablet (UB-15MS10 and UB-15MS10SA) FAQ December 2014 Navigation... 2 Question 1: What are charms used for?... 2 Question 2: How do I navigate while using a mouse or trackpad?... 3 Question
Windows 10.1 Tablet (UB-15MS10 and UB-15MS10SA) FAQ December 2014 Navigation... 2 Question 1: What are charms used for?... 2 Question 2: How do I navigate while using a mouse or trackpad?... 3 Question
7 High-Resolution Digital Photo Frame
 TM 16-1003 User s Guide 7 High-Resolution Digital Photo Frame One demo photo included, as illustrated Please read this user s guide before using your new photo frame. Package contents Photo Frame AC Adapter
Digital Photo Picture Frame. Operation Manual
 Digital Photo Picture Frame Operation Manual 20070309 CONGRATULATIONS on your purchase of a Polaroid 7 LCD Digital Photo Picture Frame. Please read carefully and follow all warnings and instructions in
Panasonic. Proprietary Telephone for Electronic Modular Switching System MODEL NO. KX-17030. Illustrated Model: White 1
 Panasonic Proprietary Telephone for Electronic Modular Switching System MODEL NO. KX-17030 Illustrated Model: White 1 KX-T7030 is compatible with all of the Panasonic Electronic Modular Switching Systems