Table of Contents. Chapter 1 Overview In This Manual RASplus Features Product Information Chapter 2 Installation...
|
|
|
- Jody Hood
- 8 years ago
- Views:
Transcription
1
2

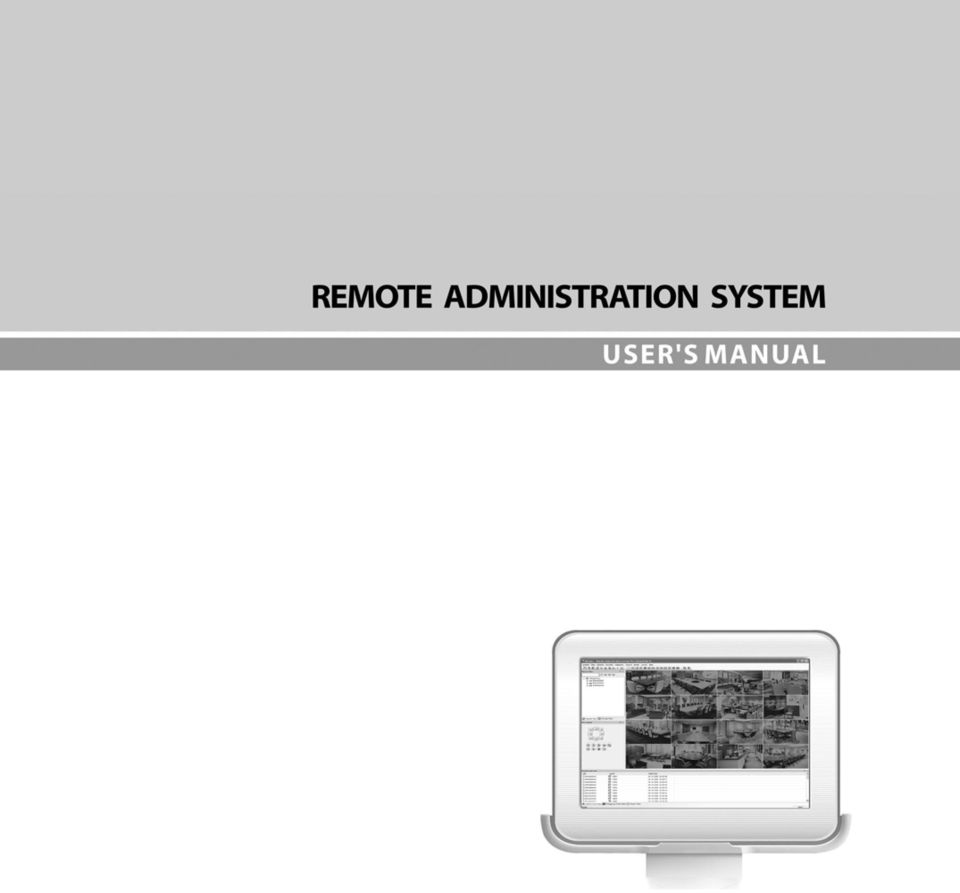
3 Remote Administration System Plus (RASplus) Table of Contents Chapter 1 Overview In This Manual RASplus Features Product Information... 1 Chapter 2 Installation... 3 Chapter 3 Configuration Screen Panel Menu Toolbar Chapter 4 Operation Live Monitoring Playback and Search Additional Functions Panic Recording Status View Appendix A Reviewing Video Clips Appendix B DVR Name Service (DVRNS) Appendix C Map Editor Appendix D Monitoring Using Mobile Devices Appendix E RAS Mobile Server i
... 51 Appendix C Map Editor... 52 Appendix D Monitoring Using Mobile Devices.")
4 User s Manual ii

5 Remote Administration System Plus (RASplus) Chapter 1 Overview 1.1 In This Manual This manual describes installation and operation of RASplus (Remote Administration System Plus) software, which is designed to be used with remote digital video recorders (DVRs, network video transmitters and network cameras included). 1.2 RASplus Features RASplus program is an integrated software program that controls system management, video monitoring, video recording and image playback of multiple remote sites. RASplus offers the following features: Checks and reports status of remote DVRs Notification of events detected at remote sites Remote monitoring of live camera images Panic recording of monitored images Time-lapse and event search of recorded images Remote software upgrades and system programming View system and event log information of remote DVRs Remote monitoring of multiple remote sites using maps Connect up to 64 remote sites (up to 16 remote sites for remote search) at a time NOTE: This product includes software developed by the OpenSSL Project for use in the OpenSSL Toolkit ( NOTE: The software included in this product contains some Open Sources. You may obtain the complete corresponding source code from us. See the Open Source Guide on the software CD (OpenSourceGuide\OpenSourceGuide.pdf) or as a printed document included along with the User's Manual. 1.3 Product Information Package Components User s Manual (this document) Installation CD System Requirements Operating System: Microsoft Windows XP x86 (32 Bit) (Service Pack 3), Microsoft Windows Vista x86 (32 Bit) (Service Pack 1) or Microsoft Windows 7 x86 (32 Bit) CPU: Intel Pentium IV (Celeron) 2.4GHz or faster RAM: 512MB or higher VGA: AGP, Video RAM 8MB or higher (1024x768, 24bpp or higher) 1

6 User s Manual 2

7 Remote Administration System Plus (RASplus) Chapter 2 Installation CAUTION: If an older version of RASplus software is installed in your computer, you should uninstall the older version first. NOTE: In the Windows Start menu, go to Control Panel. Double click the Power Options to open the Management Properties dialog box. Under the Power Schemes tab, set both Turn off monitor and Turn off hard disks to Never. 1. Insert the installation CD. 2. Run the Setup.exe file. NOTE: Run the file as the administrator user, otherwise the installation will fail. If you have logged on as other user, you will be asked to enter the administrator user name and password when running the file. NOTE: The User Account Control window might appear when using Microsoft Windows Vista or later operating system. Click Allow and install RASplus software following the instructions. 3. The.NET Framework and the Visual C++ Runtime Libraries are installed automatically. NOTE: Installing the.net Framework and the Visual C++ Runtime Libraries is required for RASplus to operate properly. This installation step will be skipped if they are already installed on your computer. 4. Designate the folder path to install RASplus and select the user(s) who can use RASplus. Then click Next. 3

8 User s Manual 5. When the following dialog box appears, click Next. 6. Click Next. 7. Select whether or not to run RASplus automatically when logging onto Windows, and then click Next. 4

9 Remote Administration System Plus (RASplus) 8. Set the language option by selecting either Select language when starting RASplus or Always start RASplus using the language below. If you select Always start RASplus using the language below, select the desired startup language from the list of available languages and then click OK. NOTE: To properly display the selected language, your PC s operating system should be set to support the selected language. 9. When the following dialog box appears after finishing the RASplus installation, select Install MSXML application and click Finish. Installing the MSXML is required for RASplus to initiate. 10. Click Next. 5

10 User s Manual 11. Select I accept the terms in the License Agreement, and click Next. 12. Enter User Name and Organization, and click Next. 13. Select Install Now. 6

11 Remote Administration System Plus (RASplus) 14. Click Finish to complete the MSXML installation. 7

12 User s Manual 8

13 Remote Administration System Plus (RASplus) Chapter 3 Configuration After installing the RASplus software, you will find the RASplus shortcut icon on the desktop. Run the RASplus program by double clicking the icon. The RASplus program consists of the screen, 12 docking panels, menu and toolbar. NOTE: Some panels will not be displayed on the screen in the default frame layout. To display those panels, open the View menu at the top of the screen and select each panel from the menu. 3.1 Screen The Screen displays images from selected cameras in the live monitoring or playback modes. RASplus provides various multiscreen layouts; single-screen, quad, 1+7, 3x3, 4x4, 5x5, 1+32, 6x6, 7x7, 8x8 and full-screen. 9

14 User s Manual NOTE: There might be a problem with screen display or screen update due to low image transmission speed when using Microsoft Windows Vista or later operating system. In this situation, it is recommended that you disable the Auto Tuning capability of your computer. Run the Command Prompt with elevated administrator permissions (Go to the Start Menu Accessories Command Prompt Click the right mouse button and select the Run as administrator option). Then enter netsh int tcp set global autotuninglevel=disable and click the OK button. Restart your computer to apply the changes. If you want to enable the Auto Tuning capability again, enter netsh int tcp set global autotuninglevel= normal after running the Command Prompt with elevated administrator permissions. Restart your computer to apply the changes. 3.2 Panel RASplus has many powerful tools that can be used to streamline your work. Most of the tools are located on 12 docking panels that can be placed on the screen where they are most convenient. You can keep your screen free of clutter by displaying only the panels you use most frequently. Clicking the icon at the upper right corner of a panel enables the auto-hide feature. Tabs for auto-hidden panels are displayed on the edge of the screen. Scrolling over an auto-hidden panel tab will cause the panel to "fly" out. You can cause the panel to lock back into its original display position by clicking the icon. Clicking the icon hides the panel without a tab. Hidden panels can be displayed by selecting them from the drop-down menus. Panels can be resized, moved and combined with other panels creating a workspace that fits your needs. To resize a panel, scroll the cursor over the edge of the panel until the cursor changes to or. Then click the left mouse button and drag the panel border to enlarge or reduce its size. To move a panel to a different position on the screen, scroll the cursor over the title bar of a panel that has not been auto-hidden until it changes to. Once you click and drag, position arrows will display on the screen. The four position arrows along the outer edges allow you to place the panel along the given edge independent of the other panels. When you drag the panel over a position arrow, a transparent blue box will display showing the new panel position. If you are satisfied with the position, release the left mouse button and the panel will move to its new position. You can also move a panel so that it is associated with another panel. To do this, drag the panel over the panel you want it associated with, and the icon with four position arrows will center over that panel. Scrolling the cursor over the icon arrows will cause a transparent blue box to display where the panel will be located. If you are satisfied with the position, release the left mouse button and the panel moves to its new position. It is possible to combine panels so that they take up less space on the screen. Combined panels have a row of tabs across the bottom. Clicking a tab brings that panel to the foreground. To combine panels, move the cursor to the title bar of the panel you want to move. Click and drag the panel onto the panel you want to combine it with. If the panels can be combined, the four-position arrow icon will have a tab symbol in the center. Drag the cursor over the tab symbol, and a new tab appears on the panel. Release the mouse button and the panels will now be combined. The layout possibilities are virtually unlimited. With a little experimentation you will be able to lay out the screen so that it best meets your workflow. 10

15 Remote Administration System Plus (RASplus) Remote Sites Panel The Remote Sites Panel displays a list of remote sites registered during RASplus System setup and a list of installed cameras at the remote sites. : Entering the site name in the query box and clicking the icon allows you to find the remote site easily in the Remote Sites list. : Clicking the icon allows you to register a remote site. : Clicking the icon removes the selected remote site from the list. : Clicking the icon allows you to edit the site information of the selected remote site from the list. To connect to a remote site, select the site or camera you want to connect to from the list and then drag and drop it in the desired position on the screen or the Status View panel. The screen displays images from selected cameras, and the Status View panel displays the system status information of the connected remote site. Selecting a site from the list and clicking the right mouse button displays a popup menu. Connect Status View: Displays the remote site status information in the Status View panel. Refer to 4.5 Status View for more details. Remote Setup: Allows you to change the setup of the remote DVR. Refer to 3.3 Menu System Menu, Setup for more details. Remote System Log, Remote Event log: Displays the system log and event log information of the remote DVR. Refer to 3.3 Menu Remote Menu for more details. Remote Desktop: Allows you to connect to the remote site using the VNC function. For this function to work, the VNC function must be enabled in the remote DVR and a port number and password for the VNC remote connection should be registered during the remote site registration at RASplus. Refer to the user manual of the remote DVR for details about the VNC function. This function may not be supported, depending on the specifications and version of the remote DVR. Favorite Sites Panel The Favorite Sites panel displays the list of Favorite sites registered during RASplus System setup. Selecting the Favorite site you want to connect to from the list and then dragging and dropping it in the desired position on the screen connects all remote sites registered in the Favorite site automatically. 11

16 User s Manual Map Panel The Map panel pops up another screen when alarm-in, motion or video loss events are detected or when you click the device icon according to the Map Editor settings. Change the popup screen location by clicking the left mouse button on the screen and dragging it to where you want it located. Clicking the right mouse button on the popup screen displays the following popup menu. The Map panel allows efficient monitoring of the remote sites by displaying a map of the selectable site. Click the right mouse button on the map panel to select the map image file (.rmp) you want to monitor from the list. The selected map image displays in the Map panel and the sites registered on the map image file will be connected. When the selected map is linked with sub-maps, clicking the linked image moves to the sub-map. NOTE: Refer to Appendix C Map Editor for details on editing maps. x0.25 to x2: Sets the desired size of the Map popup screen. Draw Motion Block: Displays the area that detects motions on the screen. (Network Video Transmitter connection only) Full Screen: Enters the full-screen mode of the Map popup screen. Transparency : Adjusts the transparency of the popup screen. PTZ Set : Controls pan, tilt and zoom of the selected PTZ camera. Disable Time Out: Continues displaying the popup screen when events are detected by disabling the dwell time out. Original Ratio: Displays the Map popup screen by matching its original aspect ratio. Anti-Aliasing Screen: Enhances image display quality on the popup screen by smoothing stair stepping (aliasing) effects in the enlarged image. User Set : Sets the mode of the current popup screens displayed on the monitor. For example, the monitor displays the current popup screen with enough frames for 16 cameras when you select 4x4. NOTE: Refer to Appendix C Map Editor, Device Setting section for more details about the popup function. To connect to the remote site, select the device you want to connect to from the Map panel and then drag and drop it in the desired position on the screen or the Status View panel. Also, placing the mouse cursor on the device on the map displays the device status. When the device detects any event or the device is not working properly, the following status icons appear (maximum of 4). Unplugged Event Off Irregular Video Loss Video Blind Motion Object Detection Audio Detection Alarm In Alarm Out Video Analytics Detection NOTE: The device status is displayed as Irregular based on to the system check settings and as each event according to the event detection settings on the remote DVR. NOTE: Some status icons may not be supported, depending on the specifications and version of the remote DVR. 12
 you want to monitor from the list.")
17 Remote Administration System Plus (RASplus) Clicking the right mouse button on the Map panel causes a text menu screen to display. Selecting Watch Event View from the menu displays the event information of the connected remote sites. Selecting Close disconnects the current connection on the Map panel. PTZ, Color and Alarm Out Control Panels Three panels allow PTZ control, color control, and alarm out control while live monitoring a remote site. NOTE: Refer to 4.1 Live Monitoring for more details. Image Processing Panel The Image Processing panel allows enhancing played back images. NOTE: Refer to 4.2 Playback and Search for more details. Watch Event View Panel The Watch Event View panel displays events detected at individual remote sites while RASplus is in the live monitoring mode. The description of event icons is as follows: 13

18 User s Manual Alarm-In On Alarm-In Off Motion Detection Object Detection Video Loss Video Blind Text-In Alarm-In Bad Recorder Bad Disk S.M.A.R.T. Disk Bad Disk Full Disk Almost Full Disk Config Change Disk Temperature Panic Recording On Panic Recording Off Fan Error On Fan Error Off System Boot Up System Alive System Restart System Shut Down Video Analytics Detection Audio Detection NOTE: Some event icons may not be supported, depending on the specifications and version of the remote DVR. Emergency Event View Panel The Emergency Event View panel displays a list of events (preset for notification at the remote site) that were called from individual remote sites (LAN connection only). Selecting an event from the list and then dragging and dropping it in the desired position on the Watch or Search screen connects to the remote site, and a checkmark is placed in the box at the left. Selecting an event or site from the list and then clicking the right mouse button causes a tooltip to appear, which contains the emergency event instruction from the remote site. NOTE: The Emergency Event View function is available only for the remote sites that were set to notify the RASplus system when configuring each event setup. Report View Panel 14

19 Remote Administration System Plus (RASplus) The Report View panel displays the system status information of remote sites. RASplus checks the remote site and reports system status. Clicking the icon on the panel reloads the data and clicking the icon prints the report out. Report Setup must be configured during RASplus System setup for this feature to function. Refer to 3.3 Menu System Menu for more details. NOTE: Some report options may not be supported, depending on the specifications of the remote DVR. Search View Panel The Search View panel allows time-lapse or event searching of recoded data on the remote DVR. NOTE: Refer to 4.2 Playback and Search for more details. Status View Panel RASplus provides a status display, remote setup, system log and event log view of the connected remote site in real-time. To display a status of the remote site, select a camera or a site from the Remote Site list and drag it to the Status View panel. You can also select Connect Status from the popup menu displayed by clicking the right mouse button after selecting the site from the Remote Site list. NOTE: Refer to 4.5 Status View for more details. 15

20 User s Manual 3.3 Menu System Menu Setup: Allows setting up the system operation and remote site configuration. System 1: Set up the date/time format for RASplus, display option, and panic recording function. 16

21 Remote Administration System Plus (RASplus) Date/Time Format: Set the date/time format. Display Option: Set up the screen display, drag & drop popup option, display acceleration and OSD. Screen Option: Select Watch Screen to use the screen for live monitoring only, Search Screen to use the screen for search only, or Watch and Search Screen to use the screen for both live monitoring and searching. Selecting Hide the Message Box hides the message box that displays the status information about RASplus and remote site connections. Drag & Drop Popup Option: Select which mouse button will be used when displaying popup menu screens from Use Left Mouse Button, Use Right Mouse Button or both (Watch and Search Screen mode only). Drawing Mode Setup : Set up the display options for the screen. Normal Drawing: Depends on your PC s CPU performance and displays images in low speed (DIB Draw Mode). Fast Drawing (Default): Displays image in normal speed (Direct Draw Mode). Fast Drawing (YUV420/RGB32): Depends on your PC s video card performance and displays images in high speed (Direct Draw Mode). Overlay (YUV420/RGB32/RGB565): Displays image in high speed (Direct Draw Overlay Mode). Deinterlacing: Set up the deinterlace filter. Using a deinterlace filter for interlaced video enhances image display quality by eliminating horizontal scan lines and noise in areas with motion. Aspect Ratio: Set up the image aspect ratio displayed on the screen. Selecting Fit to Screen displays images by fitting them to the screen size, and selecting Original Ratio displays images by fitting them within the screen size while maintaining their original ratio. Anti-Aliasing Screen: When using the option, the image display quality on the screen will be enhanced by eliminating stair-stepping (aliasing) effects in the enlarged image. Use Slow Connection Draw Mode: When using the option in slow network environments such as ADSL and connecting to a remote site in the live monitoring mode, the time taken to display the first image on the screen will be reduced. NOTE: If the image cannot be displayed properly because of your PC s specifications, lower the drawing mode level. NOTE: While in the Fast Drawing mode, the drawing speed might decrease when the RASplus screen is not located on the primary monitor. NOTE: Overlay drawing mode may not be supported, depending on the type of video card installed in your PC. Video cards with an ATI chipset are recommended. NOTE: When using dual monitors, selecting Overlay drawing will display the image only on the primary monitor. NOTE: When using a low-end computer, image drawing speed might decrease while using a deinterlace filter depending on the type of deinterlace filter. NOTE: When using a low-end computer, image drawing speed might decrease when the Anti-Aliasing Screen option is selected. OSD Setup : Select options to display on the screen. Load Default Map at Startup: Select whether or not the user-defined map file is loaded automatically when RASplus starts, and designate the path of the map file (.rmp) to load. 17
22 User s Manual Recording Setup: Set up the Use (On or Off) of the panic recording function and overwriting option of the recording folder (On or Off). When using the panic recording function and overwriting option, RASplus continues recording when the hard disk drive is full by overwriting the oldest video. Designate a recording folder path and set the recording folder size from 640MB to 2,048MB. Capacity shows the remaining space of the recording folder. NOTE: The recording folder size cannot be changed once it has been set. Designate another recording folder path if you want to expand the recording space. Recording Mode Setup : Set up the panic recording mode. Visible Watch Camera: Records camera channels currently displayed on the Watch screen. User Assignment Setup: Records camera channels assigned by the user on the Watch screen. Camera Range Setup: Records camera channels within preset channel range. Select the boxes beside Camera and adjust camera range up to 16 channels. NOTE: Panic recoding will NOT be made for the cameras currently not displayed on the Watch screen even though they are set up to be recorded. NOTE: When selecting the User Assignment Setup mode, the user can assign camera channels to record manually on the Watch screen. Select a camera on the Watch screen and click the right mouse button then select Set Record Camera in the text menu screen. The gray icon displays on the selected camera screen. 18
23 Remote Administration System Plus (RASplus) System 2: Set up the modem connection information for remote access, system password, network option, report function and DVRNS server. Dial-up Network: Select Use modem if you want to use a modem for remote access. Security Options: Designate whether password confirmation is required Before setup, Before startup, or Before shutdown of RASplus. Click the Change button to change the password. Network Option: Set up the IP port number that is used for network connection when receiving a callback message from a remote site, and the upgrade port number that is used for upgrading the PC-based DVR. NOTE: The IP port and upgrade port numbers you enter should match the values set during the network setup of the remote DVR. Event Setup : Enter the number of emergency events displayed in the Emergency Event panel. Set up RASplus to sound when events are detected by selecting events from the list and designating the sound file (.wave) path. You can set up a different sound for each type of event. Report Setup: Set up the Use (On or Off) and check intervals (from 1 to 24 hours) of the report function. When using the report function, RASplus checks on the remote site based on the user-defined interval and reports system status. DVR Name Service: Set up the IP address and port number of the DVRNS (DVR Name Service) server. The IP address and port number you enter should match the values set during the DVRNS setup of the remote DVR you want to connect to. NOTE: The DVRNS server cannot be configured when using modem connections. Refer to Appendix B for more details on DVR Name Service. Startup Settings: Select Reselect Language on Next Startup to change a language when RASplus starts. Select Automatically Run RASplus When to Log on to Windows to run RASplus automatically when logging onto Windows. Remote Desktop Option: Select Use the default password for remote desktop connection and enter the password to use the same password for every remote site when connecting to remote sites using the VNC function. In this case, the password registered in the Remote Desktop Setup setting during the remote site registration will not be used. This setting will be used when every remote site uses the same password for the VNC remote connection. 19
24 User s Manual Remote Site: Configures the connection list for remote access. Add: Click the Add button and enter the information about the remote site you want to add. Reference Group: The site should be assigned to a Reference Group for effective management of multiple remote sites. Click the Add button to create a new reference group. Device Setup: Select the system of the remote site to register. When registering an IP camera, select IP Camera. Remote Site Setup: Select PC Based DVR when registering a DVR at the remote site that is PC based. Enter a site name and the IP address of the remote site (modem telephone number for dial-up connections), acquired from your network administrator. Click the Port button to set up the IP port number of each program. The IP port number should match the value set during the network setup of the remote DVR. If the remote system version does not allow you to set the IP port numbers, use the following values: 8200 for Admin, 8016 for Watch, for Search, and 8116 ( 8115 for a PC-based DVR) for Audio. Select the number of cameras at the remote site. For example, selecting 8 from the list when registering a 16-channel DVR displays video of the first 8 channels on the screen. 20
25 Remote Administration System Plus (RASplus) NOTE: When using DVRNS server, place a checkmark in the Use DVRNS box. The IP Address field will be changed to DVR Name, and you can enter the name of remote site registered on the DVRNS server. The DVR name you enter should match the name set during the DVRNS setup on the remote DVR. Login Setup: Enter the user ID and password of the remote site to be accessed. If you have entered a user ID and a password, the site will be connected automatically without a dialog box requesting a password. Select No Password for remote systems that do not require a password (e.g., guest login). NOTE: Up to 32 characters may be used for the site names, telephone numbers and user IDs, and up to 8 characters may be used for passwords. Remote Desktop Setup: Enter the port number and password set in the remote DVR for the VNC remote connection. Refer to 3.2 Panel Remote Sites Panel for details about the VNC remote connection. If it is set up to use the same password for every remote site, you cannot enter the password here. Refer to System 2 Remote Desktop Option for details about using the same password. Emergency Event Instruction: Enter the message to display when emergency events are called in from the remote site. The Emergency Event Instruction can be checked by clicking the right mouse button after selecting the event or the site from the list in the Emergency Event panel. Change: Select the group or site you want to change and click the Change button, or double click the group or the site to change. Then, edit the site information. Remove: Select the group or site you want to remove and click the Remove button. List All: Displays all registered remote sites. Find: Enter the group name or site name to search for and click the Find button to display the matching groups or sites in the list. 21
26 User s Manual Favorite Site: The Favorite Site is a user-defined connection list that combines more than one remote site, so multiple sites can be monitored at the same time with a single connection. Add a new Favorite Site and define it by dragging and dropping sites and/or cameras to the Favorites map. Up to 64 cameras can be monitored at a time when each camera is assigned to its own position on the Favorites map. Favorites Site Name: Select a registered Favorite site from the drop-down list. ADD: Adds a new Favorite site. Clicking the button displays the Favorites dialog box. Enter the name of the Favorite site to add, and Select the desired screen layout used when the Favorite site is connected. Change: Select the Favorite site to change from the Site Name list and click the Change button. Then change the site name or screen layout. Remove: Select the Favorite site to remove from the Site Name list and click the Remove button. Connect Favorite Site at startup: Select whether or not your favorite site is automatically connected when RASplus starts. Remove Selected Camera: Removes selected cameras from the Favorites map. Cameras can also be removed by clicking the right mouse button after selecting the camera. Remove All Cameras: Removes all cameras from the Favorites map. NOTE: Cameras can be selected by clicking the left mouse button on the camera in the Favorites map. Selected cameras will be outlined in red. Clicking the left mouse button on the camera while holding the Ctrl key toggles camera selection On and Off. Multiple cameras can be selected by clicking the left mouse button while holding the Shift key. NOTE: [W] (Watch Screen) and [S] (Search Screen) displayed to the left of the camera number indicates the display option of each camera. The display option can be selected when registering a Favorite site. Selecting the remote site from the Group List and dragging and dropping it to the Favorites map using the right or left mouse buttons (This is user-defined and must be set during System setup) displays the text menu screen. Select the desired display option between Watch Screen and Search screen. If you do not select the display option, Watch Screen display will be assigned to all cameras of the registered Favorite site by default. NOTE: Clicking the button on the toolbar will save the current screen layout of the Watch screen or Search screen directly to the Favorite site. NOTE: The Favorite Site list does not work with modem connections. 22
27 Remote Administration System Plus (RASplus) Sequence Site: Configure the sequence site. RASplus connects to the registered sites sequentially allowing connection to more than one remote site. Register an Auto Sequencing group and add desired sites in the Group List to the Auto Sequencing group. Video from the sites added to the Auto Sequencing group is displayed on the screen in the preset sequence interval during the sequence monitoring. Sequence Dwell Time: Displays the preset sequence intervals (from 5 seconds to 1 hour) for each connection to the sites registered in the Auto Sequencing group. You also can change the preset sequence interval. Auto Sequencing: Displays the list of registered Auto Sequencing groups. You can add a new group (max. 20), change the Auto Sequencing settings of a group or delete the group by using the popup menu displayed by selecting the Auto Sequencing group and clicking the right mouse button. Add: Select the site to add from the Group List and click the Add button. Select an Auto Sequencing group to add the site from the popup menu displayed by clicking the button. Add All: Adds all sites in the Group List to the Auto Sequencing list. Select an Auto Sequencing group to add all sites from the popup menu displayed by clicking the button. Remove: Select the site to remove from the Auto Sequencing list and click the Remove button. Remove All: Removes all sites in the Auto Sequencing list. NOTE: The Auto Sequencing list is not valid with modem connections. Load Setup File: Allows applying the settings of the System Setup menu saved as a.xml file format to the RASplus system. Loading the setup file can also be performed by clicking the button on the toolbar. Save Setup File: Allows saving the current settings of the System Setup menu as a.xml file format. Saving the setup file can also be performed by clicking the button on the toolbar. 23
Table of Contents. Chapter 1 Overview... 1 1.1 In This Manual... 1 1.2 Speco Central Features... 1 1.3 Product Information... 1
 Speco Central Table of Contents Chapter 1 Overview... 1 1.1 In This Manual... 1 1.2 Speco Central Features... 1 1.3 Product Information... 1 Chapter 2 Installation... 3 Chapter 3 Configuration... 9 3.1
Table of Contents. Chapter 1 Overview... 1 1.1 In This Manual... 1 1.2 REVO Remote Pro Features... 1 1.3 Product Information... 1
 REVO Remote Pro (Remote Administration System) Table of Contents Chapter 1 Overview... 1 1.1 In This Manual... 1 1.2 REVO Remote Pro Features... 1 1.3 Product Information... 1 Chapter 2 Installation...
RASplus (Remote Administration System)
") RASplus (Remote Administration System) Digital Video Recorder Software User Guide Document 800-05056 Rev C 11/09 Revisions Issue Date Revisions A 09/09 New document based on 900.0857 rev 6.00 with updates
RASplus (Remote Administration System) Digital Video Recorder Software User Guide Document 800-05056 Rev C 11/09 Revisions Issue Date Revisions A 09/09 New document based on 900.0857 rev 6.00 with updates
RASplus (Remote Administration System)
") RASplus (Remote Administration System) Digital Video Recorder Software User Guide Document 900.0857 Rev 1.01 Revisions Issue Date Revisions 1.00 New document. 1.01 Minor changes. Rev 1.01 ii Document 900.0857
RASplus (Remote Administration System) Digital Video Recorder Software User Guide Document 900.0857 Rev 1.01 Revisions Issue Date Revisions 1.00 New document. 1.01 Minor changes. Rev 1.01 ii Document 900.0857
ACS CLIENT SOFTWARE USER MANUAL
 ACS CLIENT SOFTWARE USER MANUAL 1 ACS USER GUIDE 1.1 System Requirement Recommended System Requirement OS CPU VGA RAM HDD WindowXP, Vista Pentium 4, 2Ghz 1024*768, 64MB 24bit color graphic card 1GB 20MB
DVS Net (Integration)
") DVS Net (Integration) Installation and User s Guide Ver 11.10.x Digital Video Security System Digital Video Recorder www.tuniss.com PLEASE CALL TUNISS COMPUTER AT: 650-401-6138 FOR ANY QUASTIONS REGARDING
DVS Net (Integration) Installation and User s Guide Ver 11.10.x Digital Video Security System Digital Video Recorder www.tuniss.com PLEASE CALL TUNISS COMPUTER AT: 650-401-6138 FOR ANY QUASTIONS REGARDING
DVR4C Remote Viewer Operation Manual Table of Contents EN 3 1. OVERVIEW...5 1.1 MINIMUM PC REQUIREMENTS...5 2. INSTALLING THE PROGRAM...
 DVR4x4RemoteViewer.book Page 3 Tuesday, February 15, 2005 9:19 AM DVR4C Remote Viewer Operation Manual Table of Contents EN 3 1. OVERVIEW...5 1.1 MINIMUM PC REQUIREMENTS...5 2. INSTALLING THE PROGRAM...5
Table of Contents. Chapter 5 Backed-up Video Playback & Exportation... 29 5.1 Playing back Backed-up Video... 29 5.2 Exporting Backed-up Video...
 inex Backup Table of Contents Chapter 1 Introduction... 1 1.1 System Diagram... 2 Backup Service Registered on Administration Service... 2 Backup Service Registered on Federation Service... 3 Chapter 2
SMS Remote Software User Manual. Pro Series & Contender Series DVRs
 SMS Remote Software User Manual Pro Series & Contender Series DVRs Table of Contents Chapter 1 Overview 1 1.1 In This Manual 1 1.2 Overview 1 1.3 SMS Features 1 1.4 Product Information 1 1.5 System Requirements
SMS (Server Management Software) Digital Video Recorder. User s Manual
 Digital Video Recorder. User s Manual") SMS (Server Management Software) Digital Video Recorder User s Manual Contents 1 - Introduction 2 1.1 About this manual 2 1.2 Configuration 2 1.3 SMS Functions 2 1.4 Product Information 2 1.5 System Requirements
SMS (Server Management Software) Digital Video Recorder User s Manual Contents 1 - Introduction 2 1.1 About this manual 2 1.2 Configuration 2 1.3 SMS Functions 2 1.4 Product Information 2 1.5 System Requirements
SMS (Server Management Software) Digital Video Recorder. User s Manual
 Digital Video Recorder. User s Manual") SMS (Server Management Software) Digital Video Recorder User s Manual 1 Table of Contents Chapter 1 Overview.....03 1.1 In This Manual..03 1.2 Overview 03 1.3 SMS Features...03 1.4 Product Information..03
SMS (Server Management Software) Digital Video Recorder User s Manual 1 Table of Contents Chapter 1 Overview.....03 1.1 In This Manual..03 1.2 Overview 03 1.3 SMS Features...03 1.4 Product Information..03
Multi Client (Integration)
") Multi Client (Integration) Installation and User s Guide Ver 12.10.x *All contents of this document may change without prior notice. INDEX 1. Index 01 2. Introduction 02 3. Installation 03 4. Using Multi
Multi Client (Integration) Installation and User s Guide Ver 12.10.x *All contents of this document may change without prior notice. INDEX 1. Index 01 2. Introduction 02 3. Installation 03 4. Using Multi
Table of Contents. Chapter 1 Introduction... 1 1.1 Features... 1 1.2 System Diagram... 2
 inex Basic Table of Contents Chapter 1 Introduction... 1 1.1 Features... 1 1.2 System Diagram... 2 Chapter 2 Installation... 3 2.1 Product Information... 3 2.2 Installation... 3 2.3 Uninstall... 5 Chapter
IDIS Solution Suite. Backup Service. Software Manual. Powered by
 Solution Suite Software Manual Backup Service Powered by Before reading this manual This Operation Manual provides instructions for using Solution Suite, a network integration solution enabling remote
IDIS Solution Suite. Backup Service. Software Manual. Powered by
 Solution Suite Software Manual Backup Service Powered by Before reading this manual This Operation Manual provides instructions for using Solution Suite, a network integration solution enabling remote
NetClient software user manual
 NetClient software user manual 1-1. General information Net Client is an application which provides users not only viewing and controling remote DVRs, but also receiving realtime event data or alarm signals
Table of Contents. Chapter 1 Introduction... 1 1.1 Features... 1
 REVO Remote Pro (Remote Administration System) Table of Contents Chapter 1 Introduction... 1 1.1 Features... 1 Chapter 2 Installation... 3 2.1 Product Information... 3 Package Contents... 3 System Requirements...
1. Central Monitoring System Software
 1. Central Monitoring System Software 1-1. General information CMS program is an application with which users not only watch and control remote DVRs, but also receive video/audio data or alarm signals
NVMS-1200. User Manual
 NVMS-1200 User Manual Contents 1 Software Introduction... 1 1.1 Summary... 1 1.2 Install and Uninstall... 1 1.2.1 Install the Software... 1 2 Login Software... 3 2.1 Login... 3 2.2 Control Panel Instruction...
NVMS - 1000 USER MANUAL. Version 2.1.0
 NVMS - 1000 USER MANUAL Version 2.1.0 Contents 1 Software Introduction... 1 1.1 Summary... 1 1.2 Operation Environment... 1 1.3 Install and Uninstall... 2 1.3.1 Install the Software... 2 1.3.2 Uninstall
User Manual V1.0. Remote Software
 User Manual V1.0 Notice: The information in this manual was current when published. The manufacturer reserves the right to revise and improve its products. All specifications are therefore subject to change
CDVS-7000 Series Remote Software Users Guide
 CDVS-7000 Series Remote Software Users Guide Crest Electronics, Inc. Version 12.1005 Remote Surveillance Program The remote surveillance program enables users of the Crest 7000 series DVRs to connect remotely
Appendix A. CMS(Client Management Software)
") Appendix A. CMS(Client Management Software) A-1. Install CMS for Windows PC CMS is a program for communication between DVR and PC to control signal and video. Insert the enclosed CD, and go to CD-ROM Drive
Appendix A. CMS(Client Management Software) A-1. Install CMS for Windows PC CMS is a program for communication between DVR and PC to control signal and video. Insert the enclosed CD, and go to CD-ROM Drive
LOREX CLIENT Remote Software 4.0
 LOREX CLIENT Remote Software 4.0 Instruction Manual English Version 2.0 MODEL: L20WD800 Series www.lorexcctv.com Copyright 2008 LOREX Technology Inc. Table of Contents Table of Contents Software Installation...
Manual Client Management Software HDR50-CMS
 Manual Client Management Software HDR50-CMS HDR50-CMS (Client Management Software) A-1. Install HDR50-CMS for Windows PC HDR50-CMS is a program for communication between DVR and PC to control signal and
1. Central Monitoring System Software
 1. Central Monitoring System Software 1-1. General information CMS program is an application with which users not only watch and control remote DVRs, but also receive video/audio data or alarm signals
PowerVideo Plus. EverFocus Central Management Software. for Networked Video Devices Management. User s Manual
 EverFocus Central Management Software for Networked Video Devices Management User s Manual Copyright EverFocus Electronics Corp. Release Date: January, 2013 Copyright 2012 EverFocus Electronics Corp. All
CMS-DH CENTRAL MANAGEMENT SOFTWARE
 CMS-DH CENTRAL MANAGEMENT SOFTWARE CMS-DH is a central management software that allows you to view and manage up to 300 DH200 series DVRs. System Requirements Your system must meet the system requirements
IP Surveillance System. User s manual
 IP Surveillance System User s manual IP Surveillance system Table of Contents TABLE OF CONTENTS TABLE OF CONTENTS...1 SYSTEM REQUIREMENT...3 INSTALLATION...4 1. MAIN CONSOLE...12 1.1 Start...14 1.2 Information
Remote Client Program... 3. Web Client... 39
 Remote Client / Web Client USER MANUAL T Series Digital Video Recorder Remote Client Program... 3 Remote Client Program Installation... 4 Remote Client... 6 Main Window... 6 Site Registration... 7 Group
SMS (Server Management Software) Digital Video Recorder. User s Manual
 Digital Video Recorder. User s Manual") SMS (Server Management Software) Digital Video Recorder User s Manual 1 SMS User s Guide Table of Contents Chapter 1 Overview.....03 1.1 In This Manual..03 1.2 Overview 03 1.3 SMS Features...03 1.4 Product
SMS (Server Management Software) Digital Video Recorder User s Manual 1 SMS User s Guide Table of Contents Chapter 1 Overview.....03 1.1 In This Manual..03 1.2 Overview 03 1.3 SMS Features...03 1.4 Product
KViewCenter Software User Manual 2012 / 04 / 20 Version 2.2.1.0
 KViewCenter Software User Manual 2012 / 04 / 20 Version 2.2.1.0 Table of Contents Chapter 1. KViewCenter Interface... 5 1.1. Log in.... 5 1.2. Log out... 5 1.3. Control Panel... 6 1.4. Control Panel (Preview
CMS Pro. User`s Manual. Professional Central Monitoring Software. Full-featured Enterprise Class Surveillance Solution MADE IN KOREA
 Professional Central Monitoring Software CMS Pro Full-featured Enterprise Class Surveillance Solution User`s Manual MADE IN KOREA M11131CMSProDR This document contains preliminary information and is subject
Central Management Software CV3-M1024
 Table of Contents Chapter 1. User Interface Overview...5 Chapter 2. Installation...6 2.1 Beginning Installation...6 2.2 Starting the CMS software...10 2.3 Starting it from the Start menu...10 2.4 Starting
1. Central Monitoring System Software
 1. Central Monitoring System Software 1-1. General information CMS program is an application with which users not only watch and control remote DVRs, but also receive video/audio data or alarm signals
Multi-Site 4200. Remote Viewing Software. User Guide
 Multi-Site 4200 Remote Viewing Software User Guide Document 800-12064V1 Rev A 09/2012 User Guide Revisions Issue Date Revisions A 07/2012 New document. V1 Rev A 09/2012 Updated the description of the
Professional Surveillance System User s Manual
 Professional Surveillance System User s Manual \ 1 Content Welcome...4 1 Feature...5 2 Installation...6 2.1 Environment...6 2.2 Installation...6 2.3 Un-installation...8 3 Main Window...9 3.1 Interface...9
Digital Sentry DS ControlPoint
 O P E R A T I O N Digital Sentry DS ControlPoint C3674M-I (5/11) 2 C3674M-I (5/11) C3674M-I (5/11) 3 Contents Description...........................................................................................................
How To Set Up Flir Cloud Client For Pc Or Mac Or Mac (For Pc Or Ipad) On A Pc Or Pc Or Mouse (For Mac) On An Iphone Or Ipa) On Pc Or Tv (For Ipa
 On A Pc Or Pc Or Mouse (For Mac) On An Iphone Or Ipa) On Pc Or Tv (For Ipa") Instruction Manual FLIR Cloud Services Client Instruction Manual FLIR Cloud Services Client #LX400018; r. 2.0/14567/14568; en-us iii Table of contents 1 Setting up FLIR Cloud Client for PC or Mac...1
Instruction Manual FLIR Cloud Services Client Instruction Manual FLIR Cloud Services Client #LX400018; r. 2.0/14567/14568; en-us iii Table of contents 1 Setting up FLIR Cloud Client for PC or Mac...1
VMS A1 Client Software. User Manual (V2.0)
") VMS A1 Client Software User Manual (V2.0) Contents Chapter 1 Overview...4 1.1 Description...4 1.2 Running Environment...4 1.3 Function Modules...5 Chapter 2 Live View...7 2.1 User Registration and Login...7
VMS A1 Client Software User Manual (V2.0) Contents Chapter 1 Overview...4 1.1 Description...4 1.2 Running Environment...4 1.3 Function Modules...5 Chapter 2 Live View...7 2.1 User Registration and Login...7
ImagineWorldClient Client Management Software. User s Manual. (Revision-2)
") ImagineWorldClient Client Management Software User s Manual (Revision-2) (888) 379-2666 US Toll Free (905) 336-9665 Phone (905) 336-9662 Fax www.videotransmitters.com 1 Contents 1. CMS SOFTWARE FEATURES...4
ImagineWorldClient Client Management Software User s Manual (Revision-2) (888) 379-2666 US Toll Free (905) 336-9665 Phone (905) 336-9662 Fax www.videotransmitters.com 1 Contents 1. CMS SOFTWARE FEATURES...4
User`s Manual. CMS Pro. Professional Central Monitoring Software. Full-featured Enterprise Class Surveillance Solution
 Professional Central Monitoring Software CMS Pro Full-featured Enterprise Class Surveillance Solution User`s Manual This document contains preliminary information and is subject to change without notice.
<User s Guide> Plus Viewer. monitoring. Web
 Plus Viewer 1 < Plus Viewer (web ) > 1-1 Access Method The user can access the DVR system through the web. 1 Enter the IP for the DVR system in the address field of the web browser. 2 The
idvr-pro Viewer Software for Mac User Manual ver 0.1
 idvr-pro Viewer Software for Mac User Manual ver 0.1 1 Contents 1. Introduction... Error! Bookmark not defined. 1.1 Summary... Error! Bookmark not defined. 2. Install... Error! Bookmark not defined. 2.1
i -CEN S USER S Manual 2007. 08. 13.
 i -CEN S i -CEN'S USER S Manual 2007. 08. 13. i -CEN S Table of Contents Overview of i-cen S software... 4 1 Introduction of i-cen S... 4 2 Key Features... 5 3 Key Benefits... 5 4 System Specification...
Central Management System (CMS) USER MANUAL
 USER MANUAL") Central Management System (CMS) USER MANUAL LEGAL INFORMATION Reproduction, transfer, distribution or storage of part or all of the contents in this document in any form without the prior written permission
Central Management System (CMS) USER MANUAL LEGAL INFORMATION Reproduction, transfer, distribution or storage of part or all of the contents in this document in any form without the prior written permission
ivms-4200 Client Software Quick Start Guide V1.02
 ivms-4200 Client Software Quick Start Guide V1.02 Contents 1 Description... 2 1.1 Running Environment... 2 1.2 Surveillance System Architecture with an Performance of ivms-4200... 3 2 Starting ivms-4200...
Network Viewing Software User and Administrators Guide
 Network Viewing Software User and Administrators Guide Contents Contents...2 Introduction...3 System requirements...3 Connecting through a firewall....3 Connecting using a proxy server....3 Using Network
How To Use The Workstation Program On A Pc Or Mac Or Macbook Or Macintosh (Aero) With A Computer Or Ipa (A2) With An Ipa Or Ipad (A3) With The Powerpoint 2.
 With A Computer Or Ipa (A2) With An Ipa Or Ipad (A3) With The Powerpoint 2.") Mirasys NVR 6.1 User s Guide CONTENTS Contents... 2 Before you start... 3 Introduction... 6 Logging in... 9 User interface... 13 Navigator... 16 Cameras... 25 Video outputs... 41 Digital outputs... 46
Mirasys NVR 6.1 User s Guide CONTENTS Contents... 2 Before you start... 3 Introduction... 6 Logging in... 9 User interface... 13 Navigator... 16 Cameras... 25 Video outputs... 41 Digital outputs... 46
Chapter 4 Control Center
 Chapter 4 Control Center Control Center is a central monitoring station solution (CMS) that provides the CMS operator with these major features: Access to client DVRs (See Remote DVR) Access to remote
UC2 Video Surveillance Client. User Manual V1.0.6
 UC2 Video Surveillance Client User Manual V1.0.6 MODIFY STEPS VERSION WRITER STATUS DESCRIPTION DATE V1.0.3 BRIAN A Add access mode function 2011-4-11 V1.0.4 BRIAN A Add PTZ and user role and so on 2011-4-23
user s manual MultiViewer Network Software For Novus Digital Multiplexers series NV-DVR900 / NV-DVR1600
 user s manual MultiViewer Network Software For Novus Digital Multiplexers series NV-DVR900 / NV-DVR1600 TABLE OF CONTENTS 1. FOREWORD...3 1.1 Main characteristics...3 1.2 PC Hardware & Software Requirements...4
BlackHawk for MAC Software User Guide
 BlackHawk for MAC Software User Guide Products: BLK-DH2 Series and BLK-HD Series DVRs Please read this manual before using your software, and always follow the instructions for safety and proper use. Save
DIGICLIENT 8.0 Remote Agent Software
 DIGICLIENT 8.0 Remote Agent Software MODEL: D17800 Series Instruction Manual English Version 1.0 Copyright 2007 Digimerge Technologies Inc Table of Contents Table of Contents About the DigiClient 8.0...
Video Client. en Software manual
 Video Client en Software manual Video Client Table of Contents en 3 Table of contents 1 Introduction 6 1.1 System requirements 6 1.2 Software installation 6 1.3 Conventions used in the application 6 2
SmartViewer3.01 User Manual
 SmartViewer301 User Manual Before installing or while using this program, visit the Samsung website wwwsamsungsecuritycom and download and upgrade with the latest S/W version available overview Contents
OPERATION MANUAL. MV-410RGB Layout Editor. Version 2.1- higher
 OPERATION MANUAL MV-410RGB Layout Editor Version 2.1- higher Table of Contents 1. Setup... 1 1-1. Overview... 1 1-2. System Requirements... 1 1-3. Operation Flow... 1 1-4. Installing MV-410RGB Layout
MJPEG Camera Client User Manual
 MJPEG Camera Client User Manual CONTENTS User Manual 1 WELCOME... 3 1.1Features... 3 1.2Installation Requirements... 3 1.3 Software Installation... 3 2 Software Operation... 5 2.1 Tab bar... 6 2.2 Device
Enterprise Management Suite
 Light Version 02.01V 0 Tale of Contents II. INSTALLING... 4 III.EXECUTING EMS... 6 IV. FEATURES... 7 1. EMS Overview... 7 1. Online/Offline button... 7 2. Device Manager... 8 3. Tree... 10 4. EMS Log...
Professional Surveillance System User s Manual
 Professional Surveillance System User s Manual Version 4.06 Table of Contents 1 OVERVIEW AND ENVIRONMENT... 1 1.1 Overview... 1 1.2 Environment... 1 2 INSTALLATION AND UPGRADE... 2 2.1 Installation...
Quick-Start Guide. Remote Surveillance & Playback SUPER DVR MONITORING SOFTWARE. For use on Q-See s QSDT series of PC Securitiy Surveillance Cards
 Quick-Start Guide SUPER DVR MONITORING SOFTWARE Remote Surveillance & Playback For use on Q-See s QSDT series of PC Securitiy Surveillance Cards 2 CONFIGURING ROUTER FOR REMOTE ACCESS REMOTE SURVEILLANCE
Access to remote DVR from IE USER S MANUAL CONTENT
 Access to remote DVR from IE CONTENT... 2 Preface... 2 1. Introduction... 2 2. System requirement and executing environment... 2 2.1. Supported operating System:... 2 2.2. Hardware requirement (recommend):...
Contents. Introduction 3. Installation 4
 VMS User Manual Contents Introduction 3 Installation 4 Minimum Recommended Requirements 4 Login 4 Main Window 5 Menu Items 5 Toolbar Items 6 Play Bar Items 7 Configuration 8 Add network cameras/ digital
ivms-4500(windows Mobile) Mobile Client Software User Manual Version 1.0
 Mobile Client Software User Manual Version 1.0") ivms-4500(windows Mobile) Mobile Client Software User Manual Version 1.0 Thank you for purchasing our product. This manual applies to ivms-4500 (Windows Mobile) mobile client software, please read it carefully
ivms-4500(windows Mobile) Mobile Client Software User Manual Version 1.0 Thank you for purchasing our product. This manual applies to ivms-4500 (Windows Mobile) mobile client software, please read it carefully
This document is aimed at users of the Milestone XProtect Professional s Monitor application, including users of the Monitor application s Viewer.
 milestone XProtect Professional 4.6 Monitor & Viewer User s Manual Target Audience for this Document This document is aimed at users of the Milestone XProtect Professional s Monitor application, including
ivms-4200 Client Software User Manual Version 1.02
 ivms-4200 Client Software User Manual Version 1.02 Contents Chapter 1. Overview... 3 1.1 Description... 3 1.2 Running Environment... 3 Chapter 2. Starting ivms-4200... 4 2.1 User Registration... 4 2.2
Quick user guide for the Vista Quantum 960H range of DVRs, models included
 Quantum 960H DVR range Quick User guide Quick user guide for the Vista Quantum 960H range of DVRs, models included QX960H08-xxx QX960H16-xxx QP960H04-xxx QP960H08-xxx QP960H16-xxx Full manual found on
User s Manual of DVR DVS Remote Client Software V 4.0.1
 User s Manual of DVR DVS Remote Client Software V 4.0.1 Index Version description...4 1 Introduction...8 2 Software Install, Uninstall and use...9 2.1 Install remote client software ver4.0.1...9 2.2 Uninstall
Radius Multi-Site Management Software
 Radius Multi-Site Management Software User Manual model no. SW-RADIUS 27492AE 27492AE Please carefully read these instructions before using this product. Save this manual for future use. ii 27492AE OpenEye
ivms-4200 Client Software User Manual (V2.0.0)
") ivms-4200 Client Software User Manual (V2.0.0) UD.6L0201D1034A01 Contents Chapter 1 Overview... 3 1.1 Description... 3 1.2 Running Environment... 3 1.3 Function Modules... 3 1.4 Updates Instruction...
ivms-4200 Client Software User Manual (V2.0.0) UD.6L0201D1034A01 Contents Chapter 1 Overview... 3 1.1 Description... 3 1.2 Running Environment... 3 1.3 Function Modules... 3 1.4 Updates Instruction...
CMS Basic User s Manual
 CMS Basic User s Manual Central Management Solution For Multi-sites Applications V1.0.0 2 CMS Basic User s Manual Table of Contents User Interface Overview... 4 CMS UI Overview... 4 Installation... 6 Begin
Professional Surveillance System User s Manual
 Professional Surveillance System User s Manual Version 4.06 Table of Contents 1 OVERVIEW AND ENVIRONMENT... 1 1.1 Overview...1 1.2 Environment...1 2 INSTALLATION AND UPGRADE... 2 2.1 Installation...2 2.2
ACTi Central Management System
 ACTi Central Management System User s Manual Version 1.1.05.06 2012/10/12 Table of Contents 1 Overview 5 Software Architecture... 5 2 Installation 6 Requirements... 6 Operating System... 6 Hardware System
Instruction for IE network monitor
 Instruction for IE network monitor This system features a built-in browser-based software that allows you to access your system remotely over your local area network (LAN) or over the Internet (WAN) using
Integrated Intelligent Video Surveillance Management System. User's Manual V2.0
 Integrated Intelligent Video Surveillance Management System User's Manual V2.0 1 Contents 1. Product Description... 4 1.1. General Information... 4 1.2. System Topology... 5 1.3. Operating Environment...
REMOTE AGENT USER S MANUAL
 REMOTE AGENT USER S MANUAL Revision Date : 2006.10.02. 0 INDEX CHAPTER 1. Installation-------------------------------------------------------- 2 CHAPTER 2. Function introduction------------------------------------------------
Stand Alone Type. Digital Video Recorder USER S MANUAL. (Real time recording 8 & 16 CH DVR) Revision Date : 2010. 6. 30.
 Revision Date : 2010. 6. 30.") Stand Alone Type Digital Video Recorder USER S MANUAL (Real time recording 8 & 16 CH DVR) Revision Date : 2010. 6. 30. INDEX 1. Front Panel - - - - - - - - - - - - - - - - - - - - - - - - - - - - - - -
Stand Alone Type Digital Video Recorder USER S MANUAL (Real time recording 8 & 16 CH DVR) Revision Date : 2010. 6. 30. INDEX 1. Front Panel - - - - - - - - - - - - - - - - - - - - - - - - - - - - - - -
SEC-PCC10 SEC-PCC20 SEC-PCC30 PCI SECURITY CARD
 SEC-PCC10 SEC-PCC20 SEC-PCC30 PCI SECURITY CARD ADVANCED ENGLISH MANUAL 0 Installation 1. Turn off the PC s power and unplug the power cable. 2. Open the PC s cover and plug the capture card into an empty
ivms-4000 (V2.03.07) Client Software User Manual
 Client Software User Manual") ivms-4000 (V2.03.07) Client Software User Manual Table of Contents User Manual... 2 Table of Contents... 1 Chapter 1 Welcome to ivms-4000 (V2.03.04.07)... 4 1.1 Overview... 4 1.2 Computer Disposition Request...
ivms-4000 (V2.03.07) Client Software User Manual Table of Contents User Manual... 2 Table of Contents... 1 Chapter 1 Welcome to ivms-4000 (V2.03.04.07)... 4 1.1 Overview... 4 1.2 Computer Disposition Request...
How To Use Vs.Org Video Storage Server (Vs)
") Video Storage Server VSS User s Manual Version 3.10.0 Table of Contents 1. Overview... 3 1.1 Recommended Operation System... 4 2. Software Installation... 5 3. Software Upgrade... 7 3.1 Automatic Software
Video Storage Server VSS User s Manual Version 3.10.0 Table of Contents 1. Overview... 3 1.1 Recommended Operation System... 4 2. Software Installation... 5 3. Software Upgrade... 7 3.1 Automatic Software
User Manual ivms-4200 Client Software. Version 1.02
 User Manual ivms-4200 Client Software Version 1.02 TABLE OF CONTENTS Chapter 1. Overview... 3 Chapter 2. Starting ivms-4200... 3 2.1 User Registration... 3 2.2 Wizard for Importing Device... 3 2.3 User
QVIS VIEWER USER S GUIDE
 QVIS VIEWER USER S GUIDE V1.0 06.2014 WELCOME Thank you for purchasing one of our industry leading QVIS products. This user s guide is for the PC version of the Qvis Viewer remote monitoring software.
DVR-4TL/8TL/16TL Setup Guide
 Package Content DVR-4TL/8TL/16TL Setup Guide Inspect the DVR s packaging. Make sure that the DVR-4TL/8TL/16TL is packed properly. Remove all items from the box and make sure it contains the following items.
Dear Customer... 4 Remote Manager Version 7.2.1.0718 Minimum Requirements... 5 Installation of DIGIOP Remote Manager... 6 Remote Manager Screen...
 Remote Manager User Manual 2 Dear Customer... 4 Remote Manager Version 7.2.1.0718 Minimum Requirements... 5 Installation of DIGIOP Remote Manager... 6 Remote Manager Screen... 8 Connect Button... 9 Live
IP Network-Digital Video Recorder
 Ver. 99.264.7A05.001 Intelligent Surveillance Solution Table of Contents TABLE OF CONTENTS TABLE OF CONTENTS...01 SYSTEM REQUIREMENT...05 INSTALLATION...07 QUICK START...10 1. DVR MAIN...14 1.1 Start...15
ENLTV-FM3. PCI TV Tuner Adapter with FM Radio. User s Guide
 ENLTV-FM3 PCI TV Tuner Adapter with FM Radio User s Guide User s Notice No part of this manual, including the products and software described in it, may be reproduced, transmitted, transcribed, stored
TVI End User Guide. Version: Summer 2009 Release
 TVI End User Guide Version: Summer 2009 Release Table of Contents Control Center for Windows...2 TVI Control Center for Windows XP/Vista...2 Features...2 System Requirements...3 Installing Control Center...3
HRG App for Android Devices. User Guide
 HRG App for Android Devices User Guide Document 800-12218 Rev A 07/2012 Revisions Issue Date Revisions A 07/2012 New document. Contents 3 Contents 1 1 Introduction...............................................
Avigilon Control Center Web Client User Guide
 Avigilon Control Center Web Client User Guide Version: 4.12 Enterprise OLH-WEBCLIENT-E-E-Rev2 Copyright 2013 Avigilon. All rights reserved. The information presented is subject to change without notice.
MAC CMS User Manual 1
 1 TABLE OF CONTENTS Chapter 1. Overview... 4 Chapter 2. Starting CMS Client... 4 2.1 User Registration... 4 2.2 Wizard for Importing Device... 4 2.3 User Login... 9 2.4 Control Panel and Main Menu Bar
Before reading this manual
 Before reading this manual RAS Mobile for Android is an app for connecting to a device (DVR, NVR, network video transmitter or network camera) using mobile device running on Android platform and remotely
A quick user guide for your LX Apollo DVR
 A quick user guide for your LX Apollo DVR The LX Apollo series of DVR s is designed specially for the security and surveillance field and is an outstanding digital surveillance product. It has an embedded
CMS Client Software. Instruction
 CMS Client Software Instruction Version:1.0 CONTENTS 1 Introduction & operation of CMS Client software... 3 1.1 DVR Network Remote Client... 3 1.1.1 Login... 3 1.1.2 Introduction of main interface... 3
How To Use A Pew V.V.V (Windows) V.A.1.1 (Windows 8) (Windows 7) (Powerpoint) (For Windows) (Win Xp) (V.A) (Amd)
 V.A.1.1 (Windows 8) (Windows 7) (Powerpoint) (For Windows) (Win Xp) (V.A) (Amd)") VIDEO VIEWER USER MANUAL Please read instructions thoroughly before operation and retain it for future reference. Video_viewer_V1.0 LEGAL INFORMATION Reproduction, transfer, distribution or storage of
VIDEO VIEWER USER MANUAL Please read instructions thoroughly before operation and retain it for future reference. Video_viewer_V1.0 LEGAL INFORMATION Reproduction, transfer, distribution or storage of
ivms-4200 Client Software Quick Start Guide
 ivms-4200 Client Software Quick Start Guide Notices The information in this documentation is subject to change without notice and does not represent any commitment on behalf of HIKVISION. HIKVISION disclaims
Network Video Monitor Software
 Network Video Monitor Software V1.0.0.0 Operation menu Chapter 1 Product Overview 1.1 Performance instruction Network video monitoring software is a centralized management tool for I8 protocol surveillance
IDIS Solution Suite. Streaming Service. Software Manual. Powered by
 Solution Suite Software Manual Streaming Service Powered by Before reading this manual This Operation Manual provides instructions for using Solution Suite, a network integration solution enabling remote
AXIS Camera Station Quick Installation Guide
 AXIS Camera Station Quick Installation Guide Copyright Axis Communications AB April 2005 Rev. 3.5 Part Number 23997 1 Table of Contents Regulatory Information.................................. 3 AXIS Camera
Contents. 1.2 Software Installation... 1
 Software Manual Contents 1 Software Installation... 1 1.1 Overview...1 1.2 Software Installation... 1 2 Introduction To Basic Function...5 2.1 Login System... 5 2.2 CMS Operating Interface...5 2.2.1 Operating
SCS Surveillix Central Station Software
 SCS Surveillix Central Station Software User Manual Please carefully read these instructions before using this product. Save this manual for future use. 1 EXPLANATION OF GRAPHICAL SYMBOLS WARNING: Text