VAUXHALL Insignia. Owner s Manual Model Year Edition: January 2009 TS 1674-B-09
|
|
|
- Julia Walker
- 8 years ago
- Views:
Transcription
1 VAUXHALL Insignia VAUXHALL Insignia 0-1 Owner s Manual Model Year Edition: January 2009 TS 1674-B-09

2 Contents Introduction... 2 In brief... 6 Keys, doors and windows Seats, restraints Storage Instruments and controls Lighting Infotainment system Climate control Driving and operating Vehicle care Service and maintenance Technical data Customer information Index

3 2 Introduction Introduction
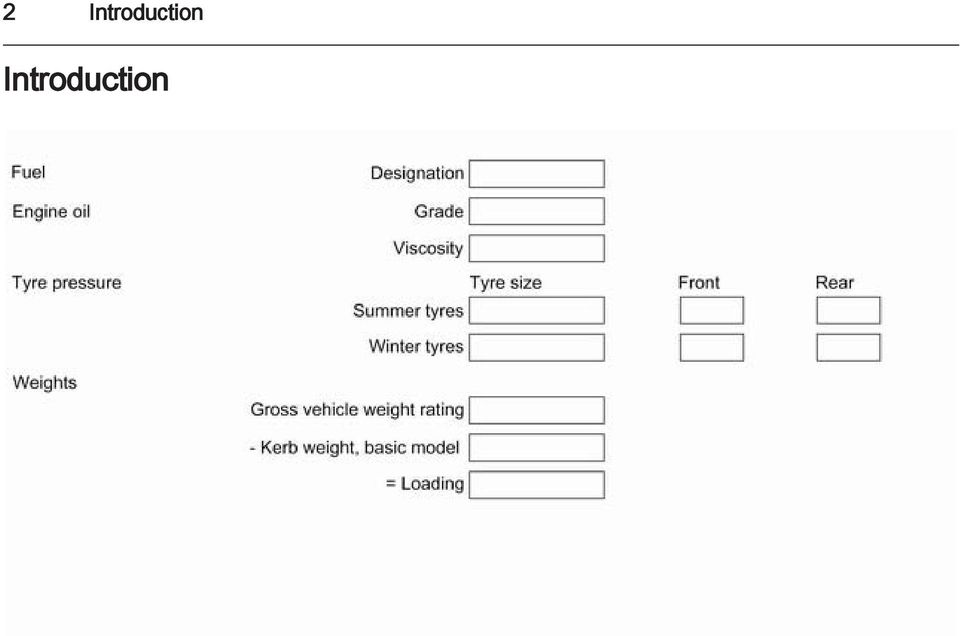
4 Introduction 3 Vehicle specific data Please enter your vehicle's data on the previous page to keep it easily accessible. This information is available in the sections "Service and maintenance" and "Technical data" as well as on the identification plate. Introduction Your vehicle is a designed combination of advanced technology, safety, environmental friendliness and economy. This Owner's Manual provides you with all the necessary information to enable you to drive your vehicle safely and efficiently. Make sure your passengers are aware of the possible risk of accident and injury which may result from improper use of the vehicle. You must always comply with the specific laws and regulations of the country that you are in. These laws may differ from the information in this Owner's Manual. When this Owner's Manual refers to a workshop visit, we recommend your Vauxhall Authorised Repairer. All Vauxhall Authorised Repairers provide first-class service at reasonable prices. Experienced mechanics trained by Vauxhall work according to specific Vauxhall instructions. The customer literature pack should always be kept ready to hand in the vehicle. Using this manual The "In brief" section will give you an initial overview. The table of contents at the beginning of this manual and within each chapter shows where the information is located. The index will enable you to search for specific information. This Owner's Manual depicts lefthand drive vehicles. Operation is similar for right-hand drive vehicles. The Owner's Manual uses the factory engine designations. The corresponding sales designations can be found in the chapter "Technical data". Directional data, e.g. left or right, or front or back, always relate to the direction of travel. Depending on the model variant, country variant, integrated special equipment and accessories, the scope of equipment in your vehicle can differ from the items mentioned in this Owner's Manual. Display messages and interior labelling are written in bold letters. Danger, Warnings and Cautions 9 Danger Text marked 9 Danger provides information on risk of fatal injury. Disregarding this information may endanger life.

5 4 Introduction 9 Warning Text marked 9 Warning provides information on risk of accident or injury. Disregarding this information may lead to injury. Caution Text marked Caution provides information on possible damage to the vehicle. Disregarding this information may lead to vehicle damage. Symbols Page references are indicated with 3. 3 means "see page". Thank you for choosing a Vauxhall. We wish you many hours of pleasurable driving. Your Vauxhall Team

6 Introduction 5

7 6 In brief In brief Initial drive information Vehicle unlocking Seat adjustment Seat positioning Press button c to unlock the doors and load compartment. Open the doors by pulling the handles. To open the tailgate, pull the button under the tailgate moulding. Press button x; only the load compartment is unlocked and opens. Radio remote control 3 20, Central locking system 3 21, Load compartment Pull handle, slide seat, release handle. Seat position 3 40, Seat adjustment Danger Do not sit nearer than 25 cm (10 inches) from the steering wheel, to permit safe airbag deployment.

8 In brief 7 Seat backrests Seat height Seat inclination Pull lever, adjust inclination and release lever. Allow the seat to engage audibly. Do not lean on backrest when adjusting. Seat position 3 40, Seat adjustment Press switch top = seat higher bottom = seat lower Seat position 3 40, Seat adjustment Lever pumping motion up = front end higher down = front end lower Seat position 3 40, Seat adjustment 3 41.

9 8 In brief Power seat adjustment Head restraint adjustment Seat belt Operate switches. positioning = move switch forwards/backwards height = move switch upwards/ downwards inclination = move switch upwards/ downwards at front backrest = turn switch forwards/ backwards Press release button, adjust height, engage. Head restraints Pull out the seat belt and engage in belt buckle. The seat belt must not be twisted and must fit close against the body. The backrest must not be tilted back too far (maximum approx. 25 ). To release belt, press red button on belt buckle. Seat position 3 40, Seat belts 3 46, Airbag system 3 49.
.")
10 In brief 9 Mirror adjustment Interior mirror Exterior mirrors Steering wheel adjustment Adjust the lever on the underside to reduce dazzle. Interior mirror 3 33, Automatic antidazzle interior mirror Select the relevant exterior mirror and adjust. Convex exterior mirrors 3 31, Electric adjustment 3 31, Folding exterior mirrors 3 31, Heated exterior mirrors Unlock lever, adjust steering wheel, then engage lever and ensure it is fully locked. Do not adjust steering wheel unless vehicle is stationary and steering wheel lock has been released. Airbag system 3 49, Ignition positions

11 10 In brief Instrument panel overview

12 In brief 11 1 Light switch Headlight range adjustment Front fog lights Rear fog light Instrument illumination Side air vents Turn and lane-change signals, headlight flash, low beam and high beam Exit lighting Parking lights Driver Information Center Cruise control Instruments Horn Driver airbag Driver Information Center Remote control for Infotainment system Windscreen wiper, windscreen washer system, headlight washer system, rear wiper Centre air vents Infotainment system Info-Display Anti-theft alarm system status LED Central locking system Hazard warning flashers Control indicator for airbag deactivation Control indicator for front passenger seat belt Sport mode Tour mode Traction Control system Electronic stability control..134 Universal parking assist Advanced parking aid Lane departure warning Front passenger airbag Glovebox Climate control system Selector lever, manual transmission Automatic transmission Ashtray Accelerator pedal Ignition switch with steering wheel lock Brake pedal Clutch pedal Steering wheel adjustment Storage compartment, fuse box Bonnet release lever

13 12 In brief

14 In brief 13 Exterior lighting Headlight flash, high beam and low beam Turn and lane-change signals Turn light switch Auto = Automatic light control: Headlights are switched on and off automatically. 7 = activation or deactivation of the automatic light control 8 = sidelights 9 = headlights Press > = front fog lights r = rear fog light Lighting headlight flash = pull lever high beam = push lever low beam = push or pull lever Automatic light control 3 102, High beam 3 104, Headlight flash right = lever up left = lever down Turn and lane-change signals 3 105, Parking lights

15 14 In brief Hazard warning flashers Horn Washer and wiper systems Windscreen wiper Operated with the button. Hazard warning flashers Press j. 2 = fast 1 = slow P = timed interval wiping or automatic wiping with rain sensor = off For a single swipe when the windscreen wiper is off, press the lever down. Windscreen wiper 3 73, Wiper blade replacement

16 In brief 15 Windscreen and headlight washer systems Rear window wiper and washer systems Pull lever. Windscreen and headlight washer system 3 73, Washer fluid Push the rocker switch to activate the rear window wiper: top = continuous operation bottom = intermittent operation Push lever. Washer fluid is sprayed on the rear window and the wiper swipes for a few strokes.

17 16 In brief Climate control Heated rear window, heated exterior mirrors Demisting and defrosting the windows Transmission Manual transmission Heating is operated by pressing the Ü button. Heated rear window Press button V. Set temperature control to warmest level. Cooling n on. Heated rear window Ü on. Climate control system Reverse: with the vehicle stationary, depress clutch pedal, pull up the button on the selector lever and engage the gear. If the gear does not engage, set the lever in neutral, release the clutch pedal and depress again; then repeat gear selection. Manual transmission

18 In brief 17 Automatic transmission P = park R = reverse N = neutral D = drive Manual mode: move selector lever from D to the left. < = higher gear ] = lower gear The selector lever can only be moved out of P when the ignition is on and the brake pedal is applied. To engage P or R, push the release button. Automatic transmission Starting off Check before starting off Tyre pressure and condition 3 174, Engine oil level and fluid levels All windows, mirrors, exterior lighting and number plates are free from dirt, snow and ice and are operational. Proper position of mirrors, seats, and seat belts 3 31, 3 40, Brake function at low speed, particularly if the brakes are wet. Starting the engine Turn key to position 1 move the steering wheel slightly to release the steering wheel lock operate clutch and brake automatic transmission in P or N do not accelerate diesel engines: turn the key to position 2 for preheating and wait until control indicator! goes out turn key to 3 and release Starting the engine

19 18 In brief Parking Always apply parking brake. Manual parking brake without pressing release button. Apply as firmly as possible on a downhill slope or uphill slope. Operate foot brake at the same time to reduce operating force. For vehicles with electrical parking brake pull switch m. Switch off the engine and ignition. Turn the ignition key to 0 and remove. Turn the steering wheel until the steering wheel lock is felt to engage. For vehicles with automatic transmission, the key can only be removed when the selector lever is in the P position. If the vehicle is on a level surface or uphill slope, engage first gear or set the selector lever to P before switching off the ignition. On an uphill slope, turn the front wheels away from the kerb. If the vehicle is on a downhill slope, engage reverse gear or set the selector lever to P before switching off the ignition. Turn the front wheels towards the kerb. Lock the vehicle with button e on the radio remote control. Activate the anti-theft alarm system Do not park the vehicle on an easily ignitable surface. The high temperature of the exhaust system could ignite the surface. Close windows and sunroof. The engine cooling fans may run after the engine has been switched off After running at high engine speeds or with high engine loads, operate the engine briefly at a low load or run in neutral for approx. 30 seconds, before switching off in order to protect the turbocharger. Keys, locks 3 19, Laying the vehicle up for a long period of time

20 Keys, doors and windows 19 Keys, doors and windows Keys, locks Doors Vehicle security Exterior mirrors Interior mirrors Windows Roof Keys, locks Keys Replacement keys The key number is specified in the Car Pass or on a detachable tag. The key number must be quoted when ordering replacement keys as it is a component of the immobiliser system. Locks Lock cylinders Designed to free-wheel if they are forcefully rotated without the correct key or if the correct key is not fully inserted. To reset, turn cylinder with the correct key until its slot is vertical, remove key and then re-insert it. If the cylinder still free-wheels, turn the key through 180 and repeat operation. Key with foldaway key section Press button to extend. To fold the key, first press the button. Car Pass The Car Pass contains security related vehicle data and should therefore be kept in a safe place. When the vehicle is taken to a workshop, this vehicle data is needed in order to perform certain operations.

21 20 Keys, doors and windows Radio remote control Used to operate: Central locking system Anti-theft locking system Anti-theft alarm system Load compartment Power windows Sunroof Foldable power mirrors The radio remote control has a range of approx. 5 metres (16 ft). This range can be affected by outside influences. The hazard warning flashers confirm operation. Handle with care, protect from moisture and high temperatures and avoid unnecessary operation. Fault If the central locking system cannot be operated with the radio remote control, it may be due to the following: Range exceeded Battery voltage too low Frequent, repeated operation of the radio remote control while not in range, which will require resynchronisation Overload of the central locking system by operating at frequent intervals, the power supply is interrupted for a short time Interference from higher-power radio waves from other sources Unlocking Basic settings Some settings can be changed in the menu Settings in the Info-Display. Vehicle personalisation Radio remote control battery replacement Replace the battery as soon as the range reduces. Batteries do not belong in household waste. They must be disposed of at an appropriate recycling collection point. Key with foldaway key section
22 Keys, doors and windows 21 Extend the key and open the unit. Replace the battery (battery type CR2032), paying attention to the installation position. Close the unit and synchronise. Radio remote control synchronisation After replacing the battery, unlock the door with the key in the driver's door lock. The radio remote control will be synchronised when you switch on the ignition. Memorised settings By removing the key from the ignition switch the settings are automatically saved for the key being used: Electronic climate control Lighting Infotainment system Power seats Power mirrors Central locking system The saved settings are automatically used when the key is inserted into the ignition switch. Vehicle personalisation Central locking system Unlocks and locks doors, load compartment and fuel filler flap. A pull on an interior door handle unlocks the entire vehicle and opens the door. Notice In the event of an accident of a certain severity, the vehicle unlocks automatically. Unlocking Press button c. Two settings are possible: To unlock only the driver's door, press button c once, and to unlock all doors, load compartment and fuel filler flap, press button c twice. Settings can be changed in the menu Settings in the Info-Display. Vehicle personalisation The settings can be saved for the key being used, Memorised settings 3 21.
23 22 Keys, doors and windows Locking Close doors, load compartment and fuel filler flap. Unlocking the tailgate Press button e. If the driver's door is not closed properly, the central locking system will not work. Activation or deactivation of this function can be changed in the menu Settings in the Info-Display. Vehicle personalisation Press button x when the ignition is off until tailgate is opened. The tailgate will unlock and open, whilst all other doors remain locked. Power tailgate 3 24 Central locking buttons Locks or unlocks all doors, the load compartment and fuel filler flap. Press the e button to lock. Press the c button to unlock. When the key is in the ignition switch, locking is only possible if all doors are closed.
24 Keys, doors and windows 23 Fault in radio remote control system Unlocking Manually unlock the driver's door by turning the key in the lock. Switch on the ignition and press the central locking button c to open all doors, load compartment and fuel filler flap. To deactivate the anti-theft locking system, switch on the ignition. Locking Manually lock the driver's door by turning the key in the lock. Fault in central locking system Unlocking Manually unlock the driver's door by turning the key in the lock. The other doors can be opened by pulling the interior handle twice. The load compartment and fuel filler flap cannot be opened. To deactivate the anti-theft locking system, switch on the ignition Locking Push inside locking knob of all doors except driver's door. Then close the driver's door and lock it from the outside with the key. The fuel filler flap and tailgate cannot be locked. Automatic locking Automatic locking after driving off This security feature can be configured to automatically lock all doors, load compartment and fuel filler flap as soon as the vehicle is driven. Settings can be changed in the menu Settings in the Info-Display. Vehicle personalisation The settings can be saved for the key being used Automatic locking when leaving the vehicle This security feature can be configured to automatically lock all doors, load compartment and fuel filler flap a short time after the doors are closed when leaving the vehicle. Settings can be changed in the menu Settings in the Info-Display. Vehicle personalisation The settings can be saved for the key being used 3 21.
25 24 Keys, doors and windows Child locks Doors Load compartment Tailgate Opening Closing 9 Warning Use the child locks whenever children are occupying the rear seats. Using a key or suitable screwdriver, turn the child lock in the rear door to the horizontal position. Door cannot be opened from the inside. For deactivation turn the child lock to the vertical position. Pull the button under the tailgate moulding. With radio remote control press button x until the tailgate is opened. Central locking system Use the interior handle. Do not pull the button under the moulding whilst closing as this will unlock tailgate again. Central locking system 3 21.
26 Keys, doors and windows 25 Power tailgate 9 Warning Take care when operating the power tailgate. Risk of injury, particularly to children. Keep a close watch on the movable tailgate when operating. Ensure that nothing becomes trapped during operating and no one is standing within the moving area. The power tailgate is operated by: Radio remote control Switch in the door panel of the driver's door Touchpad switch and button in the tailgate. It can only be operated when vehicle is stationary with applied parking brake and automatic transmission in P. The taillights flash and a chime sounds when power tailgate is operating. Notice Operating the power tailgate does not operate the central locking system. Therefore always unlock the vehicle before opening the tailgate and lock after closing. Central locking system Operation with radio remote control Press and hold button x until tailgate starts to open or close. Operation with the switch in the driver's door Press and hold button G until tailgate starts to open or close.
27 26 Keys, doors and windows Operation with switches in the tailgate Operation modes The power tailgate has three modes of operation, which are controlled by the switch in the driver's door. To change the mode turn the switch: To open the tailgate, push and hold the touchpad switch under the tailgate moulding until tailgate starts to move. To close, press and hold the button G in the open tailgate until it starts to move. Stop or change direction of movement Pressing button x or G or touchpad switch whilst moving, the tailgate will stop in the current position. Pressing button x or G again will reverse the direction of movement. Normal mode о: power tailgate opens to full height Intermediate mode : power tailgate opens to a reduced height that can be adjusted Mode Off: tailgate can be operated manually.
28 Keys, doors and windows 27 Adjust reduced opening height in intermediate mode 1. Turn operation mode switch to о or 2. Open power tailgate with any operation switch 3. Stop movement at the desired height by pressing any operation switch. If required, manually move the stopped liftgate to the desired position 4. Press and hold the button on the inside of the open tailgate for 3 seconds. The turn signals will flash and a chime will sound to indicate the new programmed setting. When turning the adjuster wheel in the driver's door to intermediate mode, the power tailgate will stop opening at the newly set position. There is a minimum open angle that the system will hold the tailgate open. The opening height cannot be programmed below that angle. Safety function If the power tailgate encounters an obstacle during opening or closing, the direction of movement will automatically be reversed to open or close slightly. Multiple obstacles in one power cycle will deactivate the function. In this case close or open the tailgate manually. Power tailgate has pinch sensors on the side edges. If the sensors detect obstacles between tailgate and chassis, the tailgate will open, until it is activated again or closed manually. Safety function is indicated as a message in the Driver Information Center and by warning chimes. Remove all obstacles for resuming normal power operation. If the vehicle is equipped with a factory-fitted towing equipment, the operation of the power tailgate is automatically deactivated, when towing a trailer. General hints for operating tailgate 9 Warning Do not drive with the tailgate open or ajar, e.g. when transporting bulky objects, since toxic exhaust gases, which can not be seen or smelled, could enter the vehicle. This can cause unconsciousness and even death.
29 28 Keys, doors and windows Caution Before opening the tailgate check overhead obstructions, such as a garage door, to avoid damage of the tailgate. Always check the moving area above and behind the tailgate. Notice Power tailgate: if the support struts of the open tailgate loose pressure, the taillights will flash and a chime will sound. The tailgate will remain open for a while and then close slowly. Seek the assistance of a workshop. Notice The operation of the power tailgate is disabled under low battery condition. In this case the tailgate can be operated manually. Notice Having the power tailgate disabled and all doors unlocked, the tailgate can be manually operated. In this case the manual efforts will be higher than a non power tailgate. Notice The installation of certain heavy accessories onto the tailgate may affect its ability to remain open. Vehicle security Anti-theft locking system 9 Warning Do not use the system if there are people in the vehicle! The doors cannot be unlocked from the inside. The system deadlocks all the doors. All doors must be closed or the system cannot be activated. If the ignition was on, the driver's door must be opened and closed once so that the vehicle can be secured. Unlocking the vehicle disables the mechanical anti-theft locking system. This is not possible with the central locking button.
30 Keys, doors and windows 29 Activating Press e on the radio remote control twice within 15 seconds. Anti-theft alarm system The anti-theft alarm system is combined with the anti-theft locking system. It monitors: Doors, tailgate, bonnet Passenger compartment including adjoining load compartment Vehicle inclination, e.g. if it is raised Ignition Activation Self-activated 30 seconds after locking the vehicle (initialisation of the system) Directly by pressing e on the radio remote control once more after locking 30 seconds after locking if the function "automatic locking when leaving the vehicle" is activated Notice Changes to the vehicle interior such as the use of seat covers, and open windows or sunroof, could impair the function of passenger compartment monitoring. Activation without monitoring of passenger compartment and vehicle inclination Switch off the monitoring of passenger compartment and vehicle inclination when people or animals are being left in the vehicle, because of high volume ultrasonic signals, movements triggering the alarm and when the vehicle is on a ferry or train. 1. Close tailgate, bonnet, windows and sunroof. 2. Press button o. LED in the button o illuminates for maximum 10 minutes.
31 30 Keys, doors and windows 3. Close doors. 4. Activate the anti-theft alarm system. Status message is displayed in the Driver Information Center. Status LED Status LED is integrated in the sensor on top of the instrument panel. Status during the first 30 seconds of anti-theft alarm system activation: LED = test, arming delay. illuminates LED flashes quickly = doors, tailgate or bonnet not completely closed, or system fault. Status after system is armed: LED flashes = system is armed. slowly LED flashes = system is disarmed. quickly 3 times after unlocking Seek the assistance of a workshop in the event of faults. Deactivation Unlocking the vehicle deactivates anti-theft alarm system. Alarm When triggered, the alarm sounds via a separate battery-backed power sounder, and the hazard warning lights flash simultaneously. The number and duration of alarm signals are stipulated by legislation. The alarm can be silenced by pressing any button of the radio remote control or by switching on the ignition. The anti-theft alarm system can be deactivated only by pressing button c or by switching on the ignition. Immobiliser The system is integrated into the ignition switch and checks whether the vehicle is allowed to start with the key being used. If the transponder in the key is recognized, the engine can be started. The electronic immobiliser activates itself automatically after the key has been removed from the ignition switch. If the control indicator d flashes when the ignition is on, there is a fault in the system; the engine cannot be started. Switch off the ignition and then repeat the start attempt.
32 Keys, doors and windows 31 If the control indicator continues flashing, attempt to start the engine using the spare key and seek the assistance of a workshop. Notice The immobiliser does not lock the doors. You should always lock the vehicle after leaving it and switch on the anti-theft alarm system 3 21, Control indicator d Exterior mirrors Convex shape The convex exterior mirror reduces blind spots. The shape of the mirror makes objects appear smaller, which will affect the abilty to estimate distances. Electric adjustment Folding For pedestrian safety, the exterior mirrors will swing out of their normal mounting position if they are struck with sufficient force. Reposition the mirror by applying slight pressure to the mirror housing. Select the relevant exterior mirror by turning the control to left (L) or right (R). Then swivel the control to adjust the mirror. In position 0 no mirror is selected.
33 32 Keys, doors and windows Electric folding Folding mirrors from outside Activation or deactivation of this function can be changed in the menu Settings in the Info-Display. Vehicle personalisation The settings can be saved for the key being used Heated Turn control to 7, then push the control down. Both exterior mirrors will fold. Push the control down again - both exterior mirrors return to their original position. If an electrically folded mirror is manually extended, pressing down the control will only electrically extend the other mirror. Press and hold e button to fold in mirrors. Press and hold c button to fold out mirrors. At the same time the windows are closed or opened Release button to stop mirror movement. If the mirrors were folded in via the control in the driver's door, they are not folded out by pressing c. Operated by pressing the Ü button. Heating works with the engine running and is switched off automatically after a short time.
34 Keys, doors and windows 33 Parking assist Both exterior mirrors are automatically aimed at the rear tyres as a parking aid when reverse gear is selected, except during trailer operation. Activation or deactivation of this function can be changed in the menu Settings in the Info-Display. Vehicle personalisation Interior mirrors Manual anti-dazzle Automatic anti-dazzle To reduce dazzle, adjust the lever on the underside of the mirror housing. Dazzle from following vehicles at night is automatically reduced.
35 34 Keys, doors and windows Windows Manual windows The door windows can be opened or closed with the window winders. Power windows 9 Warning Take care when operating the power windows. Risk of injury, particularly to children. If there are children on the rear seats, switch on the child safety system for the power windows. Keep a close watch on the windows when closing them. Ensure that nothing becomes trapped in them as they move. Power windows can be operated: with ignition on, within 10 minutes of switching ignition off, within 5 minutes of opening a door. After switching off the ignition, window operation is disabled when the driver's door is opened, then closed and locked. Operate the switch for the respective window by pushing to open or pulling to close. Pushing or pulling gently to the first detent: window moves up or down as long as switch is operated. Pushing or pulling firmly to the second detent and then releasing: window moves up or down automatically with enabled safety function. To stop movement, operate the switch once more in the same direction. Safety function If the window glass encounters resistance above the middle of the window during automatic closing, it is immediately stopped and opened again. Override safety function In the event of closing difficulties due to frost or the like, pull and hold the switch. The window moves up without safety function. To stop movement, release and pull the switch once more.
36 Keys, doors and windows 35 Child safety system for rear windows Press switch z to deactivate rear door power windows, the LED illuminates. To activate, press z again. Operating windows from outside The windows can be operated remotely from outside the vehicle. Press and hold c button to open windows. Press and hold e button to close windows. Release button to stop window movement. Overload If the windows are repeatedly operated within short intervals, the window operation is disabled for some time. Initialising the power windows If the windows cannot be closed automatically (e.g. after disconnecting the vehicle battery), a warning message or a warning code is displayed in the Driver Information Center. Vehicle messages Activate the window electronics as follows: 1. Close doors. 2. Switch on ignition. 3. Close the window completely and keep the switch pulled for additional 2 seconds. 4. Repeat for each window.
37 36 Keys, doors and windows Heated rear window Sun visors swivelled to the side can be adjusted in length. If the sun visors have integral mirrors, the mirror covers should be closed when driving. Roof Sunroof 9 Warning Operated by pressing the Ü button. Heating works with the engine running and is switched off automatically after a short time. Depending on the engine type, the heated rear window comes on automatically when the diesel particle filter is being cleaned. Sun visors The sun visors can be folded down or swivelled to the side to prevent dazzling. Roller blinds To reduce sunlight at the rear seats, pull the blind upwards using the grip and engage it at the top of the door frame. Take care when operating the sunroof. Risk of injury, particularly to children. Keep a close watch on the movable parts when operating them. Ensure that nothing becomes trapped in them as they move. Sunroof, Saloon/Hatchback
38 Keys, doors and windows 37 Open or close Press p or r gently to the first detent: sunroof is opened or closed with enabled safety function as long as the switch is operated. Press p or r firmly to the second detent and then release: the sunroof is opened or closed automatically with enabled safety function. To stop movement, operate the switch once more. Raise or close Press q or r: sunroof is raised or closed automatically with enabled safety function. If the sunroof is raised, it can be opened in one step by pushing p. Sunblind The sunblind is manually operated. Close or open the sunblind by sliding. When the sunroof is open, the sunblind is always open. Sunroof, Estate Open Press p gently to the first detent: sunroof is opened to the spoiler position. Press p firmly to the second detent and then release: the sunroof is opened automatically with enabled safety function. To stop movement, operate the switch once more. Close Press r gently to the first detent: sunroof is closed from full open or spoiler position with enabled safety function as long as the switch is operated. Press r firmly to the second detent and then release: the sunroof is completely closed automatically with enabled safety function. To stop movement, operate the switch once more. Sunblind The sunblind is power operated.
39 38 Keys, doors and windows Close or open the sunblind by pressing button H or G. Safety function If the sunblind encounters resistance during automatic closing, it is immediately stopped and opened again. General hints Function standby The sunroof can be operated: with ignition on, within 10 minutes of switching ignition off, within 5 minutes of opening a door. After switching off the ignition, sunroof operation is disabled when driver's door is opened, then closed and locked. Safety function If the sunroof encounters resistance during automatic closing, it is immediately stopped and opened again. Override safety function In the event of closing difficulties due to frost or the like, hold the switch r pressed to the second detent. The sunroof closes without safety function. To stop movement, release the switch. Closing sunroof from outside The sunroof can be closed remotely from outside the vehicle. Press and hold e button to close the sunroof. Release the button to stop the movement. Initialising of the roof If the sunroof cannot be closed (e.g. after disconnecting the vehicle battery), activate the sunroof electronics as follows: If sunroof is closed, keep the switch r pressed for 10 seconds. If sunroof is open, keep the switch r pressed until sunroof is fully closed. Then release switch shortly and press it again for 10 seconds. Relearning of safety function If the sunroof does not close correctly after initialising: 1. Open sunroof fully by pressing switch p. 2. Release switch and then press again switch p gently to the first detent for approx. 30 seconds. The switch can be released, when the sunroof is in closed position. Initialising and relearning of the power operated sun blind Repeat the previous steps using the switches H for closing and G for opening.
40 Seats, restraints 39 Seats, restraints Head restraints Front seats Rear seats Seat belts Airbag system Child restraints Head restraints Position 9 Warning Only drive with the head restraint set to the proper position. Adjustment Head restraints on front seats Height adjustment Press the button, adjust height and engage. The middle of the head restraint should be at eye level. If this is not possible for extremely tall people, set to highest position, and set to lowest position for small people.
41 40 Seats, restraints Head restraints on rear seats Front seats Seat position 9 Warning Only drive with the seat correctly adjusted. Inclination adjustment Swivel the bottom edge of the head restraint forwards or rearwards. Active head restraints on front seats In the event of a rear-end impact, the active head restraints are moved slightly forwards. The head is more effectively supported so the risk of whiplash injury is reduced. Notice Approved accessories may only be attached to the front passenger head restraint if the seat is not in use. Height adjustment Pull the head restraint upwards or press the catch to release and push the head restraint downwards. Sit with buttocks as far back against the backrest as possible. Adjust the distance between the seat and the pedals so that legs are slightly angled when pressing the pedals. Slide the front passenger seat as far back as possible.
42 Seats, restraints 41 Sit with shoulders as far back against the backrest as possible. Set the backrest rake so that it is possible to easily reach the steering wheel with arms slightly bent. Maintain contact between shoulders and the backrest when turning the steering wheel. Do not angle the backrest too far back. We recommend a maximum rake of approx. 25. Adjust the steering wheel Set seat height high enough to have a clear field of vision on all sides and of all display instruments. There should be at least one hand of clearance between head and the roof frame. Your thighs should rest lightly on the seat without pressing into it. Adjust the head restraint Adjust the height of the seat belt Adjust the thigh support so that there is a space approx. two fingers wide between the edge of the seat and the hollow of the knee. Adjust the lumbar support so that it supports the natural shape of the spine. Seat adjustment 9 Danger Do not sit nearer than 25 cm (10 inches) from the steering wheel, to permit safe airbag deployment. 9 Warning Never adjust seats while driving as they could move uncontrollably. Seat positioning Pull handle, slide seat, release handle.
43 42 Seats, restraints Seat backrests Seat height Seat inclination Pull lever, adjust inclination and release lever. Allow the backrest to engage audibly. Do not lean on backrest when adjusting. Press switch top = seat higher bottom = seat lower Lever pumping motion up = front end higher down = front end lower
44 Seats, restraints 43 Lumbar support Adjust lumbar support using four-way switch to suit personal requirements. Moving support up and down: push switch up or down. Increasing and decreasing support: push switch forwards or backwards. Adjustable thigh support Pull the lever and slide the thigh support. Power seat adjustment 9 Warning Care must be taken when operating the power seats. There is a risk of injury, particularly for children. Articles could become trapped. Keep a close watch on the seats when adjusting them. Vehicle passengers should be informed accordingly.
45 44 Seats, restraints Seat positioning Move front of switch forwards/ backwards. Seat height Move switch upwards/downwards. Seat inclination Move switch upwards/downwards at front. Seat backrests Turn switch forwards/backwards. Memory function for power seat adjustment and exterior mirrors Two different seat and mirror settings can be stored. Memorised settings 3 21, Vehicle personalisation Storing settings Adjust driver seat first and then exterior mirrors. Keep memory button MEM pressed and then press position button to be used (1 or 2). Storage is acknowledged by an acoustic signal. Retrieving settings Keep position button 1 or 2 pressed until the stored seat and mirror positions have been reached. Easy exit function For easy exit from the vehicle, the power driver seat moves rearwards when vehicle is stationary, the key is out of the ignition switch and the driver's door is opened. Activation or deactivation of this function can be changed in the menu Settings in the Info-Display. Vehicle personalisation Overload If the seat setting is electrically overloaded, the power supply is automatically cut off for a short time.
46 Seats, restraints 45 Armrest Heating Ventilating Push button and fold armrest upwards. Under the armrest there is a storage compartment. Auxiliary devices Adjust heating to the desired setting by pressing the ß button for the respective seat one or more times with the ignition on. The control indicator in the button or in the display indicates the setting. Prolonged use of the highest setting for people with sensitive skin is not recommended. Seat heating is operational when engine is running. Adjust ventilation to the desired setting by pressing the A button for the driver seat one or more times with the ignition on. The control indicator in the display indicates the setting. Ventilated driver seat is operational when engine is running.
47 46 Seats, restraints Rear seats Armrest Fold armrest down. The armrest contains cupholders and a storage box. Seat belts The belts are locked during heavy acceleration or deceleration of the vehicle for the safety of the occupants. 9 Warning Fasten seat belt before each trip. In the event of an accident, people not wearing seat belts endanger their fellow occupants and themselves. Seat belt reminder X Seat belts are only designed for use by one person at a time. They are not suitable for people younger than 12 years of age or smaller than 150 cm (5 ft). Periodically check all parts of the belt system for damage and proper functionality. Have damaged components replaced. After an accident, have the belts and triggered belt tensioners replaced by a workshop. Notice Make sure that the belts are not damaged by shoes or sharp-edged objects or are trapped. Prevent dirt from getting into the belt retractors. Belt force limiters In the front seats, stress on the body is reduced by the gradual release of the belt during a collision.
48 Seats, restraints 47 Belt tensioners In the event of a head-on or rear-end collision of a certain severity, the front seat belts are tightened. 9 Warning Incorrect handling (e.g. removal or fitting of belts) can trigger the belt tensioners with risk of injury. Deployment of the belt tensioners is indicated by illumination of control indicator v Triggered belt tensioners must be replaced by a workshop. Belt tensioners can only be triggered once. Notice Do not affix or install accessories or other objects that may interfere with the operation of the belt tensioners. Do not make any modifications to belt tensioner components as this will invalidate the vehicle type approval. Three-point seat belt Fitting Withdraw belt from retractor, guide it untwisted across the body and insert the latch plate in the buckle. Tension the lap belt regularly whilst driving by tugging the shoulder belt. Loose or bulky clothing prevents the belt from fitting snugly. Do not place objects such as handbags or mobile phones between the belt and your body.
49 48 Seats, restraints 9 Warning The belt must not rest against hard or fragile objects in the pockets of your clothing. Height adjustment Do not adjust while driving. Removing Using the seat belt while pregnant 9 Warning The lap belt must be positioned as low as possible across the pelvis to prevent pressure on the abdomen. 1. Pull belt out slightly. 2. Press button. 3. Adjust height and engage. Adjust the height so that the belt lies across the shoulder. It must not lie across the throat or upper arm. To release belt, press red button on belt buckle. Seat belts on the rear seats The seat belt for the rear centre seat can only be withdrawn from the retractor if the backrest is in the rear position.
50 Seats, restraints 49 Airbag system The airbag system consists of a number of individual systems. When triggered the airbags inflate within milliseconds. They also deflate so quickly that it is often unnoticeable during the collision. 9 Warning If handled improperly the airbag systems can be triggered in an explosive manner. Notice The airbag systems and belt tensioner control electronics are located in the centre console area. Do not put any magnetic objects in this area. Do not stick anything on the airbag covers and do not cover them with other materials. Each airbag is triggered only once. Have deployed airbags replaced by a workshop. Do not make any modifications to the airbag system as this will invalidate the vehicle type approval. In the event of airbag deployment have the steering wheel, the instrument panel, all panelling parts, the door seals, the handles and the seats removed by a workshop. Control indicator v for airbag systems Front airbag system The front airbag system consists of one airbag in the steering wheel and one in the instrument panel on the front passenger side. These can be identified by the word AIRBAG. There is also a warning label on the side of the instrument panel, visible when the front passenger door is open.
51 50 Seats, restraints The forward movement of the front seat occupants is decelerated, thereby considerably reducing the risk of injury to the upper body and head. Side airbag system The front airbag system is triggered in the event of an accident of a certain severity in the depicted area. The ignition must be on. 9 Warning Optimum protection is only provided when the seat is in the proper position Keep the area in which the airbag inflates clear of obstructions. Fit the seat belt correctly and engage securely. Only then the airbag is able to protect. The side airbag system consists of an airbag in each front seat backrest and in the rear outboard seat backrests. This can be identified by the word AIRBAG.
52 Seats, restraints 51 Curtain airbag system The curtain airbag system consists of an airbag in the roof frame on each side. This can be identified by the word AIRBAG on the roof pillars. The side airbag system is triggered in the event of an accident of a certain severity in the depicted area. The ignition must be on. The risk of injury to the upper body and pelvis in the event of a side-on collision is considerably reduced. 9 Warning Keep the area in which the airbag inflates clear of obstructions. Notice Only use protective seat covers that have been approved for the vehicle. Be careful not to cover the airbags. The curtain airbag system is triggered in the event of an accident of a certain severity in the depicted area. The ignition must be on.
53 52 Seats, restraints The risk of injury to the head in the event of a side impact is considerably reduced. 9 Warning Keep the area in which the airbag inflates clear of obstructions. The hooks on the handles in the roof frame are only suitable for hanging up light articles of clothing, without coat hangers. Do not keep any items in these clothes. Airbag deactivation Front airbag and side airbag systems for the front passenger seat have to be deactivated if a child restraint system is to be fitted on this seat. The curtain airbag system, the belt tensioners and all driver airbag systems will remain active. Front passenger airbag system can be deactivated via a lock on the side of the instrument panel, visible when the front passenger door is open. Use the ignition key to choose the position: * = front passenger airbags are deactivated and will not inflate in the event of a collision. Control indicator * illuminates continuously. A child restraint system can be installed in accordance with the chart Child restraint installation locations V = front passenger airbags are active. No child restraint systems can be installed.
54 Seats, restraints 53 As long as the control indicator * is not illuminated, the airbag systems for the front passenger seat will inflate in the event of a collision. Change status only when the vehicle is stopped with the ignition off. Status remains until the next change. Control indicator for airbag deactivation Child restraints Child restraint systems When a child restraint system is being used, pay attention to the following usage and installation instructions and also those supplied with the child restraint system. Always comply with local or national regulations. In some countries, the use of child restraint systems is forbidden on certain seats. 9 Warning When using a child restraint system on the front passenger seat, the airbag systems for the front passenger seat must be deactivated; if not, the triggering of the airbags poses a risk of fatal injury to the child. This is especially the case if rearfacing child restraint systems are used on the front passenger seat. Selecting the right system Children should travel facing rearwards in the vehicle, until as old as possible. It is approp'riate to change the system when the child's head can no longer be properly supported at eye height. The childs cervical vertebrae are still very weak and in an accident they suffer less stress in the semi-prone rearward position than when sitting upright. Children under 12 years or under 150 cm (5 ft) tall should only travel in an appropriate child restraint system. When transporting children, use the child restraint systems suitable for the child's weight. Ensure that the child restraint system to be installed is compatible with the vehicle type. Ensure that the mounting location of the child restraint system within the vehicle is correct. Only allow children to enter and exit the vehicle at the side facing away from the traffic.
55 54 Seats, restraints When the child restraint system is not in use, secure the seat with a seat belt or remove it from the vehicle. Notice Do not stick anything on the child restraint systems and do not cover them with any other materials. A child restraint system which has been subjected to stress in an accident must be replaced.
56 Seats, restraints 55 Child restraint installation locations Permissible options for fitting a child restraint system Weight and age class Group 0: up to 10 kg or approx. 10 months Group 0+: up to 13 kg or approx. 2 years Group I: 9 to 18 kg or approx. 8 months to 4 years Group II: 15 to 25 kg or approx. 3 to 7 years Group III: 22 to 36 kg or approx. 6 to 12 years On front passenger seat activated airbag deactivated airbag On rear outboard seats X U 1, U 2 U 2 U 2 X U 1, U 2 U 2 U 2 X U 1, U 2 U 2 U 2 X X U U X X U U On rear centre seat 1 = Only if front passenger seat airbag systems are deactivated. If the child restraint system is being secured using a threepoint seat belt, move seat height adjustment to uppermost position and ensure that vehicle safety belt runs forwards from the upper anchorage point. 2 = Seat available with ISOFIX and Top-Tether mounting brackets. U = Universal suitability in conjunction with three-point seat belt. X = No child restraint system permitted in this weight class.
OPEL ASTRA. Owner's Manual
 OPEL ASTRA Owner's Manual Contents Introduction... 2 In brief... 6 Keys, doors and windows... 22 Seats, restraints... 39 Storage... 58 Instruments and controls... 97 Lighting... 134 Climate control...
OPEL ASTRA. Owner's Manual
 OPEL ASTRA Owner's Manual Contents Introduction... 2 In brief... 6 Keys, doors and windows... 20 Seats, restraints... 47 Storage... 67 Instruments and controls... 86 Lighting... 117 Climate control...
Introduction. Introduction. Using this Manual
 Table of Contents Introduction...1 In brief...3 Keys, doors and windows...17 Seats, restraints...35 Storage...59 Instruments and controls...71 Lighting...107 Infotainment system...115 Climate controls...185
Table of Contents. Introducing AYGO. Accessing your vehicle 2 3. Lights 9. Wipers 10. Electric windows 4. Gear change 11
 AYGO Brief Guide Table of Contents Accessing your vehicle 2 3 Electric windows 4 Steering wheel (Vehicles with an adjustable type) 4 Seat and seat belt adjustment 5 Instrument Panel overview 6 Instrument
Ell STEERING COLUMN CONTROLS STEERING COLUMN CONTROLS
 STEERING COLUMN CONTROLS Ignition Switch........ 2-1 LightinglTurn Signal Control Lever... 2-5 Windshield Wiper and Washer Lever... 2-6 Rear Window Wiper/Washer Switch (if equipped)... 2-8 Tilt Steering
QUICK GUIDE WEB EDITION WELCOME TO YOUR NEW VOLVO! VOLVO C30
 VOLVO C30 QUICK GUIDE WEB EDITION WELCOME TO YOUR NEW VOLVO! Getting to know your new car is an exciting experience. Look through this Quick Guide in order to quickly and easily learn some of the most
Owner s Manual. Operation, Safety and Maintenance TS 1515-A-08 MOVANO. Copyright by Vauxhall Motors Ltd., England.
 Owner s Manual MOVANO Operation, Safety and Maintenance Reproduction or translation, in whole or in par ts, is not permitted without prior written consent from Vauxhall Motors Ltd. All rights as understood
2009 QUICK REFERENCE GUIDE GET INFORMED. ROLL.
 xb 2009 QUICK REFERENCE GUIDE GET INFORMED. ROLL. 2009 Scion xb This Quick Reference Guide is a summary of basic vehicle operations. It contains brief descriptions of fundamental operations so you can
Supplementary restraints system
 Supplementary restraints system PRINCIPLE OF OPERATION High speed impacts may cause serious injury or death irrespective of safety features fitted to the vehicle. Always drive with caution and consideration
CYBEX GmbH Riedinger Str. 18 95448 Bayreuth Germany. info@cybex-online.com www.cybex-online.com www.facebook.com/cybex.online
 CYBEX GmbH Riedinger Str. 18 95448 Bayreuth Germany info@cybex-online.com www.cybex-online.com www.facebook.com/cybex.online GO TO WWW.CYBEX-ONLINE.COM TO WATCH AN INSTRUCTIONAL VIDEO C233_051-3_01A PALLAS
Audi A3 Audi A3 Sportback Quick reference guide
 Audi A Audi A Sportback Quick reference guide Dear Audi Driver, This quick reference guide gives you a brief introduction to the main features and controls of your vehicle. However, it cannot replace the
5 Mechanisms and accessories
 5 Mechanisms and accessories 51A SIDE OPENING ELEMENT MECHANISMS 52A NON-SIDE OPENING ELEMENT MECHANISMS 54A WINDOWS 55A EXTERIOR PROTECTION 56A EXTERIOR EQUIPMENT 57A INTERIOR EQUIPMENT X79 NOVEMBER 2009
XC60. Quick GUIDE Web Edition
 XC60 Quick GUIDE Web Edition WELCOME TO THE GLOBAL FAMILY OF VOLVO OWNERS! This Quick Guide provides a brief overview of the most common features and functions in your Volvo. The Owner s Manual and the
Adaptive cruise control (ACC)
") Adaptive cruise control (ACC) PRINCIPLE OF OPERATION The Adaptive Cruise Control (ACC) system is designed to assist the driver in maintaining a gap from the vehicle ahead, or maintaining a set road speed,
Adaptive cruise control (ACC) PRINCIPLE OF OPERATION The Adaptive Cruise Control (ACC) system is designed to assist the driver in maintaining a gap from the vehicle ahead, or maintaining a set road speed,
STEERING COLUMN CONTROLS
 STEERING COLUMN CONTROLS Ignition Switch... 2-1 Lighting/Turn Signal Control Lever... 2-5 Windshield Wiper and Washer Lever... 2-6 Rear Window WiperlWasher Switch (if equipped)... 2-8 Tilt Steering Lock
Scion xb. Pocket Reference Guide. <http://www.scion.com/>, Contact
 EMAIL US , Contact 2006 CHAT On weekdays you can chat with a Scion Customer Advocate. , Have a Question? or Contact CALL US For the Scion Customer Experience
SECTION 2 3 OPERATION OF INSTRUMENTS AND CONTROLS. Lights, Wipers and Defogger
 OPERATION OF INSTRUMENTS AND CONTROLS Lights, Wipers and Defogger SECTION 2 3 Headlights and turn signals................................... 92 Emergency flashers..........................................
FORD B-MAX Owner's Manual
 FORD B-MAX Owner's Manual The information contained in this publication was correct at the time of going to print. In the interest of continuous development, we reserve the right to change specifications,
Keys... 2-2 Master, submaster and valet key... 2-2 Key number... 2-2. Door locks... 2-3 Power door locking switches... 2-5
 Doors and locks Keys........................................................................... 2-2 Master, submaster and valet key..................................... 2-2 Key number...............................................................
Multi-information Display (see MID )
") Driving Position Memory (see Seats ) Power Mirrors (see Mirrors ) Indicators/Gauges (see Instrument Panel ) Multi-information Display (see MID ) HomeLink (see HomeLink ) Navigation System (see Navigation
Driving Position Memory (see Seats ) Power Mirrors (see Mirrors ) Indicators/Gauges (see Instrument Panel ) Multi-information Display (see MID ) HomeLink (see HomeLink ) Navigation System (see Navigation
SECTION 1-5 OPERATION OF INSTRUMENTS AND CONTROLS 06.0.711. Lights, Wipers and Defogger
 OPERATION OF INSTRUMENTS AND CONTROLS Lights, Wipers and Defogger SECTION 1-5 Headlights and turn signals................................... 76 Emergency flashers..........................................
Wipers and washers WINDSCREEN WIPERS. Intermittent variable delay
 Wipers and washers WINDSCREEN WIPERS S Do not operate the wipers on a dry screen. The drag on the wiper mechanism may cause damage. Before operating in freezing or very hot conditions, ensure that the
Introduction... 2. Body Specifications... 3. Technical Data... 4. Body... 5. Interior Rear Seats... 6. Center Arm Rest... 7. Child Seat Restraint...
 Table of Contents Subject Page Introduction.......................................... 2 Body Specifications.................................... 3 Technical Data........................................
This owner s manual should be considered a permanent part of the vehicle and should remain with the vehicle when it is sold.
 10/10/25 18:28:46 32TF0630_001 This owner s manual should be considered a permanent part of the vehicle and should remain with the vehicle when it is sold. This owner s manual covers all versions. Therefore,
Headlight switch. The daytime running. lights) turn on.
 turn on.") Headlight switch The headlights can be operated manually or automatically. U.S.A. Canada The daytime running lights turn on The side marker, parking (vehicles with halogen headlights), daytime running
Headlight switch The headlights can be operated manually or automatically. U.S.A. Canada The daytime running lights turn on The side marker, parking (vehicles with halogen headlights), daytime running
The Crafter Electrical system
 Service Training Self-study Programme 370 Commercial Vehicles The Crafter Electrical system Design and function Innovations in automotive engineering are also taking place in the commercial vehicle segment.
Secure Them for Life. Child safety seats. From infant seats to seat belts, everything you need to know to ensure your child s safety.
 Secure Them for Life Child safety seats From infant seats to seat belts, everything you need to know to ensure your child s safety. It s the law In a vehicle, children whose sitting height is less than
SIMPLY CLEVER. ŠKODA Yeti OWNER'S MANUAL
 SIMPLY CLEVER ŠKODA Yeti OWNER'S MANUAL Introduction You have opted for a ŠKODA our sincere thanks for your confidence in us. Your new ŠKODA offers you a vehicle featuring the most modern engineering
2. READY TO SET OFF 18-42. 3. EASE OF USE and COMFORT 43-84 1. FAMILIARISATION 4-17 4. SAFETY 85-102. Contents
 WELCOME Please note the following point: the fitting of electrical equipment or accessories which are not recommended by PEUGEOT may result in a failure of your vehicle's electronic system. Please note
2015 Scion tc Quick Reference Guide
 2015 Scion tc Quick Reference Guide 2015 Scion tc This Quick Reference Guide is a summary of basic vehicle operations. It contains brief descriptions of fundamental operations so you can locate and use
4008 FEATURES AND SPECIFICATIONS
 ACTIVE BODYSTYLE 5 door compact SUV SAFETY Driver and front passenger airbags Front side airbags Full length curtain airbags Driver knee airbag ABS with Electronic Brake Force Distribution (EBFD) Emergency
TABLE OF CONTENTS. Securing Child in Carrier...26. Child Requirements...24 Changing Harness Height...25
 TABLE OF CONTENTS Safe Use Checklist...4 Registration & Recall...5 Assistance...5 Warnings...6 Base Features Base Overview... Storage Compartment...3 Recline Adjustment...3 LATCH Removal & Storage...4
Grand Prix 7Jx17 alloy 225/45 R17. Porto 7½Jx17 alloy 225/45 R17. Toronto 6½Jx16 alloy 205/55 R16. Sedona 6½Jx16 alloy 205/55 R16
 1.6 Guarantees Trunk sill protection, plastic X X X X X X X X X 3-year / 120 000 km warranty X X X X X X X X X Volkswagen AutoMotion Plan : 5yr / 60 000 km X X X X X X X X X 15 000 km service intervals
DMSG_0152_0112_V4 Mamas & Papas (Holdings) Ltd. 2012 Dream Swing - 1 -
 Ltd. 2012 Dream Swing - 1 -") DMSG_0152_0112_V4 Mamas & Papas (Holdings) Ltd. 2012 Dream Swing - 1 - DREAM SWING THESE INSTRUCTIONS ARE IMPORTANT. PLEASE READ CAREFULLY AND RETAIN FOR FUTURE REFERENCE. Read the entire instruction before
DMSG_0152_0112_V4 Mamas & Papas (Holdings) Ltd. 2012 Dream Swing - 1 - DREAM SWING THESE INSTRUCTIONS ARE IMPORTANT. PLEASE READ CAREFULLY AND RETAIN FOR FUTURE REFERENCE. Read the entire instruction before
xd 2010 QUICK REFERENCE GUIDE GET INFORMED. ROLL.
 xd 2010 QUICK REFERENCE GUIDE GET INFORMED. ROLL. 2010 Scion xd This Quick Reference Guide is a summary of basic vehicle operations. It contains brief descriptions of fundamental operations so you can
Quick Guide WELCOME TO YOUR NEW VOLVO! VOLVO XC90 WEB EDITION
 VOLVO XC90 Quick Guide WEB EDITION WELCOME TO YOUR NEW VOLVO! Getting to know your car is an exciting experience. fter looking through this Quick Guide you'll like your new Volvo even more. You can find
288-289 29024V COMPACT ALARM SYSTEMS
 288-289 29024V COMPACT ALARM SYSTEMS The system is manufactured from the highest quality components to ensure a long trouble free operating life. These instructions are intended to familiarise you with
the alarm B If the vehicle is out of range when the button is pressed, the most recently stored status information will be shown.
 REMOTE KEY WITH PCC* personal car communicator Locks the doors and trunk and arms the alarm A. PCC* 1 Green light: vehicle is locked. 2 Yellow light: vehicle is unlocked. 3 Red light: alarm has been triggered.
12 & 15- Passenger Van Defensive Driver Training
 12 & 15- Passenger Van Defensive Driver Training NHTS-national Highway Traffic Safety Administration Recognizes that 12-15 passenger vans (include driver) are similar type vehicle and offer the same hazards
Quick GUIDE Web Edition
 S60 Quick GUIDE Web Edition WELCOME TO THE GLOBAL FAMILY OF VOLVO OWNERS! Getting to know your new vehicle is an exciting experience. This Quick Guide provides a brief overview of the most common features
Instrument panel. Volkswagen Touareg - Instrument panel. Special tools, testers and auxiliary items required. Release lever T10039
 Volkswagen Touareg - Instrument panel Page 1 / 14 70-1 Instrument panel Tools Special tools, testers and auxiliary items required Release lever T10039 Instrument panel, removing and installing Removing
TABLE OF CONTENTS. Securing Child in Carrier...26. Child Requirements...24 Changing Harness Height...25
 TABLE OF CONTENTS Safe Use Checklist...4 Registration & Recall...5 Assistance...5 Warnings...6 Base Features Base Overview... Storage Compartment... Recline Adjustment... LATCH Removal & Storage...4 Shoulder
EMERGENCY SERVICES. Component Location and Safety Document. X-TYPE 2001.5 my Onwards
 EMERGENCY SERVICES Component Location and Safety Document X-TYPE 2001.5 my Onwards Parts and Service Communications B/4/013 Browns Lane Allesley Coventry CV5 9DR INTRODUCTION This document is produced
LAND ROVER MANUAL CONTENTS APPLICATIONS GENERAL OPERATION SPECIAL FUNCTIONS REMOTE CONTROL PROGRAMMING
 LAND ROVER LAND ROVER MANUAL CONTENTS APPLICATIONS GENERAL OPERATION SPECIAL FUNCTIONS REMOTE CONTROL PROGRAMMING APPLICATIONS VEHICLE SYSTEM YEAR CABLE CLASSIC RANGE ROVER 10AS 95 ON ADC110-B DEFENDER
2010 Cadillac CTS/CTS-V Owner Manual M
 2010 Cadillac CTS/CTS-V Owner Manual M Keys, Doors and Windows... 1-1 Keys and Locks............... 1-2 Doors........................ 1-17 Vehicle Security.............. 1-23 Exterior Mirrors...............
OWNER S MANUAL. ProMaster
 2014 OWNER S MANUAL ProMaster VEHICLES SOLD IN CANADA With respect to any Vehicles Sold in Canada, the name Chrysler Group LLC shall be deemed to be deleted and the name Chrysler Canada Inc. used in substitution
TABLE OF CONTENTS 1 INTRODUCTION...3 1 2 THINGS TO KNOW BEFORE STARTING YOUR VEHICLE...9 2 3 UNDERSTANDING THE FEATURES OF YOUR VEHICLE...
 SECTION TABLE OF CONTENTS PAGE 1 INTRODUCTION...3 1 2 THINGS TO KNOW BEFORE STARTING YOUR VEHICLE...9 2 3 UNDERSTANDING THE FEATURES OF YOUR VEHICLE... 83 3 4 UNDERSTANDING YOUR INSTRUMENT PANEL...179
REARWARD- & FORWARD-FACING USER MANUAL ECE R44 04. GROUP WEIGHT AGE 0+/1 0-18 kg 6m-4y
 REARWARD- & FORWARD-FACING USER MANUAL ECE R44 04 GROUP WEIGHT AGE 0+/1 0-18 kg 6m-4y 1 Thank you for choosing BeSafe izi Combi ISOfix. BeSafe has developed this seat with much care, to protect your child
Installation instructions, accessories - Handsfree for cellular phone, system B, entry level
 XC90 Section Group Weight(Kg/Pounds) Year Month 3 39 0.5/1.1 2006 07 XC90 2003, XC90 2004 IMG-249663 Page 1 of 18 Required tools A0000162 A0000163 IMG-239664 M0000232 IMG-253123 IMG-252223 Page 2 of 18
SIMPLY CLEVER. ŠKODA Octavia Owner's Manual
 SIMPLY CLEVER ŠKODA Octavia Owner's Manual Preface You have opted for a ŠKODA our sincere thanks for your confidence in us. Your new ŠKODA offers you a vehicle featuring the most modern engineering and
CHILD BOOSTER SEAT. Instructions for Installation & Use Series No. 4050/A/2013 IMPORTANT: KEEP THIS BOOK IN THE PLACE PROVIDED ON THE CHILD RESTRAINT
 CHILD BOOSTER SEAT Instructions for Installation & Use Series No. 4050/A/2013 IMPORTANT: KEEP THIS BOOK IN THE PLACE PROVIDED ON THE CHILD RESTRAINT INDEX PAGE 3 4 6 7 9 10 14 19 21 22 INTRODUCTION WARNINGS
Mercedes-Benz Vito. Specifications
 Mercedes-Benz Vito Specifications Mercedes-Benz Technical Data Panel Van Specification Body Style Rated output (kw @ rpm) Max torque (Nm @ rpm) Injection Fuel consumption 1 (litres/100km) Front axle load
2013 Chevrolet Volt Owner Manual M
 2013 Chevrolet Volt Owner Manual M In Brief........................ 1-1 Instrument Panel.............. 1-2 Initial Drive Information........ 1-4 Vehicle Features............. 1-16 Battery and Efficiency........
FORD ECOSPORT Owner's Manual
 FORD ECOSPORT Owner's Manual The information contained in this publication was correct at the time of going to print. In the interest of continuous development, we reserve the right to change specifications,
VEHICLE EQUIPMENT INSTRUCTIONS
 VEHICLE EQUIPMENT INSTRUCTIONS A Table of Contents 1) Ramp and Seats 2) Passenger/Attendant Operation 3) Restraint System City CarShare addenda noted by 1) Ramp and Seats 2 Unfolding Ramp Manual Ramp Operation
2015 Scion xb Quick Reference Guide
 2015 Scion xb Quick Reference Guide 2015 Scion xb This Quick Reference Guide is a summary of basic vehicle operations. It contains brief descriptions of fundamental operations so you can locate and use
CAR DAILY VEHICLE PRE CHECKS INFORMATION. Page 1 of 6
 Page 1 of 6 CAR DAILY VEHICLE PRE CHECKS INFORMATION There are approximately 2.5 million vehicles in national fleet in Ireland. As vehicles age they are subject to wear and tear and unless attended to
2014 Chevrolet Cruze Owner Manual M
 2014 Chevrolet Cruze Owner Manual M In Brief........................ 1-1 Instrument Panel.............. 1-2 Initial Drive Information........ 1-4 Vehicle Features............. 1-15 Performance and Maintenance................
2012 Chevrolet Orlando Owner Manual M
 Black plate (1,1) 2012 Chevrolet Orlando Owner Manual M In Brief........................ 1-1 Instrument Panel.............. 1-2 Initial Drive Information........ 1-4 Vehicle Features............. 1-15
FORD FOCUS Owner's Manual
 FORD FOCUS Owner's Manual The information contained in this publication was correct at the time of going to print. In the interest of continuous development, we reserve the right to change specifications,
2005 Chevrolet Cavalier Owner Manual M
 2005 Chevrolet Cavalier Owner Manual M Seats and Restraint Systems... 1-1 Front Seats... 1-2 Rear Seats... 1-7 Safety Belts... 1-8 Child Restraints... 1-27 Airbag System... 1-46 Restraint System Check...
Portable Air Conditioner
 Portable Air Conditioner Owner's Manual Model:3 in 1 12,000 Btu/h Series 3 Please read this owner s manual carefully before operation and retain it for future reference. CONTENTS 1. SUMMARY...1 2. PORTABLE
A name a commitment! These are the criteria which have characterized the development of dependable everyday cars up to the present time.
 A name a commitment! Automobile development has been a ŠKODA commitment since 1905. Even in those days, the trade press wrote enthusiastically above the Laurin & Klement Model A: Solidly built, dependable
Chapter 4 DEFENSIVE DRIVING
 Chapter 4 DEFENSIVE DRIVING Chapter 4 Table of Contents Chapter 4 DEFENSIVE DRIVING... 4-1 DEFENSIVE DRIVING... 4-3 Positioning The Bus... 4-3 When Making a Turn at an Intersection... 4-3 Making the perfect
PATRIOT 2009 owner s manual
 PATRIOT 2009 owner s manual I nf or mat i onpr ov i dedby : VEHICLES SOLD IN CANADA With respect to any Vehicles Sold in Canada, the name Chrysler LLC shall be deemed to be deleted and the name Chrysler
TABLE OF CONTENTS 1 INTRODUCTION...3 2 THINGS TO KNOW BEFORE STARTING YOUR VEHICLE...9 3 UNDERSTANDING THE FEATURES OF YOUR VEHICLE...
 SECTION TABLE OF CONTENTS PAGE 1 INTRODUCTION...3 2 THINGS TO KNOW BEFORE STARTING YOUR VEHICLE...9 3 UNDERSTANDING THE FEATURES OF YOUR VEHICLE...83 4 INSTRUMENT PANEL AND CONTROLS... 185 5 STARTING AND
Before you Drive. Driving Controls. Audio System. Maintenance. Emergency Information. Technical Data
 Before you Drive Driving Controls Audio System Maintenance Emergency Information Technical Data 1 1 2 2 3 3 4 4 5 5 6 6 7 Introduction Publication English 01/2003 As Introduction All MG part rights Rover
ŠkodaOctavia Tour OWNER S MANUAL SIMPLY CLEVER
 ŠkodaOctavia Tour OWNER S MANUAL SIMPLY CLEVER Introduction You have opted for a Škoda - our sincere thanks for your confidence in us. Your new Škoda offers you a vehicle featuring the most modern engineering
2012 Chevrolet Cruze Owner Manual M
 2012 Chevrolet Cruze Owner Manual M In Brief........................ 1-1 Instrument Panel.............. 1-2 Initial Drive Information........ 1-4 Vehicle Features............. 1-15 Performance and Maintenance................
using the Remote Touch unit and push knob to select. STEP 5 Select category and push knob to select. Scroll to specific customization setting.
 Lexus Personalized Settings Your vehicle includes a variety of electronic features that can be programmed to your preferences. Programming of these features is performed once at no charge by your Lexus
GENERAL KNOWLEDGE PRACTICE TEST
 GENERAL KNOWLEDGE PRACTICE TEST 1. Driving under the influence of any drug that makes you drive unsafely is: a. Permitted if it is prescribed by a doctor b. Against the law c. Permitted if it is a diet
Please read all instructions BEFORE assembly and USE of product. KEEP INSTRUCTIONS FOR FUTURE REFERENCE. Model # 1305TW. Infant car seats not included
 Please read all instructions BEFORE assembly and USE of product. KEEP INSTRUCTIONS FOR FUTURE REFERENCE. Model # 1305TW Infant car seats not included Double Snap N Go Instruction Manual Convenience through
Safety Rules. Car Washes CORPORATE HEADQUARTERS 518 EAST BROAD STREET COLUMBUS, OHIO 43215 614.464.5000 STATEAUTO.COM
 TM Safety Rules Car Washes CORPORATE HEADQUARTERS 518 EAST BROAD STREET COLUMBUS, OHIO 43215 614.464.5000 STATEAUTO.COM TM Disclaimer: The information contained in this publication was obtained from sources
OWNER S MANUAL. Sebring
 2008 OWNER S MANUAL Sebring VEHICLES SOLD IN CANADA With respect to any Vehicles Sold in Canada, the name Chrysler LLC shall be deemed to be deleted and the name Chrysler Canada Inc. used in substitution
ŠKODA Fabia OWNER'S MANUAL
 ŠKODA Fabia OWNER'S MANUAL Introduction You have opted for a Škoda - our sincere thanks for your confidence in us. Your new Škoda offers you a vehicle featuring the most modern engineering and a wide range
Section 14. Forklift Safety Contents 14.1 Operator Safety
 Section 14. Forklift Safety Contents 14.1 Operator Safety... 14-1 14.2 Inspection and Maintenance... 14-2 14.3 Handling the Load... 14-3 14.4 Fueling Liquefied Petroleum (LP) Gas Forklifts... 14-3 14.5
Best Practice Guide 2007. Vehicle Ergonomics Best Practice Guide
 Best Practice Guide 2007 Vehicle Ergonomics Best Practice Guide Introduction About 80% of us will experience back pain at some stage in our lives. A number of work and leisure activities can contribute
TOYOTA ELECTRONIC TRANSMISSION CHECKS & DIAGNOSIS
 Checks and Adjustments The transmission requires regular maintenance intervals if it is to continue to operate without failure. As we discussed in previous sections, transmission fluid loses certain properties
2014 Cadillac ATS Owner Manual M
 2014 Cadillac ATS Owner Manual M In Brief........................ 1-1 Instrument Panel.............. 1-2 Initial Drive Information........ 1-4 Vehicle Features............. 1-15 Performance and Maintenance................
Adaptive Cruise Control
 33 Adaptive Cruise Control Adaptive Cruise Control Adaptive Cruise Control is a driving support system intended to allow more comfortable driving on expressways, freeways and interstate highways. The vehicle
CLK Cabriolet Operator s Manual
 CLK Cabriolet Operator s Manual CLK 320 CLK 430 Our company and staff congratulate you on the purchase of your new Mercedes-Benz. Your selection of our product is a demonstration of your trust in our company
G PART NUMBER OF CONNECTORS
 A 1 A/C Ambient Temp. Sensor 90980 11070 Buckle SW RH (w/ Power Seat) A/C Condenser Fan Motor (1G FE) 90980 10928 B 9 Buckle SW RH (w/o Power Seat) 90980 11212 A 2 A/C Condenser Fan Motor (2JZ GE) 90980
Driving and your Teen an 8 Step Guide for Parents
 Driving and your Teen an 8 Step Guide for Parents #DriveSafer Learning to drive is a rite of passage; a sacred experience between parent and teen. Helping your son or daughter on their journey doesn t
119877 Child in Car Safety Leaflet 1/8/07 8:54 am Page 1 Child In Car Safety
 Child In Car Safety Child In Car Safety Purchasing and fitting appropriate child car restraints is vital but complicated Following the advice in this leaflet will help you to protect the children travelling
Swivel seats. Boot hoists. Steering aids. Hand controls. car adaptations. for all car Manufacturers SIRUSAUTOMOTIVE.CO.UK
 Boot hoists Swivel seats Steering aids Hand controls car adaptations for all car Manufacturers SIRUSAUTOMOTIVE.CO.UK 2 Many people will experience difficulty whilst driving or using a car at some point
2012 Chevrolet Impala Owner Manual M
 2012 Chevrolet Impala Owner Manual M In Brief........................ 1-1 Instrument Panel.............. 1-2 Initial Drive Information........ 1-3 Vehicle Features............. 1-13 Performance and Maintenance................
Driver (Single Stage), Passenger (Single Stage) Driver (double), Passenger (single)
, Passenger (Single Stage) Driver (double), Passenger (single)") Nissan X Trail Nissan X Trail 1.6 diesel Acenta, LHD 86% 83% 75% 75% DETAILS OF TESTED CAR SPECIFICATIONS Tested model Nissan X Trail 1.6 diesel Acenta, LHD Body type 5 door SUV Year of publication 2014
Nissan X Trail Nissan X Trail 1.6 diesel Acenta, LHD 86% 83% 75% 75% DETAILS OF TESTED CAR SPECIFICATIONS Tested model Nissan X Trail 1.6 diesel Acenta, LHD Body type 5 door SUV Year of publication 2014
Sport Ice Elektro 124
 Sport Ice Elektro 124 Operation Manual 2007/4 V2.1 Introduction The Sport Ice Elektro 124 is an ice resurfacing machine designed to be used on small ice surfaces. The machine has been designed to produce
OWNER'S MANUAL MINI MINI CONVERTIBLE
 OWNER'S MANUAL MINI MINI CONVERTIBLE Cooper Cooper S John Cooper Works Congratulations on your new MINI This Owner's Manual should be considered a permanent part of this vehicle. It should stay with the
Transporter Fitting Locations No. 804 / 1
 Page 1 of 10 Transporter Fitting Locations No. 804 / 1 Pin connector assigment of selected connections Overview: 1 - Ignition/starter switch -D- On steering column Connector assigment chapter 2 - Onboard
OPERATOR'S MANUAL i-shift transmission
 OPERATOR'S MANUAL i-shift transmission R Volvo Trucks. Driving Success. Table of Contents i Foreword... 1 Safety Information... 2 Volvo I-Shift Transmission... 4 General Information... 4 Gear Selector...
Porsche Service. Cayenne (from MY 2008 for the following countries:
 Porsche Service Cayenne (from MY 2008 for the following countries: Abu Dhabi, Bahrain, Dubai, Jordan, Qatar, Kuwait, Lebanon, Oman, Saudi Arabia, Syria) Porsche Cayenne Maintaining driving pleasure No
OWNER S MANUAL. Caliber
 2008 OWNER S MANUAL Caliber VEHICLES SOLD IN CANADA With respect to any Vehicles Sold in Canada, the name Chrysler LLC shall be deemed to be deleted and the name Chrysler Canada Inc. used in substitution
Turbocharger system components, servicing
 21-1 Turbocharger system components, servicing Engine codes: AAZ, 1Z, AHU Observe rules of cleanliness Page 21-10 Turbocharger hoses and lines, connecting Page 21-11 WARNING! Do not re-use any fasteners
TABLE OF CONTENTS 1 INTRODUCTION...3 1 2 THINGS TO KNOW BEFORE STARTING YOUR VEHICLE...9 2 3 UNDERSTANDING THE FEATURES OF YOUR VEHICLE...
 SECTION TABLE OF CONTENTS PAGE 1 INTRODUCTION...3 1 2 THINGS TO KNOW BEFORE STARTING YOUR VEHICLE...9 2 3 UNDERSTANDING THE FEATURES OF YOUR VEHICLE...63 3 4 UNDERSTANDING YOUR INSTRUMENT PANEL...133 4
VEHICLE THEFT/SECURITY SYSTEMS
 DN VEHICLE THEFT/SECURITY SYSTEMS 8Q - 1 VEHICLE THEFT/SECURITY SYSTEMS TABLE OF CONTENTS page GENERAL INFORMATION INTRODUCTION...1 VEHICLE THEFT SECURITY SYSTEM....1 ENABLING...1 ARMING...1 DISARMING...2
UNDERSTANDING YOUR VEHICLE S. What every driver and passenger should know
 UNDERSTANDING YOUR VEHICLE S What every driver and passenger should know This booklet was prepared to answer questions about seat belts, airbags, and other safety equipment in newer Honda and Acura vehicles.
The SIPS (Side Impact Protection System) includes side and Inflatable Curtain (IC) airbags that protect both front and rear occupants.
 includes side and Inflatable Curtain (IC) airbags that protect both front and rear occupants.") SAFETY In brief: Volvo s commitment to safety is as old as the company itself, and the Volvo S60 has been extensively crash tested in the award winning Volvo Safety Centre in Gothenburg, Sweden and features
SAFETY In brief: Volvo s commitment to safety is as old as the company itself, and the Volvo S60 has been extensively crash tested in the award winning Volvo Safety Centre in Gothenburg, Sweden and features
2007 Saturn VUE Owner Manual M
 2007 Saturn VUE Owner Manual M Seats and Restraint Systems... 7 Front Seats... 9 Rear Seats... 18 Safety Belts... 20 Child Restraints... 42 Airbag System... 71 Restraint System Check... 90 Features and
Owner s Handbook Instruktieboekje Manuel du Conducteur Betriebsanleitung Manuale di Istruzioni Manual del Conductor Manual do Proprietário
 Owner s Handbook Instruktieboekje Manuel du Conducteur Betriebsanleitung Manuale di Istruzioni Manual del Conductor Manual do Proprietário CONTENTS SECTION 1 Introduction... 1 SECTION 2 Controls & instruments...