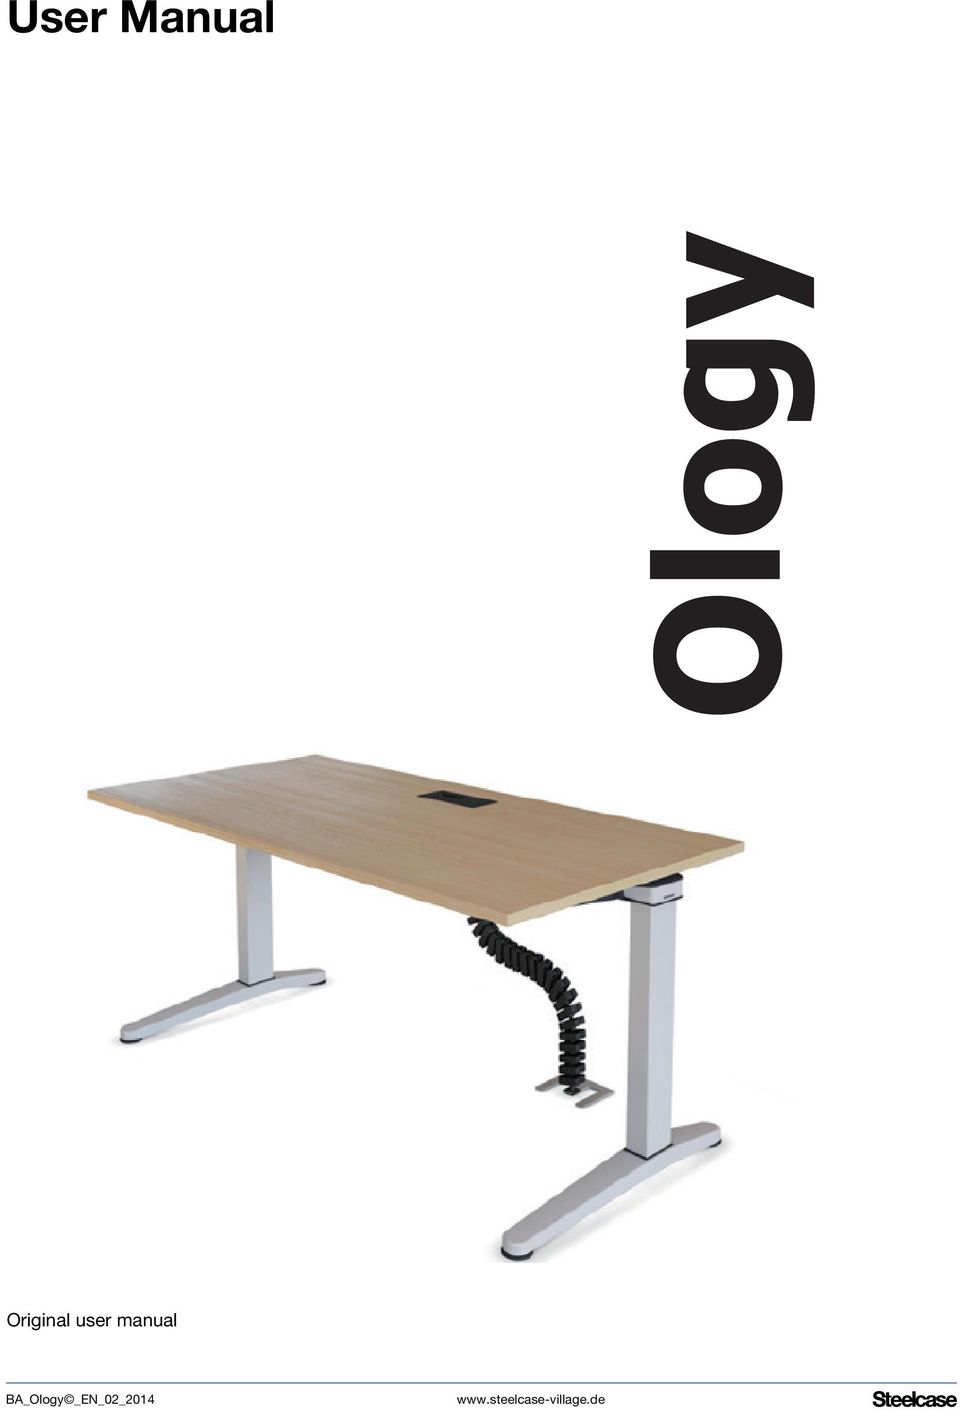
User Manual. Ology. Original user manual
|
|
|
- Derrick Stanley
- 8 years ago
- Views:
Transcription
1 User Manual Ology Original user manual BA_Ology _EN_02_2014
2 Table of contents 1 General instructions 1.1 About the Ology product series About this user manual Explanations of symbols and notices Exclusion of liability Basic safety instructions 2.1 Intended use Non-intended use Safety regulations Users with limitations Product description 3.1 Desk Electrical components Factory settings at delivery Components Desk overview Operator panel - intuitive Operator panel - programmable (optional) Electrical height adjustment Transport and storage 4.1 Safety guidelines Intermediate storage Installation, assembly, dismantling 5.1 Safety guidelines Power supply connections Installation, assembly and setting up Height compensation Disposal of the packaging material Dismantling Disposing of the desk Operation and settings 6.1 Safety guidelines Optimal desk height BA_Ology _EN_02_

3 6.3 Variant - Basic Variant - facility manager Variant - user crank Variants - Lift 1 and Lift Operator panel - intuitive Manual reset, operator panel intuitive Adjusting the desktop height with the intuitive operator panel Operator panel - programmable (optional) Manual reset, operator panel - programmable Adjusting desktop height with the operator panel - programmable Changing the display between centimetres and inches Setting the memory position Calling up a memory position Sliding desktop Errors and faults 7.1 Safety regulations Error messages on the display of the programmable operator panel Maintenance 8.1 Safety regulations Function checks Functional Check Table Maintenance tasks Cleaning and care Customer service 9.1 Delivery, setup, instruction Repairs and spare parts BA_Ology _EN_02_

4 General instructions 1 General instructions 1.1 About the Ology product series The Ology office furniture product line from Steelcase is subject to constant quality control in its manufacturing and sales. Thus fault-free functionality is ensured. The products have been designed and manufactured in accordance with the state of the technology (in Germany at the time of construction) and the recognized technical rules, nevertheless hazards can occur. Comply with the respective safety instructions in this regard! Faults that can impair safety must be corrected immediately. We reserve the right to make technical changes to the products for technical reasons. Steelcase uses a quality management system that satisfies the requirements specified in DIN EN ISO Steelcase is entitled to use the GS mark for its Ology product series. Moreover Steelcase affixes the Öko-Audit-Siegel (ECO-Audit-Seal) for the "EC system for environmental management and environmental business management". The electric height adjustment unit type plate is located on the controller housing and on the columns, and under the tabletop. Product information BA_Ology _EN_02_

5 General instructions 1.2 About this user manual This user manual provides information about the components, the function, use and maintenance of the Ology desk and its components. If there are malfunctions it serves as an aid for troubleshooting and fault rectification. The safety instructions help to avoid personal injury and material damage. The users of the Ology desk are obligated to take note of these safety instructions and to always comply with them. Purpose of the user manual Steelcase accepts no liability and offers no guarantee for damage and malfunctions that occur due to failure to comply with the instructions in the user manual. This user manual is a component of the Ology desk. It is only valid as a complete document. If the desk is resold, this user manual is part of the scope of delivery. Steelcase makes this user manual available on the Internet, at the following address: Excerpts or copies must not be forwarded to third parties or used in any other published form without prior written consent from Steelcase. This user manual, provided as part of the technical documentation, is subject to German copyright law. Copyright BA_Ology _EN_02_

6 General instructions 1.3 Explanations of symbols and notices The symbols listed below are used in this user manual and have the following meanings: DANGER Imminent danger! Injury is possible! Failure to comply with the instructions can result in serious health impairment or death. WARNING Potentially hazardous situation! Failure to comply with the instructions can result in serious bodily injury. CAUTION Failure to comply with the instructions can result in minor injury, material damage or malfunction. Tips and important information Typographic emphasis: Listing Handling instruction BA_Ology _EN_02_

7 General instructions 1.4 Exclusion of liability Under one or more of the following conditions Steelcase can be excluded from all liability: Non-intended use of the product; Use of the product beyond its intended purpose as office furniture; Use of the product with defective or malfunctioning safety and protection devices; Improper assembly by unauthorised persons; Use of components and adaptations not supplied by Steelcase. If parts are purchased externally, we cannot guarantee that they are designed and manufactured in a manner suitable for the stress and safety requirements; Strategies by third-party suppliers that demonstrably result in misuse of the product; Unapproved changes to the product with regard to its design and implementation; Product loads exceeding the maximum loads specified by the manufacturer; Improper maintenance, maintenance by third parties or maintenance by unqualified persons; Inadequate monitoring of the product components (functional checks); In the event of improper disposal and recycling of the product or of the packaging in the material recycling system; Resale to third parties if the user manual is not supplied; Catastrophes caused by the influence of foreign objects or force majeure. Check all of the components regularly and, if damage occurs, contact authorised and qualified technicians or our service hotline (see 9.2 Repairs and spare parts). Extensive assembly, maintenance and disposal activities must only be performed by technicians who are qualified to perform these tasks. More extensive information and recommendations can be found in later sections of this user manual. BA_Ology _EN_02_

8 Basic safety instructions 2 Basic safety instructions 2.1 Intended use The Ology desk is exclusively designed to be used as office furniture. Any other use or use beyond that cited above is non-intended use. In the event of non-intended use, Steelcase shall assume no liability for any damage caused and no guarantee for trouble-free and functional operation of the components. Intended use Intended use also includes compliance with all instructions in the user manual. 2.2 Non-intended use If the product is not used as intended, dangers to life and limb, as well as material damage can occur. For this reason, non-intended use is prohibited. In the event of non-intended use, Steelcase shall assume no liability for any damage caused and no guarantee for trouble-free and functional operation of the components. Non-intended use includes: Load lifting Use as a climbing aid Permanent storage surface for objects with a total weight of more than approx. 75 kg Outdoor use Use in damp rooms Prohibited use 2.3 Safety regulations The Ology desk may only be used and operated when in a technically perfect condition and in compliance with the user manual. The user of the Ology desk is obligated to always comply with the safety regulations and warnings in this user manual. In supplementation to the user manual, the generally valid, as well as local regulations, concerning accident prevention and environmental protection must be provided and complied with. Comply with the safety regulations 2.4 Users with limitations This desk can be used by children 8 years of age and older, as well as by persons with reduced physical, sensory, or mental capabilities, or lack of experience and knowledge, if they are supervised, or have been instructed in the safe use of the desk, and understand the dangers associated with use of the desk. Children must not play with the desk. Cleaning and user maintenance must not be executed by children without supervision. BA_Ology _EN_02_

9 Product description 3 Product description 3.1 Desk Ology Lift 1 / Lift 2 Dimensions: Weight: (See delivery ticket) (See delivery ticket) 3.2 Electrical components Controller and drive Temperature range at installation site: +5 C to +35 C Relative humidity: 5% to 80% (non-condensing) Rated voltage: 230 V AC ± 10% Rated frequency: Maximum load capacity: Maximum switch-on duration: Protection class (with ground connection) Maximum power consumption for the lift process: - 2 telescopic columns per desk - 3 telescopic columns per desk Power consumption in standby mode: Maximum adjustment range: - Single telescope - Double telescope Operator panel - intuitive Operator panel - programmable Noise emission: 50 Hz Approx. 75 kg / 750 N 2 min ON / 18 min OFF I 300 W 380 W 0.3 W 680 mm to 1180 mm 650 mm to 1250 mm Standard optional < 60 db(a) Type plates are on the controller housing, on the columns and under the desktop. 3.3 Factory settings at delivery At delivery, the desktop reference height is: Variant - Basic: 740 mm Variant - Telescopic: 740 mm Variant - Crank: 740 mm Variant - Lift 1: 680 mm Variant - Lift 2: 650 mm With the Telescopic, Crank and Lift variants, you can change these settings according to your requirements. You will find the corresponding descriptions in Chapter 6. BA_Ology _EN_02_

10 Product description 3.4 Components The Ology desk is essentially comprised of the following components (you can find the variant descriptions in the respective chapters): Desktop with plastic parts for desktop fastening Columns with sheet steel skids (see variants fix, FM, Crank, Lift 1, Lift 2), welded, including adjustment screw for compensating floor unevenness. Top cantilever left/right Horizontal structural tube Cable duct (optional) Manual height adjustment (telescopic or crank) Electrical height adjustment element: Lift 1: Electric motor ( ), in column Lift 2: Electric motor ( ), in column Control system for lift height adjustment, including software-supported stopping device Optional: Sensor Standard: Operator panel - intuitive Optional: Operator panel with display of height; programming functions for three desktop heights All available components, are in the separate technical description and in the price list. A wide range of accessories is available in various materials, surface treatments and dimensions. Please follow the instructions for using the components and accessories (see Chapter 6 Operation and settings). Accessories Please contact our Customer Service for detailed information on available system components and for additional orders and subsequent deliveries (see Chapter 9 Customer service). BA_Ology _EN_02_
 Manual height adjustment (telescopic or crank) Electrical height adjustment element: Lift 1: Electric motor (680.")
11 Product description 3.5 Desk overview Each of the illustrations shows one of the many design variants of the Ology desk. They are provided merely to illustrate the desk components. Figure 3 1 Variant - Basic Sliding desktop (closed) 2 Cable duct 3 Cantilever 4 Column 5 Runner 6 Adjusting screw for height compensation Figure 3 2 Variant - facility manager Sliding desktop (closed) can only be operated by qualified personnel 2 Cantilever 3 Column 4 Runner 5 Adjusting screw for height compensation Desk height adjustment is described in Chapter 6. BA_Ology _EN_02_
 can only be operated by qualified personnel 2 Cantilever 3 Column 4 Runner 5")
12 Product description Figure 3 3 Variant - user crank Desktop (closed), can be operated by each user 2 Support cantilever 3 Cantilever 4 Crank 5 Telescopic column 6 Runner 7 Sliding desktop opening latch 8 Adjusting screw for height compensation Desk height adjustment is described in Chapter 6. Figure 3 4 Variant - Lift Telescopic column 2 Lift column 3 Runner 4 Adjusting screw for height compensation Desk height adjustment is described in Chapter 6. BA_Ology _EN_02_

13 Product description Figure 3 5 Variant - Lift Telescopic column 2 Lift column 3 Runner 4 Adjusting screw for height compensation Desk height adjustment is described in Chapter 6. BA_Ology _EN_02_

14 Product description 3.6 Operator panel - intuitive The Operator panel with "up" and "down" functions is usually located on the right, on the underside of the desktop. Figure 3 6 Operator panel - intuitive Operator panel 2 "Up"' button 3 "Down" button BA_Ology _EN_02_

15 Product description 3.7 Operator panel - programmable (optional) Three different memory positions can be entered via the programmable operator panel. Memory position setting is described in Chapter 6. Figure Operator panel - programmable "Down" button 2 "Up"' button 3 Display 4 "STORE" button 5 Keypad "MEMORY 1 / 2 / 3 + calibration mode The cable of the operator panel in connected to the controller. It is located below the desk. Information concerning the motor controller is in the user manual, COMPACT_eco Firmware version 1.9 at BA_Ology _EN_02_

16 Product description 3.8 Electrical height adjustment Operation of the electrical height adjustment unit is described in Chapter 6. The electrical height adjustment unit allows three optimal desk heights (seated height and standing height) to be set and permanently programmed. Essentially it consists of the following components: Lift 1: Electric motor Lift 2: Electric motor Operator panel Control system for lift height adjustment, including software-supported stopping device The stopping device is an extension module for desk height adjustment. It responds as soon as desk travel is disturbed by an object, e.g. when an open window enters the travel range. Desk travel is stopped, the travel direction is reversed and the desk moves approx. 2 cm out of the area where there is a jam. The stopping device does not respond to relatively soft objects. The mechanical lift movement is executed via an electronic controller. The electronic controller is in a plastic housing under the desktop. BA_Ology _EN_02_

17 Transport and storage 4 Transport and storage 4.1 Safety guidelines WARNING Risk of injury or damage! When lifting the desktop or the attached components, the attachment screws may tear. When transporting or moving the desk, only grasp the desk on the upper frame or on the side frame. CAUTION Values stored in the controller do not agree with the settings of a different desk. Risk of damaging the lifting mechanism! After dismantling the desk, e.g. for transport reasons: Always reattach the two side frames to the associated desktop cross member of the same desk. Comply with the separate assembly instructions in this regard. 4.2 Intermediate storage If the desk must be temporarily stored before installation, the following conditions must be fulfilled: The transport packaging must be intact The floor must have sufficient load-bearing capacity Dry floor Level set-up surface Temperature range +5 C to +40 C Max. rel. humidity: 80% BA_Ology _EN_02_

18 Installation, assembly, dismantling 5 Installation, assembly, dismantling 5.1 Safety guidelines WARNING Danger of crushing and shearing! Maintain a sufficient lateral distance (at least 2.5 cm) from all surrounding objects, walls, etc. within the entire lift range. WARNING Danger of injury and damage! Set up the desk so that sufficient space is ensured for lifting and for maintenance. WARNING Risk of injury or damage! When lifting the desktop or the attached components, the attachment screws may tear. When transporting or moving the desk, only grasp it on the under-frame. 5.2 Power supply connections Supply connections must only be executed by technicians who are qualified and authorized to perform this task. The electrical equipment for the desk must be checked. Loose connections and damaged cables must be repaired immediately. Only plug in or unplug plug-and-socket-connections when the electrical equipment is de-energised. The power plug of the desk must be accessible at all times. Information concerning the connections for the motor control system is provided in the operating manual COMPACT_eco, firmware version 1.9 at Installation, assembly and setting up Setup and use of the product requires detailed planning. For this Steelcase offers the services of a separate planning department. The partially-assembled units for the Ology desk are generally supplied via retailers or directly from the manufacturer. After unpacking, check the product immediately for damage sustained during transportation and completeness; if necessary, inform the manufacturer of any damage as soon as possible. The installation site must meet the following conditions: The floor must have sufficient load-bearing capacity Level set-up surface Temperature range +5 C to +40 C Max. rel. humidity: 80% Steelcase recommends having the installation performed by the retailer or by a qualified installation company. Delivery verification Setting up Assembly BA_Ology _EN_02_

19 Installation, assembly, dismantling 5.4 Height compensation To compensate for floor unevenness, you can elevate each foot by as much as 1.0 cm with an adjusting screw. The following applies for a desk that has already been set up: Before performing the height compensation, remove any objects from the desktop. Figure 5 1 Height compensation 1 1 Adjusting screw Turn the adjusting screw until the height is compensated. BA_Ology _EN_02_

20 Installation, assembly, dismantling 5.5 Disposal of the packaging material The packaging includes the following: Outer cardboard packaging Shrink film of polyethylene (PE) Bubble wrap of Polyethylene (PE) Edge guards of cardboard or polyethylene (PE) Corner guards of polyethylene (PE) These materials are recyclable. With assembly by Steelcase or an assembly company authorized by Steelcase, the packaging will be disposed of by the manufacturer. If you assemble the desk yourself, then ensure correctly sorted separation and recycling in the material recycling system. Disposing of packaging material 5.6 Dismantling Dismantling must be carried out by qualified personnel. For subsequent set-up, see 5.3 Installation, assembly and setting up. CAUTION Values stored in the controller do not agree with the settings of a different desk. Risk of damaging the lifting mechanism! After dismantling the desk, e.g. for transport reasons: Always reattach the two side frames to the associated desktop cross member of the same desk. Comply with the separate assembly instructions in this regard. 5.7 Disposing of the desk If the Ology desk must be definitively dismantled and disposed of, Disconnect the desk from the supply connections: Dismantle the desk into its various components; Sort the dismantled parts by Reusable components; The material groups to be disposed of (wood, metal, plastic, electrical parts) And ensure recycling in the material recycling system. The national regulations must be complied with. BA_Ology _EN_02_

21 Operation and settings 6 Operation and settings 6.1 Safety guidelines The Ology desk must only be used when in a technically perfect condition and in compliance with the user manual. Before changing the height of the desk, ensure: That the desktop is level (if the floor is uneven, align via the adjusting screws on the feet); That no persons or objects (e.g. open doors or windows, are in the lift range, or protrude into the lift range; That no one is on the desk; The maximum permissible desk load-carrying capacity is not exceeded. DANGER Contact with electrical voltage can cause serious injury and death by electrocution! Only unplug or plug-in plug connections when the desk is de-energised Do not attempt to open the housing of the following components: Controller Columns Operator panel DANGER Contact with electrical voltage can cause serious injury and death! The metal parts of the desk can become energised if live cables and connections are damaged. Do not earth electrical devices to the desk frame! WARNING Danger of crushing and shearing! Maintain a sufficient lateral distance (at least 2.5 cm) from all surrounding objects, walls, etc. over the entire lift range. WARNING Danger of injury and damage! Set up the desk so that sufficient space is ensured for lift movements and for maintenance. WARNING Danger of injury and damage! When lifting the desktop or the attached components, the fastening screws may tear. When transporting or moving the desk, only grasp the desk on the under-frame. BA_Ology _EN_02_
22 Operation and settings WARNING Danger of injury and damage! When loading the CPU holder with weight that is higher than the approved weight, the fastening screws can tear. Comply with the permissible weight! Ensure that the connecting cables for the devices on the desk are long enough. 6.2 Optimal desk height Optimal desk height adjustment (seated height) is crucial for sitting correctly at the workstation. The desk height to be set for the workstation is provided in the workstation analysis (e.g. in accordance with the German occupational Health and Safety Act, ordinance governing VDU workstations (accident prevention regulations). 6.3 Variant - Basic The desk has a height of 74 cm. If the floor is uneven, a height adjustment of up to 1.0 cm can be executed with an adjustment screw on each of the feet of the desk. Figure 6 1 Height compensation 1 1 Adjusting screw Remove all objects from the desk Turn the adjusting screw to the desired position BA_Ology _EN_02_
23 Operation and settings 6.4 Variant - facility manager The desk can be adjusted to a height between 620 mm and 900 mm with an adjusting wheel. Figure 6 2 Adjust the height of the desk 1 Adjusting the desk height Display desk height 2 Adjustment wheel 3 Maximum desk height 4 Average desk height Remove all objects from the desk 1 Loosen the adjustment wheel. 2 Pull up or slide down the telescopic column to the desired length (see scale). In this process firmly hold the desktop! Do not position yourself under the desk when performing the height adjustment! 3 Tighten the adjustment wheel. Adjust all columns to the same height. BA_Ology _EN_02_
24 Operation and settings 6.5 Variant - user crank The desk can be variably adjusted to a height between 620 mm and 900 mm: Figure 6 3 Adjusting the desk height Adjusting the desk height Crank in park position 2 Crank in working position 3 Maximum desk height Average desk height Remove all objects from the desk. 1 Pull crank out of the park position. 2 Crank the telescopic columns up or down to the desired length (see scale). All of the columns are moved simultaneously. Do not lift the desktop during the cranking procedure! 3 Slide the crank back into park position If the crank remains in its working position, there is danger of impact! BA_Ology _EN_02_
25 Operation and settings 6.6 Variants - Lift 1 and Lift 2 The desk can be variably set at a height between 650 mm and 1250 mm (variant - Lift 1) or between 680 mm and 1180 mm (variant - Lift 2). Before placing the desk in service, ensure that the desk has been properly assembled, that the controller is connected to the motor via cable, that the operator panel is connected to the controller. that all safety regulations have been complied with. You can now connect the power supply: Plug the mains plug into a 220 V/230 V power outlet Placing the desk in service Prior to placing the desk in service it is necessary to execute a reset process. The instructions in this regard are in the description of the appropriate operator panel. BA_Ology _EN_02_
26 Operation and settings 6.7 Operator panel - intuitive The operator panel is located on the left or right on the underside of the desktop. Figure "Up" button 2 "Down" button 3 Desktop CAUTION Risk of damaging the operator panel! Do not place any loads on the operator panel Do not lay any objects on the operator panel Do not pour any liquids onto the operator panel BA_Ology _EN_02_
27 Operation and settings Manual reset, operator panel intuitive An end position calibration of the lowest desktop position must be executed: Prior to placing the desk in service If the actual desktop position no longer agrees with the displayed desktop position. If a previously configured motor controller is used in a different electrically height adjustable workstation of the same design. WARNING Danger of crushing and shearing! During the reset movement, and for the end position calibration, the software-supported stop device is not active., Press the "Down" button and keep it depressed until the lower end position (programmed desktop position) is reached. Release the "Down" button. Again, press the "Down" button and keep it depressed for approx. 5 s. The desktop moves into the lower end position. Release the "Down" button. The system is now ready for operation. If the button is released before the process is completely concluded, the manual reset process will be interrupted and must be restarted. In the event that the reset process could not be successfully executed, proceed as follows: Faulty manual reset Press the "Up" and "Down" buttons simultaneously and keep them depressed for at least 5 seconds. Restart the manual reset process as described above BA_Ology _EN_02_
28 Operation and settings Adjusting the desktop height with the intuitive operator panel Before performing the height adjustment, you must ensure: That there are no people or objects (e.g. open doors or windows) in the lift area or that protrude into the lift range, That there are no objects in the lift range of the lift column, That no one is on the desk, That the maximum permissible load-carrying capacity of the desk is not exceeded (see Technical data), That there are no heavy loads on the desk. Any such loads will hinder height the adjustment, That the desktop is horizontal. If the floor is uneven, align the desktop via the adjustment screws on the feet. Ensure that the connecting cables for the devices on the desk are long enough. Press the "Up" or "Down" button A lift movement only occurs As long as the corresponding button is pressed As long as the maximum load (approx. 75 kg) is not exceeded. The desk starts up! The desk moves at a speed of approx. 4 cm/s. CAUTION. RISK OF DAMAGING THE DESK If the desktop only moves on one side, or if desktop movement is not uniform: Release the button immediately so that the movement stops! Determine the cause in accordance with the troubleshooting table (see 7.2 Error messages on the display of the programmable operator panel on page 36). If necessary request a service technician. BA_Ology _EN_02_
29 Operation and settings 6.8 Operator panel - programmable (optional) Prior to placing the desk in service it is necessary to execute a reset process. Figure Operator panel - programmable "Down" button 2 "Up"' button 3 Display 4 "STORE" button 5 Keypad "MEMORY 1 / 2 / 3 + calibration mode BA_Ology _EN_02_
30 Operation and settings Manual reset, operator panel - programmable WARNING Danger of crushing and shearing! During the reset movement, and for the end position calibration, the software-supported stop device is not active. Press the "Down" button and keep it depressed until the lower end position (programmed desktop position) is reached. Release the "Down" button. Again, press the "Down" button and keep it depressed for approx. 5 s. The desktop moves into the lower end position. Release the "Down" button. The system is now ready for operation. If the button is released before the process is completely concluded, the manual reset process will be interrupted and must be restarted. BA_Ology _EN_02_
31 Operation and settings Adjusting desktop height with the operator panel - programmable Before performing the height adjustment, you must ensure that No error message is shown on the display of the operator panel (see 7.2 Error messages on the display of the programmable operator panel on Page 36), That there are no people or objects (e.g. open doors or windows) in the lift area or that protrude into the lift range, That there are no objects in the lift range of the lift column, That no one is on the desk, That the maximum permissible load-carrying capacity of the desk is not exceeded (see Technical data), That there are no heavy loads on the desk. Any such loads will hinder height the adjustment, That the desktop is horizontal. If the floor is uneven, align the desktop via the adjustment screws on the feet. Ensure that the connecting cables for the devices on the desk are long enough. Press the "Up" or "Down" button Control panel - programmable A lift movement only occurs As long as the corresponding button is pressed As long as the maximum load (approx. 75 kg) is not exceeded. The desk starts up! The desk moves at a speed of approx. 4 cm/s. CAUTION. CAUTION Risk of damaging the desk If the desktop only moves on one side, or if desktop movement is not uniform: Release the button immediately so that the movement stops! Determine the cause in accordance with the troubleshooting table (see 7.2 Error messages on the display of the programmable operator panel on page 36). If necessary request a service technician. BA_Ology _EN_02_
32 Operation and settings Changing the display between centimetres and inches You can select between displaying the height in centimetres [cm] or in inches [inches]. Changing this function does not change the desk height. To change the display, proceed as indicated in the following table: + Simultaneously press the memory position buttons 1, 2 and the desktop up button. Keep this button combination depressed for approx. 3 s. Release the buttons. On the display S and a number, e.g. S 7, will be shown on the display. Press the desktop up button until S 5 is shown on the display. S 5 is shown on the display. Press the memory button If the display was previously set to cm, it will now be switched over to inches. If the display was previously set to inches, it will now be switched over to cm. BA_Ology _EN_02_
33 Operation and settings Setting the memory position This function stores a defined desktop height. A desktop height can be stored for each memory position button. A maximum of three memory positions can be entered. To store a desktop position, proceed as follows: Move the desktop to the desktop position you desire. This desktop position will be shown on the display, e.g. 73 cm. Press the memory button. S will be shown on the display. Press the desired memory position button, e.g. 2. S 2 will be shown on the display. The set desktop position will now be stored under the selected memory position button. A double click will sound, after approx. 2 seconds the saved desktop position will be displayed. BA_Ology _EN_02_
34 Operation and settings Calling up a memory position With this function you can set a stored desktop position. To set a stored desktop position, proceed as follows: Press the desired memory position button, e.g. 2, and keep it depressed. The desktop moves until the stored desktop position is reached. If you release the button before reaching the stored desktop position, the desktop will stop and the stored desktop position will not be reached. The desktop has reached the stored desktop position. Now release the memory position button. The current desktop position will be shown on the display, e.g. 73 cm. Always move the desk up or down until the desired or programmed height is reached and the desk stops. This ensures that the desk is aligned evenly (horizontally) if there is a load on one side. BA_Ology _EN_02_
35 Operation and settings 6.9 Sliding desktop The Ology desk is supplied with a sliding desktop (except for the 600 depth). The sliding top allows you to reach the cable duct even if the rear of the desk is not accessible. Ensure that the connecting cables for the devices on the desk are long enough. WARNING Danger of crushing! Keep your hands and fingers away from the guides! WARNING Danger of injury! If the pulled out sliding desktop is under load, the desk can tip over! Do not put any weight on the pulled out desktop! CAUTION There is a risk of damaging the desk and objects. Keep the travel path clear! Figure 6 6 Sliding desktop opened Cable duct 2 Guides 3 Desktop locking mechanism, operation by authorized technicians (standard) 4 Handle of the desktop locking mechanism, operation by the user (optional) Release the desktop locking mechanisms on both sides. Pull the desktop out to the stop. Opening the desktop CAUTION You can damage the sliding desktop if the sliding desktop locking mechanisms are closed! To close the sliding desktop, the sliding desktop locking mechanisms must be open BA_Ology _EN_02_
36 Operation and settings Slide the sliding desktop in to the limit stop on the safety block. Unlock the safety block. Close the desktop locking mechanisms on both sides. Closing the sliding desktop BA_Ology _EN_02_
37 Errors and faults 7 Errors and faults 7.1 Safety regulations For troubleshooting, the following always applies: DANGER Contact with electrical voltage can cause serious injury and death by electrocution. Only unplug or plug-in plug connections when the desk is de-energised. Do not attempt to open the housing of the following components: Controller Columns Operator panel CAUTION Risk of damaging the electrical equipment! Do not pull on the power cord to unplug the plug from the power outlet. 7.2 Error messages on the display of the programmable operator panel If faults occur during operation of the Ology desk, please check whether it is operated in accordance with the user manual. In most cases, this manual will help you to locate and correct the errors. Any errors that occur will be shown on the display of the programmable operator panel. The "Error" segment flashes. The table below should help you to identify the cause and to correct the error. Display Error description / cause Measure Display shows an E and an error number: The motor controller COMPACT ECO is equipped with an overheating protection circuit. Due to overheating, this overheating protection circuit has been activated. An internal error is present on the COMPACT ECO motor controller. Wait until the motor controller has cooled, and the message HOT no longer appears on the display. Then the COMPACT ECO motor controller is again ready for operation. Proceed as specified in the following error list. 00 Internal error channel 1 Switch off the motor controller. Contact Customer Service. 01 Internal error channel 2 02 Internal error channel 3 12 Defect - channel 1 Unplug the motor controller. 13 Defect - channel 2 14 Defect - channel 3 Repair the external short circuit. Or: Plug the correct motor into the socket in question. Start up the motor controller again. BA_Ology _EN_02_
38 Errors and faults Display Error description / cause Measure Over current - motor M1 Overcurrent motor M2 Remove the objects that are jammed in the travel area. 26 Overcurrent M3 Desk overloaded --> remove the load from the desktop. 48 Overcurrent motor group 1 Contact Customer Service. 49 Overcurrent motor group 2 60 Collision protection 62 Overcurrent - controller 36 Plug detection on motor socket M1 37 Plug detection on motor socket M2 Plug the correct motor into the socket in question. Execute a reset. 38 Plug detection on motor socket M3 61 Motor swapped 55 Synchronization of motor group 1 not possible 56 Synchronization of motor group 2 is not possible. Remove the load from the desk. Execute a reset. If the error is still displayed after the reset, contact Customer Service. 67 Excessive voltage Unplug the power supply cable and contact Customer Service. 70 Change in the drive configuration 71 Change in the anti-pinch configuration Contact Customer Service. Contact Customer Service. 81 Internal error Execute a reset. Unplug the power supply cable and plug it back in after a few seconds. If this error occurs regularly, unplug the power supply cable and contact Customer Service. BA_Ology _EN_02_
39 Maintenance 8 Maintenance 8.1 Safety regulations All maintenance and repair tasks must only be performed by appropriately qualified and authorised technicians. Only use tools appropriate for these activities. 8.2 Function checks The Ology desk components should be checked for functionality at regular intervals. Particular attention should be devoted to the electrical connections: The electrical equipment for the desk must be checked at regular interval. Loose connections and damaged cables must be repaired immediately. Only plug in or unplug plug-and-socket-connections when the electrical equipment is de-energised. The power plug of the desk must be accessible at all times. BA_Ology _EN_02_
40 Maintenance 8.3 Functional Check Table Interval Inspection point Function check Permitted value Measure if required Upon assembly Frame parts Position desktop brace Desktop traverse completely inserted in the guides and firmly bolted Loosen the screws, insert the desktop brace correctly and firmly tighten the screws Prior to every height adjustment Direct vicinity of the desk Check safety clearances No objects in the lift range Remove objects Desktop Check for horizontal alignment Horizontal Align using the adjustment screws on the feet Regularly Connections of the electrical supply lines (cables) Check the insulation for damage No damage Replace connections Insulation of the electrical supply lines (cable) Check the insulation for damage No damage Replace the cables Surroundings of the electrical supply lines (cables) Check for distance to hot objects (e.g. radiators) Sufficient distance Establish distance BA_Ology _EN_02_
41 Maintenance 8.4 Maintenance tasks Maintenance tasks may only be carried out by authorised and qualified personnel. For more information, please contact our Customer Service Department (see 9.2 Repairs and spare parts on page 43). Prior to the adjusting the height of the desk you must ensure that the desktop is horizontal. If the floor is uneven, align the desktop via the adjustment screws on the feet. Ensure that there are no objects in the movement range of the lift column! DANGER Contact with electrical voltage can cause serious injury and death by electrocution. Only unplug or plug-in plug connections when the desk is de-energised. Do not attempt to open the housing of the following components: Controller Columns Operator panel WARNING Unintentional lifting or lowering of the desktop can cause bodily injury! For maintenance and repair tasks on all non-electric components of the desk, disconnect the electrical connection of the height adjustment element from the mains supply. BA_Ology _EN_02_
42 Maintenance WARNING Risk of injury or damage! When lifting the desktop or the attached components, the attachment screws may tear. When transporting or moving the desk, only grasp the desk on the under-frame. CAUTION Values stored in the controller do not agree with the settings of a different desk. Risk of damaging the lifting mechanism! After dismantling the desk, e.g. for transport reasons: Always reattach the two side frames to the associated desktop cross member of the same desk. Comply with the separate assembly instructions in this regard. CAUTION The desk may be damaged by the use of unauthorised spare parts! Only components provided by Steelcase Werndl AG may be used as spare parts. Installation of other parts must be coordinated with Steelcase. The specified maintenance and inspection intervals must be complied with. Steelcase Werndl AG shall assume no liability and will provide no guarantee in the following cases (see 1.4 Exclusion of liability on page 6): Inadequate monitoring of the product components (functional checks) Improper maintenance Maintenance performed by third parties Maintenance performed by unqualified and unauthorised persons Use of components and adaptations not supplied by Steelcase. Unapproved changes to the product with regard to its construction and implementation Deliberate misuse Improper use. Exclusion of liability BA_Ology _EN_02_
43 Maintenance 8.5 Cleaning and care CAUTION Humidity may damage the operator panel and the control system. Keep the operator panel free of moisture and liquids. Keep the controller free of moisture and liquids. For cleaning the surfaces of the desk off-the-shelf cleaning agents can be used. Ensure that only care and cleaning agents are used that are suitable for the respective materials (wood, plastic, metal, etc.). BA_Ology _EN_02_
44 Customer service 9 Customer service 9.1 Delivery, setup, instruction The desk is normally delivered, assembled, and set up by the manufacturer or by the retailer. The users are instructed in the operation of the device by the manufacturer or the retailer. 9.2 Repairs and spare parts Original spare parts and accessories can be obtained from the manufacturer. If any errors or defects cannot be corrected, please contact the Customer Service department. Steelcase Werndl AG Hotline: Georg-Aicher-Strasse 7 telephone:+49 (0) D Rosenheim Fax: +49 (0) support@steelcase.com Service hotline Country Customer Service Hotline France +33 (0) Great Britain +44 (0) Spain Italy +39 (051) The Netherlands Belgium Luxembourg Scandinavia The Baltics Poland The Czech Republic Slovakia other +33 (0) BA_Ology _EN_02_
UPLIFT Height Adjustable Standing Desk (T-Frame) DIRECTIONS FOR ASSEMBLY AND USE - - ALSO - - Watch our assembly video
 DIRECTIONS FOR ASSEMBLY AND USE - - ALSO - - Watch our assembly video") UPLIFT Height Adjustable Standing Desk (T-Frame) DIRECTIONS FOR ASSEMBLY AND USE - - ALSO - - Watch our assembly video http://bit.ly/9ywwh! CAUTION MAKE SURE NO OBSTACLES ARE IN THE DESK S PATH AND ALL
UPLIFT Height Adjustable Standing Desk (T-Frame) DIRECTIONS FOR ASSEMBLY AND USE - - ALSO - - Watch our assembly video http://bit.ly/9ywwh! CAUTION MAKE SURE NO OBSTACLES ARE IN THE DESK S PATH AND ALL
GeekDesk Max Instructions for Assembly & Use
 GeekDesk Max Instructions for Assembly & Use Work Sitting OR Standing! With the touch of a button... Elevate Your Work Instructions release 1.5, 2012-08-09 WELCOME! Thank you for purchasing a GeekDesk!
COMPACT eco For firmware version 1.8 Rev0
 User manual Control Unit for an Electric Height-Adjustable Desk COMPACT eco For firmware version 1.8 Rev0 Subject to change without notice. Errors and omissions excepted. LOGICDATA cannot accept responsibility
MIGRATION HEIGHT-ADJUSTABLE DESKS. Troubleshooting Guide
 Troubleshooting Guide Control Box Power Cable Wire Manager Controller Lifting Column Foot Low-Voltage Cable MIGRATION HEIGHT-ADJUSTABLE DESKS HOW THEY WORK Each Lifting Column contains an individual motorized
Installation and safety instructions for AC/DC built-in devices
 The device type and date of manufacture (week/year) can be found on the device rating plate. In the event of any queries about the device, please quote all the details given on the rating plate. For further
Portable Air Conditioner
 Portable Air Conditioner Owner's Manual Model:3 in 1 12,000 Btu/h Series 3 Please read this owner s manual carefully before operation and retain it for future reference. CONTENTS 1. SUMMARY...1 2. PORTABLE
MICA HEATER INSTRUCTION MANUAL Model No: UHM-786 230V 50Hz 2200W
 MICA HEATER INSTRUCTION MANUAL Model No: UHM-786 230V 50Hz 2200W Safety Precautions To reduce the risk of personal injury or damage to property, basic safety precautions must be observed including the
Meaco 30L and Meaco 40L dehumidifier instruction manual
 Meaco 30L and Meaco 40L dehumidifier instruction manual Please read this instruction manual before using the dehumidifier and keep safe for future reference SAFETY INSTRUCTIONS PLEASE READ ALL INSTRUCTIONS
ATS Overhead Table Shelf System INSTRUCTION MANUAL
 ATS Overhead Table Shelf System INSTRUCTION MANUAL ATS Overhead Table Shelf System Instruction Manual Warranty Newport Corporation warrants this product to be free of defects in material and workmanship
English AUTOMATION SYSTEMS FOR SLIDING GATES. Operating and installation instructions SLIDE SERIES
 English AUTOMATION SYSTEMS FOR SLIDING GATES Operating and installation instructions SLIDE SERIES v.0 Rev /202 INDEX ) General Safety Regulations... pág. 0 2) Description... pág. 02 3) Technical Specifications...
Portable Air Conditioner. OWNER S MANUAL Read these instructions before use. Model: MM14CCS. Voltage rating: 115V~60Hz Power rating : 1400W
 Portable Air Conditioner OWNER S MANUAL Read these instructions before use Model: MM14CCS Customer Support : 1-800-474-2147 Voltage rating: 115V~60Hz Power rating : 1400W For product inquiries or support
- 2 - IMPORTANT SAFETY REMINDERS
 USER MANUAL IMPORTANT SAFETY REMINDERS This appliance should only be used for domestic cleaning, as described in this user guide. Please ensure that this guide is fully understood before operating the
OPERATING INSTRUCTIONS
 GB OPERATING INSTRUCTIONS Automatic Wedge Welding Machine Please read operating instructions carefully before use and keep for further reference. APPLICATION The is an automatic wedge welding machine for
Portable Air Conditioner. OWNER S MANUAL Read these instructions before use. Model: MN12CES / MN10CESWW
 Portable Air Conditioner OWNER S MANUAL Read these instructions before use 8 Model: MN12CES / MN10CESWW Voltage rating: 120V~60Hz Power rating : 1100W (MN12CES) Power rating : 900W (MN10CESWW) Customer
Carpet Washer. vax.co.uk VRS5W. Vax Careline: (UK) 0844 412 8455 (ROI) 1-800 928 308. Vax model number: Version 1.0
 0844 412 8455 (ROI) 1-800 928 308. Vax model number: Version 1.0") VRS5W Powermax User Guide V1.0.qxd:V1.0 23/7/10 15:35 Page 1 Vax Careline: (UK) 0844 412 8455 (ROI) 1-800 928 308 Carpet Washer Vax model number: VRS5W instruction manual Version 1.0 Please read carefully
VRS5W Powermax User Guide V1.0.qxd:V1.0 23/7/10 15:35 Page 1 Vax Careline: (UK) 0844 412 8455 (ROI) 1-800 928 308 Carpet Washer Vax model number: VRS5W instruction manual Version 1.0 Please read carefully
Portable Air Conditioner. OWNER S MANUAL Read these instructions before use. Model: MF08CESWW. Voltage rating: 115V~60Hz Power rating : 800W
 MODE ALARM Portable Air Conditioner OWNER S MANUAL Read these instructions before use 8 Model: MF08CESWW Voltage rating: 115V~60Hz Power rating : 800W Customer Support : 1-800-474-2147 For product inquiries
IMPORTANT INSTRUCTIONS & OPERATING MANUAL. Houston 50 Inch Electric Wall Mounted Fireplace Black / White
 IMPORTANT INSTRUCTIONS & OPERATING MANUAL Houston 50 Inch Electric Wall Mounted Fireplace Black / White Model Number:MFE5050BK Model Number:MFE5050WH Read these instructions carefully before attempting
42U/45U 28" Wide Rack Installation & Service Guide
 42U/45U 28" Wide Rack Installation & Service Guide 96-00171-005 Rev B Important Information Information in this document is subject to change without notice and does not represent a commitment on the part
FOR THE FOLLOWING MODELS: EE-8075W EE-8075O EE-8075R EE-8075BK
 FIREPLACE HEATER FOR THE FOLLOWING MODELS: EE-8075W EE-8075O EE-8075R EE-8075BK If you have any questions about the operation of your fireplace heater, please contact Crane Customer Care. Toll Free: 888-599-0992
16/32 Channel 1U Rack Mount CCTV Power Supply
 16/32 Channel 1U Rack Mount CCTV Power Supply Manual PH-A3224-GUQ Shown 16-Channel 32-Channel PTC PH-A1612-PUQ PH-A3224-PUQ Glass Fuse PH-A1612-GUQ PH-A3224-GUQ Industrial design 12 Amp 3 Amps per channel
Hot Water Urns. all models. Helpline. v3.0
 Hot Water Urns all models Helpline 01384 573999 instructions.indd 1 v3.0 02/06/2014 14:50 IMPORTANT INFORMATION - RETAIN FOR FUTURE USE When using any electrical appliance, basic safety precautions should
Instruction Manual. Image of SP-3015 & SP-3815. Important Safeguards. Automatic Dispensing Hot Water Pot with Reboil Function
 Important Safeguards READ ALL INSTRUCTIONS BEFORE USE. Instruction Manual Automatic Dispensing Hot Water Pot with Reboil Function Image of SP-3015 & SP-3815 SP-3015: 3.0L SP-3815: 3.8L SP-3017: 3.0L (Stainless
Operating Instructions Drill rig DRU160
 Operating Instructions Drill rig DRU160 Index 000 / 001 Original operating instructions 10988825 en / 20.10.2009 Congratulations! With a Hydrostress unit from TYROLIT you have chosen a tried and tested
2-SLICE COOL TOUCH TOASTER
 2-SLICE COOL TOUCH TOASTER PLA0405 Instruction Manual Due to on-going product improvements, specifications and accessories may change without notice. Actual product may differ slightly to that depicted.
Spetec Laminar Flow Systems. Operating Instructions
 Spetec Laminar Flow Systems Operating Instructions 1 Spetec Laminar Flow Systems Operating Instructions Thank you for your trust in the Spetec clean room systems! Your chosen system is ideally suited for
TIG INVERTER INSTRUCTION MANUAL
 TIG INVERTER INSTRUCTION MANUAL Contents Warning General Description Block Diagram Main Parameters Circuit Diagram Installation and Operation Caution Maintenance Spare Parts List Troubleshooting 3 4 4
Important Safeguards
 Table of Contents Important Safeguards...2 Product Layout...3 Preparing for Use...4 Air-conditioning without installation...4 Air-conditioning with installation...5 Control Panel...6 Operating from the
CAUTION RISK OF ELECTRIC SHOCK DO NOT OPEN
 BeoLab 7-6 Guide CAUTION RISK OF ELECTRIC SHOCK DO NOT OPEN CAUTION: To reduce the risk of electric shock, do not remove cover (or back). No User-serviceable parts inside. Refer servicing to qualified
installation guide ACTIV-1
 installation guide ACTIV- Base foot. Leg x columns - right & left Motor unit. Work surface supporting bracket (Cantilever) x Control. box Base foot x Handset 4. Phase Motor unit Materials and Tools Hardware
Operating instructions Diffuse reflection sensor with background suppression O1D101 O1D104 706114 / 00 01 / 2012
 Operating instructions Diffuse reflection sensor with background suppression O1D101 O1D104 706114 / 00 01 / 2012 Contents 1 Preliminary note 3 1.1 Symbols used 3 1.2 Warning signs used 3 2 Safety instructions
FF30. Flexicon. Operator s Manual. FF30-F In-feed Rotary Table. OPERATOR S MANUAL Serial Number yyww xxxx. Filling and Capping System
 Flexicon Filling and Capping System FF30 Operator s Manual FF30-F In-feed Rotary Table FF30F OM 2.02 EN Page 1 of 19 DECLARATION OF CONFORMITY....3 CAUTION...4 1 GENERAL INFORMATION....5 1.1 Use...5 1.2
BeoLab 7-1 BeoLab 7-2. Guide
 BeoLab 7-1 BeoLab 7-2 Guide CAUTION: To reduce the risk of electric shock, do not remove cover (or back). No User-serviceable parts inside. Refer servicing to qualified service personnel. WARNING: To prevent
USER INSTRUCTIONS FOR 10 LITRE PORTABLE DEHUMIDIFIER MODEL NO. DHMD102
 USER INSTRUCTIONS FOR 10 LITRE PORTABLE DEHUMIDIFIER MODEL NO. DHMD102 THANK YOU FOR CHOOSING YOUR NEW DEHUMIDIFIER. BEFORE USING THE UNIT READ THESE INSTRUCTIONS FULLY AND RETAIN THEM FOR FUTURE REFERENCE
NewAir AC-10000E, AC-10000H Portable Air Conditioner Owner s Manual PLEASE READ AND SAVE THESE INSTRUCTIONS
 NewAir AC-10000E, AC-10000H Portable Air Conditioner Owner s Manual PLEASE READ AND SAVE THESE INSTRUCTIONS BEFORE USE GENERAL SAFETY INSTRUCTIONS: ALWAYS OPERATE THE UNIT IN AN UPRIGHT POSITION AND PLACE
Daily use. Never use alcohol or other solvents to clean any part of the loudspeakers!
 BeoLab 6002 Guide WARNING: To reduce the risk of fire or electric shock, do not expose this appliance to rain or moisture. Do not expose this equip ment to dripping or splashing and ensure that no objects
Pet hair clipper. Model 96822. Diagrams within this manual may not be drawn proportionally.
 Pet hair clipper Model 96822 Cleaning And Operation Instructions Diagrams within this manual may not be drawn proportionally. Due to continuing improvements, actual product may differ slightly from the
GENANO 4500 MEDICAL AIR PURIFICATION DEVICE
 GENANO AIR PURIFICATION TECHNOLOGY GENANO 4500 MEDICAL AIR PURIFICATION DEVICE OPERATING INSTRUCTION 1 GENANO LTD Kimmeltie 3 FI- 02110 Espoo, Finland Tel + 358 9 7743 870 Fax + 358 9 7533 130 www.genano.fi
USER S MANUAL FH052EAV1 FH070EAV1. System Air Conditioner (Cooling and Heating) ENGLISH ESPAÑOL FRANÇAIS ITALIANO PORTUGUÊS DEUTSCH E HNIKA
 ENGLISH ESPAÑOL FRANÇAIS ITALIANO PORTUGUÊS DEUTSCH E HNIKA") USER S MANUAL FH052EAV1 FH070EAV1 E HNIKA PORTUGUÊS ENGLISH ESPAÑOL ITALIANO DEUTSCH FRANÇAIS System Air Conditioner (Cooling and Heating) E S F I P D G DB98-29263A(1) Safety Precautions Register your
USER S MANUAL FH052EAV1 FH070EAV1 E HNIKA PORTUGUÊS ENGLISH ESPAÑOL ITALIANO DEUTSCH FRANÇAIS System Air Conditioner (Cooling and Heating) E S F I P D G DB98-29263A(1) Safety Precautions Register your
VACUUM CLEANER INSTRUCTION MANUAL
 VACUUM CLEANER INSTRUCTION MANUAL MODEL: SVC9702 PLEASE READ THIS MANUAL CAREFULLY BEFORE USING AND KEEP IT PROPERLY FOR FUTURE USE 1 Safety Cautions: WARNING: To reduce the risk of fire, electrical shock,
Operating instructions Platform/floor scales
 KERN & Sohn GmbH Ziegelei 1 D-72336 Balingen email: info@kern-sohn.com Phone: +49-[0]7433-9933-0 Fax: +49-[0]7433-9933-149 Internet: www.kern-sohn.com Operating instructions Platform/floor scales KERN
HYLA NST Cleaning System
 Owner s Manual HYLA NST Cleaning System The HYLA NST Cleaning System aspirates and cleans the air through a waterbased filtration process. The system is intended for household use only. Applications: Usual
LUCCI AIRFUSION QUEST II CEILING FAN
 LUCCI AIRFUSION QUEST II CEILING FAN WITH IR REMOTE INSTALLATION OPERATION MAINTENANCE WARRANTY INFORMATION CAUTION READ INSTRUCTIONS CAREFULLY FOR SAFE INSTALLATION AND FAN OPERATION. V1.0 QUEST II IR
USER INSTRUCTIONS FOR GET PORTABLE 12k BTU AIR CONDITIONER MODEL No. GPACU12HR
 USER INSTRUCTIONS FOR GET PORTABLE 12k BTU AIR CONDITIONER MODEL No. GPACU12HR CONTENTS Introduction Safety Notes Identification of parts Installation instructions Operation instructions Maintenance Troubleshooting
User Manual. RK-2d / RK-2t. dedicated KVM switch and rackmount screen technology. Designed and manufactured by Austin Hughes
 dedicated KVM switch and rackmount screen technology User Manual RK-2d / RK-2t 1U Short Depth Keyboard Drawer Designed and manufactured by Austin Hughes 751 Legal Information First English printing, October
StorTrends 3400 Hardware Guide for Onsite Support
 StorTrends 3400 Hardware Guide for Onsite Support MAN-3400-SS 11/21/2012 Copyright 1985-2012 American Megatrends, Inc. All rights reserved. American Megatrends, Inc. 5555 Oakbrook Parkway, Building 200
GenStore Archive Cabinet
 GenStore Archive Cabinet Setup and Maintenance Manual Version A April 2014 Two GenStore Archives shown mounted on optional table stand. 2 Contents Getting Started... 4 Using this Manual...4 Safety Precautions...4
Andersen Electric Window Opener for Andersen Awning and Roof Windows
 W A Electric Window Opener Electric Window Opener for Awning and Roof Windows Congratulations! You have just purchased one of the many fine products. For ease of installation and continued enjoyment of
Installation Instructions For Slider Casement Air Conditioners
 Installation Instructions For Slider Casement Air Conditioners NOTE: These instructions describe installation in a typical wood framed window with a wood SLIDE-BY sash, or installation in a metal CASEMENT
IMPORTANT SAFETY RULES TO FOLLOW
 WARNING FLOOR & CARPET CLEANER Any piece of equipment can be dangerous if not operated properly. YOU are responsible for the safe operation of this equipment. The operator must carefully read and follow
User Guide Nokia Portable Wireless Charging Plate DC-50
 User Guide Nokia Portable Wireless Charging Plate DC-50 Issue 1.1 EN User Guide Nokia Portable Wireless Charging Plate DC-50 Contents For your safety 3 About your accessory 4 Keys and parts 5 Top up your
Please read this owner s Manual carefully before operating the unit. - Cooling - Heating - Dehumidifying - Fan
 Please read this owner s Manual carefully before operating the unit. - Cooling - Heating - Dehumidifying - Fan TABLE OF CONTENTS INTRODUCTION 2 IMPORTANT SAFEGUARDS...2 PACKAGE CONTAINS..2 NAMES OF PARTS.3
User Manual THR840DUK Digital Thermostat
 User Manual THR840DUK Digital Thermostat 50051982-001 Rev. A WARNING: This product must be correctly installed and configured to work properly (see pages 12-24). If you are not experienced in wiring electrical
LT SERIES User s Manual
 LT SERIES User s Manual 1 - LT Series Operations Manual TABLE OF CONTENTS Specifications... 2 Introduction... 3 LT Series Models... 4 Optional Features... 4 Getting Started... 5 Installation... 5 Registration...
MCR1900 Media Converter 19-Slot Chassis
 MCR1900 Media Converter 19-Slot Chassis Installation Guide Part #5500304-11 Copyright Statement This document must not be reproduced in any way whatsoever, either printed or electronically, without the
Addendum to the Operating Instructions
 Drive Technology \ Drive Automation \ System Integration \ Services Addendum to the Operating Instructions MOVIMOT with AS-Interface and AC Motor DT/DV Unit Replacement MOVIMOT MM..C -> MM..D with MLK3A
Daker DK 1, 2, 3 kva. Manuel d installation Installation manual. Part. LE05334AC-07/13-01 GF
 Daker DK 1, 2, 3 kva Manuel d installation Installation manual Part. LE05334AC-07/13-01 GF Daker DK 1, 2, 3 kva Index 1 Introduction 24 2 Conditions of use 24 3 LCD Panel 25 4 Installation 28 5 UPS communicator
Portable Air Conditioner. OWNER S MANUAL Read these instructions before use. Model: MM14CHCSCS
 Portable Air Conditioner OWNER S MANUAL Read these instructions before use Model: MM14CHCSCS Voltage rating: 120V~60Hz Power rating : 1400W(Cooling) Power rating : 1350W(Heating) Customer Support : 1-800-474-21477
FUEL CELL CAR SCIENCE KIT ASSEMBLY GUIDE. Battery operation instructions:
 FUEL CELL CAR SCIENCE KIT ASSEMBLY GUIDE Battery operation instructions: 1. The removing and inserting of batteries is to be conducted by the adults only. Unscrew the screw holding the battery pack s cover
LockerLock Schließgehäuse LockerLock lock case Boîtier de fermeture LockerLock Scatola di ciusura LockerLock Caja de cierre LockerLock
 LockerLock Schließgehäuse LockerLock lock case Boîtier de fermeture LockerLock Scatola di ciusura LockerLock Caja de cierre LockerLock Caution! Õ It is necessary to read the section "Commissioning" in
Get Cleaning... User Guide Vax Careline: (UK) 0844 412 8455 (ROI) 1-800 928 308. Carpet Washer. vax.co.uk. Rapide Ultra series
 0844 412 8455 (ROI) 1-800 928 308. Carpet Washer. vax.co.uk. Rapide Ultra series") W90-RU & W89-RU Series User Guide v1.4.qxd:user guide 2/3/11 10:03 Page 1 Carpet Washer User Guide Vax Careline: (UK) 0844 412 8455 Get Cleaning... What s your Vax model number? (Located on the top flap
W90-RU & W89-RU Series User Guide v1.4.qxd:user guide 2/3/11 10:03 Page 1 Carpet Washer User Guide Vax Careline: (UK) 0844 412 8455 Get Cleaning... What s your Vax model number? (Located on the top flap
Getting started with
 PART NO. CMA113 MADE IN CHINA 1. Measuring CAT II 2. Max. voltage 250V ~ 3. Max. current 71 Amp Getting started with Electricity consumption monitoring single phase for homes and some smaller light commercial
IMPORTANT SAFETY INSTRUCTIONS WARNING READ AND SAVE THESE OPERATING AND SAFETY INSTRUCTIONS BEFORE USING THIS HEATER.
 THERMAWAVE CERAMIC HEATER Model HZ-850 Series Model HZ-860 Series IMPORTANT SAFETY INSTRUCTIONS WARNING READ AND SAVE THESE OPERATING AND SAFETY INSTRUCTIONS BEFORE USING THIS HEATER. Warning Failure to
MACBlower Model Number: MAC40R MAC60R MAC80R MAC100R. MAC120R MAC150R MAC 200R Serial # www.macblowers.com
 MACBlower Model Number: MAC40R MAC60R MAC80R MAC100R MAC120R MAC150R MAC 200R Serial # Fuji Clean USA 41-2 Greenwood Road Brunswick, Maine 04011 207-406-2729 www.macblowers.com MACBlowers The Intelligent
4P359542-1H. Wireless LAN Connecting Adapter <BRP069A41> Installation Manual
 4P359542-1H Wireless LAN Connecting Adapter Installation Manual Wireless LAN Connecting Adapter Installation Manual Homepage: http://www.onlinecontroller.daikineurope.com For details
THE NEW GENERATION IN TECHNOLOGY. NI-3103A Alarm Clock w/fm Radio ipod & iphone Docking. Operating Instructions
 THE NEW GENERATION IN TECHNOLOGY NI-3103A Alarm Clock w/fm Radio ipod & iphone Docking Operating Instructions Table of Contents Important Safeguards... 3 Parts... 6 Controls... 6 To Set Up... 7 ipod/iphone
BeoLab 1. User s guide
 BeoLab 1 User s guide Legal notice: CAUTION RISK OF ELECTRIC SHOCK DO NOT OPEN CAUTION: To reduce the risk of electric shock, do not remove cover (or back). No User-serviceable parts inside. Refer servicing
Express5800/120Ed. Rack Mount Kit Installation Procedures PN: 455-01607-001
 Express5800/120Ed Rack Mount Kit Installation Procedures PN: 455-01607-001 Proprietary Notice and Liability Disclaimer The information disclosed in this document, including all designs and related materials,
Model 349KLX Remote Display Digital Scale User Instructions
 Model 349KLX Remote Display Digital Scale User Instructions P/N UM349KLX Rev 3-080713 1 Model 349KLX Thank you for your purchase of this Health o meter Professional product. Please read this manual carefully,
Vertical Display and Storage B1350-2. SKOPE Gen2: Three Door Chiller
 Vertical Display and Storage User Manual MAN1227 Rev. 3.0 March 2008 edition CONTACT ADDRESSES Designed and Manufactured by New Zealand SKOPE INDUSTRIES LIMITED PO Box 1091, Christchurch New Zealand Freephone:
FT-100 Fire Training Fog Machine User Manual English
 FT-100 Fire Training Fog Machine User Manual English 2015 Antari Lighting and Effects Ltd. User Manual - English Safety Information Please read the following safety information carefully before operating
Rousseau 10. User Guide
 Rousseau 10 User Guide Base station overview ➀ LED signals White, permanent light: - Base station ready, you can register a handset Slow flashing white light: - Paging call in progress - Active call (you
FLUORESCENT UV- RING LIGHT OPERATING INSTRUCTION
 FLUORESCENT UV- RING LIGHT OPERATING INSTRUCTION Caution! UV-radiation of this device is in the range of UV-A (320-400 nm). Direct exposure to eyes shall therefore be avoided. UV protection glasses shall
T7560A,B,C Digital Wall Module
 T7560A,B,C Digital Wall Module HONEYWELL EXCEL 5000 OPEN SYSTEM BEFORE INSTALLATION All wiring must comply with local electrical codes and ordinances or as specified on installation wiring diagrams. Digital
Operating instructions Optical distance sensor O1D100 O1D103 704991 / 00 08 / 2012
 Operating instructions Optical distance sensor UK O1D100 O1D103 704991 / 00 08 / 2012 Contents 1 Preliminary note4 1.1 Symbols used 4 1.2 Warning signs used 4 2 Safety instructions 4 3 Functions and features
DIAMOND Retractable Rodding Robot Model SPRAYROD-R
 2004-12-21 2 1 (23) DIAMOND Retractable Rodding Robot Model SPRAYROD-R 2004-12-21 2 2 (23) Table of contents 1 TECHNICAL DESCRIPTION...4 1.1 MAIN DETAILS...5 1.2 COMPONENTS DESCRIPTION...5 1.2.1 Pneumatic
ZAPPY 3 OWNER S MANUAL. Read this manual completely before riding your Electric ZAPPY 3.
 ZAPPY 3 OWNER S MANUAL Read this manual completely before riding your Electric ZAPPY 3. TECHNICAL INFORMATION Model No. : ZAPPY 3 Product size Type of motor Motor power Battery type Battery Charger Charging
esata External Storage
 esata External Storage Operation Manual DA-ES110 Before reading this manual This operation manual contains basic instruction on installing and using esata External Storage, an IDIS product. Users who are
Rack Installation. Unpacking the System. Choosing a Setup Location. General Server Precautions. Barracuda Appliances
 This set of instructions applies to racking and rail kit installation for 6XX and above. The Rack Mounting Instructions section below provides information on installing the SC825 chassis into a rack unit
TT TOYS TOYS - OWNER S MANUAL. We are delighted that you have decided to purchase this TT Toys Toys children s car.
 TT TOYS TOYS - OWNER S MANUAL We are delighted that you have decided to purchase this TT Toys Toys children s car. This owner s manual contains important information for the safe assembly, handling and
MB-Accumulator Operator's Manual
 Mathias Bäuerle GmbH Gewerbehallestraße 7-11 D-78112 St.Georgen Telefon (07724) 882-0 Telefax (07724) 882-111 Internet: http://www.mbfold.de E-mail: center@mbfold.de MB-Accumulator Operator's Manual CONTENTS
Use and Care Manual. Model CPA12KH AIR CONDITIONER
 Use and Care Manual Model CPA12KH AIR CONDITIONER Introduction Thank you for choosing this air conditioner to provide you and your family with all of the "Home Comfort" requirements for your home, cottage
This equipment has been tested and found to comply with the limits for a Class B digital device, pursuant to part 15 of the FCC Rules.
 Power Max Level 2 Charging Station en Installation and Operating Instructions This equipment has been tested and found to comply with the limits for a Class B digital device, pursuant to part 15 of the
HP 2530 8-Port Switches Quick Setup Guide
 HP 2530 8-Port Switches Quick Setup Guide The switch drawings in this document are for illustration only and may not match your particular switch model. For more detailed instructions and information to
BUSINESS. Elektronisches Türschloss. Installation and User Manual. www.burg-waechter.de. Ingeniously safe. Ingeniously simple.
 Elektronisches Türschloss BUSINESS Set 5011 PINCODE Set 5012 FINGERSCAN Set 5013 E-KEY Ingeniously safe. Ingeniously simple. BA/MA TSE Set 5000 dp/fsc 04/2012 Installation and User Manual BURG-WÄCHTER
Wine Cooler with Thermo-Electric Cooling & Heating Technology
 Wine Cooler with Thermo-Electric Cooling & Heating Technology Model number: WC-0888H (8-bottles capacity) Instruction Manual Please read carefully and follow all safety rules and operating instructions.
MAKING MODERN LIVING POSSIBLE. living connect. Installation and User Guide. Danfoss heating
 MAKING MORN LIVING POSSIBLE Danfoss heating living connect Installation and User Guide Contents 1.0 System overview... 3 2.0 Overview of display and control buttons... 3 3.0 Installation - step by step...
TECHNICAL DATA & SERVICE MANUAL SPLIT SYSTEM AIR CONDITIONER INDOOR UNIT: AW52AL AW64AL AW52AL 387030095 AW64AL 0.8180.463.0 07/05
 TECHNICAL DATA & SERVICE MANUAL INDOOR UNIT: AW52AL AW64AL SPLIT SYSTEM AIR CONDITIONER Model No. Product Code No. AW52AL 387030095 AW64AL 387030096 0.8180.463.0 07/05 IMPORTANT! Please read before installation
Carpet Shampooer 500w
 Carpet Shampooer 500w VC9388 Specification Parameters ZW-9006A - Bagless Rated Voltage: 220-240V Rated Power: 500W Rated Frequency: 50HZ Net Weight: 8kg Instruction Manual Please read this manual before
PBX Series Quick Fit Connector Bimetallic Steam Traps
 6262100/6 IM-P626-01 ST Issue 6 PBX Series Quick Fit Connector Bimetallic Steam Traps Installation and Maintenance Instructions 1. Safety information 2. General product information 3. Installation 4. Commissioning
USER MANUAL Stand Alone Power Supply PSQ 2909 / PSQ 3909 / PSQ 4909 PSQ 2920 / PSQ 3920 / PSQ 4920
 USER MANUAL Stand Alone Power Supply PSQ 2909 / PSQ 3909 / PSQ 4909 PSQ 2920 / PSQ 3920 / PSQ 4920 [This page intentionally left blank] Warning for Your Protection 1. Read these instructions. 2. Keep these
Operating instructions. SCORP 220 Plus SCORP 360. Pipe Cutter. Code 790 014 762 Machine-no.:
 precision. power. simplicity. Operating instructions Pipe Cutter SCORP 220 Plus SCORP 360 Code 790 014 762 Machine-no.: All rights reserved, in particular the rights of duplication and distribution as
Luna/200. Luna/275. Ceiling hoist. User instruction. Important - warning. This manual must be read before the Luna is used
 Luna/200 Luna/275 Ceiling hoist User instruction! Important - warning This manual must be read before the Luna is used This manual is intended for technicians, installers, therapists and other personnel,
SNQ-60x0-320 Series Data Center Switch. Quick Installation Guide
 Introduction This guide is to assist the reader with the most basic form of installation and connection to switches in this series. As there is more than one switch in this series, the diagrams might slightly
Tyan Computer. Transport PX22. Service Engineer s Manual
 Tyan Computer Transport PX22 Service Engineer s Manual 1 Precaution To read through the user manual, check all assembly and follow setup process before any operation on this server To keep paper clips,
Register your product and get support at. www.philips.com/welcome AS111. User manual
 Register your product and get support at www.philips.com/welcome AS111 User manual Contents 1 Important 4 Safety 4 English 2 Your docking speaker for AndroidTM 5 Introduction 5 What's in the box 5 Overview
BroadBand PowerShield. User Manual
 BroadBand PowerShield User Manual 990-0375G 12/2006 Chapter 1 General Information The PowerShield provides a power source for broadband telephony and other DC applications. Safety This Safety Guide contains
Oil and Coolant Circulating Heating System. Model - OCSM
 Oil and Coolant Circulating Heating System Model - OCSM Installation & Operation Manual 216280-000 REV 2 Identifying Your System The HOTSTART heating system is designed to heat fluids for use in marine
DE1600 DSA E-Series iscsi Disk Arrays. Installation Manual
 DE1600 DSA E-Series iscsi Disk Arrays en Installation Manual DE1600 DSA E-Series iscsi Disk Arrays Table of Contents en 3 Table of Contents 1 Safety Precautions 4 1.1 Warning Notices 4 1.2 Caution Notices
Contact Details. Please note that some of the contact details on this PDF document may not be current.
 Contact Details Please note that some of the contact details on this PDF document may not be current. Please use the following details if you need to contact us: Telephone: 0844 879 3588 Email: customer.services@gdcgroup.co.uk