idex Manual Contact details Producer: FOCI BV. The Netherlands
|
|
|
- Alexina Sutton
- 8 years ago
- Views:
Transcription
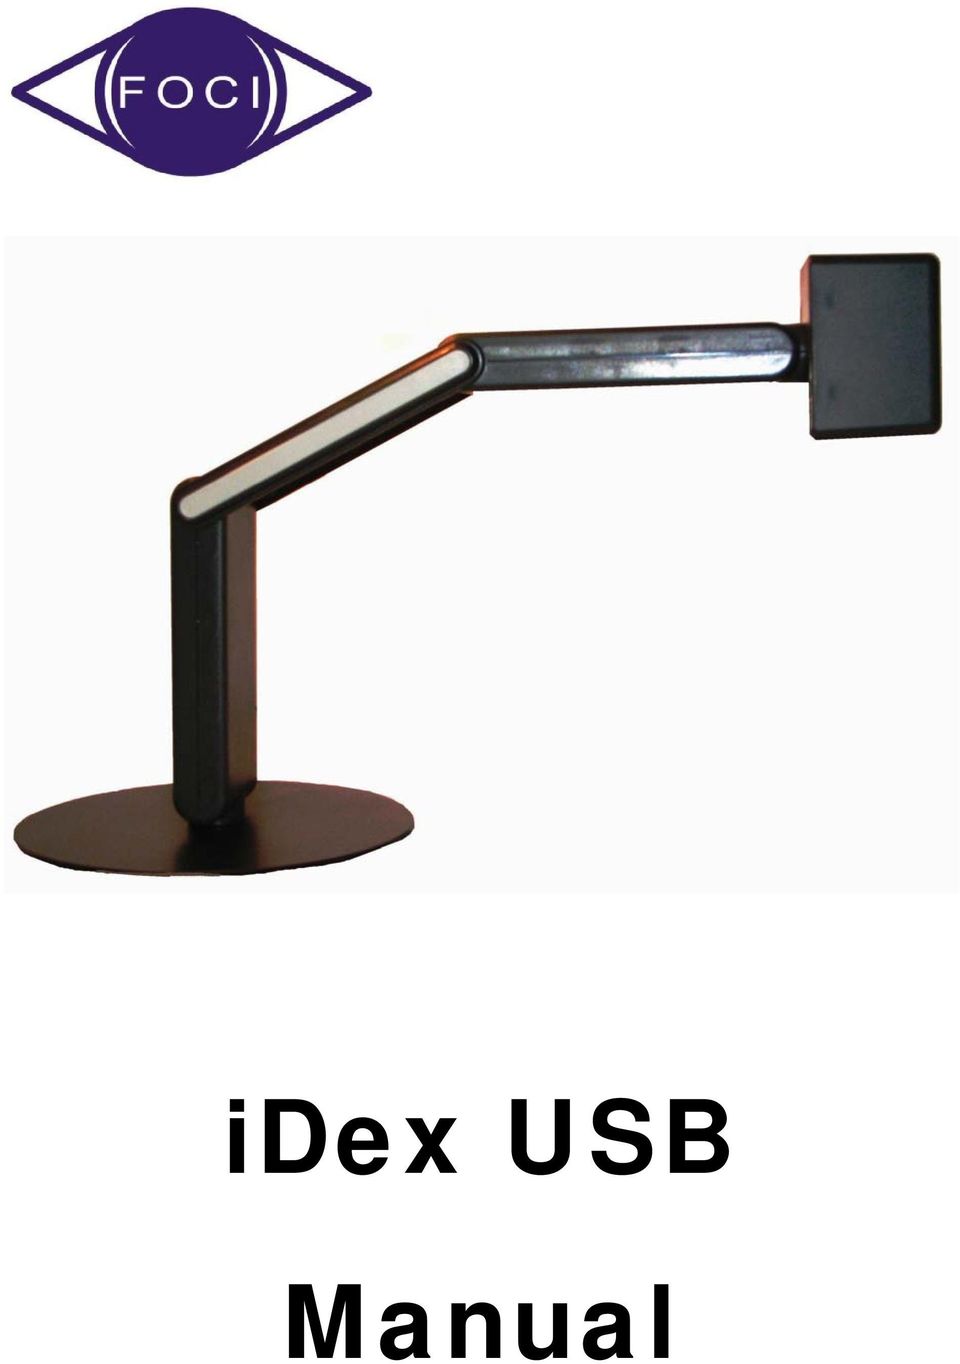
1 idex USB Manual
2 Contact details Producer: FOCI BV. The Netherlands 2

3 Index Index General Get started! First use FOCI idex Software Operating the camera Picture modes and picture settings Combination with Magnification Software Keyboard shortcuts List of shortcuts FOCI idex Software General hotkeys Technical Data Safety & maintenance

4 1. General Congratulations with the purchase the idex, the FOCI portable Computer Connected Video Magnifier. Our aim was to develop a highly qualitative and userfriendly product. We think we have succeeded, and we hope you have the same opinion. Serial Number: The serial number of the device can be found on the first page and also under the help menu in the software program 4

5 2. Get started! To use the idex, you need the following : 1. idex 2. USB wires 3. Computer 4. idex Software 5. Carrying bag idex The portable video magnifier idex consists of two parts a foldable arm with Camera and a Base Plate. USB cables You need (always) two USB cables to connect the idex. Both should have the following requirements: Be compatible with USB Hi-Speed (or USB2.0). The PC connector : USB Type A, Male The idex connector USB Type Mini-B-5, Male. Computer Connector idex Connector 5
.")
6 Note: The idex needs 2 wires connected to be able to use the device. The idex will not function when one USB wire is connected. Computer To be able to use the idex, you have to connect it to a pc. That pc should at least have the following properties: Two USB2.0 ports. Operating system: Windows XP (Direct X 9.0C) or Windows Vista. 512 MB RAM memory FOCI idex Software A CD-Rom with all Software to for using the idex is provided with your purchase. The latest version of the idex Software can be downloaded on our website, Carrying bag The idex is a robust and solid device. However, for transport, the carrying bag should be used to avoid damage to the idex. 6

7 3. First use When you use the idex for the first time, use the following sequence: 1. Install the FOCI idex Software 2. Connect the idex 3. Check whether it works Install the FOCI idex Software The FOCI idex software can be found on the CD-ROM that comes with the idex. The latest version of the Software can be downloaded from our website (Free). The installation works in the same way most Windows programmes work. Start the file setup.exe on the CD- ROM. Attention: If the current DirectX version on your pc is older than the 9.0c version, than the FOCI idex software will automatically replace your DirectX installation by the required 9.0c version. After this, the computer might ask you to restart the computer. 7

8 Tip 1 If you only have one USB2.0 port on your PC, you can use a powered hub in order to have more ports. You can find a powered USB2.0 hub in every pc shop. Tip 2 If you use a laptop on its battery, the performance of the system is reduced to save battery power. When using the idex, assure that the system performance is set to the same parameters as when connected to the Power- Supply. 8

9 Unfold the idex The idex consist of 2 pieces. The arm with Camera and the Base Plate. In the carrying bag you will find them as below: To be able to use the idex you should mount it on the Hinge Pin and unfold it. The 4 pictures below show how to unfold the unit: 9

10 Note: the hinges into the red circle in the last picture should be positioned against the hard stop. This is the only way to unfold the idex. Reading and Far Vision The camera can be rotated to the front for Far Vision or downwards (ground) which enables the user to use it for reading. 10

11 Connect the idex After having successfully installed the FOCI idex software and after having restarted your pc, you can now connect the idex. Connect the idex to the USB ports of your computer via two USB cables. As soon as you have connected the magnifier, a balloon will pop-up in the taskbar with the message new Hardware found Afterwards you get the wizard Found New Hardware. Select Next. New hardware was found. Select Next. The system will now look automatically for the correct driver. 11

12 As soon as the driver is located by the computer, you will get the following: Select Continue anyway. The drivers will be installed. And the message will appear: Select Finish. The drivers are successfully installed. 12

13 Checking whether the magnifier works As soon as you have installed the software and connected the magnifier, you can start the FOCI idex programme to check whether the magnifier works. In your Start Menu and on your Desktop look for this icon: If you start the programme, you will be able to see the camera picture in a separate window. (The picture does of course depend on the document that lies underneath the camera.) If you are able to see the camera picture, then all software has been successfully installed. 13

14 4. FOCI idex Software Now that you have connected and tested the magnifier, we continue to expand on the idex software program and the use of the idex. This programme is called FOCI idex Software. Summary of the window The idex software window looks as shown below. 14

15 This window Elements: Title bar Menu bar Toolbar Proportions Toolbar Camera, Toolbar Picture modes Toolbar Picture settings Via the menu Window, you can show or hide these elements. In the following example, the Title bar, Status bar and Toolbar Picture settings are hidden: 15

16 This way there is more room on the screen for the picture. You can actually hide all elements, as shown in the following example. Even when the Menu bar is hidden, you can still select the main options by clicking in the picture with the right mouse button. 16

17 You can change the size of the window by clicking with the mouse on the bottom right corner and drag it to the required size format. You can move the window by clicking on the Title bar or in the picture and drag. You can quickly maximize the window by double-clicking on the Title bar or in the picture. You can always put the window on the foreground via the menu Window. When the setting Always on top is selected, the window of FOCI idex Software is always visible on top of any other window, even when you start up another programme. 17

18 Image dimensions Depending on the shape of the window and the screen format (normal or wide screen), it can be that the picture of the idex does not exactly fit the window. The way to solve this problem depends on the chosen picture settings. You can change the setting on the Toolbar Picture settings. In the following example, the window is always wider than the camera picture. Window filling The camera s picture is enlarged in order to fill the window. The result is that the picture is deformed. You can easily see this in round objects: they become oval, stretched horizontally and vertically. In the following example, you can see how the width of the picture was stretched in order to fill the window. Cutting out A part of the camera picture is cut out, so it fits the window. No Deformation, but a part of the picture is lost. 18

19 In the following example, a part of the picture was cut off at the top and the bottom of the picture. Fitting The camera picture is put in the window without any deformations. The excess space in the window is filled with black bars. In the following example, you can see that black bars have been added to the left and right-hand side of the picture. 19

20 5. Operating the camera The Camera Toolbar in the idex program fully operates the idex Camera. Zooming in and out (reading) : : magnifies and reduces the picture when the object is close to the camera (less than one meter). To use when reading documents. Zooming in and out (faraway) : : magnifies and reduces the picture when the object is far away from the camera (more than one meter). To use when reading a sign. Auto focus : : Switches the auto focus of the Camera on or off. When the distance of the object to the camera constantly changes (e.g. when reading a thick book), you need to use this automatic focus. Rotating : : Rotates the picture 90, 180 or

21 6. Picture modes and picture settings The Toolbar: Picture modes To make reading documents easier, you can set different picture modes in the FOCI idex Software. Picture modes : : The mode can be chosen. Possibilities are: colour, positive and negative mode. Background colours : : In the positive and negative mode you can choose between eight different combinations of foreground and background colours. The Toolbar: Picture settings You can select the level of contrast, the brightness, the colour, the intensity (of the colours), the definition of the picture and the background suppression. Drag the setting bars to the desired position in order to adapt the picture. 21
22 Snapshots It is possible to store the picture shown in the idex Software program. This way, you can look at it later on or you can adapt it. How to put a snapshot to the clipboard When you use the keyboard shortcut Ctrl-C, you put a copy of the picture on the clipboard. Afterwards, you can paste it ( Ctrl-V ) in another program, such as a word processor. How to store a snapshot as a file When you press the key S, you can save a copy of the picture as a file. The dialog box Save as appears: 22
23 Via this dialog box, you can save the picture under the name and on the location that you wish. The picture can be saved in two different file sizes: A bitmap file (.bmp): high quality, pictures are approx about 900 kb. A JPEG file (.jpg): lower quality, less than 100kb per picture. Video acceleration The video card of your computer can autonomously perform a part of the tasks needed to show a video picture. This is the video acceleration function. In order to get a smooth and sharp picture, we advise you to switchon the video acceleration. You can switch the video acceleration on or off via the menu Settings. Exceptionally, it can be that the video acceleration creates compatibility problems with other software. This can be the case if you use a dated magnification programme, e.g. a dated version of Lunar or ZoomText. In that case, you d better temporarily switch off the video acceleration function. 23
24 7 Combination with Magnification Software Supported magnification software The idex software is compatible with the so-called CCTV functions of the main magnification programmes. The following magnification programmes are supported: Ai Squared: ZoomText from version 9.04 or higher (see ) Dolphin Computer Access Ltd: Lunar, Lunar Plus, SuperNova or SuperNova Pro, each time version 6.53 or higher (see Split screen If you use a compatible magnification programme, you can divide your computer picture in two parts via the menu Split screen of the idex software : In the one part, you can find the desktop of your computer, possibly enlarged by your magnification programme. In the other part, you can find the camera picture. Via the menu Split screen, you can choose one of the four different settings for the split screen. 24
25 8 Keyboard shortcuts Keyboard shortcuts are a way to work with idex Software program through the keyboard. General keyboard shortcuts The idex Software program makes a distinction between two kinds of keyboard shortcuts: Keyboard shortcuts in the idex Software program : you can only use these keyboard shortcuts when this program is the active programme on your desktop. You activate The idex Software program by clicking idex on the task bar, by clicking inside the window idex Software or by using Alt-Tab. General keyboard shortcuts : these keyboard shortcuts can be used at any given time, even if the idex Software program is not the active programme. General keyboard shortcuts are useful when the picture is shown in split screen. You can activate another programme (e.g. a word processor), but via the General keyboard shortcuts of the program you can directly adapt the settings of the video picture. When selecting general keyboard shortcuts, it is important to make sure that these keyboard shortcuts do not conflict with other key combinations of the system, such as: Keyboard shortcuts of the programme that you are currently using. Other general keyboard shortcuts, such as Ctrl-Alt-Del, keyboard shortcuts for your magnification software, 25
26 Adjusting keyboard shortcuts You can adjust the keyboard shortcuts to fit a specific keyboard (such as a keyboard of a laptop) or the wishes of the user. You need to use the menu Settings Hotkeys A dialog box shows you a list of all available keyboard shortcuts. To change a keyboard shortcut, you double-click on the description of a keyboard shortcut. Afterwards, you enter the key or key combination of your choice and select OK. 26
27 9 List of shortcuts FOCI idex Software Window settings T Y U I O P W X C V F1 F2 - F6 Ctrl + Shift + F2 to Ctrl + Shift + F6 Space bar Always on top on/off Maximize on/off Menu bar on/off Title bar on/off Full screen on/off Status bar on/off Toolbar Proportions on/off Toolbar Camera on/off Toolbar Picture modes on/off Toolbar Picture settings on/off Set all window settings back to their defaults Load one of the saved window settings Save the current window settings. Load the saved settings with keys F2-F6. Changes between the splitscreen settings. Only in combination with Zoomtext and Lunar 27
28 Camera Control PageUp PageDown Insert Delete A Zoom in (far) Zoom out (far) Zoom in (near) Zoom out (near) Autofocus R Rotate image 90, 180, 270 Image Mode M B Toggle image mode (color, positive, negative) Toggle colour combinations (fore- &background colours) Image Dimensions Q Picture settings (window filling, fitting, cutting out) 28
29 Picture settings (The numbers refer to numeric keys on top of the keyboard, not the separate numeric keypad) 1 (&) Less Contrast 2 (é) More Contrast 3 ( ) Less Brightness 4 ( ) More Brightness 5 (() Less Tint (more blue) 6 ( ) More Tint (more green) 7 (è) Less Saturation 8 (!) More Saturation 9 (ç) Less Sharpness 0 (à) More Sharpness ()) Less Background _ (-) F12 More Background Image Settings to defaults (zoom, image mode, contrast, brightness) 29
30 F7 - F11 Ctrl + Shift + F7 to Ctrl + Shift + F11 Load one of the saved image settings Save the current image settings. Video Accerleration D Video accerleration on/off Snapshots S Ctrl-C Snapshot to file Snapshot to clipboard 10 General hotkeys Ctrl + Shift + PageUp Zoom in (far) Ctrl + Shift + PageDown Zoom out (far) Ctrl + Shift + Insert Ctrl + Shift + Delete Ctrl + Space bar Zoom in (near) Zoom out (near) Changes splitscreen 30
31 11 Technical Data Type: Connections: Supply: Power: FOCI idex 2 x USB 2.0, mini-b-5 2 x 5V DC, 500mA 5W The magnification always depends on the Size of the Screen used and the distance to the object. Maximum Viewing angle Minimum viewing angle 140 mm 13 mm On a wide screen of 17, this corresponds to a magnification range of 2,7 to 29 times 31
32 12 Safety & maintenance Safety regulations Handle this manual with care, it contains all the information you need on your idex. Install the magnifier in a dry, well-ventilated and clean room. Do not use the idex in direct sunlight or next to the radiator. Avoid the idex get in contact with liquids to avoid electrical damage. When you move the magnifier from a cold to a warmer surroundings, you can have condensation. To avoid any breakdowns or short-circuits, you should leave the magnifier switched on for at least one hour. Remove the USB cables at the plug, never remove them by pulling at the cable. All connections have been made in such a way that you can only use them in one way. Never force a connection. Never try to repair the magnifier yourself. In case of a breakdown, contact your distributor or FOCI. If you want to transport the magnifier, please first disconnect all connections. 32
33 Maintenance You can clean the magnifier by using a moist cloth. Never use chemical products, since they can damage the finish and/or certain parts. Do not touch the camera lens. Do not expose the camera lens to sharp or hard objects. If the lens is dirty, clean it with an eyeglass wipe. Handle your idex with care and you will be able to get a great deal of use out of it. 33
Magic Switch User Manual for Mac & Windows Mac to Mac / Mac to Windows / Windows to Windows / Windows/Mac to ipad Windows/Mac to Android
 User Manual for Mac & Windows Mac to Mac / Mac to Windows / Windows to Windows / Windows/Mac to ipad Windows/Mac to Android TABLE OF CONTENTS INTRODUCTION... 2 FEATUR ES... 2 SYSTEM REQUIREMENTS... 2 REGULATORY
USB 2.0 VGA ADAPTER USER MANUAL
 USB 2.0 VGA ADAPTER USER MANUAL CONTENTS INTRODUCTION... 3 FEATURES... 3 SYSTEM REQUIREMENTS... 3 PACKAGE CONTENTS... 3 SUPPORTED COMMON DISPLAY RESOLUTION... 4 TECHNICAL SPECIFICATIONS... 4 INSTALLATION
Software for Producing Rack Layouts and Purchase Orders
 1 Software for Producing Rack Layouts and Purchase Orders Welcome to RackTools: software that makes it simple and quick to specify Middle Atlantic Products. RackTools has been designed with one purpose
Sharing Files and Whiteboards
 Your user role in a meeting determines your level of file sharing. The type of files you can share include documents, presentations, and videos. About Sharing Files, page 1 Changing Views in a File or
13 Managing Devices. Your computer is an assembly of many components from different manufacturers. LESSON OBJECTIVES
 LESSON 13 Managing Devices OBJECTIVES After completing this lesson, you will be able to: 1. Open System Properties. 2. Use Device Manager. 3. Understand hardware profiles. 4. Set performance options. Estimated
Acer LCD Monitor Driver Installation Guide
 1 Contents 1 Contents... 1 2 Introduction... 2 3 Installation Guide... 2 3.1 PC requirements... 2 3.2 Installing the Acer LCD Monitor Driver on Windows Vista... 3 3.2.1 Hardware first install... 3 3.2.2
7. Computer System Minimum Requirement. 31 8. Troubleshooting. 32. PortableCapture Pro Software Introductions...33
 Table of Contents EN 1. Precaution. 3 2. Preparation..6 Standard Accessories 6 Part Names & Functions..7 3. key features..... 8 4. Use the Microscope.....9 Install Battery... 9 Insert a MicroSD Card...
Page 1 S5.5 Monitoring Software Manual Rev 1.2 for Software Ver 1.0
 Trantec S5.5 Monitoring Software Manual Initial Setup Minimum PC Requirements 1.6 GHz CPU, 256 MB Memory, 1 available USB port, Windows XP Recommended PC >2.0 GHz CPU, 512 MB (XP) 1 GB (Vista) memory,
QUICK START GUIDE. SG2 Client - Programming Software SG2 Series Programmable Logic Relay
 QUICK START GUIDE SG2 Client - Programming Software SG2 Series Programmable Logic Relay SG2 Client Programming Software T he SG2 Client software is the program editor for the SG2 Series Programmable Logic
ZoomText 10.1 for Windows 8 Quick Reference Guide Addendum
 ZoomText 10.1 for Windows 8 Quick Reference Guide Addendum This addendum to the ZoomText 10 Quick Reference Guide covers the new features and other changes specific to ZoomText 10.1 for Windows 8. For
SMART Board User Guide for PC
 SMART Board User Guide for PC What is it? The SMART Board is an interactive whiteboard available in an increasing number of classrooms at the University of Tennessee. While your laptop image is projected
Software User's Guide
 Software User's Guide Brother QL-series The contents of this guide and the specifications of this product are subject to change without notice. Brother reserves the right to make changes without notice
PCLinq2 Hi-Speed USB Bridge-Network Cable. Quick Network Setup Guide
 PCLinq2 Hi-Speed USB Bridge-Network Cable Congratulations! Quick Network Setup Guide For Windows 98/ME/2000/XP Congratulations for installing the PCLinq2 Hi-Speed USB Bridge-Network Cable. This Quick Network
Smart Cam, CC-Smart-Cam, and Smart Cam Packages Installation and Quick Start Operating Instructions
 Smart Cam, CC-Smart-Cam, and Smart Cam Packages Installation and Quick Start Operating Instructions 12/12/2013 FRONT VIEW BACK VIEW TYPICAL PACKAGE 1 Installation Assemble video coupler to the zoom body
EasyPen i405x. MousePen i608x. User Manual For Windows 7/Vista/XP
 EasyPen i405x MousePen i608x User Manual For Windows 7/Vista/XP *The driver may already be updated to a newer version before/after packaging. If your installation screen does not match the contents of
Embroidery Fonts Plus ( EFP ) Tutorial Guide Version 1.0505
 Tutorial Guide Version 1.0505") Embroidery Fonts Plus ( EFP ) Tutorial Guide Version 1.0505 1 Contents Chapter 1 System Requirements.................. 3 Chapter 2 Quick Start Installation.................. 4 System Requirements................
Embroidery Fonts Plus ( EFP ) Tutorial Guide Version 1.0505 1 Contents Chapter 1 System Requirements.................. 3 Chapter 2 Quick Start Installation.................. 4 System Requirements................
Intra-oral Camera User s Manual
 Intra-oral Camera User s Manual Thanks for having this home care intra-oral camera! This product is a PC solution device and so friendly in user interface. It can help users taking still photo, recording
Table of Contents. 1. Overview... 3. 1.1 Materials Required. 3 1.2 System Requirements. 3 1.3 User Mode 3. 2. Installation Instructions..
 Table of Contents 1. Overview..... 3 1.1 Materials Required. 3 1.2 System Requirements. 3 1.3 User Mode 3 2. Installation Instructions.. 4 2.1 Installing the On Call Diabetes Management Software. 4 2.2
English Table of Contents
 Table of Contents FaceCam 1020 Features 1 Set up the device 2 I.P.M(Image Protection Mechanism) setting 3 Using Instant Messenger Application 4-5 CrazyTalk CamSuite PRO 6-16 CrazyTalk CamSuite PRO with
Magic Control Technology Corporation. Android Mirror KM-C6105. User Manual
 Magic Control Technology Corporation Android Mirror KM-C6105 Table of Contents Features... 3 Specifications... 3 Getting Started... 4 Windows 7 / XP - First Time Installation... 4 Windows 7 Start the Andriod
1. Open the battery compartment as shown in the image.
 This Quick User Guide helps you get started with the IRIScan Book 3 scanner. This scanner is supplied with the software applications Readiris Pro 12, IRIScan Direct and IRISCompressor. Corresponding Quick
ActiView. Visual Presenter Image Software User Manual - English
 ActiView Visual Presenter Image Software User Manual - English Date: 05/02/2013 Table of Contents 1. Introduction... 3 2. System Requirements... 3 3. Install ActiView - Windows OS... 4 4. Install ActiView
2 Port USB Keyboard Mouse Switch Cable with File Transfer for PC and Mac
 2 Port USB Keyboard Mouse Switch Cable with File Transfer for PC and Mac SVKMS2 *actual product may vary from photos DE: Bedienungsanleitung - de.startech.com FR: Guide de l'utilisateur - fr.startech.com
Additional Requirements for ARES-G2 / RSA-G2. One Ethernet 10 Base T/100 Base TX network card required for communication with the instrument.
 TA Instruments TRIOS Software Installation Instructions Installation Requirements Your TRIOS Instrument Control software includes all the components necessary to install or update the TRIOS software, as
User Manual. Windows 7 / Vista / XP. iotablet Driver
 User Manual Windows 7 / Vista / XP iotablet Driver I. General Information 2 1. Overview 2 2. Pen Tablet Function 2 3. System Requirements 2 4. Driver Installation 3 5. Hardware Installation 3 6. Verifying
IVS-Basic 4.4 IVS-Professional 4.4 IVS-PowerPoint 1.1
 Manual IVS-Basic 4.4 IVS-Professional 4.4 IVS-PowerPoint 1.1 Supplement connecting USB RF-II Base Station 1213 2 Contents Contents... 3 Connecting the RF-II Base Station to the USB port... 4 Using the
IP Camera User Manual
 IP Camera User Manual - 1 - Thank you for purchasing the Time2 MIP11 Surveillance Camera this device is a great way monitor any part of your office, home or warehouse making sure all your valuables are
Magic Wand Portable Scanner
 Magic Wand Portable Scanner PDS-ST470-VP User Manual Table of Contents 1. Key Features... 3 2. Functional Parts... 3 3. Explanation of the Status Icons... 5 4. Using the Scanner... 5 4.1. Charging up the
Trace600 OTDR Test Management Software User s guide
 Trace600 OTDR Test Management Software User s guide T e s t & I n s p e c t i o n A Trace600 OTDR Test Management Software User s guide T e s t & I n s p e c t i o n 2002, AFL Telecommunications, all rights
Applying a circular load. Immediate and consolidation settlement. Deformed contours. Query points and query lines. Graph query.
 Quick Start Tutorial 1-1 Quick Start Tutorial This quick start tutorial will cover some of the basic features of Settle3D. A circular load is applied to a single soil layer and settlements are examined.
Manual Client Management Software HDR50-CMS
 Manual Client Management Software HDR50-CMS HDR50-CMS (Client Management Software) A-1. Install HDR50-CMS for Windows PC HDR50-CMS is a program for communication between DVR and PC to control signal and
1 ImageBrowser Software Guide
 1 ImageBrowser Software Guide Table of Contents (1/2) Chapter 1 Try It! ImageBrowser Starting ImageBrowser -------------------------------------------------- 4 Importing Images to Your Computer ---------------------------------
Downloading Images and Movies from a Digital Camera to OLYMPUS Master 2
 Overview Downloading Images and Movies from a Digital Camera to OLYMPUS Master 2 This article describes how to download image and movie files from an Olympus digital camera 1 to the OLYMPUS Master 2 application.
CS01-200 Digital Microscope User Manual
 CS01-200 Digital Microscope User Manual Prepared by Coolingtech Digital Engineering Dept. 2010.3.25 1/45 Thank you for purchasing our CS01-200 Digital Microscope, it is a slim type tool and can be easily
1. Check the Accessories
 This Quick User Guide helps you get started with the IRIScan Book Executive 3 scanner. This scanner is supplied with the software applications Readiris Pro 14 (Windows and Mac ), IRIScan Direct and IRISCompressor
SMS (Server Management Software) Digital Video Recorder. User s Manual
 Digital Video Recorder. User s Manual") SMS (Server Management Software) Digital Video Recorder User s Manual Contents 1 - Introduction 2 1.1 About this manual 2 1.2 Configuration 2 1.3 SMS Functions 2 1.4 Product Information 2 1.5 System Requirements
SMS (Server Management Software) Digital Video Recorder User s Manual Contents 1 - Introduction 2 1.1 About this manual 2 1.2 Configuration 2 1.3 SMS Functions 2 1.4 Product Information 2 1.5 System Requirements
SMART Ink 1.5. Windows operating systems. Scan the following QR code to view the SMART Ink Help on your smart phone or other mobile device.
 SMART Ink 1.5 Windows operating systems User s guide Scan the following QR code to view the SMART Ink Help on your smart phone or other mobile device. Trademark notice SMART Ink, SMART Notebook, SMART
Appendix A. CMS(Client Management Software)
") Appendix A. CMS(Client Management Software) A-1. Install CMS for Windows PC CMS is a program for communication between DVR and PC to control signal and video. Insert the enclosed CD, and go to CD-ROM Drive
Appendix A. CMS(Client Management Software) A-1. Install CMS for Windows PC CMS is a program for communication between DVR and PC to control signal and video. Insert the enclosed CD, and go to CD-ROM Drive
VantagePoint PC Application Software USER MANUAL
 VantagePoint PC Application Software USER MANUAL 605-0183-004 A Overview Magellan VantagePoint software allows you to view, edit and store color maps on a personal computer, with zoom and pan functions
LOREX CLIENT Remote Software 4.0
 LOREX CLIENT Remote Software 4.0 Instruction Manual English Version 2.0 MODEL: L20WD800 Series www.lorexcctv.com Copyright 2008 LOREX Technology Inc. Table of Contents Table of Contents Software Installation...
SOFTWARE GUIDE PM1405 DATA PROCESSING SOFTWARE
 SOFTWARE GUIDE PM1405 DATA PROCESSING SOFTWARE Equipment Software Manufacturer Survey meter РМ1405 "РМ1405 Software" Polimaster Copyright Polimaster 2015. All rights reserved. According Copyright protection
Trace.Net OTDR Test Management Software User s guide
 Trace.Net OTDR Test Management Software User s guide 2007-2009, AFL Telecommunications, all rights reserved. TRAC-01-1000 Revision B, 2009-06-10 Specifications are subject to change without notice. I Contents
Simple Computer Backup
 Title: Simple Computer Backup (Win 7 and 8) Author: Nancy DeMarte Date Created: 11/10/13 Date(s) Revised: 1/20/15 Simple Computer Backup This tutorial includes these methods of backing up your PC files:
Wormhole Switch JUC400
 For MAC & Windows OS Wormhole Switch JUC400 User Manual JUC400 Ver4.0 Required Environments Windows - OS: Windows 7 / Vista / XP / 2000 - Available USB port (USB 2.0 is recommended) - CPU: Intel Pentium
SMART Board User Guide for Mac
 SMART Board User Guide for Mac What is it? SMART Board is an interactive whiteboard available in an increasing number of classrooms at the University of Tennessee. While your laptop image is projected
Manual. OIRE Escuela de Profesiones de la Salud. Power Point 2007
 Power Point 2007 Manual OIRE Escuela de Profesiones de la Salud Power Point 2007 2008 The New Power Point Interface PowerPoint is currently the most common software used for making visual aids for presentations.
Sirona SIDEXIS Installation
 Sirona SIDEXIS Installation The installation and configuration of Sopro inter-oral cameras with SIDEXIS version 2.3 is a three step process. The first step is to install the USB 2.0 driver and test the
Contents. Hardware Configuration... 27 Uninstalling Shortcuts Black...29
 Contents Getting Started...1 Check your Computer meets the Minimum Requirements... 1 Ensure your Computer is Running in Normal Sized Fonts... 7 Ensure your Regional Settings are Correct... 9 Reboot your
OFFICE KEYBOARD (MT1210 & MT1405) OFFICE FEATURES
 OFFICE FEATURES") OFFICE KEYBOARD (MT1210 & MT1405) OFFICE FEATURES Thank you for purchasing OFFICE KEYBOARD. This User s manual contains all information that helps you to operate your keyboard. Please keep the software
OFFICE KEYBOARD (MT1210 & MT1405) OFFICE FEATURES Thank you for purchasing OFFICE KEYBOARD. This User s manual contains all information that helps you to operate your keyboard. Please keep the software
Understand the Sketcher workbench of CATIA V5.
 Chapter 1 Drawing Sketches in Learning Objectives the Sketcher Workbench-I After completing this chapter you will be able to: Understand the Sketcher workbench of CATIA V5. Start a new file in the Part
USB PC Camera User s Guide
 USB PC Camera User s Guide For VGA 300K Pixels D-PCV-1.1 Table of Contents 1.Basic Computer Requirement............02 2. USB PC Camera.....02 2.1 USB PC Camera Package......02 2.2 How to Adjust the Focus......02
Getting Started on the Computer With Mouseaerobics! Windows XP
 This handout was modified from materials supplied by the Bill and Melinda Gates Foundation through a grant to the Manchester City Library. Getting Started on the Computer With Mouseaerobics! Windows XP
SMART BOARD USER GUIDE FOR PC TABLE OF CONTENTS I. BEFORE YOU USE THE SMART BOARD. What is it?
 SMART BOARD USER GUIDE FOR PC What is it? SMART Board is an interactive whiteboard available in an increasing number of classrooms at the University of Tennessee. While your laptop image is projected on
Getting Started with Vision 6
 Getting Started with Vision 6 Version 6.9 Notice Copyright 1981-2009 Netop Business Solutions A/S. All Rights Reserved. Portions used under license from third parties. Please send any comments to: Netop
Motorola Phone Tools. Quick Start
 Motorola Phone Tools Quick Start Contents Minimum Requirements...2 Before Installing Motorola Phone Tools...3 Installing Motorola Phone Tools...4 Mobile Device Installation and Configuration...5 Online
Networking. General networking. Networking overview. Common home network configurations. Wired network example. Wireless network examples
 Networking General networking Networking overview A network is a collection of devices such as computers, printers, Ethernet hubs, wireless access points, and routers connected together for communication
IMPORTANT! CPD 8424R1
 IMPORTANT! You need to reinstall EPSON Image Authentication System (IAS) on your camera if it was installed before your camera was repaired. Please see your EPSON Image Authentication System User s Guide
PN-L702B LCD MONITOR TOUCH PANEL DRIVER OPERATION MANUAL. Version 2.1
 PN-L702B LCD MONITOR TOUCH PANEL DRIVER OPERATION MANUAL Version 2.1 Contents Setting up the PC...3 Installing the touch panel driver...3 Touch Panel Settings...4 How to configure settings...4 Calibration...5
Introduction to Windows XP
 Introduction to Windows XP Academic Computing Support Information Technology Services Tennessee Technological University January 2003 1. What s new in XP New colorful interface. More stable than 9x/Me
ENLTV-FM3. PCI TV Tuner Adapter with FM Radio. User s Guide
 ENLTV-FM3 PCI TV Tuner Adapter with FM Radio User s Guide User s Notice No part of this manual, including the products and software described in it, may be reproduced, transmitted, transcribed, stored
SMART Board Software for Macintosh Computers FAQ
 SMART Board Software for Macintosh Computers FAQ NOTE: The following FAQs relate to the latest SMART Board software release and apply only to Macintosh computers. The latest version of SMART Board software
PLUS TV ANALOG USB STICK Installation Manual
 PLUS TV ANALOG USB STICK Installation Manual Contents V1.2 Chapter 1 : PLUS TV ANALOG USB STICK Hardware Installation...2 1.1 Package Contents...2 1.2 System Requirements...2 1.3 Hardware Installation...2
Central Management Software CV3-M1024
 Table of Contents Chapter 1. User Interface Overview...5 Chapter 2. Installation...6 2.1 Beginning Installation...6 2.2 Starting the CMS software...10 2.3 Starting it from the Start menu...10 2.4 Starting
COMBOGARDPRO. 39E Electronic Combination Lock SOFTWARE INSTALLATION INSTRUCTIONS
 COMBOGARDPRO 39E Electronic Combination Lock SOFTWARE INSTALLATION INSTRUCTIONS IMPLEMENTATION PACKAGE The ComboGard Pro Software implementation package includes: 707012 ComboGard Pro Software Install
Chapter 1 Downloading Images to Your Computer (Windows)
") Software User Guide For the safe use of your camera, be sure to read the Safety Precautions thoroughly before use. Types of software installed on your computer varies depending on the method of installation
Software User Guide For the safe use of your camera, be sure to read the Safety Precautions thoroughly before use. Types of software installed on your computer varies depending on the method of installation
3D Viewer. user's manual 10017352_2
 EN 3D Viewer user's manual 10017352_2 TABLE OF CONTENTS 1 SYSTEM REQUIREMENTS...1 2 STARTING PLANMECA 3D VIEWER...2 3 PLANMECA 3D VIEWER INTRODUCTION...3 3.1 Menu Toolbar... 4 4 EXPLORER...6 4.1 3D Volume
SOFTWARE INSTALLATION INSTRUCTIONS
 AUDITGARD LGA Electronic Combination Lock SOFTWARE INSTALLATION INSTRUCTIONS Implementation Package The AuditGard Software implementation package includes: 707013 AuditGard Software Install CD 42145 Programming/Audit
StrikeRisk v6.0 IEC/EN 62305-2 Risk Management Software Getting Started
 StrikeRisk v6.0 IEC/EN 62305-2 Risk Management Software Getting Started Contents StrikeRisk v6.0 Introduction 1/1 1 Installing StrikeRisk System requirements Installing StrikeRisk Installation troubleshooting
Installing the IF-NMEASC & SC30 Windows XP Drivers & Software
 Installing the IF-NMEASC & SC30 Windows XP Drivers & Software The following document will outline the installation and use of the IF-NMEASC and SC-30 USB drivers and SC-30Tool software in three parts:
SMART Board Interactive Whiteboard Setup with USB Cable
 SMART Board Interactive Whiteboard Setup with USB Cable The instructions below are for the SMART Board interactive whiteboard 500 series and apply to both desktop and laptop computers. Ready Light USB
Digital Photo Bank / Portable HDD Pan Ocean E350 User Manual
 Digital Photo Bank / Portable HDD Pan Ocean E350 User Manual Installing a hard disk 1. Power off the unit. 2. Remove the bottom cover from the unit by removing four screws. 3. Insert the 2.5 HDD to the
SMART Board Software for Macintosh FAQ
 SMART Board Software for Macintosh FAQ NOTE: The following FAQs relate to the latest SMART Board Software for Macintosh release and apply only to Macintosh computers. SMART Board Software for Macintosh
XTreme Files OS & Data Backup/Restore User Manual Please read the Instruction manual before using the XTreme Files (F Series) 1.
 1.") XTreme Files OS & Data Backup/Restore User Manual Please read the Instruction manual before using the XTreme Files (F Series) 1. The suggested interface for your computer is USB2.0 to have better speed
XTreme Files OS & Data Backup/Restore User Manual Please read the Instruction manual before using the XTreme Files (F Series) 1. The suggested interface for your computer is USB2.0 to have better speed
Maxtor OneTouch User's Guide
 EXTERNAL HARD DRIVE Maxtor OneTouch User's Guide TM II P/N:20259600 i Contents 1 Introduction................................................. 1 Maxtor OneTouch II Drive Components............................
Leaf River Outdoor Products Vibrashine, Inc. P.O. Box 557 Taylorsville, MS 39168 (601) 785-9854 FAX (601) 785-9874 www.vibrashine.
 785-9854 FAX (601) 785-9874 www.vibrashine.") MULTI-CARD PICTURE VIEWER Model PV-2.5 Leaf River Outdoor Products Vibrashine, Inc. P.O. Box 557 Taylorsville, MS 39168 (601) 785-9854 FAX (601) 785-9874 www.vibrashine.com 2 THANKS and WELCOME What does
MULTI-CARD PICTURE VIEWER Model PV-2.5 Leaf River Outdoor Products Vibrashine, Inc. P.O. Box 557 Taylorsville, MS 39168 (601) 785-9854 FAX (601) 785-9874 www.vibrashine.com 2 THANKS and WELCOME What does
TVI End User Guide. Version: Summer 2009 Release
 TVI End User Guide Version: Summer 2009 Release Table of Contents Control Center for Windows...2 TVI Control Center for Windows XP/Vista...2 Features...2 System Requirements...3 Installing Control Center...3
Version 9.1 USER'S GUIDE
 Version 9.1 USER'S GUIDE Copyright 1981-2015 Netop Business Solutions A/S. All Rights Reserved. Portions used under license from third parties. Please send any comments to: Netop Business Solutions A/S
Window's Paint Tools
 Window's Paint Tools The selection of Paint tools. Left click the mouse button on anyone of these will switch on that function. With the chosen function the colour in the bottom left hand box is in use,
ACS CLIENT SOFTWARE USER MANUAL
 ACS CLIENT SOFTWARE USER MANUAL 1 ACS USER GUIDE 1.1 System Requirement Recommended System Requirement OS CPU VGA RAM HDD WindowXP, Vista Pentium 4, 2Ghz 1024*768, 64MB 24bit color graphic card 1GB 20MB
Guide to Using AMS 4.0 Marking Software
 Guide to Using AMS 4.0 Marking Software Guide to Using AMS 4.0 Marking Software Contents System Requirements...2 Software Installation...2 Selecting the Output Device and Changing Settings...2 Definitions...
Installing the Gerber P2C Plotter USB Driver
 Installing the Gerber P2C Plotter USB Driver 1 You can install a Gerber P2C plotter using a USB connection and communicate with it using compatible design software. The following procedures describe installing
How To Use An Easymp Network Projector On A Computer Or Network Projection On A Network Or Network On A Pc Or Mac Or Ipnet On A Laptop Or Ipro Or Ipo On A Powerbook On A Microsoft Computer On A Mini
 EasyMP Network Projection Operation Guide Contents 2 Before Use Functions of EasyMP Network Projection....................... 5 Sharing the Projector....................................................
ImagineWorldClient Client Management Software. User s Manual. (Revision-2)
") ImagineWorldClient Client Management Software User s Manual (Revision-2) (888) 379-2666 US Toll Free (905) 336-9665 Phone (905) 336-9662 Fax www.videotransmitters.com 1 Contents 1. CMS SOFTWARE FEATURES...4
ImagineWorldClient Client Management Software User s Manual (Revision-2) (888) 379-2666 US Toll Free (905) 336-9665 Phone (905) 336-9662 Fax www.videotransmitters.com 1 Contents 1. CMS SOFTWARE FEATURES...4
S PT-E550W ELECTRONIC E C LABELING L SYSTEM
 ELECTRONIC E C LABELING L SYSTEM S PT-E0W In order to use your P-touch labeling system safely, read the included Quick Setup Guide first. Read this guide before you start using your P-touch labeling system.
ShopStream Connect Software Download and Installation Instructions
 R ShopStream Connect Software Download and Installation Instructions This document contains instructions for downloading ShopStream Connect software from the internet and installing it on a personal computer
SOFTWARE INSTALLATION AND USB/i.LINK CONNECTION GUIDE
 SOFTWARE INSTALLATION AND USB/i.LINK CONNECTION GUIDE ENGLISH LYT1155-001A COPYRIGHT 2003 VICTOR COMPANY OF JAPAN, LTD. M3D8 Printed in Japan 0403-FO-ID-VP This document explains the basic information
SB101 SMART Board 101
 SB101 SMART Board 101 Pieces and Parts SMART Board with cable connected to a laptop or desktop computer LCD projector with cable connected to the computer Computer SMART Board cable (use the appropriate
NAS 249 Virtual Machine Configuration with VirtualBox
 NAS 249 Virtual Machine Configuration with VirtualBox Configure and run Virtual Machines on ASUSTOR Portal with VirtualBox A S U S T O R C O L L E G E COURSE OBJECTIVES Upon completion of this course you
Driver s License Camera Scanner Installation Guide
 Driver s License Camera Scanner Installation Guide Copyright 2008 Evelyn Manufacturing, All Rights Reserved. Distributed under license by COMPanion Corporation. Under the copyright laws, this document
BrightLink Pro. Quick Reference. BrightLink Interaction. BrightLink Pro Features. 1 Turning on and Calibrating the Projector
 BrightLink Pro BrightLink Interaction Three interactive modes are available: Whiteboard mode Quick Reference This card will help you get started using your BrightLink Pro interactive projector. Use one
Renewable Energy Monitor User Manual And Software Reference Guide. sales@fuelcellstore.com (979) 703-1925
 703-1925") Renewable Energy Monitor User Manual And Software Reference Guide sales@fuelcellstore.com (979) 703-1925 1 Introducing the Horizon Renewable Energy Monitor The Renewable Energy Monitor is an educational
Renewable Energy Monitor User Manual And Software Reference Guide sales@fuelcellstore.com (979) 703-1925 1 Introducing the Horizon Renewable Energy Monitor The Renewable Energy Monitor is an educational
USB Driver Installation for Windows XP
 USB Driver Installation for Windows XP USB Serial Converter Driver Installation for Windows XP CAUTION: You must use the drivers on the CD-ROM supplied with your USB Device. DO NOT download drivers from
For customers in USA This device complies with Part 15 of the FCC rules. Operation is subject to the following two conditions:
 User manual For customers in North and South America For customers in USA This device complies with Part 15 of the FCC rules. Operation is subject to the following two conditions: (1) This device may not
The serial port is another kind of transmission mode in some outdated PC as a supplementary in failure of USB transmission.
 Page 1 of 21 OWON Oscilloscope Installation and Use Guide Welcome to use Oscilloscope analysis software. The kind of communication software is use to acquire, store, analyze and display the data. The instruction
Transmitter Interface Program
 Transmitter Interface Program Operational Manual Version 3.0.4 1 Overview The transmitter interface software allows you to adjust configuration settings of your Max solid state transmitters. The following
Welcome to Bridgit @ CSU The Software Used To Data Conference.
 Welcome to Bridgit @ CSU The Software Used To Data Conference. Overview SMART Bridgit software is a client/server application that lets you share programs and information with anyone, anywhere in the world.
XConsole GUI setup communication manual September 2010.
 XConsole GUI setup communication manual September 2010. XConsole is compatible with Microsoft XP, Vista and Windows 7. The software will also work if using Boot camp on a Mac. IMPORTANT NOTES: - Do NOT
For customers in USA This device complies with Part 15 of the FCC rules. Operation is subject to the following two conditions:
 User manual For customers in North and South America For customers in USA This device complies with Part 15 of the FCC rules. Operation is subject to the following two conditions: (1) This device may not
JVC Monitor Calibration 2 User's Guide
 JVC Monitor Calibration 2 User's Guide Table of Contents 1. What is JVC Monitor Calibration 2? 2. System Requirement 3. Installation (JVC Monitor Calibration 2) 4. Uninstall 5. Installation (EyeOne Display
Keychain Barcode Scanner
 Keychain Barcode Scanner User Guide June 2008 2008 TABLE OF CONTENTS Quick Start... 4 Congratulations... 4 Scanner Features... 4 What s Included with Your Scanner... 5 What You Need to Get Started... 6