HOME RAIL INSTALLATION GUIDE
|
|
|
- Geoffrey Simmons
- 7 years ago
- Views:
Transcription


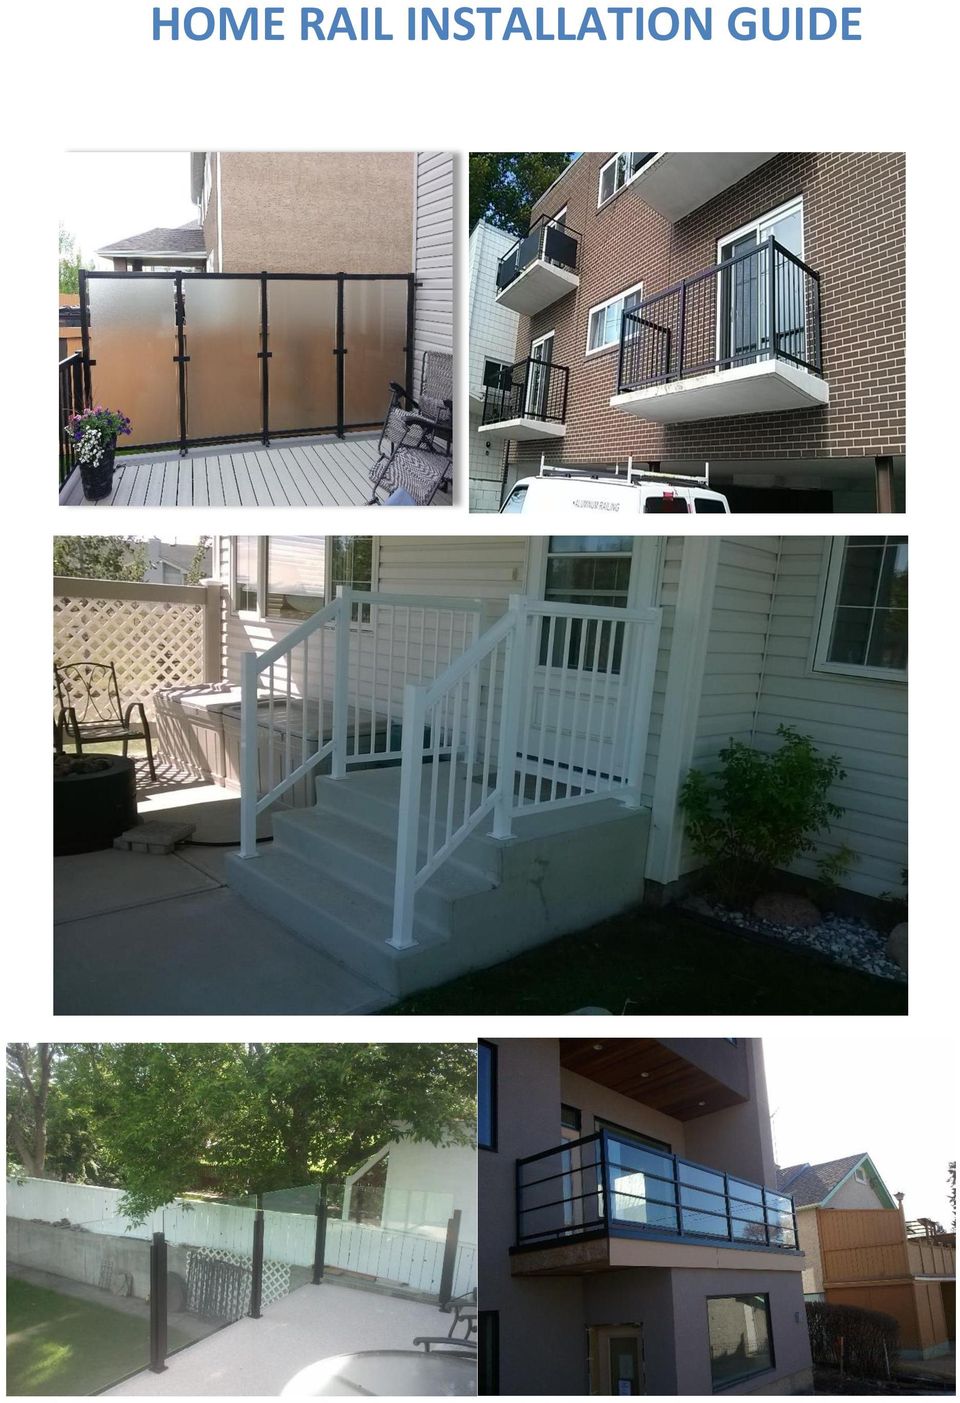
1 HOME RAIL INSTALLATION GUIDE
2 Parts

3

4

5 Parts : - Top and Bottom Rail Pack - End posts, Line posts, Corner Posts, Blank Posts, 6 ft posts 45 degree post ( need bracket ) - Picket and clip Pack - Glass Channel and Blocks for glass installs - Tek and Hex Head Bolt Jars ( 1 jar each per 50 ft ) - Fence Panel Kit - Glass ( stock and or custom ordered ) stock is high ( 1 gap on each side to post ) - Urban Rail 6 ft clips for Urban Railing - Topless Posts ( ends. Lines. corners ) 38 post - (glass at 42 high min) Tools: - 10 or 12 mitre saw (Chop Saw) with Non Ferrous blade - Square (Most important) - Torpedo Level - #3 Robertson used for post and plate dismantle - 3/8 Hex head bit, used for lag screws - Cordless Drill(s) - Hammer Drill (Hilti TE2 recommended) with 5/16 bit for concrete installation - Drill Bits for Pre-drilling into wood - Tape Measure - Hammer - Pliers, Wrenches, Socket set - Brush (to clean area after concrete holes are pre drilled before the post is put in place) - Composite shims (not supplied) - Chisel (to tidy composite shim edges) - Clamps (Quick Grip recommended) Notes about Code: - Maximum gap between two items allowed by code is 4 (post to house, column to post, picket to picket etc.) - Stair rail is to be 31.5 to 38 high from the nose of the tread - Maximum allowable size for each glass pane is 20 square feet - Hand Rail not needed on rises of 3 or less - Height min is 36 under 6 feet - All Systems are tested to meet current building code strength requirments - Railing height min is 42 on all decks above 6 ft in height - Railing required on any falling point over 2 feet off ground
 38 post - (glass at 42 high min) Tools: - 10 or 12 mitre saw (Chop Saw) with Non Ferrous blade - Square (Most important) - Torpedo Level - #3 Robertson used for post and plate dismantle -")
6 House to Column: - Measure 1 to 3 from the edge of the concrete landing (depends upon the size of the lip). Using a square, with END POST in hand, mark locations of the screw holes in the base plate onto the concrete with a black marker. This will act as a for a guide when drilling holes into the concrete for the Mungo plugs/fasteners - Drill all holes with a hammer drill making sure they are deep enough for Mungo plugs to fit flush to just below the surface of the concrete - Once holes are drilled and plugs inserted, clean area of dust and debris, and tap in plugs flush with the concrete surface - Place END POST on top of where the holes have been drilled. Use your square to position the post square to the edge - Install with 2 hex head screws to secure the post to the concrete, making sure post is kept square after each screw is put into place - Level the post both ways (parallel to the house, and perpendicular to the house) to ensure proper installation. Ensure level is determined by testing at the top of the post. Use composite shims to adjust height as needed - Once post is level, snap off shim and clean up broken edge with chisel - Repeat this process for the other post to complete a straight run from house to column (or edge of step) Once posts are level, measure for rail, insert and fasten. For a straight cut, put the tape measure all the way into 1 END POST (in the top hole), and measure to the inside face of the next post. Subtract ¼ from measurement. Once the length needed is determined, mark and cut the top and bottom rail together. Note: Rail may need to be trimmed if too long To install rail, put the top and bottom pieces into one post all of the way on one side, then slide the other end into the next post making sure to have even rail amounts in each post for fastening. Fasten the top and bottom rail using 2 Tek screws to prevent the rails from moving. You must make sure the screws connect with the rail inside the post! Fasten the rails, both top and bottom, from both the inside of the landing and the outside to eliminate flex points Once the rails are fastened, add pickets to the section. Start by adding notched spacer clips from the house to the column. The spacers will go on both top and bottom rails (one each), then a picket. Repeat until the section is completed If spacing is not even at the end of the section, take measurements to find out the spacing between picket and post. Trim the spacer on the top and bottom, if needed to make them even. Be careful when cutting small gaps. Spacers can be trimmed for the whole section to keep each gap even, or just the last spacers between the posts and picket NOTE: If the front entrance is wood, make sure to find joist in order to secure posts properly. There must be 2 outside screws attached into the joists, if not then run will be unsafe and unsecure Also, remember to install the bottom rail support braces if runs are longer than 3. This brace is used to prevent the rail from bowing. The bottom rail support is not to be fastened down; it is designed to float under the bottom rail

7 Front Entrance Stair Installation: Post Installation option 1 (on a picket): - For rail down a set of stairs on a front entrance, you will need 1 NO HOLE POST, 1 END POST and 2 pickets to start - The NO HOLE POST at top of the stairs must be flush with the inside of the column (if no column, the END POST will be used in place as it is completing the railing installed in the steps above) - Once the placement is determined, then fabricate stair posts - For fabrication, follow these steps: - First cut 2 narrow pickets at 30 long at a 35 degree angle on one end - Then measure from the base plate up to 37. Mark it, square and center the mark on the post - Place the picket with the angle facing outwards, making sure to center it at the mark on the post - Attach the picket with three 1.5 Tek screws, making sure picket is centered. If it is off slightly then the entire railing run will be off - To fabricate the bottom post measure 38.5 from base plate. Mark it, square and center the mark on the post - Place picket with angle facing inwards, making sure to place it at the mark on the post - Attach picket with three 1.5 Tek screws, making sure picket is centered NOTE: Code for stair rail states: The height from nose of tread of top rail should be 31.5 to 38. Stair rail installation completed with the steps described above will meet requirements for code.

8 Post Installation Option 2 (brackets): - When using brackets for stair rail installation, use the following steps: - Attach top stair rail bracket to blank face of END POST facing down the stairs. The top of the bracket will be 1 ½ down from the top cap - Attach bottom stair rail bracket to the same blank face as above so the bottom of the bracket is 6 up from the base plate - On the NO HOLE POST for the bottom step, place the top stair rail bracket flush with the top cap - On the same face of the NO HOLE POST, attach the bottom stair rail bracket so the bottom of the bracket is 7 ½ up from the base plate Both Picket and Bracket Installations: - Once the posts are fabricated, mark and install them to the structure - Start with the top post first. Once the post is marked, drilled, level and secured, measure its distance from the edge of the stair Ensure the bottom post is the same distance away from the edge of the stair as the top post for proper alignment of posts and rail - Once posts are level, secured and aligned, stand back and make a visual check to double check alignment. Adjustments to the posts may need to be made if it looks out, even if your tools tell you it s not To determine the length to cut the top and bottom rails for the stairs, measure 2 past the top post and 2 past the bottom post to ensure there is enough material to use for installation and fine tuning of angles. Cut both top and bottom rails to this measurement To mark the cuts for the rail start with the bottom rail first. The bottom rail has 2 lines on it; make sure that the line at the bottom of bottom rail matches up with the angle of the pickets (for brackets, ensure the tabs are on the outside of the bottom rail and the hole in the tab is at the line closest to the bottom) for both top and bottom posts. Use clamps to stabilize the rail to the posts in the proper positions. Once the angle has been found, mark it with a pencil and cut. Make sure that when cutting angles for stair rail that the railing is held securely in place to prevent it from moving and being cut poorly. Once the rail is cut, fasten it with 5/8 Tek screws on both sides (for brackets fasten through hole in tab into bottom rail). When the bottom rail is complete and fastened, proceed to install the top rail. For placement of the top rail make sure that the pickets and top rail are lined up to get the best angle (for brackets, the top rail should sit just under the top screw of the stair rail bracket). Once the angle is found, clamp it in place, mark and cut the top rail. Remember: cut it longer rather than shorter, and then trim accordingly. Once the bottom and the top rail have been fastened with 5/8 Tek screws, begin picketing. Stair pickets should be cut to approx (30 for brackets) long. Begin by installing a stair clip at the bottom of the stair rail. Add a picket. Continue until you reach the top. If the gaps aren t the same size, adjust the clips to ensure it looks evenly spaced at the top and bottom. Wood stairs: The base plate of the post has to be mounted flush with the inside of the stringer to ensure the top and bottom posts are in proper alignment for stair rail. NOTE: No rail is required down a set of stairs if it is 3 rises or less. Rail is required if there are 4 rises or more. If there are 6 rises, then rail is required down both sides of the stairs

9 Deck Railing Installation (pickets and glass) - For decks make sure to install key posts first - Key posts are posts that start and end a run of rail (END POST and CORNER POST) - Do not over tighten hex screws as you will strip wood - Make sure to find where the joists are on the deck because hex-head screws must fasten into rim joists to ensure structural stability along the outside of the deck - If it s a wood deck, find the rim joists by looking for nail or screw imprints - If the deck is vinyl, then usually ½ or ¾ from the edge of the deck is where joist should be found. - With Key posts be sure to come in the same distance from the edge all the way around. The only exception to this is at the stringer location for the stairs off the deck. - Mark the holes and pre-drill. If the deck is vinyl, then EVERY SCREW MUST BE CAULKED to ensure no water leakage occurs underneath the vinyl. - Level all Key posts with composite shims (both ways) to ensure straight runs. - Once all the Key posts are installed and level, then determine if the run requires a LINE POST - NO SECTION SHOULD EXCEED 5 FOR GLASS AND 6 FOR PICKET! If it does, then LINE POST(s) are required for the run. Also, there should not be 2 or more 6 sections of picket in a row - If the run is 12 or longer, then 2 LINE POST are needed - To mark LINE POST location do the following: - Measure from plate to plate of the Key posts and find the length (ex 144 run) - This run will need 2 LINE POST therefore 2 posts, each with 4 plates= =136 Divide 136 by 3 sections = From Key post plate to LINE POST plate is Installing posts that are evenly spaced along the run ensures evenness and stability of the railing. It is also much more visually appealing - Once all posts are placed, level and secured, move onto cutting rail for the runs - To measure each section, put the tape measure into one post and measure to the inside face of the next post. Subtract ¼ from this measurement. Cut rail accordingly. For cutting rail at the CORNER POST, add 1/2 to your measurement for additional length as the rail will be cut at a 45 degree angle. If necessary, trim. Ensure there is enough rail material in the post so it can be fastened together on either post - Make sure all sections over 3 have bottom support braces for picket and glass rail - Ensure all picket sections have equal spacing for a uniform look - If the deck is to have glass panels in the railing, remove the plastic insert from the rail and install the rubber glass insert in both the top and bottom rails - Once the rubber insert is in, make sure to drill a few drainage holes through the rubber and bottom rail to allow for any trapped moisture a path to leave. 2-3 will be enough per section - Be sure to install setting blocks in the bottom rail as the glass will rest on these blocks. Try not to put them over the drainage holes you just drilled. The blocks should sit in the bottom rubber gasket about 4 in from each post - Opening measurements need to be taken for each section that requires glass - Measure from the inside face of the post to the inside face of the post - For 42 railing, the glass height is standard as the rail locations are predetermines - Deductions will be made by Home Rail at the time of glass ordering to ensure proper fit

10 Deck Stair Railings - If rear deck has stairs then placement for posts is as follows: - Posts that are used to start the stair rail on decks are usually END POST with stair picket attached (see front step stair installation instructions above) - Make sure the post plates at the top and bottom of the stairs are the same distance from the nose of the tread - Stair rail should be made into no more than 6 sections. If a longer run is needed, then divide it into sections ensure stability - If the stair case requires a CENTER POST in the run, then 2 pickets need to be attached to a NO HOLE POST ; one at 36 ½ and on the opposite side 38.5 having the 38.5 side facing up the stairs - Use same techniques to find stairs angle as mentioned above in front entrances - Make sure the stair posts are installed on the inside of the stair stringer to match up for bottom posts (same and wood front stairs) Urban Glass Rail - Install all posts and top and bottom rails as described in the DECK RAIL instructions above - After the posts and rails are fastened in and the blue clear gasket is removed, install a narrow picket against the posts on either side of the section by fitting it into the channels, and fastening each one with 2 1 Tek screws to the post - Insert the rubber gasket between the pickets in each section in both the top and bottom rail - Be sure to drill drainage hole through the rubber gasket and bottom rail for each section, and place glass blocks accordingly - To measure for glass, the height will be standard as it is a 42 railing option only. For the width, measure for inside face of the picket to the inside face of the picket - Deductions will be made by Home Rail when the glass is ordered to ensure proper fit - Measure the inside of each section from posts to post, and cut the 6 clip to that measurement. There needs to be 2 cut for each section - Measure down from the bottom of the top rail 10 ¾ and fasten one of the cut clips to the pickets. The top of the clip will be at the 10 ¾ mark - Measure up from the top of the bottom rail 10 ¾ and fasten the second cut clip to the pickets. The bottom of the clip will be at the 10 ¾ mark Walkouts and Retaining Walls: - Walkouts need to have 42 rail installed on the top of the retaining wall to meet code if the grade is greater than 24 from the surface of the deck. The railing installation process is the same as the Deck Railing installation instructions listed above - Retaining walls must be at least 8 wide to safely install railing on it Install Key posts into retaining wall, making sure posts are level, square, and secured. Make sure to predrill all holes for Mungo plugs and 2 lag screws - Then add LINE POSTs if necessary - Install the rail as per the deck installation instructions above

11 Hand Rails Only: - Walkouts will also have stairs accessing the basement - Rail down the stairs only requires a Hand Rail - There are 2 ways to install hand rail: - The first way is to use 2 posts, 1 for the top of the landing, and the 2 nd for the last tread on stairs at the bottom - Treat the stair rail for a walk out the same as any stair installation. Only the top rail is used for a hand rail. All rules still apply when mounting rail to posts - The second way is to use a post on the top of the landing and then install a hand rail bracket which is fastened into the retaining wall - Make sure the space is the same distance from the wall to bracket and wall to post to ensure evenness. If using a hand rail bracket, install a cap on the end of the top rail run. This closes off the rail and prevents injury - Make sure the hand rail meets height requirements for code as listed above Wind Wall Installation (glass): - Make sure to have the correct materials. Need: Bottom rail brackets, top rail brackets, 6 alum posts, fasteners, general braces - The first 6 post will be fastened to the deck no further than 4 away from the house or column - Attach this post into house or column for structural stability using a general brace at the top of the post - Depending upon the height of the wind wall, the post spacing will change. For 6 wind walls, the maximum distance a part for posts is 38. For 5 wind walls, the maximum distance between posts is 48 - To make the needed 6 posts, do as follows: - Install the top rail bracket at the top of the post - Install the bottom rail bracket at 2 5/8 from the base plate. Mark it, square it, center it - NOTE: If 5 posts are needed, cut down the 6 posts by removing the top cap first, and then trimming equal amounts of each post needed for the 5 high run. After the height adjustment is made, replace the post cap and follow the same instructions for the 6 post fabrication - Once the posts are fabricated, they must be installed into rim joists for stability, if necessary block underneath deck for added support - After posts for the wind wall are installed, secured and levelled both ways, it s time to cut rail - Measure the distance in between posts to insure there is enough rail to fasten the sections together - Once the rail is cut and fitted into the brackets, fasten with 5/8 Tek screws from both sides to ensure stability. This is done for both top and bottom rail - Wind wall sections may or may not have bottom rail braces on them. This depends upon the slope of the deck - When rail is attached and fastened, remove the blue clear insert from the rails and install the rubber glass insert into both the top and bottom rail - Be sure to drill through the rubber gasket and bottom rail 2-3 times for drainage. Install setting blocks in bottom rail after - After the section is assembled and secured, measure each opening for glass that is to be installed at a later date - To measure for glass do as follows: - Measure each section separately

12 - The height is found by measuring from the bottom of the top rail to the top of the bottom rail with the rubber gaskets in - The width is found by measuring from the inside of the post to the inside of the post - Deductions and additions will be made to those measurements by Home Rail when the glass is ordered - Divide the height in half and that is where your wind wall clips will be installed to secure glass after it is installed - Wind wall clips are used to stabilize glass in 6 and 5 tall wind wall sections - To secure glass to the wind wall clips, use exterior grade caulking. This will ensure glass will not move in future - Once the wind wall is complete the only thing left to do is install general support braces for the wind wall posts These are used to ensure stabilization of the wind wall. They will need to be mounted on to the deck surface and to the aluminum post - By adding these braces and following the above installation rules, it will ensure a stable deck railing system Topless Railing Installation: - Install posts onto the deck surface making sure that they are level and plumb - Post must be no further than 4 apart - Fasten posts to the deck surface with 2 and 3 Lag screws - Use composite shims to level and plumb - - Run a string line (or use a 4-5 level) across the posts on the sides of the deck, at the bottom of the posts. Start 4 up on the outside corner. As you move closer to the house the height of the string will change due to the slope of the deck. - Cut down both the insert and the clip to match the string line height for each post. (Keep in mind each one will be different and accuracy is key for glass tops to line up with each other. - To measure for glass: - Measure from inside of metal bracket edge rubber channel to rubber channel and add The glass height will be 40 ( this allows for a 2 total slope on your deck sides )

13 - Cut Down the inserts to allow for any slope on deck sides

14 Gates Insert and attach top and bottom rail to make a frame ( 2 screws per side ) screw a picket in 3 places to each post (see below ) add pickets and clips, then attach gate to outside post with hinges (inc ) Glass Ordering Measure glass from post to post for width and inside rail to rail for height (see above) the Excel sheet sent to you back into: glassorders@home-rail.com Fill in your measurements on the left side (yellow) of the sheet Use 34.5 for the height here if the glass is standard height.
 of the sheet Use 34.")
AZEK Rail Install Guide
 TRIM MOULDING DECK PORCH RAIL PAVERS AZEK Rail Install Guide Installing AZEK Rail with Glass Infill... 2 Installing AZEk Rail Stairs with Glass Infill... 9 Notes...14 Please read all instructions completely
AZEK Rail Install Guide
 TRIM MOULDING DECK PORCH RAIL PAVERS AZEK Rail Install Guide Installing AZEK Rail with CableRail by Feeney... 1 Installing CableRail by Feeney for AZEK Rail... 7 Installing AZEK Rail Stairs with CableRail
RadianceRail Installation Guide
 RadianceRail Installation Guide Installing RadianceRail with CableRail by Feeney... 2 Installing CableRail by Feeney for RadianceRail... 7 Installing RadianceRail Stairs with CableRail by Feeney... 10
majestic install ation guide barcelona three sided enclosure 24mm surface mounted wall channels and underframe to base
 majestic install ation guide barcelona three sided enclosure 24mm surface mounted wall channels and underframe to base These Instructions are for a left and right handed unit. The diagrams show a left
VERSARAIL ALUMINUM STAIR RAILING INSTALLATION INSTRUCTIONS. Owner's Manual. Version. www.barretteoutdoorliving.com. Models
 Models VERSARAIL ALUMINUM STAIR RAILING 73013153 INSTALLATION INSTRUCTIONS 73013154 73013155 73013156 Owner's Manual Version 1.0 VERSASTAIR_BOM V1 3/2012 www.barretteoutdoorliving.com VERSARAIL ALUMINUM
Stair Railing. Installation Guide
 Stair Railing Installation Guide THE BEST CHOICE FOR STRONG & DURABLE RAILING SYSTEMS Our exclusive manufacturing process ensures our vinyl railing will provide superior strength plus it is virtually maintenance
Vinyl Brick Mould Field Installation Instructions All Vinyl and Vinyl Clad Windows
 Vinyl Brick Mould Field Installation Instructions All Vinyl and Vinyl Clad Windows Viewed from the exterior. IMPORTANT: Please read before you begin installation. TABLE OF CONTENTS AND TOOL / MATERIAL
MGB Chrome Bumper Conversion
 MGB Chrome Bumper Conversion Installation Instructions For 1974 1/2-1980 MGB This kit requires cutting, welding, and painting. Professional installation recommended. Note: Every MGB body is slightly different
Ceiling Mounted Folding Attic Ladders Installation Instructions
 Ceiling Mounted Folding Attic Ladders Installation Instructions WARNING Before you start installing your new Louisville Ceiling Mounted Folding Attic Ladder, you must read and understand the following:
Composite Stone Veneer
 Composite Stone Veneer Installation Guide Ver 1 Jun 2015 www.compstone.com Composite Stone Veneer Installation Guide Contents Introduction & Overview 3 Required Tools 4 Optional Tools 4 Attachment Guidelines:
TREX SELECT RAILING. Installation Instructions 1 800 BUY TREX PARTS G * I ** H *
 TREX SELECT RAILING NOTE: All Trex Select Railing lengths are manufactured at ON CENTER dimensions (spanning from center of each post): 67-5/8" (76.8 cm) for 6' (.83 m) on center, and 9-5/8" (35.3 cm)
TREX SELECT RAILING Installation Instructions
 TREX SELECT RAILING NOTE: All Trex Select Railing lengths are manufactured at ON CENTER dimensions (spanning from center of each post): 67-5/8" (76.8 cm) for 6' (.83 m) on center, and 9-5/8" (35.3 cm)
SPIRAL STAIR KIT INSTALLATION MANUAL
 SPIRAL STAIR KIT INSTALLATION MANUAL Effective January 1, 2014 If you have any questions, please call the location that your Stair Kit was purchased from: Broomall, Pennsylvania 1-800-52-7427 Ontario,
Brick Veneer Construction
 Brick Veneer Construction Check list of suggested tools & support items Claw hammer Tape measure 3/4" [19 or 20] Wood chisel Wood or plastic shims Pry bar Utility knife Caulking and caulking gun Power
KITCHENS. Tip PAGE 1 FITTING YOUR KITCHEN GUIDE. How to mark out a kitchen. Tools required for installing a kitchen STEP ONE STEP TWO STEP THREE
 FITTING YOUR KITCHEN GUIDE How to mark out a kitchen PAGE 1 Before starting on the installation, measure 870mm from the lowest point of the floor and mark a datum line around the room to indicate where
By SP Partners, LLC. www.rainbowatticstair.com INSTALLATION GUIDE. Prestige
 By SP Partners, LLC www.rainbowatticstair.com INSTALLATION GUIDE Prestige IMPORTANT READ THIS FIRST Inspect stair for any damage prior to installation. Stair is NOT to be installed while home is under
HOW TO INSTALL A BEAUTIFUL NEW KITCHEN
 HOW TO INSTALL A BEAUTIFUL NEW KITCHEN Easy to follow step-by-step kitchen cabinet installation TOOL AND MATERIAL LIST Hammer Pry bar Screwdriver Phillips Flathead Level Tape measure Pencil Straight edge
Stair Parts Installation. Tricks
 Stair Parts Installation Tips & Tricks Introduction Your DIY staircase guide Welcome to the Stairpart home installation guide. Your stairway is both a functional and focal point in your home, so keeping
INSTRUCTIONS THOROUGHLY BEFORE BEGINNING***************
 Bill of Materials: RAC0012 Green Wing Aerodynamic Skirt Kit Item Part Number Description Quantity 1 RMC0218 Gen 2 Trailer Skirt Roadside 1 2 RMC0219 Gen 2 Trailer Skirt Curbside 1 3 RMC0041 Trailer Skirt
Heavy Glass Frameless Shower Door With Return Panel
 202 Anderson Ave., elvue, KS 66407 Phone: 800-669-9867 Fax: 800-393-6699 www.onyxcollection.com Heavy Glass Frameless Shower Door With Return Panel Full Showers with Return ench Seat with Return FRLSDRPL-0116
NATURAL RAILING INSTALLATION INSTRUCTIONS
 NTURL RILING INSTLLTION INSTRUCTIONS Manufactured by fiberondecking.com 800.573.8841 FI-0217-PKG 5/14 Natural Railing Installation Instructions Natural Top Rail Profile Required Tools and Supplies: Power
Tools Required: Sawzall, hack saw, or small body saw, drill, ¼ drill bit, ¾ hole saw, tape measure, silicone or epoxy, & 7/16 socket.
 When installing a one-piece window kit, it is best to do it as early as possible in the restoration process. This will allow for minimal repairs if need be. Kit Contents: Glass - 2 pcs Felt channels 2
Installing Shutters using Fasteners
 Installing Shutters using Fasteners Electric drill, ¼" drill bit, 3 8" drill bit, hammer, and shutter fasteners. (¼" carbide drill bit is required for stucco, hardboard, fiber cement, brick or masonry.)
Retail Reception kiosk
 Retail Reception kiosk put 42" corner post in below 66" to allow post to extend above kiosk for raised box sign Mini cantilever option - 24" overhead support leg Mini cantilever option - 24" overhead 66/48E
BEFORE YOU BEGIN TOOLS REQUIRED FOR INSTALLATION
 Vinyl Railing & Deck Systems STEP-BY-STEP INSTALLATION INSTRUCTIONS FOR DECK AND OXFORD RAILING Both EverNew decking and the Oxford railing system achieved certification from the NES (National Evaluation
Wren Kitchens Installation Tips... 3. Carefully check your kitchen delivery... 4. Measuring out and marking up... 5. Fitting the base cabinets...
 tra 1 Index Wren Kitchens Installation Tips... 3 Carefully check your kitchen delivery... 4 Measuring out and marking up... 5 Fitting the base cabinets... 6 Fitting the corner cabinets... 7 The 972mm or
How to Install UnderDeck The Original.
 How to Install UnderDeck The Original. TOOLS: Chalk Line Caulk Gun Garden hose or water bucket Gloves Hammer or Screw Gun Power Mitre Saw with OSB Blade Pencil Pliers Safety Glasses Straight Edge / Carpenter
Chapter 10 - Scaffolding Systems
 Chapter 10 - Scaffolding Systems Contents Chapter 10 - Scaffolding Systems... 10-1 Check and Oil the Pump Jacks... 10-4 Set Pump Jack Brackets... Error! Bookmark not defined. Set Pump Jack Poles... 10-5
We urge you to read and follow the attached installation instructions. Failure to do so may void the warranty of this garden window unit.
 Important Information for New Construction Installations Attention Installer! We urge you to read and follow the attached installation instructions. Failure to do so may void the warranty of this garden
SUPER SHED. Indoor shelter for your outdoor tools.
 SUPER SHED Indoor shelter for your outdoor tools. Not everyone needs a garden shed. But, if you've no more space on your garage wall for that new leaf rake, if you can't find your potting trowel because
Customer Service 800.780.8889 or visit us online at smithnoble.com. Wood Shutters. Step by Step Installation. Troubleshooting Tips
 reflect your style TM Customer Service 800.780.8889 or visit us online at smithnoble.com Wood Shutters Step by Step Installation Troubleshooting Tips Easy Care Instructions STEP 1 Your New Shutter Thank
Best Barns USA Assembly Book
 Best Barns USA Assembly Book Revised November 27, 2013 the Easton - R 12'x 20' Manufactured by Reynolds Building Systems, Inc. 205 Arlington Drive Greenville, PA 16125 724-646-3775 This manual is copyrighted.
We urge you to read and follow the attached installation instructions. Failure to do so may void the warranty of this garden window unit.
 Important Information for New Construction Installations Attention Installer! We urge you to read and follow the attached installation instructions. Failure to do so may void the warranty of this garden
INSTALLATION INSTRUCTIONS for Bifold Doors (JII103)
") Thank you for selecting JELD-WEN products. Attached are JELD-WEN s recommended installation instructions for premium composite, hollow and solid core molded Bifold Doors. Bifolds are designed for fast
Thank you for selecting JELD-WEN products. Attached are JELD-WEN s recommended installation instructions for premium composite, hollow and solid core molded Bifold Doors. Bifolds are designed for fast
Window Installation Instructions
 Caution The correct installation methods of windows in full frame or insert applications is critical towards achieving the tested performance of the window and longterm enjoyment and energy savings for
IMPORTANT INSTALLATION GUIDE VALENCIA SQUARE CORNER SHOWER READ ALL INSTRUCTIONS CAREFULLY BEFORE STARTING THE INSTALLATION
 INSTALLATION GUIDE VALENCIA SQUARE CORNER SHOWER SEALANT REQUIRED TO COMPLETE THIS INSTALLATION: (Not supplied) Sika Sikasil NG (Arctic White) To seal the WHITE shower door and returns to the shower tray.
REDI-EXIT COMMERCIAL FIRE DOOR AND EXTERIOR DOOR KITS INSTALLATION GUIDELINES
 REDI-EXIT COMMERCIAL FIRE DOOR AND EXTERIOR DOOR KITS INSTALLATION GUIDELINES Tools Required Tape Measure Hammer Slotted Screw Driver #2 & #3 Philips Screw Driver 3-4 Foot Level 12 Pry Bar Cold Chisel
1958-64 WINDOW CHANNEL, WEATHERSTRIP & WHISKER STRIP REPLACEMENT FOR 2-DOOR SEDANS
 By Denny Williams Photos by Denny Williams 1958-64 WINDOW CHANNEL, WEATHERSTRIP & WHISKER STRIP REPLACEMENT FOR 2-DOOR SEDANS Denny Williams - Technical Writer Denny is first and foremost a dyed-in-thewool
The tablesaw may be your shop s most valuable cutting. Crosscut Sleds. Foolproof. Innovative approach guarantees perfect results
 Foolproof Crosscut Sleds Innovative approach guarantees perfect results B Y A L A N T U R N E R The tablesaw may be your shop s most valuable cutting tool, but for precise, repeatable crosscuts it needs
HALE PET DOOR INSTALLATION INSTRUCTIONS HALE STANDARD PANEL MODEL
 HALE PET DOOR INSTALLATION INSTRUCTIONS HALE STANDARD PANEL MODEL Please read these instructions carefully and completely before attempting to install Hale Pet Doors; they will guide you through the steps
www.cornholesupplies.com
 www.cornholesupplies.com How To Build Regulation Cornhole Boards Home of the Original Cornhole Bags and Boards Supply List: 1-4' X 8' Piece of Plywood (pre sanded) 4-2" X 4" X 8' Studs (2 by 4s make sure
FTC 2015-2016 DIY Mountain Build Guide
 FTC 2015-2016 DIY Mountain Build Guide Assembly Instructions Check out the DIY2015-2016 Prints and BoM for individual part details. Release 1.0 9/10/15 Page 1 This guide and Bill of Materials are for constructing
CHARISMA SHOWER/TUB DOOR INSTALLATION INSTRUCTIONS
 CHARISMA SHOWER/TUB DOOR INSTALLATION INSTRUCTIONS IMPORTANT DreamLine reserves the right to alter, modify or redesign products at any time without prior notice. For the latest up-to-date technical drawings,
Horizontal Mini Blinds Installation Guide
 Horizontal Mini Blinds Installation Guide We make it easy! BTG 468298 EN_ rev0614 For more safety information: 1-866-662-0666 or.www.healthcanada.gc.ca/blindcords Before starting Your new Blinds To Go
BUILD A CARPORT. 2 - Planning the carport. 3 - Designing the carport
 BUILD A CARPORT You only need basic DIY and woodworking skills to build a carport. The most important part of the job is setting the supporting posts truly vertical - a job for which another pair of hands
Installation Instructions
 READ BEFORE INSTALLING UNIT For Slider Casement Air Conditioners To avoid risk of personal injury, property damage, or product damage due to the weight of this device and sharp edges that may be exposed:
March 14, 2007. Installation of Bay, Bow and Garden Windows
 March 14, 2007 Re: Installation of Bay, Bow and Garden Windows Attached are the Atrium Companies, Inc recommendation for the installation of bay, bow and garden windows. These instructions were developed
Chapter 3 Installing Over-the-Post Railing on an L-Shaped Stair
 49 Chapter 3 Installing Over-the-Post Railing on an L-Shaped Stair In this chapter: The Over-the-Post Balustrade System Determining the Rail Centerline Using Rail Bolts Making a Pitch Block Laying Out
Panel Track Installation Guide
 Panel Track Installation Guide We make it easy! BTG 493361 EN_0510 Before starting Your new Blinds To Go panel track is custom made to your specifications from the finest materials available. To ensure
Owner's Manual & Assembly Instructions
 Owner's Manual & Assembly Instructions PM01 BASE KIT Model No. FDN1014 717090311 CAUTION: SOME PARTS HAVE SHARP EDGES. CARE MUST BE TAKEN WHEN HANDLING THE VARIOUS PIECES TO AVOID A MISHAP. FOR SAFETY
How To Install Your Frameless Shower Enclosure
 How To Install Your Frameless Shower Enclosure a) Installing Single Frameless Door Side Mounted Wall Hinges b) Installing Frameless Door with In-Line Panel c) Installing Frameless Door Between In-Line
Hive Top Ventilation Shims
 Hive Top Ventilation Shims When preparing your bee hives for the winter, it is very important to provide for ventilation at the top of the hive. Through out the winter, the bees are expelling a lot of
PANELIZED HOME INSTALLATION GUIDELINE
 PANELIZED HOME INSTALLATION GUIDELINE A typical home package will be constructed of Snap-N-Lock Insulated Panels clad with steel skins. 4" panels will be used for the walls, and 6" panels for the roof.
DIY CABINET REFACING INSTALLATION GUIDE
 DIY CABINET REFACING INSTALLATION GUIDE CABINET REFACING INSTALLATION Are you ready to reface your outdated cabinets? This guide will show you how to install your new Facelifters Cabinet Refacing Products
Installation Instructions For Slider Casement Air Conditioners
 Installation Instructions For Slider Casement Air Conditioners NOTE: These instructions describe installation in a typical wood framed window with a wood SLIDE-BY sash, or installation in a metal CASEMENT
Cedar Cottage Doghouse Plans
 Overlapping cedar shingles add an element of charm to this medium size doghouse. The walls, floor, and trim are constructed of solid cedar, making it naturally weather resistant and provides excellent
INSTALLATION INSTRUCTIONS for Premium Pocket Windows (JII022) IMPoRtaNt INFoRMatIoN & glossary. safety & HaNdlINg
 IMPoRtaNt INFoRMatIoN & glossary. safety & HaNdlINg") Thank you for selecting JeLd-weN products. Attached are JeLd-weN s recommended installation instructions for pocket (replacement) double-hung, casement, awning, picture or transom windows, designed to
Thank you for selecting JeLd-weN products. Attached are JeLd-weN s recommended installation instructions for pocket (replacement) double-hung, casement, awning, picture or transom windows, designed to
BUILDINGA 1/10 SCALE FLATBED TRAILER
 VOLUME 1, ISSUE 1 BUILDINGA 1/10 SCALE FLATBED TRAILER BUILT, DESIGNED & WRITTEN BY NATHAN MYERS MATERIALS: FEATURES: While the design was kept simple to allow anyone to be able to build their own trailer,
Premier & Deluxe 3-Season Room Sliding Glass Door
 DTSSGD-11 Premier & Deluxe 3-Season Room Sliding Glass Door Installation Instructions Screen Door Seal Left Side Track Top Track Assembly Right Side Track Right Side Trim Sliding Glass Door Sliding Screen
Residential Deck Safety, Construction, and Repair
 Juneau Permit Center, 4 th Floor Marine View Center, (907)586-0770 This handout is designed to help you build your deck to comply with the 2006 International Residential Building code as modified by the
OWNER S MANUAL Table Tennis Table Patent Pending
 OWNER S MANUAL Table Tennis Table Patent Pending Be sure to write your model number and serial number here for future reference. You can find these numbers printed on the bottom of the table. MODEL # T8179
Sliding Barn Door Hardware Installation Instructions BALDUR and ODEN
 Sliding Barn Door Hardware Installation Instructions BALDUR and ODEN Installation Instructions Structural Information For standard systems and most custom single door opening systems. General Overview
How to Build a Poker Table
 How to Build a Poker Table www.pokertablematerials.com 10-Person Poker Table- 96 x 48 These are step by step instructions for building a poker table. The table will measure 48" x 96" and have a 4" wide
WINDOW REPAIR MANUAL & REFERENCE GUIDE
 WINDOW REPAIR MANUAL & REFERENCE GUIDE TABLE OF CONTENTS DOUBLE HUNG & SINGLE HUNG PARTS 4-5 CASEMENT PARTS 6 SCREEN PARTS 7-8 HOW TO REMOVE TILT-IN SASH 9 HOW TO REMOVE A BALANCE 10 HOW TO INSTALL BALANCE
Router Table Plans. www.bobsplans.com
 www.bobsplans.com Router Table Plans Increase the capabilities of your router with this weekend project. Features a sliding fence with EZ-Mount clamps. These clamps are simple to make and grip tightly
All-Season Sunroom Sliding Glass Door Installation Instructions
 ASRESGD-08 All-Season Sunroom Sliding Glass Door Installation Instructions Panel Frame Door Frame Left Side Foam Insulator IE241 H Bar Assembly Door Frame Top Track Panel Frame Door Frame Right Side Stationary
Information Technology Solutions
 Information Technology Solutions Aluminum Sliding Door Assembly Instructions Shield Doors & Windows Bi-fold Door Assembly Instructions For Support Please Call 03 8339 2252 Aluminum Sliding Door Assembly
WHI 90-Minute Rated Veneered Door Frame Installation Instructions
 No. 940-03-10 INSTALLATION INSTRUCTIONS 90 MINUTE RATED VENEERED DOOR FRAME DOOR REQUIREMENTS: Consult the door manufacturer to make sure that the doors are qualified for the hardware to be installed,
Owner's Manual & Assembly Instructions
 Owner's Manual & Assembly Instructions BO01 PATIO COVER/CARPORT Model No. PC1010 Attached 705220511 Missing Parts, Questions on Assembly? Call: 1-800-851-1085 or assist@arrowsheds.com Do not return to
DYI INNOVA LIGHT BAR
 H U R D U S E W www.hurdusew.com PATRICK HURD: phurd99@gmail.com Southwest Florida phurd99@gamai.com www.hurdusew.com PARTS NEEDED All the parts were purchased at Home Depot Total Cost: 224.51 All parts
HEAVY DUTY STAIR LIFT SYSTEM Installation and Service Manual
 HEAVY DUTY STAIR LIFT SYSTEM Installation and Service Manual WARNING! STRICT ADHERENCE TO THESE INSTALLATION INSTRUCTIONS is required and will promote the safety of those installing this product, as well
REPLACEMENT INSTRUCTIONS FOR AWNING
 REPLACEMENT INSTRUCTIONS FOR AWNING Fabric Roller Tube Torsion Assembly For Models 8500 & 9000 Tools Required: Vise Grips Socket Wrench Set 3/16" rill Bit 1/8" Pop Rivets End Cap Guide Screwdriver Electric
AMERICAN GOTHIC PLAYHOUSE
 AMERICAN GOTHIC PLAYHOUSE Project Plan #856 Sheet 1 of 5 Pick a spot and get started with the beautiful that your kids will love. The design of the playhouse includes 35 square feet of interior space plus
INSTALLATION INSTRUCTIONS
 Turbo Tube Slide INSTALLATION INSTRUCTIONS C A U T I O N Do not climb on the outside of the slide This slide is designed for home use only, not for Public Playgrounds PlayCore, Inc. 2004 Copyrighted Material.
Gate Leg Drop Leaf Table Plans
 Preparing the table top blanks: Cut and glue enough 3/4 stock to make three panels 40 long by 24 wide (they will be cut to final size at a later time). While the glue dries we will work on the legs. Preparing
Sash Replacement Guide
 for Andersen 200/400 Series Awning Windows Read all instructions carefully before attempting this procedure. If you have any questions about your ability to complete this procedure, call Andersen at 1-888-888-7020
Tools Required. Recommended Adhesives Vinyl Bonding: - Christy s White Hot Vinyl Cement
 Assembly Instructions STEP-BY-STEP HANDRAIL INSTALLATION for 1-1/2" vinyl handrail component system Rise in inches Run in inches 8 8.5 9 9.5 10 10.5 11 11.5 12 12.5 13 13.5 14 14.5 15 8.5 47 45 43 42 40
1 Door Tall Unit ASSEMBLY GUIDE. Page 1 of 9. WARNING: Contains small parts, keep out of reach of children.
 Page 1 of 9 ASSEMBLY GUIDE 1 Door Tall Unit IMPORTANT Before Commencing Assembly: Read all instructions COMPLETELY Ensure all listed parts are present If any parts are missing from Parts List 1, please
Speed-Mat Rectangle Cutter
 Speed-Mat Rectangle Cutter 1 Honeycomb baseboard. 2 Left hold down. 14 3 Bottom hold down. 4 4 Left / right rule. 8 5 8 5 Left / right rule pointer. 1 6 Top / bottom rule. 7 Top / bottom rule pointer.
Basement Window Installation Guide Hopper and Sliding
 Basement Window Installation Guide Hopper and Sliding americancraftsmanwindows.com Project Requirements: Installation must comply with all applicable building codes. Existing window frame, wall and weatherresistant
FLAT ROOF CARPORT RECOMMENDED INSTRUCTION MANUAL
 FLAT ROOF CARPORT RECOMMENDED INSTRUCTION MANUAL Table of Contents Introduction... 2 Components... 3 Step 1 Marking out the Perimeter of the Carport... 3 Step 2a Footing Set-Out for Concrete Block Pad
Go-kart for little race-drivers
 Go-kart for little race-drivers Drill and drive. Go-kart What it lacks in speed, it more than makes up for in fun: the go-kart will excite little race-drivers. 1 Introduction It s only a go-kart, but it
CordlessPleated FabricShade including Top-Down/Bottom-Up. owner's handbook
 CordlessPleated FabricShade including Top-Down/Bottom-Up owner's handbook July, 2013 español página 9 2 INSTALLATION INSTRUCTIONS Step 1. Check Package Contents Missing part? Call 1-800-264-1190 Mounting
WILDING WALLBEDS BUNK BED INSTALLATION INSTRUCTIONS
 WILDING WALLBEDS BUNK BED INSTALLATION INSTRUCTIONS Instruction Booklet 18 WARNING! ALL MURPHY/WALLBED SYSTEMS CONTAIN POWERFUL LIFTING COMPONENTS. FAILURE TO USE AND FOLLOW THESE INSTRUCTIONS DURING THE
Cable Support System Guide for Andersen Bow, Bay, and Box Projecting Window Units
 for Andersen Bow, Bay, and Box Projecting Window Units Congratulations! You have just purchased one of the many fine Andersen products. Proper assembly, installation and maintenance are essential if the
Integral Kit Instructions
 Integral Kit Instructions For Fisher & Paykel Cabinet widths of 525, 635, 680, 790 mm wide For curved door Models Series B, C, D & G Manual 814980 Updated August 2008 IMPORTANT If your refrigerator has
Vinyl Fence Installation Instructions
 Vinyl Fence Systems Vinyl Fence Installation Instructions Table of Contents Glossary... 2 System Components... 2 Tools & Materials... 3 Laying Out Fence Line... 3 Ordering Materials... 4 Working with Materials...
Installation Guide for Andersen Architectural Clad Outswing Commercial Doors
 Installation Guide for Andersen Architectural Clad Outswing Commercial Doors Congratulations! You have just purchased one of the many fine Andersen products. Proper assembly, installation and maintenance
SPRITE and BIGFOOT DESKTOP CNC MACHINE KIT ASSEMBLY INSTRUCTIONS
 SPRITE and BIGFOOT DESKTOP CNC MACHINE KIT ASSEMBLY INSTRUCTIONS README FIRST: Thank you for purchasing your MyDIYCNC Desktop CNC Machine Kit. We hope this versatile and innovative machine brings you many
UPLIFT Height Adjustable Standing Desk (T-Frame) DIRECTIONS FOR ASSEMBLY AND USE - - ALSO - - Watch our assembly video
 DIRECTIONS FOR ASSEMBLY AND USE - - ALSO - - Watch our assembly video") UPLIFT Height Adjustable Standing Desk (T-Frame) DIRECTIONS FOR ASSEMBLY AND USE - - ALSO - - Watch our assembly video http://bit.ly/9ywwh! CAUTION MAKE SURE NO OBSTACLES ARE IN THE DESK S PATH AND ALL
UPLIFT Height Adjustable Standing Desk (T-Frame) DIRECTIONS FOR ASSEMBLY AND USE - - ALSO - - Watch our assembly video http://bit.ly/9ywwh! CAUTION MAKE SURE NO OBSTACLES ARE IN THE DESK S PATH AND ALL
Installation Instructions
 Installation Instructions 1. Position the unit onto bridging packers. These keep the unit away from any water sitting inside the frame. 2. Centralise the unit within the frame and pack the edges with appropriate
STEADYfast Stabilizer Installation Notes Fifth Wheel and Travel Trailers 11/23/13
 STEADYfast Stabilizer Installation Notes Fifth Wheel and Travel Trailers 11/23/13 (See Supplemental Instructions for trailers with heavy duty round footplates and/or Power Leveling Systems) PHONE SUPPORT
UNIVERSAL ASSEMBLY INSTRUCTIONS FOR VERSATUBE BUILDINGS CONTRACTOR SERIES 2 X 4 FRAMES
 UNIVERSAL ASSEMBLY INSTRUCTIONS FOR VERSATUBE BUILDINGS CONTRACTOR SERIES 2 X 4 FRAMES Our unique assembly process quickly transforms the individual pieces into a finished structure that will give you
Residential Decks. Planning and Development Services Department
 Building Safety Division 8500 Santa Fe Drive Overland Park, KS 66212 (913) 895-6225 Fax (913) 895-5016 Email: permitservices@opkansas.org Planning and Development Services Department Residential Decks
Important Information for Installer & Homeowner
 Important Information for Installer & Homeowner Homeowner: Please keep this information for your records, do not discard! Installation Instructions for Wood Frame Construction Replacement (See other side
Free 12 x 8 Shed Plan With Illustrations, Blueprints & Step By Step Details
 Free 12 x 8 Shed Plan With Illustrations, Blueprints & Step By Step Details Brought To You By: MyShedPlans Click Here To Download 12,000 Shed Plans >> 12 x 8 Basic Shed This 8 12-ft. shed features a simple
Installation Guide for Andersen Architectural Wood Inswing Entry Doors
 Installation Guide for Andersen Architectural Wood Inswing Entry Doors Congratulations! You have just purchased one of the many fine Andersen products. Proper assembly, installation and maintenance are
Owner's Manual & Assembly Instructions
 Owner's Manual & Assembly Instructions BL01 PATIO COVER/CARPORT Model No. PC1020 Attached 705120511 Missing Parts, Questions on Assembly? Call: 1-800-851-1085 or assist@arrowsheds.com Do not return to
Canvas Office Landscape Wall Strip Installation and Disassembly for Recycling Instructions
 Y Parts Included: Canvas Office Landscape Wall Strip Installation and Disassembly for Recycling Instructions Tools Required: Power Driver Drill Bit (Determined by fastener) Driver Bit (Determined by fastener)
Replacement Window Installation Guide Non-Impact & Impact Resistant Windows without Nailing Fin
 Replacement Window Installation Guide Non-Impact & Impact Resistant Windows without Nailing Fin americancraftsmanwindows.com Project Requirements: Failure to follow these instructions may void product