MCS Operator s Manual
|
|
|
- Laurel Thomas
- 7 years ago
- Views:
Transcription
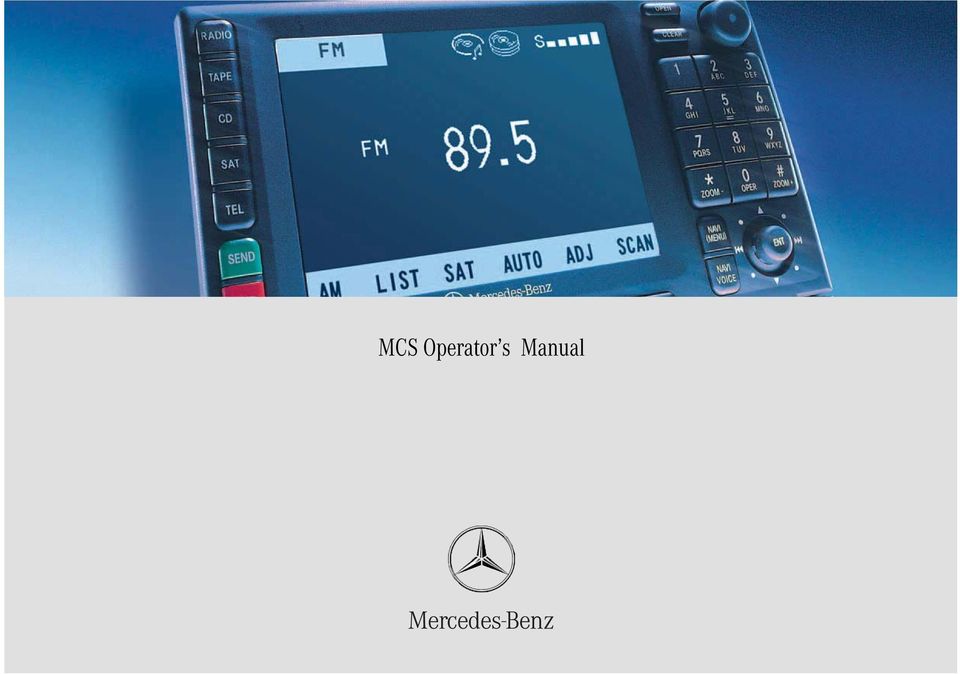
1 MCS Operator s Manual
2 Order no Part no USA Edition A 2004

3

4 Welcome to MCS! Please make yourself familiar with your MCS control unit and read the instructions in this manual before operating the MCS system. This will help you derive a greater benefit from the system. Please also follow the instructions and warnings contained in this manual. Ignoring them could result in damage to the vehicle or personal injury to you or others. Your MCS system may have some or all of the equipment described in this manual. Therefore, you may find explanations for optional equipment not installed in your vehicle. If you have any questions about the operation of any equipment, your authorized Mercedes-Benz Center will be glad to demonstrate the proper procedures. We continuously strive to improve our product and ask for your understanding that we reserve the right to make changes in design and equipment. Therefore, information, illustrations and descriptions in this manual might differ from the equipment installed in your vehicle. As such, the information, illustrations and descriptions contained in this manual may not be reasonably relied upon in making any claims with respect to the actual performance of the product. These operating instructions form an integral part of the vehicle and should therefore always be kept inside the vehicle and passed on to the new owner if the vehicle is sold. We extend our best wishes for many miles of safe, pleasurable driving. Mercedes-Benz USA, LLC A DaimlerChrysler Company

5

6 Contents Introduction Where to find it Symbols Operating safety At a glance MCS control unit Display screen Quick reference MCS Switching the MCS operating unit on and off Adjusting the volume Radio Operation Tape operation CD operation* Satellite radio* operation Telephone* operation Navigation system*, entering a destination and calculating a route Audio Radio operation Quick reference Menu overview Switching radio operation on Switching another system on Changing the Radio band Selecting a station Memory functions Tape operation Quick reference Inserting or ejecting a tape Menu overview Listening to a cassette Error messages Changing sides Fast forward and rewind Music search Tape scan Blank skip Dolby B (noise reduction) Pause CD operation Quick reference General information on CD mode Inserting or ejecting a CD Menu overview Switching CD operation on and off Error messages Selecting a CD MCS with CD changer Track select Music seek CD track scan CD track repeat CD track random play Pause Elapsed time display Audio Adjustment Audio Adjustment

7 Contents Satellite radio* Satellite radio* operation Quick reference Menu overview General information Introduction to satellite radio Satellite radio* operation Calling up the SAT main menu Soft key functions Selecting a station Obtaining additional text information Storing stations Calling up the SIRIUS information menu Telephone* Important notes Telephone* operation Quick reference Menu overview Switching telephone operation on Switching telephone operation off Incoming call Outgoing call Emergency call Navigation* Important notes Quick reference Inserting or ejecting the navigation DVD Destination input Menu overview Switching the navigation system on Entering destination address Route guidance Route guidance principles Destination memory Address book Today s plan Saving the current vehicle position Editing the Previous Destination list Settings Voice prompt frequency Selecting the guidance display Selecting the estimated time displayed Selecting which Point of Interest (POI) icons are displayed Setting map and screen orientation System settings System settings Switching between the light and the dark mode Setting the display dimming characteristics Selecting the language and unit of measure Integrated clock adjustment System information Glossary Index

8 Where to find it This Operator's Manual is designed to provide support information for you, the MCS operator. Each chapter has its own guide color to provide fast access to information. Satellite radio* This chapter contains all information related to the satellite radio system. Introduction Where to find it System settings This chapter provides information on how to adjust MCS system settings. At a glance This chapter will give you an overview of all MCS control elements and system components. If you are operating MCS for the first time or if you have rented or borrowed the vehicle, this is the chapter you should read first. Audio Here you will find detailed information on how to use the radio, cassette player, single CD player*, CD changer* and adjust the audio system settings. Telephone* Here you can learn in detail about the many functions of the telephone, how to initiate an emergency call and use service numbers. Navigation* This chapter provides detailed information on the following topics: Destination input Route selection and calculation Route guidance Destination memory Directories The table of contents and index will help you to quickly locate the information you need. 5

9 Introduction Symbols You will find the following symbols in these operating instructions: * An asterisk identifies optional equipment. Since the MCS will vary according to the items ordered with it, certain descriptions and illustrations may be different. Warning G Warning notices draw your attention to hazards that may endanger your health or life, or the health or life of others.! Highlights hazards that may result in damage to your MCS i Helpful hints or additional information you may find useful. This symbol points to instructions for you to follow. A number of these symbols appearing in succession indicates a multiple-step procedure. ( page 7) This symbol tells you where to look for additional information on a subject. The continuation symbol marks an interrupted procedure which will be continued on the next page. Display Words appearing in the MCS display are printed in the type shown here. 6

10 Operating safety Warning G Any alterations made to electronic components and the software can cause malfunctions. The radio, amplifier, CD player*, CD changer*, and telephone* are interconnected. When one of the components is not operational or has not been removed/replaced properly, the function of other components may be impaired. This condition might seriously impair the operating safety of your vehicle. We recommend that you have any service work on electronic components carried out by an authorized Mercedes-Benz Center. Warning G In order to avoid distraction which could lead to an accident, the driver should enter system settings while the vehicle is at a standstill and operate the system only when permitted by road, weather and traffic conditions. Bear in mind that at a speed of just 30 mph (approximately 50 km/h), your car is covering a distance of 44 feet (approximately 14 m) every second. MCS supplies you with the information to help you select your route more easily and guide you conveniently and safely to your destination. For safety reasons, we encourage the driver to stop the vehicle in a safe place before answering or placing a call, or consulting the MCS screen to read navigational maps, instructions, or downloaded information. Introduction Operating safety While the navigation system* provides directional assistance, the driver must remain focused on safe driving behavior, including attention to traffic and street signs, and should utilize the system's audio cues while driving. The navigation system* does not supply any information on stop signs, yield signs, traffic regulations or traffic safety rules. This always remains your personal responsibility when you drive. DVD maps do not cover all areas nor all routes within an area. 7

11 8

12 At a glance MCS control unit Quick reference MCS 9

13 At a glance MCS control unit 10

14 At a glance MCS control unit Function Page Function Page Function Page 1 Switches the radio operation on 2 Color display 3 Delete the last input, return to previous screen 4 Press to: Open and close the control panel Cassette compartment and CD/DVD slot are located behind control panel 5 Press to: Switch the MCS on and off Turn to: Adjust the volume of an audio source, or navigation voice prompt during active route guidance announcement , Radio operation: Selecting a station Saving stations manually CD operation: Selecting a track or CDs Telephone: Entering the unlock code Entering the telephone number 7 Joystick: Activates equipment functions and submenus via menu fields Pressing : Confirms a selection 8 Switches the navigation* system on Activates the navigation menu , Repeats current (last) voice instruction a Softkeys b Ending a call 87 c Accepting an incoming 85 call Sending a call d Switches telephone* operation 84 on e Switches satellite radio* 71 operation on f Switches CD operation 56 on (single CD player*, CD changer*) g Switches tape operation on 44 11

15 At a glance MCS control unit Display screen Main menu structure Main radio display 1 Active system/function display field 2 Inserted cassette icon 3 Inserted navigation DVD or audio CD icon 4 Inserted CD changer icon 5 Telephone roaming indicator 6 Telephone signal strength meter 7 Selected station preset / CD 8 Softkey menu Active system / function display field System Display FM AM, WB CD CHANGER SAT PHONE TAPE Roaming indicator S R R (highlighted) Meaning FM radio band selected AM radio band or Weather Band WB selected Single CD player* selected CD changer* selected Satellite radio* selected Telephone* selected Tape selected Signal in home network Roaming Roaming on non-home type system 12

16 At a glance MCS control unit Warning messages Anti-theft system Display is too hot If the display is too hot, the message DIS- PLAY IS TOO HOT... will briefly appear. To protect the display from damage, the light shuts off. As soon as the display reaches normal operating temperatures, it turns on automatically. If the power supply to the MCS has been interrupted, the message PLEASE EN- TER SECURITY CODE will be displayed the next time the MCS unit is switched on. Use the number keypad to enter your five digit security code and press the softkey OK to confirm. The MCS unlocks and normal operation is enabled. 13

17 At a glance Quick reference MCS This section only provides a brief overview of the MCS. Please read all instructions carefully before operating the unit to ensure your complete understanding and to obtain the best possible performance from the system. For detailed information, please refer to the pages indicated and the respective system chapters. Switching the MCS operating unit on and off Switching on Press the rotary/push-button 1. or Turn the key in the steering lock to position 1 or 2 if the MCS has been switched off by turning the key in the steering lock to position 0 or removed. The MCS will switch on the last active source and display the corresponding menu. Switching off Press the rotary/push-button 1. or Turn the key in the steering lock to position 0. or Remove the key. The MCS switches off. 14

18 At a glance Quick reference MCS The navigation system* was the last system used The menu displayed will vary according to the last navigation function used. If route guidance was active, you will see: the basic guidance display or i If the MCS is switched off for more than 30 minutes during active route guidance, all manually entered traffic jams and detours are deleted. Selecting a detour ( page 131). the map If destination input was active, the main destination input menu appears. Switching another system on Press a system key, e.g.. The main radio menu will appear. 15
.")
19 At a glance Quick reference MCS Adjusting the volume Turn the rotary/push-button. For the audio sources Radio Tape CD* (single CD and CD changer) Satellite radio* you can set the volume jointly. For the service source Telephone* you can alter the listening volume for the telephone only. For the service sources Voice output during route guidance (navigation system*) and Voice Control System* (refer to separate operating instruction) you can set the volume jointly. i The volume of the navigation voice prompt can only be adjusted during active route guidance. Turn the rotary push button during an announcement, or press Navi Voice to repeat the current/last voice instruction and turn the rotary push button during the announcement to adjust the volume. During a navigation announcement, the volume of the audio source is lowered automatically. Radio Operation Switching on Press. The radio is switched on. The station last tuned to will begin to play. Changing the radio band Press the softkey AM, FM or WB. 16

20 At a glance Quick reference MCS Selecting a station Automatic seek tuning Push the joystick to or. In the FM-, AM-, Weather Band WB, the radio will tune in to the next receivable station (FM/AM) or channel (WB) with descending/ascending frequency. Switching another system on Press any system key, e.g.. The MCS will switch to tape operation. Refer to ( page 26) Radio operation for additional information. Tape operation Switching on Press. The main tape menu will be displayed and playback begins. Inserting a cassette into the cassette compartment ( page 40). Music search Push the joystick to /. The tape will wind to the beginning of the current track, to the previous track or to the next track. Refer to ( page 38) Tape operation for additional information. 17
. Music search Push the joystick to /.")
21 At a glance Quick reference MCS CD operation* Switching on Press. The main CD menu will be displayed. CD playback will begin automatically depending on the CD player selected. Single CD player. The first track on the CD is played. CD changer. The first track on the first CD detected in the magazine is played. Inserting a CD into the CD drive ( page 51) and inserting CDs in the CD changer ( page 52). Track select Push the joystick to /. The beginning of the current track, the previous track, or the next track will be played. Selecting a CD from the CD changer Activate the CD changer. Press one of the number keys. Keys - select the corresponding magazine slot of the CD changer. The message LOADING CD... appears on the display. Playback begins with track 1. CD track scan Press the softkey SCAN. The tracks on the CD are played one after the other for 8 seconds each. Press the highlighted softkey SCAN to cancel the function. Refer to ( page 48) CD operation for additional information. Satellite radio* operation Switching on Press. or Press the softkey SAT in the radio menu. The Satellite Radio is switched on. The channel last tuned to will begin to play. 18
22 At a glance Quick reference MCS Selecting a station Selecting by category Press the softkey PTY. or Push the joystick to or. The program category list contains all receivable categories of programs. Select any desired category Push the joystick to or as often as necessary. or Press the softkey or. In the station list, only stations of the selected category are available (category mode). When changing the category, the channel selected last in the new category becomes audible. The system will automatically switch to a station of the selected category if the currently selected station is not of the selected category. Otherwise, the currently selected station remains tuned. Switching another system on Press any system key, e.g.. The MCS will switch to tape operation. Refer to ( page 71) Satellite Radio operation for additional information. Telephone* operation Switching on Press. The unlock code menu will appear. i Timeport phones use a three-digit code. V60 phones use a four-digit code. The head unit will unlock the phone using the first three digits of the four-digit V60 unlock code. 19
23 At a glance Quick reference MCS Entering the unlock code Use the number keys from to to enter the unlock code. Asterisks instead of digits appear in the input line. If the code entered is correct and the phone is registered in a network, the phone is ready for use. Outgoing call Enter a telephone number Use the number keys from to to enter the telephone number. The menu changes when the first digit is entered. Begin dialing If you have entered the correct number, press. Dialing will begin. If the phone number and name are stored in the phone book, the name appears on the screen. The active audio source will switch to mute. Conducting a call When the call is initiated, the call time will be displayed. Ending a call Press. Refer to ( page 80) Telephone operation for additional information. Navigation system*, entering a destination and calculating a route Switching the navigation system on Main destination input menu Press. If the navigation system has not been booted, the navigation startup screen appears during the software loading process. 20
24 At a glance Quick reference MCS The navigation menu displayed will vary according to the last navigation function used. If route guidance was switched off, the main navigation menu is displayed. To find the addresses, select: Street Name, to search for the address by street name and number. City Name, to search for the address in a specific city. Entering destination address Press. Use the joystick to select INPUT DESTINATION and press. The Find Destination by menu appears. Use the joystick to select Address and press. Change State, to search for the address in a different state. Change Province, to search for the address in a different province. Use the joystick to select the desired method and press. i If you have entered the state or the province and you know the city name, start your search using the city name. This will save time versus starting a search where you use the street name. 21
25 At a glance Quick reference MCS Changing the state or province The input screen appears showing the current state or province. If you want to choose another state or province, use the joystick to select it and press. The new state or province is selected. Entering a city name The input screen appears. If you have selected the city name menu, the current city name appears. 1 Text window 2 Keypad 3 List button 4 Space button 5 Delete button If you want to choose another city, use the joystick to select the first character of the city name from the keypad 2 and press. The character appears in the text window 1. To enter more characters, repeat above step. If a character is not available, it will automatically be shaded out. To correct the last character, use the joystick to select Delete 5 and press. When you have entered the city name, use the joystick to select List 3 and press. or Use the joystick to enter the first few characters of the city name, select List 3 and press. Select the desired city name from the name list and press. The Input Street Name menu appears. 22
26 At a glance Quick reference MCS Entering a street name The input screen appears. To enter the street name, use the joystick to select the first character from the keypad 2 and press. Use the joystick to enter the first few characters of the street name, select List 3 and press. The character will appear in the text window 1. To enter more characters, repeat above step. If a character is not available, it will automatically be shaded out. Use the joystick to select the desired street name from the name list and press. The Address Number menu appears. 1 Text window 2 Keypad 3 List button 4 Space button 5 Delete button To correct the last character, use the joystick to select Delete 5 and press. When you have entered the street name, use the joystick to select List 3 and press. or 23
27 At a glance Quick reference MCS Entering an address number The input screen appears if you have entered the street name and the address numbers for this street are stored on the navigation DVD. Use the joystick to select the first number of the desired address number and press. The character will appear in the number window. i Numbers can also be entered using the number keypad. If a character is not available, it will automatically be shaded out. Use N, E, W or S only if the address number contains such a character. The MCS will automatically differentiate north, east, west and south street names. To correct the last character, use the joystick to select Delete and press. When the address number is displayed, use the joystick to select Done and press. If the city name was not previously entered, the City Name menu will appear. Once you have entered the complete address, the Confirm Destination menu appears. Use the joystick to select OK to Proceed and press. The MCS begins calculating the route. To enter more characters, repeat the above step. 24
28 Audio Radio operation Tape operation CD operation Audio Adjustment 25
29 Audio Radio operation Quick reference 26
30 Audio Radio operation Function Page Function Page 1 Switches radio operation on 2 Color display 3 Press to: Switch the MCS on and off Turn to: Adjust the volume 4 Selecting a station (presets) Selecting a station via direct frequency entry Saving a station Selecting a station from the preset menu FM/AM Selecting a station from the WB preset menu Joystick : Automatic seek tuning, ascending : Automatic seek tuning, descending : Manual tuning, ascending : Manual tuning, descending 6 Softkeys LIST: Preset menu AM, FM, WB: Changing radio band Weather Band SAT: Satellite Radio AUTO: Automatically saves stations ADJ: Audio adjustment SCAN: Scan
31 Audio Radio operation Menu overview 28
32 Audio Radio operation Function 1 Main radio menu, FM Page 2 Currently selected frequency band (FM) and memory preset (such as 1) 3 Current frequency 4 Scan function 35 5 Main Audio Adjust menu 63 Audio Adjustment 6 Auto store menu 37 Function Page 7 Satellite radio* (SAT) 32 menu 8 Preset menu 32 9 Main AM radio menu or Main Weather Band (WB) menu a Current frequency band (AM) and memory preset selected (e.g. 1)
33 Audio Radio operation This chapter will provide detailed information on: Radio operation Tape operation CD operation* and Sound adjustments If you have not done so already, please familiarize yourself with these functions by reading the At a glance chapter. Switching radio operation on Main FM radio menu Press. The radio is switched on and the station last tuned to will begin to play. i You can operate the telephone and the navigation system while the radio is on. Switching another system on Press any system key, e.g.. MCS will switch to the tape mode. 30
34 Audio Radio operation Changing the Radio band You can select between FM-, AM- and WB- Band. FM Band AM Band Frequency band FM AM Frequency range FM AM Press the softkey FM. FM is displayed in the upper left hand corner of the display. The FM station last tuned to begins to play and the frequency appears in the display. Press the softkey AM. AM is displayed in the upper left hand corner of the display. The AM station last tuned to begins to play and the frequency appears in the display. 31
35 Audio Radio operation Weather Band WB Press the softkey WB. WB is displayed in the upper left hand corner of the display. The channel last tuned to will appear in the display. i If a weather band station cannot be received on this channel, an automatic search of all 7 channels will take place. As soon as you receive a weather band, the search will stop and the channel appears in the display. The automatic search performs two cycles through the 7 channels. Message WB NOT AVAILABLE A weather band station cannot be received on any of the 7 channels. The following functions are available to select a station: Automatic seek tuning ( page 33) Manual tuning ( page 33) Station selection using number keypad (presets) ( page 34) Station selection using direct frequency entry ( page 34) Automatic station scan ( page 35) Selecting a station Station selection from the preset menu ( page 37) 32
36 Audio Radio operation Automatic seek tuning Push the joystick to. The next receivable ascending frequency is tuned in and begins to play. The station frequency appears on the screen. Push the joystick to. The next receivable descending frequency is tuned in and begins to play. The station frequency appears on the screen. i The MCS needs about 10 seconds to seek through the entire band. If you cannot receive a station, activate another radio function to stop the seek function. Manual tuning (FM, AM) Push the joystick to. The frequency displayed ascends in increments of 200 khz (FM) or 10 khz (AM). This process begins slowly and then gradually increases. Push the joystick to. The frequency displayed descends in increments of 200 khz (FM) or 10 khz (AM). This process begins slowly and then gradually increases. 33
37 Audio Radio operation Station selection using the number keypad (presets) FM- and AM-Bands F i FM and AM presets are independent. You can access them only if you are in the corresponding band. Station selection using the direct frequency entry (FM, AM) Saving stations for FM and AM ( page 36). Weather Band WB Tune the radio to the selected channel. The memory preset number appears in the status line. Press. Press one of the number keys, such as. The radio tunes to the frequency assigned to that memory location. If you have not saved a station to the memory location, the radio does not change frequencies. Input line appears in the main radio menu. Use the number keys to enter the desired frequency within 8 seconds, e.g. for FM. The station you have selected begins to play. 34
38 Audio Radio operation i If you do not make another entry within 8 seconds, the function cancels. i A frequency entered outside the allowable input range will not be accepted. Automatic station scan The stations on the bands (FM/AM/WB) can be scanned in succession for 8 seconds each. Weather Band WB The 7 individual weather channels stored in memory are scanned in succession. The scan function stops automatically when the first station received has been scanned twice. Ending the scan function Press the softkey SCAN. The station selected appears and the station frequency is displayed. Press the softkey SCAN. The scan function will begin. SCAN is highlighted. 35
39 Audio Radio operation The following memory functions are available: Memory functions Saving FM, AM stations manually ( page 36) Saving FM, AM stations automatically ( page 37) Selecting a station from the FM/AM preset menu ( page 37) Selecting channels from the WB preset menu ( page 37) Saving stations manually (FM, AM) In the main radio menu Select the AM- or the FM-Band ( page 31). Press one of the number keys, e.g., longer than 2 seconds. You will hear a confirmation beep. The radio saves the current station at the memory preset selected. The memory preset selected appears in the status line, e.g. FM3. i There are 10 presets available for each band (FM & AM). An existing entry is overwritten in the memory list when a new input is given. i Two presets available for the FM/AM wavebands: Standard FM/AM preset (saving stations manually) Auto preset (saving stations automatically). The standard FM/AM presets are not affected by the Auto store presets. This is a second possibility for storing stations. 36
40 Audio Radio operation Saving (FM, AM) stations automatically Selecting a (FM, AM) station from the preset menu You can view the preset menu with all the preset positions. Return to the radio menu Press the softkey LIST. Selecting channels from the WB preset The WB menu is displayed: Press a number key from to to select the desired weather band. If the FM/AM main radio menu is displayed. Press the softkey AUTO for longer than two seconds. The radio stores the 10 strongest stations. The station frequencies available will appear in the memory list. While the stations are being stored AUTO STORE IN PROGRESS appears in the display. To view the preset menu, press the softkey LIST. To select a desired station, press one of the number keys, e.g.. To exit the preset menu, press the softkey FM or AM. 37
41 Audio Tape operation Quick reference r 38
42 Audio Tape operation Function Page Function Page 1 Switches the tape operation on 2 Color screen 3 Press to: Open and close the control panel The cassette compartment is located behind the control panel 4 Press to: Switch the MCS on and off Turn to: Adjust the volume Joystick : Forward music search : Reverse music search : Fast forward : Rewind 6 Softkeys II: Pause SIDE: Changing sides : Dolby B SKIP: Blank Skip ADJ: Audio adjustment SCAN: Tape scan
43 Audio Tape operation Inserting or ejecting a tape Inserting Press. The control panel opens. Insert a cassette into the cassette compartment. The control panel closes automatically after a few seconds. Make sure that the wider portion of the tape faces right. i If a cassette is inserted, a cassette icon will be displayed in the radio and CD mode. Ejecting Press. Press to eject the cassette. Press. The control panel closes. After the cassette has been ejected, the MCS switches to the last audio mode. 40
44 Audio Tape operation i If the control panel is in the down position for more than 20 seconds, two successive beeps will be heard. This will continue at five second intervals until the control panel is returned to its normal position. Press to return the control panel to its closed position.! A lowered control panel can easily be damaged. Close the control panel as soon as the cassette is ejected. Do not place anything on the lowered control panel. 41
45 Audio Tape operation Menu overview 42
46 Audio Tape operation Function 1 Main tape menu Page 2 Scan function 46 3 Main Audio Adjust menu 63 Audio Adjustment 4 Blank skip 46 5 Noise reduction, Dolby B 47 6 Changing sides 44 7 Pause function 47 43
47 I Audio Tape operation Listening to a cassette Listening to a cassette The telephone and navigation functions can be used while a tape is playing. Switch off tape operation Changing sides Eject the cassette, switch to the radio or CD mode or switch off the MCS. To begin tape playback: Insert a cassette into the cassette compartment. Tape playback will begin automatically ( page 40). Press if a cassette has already been inserted. i The cassette side facing upward is considered SIDE 1. The following screen messages can appear after is pressed: Error messages NO TAPE... - no cassette is inserted. Insert a cassette. TAPE ERROR, TAPE MAY BE TOO TIGHT - the cassette cannot be played. The tape is too tight or is damaged. The MCS will switch to the radio mode. Press the softkey SIDE. The other side of the tape automatically starts to play. The side selected is displayed in the main tape menu. i When the end of the tape has been reached, the cassette changes sides automatically. 44
48 Audio Tape operation Fast forward and rewind Fast forward Push the joystick to. The tape winds fast forward and FOR- WARD is displayed in the main tape menu. Rewind Push the joystick to. The tape rewinds and REWIND is displayed in the main tape menu. Music search i The music search function will not work properly unless there is enough blank tape (approx. 2 seconds) separating the individual tracks. Forward Push the joystick to. The MCS locates and plays the next track. While searching MUSIC SEARCH FORWARD is displayed in the main tape menu. Reverse Push the joystick to. The MCS locates and plays the previous track. While searching MUSIC SEARCH REVERSE is displayed in the main tape menu. Cancelling music search Push the joystick in any direction. 45
49 Audio Tape operation Tape scan When this function is activated, you can play back the first 8 seconds of each track in succession. i The scan function does not work properly unless there is enough blank tape (approx. 2 seconds) separating the individual tracks. Activating scan Press the softkey SCAN. Scan begins. SCAN is highlighted in the softkey menu and SCANNING is displayed in the tape menu. i At the end of the tape, the tape automatically switches to the other side and scan stops. Cancelling scan Press the highlighted softkey SCAN. or Push the joystick in any direction. Playback resumes with the desired track. Blank skip When this function is activated, the unit skips blank segments longer than 15 seconds. The unit fast forwards to the next track or side and starts playing it. Starting blank skip Press the softkey SKIP. Blank skip begins. SKIP is highlighted in the softkey menu. If a blank section is detected SKIPPING BLANK SECTION is displayed in the tape menu. 46
50 Audio Tape operation Cancelling blank skip Press the highlighted softkey SKIP. Dolby B (noise reduction) This function provides the optimum playback of tapes recorded with Dolby B. Activating Dolby B Press the softkey. The Dolby B mode is activated when the is highlighted in the softkey menu. Cancelling Dolby B Press the highlighted softkey. i The Dolby noise reduction system is manufactured under license by Dolby Laboratories Licensing Corporation. The word Dolby and the double-d symbol are trademarks of Dolby Laboratories Licensing Corporation. Pause Activating pause Press the softkey II. The tape stops playing and PAUSE is displayed in the tape menu. Cancelling pause Press the softkey PLAY. i The tape stops playing if you send or receive a phone call. 47
51 Audio CD operation Quick reference r 48
52 Audio CD operation Function 1 Switches CD operation on (single CD player*, CD changer*) 2 Color screen 3 Press to: Open and close the control panel The CD slot is located behind the control panel. 4 Press to: Switch the MCS on and off Turn to: Adjust the volume 5 Playing a CD (CD changer) Selecting a track Page Function 6 Joystick : Track select forward : Track select reverse : Music seek forward : Music seek reverse 7 Softkeys II: Pause RDM: Random play RPT: Repeat TIME: Select time display ADJ: Audio adjustment SCAN: Scan Page
53 Audio CD operation General information on CD mode Warning G The single CD player and CD changer are Class 1 laser products. There is a danger of invisible laser radiation if the cover is opened or damaged. Do not remove the cover. The single CD player and the CD changer do not contain any parts which can be serviced by the user. For safety reasons, have any necessary service work performed only by qualified personnel. CD player locations! Use only CDs with a diameter of 12 cm; do not use 8-cm CDs. An 8-cm CD adapter may cause damage to the CD changer and should not be used. The single CD player* is located behind the MCS control panel You can play audio CDs or read data from the navigation DVD. The 6 disc CD changer*. The status line in the main CD menu indicates which component is being used for CD playback. Tips on caring for your CDs Only touch the CD on the sides. Avoid touching the CD recording surface with your fingers. Clean the CD with a dry, lint-free cloth. Wipe the CD in a straight line from the center. Never wipe the CD in a circular motion. Do not use rubbing alcohol or solvents to clean the CDs. Do not expose the CDs to heat or direct sunlight. Do not write or put stickers on CDs. 50
54 Audio CD operation Inserting or ejecting a CD Inserting or ejecting a CD (Single CD player*) Inserting Press. The control panel is lowered. Insert the CD into the CD slot with the label side up. The CD will automatically be fed into the CD player. The control panel closes automatically after a few seconds. i If an audio CD is inserted, an audio CD icon is displayed when in the radio or tape mode. Ejecting Press. Press to eject the CD. Press. The control panel is raised. After the CD has been ejected, the MCS will switch to the last audio mode. i If the control panel is in the down position for more than 20 seconds, two successive beeps will be heard. This will continue at five second intervals until the control panel is returned to its normal position. Press to return the control panel to its closed position.! A lowered control panel can easily be damaged. As soon as the CD is ejected, close the control panel. Do not place anything on the lowered control panel. i If you do not remove an ejected CD, the CD drive automatically retrieves it after 10 seconds. The CD drive can read either Navigation DVDs or Audio CDs. 51
55 Audio CD operation Loading CDs in the changer The CD changer is located behind the trim panel on the right side of the cargo area. It can accommodate up to 6 CDs. 1 Eject button Pull the disk tray forward until it stops. Open the sliding door by pushing in the direction of the arrow above. Push the door completely open until it locks in the open position. Press the eject button. The magazine will slide upwards. i The magazine can be ejected even if the MCS is switched off. The eject button does not function if the battery is drained or disconnected. i Do not attempt to remove the tray from the magazine. 52
56 Audio CD operation Place a CD in the tray. The CD should be inserted with the label side up. 2 Arrow tip on the rack wall Push the CD tray into the magazine completely. Slide the magazine into the CD changer until it clicks into place (listen for the click). Close the sliding door. i Make sure that 2 is pointing in the direction of the arrow 3. Do not force the magazine into the changer. If the magazine does not enter smoothly, please check for proper orientation of the magazine. 53
57 Audio CD operation Menu overview 54
58 Audio CD operation Function Single CD player* 1 Main single CD menu Page 2 Icon for inserted CD in single CD player 3 Scan 60 4 Repeat 61 5 Random play 61 6 Audio adjust menu 7 Select time display 8 Pause 62 CD changer* 9 Main CD changer menu a Icon for connected and loaded CD changer b Number of selected CD c Scan 60 d Repeat 61 e Random play 61 f Audio adjust menu 63 g Select time display 62 h Pause 62 55
59 Audio CD operation Switching CD operation on and off i The navigation functions can be used while a CD is playing in the CD-changer. MCS with navigation system: Navigation is only possible when a navigation DVD is inserted in the single CD player. MCS with single CD player* CD operation begins: Automatically, by inserting a CD ( page 51) The playback starts at Track 1. By pressing when a CD is already inserted in the CD slot, playback starts at Track 1. The telephone functions can be used while a CD is playing. To stop CD playback Eject the CD, switch to the radio or tape mode, or switch off the MCS. MCS with CD changer* CD changer operation begins: Press when CDs are inserted in the CD changer ( page 52). The playback starts at Track 1 of the first CD. The telephone and navigation functions can be used while a CD is playing. To stop CD playback Switch to the radio or tape mode or switch off the MCS. 56
60 Audio CD operation MCS with single CD player* and CD changer* If you press, the MCS starts the CD mode that was last activated. To switch between CD modes, press again. Single CD player playback Single CD player playback begins: Automatically, by inserting a CD, ( page 51) The playback starts at Track 1. By pressing when a CD is already inserted in the CD slot, playback starts at Track 1. To stop CD playback Eject the CD or Switch to the radio, tape or CD changer or Switch off the MCS CD changer playback CD changer operation begins: By pressing when CDs are inserted in the CD changer, ( page 52). Playback starts at Track 1. To stop CD playback Switch to the radio or Switch to tape or single CD player mode or Switch off the MCS The following error messages can appear after is pressed: Error messages NO CD - there is no CD inserted. Insert a CD. CD ERROR - the inserted CD can not be read. The CD may be inserted incorrectly, be damaged, or is not an audio CD. The CD may be copy protected. If it is a recorded CD (instead of a stamped CD), the quality may be poor or the formatting incorrect. Single CD mode: NAVIGATION DISC INSERTED... - a navigation DVD is inserted in the CD slot. Replace the DVD with an audio CD. 57
61 Audio CD operation CD changer mode: MAG. EMPTY - there are no CDs in the magazine. Eject the CD changer magazine and insert CDs. CD changer mode: NO MAGAZINE - there is no magazine in the CD changer. Insert a loaded magazine into the CD changer. CD changer mode: CHANGER ERROR - have the MCS and the CD changer checked by an authorized Mercedes- Benz Center. i In the CD, radio and tape modes icons are displayed for an inserted CD (single CD player) or a connected and loaded CD changer. Selecting a CD MCS with CD changer Press a number key, e.g. to select the corresponding CD. The screen as shown above appears for 4 seconds. The selected CD will be highlighted. If the selected magazine slot is empty, the NO CD message and the number of the selected slot appears on the screen. The next CD inserted will be selected. Playback begins with track 1 of the selected CD. i After the last track of the current CD has been played, the next CD inserted in the magazine is selected and playback continues with track 1. 58
62 I Audio CD operation You can select a track by using Track select the joystick the number keypad Selecting a track using the joystick Next track Push the joystick to. Previous track or start of title (if more than 10 seconds of playing time has elapsed) Push the joystick to. Select any desired track Push the joystick to or as often as necessary. Selecting a track using the number keypad Press and enter the number of the track you wish to select, e.g. and. i To enter a single digit track number, you can enter zero (0) followed by the track number, e.g. 01, or simply enter the track number, e.g. 1, and wait 4 seconds to have the track selected automatically. When entering a two digit number you must enter the second digit within 4 seconds. Otherwise, the function switches off and the screen returns to the previous display. If you enter a track number which is higher than the last track on the disk, INVALID TRACK appears on the display. The current track keeps playing. 59
63 Audio CD operation Music seek CD track scan The tracks on a CD can be scanned in succession for 8 seconds each. Activating scan Cancelling scan Press the highlighted softkey SCAN. or Push the joystick in any direction. Playback resumes with the desired track. Forward Push the joystick to. The CD seeks forward as long as you push the joystick. Backward Push the joystick to. The CD seeks backward as long as you push the joystick. Press the softkey SCAN. Scan begins and SCAN is highlighted in the softkey menu. 60
64 Audio CD operation CD track repeat Activating repeat Press the softkey RPT. The current track repeats until you switch the function off. The repeat mode is activated when RPT is highlighted in the softkey menu. Cancelling repeat mode Press the highlighted softkey RPT. i You cannot activate the repeat mode and the random mode at the same time. You can only select one mode at a time. CD track random play Activating random play Press the softkey RDM. The tracks on the currently selected CD play back in a random order. The random mode is activated when RDM is highlighted in the softkey menu. Selecting the next / previous track Push the joystick to or. The next or previous track in the random list plays. Cancelling random play Press the highlighted softkey RDM. i You cannot activate the repeat mode and the random mode at the same time. You can only select one mode at a time. 61
65 Audio CD operation Pause Elapsed time display When this function is selected, the main CD menu displays the current track and elapsed time. Press the softkey TIME. The total numbers of tracks and the total playing time are displayed. To return Press the softkey TIME. or Wait 4 seconds to automatically return to the main CD menu. Activating the pause Press the softkey II. The CD stops playing and PAUSE appears in the display. Cancelling pause Press the softkey PLAY. i The CD stops playing if a phone call is sent or received. 62
66 Audio Audio Adjustment Audio Adjustment Audio Adjustment The sound settings for all audio sources can be adjusted. Audio sources include Radio FM, AM, WB Satellite radio* Tape CD (Single CD*, CD changer*) Each audio source has its own audio adjustments for bass and treble. The normal operation of the Bose Audiopilot TM could be interpreted as volume fluctuations, however this is normal operation. Setting Bass/Treble/Balance/Fader To select the parameter you want to adjust, press the softkeys or. The selected parameter is highlighted. To set the desired values, press the softkeys - and + or L and R. To reset the selected parameter press and hold both softkeys, - and + or L and R for longer then 2 seconds. Once you are satisfied with the sound setting, press the softkey EXIT. All audio sources share the balance and fader functions. i If your vehicle is equipped with the Bose Audiopilot TM digital processor, digital electronics will continually separate program material from ambient noise and modify the programming signal so that you can enjoy the full musical performance without making any adjustments. Press the softkey ADJ in any audio menu. Your current settings are displayed in the main audio adjust menu. 63
67 Audio Audio Adjustment Activating sound optimization* Only in vehicles with a premium sound system*. Press the softkey ADJ in any audio menu. Your current settings will be displayed in the main audio adjust menu. Select the parameter SOUND with the softkeys or. To select the desired sound settings, press the softkeys, and. i You can only select one sound optimization at a time. i Sound Optimization is not available for service sources. Available sound optimizations STANDARD- linear sound from the center of the vehicle. SPEECH - emphasis is placed on the spoken word. DRIVER - sound is optimized for the front seats. AMBIENCE - recreates the sound of a room. i If your vehicle is equipped with the Bose Audiopilot TM digital processor, digital electronics will continually separate program material from ambient noise and modify the programming signal so that you can enjoy the full musical performance without making any adjustments. The normal operation of the Bose Audiopilot TM could be interpreted as volume fluctuations, however this is normal operation. Resetting audio adjustments Return to the audio menu by pressing the softkey EXIT. Press and hold the audio menu softkey ADJ for longer than 2 seconds. All parameters are set to 0 and the sound optimization is set to STANDARD. The MCS automatically returns to the audio mode. 64
68 Satellite radio* General information Satellite radio* operation 65
69 Satellite radio* Satellite radio* operation Quick reference 66
70 Satellite radio* Satellite radio* operation Function 1 Switches Satellite radio operation on 2 Color display 3 Press to: Switch the MCS on and off Turn to: Adjust the volume 4 Selecting a station (presets) Selecting a station via manual channel input Saving a station Page Function 5 Joystick : Tuning a station within the selected category, ascending : Tuning a station within the selected category, descending : Selecting a category : Selecting a category 6 Softkeys LIST: Preset menu AM, FM, WB: Changing radio band PTY: Category menu ADJ: Audio adjustment SCAN: Scan NUM: SIRIUS information menu Page
71 Satellite radio* Satellite radio* operation Menu overview 68
72 Satellite radio* Satellite radio* operation Function Page 1 Main satellite radio menu 71 2 Memory preset (such 72 as 5) 3 Current station name 4 Current program category 5 Channel number 6 Scan function 75 7 Main Adjust menu 63 Audio Adjustment 8 Program category menu 70 9 SIRIUS service menu 75 a Preset menu 72 b Radio main menu 30 This chapter will provide detailed information on: Satellite radio operation If you have not done so already, please familiarize yourself with these functions by reading the At a glance chapter. 69
73 Satellite radio* General information Introduction to satellite radio SIRIUS satellite radio provides 100 channels of digital-quality radio, among others music, sports, news, and entertainment, free of commercials. SIRIUS satellite radio uses a fleet of high-power satellites to broadcast 24 hours per day, coast to coast. This diverse, satellite-delivered programming is available for a monthly subscription fee. For more information call the SIRIUS Service Center, ( page 75) or contact i Additional satellite radio equipment and a subscription to satellite radio service provider is required for the satellite radio operation described here. Feature description is based on preliminary information available at time of printing. i At time of printing, no date for the availability of optional equipment required for satellite radio operation had been set. Contact your authorized Mercedes- Benz Center for details and availability for your vehicle. Note that categories and channels shown in illustrations are dependent on programming content delivered by the service provider. Programming content is subject to change. Therefore, channel and categories shown in illustrations and descriptions contained in this manual may differ from the channels and categories delivered by the service provider. i Satellite radio service may be unavailable or interrupted from time to time for a variety of reasons, such as environmental or topographic conditions and other things beyond the service provider's or our control. Service might also not be available in certain places (e.g., in tunnels, parking garages, or within or next to buildings) or near other technologies. Program categories The channels are categorized. Categories allow you to tune to stations broadcasting a certain type of program (category mode) ( page 74). 70
Owner's Manual for your BMW Business CD Car Radio. For your listening enjoyment.
 Owner's Manual for your BMW Business CD Car Radio. For your listening enjoyment. 2n This Owner's Manual is intended to familiarize you with the details of your BMW car radio. In addition, we recommend
ŠkodaAuto CAR RADIO BEAT SIMPLY CLEVER
 ŠkodaAuto CAR RADIO BEAT SIMPLY CLEVER Contents 1 Contents Radio....................................... Radio - Overview............................. Important information........................ Anti-theft
ŠkodaOctavia Tour CAR RADIO SYMPHONY SIMPLY CLEVER
 ŠkodaOctavia Tour CAR RADIO SYMPHONY SIMPLY CLEVER Contents 1 Contents Radio....................................... Radio - Overview............................. Important information........................
UVO SYSTEM QUICK REFERENCE GUIDE
 UVO SYSTEM QUICK REFERENCE GUIDE Congratulations on the Purchase of your new UVO system! Your new UVO system allows you to enjoy various audio and multimedia features through the main audio system. For
CONTENTS INTRODUCTION AND GENERAL INFORMATION - CONTROLS ON STEERING WHEEL MAIN DISPLAY (MAIN) CELL PHONE (TEL) AUDIO SYSTEM (AUDIO) NAVIGATOR (NAVI)
 CELL PHONE (TEL) AUDIO SYSTEM (AUDIO) NAVIGATOR (NAVI)") CONTENTS INTRODUCTION AND GENERAL INFORMATION - CONTROLS ON STEERING WHEEL MAIN DISPLAY (MAIN) CELL PHONE (TEL) AUDIO SYSTEM (AUDIO) NAVIGATOR (NAVI) ON-BOARD COMPUTER (TRIP) STATUS MESSAGES, GENERALITIES
CONTENTS INTRODUCTION AND GENERAL INFORMATION - CONTROLS ON STEERING WHEEL MAIN DISPLAY (MAIN) CELL PHONE (TEL) AUDIO SYSTEM (AUDIO) NAVIGATOR (NAVI) ON-BOARD COMPUTER (TRIP) STATUS MESSAGES, GENERALITIES
Part 2. Copyright 1998 Philips Consumer Communications L.P. All rights reserved. Printed in Mexico. Issue 1AT&T 848229506
 2 User's Manual for Two-Line Digital Answering System Telephone with Speakerphone 1872 Fold open this paper for information about this telephone's installation and operation. Please read Part 1 Important
2007 Cadillac Escalade/Escalade ESV and Escalade EXT Navigation System M
 2007 Cadillac Escalade/Escalade ESV and Escalade EXT Navigation System M Overview... 3 Overview... 4 Features and Controls... 15 Features and Controls... 16 Navigation Audio System... 61 Navigation Audio
>> smart cross connect Users Guide. November 2014.
 >> smart cross connect Users Guide November 2014. >> Table of Contents 1 Overview 1.1 Getting Around 1.2 Pairing your smart with smart cross connect 2 In-Car Mode 2.1 Car Info 2.2 Navigation 2.2.1 Addresses
2006 Cadillac Escalade, Escalade ESV and Escalade EXT Navigation System M
 2006 Cadillac Escalade, Escalade ESV and Escalade EXT Navigation System M Overview... 1-1 Overview... 1-2 Features and Controls... 2-1 Features and Controls... 2-2 Navigation Audio System... 3-1 Navigation
Getting to Know Xsight... 3. Home Screen and Everyday Use... 9. Settings... 11. PC Setup... 17. 2 www.oneforall.com
 User Manual English English Getting to Know Xsight........................................ 3 Unpacking and Setting Up Xsight............................................................. 3 Using Xsight
Infotainment Manual Model Year 2015 Edition: March 2014 KTA-2701/5-VX-en. VAUXHALL Movano
 Infotainment Manual Model Year 2015 Edition: March 2014 KTA-2701/5-VX-en VAUXHALL Movano 0-1 Infotainment Manual Model Year 2015 Edition: March 2014 KTA-2701/5-VX-en Contents Introduction... 2 Radio...
Contents of the Guide
 BeoCenter 1 Guide Contents of the Guide 3 The following is an index to the contents of the separate Reference book with page references: How to set up BeoCenter 1, 4 Connect your TV cables, 5 Connect
Operation Manual for Users
 Operation Manual for Users Model No.: FLTAMFMRCD!!!!!!!!!! ATTENTION!!!!!!!!!! THE RESET BUTTON MUST BE PRESSED TO ENSURE PROPER OPERATION. SEE INSTRUCTION MANUAL Table of Contents Table of Contents ---------------------------------------------------------------------------------------------
CONNECTIVITY QUICK START GUIDE
 CONNECTIVITY QUICK START GUIDE MZD-CONNECT 1 MZD-CONNECT INFOTAINMENT SYSTEM The MZD-Connect system is divided into five sections as displayed on the Home screen. The Home screen can be accessed at any
Contents. 5. Navigating the Software Menus 25 The Basics 25 Diagrams of Top Level Sub Menus 27. 6. Tips and Troubleshooting 34
 Contents 1. Quick Start 1 Features 1 What You Need to Begin 2 Installing the Battery 2 The Basic Controls 3 Play Music 5 Listen to the FM Radio 7 Voice recording 8 Headphone/Earphone 9 2. Playing Music
2010 Chevrolet Corvette Navigation System M
 2010 Chevrolet Corvette Navigation System M Infotainment System... 3 Introduction... 3 Overview... 4 Radio... 13 AM-FM Radio... 13 Satellite Radio... 21 Audio Players... 23 CD Player... 23 Navigation...
Table of Contents. System Requirement of MP3 Player:... 4. Connection and Downloading... 7. Downloading DRM10 Files... 8.
 Table of Contents Instructions... 1 Precautions... 2 System requirements... 4 System Requirement of MP3 Player:... 4 Introduction... 5 Features... 5 Charging the Battery... 6 Connection and Downloading...
CR9986 ROBERTS. Dual Alarm CD Clock Radio. Sound for Generations. Please read this manual before use
 ROBERTS Sound for Generations CR9986 Dual Alarm CD Clock Radio Please read this manual before use Contents Contents... Controls... - Switching on and setting the time... 4 Listening to the radio... 5 Compact
2008 Cadillac Escalade/Escalade ESV and Escalade EXT Navigation System M
 2008 Cadillac Escalade/Escalade ESV and Escalade EXT Navigation System M Overview... 1-1 Overview... 1-2 Features and Controls... 2-1 Features and Controls... 2-2 Navigation Audio System... 3-1 Navigation
ALL-NEW MAZDA3 CONNECTIVITY QUICK START GUIDE
 ALL-NEW MAZDA3 CONNECTIVITY QUICK START GUIDE 1 MZD-CONNECT INFOTAINMENT SYSTEM For more information on any of the topics covered in this guide as well as detailed how-to guides for most functions please
2011 Cadillac STS Navigation System M
 2011 Cadillac STS Navigation System M Infotainment System...... 3 Introduction.................. 3 Overview....................... 4 Radio....................... 13 AM-FM Radio................. 13 Satellite
Printed in China. Issue 1.2 AT&T 03/07. Advanced American Telephones. AT&T and the AT&T logo are trademarks of AT&T Knowledge Ventures, licensed to
 2007 Advanced American Telephones. All rights reserved. AT&T and the AT&T logo are trademarks of AT&T Knowledge Ventures, licensed to Advanced American Telephones. Printed in China. Issue 1.2 AT&T 03/07
Anti Shock CD / USB / SD Card Reader / Remote Control Player RM-CD
 Anti Shock CD / USB / SD Card Reader / Remote Control Player RM-CD DESCRIPTION OF CONTROLS: POWER: ON: Press Power button to switch on the power. OFF: Press and hold to switch off the power. CD / USB /
HANDS FREE COMMUNICATION (UConnect ) IF EQUIPPED
 IF EQUIPPED") UConnect Hands Free Communications- Complete Instructions HANDS FREE COMMUNICATION (UConnect ) IF EQUIPPED UConnect is a voice-activated, hands-free, in- vehicle communications system. UConnect allows
UConnect Hands Free Communications- Complete Instructions HANDS FREE COMMUNICATION (UConnect ) IF EQUIPPED UConnect is a voice-activated, hands-free, in- vehicle communications system. UConnect allows
Table of Contents Function Keys of Your RF Remote Control Quick Setup Guide Advanced Features Setup Troubleshooting
 Congratulations on your purchase of the AT&T U-verse TV Point Anywhere RF Remote Control. This product has been designed to provide many unique and convenient features to enhance your AT&T U-verse experience.
INSTRUCTIONS Please read all instructions carefully before using
 Car Multimedia System XM-2DTSB79 AUX IR MIC RESET USB INSTRUCTIONS Please read all instructions carefully before using Touch calibration If touch calibration error occurs, you can adjust the touch coordinate
CAR RADIO BLUES OWNER'S MANUAL
 CAR RADIO BLUES OWNER'S MANUAL Contents 1 Contents Radio........................................ Radio - Overview............................. Important information........................ Anti-theft
User s Guide EKT-824
 User s Guide EKT-824 The Communiqué Telephone Station Table of Contents Introduction 3 About This Guide 3 The Basics Answering and Making Calls 4 Answering an External Call 4 Answering an Internal Call
Portable media PORTABLE MEDIA PORTABLE MEDIA CONNECTIONS
 Portable media PORTABLE MEDIA Do not adjust the auxiliary device or allow the device to distract the driver while the vehicle is moving. Driver distraction can lead to accidents causing serious injury
Controls. LCD Display. Tuning Up Time Set and Station Scan
 PR-D8 GB Revision 3 1 1 2 4 5 7 9 10 12 14 16 18 20 22 24 25 26 27 29 31 33 35 36 37 38 Controls Stereo Built-in Microphone (Left Channel) LCD Display Stereo Built-in Microphone (Right channel) Power/Auto
Jabra CRUISER2. User manual. www.jabra.com MUTE VOL - VOL + jabra
 Jabra CRUISER2 VOL - VOL + MUTE jabra User manual www.jabra.com Contents THANK YOU...2 ABOUT YOUR JABRA CRUISER2...2 WHAT YOUR SPEAKERPHONE CAN DO...3 GETTING STARTED...4 CHARGE YOUR SPEAKERPHONE...4 TURNING
SIMPLY CLEVER. ŠkodaAuto CAR RADIO BLUES
 SIMPLY CLEVER ŠkodaAuto CAR RADIO BLUES Contents 1 Contents Radio....................................... Radio - Overview............................. Important information........................ Anti-theft
PERSONAL music center II
 PERSONAL music center II Owner s Guide Guía de usario Notice d utilisation Français English INTRODUCTION Thank you By choosing a Bose PERSONAL music center II, you have opened the door to a variety of
Digital Radio/DAB+/FM RDS digital clock radio with dual alarm Operating instruction
 381SE1D-A Digital Radio/DAB+/FM RDS digital clock radio with dual alarm Operating instruction GB Contents Controls... 2-3 Using the clock radio for the first time... 4 Operating your clock radio... 5 Selecting
Charger / Magnum, Grand Caravan, Avenger, Nitro, (Journey and Caliber 2009 only) Chrysler:
 Chrysler:") MyGIG Multimedia System with GPS Navigation Detailed Information Availability 2008-09 Model Year Vehicles Dodge: Charger / Magnum, Grand Caravan, Avenger, Nitro, (Journey and Caliber 2009 only) Chrysler:
MyGIG Multimedia System with GPS Navigation Detailed Information Availability 2008-09 Model Year Vehicles Dodge: Charger / Magnum, Grand Caravan, Avenger, Nitro, (Journey and Caliber 2009 only) Chrysler:
MyGIG Multimedia System with GPS Navigation
 MyGIG Multimedia System with GPS Navigation Detailed Information Availability 2008-09 Model Year Vehicles Dodge: Charger / Magnum, Grand Caravan, Avenger, Nitro, (Journey and Caliber 2009 only) Chrysler:
Audi Navigation Syste Operating Instr. Audi Navigation System plus (RNS-E) 11.04
 11.04") Audi Navigation Syste Operating Instr Audi Navigation System plus (RNS-E) 11.04 2004 AUDI AG It has always been Audi s policy to continuously improve its products. Audi, therefore, reserves the right to
Audi Navigation Syste Operating Instr Audi Navigation System plus (RNS-E) 11.04 2004 AUDI AG It has always been Audi s policy to continuously improve its products. Audi, therefore, reserves the right to
Using the System ORDER YOUR BELL EXPRESSVU PROGRAMMING. Page 3-1
 Using the System ORDER YOUR BELL EXPRESSVU PROGRAMMING This procedure notifies the Bell ExpressVu Customer Service Call Centre that your system is on-line and installed. You need to have your services
Owner s Manual AWM910 JENSEN AWM910 COMPACT DISC PLAYER RADIO CD COMPACT MUSIC SYSTEM MUTE AUX BAND AUX IN PUSH PUSH PWR VOL ALARM T/F AUD SPK A SPK B
 AWM910 Owner s Manual COMPACT DISC PLAYER PUSH 1 2 3 4 5 6 RPT SCAN RDM H M PUSH PWR VOL ALARM SET ON/OFF EQ T/F AUD RADIO CD COMPACT MUSIC SYSTEM MUTE AUX BAND CD AUX IN A B A+B JENSEN AWM910 Thank You!
2008 Acadia, Enclave, Equinox, Lucerne, OUTLOOK, Torrent and VUE Navigation System M
 2008 Acadia, Enclave, Equinox, Lucerne, OUTLOOK, Torrent and VUE Navigation System M Overview... 1-1 Overview... 1-2 Features and Controls... 2-1 Features and Controls... 2-2 Navigation Audio System...
2009 Cadillac STS/STS-V Navigation System M
 2009 Cadillac STS/STS-V Navigation System M Overview... 1-1 Overview... 1-2 Features and Controls... 2-1 Features and Controls... 2-2 Navigation Audio System... 3-1 Navigation Audio System... 3-2 Voice
Important Safety Instructions
 PR-D7 GB Revision 1 Important Safety Instructions 1. Read these instructions. 2. Keep these instructions. 3. Heed all warnings. 4. Follow all instructions. 5. Do not use this apparatus near water. 6. Clean
Owner's Manual for Voice Control. The Convenient Alternative to Manual Control.
 Owner's Manual for Voice Control. The Convenient Alternative to Manual Control. 2000 BMW AG Munich/Germany Reprinting, including excerpts, only with the written consent of BMW AG, Munich. Part number 01
OPEL ASTRA. Infotainment System
 OPEL ASTRA Infotainment System Contents CD 70 / DVD 90 NAVI... 3 CDC 40 OPERA... 73 CD 30 / CD 30 MP3... 111 Mobile phone portal... 137 CD 70 / DVD 90 NAVI Introduction... 4 Radio... 22 CD Player...
Radio BMR100 INSTRUCTION MANUAL. ENGLISH (Original instructions)
") ENGLISH (Original instructions) INSTRUCTION MANUAL Radio BMR00 WARNING: For your personal safety, READ and UNDERSTAND before using. SAVE THESE INSTRUCTIONS FOR FUTURE REFERENCE. Symbols The following show
ENGLISH (Original instructions) INSTRUCTION MANUAL Radio BMR00 WARNING: For your personal safety, READ and UNDERSTAND before using. SAVE THESE INSTRUCTIONS FOR FUTURE REFERENCE. Symbols The following show
H203D 中文 GB Version 1
 H203D 中 GB文 Version 1 Contents Installing batteries... 4 Using the AC adapter (not supplied)... 5 Setting the clock... 6-7 Updating your radio - DAB... 8 Selecting a station - DAB... 9 Secondary services
SVMi-4 & SVM-400. Voice Mail System. System Administration Manual
 SVMi-4 & SVM-400 Voice Mail System System Administration Manual Contents About this Book 3 How to use this online manual 4 How to print this online manual 5 Feature Descriptions 6 SYSTEM FEATURES 6 AUTO
Printed in China. Issue 4 AT&T 12/11. Message Guard is a registered trademark of Advanced American Telephones.
 www.telephones.att.com 2011 Advanced American Telephones. All Rights Reserved. AT&T and the AT&T logo are trademarks of AT&T Intellectual Property licensed to Advanced American Telephones, San Antonio,
How To Use A 2010 Element
 Element 2 0 1 0 Technology Reference Guide Indicators/Info Display/TPMS Instrument Panel Indicators Indicators briefly appear with each engine start. Red and amber indicators are most critical. Blue and
Controls (front) 1. Loudspeaker 2. Light button 3. Band button 4. Auto tune button 5. Alarm button 6. LCD display
 1. Loudspeaker 2. Light button 3. Band button 4. Auto tune button 5. Alarm button 6. LCD display") GB Contents Controls... 2-4 Mains operation... 5 Operating your radio... 6 Selecting a station DAB... 7 Display modes DAB... 8 Finding new stations - DAB... 9 Secondary services DAB... 9 Manual tuning
GB Contents Controls... 2-4 Mains operation... 5 Operating your radio... 6 Selecting a station DAB... 7 Display modes DAB... 8 Finding new stations - DAB... 9 Secondary services DAB... 9 Manual tuning
2008 Mid-Size Truck Navigation System M
 2008 Mid-Size Truck Navigation System M Overview... 1-1 Overview... 1-2 Features and Controls... 2-1 Features and Controls... 2-2 Navigation Audio System... 3-1 Navigation Audio System... 3-2 Index...
INSTRUCTION MANUAL K100C
 INSTRUCTION MANUAL K100C MP3/WMA CD PLAYER WITH AM/FM RADIO BEFORE USE Before operating the unit, please read this manual thoroughly and retain it for future reference 1. OPERATING INSTRUCTIONS ---------------------------------------------
CAR RADIO SWING OWNER'S MANUAL
 CAR RADIO SWING OWNER'S MANUAL B1Z-6000F Contents 1 Contents General information................. Operating instructions....................... Symbols in the text of the operating instructions Equipment
SIMPLY CLEVER RADIO BLUES OWNER'S MANUAL
 SIMPLY CLEVER RADIO BLUES OWNER'S MANUAL Table of Contents 1 Table of Contents General information...................... 2 Owner's Manual.................................... 2 Symbols in the text of the
MVS - Mini Video Speaker
 MVS - Mini Video Speaker Mini Clock Radio Night Vision Hidden Camera User Manual Spy Tec www.spytecinc.com GETTING STARTED Components Features Powering Up the Device Micro SD Memory Card for Data Storage
2.4 GHz Dual Handset Cordless Telephone Answering System 2255 with Caller ID/Call Waiting
 USER S MANUAL Part 2 2.4 GHz Dual Handset Cordless Telephone Answering System 2255 with Caller ID/Call Waiting Please also read Part 1 Important Product Information AT&T and the globe symbol are registered
/&' 79 7; /% ) &RORU 7HOHYLVLRQ (QJOLVK
 &RORU 7HOHYLVLRQ (QJOLVK") 245U Using the On Screen Displays Many features available on this TV can be accessed via the On Screen Display menu system. Use the remote control as shown below to access and adjust features as desired.
245U Using the On Screen Displays Many features available on this TV can be accessed via the On Screen Display menu system. Use the remote control as shown below to access and adjust features as desired.
SIMPLY CLEVER. Radio Swing Owner's Manual
 SIMPLY CLEVER Radio Swing Owner's Manual Table of Contents General information Owner's Manual 2 Symbols in the text of the operating instructions 2 Equipment overview 2 Important information 2 Anti-theft
ABOUT YOUR SATELLITE RECEIVER
 2 Satellite Receiver ABOUT YOUR SATELLITE RECEIVER This chapter gives you an overview and a description of your satellite receiver. SATELLITE RECEIVER OVERVIEW SINGLE AND DUAL MODES REMOTE CONTROL SATELLITE
Classroom Setup... 2 PC... 2 Document Camera... 3 DVD... 4 Auxiliary... 5. Lecture Capture Setup... 6 Pause and Resume... 6 Considerations...
 Classroom Setup... 2 PC... 2 Document Camera... 3 DVD... 4 Auxiliary... 5 Lecture Capture Setup... 6 Pause and Resume... 6 Considerations... 6 Video Conferencing Setup... 7 Camera Control... 8 Preview
CISCO IP PHONE MODEL 7960 & UNITY VOICEMAIL INCLUDES CISCO CALLMANAGER ATTENDANT CONSOLE. Getting Started Manual
 CISCO IP PHONE MODEL 7960 & UNITY VOICEMAIL INCLUDES CISCO CALLMANAGER ATTENDANT CONSOLE Getting Started Manual... 3 Getting Started... 3 Using LCD Icons... 3 Using the IP Phone Configuration Utility...
Tiny Audio C3. English TINY AUDIO C3. Please read carefully before using this product
 English TINY AUDIO C3 Please read carefully before using this product 1 Safety Instructions: 1. Do not use this radio near water. 2. Clean with dry cloth. 3. Do not block any ventilation openings. 4. Do
THE NEW GENERATION IN TECHNOLOGY. NI-3103A Alarm Clock w/fm Radio ipod & iphone Docking. Operating Instructions
 THE NEW GENERATION IN TECHNOLOGY NI-3103A Alarm Clock w/fm Radio ipod & iphone Docking Operating Instructions Table of Contents Important Safeguards... 3 Parts... 6 Controls... 6 To Set Up... 7 ipod/iphone
DAB1001. Wireless Digital Radio Interface. Installation & User Guide
 DAB1001 Wireless Digital Radio Interface Installation & User Guide Contents Contents... 2 Introduction... 3 Contents of Package... 4 Installation... 5 Product Overview... 5 Installation Procedure... 5
BUSINESS COMMUNICATIONS DIVISION. IP4100 SIP DECT User Guide
 BUSINESS COMMUNICATIONS DIVISION IP4100 SIP DECT User Guide TOSHIBA IP4100 DECT HANDSET END USER GUIDE FEATURES Toshiba IP4100 DECT Handset Features 2.0 inch colour TFT back-lit display Li-ion battery
RCR-22 AM/MW 2 bands Digital Clock Radio instruction manual
 RCR-22 AM/MW 2 bands Digital Clock Radio instruction manual Important safety instructions 1. Read and understand all safety and operating instructions before the radio is operated. 2. Retain instruction:
Introduction 1 The system 1 The meter 2 The display 3 The mode 3 The measurement 4 Coding the meter 4 How to obtain a drop of blood 6 Application of
 Introduction 1 The system 1 The meter 2 The display 3 The mode 3 The measurement 4 Coding the meter 4 How to obtain a drop of blood 6 Application of the blood 7 Procedure to test glucose 7 Procedure to
DVR GUIDE. Using your DVR/Multi-Room DVR. 1-866-WAVE-123 wavebroadband.com
 DVR GUIDE Using your DVR/Multi-Room DVR 1-866-WAVE-123 wavebroadband.com Table of Contents Control Live TV... 4 Playback Controls... 5 Remote Control Arrow Buttons... 5 Status Bar... 5 Pause... 6 Rewind...
ŠkodaAuto CAR RADIO SWING SIMPLY CLEVER
 ŠkodaAuto CAR RADIO SWING SIMPLY CLEVER Contents 1 Contents General information................. Equipment overview.......................... Important information........................ Anti-theft protection..........................
HP Mobile Remote Control (Select Models Only) User Guide
 User Guide") HP Mobile Remote Control (Select Models Only) User Guide Copyright 2008 Hewlett-Packard Development Company, L.P. Windows and Windows Vista are either trademarks or registered trademarks of Microsoft Corporation
HP Mobile Remote Control (Select Models Only) User Guide Copyright 2008 Hewlett-Packard Development Company, L.P. Windows and Windows Vista are either trademarks or registered trademarks of Microsoft Corporation
Audio/Visual System User Operations Manual 100 Seat Lecture Hall Enhanced
 Audio/Visual System User Operations Manual 100 Seat Lecture Hall Enhanced 1 of 24 Table of Contents Table of Contents... 2 Overview... 3 Capabilities:... 3 Control System - Touch Panel Logo Page:... 4
Moxi Whole Home HD DVR QUICK REFERENCE GUIDE
 Moxi Whole Home HD DVR QUICK REFERENCE GUIDE Let s get started with learning more about what your Moxi System can do. This is a quick reference guide to get you up and running. Contents: Menu Quick Look
Car Radio CD USB SD Bluetooth
 Car Radio CD USB SD Bluetooth www.blaupunkt.com Helsinki 220 BT 1 011 200 210 / 1 011 200 211 London 120 1 011 300 311 / 1 011 300 312 Sydney 220 BT 1 011 200 110 / 1 011 200 111 Melbourne 120 1 011 300
CAR RADIO STOCKHOLM 230 DAB 1 011 402 220 001. Enjoy it. Operating and installation instructions
 CAR RADIO STOCKHOLM 230 DAB 1 011 402 220 001 Enjoy it. Operating and installation instructions Controls 1 2 3 4 5 6 7 8 9 16 15 14 13 12 11 10 1 button Unlock the detachable control panel 2 MENU button
UCONNECT VOICE COMMANDS QUICK GUIDE
 UCONNECT VOICE COMMANDS QUICK GUIDE For Uconnect 4.3/RHA, Uconnect 4.3S/REB, Uconnect 8.4/RE2 and Uconnect 8.4N/RB5 how to speak uconnect With this quick guide of commands and tips you ll be speaking your
2008 Chevrolet Corvette Navigation System M
 2008 Chevrolet Corvette Navigation System M Overview... 1-1 Overview... 1-2 Features and Controls... 2-1 Features and Controls... 2-2 Navigation Audio System... 3-1 Navigation Audio System... 3-2 Voice
Model : TCM-3 Instruction Manual. Compact Disc CD/CD-R/CD-RW/MP3 Player with PLL MW/FM Radio, Radio Data System
 Model : TCM-3 Instruction Manual Compact Disc CD/CD-R/CD-RW/MP3 Player with PLL MW/FM Radio, Radio Data System LOCATIONS OF CONTROLS 1. POWER ON/OFF 2. FUNCTION SELECT BUTTON 3. VOL UP/VOL DOWN 4. MODE
For your safety, read carefully and keep in this vehicle. 2014 Infiniti Navigation System Owner s Manual
 For your safety, read carefully and keep in this vehicle. 2014 Infiniti Navigation System Owner s Manual INFINITI NAVIGATION SYSTEM HELPDESK CONTACT INFORMATION For assistance or inquiries about the INFINITI
TR7322U-OR RDS / MP3-USB TUNER (24 Volt)
") www.vdo.com TR7322U-OR RDS / MP3-USB TUNER (24 Volt) OWNER'S MANUAL Safety Information Safety Information Thank you for purchasing this product, please read the manual carefully before operating, and reserve
www.vdo.com TR7322U-OR RDS / MP3-USB TUNER (24 Volt) OWNER'S MANUAL Safety Information Safety Information Thank you for purchasing this product, please read the manual carefully before operating, and reserve
High Power Receiver CR-W400U Operating Instructions
 High Power Receiver CR-W400U Operating Instructions Please read these instructions carefully before using this product and save this manual for future use. Panasonic welcomes you to our ever growing family
DX-395. FM/AM/SW1/SW2 PLL Synthesized Receiver OWNER S MANUAL. Cat. No. 20-225. Please read before using this equipment.
 20-225.fm Page 1 Wednesday, August 4, 1999 10:07 AM Cat. No. 20-225 OWNER S MANUAL Please read before using this equipment. DX-395 FM/AM/SW1/SW2 PLL Synthesized Receiver 20-225.fm Page 2 Wednesday, August
Quick GUIDE Web Edition
 S60 Quick GUIDE Web Edition WELCOME TO THE GLOBAL FAMILY OF VOLVO OWNERS! Getting to know your new vehicle is an exciting experience. This Quick Guide provides a brief overview of the most common features
DR 70 Portable Digital DAB+ and FM Radio Receiver User Manual English Please read carefully before using this product
 DR 70 Portable Digital DAB+ and FM Radio Receiver User Manual Please read carefully before using this product 15 1 Table of Contents 1 Table of Contents... 16 2 Safety Instructions:... 17 3 Specification:...
Mini Hi-Fi Component System
 3-860-707-14(1) Mini Hi-Fi Component System Operating Instructions Owner s Record The model and serial numbers are located on the rear panel. Record the serial number in the space provided below. Refer
Kanguru Micro MP3 PRO USB2.0 User s Manual
 Kanguru Micro MP3 PRO USB2.0 User s Manual MP3/WMA Player + Digital Voice Recorder FM Tuner + USB Flash Drive Copyright 2005, All Rights Reserved. This manual applies to 1.1 or later versions of the Kanguru
Eclipse 180 User s Manual
 Eclipse 180 User s Manual Congratulations on purchasing your Eclipse Personal Media Player! To get the most out of your purchase, please take the time to carefully read through this manual. Foreword If
Marantz PMD660 Digital Recorder Guide
 Marantz PMD660 Digital Recorder Guide August 2005 Set Up Inserting a Compact Flash Card The PMD660 records onto CF or Compact Flash Cards. To insert a CF card: 1. Open the CF Card Door on the front side
PR-D9W. GB Version 1
 PR-D9W Version 1 Table of contents Important safety instructions... 2-3 Introduction... 4 Controls... 5-8 Using your weather alert radio for the first time... 9 Operating your radio Search tuning AM/FM...
Always there to help you. Register your product and get support at www.philips.com/welcome PD7001B. Question? Contact Philips.
 Always there to help you Register your product and get support at www.philips.com/welcome Question? Contact Philips PD7001B User manual Contents 1 Important 3 Safety and notice 3 Safety 3 Compliance 4
DAB/FM personal digital radio with OLED display
 DAB/FM personal digital radio with OLED display ROBERTS Enjoy Listening Please read this manual before use Contents Controls... 3-4 Using the AC adaptor... 5-6 Keylock function... 7-8 Navigation... 9-10
Lenovo Miix 2 8. User Guide. Read the safety notices and important tips in the included manuals before using your computer.
 Lenovo Miix 2 8 User Guide Read the safety notices and important tips in the included manuals before using your computer. Notes Before using the product, be sure to read Lenovo Safety and General Information
REC FIM LOCKPICK INSTALLATION OPTIONS
 REC FIM LOCKPICK INSTALLATION OPTIONS TM PLUG INTO RADIO PLUG WHITE CONNECTOR INTO RADIO PLUG AND PLAY RADIO CONNECTORS UNPLUG ORIGINAL RADIO GRAY CONNECTOR THEN PLUG IN HERE AFTERMARKET FRONT CAMERA VIDEO
STEREO BLUETOOTH WIRELESS SPORTS In-Ear Headphones
 STEREO BLUETOOTH WIRELESS SPORTS In-Ear Headphones USER MANUAL model: X7 PACKAGE CONTENTS EN X7 Stereo Bluetooth Wireless Sports In-Ear Headphones Micro-USB charging cable Carrying case 3 pairs of eartips
USB Recorder. User s Guide. Sold by: Toll Free: (877) 389-0000
 389-0000") USB Recorder User s Guide Sold by: http://www.twacomm.com Toll Free: (877) 389-0000 Table of Contents 1. Getting Started 1-1...First Login 1-2...Creating a New User 2. Administration 2-1...General Administration
USB Recorder User s Guide Sold by: http://www.twacomm.com Toll Free: (877) 389-0000 Table of Contents 1. Getting Started 1-1...First Login 1-2...Creating a New User 2. Administration 2-1...General Administration
Register your product and get support at www.philips.com/welcome LFH0645 LFH0648. EN User manual
 Register your product and get support at www.philips.com/welcome LFH0645 LFH0648 EN User manual Table of contents 1 Welcome 3 Product highlights 3 2 Important 4 Safety 4 Hearing safety 4 Disposal of your
INSTRUCTION MANUAL CD/MP3 PLAYER WITH FM RADIO AND USB READER
 English INSTRUCTION MANUAL CD/MP3 PLAYER WITH FM RADIO AND USB READER Please read and follow these instructions before using your unit. OVERVIEW OF THE PLAYER 1 2 3 10 8 4 5 6 9 7 11 12 13 14 15 16 17
ATS-505. GB Version 1
 ATS-505 GB Version 1 Control Locations Power/Sleep Power On/off/Alarm off/sleep function Display Switch between radio frequency and time while radio is power on Mode Mode set up (please see below mode
BMW of North America, LLC Woodcliff Lake, New Jersey 07677 Printed in U.S.A. 10/05 84 11 0 409 345
 Telephone Users Manual For BMW Assist With Bluetooth Wireless Technology 05/06 X3, X5 & Z4 05 3 Series (E46) The Ultimate Driving Machine BMW of North America, LLC Woodcliff Lake, New Jersey 07677 Printed
How To Use An Easypad On A Pc Or Macbook Or Ipad (For Pc)
") User Guide Congratulations on your new EasyPad 1000. Please follow the instructions in this manual carefully. Statement: If the final version of this product has any differences from the description of
User Guide Congratulations on your new EasyPad 1000. Please follow the instructions in this manual carefully. Statement: If the final version of this product has any differences from the description of
Jabra FREEWAY. User manual. www.jabra.com
 Jabra FREEWAY User manual www.jabra.com CONTENTS THANK YOU...2 ABOUT YOUR...2 WHAT YOUR SPEAKERPHONE CAN DO...3 GETTING STARTED...4 CHARGE YOUR SPEAKERPHONE...4 TURNING YOUR SPEAKERPHONE ON AND OFF...5