Encrypting Data at Rest in Cloudera Manager
|
|
|
- Angelica Wiggins
- 2 years ago
- Views:
Transcription
1 7.4.4 Encrypting Data at Rest in Date published: Date modified:
2 Legal Notice Cloudera Inc All rights reserved. The documentation is and contains Cloudera proprietary information protected by copyright and other intellectual property rights. No license under copyright or any other intellectual property right is granted herein. Copyright information for Cloudera software may be found within the documentation accompanying each component in a particular release. Cloudera software includes software from various open source or other third party projects, and may be released under the Apache Software License 2.0 ( ASLv2 ), the Affero General Public License version 3 (AGPLv3), or other license terms. Other software included may be released under the terms of alternative open source licenses. Please review the license and notice files accompanying the software for additional licensing information. Please visit the Cloudera software product page for more information on Cloudera software. For more information on Cloudera support services, please visit either the Support or Sales page. Feel free to contact us directly to discuss your specific needs. Cloudera reserves the right to change any products at any time, and without notice. Cloudera assumes no responsibility nor liability arising from the use of products, except as expressly agreed to in writing by Cloudera. Cloudera, Cloudera Altus, HUE, Impala, Cloudera Impala, and other Cloudera marks are registered or unregistered trademarks in the United States and other countries. All other trademarks are the property of their respective owners. Disclaimer: EXCEPT AS EXPRESSLY PROVIDED IN A WRITTEN AGREEMENT WITH CLOUDERA, CLOUDERA DOES NOT MAKE NOR GIVE ANY REPRESENTATION, WARRANTY, NOR COVENANT OF ANY KIND, WHETHER EXPRESS OR IMPLIED, IN CONNECTION WITH CLOUDERA TECHNOLOGY OR RELATED SUPPORT PROVIDED IN CONNECTION THEREWITH. CLOUDERA DOES NOT WARRANT THAT CLOUDERA PRODUCTS NOR SOFTWARE WILL OPERATE UNINTERRUPTED NOR THAT IT WILL BE FREE FROM DEFECTS NOR ERRORS, THAT IT WILL PROTECT YOUR DATA FROM LOSS, CORRUPTION NOR UNAVAILABILITY, NOR THAT IT WILL MEET ALL OF CUSTOMER S BUSINESS REQUIREMENTS. WITHOUT LIMITING THE FOREGOING, AND TO THE MAXIMUM EXTENT PERMITTED BY APPLICABLE LAW, CLOUDERA EXPRESSLY DISCLAIMS ANY AND ALL IMPLIED WARRANTIES, INCLUDING, BUT NOT LIMITED TO IMPLIED WARRANTIES OF MERCHANTABILITY, QUALITY, NON-INFRINGEMENT, TITLE, AND FITNESS FOR A PARTICULAR PURPOSE AND ANY REPRESENTATION, WARRANTY, OR COVENANT BASED ON COURSE OF DEALING OR USAGE IN TRADE.
3 Contents iii Contents Encrypting Data at Rest... 5 Data at Rest Encryption Reference Architecture...5 Data at Rest Encryption Requirements... 7 Resource Planning for Data at Rest Encryption Key Concepts and Architecture...12 Keystores and the Hadoop Key Management Server KMS Solutions...13 Encryption Zones and Keys Accessing Files Within an Encryption Zone Optimizing Performance for Enabling HDFS Encryption Using the Wizard...18 Enabling HDFS Encryption Using Navigator Key Trustee Server...18 Enabling HDFS Encryption Using a Java KeyStore Managing Encryption Keys and Zones...24 Validating Hadoop Key Operations Creating Encryption Zones...24 Adding Files to an Encryption Zone...25 Deleting Encryption Zones...25 Backing Up Encryption Keys...26 Rolling Encryption Keys Re-encrypting Encrypted Data Encryption Keys (EDEKs) Configuring the Key Management Server (KMS)...32 Configuring the KMS Using Securing the Key Management Server (KMS) Enabling Kerberos Authentication for the KMS Configuring TLS/SSL for the KMS...34 Migrating Keys from a Java KeyStore to Cloudera Navigator Key Trustee Server...35 Migrating a Key Trustee KMS Server Role Instance to a New Host Assumptions and Requirements Migrate a Key Trustee KMS Server Role Instance to a New Host Migrating ACLs from Key Trustee KMS to Ranger KMS Key Trustee KMS operations not supported by Ranger KMS ACLs supported by Ranger KMS and Ranger KMS Mapping Configuring CDP Services for HDFS Encryption Transparent Encryption Recommendations for HBase Transparent Encryption Recommendations for Hive...45 Transparent Encryption Recommendations for Hue Transparent Encryption Recommendations for Impala...47 Transparent Encryption Recommendations for MapReduce and YARN Transparent Encryption Recommendations for Search...48
4 Transparent Encryption Recommendations for Spark Transparent Encryption Recommendations for Sqoop Migrating Keys from a Java KeyStore to Cloudera Navigator Key Trustee Server...50 Configuring CDP Services for HDFS Encryption HBase Hive Hue Impala...54 MapReduce and YARN...55 Search Spark...56 Sqoop...57 Using the Ranger Key Management Service...57 Accessing the Ranger KMS Web UI List and Create Keys Roll Over an Existing Key...66 Delete a Key... 70
5 Encrypting Data at Rest Encrypting Data at Rest Cloudera clusters can use a combination of data at rest encryption mechanisms, including HDFS transparent encryption and Cloudera Navigator Encrypt. Both of these data at rest encryption mechanisms can be augmented with key management using Cloudera Navigator Key Trustee Server and Cloudera Navigator Key HSM.. Before configuring encryption for data at rest, familiarize yourself with the requirements in "Data at Rest Encryption Requirements". Related Information Data at Rest Encryption Requirements Data at Rest Encryption Reference Architecture The following diagram illustrates the supported architecture for deploying Cloudera Navigator encryption for data at rest: 5

6 Data at Rest Encryption Reference Architecture To isolate Key Trustee Server from other CDP services, you must deploy Key Trustee Server on dedicated hosts in a separate cluster in. Deploy Key Trustee KMS on dedicated hosts in the same cluster as the CDP services that require access to Key Trustee Server. This provides the following benefits: You can restart your CDP cluster without restarting Key Trustee Server, avoiding interruption to other clusters or clients that use the same Key Trustee Server instance. You can manage the Key Trustee Server upgrade cycle independently of other cluster components. You can limit access to the Key Trustee Server hosts to authorized key administrators only, reducing the attack surface of the system. Resource contention is reduced. Running Key Trustee Server and Key Trustee KMS services on dedicated hosts prevents other cluster services from reducing available resources (such as CPU and memory) and creating bottlenecks. If you are using virtual machines for the Key Trustee Server or Key Trustee KMS hosts, see "Resource Planning for Data at Rest Encryption". 6
7 Data at Rest Encryption Requirements Related Information Resource Planning for Data at Rest Encryption Data at Rest Encryption Requirements Encryption comprises several components, each with its own requirements. Data at rest encryption protection can be applied at a number of levels within Hadoop: OS filesystem-level Network-level HDFS-level (protects both data at rest and in transit) For more information on the components, concepts, and architecture for encrypting data at rest, see "Encrypting Data at Rest". Product Compatibility Matrix See "Product Compatibility Matrix for Cloudera Navigator Encryption" for the individual compatibility matrices for each Cloudera Navigator encryption component. Entropy Requirements Cryptographic operations require entropy to ensure randomness. You can check the available entropy on a Linux system by running the following command: cat /proc/sys/kernel/random/entropy_avail The output displays the entropy currently available. Check the entropy several times to determine the state of the entropy pool on the system. If the entropy is consistently low (500 or less), you must increase it by installing rngtools and starting the rngd service. Run the following commands on RHEL 6-compatible systems: sudo sudo sudo sudo yum install rng-tools echo 'EXTRAOPTIONS="-r /dev/urandom"' >> /etc/sysconfig/rngd service rngd start chkconfig rngd on For RHEL 7, run the following commands: sudo yum install rng-tools cp /usr/lib/systemd/system/rngd.service /etc/systemd/system/ sed -i -e 's/execstart=\/sbin\/rngd -f/execstart=\/sbin\/rngd -f -r \/dev\/u random/' /etc/systemd/system/rngd.service systemctl daemon-reload systemctl start rngd systemctl enable rngd Make sure that the hosts running Key Trustee Server, Key Trustee KMS, and Navigator Encrypt have sufficient entropy to perform cryptographic operations. Key Trustee Server Requirements Recommended Hardware and Supported Distributions Key Trustee Server must be installed on a dedicated server or virtual machine (VM) that is not used for any other purpose. The backing PostgreSQL database must be installed on the same host as the Key Trustee Server, and must 7
8 Data at Rest Encryption Requirements not be shared with any other services. For high availability, the active and passive Key Trustee Servers must not share physical resources. See "Resource Planning for Data at Rest Encryption" for more information. The recommended minimum hardware specifications are as follows: Processor: 1 GHz 64-bit quad core Memory: 8 GB RAM Storage: 20 GB on moderate- to high-performance disk drives For information on the supported Linux distributions, see "Product Compatibility Matrix for Cloudera Navigator Encryption". Requirements Installing and managing Key Trustee Server using requires and higher. Key Trustee Server does not require Cloudera Navigator Audit Server or Metadata Server. umask Requirements Key Trustee Server installation requires the default umask of Network Requirements For new Key Trustee Server installations (5.4.0 and higher) and migrated upgrades (see "Cloudera Enterprise Upgrade Guide"> for more information), Key Trustee Server requires the following TCP ports to be opened for inbound traffic: Clients connect to this port over HTTPS (PostgreSQL) The passive Key Trustee Server connects to this port for database replication. For upgrades that are not migrated to the CherryPy web server, the pre-upgrade port settings are preserved: 80 Clients connect to this port over HTTP to obtain the Key Trustee Server public key. 443 (HTTPS) Clients connect to this port over HTTPS (PostgreSQL) The passive Key Trustee Server connects to this port for database replication. TLS Certificate Requirements To ensure secure network traffic, Cloudera recommends obtaining Transport Layer Security (TLS) certificates specific to the hostname of your Key Trustee Server. To obtain the certificate, generate a Certificate Signing Request (CSR) for the fully qualified domain name (FQDN) of the Key Trustee Server host. The CSR must be signed by a trusted Certificate Authority (CA). After the certificate has been verified and signed by the CA, the Key Trustee Server TLS configuration requires: The CA-signed certificate The private key used to generate the original CSR The intermediate certificate/chain file (provided by the CA) Cloudera recommends not using self-signed certificates. If you use self-signed certificates, you must use the -skip-ssl-check parameter when registering Navigator Encrypt with the Key Trustee Server. This skips TLS hostname validation, which safeguards against certain network-level attacks. For more information regarding insecure mode, see "Registering Cloudera Navigator Encrypt with Key Trustee Server>Registration Options". 8
9 Data at Rest Encryption Requirements Key Trustee KMS Requirements Recommended Hardware and Supported Distributions The recommended minimum hardware specifications are as follows: Processor: 2 GHz 64-bit quad core Memory: 16 GB RAM Storage: 40 GB on moderate- to high-performance disk drives For information on the supported Linux distributions, see "Product Compatibility Matrix for Cloudera Navigator Encryption". The Key Trustee KMS workload is CPU-intensive. Cloudera recommends using machines with capabilities equivalent to your NameNode hosts, with Intel CPUs that support AES-NI for optimum performance. Also, Cloudera strongly recommends that you enable TLS for both the HDFS and the Key Trustee KMS services to prevent the passage of plain text key material between the KMS and HDFS data nodes. Key HSM Requirements The following are prerequisites for installing Navigator Key HSM: Oracle Java Runtime Environment (JRE) 7 or higher with Java Cryptography Extension (JCE) Unlimited Strength Jurisdiction Policy Files: JCE for Java SE 7 JCE for Java SE 8 A supported Linux distribution. See "Product Compatibility Matrix for Cloudera Navigator Encryption". A supported HSM device: SafeNet Luna HSM firmware version: HSM software version: SafeNet KeySecure HSM firmware version: HSM software version: Thales nsolo, nconnect HSM firmware version: Client software version: cam136 Key Trustee Server 3.8 or higher Important: You must install Key HSM on the same host as Key Trustee Server. Root access is required to install Navigator Key HSM. Navigator Encrypt Requirements Operating System Requirements For supported Linux distributions, see "Product Compatibility Matrix for Cloudera Navigator Encryption". Supported command-line interpreters: sh (Bourne) bash (Bash) dash (Debian) 9
10 Data at Rest Encryption Requirements Note: Navigator Encrypt does not support installation or use in chroot environments. Network Requirements For new Navigator Key Trustee Server (5.4.0 and higher) installations, Navigator Encrypt initiates TCP traffic over port (HTTPS) to the Key Trustee Server. For upgrades and Key Trustee Server versions lower than 5.4.0, Navigator Encrypt initiates TCP traffic over ports 80 (HTTP) and 443 (HTTPS) to the Navigator Key Trustee Server. Internet Access You must have an active connection to the Internet to download many package dependencies, unless you have internal repositories or mirrors containing the dependent packages. Maintenance Window Data is not accessible during the encryption process. Plan for system downtime during installation and configuration. Administrative Access To enforce a high level of security, all Navigator Encrypt commands require administrative (root) access (including installation and configuration). If you do not have administrative privileges on your server, contact your system administrator before proceeding. Package Dependencies Navigator Encrypt requires these packages, which are resolved by your distribution package manager during installation: dkms keyutils ecryptfs-utils libkeytrustee navencrypt-kernel-module openssl lsof gcc cryptsetup These packages may have other dependencies that are also resolved by your package manager. Installation works with gcc, gcc3, and gcc4. Related Information Encrypting Data at Rest Resource Planning for Data at Rest Encryption Product Compatibility Matrix for Cloudera Navigator Encryption Registering Cloudera Navigator Encrypt with Key Trustee Server AES-NI JCE for Java SE 7 JCE for Java SE 8 10
11 Resource Planning for Data at Rest Encryption Resource Planning for Data at Rest Encryption For production environments, you must configure high availability for: Key Trustee Server Key Trustee KMS Key Trustee Server and Key Trustee KMS HA Planning For high availability, you must provision two dedicated Key Trustee Server hosts and at least two dedicated Key Trustee KMS hosts, for a minimum of four separate hosts. Do not run multiple Key Trustee Server or Key Trustee KMS services on the same physical host, and do not run these services on hosts with other cluster services. Doing so causes resource contention with other important cluster services and defeats the purpose of high availability. See "Data at Rest Encryption Reference Architecture" for more information. The Key Trustee KMS workload is CPU intensive. Cloudera recommends using machines with capabilities equivalent to your NameNode hosts, with Intel CPUs that support AES-NI for optimum performance. Make sure that each host is secured and audited. Only authorized key administrators should have access to them. Red Hat provides security guides for RHEL: RHEL 6 Security Guide RHEL 7 Security Guide For hardware sizing information, see "Data at Rest Encryption Requirements" for recommendations for each Cloudera Navigator encryption component. For deployments, deploy Key Trustee Server in its own dedicated cluster. Deploy Key Trustee KMS in each cluster that uses Key Trustee Server. See "Data at Rest Encryption Reference Architecture" for more information. For information about enabling Key Trustee Server high availability, refer to "Cloudera Navigator Key Trustee Server High Availability". For information about enabling Key Trustee KMS high availability, refer to "Enabling Key Trustee KMS High Availability". Virtual Machine Considerations If you are using virtual machines, make sure that the resources (such as virtual disks, CPU, and memory) for each Key Trustee Server and Key Trustee KMS host are allocated to separate physical hosts. Hosting multiple services on the same physical host defeats the purpose of high availability, because a single machine failure can take down multiple services. To maintain the security of the cryptographic keys, make sure that all copies of the virtual disk (including any backend storage arrays, backups, snapshots, and so on) are secured and audited with the same standards you apply to the live data. Related Information Data at Rest Encryption Requirements Data at Rest Encryption Reference Architecture RHEL 6 Security Guide RHEL 7 Security Guide AES-NI Cloudera Navigator Key Trustee Server High Availability Enabling Key Trustee KMS High Availability 11
12 Data encryption is mandatory for many government, financial, and regulatory entities, worldwide, to meet privacy and other security requirements. For example, the card payment industry has adopted the Payment Card Industry Data Security Standard (PCI DSS) for information security. Other examples include requirements imposed by United States government's Federal Information Security Management Act (FISMA) and Health Insurance Portability and Accountability Act (HIPAA). Encrypting data stored in HDFS can help your organization comply with such regulations. Transparent encryption for HDFS implements transparent, end-to-end encryption of data read from and written to HDFS blocks across your cluster. Transparent means that end-users are unaware of the encryption/decryption processes, and end-to-end means that data is encrypted at-rest and in-transit (see the Cloudera Engineering Blog post for complete details). Note: is not the same as TLS encryption. Clusters configured TLS/SSL encrypt network communications throughout the cluster. Depending on the type of services your cluster supports, you may want to configure both and TLS/SSL for the cluster. HDFS encryption has these capabilities: Only HDFS clients can encrypt or decrypt data. Key management is external to HDFS. HDFS cannot access unencrypted data or encryption keys. Administration of HDFS and administration of keys are separate duties encompassed by distinct user roles (HDFS administrator, Key Administrator), thus ensuring that no single user has unrestricted access to both data and keys. The operating system and HDFS interact using encrypted HDFS data only, mitigating threats at the OS- and filesystem-level. HDFS uses the Advanced Encryption Standard-Counter mode (AES-CTR) encryption algorithm. AES-CTR supports a 128-bit encryption key (default), or can support a 256-bit encryption key when Java Cryptography Extension (JCE) unlimited strength JCE is installed. HDFS encryption has been designed to take advantage of the AES-NI instruction set, a hardware-based encryption acceleration technique, so your cluster performance should not adversely affected by configuring encryption. (The AES-NI instruction set can be an order of magnitude faster than software implementations of AES.) However, you may need to update cryptography libraries on your HDFS and MapReduce client hosts to use the acceleration mechanism. Related Information Transparent Encryption in HDFS AES-NI Standard Instructions Java Cryptography Extension (JCE) Unlimited Strength Jurisdiction Policy Files 7 Download Optimizing Performance for Key Concepts and Architecture HDFS must be integrated with an external enterprise-level keystore. The Hadoop Key Management server serves as a proxy between HDFS clients and the keystore. The keystore can be either the Cloudera Navigator Key Trustee Server or a support Hardware Security Module. HDFS transparent encryption involves the creation of an encryption zone, which is a directory in HDFS whose contents will be automatically encrypted on write and decrypted on read. Each encryption zone is associated with a key (EZ Key) specified by the key administrator when the zone is created. The EZ keys are stored on the external keystore. 12
13 Keystores and the Hadoop Key Management Server Integrating HDFS with an external, enterprise-level keystore is the first step to deploying transparent encryption. This is because separation of duties between a key administrator and an HDFS administrator is a very important aspect of this feature. However, most keystores are not designed for the encrypt/decrypt request rates seen by Hadoop workloads. This led to the development of a new service, called the Hadoop Key Management Server (KMS), which serves as a proxy between HDFS clients and the backing keystore. Both the keystore and Hadoop KMS must use Hadoop's KeyProvider API to interact with each other and with HDFS clients. While HDFS encryption can be used with a local Java KeyStore for key management, Cloudera does not recommend this for production environments where a more robust and secure key management solution should be used. Cloudera offers the following two options for enterprise-grade key management: Cloudera Navigator Key Trustee Server is a key store for managing encryption keys. To integrate with the Navigator Key Trustee Server, Cloudera provides a custom KMS service, Key Trustee KMS. Hardware security modules (HSM) are third-party appliances that provide the highest level of security for keys. The diagram below illustrates how HDFS clients and the NameNode interact with an enterprise keystore through the Hadoop Key Management Server. The keystore can be either the Cloudera Navigator Key Trustee Server or a support HSM. KMS Solutions When selecting a Key Management Server (KMS), you must consider the key management and encryption requirements for your cluster. The following are the various KMS solutions available, and the criteria often used for selecting each. Ranger KMS with database Choose Ranger KMS with database if: Enterprise-grade key management is required Encryption zone key protection by an HSM is not required Ranger KMS with Key Trustee Server Choose KT KMS with Key Trustee Server and Key HSM if: Enterprise-grade key management is required Encryption zone key protection by an HSM (as root of trust) is required Performance for encryption zone key operations is critical 13
, which is a directory in HDFS whose contents will be automatically")
14 Ranger KMS with Key Trustee Server and Key HSM Choose Key HSM if: Enterprise-grade key management is required Encryption zone keys must be stored only on the HSM Performance for encryption zone key operations is not critical Encryption Zones and Keys HDFS transparent encryption introduces the concept of an encryption zone (EZ), which is a directory in HDFS whose contents will be automatically encrypted on write and decrypted on read. Encryption zones always start off as empty directories, and tools such as distcp with the -skipcrccheck -u pdate flags can be used to add data to a zone. (These flags are required because encryption zones are being used.) Every file and subdirectory copied to an encryption zone will be encrypted. Note: An encryption zone cannot be created on top of an existing directory. Each encryption zone is associated with a key (EZ Key) specified by the key administrator when the zone is created. EZ keys are stored on a backing keystore external to HDFS. Each file within an encryption zone has its own encryption key, called the Data Encryption Key (DEK). These DEKs are encrypted with their respective encryption zone's EZ key, to form an Encrypted Data Encryption Key (EDEK). The following diagram illustrates how encryption zone keys (EZ keys), data encryption keys (DEKs), and encrypted data encryption keys (EDEKs) are used to encrypt and decrypt files. EDEKs are stored persistently on the NameNode as part of each file's metadata, using HDFS extended attributes. EDEKs can be safely stored and handled by the NameNode because the hdfs user does not have access to the EDEK's encryption keys (EZ keys). Even if HDFS is compromised (for example, by gaining unauthorized access to a 14
.")
15 superuser account), a malicious user only gains access to the encrypted text and EDEKs. EZ keys are controlled by a separate set of permissions on the KMS and the keystore. An EZ key can have multiple key versions, where each key version has its own distinct key material (that is, the portion of the key used during encryption and decryption). Key rotation is achieved by bumping up the version for an EZ key. Per-file key rotation is then achieved by re-encrypting the file's DEK with the new version of the EZ key to create new EDEKs. HDFS clients can identify an encryption key either by its key name, which returns the latest version of the key, or by a specific key version. Related Information Managing Encryption Keys and Zones Extended Attributes in HDFS Accessing Files Within an Encryption Zone To encrypt a new file, the HDFS client requests a new EDEK from the NameNode. The NameNode then asks the KMS to decrypt it with the encryption zone's EZ key. This decryption results in a DEK, which is used to encrypt the file. 15

16 The diagram above depicts the process of writing a new encrypted file. Note that the EDEK cache on the NameNode is populated in the background. Since it is the responsibility of KMS to create EDEKs, using a cache avoids having to call the KMS for each create request. The client can request new EDEKs directly from the NameNode. To decrypt a file, the HDFS client provides the NameNode with the file's EDEK and the version number of the EZ key that was used to generate the EDEK. The NameNode requests the KMS to decrypt the file's EDEK with the encryption zone's EZ key, which involves checking that the requesting client has permission to access that particular version of the EZ key. Assuming decryption of the EDEK is successful, the client then uses this DEK to decrypt the file. Encryption and decryption of EDEKs takes place entirely on the KMS. More importantly, the client requesting creation or decryption of an EDEK never handles the EZ key. Only the KMS can use EZ keys to create and decrypt EDEKs as requested. It is important to note that the KMS does not store any keys, other than temporarily in its cache. It is up to the enterprise keystore to be the authoritative storage for keys, and to ensure that keys are never lost, as a lost key is equivalent to introducing a security hole. For production use, Cloudera recommends you deploy two or more redundant enterprise key stores. Optimizing Performance for CDP implements the Advanced Encryption Standard New Instructions (AES-NI), which provide substantial performance improvements. To get these improvements, you need a recent version of libcrypto.so on HDFS and MapReduce client hosts -- that is, any host from which you originate HDFS or MapReduce requests. Many OS versions have an older version of the library that does not support AES-NI. The instructions that follow tell you what you need to do for each OS version that CDP supports. Warning: To ensure that HDFS encryption functions as expected, the steps described in this section are mandatory for production use. RHEL/CentOS 6.5 or later The installed version of libcrypto.so supports AES-NI, but you need to install the openssl-devel package on all clients: sudo yum install openssl-devel RHEL/CentOS 6.4 or earlier 6.x versions, or SLES 11 16
17 Download and extract a newer version of libcrypto.so from a CentOS 6.5 repository and install it on all clients in /var/lib/hadoop/extra/native/: 1. Download the latest version of the openssl package. For example: wget el6.x86_64.rpm The libcrypto.so file in this package can be used on SLES 11 as well as RHEL/CentOS. 2. Decompress the files in the package, but do not install it: rpm2cpio openssl-1.0.1e-30.el6.x86_64.rpm cpio -idmv 3. If you are using parcels, create the /var/lib/hadoop/extra/native/ directory: sudo mkdir -p /var/lib/hadoop/extra/native 4. Copy the shared library into /var/lib/hadoop/extra/native/. Name the target file libcrypto.so, with no suffix at the end, exactly as in the command that follows. sudo cp./usr/lib64/libcrypto.so.1.0.1e /var/lib/hadoop/extra/native/lib crypto.so Debian Wheezy The installed version of libcrypto.so supports AES-NI, but you need to install the libssl-devel package on all clients: sudo apt-get install libssl-dev Ubuntu Precise and Ubuntu Trusty Install the libssl-devel package on all clients: sudo apt-get install libssl-dev Testing if encryption optimization works To verify that a client host is ready to use the AES-NI instruction set optimization for HDFS encryption at rest, use the following command: hadoop checknative You should see a response such as the following: 14/12/12 13:48:39 INFO bzip2.bzip2factory: Successfully loaded & initialized native-bzip2 library system-native14/12/12 13:48:39 INFO zlib.zlibfactory: Successfully loaded & initialized native-zlib library Native library checking: hadoop: true /usr/lib/hadoop/lib/native/libhadoop.so zlib: true /lib64/libz.so.1 snappy: true /usr/lib64/libsnappy.so.1 lz4: true revision:99 bzip2: true /lib64/libbz2.so.1 openssl: true /usr/lib64/libcrypto.so If you see true in the openssl row, Hadoop has detected the right version of libcrypto.so and optimization will work. If you see false in this row, you do not have the right version. 17
18 Enabling HDFS Encryption Using the Wizard To accommodate the security best practice of separation of duties, enabling HDFS encryption using the wizard requires different user roles for different steps. Launch the Set up HDFS Data At Rest Encryption wizard in one of the following ways: Cluster > Set up HDFS Data At Rest Encryption Minimum Required Role: Key Administrator or Cluster Administrator (also provided by Full Administrator) Administration > Security > Set up HDFS Data At Rest Encryption Minimum Required Role: Key Administrator or Cluster Administrator (also provided by Full Administrator) HDFS service > Actions > Set up HDFS Data At Rest Encryption Minimum Required Role: Cluster Administrator (also provided by Full Administrator) On the first page of the wizard, select the root of trust for encryption keys: Cloudera Navigator Key Trustee Server A file-based password-protected Java KeyStore Cloudera strongly recommends using Cloudera Navigator Key Trustee Server as the root of trust for production environments. The file-based Java KeyStore root of trust is insufficient to provide the security, scalability, and manageability required by most production systems. More specifically, the Java KeyStore KMS does not provide: Scalability, so you are limited to only one KMS, which can result in bottlenecks High Availability (HA) Recoverability, so if you lose the node where the Java KeyStore is stored, then you can lose access to all the encrypted data Ultimately, the Java KeyStore does not satisfy the stringent security requirements of most organizations for handling master encryption keys. Choosing a root of trust displays a list of steps required to enable HDFS encryption using that root of trust. Each step can be completed independently. The Status column indicates whether the step has been completed, and the Notes column provides additional context for the step. If your user account does not have sufficient privileges to complete a step, the Notes column indicates the required privileges. Available steps contain links to wizards or documentation required to complete the step. If a step is unavailable due to insufficient privileges or a prerequisite step being incomplete, no links are present and the Notes column indicates the reason the step is unavailable. Continue to the section for your selected root of trust for further instructions. Related Information Encrypting Data at Rest Data at Rest Encryption Requirements Data at Rest Encryption Reference Architecture Resource Planning for Data at Rest Encryption Enabling HDFS Encryption Using Navigator Key Trustee Server Enabling HDFS encryption using Key Trustee Server as the key store involves multiple components. Before you begin Before continuing, make sure the server host has access to the internal repository hosting the Key Trustee Server software. About this task Selecting Cloudera Navigator Key Trustee Server as the root of trust to view the various steps. 18
19 Procedure 1. Enable Kerberos. Minimum Required Role: Cluster Administrator (also provided by Full Administrator) 2. Enable TLS/SSL. Minimum Required Role: Cluster Administrator (also provided by Full Administrator) 3. Add a dedicated cluster for the Key Trustee Server. Minimum Required Role: Cluster Administrator (also provided by Full Administrator) If you have not already done so, you must create an internal repository to install Cloudera Navigator before you can set up and use Navigator Key Trustee Server. This step creates a new cluster in for the Key Trustee Server hosts to isolate them from other enterprise data hub (EDH) services for increased security and durability. To complete this step: a) Click Add a dedicated cluster for the Key Trustee Server. b) Leave Enable High Availability checked to add two hosts to the cluster. For production environments, you must enable high availability for Key Trustee Server. Failure to enable high availability can result in complete data loss in the case of catastrophic failure of a standalone Key Trustee Server. Click Continue. c) Search for new hosts to add to the cluster, or select the Currently Managed Hosts tab to add existing hosts to the cluster. After selecting the hosts, click Continue. d) Select the KEYTRUSTEE_SERVER parcel to install Key Trustee Server using parcels, or select None if you want to use packages. If you do not see a parcel available, click More Options and add the repository URL to the Remote Parcel Repository URLs list. After selecting a parcel or None, click Continue. If you selected None, click Continue again, and skip to step 4. Install Key Trustee Server binary using packages or parcels. e) After the KEYTRUSTEE_SERVER parcel is successfully downloaded, distributed, unpacked, and activated, click Continue. f) Click Continue to complete this step and return to the main page of the wizard. 19
20 4. Install Key Trustee Server binary using packages or parcels. Minimum Required Role: Cluster Administrator (also provided by Full Administrator) Important: If you selected None in 3. Add a dedicated cluster for the Key Trustee Server., the step title is changed to Install Parcel for Key Trustee Server. If you are using packages, skip this step and see 'Installing Key Trustee Server Using the Command Line' for package-based installation instructions. After installing Key Trustee Server using packages, continue to 5. Install Parcel for Key Trustee KMS. If you have not already done so, you must create an internal repository to install Cloudera Navigator before you can set up and use Navigator Key Trustee Server. This step is completed automatically during step 3. Add a dedicated cluster for the Key Trustee Server. if you are using parcels. If the step is incomplete for any reason (such as the wizard being interrupted or a failure installing the parcel), complete it manually: a) Click Install Key Trustee Server binary using packages or parcels. b) Select the KEYTRUSTEE_SERVER parcel to install Key Trustee Server, or select None if you need to install Key Trustee Server manually using packages. If you do not see a parcel available, click More Options and add the repository URL to the Remote Parcel Repository URLs list. After selecting a parcel, click Continue. c) After the KEYTRUSTEE_SERVER parcel is successfully downloaded, distributed, unpacked, and activated, click Finish to complete this step and return to the main page of the wizard. 5. Install Parcel for Key Trustee KMS. Minimum Required Role: Cluster Administrator (also provided by Full Administrator) If you have not already done so, you must create an internal repository to install Cloudera Navigator before you can set up and use Navigator Key Trustee Server. This step installs the Key Trustee KMS parcel. If you are using packages, skip this step and see 'Installing Key Trustee KMS Using Packages' for instructions. After installing Key Trustee KMS using packages, continue to 6. Add a Key Trustee Server Service. To complete this step for parcel-based installations: a) Click Install Parcel for Key Trustee KMS. b) Select the KEYTRUSTEE parcel to install Key Trustee KMS. If you do not see a parcel available, click More Options and add the repository URL to the Remote Parcel Repository URLs list. After selecting a parcel, click Continue. c) After the KEYTRUSTEE parcel is successfully downloaded, distributed, unpacked, and activated, click Finish to complete this step and return to the main page of the wizard. 6. Add a Key Trustee Server Service. Minimum Required Role: Key Administrator (also provided by Full Administrator) This step adds the Key Trustee Server service to. To complete this step: a) Click Add a Key Trustee Server Service. b) Click Continue. c) On the Customize Role Assignments for Key Trustee Server page, select the hosts for the Active Key Trustee Server and Passive Key Trustee Server roles. Make sure that the selected hosts are not used for other services and click Continue. d) The Entropy Considerations page provides commands to install the rng-tools package to increase available entropy for cryptographic operations. After completing these commands, click Continue. e) The Synchronize Active and Passive Key Trustee Server Private Keys page provides instructions for generating and copying the Active Key Trustee Server private key to the Passive Key Trustee Server. Cloudera recommends following security best practices and transferring the private key using offline media, such 20
21 as a removable USB drive. For convenience (for example, in a development or testing environment where maximum security is not required), you can copy the private key over the network using the provided rsync command. After you have synchronized the private keys, run the ktadmin init command on the Passive Key Trustee Server as described in the wizard. After the initialization is complete, check the box to indicate you have synchronized the keys and click Continue in the wizard. f) The Setup TLS for Key Trustee Server page provides instructions on replacing the auto-generated selfsigned certificate with a production certificate from a trusted Certificate Authority (CA). Click Continue to view and modify the default certificate settings. g) On the Review Changes page, you can view and modify the following settings: Database Storage Directory (db_root) Default value: /var/lib/keytrustee/db The directory on the local filesystem where the Key Trustee Server database is stored. Modify this value to store the database in a different directory. Active Key Trustee Server TLS/SSL Server Private Key File (PEM Format) (ssl.privatekey.l ocation) Default value: /var/lib/keytrustee/.keytrustee/.ssl/ssl-cert-keytrustee-pk. pem The path to the Active Key Trustee Server TLS certificate private key. Accept the default setting to use the auto-generated private key. If you have a CA-signed certificate, change this path to the CA-signed certificate private key file. This file must be in PEM format. Active Key Trustee Server TLS/SSL Server Certificate File (PEM Format) (ssl.cert.location) Default value: /var/lib/keytrustee/.keytrustee/.ssl/ssl-cert-keytrustee.pem The path to the Active Key Trustee Server TLS certificate. Accept the default setting to use the autogenerated self-signed certificate. If you have a CA-signed certificate, change this to the path to the CAsigned certificate. This file must be in PEM format. Active Key Trustee Server TLS/SSL Server CA Certificate (PEM Format) (ssl.cacert.locat ion) Default value: (none) The path to the file containing the CA certificate and any intermediate certificates (if any intermediate certificates exist, then they are required here) used to sign the Active Key Trustee Server certificate. If you 21
22 have a CA-signed certificate, set this value to the path to the CA certificate or certificate chain file. This file must be in PEM format. Active Key Trustee Server TLS/SSL Private Key Password (ssl.privatekey.password) Default value: (none) The password for the Active Key Trustee Server private key file. Leave this blank if the file is not password-protected. Passive Key Trustee Server TLS/SSL Server Private Key File (PEM Format) (ssl.privatekey.l ocation) Default value: /var/lib/keytrustee/.keytrustee/.ssl/ssl-cert-keytrustee-pk. pem The path to the Passive Key Trustee Server TLS certificate private key. Accept the default setting to use the auto-generated private key. If you have a CA-signed certificate, change this path to the CA-signed certificate private key file. This file must be in PEM format. Passive Key Trustee Server TLS/SSL Server Certificate File (PEM Format) (ssl.cert.loc ation) Default value: /var/lib/keytrustee/.keytrustee/.ssl/ssl-cert-keytrustee.pem The path to the Passive Key Trustee Server TLS certificate. Accept the default setting to use the autogenerated self-signed certificate. If you have a CA-signed certificate, change this to the path to the CAsigned certificate. This file must be in PEM format. Passive Key Trustee Server TLS/SSL Server CA Certificate (PEM Format) (ssl.cacert.locat ion) Default value: (none) The path to the file containing the CA certificate and any intermediate certificates (if any intermediate certificates exist, then they are required here) used to sign the Passive Key Trustee Server certificate. If you have a CA-signed certificate, set this value to the path to the CA certificate or certificate chain file. This file must be in PEM format. Passive Key Trustee Server TLS/SSL Private Key Password (ssl.privatekey.password) Default value: (none) The password for the Passive Key Trustee Server private key file. Leave this blank if the file is not password-protected. After reviewing the settings and making any changes, click Continue. h) After all commands complete successfully, click Continue. If the Generate Key Trustee Server Keyring appears stuck, make sure that the Key Trustee Server host has enough entropy. i) Click Finish to complete this step and return to the main page of the wizard. For parcel-based Key Trustee Server releases 5.8 and higher, automatically backs up Key Trustee Server (using the ktbackup.sh script) after adding the Key Trustee Server service. It also schedules automatic backups using cron. For package-based installations, you must manually back up Key Trustee Server and configure a cron job. configures cron to run the backup script hourly. The latest ten backups are retained in /var/ lib/keytrustee in cleartext. 22
23 7. Restart stale services and redeploy client configuration. Minimum Required Role: Cluster Administrator (also provided by Full Administrator) This step restarts all services which were modified while enabling HDFS encryption. To complete this step: a) b) c) d) Click Restart stale services and redeploy client configuration. Click Restart Stale Services. Ensure that Re-deploy client configuration is checked, and click Restart Now. After all commands have completed, click Finish. 8. Validate Data Encryption. Minimum Required Role: Key Administrator or Cluster Administrator (also provided by Full Administrator) This step launches a tutorial with instructions on creating an encryption zone and putting data into it to verify that HDFS encryption is enabled and working. Related Information Resource Planning for Data at Rest Encryption Data at Rest Encryption Reference Architecture Data at Rest Encryption Requirements Configuring TLS/SSL for the KMS Enabling HDFS Encryption Using a Java KeyStore Cloudera strongly recommends using Cloudera Navigator Key Trustee Server as the root of trust for production environments. The file-based Java KeyStore root of trust is insufficient to provide the security, scalability, and manageability required by most production systems. About this task After selecting A file-based password-protected Java KeyStore as the root of trust, the following steps are displayed. Procedure 1. Enable Kerberos. Minimum Required Role: Cluster Administrator (also provided by Full Administrator) 2. Enable TLS/SSL. Minimum Required Role: Cluster Administrator (also provided by Full Administrator) 3. Add a Java KeyStore KMS Service. Minimum Required Role: Key Administrator (also provided by Full Administrator) This step adds the Java KeyStore KMS service to the cluster. The Java KeyStore KMS service uses a passwordprotected Java KeyStore for cryptographic key management. To complete this step: a) Click Add a Java KeyStore KMS Service. b) Select a cluster host for the Java KeyStore KMS service. Click Continue. c) The Setup TLS for Java KeyStore KMS page provides high-level instructions for configuring TLS communication between the EDH cluster and the Java KeyStore KMS. Click Continue. d) The Review Changes page lists the Java KeyStore settings. Click the icon next to any setting for information about that setting. Enter the location and password for the Java KeyStore and click Continue. 4. Click Continue to automatically configure the HDFS service to depend on the Java KeyStore KMS service. 23
24 5. Click Finish to complete this step and return to the main page of the wizard. 6. Restart stale services and redeploy client configuration. Minimum Required Role: Cluster Administrator (also provided by Full Administrator) This step restarts all services that were modified while enabling HDFS encryption. To complete this step: a) Click Restart stale services and redeploy client configuration. b) Click Restart Stale Services. c) Ensure that Re-deploy client configuration is checked, and click Restart Now. d) After all commands have completed, click Finish. 7. Validate Data Encryption. Minimum Required Role: Key Administrator or Cluster Administrator This step launches a Validate Data Encryption tutorial with instructions describing how to create an encryption zone and place data into it to verify that HDFS encryption is enabled and working. Related Information Configuring TLS/SSL for the KMS Managing Encryption Keys and Zones Interacting with the KMS and creating encryption zones requires the use of two CLI commands: hadoop key and hdfs crypto. Before getting started with creating encryption keys and setting up encryption zones, make sure that your KMS ACLs have been set up according to best practices. Validating Hadoop Key Operations Use hadoop key create to create a test key, and then use hadoop key list to retrieve the key list. sudo -u <key_admin> hadoop key create keytrustee_test hadoop key list Warning: If you are using or plan to use Cloudera Navigator Key HSM in conjunction with Cloudera Navigator Key Trustee Server, ensure that: Key names begin with alphanumeric characters and do not use special characters other than hyphen (-), period (.), or underscore (_). Using other special characters can prevent you from migrating your keys to an HSM. Creating Encryption Zones Once a KMS has been set up and the NameNode and HDFS clients have been correctly configured, use the hadoop key and hdfs crypto command-line tools to create encryption keys and set up new encryption zones. Important: Cloudera does not currently support configuring the root directory as an encryption zone. Nested encryption zones are also not supported. Important: The Java Keystore KMS default Truststore (for example, org.apache.hadoop.crypto.key.javakeystoreprovider) does not support uppercase key names. Create an encryption key for your zone as keyadmin for the user/group (regardless of the application that will be using the encryption zone): sudo -u hbase hadoop key create <key_name> Create a new empty directory and make it an encryption zone using the key created above. sudo -u hdfs hadoop fs -mkdir /encryption_zone 24
25 sudo -u hdfs hdfs crypto -createzone -keyname <key_name> -path / encryption_zone You can verify creation of the new encryption zone by running the -listzones command. You should see the encryption zone along with its key listed as follows: $ sudo -u hdfs hdfs crypto -listzones /encryption_zone <key_name> Warning: Do not delete an encryption key as long as it is still in use for an encryption zone. This results in loss of access to data in that zone. Also, do not delete the KMS service, as your encrypted HDFS data will be inaccessible. To prevent data loss, first copy the encrypted HDFS data to a non-encrypted zone using the distcp command. Related Information Configuring CDP Services for HDFS Encryption Adding Files to an Encryption Zone You can add files to an encryption zone by copying them to the encryption zone using distcp. For example: sudo -u hdfs hadoop distcp /user/dir /encryption_zone Important: You can delete files or directories that are part of an HDFS encryption zone. DistCp Considerations A common use case for DistCp is to replicate data between clusters for backup and disaster recovery purposes. This is typically performed by the cluster administrator, who is an HDFS superuser. To retain this workflow when using HDFS encryption, the virtual path prefix /.reserved/raw/ has been introduced, that gives superusers direct access to the underlying block data in the filesystem. This allows superusers to distcp data without requiring access to encryption keys, and avoids the overhead of decrypting and re-encrypting data. It also means the source and destination data will be byte-for-byte identical, which would not have been true if the data was being re-encrypted with a new EDEK. Warning: When using /.reserved/raw/ to distcp encrypted data, make sure you preserve extended attributes with the -px flag. This is because encrypted attributes such as the EDEK are exposed through extended attributes and must be preserved to be able to decrypt the file. This means that if the distcp is initiated at or above the encryption zone root, it will automatically create a new encryption zone at the destination if it does not already exist. Hence, Cloudera recommends you first create identical encryption zones on the destination cluster to avoid any potential mishaps. Copying data from encrypted locations By default, distcp compares checksums provided by the filesystem to verify that data was successfully copied to the destination. When copying from an encrypted location, the file system checksums will not match because the underlying block data is different. This is true whether or not the destination location is encrypted or unencrypted. In this case, you can specify the -skipcrccheck and -update flags to avoid verifying checksums. When you use -skipcrccheck, distcp checks the file integrity by performing a file size comparison, right after the copy completes for each file. Deleting Encryption Zones To remove an encryption zone, delete the encrypted directory. 25
26 Warning: This command deletes the entire directory and all of its contents. Ensure that the data is no longer needed before running this command. sudo -u hdfs hadoop fs -rm -r -skiptrash /encryption_zone Important: The Key Trustee KMS does not directly run a key deletion (for example, it may perform a soft delete instead, or delay the actual deletion to prevent mistakes). In these cases, errors may occur when creating or deleting a key using the same name after it has already been deleted. Backing Up Encryption Keys It is very important that you regularly back up your encryption keys. Failure to do so can result in irretrievable loss of encrypted data. If you are using the Java KeyStore KMS, make sure you regularly back up the Java KeyStore that stores the encryption keys. Rolling Encryption Keys When you roll an EZ key, you are essentially creating a new version of the key (ezkeyversionname). Rolling EZ keys regularly helps enterprises minimize the risk of key exposure. If a malicious attacker were to obtain the EZ key and decrypt encrypted data encryption keys (EDEKs) into DEKs, they could gain the ability to decrypt HDFS files. Rolling an EZ key ensures that all DEKs for newly-created files will be encrypted with the new version of the EZ key. The older EZ key version that the attacker obtained cannot decrypt these EDEKs. Before you begin Before attempting to roll an encryption key (also known as an encryption zone key, or EZ key),you must be familiar with the concepts associated with Navigator Data Encryption and the. About this task You may want to roll the encryption key periodically, as part of your security policy or when an external security compromise is detected. Procedure 1. Optional: Before rolling any keys, log in as HDFS Superuser and verify/identify the encryption zones to which the current key applies. This operation also helps clarify the relationship between the EZ key and encryption zones, and, if necessary, makes it easier to identify more important, high priority zones. $ hdfs crypto listzones /ez key1 /ez2 key2 /user key1 The first column identifies the encryption zone paths; the second column identifies the encryption key name. 2. Optional: You can verify that the files inside an encryption zone are encrypted using the hdfs crypto -get FileEncryptionInfo command. Note the EZ key version name and value, which you can use for comparison and verification after rolling the EZ key. $ hdfs crypto getfileencryptioninfo path /ez/f {ciphersuite: {name: AES/CTR/NoPadding, algorithmblocksize: 16}. crypto ProtocolVersion: CryptoProtocolVersion{description= Encryption zones, version=2, unknow nvalue=null}, edek: 373c0c2e919c27e58c1c343f54233cbd, 26
27 iv: d129c913c8a34cde6371ec95edfb7337, keyname: key1, ezkeyversionname: 7mbvopZ0Weuvs0XtTkpGw3G92KuWc4e4xcTXl0bXCpF} 3. Log off as HDFS Superuser and log in as Key Administrator. Because keys can be rolled, a key can have multiple key versions, where each key version has its own key material (the actual secret bytes used during DEK encryption and EDEK decryption). You can fetch an encryption key by either its key name, returning the latest version of the key, or by a specific key version. Roll the encryption key (previously identified/confirmed by the HDFS Superuser in step 1. Here, the <key nam e> is key1. hadoop key roll key1 This operation contacts the KMS and rolls the keys there. Note that this can take a considerable amount of time, depending on the number of key versions residing in the KMS. Rolling key version from KeyProvider: org.apache.hadoop.crypto.key.kms.l oadbalancingkmsclientprovider@5ea434c8 for keyname: key1 key1 has been successfully rolled. org.apache.hadoop.crypto.key.kms.loadbalancingkmsclientprovider@5ea434c8 has been updated. 4. Log out as Key Administrator, and log in as HDFS Superuser. Verify that new files in the encryption zone have a new EZ key version. Note: For performance reasons, the NameNode caches EDEKs, so after rolling an encryption key, you may not be able to see the new version encryption key immediately, or at least until after the EDEK cache is consumed. Of course, the file decryption and encryption still works with these EDEKs. If you require that all files' DEKs in an encryption zone are encrypted using the latest version encryption key, please reencrypt the EDEKs. $ hdfs crypto getfileencryptioninfo path /ez/new_file {ciphersuite: {name: AES/CTR/NoPadding, algorithmblocksize: 16}. cryptop rotocolversion: CryptoProtocolVersion{description= Encryption zones, version=2, unknown Value=null}, edek: 9aa13ea4a700f96287cfe1349f6ff4f2, iv: 465c878ad9325e42fa460d2a22d12a72, keyname: key1, ezkeyversionname: 4tuvorJ6Feeqk8WiCfdDs9K32KuEj7g2ydCAv0gNQbY} Alternatively, you can use KMS Rest API to view key metadata and key versions. Elements appearing in brackets should be replaced with your actual values. So in this case, before rolling a key, you can view the key metadata and versions as follows: $ curl -k --negotiate -u: " { "name" : "<key-name>", "cipher" : "<cipher>", "length" : <length>, "description" : "<decription>", "created" : <millis-epoc>, "versions" : <versions> (For example, 1) } $ curl -k --negotiate -u: " { "material" : "<material>", "name" : "<key-name>", "versionname" : "<versionname>" (For example, version 1) 27
28 } Roll the key and compare the results: $ hadoop key roll key1 Rolling key version from KeyProvider: KMSClientProvider[ TNAME>:16000/kms/v1/] for key name: <key-name> key1 has been successfully rolled. KMSClientProvider[ has been updated. $ curl -k --negotiate -u: " { "material" : "<material>", (New material) "name" : "<key-name>", "versionname" : "<versionname>" (New version name. For example, version 2) } $ curl -k --negotiate -u: " { "name" : "<key-name>", "cipher" : "<cipher>", "length" : <length>, "description" : "<decription>", "created" : <millis-epoc>, "versions" : <versions> (For example, version 2) } Re-encrypting Encrypted Data Encryption Keys (EDEKs) When you re-encrypt an EDEK, you are essentially decrypting the original EDEK created by the DEK, and then reencrypting it using the new (rolled) version of the EZ key. The file's metadata, which is stored in the NameNode, is then updated with this new EDEK. Re-encryption does not impact the data in the HDFS files or the DEK the same DEK is still used to decrypt the file, so re-encryption is essentially transparent. Related Information Rolling Encryption Keys Benefits and Capabilities In addition to minimizing security risks, re-encrypting the EDEK offers other capabilities and benefits. Re-encrypting EDEKs does not require that the user explicitly re-encrypt HDFS files. In cases where there are several zones using the same key, the Key Administrator has the option of selecting which zone s EDEKs are re-encrypted first. The HDFS Superuser can also monitor and cancel re-encryption operations. Re-encryption is restarted automatically in cases where you have a NameNode failure during the re-encryption operation. Prerequisites and Assumptions There are certain considerations that you must be aware of as you re-encrypt an EDEK. It is recommended that you perform EDEK re-encryption at the same time that you perform regular cluster maintenance because the operation can adversely impact CPU resources on the NameNode. 28
29 In, review the cluster s NameNode status, which must be in Good Health. If the cluster NameNode does not have a status of Good Health, then do not proceed with the re-encryption of the EDEK. In the WebUI menu, you can verify the status for the cluster NameNode, which must not be in Safe mode (in other words, the WebUI should indicate Safemode is off ). Running the re-encryption command without successfully verifying the preceding items will result in failures with errors. Limitations There are few limitations associated with the re-encryption of EDEKs. Caution: You cannot perform any rename operations within the encryption zone during re-encryption. If you attempt to perform a rename operation during EDEK re-encryption, you will receive an IOException error. EDEK re-encryption does not change EDEKs on snapshots, due to the immutable nature HDFS snapshots. Thus, you should be aware that after EZ key exposure, the Key Administrator must delete snapshots. Re-encrypting an EDEK This scenario operates on the assumption that an encryption zone has already been set up for this cluster. Procedure 1. Navigate to the cluster in which you will be rolling keys and re-encrypting the EDEK. 2. Log in as HDFS Superuser. 3. Optional: View all of the options for the hdfs crypto command: $ hdfs crypto [-createzone keyname <keyname> -path <path>] [-listzones] [-provisiontrash path <path>] [-getfileencryptioninfo path <path>] [-reencryptzone <action> -path <zone>] [-listreencryptionstatus] [-help <command-name>] 4. Before rolling any keys, verify/identify the encryption zones to which the current key applies. This operation also helps clarify the relationship between the EZ key and encryption zones, and, if necessary, makes it easier to identify more important, high priority zones. $ hdfs crypto listzones /ez key1 The first column identifies the encryption zone path (/ez); the second column identifies the encryption key name (key1). 5. Exit from the HDFS Superuser account and log in as Key Administrator. 6. Roll the encryption key (previously identified/confirmed by the HDFS Superuser in step 4). Here, the <key name> is key1 hadoop key roll key1 This operation contacts the KMS and rolls the keys. Note that this can take a considerable amount of time, depending on the number of key versions. Rolling key version from KeyProvider: org.apache.hadoop.crypto.key.kms.l oadbalancingkmsclientprovider@5ea434c8 for keyname: key1 key1 has been successfully rolled. 29
30 has been updated. 7. Log out as Key Administrator, and log in as HDFS Superuser. 8. Optional: Before performing the re-encryption, you can verify the status of the current key version being used (keyname). Then, after re-encrypting, you can confirm that the EZ key version (ezkeyversionname) and EDEK have changed. $ hdfs crypto getfileencryptioninfo path /ez/f {ciphersuite: {name: AES/CTR/NoPadding, algorithmblocksize: 16}. crypto ProtocolVersion: CryptoProtocolVersion{description= Encryption zones, version=2, unknow nvalue=null}, edek: 9aa13ea4a700f96287cfe1349f6ff4f2, iv: d129c913c8a34cde6371ec95edfb7337, keyname: key1, ezkeyversionname: 7mbvopZ0Weuvs0XtTkpGw3G92KuWc4e4xcTXl0bXCpF} 9. After the EZ key has been rolled successfully, re-encrypt the EDEK by running the re-encryption command on the encryption zone: $ hdfs crypto reencryptzone start path /ez The following information appears when the submission is complete. At this point, the NameNode is processing and re-encrypting all of the EDEKs under the /ez directory. re-encrypt command successfully submitted for zone: /ez action: START: Depending on the number of files, the re-encryption operation can take a long time. Re-encrypting a 1M EDEK file typically takes between 2-6 minutes, depending on the NameNode hardware. To check the status of the reencryption for the zone: hdfs crypto listreencryptionstatus Column Name Description Sample Data ZoneName The encryption zone name /ez Status Completed Submitted: the command is received, but not yet being processed by the NameNode. Processing: the zone is being processed by the NameNode. Completed: the NameNode has finished processing the zone, and every file in the zone has been re-encrypted. EZKey Version Name The encryption zone key version name, ZMHfRoGKeXXgf0QzCX8q16NczIw2sq0rWRTOHS3YjCz which used for re-encryption comparison. After re-encryption is complete, all files in the encryption zone are guaranteed to have an EDEK whose encryption zone key version is at least equal to this version. Submission Time The time at which the re-encryption operation commenced :01:09, Is Canceled? True: the encryption operation has been canceled. False False: the encryption operation has not been canceled. Completion Time The time at which the re-encryption operation completed :01:10,
31 Column Name Description Sample Data Number of files re-encrypted The number that appears in this column reflects only the files whose EDEKs have been updated. If a file is created after the key is rolled, then it will already have an EDEK that has been encrypted by the new key version, so the re-encryption operation will skip that file. In other words, it's possible for a "Completed" re-encryption to reflect a number of re-encrypted files that is less than the number of files actually in the encryption zone. 1 Note: In cases when you re-encrypt an EZ key that has already been re-encrypted and there are no new files, the number of files reencrypted will be 0. Number of failures When 0, no errors occurred during the reencryption operation. If larger than 0, then investigate the NameNode log, and reencrypt. 0 Last file Checkpointed Identifies the current position of the reencryption process in the encryption zone--in other words, the file that was most recently re-encrypted After the re-encryption completes, you can confirm that the EDEK and EZ Key Version Name values have changed. $ hdfs crypto getfileencryptioninfo path /ez/f {ciphersuite: {name: AES/CTR/NoPadding, algorithmblocksize: 16}. crypto ProtocolVersion: CryptoProtocolVersion{description= Encryption zones, version=2, unknow nvalue=null}, edek: 373c0c2e919c27e58c1c343f54233cbd, iv: d129c913c8a34cde6371ec95edfb7337, keyname: key1, ezkeyversionname: ZMHfRoGKeXXgf0QzCX8q16NczIw2sq0rWRTOHS3YjCz } Managing Re-encryption Operations There are various facets of the EDEK re-encryption process such as cancelling re-encryption, rolling keys during a reencryption operation, and throttling re-encryption operations. Cancelling Re-encryption Only users with the HDFS Superuser privilege can cancel the EDEK re-encryption after the operation has started. To cancel a re-encryption: hadoop crypto -reencryptzone cancel -path <zone> Rolling Keys During a Re-encryption Operation While it is not recommended, it is possible to roll the encryption zone key version on the KMS while a re-encryption of that encryption zone is already in progress in the NameNode. The re-encryption is guaranteed to complete with all DEKs re-encrypted, with a key version equal to or later than the encryption zone key version when the re-encryption command was submitted. This means that, if initially the key version is rolled from v0 to v1, then a re-encryption command was submitted. If later on the KMS the key version is rolled again to v2, then all EDEKs will be at least re-encrypted to v1. To ensure that all EDEKs are re-encrypted to v2, submit another re-encryption command for the encryption zone. Rolling keys during re-encryption is not recommended because of the potential negative impact on key management operations. Due to the asynchronous nature of re-encryption, there is no guarantee of when, exactly, the rolled 31
32 encryption keys will take effect. Re-encryption can only guarantee that all EDEKs are re-encrypted at least on the EZ key version that existed when the re-encryption command is issued. Throttling Re-encryption Operations With the default operation settings, you will not typically need to throttle re-encryption operations. However, in cases of excessive performance impact due to the re-encryption of large numbers of files, advanced users have the option of throttling the operation so that the impact on the HDFS NameNode and KT KMS are minimized. Specifically, you can throttle the operation to control the rate of the following: The number of EDEKs that the NameNode should send to the KMS to re-encrypt in a batch (dfs.namenode.reencrypt.batch.size) The number of threads in the NameNode that can run concurrently to contact the KMS. (dfs.namenode.reencrypt.edek.threads) Percentage of time the NameNode read-lock should be held by the re-encryption thread (dfs.namenode.reencrypt.throttle.limit.handler.ratio) Percentage of time the NameNode write-lock should be held by the re-encryption thread (dfs.namenode.reencrypt.throttle.limit.updater.ratio) You can monitor the HDFS NameNode heap and CPU usage from. Configuring the Key Management Server (KMS) Hadoop Key Management Server (KMS) is a cryptographic key management server based on the Hadoop KeyProvider API. It provides a KeyProvider implementation client that interacts with the KMS using the HTTP REST API. Both the KMS and its client support HTTP SPNEGO Kerberos authentication and TLS/SSL-secured communication. The KMS is a Java-based web application that uses a preconfigured Jetty server bundled with the Hadoop distribution. Cloudera provides the following implementations of the Hadoop KMS: Java KeyStore KMS - The default Hadoop KMS included in CDH that uses a file-based Java KeyStore (JKS) for its backing keystore. For parcel-based installations, no additional action is required to install or upgrade the KMS. Cloudera strongly recommends not using Java Keystore KMS in production environments. Java KeyStore KMS does not support high availability. Key Trustee KMS - A custom KMS that uses Cloudera Navigator Key Trustee Server for its backing keystore instead of the file-based Java KeyStore (JKS) used by the default Hadoop KMS. Cloudera strongly recommends using Key Trustee KMS in production environments to improve the security, durability, and scalability of your cryptographic key management. Also, integrating Key Trustee Server with Cloudera Navigator Key HSM provides an additional layer of protection. Navigator KMS Services backed by Thales HSM - A custom KMS that uses a supported Thales Hardware Security Module (HSM) as its backing keystore. This KMS service provides the highest level of key isolation to customers who require it. Navigator KMS Services backed by Luna HSM - A custom KMS that uses a supported Luna Hardware Security Module (HSM) as its backing keystore. This KMS provides the highest level of key isolation to customers who require it. Related Information Securing the Key Management Server (KMS) Configuring the KMS Using If you are using, you can view and edit the KMS configuration by navigating to the specific pages, depending on the KMS implementation you are using. Key Trustee KMS service > Configuration 32
33 Java KeyStore KMS service > Configuration Configuring the KMS Cache Using By default, the KMS caches keys to reduce the number of interactions with the key provider. You can disable the cache by setting the hadoop.kms.cache.enable property to false. The cache is only used with the getcurrentkey(), getkeyversion() and getmetadata() methods. For the getcurrentkey() method, entries are cached for a maximum of milliseconds to prevent stale keys. For the getkeyversion() method, entries are cached with a default inactivity timeout of milliseconds (10 minutes). You can configure the cache and its timeout values by adding the following properties to KMS service > Configuration > Advanced > Key Management Server Proxy Advanced Configuration Snippet (Safety Valve) for kms-site.xml: <property> <name>hadoop.kms.cache.enable</name> <value>true</value> </property> <property> <name>hadoop.kms.cache.timeout.ms</name> <value>600000</value> </property> <property> <name>hadoop.kms.current.key.cache.timeout.ms</name> <value>30000</value> </property> Configuring the Audit Log Aggregation Interval Audit logs are generated for GET_KEY_VERSION, GET_CURRENT_KEY, _EEK operations. DECRYPT_EEK, and GENERATE Entries are aggregated by user, key, and operation for a configurable interval, after which the number of aggregated operations by the user for a given key is written to the audit log. The interval is configured in milliseconds by adding the hadoop.kms.aggregation.delay.ms property to KMS service > Configuration > Advanced > Key Management Server Proxy Advanced Configuration Snippet (Safety Valve) for kms-site.xml: <property> <name>hadoop.kms.aggregation.delay.ms</name> <value>10000</value> </property> Securing the Key Management Server (KMS) Cloudera provides the following implementations of Key Mangement Server (KMS): Ranger KMS with database, Ranger KMS with Key Trustee Server and Ranger KMS with Key Trustee Server and Key HSM (if HSM support is required) You can secure the KMS using Kerberos, TLS/SSL communication, and access control lists (ACLs) for operations on encryption keys. instructions can be performed for both Ranger KMS and Ranger KMS with KTS. Enabling Kerberos Authentication for the KMS You can use to enable Kerberos authentication for the KMS. 33
34 About this task Minimum Required Role: Full Administrator Procedure Open the Admin Console and go to the KMS service. Click Configuration. Set the Authentication Type property to kerberos. Click Save Changes. Because does not automatically create the principal and keytab file for the KMS, you must run the Generate Credentials command manually. On the top navigation bar, go to Administration > Security > Kerberos Credentialsand click Generate Missing Credentials Note: This does not create a new Kerberos principal if an existing HTTP principal exists for the KMS host. 6. Return to the home page by clicking the logo. 7. Click the icon that is next to any stale services to invoke the cluster restart wizard. 8. Click Restart Stale Services. 9. Click Restart Now. 10. Click Finish. Configuring TLS/SSL for the KMS You must configure specific TLS/SSL properties associated with the KMS. About this task Minimum Required Role: Configurator (also provided by Cluster Administrator, Full Administrator) Procedure 1. Go to the KMS service. 2. Click Configuration. 3. In the Search field, type TLS/SSL to show the KMS TLS/SSL properties (in the Key Management Server Default Group > Security category). 4. Edit the following TLS/SSL properties according to your cluster configuration. Property Description Enable TLS/SSL for Key Management Server Encrypt communication between clients and Key Management Server using Transport Layer Security (TLS) (formerly known as Secure Socket Layer (TLS/SSL)). Key Management Server TLS/SSL Server JKS Keystore File Location The path to the TLS/SSL keystore file containing the server certificate and private key used for TLS/SSL. Used when Key Management Server is acting as a TLS/SSL server. The keystore must be in JKS format. Key Management Server TLS/SSL Server JKS Keystore File Password The password for the Key Management Server JKS keystore file. Key Management Server Proxy TLS/ SSL Certificate Trust Store File The location on disk of the truststore, in.jks format, used to confirm the authenticity of TLS/SSL servers that Key Management Server Proxy might connect to. This is used when Key Management Server Proxy is the client in a TLS/SSL connection. This truststore must contain the certificates used to sign the services connected to. If this parameter is not provided, the default list of wellknown certificate authorities is used instead. Key Management Server Proxy TLS/ SSL Certificate Trust Store Password The password for the Key Management Server Proxy TLS/SSL Certificate Trust Store File. This password is not required to access the truststore; this field can be left blank. This password provides optional integrity checking of the file. The contents of truststores are certificates, and certificates are public information. 34
35 5. Click Save Changes. 6. Return to the home page by clicking the logo. 7. Click the icon that is next to any stale services to invoke the cluster restart wizard. 8. Click Restart Stale Services. 9. Click Restart Now. 10. Click Finish. Migrating Keys from a Java KeyStore to Cloudera Navigator Key Trustee Server You can migrate keys from an existing Java KeyStore (JKS) to Key Trustee Server to improve security, durability, and scalability. Before you begin This procedure assumes that the Java KeyStore (JKS) is on the same host as the new Key Trustee KMS service. Procedure 1. Stop the Java KeyStore KMS service. 2. Add and configure the Key Trustee KMS service, and configure HDFS to use it for its KMS Service setting. 3. Restart the HDFS service and redeploy client configuration for this to take effect. a. Home > Cluster-wide > Deploy Client Configuration 4. Add the following to the Key Management Server Proxy Advanced Configuration Snippet (Safety Valve) for kms-site.xml (Key Trustee KMS Service > Configuration > Category > Advanced): <property> <name>hadoop.kms.key.provider.uri</name> <value>keytrustee://file@/var/lib/kms-keytrustee/keytrustee/.keytrustee/,jceks://file@/path/to/kms.keystore</value> <description>uri of the backing KeyProvider for the KMS</description> </property> <property> <name>hadoop.security.keystore.java-keystore-provider.password-file</ name> <value>/tmp/password.txt</value> <description>java KeyStore password file</description> </property> If the Java KeyStore is not password protected, omit the hadoop.security.keystore.java-keysto re-provider.password-file property. 5. Click Save Changes and restart the Key Trustee KMS service. If the Java KeyStore is not password protected, skip to step Create the file /var/lib/keytrustee-kms/jetty-deployment/webapps/kms/web-inf/cla sses/tmp/password.txt and add the Java KeyStore password to it. 7. Change the ownership of /var/lib/keytrustee-kms/jetty-deployment/webapps/kms/webinf/classes/tmp/password.txt to kms:kms. sudo chown kms:kms /var/lib/keytrustee-kms/jetty-deployment/webapps/kms/ WEB-INF/classes/tmp/password.txt 35
36 8. From the host running the Key Trustee KMS service, if you have not configured Kerberos and TLS/SSL, run the following command: curl -L -d "trusteeop=migrate" " ame=username&trusteeop=migrate" If you have configured Kerberos and TLS/SSL, use the following command instead: curl --negotiate -u : -L -d "trusteeop=migrate" " ame=username&trusteeop=migrate" --cacert /path/to/kms/cert 9. Monitor /var/log/kms-keytrustee/kms.log and /var/log/kms-keytrustee/kms-cata lina.<date>.log to verify that the migration is successful. You can also run sudo -u <key_admin> hadoop key list to verify that the keys are listed. 10. After you have verified that the migration is successful, remove the safety valve entry used in step 3 and restart the Key Trustee KMS service. Migrating a Key Trustee KMS Server Role Instance to a New Host In some cases for example, after your upgrading your servers it is desirable to migrate a Key Trustee KMS Server role instance to a new host. This procedure describes how to move a Key Trustee KMS proxy service role instance from an existing cluster host to another cluster host. The security and performance requirements for the KMS proxy are based on providing a dedicated system to the role, and not shared with CDP or other services. Note: This migration procedure applies only to the Key Trustee KMS Server, and does not apply to the Key Trustee Server. Do not attempt this migration on the Key Trustee Server. The KMS proxy represents a service that must be: secure isolated from non-administrator access maintained as a system with a higher level of isolation and security requirements compared to other cluster nodes Assumptions and Requirements There are various assumptions and requirements that apply during the migration of a Key Trustee KMS server role instance to a new host. Complete the steps one node at a time (migrate to the first new node, verify, then repeat the steps to migrate to second new node, verify, and so on). The sequence of restarts indicated throughout the steps are critical to successfully completing the migration without data loss. Do not skip any of the steps. As required for any KMS service that is configured for HA, Zookeeper must be deployed as a service (true by default). Review and examine TLS and Kerberos configuration requirements: the new KMS nodes must be ready with a Java Keystore and Truststore that present the correct host certificates while also trusting the Key Trustee Server. If the custom Kerberos keytab retrieval script is in use for Kerberos integration, it is important to have those keytabs ready and ingested before proceeding. For this use case/procedure, assume that the existing KMS proxy host instances are named: ktkms01.example.com ktkms02.example.com 36
37 Assume that the host destination instances are: ktkms03.example.com ktkms04.example.com Related Information Migrate a Key Trustee KMS Server Role Instance to a New Host Migrate a Key Trustee KMS Server Role Instance to a New Host After ensuring that the requirements for migrating the Key Trustee KMS Server role instance to a new instance are satisfied, initiate the migration process. About this task Warning: Do not attempt this migration procedure on any Key Trustee KMS version lower than Procedure 1. Back up the Key Trustee KMS private key and configuration directory. 2. Before adding the new role instance, see Resource Planning for Data at Rest Encryption for considerations when selecting a host. 3. Run the Add Role Instances wizard for the Key Trustee KMS service (Key Trustee KMS service > Actions > Add Role Instances). 4. Click Select hosts and select the checkbox for the host to which you are adding the new Key Management Server proxy service role instance. Click OK and then Continue. 5. On the Review Changes page of the wizard, confirm the authorization code, organization name, and settings, and then click Finish. 6. Select and start the new KMS instance (Actions for Selected > Start). Important: The initial startup of the KMS instance may fail with the following error message: java.io.ioexception: Unable to verify private key match between KMS hosts. If the system has been recently upgraded, DO NOT TAKE FURTHER ACTION and contact your support representative as soon as possible. If this is a new installa tion, verify private key files have been synced between all KMS hosts. Aborting to prevent data inconsistency. If this occurs, it indicates that the KMS attempted to verify the Key Trustee private key has been synchronized with the new instance, but was unable to because that synchronization has not yet taken place. This is expected behavior at this point in the process. Proceed to the next step, and the new KMS instance will come up when the KMS service is restarted after the synchronization. 7. Verify that a Kerberos HTTP principal has been created for that specific host role instance in the Security configuration interface (Administration > Security > Kerberos Credentials). For example, in this scenario the existing KMS Kerberos principal is HTTP/ ktkms01.example.com@example.com, and you must verify the new host principal HTTP/ ktkms03.example.com@example.com has been created before continuing. If you cannot verify the new host principal, then click Generate Missing Credentials on the Kerberos Credentials tab to generate it before continuing. If the custom Kerberos keytab retrieval script is in use for Kerberos integration, it is important to have those keytabs ready and ingested before proceeding. 37
38 8. Synchronize the Key Trustee KMS private key. In this use case you log into the original working KMS instance host, which is ktkms01.example.com, and synchronize the keys from your existing KMS host ktkms01.example.com to the new host to which you are migrating, ktkms03.example.com. Copy the private key over the network by running the following command as a privileged (root) user on the original Key Trustee KMS host: rsync -zav /var/lib/kms-keytrustee/keytrustee/.keytrustee root@ktkms03.e xample.com:/var/lib/kms-keytrustee/keytrustee/. Replace the host name (here, it is ktkms03.example.com) with the hostname of the Key Trustee KMS host to which you are migrating. Warning: It is very important that you perform this step. If the KMS private key is not copied from the existing instance to the new instance, then the encryption keys will be inaccessible when the old KMS instance is removed from the cluster. 9. To verify that the Key Trustee KMS private keys successfully synchronized, compare the MD5 hash of the private keys. On each Key Trustee KMS host, run the following command: $ md5sum /var/lib/kms-keytrustee/keytrustee/.keytrustee/secring.gpg If the outputs are different, contact Cloudera Support for assistance. Do not attempt to synchronize existing keys. If you overwrite the private key and do not have a backup, any keys encrypted by that private key are permanently inaccessible, and any data encrypted by those keys is permanently irretrievable. If you are configuring Key Trustee KMS high availability for the first time, continue synchronizing the private keys. 10. Restart the Key Trustee KMS service (Key Trustee KMS service > Actions > Restart). After the restart completes, click Close. 11. Restart the cluster. This refreshes all the KMS instances in the cluster, and ensures all stale services are restarted. 12. Redeploy the client configuration (Home > > Cluster > > Deploy Client Configuration). 13. Run the steps in Validating Hadoop Key Operations. Perform the check multiple times to exercise the Load balanced KMS nodes properly. If a command fails during this test, stop immediately, halt the cluster, and contact Cloudera Support. 14. Remove the old KMS instance being migrated. First stop the KMS instance (ktkms01.example.com) (Select KMS instance > Actions for Selected > Stop), and then delete it (Select KMS instance > > Actions for Selected > > Delete). Delete the /var/lib/kms-keytrustee directories on the old KMS instance only after configuring and verifying the new KMS instances. Delete this material only after completing the following tasks: a) Remove the old KMS instances from the KMS service. b) Verify that you can read previously encrypted data only using the new KMS instances. 15. Restart the cluster. This refreshes all the KMS instances in the cluster, and ensures all stale services are restarted. 16. Redeploy the client configuration (Home > Clusterwide > Deploy Client Configuration). 17. Re-run the steps in Validating Hadoop Key Operations. Perform the check multiple times to exercise the Load balanced KMS nodes properly. If a command fails during this test, stop immediately, halt the cluster, and contact Cloudera Support. 18. Repeat these steps for any additional KMS node migrations you wish to perform. In the use case shown here, repeat the steps to migrate the ktkms02.example.com host to the ktkms04.example.com host. 38

39 Migrating ACLs from Key Trustee KMS to Ranger KMS You must perform the following procedures to migrate ACLs from Key Trustee Key Management Server (KMS) to Ranger KMS. Key Trustee ACL evaluation Before going into the details of how Key Trustee ACLs are evaluated, it is critical that you understand the key rules that the Key Trustee Key Management Server uses in performing this evaluation. KMS ACL Flow Rules: The whitelist class bypasses key.acl and default.key.acl controls. The key.acl definitions override all default definitions. Encryption key access is evaluated as follows: 1 and 2 The KMS evaluates the hadoop.kms.acl.<operation> and hadoop.kms.blacklist.<operation> classes to determine whether or not access to a specific KMS feature or function is authorized. In other words, a user must be allowed by hadoop.kms.acl.<operation>, and not be disallowed by hado op.kms.blacklist.<operation>. If a user is denied access to a KMS-wide operation, then the flow halts and returns the result Denied. If a user is allowed access to a KMS-wide operation, then the evaluation flow proceeds. 39
40 3 The KMS evaluates the whitelist.key.acl class. The KMS ACL workflow evaluates the whitelist.key.acl.<operation>, and if the user is allowed access, then it is granted (Allowed). If not, then the flow continues with the evaluation. 4 and 5 The KMS evaluates the default.key.acl.<operation> and key.acl.<operation> classes. The KMS evaluates whether or not there is a key.acl.key.<operation> class that matches the action the user is attempting to perform. If there is, it then evaluates that value to determine whether or not the user can perform the requested operation. Note: Before evaulating the default.key.acl.<operation> and key.acl.<operation> classes, the flow logic determines which classes exist. Only one of these can exist and be used at any time (for example, key.acl.prodkey.read overrides default.key.acl.read for prodkey, so the flow logic is configured with it s own READ ACLs) Depending on the result of the Key Trustee ACL evaluation, controls are applied to the key and results (Allowed or Denied). Access evaluation with Ranger KMS policies Access is evaluated with Ranger KMS policies as follows: 40
41 1 After the request is received, the Deny condition of the Global Override policy is evaluated. If the user is present, the flow halts and returns the result Deny. If the user is not present, the evaluation flow proceeds. 2 Now, the Allow condition of the Global Override policy is evaluated. If the user is present, the flow halts and returns the result Allow. If the user is not present, the evaluation flow proceeds. 41
42 3 If the Key Resource Specific policy is present, the Allow condition of the Key Resource Specific policy is evaluated. If the user is not present, the flow halts and returns the result Deny. If the user is present, the flow is complete and returns the result Allow. 4 If the Key Resource Specific policy is not present, the Deny condition of the Default policy, all-keyname, is evaluated. If the user is present, the flow halts and returns the result Deny. If the user is not present, the evaluation flow proceeds. 5 Now, the Allow condition of the Default policy, all-keyname, is evaluated. If the user is not present, the flow halts and returns the result Deny. If the user is present, the flow is complete and returns the result Allow. Key Trustee KMS operations not supported by Ranger KMS The following Key Trustee KMS operations are not supported by Ranger KMS. hadoop.kms.acl.<operation> The ACLs mentioned below are ignored by Ranger KMS because these ACLs are not migrated to the Ranger KMS policy. hadoop.kms.acl.create hadoop.kms.acl.delete hadoop.kms.acl.rollover hadoop.kms.acl.get hadoop.kms.acl.get_keys hadoop.kms.acl.get_metadata hadoop.kms.acl.set_key_material hadoop.kms.acl.generate_eek hadoop.kms.acl.decrypt_eek keytrustee.kms.acl.<operation> The ACLs mentioned below are Key Trustee-specific ACLs. These ACLs are ignored by Ranger KMS because they are not migrated to the Ranger KMS policy. Also, these ACLs are not supported by Hadoop KMS. keytrustee.kms.acl.undelete keytrustee.kms.acl.purge ACLs supported by Ranger KMS and Ranger KMS Mapping The following ACLs are supported by Ranger KMS and Ranger KMS mapping. whitelist.key.acl.<operation> and hadoop.kms.blacklist.<operation> In this case, you create a Global Override policy under the service cm_kms. Service : cm_kms Policy Key-resource Priority Key Trustee ACL Ranger Policy Condition Ranger Policy Permission Global Override Policy * Override whitelist.ke y.acl.manage MENT ALLOW CREATE, DELE TE, ROLLOVER whitelist.ke y.acl.genera TE_EEK ALLOW GENERATE_EEK 42
43 Policy Key-resource Priority Key Trustee ACL Ranger Policy Condition Ranger Policy Permission whitelist.ke y.acl.decryp T_EEK ALLOW DECRYPT_EEK whitelist.ke y.acl.read ALLOW GET, GET KEYS, GET METADATA hadoop.kms.b lacklist.cre ATE DENY CREATE hadoop.kms.b lacklist.del ETE DENY DELETE hadoop.kms.b lacklist.rol LOVER DENY ROLLOVER hadoop.kms.b lacklist.get DENY GET hadoop.kms.b lacklist.get _KEYS DENY GET KEYS hadoop.kms.b lacklist.get _METADATA DENY GET METADATA hadoop.kms.b lacklist.set _KEY_MATERIAL DENY SET KEY MATE RIAL hadoop.kms.b lacklist.gen ERATE_EEK DENY GENERATE_EEK hadoop.kms.b lacklist.dec RYPT_EEK DENY DECRYPT_EEK default.key.acl.<operation> Service : cm_kms Policy Key-resource Priority Key Trustee ACL Ranger Policy Condition Ranger Policy Permission Default Policy * Normal default.key. acl.management ALLOW CREATE, DELE TE, ROLLOVER default.key. acl.generate _EEK ALLOW GENERATE_EEK default.key. acl.decrypt_ EEK ALLOW DECRYPT_EEK default.key. acl.read ALLOW GET, GET KEYS, GET METADATA all-keyname 43
44 key.acl.<key-name>.<operation> Key Specific ACL In this case, you create a Key Resource Specific policy under the service cm_kms. Service : cm_kms Policy Key-resource Priority Key Trustee ACL Ranger Policy Condition Ranger Policy Permission Key Resource Specific policy <keyname> Normal key.acl.<key -name>.manag EMENT ALLOW CREATE, DELE TE, ROLLOVER key.acl.<key -name>.gener ATE_EEK ALLOW GENERATE_EEK key.acl.<key -name>.decry PT_EEK ALLOW DECRYPT_EEK key.acl.<keyname>.read ALLOW GET, GET KEYS, GET METADATA key.acl.<keyname>.all ALLOW SELECT ALL <keyname> Note: In Key Resource Specific policies, DENY ALL OTHER ACCESS flags are set to true. Configuring CDP Services for HDFS Encryption There are recommendations that you must consider for setting up with various CDP services. Important: Encrypting /tmp using HDFS encryption is not supported. Transparent Encryption Recommendations for HBase Make /hbase an encryption zone. Do not create encryption zones as subdirectories under /hbase, because HBase may need to rename files across those subdirectories. When you create the encryption zone, name the key hbasekey to take advantage of auto-generated KMS ACLs. Steps On a cluster without HBase currently installed, create the /hbase directory and make that an encryption zone. On a cluster with HBase already installed, perform the following steps: Stop the HBase service. Move data from the /hbase directory to /hbase-tmp. Create an empty /hbase directory and make it an encryption zone. Distcp all data from /hbase-tmp to /hbase, preserving user-group permissions and extended attributes. Start the HBase service and verify that it is working as expected. Remove the /hbase-tmp directory. KMS ACL Configuration for HBase In the KMS ACL, grant the hbase user and group DECRYPT_EEK permission for the HBase key: <property> <name>key.acl.hbase-key.decrypt_eek</name> 44
45 <value>hbase hbase</value> </description> </property> Transparent Encryption Recommendations for Hive HDFS encryption has been designed so that files cannot be moved from one encryption zone to another or from encryption zones to unencrypted directories. Therefore, the landing zone for data when using the LOAD DATA IN PATH command must always be inside the destination encryption zone. To use HDFS encryption with Hive, ensure you are using one of the following configurations: Single Encryption Zone With this configuration, you can use HDFS encryption by having all Hive data inside the same encryption zone. In, configure the Hive Scratch Directory (hive.exec.scratchdir) to be inside the encryption zone. Recommended HDFS Path: /user/hive To use the auto-generated KMS ACL, make sure you name the encryption key hive-key. For example, to configure a single encryption zone for the entire Hive warehouse, you can rename /user/hive to /user/hive-old, create an encryption zone at /user/hive, and then distcp all the data from /user/hi ve-old to /user/hive. In, configure the Hive Scratch Directory (hive.exec.scratchdir) to be inside the encryption zone by setting it to /user/hive/tmp, ensuring that permissions are 1777 on /user/hive/tmp. Multiple Encryption Zones With this configuration, you can use encrypted databases or tables with different encryption keys. To read data from read-only encrypted tables, users must have access to a temporary directory that is encrypted at least as strongly as the table. For example: 1. Configure two encrypted tables, eztbl1 and eztbl2. 2. Create two new encryption zones, /data/eztbl1 and /data/eztbl2. 3. Load data to the tables in Hive using LOAD statements. Other Encrypted Directories LOCALSCRATCHDIR: The MapJoin optimization in Hive writes HDFS tables to a local directory and then uploads them to the distributed cache. To ensure these files are encrypted, either disable MapJoin by setting hive.auto.convert.join to false, or encrypt the local Hive Scratch directory (hive.exec.local.scra tchdir) using Cloudera Navigator Encrypt. DOWNLOADED_RESOURCES_DIR: JARs that are added to a user session and stored in HDFS are downloaded to hive.downloaded.resources.dir on the HiveServer2 local filesystem. To encrypt these JAR files, configure Cloudera Navigator Encrypt to encrypt the directory specified by hive.downloaded.resource s.dir. NodeManager Local Directory List: Hive stores JARs and MapJoin files in the distributed cache. To use MapJoin or encrypt JARs and other resource files, the yarn.nodemanager.local-dirs YARN configuration property must be configured to a set of encrypted local directories on all nodes. Changed Behavior after HDFS Encryption is Enabled You must consider various factors when working with Hive tables after enabling HDFS transparent encryption for Hive. Loading data from one encryption zone to another results in a copy of the data. Distcp is used to speed up the process if the size of the files being copied is higher than the value specified by HIVE_EXEC_COPYFILE_M 45
46 AXSIZE. The minimum size limit for HIVE_EXEC_COPYFILE_MAXSIZE is 32 MB, which you can modify by changing the value for the hive.exec.copyfile.maxsize configuration property. When loading data to encrypted tables, Cloudera strongly recommends using a landing zone inside the same encryption zone as the table. Example 1: Loading unencrypted data to an encrypted table - Use one of the following methods: If you are loading new unencrypted data to an encrypted table, use the LOAD DATA... statement. Because the source data is not inside the encryption zone, the LOAD statement results in a copy. For this reason, Cloudera recommends landing data that you need to encrypt inside the destination encryption zone. You can use distcp to speed up the copying process if your data is inside HDFS. If the data to be loaded is already inside a Hive table, you can create a new table with a LOCATION inside an encryption zone as follows: CREATE TABLE encrypted_table [STORED AS] LOCATION... AS SELECT * FR OM <unencrypted_table> The location specified in the CREATE TABLE statement must be inside an encryption zone. Creating a table pointing LOCATION to an unencrypted directory does not encrypt your source data. You must copy your data to an encryption zone, and then point LOCATION to that zone. Example 2: Loading encrypted data to an encrypted table - If the data is already encrypted, use the CREATE TABLE statement pointing LOCATION to the encrypted source directory containing the data. This is the fastest way to create encrypted tables. CREATE TABLE encrypted_table [STORED AS] LOCATION... AS SELECT * FROM < encrypted_source_directory> Users reading data from encrypted tables that are read-only must have access to a temporary directory which is encrypted with at least as strong encryption as the table. Temporary data is now written to a directory named.hive-staging in each table or partition Previously, an INSERT OVERWRITE on a partitioned table inherited permissions for new data from the existing partition directory. With encryption enabled, permissions are inherited from the table. KMS ACL Configuration for Hive When Hive joins tables, it compares the encryption key strength for each table. For this operation to succeed, you must configure the KMS ACL to allow the hive user and group READ access to the Hive key. <property> <name>key.acl.hive-key.read</name> <value>hive hive</value> </property> If you have restricted access to the GET_METADATA operation, you must grant permission for it to the hive user or group: <property> <name>hadoop.kms.acl.get_metadata</name> <value>hive hive</value> </property> If you have disabled HiveServer2 Impersonation, you must configure the KMS ACLs to grant DECRYPT_EEK permissions to the hive user, as well as any user accessing data in the Hive warehouse. Cloudera recommends creating a group containing all Hive users, and granting DECRYPT_EEK access to that group. 46
47 For example, suppose user jdoe (home directory /user/jdoe) is a Hive user and a member of the group hiveusers. The encryption zone (EZ) key for /user/jdoe is named jdoe-key, and the EZ key for /user/hive is hive-key. The following ACL example demonstrates the required permissions: <property> <name>key.acl.hive-key.decrypt_eek</name> <value>hive hive-users</value> </property> <property> <name>key.acl.jdoe-key.decrypt_eek</name> <value>jdoe,hive</value> </property> If you have enabled HiveServer2 impersonation, data is accessed by the user submitting the query or job, and the user account (jdoe in this example) may still need to access data in their home directory. In this scenario, the required permissions are as follows: <property> <name>key.acl.hive-key.decrypt_eek</name> <value>nobody hive-users</value> </property> <property> <name>key.acl.jdoe-key.decrypt_eek</name> <value>jdoe</value> </property> Transparent Encryption Recommendations for Hue Make /user/hue an encryption zone because Oozie workflows and other Hue-specific data are stored there by default. When you create the encryption zone, name the key hue-key to take advantage of auto-generated KMS ACLs. Steps On a cluster without Hue currently installed, create the /user/hue directory and make it an encryption zone. On a cluster with Hue already installed: Create an empty /user/hue-tmp directory. Make /user/hue-tmp an encryption zone. DistCp all data from /user/hue into /user/hue-tmp. Remove /user/hue and rename /user/hue-tmp to /user/hue. KMS ACL Configuration for Hue In the KMS ACLs, grant the hue and oozie users and groups DECRYPT_EEK permission for the Hue key: <property> <name>key.acl.hue-key.decrypt_eek</name> <value>oozie,hue oozie,hue</value> </property> Transparent Encryption Recommendations for Impala There are various recommendations to consider when configuring for Impala. Recommendations If HDFS encryption is enabled, configure Impala to encrypt data spilled to local disk. 47
48 Limit the rename operations for internal tables once encryption zones are set up. Impala cannot do an ALTER TA BLE RENAME operation to move an internal table from one database to another, if the root directories for those databases are in different encryption zones. If the encryption zone covers a table directory but not the parent directory associated with the database, Impala cannot do an ALTER TABLE RENAME operation to rename an internal table, even within the same database. Avoid structuring partitioned tables where different partitions reside in different encryption zones, or where any partitions reside in an encryption zone that is different from the root directory for the table. Impala cannot do an INSERT operation into any partition that is not in the same encryption zone as the root directory of the overall table. If the data files for a table or partition are in a different encryption zone than the HDFS trashcan, use the PURGE keyword at the end of the DROP TABLE or ALTER TABLE DROP PARTITION statement to delete the HDFS data files immediately. Otherwise, the data files are left behind if they cannot be moved to the trashcan because of differing encryption zones. This syntax is available in Impala 2.3 and higher. Steps Start every impalad process with the --disk_spill_encryption=true flag set. This encrypts all spilled data using AES-256-CFB. Set this flag by selecting the Disk Spill Encryption checkbox in the Impala configuration (Impala service > Configuration > Category > Security). Important: Impala does not selectively encrypt data based on whether the source data is already encrypted in HDFS. This results in at most 15 percent performance degradation when data is spilled. KMS ACL Configuration for Impala Cloudera recommends making the impala user a member of the hive group, and following the ACL recommendations in KMS ACL Configuration for Hive. Related Information KMS ACL Configuration for Hive Transparent Encryption Recommendations for MapReduce and YARN MapReduce v1 stores both history and logs on local disks by default. Even if you do configure history to be stored on HDFS, the files are not renamed. Hence, no special configuration is required. Recommendations for MapReduce v2 (YARN) Make /user/history a single encryption zone, because history files are moved between the intermediate and done directories, and HDFS encryption does not allow moving encrypted files across encryption zones. When you create the encryption zone, name the key mapred-key to take advantage of auto-generated KMS ACLs. Steps On a cluster with MRv2 (YARN) installed, create the /user/history directory and make that an encryption zone. If /user/history already exists and is not empty: Create an empty /user/history-tmp directory. Make /user/history-tmp an encryption zone. DistCp all data from /user/history into /user/history-tmp. Remove /user/history and rename /user/history-tmp to /user/history. Transparent Encryption Recommendations for Search Make /solr an encryption zone. When you create the encryption zone, name the key solr-key to take advantage of auto-generated KMS ACLs. 48
49 Steps On a cluster without Solr currently installed, create the /solr directory and make that an encryption zone. On a cluster with Solr already installed: Create an empty /solr-tmp directory. Make /solr-tmp an encryption zone. DistCp all data from /solr into /solr-tmp. Remove /solr, and rename /solr-tmp to /solr. KMS ACL Configuration for Search In the KMS ACL, grant the solr user and group DECRYPT_EEK permission for the Solr key: <property> <name>key.acl.solr-key.decrypt_eek</name> <value>solr solr</value> </description> </property> Transparent Encryption Recommendations for Spark There are various recommendations to consider when configuring for Spark. Recommendations By default, application event logs are stored at /user/spark/applicationhistory, which can be made into an encryption zone. Spark also optionally caches its JAR file at /user/spark/share/lib (by default), but encrypting this directory is not required. Spark does not encrypt shuffle data. To do so, configure the Spark local directory, spark.local.dir (in Standalone mode), to reside on an encrypted disk. For YARN mode, make the corresponding YARN configuration changes. KMS ACL Configuration for Spark In the KMS ACL, grant DECRYPT_EEK permission for the Spark key to the spark user and any groups that can submit Spark jobs: <property> <name>key.acl.spark-key.decrypt_eek</name> <value>spark spark-users</value> </property> Transparent Encryption Recommendations for Sqoop There are various recommendations to consider when configuring for Sqoop. Recommendations For Hive support: Ensure that you are using Sqoop with the --target-dir parameter set to a directory that is inside the Hive encryption zone. For append/incremental support: Make sure that the sqoop.test.import.rootdir property points to the same encryption zone as the --target-dir argument. For HCatalog support: No special configuration is required. 49
50 Migrating Keys from a Java KeyStore to Cloudera Navigator Key Trustee Server You can migrate keys from an existing Java KeyStore (JKS) to Key Trustee Server to improve security, durability, and scalability. If you are using the Java KeyStore KMS service, and want to use Key Trustee Server as the backing key store for, use the following procedure. This procedure assumes that the Java KeyStore (JKS) is on the same host as the new Key Trustee KMS service. 1. Stop the Java KeyStore KMS service. 2. Add and configure the Key Trustee KMS service, and configure HDFS to use it for its KMS Service setting. 3. Restart the HDFS service and redeploy client configuration for this to take effect: a. Home > Cluster-wide > Deploy Client Configuration 4. Add the following to the Key Management Server Proxy Advanced Configuration Snippet (Safety Valve) for kms-site.xml (Key Trustee KMS Service > Configuration > Category > Advanced): <property> <name>hadoop.kms.key.provider.uri</name> <value>keytrustee://file@/var/lib/kms-keytrustee/keytrustee/.keytrustee/,jceks://file@/path/to/kms.keystore</value> <description>uri of the backing KeyProvider for the KMS</description> </property> <property> <name>hadoop.security.keystore.java-keystore-provider.password-file</ name> <value>/tmp/password.txt</value> <description>java KeyStore password file</description> </property> If the Java KeyStore is not password protected, omit the hadoop.security.keystore.java-keysto re-provider.password-file property. 5. Click Save Changes and restart the Key Trustee KMS service. If the Java KeyStore is not password protected, skip to step Create the file /var/lib/keytrustee-kms/jetty-deployment/webapps/kms/web-inf/cla sses/tmp/password.txt and add the Java KeyStore password to it. 7. Change the ownership of /var/lib/keytrustee-kms/jetty-deployment/webapps/kms/webinf/classes/tmp/password.txt to kms:kms: sudo chown kms:kms /var/lib/keytrustee-kms/jetty-deployment/webapps/kms/ WEB-INF/classes/tmp/password.txt 8. From the host running the Key Trustee KMS service, if you have not configured Kerberos and TLS/SSL, run the following command: curl -L -d "trusteeop=migrate" " ustee/key/migrate?user.name=username&trusteeop=migrate" If you have configured Kerberos and TLS/SSL, use the following command instead: curl --negotiate -u : -L -d "trusteeop=migrate" "htt ps://kms01.example.com:16000/kms/v1/trustee/key/migrate?user.n ame=username&trusteeop=migrate" --cacert /path/to/kms/cert 9. Monitor /var/log/kms-keytrustee/kms.log and /var/log/kms-keytrustee/kms-cata lina.<date>.log to verify that the migration is successful. You can also run sudo -u <key_admin> hadoop key list to verify that the keys are listed. 50
51 10. After you have verified that the migration is successful, remove the safety valve entry used in step 3 and restart the Key Trustee KMS service. Configuring CDP Services for HDFS Encryption This page contains recommendations for setting up with various CDP services. Important: HDFS encryption does not support file transfer (reading, writing files) between zones through WebHDFS. For web-based file transfer between encryption zones managed by HDFS, use HttpFS with a load balancer ( Add the HttpFS role ) instead. Important: Encrypting /tmp using HDFS encryption is not supported. HBase Recommendations Make /hbase an encryption zone. Do not create encryption zones as subdirectories under /hbase, because HBase may need to rename files across those subdirectories. When you create the encryption zone, name the key hbasekey to take advantage of auto-generated KMS ACLs ( Configuring KMS Access Control Lists (ACLs) ). Steps On a cluster without HBase currently installed, create the /hbase directory and make that an encryption zone. On a cluster with HBase already installed, perform the following steps: Stop the HBase service. Move data from the /hbase directory to /hbase-tmp. Create an empty /hbase directory and make it an encryption zone. Distcp all data from /hbase-tmp to /hbase, preserving user-group permissions and extended attributes. Start the HBase service and verify that it is working as expected. Remove the /hbase-tmp directory. KMS ACL Configuration for HBase In the KMS ACL ( Configuring KMS Access Control Lists (ACLs) ), grant the hbase user and group DECRYPT_ EEK permission for the HBase key: <property> <name>key.acl.hbase-key.decrypt_eek</name> <value>hbase hbase</value> </description> </property> Hive HDFS encryption has been designed so that files cannot be moved from one encryption zone to another or from encryption zones to unencrypted directories. Therefore, the landing zone for data when using the LOAD DATA IN PATH command must always be inside the destination encryption zone. To use HDFS encryption with Hive, ensure you are using one of the following configurations: 51
52 Single Encryption Zone With this configuration, you can use HDFS encryption by having all Hive data inside the same encryption zone. In, configure the Hive Scratch Directory (hive.exec.scratchdir) to be inside the encryption zone. Recommended HDFS Path: /user/hive To use the auto-generated KMS ACLs ( Configuring KMS Access Control Lists (ACLs) ), make sure you name the encryption key hive-key. For example, to configure a single encryption zone for the entire Hive warehouse, you can rename /user/hive to /user/hive-old, create an encryption zone at /user/hive, and then distcp all the data from /user/hi ve-old to /user/hive. In, configure the Hive Scratch Directory (hive.exec.scratchdir) to be inside the encryption zone by setting it to /user/hive/tmp, ensuring that permissions are 1777 on /user/hive/tmp. Multiple Encryption Zones With this configuration, you can use encrypted databases or tables with different encryption keys. To read data from read-only encrypted tables, users must have access to a temporary directory that is encrypted at least as strongly as the table. For example: 1. Configure two encrypted tables, eztbl1 and eztbl2. 2. Create two new encryption zones, /data/eztbl1 and /data/eztbl2. 3. Load data to the tables in Hive using LOAD statements. For more information, see Changed Behavior after HDFS Encryption is Enabled on page 52. Other Encrypted Directories LOCALSCRATCHDIR: The MapJoin optimization in Hive writes HDFS tables to a local directory and then uploads them to the distributed cache. To ensure these files are encrypted, either disable MapJoin by setting hive.auto.convert.join to false, or encrypt the local Hive Scratch directory (hive.exec.local.scra tchdir) using Cloudera Navigator Encrypt. DOWNLOADED_RESOURCES_DIR: JARs that are added to a user session and stored in HDFS are downloaded to hive.downloaded.resources.dir on the HiveServer2 local filesystem. To encrypt these JAR files, configure Cloudera Navigator Encrypt to encrypt the directory specified by hive.downloaded.resource s.dir. NodeManager Local Directory List: Hive stores JARs and MapJoin files in the distributed cache. To use MapJoin or encrypt JARs and other resource files, the yarn.nodemanager.local-dirs YARN configuration property must be configured to a set of encrypted local directories on all nodes. Changed Behavior after HDFS Encryption is Enabled Loading data from one encryption zone to another results in a copy of the data. Distcp is used to speed up the process if the size of the files being copied is higher than the value specified by HIVE_EXEC_COPYFILE_M AXSIZE. The minimum size limit for HIVE_EXEC_COPYFILE_MAXSIZE is 32 MB, which you can modify by changing the value for the hive.exec.copyfile.maxsize configuration property. When loading data to encrypted tables, Cloudera strongly recommends using a landing zone inside the same encryption zone as the table. Example 1: Loading unencrypted data to an encrypted table - Use one of the following methods: If you are loading new unencrypted data to an encrypted table, use the LOAD DATA... statement. Because the source data is not inside the encryption zone, the LOAD statement results in a copy. For this reason, Cloudera recommends landing data that you need to encrypt inside the destination encryption zone. You can use distcp to speed up the copying process if your data is inside HDFS. 52
53 If the data to be loaded is already inside a Hive table, you can create a new table with a LOCATION inside an encryption zone as follows: CREATE TABLE encrypted_table [STORED AS] LOCATION... AS SELECT * FR OM <unencrypted_table> The location specified in the CREATE TABLE statement must be inside an encryption zone. Creating a table pointing LOCATION to an unencrypted directory does not encrypt your source data. You must copy your data to an encryption zone, and then point LOCATION to that zone. Example 2: Loading encrypted data to an encrypted table - If the data is already encrypted, use the CREATE TABLE statement pointing LOCATION to the encrypted source directory containing the data. This is the fastest way to create encrypted tables. CREATE TABLE encrypted_table [STORED AS] LOCATION... AS SELECT * FROM < encrypted_source_directory> Users reading data from encrypted tables that are read-only must have access to a temporary directory which is encrypted with at least as strong encryption as the table. Temporary data is now written to a directory named.hive-staging in each table or partition Previously, an INSERT OVERWRITE on a partitioned table inherited permissions for new data from the existing partition directory. With encryption enabled, permissions are inherited from the table. KMS ACL Configuration for Hive When Hive joins tables, it compares the encryption key strength for each table. For this operation to succeed, you must configure the KMS ACLs ( Configuring KMS Access Control Lists (ACLs) ) to allow the hive user and group READ access to the Hive key: <property> <name>key.acl.hive-key.read</name> <value>hive hive</value> </property> If you have restricted access to the GET_METADATA operation, you must grant permission for it to the hive user or group: <property> <name>hadoop.kms.acl.get_metadata</name> <value>hive hive</value> </property> If you have disabled HiveServer2 Security Configuration, you must configure the KMS ACLs to grant DECRYPT_ EEK permissions to the hive user, as well as any user accessing data in the Hive warehouse. Cloudera recommends creating a group containing all Hive users, and granting DECRYPT_EEK access to that group. For example, suppose user jdoe (home directory /user/jdoe) is a Hive user and a member of the group hiveusers. The encryption zone (EZ) key for /user/jdoe is named jdoe-key, and the EZ key for /user/hive is hive-key. The following ACL example demonstrates the required permissions: <property> <name>key.acl.hive-key.decrypt_eek</name> <value>hive hive-users</value> </property> <property> <name>key.acl.jdoe-key.decrypt_eek</name> <value>jdoe,hive</value> </property> 53
54 If you have enabled HiveServer2 impersonation, data is accessed by the user submitting the query or job, and the user account (jdoe in this example) may still need to access data in their home directory. In this scenario, the required permissions are as follows: <property> <name>key.acl.hive-key.decrypt_eek</name> <value>nobody hive-users</value> </property> <property> <name>key.acl.jdoe-key.decrypt_eek</name> <value>jdoe</value> </property> Hue Recommendations Make /user/hue an encryption zone because Oozie workflows and other Hue-specific data are stored there by default. When you create the encryption zone, name the key hue-key to take advantage of auto-generated KMS ACLs ( Configuring KMS Access Control Lists (ACLs) ). Steps On a cluster without Hue currently installed, create the /user/hue directory and make it an encryption zone. On a cluster with Hue already installed: Create an empty /user/hue-tmp directory. Make /user/hue-tmp an encryption zone. DistCp all data from /user/hue into /user/hue-tmp. Remove /user/hue and rename /user/hue-tmp to /user/hue. KMS ACL Configuration for Hue In the KMS ACLs ( Configuring KMS Access Control Lists (ACLs) ), grant the hue and oozie users and groups DECRYPT_EEK permission for the Hue key: <property> <name>key.acl.hue-key.decrypt_eek</name> <value>oozie,hue oozie,hue</value> </property> Impala Recommendations If HDFS encryption is enabled, configure Impala to encrypt data spilled to local disk. In releases lower than Impala / CDH 5.4.0, Impala does not support the LOAD DATA statement when the source and destination are in different encryption zones. If you are running an affected release and need to use LOAD DATA with HDFS encryption enabled, copy the data to the table's encryption zone prior to running the statement. Use Cloudera Navigator to lock down the local directory where Impala UDFs are copied during execution. By default, Impala copies UDFs into /tmp, and you can configure this location through the --local_library_ dir startup flag for the impalad daemon. Limit the rename operations for internal tables once encryption zones are set up. Impala cannot do an ALTER TA BLE RENAME operation to move an internal table from one database to another, if the root directories for those databases are in different encryption zones. If the encryption zone covers a table directory but not the parent 54
55 directory associated with the database, Impala cannot do an ALTER TABLE RENAME operation to rename an internal table, even within the same database. Avoid structuring partitioned tables where different partitions reside in different encryption zones, or where any partitions reside in an encryption zone that is different from the root directory for the table. Impala cannot do an INSERT operation into any partition that is not in the same encryption zone as the root directory of the overall table. If the data files for a table or partition are in a different encryption zone than the HDFS trashcan, use the PURGE keyword at the end of the DROP TABLE or ALTER TABLE DROP PARTITION statement to delete the HDFS data files immediately. Otherwise, the data files are left behind if they cannot be moved to the trashcan because of differing encryption zones. This syntax is available in Impala 2.3 / CDH 5.5 and higher. Steps Start every impalad process with the --disk_spill_encryption=true flag set. This encrypts all spilled data using AES-256-CFB. Set this flag by selecting the Disk Spill Encryption checkbox in the Impala configuration (Impala service > Configuration > Category > Security). Important: Impala does not selectively encrypt data based on whether the source data is already encrypted in HDFS. This results in at most 15 percent performance degradation when data is spilled. KMS ACL Configuration for Impala Cloudera recommends making the impala user a member of the hive group, and following the ACL recommendations in KMS ACL Configuration for Hive on page 53. MapReduce and YARN MapReduce v1 Recommendations MRv1 stores both history and logs on local disks by default. Even if you do configure history to be stored on HDFS, the files are not renamed. Hence, no special configuration is required. MapReduce v2 (YARN) Recommendations Make /user/history a single encryption zone, because history files are moved between the intermediate and done directories, and HDFS encryption does not allow moving encrypted files across encryption zones. When you create the encryption zone, name the key mapred-key to take advantage of auto-generated KMS ACLs ( Configuring KMS Access Control Lists (ACLs) ). Steps On a cluster with MRv2 (YARN) installed, create the /user/history directory and make that an encryption zone. If /user/history already exists and is not empty: Create an empty /user/history-tmp directory. Make /user/history-tmp an encryption zone. DistCp all data from /user/history into /user/history-tmp. Remove /user/history and rename /user/history-tmp to /user/history. 55
56 KMS ACL Configuration for MapReduce In the KMS ACLs ( Configuring KMS Access Control Lists (ACLs) ), grant DECRYPT_EEK permission for the MapReduce key to the mapred and yarn users and the hadoop group: <property> <name>key.acl.mapred-key.decrypt_eek</name> <value>mapred,yarn hadoop</value> </description> </property> Search Recommendations Make /solr an encryption zone. When you create the encryption zone, name the key solr-key to take advantage of auto-generated KMS ACLs ( Configuring KMS Access Control Lists (ACLs) ). Steps On a cluster without Solr currently installed, create the /solr directory and make that an encryption zone. On a cluster with Solr already installed: Create an empty /solr-tmp directory. Make /solr-tmp an encryption zone. DistCp all data from /solr into /solr-tmp. Remove /solr, and rename /solr-tmp to /solr. KMS ACL Configuration for Search In the KMS ACLs ( Configuring KMS Access Control Lists (ACLs) ), grant the solr user and group DECRYPT_ EEK permission for the Solr key: <property> <name>key.acl.solr-key.decrypt_eek</name> <value>solr solr</value> </description> </property> Spark Recommendations By default, application event logs are stored at /user/spark/applicationhistory, which can be made into an encryption zone. Spark also optionally caches its JAR file at /user/spark/share/lib (by default), but encrypting this directory is not required. Spark does not encrypt shuffle data. To do so, configure the Spark local directory, spark.local.dir (in Standalone mode), to reside on an encrypted disk. For YARN mode, make the corresponding YARN configuration changes. KMS ACL Configuration for Spark In the KMS ACLs ( Configuring KMS Access Control Lists (ACLs) ), grant DECRYPT_EEK permission for the Spark key to the spark user and any groups that can submit Spark jobs: <property> <name>key.acl.spark-key.decrypt_eek</name> 56
57 <value>spark spark-users</value> </property> Sqoop Recommendations For Hive support: Ensure that you are using Sqoop with the --target-dir parameter set to a directory that is inside the Hive encryption zone. For more details, see Hive on page 51. For append/incremental support: Make sure that the sqoop.test.import.rootdir property points to the same encryption zone as the --target-dir argument. For HCatalog support: No special configuration is required. Using the Ranger Key Management Service Ranger KMS can be accessed by logging into the Ranger web UI as the KMS administrator. Role Separation Ranger uses separate admin users for Ranger and Ranger KMS. The Ranger admin user manages Ranger access policies. The Ranger KMS admin user (keyadmin by default) manages access policies and keys for Ranger KMS, and has access to a different set of UI features than the Ranger admin user. Using separate administrator accounts for Ranger and Ranger KMS separates encryption work (encryption keys and policies) from cluster management and access policy management. Note: For more information about creating, deleting, listing, and rolling over existing keys using Ranger REST APIs, see Accessing the Ranger KMS Web UI How to access the Ranger Key Management Service web UI. To access Ranger KMS, click the Ranger Admin web UI link, enter your Ranger KMS admin user name and password, then click Sign In. 57

58 After logging in, the Service Manager page appears. 58

59 59
60 To edit Ranger KMS repository properties, click the Edit icon for the service and update the settings on the Edit Service page. 60
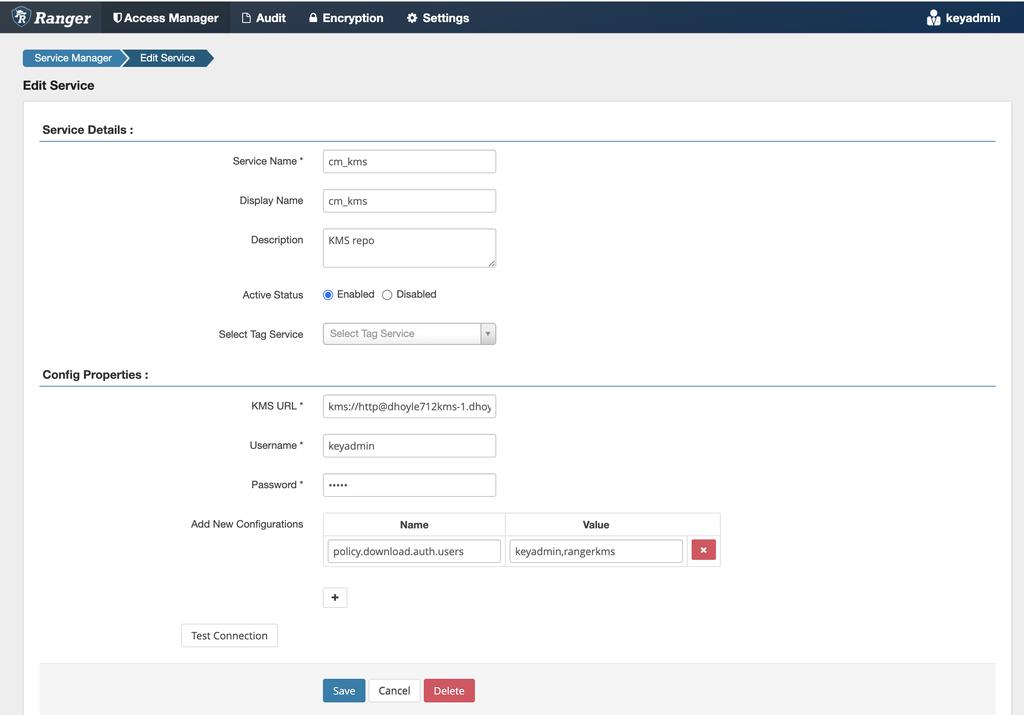
61 61
62 List and Create Keys How to list and create Ranger KMS keys. List existing keys 1. Log in to Ranger as the Ranger KMS admin user. 2. Click Encryption in the top menu to display the Key Management page. 3. Use the Select Service box to Select a Ranger KMS service. The keys for the service are dislayed. 62
63 63
64 Create a new key Click Add New Key. On the Key Detail page, add a valid key name. Specify a cipher. Ranger KMS supports AES/CTR/NoPadding as the cipher suite. Specify the key length: 128 or 256 bits. Add other attributes as needed, then click Save. 64

65 65
66 Roll Over an Existing Key How to roll over an existing Ranger KMS key. About this task Rolling over (or "rotating") a key retains the same key name, but the key will have a different version. This operation re-encrypts existing file keys, but does not re-encrypt the actual file. Keys can be rolled over at any time. After a key is rotated in Ranger KMS, new files will have the file key encrypted by the new master key for the encryption zone. Procedure 1. Log in to Ranger as the Ranger KMS admin user, click Encryption in the top menu, then select a Ranger KMS service. 66
67 2. To rotate a key, click the Rollover icon for the key in the Action column. 67

68 68

69 3. Click OK on the confirmation pop-up. 69
Extended Attributes and Transparent Encryption in Apache Hadoop
 Extended Attributes and Transparent Encryption in Apache Hadoop Uma Maheswara Rao G Yi Liu ( 刘 轶 ) Who we are? Uma Maheswara Rao G - umamahesh@apache.org - Software Engineer at Intel - PMC/committer, Apache
IBM Software Information Management Creating an Integrated, Optimized, and Secure Enterprise Data Platform:
 Creating an Integrated, Optimized, and Secure Enterprise Data Platform: IBM PureData System for Transactions with SafeNet s ProtectDB and DataSecure Table of contents 1. Data, Data, Everywhere... 3 2.
Veeam Cloud Connect. Version 8.0. Administrator Guide
 Veeam Cloud Connect Version 8.0 Administrator Guide April, 2015 2015 Veeam Software. All rights reserved. All trademarks are the property of their respective owners. No part of this publication may be
Cloudera Enterprise Reference Architecture for Google Cloud Platform Deployments
 Cloudera Enterprise Reference Architecture for Google Cloud Platform Deployments Important Notice 2010-2016 Cloudera, Inc. All rights reserved. Cloudera, the Cloudera logo, Cloudera Impala, Impala, and
Cloudera Enterprise Reference Architecture for Google Cloud Platform Deployments
 Cloudera Enterprise Reference Architecture for Google Cloud Platform Deployments Important Notice 2010-2015 Cloudera, Inc. All rights reserved. Cloudera, the Cloudera logo, Cloudera Impala, Impala, and
Netwrix Auditor for Exchange
 Netwrix Auditor for Exchange Quick-Start Guide Version: 8.0 4/22/2016 Legal Notice The information in this publication is furnished for information use only, and does not constitute a commitment from Netwrix
Cloudera Backup and Disaster Recovery
 Cloudera Backup and Disaster Recovery Important Note: Cloudera Manager 4 and CDH 4 have reached End of Maintenance (EOM) on August 9, 2015. Cloudera will not support or provide patches for any of the Cloudera
Syncplicity On-Premise Storage Connector
 Syncplicity On-Premise Storage Connector Implementation Guide Abstract This document explains how to install and configure the Syncplicity On-Premise Storage Connector. In addition, it also describes how
insync Installation Guide
 insync Installation Guide 5.2 Private Cloud Druva Software June 21, 13 Copyright 2007-2013 Druva Inc. All Rights Reserved. Table of Contents Deploying insync Private Cloud... 4 Installing insync Private
Introduction to Mobile Access Gateway Installation
 Introduction to Mobile Access Gateway Installation This document describes the installation process for the Mobile Access Gateway (MAG), which is an enterprise integration component that provides a secure
Cloudera Manager Training: Hands-On Exercises
 201408 Cloudera Manager Training: Hands-On Exercises General Notes... 2 In- Class Preparation: Accessing Your Cluster... 3 Self- Study Preparation: Creating Your Cluster... 4 Hands- On Exercise: Working
OnCommand Performance Manager 1.1
 OnCommand Performance Manager 1.1 Installation and Setup Guide For Red Hat Enterprise Linux NetApp, Inc. 495 East Java Drive Sunnyvale, CA 94089 U.S. Telephone: +1 (408) 822-6000 Fax: +1 (408) 822-4501
Installing and Configuring vcloud Connector
 Installing and Configuring vcloud Connector vcloud Connector 2.0.0 This document supports the version of each product listed and supports all subsequent versions until the document is replaced by a new
Cloudera Backup and Disaster Recovery
 Cloudera Backup and Disaster Recovery Important Notice (c) 2010-2013 Cloudera, Inc. All rights reserved. Cloudera, the Cloudera logo, Cloudera Impala, and any other product or service names or slogans
Enterprise Manager. Version 6.2. Installation Guide
 Enterprise Manager Version 6.2 Installation Guide Enterprise Manager 6.2 Installation Guide Document Number 680-028-014 Revision Date Description A August 2012 Initial release to support version 6.2.1
Parallels Plesk Automation
 Parallels Plesk Automation Contents Get Started 3 Infrastructure Configuration... 4 Network Configuration... 6 Installing Parallels Plesk Automation 7 Deploying Infrastructure 9 Installing License Keys
CA Identity Manager. Installation Guide (WebLogic) r12.5 SP8
 r12.5 SP8") CA Identity Manager Installation Guide (WebLogic) r12.5 SP8 This documentation, which includes embedded help systems and electronically distributed materials, (hereinafter referred to as the Documentation
CA Identity Manager Installation Guide (WebLogic) r12.5 SP8 This documentation, which includes embedded help systems and electronically distributed materials, (hereinafter referred to as the Documentation
SSL Configuration on Weblogic Oracle FLEXCUBE Universal Banking Release 12.0.87.01.0 [August] [2014]
![SSL Configuration on Weblogic Oracle FLEXCUBE Universal Banking Release 12.0.87.01.0 [August] [2014]](/thumbs/34/16904074.jpg "SSL Configuration on Weblogic Oracle FLEXCUBE Universal Banking Release 12.0.87.01.0 [August] [2014]") SSL Configuration on Weblogic Oracle FLEXCUBE Universal Banking Release 12.0.87.01.0 [August] [2014] Table of Contents 1. CONFIGURING SSL ON ORACLE WEBLOGIC... 1-1 1.1 INTRODUCTION... 1-1 1.2 SETTING UP
SSL Configuration on Weblogic Oracle FLEXCUBE Universal Banking Release 12.0.87.01.0 [August] [2014] Table of Contents 1. CONFIGURING SSL ON ORACLE WEBLOGIC... 1-1 1.1 INTRODUCTION... 1-1 1.2 SETTING UP
Tivoli Endpoint Manager for Remote Control Version 8 Release 2. User s Guide
 Tivoli Endpoint Manager for Remote Control Version 8 Release 2 User s Guide Tivoli Endpoint Manager for Remote Control Version 8 Release 2 User s Guide Note Before using this information and the product
Configuring TLS Security for Cloudera Manager
 Configuring TLS Security for Cloudera Manager Cloudera, Inc. 220 Portage Avenue Palo Alto, CA 94306 info@cloudera.com US: 1-888-789-1488 Intl: 1-650-362-0488 www.cloudera.com Notice 2010-2012 Cloudera,
Centrify Identity and Access Management for Cloudera
 Centrify Identity and Access Management for Cloudera Integration Guide Abstract Centrify Server Suite is an enterprise-class solution that secures Cloudera Enterprise Data Hub leveraging an organization
Active Directory Rights Management Service Integration Guide
 Active Directory Rights Management Service Integration Guide Preface Preface 2013 SafeNet, Inc. All rights reserved. Part Number: 007-011230-001 (Rev F, 07/2013) All intellectual property is protected
Installing and Configuring vcloud Connector
 Installing and Configuring vcloud Connector vcloud Connector 2.7.0 This document supports the version of each product listed and supports all subsequent versions until the document is replaced by a new
VMware vcenter Update Manager Administration Guide
 VMware vcenter Update Manager Administration Guide Update 1 vcenter Update Manager 4.0 This document supports the version of each product listed and supports all subsequent versions until the document
How To Use Cloudera Manager Backup And Disaster Recovery (Brd) On A Microsoft Hadoop 5.5.5 (Clouderma) On An Ubuntu 5.2.5 Or 5.3.5
 On A Microsoft Hadoop 5.5.5 (Clouderma) On An Ubuntu 5.2.5 Or 5.3.5") Cloudera Manager Backup and Disaster Recovery Important Notice (c) 2010-2015 Cloudera, Inc. All rights reserved. Cloudera, the Cloudera logo, Cloudera Impala, and any other product or service names or
Cloudera Manager Backup and Disaster Recovery Important Notice (c) 2010-2015 Cloudera, Inc. All rights reserved. Cloudera, the Cloudera logo, Cloudera Impala, and any other product or service names or
DameWare Server. Administrator Guide
 DameWare Server Administrator Guide About DameWare Contact Information Team Contact Information Sales 1.866.270.1449 General Support Technical Support Customer Service User Forums http://www.dameware.com/customers.aspx
How To Install An Aneka Cloud On A Windows 7 Computer (For Free)
") MANJRASOFT PTY LTD Aneka 3.0 Manjrasoft 5/13/2013 This document describes in detail the steps involved in installing and configuring an Aneka Cloud. It covers the prerequisites for the installation, the
MANJRASOFT PTY LTD Aneka 3.0 Manjrasoft 5/13/2013 This document describes in detail the steps involved in installing and configuring an Aneka Cloud. It covers the prerequisites for the installation, the
Fast, Low-Overhead Encryption for Apache Hadoop*
 Fast, Low-Overhead Encryption for Apache Hadoop* Solution Brief Intel Xeon Processors Intel Advanced Encryption Standard New Instructions (Intel AES-NI) The Intel Distribution for Apache Hadoop* software
Netwrix Auditor for SQL Server
 Netwrix Auditor for SQL Server Quick-Start Guide Version: 8.0 4/22/2016 Legal Notice The information in this publication is furnished for information use only, and does not constitute a commitment from
Interworks. Interworks Cloud Platform Installation Guide
 Interworks Interworks Cloud Platform Installation Guide Published: March, 2014 This document contains information proprietary to Interworks and its receipt or possession does not convey any rights to reproduce,
QuickStart Guide for Managing Mobile Devices. Version 9.2
 QuickStart Guide for Managing Mobile Devices Version 9.2 JAMF Software, LLC 2013 JAMF Software, LLC. All rights reserved. JAMF Software has made all efforts to ensure that this guide is accurate. JAMF
Dell One Identity Cloud Access Manager 7.0.2. Installation Guide
 Dell One Identity Cloud Access Manager 7.0.2 2014 Dell Inc. ALL RIGHTS RESERVED. This guide contains proprietary information protected by copyright. The software described in this guide is furnished under
JAMF Software Server Installation and Configuration Guide for OS X. Version 9.2
 JAMF Software Server Installation and Configuration Guide for OS X Version 9.2 JAMF Software, LLC 2013 JAMF Software, LLC. All rights reserved. JAMF Software has made all efforts to ensure that this guide
XenClient Enterprise Synchronizer Installation Guide
 XenClient Enterprise Synchronizer Installation Guide Version 5.1.0 March 26, 2014 Table of Contents About this Guide...3 Hardware, Software and Browser Requirements...3 BIOS Settings...4 Adding Hyper-V
NetIQ Sentinel 7.0.1 Quick Start Guide
 NetIQ Sentinel 7.0.1 Quick Start Guide April 2012 Getting Started Use the following information to get Sentinel installed and running quickly. Meeting System Requirements on page 1 Installing Sentinel
CA SiteMinder. Web Agent Installation Guide for IIS 12.51
 CA SiteMinder Web Agent Installation Guide for IIS 12.51 This Documentation, which includes embedded help systems and electronically distributed materials (hereinafter referred to as the Documentation
Netwrix Auditor for Active Directory
 Netwrix Auditor for Active Directory Quick-Start Guide Version: 7.1 10/26/2015 Legal Notice The information in this publication is furnished for information use only, and does not constitute a commitment
vsphere Replication for Disaster Recovery to Cloud
 vsphere Replication for Disaster Recovery to Cloud vsphere Replication 6.0 This document supports the version of each product listed and supports all subsequent versions until the document is replaced
CDH 5 Quick Start Guide
 CDH 5 Quick Start Guide Important Notice (c) 2010-2015 Cloudera, Inc. All rights reserved. Cloudera, the Cloudera logo, Cloudera Impala, and any other product or service names or slogans contained in this
www.novell.com/documentation Server Installation ZENworks Mobile Management 2.7.x August 2013
 www.novell.com/documentation Server Installation ZENworks Mobile Management 2.7.x August 2013 Legal Notices Novell, Inc., makes no representations or warranties with respect to the contents or use of this
JAMF Software Server Installation and Configuration Guide for Windows. Version 9.3
 JAMF Software Server Installation and Configuration Guide for Windows Version 9.3 JAMF Software, LLC 2014 JAMF Software, LLC. All rights reserved. JAMF Software has made all efforts to ensure that this
Introduction to Hyper-V High- Availability with Failover Clustering
 Introduction to Hyper-V High- Availability with Failover Clustering Lab Guide This lab is for anyone who wants to learn about Windows Server 2012 R2 Failover Clustering, focusing on configuration for Hyper-V
Netwrix Auditor for SQL Server
 Netwrix Auditor for SQL Server Quick-Start Guide Version: 7.1 10/26/2015 Legal Notice The information in this publication is furnished for information use only, and does not constitute a commitment from
Creating and Managing Certificates for My webmethods Server. Version 8.2 and Later
 Creating and Managing Certificates for My webmethods Server Version 8.2 and Later November 2011 Contents Introduction...4 Scope... 4 Assumptions... 4 Terminology... 4 File Formats... 5 Truststore Formats...
Synchronizer Installation
 Synchronizer Installation Synchronizer Installation Synchronizer Installation This document provides instructions for installing Synchronizer. Synchronizer performs all the administrative tasks for XenClient
CA Nimsoft Unified Management Portal
 CA Nimsoft Unified Management Portal HTTPS Implementation Guide 7.6 Document Revision History Document Version Date Changes 1.0 June 2014 Initial version for UMP 7.6. CA Nimsoft Monitor Copyright Notice
BlackBerry Enterprise Service 10. Secure Work Space for ios and Android Version: 10.1.1. Security Note
 BlackBerry Enterprise Service 10 Secure Work Space for ios and Android Version: 10.1.1 Security Note Published: 2013-06-21 SWD-20130621110651069 Contents 1 About this guide...4 2 What is BlackBerry Enterprise
PowerChute TM Network Shutdown Security Features & Deployment
 PowerChute TM Network Shutdown Security Features & Deployment By David Grehan, Sarah Jane Hannon ABSTRACT PowerChute TM Network Shutdown (PowerChute) software works in conjunction with the UPS Network
Upgrading VMware Identity Manager Connector
 Upgrading VMware Identity Manager Connector VMware Identity Manager This document supports the version of each product listed and supports all subsequent versions until the document is replaced by a new
Quick Start Guide for Parallels Virtuozzo
 PROPALMS VDI Version 2.1 Quick Start Guide for Parallels Virtuozzo Rev. 1.1 Published: JULY-2011 1999-2011 Propalms Ltd. All rights reserved. The information contained in this document represents the current
EMC DATA DOMAIN ENCRYPTION A Detailed Review
 White Paper EMC DATA DOMAIN ENCRYPTION A Detailed Review Abstract The proliferation of publicized data loss, coupled with new governance and compliance regulations, is driving the need for customers to
ACE Management Server Deployment Guide VMware ACE 2.0
 Technical Note ACE Management Server Deployment Guide VMware ACE 2.0 This technical note provides guidelines for the deployment of VMware ACE Management Servers, including capacity planning and best practices.
Installing and Administering VMware vsphere Update Manager
 Installing and Administering VMware vsphere Update Manager Update 1 vsphere Update Manager 5.1 This document supports the version of each product listed and supports all subsequent versions until the document
CA Performance Center
 CA Performance Center Single Sign-On User Guide 2.4 This Documentation, which includes embedded help systems and electronically distributed materials, (hereinafter referred to as the Documentation ) is
IDENTIKEY Server Windows Installation Guide 3.2
 IDENTIKEY Server Windows Installation Guide 3.2 Disclaimer of Warranties and Limitations of Liabilities Disclaimer of Warranties and Limitations of Liabilities The Product is provided on an 'as is' basis,
Enabling SSL and Client Certificates on the SAP J2EE Engine
 Enabling SSL and Client Certificates on the SAP J2EE Engine Angel Dichev RIG, SAP Labs SAP AG 1 Learning Objectives As a result of this session, you will be able to: Understand the different SAP J2EE Engine
CA SiteMinder. Web Agent Installation Guide for IIS. r12.5
 CA SiteMinder Web Agent Installation Guide for IIS r12.5 This Documentation, which includes embedded help systems and electronically distributed materials, (hereinafter referred to as the Documentation
JAMF Software Server Installation and Configuration Guide for Linux. Version 9.2
 JAMF Software Server Installation and Configuration Guide for Linux Version 9.2 JAMF Software, LLC 2013 JAMF Software, LLC. All rights reserved. JAMF Software has made all efforts to ensure that this guide
CA ARCserve Backup for Windows
 CA ARCserve Backup for Windows Agent for Microsoft SharePoint Server Guide r15 This documentation and any related computer software help programs (hereinafter referred to as the "Documentation") are for
CA IdentityMinder. Installation Guide (WebLogic) 12.6
 12.6") CA IdentityMinder Installation Guide (WebLogic) 12.6 This Documentation, which includes embedded help systems and electronically distributed materials, (hereinafter referred to as the Documentation ) is
CA IdentityMinder Installation Guide (WebLogic) 12.6 This Documentation, which includes embedded help systems and electronically distributed materials, (hereinafter referred to as the Documentation ) is
VMware Horizon FLEX User Guide
 Horizon FLEX 1.5 This document supports the version of each product listed and supports all subsequent versions until the document is replaced by a new edition. To check for more recent editions of this
Quick Start Guide for VMware and Windows 7
 PROPALMS VDI Version 2.1 Quick Start Guide for VMware and Windows 7 Rev. 1.1 Published: JULY-2011 1999-2011 Propalms Ltd. All rights reserved. The information contained in this document represents the
Certificate Management
 Certificate Management Palo Alto Networks PAN-OS Administrator s Guide Version 6.0 Contact Information Corporate Headquarters: Palo Alto Networks 4401 Great America Parkway Santa Clara, CA 95054 www.paloaltonetworks.com/company/contact-us
EMC Data Protection Search
 EMC Data Protection Search Version 1.0 Security Configuration Guide 302-001-611 REV 01 Copyright 2014-2015 EMC Corporation. All rights reserved. Published in USA. Published April 20, 2015 EMC believes
Netwrix Auditor for Windows Server
 Netwrix Auditor for Windows Server Quick-Start Guide Version: 7.0 7/7/2015 Legal Notice The information in this publication is furnished for information use only, and does not constitute a commitment from
How To Install Powerpoint 6 On A Windows Server With A Powerpoint 2.5 (Powerpoint) And Powerpoint 3.5.5 On A Microsoft Powerpoint 4.5 Powerpoint (Powerpoints) And A Powerpoints 2
 And Powerpoint 3.5.5 On A Microsoft Powerpoint 4.5 Powerpoint (Powerpoints) And A Powerpoints 2") DocAve 6 Service Pack 1 Installation Guide Revision C Issued September 2012 1 Table of Contents About the Installation Guide... 4 Submitting Documentation Feedback to AvePoint... 4 Before You Begin...
DocAve 6 Service Pack 1 Installation Guide Revision C Issued September 2012 1 Table of Contents About the Installation Guide... 4 Submitting Documentation Feedback to AvePoint... 4 Before You Begin...
JAMF Software Server Installation Guide for Linux. Version 8.6
 JAMF Software Server Installation Guide for Linux Version 8.6 JAMF Software, LLC 2012 JAMF Software, LLC. All rights reserved. JAMF Software has made all efforts to ensure that this guide is accurate.
Installing and Configuring vcenter Multi-Hypervisor Manager
 Installing and Configuring vcenter Multi-Hypervisor Manager vcenter Server 5.1 vcenter Multi-Hypervisor Manager 1.1 This document supports the version of each product listed and supports all subsequent
Getting Started with ESXi Embedded
 ESXi 4.1 Embedded vcenter Server 4.1 This document supports the version of each product listed and supports all subsequent versions until the document is replaced by a new edition. To check for more recent
Installation Guide. SAP Control Center 3.3
 Installation Guide SAP Control Center 3.3 DOCUMENT ID: DC01002-01-0330-01 LAST REVISED: November 2013 Copyright 2013 by SAP AG or an SAP affiliate company. All rights reserved. No part of this publication
Oracle Virtual Machine Qualification Note Oracle FLEXCUBE Universal Banking Release 12.0.3.0.0 [April] [2014]
![Oracle Virtual Machine Qualification Note Oracle FLEXCUBE Universal Banking Release 12.0.3.0.0 [April] [2014]](/thumbs/40/20971859.jpg "Oracle Virtual Machine Qualification Note Oracle FLEXCUBE Universal Banking Release 12.0.3.0.0 [April] [2014]") Oracle Virtual Machine Qualification Note Oracle FLEXCUBE Universal Banking Release 12.0.3.0.0 [April] [2014] Table of Contents 1. INTRODUCTION... 2 1.1 SCOPE... 2 1.2 INTRODUCTION TO ORACLE VM... 2 1.3
Oracle Virtual Machine Qualification Note Oracle FLEXCUBE Universal Banking Release 12.0.3.0.0 [April] [2014] Table of Contents 1. INTRODUCTION... 2 1.1 SCOPE... 2 1.2 INTRODUCTION TO ORACLE VM... 2 1.3
Installation Guide. McAfee VirusScan Enterprise for Linux 1.9.0 Software
 Installation Guide McAfee VirusScan Enterprise for Linux 1.9.0 Software COPYRIGHT Copyright 2013 McAfee, Inc. Do not copy without permission. TRADEMARK ATTRIBUTIONS McAfee, the McAfee logo, McAfee Active
Server Monitoring. AppDynamics Pro Documentation. Version 4.1.7. Page 1
 Server Monitoring AppDynamics Pro Documentation Version 4.1.7 Page 1 Server Monitoring......................................................... 4 Standalone Machine Agent Requirements and Supported Environments............
Release Notes for Version 1.5.207
 Release Notes for Version 1.5.207 Created: March 9, 2015 Table of Contents What s New... 3 Fixes... 3 System Requirements... 3 Stonesoft Appliances... 3 Build Version... 4 Product Binary Checksums... 4
Identikey Server Performance and Deployment Guide 3.1
 Identikey Server Performance and Deployment Guide 3.1 Disclaimer of Warranties and Limitations of Liabilities Disclaimer of Warranties and Limitations of Liabilities The Product is provided on an 'as is'
JAMF Software Server Installation and Configuration Guide for OS X. Version 9.0
 JAMF Software Server Installation and Configuration Guide for OS X Version 9.0 JAMF Software, LLC 2013 JAMF Software, LLC. All rights reserved. JAMF Software has made all efforts to ensure that this guide
CTERA Agent for Linux
 User Guide CTERA Agent for Linux September 2013 Version 4.0 Copyright 2009-2013 CTERA Networks Ltd. All rights reserved. No part of this document may be reproduced in any form or by any means without written
ENABLING GLOBAL HADOOP WITH EMC ELASTIC CLOUD STORAGE
 ENABLING GLOBAL HADOOP WITH EMC ELASTIC CLOUD STORAGE Hadoop Storage-as-a-Service ABSTRACT This White Paper illustrates how EMC Elastic Cloud Storage (ECS ) can be used to streamline the Hadoop data analytics
New Features... 1 Installation... 3 Upgrade Changes... 3 Fixed Limitations... 4 Known Limitations... 5 Informatica Global Customer Support...
 Informatica Corporation B2B Data Exchange Version 9.5.0 Release Notes June 2012 Copyright (c) 2006-2012 Informatica Corporation. All rights reserved. Contents New Features... 1 Installation... 3 Upgrade
VMware Identity Manager Connector Installation and Configuration
 VMware Identity Manager Connector Installation and Configuration VMware Identity Manager This document supports the version of each product listed and supports all subsequent versions until the document
vcenter Chargeback User s Guide vcenter Chargeback 1.0 EN-000186-00
 vcenter Chargeback 1.0 EN-000186-00 You can find the most up-to-date technical documentation on the VMware Web site at: http://www.vmware.com/support/ The VMware Web site also provides the latest product
MySQL and Virtualization Guide
 MySQL and Virtualization Guide Abstract This is the MySQL and Virtualization extract from the MySQL Reference Manual. For legal information, see the Legal Notices. For help with using MySQL, please visit
Installing Management Applications on VNX for File
 EMC VNX Series Release 8.1 Installing Management Applications on VNX for File P/N 300-015-111 Rev 01 EMC Corporation Corporate Headquarters: Hopkinton, MA 01748-9103 1-508-435-1000 www.emc.com Copyright
Decryption. Palo Alto Networks. PAN-OS Administrator s Guide Version 6.0. Copyright 2007-2015 Palo Alto Networks
 Decryption Palo Alto Networks PAN-OS Administrator s Guide Version 6.0 Contact Information Corporate Headquarters: Palo Alto Networks 4401 Great America Parkway Santa Clara, CA 95054 www.paloaltonetworks.com/company/contact-us
Arcserve Backup for Windows
 Arcserve Backup for Windows Agent for Microsoft SharePoint Server Guide r16 Pre-release Document, only for reference This Documentation, which includes embedded help systems and electronically distributed
GlobalSCAPE DMZ Gateway, v1. User Guide
 GlobalSCAPE DMZ Gateway, v1 User Guide GlobalSCAPE, Inc. (GSB) Address: 4500 Lockhill-Selma Road, Suite 150 San Antonio, TX (USA) 78249 Sales: (210) 308-8267 Sales (Toll Free): (800) 290-5054 Technical
Avalanche Site Edition
 Avalanche Site Edition Version 4.8 avse ug 48 20090325 Revised 03/20/2009 ii Copyright 2008 by Wavelink Corporation All rights reserved. Wavelink Corporation 6985 South Union Park Avenue, Suite 335 Midvale,
Netwrix Auditor for Windows File Servers
 Netwrix Auditor for Windows File Servers Quick-Start Guide Version: 8.0 4/22/2016 Legal Notice The information in this publication is furnished for information use only, and does not constitute a commitment
IDENTIKEY Server Windows Installation Guide 3.1
 IDENTIKEY Server Windows Installation Guide 3.1 Disclaimer of Warranties and Limitations of Liabilities Disclaimer of Warranties and Limitations of Liabilities The Product is provided on an 'as is' basis,
VERITAS Backup Exec TM 10.0 for Windows Servers
 VERITAS Backup Exec TM 10.0 for Windows Servers Quick Installation Guide N134418 July 2004 Disclaimer The information contained in this publication is subject to change without notice. VERITAS Software
VMware vcenter Update Manager Administration Guide
 VMware vcenter Update Manager Administration Guide vcenter Update Manager 4.0 This document supports the version of each product listed and supports all subsequent versions until the document is replaced
White Paper. Fabasoft on Linux - Preparation Guide for Community ENTerprise Operating System. Fabasoft Folio 2015 Update Rollup 2
 White Paper Fabasoft on Linux - Preparation Guide for Community ENTerprise Operating System Fabasoft Folio 2015 Update Rollup 2 Copyright Fabasoft R&D GmbH, Linz, Austria, 2015. All rights reserved. All
Virtual Appliance Setup Guide
 The Barracuda SSL VPN Vx Virtual Appliance includes the same powerful technology and simple Web based user interface found on the Barracuda SSL VPN hardware appliance. It is designed for easy deployment
Microsoft SQL Server 2008 R2 Enterprise Edition and Microsoft SharePoint Server 2010
 Microsoft SQL Server 2008 R2 Enterprise Edition and Microsoft SharePoint Server 2010 Better Together Writer: Bill Baer, Technical Product Manager, SharePoint Product Group Technical Reviewers: Steve Peschka,
Copyright 2015 SolarWinds Worldwide, LLC. All rights reserved worldwide. No part of this document may be reproduced by any means nor modified,
 Copyright 2015 SolarWinds Worldwide, LLC. All rights reserved worldwide. No part of this document may be reproduced by any means nor modified, decompiled, disassembled, published or distributed, in whole
http://docs.trendmicro.com
 Trend Micro Incorporated reserves the right to make changes to this document and to the products described herein without notice. Before installing and using the product, please review the readme files,
Online Backup Client User Manual Linux
 Online Backup Client User Manual Linux 1. Product Information Product: Online Backup Client for Linux Version: 4.1.7 1.1 System Requirements Operating System Linux (RedHat, SuSE, Debian and Debian based
http://docs.trendmicro.com
 Trend Micro Incorporated reserves the right to make changes to this document and to the products described herein without notice. Before installing and using the product, please review the readme files,
NETWRIX FILE SERVER CHANGE REPORTER
 NETWRIX FILE SERVER CHANGE REPORTER ADMINISTRATOR S GUIDE Product Version: 3.3 April/2012. Legal Notice The information in this publication is furnished for information use only, and does not constitute