NBU651 BMR. Avi Weinberger
|
|
|
- Cori Robinson
- 8 years ago
- Views:
Transcription
1 NBU651 BMR Avi Weinberger

2 Bare Metal Restore Overview BMR automates system recovery by restoring the operating system, the system configuration, and all system and data files with two steps: Run one command from the NetBackup master server. Reboot the client. Separate system backups or reinstallations are not required. Point in Time recovery. 2

3 Bare Metal Restore Overview Industry s Broadest Platform Support Recover Linux Servers (Red Hat & SUSE) Single Solution for: Windows, Linux, and UNIX Recover Windows servers to dissimilar hardware Step 9. Reboot 8. Server Recovery Time A simplified and automated restore process Custom Application Restore Integration into NetBackup console Bare Metal Restore 7. Load tape(s) and restore Reload backup software Reboot Step Patches Install OS 3. Reboot 2. Collect all media & Lic. 2. Click Prepare to Restore 1. Repair hardware 1. Repair hardware Traditional Recovery 3 Faster Restores Reboot Bare Metal Restore
 and restore 6. 5. 4. 3. Reload backup software Reboot Step Patches Install OS 3. Reboot 2. Collect all media & Lic. 2. Click Prepare to Restore 1.")
4 Bare Metal Restore Overview Master server. The NetBackup master server manages backups and restores of the protected client systems. BMR server Media servers. NetBackup media servers control storage devices on which the client files are stored. 4

5 Bare Metal Restore Overview Boot servers. Boot servers provide the environment that is required to rebuild a protected client, including resources such as shared resource trees (SRT). For UNIX and Linux systems, a boot server also provides the resources used to boot the client system when it performs a network boot prior to restore. Shared resource trees contain the operating system software, NetBackup client and additional software that are used to rebuild the protected system so that NetBackup can restore the original files. 5

6 Bare Metal Restore Overview Each client type and operating system version requires its own SRT. For example: Solaris 9 requires a Solaris 9 SRT, Windows Server 2003 requires a Windows Server 2003 SRT, and so on. Windows SRTs require the appropriate service packs. If you have some Windows XP protected clients at Service Pack 1 and others at Service Pack 2, you need two SRTs Clients. Clients are the systems backed up by NetBackup and protected by BMR. A client may also be a server for other applications or data, a NetBackup media server, or a BMR boot server. 6

7 Bare Metal Restore Topology 7

8 NetBackup BMR How To Install BMR server product. BMR on Windows Install and configure windows boot server. Shared Resource Tree Management. Client Restoration. BMR on Unix Install and configure Solaris boot server. Shared Resource Tree Management. Client Restoration. 8

9 Installing BMR Server./install NetBackup Add-On Product Installation Choose the Add-On Products you wish to install one at a time or select Install All Add-On Products. 1) NetBackup Bare Metal Restore 2) NetBackup Bare Metal Restore Boot Server 3) Install All Add-On Products q) Done Selecting Products x) Exit from this Script Choose an option: 1 Choose an option: q Installing NetBackup Bare Metal Restore Starting the NetBackup Bare Metal Restore daemon. [Info] V Setting up BMR Database... [Info] V Initializing BMR database... [Info] V Loading BMR database... 9

10 Installing BMR Server [Info] V Loading data from dos.uncooked into BMR database... [Info] V Loading data from unattend.txt into BMR database... [Info] V Loading data from BMRDB.install.sql into BMR database... [Info] V Loading data from PnpDB_2000.xml into BMR database... [Info] V Loading data from PnpDB_2000SP1.xml into BMR database... [Info] V Loading data from PnpDB_2000SP2.xml into BMR database... [Info] V Loading data from PnpDB_2000SP3.xml into BMR database... [Info] V Loading data from PnpDB_2000SP4.xml into BMR database... [Info] V Loading data from PnpDB_2003SP1.xml into BMR database... [Info] V Loading data from PnpDB_WinPE_2003SP1.xml into BMR database... [Info] V Loading data from PnpDB_XP.xml into BMR database... [Info] V Loading data from PnpDB_XPSP1.xml into BMR database... [Info] V Loading data from PnpDB_XPSP2.xml into BMR database... [Info] V Loading data from PnPDB_2003.xml into BMR database... [Info] V Loading data from PnpDB_2003SP2.xml into BMR database... Verifying the running version of BMRDB... BMRDB version verified. bmrsetupmaster Nothing to upgrade. Version unchanged. Database validation successful. [Info] V Setting up BMR master server completed successfully. 10
![xml into BMR database... [Info] V-127-68 Loading data from PnpDB_2000SP3.xml into BMR database... [Info] V-127-68 Loading data from PnpDB_2000SP4.xml into BMR database... [Info] V-127-68 Loading data from PnpDB_2003SP1.](/docs-images/41/12182988/images/page_10.jpg "xml into BMR database... [Info] V-127-68 Loading data from PnpDB_WinPE_2003SP1.xml into BMR database... [Info] V-127-68 Loading data from PnpDB_XP.xml into BMR database... [Info] V-127-68 Loading data from PnpDB_XPSP1.")
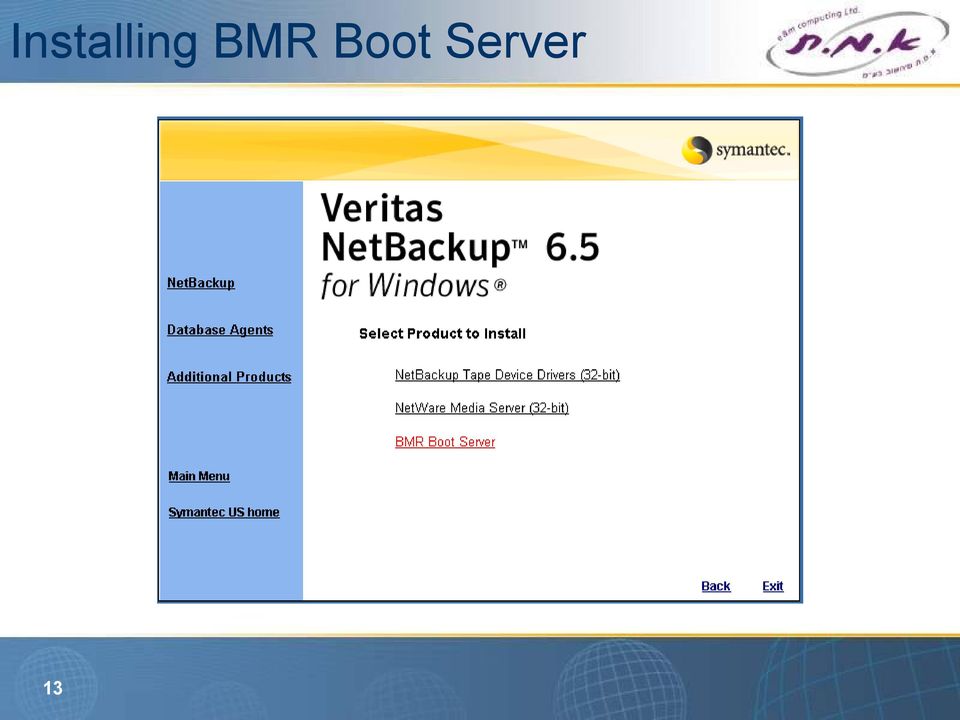
11 Installing BMR Boot Server 11

12 Installing BMR Boot Server 12

13 Installing BMR Boot Server 13

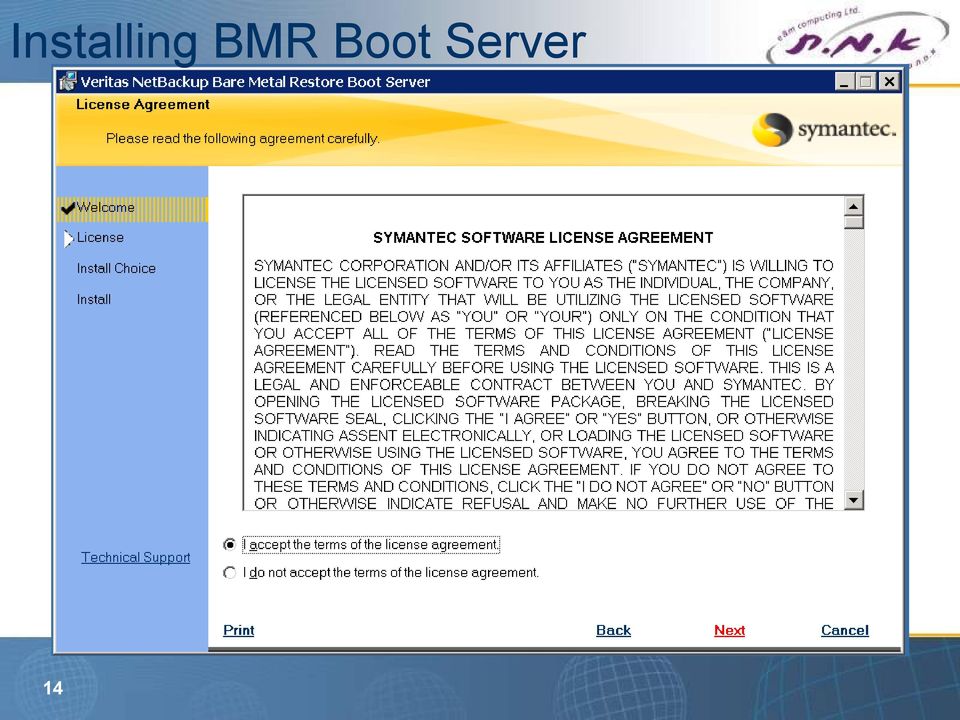
14 Installing BMR Boot Server 14

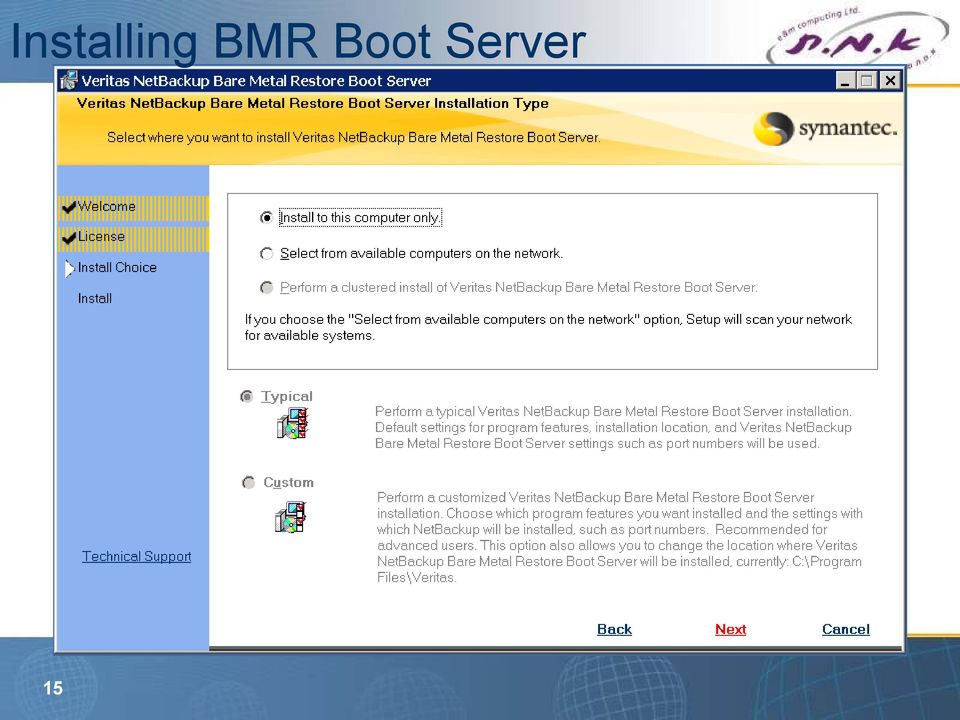
15 Installing BMR Boot Server 15

16 Installing BMR Boot Server 16


17 Installing BMR Boot Server 17

18 Installing BMR Boot Server 18

19 Boot Server Assistant 19


20 Setting Network Boot 20

21 Setting Network Boot 21
22 Setting Network Boot 22

23 Setting Network Boot 23

24 Setting Network Boot 24

25 Shared Resource Tree 25
26 Create Shared Resource Tree 26

27 Create Shared Resource Tree 27

28 Create Shared Resource Tree 28

29 Create Shared Resource Tree 29

30 Create Shared Resource Tree 30

31 Create Shared Resource Tree 31

32 Create Shared Resource Tree 32
33 Create Shared Resource Tree 33

34 Update Shared Resource Tree 34

35 Update Shared Resource Tree 35
36 Update Shared Resource Tree 36
37 Update Shared Resource Tree 37

38 BMR Boot Servers 38

39 List Shared Resource Tree 39

40 BMR Policy Collect disaster recovery information for Bare Metal Restore 40

41 BMR Policy 41
42 BMR Policy ALL_LOCAL_DRIVES C:\ Shadow Copy Components:\ 42

43 Client Backup 43

44 BMR Client Configuration File 44
45 Client Restoration 45

46 Client Restoration Task 46
47 Client Restoration 47
48 Client Restoration 48
49 Client Restoration 49
50 Client Restoration 50
51 Client Restoration 51

52 Client Restoration 52

53 Client Restoration 53
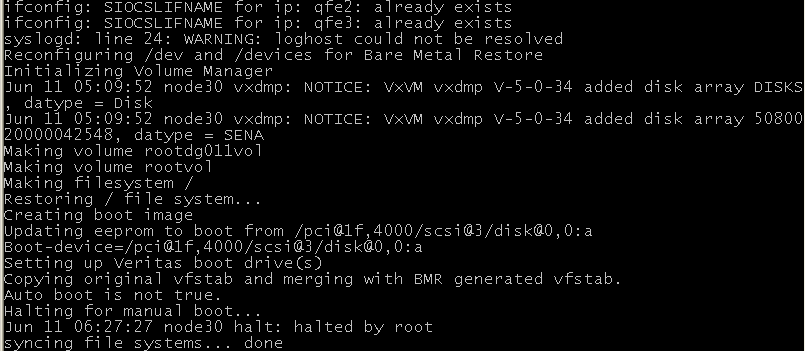
54 Client First Boot 54
55 Client First Boot 55

56 Client Restoration Task 56

57 Driver Package Wizard 57

58 Driver Package Wizard 58

59 Driver Package Wizard 59

60 Restoring to a Dissimilar System 60

61 Restoring to a Dissimilar System 61

62 Restoring to a Dissimilar System 62

63 Restoring to a Dissimilar System 63

64 Restoring to a Dissimilar System 64
65 Installing BMR Boot Server./install NetBackup Add-On Product Installation Choose the Add-On Products you wish to install one at a time or select Install All Add-On Products. ( 1 NetBackup Bare Metal Restore ( 2 NetBackup Bare Metal Restore Boot Server ( 3 Install All Add-On Products q) Done Selecting Products x) Exit from this Script Choose an option: 2 Choose an option: q Installing NetBackup Bare Metal Restore Boot Server 65
66 Installing BMR Boot Server Starting the NetBackup Bare Metal Restore Boot Server daemon. LiveUpdate is not installed, skipping registration step... Please refer to the NetBackup Bare Metal Restore Administrator's Guide for complete details on use and configuration of NetBackup Bare Metal Restore Boot Server. NetBackup Bare Metal Restore Boot Server installation completed. ********** Execution of./install is complete. bmrsetupboot 66
67 Create Shared Resource Tree # bmrsrtadm Select one of the following options: Create a new Shared Resource Tree. Create a new CD image based Shared Resource Tree. Copy an existing Shared Resource Tree to a new location. Import a Shared Resource Tree. Modify an existing Shared Resource Tree. Delete an existing Shared Resource Tree. List Shared Resource Trees available on this server. Quit. Enter your selection (1-8) [1] : 1 Enter the name of the SRT to create : Solaris10 Enter the description of the new SRT : Solaris10U4 SFHA50MP1 NBU651 Enter desired level of Solaris/SunOS (8/5.8, 9/5.9 or 10/5.10) [5.10] : Enter the directory in which to place the new SRT [/export/srt] : Enter a [hostname:/]pathname containing a suitable Solaris 5.10 Boot CDROM or SRT image [/cdrom/cdrom0/s0] : This step may take considerable time. Please wait... Preparing boot files - please stand by... 67
68 Create Shared Resource Tree Enter a [hostname:]/pathname containing Veritas NetBackup Client software : / export/netbackup65/nb_65_unix_clients/nb_65_clients3_ Symantec Installation Script Copyright Symantec Corporation, All Rights Reserved. Installing NetBackup Client Software NOTE: To install NetBackup Server software, insert the appropriate NetBackup Server cdrom. Do you wish to continue? [y,n] (y) Do you want to install the NetBackup client software for this client? [y,n] (y) This package will install Solaris/Solaris10 client. This package will install NetBackup client 6.5. Enter the name of the NetBackup server : t
69 List Shared Resource Tree # bmrsrtadm Select one of the following options: Create a new Shared Resource Tree. Create a new CD image based Shared Resource Tree. Copy an existing Shared Resource Tree to a new location. Import a Shared Resource Tree. Modify an existing Shared Resource Tree. Delete an existing Shared Resource Tree. List Shared Resource Trees available on this server. Quit. Enter your selection (1-8) [1] : 7 Name State Type Path Description Solaris10 READY NFS /export/srt/solaris10 Solaris10U4 SFHA50MP1 NBU651 69
70 Modify Shared Resource Tree Select one of the following options: Create a new Shared Resource Tree. Create a new CD image based Shared Resource Tree. Copy an existing Shared Resource Tree to a new location. Import a Shared Resource Tree. Modify an existing Shared Resource Tree. Delete an existing Shared Resource Tree. List Shared Resource Trees available on this server. Quit. Enter your selection (1-8) [1] : 5 Enter the name of an existing SRT : Solaris SRT name: Solaris10 Location: /export/srt/solaris10 Description: Solaris10U4 SFHA50MP1 NBU651 Exclusive use: (none)
71 Modify Shared Resource Tree You may make modifications to this SRT. Select one of the following options: Install Veritas NetBackup Maintenance Pack. Install Veritas Volume Manager and Veritas File System. Update Veritas Volume Manager and Veritas File System. Install Veritas Security Services. Install additional packages or patches. Change SRT description. Change client exclusive use of this SRT. Quit. Enter your selection (1-8) [8] : 2 71
72 Modify Shared Resource Tree Ready to add Veritas Volume Manager/File System to SRT. Select one of the following options: Install Veritas License Software. (prerequisite to below) Install Veritas Volume Manager. Install Veritas File System. Return to the previous menu.

73 List Shared Resource Tree 73

74 Client Backup 74

75 BMR Client Configuration File 75

76 Client Restoration 76

77 Client Restoration 77

78 Client Restoration 78
79 Client Restoration 79
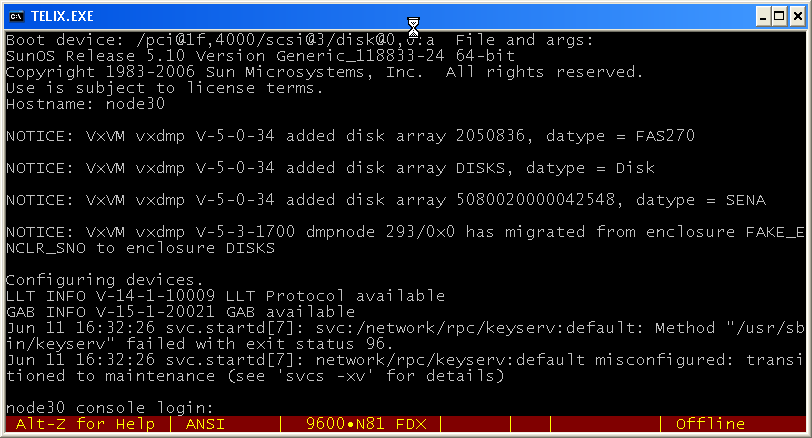
80 Client Restoration 80
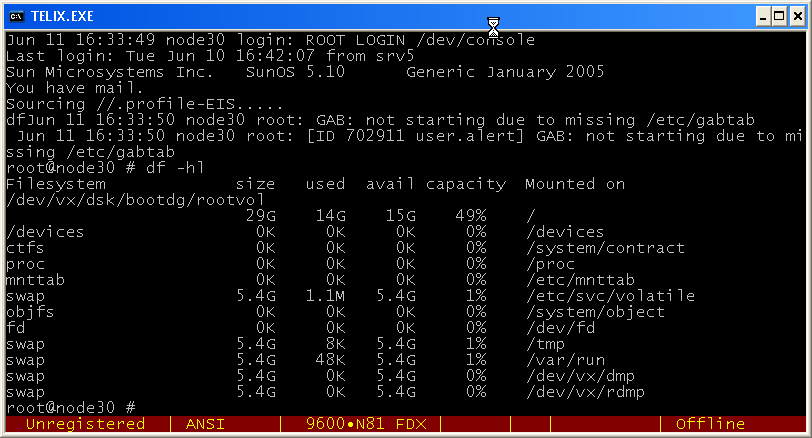
81 Client Restoration 81
82 Thanks