Paragon Protect & Restore
|
|
|
- Clarissa Chandler
- 8 years ago
- Views:
Transcription
 761 59018201 Fax +49 (0) 761 59018130 Email sales@paragon-software.com Product website : www.protect-restore.com Company website: www.")
1 PARAGON Software GmbH Heinrich-von-Stephan-Str. 5c Freiburg, Germany Tel. +49 (0) Fax +49 (0) Product website : Company website: Paragon Protect & Restore Deployment Guide

2 2 Contents Getting Started with Protect & Restore... 3 System Requirements... 3 Infrastructure Deployment... 4 First Start... 4 Deployment Phases... 6 Installing Server... 6 Installing Console... 7 Launching Console... 8 Installing ESX Bridge... 9 Adding ESX Connections Installing Backup Server Registering Primary Storages Adding Target Machines Installing Tray Application Building WinPE Recovery Media What You Should Know More Privileges to Manage vsphere Guests Managing Activities Monitoring running activities Monitoring past activities Monitoring scheduled activities Managing Events Removing Machines from the Infrastructure Collecting Logs... 44

3 Getting Started with Protect & Restore 3 Protect & Restore provides comprehensive agentless protection for virtual environments hosted by VMware vsphere or standalone ESX servers and agent based protection for physical and virtual Windows systems. As a backbone it uses Paragon s brand-new distributed architecture that allows efficient central management of hundreds of computers. Being obviously a product for IT personnel, it s anyway really flexible in administration. For those, who are accustomed to automation scripts and command-line tools, there s a Windows PowerShell based console, while for those, who value comfort a well thought-out GUI console. In this guide you will find all the information necessary to get the product ready to use. System Requirements Hypervisors Protect & Restore can back up, replicate and recover virtual machines running on: VMware vsphere 5.1, 5.0, 4.1, and 4.0 VMware ESX and VMware ESXi 4.x and 5.x, including agent-based backup of guests hosted by free versions of ESX Virtual machines can run any guest operating system supported by VMware vsphere. Product deployment Administration Server, Backup Server, ESX Bridge and Consoles have similar software and hardware requirements. OS and software requirements: Microsoft Windows XP SP3, Windows Vista, Windows 7, Windows 8, Windows Server 2003 SP2, Windows Server 2008, Windows Server 2008 R2, Windows Server 2012 An Active Directory domain environment Domain administrator credentials Domain administrator must have permissions of the local domain administrator on all machines that join the Protect & Restore infrastructure WMI (Windows Management Instrumentation) service is running Open TCP ports: 135, 18950, 60543, or disabled Firewalls on all computers included into Protect & Restore infrastructure File and Printer Sharing is allowed in Firewall, which enables default system shares on local volumes (ADMIN$, C$, D$, etc.) Hardware requirements: CPU: x86/x64 processor (minimum 2 cores / 4 cores for Backup Server). The use of fast multi-core processors improves the data processing performance, and allows for more concurrent jobs


4 4 Memory: 2 GB RAM Hard disk space: - Administration Server: 400 MB to install the component - ESX Bridge or Backup Server: 200 MB to install the component - GUI Console: 50 MB to install the component Infrastructure Deployment First Start The product comes in one.exe file. When clicked on, the opened first start wizard informs you about the necessity to extract files into a temporary folder, which may take several minutes. When done, you can see Protect & Restore Installer that enables to initiate installation of components, register in Paragon s E-service for support and updates, uninstall all or required infrastructure components, upgrade the product, read the user guide, etc.


5 5
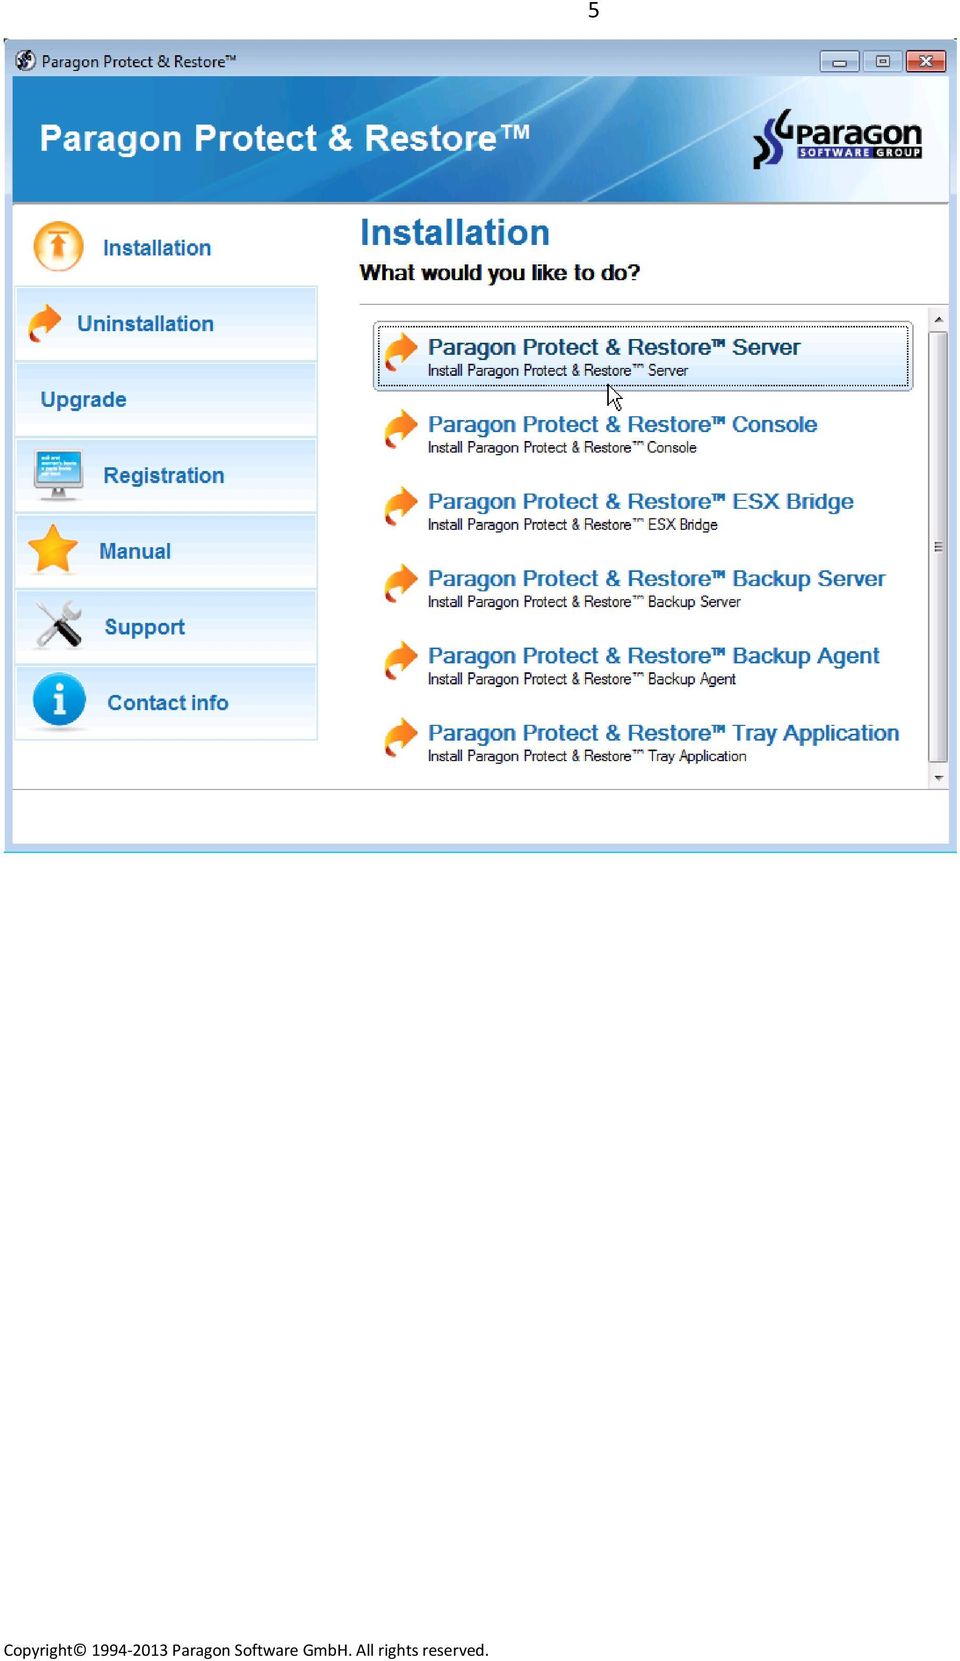
6 Deployment Phases 6 To simplify deployment of the infrastructure there s an intuitive setup wizard, which depending on the chosen component selects required product installation packages and prerequisites. The whole process involves several phases: Mandatory actions on-site: Installation of Protect & Restore Server the main management component of the infrastructure that includes Administration and Installation Servers. Installation of Protect & Restore Console to install GUI and a PowerShell based consoles for administering the infrastructure. Actions for getting the infrastructure ready to work (depend on set tasks): Launch of Protect & Restore Console to do remote installation of other infrastructure components. Installation of Protect & Restore ESX Bridge to protect guests of one or several ESX hosts or vsphere. Registering of a standalone ESX host or vcenter to access its guests for protection and/or management. Installation of Protect & Restore Backup Server to configure backup and/or replica storages. Setup of backup and/or replica storages. Adding Windows physical machines to the infrastructure to do agent based protection. Additional actions: Installation of Protect & Restore Tray Application to monitor backup progress on a Windows physical or a virtual machine where Backup Agent is deployed. Creation of WinPE recovery media to do bare metal recovery of Windows physical machines. It can be done with Boot Media Builder. Protect & Restore Server and Console require manual installation on-site. All other components can be installed remotely through one of the consoles. Installing Server It s highly recommended to deploy Protect & Restore in a Windows domain environment. 1. Choose a computer to install Protect & Restore Server on. It can be any domain machine, but the more powerful, the better. 2. Make sure it meets the systems requirements. 3. Run Protect & Restore Installer. 4. Select Installation > Paragon Protect & Restore Server. 5. Click Next on the first page of the setup wizard. 6. The wizard will analyze the computer for required prerequisites and notify you about product components to install. Click Install to initiate the process.


7 7 7. The wizard will detect your domain and prompt to provide credentials of the domain administrator. The provided credentials are only needed for this installation. Please make sure the domain administrator also joins the local admins group. 8. At the final stage the wizard will inform you on the installed prerequisites and product components and the roles the computer acquired in the infrastructure. Click Finish to confirm. 9. The main indicator that the component has been successfully installed is the PRM service running you can check it up in Windows Task Manager. Installing Console Protect & Restore Console should be installed on a computer within a domain environment of the Protect & Restore infrastructure.

8 1. Choose a computer to install Protect & Restore Console on. It can be any domain machine. 2. Make sure it meets the systems requirements. 3. Run Protect & Restore Installer. 4. Select Installation > Paragon Protect & Restore Console. 5. Click Next on the first page of the setup wizard The wizard will analyze the computer for required prerequisites and notify about product components to install. Click Install to initiate the process. 7. At the final stage the wizard will inform you on the installed prerequisites and product components. The computer with Protect & Restore Console doesn t acquire a role in the infrastructure. Click Finish to confirm. As you can see through the installation process the wizard installs two consoles, one GUI and one command-line based on PowerShell. In this guide only GUI console will be considered for administering the infrastructure. Launching Console 1. Launch Protect & Restore Console, by either clicking on its desktop icon or going to Start > Programs > Protect & Restore Console. 2. Provide a DNS name or IP address of a machine where Administration Server has been installed and credentials of the domain administrator or a member of the PRM Admins group. Click Connect. Beside domain administrators, Protect & Restore can also be administered by members of a special domain group PRM Admins. To use this option, create this group in the root domain AD, then add there users you want to allow management of the infrastructure. Our product will check this group up for a user, attempting to access the console. And if it s a


9 member of the group, the access will be granted. 9 Installing ESX Bridge You can install ESX Bridge either centrally through Protect & Restore Console (recommended) or manually on-site. Obviously the manual option is not default, and should only be used if there s no way to do the remote installation. There s allowed to have only one ESX Bridge in Protect & Restore infrastructure. Through Console 1. Launch Protect & Restore Console. 2. If a connection with the server has been established, click on the Home ribbon (active by default), then select Add ESX Bridge, or go to Infrastructure > ESX Bridge, then click on Choose computers for ESX Bridge. 3. Choose a machine to install ESX Bridge on. Despite the fact that it can be any machine, the maximum performance and stability can be achieved only when ESX Bridge is installed in a guest environment of an ESX server that hosts virtual machines you re planning to protect.
, then select Add ESX Bridge, or go to Infrastructure > ESX Bridge, then click on Choose computers")

10 10 By default, there only listed machines registered in Active Directory that join a forest domain where Protect & Restore is deployed. If you d like to specify a machine that belongs to another forest click on Change forest and enter its name. Click Change when ready. If you d like to specify a machine that belongs to some workgroup, click on the corresponding link and provide a name or IP address of the required machine and its access credentials (recommended). You can also browse the entire network by using the corresponding option, but it may take plenty of time. When ready, click Save changes.
.")
11 11 4. There will be created a summary page and a new installation policy, submitted immediately, which you can see through a popup window. 5. To get detailed information on the operation progress, click on the link in the popup window or select Activities and Events > Activities, or Activities and Events > Events, where you can see all events of the infrastructure. Just click on the interested one to see details. Use the Refresh icon to force update of the information. To know more on the subject, please consult the corresponding chapters: Managing Activities, Managing Events. 6. The required machine will be added to the list of computers that join the infrastructure and eventually acquire the roles of Agent/ESX Bridge/ESX Backup Agent. To make ESX Bridge access the VMware infrastructure, you should add at least one ESX host or vsphere. Please consult the Adding ESX Connections chapter for more information.

12 Manually Choose a machine to install ESX Bridge on. Despite the fact that it can be any machine, the maximum performance and stability can be achieved only when ESX Bridge is installed in a guest environment of an ESX server that hosts virtual machines you re planning to protect. 2. Make sure it meets the systems requirements. 3. Run Protect & Restore Installer. 4. Select Installation > Paragon Protect & Restore ESX Bridge. 5. Click Next on the first page of the setup wizard. 6. The wizard will analyze the computer for required prerequisites and notify about product components to install. Click Install to initiate the process. 7. When done with the installation, click Next to let the wizard assign the roles of Agent/ESX Bridge/ESX Backup Agent to this computer. At this stage you will need to provide a DNS name or IP address of Protect & Restore Server. By default, Administration Server communicates with agents through port 60543, which you can change however (available from the command-line console only). If changed, please set the same port in the corresponding field. If not changed, please ignore this option. 8. At the final stage the wizard will inform you on the installed prerequisites and product components and the roles the computer acquired in the infrastructure. Click Finish to confirm. 9. The main indicator that ESX Bridge has been successfully installed is appearance of the computer in Protect & Restore Console in the online state. To check it out launch the console, then select Machines > Physical Machines to see the required computer. To make ESX Bridge access the VMware infrastructure, you should add at least one ESX host or vsphere. Please consult the Adding ESX Connections chapter for more information.

 is installed on any domain machine, but the")
13 13 Adding ESX Connections Protect & Restore can simultaneously work with several ESX hosts, or vcenters. To register a standalone ESX host or vcenter, please do the following: Prerequisites Protect & Restore Server (Administration and Installation Servers) is installed on any domain machine, but the more powerful, the better. Protect & Restore Console is installed. Protect & Restore ESX Bridge is installed. Enough ESX privileges. 1. Once you ve got ESX Bridge installed, select Infrastructure > ESX Bridge, then click on Add ESX connection. 2. Enter a DNS name or IP address of the required vcenter or ESX host, a communication port (if necessary), and administrator credentials in the corresponding fields. Click Save changes to start the operation, which takes approx. a couple of seconds. If a success, the corresponding connection will be added to the list.


14 14 If the required ESX host is a member of a vcenter, always use the IP address and credentials of that vcenter. 3. Select Machines > Virtual Machines > Host and Clusters to see the connected ESX host, or vcenter. It s the main indicator that ESX Bridge has been appropriately configured. If ESX Bridge has been installed, but no ESX host is displayed here, first click Refresh to force update of the information. If still no result, please check the following: A network adapter on the machine where ESX Bridge is installed can access outer resources;

15 The provided ESX access credentials are valid and allow enough privileges. You can always edit credentials by selecting Infrastructure > ESX Bridge > Edit. Installing Backup Server 15 You can install Backup Server either centrally through Protect & Restore Console (recommended) or manually on-site. Obviously the manual option is not default, and should only be used if there s no way to do the remote installation. Through Console 1. Launch Protect & Restore Console. 2. If a connection with the server has been established, click on the Home ribbon (active by default), then select Add Backup Servers, or go to Infrastructure > Backup Servers, then click on Set up Backup Server now. 3. Choose a domain or a workgroup machine you re planning to use as Backup Server. Click Save changes to proceed.
, then select Add Backup Servers, or go to Infrastructure > Backup Servers, then click on Set up")
16 If you d like to specify a machine that belongs to another forest domain or some workgroup, use the corresponding links. Click here to get more details There will be created a summary page and a new installation policy, submitted immediately, which you can see through a popup window. 5. To get detailed information on the operation progress, click on the link in the popup window or select Activities and Events > Activities, or Activities and Events > Events, where you can see all events of the infrastructure. Just click on the interested one to see details. Use the Refresh icon to force update of the information. To know more on the subject, please consult the corresponding chapters: Managing Activities, Managing Events. 6. The required machine will be added to the list of computers that join the infrastructure and eventually acquire the roles of Agent/Backup Server/ESX Storage plug-in/remote Storage plug-in. To allow Backup Server to store backups of physical and virtual machines or VM replicas, you should configure corresponding primary storages, a local or network one for backups, and an ESX one for replicas. Please consult the Registering Primary Storages chapter for more information. Manually The procedure is similar to the manual installation of ESX Bridge, so please consult the corresponding scenario for more information. Registering Primary Storages Backup Server supports two-tier backup storage architecture of primary and secondary storages, enabling to set up data migration policies (Storage Archiving) between them according to a particular disaster recovery plan. It s up to you to use this option or not, but if you want Backup Server to store backups of physical and/or virtual machines or VM replicas, you need to register at least one primary storage of the appropriate type. The current version of the product can back up physical or virtual target machines either to a local folder of Backup Server or to a network share, while replicate virtual machines directly to an ESX datastore. Thus you should configure at least two primary storages if you d like both to back up and replicate, which is easy to achieve since one Backup Server can manage several storages at a time. It s allowed to configure several Backup Servers, each having several primary and secondary storages. Prerequisites Protect & Restore Server (Administration and Installation Servers) is installed on any domain machine, but the more powerful, the better. Protect & Restore Console is installed. Protect & Restore Backup Server is installed. Operation scenario


17 1. Launch Protect & Restore Console. 2. If a connection with the server has been established, go to Infrastructure > Backup Servers If you ve got several backup servers, first select the required backup server by clicking on its name, then click on the New primary storage link. You can also initiate this operation by the right click of the mouse button, then selecting the corresponding option. 4. In the opened dialog you can see four tabs (Common properties, Archiving, Free space notification, and Advanced settings). The first one enables to configure a primary storage, the second one to create an archiving policy for it, the third one to make the program generate notifications when the storage is about of free space, and the fourth one to modify advanced parameters (available if the corresponding option is active in the Settings dialog). Configure a primary storage of the required type:
.")

18 18 For local storages (can store backups of physical and virtual machines): Storage Location. Select Local disk on Backup Server for storing backups of target machines locally. Folder. Click Browse to specify a local disk and folder on Backup Server to place backup images to. Use the New folder button if necessary. Please make sure the amount of free space on the selected volume is enough to store all future backup images. Name. Give it a catchy name. Retention policy. Click on the default option (two weeks) to specify how long backups should be kept on the storage (from one second to infinite time) by using the appeared dialog. By default, for every machine our

19 19 product creates a full backup during the first run, then incremental updates according to a set timetable. When time comes, all restore points beyond the set limit are merged with their full backup thus creating a new full backup. Retention schedule. By default, all backup images inside the storage will be checked for and processed according to the specified data retention policy (general or individual) every day. If you want to change the default schedule, just click on the corresponding link. The opened dialog consists of two sections: Basic scheduling In this section you can set up a data retention timetable. The minimal available update interval is one day. Exclude from schedule


20 20 In this section you can specify days of week, or certain dates, when the retention policy should not be submitted. Backup Server checks for and processes backup data of each storage according to their retention schedules. So if a retention policy limits the storage of backup images for two weeks for instance, while the specified retention schedule is configured to start up once a month, then backup images will only be checked for and processed once a month. Click on the Free space notification tab to set up notifications when the storage reaches the specified free space limit (10 GBs by default). The corresponding warnings will also be generated in the Event Journal after each backup or maintenance policy. Click on the corresponding tab to see and configure additional options if necessary: - Ticket count. Use this option to limit the number of simultaneously backed up machines to this storage (Auto by default). This can help when Backup Server lacks CPU, disk subsystem and/or network throughput performance; - Stream count. Use this option to limit the number of simultaneously opened connections to backup objects (Auto by default);
.")
: Storage location.")
21 Advanced settings will be available if the corresponding option is enabled in the Settings dialog (click on the Logo button, then select Settings > Advanced > Apply advance mode). 21 Click Save changes to complete configuration of the backup storage. For network storages (can store backups of physical and virtual machines): Storage location. Select Local network server for storing backups of target machines locally. Share. Specify the required network share by manually entering its location or click Browse to find it on the net. Manually: Through browsing: Double click on the required network machine to provide access credentials.

22 22 If the provided credentials are valid, you will be able to browse the specified network machine for the required storage folder. Click OK when ready. Login and Password. Specify access credentials for the manually provided network resource. Name. Give it a catchy name. Retention policy. Click here to know more on the subject. Retention schedule. Click here to know more on the subject. Modify advanced settings if necessary. Click Save changes to complete configuration of the backup storage. For ESX storages (can only store VM replicas): Storage location. Select ESX server for storing replicas of target machines.

23 23 ESX server. Click Select storage location to specify an ESX host, resource pool, and datastore to place replicas to. By default, there will be pre-selected parameters of the last added ESX connection. If the provided IP and access credentials are valid, there will be established connection to the specified VMware infrastructure. If the required ESX host is a member of a vcenter, always use the IP address and credentials of that vcenter.

24 24 More ESX server connection info. Click on the corresponding arrow button to see detailed information on the connected VMware infrastructure if necessary. Name. Give it a catchy name. Retention policy. Click here to know more on the subject. Retention schedule. Click here to know more on the subject. Modify advanced settings if necessary. Click Save changes to complete configuration of the backup storage. 5. As a result you should have a new primary storage of the specified type and properties registered on Backup Server. If you need to register another primary storage, please go through this scenario once again.
 or manually by installing Backup Agent on all target computers.")
25 Adding Target Machines 25 To do agent based protection of Windows machines (physical or virtual), you need to add them to the infrastructure. It can be done either centrally through Protect & Restore Console (recommended) or manually by installing Backup Agent on all target computers. Obviously the manual option is not default, and should only be used if there s no way to do the remote installation. Through Console 1. Launch Protect & Restore Console. 2. If a connection with the server has been established, click on the Home ribbon then select Add Machines. 3. The wizard will detect and list all machines (domain controllers separately) of a forest domain where Protect & Restore is deployed. Mark checkboxes next to those that require protection. Click Next to proceed. If you d like to specify a machine that belongs to another forest domain or some workgroup, use the corresponding links. Click here to get more details. The wizard lists both physical and virtual machines. If virtual machines hosted by VMware ESX are on the list, please do not mark them here. Otherwise, they will be processed as
26 ordinary physical machines, so you won t get the benefits of ESX Bridge (much higher performance, complete data safety, minimal downtime, etc.) Specify plug-ins to install. By default, the wizard will only add all selected machines to the infrastructure, assigning them the general role of Agent. To allow their protection, you should extend functionality of this agent by selecting required plug-in(s). The number of available plug-ins depends on the purchased license. Let s take a detailed look at all possible plug-ins: Wake-on-LAN assistant. It doesn t provide any backup functions. It only allows waking up remote target machines to do backup. There s no need to install this plug-in on all machines that require wake-up-on-lan. Just select one that is always online and it will automatically wake up all others that share the same subnet when needed. System tray application. It doesn t provide any backup functions. It only allows users to monitor backup progress on machines where Backup Agent is deployed. Volume backup application plug-in. It extends functionality of the general agent allowing it to back up an entire machine or separate volumes at sector level. It also enables to do remote restore of data volumes. Exchange Server 2007 application plug-in. It extends functionality of the general agent allowing it to back up and restore databases of MS Exchange Server 2007 (not available in the current version). Exchange Server 2010 application plug-in. It extends functionality of the general agent allowing it to back up and restore databases of MS Exchange Server 2010 (not available in the current version). 5. Specify how and when the selected plug-ins should be installed. You ve got three options to choose from:

27 27 Install now. Installation will start immediately after confirmation. Deferred installation. If you choose this option all target machines will become available in the infrastructure with the statuses Role pending, Off-line as show below. That means no installation procedures will be initiated until you right click each machine and then select Update roles. Install on specified date and time. By choosing this option you can schedule installation of roles on target machines, validating the process if necessary (highly recommended). Validation can be of great help as sometimes product components fail to install to a remote machine due to various reasons (incorrect credentials, off-line state, active firewall, disabled WMI, etc.). To make sure the scheduled installation will be a success, select one of the available validation levels: - Low. There will be checked all policy parameters, access credentials and availability of target machines. - Medium (recommended). Additionally there will be established connection to target machines and their systems will be checked for missed prerequisites, etc. Actually there will be carried out all actions required for the real installation, except for the installation of packages itself. The validation process will start once you click Finish, while the real installation as scheduled.

28 28 Validation is not a separate policy, but an installation policy committed with certain parameters. 6. To get detailed information on the operation progress, click on the link in the popup window or select Activities and Events > Activities, or Activities and Events > Events, where you can see all events of the infrastructure. Just click on the interested one to see details. Use the Refresh icon to force update of the information. To know more on the subject, please consult the corresponding chapters: Managing Activities, Managing Events. 7. The required machine(s) will be added to the list of computers that join the infrastructure (select Machines > Physical Machines) and eventually acquire the specified roles. Automatically through policy 1. Launch Protect & Restore Console. 2. If a connection with the server has been established, click on the Home ribbon then select Configure discovery policy. 3. The wizard will show organizational units of your Active Directory. Specify one or several units you d like our program to check for new computers, and if a new machine has been found, it will be added to the infrastructure. This is realized with a special service that monitors activities in Active Directory every hour. Click Next.

29 29 4. Specify plug-ins to install. Click Finish when ready. Manually 1. Choose a computer to install Backup Agent on. It can be any computer on the net. 2. Make sure it meets the systems requirements. 3. Run Protect & Restore Installer. 4. Select Installation > Paragon Protect & Restore Backup Agent. 5. Click Next on the first page of the setup wizard. 6. The wizard will analyze the computer for required prerequisites and notify about product components to install. Click Install to initiate the process. 7. When done with the installation, click Next to let the wizard assign the roles of Backup Agent to this computer. At this stage you will need to provide a DNS name or IP address of Administration Server. By default, Administration Server communicates with agents through port 60543, which you can change however (available for the command-line console only). If changed, please set the same port in the corresponding field. If not changed, please ignore this option. 8. At the final stage the wizard will inform you on the installed prerequisites and product components and the roles the computer acquired in the infrastructure. Click Finish to confirm. 9. The main indicator that Backup Agent has been successfully installed is appearance of the computer in Protect & Restore Console. Installing Tray Application To monitor backup progress directly on a machine where Backup Agent is deployed, you need to additionally install Tray Application on it. It can be done either centrally through Protect & Restore Console (recommended) or manually

30 through the Installer. Obviously the manual option is not default, and should only be used if there s no way to do the remote installation. Through Console If the required machine has already been added to the infrastructure, then use the Edit roles dialog to additionally install Tray Application on it. If not, install it when adding this machine to the infrastructure. 30 Manually If the required machine has already been added to the infrastructure, then use the Installer to install Tray Application on it (Installation > Paragon Protect & Restore Tray Application). If not, first install Backup Agent, then Tray Application. Building WinPE Recovery Media Prerequisites A computer where you re going to prepare WinPE recovery media should run Windows Vista or later operating system. Before you launch Boot Media Builder please make sure you ve got Windows Assessment and Deployment Kit (ADK) installed in the chosen system. Otherwise, you won t be able to accomplish the operation. ADK is a Microsoft s

31 31 proprietary tool and can be obtained from its Download Center for free. Please note that you need a genuine Windows installation to be able to download this tool. Moreover you will need to download a version, which is suitable for your Windows OS Boot Media Builder automatically detects your system and offers the required download link. Preparing the WinPE recovery environment on a flash stick 1. Plug in a thumb drive of at least 250 MBs in size. Please note all data on that drive will be deleted. 2. Launch Protect & Restore Console. 3. If a connection with the server has been established, click on the Home ribbon then select Create recovery media. 4. First you will be asked to specify Administration Server to connect to during recovery operations. Use current Administration Server. Once the recovery environment has been loaded, there will automatically be established connection to Administration Server used by the console at the moment. Specify Administration Server to use. Once the recovery environment has been loaded, you will be prompted to specify a DNS name or IP address of Administration Server, you d like to connect to. Specify Administration Server and port to use. Similar option to the previous one, but you will be additionally prompted to specify a port, if it s not default.

32 By default, Administration Server communicates with agents through port 60543, which you can change however (available from the command-line console only). If changed, please set the same port in the corresponding field. If not changed, please ignore this option The welcome page introduces the wizard s functionality. Please click Next. 6. Select USB Flash. The other two options enable to prepare a bootable environment either on a CD/DVD/BD disc or in an ISO/WIM/PXE image format. 7. Specify architecture of the prepared WinPE environment (either 32-bit or 64-bit). Please note it doesn t matter what Windows OS architecture is used to build the recovery media. 8. If you install ADK by its default location, the wizard automatically detects it. Otherwise, you will need to browse for the required folder. If you haven t installed it yet, click Download ADK to get it directly from the Microsoft website. The wizard won t continue until you install Windows ADK. 9. As the next step you re to set up a network connection. You ve got several options to choose from:

33 33 Connect to the network automatically after the startup (recommended). Specify the following parameters if you d like to have an active network connection once the bootable environment has been started: - A network adapter to use. Select a network adapter (if several in the system) to be used for the network connection. - IP address settings. Choose whether to get an IP address automatically from a DHCP server or set it manually. Connect to the network manually after the startup. You will be prompted to set up a network connection once the bootable environment has been started. Skip network adjusting. 10. The next page allows injection of drivers for special storage controllers, network cards, USB devices, etc. Click on the desired section, then click Add. In the opened dialog click Browse to find an.inf file of the required driver or manually set a path to it. In the Driver Details section you can see properties of the selected driver. Click OK when ready.

34 Select a thumb drive from the list of flash memory devices available in the system at the moment (if several). If you haven t plugged it in yet, do it now, then click Refresh to see it on the list. 12. You will have to confirm the operation. The wizard starts the operation immediately after confirmation. All data on the selected drive will be deleted. After you ve installed all necessary components, you can get to protection of target machines. For more information, please consult the user guide of Protect & Restore.
35 35 What You Should Know More Privileges to Manage vsphere Guests The security model of VMware allows much flexibility in limiting access and management rights of any object of the virtual infrastructure. In vsphere 5.0 for instance, there are distinguished 255 privileges. To do backup, restore, partition alignment of ESX guests, or to store VM replicas on ESX datastores, Protect & Restore may require up to 50 privileges. Depending on tasks you re going to accomplish with Protect & Restore, you can create one or several users in vsphere or modify already existed users according to the information above. For instance, the standard user VMBackupUser2 can well be used to do backup of ESX guests. If you don t want to waste time on configuring users with specific privileges, you can use an administrative account of the datacenter you re going to manage + add it the Global.Licenses privilege. Only one account can be used for one ESX connection, thus if you need to back up and restore ESX guests for instance, you need to provide an account that cover privileges for both operations. Let s see what privileges are needed for each type of operations: Privilege Backup Align Store Restore Category Global Global.CancelTask Global.Licenses Category Folder Folder.Create Folder.Delete Category Datastore Datastore.Browse Datastore.FileManagement Datastore.AllocateSpace Datastore.UpdateVirtualMachineFiles Category Network Network.Assign Category Host > Configuration Host.Config.Storage Category Virtual machine > Inventory
36 36 VirtualMachine.Inventory.Create VirtualMachine.Inventory.Delete VirtualMachine.Inventory.Move Category Virtual machine > Interaction VirtualMachine.Interact.PowerOn VirtualMachine.Interact.PowerOff VirtualMachine.Interact.DeviceConnection Category Virtual machine > Configuration VirtualMachine.Config.Rename VirtualMachine.Config.AddExistingDisk VirtualMachine.Config.AddNewDisk VirtualMachine.Config.RemoveDisk VirtualMachine.Config.CPUCount VirtualMachine.Config.Memory VirtualMachine.Config.AddRemoveDevice VirtualMachine.Config.Settings VirtualMachine.Config.Resource VirtualMachine.Config.DiskLease VirtualMachine.Config.ChangeTracking Category Virtual machine > State VirtualMachine.State.CreateSnapshot VirtualMachine.State.RevertToSnapshot VirtualMachine.State.RemoveSnapshot VirtualMachine.State.RenameSnapshot Category Virtual machine > Provisioning VirtualMachine.Provisioning.Clone VirtualMachine.Provisioning.DiskRandomAccess VirtualMachine.Provisioning.DiskRandomRead Category Resource Resource.AssignVMToPool

37 37 Resource.CreatePool Resource.RenamePool Resource.EditPool Resource.DeletePool Resource.HotMigrate Resource.ColdMigrate If you d like to know how to create users with specific privileges in vsphere, please consult documentation provided by VMware. Managing Activities The Activities pane is the primary tool for getting information on policies created by the user. To open the pane, please go to Activities and Events > Activities. As you can see the pane is divided into two sections: Current progress and future activities that displays scheduled policies and those that are being accomplished at the moment, Past activities that displays already completed policies. By default, the program lists all ever submitted user policies by name, which can be customized through the View ribbon. To make the job with activities easier and more efficient, you can: Sort out policies;
38 38 Filter policies by their type; Let the program display policies that require user s attention on top (partially incomplete or failed policies); Set a period and duration of policies. Monitoring running activities Let s take a closer look at one of the running activities to see what information you can get from it and how it can help. For each activity the program outputs its name and type, time when it s started, its current status, and estimated duration. As you may have noticed the current status of the questioned activity is Running actually nothing to worry
39 about, if not for a warning that should attract our attention. By clicking on this warning we learn that the installation policy was accomplished by the machine named ARGUT (Protect & Restore Server) with the resulted status Finished, there were errors not a good sign. 39 By clicking on the More link, we can finally see the reason. Having this information at hand, you can check the target machine and solve the problem. When done, the installation will be automatically completed. Monitoring past activities Submitted policies can either be successfully completed or with errors, which can be seen from their statuses. For each past activity you can open a list of corresponding infrastructure events to get detailed information on the operation progress.
40 40 Failed policies can be examined and restarted. Monitoring scheduled activities For each scheduled policy you can see when it s planned to run next time. By using corresponding buttons, it s also possible to change parameters of the policy or disable it.

41 Managing Events 41 The Events pane provides in-depth information on all actions that take place within the infrastructure, both user and service. It s a tool for thorough analysis of the infrastructure functioning and troubleshooting. To open the pane, please go to Activities and Events > Events. By clicking the arrow button you can hide/unhide details on the selected at the moment event. Events can be filtered for easier monitoring if necessary by using the corresponding icon.
42 42 In the opened dialog you can filter events by their type, an infrastructure component (Backup Server, ESX Bridge, etc.), a particular machine, or a policy for transparent and easy administration and troubleshooting. All events fall into 4 types (errors, warnings, information, and debugs). To get the latest events available, force the update by directly requesting Administration Server. This action can take some time.
 you d like to be removed from the infrastructure.")
43 43 To see all infrastructure events just clear the previously made filtering. Removing Machines from the Infrastructure 1. Launch Protect & Restore Console. 2. Select Machines > Physical Machines, then a computer (use Ctrl or Shift for selecting several machines) you d like to be removed from the infrastructure. Use the Delete Machine icon to initiate the operation. 3. Confirm the operation in the opened dialog. Please note that this operation initiates de-installation of all components of Protect & Restore on the selected computer. 4. Select Activities and Events > Activities to monitor the operation progress.

44 If the delete operation fails for the selected target machine, please reopen the dialog and additionally mark the Force Remove option to delete all information on this computer from the infrastructure. Then uninstall all components of Protect & Restore on-site by using the Installer and its corresponding section. 44 Collecting Logs In case of having difficulties with handling the product you can address our support engineers for assistance. To submit a support ticket, first you need to collect all operation logs. Protect & Restore simplifies this operation with a handy dialog. To prepare a package of operation logs, please do the following: 1. Launch Protect & Restore Console. 2. If a connection with the server has been established, click on the Logo button, then select Export logs. 3. In the opened dialog select infrastructure members, which logs you re interested in. Please note logs from Administration Server can help to figure out and resolve 90% of issues. However when the database replication with one or several infrastructure components is not possible, or has not been completed yet, the logs stored on Administration Server will not contain the most up-to-date information. Click Next to proceed. 4. Browse to a place where you d like to save the logs to. If you d like Windows Explorer to open in the specified folder once the operation is over, please additionally mark the corresponding option. Click Export to initiate the operation.

45 45 Log files do not contain any confidential information on the operating system settings or the user documents.
Paragon Recovery Media Builder
 PARAGON Software GmbH Heinrich-von-Stephan-Str. 5c 79100 Freiburg, Germany Tel. +49 (0) 761 59018201 Fax +49 (0) 761 59018130 Internet www.paragon-software.com E-mail sales@paragon-software.com Paragon
Paragon Protect & Restore
 Paragon Protect & Restore ver. 3 Centralized and Disaster Recovery for virtual and physical environments Tight Integration with hypervisors for agentless backups, VM replication and seamless restores Paragon
Paragon Protect & Restore (PPR)
") PARAGON Software GmbH Heinrich-von-Stephan-Str. 5c 79100 Freiburg, Germany Tel. +49 (0) 761 59018201 Fax +49 (0) 761 59018130 Internet www.paragon-software.com Email sales@paragon-software.com Paragon
PARAGON Software GmbH Heinrich-von-Stephan-Str. 5c 79100 Freiburg, Germany Tel. +49 (0) 761 59018201 Fax +49 (0) 761 59018130 Internet www.paragon-software.com Email sales@paragon-software.com Paragon
Paragon Boot Media Builder
 PARAGON Software GmbH Heinrich-von-Stephan-Str. 5c 79100 Freiburg, Germany Tel. +49 (0) 761 59018201 Fax +49 (0) 761 59018130 Internet www.paragon-software.com E-mail sales@paragon-software.com Paragon
Managing Physical and Virtual Machines in Paragon Protect & Restore
 Managing Physical and Virtual Machines in Paragon Protect & Restore Best Practices last updated: August 2013 Overview Paragon Software s Protect & Restore (PPR) offers a unified system and data protection
VMware/Hyper-V Backup Plug-in User Guide
 VMware/Hyper-V Backup Plug-in User Guide COPYRIGHT No part of this publication may be reproduced, stored in a retrieval system, or transmitted in any form or by any means, electronic, mechanical, photocopying,
Getting Started with ESXi Embedded
 ESXi 4.1 Embedded vcenter Server 4.1 This document supports the version of each product listed and supports all subsequent versions until the document is replaced by a new edition. To check for more recent
ArCycle vmbackup. for VMware/Hyper-V. User Guide
 ArCycle vmbackup for VMware/Hyper-V User Guide 2 Copyright Copyright ArCycle Software, Ltd., 2011-2014. All rights reserved. No part of this publication may be reproduced, stored in a retrieval system,
Paragon Recovery Media Builder
 PARAGON Software GmbH Heinrich-von-Stephan-Str. 5c 79100 Freiburg, Germany Tel. +49 (0) 761 59018201 Fax +49 (0) 761 59018130 Internet www.paragon-software.com E-mail sales@paragon-software.com Paragon
How to Test Out Backup & Replication 6.5 for Hyper-V
 How to Test Out Backup & Replication 6.5 for Hyper-V Mike Resseler May, 2013 2013 Veeam Software. All rights reserved. All trademarks are the property of their respective owners. No part of this publication
Acronis Backup & Recovery 11.5
 Acronis Backup & Recovery 11.5 Update 2 Installation Guide Applies to the following editions: Advanced Server Server for Windows Virtual Edition Server for Linux Advanced Server SBS Edition Workstation
Paragon Protect & Restore
 Paragon Protect & Restore VMware vsphere Free The Most Powerful Free Solution for Backup, Replication and Restore of Virtual Machines in VMware vsphere Environments Backup of on-/offline VMware Guest Systems,
Acronis Backup & Recovery 10 Advanced Server Virtual Edition. Quick Start Guide
 Acronis Backup & Recovery 10 Advanced Server Virtual Edition Quick Start Guide Table of contents 1 Main components...3 2 License server...3 3 Supported operating systems...3 3.1 Agents... 3 3.2 License
Acronis Backup & Recovery 11.5 Quick Start Guide
 Acronis Backup & Recovery 11.5 Quick Start Guide Applies to the following editions: Advanced Server for Windows Virtual Edition Advanced Server SBS Edition Advanced Workstation Server for Linux Server
Paragon Boot Media Builder
 1 Paragon Boot Media Builder General guide on installing WAIK/ADK and using Boot Media Builder 2 Contents Introduction... 3 Key Features... 3 Building a WinPE Environment... 3 Download and Install the
Paragon Exchange Granular Recovery 2010
 PARAGON Technologie GmbH, Systemprogrammierung Heinrich-von-Stephan-Str. 5c 79100 Freiburg, Germany Tel. +49 (0) 761 59018201 Fax +49 (0) 761 59018130 Internet www.paragon-software.com Email sales@paragon-software.com
Core Protection for Virtual Machines 1
 Core Protection for Virtual Machines 1 Comprehensive Threat Protection for Virtual Environments. Installation Guide e Endpoint Security Trend Micro Incorporated reserves the right to make changes to this
1 Main components... 3
 Quick Start Guide Table of contents 1 Main components... 3 2 Supported operating systems and environments... 4 2.1 Acronis vmprotect 8 Windows Agent... 4 2.2 Acronis vmprotect 8 Virtual Appliance... 4
Metalogix SharePoint Backup. Advanced Installation Guide. Publication Date: August 24, 2015
 Metalogix SharePoint Backup Publication Date: August 24, 2015 All Rights Reserved. This software is protected by copyright law and international treaties. Unauthorized reproduction or distribution of this
Paragon Remote Management
 PARAGON Technologie GmbH, Systemprogrammierung Heinrich-von-Stephan-Str. 5c 79100 Freiburg, Germany Tel. +49 (0) 761 59018201 Fax +49 (0) 761 59018130 Internet www.paragon-software.com Email sales@paragonsoftware.com
WhatsUp Gold v16.3 Installation and Configuration Guide
 WhatsUp Gold v16.3 Installation and Configuration Guide Contents Installing and Configuring WhatsUp Gold using WhatsUp Setup Installation Overview... 1 Overview... 1 Security considerations... 2 Standard
Virtual Web Appliance Setup Guide
 Virtual Web Appliance Setup Guide 2 Sophos Installing a Virtual Appliance Installing a Virtual Appliance This guide describes the procedures for installing a Virtual Web Appliance. If you are installing
Unitrends Virtual Backup Installation Guide Version 8.0
 Unitrends Virtual Backup Installation Guide Version 8.0 Release June 2014 7 Technology Circle, Suite 100 Columbia, SC 29203 Phone: 803.454.0300 Contents Chapter 1 Getting Started... 1 Version 8 Architecture...
VMware Data Recovery. Administrator's Guide EN-000193-00
 Administrator's Guide EN-000193-00 You can find the most up-to-date technical documentation on the VMware Web site at: http://www.vmware.com/support/ The VMware Web site also provides the latest product
Virtual Appliance Setup Guide
 The Virtual Appliance includes the same powerful technology and simple Web based user interface found on the Barracuda Web Application Firewall hardware appliance. It is designed for easy deployment on
Veeam Backup Enterprise Manager. Version 7.0
 Veeam Backup Enterprise Manager Version 7.0 User Guide August, 2013 2013 Veeam Software. All rights reserved. All trademarks are the property of their respective owners. No part of this publication may
Quick Start - Virtual Server idataagent (VMware)
") Page 1 of 24 Quick Start - Virtual Server idataagent (VMware) TABLE OF CONTENTS OVERVIEW Introduction Key Features Complete Virtual Machine Protection Granular Recovery of Virtual Machine Data Minimal
Page 1 of 24 Quick Start - Virtual Server idataagent (VMware) TABLE OF CONTENTS OVERVIEW Introduction Key Features Complete Virtual Machine Protection Granular Recovery of Virtual Machine Data Minimal
Freshservice Discovery Probe User Guide
 Freshservice Discovery Probe User Guide 1. What is Freshservice Discovery Probe? 1.1 What details does Probe fetch? 1.2 How does Probe fetch the information? 2. What are the minimum system requirements
Bare Metal Recovery Quick Start Guide
 Bare Metal Recovery Quick Start Guide Revisions Document Control Version 5.4.3 Status Changes Date Final Created. August 2014 Copyright 2003-2014 Intronis, Inc. All rights reserved. 1 Table of Contents
How To Run Paragon Boot Camp Backup On A Mac Computer (Windows) On A Pc Or Mac (Windows 2) On An Ntos 2 (Windows 3) On Your Computer Or Ipad (Windows 1) On Pc Or Ipa
 On A Pc Or Mac (Windows 2) On An Ntos 2 (Windows 3) On Your Computer Or Ipad (Windows 1) On Pc Or Ipa") PARAGON Software GmbH Heinrich-von-Stephan-Str. 5c 79100 Freiburg, Germany Tel. +49 (0) 761 59018201 Fax +49 (0) 761 59018130 Internet www.paragon-software.com Email sales@paragon-software.com Paragon
PARAGON Software GmbH Heinrich-von-Stephan-Str. 5c 79100 Freiburg, Germany Tel. +49 (0) 761 59018201 Fax +49 (0) 761 59018130 Internet www.paragon-software.com Email sales@paragon-software.com Paragon
Deploying System Center 2012 R2 Configuration Manager
 Deploying System Center 2012 R2 Configuration Manager This document is for informational purposes only. MICROSOFT MAKES NO WARRANTIES, EXPRESS, IMPLIED, OR STATUTORY, AS TO THE INFORMATION IN THIS DOCUMENT.
StarWind iscsi SAN: Global Deduplication with Veeam Backup&Replication
 StarWind iscsi SAN: Global Deduplication with Veeam Backup&Replication May 2012 TRADEMARKS StarWind, StarWind Software, and the StarWind and StarWind Software logos are trademarks of StarWind Software
EMC Data Domain Management Center
 EMC Data Domain Management Center Version 1.1 Initial Configuration Guide 302-000-071 REV 04 Copyright 2012-2015 EMC Corporation. All rights reserved. Published in USA. Published June, 2015 EMC believes
Acronis Backup & Recovery 11
 Acronis Backup & Recovery 11 Update 0 Installation Guide Applies to the following editions: Advanced Server Virtual Edition Advanced Server SBS Edition Advanced Workstation Server for Linux Server for
Thinspace deskcloud. Quick Start Guide
 Thinspace deskcloud Quick Start Guide Version 1.2 Published: SEP-2014 Updated: 16-SEP-2014 2014 Thinspace Technology Ltd. All rights reserved. The information contained in this document represents the
VERITAS Backup Exec TM 10.0 for Windows Servers
 VERITAS Backup Exec TM 10.0 for Windows Servers Quick Installation Guide N134418 July 2004 Disclaimer The information contained in this publication is subject to change without notice. VERITAS Software
Installation Notes for Outpost Network Security (ONS) version 3.2
 version 3.2") Outpost Network Security Installation Notes version 3.2 Page 1 Installation Notes for Outpost Network Security (ONS) version 3.2 Contents Installation Notes for Outpost Network Security (ONS) version 3.2...
Outpost Network Security Installation Notes version 3.2 Page 1 Installation Notes for Outpost Network Security (ONS) version 3.2 Contents Installation Notes for Outpost Network Security (ONS) version 3.2...
Installing and Configuring vcenter Support Assistant
 Installing and Configuring vcenter Support Assistant vcenter Support Assistant 5.5 This document supports the version of each product listed and supports all subsequent versions until the document is replaced
Index C, D. Background Intelligent Transfer Service (BITS), 174, 191
, 174, 191") Index A Active Directory Restore Mode (DSRM), 12 Application profile, 293 Availability sets configure possible and preferred owners, 282 283 creation, 279 281 guest cluster, 279 physical cluster, 279 virtual
Index A Active Directory Restore Mode (DSRM), 12 Application profile, 293 Availability sets configure possible and preferred owners, 282 283 creation, 279 281 guest cluster, 279 physical cluster, 279 virtual
Installing and Configuring vcenter Multi-Hypervisor Manager
 Installing and Configuring vcenter Multi-Hypervisor Manager vcenter Server 5.1 vcenter Multi-Hypervisor Manager 1.1 This document supports the version of each product listed and supports all subsequent
Quick Start Guide for VMware and Windows 7
 PROPALMS VDI Version 2.1 Quick Start Guide for VMware and Windows 7 Rev. 1.1 Published: JULY-2011 1999-2011 Propalms Ltd. All rights reserved. The information contained in this document represents the
Virtual Managment Appliance Setup Guide
 Virtual Managment Appliance Setup Guide 2 Sophos Installing a Virtual Appliance Installing a Virtual Appliance As an alternative to the hardware-based version of the Sophos Web Appliance, you can deploy
Paragon System Backup 11
 PARAGON Software GmbH Heinrich-von-Stephan-Str. 5c 79100 Freiburg, Germany Tel. +49 (0) 761 59018201 Fax +49 (0) 761 59018130 Internet www.paragon-software.com E-mail sales@paragon-software.com Paragon
Exchange Mailbox Protection Whitepaper
 Exchange Mailbox Protection Contents 1. Introduction... 2 Documentation... 2 Licensing... 2 Exchange add-on comparison... 2 Advantages and disadvantages of the different PST formats... 3 2. How Exchange
Table of Contents. Introduction...9. Installation...17. Program Tour...31. The Program Components...10 Main Program Features...11
 2011 AdRem Software, Inc. This document is written by AdRem Software and represents the views and opinions of AdRem Software regarding its content, as of the date the document was issued. The information
User Manual. Onsight Management Suite Version 5.1. Another Innovation by Librestream
 User Manual Onsight Management Suite Version 5.1 Another Innovation by Librestream Doc #: 400075-06 May 2012 Information in this document is subject to change without notice. Reproduction in any manner
Acronis Backup & Recovery 11
 Acronis Backup & Recovery 11 Quick Start Guide Applies to the following editions: Advanced Server Virtual Edition Advanced Server SBS Edition Advanced Workstation Server for Linux Server for Windows Workstation
Introduction to Hyper-V High- Availability with Failover Clustering
 Introduction to Hyper-V High- Availability with Failover Clustering Lab Guide This lab is for anyone who wants to learn about Windows Server 2012 R2 Failover Clustering, focusing on configuration for Hyper-V
Windows BitLocker and Paragon s Backup Solutions
 PARAGON Software GmbH Heinrich-von-Stephan-Str. 5c 79100 Freiburg, Germany Tel. +49 (0) 761 59018201 Fax +49 (0) 761 59018130 Internet www.paragon-software.com Email sales@paragon-software.com Windows
PHD Virtual Backup for Hyper-V
 PHD Virtual Backup for Hyper-V version 7.0 Installation & Getting Started Guide Document Release Date: December 18, 2013 www.phdvirtual.com PHDVB v7 for Hyper-V Legal Notices PHD Virtual Backup for Hyper-V
Remote Application Server Version 14. Last updated: 06-02-15
 Remote Application Server Version 14 Last updated: 06-02-15 Information in this document is subject to change without notice. Companies, names, and data used in examples herein are fictitious unless otherwise
Desktop Surveillance Help
 Desktop Surveillance Help Table of Contents About... 9 What s New... 10 System Requirements... 11 Updating from Desktop Surveillance 2.6 to Desktop Surveillance 3.2... 13 Program Structure... 14 Getting
Installing and Administering VMware vsphere Update Manager
 Installing and Administering VMware vsphere Update Manager Update 1 vsphere Update Manager 5.1 This document supports the version of each product listed and supports all subsequent versions until the document
Consolidated Monitoring, Analysis and Automated Remediation For Hybrid IT Infrastructures. Goliath Performance Monitor Installation Guide v11.
 Consolidated Monitoring, Analysis and Automated Remediation For Hybrid IT Infrastructures Goliath Performance Monitor Installation Guide v11.6 (v11.6) Document Date: August 2015 www.goliathtechnologies.com
How to Backup and Restore a VM using Veeam
 How to Backup and Restore a VM using Veeam Table of Contents Introduction... 3 Assumptions... 3 Add ESXi Server... 4 Backup a VM... 6 Restore Full VM... 12 Appendix A: Install Veeam Backup & Replication
How to install/upgrade the LANDesk virtual Cloud service appliance (CSA)
") How to install/upgrade the LANDesk virtual Cloud service appliance (CSA) The upgrade process for the virtual Cloud Services Appliance is a side- by- side install. This document will walk you through backing
How to install/upgrade the LANDesk virtual Cloud service appliance (CSA) The upgrade process for the virtual Cloud Services Appliance is a side- by- side install. This document will walk you through backing
WhatsUp Gold v16.1 Installation and Configuration Guide
 WhatsUp Gold v16.1 Installation and Configuration Guide Contents Installing and Configuring Ipswitch WhatsUp Gold v16.1 using WhatsUp Setup Installing WhatsUp Gold using WhatsUp Setup... 1 Security guidelines
Enterprise Manager. Version 6.2. Installation Guide
 Enterprise Manager Version 6.2 Installation Guide Enterprise Manager 6.2 Installation Guide Document Number 680-028-014 Revision Date Description A August 2012 Initial release to support version 6.2.1
NovaBACKUP. User Manual. NovaStor / May 2014
 NovaBACKUP User Manual NovaStor / May 2014 2014 NovaStor, all rights reserved. All trademarks are the property of their respective owners. Features and specifications are subject to change without notice.
CITRIX 1Y0-A14 EXAM QUESTIONS & ANSWERS
 CITRIX 1Y0-A14 EXAM QUESTIONS & ANSWERS Number: 1Y0-A14 Passing Score: 800 Time Limit: 90 min File Version: 42.2 http://www.gratisexam.com/ CITRIX 1Y0-A14 EXAM QUESTIONS & ANSWERS Exam Name: Implementing
Virtualizing your Datacenter
 Virtualizing your Datacenter with Windows Server 2012 R2 & System Center 2012 R2 Part 2 Hands-On Lab Step-by-Step Guide For the VMs the following credentials: Username: Contoso\Administrator Password:
Setting up VMware ESXi for 2X VirtualDesktopServer Manual
 Setting up VMware ESXi for 2X VirtualDesktopServer Manual URL: www.2x.com E-mail: info@2x.com Information in this document is subject to change without notice. Companies, names, and data used in examples
Backup & Disaster Recovery Appliance User Guide
 Built on the Intel Hybrid Cloud Platform Backup & Disaster Recovery Appliance User Guide Order Number: G68664-001 Rev 1.0 June 22, 2012 Contents Registering the BDR Appliance... 4 Step 1: Register the
How To Backup A Virtual Machine With Thinware Vbackup
 vbackup Administrator s Guide Thinware vbackup 4.0.1 Thinware vbackup Administrator s Guide Thinware vbackup Administrator s Guide Revision: 4.0.1-1 The latest product updates and most up-to-date documentation
Kaspersky Lab Mobile Device Management Deployment Guide
 Kaspersky Lab Mobile Device Management Deployment Guide Introduction With the release of Kaspersky Security Center 10.0 a new functionality has been implemented which allows centralized management of mobile
Direct Storage Access Using NetApp SnapDrive. Installation & Administration Guide
 Direct Storage Access Using NetApp SnapDrive Installation & Administration Guide SnapDrive overview... 3 What SnapDrive does... 3 What SnapDrive does not do... 3 Recommendations for using SnapDrive...
Installation Guide. Novell Storage Manager 3.1.1 for Active Directory. Novell Storage Manager 3.1.1 for Active Directory Installation Guide
 Novell Storage Manager 3.1.1 for Active Directory Installation Guide www.novell.com/documentation Installation Guide Novell Storage Manager 3.1.1 for Active Directory October 17, 2013 Legal Notices Condrey
VMware Mirage Web Manager Guide
 Mirage 5.1 This document supports the version of each product listed and supports all subsequent versions until the document is replaced by a new edition. To check for more recent editions of this document,
safend a w a v e s y s t e m s c o m p a n y
 safend a w a v e s y s t e m s c o m p a n y SAFEND Data Protection Suite Installation Guide Version 3.4.5 Important Notice This guide is delivered subject to the following conditions and restrictions:
AVG 8.5 Anti-Virus Network Edition
 AVG 8.5 Anti-Virus Network Edition User Manual Document revision 85.2 (23. 4. 2009) Copyright AVG Technologies CZ, s.r.o. All rights reserved. All other trademarks are the property of their respective
Acronis Backup & Recovery 10 Server for Windows. Installation Guide
 Acronis Backup & Recovery 10 Server for Windows Installation Guide Table of Contents 1. Installation of Acronis Backup & Recovery 10... 3 1.1. Acronis Backup & Recovery 10 components... 3 1.1.1. Agent
Hard Disk Manager 14 Hyper-V Preview
 PARAGON Software GmbH Heinrich-von-Stephan-Str. 5c 79100 Freiburg, Germany Tel. +49 (0) 761 59018201 Fax +49 (0) 761 59018130 Internet www.paragon-software.com Email sales@paragon-software.com Hard Disk
Installation and Deployment
 Installation and Deployment Help Documentation This document was auto-created from web content and is subject to change at any time. Copyright (c) 2016 SmarterTools Inc. Installation and Deployment SmarterStats
Table of Contents. Online backup Manager User s Guide
 Table of Contents Backup / Restore VMware Virtual Machines... Error! Bookmark not defined. Backup virtual machines running on VMware ESXi / ESX Server with VDDK / non VDDK... 2 Requirements and recommendations...
Consolidated Monitoring, Analysis and Automated Remediation For Hybrid IT Infrastructures. Goliath Performance Monitor Installation Guide v11.
 Consolidated Monitoring, Analysis and Automated Remediation For Hybrid IT Infrastructures Goliath Performance Monitor Installation Guide v11.5 (v11.5) Document Date: March 2015 www.goliathtechnologies.com
Nexio Connectus with Nexio G-Scribe
 Nexio Connectus with Nexio G-Scribe 2.1.2 3/20/2014 Edition: A 2.1.2 Publication Information 2014 Imagine Communications. Proprietary and Confidential. Imagine Communications considers this document and
Migrating TimeForce To A New Server
 Rev. 4/28/14 Migrating TimeForce To A New Server Table of Contents 1. Installation Prerequisites... 2 Required... 2 Recommended... 3 2. Update to a Migration Compatible Version... 3 Determine the Database
BackupAssist v6 quickstart guide
 New features in BackupAssist v6... 2 VSS application backup (Exchange, SQL, SharePoint)... 3 System State backup... 3 Restore files, applications, System State and mailboxes... 4 Fully cloud ready Internet
VMware Quick Start Guide
 VMware Quick Start Guide Quick Start Guide Version 5.8 March 7, 2011 NOTICE The information contained in this document is believed to be accurate in all respects but is not warranted by Mitel Networks
Interworks. Interworks Cloud Platform Installation Guide
 Interworks Interworks Cloud Platform Installation Guide Published: March, 2014 This document contains information proprietary to Interworks and its receipt or possession does not convey any rights to reproduce,
NetWrix USB Blocker. Version 3.6 Administrator Guide
 NetWrix USB Blocker Version 3.6 Administrator Guide Table of Contents 1. Introduction...3 1.1. What is NetWrix USB Blocker?...3 1.2. Product Architecture...3 2. Licensing...4 3. Operation Guide...5 3.1.
Getting Started with Vision 6
 Getting Started with Vision 6 Version 6.9 Notice Copyright 1981-2009 Netop Business Solutions A/S. All Rights Reserved. Portions used under license from third parties. Please send any comments to: Netop
VMware for Bosch VMS. en Software Manual
 VMware for Bosch VMS en Software Manual VMware for Bosch VMS Table of Contents en 3 Table of contents 1 Introduction 4 1.1 Restrictions 4 2 Overview 5 3 Installing and configuring ESXi server 6 3.1 Installing
Acronis Backup & Recovery 10 Workstation. Installation Guide
 Acronis Backup & Recovery 10 Workstation Installation Guide Table of Contents 1. Installation of Acronis Backup & Recovery 10... 3 1.1. Acronis Backup & Recovery 10 components... 3 1.1.1. Agent for Windows...
Quick Start Guide for Parallels Virtuozzo
 PROPALMS VDI Version 2.1 Quick Start Guide for Parallels Virtuozzo Rev. 1.1 Published: JULY-2011 1999-2011 Propalms Ltd. All rights reserved. The information contained in this document represents the current
WhatsUp Gold v16.2 Installation and Configuration Guide
 WhatsUp Gold v16.2 Installation and Configuration Guide Contents Installing and Configuring Ipswitch WhatsUp Gold v16.2 using WhatsUp Setup Installing WhatsUp Gold using WhatsUp Setup... 1 Security guidelines
Barracuda Message Archiver Vx Deployment. Whitepaper
 Barracuda Message Archiver Vx Deployment Whitepaper Document Scope This document provides guidance on designing and deploying Barracuda Message Archiver Vx on VMware vsphere Document Scope, and Microsoft
Virtual Appliance Setup Guide
 Virtual Appliance Setup Guide 2015 Bomgar Corporation. All rights reserved worldwide. BOMGAR and the BOMGAR logo are trademarks of Bomgar Corporation; other trademarks shown are the property of their respective
About This Manual. 2 About This Manual
 Ver.4.1 Important This System Guide applies to RadiNET Pro Ver. 4.1. Please read this System Guide and the User s Manual on the RadiNET Pro CD-ROM carefully to familiarize yourself with safe and effective
Remote Application Server Version 14. Last updated: 25-02-15
 Remote Application Server Version 14 Last updated: 25-02-15 Information in this document is subject to change without notice. Companies, names, and data used in examples herein are fictitious unless otherwise
Altaro Hyper-V Backup V4 - User Guide
 Altaro Hyper-V Backup V4 - User Guide 1 / 161 Table of contents Introducing Altaro Hyper-V Backup... 5 Roles... 6 Sample Scenario... 7 Different Editions... 9 Getting Started... 11 System requirements...
Enterprise Remote Control 5.6 Manual
 Enterprise Remote Control 5.6 Manual Solutions for Network Administrators Copyright 2015, IntelliAdmin, LLC Revision 3/26/2015 http://www.intelliadmin.com Page 1 Table of Contents What is Enterprise Remote
Reconfiguring VMware vsphere Update Manager
 Reconfiguring VMware vsphere Update Manager vsphere Update Manager 6.0 This document supports the version of each product listed and supports all subsequent versions until the document is replaced by a
Pearl Echo Installation Checklist
 Pearl Echo Installation Checklist Use this checklist to enter critical installation and setup information that will be required to install Pearl Echo in your network. For detailed deployment instructions
XenDesktop Implementation Guide
 Consulting Solutions WHITE PAPER Citrix XenDesktop XenDesktop Implementation Guide Pooled Desktops (Local and Remote) www.citrix.com Contents Contents... 2 Overview... 4 Initial Architecture... 5 Installation
VERITAS Backup Exec 9.1 for Windows Servers Quick Installation Guide
 VERITAS Backup Exec 9.1 for Windows Servers Quick Installation Guide N109548 Disclaimer The information contained in this publication is subject to change without notice. VERITAS Software Corporation makes
Administration GUIDE. Exchange Database idataagent. Published On: 11/19/2013 V10 Service Pack 4A Page 1 of 233
 Administration GUIDE Exchange Database idataagent Published On: 11/19/2013 V10 Service Pack 4A Page 1 of 233 User Guide - Exchange Database idataagent Table of Contents Overview Introduction Key Features
Legal Notes. Regarding Trademarks. 2013 KYOCERA Document Solutions Inc.
 Legal Notes Unauthorized reproduction of all or part of this guide is prohibited. The information in this guide is subject to change without notice. We cannot be held liable for any problems arising from
Virtual Storage Console 4.0 for VMware vsphere Installation and Administration Guide
 Virtual Storage Console 4.0 for VMware vsphere Installation and Administration Guide NetApp, Inc. 495 East Java Drive Sunnyvale, CA 94089 U.S.A. Telephone: +1 (408) 822-6000 Fax: +1 (408) 822-4501 Support
Dell NetVault Bare Metal Recovery 10.5. User s Guide
 Dell NetVault Bare Metal Recovery 10.5 User s Guide Copyright 2015 Dell Inc. All rights reserved. This product is protected by U.S. and international copyright and intellectual property laws. Dell, the