Ford Super Duty Rear Brake Pad & Rotor Replacement F250 4x4 XLT Sport Crew Cab
|
|
|
- Lawrence Cox
- 8 years ago
- Views:
Transcription
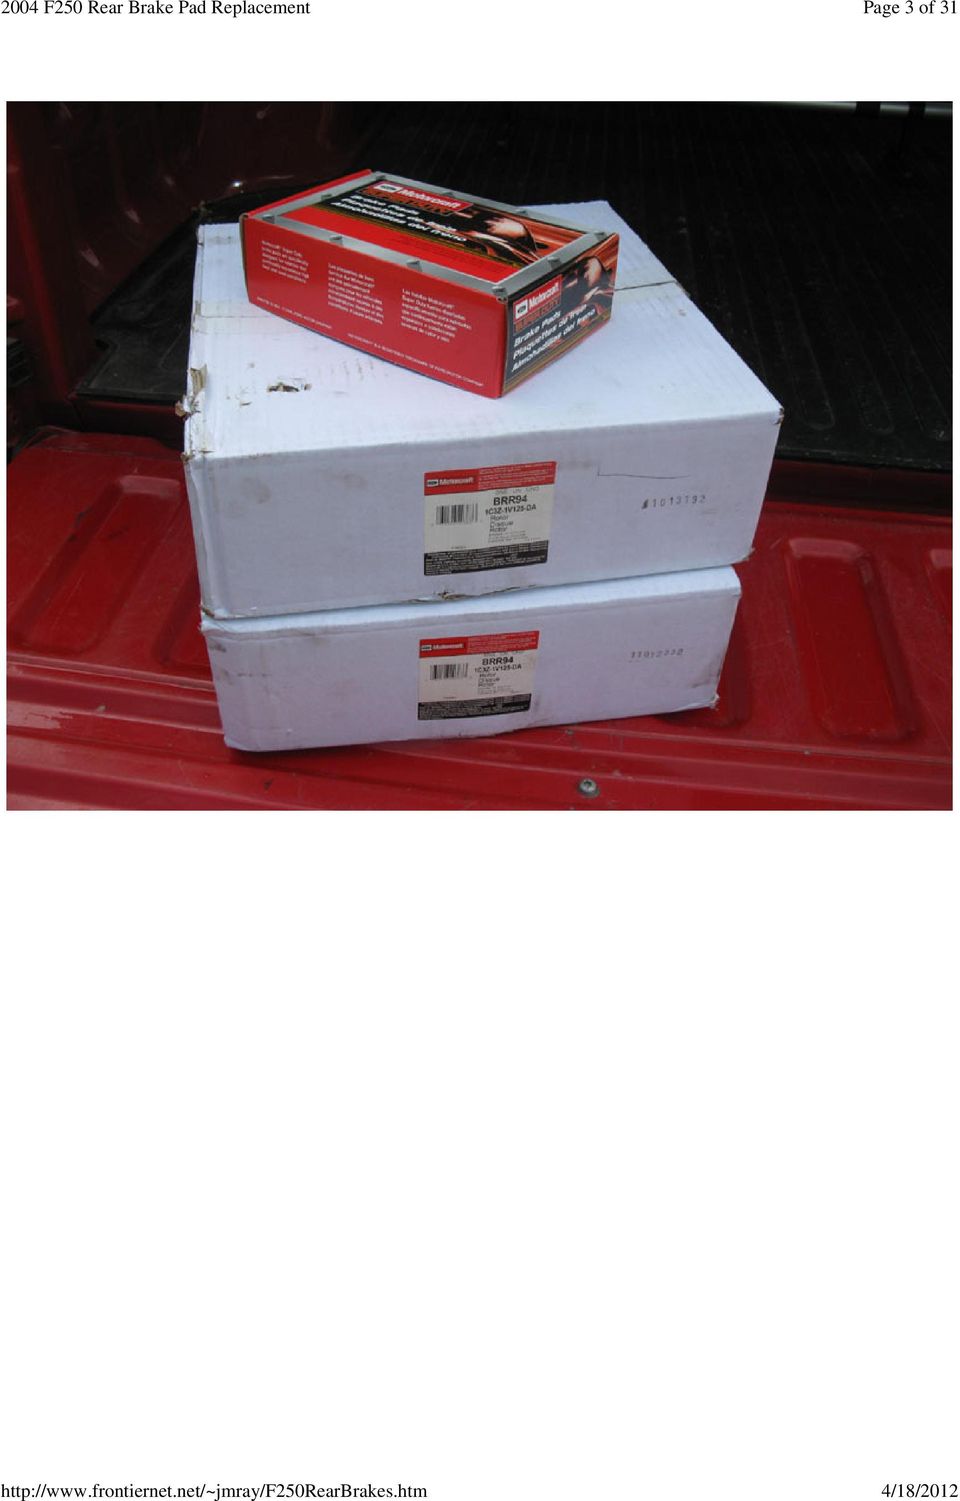
1 Page 1 of 31 Ford Super Duty Rear Brake Pad & Rotor Replacement 2004 F250 4x4 XLT Sport Crew Cab Back to 2004 F250 Main Page Click Here for a PDF version of this article *** NOTE *** Some of you may remember my first article about working on the rear brakes. This was from 2009 when I replaced my front brakes & ball joints. Back then, my rear rotors were fine and I only replaced the pads. Fast forward three years and 30k miles and its time for rear rotors. So, I updated this article accordingly. Some of the pictures below are re-used from the original article, as denoted in the caption. Here's the new pads this go-round. Motorcraft part number 2U2Z-2V200-FB

2 Page 2 of 31 And here are the new rotors. Both are Motorcraft part number 1C3Z-1V125-DA. I had always planned to go with Powerslot Cryos on the rear like I have on the front, but I couldn't justify the cost difference between those and OEM rotors on the rear. Time will tell if this was a mistake.

3 Page 3 of 31
4 Page 4 of 31

5 Page 5 of 31

6 Page 6 of 31 Now on to the procedure... First thing to do is to remove one of the rear tires. I started with the driver's side. Be sure to chock the front wheels and put a jackstand somewhere under the rear. (pic from 2009)

7 Page 7 of 31 Next, remove the two 12mm bolts that attach the caliper to the bracket. (pic from 2009)

8 Page 8 of 31 (pic from 2009)
")
9 Page 9 of 31 Then, pry the bracket away from the rotor. If its real tight, you might need to use a c-clamp or another method to slightly compress the caliper pistons to relieve a little pressure. I was able to pry mine off with ease. Either tie up the caliper to the springs or place it on something like a milk crate to keep from damaging the brake hose. (pic from 2009)

10 Page 10 of 31 Remove the two bolts that attach the caliper bracket. (pic from 2009)

11 Page 11 of 31 (pic from 2009)
")
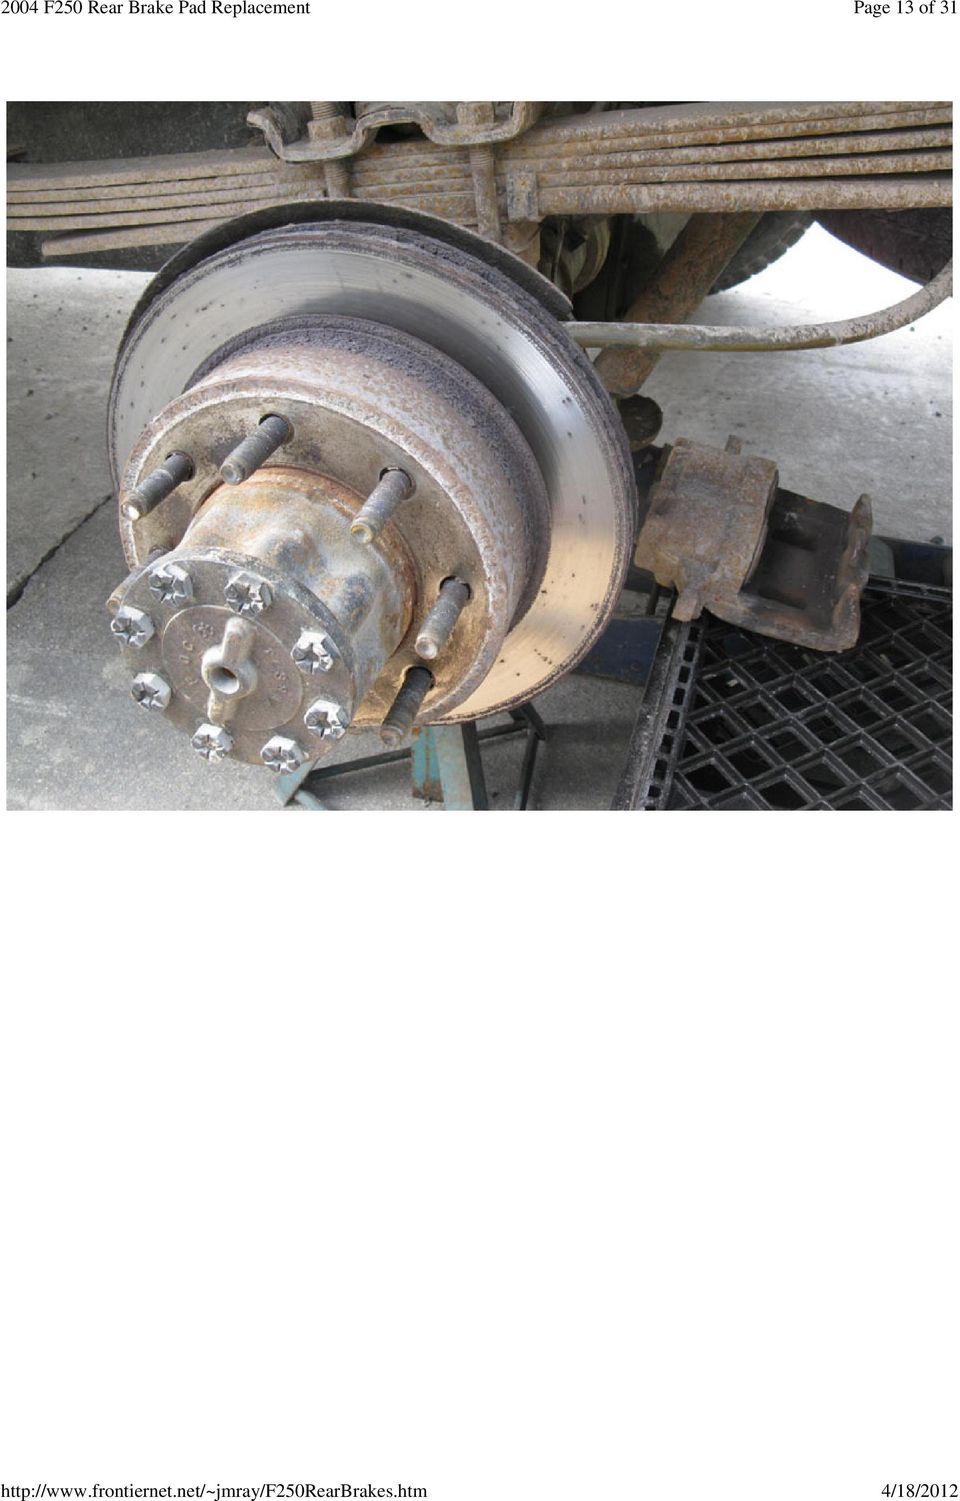
12 Page 12 of 31 Here's what the rear rotors looked like. Quite a bit of wear on the outer surface, even more on the inner.

13 Page 13 of 31
14 Page 14 of 31 Next, remove the rotor. This will likely take some persuasion with a hammer. Since I was replacing the rotors, I didn't mind wailing away on it with a large metal ball pein. However, if you're planning to have them turned, you should use a rubber mallet or a block of wood with the metal hammer. My parking brake assembly looked fine so I didn't bother replacing it.

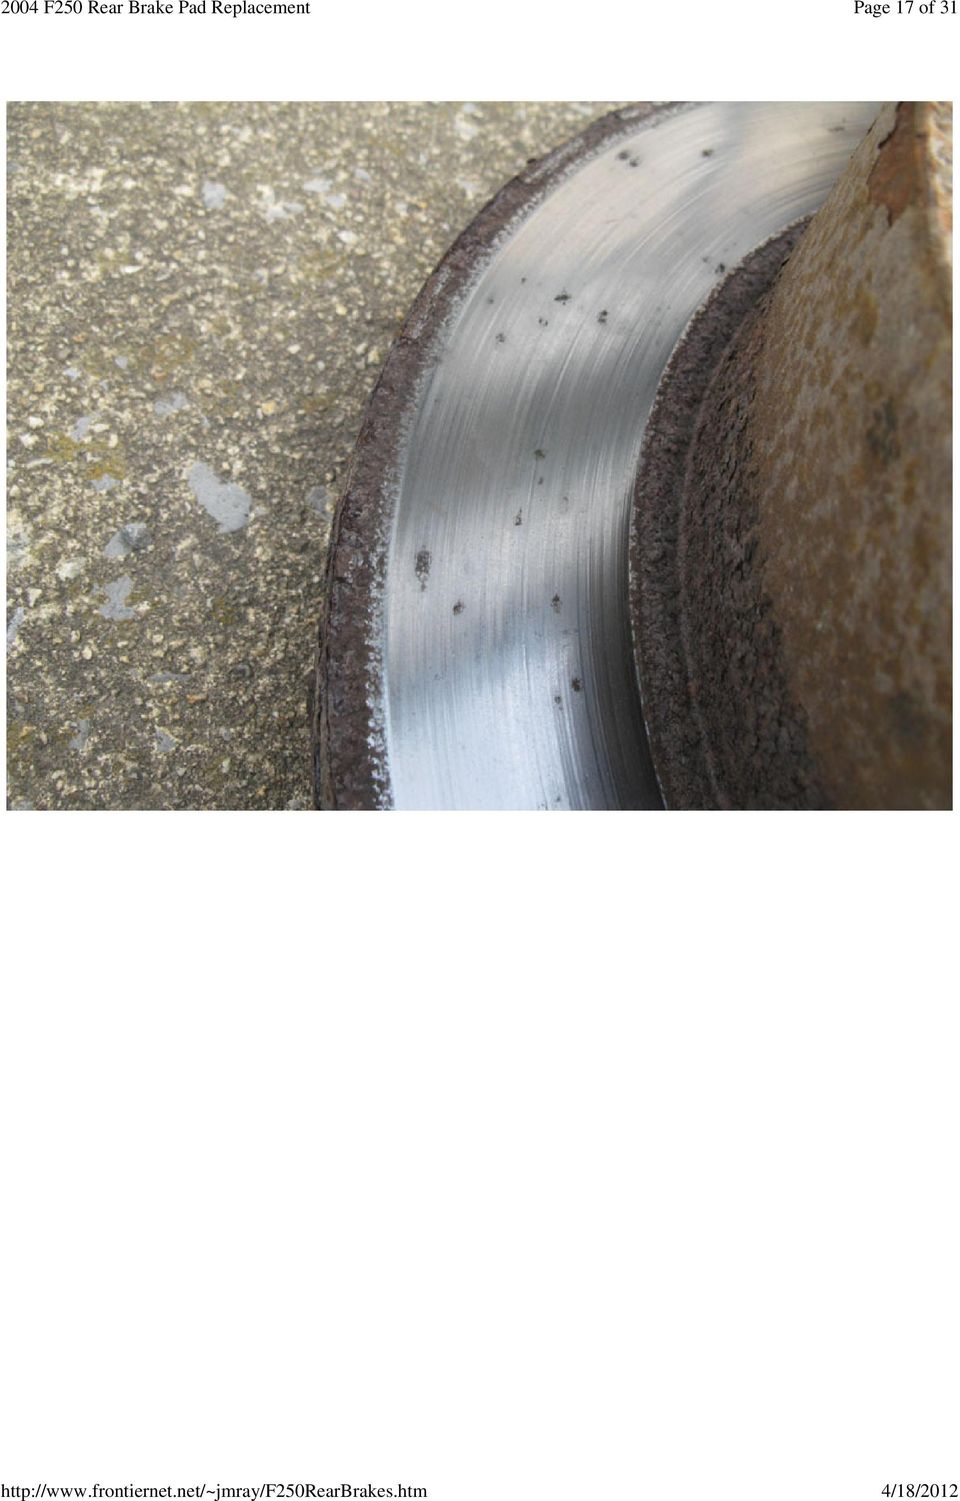
15 Page 15 of 31 Here's the wear on the rotor.

16 Page 16 of 31

17 Page 17 of 31
18 Page 18 of 31

19 Page 19 of 31

20 Page 20 of 31 Here's the rear rotor.

21 Page 21 of 31
22 Page 22 of 31 Next, install the new rotor.
23 Page 23 of 31 Grease the slide pins on the caliper bracket and install the new clips that came with the pads.
24 Page 24 of 31
25 Page 25 of 31 Re-install the caliper bracket with the two large bolts. Note that I ran a couple lug nuts on to hold the rotor in place while installing the caliper, bracket, and pads.
26 Page 26 of 31 Install the two brake pads. I put a little caliper grease on the contact points, after taking this pic.
27 Page 27 of 31 Use a large c-clamp and one of the old pads to compress the caliper pistons. Otherwise it won't fit over the new pads. (pic from 2009)
28 Page 28 of 31 Re-install the caliper with the two bolts that hold it to the bracket.
29 Page 29 of 31 Driver's side done!
30 Page 30 of 31 Remove the jackstand, the two lug nuts, reinstall the wheel and tire, repeat this process on the passenger side, remove the tire chocks, and you're done. Bed-in the new pads as described on the Hawk box...
31 Page 31 of 31 Questions or Comments?
2005-2007 Ford Focus Front Brake Rotors
 2005-2007 Ford Focus Front Brake Rotors Replacement Replacing the rotors in 2005-2007 Ford Focus models with rear drum brakes. Written By: David Hodson INTRODUCTION The steps in this guide are used to
8) Push piston in the remaining distance while bleeding through bleed nipple
 Push piston in the remaining distance while bleeding through bleed nipple") 1 of 16 Replacing Brake pads on a Jeep Cherokee (XJ) Copyright 2004 jeep@blackonyx.net *All things shown or advice given in this PDF is to give you ideas of what can be done. They may not be suited to
1 of 16 Replacing Brake pads on a Jeep Cherokee (XJ) Copyright 2004 jeep@blackonyx.net *All things shown or advice given in this PDF is to give you ideas of what can be done. They may not be suited to
DO NOT attempt to repair hub and wheel bearing assembly.
 Page 1 of 6 HUB & WHEEL BEARINGS (WITH PULSE VACUUM HUBLOCK) DO NOT attempt to repair hub and wheel bearing assembly. Removal DO NOT remove hub lock assembly by prying on hub lock legs. This can crack
MKV Golf GTI Rear Brake Service - Replace Pads and Rotors
 Page 1 Installation Procedures MKV Golf GTI Rear Brake Service - This tutorial is provided as a courtesy by ECS Tuning. Proper service and repair procedures are vital to the safe, reliable operation of
MUSTANG II IFS COMPLETE PARTS PACKAGE
 MUSTANG II IFS COMPLETE PARTS PACKAGE Your Southern Rods & Parts Mustang II IFS Parts Package contains the following items: 1 pr) Upper Control Arms (2023) 1) Upper Arm Bolt Kit (MP-001-A) 1 pr) Lower
Volkswagen Jetta, Golf, GTI 1999, 2000 Brake System 46 Brakes - Mechanical Components (Page GR-46)
") 46 Brakes - Mechanical Components (Page GR-46) Front brakes Brake pads, removing and installing Brake pads, removing and installing FN 3 brake caliper, servicing FS III brake caliper, servicing Rear wheel
46 Brakes - Mechanical Components (Page GR-46) Front brakes Brake pads, removing and installing Brake pads, removing and installing FN 3 brake caliper, servicing FS III brake caliper, servicing Rear wheel
Technical Service Bulletin
 Subject BRAKE SERVICE BEST PRACTICES RECOMMENDATIONS Date Model [X] PARTS MANAGER OCTOBER, 2010 [X] TECHNICIAN CIRCULATE TO: [ ] GENERAL MANAGER [X] SERVICE ADVISOR [X] SERVICE MANAGER [X] WARRANTY MGR
Installing Ball joints on a Ford 1999-2004 Superduty Pickup truck REV2 7-8-07
 Installing Ball joints on a Ford 1999-2004 Superduty Pickup truck REV2 7-8-07 Pre-introduction My name is Kenny Gallo, I am not a certified mechanic in any way shape or form. I work on my truck as a hobby.
How Do I Replacing My Rear Brake Pads and Rotors?
 How Do I Replacing My Rear Brake Pads and Rotors? WARNING! Always have the vehicle under inspection on level ground, in park with the emergency brake on. Always wear protective eyewear, gloves and necessary
2011-14 F250 6 RADIUS ARM KIT
 92154000 Thank you for choosing Rough Country for your suspension needs. 2011-14 F250 6 RADIUS ARM KIT Rough Country recommends a certified technician installs this system. In addition to these instructions,
HOWTO: Install Brake Pads, Rotors, and Lines
 Page 1 of 25 HOWTO: Install Brake Pads, Rotors, and Lines Introduction Based on the guide written by sok07 on www.mazda3forums.com Reproduced with Permission. Edited with commentary by Wild Weasel The
2007 Hummer H3. 2007 BRAKES Disc Brakes - H3. Fastener Tightening Specifications Specification Application
 2007 BRAKES Disc Brakes - H3 SPECIFICATIONS FASTENER TIGHTENING SPECIFICATIONS Fastener Tightening Specifications Specification Application Metric English Backing Plate Bolts 135 N.m 100 lb ft Brake Hose
M-2004-MBA Brake Duct Kit 2013 BOSS 302, Mustang GT and California Special INSTALLATION INSTRUCTIONS
 Please visit www.fordracingparts.com for the most current instruction information.!!! PLEASE READ ALL OF THE FOLLOWING INSTRUCTIONS CAREFULLY PRIOR TO INSTALLATION. AT ANY TIME YOU DO NOT UNDERSTAND THE
Thank You For Choosing. INSTALLATION INSTRUCTIONS Portal Gear Hubs Polaris RZR 800. (installation performed on 60 Model) (Right) (Left)
 (Right) (Left)") 740B Clifty Drive Madison, Indiana 47250 812-574-7777 INSTALLATION INSTRUCTIONS Portal Gear Hubs Polaris RZR 800 A (installation performed on 60 Model) Item Description Qty A Rotor 4 B Gear Box, L 2 C
740B Clifty Drive Madison, Indiana 47250 812-574-7777 INSTALLATION INSTRUCTIONS Portal Gear Hubs Polaris RZR 800 A (installation performed on 60 Model) Item Description Qty A Rotor 4 B Gear Box, L 2 C
DANA 30 MANUAL HUB CONVERSION KIT
 DANA 30 MANUAL HUB CONVERSION KIT 12194 PLEASE READ AND UNDERSTAND ALL INSTRUCTIONS BEFORE YOU BEGIN Your safety and the safety of other motorists is very important. Your Jeep is an off road capable vehicle
Thank You For Choosing. INSTALLATION INSTRUCTIONS Portal Gear Hubs Polaris RZR XP 900 Crew. (Right) (Left)
 (Left)") 740B Clifty Drive Madison, Indiana 47250 812-574-7777 INSTALLATION INSTRUCTIONS Portal Gear Hubs Polaris RZR XP 900 Crew A Item Description Qty A Rotor 4 B Gear Box, L 2 C Gear Box, R 2 D Gasket 4 E Cap
740B Clifty Drive Madison, Indiana 47250 812-574-7777 INSTALLATION INSTRUCTIONS Portal Gear Hubs Polaris RZR XP 900 Crew A Item Description Qty A Rotor 4 B Gear Box, L 2 C Gear Box, R 2 D Gasket 4 E Cap
SUBJECT: Special Offset Ball Joint - Allows Adjustment To Caster And Camber Angles
 NUMBER: 02-001-02 GROUP: Suspension DATE: Jun. 10, 2002 This bulletin is supplied as technical information only and is not an authorization for repair. No part of this publication may be reproduced, stored
LIFT-505. BMF Lift Kit. Yamaha Drive Gas or Electric. Installation Instructions
 LIFT-505 BMF Lift Kit Yamaha Drive Gas or Electric Installation Instructions Contents of LIFT-505 Yamaha Drive BMF Lift Kit: a (1 ea.) BMF A-Arm Assembly b (1 ea.) Driver Side Shock Tower c (1 ea.) Passenger
4850-01 BRAKE SYSTEM OVERVIEW AND OPERATION PROCESS 1. BRAKE SYSTEM GENERAL INFORMATION 1) DESCRIPTION AND OPERATION 16-3.
 DESCRIPTION AND OPERATION 16-3.") 16-3 OVERVIEW AND OPERATION PROCESS 1. GENERAL INFORMATION 1) DESCRIPTION AND OPERATION (1) Brake System Even though a driver cuts off the power, while driving, the vehicle continues to move due to the
16-3 OVERVIEW AND OPERATION PROCESS 1. GENERAL INFORMATION 1) DESCRIPTION AND OPERATION (1) Brake System Even though a driver cuts off the power, while driving, the vehicle continues to move due to the
INSTALLATION INSTRUCTIONS. 6111 Air Spring Kit 2011+ Ford F250/F-350 Single Wheel 2WD 2011+ Ford F350 Dually 2WD IMPORTANT NOTES
 INSTALLATION INSTRUCTIONS 6111 Air Spring Kit 2011+ Ford F250/F-350 Single Wheel 2WD 2011+ Ford F350 Dually 2WD Thank you for purchasing a quality Hellwig Product. PLEASE READ THIS INSTRUCTION SHEET COMPLETELY
Verify caster, camber and toe-in are correct before proceeding.
 If rotating the tie rod end 360 degrees changes the toe-in too much, use the rack tie rod to make smaller adjustments. Put the tie rod end in the steering arm and snug the castle nut before adjusting.
DiscPlus DX195 and DX225 Air Disc Brakes
 Revised 11-04 Technical Bulletin Revised 1 Technical 11-04 Bulletin DiscPlus DX195 and DX225 Air Disc Brakes Inspection, Installation and Diagnostics Air Disc Brake Inspection Intervals and Procedures
88-98 Chevy / GMC Fullsize 4WD 6-Lug 2"- 2 1/2" Suspension Lift Installation Instructions
 88-98 Chevy / GMC Fullsize 4WD 6-Lug 2"- 2 1/2" Suspension Lift Installation Instructions Safety Glasses Metric / Standard Wrenches & Sockets Floor Jack Jack Stands Hack Saw Ball Joint Seperator Measuring
Sebring Timing Belt and Water Pump Replacement
 Sebring Timing Belt and Water Pump Replacement I was motivated to do this work because of a bearing growling sound emanating from the engine. It would grind at low rpms when the engine was cold and then
Unit: mm(in) Item Standard value Service limit Axle shaft run out - 0.2(0.008)
 Item Standard value Service limit Axle shaft run out - 0.2(0.008)") Rear Wheel/Brake/Suspension 13. Rear Wheel/Brake/Suspension Service Information 13-1 Troubleshooting 13-2 Rear Wheel 13-3 Rear Cushion 13-4 Rear Swing Arm 13-7 Service Information General Safety If the
Rear Wheel/Brake/Suspension 13. Rear Wheel/Brake/Suspension Service Information 13-1 Troubleshooting 13-2 Rear Wheel 13-3 Rear Cushion 13-4 Rear Swing Arm 13-7 Service Information General Safety If the
WARNING TO END USER, INSTALLER AND SELLER OF THIS PART!
 WARNING TO END USER, INSTALLER AND SELLER OF THIS PART! By installing this part you are accepting full responsibility and liability for proper wheel and tire fitment after installation. It is the installer
Front brakes (FN- 3), servicing
, servicing") j a t Front brakes (FN- 3), servicing 46-1 Front brakes, servicing Note: Install complete repair kit. After replacing brake pads and before moving vehicle, depress brake pedal several times firmly to properly
j a t Front brakes (FN- 3), servicing 46-1 Front brakes, servicing Note: Install complete repair kit. After replacing brake pads and before moving vehicle, depress brake pedal several times firmly to properly
INTRODUCTION KINGPIN REPLACEMENT
 KINGPIN REPLACEMENT Author: Randy Baumann All information, illustrations and specifications are based on the best information available at the time of publication. The author cannot guarantee the accuracy
2008 ACCORD - Front Knuckle/Hub/Wheel Bearing Replacement (page 18-13)
") 2008 ACCORD - Front Knuckle/Hub/Wheel Bearing Replacement (page 18-13) Exploded View Special Tools Required Ball joint remover, 28 mm 07MAC-SL0A202 Hub dis/assembly tool 07GAF-SD40100 Bearing driver attachment,
2008 ACCORD - Front Knuckle/Hub/Wheel Bearing Replacement (page 18-13) Exploded View Special Tools Required Ball joint remover, 28 mm 07MAC-SL0A202 Hub dis/assembly tool 07GAF-SD40100 Bearing driver attachment,
Installation manual. 1.75 front leveling kit. 2011 Dodge Durango 2011-2014 Jeep Grand Cherokee. Part # 42006. Part # 42006
 Installation manual 1.75 front leveling kit 2011 Dodge Durango 2011-2014 Jeep Grand Cherokee Part # 42006 sj02282011rev.01 Part # 42006 2011-2014 Dodge Durango 2011 Jeep Grand Cherokee 1.75 front leveling
Time needed: ~3h for lid replacement only. Add 1h for operation harness in lid and ~2h more for installing drive unit and cable harness in trunk.
 DIY for replacing trunk lid and/or retrofitting electrical operation of trunk lid. This document is meant to be a support and give advice on the procedure but I will take no responsibility for any damage
CorkSport Mazdaspeed 6 Rear Sway Bar 2006-2007 Mazdaspeed 6
 CorkSport Mazdaspeed 6 Rear Sway Bar 2006-2007 Mazdaspeed 6 Pre-Installation Notes: The CorkSport Rear Sway Bar is a great addition to improving the handling performance to the Mazdaspeed 6. It will minimize
Installation manual. 3 suspension system. 2009-2013 Ford F150. Part # 23000. Part # 23000. Important customer information: 2009-2013 Ford F150
 Installation manual 3 suspension system 2009-2013 Ford F150 Part # 23000 sj12112012rev.03 Part # 23000 2009-2013 Ford F150 3 suspension system Part # Description Qty. 23000-01 Driver side upper control
Rear wheel brakes, servicing. Стр. 1 из 45. Note:
 Volkswagen Touareg - Rear wheel brakes, servicing Стр. 1 из 45 46-2 Rear wheel brakes, servicing Rear brakes, FN 44 brake caliper, servicing Note: After replacing brake pads, depress brake pedal firmly
Installation Guide for the TJ LCG PRO Suspension System (Low Center of Gravity) Available 4 or 5
 Available 4 or 5") INSTALLATION GUIDE Installation Guide for the TJ LCG PRO Suspension System (Low Center of Gravity) Available 4 or 5 Take every precaution to make this installation a safe procedure. Make safety the number
INSTALLATION GUIDE Installation Guide for the TJ LCG PRO Suspension System (Low Center of Gravity) Available 4 or 5 Take every precaution to make this installation a safe procedure. Make safety the number
Tooling List 17mm Socket 17mm Wrench 24mm Wrench 26mm Wrench 3/8 Drive Ratchet Torque Wrench
 Thank you for purchasing the CorkSport Rear Adjustable Camber Arms. By replacing your OEM camber arms with the CorkSport Adjustable Camber Arms, you will be able to dial in your suspension with +/- 5 degrees
New method, replacement of window and window lift, front door
 SERVICE INFORMATION Number: 831-1646 Year: 1996 Month: Market: FEBRUARI ALL New method, replacement of window and window lift, front door Cars concerned All Saab 900 M94- Background A new method of removing
INSTALLATION INSTRUCTIONS. 6108 Air Spring Kit 2011+ Ford F250 Single Wheel 4WD 2011+ Ford F350 Dually 4WD (2011 F350 Single Wheel 4WD use p/n 6113)
") INSTALLATION INSTRUCTIONS 6108 Air Spring Kit 2011+ Ford F250 Single Wheel 4WD 2011+ Ford F350 Dually 4WD (2011 F350 Single Wheel 4WD use p/n 6113) Thank you for purchasing a quality Hellwig Product. PLEASE
INSTALLATION INSTRUCTIONS 6108 Air Spring Kit 2011+ Ford F250 Single Wheel 4WD 2011+ Ford F350 Dually 4WD (2011 F350 Single Wheel 4WD use p/n 6113) Thank you for purchasing a quality Hellwig Product. PLEASE
1993 SUSPENSION Volkswagen Front. EuroVan
 Article Text ARTICLE BEGINNING 1993 SUSPENSION Volkswagen Front EuroVan DESCRIPTION FWD independent suspension is an double-wishbone type with torsion bars mounted on upper control arm. Wheel is supported
STEERING HANDLEBAR/FRONT WHEEL/ FRONT SHOCK ABSORBER
 14 14 STEERING HANDLEBAR/FRONT WHEEL/ SCHEMATIC DRAWING ------------------------------------------------- 14-1 SERVICE INFORMATION------------------------------------------------ 14-2 TROUBLESHOOTING-----------------------------------------------------
FOR ANY QUESTIONS, PLEASE CALL US @ 727.347.9915 M-F 8:00a.m.-8:00p.m. EST. REAR BRAKES 1 AEROSPACE COMPONENTS 727.347.9915
 REAR BRAKES 1 AEROSPACE COMPONENTS 727.347.9915 REAR BRAKES Before getting started, remove all stock braking components. Pre-assembly of parts: Clean the bolts and the threads in the hat with acetone.
»Product» Safety Warning
 C1200 Installation Instructions 2007-2016 Chevy/GM 1500 2/4wd 2" Strut Spacer Lift Read and understand all instructions and warnings prior to installation of product and operation of vehicle. Zone Offroad
INSTALLATION INSTRUCTIONS COMPETITION SERIES COILOVER SUSPENSION SYSTEM 03+ Scion xb
 INSTALLATION INSTRUCTIONS COMPETITION SERIES COILOVER SUSPENSION SYSTEM 03+ Scion xb NOTE: Progress Technology products should only be installed by a qualified licensed mechanic experienced in the installation
Webinar Series. Committee. Disc Brake Wheels Off Inspection and Reline. Presents
 1 APTA Bus Webinar Technical Series Maintenance Committee Webinar Series Presents Disc Brake Wheels Off Inspection and Reline January 21, 2015 2 Introduction Welcome to today s webinar in which we will
1958-64 WINDOW CHANNEL, WEATHERSTRIP & WHISKER STRIP REPLACEMENT FOR 2-DOOR SEDANS
 By Denny Williams Photos by Denny Williams 1958-64 WINDOW CHANNEL, WEATHERSTRIP & WHISKER STRIP REPLACEMENT FOR 2-DOOR SEDANS Denny Williams - Technical Writer Denny is first and foremost a dyed-in-thewool
Volkswagen Jetta, Golf, GTI 1999, 2000 Brake System 47 Brakes - Hydraulic Components (Page GR-47)
") 47 Brakes - Hydraulic Components (Page GR-47) FS III front brake calipers, servicing Front brake caliper piston, removing and installing FN 3 front brake calipers, servicing Front caliper piston, removing
47 Brakes - Hydraulic Components (Page GR-47) FS III front brake calipers, servicing Front brake caliper piston, removing and installing FN 3 front brake calipers, servicing Front caliper piston, removing
Ford F-250 / 350 2-1/2 Coil Kit. Ford F-250, F350 2011-2015. Part#: 013255
 Part#: 013255 Ford F-250 / 350 2-1/2 Coil Kit Ford F-250, F350 2011-2015 Rev.040815 491 W. Garfield Ave., Coldwater, MI 49036. Phone: 517-279-2135 Web/live chat: www.bds-suspension.com. E-mail: tech@bds-suspension.com
SUSP-06, Torsion Bars - Removing, Replacing, and Indexing
 Introduction SUSP-06, Torsion Bars - Removing, Replacing, and Indexing Replacing the torsion bar on a 944 is not all that difficult. However, reindexing the torsion after completion is a pain and can be
REAR AXLE 27-1 CONTENTS 27109000161 ON-VEHICLE SERVICE... 3 GENERAL INFORMATION... 2 SERVICE SPECIFICATIONS... 2 SPECIAL TOOLS... 2 REAR AXLE HUB...
 27-1 REAR AXLE CONTENTS 27109000161 GENERAL INFORMATION... 2 SERVICE SPECIFICATIONS... 2 SPECIAL TOOLS... 2 ON-VEHICLE SERVICE... 3 Wheel Bearing Axial Play Check... 3 Wheel Bearing Rotary-Sliding Resistance
SUSPENSION DIAGNOSIS
 SECTION 2A SUSPENSION DIAGNOSIS TABLE OF CONTENTS Diagnosis... 2A-2 General Diagnosis... 2A-2 Hub and Bearing... 2A-7 2A-2 SUSPENSION DIAGNOSIS DIAGNOSIS GENERAL DIAGNOSIS Problems in the steering, the
Street-Lynx. Reilly MotorSports, Inc. Installation Manual
 Street-Lynx By Reilly MotorSports, Inc. Installation Manual 1 1- Begin by removing your original rear suspension disconnect your brake lines, E-brake cables, and remove the driveshaft. To prevent fire
2014-2015 GM 1500 Pick-Up 4WD 4" Suspension Lift Installation Instructions
 2014-2015 GM 1500 Pick-Up 4WD 4" Suspension Lift Installation Instructions www.skyjacker.com Required Tool List: * Safety Glasses * Metric / Standard Wrenches & Sockets * Allen Wrenches * Floor Jack *
6 inch A-Arm Lift Kit WARNING: 16-018/16-019. installation instructions. will fit CLUB CAR DS. included:
 Revised May 205 6-08/6-09 6 inch A-Arm Lift Kit will fit CLUB CAR DS installation instructions included: Rear Lift Blocks Main Suspension Assembly Spindles A-Arms Rear Shock Mounting Plates U-Bolts WARNING:
The Ford Model A Water Pump
 The Ford Model A Water Pump George Washington Chapter, Inc. 3903 Old Lee Highway Fairfax, VA 22030 1 Table of Contents Introduction/Specifications.. 3 1. Water Pump Inspection and Removal. 4 a. Removal..
ReadyLift (Part# 66-5075) Strut Extension, Installation Instructions Toyota Tundra New Body Style 2WD & 4WD
 Strut Extension, Installation Instructions Toyota Tundra New Body Style 2WD & 4WD") SAFETY WARNING: recommends this system be installed by a professional technician. In addition to these instructions, professional knowledge of disassembly/ reassembly procedures and post installation checks
SAFETY WARNING: recommends this system be installed by a professional technician. In addition to these instructions, professional knowledge of disassembly/ reassembly procedures and post installation checks
Corvette Hub/Bearing Adapter Installation Manual 4th-Gen F-body
 Corvette Hub/Bearing Adapter Installation Manual 4th-Gen F-body This manual covers the installation of our Corvette hub adapter, used with 98+ (LS1 style) Camaro and Firebird spindles. The adapter will
M113 VEHICLE FAMILY RUBBER TRACK INSTALLATION INSTRUCTIONS SOUCY TRACK SYSTEM 04-M113-1ENS (SPLIT IDLER) Litho d in Canada 1 04-M113-1ENS
 Litho d in Canada 1 04-M113-1ENS") M113 VEHICLE FAMILY RUBBER TRACK INSTALLATION INSTRUCTIONS (SPLIT IDLER) 1 # TABLE OF CONTENTS List of parts and tools................................................3 Installation of complete kit...................................................5
M113 VEHICLE FAMILY RUBBER TRACK INSTALLATION INSTRUCTIONS (SPLIT IDLER) 1 # TABLE OF CONTENTS List of parts and tools................................................3 Installation of complete kit...................................................5
Code - Code R Service Manual
 2012 Code - Code R Service Manual GEN.0000000003528 Rev B SRAM LLC WARRANTY SRAM warrants its products to be free from defects in materials or workmanship for a period of two years after original purchase.
INSTRUCTIONS FXSTSB (SPRINGER) FRONT END KIT 1WARNING -J01813 REV. 10-28-99 GENERAL. INSTALLATION Bearing Races and Fork Assembly
 FRONT END KIT 1WARNING -J01813 REV. 10-28-99 GENERAL. INSTALLATION Bearing Races and Fork Assembly") INSTRUCTIONS -J08 REV. 0-28-99 GENERAL This kit is designed for installation on 996 to 999 FXSTSB model motorcycles. We recommend this kit be installed by a factory trained technician at an authorized
INSTRUCTIONS -J08 REV. 0-28-99 GENERAL This kit is designed for installation on 996 to 999 FXSTSB model motorcycles. We recommend this kit be installed by a factory trained technician at an authorized
M-9000-ZX3 JRSC Focus Big Boost Upgrade Kit INSTALLATION INSTRUCTIONS
 Please contact the Tech Hot Line for the most current instruction information (586) 468-1356!!! PLEASE READ THE FOLLOWING INSTRUCTIONS CAREFULLY PRIOR TO INSTALLATION!!! INTRODUCTION: These instructions
DRIVE AND DRIVEN PULLEY
 11 DRIVE AND DRIVEN PULLEY SCHEMATIC DRAWING ------------------------------------------------- 11-1 SERVICE INFORMATION------------------------------------------------ 11-2 TROUBLESHOOTING-----------------------------------------------------
GTI VR6 Front Wheel Bearing DIY http://www.gtishrine.com
 GTI VR6 Front Wheel Bearing DIY http://www.gtishrine.com This procedure covers replacing the front wheel bearings. Tools and Parts required: Wheel Bearing Puller w/ ABS adapter. Available for rent from
Replacing the handbrake drum/rear output shaft oil seal. Series models.
 Replacing the handbrake drum/rear output shaft oil seal. Series models. You may notice oil coming out of your handbrake (transmission brake) drum. This will in all probability be a leak from the gearbox
MM Adjustable Tie-Rod Ends (MMTR-2, -4, -7)
") 3430 Sacramento Dr., Unit D San Luis Obispo, CA 93401 Telephone: 805/544-8748 Fax: 805/544-8645 www.maximummotorsports.com MM Adjustable Tie-Rod Ends (MMTR-2, -4, -7) PLEASE NOTE: The use of 1996-2004
3430 Sacramento Dr., Unit D San Luis Obispo, CA 93401 Telephone: 805/544-8748 Fax: 805/544-8645 www.maximummotorsports.com MM Adjustable Tie-Rod Ends (MMTR-2, -4, -7) PLEASE NOTE: The use of 1996-2004
SLACK PERFORMANCE KARTS
 SLACK PERFORMANCE KARTS SET UP GUIDE Thank you for purchasing a 2013 Slack Axiom Chassis. Performance Mfg. strives to provide you with the very best chassis and components on the market today. Your satisfaction
JK 2.5 Spring Lift Part # 1251000-1251002 # 1351000-1351002 # 1352000-1352002
 TeraFlex, Inc. 5241 South Commerce Dr. Murray, Utah 84107 Phone/801.288.2585 Fax/801.713.2313 www.teraflex.biz Rev. 2 December 2010 TT PRODUCT INSTALLATION GUIDE JK 2.5 Spring Lift Part # 1251000-1251002
Solstice/Sky Water Pump Replacement
 Solstice/Sky Water Pump Replacement The water pump on the Solstice/Sky is starting to need replacement on some vehicles. This guide will help in replacing the water pump while the engine is still in the
Important: Please read these instructions carefully and completely before starting the installation. TITAN Fuel Tanks
 TITAN pt. no.: 03 0000 0120 Important: Please read these instructions carefully and completely before starting the installation. TITAN Fuel Tanks INSTALLATION INSTRUCTIONS G e n e r a t i o n V Extended
TITAN Fuel Tanks. INSTALLATION INSTRUCTIONS G e n e r a t i o n V
 TITAN pt. no.: 02 0000 0143 Important: Please read these instructions carefully and completely before starting the installation. TITAN Fuel Tanks INSTALLATION INSTRUCTIONS G e n e r a t i o n V Extended
AXLE SHAFTS - FRONT. 1993 Toyota Celica DESCRIPTION REMOVAL, DISASSEMBLY, REASSEMBLY & INSTALLATION. 1993 DRIVE AXLES Toyota FWD Axle Shafts
 AXLE SHAFTS - FRONT 1993 Toyota Celica 1993 DRIVE AXLES Toyota FWD Axle Shafts Toyota; Celica DESCRIPTION Axle shafts transfer power from transaxle to driving wheels. All axle shafts consist of a shaft
Class 5 to 7 Truck and Bus Hydraulic Brake System
 Class 5 to 7 Truck and Bus Hydraulic Brake System Diagnostic Guide 1st Edition * 5+0 Important Service tes The information in this publication was current at the time of printing. The information presented
Char-Lynn Hydraulic Motor. Repair Information. 10 000 Series. October, 1997
 Char-Lynn Hydraulic Motor October, 1997 Repair Information Geroler Motor Two Speed 001 27 Retainer inside bore of valve plate bearingless motors only 4 15 16 3 6 35 Parts Drawing 25 2 2 1 19 17 36 40 47
Service Manual Supplement
 Volvo Trucks North America, Inc. Greensboro, NC USA This Service Bulletin is a supplement to Service Manual, Group, Anti-lock Brake System (ABS), Bendix, VNL, VNM publication number PV /. Service Manual
HC-3000 SERIES RAKE Parts Breakdown DURABILT INDUSTRIES, LLC - 1810 AIRPORT ROAD POCAHONTAS ARKANSAS 72455
 HC-3000 SERIES RAKE Parts Breakdown 1 SPRING TOWER PARTS PAGE 4 RAKE WHEEL AND ARM PARTS PAGE 8 PIVOT PARTS PAGE 6 6 2,3,4 23 21 7 22 24 HUB & SPINDLE PARTS 8 THRU 20 HYDRAULIC PARTS PAGES 10 AND 12 1
13. REAR WHEEL/BRAKE/SUSPENSION
 13. REAR WHEEL/BRAKE/SUSPENSION 13 3.5~4.5kg-m 8.0~10.0kg-m 0.8~1.2kg-m 3.0~4.0kg-m 2.4~3.0kg-m 3.5~4.5kg-m 6.0~8.0kg-m 13-0 13. REAR WHEEL/BRAKE/SUSPENSION 13 REAR WHEEL/BRAKE/SUSPENSION SERVICE INFORMATION...
ALL NISSAN; BRAKE NOISE/JUDDER/PEDAL FEEL DIAGNOSIS AND REPAIR
 Classification: Reference: Date: BR00-004b NTB00-033b August 30, 2004 ALL NISSAN; BRAKE NOISE/JUDDER/PEDAL FEEL DIAGNOSIS AND REPAIR This bulletin amends NTB00-033. This version amends the Brake Judder
DR90. Baja Motorsports Inc. P.O. Box 61150 Phoenix, AZ 85082 Toll Free: 888-863-2252 PART NUMBERS AND PRICES ARE SUBJECT TO CHANGE 1 of 51
 DR90 Toll Free: 888-863-2252 PART NUMBERS AND PRICES ARE SUBJECT TO CHANGE 1 of 51 CYLINDER & CYLINDER HEAD Part UPC Number Description Baja Description 1 DR90-001 842645048166 CYLINDER 1 1 2 DR90-002
Figure 2 The fan and shroud also needs to be removed for access to the four a/c compressor bolts and removal of the compressor from the top.
 Here are some pictures to show what s required when replacing the A/C compressor, expansion valve and receiver/drier on a 2001 Volvo V70. Even if you don t replace these A/C parts these pictures can help
Drive shaft, servicing
 Volkswagen Passat B6 - Drive shaft, servicing Стр. 1 из 41 40-7 Drive shaft, servicing Drive shafts, overview I - Assembly overview: Drive axle with CV joint VL100 40-7, Drive axle with CV joint VL100,
TJ Quick Disconnect Instructions
 1 TJ Quick Disconnect Instructions www.teraflex.com Kit #17012 Kit #17092 Kit #17010 Kit #17090 Important Notes: Prior to beginning this or any installation read these instructions to familiarize yourself
6,100 7,000 lb. Spring Axles
 Typical Industries & Applications include: Recreational Vehicle Trailers Enclosed Trailers Cargo Vehicle Race Vehicle Open Utility Trailers Landscape Equipment Dump Trailers Construction Agricultural Equipment
INSTALL/REMOVAL INSTRUCTIONS: WINDOW LIFT MOTOR
 REMOVAL/INSTALL OF WINDOW LIFT MOTOR (742-273) Ford Expedition 1997 2002, Lincoln Navigator 1998 2002, Ford F-150 Super Crew Cab 2001 General Tech Tips: Use painter s tape rather than duct tape to secure
DR90. Baja Motorsports Inc. P.O. Box 61150 Phoenix, AZ 85082 Toll Free: 888-863-2252 PART NUMBERS AND PRICES ARE SUBJECT TO CHANGE 1 of 51
 DR90 Toll Free: 888-863-2252 PART NUMBERS AND PRICES ARE SUBJECT TO CHANGE 1 of 51 CYLINDER & CYLINDER HEAD 1 DR90-001 842645048166 CYLINDER 1 1 2 DR90-002 842645048173 GASKET, CYLINDER 1 1 3 DR90-003
(A5) Brakes Sample Questions and Answers
 Brakes Sample Questions and Answers") (A5) Brakes Sample Questions and Answers Answers to these questions are found beginning on page 4 of this document 1. Two technicians are discussing a problem where the brake pedal travels too far before
(A5) Brakes Sample Questions and Answers Answers to these questions are found beginning on page 4 of this document 1. Two technicians are discussing a problem where the brake pedal travels too far before
PUMP MAINTENANCE SCHEDULE AND CHECKLISTS
 PUMP MAINTENANCE SCHEDULE AND CHECKLISTS Providing a maintenance schedule defined specifically by run hours or yardage pumped serves only as a general guideline given the large amount of variables a unit
2012 XX World Cup, XX, & XO Service Manual
 2012 XX World Cup, XX, & XO Service Manual GEN.0000000003507 Rev B SRAM LLC WARRANTY SRAM warrants its products to be free from defects in materials or workmanship for a period of two years after original
WHEEL ALIGNMENT SPECIFICATIONS & PROCEDURES
 WHEEL ALIGNMENT SPECIFICATIONS & PROCEDURES 1998 Mitsubishi Montero 1997-98 WHEEL ALIGNMENT Mitsubishi - Specifications & Procedures Diamante, Eclipse, Galant, Mirage, Montero, Montero Sport, 3000GT RIDING
Tool And Material Checklist
 HOW - TO CV JOINTS CV JOINTS Tool And Material Checklist Screwdriver Metal Shears Breaker Bar or Torque Wrench Assorted Wrenches Wire Evaporating Spray Solvent Pusher Tool Vise Snap Ring or Duckbill Pliers
Disc Brake Service. Chapter 13. Common Disc Brake Problems. Caliper and Pad Service. Important Terms
 This sample chapter is for review purposes only. Copyright The Goodheart-Willcox Co., Inc. ll rights reserved. fter studying this chapter, you will be able to: Identify common disc brake problems. Diagnose
Installation manual. 4 suspension system. 2014-2016 Chevy or GMC 1500 4WD. Part # 14059. Part # 14059. Important customer information:
 Installation manual 4 suspension system 2014-2016 Chevy or GMC 1500 4WD Part # 14059 sj09052013rev.01 Part # 14059 2014-2016 Chevy or GMC 1500 4WD 4 suspension system Part # Description Qty. 14056-01 Upper
2100 AD 015 0009 Mirror Elevator Ball Nut Replacement Procedure
 2100 AD 015 0009 Mirror Elevator Ball Nut Replacement Procedure Derek Guenther 1/28/2015 Rev. Purpose The purpose of this document is to describe the procedure necessary to replace one of the ball nuts
Rebuild Instructions for 70001 and 70010 Transmission
 Rebuild Instructions for 70001 and 70010 Transmission Brinn, Incorporated 1615 Tech Drive Bay City, MI 48706 Telephone 989.686.8920 Fax 989.686.6520 www.brinninc.com Notice Read all instructions before
PRODUCT: WASHER / WASHER-DRYER COMBO MODEL: AW 120 / AW 122 / AW 125 AWD 120 / AWD 121 / AWD 129
 PRODUCT: WASHER / WASHER-DRYER COMBO MODEL: The information included in this Splendide Repair Manual may change without notice. Please see our web site www.splendide.com/service/docs.html for updates,
2002 2005 Mini Cooper S Grille Install Instructions
 2002 2005 Mini Cooper S Grille Install Instructions Lower Front Grille BEFORE AFTER Package Contents 1 perforated grille (Stiletto, RAZR, or Monster) 6 Zip Tie Mounting Pads 1 is for the temp. sensor 5
Operating Instructions Parts List Manual Scissor Lift Pallet Truck
 Operating Instructions Parts List Manual Scissor Lift Pallet Truck Note: Operator MUST read and understand this operating instructions before use this Hand Scissor Lift. Thank you for using this hand scissors
AXLE SHAFTS - FRONT. 1998 Pontiac Bonneville MODEL IDENTIFICATION DESCRIPTION & OPERATION TROUBLE SHOOTING REMOVAL & INSTALLATION
 AXLE SHAFTS - FRONT 1998 Pontiac Bonneville 1998-99 DRIVE AXLES FWD Axle Shafts - Cars - "C", "G" & "H" Bodies GM Aurora, Bonneville, Eighty Eight, LeSabre, LSS, Park Avenue, Regency, Riviera MODEL IDENTIFICATION
2. This is a close up of a typical area where the rocker is rusted out leaving holes under where the rocker moulding would be..
 ROCKER PANELS 55,56,57 CHEVY REPLACEMENT Do not throw away any pieces when you first remove them. There are many supports that are not reproduced and will need to be used again. When disassembling try
Service Information for. With patented stainless steel wheel bearing protectors.
 Service Information for With patented stainless steel wheel bearing protectors. Spindle Spring Loaded Seal Bearing Cap Hub Patent No. 5,054,859 Check Valve Overflow Cavity Grease Fitting Stainless Steel
LOCKHEED HYDRAULIC BRAKING SYSTEMS MORRIS 8 CARS
 LOCKHEED HYDRAULIC BRAKING SYSTEMS MORRIS 8 CARS 1934 to 1938 In general terms the Series E Workshop Manual can be used for brake reference for all the Morris 8s from 1934 to 1938, and up to the end of
Volkswagen Corrado 1990-1994 Suspension Wheels -Tires Wheel Alignment (Page GR-44)
") Wheels -Tires Wheel Alignment (Page GR-44) Front wheel camber adjusting Rear wheel toe determining Snow tires size Vibrations eliminating Wheel alignment data (4 cylinder) data (6 cylinder) Wheels - Tires,
Wheels -Tires Wheel Alignment (Page GR-44) Front wheel camber adjusting Rear wheel toe determining Snow tires size Vibrations eliminating Wheel alignment data (4 cylinder) data (6 cylinder) Wheels - Tires,