|
|
|
- Lorena Robertson
- 10 years ago
- Views:
Transcription
1
2

3

4
5

6
7

8

9

10
11
12

13

14

15

16

17

18

19

20

21
22
23
24
25
26
27 Contents GENERAL INFORMATION Main Features For your Safety Unpacking General Operation RCU P1 P2 P3 P3 P4 P1 INSTALLATION P5 WELCOME PAGE P7 MAIN MENU 1. Edit Channel 2. Installation 3. System Setup 4. Tools 5. Game 6. REC 7. Hot key P8 P8 P11 P12 P14 P17 P18 P19 TROUBLE SHOOTING P22
28 GENERAL INFORMATION GENERAL INFORMATION This Digital Terrestrial Receiver (DTR) will take you to the new and exciting world of Digital Television. A world of crystal clear widescreen pictures, digital sound, more information and new services. All this and more on "Free to Air" Digital Television. To make full use of your new DTR please take the time to familiarize yourself with the extensive features of the unit detailed in this User's Guide. If you need help in setting up please call your dealer or a customer service adviser. Main Features SD MPEG-2/HD H.264 & fully DVB-T compliant Automatic PAL/NTSC conversion 1000 channels TV and Radio programmable 8 different favorite groups selection On Screen Display with multi-language Fully support to 7 days Electronic Program Guide(EPG) Picture in Graphics(PIG) support 256 colors On Screen Display Channel search in automatic, manual search Various channel editing functions(favorite, move, lock, rename and sort) Parental control for channels Ease to use Menu System Software upgrades through USB port Time set by GMT offset automatic and manual,summer Time support Automatic turn on/off by Timer setting(multiple options) Subtitle support DVB EN and EBU Teletext support DVB ETS by VBI and OSD Automatic save for last channel Support Logic Channel Number(LCN) Teris,Othello,Sudoku Supprot FAT16/FAT32/FAT12,NTFS(Option) MP3/ JPEG/ BMP/ OGG files Default 2 hours, user can setting the end time(support subtitle), record scramble program and descramble program Lock/Delete/Rename,Preview playback,browse record files information Play/Pause/Stop/Step Fast Forward/Fast Backward 2/4/8/16/24, Slow Forward/Slow Backward 1/2, 1/4, 1/8 Bookmark set / Bookmark jump 1
29 GENERAL INFORMATION GENERAL INFORMATION For Your Safety To avoid electric-shock hazards, do not open the cabinet, refer servicing to qualified personnel only. Keep the receiver away from flower vases, tubs, sinks, etc., in order to avoid damaging the equipment. Do not expose the receiver un-der the sunlight. And keep it away from the heat source. Do not block ventilation holes of the Receiver so that air can circulate freely. When the abnormal phenomenon occur, you should cut off the power immediately. Do not touch the receiver during thunder, since that might create electric-shock hazards. Switch the receiver off whenever it remains out of service for an extended period. Be sure to turn the Receiver off and disconnect the AC power cord before cleaning the Receiver surface. If the surface is dirty, wipe clean with a cloth which has been dipped in a weak soap-andwater solution and wrung out thoroughly, and then wipe again with a dry cloth. 2
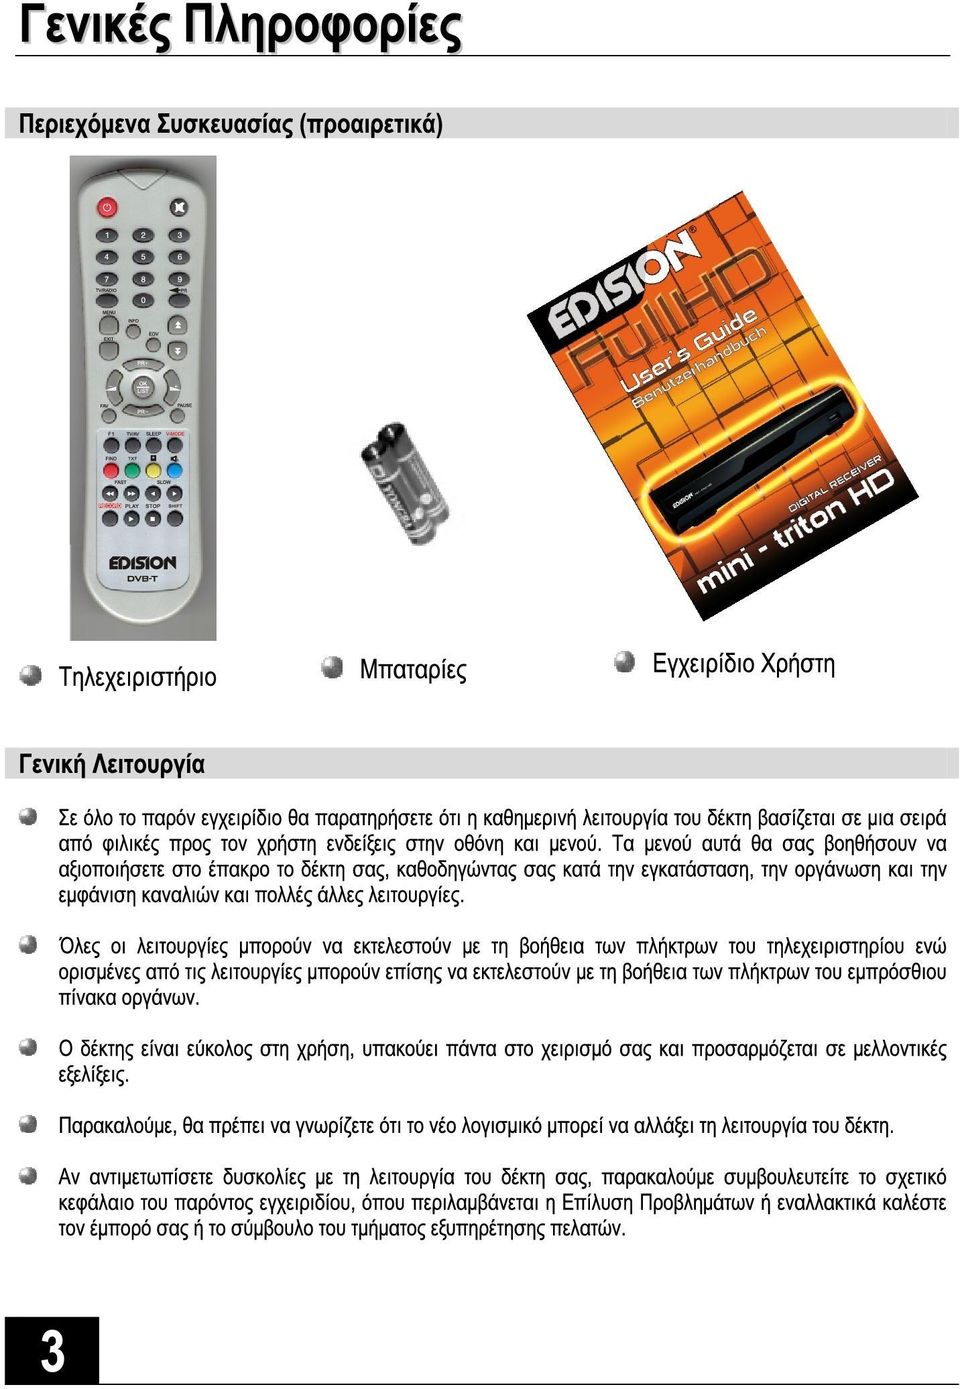
30 GENERAL INFORMATION INFORMATION GENERAL Unpacking(optional) Remote Control Batteries User s manual General Operation Throughout this manual you will notice that the everyday operation of the receiver is based on a series of user friendly on screen display and menus. These menus will help you get the most from your receiver, guiding you through installation, channel organizing, viewing and many other functions. All functions can be carried out using the buttons on the RCU, and some of the functions can also be carried out using the buttons on the front panel. The receiver is easy to use, always at your command and adaptable for future advances. Please be aware that new software may change the functionality of the receiver. Should you experience any difficulties with the operation of your receiver, please consult the relevant section of this manual, including the Problem Shooting, or alternatively call your dealer or a customer service adviser. 3
31 GENERAL INFORMATION INFORMATION GENERAL RCU Key Function Turns power ON/OFF When watching a channel, mute the sound 0~9 TV/RADIO PR FAV Enter number of the required menu item or select a channel number to watch Switches between TV and Radio mode Switches back to previous channel Displays the favorite group list SHIFT Timeshift function key FIND Display the Find window INFO Show information of the current channel MENU Press this key one time to run menu onscreen PAGE+,PAGEOK, LIST PR+, PR- EXIT EPG L R TV/AV TXT SLEEP PAUSE RECORD V-FORMAT Moves up / down a page in the list Executes the selected item in the menu screen or enters the desired value in any input mode When watching a channel, change channels or move to the next higher or lower item in the menu When watching a channel, adjust the volume or move to the left or right item in the menu Return to the previous menu on the menu screen or escape from the menu Call up the EPG (Electronic Program Guide) Display the Audio window. Switch between TV and AV modes Switch to teletext mode Enter into the sleep in mode Press once to pause the screen picture, press once again to go to the normal mode Record the program Changes the HD-Format Switch to subtitle mode, Play and stop the program Press to fast forward or fast backward Press to slow forward or slow backward 4 The picture is only for reference, please make the object as the standard.
32 INSTALLATION Rear Panel CONNECT TO DIGITAL AMPLIFIER POWER CABLE CONNECT TO TV USING A SCART CABLE CONNECT TO TV SET HDMI-OUT INPUT ANT IN: CONNECT TO ANTENNA LOOP: CONNECT TO ANOTHER RECEIVER Connecting to TV using SCART support Antenna DTR TV IN SCART 5 The picture is only for reference, please make the object as the standard.
33 INSTALLATION Connecting to Digital Amplifier Antenna DTR DIGITAL AUDIO CONVERTOR OR AMPLIFIER R L SPDIF SPEAKER The picture is only for reference, please make the object as the standard. 6
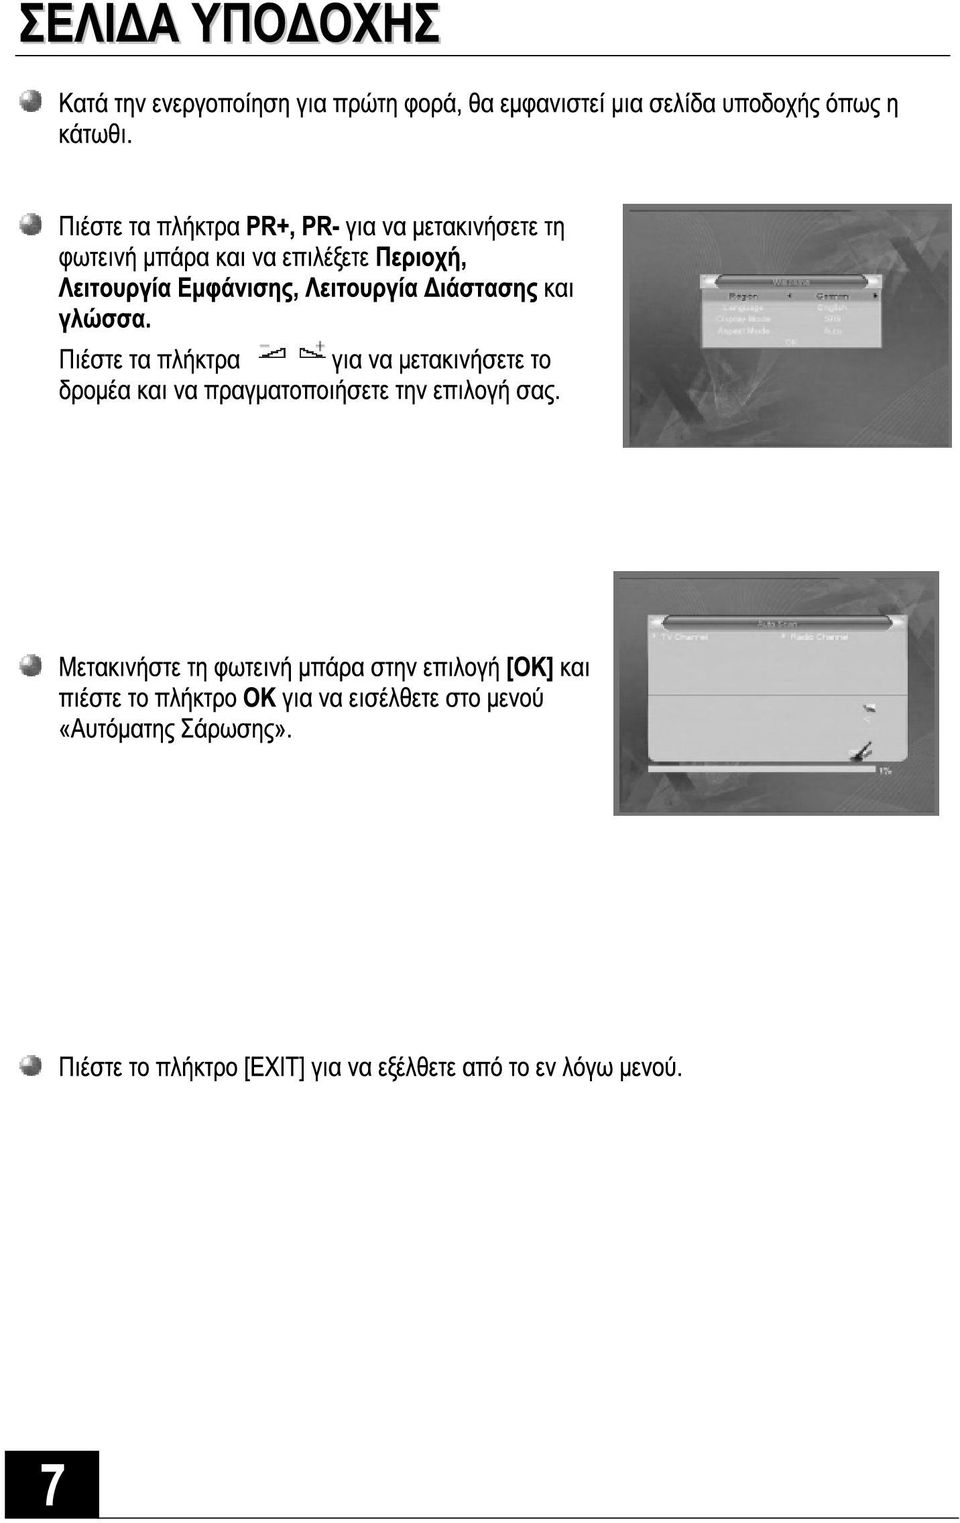
34 WELCOME PAGE WELCOME PAGE When power on first time, it will show welcome page like below. Press PR+,PR- keys to move highlight to select Region, Display Mode, Aspect Mode and language. Press your choice. keys to move the cursor to choose Move highlight to [OK] option and press OK key to enter Auto Scan menu. Press [EXIT] key to exit this menu. 7
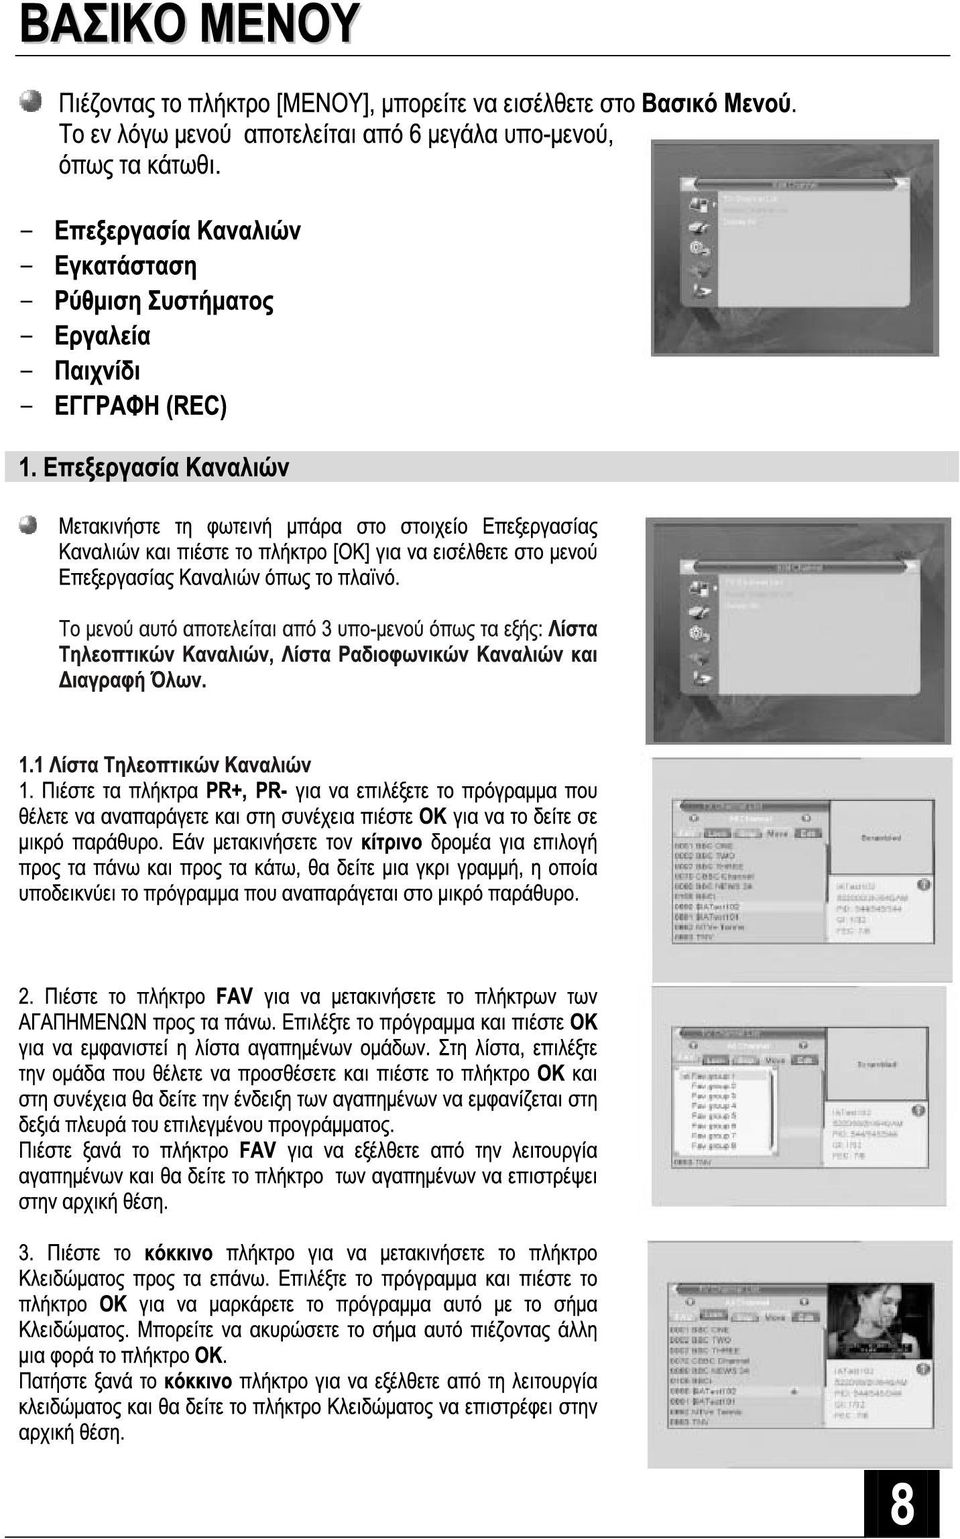
35 MAIN MENU MAIN MENU When you press [MENU] key, you can enter Main Menu. This menu consists of 6 major sub-menus as below. - Edit Channel - Installation - System Setup - Tools - Game - REC 1. Edit Channel Move highlight on Edit Channel item and press [OK] key to enter Edit Channel menu as besides. This menu has 3 sub-menus such as: TV Channel list, Radio Channel List and Delete All. 1.1 TV Channel List 1. Press PR+, PR- keys to select the program that you want to play, and then press OK key to view it in the small window. If move the yellow cursor to select up or down, you will see a gray line which indicates the playing program in the small window. 2. Press FAV key to move the FAV button upward. Select the program and press OK key to pop up the favourite group list. In the list, select the group that you want to add into and press OK key, and then you will find the favourite mark is displayed at the right side of the selected program. Press FAV key again to exit from the fav mode, and you will find the FAV button return to the origin position. 3. Press red colour key to move the Lock button upward. Select the program and press OK key to mark this program with the Lock mark. You can cancel this mark by pressing OK key once more. Press red colour key again to exit from the lock mode, and you will find the Lock button return to the origin position. 8
36 MAIN MENU MAIN MENU 4. Press green colour key to move the Skip button upward. Select the program and press OK key to mark this program with the skip mark. You can cancel this mark by pressing OK key once more. Press green colour key again to exit from the skip mode, and you will find the Skip button return to the origin position. 5. Press yellow colour key to move the Move button upward. Select the program and press OK key to mark this program with the move mark. Press PR+, PR- keys to move the cursor to the position where you want to locate and press OK key to confirm. Press yellow colour key again to exit from the yellow mode, and you will find the yellow button return to the origin position. 6. Press blue colour key to enter into the Edit channel window. 9 i. Sort (red colour key) Press red colour key to pop up the Sort drop-down list. Name(A-Z): The ascending order, omitting the $ character, the number is ahead, then the capital letter, at last the lowercase. Name (Z-A): The opposite order of the above Name (A- Z). Free/Scrabmle:: All FTA programs are listed ahead, while all scrambled programs are listed last. Lock: all locked programs are listed at the bottom. Default ii. Edit (green colour key) Press green colour key to move the Edit button upward. Select the program and press OK key to pop up the Rename window. In Rename window, press yellow colour key to switch between capital letter and lower-case letter; press red colour key to delete the character on the cursor; press keys to move the cursor left or right; press numeric keys (0-9) to input the character, please refer to the down table. Press blue colour key to save and exit.
37 MAIN MENU MAIN MENU Numeric keys Press numeric key repeatedly, display in circle.,*?!@1 ABC2 DEF3 GHI4 JKL5 MNO6 PQRS7 TUV8 WXYZ9 [space]_-0 If the name is empty, system will pop up a dialogue informing "Name" once yellow colour key is pressed. Press OK key to close this dialogue. iii. Delete (blue colour key) In Delete window, press blue colour key to move the Delete button upward. Select the program and press OK key to mark this program with the deletion mark. You can cancel this mark by pressing OK key again. Press EXIT key to pop up the dialogue "Are you sure to save?". Select Yes button and press OK key to save, or select NO button and press OK key to exit without saving. 1.2 Radio Channel List The same operation as 1.1 TV Channel List, here we don't explain any more. 1.3 Delete All Move cursor to the Delete All item, and press OK Key to pop up the dialogue "Warning! Do you really want to delete all channel?". Press EXIT key to pop up the dialogue "Are you sure to save?". Select Yes button and press OK key to save, or select NO button and press OK key to exit without saving. 10
38 MAIN MENU MAIN MENU 2. Installation 1. Press PR+, PR- keys to move the cursor up or down. 2. Press EXIT key or key to move the focus to the left menu. 2.1 Auto Scan When you enter Auto Scan menu, the screen will display as below. In FTA Only, press [Left/Right] key to choose Yes or No. Move the highlight on the search option, and press [OK] key to start scanning. Press [EXIT] key to exit this menu. 2.2 Channel Scan 11 When you enter Channel Scan, the screen will display as beside. There are two scan modes for you. You can choose to scan by channel or by frequency. When scan band is UHF and region is China, the range of Ch Number is from 13 to 61. When scan band is VHF and region is China, the range of Ch Number is from 1 to 12. (It s according to region.) When you complete your configuration, move highlight to search option, and press [OK] key to start scanning. Press [EXIT] key to exit the scanning and save the current parameters. 2.3 Aerial Adjustment When you enter Antenna feeding, the screen will display as beside. In CH No. submenu, press [Left/Right] key to choose the channel. In Tuner Power submenu, press [Left/Right] key to choose Off and On. 2.4 LCN Press [Left/Right] key to choose On and Off.
39 MAIN MENU MAIN MENU 3. System Setup When you enter the System Setup menu, you will see the screen like besides. It contains 8 sub-menus such as: Language, TV System, Local Timer Setting, Timer Setting, Parental Lock, OSD Setting, Favorite and Auto Standby. Press [Up/Down] key to select menu among all the items. Press [OK] key to enter the selected item. 3.1 Language 1. Press OK key to enter into the Language window. Press keys to select the language in circle, while press PR+, PR- keys to move the cursor up or down in circle. 2. Press MENU key or EXIT key to save and exit. 3. The types of the language, pleaser refer to the configuration of the customer. 3.2 TV System Press PR+, PR- key to move the cursor up or down, while press keys to change the setting and the setting will take effect immediately. 1. Video Resolution: Select between 480i /480p/576i/576P/720P/1080i. 2. Aspect Mode: Select among 4:3LB, 4:3PS, 16:9 and Auto. 3 Video Output: Select between YUV and RGB. 4. Digital Audio Output: Select between LPCM Out and BS Out. 3.3 Local Time Setting 1. Region: Select the region. 2. GMT Usage: Select between On and Off. If select "Off", the GMT Offset and Summer Time item will turned gray. 3. GMT Offset: When select "ON" in GMT Usage item, system will get the date and time information from the screen automatically. Date and Time two items will turn grey. Select the proper option in the GMT Offset item. The default setting is GMT ON. 4. Summer Time: Select between ON and OFF. "OFF" delegates the normal time. If select ON, time will add one hour. 12
40 MAIN MENU MAIN MENU 5.Date, Time: When select "OFF" in GMT Usage, Date and Time two items take effect, while GMT Usage turns grey. Use numeric keys to input the desired value.5. After setting, press MENU key or EXIT key to exit and save. If the value is invalid, system will inform "Invalid input! Continue to edit?". Press OK key at the Yes button to continue the modification, or press OK key at the No button to exit without saving. 3.4 Timer Setting If there is no program, you can not enter into this window. There are 8 timers that can be set. Select Timer up or down, and press OK key to enter into the setting window. 1. Timer mode: The default mode is off. You can set the timer once, daily and Off. 2. Wakeup Channel: Select the channel. 3. Wakeup Date, Time: Use numeric keys to input the valid date. Duration: Set the gap time. After waking up, system will power off automatically after the duration time. Press MENU or EXIT key to save and exit. 3.5 Parental Lock Before entering into the Parental Lock window, you need input the correct password. The default password is Menu Lock: Press keys to select between Off and On. If select "On", you can not enter into the most sub-menu before entering the password. 2. Channel Lock: Press keys to select between Off and On. The default value is Off. If select "On", you can not view the locked channel set in Chanel List Edit window until you input the correct password. 3. New Password: User numeric key (0-9) to input the new password. 4. Confirm Password: Input the new password once again. Confirm password must be the same as the New password. System will inform you "Change password successfully!" while they are the same, or inform you to input the password of Confirm password once again when they are not the same. 13
41 MAIN MENU MAIN MENU 3.6 OSD Setting 1. OSD Timeout: Press keys toselect from 1 to 10 by step1. The default values Is OSD Transparency: Press keys to select among Off, 10%, 20%, 30%, 40%. The default option is Off. Press MENU or EXIT key to save and exit. 3.7 Favorite There are 8 favorites group listed in this window. Press PR+, PR- keys to select one and press OK key to the Rename window, here we don't explain any more. 3.8 Auto Standby Select between On and Off. 4. Tools 1. Press PR+, PR- keys to move the cursor up or down. 2. Press EXIT key or key to move the focus to the left menu. 4.1 Information When you enter Information menu, you should see the screen like it displays on the right. This screen displays receiver information. You should press [EXIT] key to cancel this menu. 4.2 Load Factory Setting When you choose the option of Load Factory Setting and press [OK] key, there will be a dialogue for you to input the password. The default password is If you input the correct password, you will see a screen like beside. If you choose Yes, all the parameters of this receiver will reset to the default value. Note: Please use this function carefully. 14
42 MAIN MENU MAIN MENU 4.3 Upgrade By RS Press keys to select among allcode, maincode,card,radioback,keydate defaultdb, userdb. The default option is allcode. 2. Press OK key at the Start button to start checking serial port. 4.4 S/W Upgrade by OTA 1. Frequency: Use numeric keys to input the proper value. 2. Bandwidth: Select among 6, 7, 8MHz. 3. Down load PID: Use numeric keys to input the proper value. 3. Start: Press OK key to start upgrading. If no correct searching information, system will inform "Collecting information". You can press Exit button to return to the previous window. System will start upgrading after collecting information successfully. Press OK key at the Download button and press OK key at the Burnflash button to start burning. After booting, press OK key at the Reboot button to reboot Upgrade by USB 1.Upgrade File: Show the Upgrade File. 2.Upgrade Mode: Select among AllCode, maincode, conaxca and radioback. When users switch the upgrade mode, Upgrade File will show the corresponding file according to the table below: Upgrade Mode All code : File feature File named as "*.abs" Main Code: File named as *.abs Radio back: Default db: File named as "*.abs", the picture will be used as both radio back and menu back File named as "*.abs" Select the upgrade mode and upgrade file, then you can start upgrade by USB. 3.Press OK key on start button to start receiving the data from USB device. When the USB device is not connected, this item is grey, you can not edit it now.
43 MAIN MENU MAIN MENU 4.6 USB Device USB Device menu will be automatically shown when insert U disk to USB port except auto scan, multi picture, upgrade. Or open USB menu according to Menu -> Tools-> USB. Press OK to enter into this window. USB Device menu will be disabled when no USB device is plugged. Media Play List will not be saved when USB plug out or standby or power off. Move scroll bar when press up/down key, page up or down by page key. Go into sub-directory when press ok key in the file directory, play the selected file when scroll bar is on the file, automatic return USB menu after play is over. Function Key Yellow key: Press to show the Play List add all music to the Play List 2.Press number key 1 to add all images to the Play List. 3.Press INFO key to display the Setup window. 4.Press FIND key to display the Sort window. FAV:Press FAV key add. Play List Press FAV key to add the image or music to Play List. Press [OK] on Play List button you can see the image or music you selected and in this list you can play and delete them. Red key: Playing the image in full screen. Yellow key: Delete the image you selected. Blue key: Delete all the image in the list. Music List Press PR+,PR- key to select the music you want, and press FAV key to added it to the music list, or you can press number key 0 to add all the music to music list. Press yellow key and select the music button in the window, you can see the music you selected and in this list you can play and delete the music. Red key: Playing the music. Yellow key: Delete the music you selected. Blue key: Delete all the music in the list. 16
44 MAIN MENU MAIN MENU Image List Press PR+,PR- key to select the iamge you want, and press FAV key to added it to the image list, or you can press number key 1 to add all the images to image list. Press yellow key and select the image button in the window, you can see the iamge you selected and in this list you can play and delete them. Red key: Playing the picture. Yellow key: Delete the picture you selected. Blue key: Delete all the picture in the list. Setup Show Image Size: Select between full and real. Slide Show Time: Select among 1-10sec. Slide Show Repeat: Select between on and off. Sort Pressing FIND key, it will pop up the Sort drop-down list. Name(A-Z): The ascending order, omitting the $ character, the number is ahead, then the capital letter, at last the lowercase. Name (Z-A): The opposite order of the above Name (A-Z). 4.7 Remove USB Device safely 1. Press OK key on Remove USB device safely it will pop up a dialog:"you can safely remove USB device now!". Press OK on Yes button to remove the USB device. 5. Game 1. Press OK key or key to enter into the game. 2. Press PR+, PR- keys to move the cursor up or down. 3. Press EXIT key or key to move the focus to the left menu. 4. Select the game that you want to play and press OK key to enter into the window. 17
45 MAIN MENU MAIN MENU 6. REC 6.1. Record Manager 1. Press PR+, PR- keys to select up or down, 2. Press green color key to lock the file you selected, the lock symbol will be marked behind the file. Before you lock the file you must input the correct password, the default password is Press blue color key to delete the file you selected. 4.Press red color key to pop up the window for renaming the file you selected, press numeric keys (0-9) to input the character. 5.Press [Play] key to preview. Press [OK] to play the recorder in full screen as below picture. 6.Press [Pause] key to pause. Press [Pause] key repeatedly to realize the step function. Press / key to fast Forward or fast backward. Press / key to slow forward or slow backward. 6.2 DVR HDD Information Show you the removable device information in windows as besides. 6.3 HDD Format Show you the information in windows as besides. Press OK key on format button to format the disk. 6.4 DVR Configuration 1.Timeshif: Select between on and off. 2. Timeshift to recorde:select between on and off. 3. Record Type: Select between TS and PS. 4. Record Selection: Select the USB partition. 5. Standby after record: Select between on and off. 6.5 Jump Select among 30sec, 1min, 5 min, 10 min and 30 min. 18
46 MAIN MENU MAIN MENU 7. Hot Key 7.1 Number Use the numeric keys (0-9) to input the number of the desired channel. If the inputted number is beyond the valid channel number, system will "Invalid number and press OK key to close this message. 7.2 TV/RADIO In normal mode, press TV/RADIO key to switch between TV mode and Radio mode. 7.3 Up/Down (Channel Change) Press PR+, PR- keys to change the channel up or down. 7.4 Left/Right (Volume+/-) Press keys to change the volume. Press keys to decrease the volume by step 1, while press keys to add the volume by step Mute Press key to close the volume. You can press key once again to restore the volume, or press keys to open the volume. 7.6 Pause During the viewing, you can press PAUSE key to stop the picture while the volume continues. You can play the picture by pressing PAUSE key once again. 7.7 Teletext Press TXT keys to open the teletext on the screen. If there is no teletext, system will inform "No Data!". Press EXIT key to exit. 7.8OK 1. During the viewing or listening, press OK key to pop up the TV program list or the Radio program list. 2. Press PR+, PR- keys to select the channel up or down, and then press OK key to play this channel in full-screen. 3. Press MENU or EXIT key to close this window. 19
47 MAIN MENU MAIN MENU 7.9 Audio 1. Press key to enter into the Audio window. 2. Press keys to select between Left, Right, Mono and Stereo. 3. Changing the audio mode is only connected with the current channel, not all the channels. 4. Press MENU or EXIT key to close this window Recall Press key to switch the current channel to the previous channel Info Press INFO key to enter into the information window FAV 1. Press FAV key to pop up the favourite group window. 2. Press keys to select the favorite group. Press PR+, PR- keys to select the channel up or down. Press OK key at the selected channel to view it in full-screen. Press MENU or EXIT key to exit. 3. If there is no favorite channel, system will inform " No FAV Channel!" when you press FAV key EPG Press EPG key to enter into the EPG window. 1. Press PR+, PR-, keys to select up or down, left or right. 2. Press red colour key to pop up the Time Bar window. Press PR+, PR- keys to select up or down, while press keys to select left or right in the time bar. : Press OK key at this button to return to the EPG window. 20
48 MAIN MENU MAIN MENU : Press OK key at this button to move the cursor to the current time line. : Press OK key to push the time forward or backward by half an hour. : Press OK key to push the time forward or backward by 2 hours. : Press OK key to push the time forward or backward by a day. From the current day, you can switch among the future 7 days in circle. 3. Detail Information: In the EPG window, press PR+, PR- keys to select the channel and program, and press OK key to know the detail information of the current program. 4. Press green colour key to enter into the Timer window. You can add the current program to the Timer. If 8 timers is already, system will inform "Timer is full!' Subtitle Press key to open the subtitle window on the screen. 21
49 TROUBLE SHOOTING TROUBLE SHOOTING Problem Possible causes What to do The display on the front panel does not light up. Main cable is not connected. Check that the main cable is plugged into the power socket. No sound or picture, but the front panel shows red light. The receiver is in standby mode. Press the standby button. No sound or picture. No signal or weak signal. Check the cable connections, antenna and other equipment connected between the antenna and the receiver. Bad picture / blocking error. Signal is too strong. Antenna noise factor too high. Connect a signal attenuator to the antenna input. Change to an antenna with lower noise factor. The antenna is faulty. Change the antenna. The picture is not displayed on the screen, when switching on. The system is connected by RF leads. Check the UHF channel fixed in your system and tune the UHF channel properly. There is interference on your terrestrial program or video signal. The system is connected by RF leads and the output program of the receiver interferes with an existing terrestrial programs or Video signal. Change the receiver output program to a more suitable program, or connect the system by SCART leads. The RCU is not working. Battery exhausted. RCU is incorrectly aimed. Change the batteries. Aim RCU at the receiver, or check that nothing blocks the front panel. Note : If you have tried all of the actions suggested above, without solving the problem, please contact your dealer or a customer service adviser. 22
50
DVB-T2 DIGITAL TV BOX
 DVB-T2 DIGITAL TV BOX QUALITY OF DIGITAL TELEVISION MT4159 User Manual EN 2 Index Index...2 Introduction...3 Front panel...3 Rear panel...3 Remote control...4 Hardware configuration...5 Connecting tuner
DVB-T VERTO. User Manual HD TERRESTRIAL DIGITAL TV STB & PLAYER MT4162
 DVB-T VERTO HD TERRESTRIAL DIGITAL TV STB & PLAYER MT4162 User Manual EN 2 Index Index...2 Overview...2 Remote Control...3 Battery installation in remote control...4 Using remote control...4 Connections...4
Movie Cube N150H. User s Manual
 Movie Cube N150H User s Manual (v1.0) TABLE OF CONTENTS 1. Main Features... 4 1.1 Front panel... 4 1.2 Back panel... 4 2. Remote Control... 5 3. Welcome Page... 6 4. Installation Guide... 6 5. Program...
(2012 10 24) manual_tocomsat duo LITE.indd 20-1 2012-10-24 7:44:57
 manual_tocomsat duo LITE.indd 20-1 2012-10-24 7:44:57") (2012 10 24) manual_tocomsat duo LITE.indd 20-1 2012-10-24 7:44:57 TABLE OF CONTENTS Table of Contents Table of Contents Safety Warning General Information Package Contents & Features Front Panel Rear
(2012 10 24) manual_tocomsat duo LITE.indd 20-1 2012-10-24 7:44:57 TABLE OF CONTENTS Table of Contents Table of Contents Safety Warning General Information Package Contents & Features Front Panel Rear
DVB-T 730. User s Manual
 EPG Program Reservation There are 10 program timers to bring up reminder for a reserved program. 20 seconds before the start of the reserved program, a pop-up window will remind viewer. If no further instruction,
TRIAX ST-HD527 CI. Digital Combo set-top box 305013 / 305014
 TRIAX ST-HD527 CI Digital Combo set-top box 305013 / 305014 Copyright Not to be copied, used or translated in part or whole without prior consent in writing except approval of ownership of copyright and
DTVS-T1 User Guide. Digital Terrestrial Receiver
 DTVS-T1 User Guide Digital Terrestrial Receiver Contents Safety Instructions...4 Warning... 4 Copyright Statement... 4 Disclaimer... 4 About the Set Top Box...5 Main Features... 5 Package Contents... 5
Safety Instructions 1 Product Overview 2 Remote Control Unit 4 Set-top box Connections 6 Inserting CI Module & Smartcard 8
 CONTENTS PART I : INSTALLATIONS Safety Instructions 1 Product Overview 2 Remote Control Unit 4 Set-top box Connections 6 Inserting CI Module & Smartcard 8 PART II : MENU GUIDE Menu Map 9 Search Channels
Do not expose the receiver under the sunlight. And keep it away from the heat source.
 TM User s Manual 2 S2000 SERIES & S2300 SERIES COMBO & C2200 CONTENTS MAIN FEATURES 2 For your Safety 2 Unpacking 4 General Operation 4 RCU 4 Rear Panel 5 INSTALLATION 5 Connecting to TV using SCART support
/&' 79 7; /% ) &RORU 7HOHYLVLRQ (QJOLVK
 &RORU 7HOHYLVLRQ (QJOLVK") 245U Using the On Screen Displays Many features available on this TV can be accessed via the On Screen Display menu system. Use the remote control as shown below to access and adjust features as desired.
245U Using the On Screen Displays Many features available on this TV can be accessed via the On Screen Display menu system. Use the remote control as shown below to access and adjust features as desired.
HD-TV100 MP Digital TV and media player
 HD-TV100 MP Digital TV and media player User s manual 1. Functions overview: FULL HD TV HD Digital TV with MPEG-4(H.264)&MPEG-2, HD&SD standard DVB-T. HDMI HD format output 1080I, also compatible with
Quick Start. Digital Satellite Receiver
 Quick Start Digital Satellite Receiver Support of SD (MPEG2), DVB-S system Slot for Smart Card in Conax system HDMI video output Low power consumption in Stand-by mode, below 1W Automatic Stand-By Compatible
HD Digital Cable Receiver DVBC-123CI. User s Manual
 HD Digital Cable Receiver DVBC-123CI User s Manual Keep this manual for future reference www.facebook.com/denverelectronics I General Safety User s Manual This STB has been manufactured to meet international
Digital Terrestrial Receiver SRT 5200/SRT 5202/SRT5205
 Digital Terrestrial Receiver SRT 5200/SRT 5202/SRT5205 Picture similar User manual Table of Contents 1.0 Instruction 2 1.1 Safety Instructions 2 1.2 Storage 3 1.3 Equipment Set-up 4 1.4 Features & Accessories
Transparent Video System. User s s Manual TVS-3000 TCC-6000 HD DVR
 Transparent Video System User s s Manual TVS-3000 TCC-6000 HD DVR CONTENTS Safety Instructions 1 Appearance 2 Remote Control Unit 4 How to Format the Hard Disk Drive 6 Inserting Smartcard 6 Receiver Connections
Ref. 717501 SATELLITE. User Manual. High Definition TV Satellite Receiver. w w w. t e l e v e s. c o m
 SATELLITE High Definition TV Satellite Receiver Ref. 717501 User Manual w w w. t e l e v e s. c o m Index SATELLITE 1. Safety recommendations............................................................
KTC-D500E DIGITAL TV TUNER
 KTC-D500E DIGITAL TV TUNER INSTRUCTION MANUAL C B64-3808-00/00 (E) Contents Safety precautions 3 Notes 4 Getting Started 5 Switching to Digital TV Screen ÅıÇ 5 Functions During Digital TV Screen Åı 5 Functions
9600 IP. Set Top Box. User s Guide
 9600 IP Set Top Box User s Guide For your safety Information contained in this manual is subject to change without notice. No part of this publication may be copied, reproduced, or translated to another
CONTENTS 1. SAFETY... 3 2. INTRODUCTION... 3 3. FEATURES... 4 4. REMOTE CONTROL... 5 5. FRONT PANEL... 6 6. REAR PANEL... 8
 CONTENTS 1. SAFETY... 3 2. INTRODUCTION... 3 3. FEATURES... 4 4. REMOTE CONTROL... 5 5. FRONT PANEL... 6 6. REAR PANEL... 8 7. CONNECTING YOUR SYSTEM... 8 8. BASIC OPERATIONS... 11 8.1 TURN ON XFINDER...
Echolite DSB-771 Echolite DSB-791. User`s manual
 Echolite DSB771 Echolite DSB791 User`s manual IMP O R TA N T S A F E T Y I N S T R U C T IO N S T h a n k y o u f o r c h o o s in g o u r p r o du c t. B e fo r e i n s ta lla tio n, w e w o u ld lik
HD Digital Receiver. User s Manual. HD-5400S HD-5600S TivuMax Pro. The default password is 0000.
 HD Digital Receiver User s Manual HD-5400S HD-5600S TivuMax Pro The default password is 0000. Contents & Accessories Contents Contents & Accessories...2 Contents Accessories Quick Start Guide...3 Front
Quick Start Guide English
 Quick Start Guide 1. Checking Accessories Quick Start Guide User s Manual Remote Control & Batteries Manual & Quick Start Guide HUMAX Wi-Fi USB Adapter (Supplied with HDR-2000T/1TB/WD) HDMI Cable Ethernet
Satellite HD Digital Television Recorder. User s Manual FOXSAT-HDR. The default password is 0000.
 Satellite HD Digital Television Recorder FOXSAT-HDR The default password is 0000. Notice Thank you for purchasing a Humax Foxsat-HDR (Digital Television Recorder) Your Foxsat-HDR supports freesat+ provided
Digital High Definition Terrestrial Receiver SRT 8110
 Digital High Definition Terrestrial Receiver SRT 8110 Picture similar User Manual Table of Contents 1. 0 Instruction 2 1.1 Safety Instructions 2 1.2 Storage 3 1.3 Equipment Set-up 3 1.4 Accessories 3
Table of Contents. 1.1 General Features...3 1.2 Accessories...4. 2.1 Front Panel...5 2.2 Rear Panel...6 2.3 Remote Control Unit...
 Table of Contents Safety Precaution...2 1. Reference 1.1 General Features...3 1.2 Accessories...4 2. Basic Function 2.1 Front Panel...5 2.2 Rear Panel...6 2.3 Remote Control Unit...7 3. Installation and
HT8000 PVR. User Guide. HT8000 PVR User Guide Firmware Version 1.03.0A
 HT8000 PVR User Guide 1 2 Table of Contents 1. Notice 9 Cautions, Warnings and Notes 9 2. Safety Information 10 Safety Instructions and Precautions 10 3. Before You Begin 12 3.1 Features 12 3.2 Supplied
DVB-T2 HD Terrestrial Receiver
 DVB-T2 HD Terrestrial Receiver User Manual MODEL NUMBER HDT2-5101 Please read this Manual thoroughly before using your Receiver and then retain for future reference. Contents 1. Important Instructions
MyM 3T. User Manual. English
 User Manual Compact unit with 2 DVB-T tuners MPEG-2 and MPEG-4 compliant 3 analogue modulators Two CI for decryption or multidecryption NICAM or A2 stereo 12-volt power supply Low power consumption MyM
Instruction Manual. High Definition Personal Video Recorder Digital Satellite Receiver
 Instruction Manual High Definition Personal Video Recorder Digital Satellite Receiver The XPEED LX1digital receiver is fully compliant with the international Digital Video Broad-casting (DVB) standard,
TechniSat HDFV Freesat HD Digital Receiver. Owner s Manual
 TechniSat HDFV Freesat HD Digital Receiver Owner s Manual Dear Customer, Welcome and thank you for choosing TechniSat Digital s HDFV Digital Freeview HD Receiver for your TV entertainment. This product
Digital Cable TV. User Guide
 Digital Cable TV User Guide T a b l e o f C o n T e n T s DVR and Set-Top Box Basics............... 2 Remote Playback Controls................ 4 What s on TV.......................... 6 Using the OK Button..................
RFS-805. Digital Modulator AV to COFDM. User Manual
 RFS-805 Digital Modulator AV to COFDM User Manual 1. Purpose of use RFS-805 is a digital modulator designed for a processing audio and video signals into COFDM (DVB-T) multiplex. 2. Installation The connections
DIGITAL CABLE TV RECEIVER TV STAR C101 USER MANUAL
 DIGITAL CABLE TV RECEIVER TV STAR C101 USER MANUAL 1 Table of contents Safety Instructions... 3 General Introduction... 4 Front Panel/ Rear Panel... 5 Remote Control Unit... 6 S.T.B Connection... 8 Digital
VideoMate V200/V200F Analog Standalone TV Box Start Up Guide
 VideoMate V200/V200F Analog Standalone TV Box Start Up Guide Compro Technology, Inc. www.comprousa.com 1 Table of Contents About This Guide... 3 VideoMate V200/V200F TV Box Contents... 4 Install V200/V200F
BlazeVideo HDTV Player v6.0r User s Manual. Table of Contents
 BlazeVideo HDTV Player v6.0r User s Manual Table of Contents Ⅰ. Overview... 2 1.1 Introduction... 2 1.2 Features... 2 1.3 System Requirements... 2 Ⅱ. Appearance & Menus... 4 Ⅲ. Operation Guide... 7 3.1
focus TOuCh P10 FOR DISPLAYS: 55, 70 AND 82 ENgliSh V01.3-2014-7
 focus TOuCh P10 FOR DISPLAYS: 55, 70 AND 82 ENgliSh V01.3-2014-7 Thank you for purchasing our product. Please read this manual carefully before operation your set and retain it for future reference. FT55-P10
INSTRUCTIONS Please read all instructions carefully before using
 Car Multimedia System XM-2DTSB79 AUX IR MIC RESET USB INSTRUCTIONS Please read all instructions carefully before using Touch calibration If touch calibration error occurs, you can adjust the touch coordinate
Terrestrial Signal Finder
 Terrestrial Signal Finder Please read this manual carefully before using your meter for the first time. The technical specifications and operating methods included in this manual are subject to changes
DVB-T STICK LT. User Manual. USB DVB-T dongle for receiving aerial TV channels MT4171
 DVB-T STICK LT USB DVB-T dongle for receiving aerial TV channels MT4171 User Manual EN Index Index 2 Introduction 2 Package content 2 System Requirements 2 Device installation 3 Software installation 3
HD Digital Television Recorder. User s Manual HDR-7500T. The default password is 0000.
 HD Digital Television Recorder User s Manual HDR-7500T The default password is 0000. Notice English Thank you for purchasing a HUMAX product. Please read this user s manual carefully to be able to safely
ENLTV-FM3. PCI TV Tuner Adapter with FM Radio. User s Guide
 ENLTV-FM3 PCI TV Tuner Adapter with FM Radio User s Guide User s Notice No part of this manual, including the products and software described in it, may be reproduced, transmitted, transcribed, stored
TOPFIELD TF 6000 COC. User Guide. Digital Cable Receiver CONAX
 TOPFIELD TF 6000 COC User Guide Digital Cable Receiver CONAX Contents iii Contents 1 Introduction 1 1.1 Features............................... 1 1.2 Controlling the digital receiver..................
User Guide. Plaza HDR S freesat digital HD TV recorder
 User Guide Plaza HDR S freesat digital HD TV recorder CONGRATULATIONS on buying a Manhattan Plaza HDR S freesat receiver. This high performance unit lets you record and watch the best of digital TV and
HANTZ + PARTNER The Upgrade Company! www.hantz.com
 Quick Start Guide X3000 HD Network Media Player X3000 HD NETWORK MEDIA PLAYER POWER HANTZ + PARTNER The Upgrade Company! www.hantz.com A Get to know your HELIOS X3000 Thank you for purchasing the HELIOS
46 FHD LED TV USER MANUAL 46GSR3000. www.polaroidhdtv.com. www.polaroidhdtv.com USA:1-888-636-8599 USA:1-888-636-8599
 46 FHD LED TV 46GSR3000 USER MANUAL USA:1-888-636-8599 www.polaroidhdtv.com USA:1-888-636-8599 www.polaroidhdtv.com 2013 Empire Electronic Corporation. www.polaroidhdtv.com www.polaroidhdtv.com User Warranty
HD Digital Recorder. User s Manual HDR-FOX T2. The default password is 0000.
 HD Digital Recorder User s Manual HDR-FOX T2 The default password is 0000. Notice Thank you for purchasing a Humax HDR-FOX T2 Freeview+ HD product. Freeview+ HD explained: Accurate recording The start
EV-8000S. Features & Technical Specifications. EV-8000S Major Features & Specifications 1
 EV-8000S Features & Technical Specifications EV-8000S Major Features & Specifications 1 I. General Description EV-8000S is fully compliant with the international DVB standard and thus transmits digital
Using the System ORDER YOUR BELL EXPRESSVU PROGRAMMING. Page 3-1
 Using the System ORDER YOUR BELL EXPRESSVU PROGRAMMING This procedure notifies the Bell ExpressVu Customer Service Call Centre that your system is on-line and installed. You need to have your services
RCN DIGITAL CABLE USERS GUIDE
 RCN DIGITAL CABLE USERS GUIDE WELCOME Congratulations! Thanks to your new Digital Cable Service, you now have access to the most cutting-edge cable television services available, only from RCN. At RCN,
How To Use Tv On A Tv On An Ipod (Vplayer) On A Pc Or Macbook
 On A Pc Or Macbook") UFS 910 Operating manual - englisch - HDTV receiver for satellite reception PREFACE Dear customer, this Operating Manual is intended to help you make the fullest use of the extensive range of functions
UFS 910 Operating manual - englisch - HDTV receiver for satellite reception PREFACE Dear customer, this Operating Manual is intended to help you make the fullest use of the extensive range of functions
How To Use A Satellite Receiver
 Thank you for choosing this Strong satellite receiver. This receiver is of our latest development and it is designed to be capable of upgrading its software through the satellite and the Internet. It is
32FEB5714 (REF. NO.: 10090405)
") FUNAI BRANDNEW PRODUCT LOGO (revised edition 1,APR.,2010 32FEB5714 (REF. NO.: 10090405) ENGLISH Contents Safety Information...1 Getting Started...2...2 Features...2 Connect Power...3 Remote Control...4
FUNAI BRANDNEW PRODUCT LOGO (revised edition 1,APR.,2010 32FEB5714 (REF. NO.: 10090405) ENGLISH Contents Safety Information...1 Getting Started...2...2 Features...2 Connect Power...3 Remote Control...4
Evolution Digital HD Set-Top Box Important Safety Instructions
 Evolution Digital HD Set-Top Box Important Safety Instructions 1. Read these instructions. 2. Keep these instructions. 3. Heed all warnings. 4. Follow all instructions. 5. Do not use this apparatus near
CAUTION RISK OF ELECTRIC SHOCK NO NOT OPEN
 Evolution Digital HD Set-Top Box Important Safety Instructions 1. Read these instructions. 2. Keep these instructions. 3. Heed all warnings. 4. Follow all instructions. 5. Do not use this apparatus near
High Definition LCD TV. Kogan HD32 USER MANUAL
 High Definition LCD TV Kogan HD32 USER MANUAL Safety information To ensure reliable and safe operation of this equipment, please read carefully all of the instructions in this user guide, especially the
Higth definition from A to Z. www.azbox-hd.com
 Higth definition from A to Z www.azbox-hd.com Do you Feel the full HD multimedia? Wifi Web Browser Yes, you read this correctly. O2media present a new line of AzBox HD receivers, with the AzBox HD Elite
QUICK INSTALLATION GUIDE. Model No: T18
 QUICK INSTALLATION GUIDE Model No: T18 Contents V1.0 Chapter 1:iBall Claro TV Hardware Installation... 2 1.1 Package Contents... 2 1.2 System Requirements... 2 1.3 Hardware Installation... 2 Chapter 2:iBall
H203D 中文 GB Version 1
 H203D 中 GB文 Version 1 Contents Installing batteries... 4 Using the AC adapter (not supplied)... 5 Setting the clock... 6-7 Updating your radio - DAB... 8 Selecting a station - DAB... 9 Secondary services
Controls (front) 1. Loudspeaker 2. Light button 3. Band button 4. Auto tune button 5. Alarm button 6. LCD display
 1. Loudspeaker 2. Light button 3. Band button 4. Auto tune button 5. Alarm button 6. LCD display") GB Contents Controls... 2-4 Mains operation... 5 Operating your radio... 6 Selecting a station DAB... 7 Display modes DAB... 8 Finding new stations - DAB... 9 Secondary services DAB... 9 Manual tuning
GB Contents Controls... 2-4 Mains operation... 5 Operating your radio... 6 Selecting a station DAB... 7 Display modes DAB... 8 Finding new stations - DAB... 9 Secondary services DAB... 9 Manual tuning
19 HD Ready Digital LCD TV. Instruction Manual L19DIGB10
 19 HD Ready Digital LCD TV Instruction Manual L19DIGB10 Contents Preparation... 4 Unpacking the TV...4 Installing / Removing the Base Stand...5 Front / Top / Side View and Controls...6 Rear View and Sockets...7
IPTV STB QUICK GUIDE. Detailed user manual download from www.my-home-television.com
 IPTV STB QUICK GUIDE Detailed user manual download from www.my-home-television.com Dolby Digital: Manufactured under license from Dolby Laboratories. Dolby and the double-d symbol are trademarks of Dolby
DVB-T PenType USB Receiver. User s Manual
 DVB-T PenType USB Receiver User s Manual Copyright Notice Copyright 2004. All rights reserved. Axdia reserves the right to modify product offerings or specifications without advance notice. No part of
DIGITAL SATELLITE RECEIVER DVB4600
 ENGLISH DIGITAL SATELLITE RECEIVER DVB4600 USER MANUAL STANBY REMOTE DVB4600 DIGITAL SATELLITE RECEIVER Table of Contents Safety Precautions... 70 1. Important Safety Instructions... 70 2. Notice... 71
DSTV DECODER SETUP MANUAL July 2013
 DSTV DECODER SETUP MANUAL July 2013 DSTV SINGLE VIEW AND SD PVR DECODER SETUP How to program your Single View and SD PVR DSTV Decoders STEP 1 Ensure that the DSTV decoder is connected correctly to the
Welcome to FOXTEL Digital!... 1 Your FOXTEL Digital set-top unit... 1 Updates to your digital set-top unit... 1 Getting in touch with FOXTEL...
 Welcome to FOXTEL Digital!......... 1 Your FOXTEL Digital set-top unit...... 1 Updates to your digital set-top unit..... 1 Getting in touch with FOXTEL........ 1 For your safety.................... 2 Getting
HD Digital Receiver. User Manual MODEL NUMBER HD DVB-S2 1201
 TM HD Digital Receiver User Manual MODEL NUMBER HD DVB-S2 1201 Please read this Manual thoroughly before using your Receiver and then retain for future reference. Contents 1. Important Safety Instructions
User guide. QAM module - 492055/492056 891076C. TRIAX - your ultimate connection. Rev. 01-2012 - C. TRIAX - your ultimate connection
 User guide 891076C GB QAM module - 492055/492056 TRIAX - your ultimate connection TRIAX - your ultimate connection Contents Contents Disposal... 3 Box content... 3 QAM module... 3 Labels... 4 Module installation...
ABOUT YOUR SATELLITE RECEIVER
 2 Satellite Receiver ABOUT YOUR SATELLITE RECEIVER This chapter gives you an overview and a description of your satellite receiver. SATELLITE RECEIVER OVERVIEW SINGLE AND DUAL MODES REMOTE CONTROL SATELLITE
CINEMATE 1 SR DIGITAL HOME THEATER SPEAKER SYSTEM. Operating Guide Guía del usuario Guide d utilisation
 CINEMATE 1 SR DIGITAL HOME THEATER SPEAKER SYSTEM Operating Guide Guía del usuario Guide d utilisation Notice This equipment has been tested and found to comply with the limits for a Class B digital device,
Contents Introduction Installation Scanning for Channels
 mini User Guide Contents 1 Introduction 7 1.1 Features................................. 7 1.2 Accessories............................... 8 1.3 The Remote Control.......................... 9 1.4 Getting
Contents of the Guide
 BeoCenter 1 Guide Contents of the Guide 3 The following is an index to the contents of the separate Reference book with page references: How to set up BeoCenter 1, 4 Connect your TV cables, 5 Connect
User User Manual Manual Harmony 900
 User User Manual Manual Harmony 900 English Version 1.0 Version 1.0 Contents Introduction...6 Getting to know your remote...6 How your Harmony 900 works...6 Activities...6 How your RF System works...7
Receiver Customization
 11 Receiver Customization PERSONALIZING YOUR SATELLITE RECEIVER Use the information in this chapter to customize your receiver. USING SHARED VIEW USING CALLER ID CHANGING LANGUAGES USING CLOSED CAPTIONING
The Parts of the System
 2 The Parts of the System THE RECEIVER THE RECEIVER FRONT PANEL Power Light This green light on the receiver front panel lights up when the receiver is turned ON. This light flashes when the receiver memory
HIGH DEFINITION DIGITAL RECEIVER FULL HD 1080p TV STAR T1030 HD USB PVR
 HIGH DEFINITION DIGITAL RECEIVER FULL HD 1080p TV STAR T1030 HD USB PVR GB HIGH DEFINITION DIGITAL TERRESTRIAL RECEIVER SHORT USER MANUAL PLEASE CLICK THE WEB SITE WWW.TVSTAR.EU FOR THE FULL USER MANUAL
It s here a New Breed of TV entertainment.
 Quick Start Guide 1 2 It s here a New Breed of TV entertainment. Welcome to Fetch TV an exciting new television experience that puts you in control of the best TV, great movies, and popular interactive
USING YOUR DMX PROFUSION
 Set Up Guide USING YOUR DMX PROFUSION io FOR 1 Connect 2 Set Up 3 Listen SIMPLE PERSONALIZED UNLIMITED ECONOMICAL LICENSED Welcome Thank you for choosing DMX to provide your Pandora listening experience
Pocket DAB & FM Radio with Speaker
 Pocket DAB & FM Radio with Speaker P MODEL: GDPRDAB USER MANUAL 1 Welcome 2 Your DAB Digital Radio 2.1 In The Box 2.2 Front View 2.3 Rear View 3 Quick Setup 3.1 Power On and Autoscan 3.2 Changing DAB Stations
ISTAR DIGITAL SATELLITE RECEIVER
 ISTAR DIGITAL SATELLITE RECEIVER ISTAR User Manual February 14, 2015 Table of contents Safety 4 General Introduction 6 Remote Control Unit.. 7 S.T.B Connection.. 10 Main Menu 11 1. Starting 11 1.1 Installation
High-Definition Personal Digital Recorder. user guide
 High-Definition Personal Digital Recorder user guide Contents Welcome to MY SKY HDi................... 1 MY SKY HDi................................... 1 Updates to MY SKY HDi......................... 1
PDP TV. quick start guide. imagine the possibilities
 PDP TV quick start guide imagine the possibilities Thank you for purchasing a Samsung product. To receive a more complete service, please register your product at www.samsung.com/global/register 02134A_CMS.indd
User s Guide Full HD Digital Satellite Receiver
 User s Guide Full HD Digital Satellite Receiver Full HD Digital Satellite Receiver HD Video Formats 1080i, 720p, 576p Internet Connection Ethernet Port USB 2.0 Ready Dolby Digital 5.1 Audio Decoding Smart
DIGITAL CABLE TV RECEIVER OPERATION MANUAL DVB-C8080AL DIGITAL CABLE RECEIVER DEAR CONSUMER
 DIGITAL CABLE TV RECEIVER OPERATION MANUAL DVB-C8080AL DIGITAL CABLE RECEIVER DEAR CONSUMER GREAT APPRECIATION FOR PURCHASING OUR PRODUCT TO ENSURE THE BEST PERFORMANCE AND THE HIGHEST SAFETY, PLEASE READ
R Series R6S/R150/R160/R200S/R300/R900
 R Series R6S/R150/R160/R200S/R300/R900 Table of contents TABLE OF CONTENTS... 1 1.CONNECTING INTRODUCE... 3 2.EXPLANATION OF REMOTE CONTROL... 5 3.SYSTEM INITIALIZATION... 8 3.1 MENU LANGUAGE... 8 3.2
Getting to Know Xsight... 3. Home Screen and Everyday Use... 9. Settings... 11. PC Setup... 17. 2 www.oneforall.com
 User Manual English English Getting to Know Xsight........................................ 3 Unpacking and Setting Up Xsight............................................................. 3 Using Xsight
mini box User s Manual
 mini box User s Manual Version. Updated: 0/0/4 04 Cox Communications, Inc. Table of Contents Chapter : Introduction... About This Manual... Chapter : Installing & Activating Your mini box... 4 Connecting
Amcrest 960H DVR Quick Start Guide
 Amcrest 960H DVR Quick Start Guide Welcome Thank you for purchasing our Amcrest 960H DVR! This quick start guide will help you become familiar with our DVR in a very short time. Before installation and
DTA INSTALLATION PROCESS & USER GUIDE FOR CHARTER BUSINESS CUSTOMERS
 DTA INSTALLATION PROCESS & USER GUIDE FOR CHARTER BUSINESS CUSTOMERS This guide is intended for owners or managers and front desk personnel. This guide is not intended for guests. Customer Care 1-800-314-7195
Product Picture. Product Specification. Model: URZ0323 DVB-T H.264 HD Set top box. Hardware Specification
 Model: URZ0323 DVB-T H.264 HD Set top box Product Picture Hardware Specification Chip & Board Main Chip Flash SDRAM System Crystal TUNER COFDM Demdulator Embedded Audio DAC Audio Amp USB 2.0 Video DAC
Controls. LCD Display. Tuning Up Time Set and Station Scan
 PR-D8 GB Revision 3 1 1 2 4 5 7 9 10 12 14 16 18 20 22 24 25 26 27 29 31 33 35 36 37 38 Controls Stereo Built-in Microphone (Left Channel) LCD Display Stereo Built-in Microphone (Right channel) Power/Auto
WELCOME TO. Your step-by-step guide to getting the most out of your Internet, Phone and TV services. VyveBroadband.com
 WELCOME TO Your step-by-step guide to getting the most out of your Internet, Phone and TV services. VyveBroadband.com Thank you for turning your Vyve on! We know you re pretty busy, so we went ahead and
Userʼs Manual. 7 Color LCD TV & Monitor V7000
 Userʼs Manual 7 Color LCD TV & Monitor V7000 Dear Customers Thank you for purchasing the ikan V7000 7 LCD TFT Monitor. This product employs new integrate circuitry, and a high quality TFT LCD panel. It
Receiver Customization
 9242_13_Ch11_eng 6/11/07 9:36 AM Page 1 Receiver Customization PERSONALIZING YOUR SATELLITE RECEIVER Take a look through this chapter and you ll find out how to change settings on the receiver to make
Register your product and get support at www.philips.com/welcome. User Manual
 Register your product and get support at www.philips.com/welcome User Manual Contents 1 Your new TV 3 1.1 EasyLink 3 2 Setting up 4 2.1 Read safety 4 2.2 TV stand and wall mounting 4 2.3 Tips on placement
Harmony Ultimate One User Guide
 Harmony Ultimate One User Guide Version 1 (2014-02- 11) Harmony Ultimate One User Guide Ultimate One Table of Contents About this Manual... 6 Terms used in this manual... 6 At a Glance... 6 Features...
24 Wide Screen LED Monitor with HDMI
 24 Wide Screen LED Monitor with HDMI USER MANUAL L24LE11B_MANUAL_EN_R1 Please read this manual carefully before using, and keep it for future reference. TABLE OF CONTENTS GETTING STARTED Monitor Stand
TechniCorder ISIO STC
 Quick Start Manual TechniCorder ISIO STC Digital Multituner HD Receiver with Internet Access With CONAX cardreader and an interface for recording from two CI/CI+ modules and a DVR recording function via
Welcome. Sit back, and enjoy Tata Sky. Now, entertainment will never be the same again!
 Welcome Enjoy DVD quality picture, where every detail is crystal clear. CD quality sound, where each roar and whisper comes through in perfect clarity. And best of all Interactive services that let you
DIGITAL SET-TOP-BOX Irdeto CA Satellite Receiver SMP-6200 USER S MANUAL
 DIGITAL SET-TOP-BOX Irdeto CA Satellite Receiver SMP-6200 USER S MANUAL Table of Contents 1. PRE-INSTALLATION CHECKUP 3 2. SAFETY WARNINGS 4 3. CONNECTIONS 6 4. REMOTE CONTROL 8 4.1 Remote Control Unit
PR-D9W. GB Version 1
 PR-D9W Version 1 Table of contents Important safety instructions... 2-3 Introduction... 4 Controls... 5-8 Using your weather alert radio for the first time... 9 Operating your radio Search tuning AM/FM...