Model: PRT-EModel: Slimline-E1
|
|
|
- Bernice Cameron
- 7 years ago
- Views:
Transcription


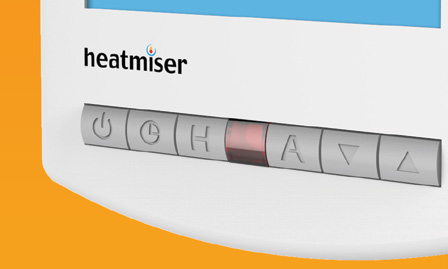
1 Model: PRT-EModel: Slimline-E1


2 Model: Slimline-E 1 Slimline Series
3 Table of Contents Product Image Table of Contents What is a Programmable Room Thermostat? Installation Procedure LCD LCD Display Display Setting the Clock Setting the Clock Temperature Display Temperature Display Setting the Comfort Levels Setting the Comfort Levels Locking the Thermostat Locking the Thermostat Temperature Control Setting the Temperature Temperature Hold Holiday Temperature Mode Hold Frost Holiday Protection Programming Heating Frost Protection On/Off Optional Power On Features / Off Explained Error Optional Codes Features Re-calibrating the Thermostat Factory Reset Wiring Wiring Diagram Diagrams Model: Slimline-E 2
4 What is a Programmable Room Thermostat? A programmable room thermostat is both a programmer and a room thermostat. A programmer allows you to set On and Off periods to suit your own lifestyle. A room thermostat works by sensing the air temperature, switching on the heating when the air temperature falls below the thermostat setting, and switching it off once this set temperature has been reached. So a programmable room thermostat lets you choose what times you want the heating to be on, and what temperature it should reach while it is on. It will allow you to select different temperatures in your home at different times of the day (and days of the week) to meet your particular needs and preferences. Setting a programmable room thermostat to a higher temperature will not make the room heat up any faster. How quickly the room heats up depends on the design and size of the floor heating system. Similarly reducing the temperature setting does not affect how quickly the room cools down. Setting a programmable room thermostat to a lower temperature will result in the room being controlled at a lower temperature, and saves energy. 3 Slimline Series
5 The way to set and use your programmable room thermostat is to find the lowest temperature settings that you are comfortable with at the different times you have chosen, and then leave it alone to do its job. The best way to do this is to set the room thermostat to a low temperature say 18 C, and then turn it up by 1 C each day until you are comfortable with the temperature. You won t have to adjust the thermostat further. Any adjustment above this setting will waste energy and cost you more money. You are able to temporarily adjust the heating program by overriding or using the temperature hold feature. These features are explained further on pages 14 and 15 of this manual. Programmable room thermostats need a free flow of air to sense the temperature, so they must not be covered by curtains or blocked by furniture. Nearby electric fires, televisions, wall or table lamps may also prevent the thermostat from working properly. Model: Slimline-E 4
6 Installation Procedure Do Mount the thermostat at eye level. Read the instructions fully so you get the best from our product. Don t Do not install near to a direct heat source as this will affect functionality. Do not push hard on the LCD screen as this may cause irreparable damage. This Slimline Series thermostat is designed to be flush mounted and requires a back box of 35mm (minimum depth) to be sunk into the wall prior to installation. Step 1 Carefully separate the front half of the thermostat from the back plate by placing a small flat head terminal driver into the slots on the bottom face of the thermostat. Step 2 Place the thermostat front somewhere safe. Terminate the thermostat as shown in the diagram on page 26 of this booklet. Step 3 Screw the thermostat back plate securely into the back box. Step 4 Clip the front of the thermostat back onto the thermostat back plate. 5 Slimline Series


7 Model: Slimline-E 6
8 Slimline Series
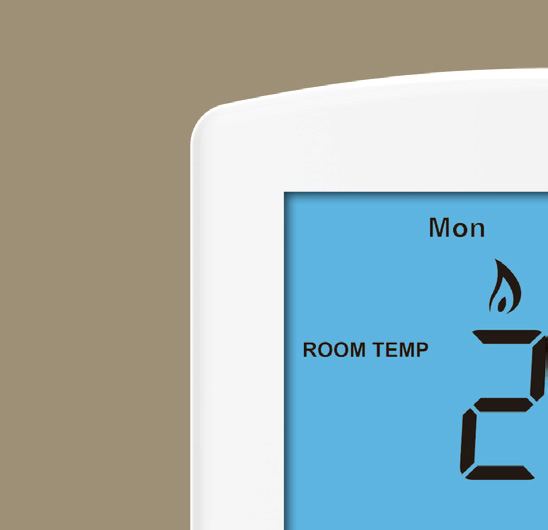
9 LCD Display 1. Room/Floor Temp - Indicates the current temperature sensor mode. 2. Day Indicator - Displays the current day. 3. Frost Icon - Displayed when the thermostat is in frost protection mode. 4. Flame Icon - Displayed when the thermostat is calling for heat, the flame icon will flash when the optimum start function is in operation. 5. Floor Temp Limit Icon - Displayed when the floor sensor probe has reached the temperature limit set on feature Temperature Hold - When a Temp Hold is active, HOLD FOR and the remaining time period is displayed. 7. Set - Indicates when changes are being made to programs or temperature set points. 8. Holiday Indicator - Displayed when the thermostat is in holiday mode. 9. Current Temp - Indicates the current sensor temperature. 10. Program Cycle Indicator - Displayed during programming only to show which period is being altered. 11. Keypad Lock Indicator - Displayed when the keypad is locked. 12. Units of Temperature - Degrees Celsius or Fahrenheit. 13. Clock - Digital clock display in 24h format. Model: Slimline-E 8

10 Setting the Clock To set the clock, follow these steps. With the thermostat turned ON, press the Clock key twice... Use the Up/Down keys to set the hours... Press H to confirm settings... Use the Up/Down keys to set the minutes... Press H to confirm settings... Use the Up/Down keys to set the day of the week... Press A to confirm settings and return to main display... Day Hours Minutes 9 Slimline Series

11 Temperature Display This thermostat can be setup to use an air sensor, floor sensor or both. The display will clearly show which sensor is being controlled by showing either: Room Temperature Floor Temperature Note: Built in air sensor only MUST NOT be used to control electric underfloor heating. Floor sensor only or built in air & floor sensor together must be used. When the thermostat is set to use both sensors, the room temperature will be displayed. To view the floor temperature, press and hold the key until the Floor Temp is displayed on screen. Model: Slimline-E 10

12 Setting the Comfort Levels The thermostat offers the following program mode options; Non-Programmable Basic up/down override temperature control. 5/2 Day Programming 4 levels for the weekdays and 4 different levels for the weekend. 7 Day Programming 4 levels for each day. Consult the Optional Features section to select the required mode. To program comfort levels, press Clock once... For Weekday/Weekend programming, Mon Tue Wed Thu Fri are displayed on screen. For 7 Day programming, only Mon is displayed in the day indicator field. 11 Slimline Series
13 Setting the Comfort Levels Continued Use the Up/Down keys to enter the required WAKE time... Press H to confirm settings... Use the Up/Down keys to enter the required WAKE temperature... Press H to confirm settings... You will now see LEAVE displayed on screen. Repeat the programming steps for each period until complete. For unused periods enter and the thermostat will ignore the setting. Press A to confirm settings and return to main display... Note: In 7 Day programming mode you can repeat for each day independently. In Weekday/Weekend programming mode you will see Sat Sun displayed on screen and can repeat for the weekdays. To change the programming mode please refer to pages Model: Slimline-E 12

14 Locking the Thermostat The thermostat has a keypad lock facility. To activate the lock follow these steps. Press and hold the A and Down keys together for 10 seconds... You will see the lock symbol appear on screen... To unlock, repeat the steps above until the lock symbol disappears. Note: The keypad lock indicator is only displayed when the lock is active. Keypad Lock Indicator 13 Slimline Series
15 Temperature Control The Up/Down keys allow you to adjust the set temperature... When you press either key, you will see the word SET and the desired temperature will be displayed on screen. Use the Up/Down keys to adjust the SET value... Press A to confirm settings and return to main display... Note: In programmable mode, this new temperature is maintained only until the next programmed comfort level. In non-programmable mode, this temperature will be constantly maintained. Set Temperature Set Icon Model: Slimline-E 14
16 Temperature Hold The temperature hold function allows you to manually override the current operating program and set a different temperature for a desired period. Press H to commence temperature hold... Use the Up/Down keys to enter the required Hold time... Press H to confirm settings... Use the Up/Down keys to enter the required Hold temperature... Press A to confirm settings and return to main display... You will see the HOLD FOR indication is displayed on screen. The time will countdown the set duration and then revert to the normal program. Hold ON Indicator Hold Time Remaining To cancel temperature hold, follow the same steps but reduce the hold time to 00: Slimline Series

17 Holiday Mode The holiday function reduces the set temperature in your home to the frost protection temperature setting (see page 22). The thermostat will maintain this temperature for the duration of the holiday and will then automatically return to the program mode on your return. Press H three times (until you see the suitcase on screen)... Use the Up/Down keys to enter the number of days holiday... Press A to confirm settings and return to main display... The display will show a suitcase indicating the thermostat is in holiday mode. Note: A holiday period does not start until 00:00 the next day. For example, if you set a holiday period on Friday for 2 days, Saturday will be counted as the first day and the thermostat will revert back to the programmed schedule at 00:00 on Monday. Holiday Days Holiday ON Indicator To cancel, follow the same steps but reduce the Holiday duration to 00 days. Model: Slimline-E 16
18 Pressing the Frost Protection button once will place the thermostat in frost protect mode. In this mode, the thermostat will display the frost icon and will only turn the heating on should the room temperature drop below the set frost temperature (see page 19). Should the heating be turned on whilst in frost protect mode, the flame icon will be displayed. To cancel the frost protect mode, press the button once again. Frost Protect Mode Enabled 17 Slimline Series


19 Heating On/Off The heating is indicated ON when the flame icon is displayed. When the flame icon is absent, there is no requirement for heating to achieve the set temperature but the thermostat remains active. To turn the thermostat OFF completely, press and hold the Power button... The display and heating output will be turned OFF completely.* To turn the thermostat back ON, press the Power button once again... Thermostat completely OFF Thermostat powered ON *See Feature 3 on page 19 Model: Slimline-E 18
20 Optional Features Explained THE FOLLOWING SETTINGS ARE OPTIONAL AND IN MOST CASES NEED NOT BE ADJUSTED Feature 01 Temperature Format: This function allows you to select between C and F Feature 02 Switching Differential: This function allows you to increase the switching differential of the thermostat. The default is 1 C which means that with a set temperature of 20 C, the thermostat will switch the heating on at 19 C and off at 20 C. With a 2 C differential, the heating will switch on at 18 C and off at 20 C. Feature 03 Frost Protect: You can set whether the thermostat will maintain the frost temperature when the thermostat display is turned off. As a default, this is enabled. Feature 04 Frost Protect Temperature: This is the temperature maintained when the thermostat is in frost protect mode. The range is C. The default is 12 C and is suitable for most applications. Feature 05 Output Delay: To prevent rapid switching, an output delay can be entered. This can be set from minutes. The default is 00 which means there is no delay. Feature 06 Communication Address: Not in use on this model. Feature 07 Temperature Up/Down Limit: This function allows you to limit the use of the Up and Down keys. This limit is also applicable when the thermostat is locked and so allows you to give others limited control over the heating system. 19 Slimline Series
21 Feature 08 Sensor Selection: On this thermostat, you can select which sensor should be used. You can select between air temperature only, floor temperature, or both. When you enable both sensors, the floor sensor is used as a floor limiting sensor and is designed to prevent the floor from overheating. Note: Built in air sensor only MUST NOT be used to control electric underfloor heating. Floor sensor only or built in air & floor sensor together must be used. Feature 09 Floor Temp Limit: When the Floor Sensor has been enabled in feature 08, you can set a floor limiting temperature between C, this protects the floor from overheating. (27 C is the default). Feature 10 Optimum Start: Optimum start will delay the start up of the heating system to the latest possible moment to avoid unnecessary heating and ensure the building is warm at the programmed time. The thermostat uses the rate of change information to calculate how long the heating needs to raise the building temperature 1 C (with a rate of change of 20, the thermostat has calculated the heating needs 20 minutes to raise the building temperature 1 C) and starts the heating accordingly. On this thermostat, optimum start works on the Wake and Return comfort levels. Feature 11 Rate of Change: Number of minutes to raise the temperature by 1 C. Feature 12 Programming Mode: The following program modes are available; Non-Programmable Basic up/down override temperature control. 5/2 Day Programming 4 levels for the weekdays and 4 different levels for the weekend. 7 Day Programming 4 levels for each day. Model: Slimline-E 20
22 Adjusting the Optional Settings To adjust the optional settings, follow these steps. Press and hold the Power button to turn the thermostat OFF... Press and hold the Clock key until the display appears as shown below... Setting Value Feature Number Use the Clock key to cycle through the features... Use the Up/Down keys to change the setting... Press A to confirm settings... Press the Power button once again to turn the thermostat back ON Slimline Series
23 Optional Settings - Feature Table FEATURE DESCRIPTION Temperature Format Switching Differential Frost Mode Frost Protection Temperature Output Delay Communications ID No. Up/Down Temperature Limit Sensor Selection Floor Temperature Limit Optimum Start Rate of Change Program Mode SETTING 00 = C, 01 = F ( C = Default) C (01 C = Default) 00 = Enabled, 01 = Disabled (00 = Default) C (12 C = Default) Minutes (00 = Default) Not in use on this model C (00 = Default) 00 = Built in Air Sensor 01 = Remote Air Sensor 02 = Floor Sensor Only 03 = Built In & Floor Sensor 04 = Remote Air & Floor Sensor C (27 C = Default) Hours (00 = Default) Minutes to raise by 1 C 00 = Non-Programmable 01 = 5/2 Day Programming 02 = 7 Day Programming Model: Slimline-E 22
24 Error Codes E0 = The internal sensor has developed a fault. You should contact your thermostat retailer for assistance. E1 = The remote floor probe has not been connected, has been wired incorrectly or the probe is faulty. E2 = The remote air probe has not been connected, has been wired incorrectly or the probe is faulty. Error Number 23 Slimline Series
25 Re-calibrating the Thermostat If you need to re-calibrate the thermostat, follow these steps. Press and hold the Power button to turn the thermostat OFF... Press and hold BOTH the Power and Down keys together until the temperature appears on the screen... Use the Up/Down keys to configure the new temperature... Press A to confirm settings... Press the Power button once to turn the thermostat back ON... Calibration Temperature Setting Set Icon Model: Slimline-E 24

26 Factory Reset The thermostat has a reset function to restore all settings to their factory defaults. To perform a factory reset, follow these steps. Press and hold the Power button to turn the thermostat OFF... Press and hold the Power and Up keys together until the LCD powers up. All of the icons will be displayed on screen... When the icons have disappeared from the screen, the thermostat has been successfully reset. Press the Power button once to turn the thermostat back ON... All icons displayed simultaneously. Factory reset is complete. 25 Slimline Series
27 Wiring Diagram - Slimline-E Slimline-E MAINS SUPPLY Floor Sensor Remote Air Sensor 230VAC L RCD N RT1 - RT2 N N LOAD L FLOOR PROBE MATTING OR WIRE REMOTE AIR PROBE (Optional) Model: Slimline-E 26


28 Want More Information? Call our support team on: +44 (0) PDF FAQ Video Facebook: facebook.com/thermostats 23 Time Clock Series Rev 2.0
Operating Instructions DT, PRT, PRT/HW PRT-R, PRT-R2
 Operating Instructions DT, PRT, PRT/HW PRT-R, PRT-R2 Heatmiser UK td Tel: +44(0)1254 776343 Primrose House www.heatmiser.co.uk Primrose Street Darwen ancashire BB3 2DE Contents Contents 1 Installation
Drayton Digistat +2RF
 Drayton Digistat +2RF T Programmable Room Thermostat Wireless 24 Hour Model: RF700/22090 Power Supply: Battery - Thermostat Mains - Digistat SCR Invensys Controls Europe Customer Service Tel: 0845 130
Wireless 7 Day Programmable Room Thermostat
 Wireless 7 Day Programmable Room Thermostat Cat. No. TRT037 Transmitter Receiver Operating & Installation Instructions What is a programmable room thermostat? an explanation for householders A programmable
AN500T, AN1000, AN1000T, AN1500, AN1500T AN2000, AN2000T
 Product Instruction Manual Accona AN500T, AN1000, AN1000T, AN1500, AN1500T AN2000, AN2000T Panel heater v16.5/5 Version 3.2 Jan 2015 Contents 1. Important safety points 2. Installation 2.1. Wall mounting
User Manual THR840DUK Digital Thermostat
 User Manual THR840DUK Digital Thermostat 50051982-001 Rev. A WARNING: This product must be correctly installed and configured to work properly (see pages 12-24). If you are not experienced in wiring electrical
EK908FHL - Thermostat for floor heating
 EK908FHL - Thermostat for floor heating EK908FHL is a programmable thermostat designed for floor warming application or helping to limit floor temperature. This thermostat can be used for hot water radiant
Table of Contents. Introduction. Radio Frequency Control. Initial setup Setting the time. Setting the temperature
 LHZ USER GUIDE LHZ User Guide LHZ would like to thank you for purchasing your LHZ radiator. You have purchased a high quality, German designed and manufactured heating device, which will give you soft
CM921 - User Guide. Description. Features. 1 day Wireless Programmable Room Thermostat with LoT technology WHAT IS A PROGRAMMABLE ROOM THERMOSTAT?
 WHAT IS A PROGRAMMABLE ROOM THERMOSTAT?...an explanation for householders A programmable room thermostat is both a programmer and a room thermostat. A programmer allows you to set On and Off time periods
Drayton Digistat +2RF/+3RF
 /+3RF Programmable Room Thermostat Wireless Model: RF700/22090 Model: RF701/22092 Power Supply: Battery - Thermostat Mains - Digistat SCR Invensys Controls Europe Customer Service Tel: 0845 130 5522 Customer
Programmable Room Thermostat 7 Day (5-2 Day) Models: 22083 / 22087 Power Supply: Battery / Mains
 Models: 22083 / 22087 Power Supply: Battery / Mains") Drayton Programmable Room Thermostat 7 Day (5-2 Day) Models: 22083 / 22087 Power Supply: Battery / Mains Invensys Controls Europe Technical Helpline: +44 (0) 845 130 7722 www.draytoncontrols.co.uk Installation
Drayton Programmable Room Thermostat 7 Day (5-2 Day) Models: 22083 / 22087 Power Supply: Battery / Mains Invensys Controls Europe Technical Helpline: +44 (0) 845 130 7722 www.draytoncontrols.co.uk Installation
TP5000 Si Range Electronic 5/2 day programmable room thermostat Mains, Battery and RF versions Installation and User Instructions
 TP5000 Si Range Electronic 5/2 day programmable room thermostat Mains, Battery and RF versions Certification Mark GB Installation and GB Index Index Installation Instructions 3-14 Product Specification
TABLE 1: Wiring Terminals. Connect to... 1C 1H 2C 2H 1H1C 2H1C 2H2C 3H2C
 Installation TURN OFF POWER TO THE SYSTEM AT THE MAIN POWER PANEL TO AVOID ELECTRICAL SHOCK. Installation should be carried out by an electrician or a qualified technician. 1.1 Find a Location for the
TRANSMITTER RECEIVER THESE INSTRUCTIONS APPLY IN THE UK ONLY THESE INSTRUCTIONS ARE TO BE LEFT WITH THE USER OR AT THE APPLIANCE. Digistat Optimiser
 FITTING AND OPERATING INSTRUCTIONS FOR DIGISTAT OPTIMISER PROGRAMMABLE 7 DAY ROOM THERMOSTAT SYSTEM General information is given in the users instruction leaflet despatched with the appliance and/or on
Operation Guide 3M-22
 Operation Guide 3M-22 TEMP UP Target Temp Time Reset TEMP DOWN Control Panel Heat/Cool Mode Switch Fan Switch Battery Compartment Statement of use: The 3M-22 can be used with - millivolt, 24VAC single
CM927 - User Guide. Description. Features. 7 day Wireless Programmable Room Thermostat with LoT Technology WHAT IS A PROGRAMMABLE ROOM THERMOSTAT?
 WHAT IS A PROGRAMMABLE ROOM THERMOSTAT?...an explanation for householders A programmable room thermostat is both a programmer and a room thermostat. A programmer allows you to set On and Off time periods
Wireless Thermostats 230v and Battery Operated Instruction Manual
 Wireless Thermostats 230v and Battery Operated Instruction Manual For models: JGSTATW2W JGSTATW2B JGSTATW1W JGSTATW1B Contents Box contents: Wireless Thermostats 230v and Battery Operated Instruction Manual
MAKING MODERN LIVING POSSIBLE. Electronic 7 Day Programmable Room Thermostat TP7000 Range. User Guide. Danfoss Heating
 MAKNG MOERN LVNG POSSBLE Electronic 7 ay Programmable Room Thermostat TP7000 Range anfoss Heating User Guide or a large print version of these instructions please call Marketing on 0845 121 7400. Certification
Article: 08090705 Version: 01.02. www.devi.com
 Article: 08090705 Version: 01.02 www.devi.com GB User s Guide - devireg 550 Thermostat User s Guide - devireg 550 Thermostat About the thermostat Pages 2-5 Configurations Pages 6-9 Set weekday and clock
Owner s Guide Guide du propriétaire Guía para el usuario TH115-AF-GB-10. Programmable thermostat Thermostat programmable Termostato programable
 Owner s Guide Guide du propriétaire Guía para el usuario TH115-AF-GB-10 Programmable thermostat Thermostat programmable Termostato programable Read and save these instructions. Veuillez lire le mode d
Sensi TM. Wi-Fi Programmable Thermostat MANUAL OPERATION. Version: March 2016 2016 Emerson Electric Co. All rights reserved.
 Sensi TM Wi-Fi Programmable Thermostat MANUAL OPERATION Version: March 2016 2016 Emerson Electric Co. All rights reserved. Contents MANUAL OPERATION GUIDE Buttons and Icons 3 Basic Functionality 4 Manual
Mode Switch. Fan Switch Menu button Program button
 Operation 3M-30 Day Time of day Target Temperature Time Slot Touch Screen Current Room Temperature Thermostat Mode Statement of use: The 3M-30 can be used with millivolt, 24VAC, single and 2 stage conventional
HEAT PUMP PROGRAMMABLE THERMOSTAT
 HEAT PUMP PROGRAMMABLE THERMOSTAT SA PM 3 COOL TEMP Form 44014-01 r010408 Model 43168 Owners Manual 1 Congratulations! Heat Pump Programmable Thermostat Model 43168 THERMOSTAT CONTROLS Switches & Buttons...15
STERILIZERS, LABORATORY DRYING OVENS
 TS9026 TS9053 TS9135 TS9430 TS 9000 SERIES: STERILIZERS, LABORATORY DRYING OVENS Series TS9000 consists of four different cabinets available in sizes from 26 litres to 430 litres. Interior housing and
MAKING MODERN LIVING POSSIBLE. living connect. Installation and User Guide. Danfoss Heating Solutions
 MAKING MODERN LIVING POSSIBLE living connect Installation and User Guide Danfoss Heating Solutions 2 living connect Thank you for buying a Danfoss product Danfoss Heating Solutions 3 Contents 1. System
DUAL SENSING DIGITAL THERMOSTAT PRODUCT INSTRUCTIONS. Construction Automotive Industry
 DUAL SENSING DIGITAL THERMOSTAT PRODUCT INSTRUCTIONS www.rehau.com Construction Automotive Industry SCOPE This guide gives instruction regarding REHAU Programmable Digital Thermostat installation and operation.
Alpha Climatic Programmable Modulating Boiler Energy Manager. Installation and User Instructions
 Alpha Climatic Programmable Modulating Boiler Energy Manager Part No 3.022144 (Hard Wired) Part No 3.022143 (Radio Frequency) Installation and User Instructions 1. Description The Alpha Climatic energy
Chapter 2 System Basics
 Chapter 2 System Basics The Evolution DX2 Controller contains a comprehensive feature set to support virtually any conceivable irrigation system/configuration. In addition to the more traditional irrigation
Installation Guide. VisionPRO. TH8000 Series. Need Help? This manual covers the following models. System Types
 Installation Guide VisionPRO TH8000 Series Touch-screen Programmable Thermostat This manual covers the following models TH8110U: For 1 Heat/1 Cool systems TH8320U: For up to 3 Heat/2 Cool systems TH8321U:
Installation Instructions
 TP-PRH-A, TP-NRH-A Performance Series Edge Thermidistat Control Installation Instructions Programmable Control A07049 A07048 Non Programmable Control Designed and Assembled in the USA. NOTE: Read the entire
Sensi TM. Wi-Fi Programmable Thermostat SCHEDULING GUIDE. Version: March 2016 2016 Emerson Electric Co. All rights reserved.
 Sensi TM Wi-Fi Programmable Thermostat SCHEDULING GUIDE Version: March 2016 2016 Emerson Electric Co. All rights reserved. Contents SCHEDULING GUIDE Accessing Schedules 3 Creating, Editing and Deleting
Blue Easy Reader Thermostat 1F95EZ-0671. Homeowner s Guide
 Blue Easy Reader Thermostat 1F95EZ-0671 Homeowner s Guide Message to Homeowners Congratulations on choosing the Emerson Blue Easy Reader Thermostat. Blue Easy Reader is designed to be the easiest thermostat
Owner s Manual. Walk-in Monitoring System 100. Cooler is Better! TM. Used in UL Listed Door Panel Assemblies
 REV. G Cooler is Better! TM Owner s Manual Walk-in Monitoring System 100 Used in UL Listed Door Panel Assemblies American Panel Corporation 5800 S.E. 78th Street, Ocala, Florida 34472-3412 Phone: (352)
DC1100 & 1400 Energy Controllers. Satchwell DC1100 & DC1400 for energy-efficient temperature control in smaller buildings.
 1100 & 1400 Energy Controllers Satchwell 1100 & 1400 for energy-efficient temperature control in smaller buildings. 02 1100 & 1400 Energy Controllers Features he 1100 and 1400 Energy Controllers are self-configuring
Programmable Thermostat MODEL 3312026.XXX With Dehumidify 3312024.XXX With Out Dehumidify
 Comfort Control Center 2 Thermostat Operating Instructions Programmable Thermostat MODEL 3312026.XXX With Dehumidify 3312024.XXX With Out Dehumidify TABLE OF CONTENTS About your new thermostat Features...2
COMPUTHERM Q7 Programmable, digital room thermostat. Operating Instructions
 COMPUTHERM Q7 Programmable, digital room thermostat Operating Instructions GENERAL DESCRIPTION OF THE THERMOSTAT The COMPUTHERM Q7 type switched-mode room thermostat is suitable to regulate the overwhelming
its ELECTRIC POSITION for electric heat, or set the units fan control appropriately to ELECTRIC or another appropriate setting.
 Troubleshooting Poor Temperature Regulation This page lists problems that may affect the temperature performance of your LUX thermostat with suggested resolutions. For more detailed information please
GB/DAS User Instruction
 GB/DAS User Instruction devireg 540/550 Table of contents Introduction 3 Introducing devireg 540/550 4 How to use your deviheat heating system 6 Daily operation 7 Setting the clock & day 10 Timer programming
RDJ10RF/SET. Wireless room temperature controller with 24-hour time switch and LCD. Programmable, for heating systems
 3 072 RDJ10RF RCR10/433 Wireless room temperature controller with 24-hour time switch and LCD Programmable, for heating systems RDJ10RF/SET Operating modes: Automatic, Comfort, Energy Saving, and Frost
ES-LCD User Control SD Card Location
 SD Card Location Addendum to Leaflet Number 671415 The EMC Directive 2004/108/EC The Low Voltage directive 2006/95/EC Checking SD Card for secure location Due to the possibility of movement during transit,
ecomax Instructions for use Wall hung room sealed fan assisted condensing boilers For the user
 For the user Instructions for use ecomax Wall hung room sealed fan assisted condensing boilers ecomax 63/ E ecomax 68/ E ecomax 6/ E ecomax 635 E ecomax 84/ E ecomax 88/ E ecomax 835 E GB Table of contents
RF 1. Contents: Connecting diagram. Detailed information:
 Contents: Introduction UFH-ZONE-R UFH-EXTRAZONE -R Connection of a thermostat (UFH-THERM-R) o Joining of a thermostat with UFH-ZONE-R or UFH-EXTRAZONE-R Connection of a digital thermostat (UFH-THERM -RD)
NOTE: Append this Operation IB to the Install IB to make one IB-booklet. Need a divider tab between the 2 sections. Blank page remove.
 Product Name: CT101 Document Title: CT101 Operation Guide Document Type Code: IBOE Part Number: 1202-004-002 20apr12 Iris inclusion text added mtf 9apr12 bs edits mtf 14mar12 ch edits mtf 13mar12 initial
USER MANUAL WARNING! CONTENTS MODEL 1 SPECIFICATIONS READ ALL INSTRUCTIONS BEFORE PROCEEDING. Non-Programmable Single Stage Heat/Cool Thermostat
 Builder MODEL 1010 Series Non-Programmable Single Stage Heat/Cool Thermostat USER MANUAL Compatible with low voltage single stage gas, oil or electric heating or cooling systems, including single stage
THERMONET UNDERFLOOR HEATING STANDARD THERMOSTAT KIT STOCK CODE 5260
 THERMONET UNDERFLOOR HEATING STANDARD THERMOSTAT KIT STOCK CODE 5260 STANDARD THERMOSTAT KIT 1.0 KIT CONTENTS Parts included: 1 x Thermostat 1 x Wall plate 2 x Mounting box screws 1 x Floor temperature
ELECTRIC POSITION for electric heat, then confirm with Fan Test below.
 Troubleshooting Poor Temperature Regulation This page lists problems that may affect the temperature performance of your LUX thermostat with suggested resolutions. For more detailed information please
PSPA711a. LUXPRO PSPA711a INSTALLATION AND OPERATING INSTRUCTIONS. Mt. Laurel, New Jersey 08054, USA www.luxproproducts.com
 PSPA711a LUXPRO PSPA711a INSTALLATION AND OPERATING INSTRUCTIONS 52070 1 COMPATIBILITY...................................... 2 2 FEATURES............................................ 2 3 ELECTRICAL RATINGS................................
Thermostat with display
 H/LN4691-0 674 59-64170 Thermostat with display RA00118AA_I-01PC-13W39 www.homesystems-legrandgroup.com Thermostat with display Contents Thermostat with display 1 Introduction 4 1.1 Warnings and recommendations
Instruction manual for models:
 Instruction manual for models: Prisma+ Prisma+ ivista Cast Aluminium Electric Radiators High Performance with Intelligent Technology INCORPORATiNG HiGH-PRECiSiON ELECTRONiC CONTROL WiTH THE LATEST ENERGY
1 For All Non-Programmable Digital Thermostat
 OWNER'S MANUAL P/N P474-0100 1 For All Non-Programmable Digital Thermostat TOTALINE 68 Dual Setpoint Very easy to program Thermoglow Backlight No batteries required Auto-Changeover Locking Keypad Meets
Fused Spur Time Switch
 Fused Spur Time Switch Model No. FST24 24 Hour Timer Model No. FST77 7 Day Timer Installation & Operating Instructions 1. General Information Illuminated screen Sets programmes Sets time and date Reset
EBDSPIR-PRM, EBDSPIR-PRM-IP
 Product Guide EBDSPIR-PRM, EBDSPIR-PRM-IP Ceiling PIR presence/absence detector Overview The EBDSPIR-PRM PIR (passive infrared) presence detector provides automatic control of lighting loads with optional
Rain+Birdt. Simple To Set Timer (SST) Setup & Operation Instructions. English. 1-800- RAIN BIRD (800-724-6247) or visit www.rainbird.
 Setup & Operation Instructions. English. 1-800- RAIN BIRD (800-724-6247) or visit www.rainbird.") Rain+Birdt Simple To Set r (SST) Setup & Operation Instructions English Installation...2 Tools and Supplies Needed...2 Step 1. Mount r...2 Step 2. Connect Power...2 Indoor r...2 Outdoor r...2 Step 3. Connect
Rain+Birdt Simple To Set r (SST) Setup & Operation Instructions English Installation...2 Tools and Supplies Needed...2 Step 1. Mount r...2 Step 2. Connect Power...2 Indoor r...2 Outdoor r...2 Step 3. Connect
Contact Details. Please note that some of the contact details on this PDF document may not be current.
 Contact Details Please note that some of the contact details on this PDF document may not be current. Please use the following details if you need to contact us: Telephone: 0844 879 3588 Email: customer.services@gdcgroup.co.uk
PROGRAMMING & OPERATING INSTRUCTIONS CL5000 AUDIT TRAIL
 PROGRAMMING & OPERATING INSTRUCTIONS CL5000 AUDIT TRAIL 1 CODES AND OPERATION CODES The factory set Master Code is #1234. This should be changed immediately after installation (see Program 10). The Master
MAKING MODERN LIVING POSSIBLE. living connect. Installation and User Guide. Danfoss heating
 MAKING MORN LIVING POSSIBLE Danfoss heating living connect Installation and User Guide Contents 1.0 System overview... 3 2.0 Overview of display and control buttons... 3 3.0 Installation - step by step...
Chronotherm III for Comfort and Convenience
 Chronotherm III for Comfort and Convenience OWNER'S GUIDE Congratulations! You made a smart choice when you purchased your new Honeywell Communicating Chronotherm III Thermostat. It s the smart thermostat
ACONT900AC43UA Communicating, Programmable Comfort Control
 ACONT900AC43UA Communicating, Programmable Comfort Control OWNER S GUIDE Pub No. 69-1820-04 TABLE OF CONTENTS Page Contents 3 Features 4 Home Screen 6 Programming Your Heating and Cooling Schedule 14 Operating
Owner s Manual RBC-AMS41E. Remote controller with weekly timer. Owner s Manual
 Owner s Manual Remote controller with weekly timer RBC-AMS41E Owner s Manual Remote controller Mode d emploi Télécommande Bedienungsanleitung Fernbedienung Manuale di istruzioni Telecomando Manual del
QUICK REFERENCE. Wired remote controller BRC2E52C7 BRC3E52C7
 QUICK REFERENCE BRCEC BRCEC BRCEC BRCEC Table of contents Page Operation General safety precautions Features and functions Name and function of switches Name and function of icons Description of the operation
GeyserWise TSE. thermostat instruction manual. SANS 181 compliant
 GeyserWise TSE thermostat instruction manual SANS 181 compliant Before operating and installation, carefully read all instructions. Do not discard this manual. Index Warranty Components About the GeyserWise
SET1E. Installation & User Instructions. Electronic timeswitch for heating & hot water. Certification Mark
 SET1E Electronic timeswitch for heating & hot water Installation & User Instructions Certification Mark Index INDEX Installation Product specification 3 Installation 4-5 Wiring 5-10 Replacement 11-13 User
Table of Contents. 1 - Specifications...3. 2 - Installation...3. 3 - Wiring...5. 4 - User controls...7
 THERMOSTATS Table of Contents Page 1 - Specifications...3 1.1 - Product range...3 ARTTH001 (DSL-610)...3 ARTTH002 (DSL-700)...3 ARTTH003 (DSL-600)...3 1.2 - Technical data...3 1.3 - Power failures...3
AIR CONDITIONER WALL CONTROLLER
 AIR CDITIER WALL CTROLLER Operating Instructions Controller Model Numbers LM7 LM7-D LM4 Please Read This Manual Congratulations on your purchase of an ActronAir air conditioning system. This unit has been
TC --- PHP, TC --- PAC Comfort Series Programmable Thermostat. Owner s Manual
 TC --- PHP, TC --- PAC Comfort Series Programmable Thermostat Owner s Manual YOU WILL LOVE THIS THERMOSTAT. You have the Comfortt Programmable thermostat. This unique device s state -of -the -art technology
SCORPION. micron security products
 SCORPION 4120 6020 & 8020 USER INSTRUCTIONS Thank you for purchasing a Quality Micron Security Alarm Controller. Micron product is manufactured to exacting quality standards. We understand the importance
Installation & User Instructions
 103 electro-mechanical 24 hour timeswitch for controlling hot water and heating Installation & User Instructions including Factory Replacement Units (FRU) Certification Mark This product complies with
User Manual. Humidity-Temperature Chart Recorder. Model RH520
 User Manual Humidity-Temperature Chart Recorder Model RH520 Introduction Congratulations on your purchase of the Extech RH520 Temperature + Humidity Chart Recorder. The RH520 measures and displays Temperature,
HEAT HEAT COOL HEAT PUMP COOL
 OWNER S MANUAL RESIDENTIAL THERMOSTAT P/N P374-1800 HEAT COOL HEAT PUMP Su AUTO 0I20: Pm 74 COOL HEAT 27 7-DAY MABLE DIGITAL THERMOSTAT 3 Configurable Outputs Accepts Optional Humidity Module: Control
Operation 8022C. Customer Support: 888-515-2585 or Visit our webiste www.ritetemp-thermostats.com Made In China 401-006 OFF FAN HEAT COOL AUTO ON
 Operation 8022C HEAT O AN HEAT COOL AUTO ON HEAT O AN HEAT COOL AUTO ON Customer Support: 888-515-2585 or Visit our webiste www.ritetemp-thermostats.com Made In China 401-006 Operation 8022C TEMP UP Time/
RADIO CONTROLLED DIGITAL CLOCK MODELS 88905 / 88906
 RADIO CONTROLLED DIGITAL CLOCK MODELS 88905 / 88906 QUICK SETUP GUIDE IMPORTANT! INSTALL BATTERIES IN THE OUTDOOR TRANSMITTER BEFORE INSTALLING BATTERIES IN THE RADIO-CONTROLLED CLOCK. ALKALINE BATTERIES
your comfort. our world. User Guide Altherma HT For your new Daikin Altherma high temperature heat pump
 your comfort. our world. User Guide Altherma HT For your new Daikin Altherma high temperature heat pump Your new Daikin Altherma heat pump In this manual you will find information and guidelines that
Digital Radio/DAB+/FM RDS digital clock radio with dual alarm Operating instruction
 381SE1D-A Digital Radio/DAB+/FM RDS digital clock radio with dual alarm Operating instruction GB Contents Controls... 2-3 Using the clock radio for the first time... 4 Operating your clock radio... 5 Selecting
1-877-654-9394. UP400 Programmable Thermostat Installation Instructions & User Guide. For Installation Help. White-Rodgers.com
 UP400 Programmable Thermostat Installation Instructions & User Guide For Installation Help 1-877-654-9394 White-Rodgers.com 2011 Printed in China White-Rodgers 8100 West Florissant Avenue St. Louis, MO
Installation Instructions
 TP --- PAC, TP --- PHP TP --- NAC, TP --- NHP Performance Series AC / HP Thermostat Installation Instructions A07049 Programmable Control A07048 Non-Programmable Control Designed and Assembled in the U.S.A.
REMOTE CONTROL MANUAL
 REMOTE CONTROL MANUAL ENGLISH CONTENT PRECAUTIONS...1-2 USING THE REMOTE CONTROL UNIT...3 OPERATION...4-9 Thank you for purchasing our Room Air Conditioner. Before using your air-conditioner, please read
Operating instructions for built-in electronic timers with Day and Week programms. Series 884
 Operating instructions for built-in electronic timers with Day and Week programms Series 884 Attention: This operating manual is destined for our OEM customers and is intended as a basis for the instruction
Time Recorder. User Manual. PDF created with FinePrint pdffactory trial version www.pdffactory.com
 Time Recorder User Manual 1 (1) Specifications: 1. Power supply 100, 110, 200, 220, 230 V AC (as designated), 50/60 Hz, single phase. 2. Power consumption Normal 2W (MAX 30W) 3. Standard time signal Quartz
Master User Guide Premier Elite Series
 Master User Guide Premier Elite Series INS177-8 Overview Premier Elite Series Master User Guide Contents 1. Overview... 5 Introduction... 5 Keypads... 7 Emergency Keys... 8 The Quick Arm Keys... 9 Keypad
ODYSSEY. Security System Owner s Manual. Kit No. 08E51-SHJ-100 08E55-SHJ-100. 2004 American Honda Motor Co., Inc. - All Rights Reserved.
 Kit No. 08E5-SHJ-00 08E55-SHJ-00 Security System Owner s Manual ODYSSEY 004 American Honda Motor Co., Inc. - All Rights Reserved. Contents Introduction... 3 Emergency Disarming During the Panic Alarm Activation...
ENGLISH INSTRUCTION & INSTALLATION MANUAL DUCTLESS MINI SPLIT AIR CONDITIONING SYSTEMS
 ENGLISH INSTRUCTION & INSTALLATION MANUAL DUCTLESS MINI SPLIT AIR CONDITIONING SYSTEMS Céliera Corporation. All rights reserved. Unauthorized duplication, reproduction prohibited. CONTENTS SAFETY PRECAUTIONS...
Walk-in Monitoring System 200
 REV. 1/18/16 Cooler is Better! TM Walk-in Monitoring System 200 Used in UL Listed Door Panel Assemblies American Panel Corporation 5800 S.E. 78th Street, Ocala, Florida 34472-3412 Phone: (352) 245-7055
Operation manual. Daikin Altherma hybrid heat pump EHYHBH05AA EHYHBH08AA EHYHBX08AA. Operation manual Daikin Altherma hybrid heat pump.
 EHYHBH05AA EHYHBH08AA EHYHBX08AA English Table of contents Table of contents 1 About this document 2 2 About the system 2 2.1 Components in a typical system layout... 2 3 Operation 3 3.1 Overview: Operation...
FG MOISTURE MONITOR Installation & Operation Manual
 FG MOISTURE MONITOR Installation & Operation Manual Issue 3.0 7/20/10 1 Contents SERVICE AND TECHNICAL SUPPORT... 2 INSTALLATION:... 3 MOISTURE SENSOR INSTALLATION:... 3 SENSOR CONNECTOR:... 5 MONITOR
Aerona Air Source Heat Pumps
 ADDENDUM to INSTALLATION INSTRUCTIONS for Aerona Air Source Heat Pumps DOC.87-05/05 Rev.04 March 2013 ATTENTION INSTALLERS - UPDATED INFORMATION! Your Grant Aerona Air Source Heat Pump has a number of
evohome Wireless Radiator Zoning Kit Installation & User Guide
 evohome Wireless Radiator Zoning Kit Installation & User Guide Getting the most from your evohome system Installation & User Guide 1 Getting the most from your evohome system Thanks for choosing an evohome
PR-2500 Portable Receiver. Owner s Manual
 PR-2500 Portable Receiver Owner s Manual CONTENTS The PR-2500, battery charger, and belt clip. (figure 1) Figure 1 Warning This device complies with Part 15 of the FCC rules, operation of this device is
Video Baby Monitor System. User Guide
 Video Baby Monitor System User Guide What s inside Welcome!... 2 Getting started... 3 Tour of the system... 7 Everyday use...13 Cameras... 14 Motion/Alerts... 18 Recording... 21 Playing Back Pictures and
GAS FIREPLACE USER GUIDE ST900. NORTH AMERICA Ce manual est disponsible en Français. www.escea.net. 630169_3_Manual_User_ST900_US_R-emotion
 GAS FIREPLACE USER GUIDE ST900 NORTH AMERICA Ce manual est disponsible en Français sur demande www.escea.net 630169_3_Manual_User_ST900_US_R-emotion Any installation or service work carried out on this
Digital 2 Channel Time Clock EFFECTIVE: 1ST APRIL 2012. User Guide PB2CTC
 PB2ZCTC Digital 2 Channel Time Clock APRIL 2012 EFFECTIVE: 1ST APRIL 2012 User Guide PB2CTC April 2012 CONTENTS Overview...03 1 Battery access and user controls...04 1.1 Keyboard...04 1.2 Displays and
TC-9102 Series Surface Mount Temperature Controllers
 TC-9102 Series Surface Mount Temperature Controllers General Description & Applications The TC-9102 Series Temperature Controller offers a versatile solution for a wide variety of applications that may
AIR CONDITIONER REMOTE CONTROLLER ILLUSTRATION CS457-R14A 202055090318 20110215
 AIR CDITIER REMOTE CTROLLER ILLUSTRATI CS5-RA 005500 005 Thank you very much for purchasing our air conditioner Please read this owner's manual carefully before using your air conditioner CTENTS Handling
Installation Guide for Hive Active Heating
 Installation Guide for Hive Active Heating Important note: Installation should only ever be carried out by a qualified engineer. Technical Support If you need to contact Hive s Technical Support team during
Applied Electronics. Commercial Dimming System UPDATE NOTICE
 REV. A Applied Electronics Commercial Dimming System UPDATE NOTICE This notice is to inform the end user of an additional feature added to this DP12/2400 dimming unit. This unit has been outfitted with
Installation Guide. LR-HWLV-HVAC TouchPRO Wireless. System Types
 Installation Guide LR-HWLV-HVAC TouchPRO Wireless Touchscreen Thermostat System Types Gas, oil, or electric heat with air conditioning Warm air, hot water, high efficiency furnaces, heat pumps, steam,
User Guide and Important Warranty Information. Suprima 30L - 100L. Wall Mounted Fan Assisted Balanced Flue Gas Boiler
 User Guide and Important Warranty Information Suprima 30L - 100L Wall Mounted Fan Assisted Balanced Flue Gas Boiler These instructions are for use with boilers whose serial numbers end C (or higher) only.
User Guide. Temperature and Humidity Datalogger. Model 42280
 User Guide Temperature and Humidity Datalogger Model 42280 Introduction Congratulations on your purchase of the Extech 42280 Thermometer and Relative Humidity Datalogger. The 42280 is a wall-mount, tripod
Dixell. Electronic Controls Handbook September 2000. Programming Flow Charts & Parameter Lists for:
 Dixell Electronic Controls Handbook September 2000 Programming Flow Charts & Parameter Lists for: XR100 Series - Refrigeration Controller XT Series - Heating & Cooling Controllers XC Series - Step Controllers
ELECTRONIC THERMOSTAT AND THERMOMETER With SPEED CONTROL
 148 OLD CONCORD TURNPIKE, BARRINGTON NH 03825 USA TEL (603) 868-5720 FAX (603) 868-1040 1-800-435-6708 E-Mail:sales@seafrost.com www.seafrost.com ELECTRONIC THERMOSTAT AND THERMOMETER With SPEED CONTROL
B/S/H/ Error codes and service programmes PH
 1 ERROR CODES AND APPLIANCE MESSAGES... 3 1.1 Complete overview of all error codes (in order)... 3 Automatic switch-off... 3 Display is dark and any individual LEDs are lit... 3 E 005... 3 E 011... 3 E
Introducing the hard disc recorder and Beo4, Daily use, Advanced operation, Preference settings, Set up the hard disc recorder, On-screen menus,
 HDR 2 Guide Contents 3 Introducing the hard disc recorder and Beo4, 4 Find out how to operate the hard disc recorder with the Beo4 remote control and bring up the menus on your television screen. Daily