INSTRUCTIONS FOR ASSEMBLY
|
|
|
- Randall Watts
- 7 years ago
- Views:
Transcription

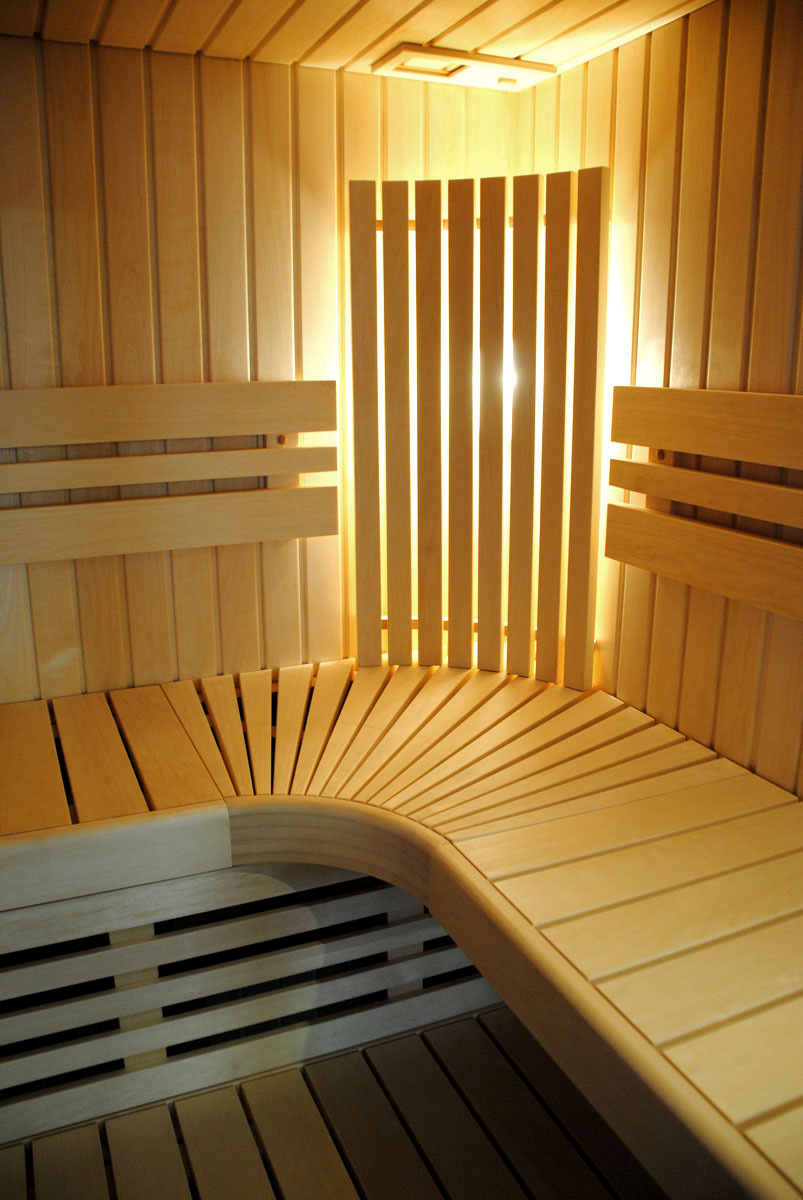
1 INSTRUCTIONS FOR ASSEMBLY 150x180 h TRADITIONAL SAUNACABIN Thank You for choosing the SAUNAX sauna cabin!

2 INTRODUCTION FOR ASSEMBLY AND USE Congratulations on Your purchase. You will soon be enjoying Your SAUNAX sauna cabin. Before assembling the sauna cabin, please read these instructions carefully. Assembling the sauna in correct way and with care You can be sure that the sauna will last many years. The sauna is made of prefabricated elements and has been designed for easy assembly. The proper air circulation is ensured with ventilation hole in the base frame and with the ventilation valve in the ceiling element. Unpack the sauna parts and check the quality. Some trim pieces are longer than necessary so they can be sawn to the right length during assembly. The panels, trim, screws and nails are added. Please note that the floor should be level so that the sauna cabin can be installed in the proper way. If the floor is not level, You should place adjustable feet under the base frame to make it level. TOOLS REQUIRED: Hammer or pin nailer Drill or cordless screwdriver Tape measure Square Level Handsaw (for mouldings and ventilation grid/valve installation) 1. BASE FRAME There are 4 details for the base frame. Place the details on the floor so that the two notching fits together. There are small pilot holes in the corners. Fasten the three corners together with the screws (4x30 mm). Cross-measure from the corners to check that they are at straight angle. Correct the corners if necessary and screw the last screw in. Check that the base frame is level using a spirit level Figure 1.a DETAIL NR.1 DETAIL NR BASE FRAME DETAIL NR Ventilation inlet DETAIL NR

3 2. WALL ELEMENTS Figure 2.a Figure 2.b WALL ELEMENT B1 900 Wall elements are installed on top of the base frame. They are marked with alphabetical/numeral combination. Start from the element, which is marked as B1 or B. Have someone hold the first panel in place and then put the other panel on the base frame so these to panels make up each corner. *There are 2 methods for fastening Your sauna panels: EXTERIOR (standard): To be followed when there is easy access to all exterior corners of the sauna. See diagram A. INTERIOR (Alternate): To be followed when there is no room to move/work around the all 4 walls. (For example when Your room is to narrow to fasten the side wall elements, A and C, with the screws from the sides). See diagram B. IN YOUR SAUNA THERE ARE SOME WALL PANELS NOT FIXED. THERE YOU CAN USE SCREWS. NB! If the sauna is to be placed against existing wall(s), panel installation should begin at these sides. Make sure that the wall element is straight and in correct place, then fix it to the base frame with screws. There are predrilled pilot holes in each element. Next element should be marked with B, then C and D. NOTE: it is not always necessary to install your panels in sequence according to their numbers. Bring the two wall elements together and after making sure that they are straight, fasten them with the screws from the sides (Diagram 2.c). WALL ELEMENT B2 884 WALL ELEMENT A WALL ELEMENTS 848 WALL ELEMENT C WALL ELEMENT C WALL ELEMENT E1 (287) 118 WALL ELEMENT D1
. There is sauna door handle in your sauna kit. The opening direction can be changed.")
4 3. DOOR Your sauna contains a high quality sauna door. Be careful when handling the door as the window may break if it is hit with a sharp object. The door element is the last wall element. The door is fastened with screws (4x70 mm). There is sauna door handle in your sauna kit. The opening direction can be changed. You need to remove the door with door jamb from wall element and swing the door around in its wall element to change the opening direction. Chance the places of the upper and lower details of the door jamb. Put the door back to the wall element. Cover the exposed holes with wooden covers. The door always opens out. 4. CEILING ELEMENT Lift the ceiling element in place (Figure 4.a). One person should be inside the sauna and another outside, feed the ceiling panel over the top of the walls being very careful not to scratch the panels. Make sure that the ceiling element fits on the top of the wall elements. You may fix the ceiling elements with screws (4x70 mm) also, if You think that is necessary. Figure 4.a 5. ELECTRICAL WIRES Always use a certified electrician for any electrical work. This will prevent injury to you and the product. You may need to install the control unit into a wall element. The sauna light with shade can be installed to the right corner of sauna. 6. OUTSIDE TRIM/MOULDINGS Figure 6.a Cut the trims, if necessary, to the right length. Fasten the trim with nails to the wall from the front door side first (top and bottom of the sauna). Then fasten trims to the sides (left and right). After fasten door trims on both sides of the door (Figure 6.a). All trims are chamfered at the edges to provide a finished look.
5 7. BENCHES In standard cases, the benches are positioned with upper bench against the back wall of the sauna, and lower bench parallel to it. There are bench support boards: 280 mm for the lower bench and 730 mm for the upper bench. (Figure 7.a and Figure 7.b). Fix the bench support details with screws. Start to measure the length from the bottom of the wall element. Start to mount from the upper bench frame. Use screws 4x45 mm. The last step is to fit in the bench grid. Use extra support detail (PHL 28x45) to support bench from the middle. CROSS-CUT OF THE BENCHES UPPER BENCH 500 BENCH SKIRT LOWER BENCH Figure 7.a
6 1800 HEATER SAWO SCA-45NS 288x421 mm Figure 7.b 8. BENCH SKIRT After placing the bench, place the bench skirt. Bench skirt is located between upper and lower bench element (Figure 7.a). Fasten it from the back using screws (4x45 mm). 9. BACK GRID After placing the bench skirt, place the back grid. There are predrilled holes. Fasten the back grid using screws (4x45 mm) and cover the screw holes with wooden covers. 10. HEATER GUARD Place the heater guard around the heater as described in Your heater instructions. Spacing may vary according to heater kilowatt. Use screws (4x45 mm) for fastening the heater guard to the wall.
.")
7 11. FLOOR GRID Next step is the installation the floor grid. In your sauna, there is two floor grids. You do not need to fix it with screws. 12. UPPER FRAME WITH SPOT LIGHTS You must install the upper frame. They are all around the ceiling (Figure 12.a). Lift it to the top of the sauna and fasten it to the ceiling element using screws (4x30 mm) and metal angles. Use plywood pieces to fix upper frame to the ceiling. Figure 12.a
8
9

10
11 NAILS 1,4x45 mm CORNER MOULDING, 28x45 mm SCREW 5x80 mm WALL ELEMENT B DIAGRAM A WALL ELEMENT A NAILS 1,4x45 mm CORNER MOULDING, 28x45 mm WALL ELEMENT B SCREW 5x80 mm, IN A 45, FROM TOP AND FROM BOTTOM DIAGRAM B WALL ELEMENT A
12 BASE FRAME, 42x42 mm, with notch joints, Fastened with screws. OUTSIDE CORNER MOULDING, 28x45 mm (outside of the sauna). Fastened with nails. DOOR MOULDING, 12x42 mm (inside and outside of the sauna). Fastened with nails.
INSTRUCTION FOR ASSEMBLY. 150x180 v Traditional sauna cabin
 INSTRUCTION FOR ASSEMBLY 150x180 v Traditional sauna cabin 1. SAUNA PLAN 1800 LIGHT UNDER THE BENCH VENTILATION OUTLET UPPER BENCH 600 1500 LOWER BENCH 400 700 1656 956 HEATER 366 381 690 815 Light switch
Vinyl Brick Mould Field Installation Instructions All Vinyl and Vinyl Clad Windows
 Vinyl Brick Mould Field Installation Instructions All Vinyl and Vinyl Clad Windows Viewed from the exterior. IMPORTANT: Please read before you begin installation. TABLE OF CONTENTS AND TOOL / MATERIAL
Assembly GUIDE. display wine cellar kits. Required. Suggested. Questions? 888.373.6057. or visit wineracksamerica.com
 Page 1 Middle Ladder End Ladder Display Tray Screwless Connector Package Contents * All models follow the same assembly procedure varying only in the number of middle ladders your rack will require. Depending
HOW TO INSTALL A BEAUTIFUL NEW KITCHEN
 HOW TO INSTALL A BEAUTIFUL NEW KITCHEN Easy to follow step-by-step kitchen cabinet installation TOOL AND MATERIAL LIST Hammer Pry bar Screwdriver Phillips Flathead Level Tape measure Pencil Straight edge
Owner's Manual & Assembly Instructions
 Owner's Manual & Assembly Instructions PM01 BASE KIT Model No. FDN1014 717090311 CAUTION: SOME PARTS HAVE SHARP EDGES. CARE MUST BE TAKEN WHEN HANDLING THE VARIOUS PIECES TO AVOID A MISHAP. FOR SAFETY
REDI-EXIT COMMERCIAL FIRE DOOR AND EXTERIOR DOOR KITS INSTALLATION GUIDELINES
 REDI-EXIT COMMERCIAL FIRE DOOR AND EXTERIOR DOOR KITS INSTALLATION GUIDELINES Tools Required Tape Measure Hammer Slotted Screw Driver #2 & #3 Philips Screw Driver 3-4 Foot Level 12 Pry Bar Cold Chisel
March 14, 2007. Installation of Bay, Bow and Garden Windows
 March 14, 2007 Re: Installation of Bay, Bow and Garden Windows Attached are the Atrium Companies, Inc recommendation for the installation of bay, bow and garden windows. These instructions were developed
Table of Contents. www.hunterfan.com. What to Expect with. Preparation. Tools Needed. Wiring. Hanging the Fan. Blades. Motor Housing.
 www.hunterfan.com Table of Contents What to Expect with Your Installation 30 inches Hanging the Fan Wiring 8 Maintenance, Operation & Cleaning Light Kit 13??? 14 1 9 Troubleshooting 11 5 Blades Motor Housing
2.9 WINDOW & DOOR BUCKS
 2.9 WINDOW & DOOR BUCKS Bucks provide attachment surfaces for windows and doors while holding back concrete from these openings during concrete placement. Mark the center and edges of openings as you place
Installing Window and Door Mouldings
 Installing Window and Door Mouldings About Window and Door Mouldings The trim around windows and doors greatly influences the look and style of your interior. They also bridge the gaps and cover spaces
Basement Window Installation Guide Hopper and Sliding
 Basement Window Installation Guide Hopper and Sliding americancraftsmanwindows.com Project Requirements: Installation must comply with all applicable building codes. Existing window frame, wall and weatherresistant
Installation Instructions
 READ BEFORE INSTALLING UNIT For Through-the-Wall Air Conditioners To avoid risk of personal injury, property damage, or product damage due to the weight of this device and sharp edges that may be exposed:
Total Quantity: IMPORTANT: Plans are to be used with 3 x6 Plexiglass (SKU #298-017).
.") # Materials: Quantity Each: 4x4x8 3 2x4x8 2 2x8x8 1 4x8x3/4 plywood 1 3 x6 corkboard (can be 18 of the 1 x1 pieces) 1 3 x6 plexiglass 1 8 door casing 3 Primer 1 qt. Total Quantity: TIPS FOR SUCCESSFUL
# Materials: Quantity Each: 4x4x8 3 2x4x8 2 2x8x8 1 4x8x3/4 plywood 1 3 x6 corkboard (can be 18 of the 1 x1 pieces) 1 3 x6 plexiglass 1 8 door casing 3 Primer 1 qt. Total Quantity: TIPS FOR SUCCESSFUL
These instructions will show you how to install an internal door into a non-loadbearing partition wall. The instructions are split into three parts.
 No 8 in the series of 'How to' brochures produced by PlaceMakers, New Zealand How to Frame and Hang a Door These instructions will show you how to install an internal door into a non-loadbearing partition
Best Barns USA Assembly Book
 Best Barns USA Assembly Book Revised November 27, 2013 the Easton - R 12'x 20' Manufactured by Reynolds Building Systems, Inc. 205 Arlington Drive Greenville, PA 16125 724-646-3775 This manual is copyrighted.
Installation Guide. Bath and Wall Surrounds SERIES 7104 1021861-2-B
 Installation Guide and Wall Surrounds SERIES 7104 1021861-2-B Thank You For Choosing Sterling We appreciate your commitment to Sterling value. Please take a few minutes to review this manual before you
Clad Direct Glaze Window Installation Instructions
 Clad Direct Glaze Window Installation Instructions Sill flashing and sealing: 2. An overview of the proper flashing sequence is shown in figure 1. Please read entire installation instructions carefully
AZEK Rail Install Guide
 TRIM MOULDING DECK PORCH RAIL PAVERS AZEK Rail Install Guide Installing AZEK Rail with CableRail by Feeney... 1 Installing CableRail by Feeney for AZEK Rail... 7 Installing AZEK Rail Stairs with CableRail
QWALL 4 ACRYLIC SHOWER WALL INSTALLATION INSTRUCTIONS
 QWALL 4 ACRYLIC SHOWER WALL INSTALLATION INSTRUCTIONS IMPORTANT DreamLine TM reserves the right to alter, modify or redesign products at any time without prior notice. For the latest up-to-date technical
Cedar Cottage Doghouse Plans
 Overlapping cedar shingles add an element of charm to this medium size doghouse. The walls, floor, and trim are constructed of solid cedar, making it naturally weather resistant and provides excellent
Combination Unit 5'6" Windows a i o P t
 for Andersen 5'6" Double-Hung Venting s Windows a i o P t o rs D o Congratulations You have just purchased one of the many fine Andersen products. For ease of assembly and installation and continued enjoyment
CHARISMA SHOWER/TUB DOOR INSTALLATION INSTRUCTIONS
 CHARISMA SHOWER/TUB DOOR INSTALLATION INSTRUCTIONS IMPORTANT DreamLine reserves the right to alter, modify or redesign products at any time without prior notice. For the latest up-to-date technical drawings,
Combination Unit (shown from interior) WARNING
 WARNING") for Andersen Double-Hung Venting s Windows a i o P t o rs D o Congratulations You have just purchased one of the many fine Andersen products. For ease of assembly and installation and continued enjoyment
for Andersen Double-Hung Venting s Windows a i o P t o rs D o Congratulations You have just purchased one of the many fine Andersen products. For ease of assembly and installation and continued enjoyment
Wine Rack & Glass Storage Bench Chris Gardner
 Wine Rack & Glass Storage Bench Chris Gardner Quantity Length Width Material Part 2 48 16 3/4 birch plywood top, bottom 2 14 16 3/4 birch plywood sides 2 14 13 3/4 birch plywood support dividers 2 3 15
MGB Chrome Bumper Conversion
 MGB Chrome Bumper Conversion Installation Instructions For 1974 1/2-1980 MGB This kit requires cutting, welding, and painting. Professional installation recommended. Note: Every MGB body is slightly different
INSTALLATION INSTRUCTIONS
 door frames Engineered product systems INSTALLATION INSTRUCTIONS door frames MINIMALIST DOOR FRAME Fry Reglet Flush Door frames are designed for use with 3 5/8 studs with ½ drywall both sides (4 5/8 throat
Ceiling Mounted Folding Attic Ladders Installation Instructions
 Ceiling Mounted Folding Attic Ladders Installation Instructions WARNING Before you start installing your new Louisville Ceiling Mounted Folding Attic Ladder, you must read and understand the following:
Panel Track Installation Guide
 Panel Track Installation Guide We make it easy! BTG 493361 EN_0510 Before starting Your new Blinds To Go panel track is custom made to your specifications from the finest materials available. To ensure
AZEK Rail Install Guide
 TRIM MOULDING DECK PORCH RAIL PAVERS AZEK Rail Install Guide Installing AZEK Rail with Glass Infill... 2 Installing AZEk Rail Stairs with Glass Infill... 9 Notes...14 Please read all instructions completely
Installation Instructions
 READ BEFORE INSTALLING UNIT For Slider Casement Air Conditioners To avoid risk of personal injury, property damage, or product damage due to the weight of this device and sharp edges that may be exposed:
SUPER SHED. Indoor shelter for your outdoor tools.
 SUPER SHED Indoor shelter for your outdoor tools. Not everyone needs a garden shed. But, if you've no more space on your garage wall for that new leaf rake, if you can't find your potting trowel because
INSTALLATION INSTRUCTIONS for Premium Pocket Windows (JII022) IMPoRtaNt INFoRMatIoN & glossary. safety & HaNdlINg
 IMPoRtaNt INFoRMatIoN & glossary. safety & HaNdlINg") Thank you for selecting JeLd-weN products. Attached are JeLd-weN s recommended installation instructions for pocket (replacement) double-hung, casement, awning, picture or transom windows, designed to
Thank you for selecting JeLd-weN products. Attached are JeLd-weN s recommended installation instructions for pocket (replacement) double-hung, casement, awning, picture or transom windows, designed to
C5 Sound Deadening & Insulation Kit Interior Removal & Installation Instructions
 C5 Sound Deadening & Insulation Kit Interior Removal & Installation Instructions Ok, let's start with taking the radio bezel dash area off first. Here is what the OEM radio looks like... First you flip
HOW-TO LAY HARDBOARD OR PLYWOOD FLOOR OVERLAY
 HOW-TO HOW-TO LAY HARDBOARD OR PLYWOOD FLOOR OVERLAY Most floor coverings, if laid over uneven wooden floors, will wear unevenly and look unsightly. The answer is to cover the old boards with hardboard
Wren Kitchens Installation Tips... 3. Carefully check your kitchen delivery... 4. Measuring out and marking up... 5. Fitting the base cabinets...
 tra 1 Index Wren Kitchens Installation Tips... 3 Carefully check your kitchen delivery... 4 Measuring out and marking up... 5 Fitting the base cabinets... 6 Fitting the corner cabinets... 7 The 972mm or
RadianceRail Installation Guide
 RadianceRail Installation Guide Installing RadianceRail with CableRail by Feeney... 2 Installing CableRail by Feeney for RadianceRail... 7 Installing RadianceRail Stairs with CableRail by Feeney... 10
Skirt 1 / 4. The Skirt. The skirt patterns were downloaded from Mark's site but they need expanding before they can be used.
 Skirt 1 / 4 The Patterns The Skirt The skirt patterns were downloaded from Mark's site but they need expanding before they can be used. I used Corel Draw's real world dimensions to expand the patterns
CEILING SYSTEMS. Between us, ideas become reality. Installing. Suspended Ceilings. North America Version
 CEILING SYSTEMS Between us, ideas become reality Installing Suspended Ceilings North America Version 1 Installing Armstrong Suspended Ceilings An Armstrong suspended mineral fiber ceiling is functional,
DIY CABINET REFACING INSTALLATION GUIDE
 DIY CABINET REFACING INSTALLATION GUIDE CABINET REFACING INSTALLATION Are you ready to reface your outdated cabinets? This guide will show you how to install your new Facelifters Cabinet Refacing Products
Models A spe n, Econoline C o l o n i al. and Savoy. Installation Instructions. Contractors Wardrobe
 Installation Instructions Models A spe n, Econoline C o l o n i al and Savoy Contractors Wardrobe DESIGNERS MANUFACTURERS TOLL FREE: (800) CW-DOORS (800) 293-77 www.cwdoor.com 2121 Avenue Hall Valencia,
KITCHEN INSTALLATION GUIDE
 KITCHEN INSTALLATION GUIDE The step-by-step guide to installing your new kitchen right The materials and tools you ll need This brochure is your guide to preparing and installing your new kitchen. Inside
OWNER S MANUAL FOR THE PATIO SAUNA
 OWNER S MANUAL FOR THE PATIO SAUNA CONGRATULATIONS! You are about to install the world s leading portable sauna. No other sauna manufacturer can offer you the features and owner support that Saunatec,
Heavy Glass Frameless Shower Door With Return Panel
 202 Anderson Ave., elvue, KS 66407 Phone: 800-669-9867 Fax: 800-393-6699 www.onyxcollection.com Heavy Glass Frameless Shower Door With Return Panel Full Showers with Return ench Seat with Return FRLSDRPL-0116
Plans will call for one of two soffit/fascia details:
 Plans will call for one of two soffit/fascia details: Ventilated vinyl soffit with bent aluminum fascia OR Ventilated LP Smartside soffit panels with 1x6 rabbeted fascia First, let s talk terminology:
IMPORTANT INSTALLATION GUIDE VALENCIA SQUARE CORNER SHOWER READ ALL INSTRUCTIONS CAREFULLY BEFORE STARTING THE INSTALLATION
 INSTALLATION GUIDE VALENCIA SQUARE CORNER SHOWER SEALANT REQUIRED TO COMPLETE THIS INSTALLATION: (Not supplied) Sika Sikasil NG (Arctic White) To seal the WHITE shower door and returns to the shower tray.
Window Installation Instructions
 Caution The correct installation methods of windows in full frame or insert applications is critical towards achieving the tested performance of the window and longterm enjoyment and energy savings for
INSTALLATION INSTRUCTION - INSTRUCCIONES DE INSTALACION FOR DOUBLE-HUNG VENT REPLACEMENT WINDOW
 Vinyl Windows and Doors Manufactured by Pella Corporation INSTALLATION INSTRUCTION - INSTRUCCIONES DE INSTALACION FOR DOUBLE-HUNG VENT REPLACEMENT WINDOW Lea las instrucciones en español en el reverso.
DIRECTIONS FOR ASSEMBLING BASE & WALL CABINETS
 DIRECTIONS FOR ASSEMBLING BASE & WALL CABINETS TheRTAStore.com STEP 1: CLEAR A WORK SPACE Place your RTA cabinet panels on a smooth, scratch resistant surface in a large, open area. (Some people like to
IN00378 (rev A) Corner Entry
 Corner Entry") IN00378 (rev A) Corner Entry Before You Start Check that the tray has been installed correctly and that it is level (Fig. A), tiled down onto and sealed to the manufacturer s guidelines. Please Note: All
IN00378 (rev A) Corner Entry Before You Start Check that the tray has been installed correctly and that it is level (Fig. A), tiled down onto and sealed to the manufacturer s guidelines. Please Note: All
Premier & Deluxe 3-Season Room Sliding Glass Door
 DTSSGD-11 Premier & Deluxe 3-Season Room Sliding Glass Door Installation Instructions Screen Door Seal Left Side Track Top Track Assembly Right Side Track Right Side Trim Sliding Glass Door Sliding Screen
ILLUSION FRAMELESS SHOWER ENCLOSURE INSTALLATION INSTRUCTIONS
 PREPARATION Approximate Installation Time: Tools Required for Installation: 60 minutes Hacksaw Electric Drill 3/16 Masonry Bit Pencil/Felt tip pen Safety Glasses Measuring Tape Masking Tape Standard Screw
HfHMD uses LP SmartSide siding and trim.
 HfHMD uses LP SmartSide siding and trim. These products are: More durable than cement fiber board. Much more volunteer-friendly to install. When installed correctly, have a 5/50- year pro-rated warranty.
All-Season Sunroom Sliding Glass Door Installation Instructions
 ASRESGD-08 All-Season Sunroom Sliding Glass Door Installation Instructions Panel Frame Door Frame Left Side Foam Insulator IE241 H Bar Assembly Door Frame Top Track Panel Frame Door Frame Right Side Stationary
AMERICAN GOTHIC PLAYHOUSE
 AMERICAN GOTHIC PLAYHOUSE Project Plan #856 Sheet 1 of 5 Pick a spot and get started with the beautiful that your kids will love. The design of the playhouse includes 35 square feet of interior space plus
HALE PET DOOR INSTALLATION INSTRUCTIONS HALE STANDARD PANEL MODEL
 HALE PET DOOR INSTALLATION INSTRUCTIONS HALE STANDARD PANEL MODEL Please read these instructions carefully and completely before attempting to install Hale Pet Doors; they will guide you through the steps
Horizontal Mini Blinds Installation Guide
 Horizontal Mini Blinds Installation Guide We make it easy! BTG 468298 EN_ rev0614 For more safety information: 1-866-662-0666 or.www.healthcanada.gc.ca/blindcords Before starting Your new Blinds To Go
Vinyl Greenhouse Window Page 2 of 6 New Contruction Installation Instructions
 New Construction Installation Instructions EPLACEMENT Installation Instructions Page 2 of 6 New Contruction Installation Instructions 1. Frame rough opening equal to window call out size. ough opening
KITCHENS. Tip PAGE 1 FITTING YOUR KITCHEN GUIDE. How to mark out a kitchen. Tools required for installing a kitchen STEP ONE STEP TWO STEP THREE
 FITTING YOUR KITCHEN GUIDE How to mark out a kitchen PAGE 1 Before starting on the installation, measure 870mm from the lowest point of the floor and mark a datum line around the room to indicate where
Chelsea Loft Bed WARNING:
 Chelsea Loft Bed WARNING: Failure to follow these warnings and assembly instructions could result in serious injury or death. Read all instructions before assembling bunk bed. KEEP INSTRUCTIONS FOR FUTURE
FRONT BUMPER INSTALLATION INSTRUCTIONS 2007-2011 DODGE / MERCEDES SPRINTER
 Aluminess Products Inc 9402 Wheatlands Ct. #A Santee, CA 92071 619-449-9930 FRONT BUMPER INSTALLATION INSTRUCTIONS 2007-2011 DODGE / MERCEDES SPRINTER Please read before beginning Stainless steel hardware
Installation Instructions
 Installation Instructions For Use with PXPV230, PXPV265, PXPD230, and PXPD265 models Attention! - Please read these instructions completely before attempting installation. Always unplug the power supply
Installation Instructions For Slider Casement Air Conditioners
 Installation Instructions For Slider Casement Air Conditioners NOTE: These instructions describe installation in a typical wood framed window with a wood SLIDE-BY sash, or installation in a metal CASEMENT
Whalen Furniture Mfg. Inc. Factory No. 43-11696 Page # 1
 ADULT ASSEMBLY REQUIRED DUE TO THE PRESENCE OF SMALL PARTS, SHARP POINTS, SHARP EDGES If you have any questions regarding assembly or if you are missing parts, do not return this item to Sam s Wholesale
WARNING: Important: Keep these instructions for future reference. Gate Instructions (1) Assembly and Installation Instructions
 Assembly and Installation Instructions") Assembly and Installation Instructions Please read these instructions carefully. Please follow these instructions carefully to ensure that your gate extension is properly installed. Improper installation
Assembly and Installation Instructions Please read these instructions carefully. Please follow these instructions carefully to ensure that your gate extension is properly installed. Improper installation
SAMPLE INSTRUCTIONS. Best Barns USA Assembly Book. the Denver. 12'x 12' or 12'x16' Revised November 29, 2010
 Best Barns USA Assembly Book Revised November 29, 2010 SAMPLE INSTRUCTIONS the Denver 12'x 12' or 12'x16' Manufactured by Reynolds Building Systems, Inc. 205 Arlington Drive Greenville, PA 16125 724-646-3775
BUILT-IN MICROWAVE OVEN INSTALLATION INSTRUCTIONS
 UILT-IN MIROWVE OVEN INSTLLTION INSTRUTIONS 24" (61.0 cm), 27" (68.6 cm), 30" (76.2 cm) This product is suitable for use above electric or gas built-in ovens, and below non-vented electric or gas cooktops.
We urge you to read and follow the attached installation instructions. Failure to do so may void the warranty of this garden window unit.
 Important Information for New Construction Installations Attention Installer! We urge you to read and follow the attached installation instructions. Failure to do so may void the warranty of this garden
BUTTERFLY SHOWER DOOR INSTALLATION INSTRUCTIONS
 BUTTERFLY SHOWER DOOR INSTALLATION INSTRUCTIONS IMPORTANT DreamLine reserves the right to alter, modify or redesign products at any time without prior notice. For the latest up-to-date technical drawings,
Information Technology Solutions
 Information Technology Solutions Aluminum Sliding Door Assembly Instructions Shield Doors & Windows Bi-fold Door Assembly Instructions For Support Please Call 03 8339 2252 Aluminum Sliding Door Assembly
Easy Six Cube Bookshelf. Copyrighted Material. Page 1
 Compare to: Land of Nod Cube Collection, 6 Cube Bookshelf Skill Level: Beginner Easy Six Cube Bookshelf I love the storage cubes in kids rooms because they give you an opportunity to have your children
By SP Partners, LLC. www.rainbowatticstair.com INSTALLATION GUIDE. Prestige
 By SP Partners, LLC www.rainbowatticstair.com INSTALLATION GUIDE Prestige IMPORTANT READ THIS FIRST Inspect stair for any damage prior to installation. Stair is NOT to be installed while home is under
Eucaboard / Eucaplac/ Eucatile paneling is intended for dry interior use only and requires care in handling.
 i This instruction sheet describes the proper methods for installing Eucatex decorative wall paneling. Eucaboard / Eucaplac/ Eucatile paneling is intended for dry interior use only and requires care in
Installation Instructions
 Installation Instructions 1. Position the unit onto bridging packers. These keep the unit away from any water sitting inside the frame. 2. Centralise the unit within the frame and pack the edges with appropriate
COMMERCIAL BUILDINGS. Quality Buildings Since 1983
 COMMERCIAL BUILDINGS Quality Buildings Since 1983 Quality Buildings Since 1983 We are very proud of the buildings we construct Letter from the Owner: We appreciate your interest in a PDQ Building. I trust
450 SERIES SLIDING GLASS DOOR ASSEMBLY AND INSTALLATION INSTRUCTIONS
 450 SERIES SLIDING GLASS DOOR ASSEMBLY AND INSTALLATION INSTRUCTIONS Effective 2/12/11 Revised 7/7/15 TACOMA, WA (253) 922-6030 PORTLAND, OR (503) 682-3270 MARYSVILLE, WA (360) 659-0836 SACRAMENTO, CA
Installation Instructions K900 series Door Closer
 Installation Instructions series Non-Hold Open Models Adjustable size : 1(BF) thru 6 Optional Feature : Delayed Action An Incorrectly installed or improperly adjusted door closer can cause property damage
Installation Guide for Artic Air 24 Volt R134A Air Conditioner
 Installation Guide for Artic Air 24 Volt R134A Air Conditioner Rev 004 April 20, 2014 There are five objectives to installing the Artic Air unit: 1) The primary wiring from the battery, 2) The controller
Cable Support System Guide for Andersen Bow, Bay, and Box Projecting Window Units
 for Andersen Bow, Bay, and Box Projecting Window Units Congratulations! You have just purchased one of the many fine Andersen products. Proper assembly, installation and maintenance are essential if the
INSTALLATION INSTRUCTIONS for Bifold Doors (JII103)
") Thank you for selecting JELD-WEN products. Attached are JELD-WEN s recommended installation instructions for premium composite, hollow and solid core molded Bifold Doors. Bifolds are designed for fast
Thank you for selecting JELD-WEN products. Attached are JELD-WEN s recommended installation instructions for premium composite, hollow and solid core molded Bifold Doors. Bifolds are designed for fast
Customer Service 800.780.8889 or visit us online at smithnoble.com. Wood Shutters. Step by Step Installation. Troubleshooting Tips
 reflect your style TM Customer Service 800.780.8889 or visit us online at smithnoble.com Wood Shutters Step by Step Installation Troubleshooting Tips Easy Care Instructions STEP 1 Your New Shutter Thank
39HQ Airovision Air Handling Units
 39HQ Airovision Air Handling Units Mounting instructions CONTENTS 1 - TRANSPORT AND LIFTING INSTRUCTIONS... 3 1.1 - General... 3 1.2 - Transport and storage... 3 1.3 - Roof edge protection during transport
Trundle Bed Plans (For Use Under Twin or Full-Size Standard Length Beds)
") Bunk Beds Unlimited Trundle Bed Plans (For Use Under Twin or Full-Size Standard Length Beds) On the following pages we have included all of the necessary drawings and requirements for a Modified twin-size
Bunk Beds Unlimited Trundle Bed Plans (For Use Under Twin or Full-Size Standard Length Beds) On the following pages we have included all of the necessary drawings and requirements for a Modified twin-size
1 Door Tall Unit ASSEMBLY GUIDE. Page 1 of 9. WARNING: Contains small parts, keep out of reach of children.
 Page 1 of 9 ASSEMBLY GUIDE 1 Door Tall Unit IMPORTANT Before Commencing Assembly: Read all instructions COMPLETELY Ensure all listed parts are present If any parts are missing from Parts List 1, please
STEADYfast Stabilizer Installation Notes Fifth Wheel and Travel Trailers 11/23/13
 STEADYfast Stabilizer Installation Notes Fifth Wheel and Travel Trailers 11/23/13 (See Supplemental Instructions for trailers with heavy duty round footplates and/or Power Leveling Systems) PHONE SUPPORT
Installation Instructions Double-Hung, Single-Hung, Casement, Awning, Sliding, Picture & Shapes Non-Impact & Impact Resistant Nailing Fin Windows
 Installation Instructions Double-Hung, Single-Hung, Casement, Awning, Sliding, Picture & Shapes Non-Impact & Impact Resistant Nailing Fin Windows americancraftsmanwindows.com Project Requirements: Read
Composite Stone Veneer
 Composite Stone Veneer Installation Guide Ver 1 Jun 2015 www.compstone.com Composite Stone Veneer Installation Guide Contents Introduction & Overview 3 Required Tools 4 Optional Tools 4 Attachment Guidelines:
Free 12 x 8 Shed Plan With Illustrations, Blueprints & Step By Step Details
 Free 12 x 8 Shed Plan With Illustrations, Blueprints & Step By Step Details Brought To You By: MyShedPlans Click Here To Download 12,000 Shed Plans >> 12 x 8 Basic Shed This 8 12-ft. shed features a simple
Cabinetry Installation
 Cabinetry Installation INTALLATION EQUIPMENT #8 x 2 1 2 screws #8 x 2 1 2 washer head screws Variable speed drill, electric or cordless Extension cord Countersink drill bit Drill bits, 3/16 and 1/4 Assorted
IN00419 (rev A) Aqua 6 Glide Quadrant and Off-set Quadrant Enclosure
 Aqua 6 Glide Quadrant and Off-set Quadrant Enclosure") IN00419 (rev A) Aqua 6 Glide Quadrant and Off-set Quadrant Enclosure Instruction suitable for both Quadrant & Off-set Quadrant variations. Instruction suitable for both Right and Left Hand fixing variations
IN00419 (rev A) Aqua 6 Glide Quadrant and Off-set Quadrant Enclosure Instruction suitable for both Quadrant & Off-set Quadrant variations. Instruction suitable for both Right and Left Hand fixing variations
Ceiling Fan Installation Instructions
 Ceiling Fan Installation Instructions 1525..series OWNER S MANUAL READ AND SAVE THESE INSTRUCTIONS Total fan wieght with light kit 1-1525-CUL-English INSTALLATION CH-545 Safety Tips WARNING: TO REDUCE
The WANZ Guide to Window Installation
 The WANZ Guide to Window Installation as described in E2/AS1 Amendment 5 Ver. 1.1 Page 2 of 74 Contents Overview Page 5 Objective Page 5 Scope Page 5 Opening Preparation Page 7 Step P1 Preliminary Check
Protecting Your Home from Wind Damage
 Protecting Your Home from Wind Damage During severe thunderstorms or hurricanes, homes may be damaged or destroyed by high winds. Debris flying through the air can break windows and doors, allowing high
INSTALL INSTRUCTIONS KK-C-HVAC-1 HVAC UNIT 2003-2014 CHEVROLET/GMC VANS FOR
 INSTALL INSTRUCTIONS KK-C-HVAC-1 HVAC UNIT 2003-2014 CHEVROLET/GMC VANS FOR (For NEW 2007 ALL WHITE KWIK-KITS ONLY) Warning do not attempt to install A/C units unless you are experienced with servicing
Removable Aluminium posts
 Post Solent Sail Shades Ltd 120 Billington Gardens Hedge End Southampton SO30 2RT Tel/Fax: 01489 788243 www.solentsailshades.co.uk Email: info@solentsailshades.co.uk Removable Aluminium posts Single Pole
PANELIZED HOME INSTALLATION GUIDELINE
 PANELIZED HOME INSTALLATION GUIDELINE A typical home package will be constructed of Snap-N-Lock Insulated Panels clad with steel skins. 4" panels will be used for the walls, and 6" panels for the roof.
PANEL CONCEPTS LLLP.
 The Small Cottage Company DO-IT-YOURSELF CABINS & COTTAGES PANEL CONCEPTS INC. PANEL CONCEPTS LLLP. 2826 Gold 331 Creek N. M-33, Road Mio, Gold Michigan Creek, Montana 4864759733 (989) 826-6511 (406) 288-8585
www.cornholesupplies.com
 www.cornholesupplies.com How To Build Regulation Cornhole Boards Home of the Original Cornhole Bags and Boards Supply List: 1-4' X 8' Piece of Plywood (pre sanded) 4-2" X 4" X 8' Studs (2 by 4s make sure
Here is your set of Detailed Plans from Copyright 2004 All Rights Reserved
 Here is your set of Detailed Plans from Copyright 2004 All Rights Reserved Materials for the House Here is the list of materials you will need to construct the basic house then to cover it with roofing
Installation Guide for Andersen Architectural Wood Inswing Entry Doors
 Installation Guide for Andersen Architectural Wood Inswing Entry Doors Congratulations! You have just purchased one of the many fine Andersen products. Proper assembly, installation and maintenance are
Build a Trade-Show Booth for Under $200!
 Build a Trade-Show Booth for Under $200! This corner booth, with a seven foot front and sweeping 4x8 backdrop, assembles in less than 20 minutes and can be built in one weekend. Materials Tools 4 x8 x3/4