CP 130 SLIDING DOOR INSTALLATION GUIDE. Edition 15/21
|
|
|
- Lora Williams
- 7 years ago
- Views:
Transcription

1 CP 130 SLIDING DOOR INSTALLATION GUIDE Edition 15/21
2 INDEX 1. IMPORTANT NOTES Lift & slide door overview Details FITTING Fitting in the structural work Fitting accessories Fitting distance pieces Lift and slide doors...12 Slide doors Fitting the panels Fitting the buffers GLAZING Before fitting the glass panels Decompression & drainage Fitting glass panels ADDITIONAL INFORMATION Connection with other systems Glazing table... 26
3 Please read through the entire guide before beginning installation. 1. It is extremely important that work on the Reynaers systems is performed by the supplier of the systems (or a Reynaers approved installer). In this way the system guarantee remains preserved. 2. Hardware parts of the Reynaers system should only be replaced by the original parts provided by the Reynaers dealer. 3. The information in this guide is intended to assist in the installation of the Reynaers systems and needs to be used in conjunction with the specific fabrication drawings for your project. 4. In case this guide does not provide an answer to all your questions, please contact your local Reynaers professional. They can give you detailed advice on the installation of the Reynaers sliding door system(s). 3

4 4 1. IMPORTANT NOTES
5 1.1. LIFT & SLIDE DOOR OVERVIEW 1) Adjusting shims: Adjusting shims should only be removed as a last resort. It is better to rack the glass (heel and toe). 2) Backing nuts: If this keep is fitted IE fixed with machine screws rather than self tapping screws, then the backing nuts should be bonded to frame prior to installation in case the screws need to be removed. 1) Adjusting shims 3) Locking point: This locking point allows the door to be locked in a position where it is slightly open. 2) Backing nuts 3) Locking point 5
6 1.2. DETAILS Before starting the install, please make sure to look through the following pages. They contain information that might be vital to the success of your installation. A B A C C A B A A: AFTER TRANSPORT 1) Screws What is important after receiving the transport of materials is to go through it and make sure that everything ordered is delivered. There is always a risk that some things are overlooked, missing or damaged after transport. 1) Screws: Please check that all screws are tight (M5 allen key) top and bottom. 2) Seal: Make sure to check that seal is not damaged during transport. Reynaers suggests that bottom butt joint is resealed with silicone. 2) Seal 6
7 B-B: HORIZONTAL SECTION 1) Seal blocks: It is advisable to remove these seal blocks if doors are being removed from the frames for of installation. 1) Seal blocks 2) Covers: These will need to be removed in order to remove door leafs. The top and bottom components differ in size. See separate note on door removal. C-C: VERTICAL SECTION 1) Stile Filler: The stile filler can be removed at this location. 2) Covers 2) External gasket: External gasket should be cut oversized by 1 /4 per foot, mitered at ends and bonded in corners. 1) Stile filler 2) External gasket 7

8 8 2. FITTING
9 2.1. FITTING IN THE STRUCTURAL WORK Attachment to the building is either by direct fixing through the profile, e.g. screws and plugs, or by using fixing lugs. When using screws and plugs ensure that the minimum edge distances' are in accordance with the processing guidelines of the sub structure manufacturer/supplier/installer. The anchorage should in no way affect the carrying capacity of the adjacent building components. a. Anchorages shall be of aluminum or stainless steel, corrosion resistant, so that the aluminum profiles are not subjected to bi-metallic corrosion. b. When installing sliding elements, fixings are required on all sides with a max distance from each corner of 8 and max distance between fixings of 27 1 /2. c. 1) Head max. 8 max /2 2) Fixing lugs max /2 c. max. 8 4) Cill pans c. 3) Cill max. 8 max /2 max /2 max /2 max. 8 max. 8 max. 8 c. Where transom/mullions and outer frame profiles meet, the fixing must be applied maximum 8 from both sides of the transom/mullion. In this way, expansion and shrinkage of the transom/mullion (because of fluctuations in temperature) are possible without any damage. d. We recommend to position fixings at the height of each locking point. e. When screws and plugs are used directly through the profiles, the chambers in the bottom outer frame may not be pierced, so as to avoid water infiltration in this region. 9
10 1) Head: Is there a likelihood of the head dropping? Do not pack the head solid. Head should be pinned both inside and outside to avoid putting the frame in a twist. 2) Fixing lugs: Use fixing lugs both inside and outside and pack solid. It is possible to direct fix where door meets jamb by counter boring and fitting gromets to mask holes. Frame must be plumb and square. 3) Cill: Cill must be level, packed (shimmed) every foot full width of frame. Use lugs to restrain sill of frame. After frame is fully fixed and glazed and doors are working spaces between shims should be grouted in with a non shrink grout. 4) Cill pans: If cill pans are used adequate care must be taken to prevent the ingress of water through the cill pan by fixings. NOTE: The anchoring should be applied in such a way that possible expansion / shrinkage of the sliding element is not obstructed FITTING ACCESSORIES The choice of the fixing points, number of locking points, max. weight of the sliding panel, max. sizes of the sliding panel, panel profile used etc. depends on the instructions of the system supplier and the accessory producer. Sliding and moving parts should be provided with neutral grease. CLOSED POSITION When fitting, please check whether all accessories can be operated easily and without restriction. After installation is complete, make sure all accessories function properly. OPEN POSITION 10

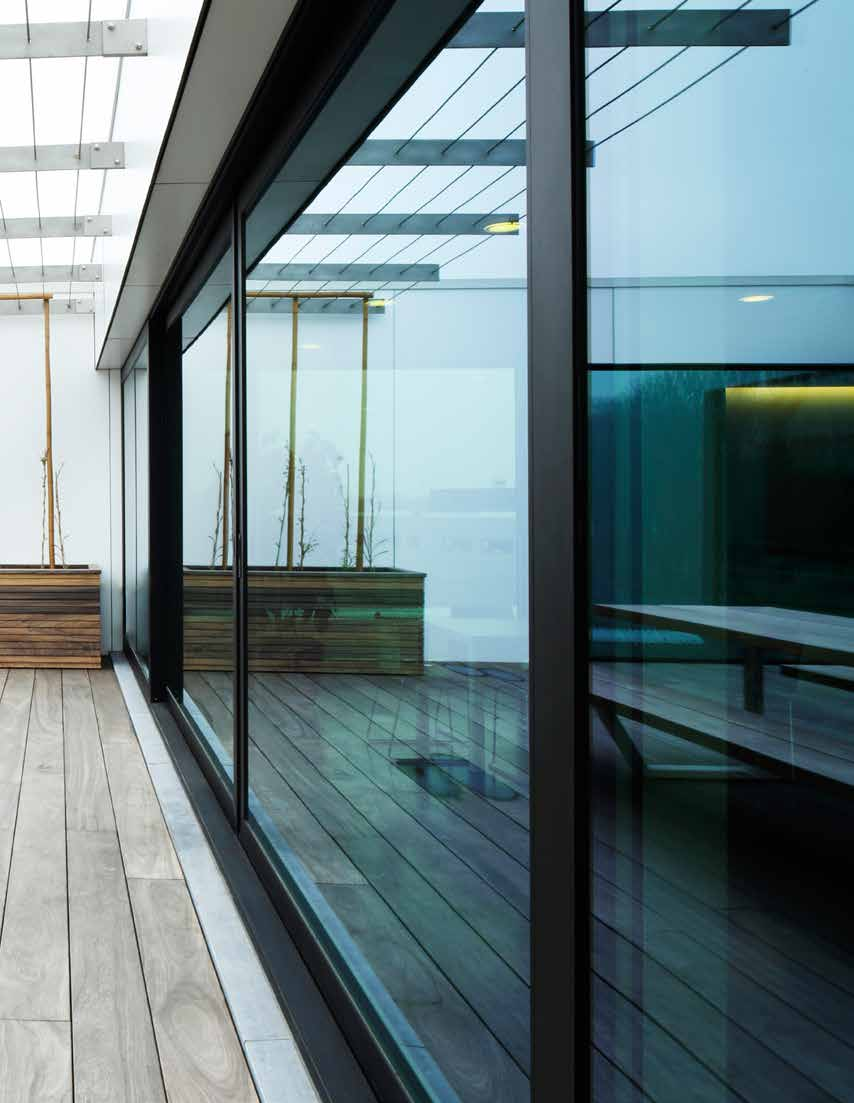
11 Architect: De Architecten NV 11
12 2.3. FITTING DISTANCE PIECES LIFT AND SLIDE DOORS The distance pieces need to be placed on one side of the moving vent (on both the in- and outside, as shown in the picture below), about 6 from the edge XX SLIDE DOORS The distance pieces need to be placed on both sides of vents (only on the inside, as shown in the picture), about 6 from the edges. The pieces may not be placed further away from each other than 31 1 /2. Two pieces also need to be placed vertically, 6 from the edges. max / XX 6 12
13 2.4. FITTING THE PANELS 1) 4) 5) 3) 2) 6) 7) 1-3) Fitting the panel: Fit the sliding panel between the outer frame on the inside rail at an angle. The sliding panel is not equipped with the supporting profiles , XX and ) Preparing: Push the sliding panel to the right. Fix the burglar protection XX on the outer frame by means of screw (3x). 5) Preparing: Push the sliding panel to the left and continue to fix the burglar protection XX by means of screw (1x). 6) Equip support profiles: Equip the sliding panel with the supporting profiles , XX and ) 8) 7-9) Fitting the fixed panel: Fit the fixed panel between the outer frame. The picture shows a CP 155 sliding door being fitted, but the general idea is the same for CP
14 2.5. FITTING THE BUFFERS To keep the door from getting damaged or damaging other parts of the door, a pair of buffers should be placed on the door one top and one bottom. Placement of these buffers depends on how far the door can be opened. Depending on the handle, the buffer can be placed at different distances. Buffer position Placement of buffer depends on position of the open vent If a cup handle is used on the side facing the other leaf(s), the buffers can be placed closer to the frame. NOTE: The buffer should always be placed on the interior side of the door. 14

15 Architect: Bruno Jourquin 15

16 3. GLAZING Architect: Tania Urvois Fabricator: Art de l'alu Location: Douarnenez, France 16
17 3.1. BEFORE FITTING THE GLASS PANELS Reynaers systems are designed for EPDM gasket or neutral silicone glazing. In case of silicone glazing a backing rod should be applied to create a correct opening between the glass panel and the aluminum frame. For easy and reliable fitting, durability and reglazing simplicity, we recommend using only Reynaers gaskets specially adapted for our profiles. The following precautions should be taken when fitting the glazing: Cut the glazing gaskets 1 /4 per foot longer than is necessary to avoid openings in the corners at a later stage. Drainage holes should be drilled to avoid build-up moisture. This is also necessary in the case of silicone glazing (see drainage drawings). Glass panels should be at least 1 /2 ( 1 /4 per side) smaller than the actual measured glazing size. The glass supports on the bottom of the glass panel should be sealed (see drawing below). NOTE: Art (white setting block) on jambs and head approximately 4 from each corner. Art is already fitted on the bottom of the leaf. 17
18 DECOMPRESSION & DRAINAGE It is important to keep decompression and drainage holes free of any blockage. Decompression holes are located on the sides drainage holes in the bottom profile. When applying gaskets and foam, please advise that these need to be cut and fitted to prevent blockage. For Reynaers HI-variants (High Insulation), a foam tape is applied between the profile and glass (see picture below). What is important is that this foam strip only runs between setting blocks and not over them. Also it is important that the foam strip does not block decompression holes nor drainage (see illustration below). Decompression holes Drainage holes *Only applicable on the -HI version *Only applicable on the -HI version 6 18
19 MONORAIL DOORS For monorail doors, it is important that the top outer gasket is prepared with a 2 space, see the drawing to the right. 2 19
20 3.2 FITTING GLASS PANELS Glass panels should not come into contact with the aluminum frame; always use glazing blocks and gaskets. Wedging prevents this contact and also ensures correct positioning of the glass in the frame, distributing the weight equally onto the rollers to avoid deformation. In order to simplify fixing of the glazing we dispose of glass supports that can be used to level the bottom of the rebate. In this case it will be possible to apply rectangular glazing blocks. For double and triple glazing there should be paid extra attention that the glass is supported over the whole panel thickness at all times and that the support blocks are strong enough to carry the whole glass panel weight. There are two types of glazing blocks: SUPPORT BLOCKS These blocks distribute the weight of the glass onto the sliding. Panel or the outer frame. Correct positioning is very important for the sliding panel to function correctly. ADJUSTING BLOCKS These blocks guarantee the correct positioning of the glass between the rebates. They must be positioned without twisting or damaging the profile. Adjusting blocks also prevent the glass panels from moving. 20
21 The following sketches indicate the different glazing blocks in different types of sliding elements: Support block (C1): Adjusting block (C2): C2 C2 C2 C2 C2 C1 C1 C2 C2 C1 C1 C2 C2 C2 C2 C2 C2 C1 C1 C2 C2 C1 C1 C2 C2 C2 C2 C2 C1 C1 C1 C1 C1 C2 C2 C1 C1 C2 C2 C2 C1 C2 C2 C1 C1 C2 C2 C1 The glass weight of sliding panels should be distributed equally onto the rollers. The support blocks (C1) should consequently be fitted below at the height of the rollers. The glass weight of fixed panels should be distributed onto the support piece of the fixed panel. The support blocks should consequently be fitted at the height of the support piece. In fixed glazing monorail, supports are fitted in the corners of the bottom profile to avoid bending due to the weight of the glass (see sketch monorail). For ease of fitting, we have special glass supports which can be used to equalize the rebate. The rectangular glazing blocks can be placed on these. After the glass has been correctly fitted, the glazing bead is twisted into position (see illustration below). The gasket is then applied (for correct gasket, see glazing table on p. 26). the glazing bead is twisted into position. 21

22 22 4. ADDITIONAL INFORMATION
23 4.1. CONNECTION WITH OTHER SYSTEMS All Reynaers systems (with exception for the unique Hi-Finity) can work together, either directly connected or through a connection profile. On the following pages are shown examples of how CP 130 can be integrated with various window systems (CS 68, CS 77 and CS 86-HI). The overlying theory behind connecting these profiles can be applied to almost all systems. CP 130 DUORAIL + CS 68 CP 130 MONORAIL + CS 68 CP 130 DUORAIL + CS 68 (WITH CONNECTION PROFILE) CP 130 MONORAIL + CS 68 (WITH CONNECTION PROFILE) 23
24 CP 130 DUORAIL + CS 77 (WITH CONNECTION PROFILE) CP 130 MONORAIL + CS 77 (WITH CONNECTION PROFILE) CP 130 DUORAIL + CS 86-HI (WITH CONNECTION PROFILE) CP 130 MONORAIL + CS 86-HI (WITH CONNECTION PROFILE) 24

25 25
26 4.2. GLAZING TABLE In the table below you will be able to look up what glazing bead as well as which inner and outer gasket to use at different glazing thicknesses. Glazing bead Glazing gasket inside Glazing thickness Glazing gasket outside XX XX SY SY SY SY SY 4 mm 5 mm 6 mm 7 mm 8 mm Which goes with what? SY 9 mm SY 10 mm XX SY 11 mm Glazing thickness SY 12 mm SY 13 mm XX SY SY SY 14 mm 15 mm 16 mm Glazing gasket inside Glazing gasket outside XX SY 17 mm SY 18 mm SY 19 mm XX SY 20 mm SY SY 21 mm 22 mm Glazing bead XX SY SY 23 mm 24 mm SY SY 25 mm XX SY 26 mm SY 27 mm SY 28 mm XX SY 29 mm SY 30 mm SY 31 mm XX SY 32 mm SY 33 mm SY 34 mm XX SY 35 mm SY 36 mm SY 37 mm XX SY 38 mm SY 39 mm SY 40 mm XX SY SY 41 mm 42 mm SY 43 mm 26
27 27
28 NEED VISUAL GUIDANCE? Reynaers has its own dedicated YouTube channel where you can watch several interesting videos, including product and training videos. Either scan the QR code in the top left of the page or follow the link below: TOGETHER FOR BETTER REYNAERS INC N 15th Ln, Ste 100 Phoenix, AZ t (480) f (623) info@reynaers.us
Technical data sheet PVC Bi-fold doors
 Standard Specifications White internally beaded, Deceuninck 3000 series profile 28mm Low-e toughened sealed units with argon gas Open in doors with white handles and hinges Tracks are fitted to the top
ISSUE 2. Installation Guide
 ISSUE 2 Installation Guide Here at Slide and Fold, we LOVE our Bi-Fold Plus range of folding-sliding doors. We want to ensure that your customers love them too. So we have created a new, detailed installation
Window Installation Instructions
 Caution The correct installation methods of windows in full frame or insert applications is critical towards achieving the tested performance of the window and longterm enjoyment and energy savings for
HALE PET DOOR INSTALLATION INSTRUCTIONS HALE STANDARD PANEL MODEL
 HALE PET DOOR INSTALLATION INSTRUCTIONS HALE STANDARD PANEL MODEL Please read these instructions carefully and completely before attempting to install Hale Pet Doors; they will guide you through the steps
Installation Instructions
 Installation Instructions 1. Position the unit onto bridging packers. These keep the unit away from any water sitting inside the frame. 2. Centralise the unit within the frame and pack the edges with appropriate
INSTALLATION INSTRUCTIONS for Premium Pocket Windows (JII022) IMPoRtaNt INFoRMatIoN & glossary. safety & HaNdlINg
 IMPoRtaNt INFoRMatIoN & glossary. safety & HaNdlINg") Thank you for selecting JeLd-weN products. Attached are JeLd-weN s recommended installation instructions for pocket (replacement) double-hung, casement, awning, picture or transom windows, designed to
Thank you for selecting JeLd-weN products. Attached are JeLd-weN s recommended installation instructions for pocket (replacement) double-hung, casement, awning, picture or transom windows, designed to
WINDOW INSTALLATION GUIDE FOR NEW CONSTRUCTION - WOOD FRAMING
 WINDOW INSTALLATION GUIDE FOR NEW CONSTRUCTION - WOOD FRAMING IMPORTANT NOTICES AND INFORMATION Read these instructions in their entirety prior to installing windows. Any local building code requirements
glass & Glazing Products
 glass & Glazing Products WallMaker Create an unlimited variety of bright, beautiful and secure interior environments with the easy-to-install Stylmark WallMaker glass wall system. This versatile system
Tundra Series Windows January 2016
 Tundra Series Windows January 2016 New Construction Installation Instructions Nail Fin, J-Fin and Brickmold Aplications product. ATTENTION! Read and understand all installation instructions before installing
4 5/16 Subframe Installation
 4 5/16 Subframe Installation The subframe system is a great installation tool for installing windows in masonry conditions. Typically subframes are used in masonry openings so that windows can be anchored
Premier & Deluxe 3-Season Room Sliding Glass Door
 DTSSGD-11 Premier & Deluxe 3-Season Room Sliding Glass Door Installation Instructions Screen Door Seal Left Side Track Top Track Assembly Right Side Track Right Side Trim Sliding Glass Door Sliding Screen
INSTALLATION INSTRUCTION - INSTRUCCIONES DE INSTALACION FOR DOUBLE-HUNG VENT REPLACEMENT WINDOW
 Vinyl Windows and Doors Manufactured by Pella Corporation INSTALLATION INSTRUCTION - INSTRUCCIONES DE INSTALACION FOR DOUBLE-HUNG VENT REPLACEMENT WINDOW Lea las instrucciones en español en el reverso.
Clad Direct Glaze Window Installation Instructions
 Clad Direct Glaze Window Installation Instructions Sill flashing and sealing: 2. An overview of the proper flashing sequence is shown in figure 1. Please read entire installation instructions carefully
Installation Instructions For Slider Casement Air Conditioners
 Installation Instructions For Slider Casement Air Conditioners NOTE: These instructions describe installation in a typical wood framed window with a wood SLIDE-BY sash, or installation in a metal CASEMENT
City of San Diego, CWP Guidelines
 PART 1 -- GENERAL SECTION 08520-1.1 WORK OF THIS SECTION City of San Diego, CWP Guidelines A. The WORK of this Section includes providing aluminum windows with frames, bracing, glazing attachments, screens,
WINDOW REPAIR MANUAL & REFERENCE GUIDE
 WINDOW REPAIR MANUAL & REFERENCE GUIDE TABLE OF CONTENTS DOUBLE HUNG & SINGLE HUNG PARTS 4-5 CASEMENT PARTS 6 SCREEN PARTS 7-8 HOW TO REMOVE TILT-IN SASH 9 HOW TO REMOVE A BALANCE 10 HOW TO INSTALL BALANCE
Sun Windows General Information Sun New Construction Window Installation Instructions
 Sun Windows General Information Section 1 G F H H H A. Apply Weather Resistive Barrier B. Apply Sill Flashing Tape C. Place Waterproof Sill Shims D. Caulk Back of Nail Fin Sides & Top, Set Window, Fasten
Replacement Installation Instructions
 Sliding Door Replacement Installation Instructions Please make sure you have: Fixed 1 - Operating (X) Panel (Glazing Bead Inside, Roller Adjustment Holes Outside) 1 - Fixed (O) Panel (For 3-Panel doors,
Confort 160. Sliding Systems. Sapa Building System
 Confort 160 Sliding Systems Sapa Building System Confort 160 is a high performance thermally insulated sliding window system, with a user-friendly slide action. The system, which has an attractive aesthetic
Residential Garage Door Terminology
 A Air Infiltration: The leakage or passage of air through a door system Anodize: A hard non-corrosive oxide film on the surface of aluminum Astragal: A compressible or deformable seal provided on the bottom
majestic install ation guide barcelona three sided enclosure 24mm surface mounted wall channels and underframe to base
 majestic install ation guide barcelona three sided enclosure 24mm surface mounted wall channels and underframe to base These Instructions are for a left and right handed unit. The diagrams show a left
Installation Detailed installation instructions are provided which should be strictly followed.
 Specification System 6 The Metal Technology Thermally-Broken Vertical Slide Window has been designed in such a way that its'attractive and clean lines will enhance all types of residential and commercial
All-Season Sunroom Sliding Glass Door Installation Instructions
 ASRESGD-08 All-Season Sunroom Sliding Glass Door Installation Instructions Panel Frame Door Frame Left Side Foam Insulator IE241 H Bar Assembly Door Frame Top Track Panel Frame Door Frame Right Side Stationary
450 SERIES SLIDING GLASS DOOR ASSEMBLY AND INSTALLATION INSTRUCTIONS
 450 SERIES SLIDING GLASS DOOR ASSEMBLY AND INSTALLATION INSTRUCTIONS Effective 2/12/11 Revised 7/7/15 TACOMA, WA (253) 922-6030 PORTLAND, OR (503) 682-3270 MARYSVILLE, WA (360) 659-0836 SACRAMENTO, CA
Tested to BS 6375: Part 1: 1989 and achieved a weathertightness classification of 2000 Pa (Special)
") THE B6 GLAZING SYSTEM GLAZING SYSTEMS FOR SEPTEMBER 2013 THE B6 HEEL BEAD SEAL SECURITY GLAZING SYSTEM Page 1 DESCRIPTION The B6 Heel Bead Seal Security Glazing System is suitable for installing all types
THE B6 GLAZING SYSTEM GLAZING SYSTEMS FOR SEPTEMBER 2013 THE B6 HEEL BEAD SEAL SECURITY GLAZING SYSTEM Page 1 DESCRIPTION The B6 Heel Bead Seal Security Glazing System is suitable for installing all types
DIY CABINET REFACING INSTALLATION GUIDE
 DIY CABINET REFACING INSTALLATION GUIDE CABINET REFACING INSTALLATION Are you ready to reface your outdated cabinets? This guide will show you how to install your new Facelifters Cabinet Refacing Products
TEST REPORT. Rendered to: INTERNATIONAL WINDOW Hayward, California. PRODUCT TYPE: Aluminum Hopper SERIES/MODEL: 7222
 Architectural Testing TEST REPORT Report No.: C2375.01-301-44 Rendered to: INTERNATIONAL WINDOW Hayward, California PRODUCT TYPE: Aluminum Hopper SERIES/MODEL: 7222 SPECIFICATIONS: AAMA/WDMA/CSA 101/I.S.2/A440-05,
PRODUCT GUIDE Vinyl Patio Doors (JPG008)
") This guide contains procedures for common user serviceable repair tasks found on vinyl patio doors. If a condition arises that is not covered in this guide, please contact us for professional help. This
This guide contains procedures for common user serviceable repair tasks found on vinyl patio doors. If a condition arises that is not covered in this guide, please contact us for professional help. This
IMPORTANT INSTALLATION GUIDE VALENCIA SQUARE CORNER SHOWER READ ALL INSTRUCTIONS CAREFULLY BEFORE STARTING THE INSTALLATION
 INSTALLATION GUIDE VALENCIA SQUARE CORNER SHOWER SEALANT REQUIRED TO COMPLETE THIS INSTALLATION: (Not supplied) Sika Sikasil NG (Arctic White) To seal the WHITE shower door and returns to the shower tray.
CHARISMA SHOWER/TUB DOOR INSTALLATION INSTRUCTIONS
 CHARISMA SHOWER/TUB DOOR INSTALLATION INSTRUCTIONS IMPORTANT DreamLine reserves the right to alter, modify or redesign products at any time without prior notice. For the latest up-to-date technical drawings,
Confort 26. Sliding Systems. Sapa Building System
 Confort 26 Sliding Systems Sapa Building System Confort 26 is Sapa s thermally insulated sliding system for windows and doors. Available as two- and three-rail solution. Among its features, there are
IN00419 (rev A) Aqua 6 Glide Quadrant and Off-set Quadrant Enclosure
 Aqua 6 Glide Quadrant and Off-set Quadrant Enclosure") IN00419 (rev A) Aqua 6 Glide Quadrant and Off-set Quadrant Enclosure Instruction suitable for both Quadrant & Off-set Quadrant variations. Instruction suitable for both Right and Left Hand fixing variations
IN00419 (rev A) Aqua 6 Glide Quadrant and Off-set Quadrant Enclosure Instruction suitable for both Quadrant & Off-set Quadrant variations. Instruction suitable for both Right and Left Hand fixing variations
7. Installation. installation 7.1.1. CAST-IN WINDOW SYSTEM 7.1. INSTALLATION OF WINDOW MAIN FRAME
 7. Installation Window involves the fixing of window frame at an earlier construction stage and subsequent of the window sashes. This is a highly workmanship dependent process. Only trained and approved
K. D. FRAME ASSEMBLY FOR CLOSED STEEL STUD WALLS...Ins 10. FRAME INSTALLATION DETAILS FOR CLOSED STEEL STUD WALLS...Ins 11
 K. D. FRAME ASSEMBLY FOR MASONRY WALLS...........................Ins 2 FRAME INSTALLATION DETAILS FOR MASONRY WALLS......................Ins 3 INSTALLING EXISTING MASONRY WALL ANCHORS IN FRAME..................Ins
INSTALLATION INSTRUCTIONS for Bifold Doors (JII103)
") Thank you for selecting JELD-WEN products. Attached are JELD-WEN s recommended installation instructions for premium composite, hollow and solid core molded Bifold Doors. Bifolds are designed for fast
Thank you for selecting JELD-WEN products. Attached are JELD-WEN s recommended installation instructions for premium composite, hollow and solid core molded Bifold Doors. Bifolds are designed for fast
BUTTERFLY SHOWER DOOR INSTALLATION INSTRUCTIONS
 BUTTERFLY SHOWER DOOR INSTALLATION INSTRUCTIONS IMPORTANT DreamLine reserves the right to alter, modify or redesign products at any time without prior notice. For the latest up-to-date technical drawings,
PRODUCT GUIDE Aluminum Single-Hung Windows (JPG002)
") This guide contains procedures for common user serviceable repair tasks found on aluminum single-hung windows. If a condition arises that is not covered in this guide, please contact us for professional
This guide contains procedures for common user serviceable repair tasks found on aluminum single-hung windows. If a condition arises that is not covered in this guide, please contact us for professional
DE Frame with C Series Sidelight
 TOOLS REQUIRED Tape measure 6' magnetic level 3' magnetic level Screw gun with clutch adjusted #2 phillips tip #3 phillips tip Screwdriver (used to adjust frame on will using oval slots) Pry Bar Powder
How To Install Your Frameless Shower Enclosure
 How To Install Your Frameless Shower Enclosure a) Installing Single Frameless Door Side Mounted Wall Hinges b) Installing Frameless Door with In-Line Panel c) Installing Frameless Door Between In-Line
Beautifully Traditional
 Arcade 800mm Single Sliding Door Quadrant - nickel Arcade 900mm Single Sliding Door Quadrant - nickel ARC48 ARC49 INSTALLATION INSTRUCTIONS A www.arcadebathrooms.com IMPORTANT - Please read before installation
INSTALLATION INSTRUCTIONS for Vinyl Windows without Nailing Fin (JII011) ImPOrTANT INFOrmATION & GlOssAry. rough OPeNINGs
 ImPOrTANT INFOrmATION & GlOssAry. rough OPeNINGs") Thank you for selecting JELD-WEN products. Attached are JELD-WEN s recommended installation instructions for vinyl windows without a nailing fin (including finless, flush fin and flange). Read these instructions
Thank you for selecting JELD-WEN products. Attached are JELD-WEN s recommended installation instructions for vinyl windows without a nailing fin (including finless, flush fin and flange). Read these instructions
Installation Instructions
 READ BEFORE INSTALLING UNIT For Slider Casement Air Conditioners To avoid risk of personal injury, property damage, or product damage due to the weight of this device and sharp edges that may be exposed:
SLIDING PATIO DOOR INSTALLATION INSTRUCTIONS USING FRAME SCREWS
 Vinyl Windows and Doors Manufactured by Pella Corporation Part Number: V984528 2012 Pella Corporation SLIDING PATIO DOOR INSTALLATION INSTRUCTIONS USING FRAME SCREWS Installation Instructions for Typical
Installation Instructions Double-Hung, Single-Hung, Casement, Awning, Sliding, Picture & Shapes Non-Impact & Impact Resistant Nailing Fin Windows
 Installation Instructions Double-Hung, Single-Hung, Casement, Awning, Sliding, Picture & Shapes Non-Impact & Impact Resistant Nailing Fin Windows americancraftsmanwindows.com Project Requirements: Read
Introduction...COMB-2 Design Considerations and Examples...COMB-3
 SECTION DIRECTORY General Information Introduction...COMB-2 Design Considerations and Examples...COMB-3 Combination Assembly Recommendations and Limitations Composite Configurations...COMB-4 Typical Sealant
SECTION 6. Glass Storefront Doors:
 SECTION 6 Glass Storefront Doors: Table of Contents 3070 Storefront Door System Description & Dimensions 6070 Storefront Door System Description & Dimensions Door Leaf Detail Optional 10 Bottom Rail Detail
We urge you to read and follow the attached installation instructions. Failure to do so may void the warranty of this garden window unit.
 Important Information for New Construction Installations Attention Installer! We urge you to read and follow the attached installation instructions. Failure to do so may void the warranty of this garden
ΑΡΧΙΤΕΚΤΟΝΙΚΑ ΣΥΣΤΗΜΑΤΑ ΑΛΟΥΜΙΝΙΟΥ ARCHITECTURAL ALUMINIUM SYSTEMS
 ΑΡΧΙΤΕΚΤΟΝΙΚΑ ΣΥΣΤΗΜΑΤΑ ΑΛΟΥΜΙΝΙΟΥ ARCHITECTURAL ALUMINIUM SYSTEMS NORMAL SLIDING and SLIDING WITH THERMAL BREAK A L U M IN IU M S Y S T E M S 32 SERIES 32 SLIDING. : 9045 815 gr/m 475 mm -25-25 - FOR
MIAMI-DADE COUNTY PERFORMANCE TEST REPORT. Report No.: B8049.01-401-18. Rendered to: AMERICAN PRODUCTS, INC Tampa, Florida
 Architectural Testing MIAMI-DADE COUNTY PERFORMANCE TEST REPORT Report No.: B8049.01-401-18 Rendered to: AMERICAN PRODUCTS, INC Tampa, Florida PRODUCT TYPE: Aluminum Storefront with Double Doors SERIES/MODEL:
Replacement Window Installation Guide Non-Impact & Impact Resistant Windows without Nailing Fin
 Replacement Window Installation Guide Non-Impact & Impact Resistant Windows without Nailing Fin americancraftsmanwindows.com Project Requirements: Failure to follow these instructions may void product
Plaisance 50. Windows and doors. Sapa Building System
 Plaisance 50 Windows and doors Sapa Building System Plaisance 50 is a non-thermally broken system for aluminium windows and doors with a building depth. The system offers a wide range of inward and outward
InsulView Window Installation Instructions
 InsulView Window Installation Instructions 1. The entire building is normally sheeted with the 2" 2 ½ OR 3 wall panel and the windows installed at a later time. A window retrofit of an existing building
Installation Guide for Andersen Architectural Clad Outswing Commercial Doors
 Installation Guide for Andersen Architectural Clad Outswing Commercial Doors Congratulations! You have just purchased one of the many fine Andersen products. Proper assembly, installation and maintenance
Casement/Awning Window Parts Reference Catalog
 Casement/Awning Window Parts Reference Catalog (Includes Miscellaneous Parts for Eyebrow Casement and Garden Bay Windows) #1028654 (Revised 03/02) Weather Shield Mfg., Inc. Medford, WI 54451 715/748-2100
INSTALLATION INSTRUCTIONS for Vinyl Windows with Integral Nailing Fin (JII001)
") Thank you for selecting JELD-WEN products. Attached are JELD-WEN s recommended installation instructions for Vinyl windows with an integral nailing fin. While the use of these installation instructions
Thank you for selecting JELD-WEN products. Attached are JELD-WEN s recommended installation instructions for Vinyl windows with an integral nailing fin. While the use of these installation instructions
Heavy Glass Frameless Shower Door With Return Panel
 202 Anderson Ave., elvue, KS 66407 Phone: 800-669-9867 Fax: 800-393-6699 www.onyxcollection.com Heavy Glass Frameless Shower Door With Return Panel Full Showers with Return ench Seat with Return FRLSDRPL-0116
Avantis 75. Windows & Doors. Sapa Building System
 Avantis 75 Windows & Doors Sapa Building System Avantis 75 is a thermally broken three-chamber window and door system, which sets the highest standards of thermal insulation and stability. Avantis 75
Combination Unit (shown from interior) WARNING
 WARNING") for Andersen Double-Hung Venting s Windows a i o P t o rs D o Congratulations You have just purchased one of the many fine Andersen products. For ease of assembly and installation and continued enjoyment
for Andersen Double-Hung Venting s Windows a i o P t o rs D o Congratulations You have just purchased one of the many fine Andersen products. For ease of assembly and installation and continued enjoyment
Active and Passive Sash Replacement
 for Andersen Gliding Windows Read all instructions carefully before attempting this procedure. If you have any questions about your ability to complete the procedure, call Andersen at 1-888-888-7020 for
Combination Unit 5'6" Windows a i o P t
 for Andersen 5'6" Double-Hung Venting s Windows a i o P t o rs D o Congratulations You have just purchased one of the many fine Andersen products. For ease of assembly and installation and continued enjoyment
All the above mentioned technical characteristics of the MU 2500 Thermal system indemnify its air and water tightness.
 MU INTRODUCTION MU 2500 Thermal,.,,,,. The MU 2500 Thermal system can be used for doors and windows in domestic and commercial applications such as houses, villas, big complexes of flats and offices.
PANELIZED HOME INSTALLATION GUIDELINE
 PANELIZED HOME INSTALLATION GUIDELINE A typical home package will be constructed of Snap-N-Lock Insulated Panels clad with steel skins. 4" panels will be used for the walls, and 6" panels for the roof.
Plaisance 24. Sliding Systems. Sapa Building System
 Plaisance 24 Sliding Systems Sapa Building System Plaisance 24 is Sapa s noninsulated sliding system for windows and doors. Available as one-, two-, three- and fourrail solution. Among its features, there
Cable Support System Guide for Andersen Bow, Bay, and Box Projecting Window Units
 for Andersen Bow, Bay, and Box Projecting Window Units Congratulations! You have just purchased one of the many fine Andersen products. Proper assembly, installation and maintenance are essential if the
SERIES 238 WINDOWS. NOTE: Read instructions completely before attempting any installation.
 1 Installation Instructions SERIES 238 WINDOWS Page 2: Page 3-4: Page 5: Page 6: Page 7: Opening Preparation and Wood Buck Installation Installation Instructions for Series 238 WINDOWS Figure 1: Buck preparation
KITCHENS. Tip PAGE 1 FITTING YOUR KITCHEN GUIDE. How to mark out a kitchen. Tools required for installing a kitchen STEP ONE STEP TWO STEP THREE
 FITTING YOUR KITCHEN GUIDE How to mark out a kitchen PAGE 1 Before starting on the installation, measure 870mm from the lowest point of the floor and mark a datum line around the room to indicate where
Time needed: ~3h for lid replacement only. Add 1h for operation harness in lid and ~2h more for installing drive unit and cable harness in trunk.
 DIY for replacing trunk lid and/or retrofitting electrical operation of trunk lid. This document is meant to be a support and give advice on the procedure but I will take no responsibility for any damage
COASTLINE QUADRANT ENCLOSURE. Installation / Maintenance Instructions Rev 05.12 05.14
 COASTLINE QUADRANT ENCLOSURE Installation / Maintenance Instructions Rev 05.12 05.14 IMPORTANT NOTES : Please Read Carefully & retain these instructions for Future Reference. 1. For ease & safety we advise
Installation Guide for Andersen Architectural Wood Inswing Entry Doors
 Installation Guide for Andersen Architectural Wood Inswing Entry Doors Congratulations! You have just purchased one of the many fine Andersen products. Proper assembly, installation and maintenance are
Installation Details. D1 General D2 Walls D3 Ceilings D4 Reference. D Installation Details
 D Installation Details D1 General D2 Walls D3 Ceilings D4 Reference D Installation Details D Contents D1 General Installation and Fastening Sequence for Steel Studs D1.1 Fastener Selection D1.3 D2 Walls
Removable Aluminium posts
 Post Solent Sail Shades Ltd 120 Billington Gardens Hedge End Southampton SO30 2RT Tel/Fax: 01489 788243 www.solentsailshades.co.uk Email: info@solentsailshades.co.uk Removable Aluminium posts Single Pole
Removing Moisture within Large Double Glazed Windows
 Removing Moisture within Large Double Glazed Windows Copyright: Max Cottrell www.mcottrell.co.uk This article gives the reasons and a method of removing accumulated moisture from double glazed windows,
Hinge Replacement & Hinge and Hardware Adjustment Guide for Andersen Frenchwood Hinged Patio Doors Manufactured Before November 2005
 Hinge Replacement & Hinge and Hardware Adjustment Guide for Andersen Frenchwood Hinged Patio Doors Manufactured Before November 2005 For ease of installation and continued enjoyment of your Andersen product,
Series 602 MAGNUM Sliding Window DESIGNER SERIES
 Series 602 DESIGNER SERIES DATE: NOVEMBER 2009 REPLACES: AUGUST 2003 DESIGNER SERIES Series 602 KEY EATURES / PERORMANCE CHARACTERISTICS Scale: NOT TO SCALE Designed to complement our existing high quality
1958-64 WINDOW CHANNEL, WEATHERSTRIP & WHISKER STRIP REPLACEMENT FOR 2-DOOR SEDANS
 By Denny Williams Photos by Denny Williams 1958-64 WINDOW CHANNEL, WEATHERSTRIP & WHISKER STRIP REPLACEMENT FOR 2-DOOR SEDANS Denny Williams - Technical Writer Denny is first and foremost a dyed-in-thewool
BUILD A TABLETOP LOOM
 BUILD A TABLETOP LOOM From 1" x 2" stock (actual 3/4" x 1"1/2) cut: 4 pieces 15" long 4 pieces 5"1/2 long Use the above to make 2 frames for the front and back of the loom. From 1" x 4" stock (actual 3/4"
Installation Window Building In Details
 Installation Window Building In Details INSTALLATION Photo courtesy of Rowe Aluminium DATE: NOVEMBER 2009 REPLACES: AUGUST 2003 INSTALLATION Installation Replaces: Scale: NOT TO SCALE Vantage snap-on couplers
300mm. 2mm MIN GAP. PLACE 100mm X 100mm. SO THAT IT IS 38mm INTO
 INSTALL PEEL & STICK (P&S) GUSSETS WITH PRIMER AS PER MANUFACTURERS INSTRUCTIONS 2mm MIN GAP IN SHEATHING STEP 1 PLACE 100mm X 100mm PIECE OF P&S IN CORNER SO THAT IT IS 38mm INTO THE OPENING EACH WAY
Air Conditioner Duct Construction & Repair
 PROPER ROOF AIR CONDITIONER MOUNTING At Newmar, there are two different models of air conditioners available on all towable and motorized units. The different models are the Dometic Brisk and Penguin models,
Chapter 3 Installing Over-the-Post Railing on an L-Shaped Stair
 49 Chapter 3 Installing Over-the-Post Railing on an L-Shaped Stair In this chapter: The Over-the-Post Balustrade System Determining the Rail Centerline Using Rail Bolts Making a Pitch Block Laying Out
Optimum Windows Reliant Installation Manual
 Optimum Windows Reliant Installation Manual 1) Ordering the proper installation components.. PG s 1 2) Receiving, Handling, Storing & Protecting.PG s 2-3 3) Preparing for the Install..PG s 3-4 4) Installing
Important Information for Installer & Homeowner
 Important Information for Installer & Homeowner Homeowner: Please keep this information for your records, do not discard! Installation Instructions for Wood Frame Construction Replacement (See other side
Wood Sound Retardant Door Hardware Information Bulletin
 overly overly 574 West Otterman Street Greensburg, PA 15601 Toll Free: (800) 979-7300 Local: (724) 834-7300 Fax: (724) 830-2871 Email: overly@overly.com DOOR COMPANY Wood Sound Retardant Door Hardware
CERTIFICATE OF APPROVAL No CF 291 SCHOTT UK LIMITED
 CERTIFICATE OF APPROVAL No CF 291 This is to certify that, in accordance with TS General Requirements for Certification of Fire Protection Products The undermentioned products of Drummond Road, Stafford.
PRODUCT GUIDE Vinyl Casement & Awning Windows (JPG005)
") This guide contains procedures for common user serviceable repair tasks found on vinyl casement and awning windows. If a condition arises that is not covered in this guide, please contact us for professional
This guide contains procedures for common user serviceable repair tasks found on vinyl casement and awning windows. If a condition arises that is not covered in this guide, please contact us for professional
Eggers meticulously-crafted door frames are rivaled only by their beauty, quality and lasting performance. Turning nature s beauty into works of art
 D O O R F R A M E S Eggers meticulously-crafted door frames are rivaled only by their beauty, quality and lasting performance. Turning nature s beauty into works of art D O O R F R A M E S Eggers Industries
INSTALLATION INSTRUCTIONS IMPERVIA (Vent and Fixed) AWNING, CASEMENT, and LARGE AWNING WINDOW WITH FINS
 AWNING, CASEMENT, and LARGE AWNING WINDOW WITH FINS") 2009 Pella Corporation INSTALLATION INSTRUCTIONS IMPERVIA (Vent and Fixed) AWNING, CASEMENT, and LARGE AWNING WINDOW WITH FINS Part Number: 80WH0100 Installation Instructions for Typical Wood Frame Construction.
2009 Pella Corporation INSTALLATION INSTRUCTIONS IMPERVIA (Vent and Fixed) AWNING, CASEMENT, and LARGE AWNING WINDOW WITH FINS Part Number: 80WH0100 Installation Instructions for Typical Wood Frame Construction.
Basement Window Installation Guide Hopper and Sliding
 Basement Window Installation Guide Hopper and Sliding americancraftsmanwindows.com Project Requirements: Installation must comply with all applicable building codes. Existing window frame, wall and weatherresistant
We urge you to read and follow the attached installation instructions. Failure to do so may void the warranty of this garden window unit.
 Important Information for New Construction Installations Attention Installer! We urge you to read and follow the attached installation instructions. Failure to do so may void the warranty of this garden
ILLUSION FRAMELESS SHOWER ENCLOSURE INSTALLATION INSTRUCTIONS
 PREPARATION Approximate Installation Time: Tools Required for Installation: 60 minutes Hacksaw Electric Drill 3/16 Masonry Bit Pencil/Felt tip pen Safety Glasses Measuring Tape Masking Tape Standard Screw
CDW Systems Ltd Contemporary Doors & Windows
 CDW Systems Ltd Contemporary Doors & Windows The comprehensive product overview A complete specification guide to CDW Systems range of Aluminium windows, doors and curtain walling for commercial and residential
Information Technology Solutions
 Information Technology Solutions Aluminum Sliding Door Assembly Instructions Shield Doors & Windows Bi-fold Door Assembly Instructions For Support Please Call 03 8339 2252 Aluminum Sliding Door Assembly
HMMA 810 HOLLOW METAL DOORS HOLLOW METAL MANUAL -87 NAAMM STANDARD FOURTH EDITION METAL DOORS & FRAMES NAAMM 2 NAAMM 2 METAL DOORS & FRAMES
 HOLLOW METAL MANUAL NAAMM STANDARD HMMA 810-87 8d METAL DOORS & FRAMES NAAMM 2 87 HOLLOW METAL HOLLOW METAL DOORS FOURTH EDITION NAAMM 2 87 8d METAL DOORS & FRAMES A Division of NATIONAL ASSOCIATION OF
KITCHEN INSTALLATION GUIDE
 KITCHEN INSTALLATION GUIDE The step-by-step guide to installing your new kitchen right The materials and tools you ll need This brochure is your guide to preparing and installing your new kitchen. Inside
Automatic Door Selection Guide
 Automatic Door Selection Guide AAADM 1300 Sumner Avenue Cleveland, OH 44115 P: 216-241-7333 F: 216-241-0105 aaadm@aaadm.com Automatic Door Selection Guide General: The members of AAADM manufacture an assortment
Glass partitions SFB 3074
 Glass partitions SFB 3074 Our facade system SFB 3074 is innovative in its design. We have made a great effort to obtain an energy effective system. The future requirements regarding the economical use
SECTION 08360 SECTIONAL OVERHEAD DOORS 521 SERIES ALUMINUM SECTIONAL OVERHEAD DOORS
 SECTION 08360 SECTIONAL OVERHEAD DOORS 521 SERIES ALUMINUM SECTIONAL OVERHEAD DOORS Display hidden notes to specifier by using Tools / Options / View / Hidden Text. On newer versions of Microsoft Word
BUILT-IN DISHWASHER INSTALLATION INSTRUCTIONS
 BUILT-IN DISHWASHER INSTALLATION INSTRUCTIONS PLEASE READ COMPLETE INSTRUCTIONS BEFORE YOU BEGIN LEAVE INSTALLATION INSTRUCTIONS AND USER'S GUIDE WITH OWNER ALL ELECTRIC WIRING AND PLUMBING MUST BE DONE