Using the Sympodium for Instructors
|
|
|
- Toby Basil Bond
- 7 years ago
- Views:
Transcription
1 Using the Sympodium for Instructors Objectives: This workshop will enable the instructor to: Turn on the Sympodium Use the Sympodium pen in place of a mouse to mark on the Sympodium screen and o Click and drag o Click o Double click o Right click Use the eraser to undo marks Change the appearance, size, and color of the Sympodium pen and eraser. Use blank PowerPoint slides to write notes which can be saved, printed, or sent electronically to students. Using the Airliner for Instructors Objectives: This workshop will teach the instructor to understand: Turning on the tablet Using the pen Drawing Pen Shortcuts Using the wireless mouse What to do when you are finished using the Airliner
2 Sympodium Quick-start Directions What is it? The Sympodium is a computer monitor and tablet rolled into one. It allows you to manipulate the screen using the included pen in a variety of ways. As a replacement for the mouse. You can draw on the screen with the pen to annotate whatever you are displaying at the time. Using PowerPoint you can use the screen as you would a whiteboard, using the special pen as a marker. You can save your material for later use. 2
3 3

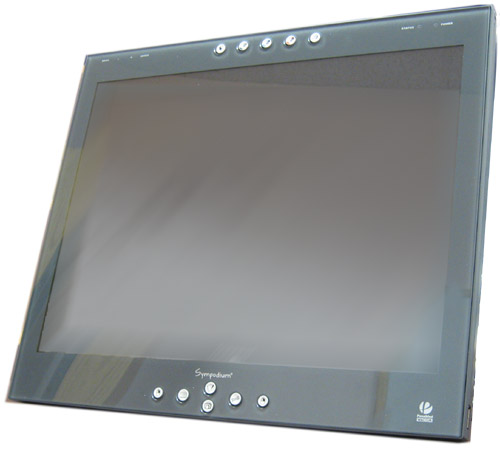
4 Introduction to the Sympodium Power Before doing anything, make sure the power led is glowing. If it is off, turn the Sypodium on using the rightmost button on top. The Pen The Pen is stored in the back of the Sympodium. Pull on the tether it get it out. Please return the pen to its holder when you are done. Adjusting the angle of the stand You may prefer the Sympodium be horizontal. To adjust the display, pull up on the tab in back of the unit and raise/lower it to suit your preference. 4

5 Using the pen as a mouse To activate Mouse Mode, click on the arrow button, leftmost on the upper controls. Left click: Touch the screen with the pen to click the mouse there. Click and drag: Keep a light steady pressure on the pen while you move it to click-and-drag. Double click: Double-tapping is the same as double-clicking. Right click: Two identical buttons with mouse icons on the bottom controls let you right click. Press the button, then tap on the screen where you want to right click. Computer tip: A left click normally selects whatever you click on. Double leftclicking often tells the program to do the default action with whatever you double-click on ( default action varies!). Right clicking calls up other actions you can do with whatever you click on. 5
6 Using the pen to draw. The Sympodium display can be used like a normal monitor on a normal computer. You can call up a website, for example, or a PowerPoint presentation. If the overhead projector has been turned on, it will normally show what the Sympodium is showing. To mark: You can, at any time, turn the pen tool into a marker to write on the display, in one of three colors. By default, these are black, blue, and red. With the pen-tip or your finger, push one of the middle three buttons on the top controls to activate the marker of that color. With the pen active, move the pen across the display to leave a mark. You can switch between the three colors freely. To erase: If you want to erase your line, click the eraser button next to the three color buttons, pen. then draw over the area you want to erase with the Tip: You cannot manipulate most open applications while drawing with the pen (You cannot click hyperlinks or press buttons). To affect the application, you must return to mouse mode. When you do so, your pen marks will disappear. Plan for this when you consider how you intend to use the system. On notable exception is MS PowerPoint, which works well with the pen. 6

7 To configure the pen beyond your basic options: To change the pen size or color beyond your basic three options, press the button with the wrench icon on the bottom controls. This will call up a toolbar on the upper left corner of the screen. 7
8 The third button over on the top row activates the pen. Double-clicking on it opens the pen properties dialog. The fourth button over on the top row changes the pen into a highlighter. Again, double-clicking on it brings up detailed properties. You can also activate the eraser or right-click modes from this menu. Double-click on the eraser button on the toolbar to set the eraser size. 8
9 Draw on PowerPoint slides The Sympodium interacts fluidly with PowerPoint when you are viewing a slide show. You can mark freely on a PowerPoint presentation when it is running, and still make use of a special toolbar to move through the presentation without losing your work. Anything you draw on the slides will remain in the presentation. When you exit the presentation, it will ask if you want to keep your markings. Be sure to say yes, or it will discard them. Instructional tip: Preparing and running a presentation that just a set of blank slides is a great way to use the Sympodium as a digital whiteboard and save your notes to distribute to your students after class. Anytime you want to clear the board, just advance to the next slide. When you quit, you can delete the unused slides, and then save the PowerPoint presentation with the markup included. Sympodium Get going with PowerPoint in 5 minutes. This no-frills guide will get you using the Sympodium display like a simple whiteboard in under 5 minutes. To get you oriented, the Sympodium looks like the image on the next page. 9
10 10
11 1. Turn it on. 2. Pull out the pen from the back. 3. On the desktop, go to Start, All Programs, Microsoft Office, Microsoft PowerPoint. 11

12 4. Click on PowerPoint 5. PowerPoint will open. 12

13 6. Click the New Slide Button on the Formatting Toolbar to create 10 new slides (or more or fewer, as you prefer.) 7. You will now have a PowerPoint slide show consisting of 10 blank slides. 8. You will want to choose a blank slide layout. 13

14 9. Click the Edit menu, then Select All (Ctrl + A) to select all of your slides. 10. Click the Format menu, then Slide Layout 11. In the Content Layouts Section of the Slide Layout task pane, Select Blank. 14

15 12. Click the drop down arrow at the right side of the Blank Content Layout choice, and click Apply to Selected Slides. (Because you selected all of your slides in step 9 above, this will apply the blank layout to all of the slides in your show. That is what you want when working with Sympodium.) 15
16 13. This your PowerPoint slide show with ten blank slides. 14. Press F5 to start the slide show going. You will get a blank white screen. 15. Press one of the top three buttons on the Sympodium to start drawing. 16
17 16. If the projector is active, as you make notes they will appear on the projected image. 17. When you are ready to erase the screen and move on, click on the right arrow in the controls to advance to the next blank slide. You can do this up to 30 times by default. 18. When you are done, press ESC. PowerPoint will ask you if you want to add your drawings to the presentation. If you want to keep your notes for distribution to your students after class, click Yes. 19. Important: The Sympodium is still in drawing mode. Click this button to go back to mouse mode. 17

18 20. Finally, if you want to keep your work, save your presentation. Click on File in the menu then Save As. You must have a USB Flash Drive or similar to save your presentation on! You cannot save it on the Sympodium computer. It will disappear when the computer is turned off! 18

19 19

20 Airliner Quick-start directions What is it? The Airliner is a wireless tablet that allows you to draw on the screen with the included pen. It is a wireless device, so you can take it around the classroom with you. Unlike the Sympodium, it does not display the current screen while you draw, so you must look at the Sympodium or the projected image on the wall to see what s happening. Using these directions, you will learn how to use the tablet to draw on whatever is currently displayed on the computer s screen. However, in most cases anything you draw will be lost when the mouse or keyboard are used (to move to a new webpage, for example). Certain applications are an exception to this rule, the simplest of which is a presentation running in Microsoft PowerPoint. To get up and running with a blank PowerPoint presentation, see the Get going with PowerPoint in 5 minutes guide for the Sympodium. 20

21 Introduction to the wireless tablet Power First, you must power on the tablet. To do so, press the power button on the upper left. Next, you need to unplug the power cord, located on the right side of the tablet. Unplug the power cable. The pen Finally, remove the pen from its holder on top of the display. You are now ready to carry the tablet around and draw. Note: When you are done with the pen, put it back in the holder. Leaving the pen outside the holder can eventually damage it. 21

22 Start drawing Once the tablet is active, you can draw on anything displayed on the computer s monitor. Press the pen to one of the pen icons to start drawing in one of four colors. If you have to erase, press the pen to the eraser, then draw with the pen to erase previous markings. To use the pen as a mouse (press buttons, follow hyperlinks, select menu items, click and drag, etc), click on the arrow icon. Pen shortcuts You can also activate the black pen and the eraser using the buttons on the side of the pen. The pen tip has to be within ¼ 22
23 inch of the tablet for the buttons to work. 23

24 Using the wireless mouse You may, at any time, use the wireless mouse on the tablet. Just set it down on the tablet and proceed normally. This will work at all times, regardless of what mode the pen is in. If you use the mouse, you will normally clear the screen of drawings unless you are working in a PowerPoint presentation. Be careful not to lose the mouse when you set it aside to start drawing with the pen. When you are finished When finished with the tablet, please be sure to Return the pen to its holder on top of the tablet. Do not leave the pen sitting on its tip, as that may damage it. Plug the tablet back into the power cable, so it will be fully charged for the next user. Set the tablet on top of the PC. Set the mouse on top of it, so it does not get lost. Turn off the tablet with the power button. 24
25 Technical addendum What to do if the tablet keeps turning itself off or How to re-establish the connection between the tablet and the computer. The tablet communicates with the computer via a Bluetooth connection. By default, it will renew that connection when it is turned on. If the computer is off at the time, it will shut down and wait, rather than lose its connection information. However, in the event that the tablet somehow loses connection to the computer permanently (someone accidentally hits the reset button, or the Bluetooth adapter is broken and replaced), it is possible to re-attune the tablet to the computer. First, run the computer s Bluetooth control program (My Bluetooth Places in the Start->Programs menu by default), Locate the Find New Bluetooth Devices option, but do not activate it yet. Return to the wireless tablet, and look for a small recessed button labeled Connect on the underside of the tablet, near the top-right when looking at the bottom. Press the button, and the power light will start to blink blue. It is now in Discoverable mode, and will remain so for three minutes. Return to the computer and run the Find New Bluetooth Devices routine. It will locate the tablet. Tell it to connect to the tablet. It will process for a moment, and the tablet mouse and pen will become functional. It may ask you to click OK on a box using the tablet s mouse. Do so using the tablet, not the regular computer mouse. The tablet should then be operating normally. 25
26
AD201, STC106, STC109, STC204, STC302, STC304, STC309, STC311
 Smart Classrooms information & instructions Smart Classrooms are located in: Administration Building Arts & Science Building Academic & Technical Building Library STC AD003, AD209, AD208, AD202 & AD201,
SMART Sympodium and Notebook Software 9.5
 SMART Sympodium and Notebook Software 9.5 What is a SMART Sympodium? Equipped with the same software as SMART Board interactive whiteboards, SMART Sympodium interactive pen displays are perfect for presenting
GOALS: The goal for this session is: OBJECTIVES: By the end of the lesson participants should be able to: MATERIALS: Instructor ACTVITIES: EVALUATION:
 GOALS: The goal for this session is: Learn how to connect and use the SMART Board for effective instruction Ability to annotate and save work using Microsoft Office and SMART Notebook Software OBJECTIVES:
Mimio Interactive. Pad and Bar. Technology Integration Department. Last update: 2/15/2013
 Mimio Interactive Technology Integration Department Last update: 2/15/2013 Getting Started 1. Mimio Bars or Pads (MS Science, and HS) may be checked out from the library. 2. You must have mimio software
Task Card #2 SMART Board: Notebook
 Task Card #2 SMART Board: Notebook Objectives: Participants will learn how to utilize the SMART Notebook. Table of Contents: Launching The SMART Notebook Page 1 Entering Text Page 1 Top Toolbar Page 2
SMART BOARD USER GUIDE FOR PC TABLE OF CONTENTS I. BEFORE YOU USE THE SMART BOARD. What is it?
 SMART BOARD USER GUIDE FOR PC What is it? SMART Board is an interactive whiteboard available in an increasing number of classrooms at the University of Tennessee. While your laptop image is projected on
SMART Board User Guide for PC
 SMART Board User Guide for PC What is it? The SMART Board is an interactive whiteboard available in an increasing number of classrooms at the University of Tennessee. While your laptop image is projected
Installing Lync. Configuring and Signing into Lync
 Microsoft Lync 2013 Contents Installing Lync... 1 Configuring and Signing into Lync... 1 Changing your Picture... 2 Adding and Managing Contacts... 2 Create and Manage Contact Groups... 3 Start an Instant
Inking in MS Office 2013
 VIRGINIA TECH Inking in MS Office 2013 Getting Started Guide Instructional Technology Team, College of Engineering Last Updated: Fall 2013 Email tabletteam@vt.edu if you need additional assistance after
Start Here. BrightLink Interaction. 1 Connect your computer and turn on the projector
 BrightLink Interaction The BrightLink interactive pens turn any wall or table into an interactive area, either with or without a computer. With a computer, you can use Easy Interactive Tools (dual pens).
Using Your Polyvision Digital Whiteboard and Walk-and-Talk
 Using Your Polyvision Digital Whiteboard and Walk-and-Talk What is Walk-and-Talk? The Walk-and-Talk Digital Whiteboard is a remote control operated interactive system that connects to your computer. You
Using SMART Boards. Display Power (Projector) & PC Buttons on the Console
 & PC Buttons on the Console") Using SMART Boards A SMART board works with a computer, projector, digital pens, and software called Notebook. The computer screen is projected to the SMART Board, where the board s surface allows you
Using SMART Boards A SMART board works with a computer, projector, digital pens, and software called Notebook. The computer screen is projected to the SMART Board, where the board s surface allows you
How to use a SMART Board
 1 How to use a SMART Board Basic instructions on how to set up the SMART Board and how to use the SMART Board with both PC and Mac laptops. Contents Page 2: SMART Board Set Up Instructions Page 3: SMART
Smart Board Basics. December, 2009. Rebecca Clemente Department of Education
 Smart Board Basics December, 2009 Rebecca Clemente Department of Education Contents Obtaining the software... 3 What your students will need... 3 Writing in the Notebook... 4 Saving... 5 Change handwriting
Introduction to Smart Board. Table of Contents. Connection Basics 3. Using the Board (Basics) 4. The Floating Tools Toolbar 5-6
 4. The Floating Tools Toolbar 5-6") Introduction to Smart Board Table of Contents Overview 2 Connection Basics 3 Using the Board (Basics) 4 The Floating Tools Toolbar 5-6 The Smartboard Smart Tool Buttons Collecting and Sharing Content with
Introduction to Smart Board Table of Contents Overview 2 Connection Basics 3 Using the Board (Basics) 4 The Floating Tools Toolbar 5-6 The Smartboard Smart Tool Buttons Collecting and Sharing Content with
PowerPoint 2013: Basic Skills
 PowerPoint 2013: Basic Skills Information Technology September 1, 2014 1 P a g e Getting Started There are a variety of ways to start using PowerPoint software. You can click on a shortcut on your desktop
Interactive Whiteboard Functionality Overview... 4. Choosing Pen Style... 5. Erasing / Modifying Writing... 6. Undo / Redo... 6. Email...
 Quick Start Guide 1 Stand-alone Usage Interactive Whiteboard Functionality Overview... 4 Choosing Pen Style... 5 Erasing / Modifying Writing... 6 Undo / Redo... 6 Email... 7 Import / Open file... 7 Saving
SMART Board User Guide for Mac
 SMART Board User Guide for Mac What is it? SMART Board is an interactive whiteboard available in an increasing number of classrooms at the University of Tennessee. While your laptop image is projected
The SMART Board Interactive Whiteboard
 The SMART Board Interactive Whiteboard 1. Press the power button, the indicator ring flashes green to indicate that the projector lamp is starting up. The What would you like to do? menu will be displayed.
SMART Boards. If the board is connected to a different computer - Orientation is needed whenever you connect it to a new or different computer.
 SMART Boards What is a SMART Board? The SMART Board is an interactive whiteboard that converts a computer and date projector into a powerful tool for teaching and learning. With the computer image projected
Welcome to Bridgit @ CSU The Software Used To Data Conference.
 Welcome to Bridgit @ CSU The Software Used To Data Conference. Overview SMART Bridgit software is a client/server application that lets you share programs and information with anyone, anywhere in the world.
Instructions for Formatting APA Style Papers in Microsoft Word 2010
 Instructions for Formatting APA Style Papers in Microsoft Word 2010 To begin a Microsoft Word 2010 project, click on the Start bar in the lower left corner of the screen. Select All Programs and then find
Getting Started on the Computer With Mouseaerobics! Windows XP
 This handout was modified from materials supplied by the Bill and Melinda Gates Foundation through a grant to the Manchester City Library. Getting Started on the Computer With Mouseaerobics! Windows XP
SMART Board Interactive Whiteboard Basics Tip Sheet for ABP Faculty
 SMART Board Interactive Whiteboard Basics Tip Sheet for ABP Faculty Introduction The SMART Board interactive whiteboard is touch sensitive and operates as part of a system that includes a computer and
2. How to Use SMART Board as a Projector and Whiteboard
 Page 1 Smart Board Getting Started Smart Board is an interactive whiteboard developed by SMART Technologies that combines the capabilities of a data projector and a white board. Use the SMART Board to
Presentations and PowerPoint
 V-1.1 PART V Presentations and PowerPoint V-1.2 Computer Fundamentals V-1.3 LESSON 1 Creating a Presentation After completing this lesson, you will be able to: Start Microsoft PowerPoint. Explore the PowerPoint
WebEx Sharing Resources
 WebEx Sharing Resources OTS PUBLICATION: WX0 REVISED: 4/8/06 04 TOWSON UNIVERSITY OFFICE OF TECHNOLOGY SERVICES =Shortcut =Advice =Caution Introduction During a WebEx session, the host has the ability
Introduction to Computers
 Introduction to Computers Parts of a computer Monitor CPU 3 Keyboard 3 4 4 Mouse 3 4 Monitor The monitor displays the content and operations of the computer. It is the visual display of what the computer
SMART board 101. SMART board 101 Training
 SMART board 101 SMART board 101 Training For those who want to learn/remember how to connect it, turn it on, configure it, and feel better about using it at a basic level. We will talk about how the SMART
Migrating to Excel 2010 from Excel 2003 - Excel - Microsoft Office 1 of 1
 Migrating to Excel 2010 - Excel - Microsoft Office 1 of 1 In This Guide Microsoft Excel 2010 looks very different, so we created this guide to help you minimize the learning curve. Read on to learn key
Handout: Word 2010 Tips and Shortcuts
 Word 2010: Tips and Shortcuts Table of Contents EXPORT A CUSTOMIZED QUICK ACCESS TOOLBAR... 2 IMPORT A CUSTOMIZED QUICK ACCESS TOOLBAR... 2 USE THE FORMAT PAINTER... 3 REPEAT THE LAST ACTION... 3 SHOW
Sharing Files and Whiteboards
 Your user role in a meeting determines your level of file sharing. The type of files you can share include documents, presentations, and videos. About Sharing Files, page 1 Changing Views in a File or
Teaching Space User Guide
 Teaching Space User Guide AMX Touch Screen Controller and Sympodium. Frequently Asked Questions: There s no computer audio playing in the room? 1) Check that the volume is not muted on the AMX touchscreen
BrightLink Pro. Quick Reference. BrightLink Interaction. BrightLink Pro Features. 1 Turning on and Calibrating the Projector
 BrightLink Pro BrightLink Interaction Three interactive modes are available: Whiteboard mode Quick Reference This card will help you get started using your BrightLink Pro interactive projector. Use one
Introduction to Word 2007
 Introduction to Word 2007 You will notice some obvious changes immediately after starting Word 2007. For starters, the top bar has a completely new look, consisting of new features, buttons and naming
Windows XP Pro: Basics 1
 NORTHWEST MISSOURI STATE UNIVERSITY ONLINE USER S GUIDE 2004 Windows XP Pro: Basics 1 Getting on the Northwest Network Getting on the Northwest network is easy with a university-provided PC, which has
Using. An excerpt from Smart Technology's getting started manual explaining the basics of the SmartBoard and how to use it.
 Using An excerpt from Smart Technology's getting started manual explaining the basics of the SmartBoard and how to use it. Quick Reference Hardware Basics for Front Projection SMART Board Interactive Whiteboards
CATIA Basic Concepts TABLE OF CONTENTS
 TABLE OF CONTENTS Introduction...1 Manual Format...2 Log on/off procedures for Windows...3 To log on...3 To logoff...7 Assembly Design Screen...8 Part Design Screen...9 Pull-down Menus...10 Start...10
How do you use word processing software (MS Word)?
?") How do you use word processing software (MS Word)? Page 1 How do you use word processing software (MS Word)? Lesson Length: 2 hours Lesson Plan: The following text will lead you (the instructor) through
How do you use word processing software (MS Word)? Page 1 How do you use word processing software (MS Word)? Lesson Length: 2 hours Lesson Plan: The following text will lead you (the instructor) through
Microsoft PowerPoint Exercises 4
 Microsoft PowerPoint Exercises 4 In these exercises, you will be working with your Music Presentation file used in part 1 and 2. Open that file if you haven t already done so. Exercise 1. Slide Sorter
SMART Ink 1.5. Windows operating systems. Scan the following QR code to view the SMART Ink Help on your smart phone or other mobile device.
 SMART Ink 1.5 Windows operating systems User s guide Scan the following QR code to view the SMART Ink Help on your smart phone or other mobile device. Trademark notice SMART Ink, SMART Notebook, SMART
STARTING WEBSTER...3 GETTING STARTED WITH WEBSTER TOOLS...5
 Table of Contents STARTING WEBSTER...3 GETTING STARTED WITH WEBSTER TOOLS...5 WEBSTER SMARTBOARD ICONS...5 THE WEBSTER SOFTWARE MAIN WINDOW...6 THE WEBSTER COMMAND TOOLBAR...7 THE PROJECTION TOOLBAR...8
SMART Board Software for Macintosh FAQ
 SMART Board Software for Macintosh FAQ NOTE: The following FAQs relate to the latest SMART Board Software for Macintosh release and apply only to Macintosh computers. SMART Board Software for Macintosh
Creating a Poster in PowerPoint 2010. A. Set Up Your Poster
 View the Best Practices in Poster Design located at http://www.emich.edu/training/poster before you begin creating a poster. Then in PowerPoint: (A) set up the poster size and orientation, (B) add and
Cool Smart Board Tricks and Tools
 Cool Smart Board Tricks and Tools Dual Page Display and Pinning You can easily toggle between dual and single page display with the dual page button on the toolbar. When in Dual Page mode you can pin one
Celluon Laserkey - User Guide for Microsoft Windows XP
 Celluon Laserkey - User Guide for Microsoft Windows XP INDEX 1. System Requirements... 2 2. Installation / Uninstalling the Driver... 2 3. Bluetooth dongle software settings... 3 4. Connection Method...4
File Management Windows
 File Management Windows : Explorer Navigating the Windows File Structure 1. The Windows Explorer can be opened from the Start Button, Programs menu and clicking on the Windows Explorer application OR by
Sharing Presentations, Documents, and Whiteboards
 Chapter 19 19 Sharing Presentations, Documents, and Whiteboards Your user role in an event determines your level of sharing. Whichever role you take, the following table describes the basic tasks associated
Ready Light on lowerright of frame bezel
 Version 10 SMART Board Interactive Whiteboard Basics This Quick Reference Guide provides an overview of the information you need to begin using a SMART Board interactive whiteboard. Before you begin, make
SMART Board 9 Software Tips and Tricks
 SMART Board 9 Software Tips and Tricks Tips for Writing and Adding Content Drawing (or erasing) fine lines For precise control of the digital ink, change the pen setting to use the thinnest line width.
SMART Board Interactive Whiteboard Setup with USB Cable
 SMART Board Interactive Whiteboard Setup with USB Cable The instructions below are for the SMART Board interactive whiteboard 500 series and apply to both desktop and laptop computers. Ready Light USB
Windows 8.1 Update 1 Supplement
 Illustrated Series Guide to Windows 8.1 Update 1 Changes June 2014 Table of Contents (CTRL+Click a link to navigate directly to Part 1, 2, 3, or 4.) Part 1: What Version of Windows Am I Using? Part 2:
SMART Board Training Packet. Notebook Software 10.0
 SMART Board Training Packet Notebook Software 10.0 Chris de Treville Chris.deTreville@avispl.com 6301 Benjamin Road Suite 101 Tampa, FL 33634 p: 813.884.7168 f: 813.882.9508 SMART Board Welcome Center
SMART Board Tips & Tricks (version 9.0) Getting Started. SMART Tools vs. SMART Notebook software
 Getting Started. SMART Tools vs. SMART Notebook software") SMART Board Tips & Tricks (version 9.0) Getting Started SMART Tools vs. SMART Notebook software Click the SMART Board icon (in the system tray at the bottom right of your screen) to access the SMART Board
SMART Board Tips & Tricks (version 9.0) Getting Started SMART Tools vs. SMART Notebook software Click the SMART Board icon (in the system tray at the bottom right of your screen) to access the SMART Board
Mastering Lync Meetings
 Mastering Lync Meetings cd_mastering_lync_meetings_v2 1 8/25/2014 Course Title Contents Overview of scheduled Online Lync meetings... 3 General Best Practices... 3 Scheduling the meeting... 4 Recurring
PowerPoint 2007: Basics Learning Guide
 PowerPoint 2007: Basics Learning Guide What s a PowerPoint Slide? PowerPoint presentations are composed of slides, just like conventional presentations. Like a 35mm film-based slide, each PowerPoint slide
Microsoft Word 2010 Training
 Microsoft Word 2010 Training Microsoft Word 102 Instructor: Debbie Minnerly Course goals Learn how to work with paragraphs. Set tabs and work with tables. Learn about styles Use the spelling and grammar
A Quick Start Guide to Using PowerPoint For Image-based Presentations
 A Quick Start Guide to Using PowerPoint For Image-based Presentations By Susan Jane Williams & William Staffeld, Knight Visual Resources Facility College of Architecture, Art and Planning Cornell University.
GoodReader User Guide. Version 1.0 GoodReader version 3.16.0
 GoodReader User Guide Version 1.0 GoodReader version 3.16.0 Contents Operating GoodReader 1 Send PDF files to Your ipad 2 Copy Files with itunes 2 Copy Files to a Cloud Service 5 Download Files from the
Microsoft Access 2010 handout
 Microsoft Access 2010 handout Access 2010 is a relational database program you can use to create and manage large quantities of data. You can use Access to manage anything from a home inventory to a giant
Microsoft Migrating to Word 2010 from Word 2003
 In This Guide Microsoft Word 2010 looks very different, so we created this guide to help you minimize the learning curve. Read on to learn key parts of the new interface, discover free Word 2010 training,
IT Quick Reference Guides Using Windows 7
 IT Quick Reference Guides Using Windows 7 Windows Guides This sheet covers many of the basic commands for using the Windows 7 operating system. WELCOME TO WINDOWS 7 After you log into your machine, the
GETTING STARTED TABLE OF CONTENTS
 Windows 7 Tutorial GETTING STARTED An operating system, sometimes called an OS, is the main program the computer uses to function properly. Operating systems act as a link between you, the user, and the
Microsoft PowerPoint 2010
 Microsoft PowerPoint 2010 Starting PowerPoint... 2 PowerPoint Window Properties... 2 The Ribbon... 3 Default Tabs... 3 Contextual Tabs... 3 Minimizing and Restoring the Ribbon... 4 The Backstage View...
Microsoft PowerPoint Tutorial
 Microsoft PowerPoint Tutorial Contents Starting MS PowerPoint... 1 The MS PowerPoint Window... 2 Title Bar...2 Office Button...3 Saving Your Work... 3 For the first time... 3 While you work... 3 Backing
Epson Brightlink Interactive Board and Pen Training. Step One: Install the Brightlink Easy Interactive Driver
 California State University, Fullerton Campus Information Technology Division Documentation and Training Services Handout Epson Brightlink Interactive Board and Pen Training Downloading Brightlink Drivers
SMARTstuff. The first rule for using an interactive whiteboard is very simple and of the utmost importance: Have faith in yourself you can do this!
 SMARTstuff The first rule for using an interactive whiteboard is very simple and of the utmost importance: Have faith in yourself you can do this! Getting Started This booklet will cover the following
Introduction to MS WINDOWS XP
 Introduction to MS WINDOWS XP Mouse Desktop Windows Applications File handling Introduction to MS Windows XP 2 Table of Contents What is Windows XP?... 3 Windows within Windows... 3 The Desktop... 3 The
SMART Board Menu. Full Reference Guide
 SMART Board Full Reference Guide Start-Up After entering Windows, click on the desktop icon SMART Board Tools. The SMART Board icon will appear in the system tray on the bottom right of the screen. Turn
Maximizing the Use of Slide Masters to Make Global Changes in PowerPoint
 Maximizing the Use of Slide Masters to Make Global Changes in PowerPoint This document provides instructions for using slide masters in Microsoft PowerPoint. Slide masters allow you to make a change just
Microsoft Office 2010: Introductory Q&As PowerPoint Chapter 1
 Microsoft Office 2010: Introductory Q&As PowerPoint Chapter 1 Are the themes displayed in a specific order? (PPT 6) Yes. They are arranged in alphabetical order running from left to right. If you point
Smartboard and Notebook 10 What s New
 Smartboard and Notebook 10 What s New Smartboard Markers and Eraser (for use with all programs): You may use your finger as the mouse. Press down twice to double click Hold your finger down for a few seconds
Introduction To Microsoft Office PowerPoint 2007. Bob Booth July 2008 AP-PPT5
 Introduction To Microsoft Office PowerPoint 2007. Bob Booth July 2008 AP-PPT5 University of Sheffield Contents 1. INTRODUCTION... 3 2. GETTING STARTED... 4 2.1 STARTING POWERPOINT... 4 3. THE USER INTERFACE...
SMART Board Training Outline Trainer: Basel Badran
 Sharjah Higher Colleges of Technology SMART Board Training Outline Trainer: Basel Badran What is a SMART Board? o Concept & Technology SMART Board Components: o Smart Tools Start Center Recorder Keyboard
Smartboard Tutorial. 1. Setting up the Smart Board and Presentation Cart. 2. Orienting the Board. 3. Smartboard Toolbars. 4. Inserting a New Slide
 Smartboard Tutorial 1. Setting up the Smart Board and Presentation Cart 2. Orienting the Board 3. Smartboard Toolbars 4. Inserting a New Slide 5. Inserting an Object 6. Setting a Picture Transparency 7.
Table of Contents. 0. Internet Connectivity Assumptions..2. 0. Identifying the Network Wall Jack... 2. 0. Identifying the Ethernet Cable..
 Table of Contents 0. Internet Connectivity Assumptions..2 0. Identifying the Network Wall Jack... 2 0. Identifying the Ethernet Cable..4 0. Identifying the Network Interface Card...5 0. Connecting Your
Lenovo Miix 2 8. User Guide. Read the safety notices and important tips in the included manuals before using your computer.
 Lenovo Miix 2 8 User Guide Read the safety notices and important tips in the included manuals before using your computer. Notes Before using the product, be sure to read Lenovo Safety and General Information
POWERPOINT BASICS: MICROSOFT OFFICE 2013
 University of North Carolina at Chapel Hill Libraries Carrboro Cybrary Chapel Hill Public Library Durham County Public Library POWERPOINT BASICS: MICROSOFT OFFICE 2013 GETTING STARTED PAGE 02 Prerequisites
Planning and Managing Projects with Microsoft Project Professional 2013
 Slides Steps to Enter Duration: 1. In the Duration column of a task, enter a value, and press Enter on your keyboard Important Points: The default time unit is days, so when you enter 5, this becomes 5
Using Microsoft Word. Working With Objects
 Using Microsoft Word Many Word documents will require elements that were created in programs other than Word, such as the picture to the right. Nontext elements in a document are referred to as Objects
Florence School District #1
 Florence School District #1 Module 2: SMART Board Basics and Beyond 1 SMART Board Software and Beyond In SMART Notebook software, you can create or open SMART Notebook software (.notebook) files. After
SMART Notebook: Basics and Application
 SMART Notebook: Basics and Application Table of Contents TESS Connection... 3 Version Number... 3 Tour of the Window... 5 The Main Toolbar... 5 The Sidebar... 18 Page Sorter... 19 The Gallery... 23 Searching...
Microsoft Word 2010. Quick Reference Guide. Union Institute & University
 Microsoft Word 2010 Quick Reference Guide Union Institute & University Contents Using Word Help (F1)... 4 Window Contents:... 4 File tab... 4 Quick Access Toolbar... 5 Backstage View... 5 The Ribbon...
Hardware Basics for Front Projection SMART Board Interactive Whiteboards
 Hardware Basics for Front Projection SMART Board Interactive Whiteboards The SMART Board interactive whiteboard is touch sensitive and operates as part of a system that includes a computer and a projector.
SYMBOL MC9060 HAND HELD TERMINAL USER MANUAL
 SYMBOL MC9060 HAND HELD TERMINAL USER MANUAL CORPORATE VERSION FEBRUARY 2007 TABLE OF CONTENTS Welcome... 3 Getting Started... 3 Equipment Setup... 3 Battery Installation... 4 About the Stylus... 5 Aligning
WORDPAD TUTORIAL WINDOWS 7
 WORDPAD TUTORIAL WINDOWS 7 Quick Access bar Home Tab Triangles = More Commands Groups on the Home tab Right paragraph margin Left paragraph Margin & Indent Paragraphs Ruler Hover the mouse pointer over
Microsoft Migrating to PowerPoint 2010 from PowerPoint 2003
 In This Guide Microsoft PowerPoint 2010 looks very different, so we created this guide to help you minimize the learning curve. Read on to learn key parts of the new interface, discover free PowerPoint
Unified Communications Using Microsoft Office Live Meeting 2007
 Unified Communications Using Microsoft Office Live Meeting 2007 Text version of online course. Contents Unified Communications... 1 About Microsoft Office Live Meeting 2007... 3 Copyright Information...
Adding emphasis to a presentation in PowerPoint 2010 and 2013 for Windows
 Adding emphasis to a presentation in PowerPoint 2010 and 2013 for Windows This document introduces technique to add interest to your presentation using graphics, audio and video. More detailed training
SMART Board Beginning
 SMART Board Beginning Downloading the Software... 2 600 Series SMART Board... 2 800 Series SMART Board... 3 SMART Board Cleaning Options... 4 SMART Board Pens... 4 SMART Board Help... 4 Using the On Screen
Hands-on Practice. Hands-on Practice. Learning Topics
 Using Microsoft PowerPoint Software on a SMART Board Interactive Whiteboard You make presentations for a reason to communicate a message. With a SMART Board interactive whiteboard, you can focus the attention
Lync 2013 Quick Reference Lync Meetings. Join a Lync Meeting. Schedule a Lync Meeting. Do I need a PIN, work number or extension? Set meeting options
 Join a Lync Meeting 1. In the meeting request, click Join Lync Meeting or click Join Online in the meeting reminder. 2. On the Join Meeting Audio window, select one of the options: Use Lync (full audio
Computer Basics: Tackling the mouse, keyboard, and using Windows
 Computer Basics: Tackling the mouse, keyboard, and using Windows Class Description: Interested in learning how to use a computer? Come learn the computer basics at the Muhlenberg Community Library. This
Basic Computer Skills for Beginners. Mesa Regional Family History Center
 Basic Computer Skills for Beginners Mesa Regional Family History Center Know your Keyboard Most keys on the keyboard are the same as an electric typewriter. The four arrows (lower right side) move the
To Begin Customize Office
 To Begin Customize Office Each of us needs to set up a work environment that is comfortable and meets our individual needs. As you work with Office 2007, you may choose to modify the options that are available.
System update procedure for Kurio 7 (For build number above 110)
") System update procedure for Kurio 7 (For build number above 110) IMPORTANT NOTE: Before starting the procedure, please check your current Android build number, that can be found as follows: exit the Kurio
System update procedure for Kurio 7 (For build number above 110) IMPORTANT NOTE: Before starting the procedure, please check your current Android build number, that can be found as follows: exit the Kurio
The Dashboard. Change ActivInspire's Look And Feel. ActivInspire Primary. ActivInspire Studio. <- Primary. Studio -> page 1
 page 1 The Dashboard When ActivInspire opens, you are immediately greeted with the Dashboard. The Dashboard contains shortcuts to flipcharts and time-saving tools. The Dashboard remains open until it is
Statgraphics Getting started
 Statgraphics Getting started The aim of this exercise is to introduce you to some of the basic features of the Statgraphics software. Starting Statgraphics 1. Log in to your PC, using the usual procedure
MS Word 2007 practical notes
 MS Word 2007 practical notes Contents Opening Microsoft Word 2007 in the practical room... 4 Screen Layout... 4 The Microsoft Office Button... 4 The Ribbon... 5 Quick Access Toolbar... 5 Moving in the
GOOGLE DOCS APPLICATION WORK WITH GOOGLE DOCUMENTS
 GOOGLE DOCS APPLICATION WORK WITH GOOGLE DOCUMENTS Last Edited: 2012-07-09 1 Navigate the document interface... 4 Create and Name a new document... 5 Create a new Google document... 5 Name Google documents...