DIY Custom Picture Frames
|
|
|
- Edgar Marsh
- 7 years ago
- Views:
Transcription

1 DIY Custom Picture Frames Avoid the high prices of buying custom frames by making your own. It s easier than you think. Step 1: Introduction Nothing helps improve the appearance of a photograph, drawing, print or other artwork than a good picture frame. Frames are available in some standard sizes, however often what one wants to frame does not fit in a standard frame. Many would have you believe that creating a custom frame requires arcane skills that only a select few can do, and they charge accordingly. This tutorial shows how one can create their own custom frames to show off your works of art, and save a good deal of money in the process. Step 2: Measurements, Materials, and Tools Measurements: There are a collection of dimensions that we will use throughout the tutorial. The next step has details on how to calculate each one. PD: Picture Dimensions - Width and height of the thing to be framed. In this example it is a panorama print. OD: Outside Dimensions - Width and height of the matt board and mounting board.

2 MID: Matt Inside Dimensions - Width and height of the inside of the matt, always slightly smaller than PD. Materials: The following is a list of the materials we will make the frame out of. 1 photograph, print, drawing, document or some other flat piece of art to frame. For this tutorial I use a panorama print of a photograph I took on a trip to London in January of piece of chip board at least OD in size 1 piece of matt board at least OD in size Enough acid free paper to cover an area at least PD in size, with a little left over (2"x6" or so) Acid free glue 1 piece of glass, plexiglass, lexan, or lucite at least OD in size. For this tutorial I chose lexan because the frame will be very large and lexan is a lot lighter than glass. 4 pieces of molding, picture frame boards (basically the same as molding except it already has a rabbit on the back side), or strait boards. Two of them must be at least FOD-width long and the other two FOD-height long. A little longer is preferable to just the right size. For this tutorial I'm using 1/2" by 2" poplar straight boards which will produce a very simple and elegant frame. At least 4 joint fastners. Glazer's Points Stain, paint, or some other finish. For this tutorial I will be using spray paint. Hardware to hang the frame later.

3 Optional Materials Wood filler: It is quite a challenge to create a perfect set of miter joints. You can use the wood filler to fill the gaps, but if you plan in staining the frame, make sure to use wood filler that matches the stain or stainable wood filler. Wood glue: You can use some wood glue to help reinforce the joints, but because it is an end to end joint, you will have to use joint fasteners. Tools: The following is a list of the tools needed to convert the materials listed above into a picture frame. A clean, flat workspace much larger than the frame under construction. I used the kitchen floor because my frame is too large to put together on a table or workbench. A sharp box knife Pencil Angled matt cutter. If you plan on making more than one frame over your lifetime, it is worth investing in this tool. Mine cost $35 and it is more than made up for in the savings you will gain by doing your own custom framing. Straight edge Glass, plexiglass, lexan, etc. cutter if you don't have it cut to size for you (highly recommended, particularly for glass). Router or table saw to create a rabbit Miter box and hand saw (unless you have a very well calibrated power miter saw or table saw) Hammer Corner clamp Tape measure Sand paper
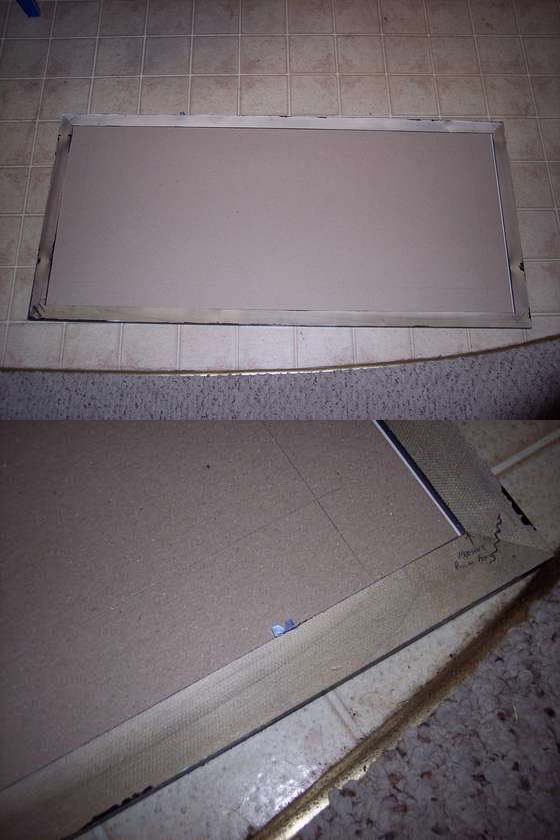
4 Step 3: Making the Measurements Make sure to be as accurate as possible when taking measurements. There is some room for error on a couple of them but most must be as accurate as possible. The object here is to generate the measurements for the mounting board, the matt and the glass. In the end, the glass, mounting board and the outside dimensions of the matt board will all be the same (OD). The inner dimension of the matt board will be slightly smaller than the picture's dimension so that the matt covers the edges of the picture. PD: To take this measurement, use a ruler or, if the thing to be framed is too big, use a tape measure. To avoid any error caused by the end of the tape measure or ruler, I usually start the measurement at the first inch rather than the end. In this case, the panorama print I'm framing in this example is exactly 32 13/16" x 12". OD: To calculate this dimension you first need to decide how wide the visible matt border will be. I decided to have a 2" visible matt border. In the final picture frame, 1/4" of the matt will be covered all the way around by the wooden frame. Therefore we need to add another quarter of an inch to the matt border for a total of 2 ". There is a border on all sides of the picture. Therefore I need to add two times 2 1/4", or 4 1/2" to the width and the height of the PD to come up with the OD. In the example here that works out to 37 5/16" x 16". Unfortunately the chip board I had available is not quite big enough at 36" x 16". Therefore rather than making another trip to the hobby store I decided I would make up the difference by allowing a slightly smaller visible border with 2" visible and 2 1/4" total matt width. MID: You only need to calculate this dimension to make sure that the matt border width you choose leaves an opening that is at least slightly smaller than PD so that the matt will cover the edges of the item being framed. This will be the OD minus the two times the total matt width (36" - 2 1/4" x 2 wide by 16" - 2 1/4" x 2 high). In this case that comes out to 32" x 11 1/2". Comparing that to the PD shows that all four edges of the picture will be covered by the matting. The Frame dimensions are not needed right now. I'll explain how to calculate them when we get to that point to avoid confusing things Step 4: Cut the Mounting Board The mounting board is the bottom layer of the frame. This is what the picture is mounted to and it should be stiff and strong enough to support the picture. Chip board around 1/8" thick is ideal, though acid free chip board would be even better if it is available (usually only from framing stores). The mounting board should be cut to OD dimensions. Measure and mark out the cut lines on the board and, using a straight edge cut the board using the box cutter. Be sure to put something down to protect your work area when cutting. See the pictures with the next step for an example of how to make this cut. step 5: Cut the Matt Board to Size Now we want to cut the mounting board down to OD. Be careful when handling the matt board so you don't stain it or get it dirty. If you do get a smudge on it, you can sometimes clean it off using a clean eraser.

5 Follow the same instructions for cutting the mounting board as illustrated. Step 6: Mount the Picture Now we want to mount the picture to the mounting board. First cut the acid free paper so it will cover the mounting board where the picture will sit. This will protect the picture somewhat from the acid in the mounting board. Glue it to the mounting board using the acid free glue. Keep enough of the acid free paper left over to make mounting corners and mounting strips. Allow the glue to dry before mounting the picture. While we are waiting for the glue to dry, we will make mounting corners. Cut 4 strips of paper 1" x 4" to form a mounting corner:

6 Fold in half lengthwise and unfold. Fold the right side so that the top edge lies alongside the center crease Fold the left side similarly. Turn over. You now have one mounting corner. Repeat with the other three corners. Create a couple strips out of the last bit of acid free paper. Glue them to the back top of the picture using the acid free glue. This will stabilize the picture. This step is only required if you are mounting

7 a large picture. For smaller pictures the corners should be adequate. Now make lines so you can tell where the picture will fall on the mounting board. The easiest way to do this is to use a scribe set to the actual width of the matt board less the overlap over the picture. A scribe is a tool that has a block that glides along the edge of a board and an arm that sticks out with a pencil or sharp nail at the end. This allows one to mark a line precisely x" from the edge of the board (see picture). The matt cutting tool I got has a scribe built into it. I set it to 2" (remember that the PD is 4" smaller than the OD) and drew a line on all the sides. I placed the picture in on the mounting board to make sure that the lines are accurate. If it is off a little, split the difference and make a little mark. These marks will be used to position the mounting corners. If you don't have a scribe, make the marks using a straight edge.

8 Next glue the mounting corners to the mounting board in at the outside corners using the acid free glue. Place them slightly outside the lines to account for the thickness of the paper. Position the picture in the corners to make sure they are positioned correctly. If not, adjust them. Let the glue dry on the backing paper and the mounting corners before continuing. You may want to put weight on the paper and corners while the glue dries as most acid free paper does not stick real well right away (the glass is a perfect weight) Step 7: Cut the Matt Center This step is perhaps the most nerve racking because if you make a mistake you have to get a whole new board. The following instructions assume you have an angled matt cutter. Following that is a description of how one might do this with a board and box cutters. Place the matt board face down on some scrap matt board, scrap chip board or something else to protect your work surface. Scribe a line the matt actual thickness from all four edges. In this example, the matt's actual thickness is 2 1/4". As with making the marks to position the picture, this is easier if a scribe is used, but it can be accomplished with a straight edge and a ruler. The next couple of steps are those for the specific matt cutting tool I have. Read the instructions for your tool and follow those if different.

9 Place a straight edge on the outside of the line. Position the tool so that that the center mark lines up with the line perpendicular to the edge of the straight edge. Plunge the knife into the board and pull it along the straight edge until the center mark lines up with the other perpendicular line. Repeat for the other three lines. Be very careful that the straight edge does not move while you are cutting the matt. If possible, clamp the straightedge down. I can't stress enough that the straight edge must not move while cutting. While making this tutorial I got sloppy and I messed up the first one. I actually messed up the second one a little as well but not as badly so I'll use it. The alternate method for cutting the matt if you don't get a tool will require a straight edge with a 45 degree angle and a long box knife. To create the straight edge, use a table saw to true up one side of a board. Tilt the saw blade to 45 degrees and trim off the second side. To cut the matt, follow the instructions above to mark the lines. Lay the straight edge on the outside of the line with the 45 degree slope toward the inside of the matt board. Adjust the box cutter so it is longer than the width of your straight edge and cut the matt. This method is much more prone to error but it will work. Step 8: Hide the Mounting Corners You will notice that the mounting corners are peaking out of the matting. Make a note of how much is sticking out with a pencil and remove the visible part using the box knife. Make sure to remove the picture before you start cutting the corners.

10 Step 9: Permanently Mount the Picture Remember the two strips that we glued to the top of our picture? Now is the time to apply glue to the underside of those strips and glue them to the mounting board. If you ever need to remount the picture, you simply have to cut these strips to remove the picture from the frame. Step 10 :Rabbit the Frame If the wood you acquired doesn't already have one, rabbit off what will be the inside bottom corner of the board. The rabbit should go into the width of the board 1/4" and it should be 1/8" deeper than the combined thickness of the mounting board, picture, matt board and glass (1/4" in my case). If using a straight board, make sure to put the rabbit on the least attractive side of the board.

11 Step 11: Miter the Boards A miter is a 90 degree joint formed by cutting each board at a 45 degree angle. This is the most common joint for picture frames, though other joints are sometimes used. Orient the board so that the board is perpendicular to you and the rabbit is face up and away from you. Make a mark from the bottom left corner to the top of the board at a 45 degree angle. This will help you avoid cutting it wrong later. Using a miter saw, miter box, table saw or some other accurate cutting method, cut off the corner along the line you made. Use a piece of sand paper to clean up the edge. This next step is a little difficult to explain but it is very important. The object is to measure the board for the next cut such that when they are assembled later, the mounted picture, glass and all the rest will fit. To do this I first add 1/4" to OD, for now we will use the OD-length, in this case that is 36 3/4". The trick here is that you want to measure from the bottom edge of the rabbit (see picture). Mark the diagonal as before only this time the angle goes the other direction. Once you have one of the boards cut, use it as a template for the other board to insure that both of your lengthwise boards are exactly the same size and the widthwise boards are exactly the same size.

12 Step 12: Assemble the Frame Now it is time to put the four pieces of wood together into your frame. Get out your corner clamp and clamp a length piece and a width piece together. If you are planning to use wood glue, apply the glue to the edges of both boards before putting them in the clamp. The clamp isn't completely necessary but it does guarantee that the frame will be square even if your miters are not perfect. It also holds the pieces together while you are pounding on it in the next part. Get a joint fastener and place so half of it is on one piece of wood and the other half is on the other. Pound the fastener in all the way using the hammer. Take the other two pieces of wood and assemble them in the same manner. Make sure you attach the boards on the right sides this time. I do this by lining them up with the other two boards to dry fit the frame. Also, make sure that you are lining the boards up so all the rabbits are on the same side and you are nailing in the joint fastener on that side (see picture). Finally, attach the two remaining corners in the same manner.

13 Once the frame is assembled, make sure the picture, glass and the rest fit in the rabbit. There should be a little bit of extra room to allow for changes in size due to humidity. It absolutely should not be so tight that the picture warps in order to fit. It may be necessary to trim just a little bit off the glass, mounting board and/or matt. Alternately you can use a chisel to make the rabbit a little larger. Obviously it is best to have it be the right size to begin with. Step 13: Paint or Stain the Frame It is very difficult to create perfect miter corners. If your corners have gaps, you can use some wood filler to fill the gaps. Let the wood filler dry and sand the frame. Finally finish as desired. In my case, I apply two coats of primer and two coats of glossy black enamel. You do not need to finish the back of the frame if you don't want to. Step 14: Mount the Picture in the Frame Almost done! Now all that is left to do is mount the picture into the frame. Place the frame back side up. First drop in the glass, making sure the glass is very clean and dry. Next drop in the matt board, followed by the mounted picture board. Make sure to put the latter two in upside down (i.e. the side you want to see toward the floor). Now that everything is in place, use glazing points to keep it from falling back out again. Just use a large flat screw driver and push the points into the wood.
14

15 My thought is if you really have something that needs to last forever or of value, you should have it professionally framed anyway. The acid free materials I used here are just to keep the picture looking nicer for longer. In this case, I still have the original digital version of the pictures so I can make another print should I need to. I'm also not selling these prints, just hanging them on my wall. I recommend professional framing if you plan on selling the works. As for cost, here is a summary. Tools: NOTE: I have made many frames (and plan on making many more) so the cost of the tools is amortize. I also had everything except the matt cutter already so for me the tool cost is negligible. The cost of the tools pay for themselves after making two to three frames (less if you already have a lot of the tools like I did). In total I estimate the tools cost me around $80. Materials Total cost for the materials is around $50 with the plexiglass being the largest overall cost. However, this $50 provided enough to make 2 frames. If you are only planning on making one frame, it is more cost effective to have something professionally framed. If you plan on making 3 or more frames and the other criteria mentioned above have been met it is better to DIY.
DIY CABINET REFACING INSTALLATION GUIDE
 DIY CABINET REFACING INSTALLATION GUIDE CABINET REFACING INSTALLATION Are you ready to reface your outdated cabinets? This guide will show you how to install your new Facelifters Cabinet Refacing Products
How to Build a Poker Table
 How to Build a Poker Table www.pokertablematerials.com 10-Person Poker Table- 96 x 48 These are step by step instructions for building a poker table. The table will measure 48" x 96" and have a 4" wide
How to Build Your Own CornHole Game
 How to Build Your Own CornHole Game DIMENSIONS Here is a diagram with the basic measurements for the Cornhole board game. SUPPLIES 1/2 thick sheet of plywood one 4 x4 or two 2 x4 s 8 long 2 4 s (4) 4 1/2
Installing Window and Door Mouldings
 Installing Window and Door Mouldings About Window and Door Mouldings The trim around windows and doors greatly influences the look and style of your interior. They also bridge the gaps and cover spaces
Gate Leg Drop Leaf Table Plans
 Preparing the table top blanks: Cut and glue enough 3/4 stock to make three panels 40 long by 24 wide (they will be cut to final size at a later time). While the glue dries we will work on the legs. Preparing
www.cornholesupplies.com
 www.cornholesupplies.com How To Build Regulation Cornhole Boards Home of the Original Cornhole Bags and Boards Supply List: 1-4' X 8' Piece of Plywood (pre sanded) 4-2" X 4" X 8' Studs (2 by 4s make sure
Ladder Shelf Plans Final dimensions: 25 L x 21 W x 72 H
 Ladder Shelf Plans Final dimensions: 25 L x 21 W x 72 H Copyright 2011. MLCS Woodworking. Page 1 Router bits and supplies needed: 3/8 Rabbeting bit (#10691) 1 Bottom Cleaning bit (#7941) Top and Bottom
The Hive Bodies. In the Beekeeper s Work Shop. Building a Bee Hive: The Hive Bodies. by Stephen E. Tilmann
 The Hive Bodies In the Beekeeper s Work Shop The hive body is the heart of a managed bee hive colony (Figure 1). It is where the queen lays her eggs, the house bees raise the brood and the workers store
COMPLIMENTARY WOODWORKING PLAN
 COMPLIMENTARY WOODWORKING PLAN Adirondack Chair This downloadable plan is copyrighted. Please do not share or redistribute this plan in any way. It has been created for Wilton Tools, a division of WMH
The JIG is UP Or A couple hours up front pays in the long run.
 Ed Simon Page 1 of 5 The JIG is UP Or A couple hours up front pays in the long run. A large part of the fun of beekeeping is the construction and assembly of the equipment. Since it is a hobby, I decided
Here is your set of Detailed Plans from Copyright 2004 All Rights Reserved
 Here is your set of Detailed Plans from Copyright 2004 All Rights Reserved Materials for the House Here is the list of materials you will need to construct the basic house then to cover it with roofing
FRAMED & MOUNTED TILE MURAL
 Page 1 of 5 There is no denying that tile murals have taken the sublimation industry by storm. The unique ability to take a customer s artwork or high resolution photograph, tile it using your software
Chapter 3 Installing Over-the-Post Railing on an L-Shaped Stair
 49 Chapter 3 Installing Over-the-Post Railing on an L-Shaped Stair In this chapter: The Over-the-Post Balustrade System Determining the Rail Centerline Using Rail Bolts Making a Pitch Block Laying Out
The tablesaw may be your shop s most valuable cutting. Crosscut Sleds. Foolproof. Innovative approach guarantees perfect results
 Foolproof Crosscut Sleds Innovative approach guarantees perfect results B Y A L A N T U R N E R The tablesaw may be your shop s most valuable cutting tool, but for precise, repeatable crosscuts it needs
HOW TO INSTALL A BEAUTIFUL NEW KITCHEN
 HOW TO INSTALL A BEAUTIFUL NEW KITCHEN Easy to follow step-by-step kitchen cabinet installation TOOL AND MATERIAL LIST Hammer Pry bar Screwdriver Phillips Flathead Level Tape measure Pencil Straight edge
KITCHEN INSTALLATION GUIDE
 KITCHEN INSTALLATION GUIDE The step-by-step guide to installing your new kitchen right The materials and tools you ll need This brochure is your guide to preparing and installing your new kitchen. Inside
Total Quantity: IMPORTANT: Plans are to be used with 3 x6 Plexiglass (SKU #298-017).
.") # Materials: Quantity Each: 4x4x8 3 2x4x8 2 2x8x8 1 4x8x3/4 plywood 1 3 x6 corkboard (can be 18 of the 1 x1 pieces) 1 3 x6 plexiglass 1 8 door casing 3 Primer 1 qt. Total Quantity: TIPS FOR SUCCESSFUL
# Materials: Quantity Each: 4x4x8 3 2x4x8 2 2x8x8 1 4x8x3/4 plywood 1 3 x6 corkboard (can be 18 of the 1 x1 pieces) 1 3 x6 plexiglass 1 8 door casing 3 Primer 1 qt. Total Quantity: TIPS FOR SUCCESSFUL
Cosmetics Case with Vinyl Interior Skill Level: Intermediate
 Cosmetics Case with Vinyl Interior Skill Level: Intermediate Designed By Lindsey Rhodes Sewn By Lindsey Rhodes http://lrstitched.com Use this step by step tutorial to create a roll-up cosmetics case with
Easy Six Cube Bookshelf. Copyrighted Material. Page 1
 Compare to: Land of Nod Cube Collection, 6 Cube Bookshelf Skill Level: Beginner Easy Six Cube Bookshelf I love the storage cubes in kids rooms because they give you an opportunity to have your children
Premier & Deluxe 3-Season Room Sliding Glass Door
 DTSSGD-11 Premier & Deluxe 3-Season Room Sliding Glass Door Installation Instructions Screen Door Seal Left Side Track Top Track Assembly Right Side Track Right Side Trim Sliding Glass Door Sliding Screen
Magnetic Levitation Track Construction Instruction Manual August 2012
 This document is intended to be used by Science Olympiad teams to assist them in building a magnetically-levitated track that will meet all specifications in the event rules for Magnetic Levitation and
These instructions will show you how to install an internal door into a non-loadbearing partition wall. The instructions are split into three parts.
 No 8 in the series of 'How to' brochures produced by PlaceMakers, New Zealand How to Frame and Hang a Door These instructions will show you how to install an internal door into a non-loadbearing partition
A Screened Bottom Board
 A Screened Bottom Board As the name implies, a bottom board sits at the bottom of the hive; it is the floor of the hive (Figure 1). Basically, the bottom board is a platform connected to two side rails.
Taking Wainscot Up Stairs
 Taking Wainscot Up Stairs raised MDF panels and stock moldings bring this elegant trim detail to the rest of the house BY GARY STRIEGLER I credit a lot of the success of my business to the trimwork we
Making Wooden Hinges
 Making Wooden Hinges By Alex Reid - www.mokkou.jp Materials and tools used - 3.2mm straight router bit - 1/8 round-over router bit - Flush-cut straight bit (with bearing on bottom) - Finger-joint jig -
CEILING SYSTEMS. Between us, ideas become reality. Installing. Suspended Ceilings. North America Version
 CEILING SYSTEMS Between us, ideas become reality Installing Suspended Ceilings North America Version 1 Installing Armstrong Suspended Ceilings An Armstrong suspended mineral fiber ceiling is functional,
3. Choose between an easy table (24 inches wide) and a hard table (20 inches wide).
 and a hard table (20 inches wide).") Ultra Carpetball Plans Version 2.0 The Best (And Only) Free Carpetball Plans On The Web By Matthew Campbell Instructions: 1. Read these instructions all the way through and look at all the diagrams before
Ultra Carpetball Plans Version 2.0 The Best (And Only) Free Carpetball Plans On The Web By Matthew Campbell Instructions: 1. Read these instructions all the way through and look at all the diagrams before
Gear PEPSI CAN STOVE INSTRUCTIONS
 Gear PEPSI CAN STOVE INSTRUCTIONS [NOTE: Updated Instructions are now available. The new stove is less likely to develop flame leaks and the fuel/air mixture is improved. Instructions for a simmer ring
How to Install UnderDeck The Original.
 How to Install UnderDeck The Original. TOOLS: Chalk Line Caulk Gun Garden hose or water bucket Gloves Hammer or Screw Gun Power Mitre Saw with OSB Blade Pencil Pliers Safety Glasses Straight Edge / Carpenter
SHELVES. www.tedswoodworking.com
 SHELVES It's rare that bookshelves look as interesting as the objects you display on them. After all, how much can you decorate the edges of your shelves and sides? This unit is unusual because the shelves
Children s Furniture Projects
 This is an excerpt from the book Children s Furniture Projects by Jeff Miller Copyright 2002 by The Taunton Press www.taunton.com CHILD S ROCKER KIDS ARE ALWAYS IN MOTION. It s not easy to get them even
Raised Panel Doors Made Simple With Freud s 2+2 Raised Panel Bit Set
 Raised Panel Doors Made Simple With Freud s 2+2 Raised Panel Bit Set Congratulations on your purchase of Freud s world class 2 + 2 Raised Panel Bit Set. This revolutionary design combines two small wings
3D Print Link's Hylian Shield
 3D Print Link's Hylian Shield Created by Ruiz Brothers Last updated on 2015-07-14 04:20:12 PM EDT Guide Contents Guide Contents Overview Parts, Tool & Supplies 3D Printing 3D Printed Parts Slicer Settings
BUILDINGA 1/10 SCALE FLATBED TRAILER
 VOLUME 1, ISSUE 1 BUILDINGA 1/10 SCALE FLATBED TRAILER BUILT, DESIGNED & WRITTEN BY NATHAN MYERS MATERIALS: FEATURES: While the design was kept simple to allow anyone to be able to build their own trailer,
How to Make and Apply Bias Binding by Alisa at Making More with Less (Busy Quilt Mom) for Sew Mama Sew
 for Sew Mama Sew") How to Make and Apply Bias Binding by Alisa at Making More with Less (Busy Quilt Mom) for Sew Mama Sew Bias Binding is an easy way to finish off edges and add interesting detail and colour to your sewing
How to Make and Apply Bias Binding by Alisa at Making More with Less (Busy Quilt Mom) for Sew Mama Sew Bias Binding is an easy way to finish off edges and add interesting detail and colour to your sewing
REDI-EXIT COMMERCIAL FIRE DOOR AND EXTERIOR DOOR KITS INSTALLATION GUIDELINES
 REDI-EXIT COMMERCIAL FIRE DOOR AND EXTERIOR DOOR KITS INSTALLATION GUIDELINES Tools Required Tape Measure Hammer Slotted Screw Driver #2 & #3 Philips Screw Driver 3-4 Foot Level 12 Pry Bar Cold Chisel
WINDOW TO THE SOUL HAPI QUILT
 PAGE 2 WINDOW TO THE SOUL HAPI QUILT To highlight the richness and depth of my Hapi fabrics I redesigned my Window to the Soul stained-glass motif to capture the great play between the prints and patterns
Picnic Table Plans. Made out of a single sheet of plywood, it s also portable! By Kevin Ayer. This children's picnic table would
 Picnic Table Plans Made out of a single sheet of plywood, it s also portable! By Kevin Ayer Materials One 4- by 8-foot sheet of 3 4-inch AC plywood Twelve 11 4-inch wood screws Primer and exterior paint
Installing Laminate Floor and Carpet Mike Teets July 2003
 Installing Laminate Floor and Carpet Mike Teets July 2003 Don't: Stay away from all foam backed carpet (foam attached to carpet) as it is mostly very cheap and won't hold up to the temp extremes and traffic
KITCHENS. Tip PAGE 1 FITTING YOUR KITCHEN GUIDE. How to mark out a kitchen. Tools required for installing a kitchen STEP ONE STEP TWO STEP THREE
 FITTING YOUR KITCHEN GUIDE How to mark out a kitchen PAGE 1 Before starting on the installation, measure 870mm from the lowest point of the floor and mark a datum line around the room to indicate where
Cedar Cottage Doghouse Plans
 Overlapping cedar shingles add an element of charm to this medium size doghouse. The walls, floor, and trim are constructed of solid cedar, making it naturally weather resistant and provides excellent
How To Level A Subfloor
 Skill Level: INTERMEDIATE Give these projects a try if you're a confident DIYer with a good working knowledge of a variety of tools. They can take a day or more to complete. If you can build a birdhouse
Rudder Repair and refinish
 Rudder Repair and refinish Montgomery 23 Dauntless The before photograph A receipt found inside the boat showed a previous owner had enlisted a boat yard to perform maintenance on the rudder by shortening
Black Wolf POCKET BILLIARD TABLE INSTALLATION MANUAL. SERVICE DEPARTMENT P.O. BOX 68 BRISTOL, WI 53104
 Black Wolf TM POCKET BILLIARD TABLE INSTALLATION MANUAL www.brunswickbilliards.com SERVICE DEPARTMENT P.O. BOX 68 BRISTOL, WI 53104 51-905710-000 SEPTEMBER 2010 NOTE: Please use the instructions in this
Installation Instructions
 Installation Instructions READ BEFORE INSTALLING UNIT For Low Profile Window Air Conditioner INSTALLATION WARNINGS AND CAUTION Carefully read the installation manual before beginning. Follow each step
INSTALLATION INSTRUCTIONS for Bifold Doors (JII103)
") Thank you for selecting JELD-WEN products. Attached are JELD-WEN s recommended installation instructions for premium composite, hollow and solid core molded Bifold Doors. Bifolds are designed for fast
Thank you for selecting JELD-WEN products. Attached are JELD-WEN s recommended installation instructions for premium composite, hollow and solid core molded Bifold Doors. Bifolds are designed for fast
Router Table Plans. www.bobsplans.com
 www.bobsplans.com Router Table Plans Increase the capabilities of your router with this weekend project. Features a sliding fence with EZ-Mount clamps. These clamps are simple to make and grip tightly
Assembly Instructions Basic Folding-Leg Box Frame Style
 Assembly Instructions Basic Folding-Leg Box Frame Style Basic Folding Leg Cornhole Board Concept 1 2 12 3 1 2 3 15 16 4 1 4 52 9 R1 3 4 6 21 48 12 1 4 Bolt Washer 9 13 16 35 Washer Double Nut CornholePlayers.net
Using the Laser Cutter and AutoCAD Template
 1 Using the Laser Cutter and AutoCAD Template This tutorial outlines the best way to cut and etch using the laser cutter. Your project is important to you, and you want to finish it efficiently. Using
How to Install Hardwood Flooring Over a Sub Floor
 How to Install Hardwood Flooring Over a Sub Floor Installation Preparation Instructions Read the entire instructions before starting your project. 1) INSPECT EACH PLANK (see fig. a) Wood is a natural product
STAIR TREAD & RISER INSTALLATION GUIDELINES
 STAIR TREAD & RISER INSTALLATION GUIDELINES ARTISTIC FINISHES DOES NOT WARRANTY THE COMPLETENESS OR ACCURACY OF ANY INSTALLATION. THE INSTALLATION CONTRACTER MUST HAVE THE EXPERIENCE AND KNOWLEDGE TO COMPLETE
Repairing Drywall Techniques for fixing everything from popped screws to big holes
 Repairing Drywall Techniques for fixing everything from popped screws to big holes BY MYRON R. FERGUSON C racks or holes in drywall, wet or stained drywall, peeling joint tape, popped nails or screws.
Building Pluto Subwoofers with Large PVC Pipe
 Building Pluto Subwoofers with Large PVC Pipe I decided to make the Pluto subwoofers from 10-12 diameter PVC pipe. It seemed to me that these would be a better visual match to the Plutos themselves. The
Wine Rack & Glass Storage Bench Chris Gardner
 Wine Rack & Glass Storage Bench Chris Gardner Quantity Length Width Material Part 2 48 16 3/4 birch plywood top, bottom 2 14 16 3/4 birch plywood sides 2 14 13 3/4 birch plywood support dividers 2 3 15
Vinyl Brick Mould Field Installation Instructions All Vinyl and Vinyl Clad Windows
 Vinyl Brick Mould Field Installation Instructions All Vinyl and Vinyl Clad Windows Viewed from the exterior. IMPORTANT: Please read before you begin installation. TABLE OF CONTENTS AND TOOL / MATERIAL
Build a Trade-Show Booth for Under $200!
 Build a Trade-Show Booth for Under $200! This corner booth, with a seven foot front and sweeping 4x8 backdrop, assembles in less than 20 minutes and can be built in one weekend. Materials Tools 4 x8 x3/4
Stair Parts Installation. Tricks
 Stair Parts Installation Tips & Tricks Introduction Your DIY staircase guide Welcome to the Stairpart home installation guide. Your stairway is both a functional and focal point in your home, so keeping
FREEBIRD THE ORIGINAL D.I.Y. ORNITHOPTER! Tools and Glue. Required Materials
 Do not try to make your ornithopter using "household materials". If you want it to fly, you have to build it right. FREEBIRD THE ORIGINAL D.I.Y. ORNITHOPTER! Wingspan: 16 inches Weight: 1/4 ounce The Ornithopter
How to Install GoBoard:
 How to Install GoBoard: A Step-by-Step Guide Durable, Ultra-Lightweight, Waterproof Tile Backer Board Introducing GoBoard Every tiling project requires a durable, waterproof surface under the tile, called
NATURAL RAILING INSTALLATION INSTRUCTIONS
 NTURL RILING INSTLLTION INSTRUCTIONS Manufactured by fiberondecking.com 800.573.8841 FI-0217-PKG 5/14 Natural Railing Installation Instructions Natural Top Rail Profile Required Tools and Supplies: Power
The M14 Conversion to The M1 Garand Version One
 The M14 Conversion to The M1 Garand Version One Project Completed and Written By Lee Cassar Feb. 19, 2007 Table of Contents Introduction:... 3 Tools needed for the Conversion:... 4 Disassembly:... 5 Modifications:...
GARDEN WINDOW GLAZING AND DE-GLAZING INSTRUCTIONS
 GARDEN WINDOW GLAZING AND DE-GLAZING INSTRUCTIONS DE-GLAZING 1.) If there is any PVC cement covering the joints where external glazing bead strips meet, cut through the cement with a utility knife. 2.)
AZEK Rail Install Guide
 TRIM MOULDING DECK PORCH RAIL PAVERS AZEK Rail Install Guide Installing AZEK Rail with Glass Infill... 2 Installing AZEk Rail Stairs with Glass Infill... 9 Notes...14 Please read all instructions completely
Bathroom Installation Guide
 Bathroom Installation Guide Step-by-step installation of your cabinets We do a lot of groundwork to make it as simple as possible for you to assemble and install your new bathroom furniture yourself. We
PANELIZED HOME INSTALLATION GUIDELINE
 PANELIZED HOME INSTALLATION GUIDELINE A typical home package will be constructed of Snap-N-Lock Insulated Panels clad with steel skins. 4" panels will be used for the walls, and 6" panels for the roof.
Pepper Mill Instructions by Fred Kachelhofer
 by Fred Kachelhofer I have seen Nick Cook turn a pepper mill twice and read his article posted at http://www.nickcookwoodturner.com/articles.htm (follow link and then click on Pepper Mill ). I have had
SCA Calligraphy 101. Marko Evanovich Panfilov September 26th, A.S. 37 (2002)
") SCA Calligraphy 101 Marko Evanovich Panfilov September 26th, A.S. 37 (2002) These tips and guidelines are based purely on personal experience and should not be considered a complete discussion of the subject.
SCA Calligraphy 101 Marko Evanovich Panfilov September 26th, A.S. 37 (2002) These tips and guidelines are based purely on personal experience and should not be considered a complete discussion of the subject.
COMPACT ELITE MAT CUTTER
 INSTRUCTION MANUAL MODEL 350-1 COMPACT ELITE MAT CUTTER INSTRUCTIONS AND OPERATION MANUAL 32in (81cm) mat cutting system with bevel & straight cutters, production stops and 20 in (51 cm) squaring bar.
Unlike a porch, which is protected by a roof,
 Rehabbing a Rotted 34 Professional Deck Builder January/February 2013 Porch Stair A template helps to fit the bottom tread neatly around the posts by Emanuel Silva Unlike a porch, which is protected by
Complete Dovetail Jig Instructions
 Complete Dovetail Jig Instructions 18 15 1 12 13 8 (22818) 19 17 16 4 3 6 14 5 9 9 11 10 2 PARTS LIST - COMPLETE DOVETAIL JIG Introduction Your new dovetail jig will cut Full Through Dovetails and three
HALE PET DOOR INSTALLATION INSTRUCTIONS HALE STANDARD PANEL MODEL
 HALE PET DOOR INSTALLATION INSTRUCTIONS HALE STANDARD PANEL MODEL Please read these instructions carefully and completely before attempting to install Hale Pet Doors; they will guide you through the steps
We urge you to read and follow the attached installation instructions. Failure to do so may void the warranty of this garden window unit.
 Important Information for New Construction Installations Attention Installer! We urge you to read and follow the attached installation instructions. Failure to do so may void the warranty of this garden
Plans will call for one of two soffit/fascia details:
 Plans will call for one of two soffit/fascia details: Ventilated vinyl soffit with bent aluminum fascia OR Ventilated LP Smartside soffit panels with 1x6 rabbeted fascia First, let s talk terminology:
QWALL 4 ACRYLIC SHOWER WALL INSTALLATION INSTRUCTIONS
 QWALL 4 ACRYLIC SHOWER WALL INSTALLATION INSTRUCTIONS IMPORTANT DreamLine TM reserves the right to alter, modify or redesign products at any time without prior notice. For the latest up-to-date technical
Go-kart for little race-drivers
 Go-kart for little race-drivers Drill and drive. Go-kart What it lacks in speed, it more than makes up for in fun: the go-kart will excite little race-drivers. 1 Introduction It s only a go-kart, but it
How To Bind A Book
 Exerpt from How To Make Your Own Book By Harvey Weiss Binding: Stapling and Sewing The term binding is sometimes used to describe the cover of a book. For example, you might refer to a book as having a
1958-64 WINDOW CHANNEL, WEATHERSTRIP & WHISKER STRIP REPLACEMENT FOR 2-DOOR SEDANS
 By Denny Williams Photos by Denny Williams 1958-64 WINDOW CHANNEL, WEATHERSTRIP & WHISKER STRIP REPLACEMENT FOR 2-DOOR SEDANS Denny Williams - Technical Writer Denny is first and foremost a dyed-in-thewool
HOW-TO LAY HARDBOARD OR PLYWOOD FLOOR OVERLAY
 HOW-TO HOW-TO LAY HARDBOARD OR PLYWOOD FLOOR OVERLAY Most floor coverings, if laid over uneven wooden floors, will wear unevenly and look unsightly. The answer is to cover the old boards with hardboard
DECKING INSTALLATION, CARE & MAINTENANCE INSTRUCTIONS. 866.729.2378 MOISTURESHIELD.COM limited lifetime warranty 866.729.2378 WWW.MOISTURESHIELD.
 DECKING INSTALLATION, CARE & MAINTENANCE INSTRUCTIONS 866.729.2378 MOISTURESHIELD.COM limited lifetime warranty Welcome To The Even Greater Outdoors. Congratulations on choosing MoistureShield for your
Wren Kitchens Installation Tips... 3. Carefully check your kitchen delivery... 4. Measuring out and marking up... 5. Fitting the base cabinets...
 tra 1 Index Wren Kitchens Installation Tips... 3 Carefully check your kitchen delivery... 4 Measuring out and marking up... 5 Fitting the base cabinets... 6 Fitting the corner cabinets... 7 The 972mm or
Chrome Finishing For 3d Powder Prints
 Chrome Finishing For 3d Powder Prints Powder Printing is definitely a very good technology for producing complex parts, but it can only generate the shape and that is not all about the appearance. Post
THE MINI AERO GRILL INSTALLATION ON MCS STOCK FRONT BUMPER
 THE MINI AERO GRILL INSTALLATION ON MCS STOCK FRONT BUMPER Original instructions (from www.r53w11.com): Some basic rules: Take your time, re-read all you instructions, and make sure you have all your parts
Customer Service 800.780.8889 or visit us online at smithnoble.com. Wood Shutters. Step by Step Installation. Troubleshooting Tips
 reflect your style TM Customer Service 800.780.8889 or visit us online at smithnoble.com Wood Shutters Step by Step Installation Troubleshooting Tips Easy Care Instructions STEP 1 Your New Shutter Thank
SUPER SHED. Indoor shelter for your outdoor tools.
 SUPER SHED Indoor shelter for your outdoor tools. Not everyone needs a garden shed. But, if you've no more space on your garage wall for that new leaf rake, if you can't find your potting trowel because
Responsibilities of a Volunteer Leader
 Responsibilities of a Volunteer Leader Inspecting tools for safe conditions. Removing unsafe tools from use and immediately notifying site supervisor. Teaching safe tool use to volunteers on your crew.
TOOLS FOR SELF RELIANCE REFURBISHING SHEET No 2. Registered Charity No 280437. Saws for Woodworking
 Registered Charity No 280437 Saws for Woodworking Issued December 2002 Registered Charity No 280437 page no 1 SAW TYPES Rip saw For cutting along the grain Crosscut saw [A smaller version is known as a
SEGMENTED WOODTURNING
 Notes on: SEGMENTED WOODTURNING Malcolm Tibbetts www.tahoeturner.com malcolm@tahoeturner.com (530) 541-6135 MATHEMATICAL FORMULAS AND CONCEPTS: A circle contains 360 Circumference = Diameter x π(3.1416)
READ THE INSTRUCTIONS SEVERAL TIMES BEFORE STARTING ASSEMBLY
 1954-87 CHEV BED INSTRUCTIONS (Revised Nov 2002) Thank you and congratulations on your purchase of the finest Street Rod Pickup Bed on the market today. The following instructions should help you assemble
Building an Off-Center Fixture for Turning Pendants
 Building an Off-Center Fixture for Turning Pendants Turning a pendant off-center with most available metal pendant chucks means that you will have a significant amount of mass off center, which will limit
30 minutes in class, 2 hours to make the first time
 Asking questions and defining problems Developing and using models Planning and carrying out investigations 30 minutes in class, 2 hours to make the first time 3 12 x 24 x ¾ inch plywood boards 1 x 12
Do-It-Yourself- Hydraulic Press Make Your Own, by Marshel Rossow
 Do-It-Yourself- Hydraulic Press Make Your Own, by Marshel Rossow This press can be built from readily available metal. Materials and dimensions need not be exactly what is shown here. Much of the material
AZEK Rail Install Guide
 TRIM MOULDING DECK PORCH RAIL PAVERS AZEK Rail Install Guide Installing AZEK Rail with CableRail by Feeney... 1 Installing CableRail by Feeney for AZEK Rail... 7 Installing AZEK Rail Stairs with CableRail
Composite Stone Veneer
 Composite Stone Veneer Installation Guide Ver 1 Jun 2015 www.compstone.com Composite Stone Veneer Installation Guide Contents Introduction & Overview 3 Required Tools 4 Optional Tools 4 Attachment Guidelines:
Installation Manual for STANDING SEAM ROOFING
 Installation Manual for STANDING SEAM ROOFING Absolute Steel Toll Free 877-833-3237 / Phone 480-768-1618 / Fax 480-768-1514 www.metalroofingsource.com Standing Seam features approximately one-inch high
Speed-Mat Rectangle Cutter
 Speed-Mat Rectangle Cutter 1 Honeycomb baseboard. 2 Left hold down. 14 3 Bottom hold down. 4 4 Left / right rule. 8 5 8 5 Left / right rule pointer. 1 6 Top / bottom rule. 7 Top / bottom rule pointer.
Brick Veneer Construction
 Brick Veneer Construction Check list of suggested tools & support items Claw hammer Tape measure 3/4" [19 or 20] Wood chisel Wood or plastic shims Pry bar Utility knife Caulking and caulking gun Power
Pole Lathe and Shave Horse Design
 Pole Lathe and Shave Horse Design These pictures and accompanying words are Copyright Michael Hughes February 2002. They are not to be re-produced, in part or whole, without permission from the author.
MGB Chrome Bumper Conversion
 MGB Chrome Bumper Conversion Installation Instructions For 1974 1/2-1980 MGB This kit requires cutting, welding, and painting. Professional installation recommended. Note: Every MGB body is slightly different
AwanaGames Circle. Official. Diagram 1. Key to diagram: Pin & Striped Bean Bag C Diagonal or Starting Line. B Scoring Pins, or Center.
 Official AwanaGames Circle Diagram 1 The AwanaGames Circle is 30 feet in diameter surrounded by a 37-40 foot square. Each team is designated by a color and occupies a quarter-circle or one side of that
HSC 2001 - Industrial Technology Band 4/5 INDUSTRIAL TECHNOLOGY FOLIO
 Statement of Intent I intend to construct a slim boy which will suit my needs and will be compatible with my furniture in my bedroom in my house. This will be very handy and useful to everyone in my home.