User Guide 4G-AC55U. Dual-Band Wireless-AC1200 LTE Modem Router
|
|
|
- Kellie Peters
- 7 years ago
- Views:
Transcription
1 User Guide 4G-AC55U Dual-Band Wireless-AC1200 LTE Modem Router

2 E10633 Second Edition V2 June 2015 Copyright 2015 ASUSTeK Computer Inc. All Rights Reserved. No part of this manual, including the products and software described in it, may be reproduced, transmitted, transcribed, stored in a retrieval system, or translated into any language in any form or by any means, except documentation kept by the purchaser for backup purposes, without the express written permission of ASUSTeK Computer Inc. ( ASUS ). Product warranty or service will not be extended if: (1) the product is repaired, modified or altered, unless such repair, modification of alteration is authorized in writing by ASUS; or (2) the serial number of the product is defaced or missing. ASUS PROVIDES THIS MANUAL AS IS WITHOUT WARRANTY OF ANY KIND, EITHER EXPRESS OR IMPLIED, INCLUDING BUT NOT LIMITED TO THE IMPLIED WARRANTIES OR CONDITIONS OF MERCHANTABILITY OR FITNESS FOR A PARTICULAR PURPOSE. IN NO EVENT SHALL ASUS, ITS DIRECTORS, OFFICERS, EMPLOYEES OR AGENTS BE LIABLE FOR ANY INDIRECT, SPECIAL, INCIDENTAL, OR CONSEQUENTIAL DAMAGES (INCLUDING DAMAGES FOR LOSS OF PROFITS, LOSS OF BUSINESS, LOSS OF USE OR DATA, INTERRUPTION OF BUSINESS AND THE LIKE), EVEN IF ASUS HAS BEEN ADVISED OF THE POSSIBILITY OF SUCH DAMAGES ARISING FROM ANY DEFECT OR ERROR IN THIS MANUAL OR PRODUCT. SPECIFICATIONS AND INFORMATION CONTAINED IN THIS MANUAL ARE FURNISHED FOR INFORMATIONAL USE ONLY, AND ARE SUBJECT TO CHANGE AT ANY TIME WITHOUT NOTICE, AND SHOULD NOT BE CONSTRUED AS A COMMITMENT BY ASUS. ASUS ASSUMES NO RESPONSIBILITY OR LIABILITY FOR ANY ERRORS OR INACCURACIES THAT MAY APPEAR IN THIS MANUAL, INCLUDING THE PRODUCTS AND SOFTWARE DESCRIBED IN IT. Products and corporate names appearing in this manual may or may not be registered trademarks or copyrights of their respective companies, and are used only for identification or explanation and to the owners benefit, without intent to infringe. 2
 the product is repaired, modified or altered, unless such repair, modification of alteration is authorized in writing by ASUS; or (2) the")
3 Table of contents 1 Getting to know your wireless router 1.1 Welcome! Package contents Your wireless router Device Properties Positioning your router Installing your router Prepare the setup requirements Set up your LTE wireless router Getting started 2.1 Quick Internet Setup (QIS) with Auto- detection Quick Look your Wireless Router 3.1 Using the Network Map Setting up the wireless security settings System Status Managing your network clients Monitoring the Internet Status Monitoring your USB device Configuring the Advanced Settings 4.1 Wireless General WPS WDS Wireless MAC Filter RADIUS Setting Professional Guest Network

4 Table of contents 4.2 LAN LAN IP DHCP Server Route IPTV Switch Control WAN Internet Connection IPv6 (Internet Settings) Dual WAN Port Trigger Virtual Server/Port Forwarding DMZ DDNS NAT Passthrough Traffic Manager QoS Traffic Monitor Setting up Parental Controls Firewall General URL Filter Keyword filter Network Services Filter IPv6 Firewall Using the USB Application Using AiDisk Using Servers Center Download Master Configuring Bit Torrent download settings

5 Table of contents NZB settings emule settings Using AiCloud Cloud Disk Smart Access Smart Sync Sync Server Settings Administration Operation Mode System Firmware Upgrade Restore/Save/Upload Setting System Log Ethernet WAN Mobile Broadband Function Support List.98 5 Utilities 5.1 Device Discovery Firmware Restoration Setting up your printer server ASUS EZ Printer Sharing Using LPR to Share Printer Troubleshooting 6.1 Basic Troubleshooting Frequently Asked Questions (FAQs) Appendices Notices ASUS Contact information Networks Global Hotline Information
...113 Appendices Notices...122 ASUS Contact information.")
6 1 Getting to know your wireless router 1.1 Welcome! Thank you for purchasing an ASUS 4G-AC55U Wireless Router! The powerful and stylish 4G-AC55U features 2.4GHz and 5GHz dual bands for an unmatched concurrent wireless HD streaming; SMB server, UPnP AV server, and FTP server for 24/7 file sharing; a capability to handle 300,000 sessions; and the ASUS Green Network Technology, which provides up to 70% power-saving solution. 1.2 Package contents 4G-AC55U Wireless Router Network cable (RJ-45) Support CD (User Manual) 2 x 3G/4G antennas AC adapter Quick Start Guide SIM adapter NOTES: If any of the items is damaged or missing, contact your retailer or ASUS for technical inquiries and support, Refer to the ASUS Support Hotline list at the back of this user manual. Keep the original packaging material in case you would need future warranty services such as repair or replacement. 6
 Support CD (User Manual) 2 x 3G/4G antennas AC adapter Quick Start Guide SIM adapter NOTES: If any of the items is damaged or")
7 1.3 Your wireless router 3G/4G antenna 3G/4G antenna Wi-Fi antenna G/4G signal strength LED 1 lit LED: Weak signal 2 lit LEDs: Normal signal 3 lit LEDs: Strong signal USB 2.0 LED Off: No power or no physical connection. On: Has physical connection to USB 2.0 devices. LAN LED Off: No data activity or no physical connection. On: Ethernet connection is established. 2.4GHz Wi-Fi LED Off: No 2.4GHz signal. On: 2.4GHz wireless is ready. Flashing: Transmitting or receiving data via wireless connection. 5GHz Wi-Fi LED Off: No 5GHz signal. On: 5GHz wireless is ready. Flashing: Transmitting or receiving data via wireless connection. WAN LED Off: No data activity or no physical connection. On: Has physical connection to a wide area network (WAN). 3G/4G Mobile Broadband LED Off: No mobile broadband Internet connection. Flashing: Establishing a LTE/Ethernet WAN connection. On: Successfully established a Mobile Broadband Internet connection. 7

8 Power LED Off: No power. On: Device is ready. Flashing slow: Rescue mode Flashing quick: WPS is processing. SIM card slot Install a USIM card with the bundled SIM adapter into this slot to establish a Mobile Broadband Internet connection. Mobile broadband signal button Long press the button to show the signal strength. The number of LEDs (up to 10 LEDs) that light up indicate the signal strength. WPS button Long press the button to launch the WPS Wizard. Power switch Press this button to power on or off the system. Power (DC-In) port Insert the bundled AC adapter into this port and connect your router to a power source. USB 2.0 port Insert USB 2.0 compatible devices such as USB hard disks or USB flash drives into this port. WAN port Connect a network cable into this port to establish WAN connection. 16 Wi-Fi On/Off button Press this button to turn on /off the Wi-Fi connection. 17 LAN ports Connect network cables into these ports to establish LAN connection. 18 Reset button This button resets or restores the system to its factory default settings. NOTES: Use only the adapter that came with your package. Using other adapters may damage the device. Ensure to insert the SIM card into the card slot before powering on the router. 8

9 1.4 Device Properties Power Consumption: Input: AC 230 V / 50 HzV, DC 19V /1.75A (EU)(UK) Maximum power consumption: 17.1 W Average power consumption: 11.4 W The average power consumption was determined at room temperature ( 23 C to 27 C ) with the following load: Active Mobile Broadband connection Wireless LAN on; no devices are connected to the wireless LAN One network device is connected to a LAN port; no data transfer; no network devices are connected to the other LAN ports Ambient conditions: DC Power adapter DC Output: +19V with max 1.75A current Operating Temperature 0~40 o C Storage Temperature 0~70 o C Operating Humidity 10 ~ 90% Storage Humidity 5 ~ 95% 9

10 1.5 Positioning your router For the best wireless signal transmission between the wireless router and the network devices connected to it, ensure that you: Place the wireless LTE router near a window to receive the best quality for maximum wireless upstream performance with an LTE base station. Keep the device away from metal obstructions and away from direct sunlight. Do not place the Wireless LTE Router in a dusty or wet environment. To prevent signal loss, keep the device away from g or 20MHz only Wi-Fi devices, 2.4GHz computer peripherals, Bluetooth devices, cordless phones, transformers, heavy-duty motors, fluorescent lights, microwave ovens, refrigerators, and other industrial equipment. Always update to the latest firmware. Visit the ASUS website at to get the latest firmware updates. To ensure the best wireless signal, orient the two detachable antennas as shown in the drawing below. 10

11 1.6 Installing your router Prepare the setup requirements. To set up your wireless network, you need to meet the following requirements: A mini SIM/USIM card with WCDMA and LTE subscription IMPORTANT! Ensure that your SIM/USIM card is subscribed to WCDMA and LTE services. Contact your mobile service provider about these services. If you use a 3rd party adapter, ensure that you cut off the portion marked in red above to avoid stocking the SIM adapter in SIM slot. CAUTION! Use only a standard SIM/USIM card with the bundled SIM adapter on your router. Using a different form of SIM card type, such as micro or nano SIM card, may result to a stuck SIM card and may damage your router. An ADSL/cable modem with Internet subscription A computer with Ethernet RJ-45 (LAN) port (10/100/1000 Base-TX) or a Wi-Fi-enabled device with a 2.4 GHz and 5 GHz a/b/g/n/ac wireless interface Web browser such as Internet Explorer, Firefox, Safari, or Google Chrome 11

12 1.6.2 Set up your LTE wireless router. b a a Wall Power Outlet c d f Power Modem e g LAN WAN Computer a. Attach the two 3G/4G antennas. b. Insert the SIM/USIM card into the USIM card slot. When the SIM/USIM card is properly installed, the Mobile Broadband LED lights up and flashes slowly after power on. See Install SIM/USIM card into your router. c. Insert the AC adapter of your router to the DC-IN port and plug it to a power outlet. d. Turn on your router. e. Using a network cable, connect your modem to the WAN port of your router. When the network cable is properly connected, the WAN LED lights up. f. Insert the AC adapter of your modem to the DC-IN port and plug it to a power outlet. NOTE: You can use either 3G/4G or wired Ethernet connection for Internet access. g. Using the bundled network cable, connect your computer to the LAN port of your router. 12

13 Manually connecting to a wireless network NOTE: Ensure that you press the Wi-Fi button on your router. 1. Enable the Wi-Fi function on your wireless client for it to automatically scan for wireless networks. 2. Select the wireless network named ASUS or ASUS_5G, which is the default wireless network name (SSID) of ASUS wireless routers. Installing SIM/USIM card into your router 1. Find the SIM card tray at the side of the router. 2. Pull out the tray. 3. Place the SIM/USIM card on the tray and push the tray all the way into the slot. Bundled SIM Adapter 1 Micro SIM Bundled SIM Adapter 2 Nano SIM NOTES: Use only the bundled SIM adapter. Always insert the SIM adapter with a Micro SIM card or Nano SIM card. The SIM adapter might get stuck if it is inserted alone. 13

14 2 Getting started 2.1 Quick Internet Setup (QIS) with Autodetection To set up your router using QIS (Quick Internet Setup): 1. Press the power button at the back of your router. Ensure that the following LEDs light up: Power LED 2.4GHz Wi-Fi LED WAN or Mobile 5GHz Wi-Fi LED Broadband LED 2. Launch your web browser such as Internet Explorer, Firefox, Google Chrome, or Safari. NOTE: If QIS does not launch automatically, enter or in the address bar and refresh the browser again. 3. Log into the Web GUI. The QIS page launches automatically. By default, the login username and password for your router s Web GUI is admin. 14


15 4. Assign your router login name and password and click Next. You need this login name and password to log into 4G-AC55U to view or change the router settings. You can take note of your router login name and password for future use. 5. If the WAN port is connected, the wireless router s Quick Internet Setup (QIS) feature automatically detects if your ISP connection type is Dynamic IP, PPPoE, PPTP, L2TP, and Static IP. Please obtain the necessary information from your Internet Service Provider (ISP). If your connection type is Dynamic IP (DHCP), QIS wizard will automatically direct you to the next step. for Automatic IP (DHCP) The DHCP server automatically assigns the IP address. 15
.")


16 for PPPoE, PPTP, and L2TP You need to key in the account name and password that you obtained from your ISP for Internet connection. for Static IP You need to manually configure the IP address. 6. If a 3G/4G network is connected, the wireless router s Quick Internet Setup (QIS) feature automatically detects and applies the APN setting to connect to the wireless base station. If the QIS wizard failed to automatically apply the APN setting or the SIM card prompts for a PIN code, set up the APN setting manually. NOTE: The PIN code may vary from different providers. 16

17 7. The dual WAN connection configuration result is displayed. Click Next to continue. Mobile Broadband Connection is configured successfully Ethernet WAN Connection is configured successfully 8. If both WAN are configured, go to next step to configure the wireless LAN settings. 17


18 9. Assign the network name (SSID) and security key for your 2.4GHz and 5GHz wireless connection. Click Apply when done. 10. Your Internet and wireless settings are displayed. Click Next to complete the QIS process. 11. The 3G/4G signal strength LED lights up and is steady after completing the 3G/4G network settings via QIS, indicating a successful Internet connection. 18

19 3 Quick Look your Wireless Router 3.1 Using the Network Map Network Map allows you to check the Internet connection status, configure your network s security settings, and manage your network clients. 19

20 3.1.1 Setting up the wireless security settings To protect your wireless network from unauthorized access, you need to configure its security settings. To set up the wireless security settings: 1. From the navigation panel, go to General > Network Map. 2. On the Network Map screen, click System status icon. You can configure the wireless security settings such as wireless name(ssid), authentication method, and encryption settings. 2.4GHz security settings 5GHz security settings 20
, authentication method, and encryption")
21 3. On the Wireless name (SSID) field, key in a unique name for your wireless network. 4. From the Authentication Method dropdown list, select the authentication method for your wireless network. If you select WPA-Personal or WPA-2 Personal as the authentication method, key in the WPA-PSK key or security passkey. IMPORTANT! The IEEE n/ac standard prohibits using Low Throughput with WEP or WPA-TKIP as the unicast cipher. If you use these encryption methods, your data rate will drop to IEEE g 54Mbps connection. 5 Click Apply when done System Status To monitor the system resources: 1. From the navigation panel, go to General > Network Map. 2. On the Network Map screen, click the System status icon. you can find the information about CPU and memory usage. 21
22 3.1.3 Managing your network clients To manage your network clients: 1. From the navigation panel, go to General > Network Map tab. 2. On the Network Map screen, select the Client Status icon to display your network client s information. 22
23 3. On Client status table, click the device icon to show the detailed profile of the device. To block a client s access to your network, select the client and click block icon. 23
24 3.1.4 Monitoring the Internet Status To monitor your Internet status: 1. From the navigation panel, go to General > Network Map tab. 2. On the Network Map screen, select the Internet icon to display your Internet configuration. 3. To terminate WAN interface from your network, click Disable button on Terminate WAN Interface. Primary WAN Secondary WAN 24

25 3.1.5 Monitoring your USB device The ASUS wireless router provides one USB port for connecting USB devices or USB printer to allow you to share files and printer with clients in your network. To monitor your USB device: 1. From the navigation panel, go to General > Network Map tab. 2. On the Network Map screen, select the USB Disk Status icon to display your USB device s information. 3. On the Media Server field, click GO to set up an itune and DLNA server for local media file sharing. NOTE: The wireless router works with most USB HDDs/Flash disks (up to 2 TB size) and supports read-write access for FAT16, FAT32, EXT2, EXT3, and NTFS. 4. On the AiDisk Wizard field, click GO to set up an FTP server for Internet file sharing. 5. To eject USB Disk from USB interface, click Remove button on Safely Remove disk field. When the USB disk is ejected successfully, the USB status shows Unmounted. 25

26 4 Configuring the Advanced Settings 4.1 Wireless General The General tab allows you to configure the basic wireless settings. To configure the basic wireless settings: 1. From the navigation panel, go to Advanced Settings > Wireless > General tab. 2. Configure wireless basic configuration for 2.4GHz or 5GHz frequency band. 3. In the SSID field, assign a unique name containing up to 32 characters for your SSID (Service Set Identifier) or network name to identify your wireless network. Wi-Fi devices can identify and connect to the wireless network via your assigned SSID. The SSIDs on the information banner are updated once new SSIDs are saved to the settings. 26
27 4. In the Hide SSID field, select Yes to prevent wireless devices from detecting your SSID. When this function is enabled, you would need to enter the SSID manually on the wireless device to access the wireless network. 5. In the Wireless Mode field, select any of these wireless mode options to determine the types of wireless devices that can connect to your wireless router: Auto: Select Auto to allow ac, n, g, b and a devices to connect to the wireless router. Legacy: Select Legacy to allow b/g/n devices to connect to the wireless router. Hardware that supports n natively, however, will only run at a maximum speed of 54Mbps. b/g Protection: Tick b/g Protection to allow wireless router protect n transmissions performance from legacy devices with g, b connection. 6. In the Control Channel field, select the operating channel for your wireless router. Select Auto to allow the wireless router to automatically select the channel that has the least amount of interference. 7. In the Channel bandwidth field, select any of these channel bandwidth to accommodate higher transmission speeds: 20/40MHz (default): Select this bandwidth to automatically select the best bandwidth for your wireless environment. In 5GHz band, the default bandwidth 20/40/80MHz is selected. 80MHz: Select this bandwidth to maximize the wireless throughput of 5GHz radio. 40MHz: Select this bandwidth to maximize the wireless throughput of 2.4GHz radio. 20MHz: Select this bandwidth if you encounter some issues with your wireless connection. 8. If 20/40/80MHz, 20/40MHz, 40MHz or 80MHz is selected, you can define a upper or lower adjacent channel in the Extension Channel field to be accommodated 9. In the Authentication Method field, select any of these authentication methods: 27
 or WPA Auto-Personal (with AES or TKIP + AES). If you select this option, you must enter the WPA Pre-Shared Key (network key).")
28 Open System: This option provides no security. WPA2-Personal / WPA Auto-Personal: This option provides strong security. You can use either WPA2- Personal (with AES) or WPA Auto-Personal (with AES or TKIP + AES). If you select this option, you must enter the WPA Pre-Shared Key (network key). WPA2 Enterprise / WPA Auto-Enterprise: This option provides very strong security. It is with integrated EAP server or an external RADIUS back-end authentication server. 11. When done, click Apply WPS WPS (Wi-Fi Protected Setup) is a wireless security standard that allows you to easily connect devices to a wireless network. You can configure the WPS function via the PIN code or WPS button. NOTE: Ensure that the devices support WPS. 28
29 To enable WPS on your wireless network: 1. From the navigation panel, go to Advanced Settings > Wireless > WPS tab. 2. In the Enable WPS field, move the slider to ON. 3. WPS uses 2.4GHz and 5GHz radio concurrently. 4. You can use any of the following WPS methods for wireless connection pairing: PBC (Push Button Configuration) Mode: Hardware PBC on the router: Press the physical WPS button on wireless router, and then press WPS button on wireless client for three (3) minutes. Software PBC on the router: Tick <Push button> on WPS Method field, click Start, and then press the WPS button on the wireless client for three (3) minutes. PIN Code Mode: Pairing from the wireless client: Press the WPS button on the wireless router, and then perform WPS connection process in PIN code mode and enter the AP PIN Code on the client device. Pairing from the wireless router: Press the WPS button on wireless client, and then perform the WPS connection process in PIN code mode and enter the Client PIN Code on the WPS Method > Client PIN Code filed. Check if the PIN code is correct and then click Start to pair with wireless client. NOTES: WPS supports authentication using Open System and WPA2- Personal. WPS does not support a wireless network that uses a Shared Key, WPA-Personal, WPA-Enterprise, WPA2-Enterprise, and RADIUS encryption method. Check your wireless device or its user manual for the location of the WPS button. During the WPS process, the wireless router scans for any available WPS devices. If the wireless router does not find any WPS devices, it switches to idle mode. The router s power LED indicators quickly flash three minutes until the WPS setup is completed. 29

30 4.1.3 WDS Bridge or WDS (Wireless Distribution System) allows your ASUS wireless router to connect to another wireless access point exclusively, preventing other wireless devices or stations to access your ASUS wireless router. It can also be considered as a wireless repeater where your ASUS wireless router communicates with another access point and other wireless devices. To set up the wireless bridge: 1. From the navigation panel, go to Advanced Settings > Wireless > WDS tab. 30
31 2. Select the band for the wireless bridge. 3. In the AP Mode field, select any of these options: AP Only: Disables the WDS function. WDS Only: Enables the WDS feature but prevents other wireless devices/stations from connecting to the router. HYBRID: Enables the Wireless Bridge feature and allows other wireless devices/stations to connect to the router. 4. In the Connect to APs in list field, click Yes if you want to connect to an Access Point listed in the Remote AP List. 5. On the Remote AP List, key in a MAC address and click the Add button to enter the MAC address of other available Access Points 6. Click Apply. NOTES: In Hybrid mode, wireless devices connected to the ASUS wireless router only receives half the connection speed of the Access Point. Any Access Point added to the list should be on the same Control Channel and the same fixed Channel bandwidth as the local ASUS wireless router. You can modify the Control Channel from Advanced Settings > Wireless > General tab. 31
32 4.1.4 Wireless MAC Filter Wireless MAC filter provides control over packets transmitted to a specified MAC (Media Access Control) address on your wireless network. To set up the Wireless MAC filter: 1. From the navigation panel, go to Advanced Settings > Wireless > Wireless MAC Filter tab. 2. Tick Yes in the Enable Mac Filter field. 3. In the MAC Filter Mode dropdown list, select either Accept or Reject. Select Accept to allow devices in the MAC filter list to access to the wireless network. Select Reject to prevent devices in the MAC filter list to access to the wireless network. 4. On the MAC filter list, click the Add button and key in the MAC address of the wireless device. 5. Click Apply. 32

33 4.1.5 RADIUS Setting RADIUS (Remote Authentication Dial In User Service) Setting provides an extra layer of security when you choose WPA- Enterprise, WPA2-Enterprise, or Radius with 802.1x as your Authentication Mode. To set up the wireless RADIUS settings: 1. Ensure that the wireless router s authentication mode is set to WPA-Enterprise or WPA2-Enterprise. NOTE: Please refer to section General for configuring your wireless router s Authentication Mode. 2. From the navigation panel, go to Advanced Settings > Wireless > RADIUS Setting. 3. Select the frequency band. 4. In the Server IP Address field, key in your RADIUS server s IP Address. 5. In the Server Port field, key in the server port. 6. In the Connection Secret field, assign the password to access your RADIUS server. 7. Click Apply. 33

34 4.1.6 Professional The Professional screen provides advanced configuration options. NOTE: We recommend that you use the default values on this page. In the Professional Settings screen, you can configure the following: Frequency: Select the frequency band that the professional settings will be applied to. Enable Radio: Select Yes to enable wireless networking. Select No to disable wireless networking. 34
35 Enable wireless scheduler: Select Yes to enable wireless networking by the following schedule rules. Select No to disable the schedule rules. Date to Enable Radio (weekdays): You can specify which days of the week wireless networking is enabled. Time of Day to Enable Radio: You can specify a time range when wireless networking is enabled during the week. Date to Enable Radio (weekend): You can specify which days of the weekend wireless networking is enabled. Time of Day to Enable Radio: You can specify a time range when wireless networking is enabled during the weekend. Set AP isolated: The Set AP isolated item prevents wireless devices on your network from communicating with each other. This feature is useful if you want to create a public wireless network that only allow guests to access the Internet. Select Yes to enable this feature or select No to disable. Roaming Assistant: When your wireless environment has provisioned a several APs (access point) or wireless repeaters to cover all wireless dead zones. When a client that connected on AP1 moves from one place with better signal to another with poor signal, but there is an another signal from AP2. To prevent the client stick on AP1, you can enable Roaming Assistant, and set a minimal RSSI value as threshold. When the connection quality lower than the threshold, AP1 disconnect the wireless client so that it can reevaluate the wireless environment to select a AP with the best signal quality, such as AP2. Enable IGMP Snooping: When IGMP snooping is enabled, multicast traffic is only forwarded to wireless client that are members of the specific multicast group. Multicast rate (Mbps): Select the multicast transmission rate or click Disable to switch off simultaneous single transmission. 35
36 36 Preamble Type: Preamble Type defines the length of time that the router spent for CRC (Cyclic Redundancy Check). CRC is a method of detecting errors during data transmission. Select Short for a busy wireless network with high network traffic. Select Long if your wireless network is composed of older or legacy wireless devices. AMPDU RTS: In n or ac using a method, A-MPDU, to aggregate short packet into a longer packet for the same MAC address. When a wireless device ready for transmission sends a RTS (Request to Send). After enabling AMPDU RTS, every AMPDU frame send with RTS process. RTS Threshold: Select a lower value for RTS (Request to Send) Threshold to improve wireless communication in a busy or noisy wireless network with high network traffic and numerous wireless devices. DTIM Interval: DTIM (Delivery Traffic Indication Message) Interval or Data Beacon Rate is the time interval before a signal is sent to a wireless device in sleep mode indicating that a data packet is awaiting delivery. The default value is three milliseconds. Beacon Interval: Beacon Interval is the time between one DTIM and the next. The default value is 100 milliseconds. Lower the Beacon Interval value for an unstable wireless connection or for roaming devices. Enable TX Bursting: Enable TX Bursting improves transmission speed between the wireless router and g devices. Enable WMM APSD: WMM APSD(Automatic Power Save Delivery) is the enhancement to the legacy power saver mode. Enable WMM APSD, the wireless AP manages radio usage to help increase battery life for battery-powered wireless clients, such as smartphone and laptop. APSD automatically changes to use a longer beacon interval when the traffic does not require a short packet exchange interval.

37 4.1.7 Guest Network The Guest Network provides temporary visitors with Internet connectivity via access to separate SSIDs or networks without providing access to your private network. To create a guest network: 1. From the navigation panel, go to General > Guest Network. 2. On the Guest Network screen, select 2.4Ghz and 5Ghz frequency band for the guest network that you want to create. 3. Click Enable. 4. Configure a guest s settings on pop-up screen 5. Assign a Network Name (SSID) for identify your guest network. 6. Select an Authentication Method. 7. If you select a WPA authentication method, select a WPA Encryption. 8. Specify the Access time or choose Limitless. 37
38 9. Select Disable or Enable on the Access Intranet item. 10. Select No or Yes on MAC Filter item for your guest network. 11. When done, click Apply. 38

39 4.2 LAN LAN IP The LAN IP screen allows you to modify the LAN IP settings of your wireless router. NOTE: Any changes to the LAN IP address will be reflected on your DHCP settings. To modify the LAN IP settings: 1. From the navigation panel, go to Advanced Settings > LAN > LAN IP tab. 2. Modify the IP address and Subnet Mask. 3. When done, click Apply. 39
40 4.2.2 DHCP Server Your wireless router uses DHCP to assign IP addresses automatically on your network. You can specify the IP address range and lease time for the clients on your network. To configure the DHCP server: 1. From the navigation panel, go to Advanced Settings > LAN > DHCP Server tab. 2. In the Enable the DHCP Server field, tick Yes. 3. In the Domain Name text box, enter a domain name for the wireless router. 4. In the IP Pool Starting Address field, key in the starting IP address. 40
41 5. In the IP Pool Ending Address field, key in the ending IP address. 6. In the Lease Time field, specify in seconds when an assigned IP address will expire. Once it reaches this time limit, the DHCP server will then assign a new IP address. NOTES: We recommend that you use an IP address format of xxx (where xxx can be any number between 2 and 254) when specifying an IP address range. An IP Pool Starting Address should not be greater than the IP Pool Ending Address. 7. In the DNS and Server Settings section, key in your DNS Server and WINS Server IP address if needed. 8. Your wireless router can also manually assign IP addresses to devices on the network. On the Enable Manual Assignment field, choose Yes to assign an IP address to specific MAC addresses on the network. Up to 32 MAC Addresses can be added to the DHCP list for manual assignment. 41
42 4.2.3 Route If your network makes use of more than one wireless router, you can configure a routing table to share the same Internet service. NOTE: We recommend that you do not change the default route settings unless you have advanced knowledge of routing tables. To configure the LAN Routing table: 1. From the navigation panel, go to Advanced Settings > LAN > Route tab. 2. On the Enable static routes field, choose Yes. 3. On the Static Route List, enter the network information of other access points or nodes. Click the Add or Delete button to add or remove a device on the list. 4. Click Apply. 42

43 4.2.4 IPTV The wireless router supports connection to IPTV services through an ISP or a LAN. The IPTV tab provides the configuration settings needed to set up IPTV, VoIP, multicasting, and UDP for your service. Contact your ISP for specific information regarding your service Switch Control Switch Control tab enables you to configure NAT Acceleration and Jumbo frame to improve network performance. We recommend that you do not change the default route settings unless you have advanced knowledge. 43
44 4.3 WAN Internet Connection The Internet Connection screen allows you to configure the settings of various WAN connection types WAN To configure the WAN connection settings: 1. From the navigation panel, go to Advanced Settings > WAN > Internet Connection tab. 2. Configure the following settings below. When done, click Apply. WAN Connection Type: Choose your Internet Service Provider type. The choices are Automatic IP, PPPoE, PPTP, L2TP or static IP. Consult your ISP if the router is unable to obtain a valid IP address or if you are unsure the WAN connection type. 44
45 Enable WAN: Select Yes to allow the router Internet access. Select No to disable Internet access. Enable NAT: NAT (Network Address Translation) is a system where one public IP (WAN IP) is used to provide Internet access to network clients with a private IP address in a LAN. The private IP address of each network client is saved in a NAT table and is used to route incoming data packets. Enable UPnP: UPnP (Universal Plug and Play) allows several devices (such as routers, televisions, stereo systems, game consoles, and cellular phone), to be controlled via an IPbased network with or without a central control through a gateway. UPnP connects PCs of all form factors, providing a seamless network for remote configuration and data transfer. Using UPnP, a new network device is discovered automatically. Once connected to the network, devices can be remotely configured to support P2P applications, interactive gaming, video conferencing, and web or proxy servers. Unlike Port forwarding, which involves manually configuring port settings, UPnP automatically configures the router to accept incoming connections and direct requests to a specific PC on the local network. Connect to DNS Server automatically: Allows this router to get the DNS IP address from the ISP automatically. A DNS is a host on the Internet that translates Internet names to numeric IP addresses. Authentication: This item may be specified by some ISPs. Check with your ISP and fill them in if required. Host Name: This field allows you to provide a host name for your router. It is usually a special requirement from your ISP. If your ISP assigned a host name to your computer, enter the host name here. MAC Address: MAC (Media Access Control) address is a unique identifier for your networking device. Some ISPs monitor the MAC address of networking devices that connect to their service and reject any unrecognized device that attempt to connect. To avoid connection issues due to an unregistered MAC address, you can: 45
46 Contact your ISP and update the MAC address associated with your ISP service. Clone or change the MAC address of the ASUS wireless router to match the MAC address of the previous networking device recognized by the ISP. DHCP query frequency: Changes the DHCP Discovery interval settings to avoid overloading the DHCP server Mobile broadband 4G-AC55U has build in 3G/4G modem that allows you to use a Mobile Broadband connection for Internet access. To set up your Mobile broadband Internet access: 1. From the navigation panel, go to Advanced Settings > WAN > Internet Connection tab, select the Mobile Broadband in WAN Type field. 2. In the Enable Mobile Broadband field, select Enable. 3. Check that you have properly inserted the SIM card, and configure the mobile settings of your router. 46
47 4. Set up the following: Location: Select your 3G/4G service provider s location from the dropdown list. ISP: Select your Internet Service Provider (ISP) from the dropdown list. APN (Access Point Name) service (optional): Contact your 3G/4G service provider for detailed information. Dial Number: The 3G/4G provider s access number PIN code: Enter the 3G/4G provider s PIN code for connection on SIM PIN Management if the SIM card is required. NOTE: The default PIN code may vary with different providers. When you set up for the first time or reboot your router, you need to enter the PIN code in any of thee two scenarios: Your ISP enabled the PIN code verification by default. You manually enabled the PIN code verification from your router's web GUI or your mobile phone. If PIN code verification is enabled, you will see the SIM lock status icon on the status icon area. 47
48 Username / Password: Enter the username and password that your 3G/4G network provider has provided. Idle Time: Enter the time (in minutes) when the router goes into sleep mode when there is no activity in the network. Internet Connection Configuration To configure your mobile broadband connection: 1. On Network Type field, select your preferred network: Auto (Default): Select Auto to allow the wireless router to automatically select the channel that has the available connection from 4G, 3G and 2G network. 48
49 3G/4G: Select 3G/4G to allow the wireless router to automatically connect to a 3G or 4G network. 4G only: Select this option to automatically connect the wireless router to a 4G network only. 3G only: Select this option to automatically connect the wireless router to a 3G network only. 2G only: Select this option to automatically connect the wireless router to a 2G network only. 2. Connection Type: This field allows you to define your connection policies. 3. PDP Type: The wireless router support several PDP Types, PPP, IPv4, IPv6, IPv6 to IPv4. 4. Roaming : When you travel to another country, you may use original SIM to access the local network if your ISP provider roaming service in the country. Enable this functions to allow you to access the local network. Click Scan to show all the available mobile networks. Select available mobile network and click Apply to connect to it. NOTES: The LTE Router can detect your ISP based on the IMSI information of your SIM card. If the mobile network from your ISP is not found, connect to a roaming network of other ISPs. Using a roaming service will incur additional charges. Inquire from your mobile service provider before using the roaming service. 49
50 Traffic Limitation To configure the Data Usage settings: 1. Data usage: Show the data usage. 2. Cycle Start Day: Select the day you wish the data usage to begin to accumulate. The data usage will be reset at the end of each cycle. 3. Data Usage Limit: Set the monthly maximum volume of traffic (in GB) for Internet usage. When this limit is reached, an exclamation mark and pop-up alert message will show up when you login administration page, and Internet access is blocked. 4. Data Usage Alert: Set the maximum volume of Internet traffic at which an exclamation mark and pop-up alert message will show up when you login administration page. When your Internet usage reaches this limit, Internet access is not blocked until the Usage Limit is reached. 5. Send SMS notification: Enable this function to send an SMS notification from your router to your mobile device once the Data Usage limit for Internet usage is reached. 6. Mobile Phone Number: Enter the mobile number that is going to receive the SMS notification. Note: The SMS fee is charged to your SIM/USIM card of your router. 7. Click Apply. 50

51 Configure PIN Code Enter PIN code if SIM card is required you to enter a PIN Code before apply APN connection. You can also click Modify button to change PIN code when PIN code authentication is enable. 51
52 Mobile Connection Status To find Mobile broadband Information: 1. Click to find the detail information 2. The Mobile Connection Status screen displays the detailed Mobile Broadband connection status. 52
53 4.3.2 IPv6 (Internet Settings) This wireless router supports IPv6 addressing, a system that supports more IP addresses. This standard is not yet widely available. Contact your ISP if your Internet service supports IPv6. To set up IPv6: 1. From the navigation panel, go to Advanced Settings > IPv6. 2. Select your Connection Type. The configuration options vary depending on your selected connection type. 3. Enter your IPv6 LAN and DNS settings. 4. Click Apply. NOTE: Please refer to your ISP regarding specific IPv6 information for your Internet service. 53
54 4.3.3 Dual WAN Your ASUS wireless router provides dual WAN support. You can set the dual WAN feature to any of these two modes: Failover Mode: Select this mode to use the secondary WAN as the backup network access. Allow Failback: Tick the checkbox to allow Internet connection switch back to primary WAN automatically when primary WAN becomes available. First time delay: Set the time delay (in seconds) before the first ping packet is sent out. Retry interval: Set the time interval (in seconds) between two ping packets. Failover Retry Count: Set the time (in seconds) when the system triggers the failover or failback action after reaching 54
 for the ping test packet. 4.3.")
55 the ping test counter and getting no response from the target IP address. Enable User-defined Target: Select Yes when you want to manually define the target IP address or FQDN (Fully Qualified Domain Name) for the ping test packet Port Trigger Port range triggering opens a predetermined incoming port for a limited period of time whenever a client on the local area network makes an outgoing connection to a specified port. Port triggering is used in the following scenarios: More than one local client needs port forwarding for the same application at a different time. An application requires specific incoming ports that are different from the outgoing ports. To set up Port Trigger: 1. From the navigation panel, go to Advanced Settings > WAN > Port Trigger tab. 55
56 2. On the Enable Port Trigger field, tick Yes. 3. On the Well-Known Applications field, select the popular games and web services to add to the Port Trigger List. 4. On the Trigger Port List table, key in the following information: Description: Enter a short name or description for the service. Trigger Port: Specify a trigger port to open the incoming port. Protocol: Select the protocol, TCP, or UDP. Incoming Port: Specify an incoming port to receive inbound data from the Internet. Protocol: Select the protocol, TCP, or UDP. 5. Click the Add button to enter the port trigger information to the list. Click the Delete button to remove a port trigger entry from the list. 6. When done, click Apply. NOTES: When connecting to an IRC server, a client PC makes an outgoing connection using the trigger port range The IRC server responds by verifying the username and creating a new connection to the client PC using an incoming port. If Port Trigger is disabled, the router drops the connection because it is unable to determine which PC is requesting for IRC access. When Port Trigger is enabled, the router assigns an incoming port to receive the inbound data. This incoming port closes once a specific time period has elapsed because the router is unsure when the application has been terminated. Port triggering only allows one client in the network to use a particular service and a specific incoming port at the same time. You cannot use the same application to trigger a port in more than one PC at the same time. The router will only forward the port back to the last computer to send the router a request/trigger. 56

57 4.3.5 Virtual Server/Port Forwarding Port forwarding is a method to direct network traffic from the Internet to a specific port or a specific range of ports to a device or number of devices on your local network. Setting up Port Forwarding on your router allows PCs outside the network to access specific services provided by a PC in your network. NOTE: When port forwarding is enabled, the ASUS router blocks unsolicited inbound traffic from the Internet and only allows replies from outbound requests from the LAN. The network client does not have access to the Internet directly, and vice versa. To set up Port Forwarding: 1. From the navigation panel, go to Advanced Settings > WAN > Virtual Server / Port Forwarding tab. 2. On the Enable Port Forwarding field, tick Yes. 57
58 3. On the Famous Server List field, select the type of service you want to access. 4. On the Famous Game List field, select the popular game that you want to access. This item lists the port required for your selected popular online game to work properly. 5. On the Port Forwarding List table, key in the following information: Service Name: Enter a service name. Port Range: If you want to specify a Port Range for clients on the same network, enter the Service Name, the Port Range (e.g :10300), the LAN IP address, and leave the Local Port empty. Port range accepts various formats such as Port Range (300:350), individual ports (566,789) or Mix (1015:1024,3021). NOTES: When your network s firewall is disabled and you set 80 as the HTTP server s port range for your WAN setup, then your http server/web server would be in conflict with the router s web user interface. A network makes use of ports in order to exchange data, with each port assigned a port number and a specific task. For example, port 80 is used for HTTP. A specific port can only be used by one application or service at a time. Hence, two PCs attempting to access data through the same port at the same time would fail. For example, you cannot set up Port Forwarding for port 100 for two PCs at the same time. Local IP: Key in the client s LAN IP address. NOTE: Use a static IP address for the local client to make port forwarding work properly. Refer to section 4.2 LAN for information. 58
59 Local Port: Enter a specific port to receive forwarded packets. Leave this field blank if you want the incoming packets to be redirected to the specified port range. Protocol: Select the protocol. If you are unsure, select BOTH. 5. Click the Add to enter the port trigger information to the list. Click the Delete button to remove a port trigger entry from the list. 6. When done, click Apply. To check if Port Forwarding has been configured successfully: Ensure that your server or application is set up and running. You will need a client outside your LAN but has Internet access (referred to as Internet client ). This client should not be connected to the ASUS router. On the Internet client, use the router s WAN IP to access the server. If port forwarding has been successful, you should be able to access the files or applications. Differences between port trigger and port forwarding: Port triggering will work even without setting up a specific LAN IP address. Unlike port forwarding, which requires a static LAN IP address, port triggering allows dynamic port forwarding using the router. Predetermined port ranges are configured to accept incoming connections for a limited period of time. Port triggering allows multiple computers to run applications that would normally require manually forwarding the same ports to each PC on the network. Port triggering is more secure than port forwarding since the incoming ports are not open all the time. They are opened only when an application is making an outgoing connection through the trigger port. 59

60 4.3.6 DMZ Virtual DMZ exposes one client to the Internet, allowing this client to receive all inbound packets directed to your Local Area Network. Inbound traffic from the Internet is usually discarded and routed to a specific client only if port forwarding or a port trigger has been configured on the network. In a DMZ configuration, one network client receives all inbound packets. Setting up DMZ on a network is useful when you need incoming ports open or you want to host a domain, web, or server. CAUTION: Opening all the ports on a client to the Internet makes the network vulnerable to outside attacks. Please be aware of the security risks involved in using DMZ. To set up DMZ: 1. From the navigation panel, go to Advanced Settings > WAN > DMZ tab. 2. Configure the setting below. When done, click Apply. IP address of Exposed Station: Key in the client s LAN IP address that will provide the DMZ service and be exposed on the Internet. Ensure that the server client has a static IP address. To remove DMZ: 1. Delete the client s LAN IP address from the IP Address of Exposed Station text box. 2. When done, click Apply. 60

61 4.3.7 DDNS Setting up DDNS (Dynamic DNS) allows you to access the router from outside your network through the provided ASUS DDNS Service or another DDNS service. To set up DDNS: 1. From the navigation panel, go to Advanced Settings > WAN > DDNS tab. 2. Configure the following settings below. When done, click Apply. Enable the DDNS Client: Enable DDNS to access the ASUS router via the DNS name rather than WAN IP address. Server and Host Name: Choose ASUS DDNS or other DDNS. If you want to use ASUS DDNS, fill in the Host Name in the format of xxx.asuscomm.com (xxx is your host name). If you want to use a different DDNS service, click FREE TRIAL and register online first. Fill in the User Name or Address and Password or DDNS Key fields. Enable wildcard: Enable wildcard if your DDNS service requires one. NOTES: DDNS service will not work under these conditions: When the wireless router is using a private WAN IP address ( x.x, 10.x.x.x, or x.x), as indicated by a yellow text. The router may be on a network that uses multiple NAT tables. 61

62 4.3.8 NAT Passthrough NAT Passthrough allows a Virtual Private Network (VPN) connection to pass through the router to the network clients. PPTP Passthrough, L2TP Passthrough, IPsec Passthrough and RTSP Passthrough are enabled by default. To enable / disable the NAT Passthrough settings: 1. Go to the Advanced Settings > WAN > NAT Passthrough tab. 2. Select Enable or Disable for specific traffic pass through the NAT firewall. 3. When done, click Apply. 62

63 4.4 Traffic Manager QoS This feature ensures bandwidth for prioritized tasks and applications. To enable the QoS function: 1. From the navigation panel, go to General > Traffic Manager > QoS tab. 2. From the Enable Smart QoS field, click ON. NOTE: Get the bandwidth information from your ISP. You can also go to to check and get your real-world bandwidth. 3. Fill in your Internet speed on the upload and download bandwidth fields. 4. Click Apply. 63
. 6.")
64 5. On the top right dropdown menu, you can select the Userdefined QoS rules to apply on specified service and devices (IP or MAC). 6. You can also select User-defined priorities to re-defined the bandwidth for each priority level. 64

65 4.4.2 Traffic Monitor The traffic monitor function allows you to access the bandwidth usage and speed of your Ethernet WAN, Mobile broadband, wired, and wireless networks. It allows you to monitor network traffic even on a daily basis. NOTE: Packets from the Ethernet WAN and Mobile broadband are evenly transmitted to the wired and wireless devices. Ethernet WAN traffic 65
66 66 Mobile Broadband traffic

67 4.4.3 Setting up Parental Controls Parental Control allows you to control the Internet access time. Users can set the time limit for a client s network usage. To use the parental control function: 1. From the navigation panel, go to General > Parental control. 2. Click ON to enable Parental Control. 3. Select the client whose network usage you want to control. You may also key in the client s MAC address in the Client MAC Address column. NOTE: Ensure that the client name does not contain special characters or spaces as this may cause the router to function abnormally. 4. Click Add or Delete to add or delete the client s profile. 5. Set up the allowed time limit in Time Management map. 67
68 6. Drag and drop a desired time zone to allow client s network usage. 6. Click OK. 7. Click Apply to save the settings. 68
69 4.5 Firewall The wireless router can serve as a hardware firewall for your network. NOTE: The Firewall feature is enabled by default General To set up basic Firewall settings: 1. From the navigation panel, go to Advanced Settings > Firewall > General tab. 2. On the Enable Firewall field, select Yes. 3. On the Enable DoS protection, select Yes to protect your network from DoS (Denial of Service) attacks though this may affect your router s performance. 4. You can also monitor packets exchanged between the LAN and WAN connection. On the Logged packets type, select Dropped, Accepted, or Both. 5. Click Apply URL Filter You can specify keywords or web addresses to prevent access to specific URLs. NOTE: The URL Filter is based on a DNS query. If a network client has already accessed a website such as then the website will not be blocked (a DNS cache in the system stores previously visited websites). To resolve this issue, clear the DNS cache before setting up the URL Filter. 69
70 To set up a URL filter: 1. From the navigation panel, go to Advanced Settings > Firewall > URL Filter tab. 2. On the Enable URL Filter field, select Enabled. 3. Enter a URL and click the button. 4. Click Apply Keyword filter Keyword filter blocks access to webpages containing specified keywords.to set up a keyword filter: 1. From the navigation panel, go to Advanced Settings > Firewall > Keyword Filter tab. 2. On the Enable Keyword Filter field, select Enabled. 3. Enter a word or phrase and click the Add button. 4. Click Apply. NOTES: The Keyword Filter is based on a DNS query. If a network client has already accessed a website such as then the website will not be blocked (a DNS cache in the system stores previously visited websites). To resolve this issue, clear the DNS cache before setting up the Keyword Filter. Web pages compressed using HTTP compression cannot be filtered. HTTPS pages also cannot be blocked using a keyword filter Network Services Filter The Network Services Filter blocks LAN to WAN packet exchanges and restricts network clients from accessing specific web services such as Telnet or FTP. 70
71 To set up a Network Service filter: 1. From the navigation panel, go to Advanced Settings > Firewall > Network Service Filter tab. 2. On the Enable Network Services Filter field, select Yes. 3. Select the Filter table type. Black List blocks the specified network services. White List limits access to only the specified network services. 4. Specify the day and time when the filters will be active. 5. To specify a Network Service to filter, enter the Source IP, Destination IP, Port Range, and Protocol. Click the button. 6. Click Apply IPv6 Firewall By default, your ASUS wireless router blocks all unsolicited incoming traffic. The IPv6 Firewall function allows incoming traffic coming from specified services to go through your network. 71

72 4.6 Using the USB Application The USB Applications function provides AiDisk, Servers Center, Network Printer Server and Download Master submenus. IMPORTANT! To use the server functions, you need to insert a USB storage device, such as a USB hard disk or USB flash drive, in the USB 2.0 port on the rear panel of your wireless router. Ensure that the USB storage device is formatted and partitioned properly. Refer to the ASUS website at for the file system support table Using AiDisk AiDisk allows you to share files stored on a connected USB device through the Internet. AiDisk also assists you with setting up ASUS DDNS and an FTP server. To use AiDisk: 1. From the navigation panel, go to General > USB application, then click the AiDisk icon. 2. From the Welcome to AiDisk wizard screen, click Go. 72

73 3. Select the access rights that you want to assign to the clients accessing your shared data. 4. Create your domain name via the ASUS DDNS services, read the Terms of Service and then select I will use the service and accept the Terms of service and key in your domain name. When done, click Next. 73
74 You can also select Skip ASUS DDNS settings then click Next to skip the DDNS setting. You can also select Skip ASUS DDNS settings then click Next to skip the DDNS setting. 5. Click Finish to complete the setting. 6. To access the FTP site that you created, launch a web browser or a third-party FTP client utility and key in the ftp link (ftp://<domain name>.asuscomm.com) you have previously created. 74

75 4.6.2 Using Servers Center Servers Center allows you to share the media files from the USB disk via a Media Server directory, Samba share service, or FTP share service. You can also configure other settings for the USB disk in the Servers Center. Using Media Server Your wireless router allows DLNA-supported devices to access multimedia files from the USB disk connected to your wireless router. NOTE: Before using the DLNA Media Server function, connect your device to the 4G-AC55U s network. 75

76 To launch the Media Server setting page, go to General > USB application > Media Services and Servers > Media Servers tab. Refer to the following for the descriptions of the fields: Enable itunes Server: Select ON/OFF to enable/disable the itunes Server. Enable DLNA Media Server: Select ON/OFF to enable/ disable the DLNA Media Server. Media Server Status: Displays the status of the media server. Media Server Path Setting: Select All Disks Shared or Manual Media Server Path Using Network Place (Samba) Share service Network Place (Samba) Share allows you to set up the accounts and permissions for the Samba service. To use Samba share: 1. From the navigation panel, go to General > USB application > Media Services and Servers > Network Place (Samba) Share / Cloud Disk tab. NOTE: Network Place (Samba) Share is enabled by default. 76
 In the Account and Password fields, key in the name and password of your network client. Retype the password to confirm. Click Add to add the account to the list.")
77 2. Follow the steps below to add, delete, or modify an account. To create a new account: a) Click to add new account. b) In the Account and Password fields, key in the name and password of your network client. Retype the password to confirm. Click Add to add the account to the list. To delete an existing account: a) Select the account that you want to delete. b) Click. c) When prompted, click Delete to confirm the account deletion. To add a folder: a) Click. b) Enter the folder name, and click Add. The folder that you created will be added to the folder list. 77

78 3. From the list of folders, select the type of access permission that you want to assign for specific folders: R/W: Select this option to assign read/write access. R: Select this option to assign read-only access. No: Select this option if you do not want to share a specific file folder. 4. Click Apply to apply the changes Using the FTP Share service FTP share enables an FTP server to share files from USB disk to other devices via your local area network or via the Internet. IMPORTANT: Ensure that you safely remove the USB disk. Incorrect removal of the USB disk may cause data corruption. To safely remove the USB disk, refer to the section Safely removing the USB disk under Monitoring your USB device. 78
79 To use FTP Share service: NOTE: Ensure that you have set up your FTP server through AiDisk. For more details, refer to the section Using AiDisk. 1. From the navigation panel, click General > USB application > Media Services and Servers > FTP Share tab. 2. From the list of folders, select the type of access rights that you want to assign for specific folders: R/W: Select to assign read/write access for a specific folder. W: Select to assign write only access for a specific folder. R: Select to assign read only access for a specific folder. No: Select this option if you do not want to share a specific folder. 3. If you prefer, you can set the Allow anonymous login field to ON. 4. In the Maximum number of concurrent connections field, key in the number of devices that can simultaneously connect to the FTP share server. 5. Click Apply to confirm the changes. 6. To access the FTP server, key in the ftp link ftp://<hostname>.asuscomm.com and your user name and password on a web browser or a third-party FTP utility. 79


80 4.7 Download Master Download Master is a utility that helps you download files even while your laptops or other devices are switched off. NOTE: You need a USB device connected to the wireless router to use Download Master. To use Download Master: 1. Click General > USB application > Download Master to download and install the utility automatically. NOTE: If you have more than one USB drive, select the USB device you want to download the files to. 2. After the download process is finished, click the Download Master icon to start using the utility. 3. Click Add to add a download task. 80


81 4. Select a download type such as BitTorrent, HTTP, or FTP. Provide a torrent file or a URL to begin downloading. NOTE: For details on Bit Torrent, refer to section Configuring Bit Torrent download settings. 5. Use the navigation panel to configure the General settings. You can define the download schedule by Selecting download Immediately or At Schedule Time. The download tasks information updates each 5 seconds in default. The options, Refresh rate, allow you to change the information updated period. You can select folder path from Download to field as download file repository. The default port number for DownloadMaster administration page is If the port number conflicts with other application you can change from here. To manage the DownloadMaster from Internet, you can slide WAN network to ON. If your network resource is tight, we recommend you disable Keep seeding after task completed by sliding the witch to OFF. 81
82 4.7.1 Configuring Bit Torrent download settings To configure BitTorrent download settings: 1. From Download Master s navigation panel, click Bit Torrent to launch the Bit Torrent Setting page. 2. Select a specific port or use the default port for your download task. 3. To prevent network congestion, you can limit the maximum upload and download speeds under Speed Limits. 4. You can limit the maximum number of allowed peers and enable or disable file encryption during downloads. 5. Enable DHT (Distributed Hash Table) network can enhance download speeds and transfer rates by jointing a information sharing domain. To use the DHT network, your wireless router also needs to share some information with other member on the network, 6. Enable PEX (Peer Exchange) network to exchange peer information between two connected peers help you to gather more peers in the network. 82
83 4.7.2 NZB settings You can set up a USENET server to download NZB files. After entering USENET settings, click Apply emule settings You can set up a emule server to download file from emule. After entering USENET settings, click Apply. 83

84 4.8 Using AiCloud 2.0 AiCloud 2.0 is a cloud service application that allows you to save, sync, share, and access your files. To use AiCloud: 1. From Google Play Store or Apple Store, download and install the ASUS AiCloud app to your smart device. 2. Connect your smart device to your network. Follow the instructions to complete the AiCloud setup process. 84
85 4.8.1 Cloud Disk To create a cloud disk: 1. Insert a USB storage device into the wireless router. 2. Turn on Cloud Disk. 3. Go to and enter the router login account and password. For better user experience, we recommend that you use Google Chrome or Firefox. 85
86 4. You can now start accessing Cloud Disk files on devices connected to the network. NOTE: When accessing the devices that are connected to the network, you need to enter the device s user name and password manually, which will not be saved by AiCloud for security reason Smart Access The Smart Access function allows you to easily access your home network via your router s domain name. NOTES: You can create a domain name for your router with ASUS DDNS. For more details, refer to section DDNS. By default, AiCloud provides a secure HTTPS connection. Key in for a very secure Cloud Disk and Smart Access usage. 86

87 4.8.3 Smart Sync To use Smart Sync: 1. From the nabigation panel, click AiCloud 2.0 > AiCloud 2.0 >Smart Sync > Go. 2. Select ON to enable Smart Sync. 3. Click Add new account. 4. Enter your ASUS WebStorage or Dropbox account password and select the directory that you want to sync with WebStorage. 5. Select Syn rules for the Smart sync task. Synchronization: Selecting Synchronization allows you to sync a folder between two servers, which sync task always keeps your folder with the same files. Download to USB Disk: Selecting Download to USB Disk allows you to replicate the remote files to the local folder on USB Disk. Upload to Cloud: Selecting Upload to Cloud allows you to replicate the local files to the remote folder on ASUS WebStorage. 87
88 6. Click Apply to add the sync task Sync Server 88

89 To use Sync Server: 1. From the navigation panel, click AiCloud 2.0 > Sync Server. 2. Enter Sync Server configuration on Invitation Generator to enable Smart Sync. 3. Send your friend the sync invitation. 4. After a invitation is generated, you can check the sync task on Sync List table. 5. You can click Delete button to terminate the task if you don t want sync task the folder with remote sync client anymore. 6. You can also check the activities of sync server by clicking Check log button or lick Log tab. 89
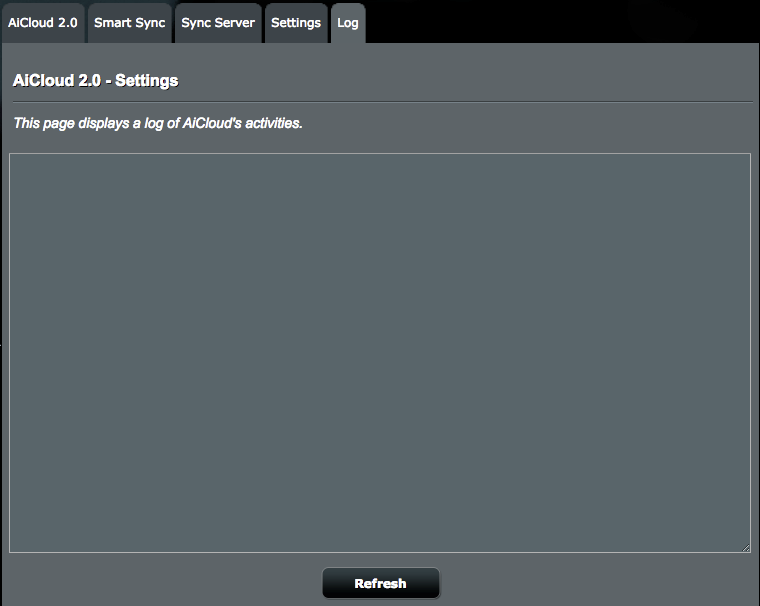
90 90

91 4.8.5 Settings AiCloud 2.0 allows you to define a access policy to prevent unauthorized access, such as dictionary attack. When a host try to access the AiCloud and exceed the defined Maximum number of failed login attempts in the defined duration, the AiCloud service will be disabled automatically. The Secure Socket Layer (SSL) is a protocol that provide an encrypted communication between web server and browsers for secure data transfer, which includes access password. User access the AiCloud web portal use a default port, 443, over https. The content delivering uses a default port, 8082, over http. 91

92 4.9 Administration Operation Mode The Operation Mode page allows you to select the appropriate mode for your network. To set up the operating mode: 1. From the navigation panel, go to Advanced Settings > Administration > Operation Mode tab. 2. Select any of these operation modes: Wireless router mode (default): In wireless router mode, the wireless router connects to the Internet and provides Internet access to available devices on its own local network. Repeater Mode: In Repeater mode, your wireless router wirelessly connects to an existing wireless network to extend the wireless coverage. In this mode, the firewall, IP sharing, and NAT functions are disabled. Access Point mode: In this mode, the router creates a new wireless network on an existing network. Media Bridge: This setup requires two wireless routers. The second router serves as a media bridge where multiple devices such as Smart TVs and gaming consoles can be connected via Ethernet. 92
93 3. Click Apply. NOTE: The router will reboot when you change the modes System The System page allows you to configure your wireless router settings. 93
94 To set up the System settings: 1. From the navigation panel, go to Advanced Settings > Administration > System tab. 2. You can configure the following settings: Change router login password: You can change the password and login name for the wireless router by entering a new name and password. Time Zone: Select the time zone for your network. NTP Server: The wireless router can access a NTP (Network time Protocol) server in order to synchronize the time. Enable Telnet: Click Yes to enable Telnet services on the network. Click No to disable Telnet. Authentication Method: You can select HTTP, HTTPS, or both protocols to secure router access. Enable Web Access from WAN: Select Yes to allow devices outside the network to access the wireless router GUI settings. Select No to prevent access. Auto Logout: System will auto log out the administration page after an idle period. To disable Auto logout, set the value in 0. Enable WAN down browser redirect notice: When WAN connection is down, the system will pop up a screen to guide to how to configure the WAN connection. If you don t like to see this notice, select No to disable the notice. Allow only specified IP address: Click Yes if you want to specify the IP addresses of devices that are allowed access to the wireless router GUI settings from WAN. Specified IP Address: Enter the WAN IP addresses of networking devices allowed to access the wireless router settings. This Client list allows you to add the maximum IP addresses of Click Apply. 94

95 4.9.3 Firmware Upgrade NOTE: Download the latest firmware from the ASUS website at To upgrade the firmware: 1. From the navigation panel, go to Advanced Settings > Administration > Firmware Upgrade tab. 2. In the New Firmware File field, click Browse to locate the downloaded file. 3. Click Upload. NOTES: When the upgrade process is complete, wait for some time for the system to reboot. If the upgrade process fails, the wireless router automatically enters rescue mode and the power LED indicator on the front panel starts flashing slowly. To recover or restore the system, refer to section "5.2 Firmware Restoration". 95

96 4.9.4 Restore/Save/Upload Setting To restore/save/upload wireless router settings: 1. From the navigation panel, go to Advanced Settings > Administration > Restore/Save/Upload Setting tab. 2. Select the tasks that you want to do: To restore to the default factory settings, click Restore, and click OK in the confirmation message. To save the current system settings, click Save, navigate to the folder where you intend to save the file and click Save. To restore from a saved system settings file, click Browse to locate your file, then click Upload. Note: If issues occur, upload the latest firmware version and configure new settings. Do not restore the router to its default settings. 96

97 4.10 System Log System Log contains your recorded network activities. NOTE: System log resets when the router is rebooted or powered off. To view your system log: 1. From the navigation panel, go to Advanced Settings > System Log. 2. You can view your network activities in any of these tabs: General Log Wireless Log DHCP Leases IPv6 (WAN and LAN network information) Wireless Log Port Forwarding Routing Table Connection 97
98 4.11 Ethernet WAN Mobile Broadband Function Support List The wireless router supports wired WAN and Mobile broadband WAN in failover and failback modes. The Mobile broadband WAN is used both as Internet access and WAN backup interface. LAN, WAN, VPN, and Firewall supports different functions. See the comparison table below. Wired WAN LAN as WAN Mobile broadband LAN IPTV V N/A N/A Switch Control >> NAT Acceleration(IPv4 Only) Switch Control >> Jumbo Frame V N/A N/A V N/A N/A WAN IPv6 V V V (1) Port Trigger V V V (2) Virtual Server / Port Forwarding V V V (2) DMZ V V V (2) DDNS V V V (2) NAT Passthrough V V V (2) Traffic Manager QoS V V V Firewall General V V V URL Filter V V V Keyword Filter V V V Network Services Filter V V V IPv6 Firewall V V N/A System >> Enable Web Access from WAN Administration V V V (2) 98
99 AiCloud Access from WAN Applications V V V (2) VPN Server V V V (2) FTP Server V V V (2) NOTES: V (1) : Mobile WAN has separated configuration on its configuration page V (2) : In most of using case, Internet service provide dispatch the mobile broadband a private IP, that will cause the WAN service failed to access from WAN side. 99
100 5 Utilities NOTES: Download and install the wireless router's utilities from the ASUS website: Device Discovery v at LiveUpdate/Release/Wireless/Discovery.zip Firmware Restoration v at ASUS/LiveUpdate/Release/Wireless/Rescue.zip Windows Printer Utility v at ASUS/LiveUpdate/Release/Wireless/Printer.zip The utilities are not supported on MAC OS. 5.1 Device Discovery Device Discovery is an ASUS WLAN utility that detects an ASUS wireless router device, and allows you to configure the wireless networking settings. To launch the Device Discovery utility: From your computer s desktop, click Start > All Programs > ASUS Utility > 4G-AC55U Wireless Router > Device Discovery. NOTE: When you set the router to Access Point mode, you need to use Device Discovery to get the router s IP address. 100

101 5.2 Firmware Restoration Firmware Restoration is used on an ASUS Wireless Router that failed during its firmware upgrading process. It uploads the firmware that you specify. The process takes about three to four minutes. IMPORTANT: Launch the rescue mode on the router before using the Firmware Restoration utility. NOTE: This feature is not supported on MAC OS. To launch the rescue mode and use the Firmware Restoration utility: 1. Unplug the wireless router from the power source. 2. Hold the Reset button at the rear panel and simultaneously replug the wireless router into the power source. Release the Reset button when the Power LED at the front panel flashes slowly, which indicates that the wireless router is in the rescue mode. 101

102 3. Set a static IP on your computer and use the following to set up your TCP/IP settings: IP address: x Subnet mask: From your computer s desktop, click Start > All Programs > ASUS Utility 4G-AC55U Wireless Router > Firmware Restoration. 5. Specify a firmware file, then click Upload. NOTE: This is not a firmware upgrade utility and cannot be used on a working ASUS Wireless Router. Normal firmware upgrades must be done through the web interface. Refer to Chapter 4: Configuring the Advanced Settings for more details. 5.3 Setting up your printer server ASUS EZ Printer Sharing ASUS EZ Printing Sharing utility allows you to connect a USB printer to your wireless router s USB port and set up the print server. This allows your network clients to print and scan files wirelessly. 102

103 To set up the EZ Printer sharing mode: 1. From the navigation panel, go to General > USB Application > Network Printer Server. 2. Click Download Now! to download the network printer utility. NOTE: Network printer utility is supported on Windows XP, Windows Vista, and Windows 7 only. To install the utility on Mac OS, select Use LPR protocol for sharing printer. 3. Unzip the downloaded file and click the Printer icon to run the network printer setup program. 103

104 4. Follow the onscreen instructions to set up your hardware, then click Next. 5. Wait a few minutes for the initial setup to finish. Click Next. 6. Click Finish to complete the installation. 104
105 7. Follow the Windows OS instructions to install the printer driver. 8. After the printer s driver installation is complete, network clients can now use the printer. 105

106 5.3.2 Using LPR to Share Printer You can share your printer with computers running on Windows and MAC operating system using LPR/LPD (Line Printer Remote/ Line Printer Daemon). Sharing your LPR printer To share your LPR printer: 1. From the Windows desktop, click Start > Devices and Printers > Add a printer to run the Add Printer Wizard. 2. Select Add a local printer and then click Next. 106

107 3. Select Create a new port then set Type of Port to Standard TCP/IP Port. Click New Port. 4. In the Hostname or IP address field, key in the IP address of the wireless router then click Next. 107

108 5. Select Custom then click Settings. 6. Set Protocol to LPR. In the Queue Name field, key in LPRServer then click OK to continue. 108

109 7. Click Next to finish setting up the standard TCP/IP port. 8. Install the printer driver from the vendor-model list. If your printer is not in the list, click Have Disk to manually install the printer drivers from a CD-ROM or file. 109

110 9. Click Next to accept the default name for the printer. 10. Click Finish to complete the installation. 110
111 6 Troubleshooting This chapter provides solutions for issues you may encounter with your router. If you encounter problems that are not mentioned in this chapter, visit the ASUS support site at: com/ for more product information and contact details of ASUS Technical Support. 6.1 Basic Troubleshooting If you are having problems with your router, try these basic steps in this section before looking for further solutions. Upgrade Firmware to the latest version. 1. Launch the Web GUI. Go to Advanced Settings > Administration > Firmware Upgrade tab. Click Check to verify if the latest firmware is available. 2. If the latest firmware is available, visit the ASUS global website at Routers/4GAC55U/#download to download the latest firmware. 3. From the Firmware Upgrade page, click Browse to locate the firmware file. 4. Click Upload to upgrade the firmware. Restart your network in the following sequence: 1. Turn off the modem. 2. Unplug the modem. 3. Turn off the router and computers. 4. Plug in the modem. 5. Turn on the modem and then wait for 2 minutes. 6. Turn on the router and then wait for 2 minutes. 7. Turn on computers. 111
112 Check if your Ethernet cables are plugged properly. When the Ethernet cable connecting the router with the modem is plugged in properly, the WAN LED will be on. When the Ethernet cable connecting your powered-on computer with the router is plugged in properly, the corresponding LAN LED will be on. Check if the wireless setting on your computer matches that of your computer. When you connect your computer to the router wirelessly, ensure that the SSID (wireless network name), encryption mehtod, and password are correct. Check if your network settings are correct. Each client on the network should have a valid IP address. ASUS recommends that you use the wireless router s DHCP server to assign IP addresses to computers on your network. Some cable modem service providers require you to use the MAC address of the computer initially registered on the account. You can view the MAC address in the web GUI, Network Map > Clients page, and hover the mouse pointer over your device in Client Status. 112

113 6.2 Frequently Asked Questions (FAQs) I cannot access the router GUI using a web browser If your computer is wired, check the Ethernet cable connection and LED status as described in the previous section. Ensure that you are using the correct login information. The default factory login name and password is admin/admin. Ensure that the Caps Lock key is disabled when you enter the login information. Delete the cookies and files in your web browser. For Internet Explorer 8, follow these steps: 1. Launch Internet Explorer 8, then click Tools > Internet Options. 2. In the General tab, under Browsing history, click Delete, select Temporary Internet Files and Cookies then click Delete. NOTES: The commands for deleting cookies and files vary with web browsers. Disable proxy server settings, cancel the dial-up connection, and set the TCP/IP settings to obtain IP addresses automatically. For more details, refer to Chapter 1 of this user manual. Ensure that you use CAT5e or CAT6 ethernet cables. 113
114 The client cannot establish a wireless connection with the router. NOTE: If you are having issues connecting to 5Ghz network, make sure that your wireless device supports 5Ghz or features dual band capabilities. Out of Range: Move the router closer to the wireless client. Try to adjust antennas of the router to the best direction as described in section 1.4 Positioning your router. DHCP server has been disabled: 1. Launch the web GUI. Go to General > Network Map> Clients and search for the device that you want to connect to the router. 2. If you cannot find the device in the Network Map, go to Advanced Settings > LAN > DHCP Server, Basic Config list, select Yes on the Enable the DHCP Server. SSID has been hidden. If your device can find SSIDs from other routers but cannot find your router s SSID, go to Advanced Settings > Wireless > General, select No on Hide SSID, and select Auto on Control Channel. If you are using a wireless LAN adapter, check if the wireless channel in use conforms to the channels available in your country/area. If not, adjust the channel, channel bandwidth, and wireless mode. If you still cannot connect to the router wirelessly, you can reset your router to factory default settings. In the router GUI,click Administration > Restore/Save/Upload Setting and click Restore. 114
115 Wired Internet is not accessible. Check if your router can connect to your ISP s WAN IP address. To do this, launch the web GUI and go to General> Network Map, and check the Internet Status. If your router cannot connect to your ISP s WAN IP address, try restarting your network as described in the section Restart your network in following sequence under Basic Troubleshooting. The device has been blocked via the Parental Control function. Go to General > Parental Control and see if the device is in the list. If the device is listed under Client Name, remove the device using the Delete button or adjust the Time Management Settings. If there is still no Internet access, try to reboot your computer and verify the network s IP address and gateway address. Check the status indicators on the ADSL modem and the wireless router. If the WAN LED on the wireless router is not ON, check if all cables are plugged properly. Mobile broadband Internet is not accessible. Insert a SIM that with data plan subscription into the USIM card slot. The 3G/4G Mobile Broadband LED lights up, indicating that the SIM card is properly installed. The APN settings are not applied automatically. Obtain the APN service settings from your ISP, then follow the steps below tho manually configure the APN settings. Go to Advanced Settings > WAN > Internet Connection tab. In the WAN Type field, select Mobile broadband. If APN is configured correct and Internet connection still failed, ensure that: The frequency band is compatible with your ISP. 115
116 The wireless router is placed close to the window for a strong 3G/4G signal. Port trigger, port forwarding, DDNS or DMZ service cannot work. Most ISPs provide a private IP address for a mobile broadband device. Hence some services, such as AiCloud, are not accessible. Please contact your ISP for assistance. You forgot the SSID (network name) or network password Setup a new SSID and encryption key via a wired connection (Ethernet cable). Launch the web GUI, go to Network Map, click the router icon, enter a new SSID and encryption key, and then click Apply. Reset your router to the default settings. Launch the web GUI, go to Administration > Restore/Save/Upload Setting, and click Restore. The default login account and password are both admin. 116
117 How to restore the system to its default settings? Go to Administration > Restore/Save/Upload Setting, and click Restore. The following are the factory default settings: User Name: Password: Enable DHCP: admin admin IP address: Domain Name: Yes (if WAN cable is plugged in) (Blank) Subnet Mask: DNS Server 1: DNS Server 2: SSID (2.4GHz): SSID (5GHz): (Blank) ASUS ASUS_5G Firmware upgrade failed. Launch the rescue mode and run the Firmware Restoration utility. Refer to section 5.2 Firmware Restoration on how to use the Firmware Restoration utility. 117

118 Cannot access Web GUI Before configuring your wireless router, do the steps described in this section for your host computer and network clients. A. Disable the proxy server, if enabled. Windows 7 1. Click Start > Internet Explorer to launch the browser. 2. Click Tools > Internet options > Connections tab > LAN settings. 3. From the Local Area Network (LAN) Settings screen, untick Use a proxy server for your LAN. 4. Click OK when done. 118
. 3. Cllick Apply Now when done.")

119 MAC OS 1. From your Safari browser, click Safari > Preferences > Advanced > Change Settings From the Network screen, deselect FTP Proxy and Web Proxy (HTTP). 3. Cllick Apply Now when done. NOTE: Refer to your browser's help feature for details on disabling the proxy server. B. Set the TCP/IP settings to automatically obtain an IP address. Windows 7 1. Click Start > Control Panel > Network and Internet > Network and Sharing Center > Manage network connections. 2. Select Internet Protocol Version 4 (TCP/IPv4) or Internet Protocol Version 6 (TCP/IPv6), then click Properties. 119


120 3. To obtain the IPv4 IP settings automatically, tick Obtain an IP address automatically. To obtain the IPv6 IP settings automatically, tick Obtain an IPv6 address automatically. 4. Click OK when done. MAC OS 1. Click the Apple icon located on the top left of your screen. 2. Click System Preferences > Network > Configure From the TCP/IP tab, select Using DHCP in the Configure IPv4 dropdown list. 4. Cllick Apply Now when done. NOTE: Refer to your operating system s help and support feature for details on configuring your computer s TCP/IP settings. 120

121 C. Disable the dial-up connection, if enabled. Windows 7 1. Click Start > Internet Explorer to launch the browser. 2. Click Tools > Internet options > Connections tab. 3. Tick Never dial a connection. 4. Click OK when done. NOTE: Refer to your browser's help feature for details on disabling the dial-up connection. 121
User Guide RT-AC88U. Wireless-AC 3100 Dual Band Gigabit Router. E10302_RT-AC88U_manual.indd 1 2015/5/11 15:40:49
 User Guide RT-AC88U Wireless-AC 3100 Dual Band Gigabit Router E10302_RT-AC88U_manual.indd 1 2015/5/11 15:40:49 E10302 First Edition April 2015 Copyright 2015 ASUSTeK Computer Inc. All Rights Reserved.
User Guide RT-AC3200. Wireless-AC 3200 Tri-Band Gigabit Router. LED WiFi USB 3.0
 User Guide RT-AC3200 Wireless-AC 3200 Tri-Band Gigabit Router LED WiFi USB 3.0 E9670 First Edition December 2014 Copyright 2014 ASUSTeK Computer Inc. All Rights Reserved. No part of this manual, including
User Guide RT-AC5300. Wireless-AC5300 Tri-band Gigabit Router
 User Guide RT-AC5300 Wireless-AC5300 Tri-band Gigabit Router E10434 First Edition June 2015 Copyright 2015 ASUSTeK Computer Inc. All Rights Reserved. No part of this manual, including the products and
RT-AC68U. User Guide. Wireless-AC1900 Dual Band Gigabit Router
 RT-AC68U User Guide Wireless-AC1900 Dual Band Gigabit Router 8U E8119 First Edition March 2013 Copyright 2013 ASUSTeK Computer Inc. All Rights Reserved. No part of this manual, including the products and
RT-N66W. User Guide. Gigabit Router Dual Band Wireless-N900
 RT-N66W User Guide Gigabit Router Dual Band Wireless-N900 E8664 First Edition Sept. 2013 Copyright 2013 ASUSTeK Computer Inc. All Rights Reserved. No part of this manual, including the products and software
Quick Start Guide. WRV210 Wireless-G VPN Router with RangeBooster. Cisco Small Business
 Quick Start Guide Cisco Small Business WRV210 Wireless-G VPN Router with RangeBooster Package Contents WRV210 Router Ethernet Cable Power Adapter Product CD-ROM Quick Start Guide Welcome Thank you for
How To Set Up An Asus Wireless Router With A Usb 2.0 (Wired) And A Usb (Wired Wired) Cable (Wired Wire) For A Cheap Price (For A Power Card) (For An Ipad) (Wired And
 And A Usb (Wired Wired) Cable (Wired Wire) For A Cheap Price (For A Power Card) (For An Ipad) (Wired And") RT-AC66U User Guide Dual Band 3x3 802.11AC Gigabit Router E7891 Second Edition January 2013 Copyright 2013 ASUSTeK Computer Inc. All Rights Reserved. No part of this manual, including the products and
RT-AC66U User Guide Dual Band 3x3 802.11AC Gigabit Router E7891 Second Edition January 2013 Copyright 2013 ASUSTeK Computer Inc. All Rights Reserved. No part of this manual, including the products and
2.4GHz / 5GHz Dual CPU 600Mbps 11N AP/Router
 Dual Band Concurrent Router ESR7750 2.4GHz / 5GHz Dual CPU 600Mbps 11N AP/Router PRODUCT DESCRIPTION ESR7750 is a Dual Band Concurrent Wireless 11N Broadband Router with dual CPU that offers user unprecedented
ESR7550 KEY FEATURES PRODUCT DESCRIPTION
 PRODUCT DESCRIPTION ESR7750 is a Dual Band Concurrent Wireless 11N Broadband Router with dual CPU that offers user unprecedented network performance. WMM support boosts streaming and multimedia intensive
Nokia Siemens Networks. CPEi-lte 7212. User Manual
 Nokia Siemens Networks CPEi-lte 7212 User Manual Contents Chapter 1: CPEi-lte 7212 User Guide Overview... 1-1 Powerful Features in a Single Unit... 1-2 Front of the CPEi-lte 7212... 1-2 Back of the CPEi-lte
TECHNICAL NOTE. GoFree WIFI-1 web interface settings. Revision Comment Author Date 0.0a First release James Zhang 10/09/2012
 TECHNICAL NOTE GoFree WIFI-1 web interface settings Revision Comment Author Date 0.0a First release James Zhang 10/09/2012 1/14 Web interface settings under admin mode Figure 1: web interface admin log
DSL-N17U. User Guide. Wireless-N300 ADSL/VDSL Modem Router
 DSL-N17U User Guide Wireless-N300 ADSL/VDSL Modem Router E10140 First Edition January 2015 Copyright 2015 ASUSTeK Computer Inc. All Rights Reserved. No part of this manual, including the products and software
WRE6505. User s Guide. Quick Start Guide. Wireless AC750 Range Extender. Default Login Details. Version 1.00 Edition 1, 4 2014
 WRE6505 Wireless AC750 Range Extender Version 1.00 Edition 1, 4 2014 2.4G 5G Quick Start Guide User s Guide Default Login Details LAN IP Address 192.168.1.2 User Name admin www.zyxel.com Password 1234
N300 Wireless Router WNR2000v4 User Manual
 User Manual March 2014 202-11229-03 350 East Plumeria Drive San Jose, CA 95134 USA Support Thank you for selecting NETGEAR products. After installing your device, locate the serial number on the label
WUA-0605 300Mbps Wireless USB Network Adapter
 WUA-0605 300Mbps Wireless USB Network Adapter User Manual V1.0 Certification FCC CE FCC Statement This equipment has been tested and found to comply with the limits for a Class B digital device, pursuant
IEEE 802.11a/ac/n/b/g Enterprise Access Points ECW5320 ECWO5320. Management Guide. www.edge-core.com. Software Release v2.0.0.1
 IEEE 802.11a/ac/n/b/g Enterprise Access Points ECW5320 ECWO5320 Management Guide Software Release v2.0.0.1 www.edge-core.com Management Guide ECW5320 Indoor Enterprise Access Point IEEE 802.11a/ac/n/b/g
NBG2105. User s Guide. Quick Start Guide. Wireless Mini Travel Router. Default Login Details. Version 1.00 Edition 1, 11/2012
 NBG2105 Wireless Mini Travel Router Version 1.00 Edition 1, 11/2012 Quick Start Guide User s Guide LAN IP Address Default Login Details 192.168.1.1 (Router Mode) 192.168.1.2 (Other Modes) Passwordwww.zyxel.com
N450 Wireless Router WNR2500
 User Manual September 2013 202-11311-01 350 East Plumeria Drive San Jose, CA 95134 USA Support Thank you for purchasing this NETGEAR product. After installing your device, locate the serial number on the
TRENDnet User s Guide. Cover Page
 Cover Page Table of contents Product Overview... 4 Package Contents... 4 Features... 4 Product Hardware Features... 5 Application Diagram... 6 Wireless Performance Considerations... 7 Basic Router Setup...
NETVIGATOR Wireless Modem Setup Guide. (TG789Pvn)
") NETVIGATOR Wireless Modem Setup Guide (TG789Pvn) Configure the NETVIGATOR Wireless Modem Make sure that system meets the following requirement prior to NETVIGATOR Wireless Modem usage: - Subscribers who
NETVIGATOR Wireless Modem Setup Guide (TG789Pvn) Configure the NETVIGATOR Wireless Modem Make sure that system meets the following requirement prior to NETVIGATOR Wireless Modem usage: - Subscribers who
HW550-3G. 3G Mobile Broadband plus 4-Port Wireless-N Router
 HW550-3G 3G Mobile Broadband plus 4-Port Wireless-N Router Table of Contents About the Product...4 Features...5 Requirements...6 Package Content...7 Device Design...8 Getting Started...11 Plan Your Network...12
DV230 Web Based Configuration Troubleshooting Guide
 DV230 Web Based Configuration Troubleshooting Guide 1. Login settings After getting a DHCP IP address from your P1 W1MAX Modem DV-230), open any Internet browser and type in the URL address: http://10.1.1.254
SOHO 6 Wireless Installation Procedure Windows 95/98/ME with Internet Explorer 5.x & 6.0
 SOHO 6 Wireless Installation Procedure Windows 95/98/ME with Internet Explorer 5.x & 6.0 Before You Begin Before you install the SOHO 6 Wireless, you must have: A computer with a 10/100BaseT Ethernet card
ESR-9753. 802.11b/g/n SOHO Router PRODUCT OVERVIEW. 2.4 GHz 150Mbps 11N Router/AP
 802.11b/g/n SOHO Router 2.4 GHz 150Mbps 11N Router/AP PRODUCT OVERVIEW is a 1T1R Wireless Single chip 11N Broadband Router that delivers up to 3x faster speeds than 802.11g devices. supports home network
User Manual. Page 2 of 38
 DSL1215FUN(L) Page 2 of 38 Contents About the Device...4 Minimum System Requirements...5 Package Contents...5 Device Overview...6 Front Panel...6 Side Panel...6 Back Panel...7 Hardware Setup Diagram...8
ENHWI-N3. 802.11n Wireless Router
 ENHWI-N3 802.11n Wireless Router Product Description Encore s ENHWI-N3 802.11n Wireless Router s 1T1R Wireless single chip can deliver up to 3x faster speed than of 802.11g devices. ENHWI-N3 supports home
N150 and N300 Wireless Routers User Manual
 User Manual Models: JNR1010v2 JWNR2000v5 JWNR2010v5 WNR614 WNR618 WNR1000v4 WNR2010 WNR2020 WNR2050 October 2014 202-11392-03 350 East Plumeria Drive San Jose, CA 95134 USA Support Thank you for selecting
LW310V2 Sweex Wireless 300N Router
 LW310V2 Sweex Wireless 300N Router Please notice! On the included CD-ROM you will find the Setup Wizard. This easy install procedure will show you how to setup the router step-by-step. Do not expose the
N300 WiFi Range Extender WN2000RPT User Manual
 N300 WiFi Range Extender WN2000RPT User Manual December 2013 202-11333-01 350 East Plumeria Drive San Jose, CA 95134 USA Support Thank you for selecting NETGEAR products. After installing your device,
TRENDnet User s Guide. Cover Page
 Cover Page Contents Product Overview... 1 Package Contents... 1 Features... 1 Product Hardware Features... 2 Application Diagram... 4 Basic Router Setup... 5 Creating a Home Network... 5 Router Installation...
Linksys WAP300N. User Guide
 User Guide Contents Contents Overview Package contents 1 Back view 1 Bottom view 2 How to expand your home network 3 What is a network? 3 How to expand your home network 3 Where to find more help 3 Operating
User s Guide. High Power 700mW Dual Band AC Wi-Fi Router RTA15
 User s Guide High Power 700mW Dual Band AC Wi-Fi Router RTA15 CONTENTS INTRODUCTION... 3 GETTING STARTED... 4 Package Contents... 4 LED Indicators... 5 Back Panel Description... 6 BASIC SETUP GUIDE...
User s Guide WI-FI ROUTER HIGHPOWERTM RTA1750 AC1750
 User s Guide RTA1750 HIGHPOWERTM AC1750 WI-FI ROUTER CONTENTS INTRODUCTION... 3 GETTING STARTED... 4 Package Contents... 4 LED Indicators... 5 Back Panel Description... 6 BASIC SETUP GUIDE... 7 5.0GHz
TRENDnet User s Guide. Cover Page
 Cover Page Table of contents Product Overview... 4 Package Contents... 4 Features... 4 Product Hardware Features... 5 Application Diagram... 6 Wireless Performance Considerations... 7 Basic Router Setup...
User Guide. E-Series Routers
 User Guide E-Series Routers Table of Contents Table of Contents Product overview E900/E1200/E1500/E2500/E3200 1 Back view 1 Bottom view 1 E4200 2 Top view 2 Back view 2 Setting Up Your E-Series Router
A6210 WiFi USB Adapter 802.11ac USB 3.0 Dual Band User Manual
 802.11ac USB 3.0 Dual Band User Manual August 2014 202-11373-01 350 East Plumeria Drive San Jose, CA 95134 USA Support Thank you for selecting NETGEAR products. After installing your device, locate the
Wireless Cable Gateway CG3100Dv3
 Wireless Cable Gateway CG3100Dv3 User Manual 350 East Plumeria Drive San Jose, CA 95134 USA October 2011 202-10942-01 v1.0 2011 NETGEAR, Inc. All rights reserved No part of this publication may be reproduced,
AC1900, N900, and N450 WiFi Cable Data Gateways
 AC1900, N900, and N450 WiFi Cable Data Gateways Models C6300BD, CG4500BD, and CG3000Dv2 User Manual March 2015 202-11434-03 350 East Plumeria Drive San Jose, CA 95134 USA Support Thank you for selecting
A Division of Cisco Systems, Inc. GHz 2.4 802.11g. Wireless-G. Access Point with SRX. User Guide WIRELESS WAP54GX. Model No.
 A Division of Cisco Systems, Inc. GHz 2.4 802.11g WIRELESS Wireless-G Access Point with SRX User Guide Model No. WAP54GX Copyright and Trademarks Specifications are subject to change without notice. Linksys
AC750 WiFi Range Extender
 Model EX6100 User Manual April 2014 202-11307-03 350 East Plumeria Drive San Jose, CA 95134 USA Support Thank you for selecting NETGEAR products. After installing your device, locate the serial number
running operation mode painless TECHNICAL SPECIFICATION WAN/LAN: One 10/100 Fast Ethernet RJ-45 WPS (WiFi Protected Setup) WAN (Internet connection)
 WAN (Internet connection)") PRODUCT DESCRIPTION ETR9350 is a 2T2R Wireless Single chip 11N Travel AP/Router that delivers up to 6x faster speeds than 802.11g devices. ETR9350 drives superior performance and unparalleled wireless
PRODUCT DESCRIPTION ETR9350 is a 2T2R Wireless Single chip 11N Travel AP/Router that delivers up to 6x faster speeds than 802.11g devices. ETR9350 drives superior performance and unparalleled wireless
TRENDnet User s Guide. Cover Page
 Cover Page Table of Contents Product Overview... 1 Package Contents... 1 Features... 1 Product Hardware Features... 2 Application Diagram... 4 Basic Router Setup... 4 Creating a Home Network... 4 Router
Wireless-N Range Extender. User Manual
 Wireless-N Range Extender User Manual Version A1.0, June 19, 2012 Preface This manual provides information related to the installation and operation of this Wireless-N Range Extender. The individual reading
LTE Broadband 11n Wireless Router MBR1515
 LTE Broadband 11n Wireless Router MBR1515 User Manual 350 East Plumeria Drive San Jose, CA 95134 USA November 2012 202-11102-01 v1.0 Support Thank you for choosing NETGEAR. To register your product, get
User s Guide. High Power Wireless-N 600mW Gigabit Dual Band Router R20000G
 User s Guide High Power Wireless-N 600mW Gigabit Dual Band Router R20000G CONTENTS INTRODUCTION... 2 GETTING STARTED... 3 Package Contents... 3 LED Indicators... 4 Back Panel Description... 5 SETUP GUIDE...
AC1600 WiFi VDSL/ADSL Modem Router
 AC1600 WiFi VDSL/ADSL Modem Router Model D6400 User Manual May 2015 202-11485-03 350 East Plumeria Drive San Jose, CA 95134 USA Support Thank you for selecting NETGEAR products. After installing your device,
MN-700 Base Station Configuration Guide
 MN-700 Base Station Configuration Guide Contents pen the Base Station Management Tool...3 Log ff the Base Station Management Tool...3 Navigate the Base Station Management Tool...4 Current Base Station
A Division of Cisco Systems, Inc. GHz 2.4 802.11g. Wireless-G. PCI Adapter with RangeBooster. User Guide WIRELESS WMP54GR. Model No.
 A Division of Cisco Systems, Inc. GHz 2.4 802.11g WIRELESS Wireless-G PCI Adapter with RangeBooster User Guide Model No. WMP54GR Copyright and Trademarks Specifications are subject to change without notice.
AC1200 Smart WiFi Router with External Antennas
 AC1200 Smart WiFi Router with External Antennas Model R6220 User Manual November 2014 202-11443-01 350 East Plumeria Drive San Jose, CA 95134 USA Support Thank you for selecting NETGEAR products. After
WRE2205. User s Guide. Quick Start Guide. Wireless N300 Range Extender. Default Login Details. Version 1.00 Edition 1, 06/2012
 WRE2205 Wireless N300 Range Extender Version 1.00 Edition 1, 06/2012 Quick Start Guide User s Guide Default Login Details LAN IP Address http://192.168.1.2 User Name admin Passwordwww.zyxel.com 1234 Copyright
Table of Contents. Wireless Installation Considerations... 10
 Table of Contents Table of Contents Product Overview...4 Package Contents...4 System Requirements... 4 Introduction...5 Features... 6 Hardware Overview...7 Connections... 7 LEDs... 8 Wireless Installation
NBG6816. User s Guide. Quick Start Guide. Simultaneous Dual-Band Wireless AC2350 Ultra HD Media Router. Default Login Details
 NBG6816 Simultaneous Dual-Band Wireless AC2350 Ultra HD Media Router Version 1.00 Edition 1, 03/2015 Quick Start Guide User s Guide Default Login Details LAN IP http://192.168.1.1 Address (Router Mode)
English version. LW320/LW321 Sweex Wireless 300N Router. Package Contents. Terminology list
 LW320/LW321 Sweex Wireless 300N Router Do not expose the Sweex Wireless 300N Router to extreme temperatures. Do not place the device in direct sunlight or in the direct vicinity of heating elements. Do
Version 1.0 January 16, 2015. User Manual. Wireless AC750 Dual Band Router DIR-816
 Version 1.0 January 16, 2015 User Manual Wireless AC750 Dual Band Router DIR-816 Preface D-Link reserves the right to revise this publication and to make changes in the content hereof without obligation
EnGenius Work & Play Series
 EnGenius Work & Play Series Wireless-N Gigabit Router User Guide V1.0 TABLE OF CONTENTS TABLE OF CONTENTS Product Overview Product Overview 1-1 Package Contents 1-2 Product Layout 1-3 LEDs.............................................................1-3
N150 2-Port Wireless Router WNR612v3
 N150 2-Port Wireless Router WNR612v3 User Manual 350 East Plumeria Drive San Jose, CA 95134 USA August 2012 202-11019-01 v1.0 2012 NETGEAR, Inc. All rights reserved. No part of this publication may be
Chapter 2 Connecting the FVX538 to the Internet
 Chapter 2 Connecting the FVX538 to the Internet Typically, six steps are required to complete the basic connection of your firewall. Setting up VPN tunnels are covered in Chapter 5, Virtual Private Networking.
BigPond Wi-Fi 4G Advanced II AirCard 790S User Manual
 AirCard 790S User Manual October 2014 202-11471-02 350 East Plumeria Drive San Jose, CA 95134 USA Support Contact your Internet service provider for technical support. Compliance For regulatory compliance
Wireless-N. User Guide. PCI Adapter WMP300N (EU) WIRELESS. Model No.
 WIRELESS. Model No.") 2,4 GHz WIRELESS Wireless-N PCI Adapter User Guide Model No. WMP300N (EU) Copyright and Trademarks Specifications are subject to change without notice. Linksys is a registered trademark or trademark of
2,4 GHz WIRELESS Wireless-N PCI Adapter User Guide Model No. WMP300N (EU) Copyright and Trademarks Specifications are subject to change without notice. Linksys is a registered trademark or trademark of
genie app and genie mobile app
 genie app and genie mobile app User Manual 350 East Plumeria Drive San Jose, CA 95134 USA June 2012 202-10933-02 v1.0 2012 NETGEAR, Inc. All rights reserved No part of this publication may be reproduced,
N600 Wireless Dual Band Router
 N600 Wireless Dual Band Router Model WNDR3400v3 User Manual June 2014 202-11204-04 350 East Plumeria Drive San Jose, CA 95134 USA Support Thank you for selecting NETGEAR products. After installing your
N300 Wireless ADSL2+ Modem Router DGN2200M Mobile Edition
 N300 Wireless ADSL2+ Modem Router DGN2200M Mobile Edition User Manual 350 East Plumeria Drive San Jose, CA 95134 USA November 2011 202-10604-02 v1.0 2011 NETGEAR, Inc. All rights reserved No part of this
Wireless N Open Source Access Point
 Wireless N Open Source Access Point Table of Contents Package Contents... 4 System Requirements... 5 Introduction... 6 Features... 8 Hardware Overview... 9 Connections... 9 LEDs...10 WPS LED/Button...11
NBG6815. User s Guide. AC2200 MU-MIMO Dual-Band Wireless Gigabit Router. Quick Start Guide. Default Login Details. Version 1.00 Edition 1, 02/2016
 NBG6815 AC2200 MU-MIMO Dual-Band Wireless Gigabit Router Version 1.00 Edition 1, 02/2016 Quick Start Guide User s Guide Default Login Details LAN IP http://192.168.1.1 Address (Router Mode) www.zyxel.comhttp://192.168.1.2
How To Use A Modem On A Pc Or Mac Or Ipad (For A Laptop)
") CLEAR MODEM with Wi-Fi USER GUIDE GET TO KNOW YOUR CLEAR MODEM WITH WI-FI 3 WHAT S IN THE BOX? 3 INFORMATIVE LED INDICATORS 3 USE WITH CARE 3 SET UP THE MODEM 4 PLACE THE MODEM ON A FLAT, STABLE SURFACE
CLEAR MODEM with Wi-Fi USER GUIDE GET TO KNOW YOUR CLEAR MODEM WITH WI-FI 3 WHAT S IN THE BOX? 3 INFORMATIVE LED INDICATORS 3 USE WITH CARE 3 SET UP THE MODEM 4 PLACE THE MODEM ON A FLAT, STABLE SURFACE
Wireless-N. User Guide. Broadband Router WRT300N WIRELESS. Model No.
 2.4 GHz WIRELESS Wireless-N Broadband Router User Guide Model No. WRT300N Copyright and Trademarks Specifications are subject to change without notice. Linksys is a registered trademark or trademark of
Chapter 2 Introduction
 Chapter 2 Introduction This chapter describes the features of the NETGEAR 54 Mbps Wireless ADSL Modem Router Model DG834G. The Wireless ADSL Modem Router is a combination of a built-in ADSL modem, ADSL
Steps for Basic Configuration
 1. This guide describes how to use the Unified Threat Management appliance (UTM) Basic Setup Wizard to configure the UTM for connection to your network. It also describes how to register the UTM with NETGEAR.
AC750 WiF Range Extender
 Model EX3700 User Manual May 2015 202-11487-01 350 East Plumeria Drive San Jose, CA 95134 USA Support Thank you for selecting NETGEAR products. After installing your device, locate the serial number on
BEC 6200WZL. 4G/LTE Cellular Broadband Router. Quick Start Guide
 BEC 6200WZL 4G/LTE Cellular Broadband Router Quick Start Guide 1 BEC 6200WZL 4G/LTE Cellular Broadband Router PLEASE READ THE QUICK START GUIDE AND FOLLOW THE STEPS CAREFULLY. THIS QUICK START GUIDE WILL
AC1750 Smart WiFi Router
 Model R6400 User Manual June 2015 202-11508-01 350 East Plumeria Drive San Jose, CA 95134 USA Support Thank you for selecting NETGEAR products. After installing your device, locate the serial number on
N750 Wireless Dual Band Gigabit Router
 N750 Wireless Dual Band Gigabit Router Model WNDR4300 User Manual September 2014 202-11031-07 350 East Plumeria Drive San Jose, CA 95134 USA Support Thank you for selecting NETGEAR products. After installing
your Gateway Windows network installationguide 802.11b wireless series Router model WBR-100 Configuring Installing
 your Gateway Windows network installationguide 802.11b wireless series Router model WBR-100 Installing Configuring Contents 1 Introduction...................................................... 1 Features...........................................................
Wireless Cable Gateway CG3300CMR
 Wireless Cable Gateway CG3300CMR User Manual 350 East Plumeria Drive San Jose, CA 95134 USA September 2012 202-11068-02 v1.0 2012 NETGEAR, Inc. All rights reserved. No part of this publication may be reproduced,
DSL-2600U. User Manual V 1.0
 DSL-2600U User Manual V 1.0 CONTENTS 1. OVERVIEW...3 1.1 ABOUT ADSL...3 1.2 ABOUT ADSL2/2+...3 1.3 FEATURES...3 2 SPECIFICATION...4 2.1 INDICATOR AND INTERFACE...4 2.2 HARDWARE CONNECTION...4 2.3 LED STATUS
WiFi Cable Modem Router C3700
 User Manual Note: This document is for certification purposes only. Images are for position only and might differ from the actual product. October 2013 350 East Plumeria Drive San Jose, CA 95134 USA Support
AC750 Multi-Function Concurrent Dual-Band Wi-Fi Router
 The extraordinary growth in the number of wireless devices found in modern homes has seen a huge increase in demand for wireless speed, range and bandwidth. This continuing trend away from wired connections
Chapter 6 Using Network Monitoring Tools
 Chapter 6 Using Network Monitoring Tools This chapter describes how to use the maintenance features of your Wireless-G Router Model WGR614v9. You can access these features by selecting the items under
USER GUIDE Cisco Small Business
 USER GUIDE Cisco Small Business WBPN Wireless-N Bridge for Phone Adapters December 2011 Cisco and the Cisco Logo are trademarks of Cisco Systems, Inc. and/or its affiliates in the U.S. and other countries.
Telstra Pre-Paid 4G My Pocket Wi-Fi Ultimate User Manual
 Telstra Pre-Paid 4G My Pocket Wi-Fi Ultimate User Manual April 2014 202-11387-01 350 East Plumeria Drive San Jose, CA 95134 USA Support Contact your Internet service provider for technical support. Compliance
A Division of Cisco Systems, Inc. GHz 2.4 802.11g. Wireless-G. USB Network Adapter with RangeBooster. User Guide WIRELESS WUSB54GR. Model No.
 A Division of Cisco Systems, Inc. GHz 2.4 802.11g WIRELESS Wireless-G USB Network Adapter with RangeBooster User Guide Model No. WUSB54GR Copyright and Trademarks Specifications are subject to change without
Wireless-N. User Guide. Broadband Router WRT300N (EU/LA) WIRELESS. Model No.
 WIRELESS. Model No.") 2,4 GHz WIRELESS Wireless-N Broadband Router User Guide Model No. WRT300N (EU/LA) Copyright and Trademarks Specifications are subject to change without notice. Linksys is a registered trademark or trademark
2,4 GHz WIRELESS Wireless-N Broadband Router User Guide Model No. WRT300N (EU/LA) Copyright and Trademarks Specifications are subject to change without notice. Linksys is a registered trademark or trademark
The following sections describe the Gateway configuration pages in the SBG1000 Setup Program.
 Configuration Gateway > WAN Page Gateway: LAN nat config Page Gateway: LAN dhcp server config Page Gateway LOG Page Preparing the Network Preparing the Computers for TCP/IP Networking Configuring TCP/IP
N900 WiFi Router. Model WNDR4500v3 User Manual. January 2015 202-11400-01. 350 East Plumeria Drive San Jose, CA 95134 USA
 Model WNDR4500v3 User Manual January 2015 202-11400-01 350 East Plumeria Drive San Jose, CA 95134 USA Support Thank you for selecting NETGEAR products. After installing your device, locate the serial number
How To Check If Your Router Is Working Properly
 Chapter 6 Using Network Monitoring Tools This chapter describes how to use the maintenance features of your RangeMax Dual Band Wireless-N Router WNDR3300. You can access these features by selecting the
AC 750. Wireless Dual Band ADSL2+ Modem Router. Highlights
 AC 750 Wireless Dual Band ADSL2+ Modem Router Highlights 750Mbps Wireless Speed 300Mbps on 2.4GHz + 433Mbps on 5GHz Broad Coverage 2 external antennas provide maximum omni-directional wireless coverage
BASIC INSTRUCTIONS TO CONFIGURE ZYXEL P8701T CPE USING THE WEB INTERFACE
 BASIC INSTRUCTIONS TO CONFIGURE ZYXEL P8701T CPE USING THE WEB INTERFACE 12/11/2012 Index 1 INTRODUCTION... 1-1 2 FACTORY DEFAULT SETTINGS... 2-1 3 CPE BASIC OPERATIONS... 3-1 3.1 PASSWORD MODIFICATION...
R6300 WiFi Router 802.11ac Dual Band Gigabit
 R6300 WiFi Router 802.11ac Dual Band Gigabit User Manual 350 East Plumeria Drive San Jose, CA 95134 USA June 2012 202-11030-02 v1.0 2012 NETGEAR, Inc. All rights reserved. No part of this publication may
TRENDnet User s Guide. Cover Page
 Cover Page Table of Contents Table of Contents... 2 Product Overview... 4 Package Contents... 4 Features... 4 Product Hardware Features... 5 Application Diagram... 6 Router Setup... 7 Creating a Home Network...
Table of Contents. Table of Contents
 Table of Contents Product Overview...4 Package Contents...4 System Requirements... 4 Introduction...5 Features... 7 Hardware Overview...8 Connections... 8 LEDs... 9 WPS LED/Button... 10 Installation...11
USER GUIDE AC2400. DUAL BAND GIGABIT Wi Fi ROUTER. Model# E8350
 USER GUIDE AC2400 DUAL BAND GIGABIT Wi Fi ROUTER Model# E8350 Table of Contents Product overview E8350..................................... 1 Setting Up Your E-Series Router Where to find more help.........................
USER GUIDE AC2600 MU-MIMO GIGABIT ROUTER. Model# EA8500
 USER GUIDE AC2600 MU-MIMO GIGABIT ROUTER Model# EA8500 Table of Contents Product overview EA8500.....................................1 Setting Up Your Router Where to find more help.........................
N300 Wireless Dual Band ADSL2+ Modem Router DGND3300v2
 N300 Wireless Dual Band ADSL2+ Modem Router DGND3300v2 User Manual 350 East Plumeria Drive San Jose, CA 95134 USA March 2012 202-11035-01 v1.0 2012 NETGEAR, Inc. All rights reserved No part of this publication
11g WiFi ADSL Router. WL-AM604g 4 3 2 1! User Manual
 11g WiFi ADSL Router WL-AM604g AP LINK ACT User Manual E3654 / March 2008 ASUS Contact Information ASUSTeK COMPUTER INC. (Asia-Pacific) Company address: 15 Li-Te Road, Beitou, Taipei 11259 Telephone: +886-2-2894-3447
UIP1868P User Interface Guide
 UIP1868P User Interface Guide (Firmware version 0.13.4 and later) V1.1 Monday, July 8, 2005 Table of Contents Opening the UIP1868P's Configuration Utility... 3 Connecting to Your Broadband Modem... 4 Setting
Router Setup Manual. NETGEAR, Inc. 4500 Great America Parkway Santa Clara, CA 95054 USA 208-10060-01 2006-03-17
 NETGEAR, Inc. 4500 Great America Parkway Santa Clara, CA 95054 USA 208-10060-01 2006-03-17 2006 by NETGEAR, Inc. All rights reserved. Trademarks NETGEAR is a trademark of Netgear, Inc. Microsoft, Windows,
Chapter 4 Customizing Your Network Settings
 . Chapter 4 Customizing Your Network Settings This chapter describes how to configure advanced networking features of the Wireless-G Router Model WGR614v9, including LAN, WAN, and routing settings. It
N300 WiFi Range Extender
 Model WN3000RP User Manual September 2014 202-11409-01 350 East Plumeria Drive San Jose, CA 95134 USA Support Thank you for selecting NETGEAR products. After installing your device, locate the serial number
802.11b/g/n SOHO Router 2.4GHz 150Mbps 11N AP/Router
 802.11b/g/n SOHO Router 2.4GHz 150Mbps 11N AP/Router ESR-9753 PRODUCT DESCRIPTION ESR-9753 is a 1T1R Wireless Single chip 11N Broadband Router that delivers up to 3x faster speeds than 802.11g devices.
ESR-9753 802.11b/g/n SOHO Router
 ESR-9753 is a 1T1R Wireless Single chip 11N Broadband Router that delivers up to 3x faster speeds than 802.11g devices. ESR-9753 supports home network with superior throughput and performance and unparalleled