Release Date: 2006/01/21 Manual Revision: Copyright All rights reserved
|
|
|
- Cornelia Arlene Neal
- 8 years ago
- Views:
Transcription
1
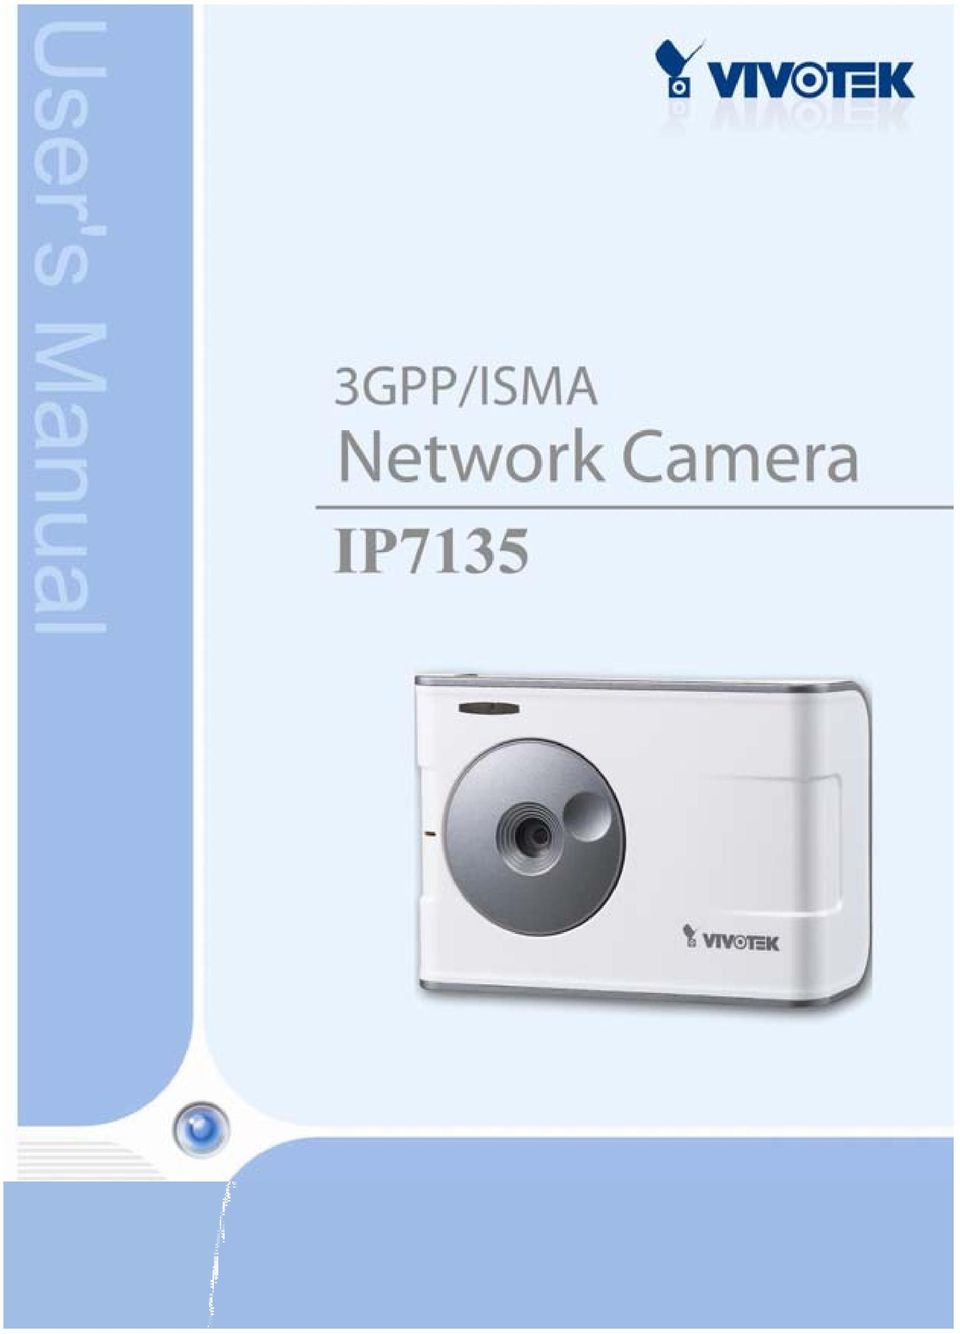
2 Product name: Network Camera (IP7135) Release Date: 2006/01/21 Manual Revision: 1.1 Web site: Made in Taiwan. Copyright All rights reserved T: F:

3 Before You Use This Product The use of surveillance devices may be prohibited by law in your country. The Network Camera is not only a high-performance web-ready camera but also can be part of a flexible surveillance system. It is the user s responsibility to ensure that the operation of such devices is legal before installing this unit for its intended use. It is important to first verify that all contents received are complete according to the list in the "Package Contents" chapter. Take notice of the warnings in Quick installation guide before the Network Camera is installed, then carefully read and follow the instructions in the Installation chapter to avoid damages due to faulty assembly and installation. This also ensures the product is used properly as intended. The Network Camera is a network device and its use should be straightforward for those who have basic network knowledge. The Troubleshooting chapter in the Appendix provides remedies to the most common errors in set up and configuration. You should consult this chapter first if you run into a system error. The Network Camera is designed for various applications including video sharing, general security/surveillance, etc. The How to Use chapter suggests ways to best utilize the Network Camera and ensure proper operations. For the creative and professional developers, the "URL Commands of The Network Camera " chapter serves to be a helpful reference to customize existing homepages or integrating with the current web server. For paragraphs preceded by the reader should use caution to understand completely the warnings. Ignoring the warnings may result in serious hazards or injuries T: F:

4 Table of Contents Before You Use This Product...2 Package Contents...6 Installation...7 Hardware installation...7 Software installation...7 Initial Access to the Network Camera...8 Check Network Settings...8 Add Password to prevent Unauthorized Access...8 How to Use...9 Authentication...9 Installing plug-in Primary user s capability Main Screen with Camera View Digital Zoom Snapshot Client settings Administrator s capability Fine-tuning for Best Performance Opening accounts for new users Build a security application Software revision upgrade Definitions in Configuration System parameters Security settings Network settings Network type HTTP RTSP Streaming DDNS Access List Audio and Video T: F:

5 General Video Settings Video orientation Audio settings Image Settings & FTP FTP Motion detection Application settings Snapshot Weekly schedule Snapshot file name prefix Send out the snapshot while motion detection Sequential operation Method for sending snapshot System log Viewing system parameters Maintenance Appendix A. Troubleshooting Status LED Reset and restore B. URL commands of the Network Camera Get server parameter values Set server parameter values Available parameters on the server Application page CGI command Capture single snapshot Account management System logs Configuration file Upgrade firmware T: F:

6 D. Technical specifications T: F:

7 Package Contents IP7135 Software CD Power adapter Quick installation guide Camera stand Warranty card T: F:

8 Installation In this manual, "User" refers to whoever has access to the Network Camera, and "Administrator" refers to the person who can configure the Network Camera and grant user access to the camera. Hardware installation Please verify that your product package contains all the accessories listed in the foregoing Package Contents. Depending on the user s application, an Ethernet cable may be needed. The Ethernet cable should meet the specs of UTP Category 5 and not exceed 100 meters in length. Connect the power adapter jack to the Network Camera before plugging in to the power socket. This will reduce the risk of accidental electric shock. Upon powering up, the front blue LED will become lighted first and then the device will go through booting process. During the booting process, both blue and red LEDs will be on and the Network Camera will standby for getting IP address. After getting IP Address, the LED will blink blue every second. The Network Camera will first detect Ethernet. During the process, the red LED of the Network Camera will flash every second. Operating in either network mode, the blue LED will flash every second as heartbeat to indicate alive

9 To install in Ethernet Make sure the Ethernet is firmly connected to a switch hub. After attaching the Ethernet cable plug in the power adapter. If the LED turns out to be steady blue, go to next paragraph Software installation. If the Ethernet is not available, Network Camera will switch to wireless LAN mode. Software installation At the end of the hardware installation, users can use Installation Wizard program included in the product CDROM to find the location of the Network Camera. There may be many Network Cameras in the local network. Users can differentiate the Network Cameras with the serial number. The serial number is printed on the labels on the carton and the back of the Network Camera body. Please refer to the user s manual of Installation Wizard for detail

10 Once installation is complete, the Administrator should proceed to the next section "Initial access to the Network Camera" for necessary checks and configurations. Initial Access to the Network Camera Check Network Settings The Network Camera can be connected either before or immediately after software installation onto the Local Area Network. The Administrator should complete the network settings on the configuration page, including the correct subnet mask and IP address of gateway and DNS. Ask your network administrator or Internet service provider for the detail information. By default the Network Camera requires the Administrator to run installation every time it reboots. If the network settings are to remain unchanged, disable the Install option. Refer to Network settings on the System Configuration page for details. If any setting is entered incorrectly and cannot proceed to setting up the Network Camera, restore the factory settings following the steps in the Troubleshooting chapter of the Appendix. Add Password to prevent Unauthorized Access The default Administrator s password is blank and the Network Camera initially will not ask for any password. The Administrator should immediately implement a new password as a matter of prudent security practice. Once the Administrator s password is saved, the Network Camera will ask for the user s name and password before each access. The Administrator can set up a maximum of twenty (20) user accounts. Each user can access the Network Camera except to perform system configuration. Some critical functions are exclusive for the Administrator, such as system configuration, user administration, and software upgrades. The user name for the Administrator is permanently assigned as root. Once the password is changed, the browser will display an authentication window to ask for the new password. Once the password is set, there is no provision to recover the Administrator s password. The - 8 -

11 only option is to restore to the original factory default settings. How to Use Authentication After opening the Web browser and typing in the URL of the Network Camera, a dialogue window pops up to request a username and password. Upon successful authentication, the following figure is displayed. The foreground is the login window and the background shows the message if authentication fails. The user may check the option box to save the password for future convenience. This option is not available to the Administrator for obvious reason

12 Installing plug-in For the initial access to the Network Camera in Windows, the web browser may prompt for permission to install a new plug-in for the Network Camera. Permission request depends on the Internet security settings of the user s PC or notebook. If the highest security level is set, the computer may prohibit any installation and execution attempt. This plug-in has been registered for certificate and is used to display the video in the browser. Users may click on to proceed. If the web browser does not allow the user to continue to install, check the Internet security option and lower the security levels or contact your IT or networking supervisor for help

13 Primary user s capability Main Screen with Camera View The main page layout has two parts: Configuration functions: The camera can be configured using these user interfaces. Camera View: What the camera sees. Click on the configuration link to the left of the image window to enter the configuration page

14 Digital Zoom Click on the magnifier icon under the camera view then the digital zoom control panel will be shown. Uncheck Disable digital zoom and use the slider control to change the zoom factors Snapshot Click on Snapshot, web browser will pop up a new window to show the snapshot. Users can point at the snapshot and click the right button of mouse to save it

15 Client settings At the initial access to the Connection type page in Windows, the web browser will ask for a new plug-in installation, the plug-in being the Network Camera. This plug-in has been registered for certification and can be used to change the parameters at the client s site. The user may click on to install the plug-in. If the web browser does not allow the user to complete the installation, check the Internet security to lower the security level or contact your IT or networking supervisor

16 There are two settings for the client side. One is Media Options for users to determine the type of media to be streaming. The other is Protocol Options which allows choices on connection protocol between client and server. There are two protocols choices to optimize your usage UDP and TCP. The UDP protocol allows for more real-time audio and video streams. However, some packets may be lost due to network burst traffic and images may be obscured. The TCP protocol allows for less packet loss and produces a more accurate video display. The downside with this protocol is that the real-time effect is worse than that with the UDP protocol. If no special need is required, UDP protocol is recommended. Generally speaking, the client s choice will be in the order of UDP TCP. After the Network Camera is connected successfully, Protocol Option will indicate the selected protocol. The selected protocol will be recorded in the user's PC and will be used for the next connection. If the network environment is changed, or the user wants to let the web browser to detect again, manually select the UDP protocol, save, and return HOME to

17 re-connect. <url> Camera>/client.html <Network Camera> is the domain name or the original IP address of the Network Camera

18 Administrator s capability Fine-tuning for Best Performance Best performance generally equates to the fastest image refresh rate with the best video quality, and at the lowest network bandwidth as possible. The three factors, Maximum frame rate, Constant bit rate, and Fix quality on the Audio and Video Configuration page, are correlative to allow for achieving the best performance possible. For Viewing by Mobile Phone Most 3GPP cell phone supports media streaming with MPEG4 video and GSM-AMR

19 audio. Due to the limitation of the bandwidth for 3GPP, only 176x144 video solution will be supported for cell phone viewing. Select the Configure for mobile viewing option will change the range of other related video settings. For Best Real-time Video Images To achieve good real-time visual effect, the network bandwidth should be large enough to allow a transmission rate of greater than 20 image frames per second. If the broadband network is over 1 Mbps, set the Fix bit rate to 1000Kbps or 1200Kbps, and set Fix quality at the highest quality. The maximum frame rate is 30. If your network bandwidth is more than 512Kbps, you can fix the bit rate according to your bandwidth and set the maximum frame rate to 30 fps. If the images vary dramatically in your environment, you may want to slow the maximum frame rate down to 20 fps in order to lower the rate of data transmission. This allows for better video quality and the human eyes cannot readily detect the differences between those of 20, 25, or 30 frames per second. If your network bandwidth is below 512 Kbps, set the Fix bit rate according to your bandwidth and try to get the best performance by fine-tuning with the Maximum frame rate. In a slow network, greater frame rate results in blur images. Another work-around is to choose 160x120 in the Size option for better images. Video quality performance will vary somewhat due to the number of users viewing on the network; even when the parameters have initially been finely tuned. Performance will also suffer due to poor connectivity because of the network s burst constraint. Only Quality Images Will Do To have the best video quality, you should set Fix quality at Detailed or Excellent and adjust the Maximum frame rate to match your network s bandwidth. If your network is slow and you receive broken pictures, go to the TCP protocol in Connection type and choose a more appropriate mode of transmission. The images may suffer a time delay due to a slower connection. The delay will also increase with added number of users. Somewhere Between Real-time and Clear Images If you have a broadband network, set Fix quality at Normal or better, rather than setting Fix bit rate. You can also fix the bandwidth according to your actual network

20 speed and adjust the frame rate. Start from 30 fps down for best results but not below 15 fps. If the image qualities are not improved, select a lower bandwidth setting

21 Opening accounts for new users Protect Network Camera by passwords The Network Camera is shipped without any password by default. That means everyone can access the Network Camera including the configuration as long as the IP address is known. It is necessary to assign a password if the Network Camera is intended to be accessed by others. Type a new word twice in 1 to enable protection. This password is used to identify the administrator. Then add an account with user name and password for your friends in 2. Network Camera can provide twenty accounts for your valuable customers or friends. You may delete some users from
22 Build a security application The Administrator can use the built-in motion detection to monitor any movement to perform many useful security applications. To upload the snapshots, users can choose either or FTP according to user s needs. Both and FTP use the network settings on the and FTP page. Refer to the definition section for detail configuration. 1. Click on Configuration on homepage, 2. Click on Motion detection at the left column, 3. Check Enable motion detection, 4. Click on new to have a new window to monitor video, 5. Type in a name to identify the new window, 6. Use the mouse to click, hold, and drag the window corner to resize or the title bar to move, 7. Fine-tune using the Sensitivity and Percentage fields to best suit the camera s environment. Higher Sensitivity detects the slighter motion. Higher Percentage discriminates smaller objects, 8. Clicking on Save enables the activity display. Green means the motion in the window is under the watermark set by Administrator and red means it is over the watermark, 9. Click on Application at the left column, 10.Check the weekdays as you need and give the time interval to monitor the motion detection every day, 11.Select the Trigger on Motion detection. 12.Set the delay before detecting next motion to avoid continuous false alarms following the original event, 13.Set the number of pre-event and post-event images to be uploaded, 14.Check the window name set in step 5, 15.Check the way to upload snapshot, 16.Click on save to validate
23 Software revision upgrade Customers can obtain the up-to-date software from the web site of Vivotek. An easy-to-use Upgrade Wizard is provided to upgrade the Network Camera with just a few clicks. The upgrade function is opened to the Administrator only. To upgrade the system, follow the procedures below. 1. Download the firmware file named xxx.pkg from the appropriate product folder. 2. Run the Upgrade Wizard and proceed following the prompts. Refer to the instructions of the Upgrade Wizard for details. 3. Or upgrade firmware from HTTP web page directly 3. The whole process will finish in a few minutes and it will automatically restart the system. If power fails during the writing process of Flash memory, the program in the memory of the Network Camera may be destroyed permanently. If the Network Camera cannot restart properly, ask your dealer for technical service
24 Definitions in Configuration Only the Administrator can access system configuration. Each category in the left column will be explained in the following pages. The bold texts are the specific phrases on the Option pages. The Administrator may type the URL below the figure to directly enter the frame page of configuration. If the Administrator also wants to set certain options through the URL, read the reference appendix for details. <url> Camera>/setup/config.html <Network Camera> is the domain name or original IP address of the Network Camera. <url> Camera>/setup/system.html <Network Camera> is the domain name or original IP address of the Network Camera
25 System parameters "Host name" The text displays the title at the top of the main page. Turn off the LED indicator Check this option to shut off the LED on the rear. It can prevent the camera s operation being noticed. "Keep current date and time" Click on this to reserve the current date and time of the Network Camera. An internal real-time clock maintains the date and time even when the power of the system is turned off. "Sync with computer time" Synchronizes the date and time of the Network Camera with the local computer. The read-only date and time of the PC is displayed as updated. Manual Adjust the date and time according to what is entered by the Administrator. Notice the format in the related fields while doing the entry. Automatic Synchronize with the NTP server over the Internet whenever the Network Camera starts up. It will fail if the assigned time-server cannot be reached. NTP server Assign the IP address or domain name of the time-server. Leaving the text box blank connects the Network Camera to the default time-servers. "Time zone" Adjust the time with that of the time-servers for local settings. Update interval Select hourly, daily, weekly, or monthly update with the time on the NTP server. Remember to click on to immediately validate the changes. Otherwise, the correct time will not be synchronized
26 Security settings Root password Change the Administrator s password by typing in the new password identically in both text boxes. The typed entries will be displayed as asterisks for security purposes. After pressing, the web browser will ask the Administrator for the new password for access. Add user Type the new user's name and password and press to insert the new entry. The new user will be displayed in the user name list. There is a maximum of twenty user accounts. Manager user Pull down the user list to find the user s name and press to complete. <url> Camera>/setup/security.html <Network Camera> is the domain name or original IP address of the Network Camera
27 Network settings Any changes made on this page will restart the system in order to validate the changes. Make sure every field is entered correctly before clicking on. Network type LAN & PPPoE The default type is LAN. Select PPPoE if using ADSL "Get IP address automatically" & Use fixed IP address The default status is Get IP address automatically. This can be tedious having to perform software installation whenever the Network Camera starts. Therefore, once the network settings, especially the IP address, have been entered correctly, select Use fixed IP address then the Network Camera will skip installation at the next boot. The Network Camera can automatically restart and operate normally after a power outage. Users can run IP installer to check the IP address assigned to the Network Camera if the IP address is forgotten or using the UPnP function provided by the Network Camera (MS Windows XP provides UPnP function at My Network Place). IP address This is necessary for network identification. Subnet mask This is used to determine if the destination is in the same subnet. The default value is Default router This is the gateway used to forward frames to destinations in a different subnet. Invalid router setting will fail the transmission to destinations in different subnet. Primary DNS The primary domain name server that translates hostnames into IP addresses. Secondary DNS Secondary domain name server that backups the Primary DNS. Enable UPnP presentation Enable the UPnP camera short cut Enable UPnP port forwarding Enable upnp port forwarding PPPoE If using the PPPoE interface, fill the following settings from ISP User name The login name of PPPoE account
28 Password The password of PPPoE account Confirm password Input password again for confirmation HTTP Http port This can be other than the default Port 80. Once the port is changed, the users must be notified the change for the connection to be successful. For instance, when the Administrator changes the HTTP port of the Network Camera whose IP address is from 80 to 8080, the users must type in the web browser instead of RTSP Streaming Access name This is the access URL for making connection from client software. Using rtsp://<ip address>/<access name> to make connection RTSP port This can be other than the default Port
29 <url> Camera>/setup/network.html <Network Camera> is the domain name or original IP address of the Network Camera
30 DDNS Enable DDNS This option turns on the DDNS function. Provider The provider list contains four hosts that provide DDNS services. Please connect to the service provider s website to make sure the service charges. Host Name If the User wants to use DDNS service, this field must be filled. Please input the hostname that is registered in the DDNS server. Username/ The Username or field is necessary for logging in the DDNS server or notify the User of the new IP address. Note: when this field is input as Username the following field must be input as Password. Password/Key Please input the password or key to get the DDNS service. Save Click on this button to save current settings for the DDNS service and UPnP function. <url> Camera>/setup/ddns.html <Network Camera> is the domain name or original IP address of the Network Camera
31 Access List The access list is to control the access permission of clients by checking the client IP address. There are two lists for permission control: Allow List and Deny List. Only those clients whose IP address is in the Allow List and not in the Deny List can connect to the Video Server or Network Camera for receiving the audio/video streaming. Both Allow List and Deny List consist of a list of IP ranges. If you want to add a new IP address range, type the Start IP Address and End IP Address in the text boxes and click on the Add button. If you want to remove an existing IP address range, just select from the pull-down menu and click on the Delete button. Both the Allow List and Deny List can have 20 entries. <url> Camera>/setup/accesslist.html <Network Camera> is the domain name or original IP address of the Network Camera
32 Audio and Video General Configure for computer viewing To make quick setting for computer viewing Configure for mobile viewing To make quick setting for cell phone viewing Video Settings Video title The text string can be displayed on video Color Select either for color or monochrome video display. Frame Size There are four options for video sizes. 160x x144, 320x240, 640x480. Power line frequency (for fluorescent light), the fluorescent light will flash according to the power line frequency that depends on local utility. Change the frequency setting to eliminate uncomfortable flash image when the light source is only fluorescent light. There are three dependent parameters provided for video performance adjustment. key frame interval Max frame rate This limits the maximal refresh frame rate, which can be combined with the Video quality to optimize bandwidth utilization and video quality. Choose Constant bit rate If the user wants to fix the bandwidth utilization regardless of the video quality, choose Fixed quality and select the desired bandwidth. The video quality may be poor due to the sending of maximal frame rate within the limited bandwidth when images are moving rapidly. Consequently, to ensure detailed video quality (quantization rate) regardless of the network, it will utilize more bandwidth to send the maximal frames when images change drastically. Video orientation Flip Vertically rotate the video
33 Mirror Horizontally rotate the video. Check options both if the Network Camera is installed upside down. White balance Adjust the value for best color temperature. Audio settings mute Audio mute Audio type Select audio codec AAC or GSM-AMR and the bit rate <url> Camera>/setup/audiovideo.html
34 <Network Camera> is the domain name or original IP address of the Network Camera. Image Settings Click on this button to pop up another window to tune Brightness, Contrast, Hue and Saturation for video compensation. Each field has eleven levels ranged from -5 to +5. In Brightness and Contrast fields the value 0 indicates auto tuning. The user may press to fine-tune the image. When the image is O.K., press to set the image settings. Click on this to recall the original settings without incorporating the changes
35 & FTP When the SMTP server support SMTP authentication, users need to give the valid user name and password to send via the server. Sender address, the address of the sender. There are two external mail server can be configured, primary and secondary server, The network camera will use primary server as default, and use secondary server when primary server is unreachable. Server address The domain name or IP address of the external server. User name This granted user name on the external server. Password This granted password on the external server. Recipient address The address of the recipients for snapshots or log file. Multiple recipients must be separated by semicolon, ;. FTP Built-in FTP server port number This can be other than the default port 21. The user can change this value from 1025 to After the changed, the external FTP client program must change the server port of connection accordingly. There are two external FTP server can be configured, primary and secondary FTP server, The network camera will use primary server as default, and use secondary server when primary server is unreachable. Server address The domain name or the IP address of the external FTP server. The following user settings must be correctly configured for remote access
36 FTP server port This can be other than the default port 21. The user can change this value from 1025 to User name Granted user name on the external FTP server. Password Granted password on the external FTP server. Remote folder name Granted folder on the external FTP server. The string must conform to that of the external FTP server. Some FTP servers cannot accept preceding slash symbol before the path without virtual path mapping. Refer to the instructions for the external FTP server for details. The folder privilege must be open for upload. <url> Camera>/setup/mailftp.html <Network Camera> is the domain name or original IP address of the Network Camera
37 Motion detection Enable motion detection Check this option to turn on motion detection. Click on this button to add a new window. At most three windows can exist simultaneously. Use the mouse to click, hold, and drag the window frame to resize or the title bar to move. Clicking on the x at the upper right-hand corner of the window to delete the window. Remember to save in order to validate the changes. Click on this button to save the related window settings. A graphic bar will rise or fall depending on the image variation. A green bar means the image variation is under monitoring level and a red bar means the image variation is over monitoring level. When the bar goes red, the detected window will also be outlined in red. Going back to the homepage, the monitored window is hidden but the red frame shows when motion is detected. "Window Name" The text will show at the top of the window. Sensitivity This sets the endurable difference between two sequential images. Percentage This sets the space ratio of moving objects in the monitoring window. Higher sensitivity and small percentage will allow easier motion detection. The following figure shows the screen when is clicked. The monitoring window has been outlined in red and the graphic bar goes red since the goldfish is moving
NetworkCam. MZ-3333-01 User's Manual
 NetworkCam MZ-3333-01 User's Manual Package Contents Network Camera Power adapter - 1 - Installation Hardware Installation Please verify that your product package contains all the accessories listed in
CMOS network camera. Installation instructions. Version 1.2 TV7203 TV7204
 CMOS network camera Installation instructions Version 1.2 TV7203 TV7204 Preface Dear Customer, Thank you for purchasing this CMOS Network Camera of the DIGI-LAN series from Security-Center. You made the
Release Date: 2007/05/18 Manual Revision: 1.00. technical@vivotek.com sales@vivotek.com Copyright 2000-2007. All rights reserved - 1 - www.vivotek.
 Product name: Video Server (VS7100) Release Date: 2007/05/18 Manual Revision: 1.00 Web site: Email: Made in Taiwan. technical@vivotek.com sales@vivotek.com Copyright 2000-2007. All rights reserved - 1
Network Video Recorder. Operation Manual
 Network Video Recorder Operation Manual Content 1 Product Description... 1 1.1 Product Overview... 1 1.2 Specification... 1 2 Product Structure Introduction... 2 2.1 Back Interface... 2 2.2 Front Panel...
TENVIS Technology Co., Ltd. User Manual. For H.264 Cameras. Version 2.0.0
 TENVIS Technology Co., Ltd User Manual For H.264 Cameras Version 2.0.0 Catalogue Basic Operation... 3 Hardware Installation... 3 Search Camera... 3 Get live video... 5 Camera Settings... 8 System... 8
Wireless Day / Night Cloud Camera TV-IP751WIC (v1.0r)
") (v1.0r) TRENDnet s Wireless Day / Night Cloud Camera, model, takes the work out of viewing video over the internet. Previously to view video remotely, users needed to perform many complicated and time
(v1.0r) TRENDnet s Wireless Day / Night Cloud Camera, model, takes the work out of viewing video over the internet. Previously to view video remotely, users needed to perform many complicated and time
Before You Use. Ignoring the warnings may result in serious hazards. - 1 - www.vivotek.com T: 886-2-22404099 F: 886-2-22404097
 Before You Use Surveillance devices may be prohibited by law in your country. Though Network Camera is not only a high performance web equipped camera but also a flexible surveillance system, ensure that
Megapixel PoE Day / Night Internet Camera TV-IP572PI (v1.0r)
") (v1.0r) PRODUCT OVERVIEW The Megapixel PoE Day / Night Internet Camera, model TV- IP572PI, transmits real-time Megapixel video over the Internet. Record crisp video in complete darkness for distances of
(v1.0r) PRODUCT OVERVIEW The Megapixel PoE Day / Night Internet Camera, model TV- IP572PI, transmits real-time Megapixel video over the Internet. Record crisp video in complete darkness for distances of
1.3 MEGAPIXEL WIRELESS NETWORK CAMERA SERIES
 1.3 MEGAPIXEL WIRELESS NETWORK CAMERA SERIES ADVANCED NETWORK SETUP Please read instructions thoroughly before operation and retain it for future reference. n812_813_network_v1.3 IMPORTANT SAFEGUARD All
DCS-5300. Manual. Internet Camera. Version 1.30. Building Networks for People
 DCS-5300 Internet Camera Manual Version 1.30 Building Networks for People 2 Contents Contents of Package...3 Introduction...4 Features and Benefits...4 Connections...6 Hardware Installation...9 Installation
Broadband Router ESG-103. User s Guide
 Broadband Router ESG-103 User s Guide FCC Warning This equipment has been tested and found to comply with the limits for Class A & Class B digital device, pursuant to Part 15 of the FCC rules. These limits
This section will focus on basic operation of the interface including pan/tilt, video, audio, etc.
 Catalogue Basic Operation... 2 For Internet Explorer... 2 For Other Non-IE Web Browsers... 5 Camera Settings... 6 System... 6 About... 6 PT Setting... 7 Backup and Restore Setup... 8 NTP Setting... 8 System
Wireless PTZ Cloud Camera TV-IP851WC (v1.0r)
") (v1.0r) TRENDnet s Wireless PTZ Cloud Camera, model, takes the work out of viewing video over the internet. Previously to view video remotely, users needed to perform many complicated and time consuming
(v1.0r) TRENDnet s Wireless PTZ Cloud Camera, model, takes the work out of viewing video over the internet. Previously to view video remotely, users needed to perform many complicated and time consuming
TL-SC3130G Wireless 2-Way Audio Surveillance Camera
 TL-SC3130G Wireless 2-Way Audio Surveillance Camera REV: 2.0.3 1910010494 COPYRIGHT & TRADEMARKS Specifications are subject to change without notice. is a registered trademark of TP-LINK TECHNOLOGIES CO.,
How To Use A Wireless Pan & Tilt Camera On A Pc Or Mac Or Ipad (For Pc) For Free (For Mac) For A Week (For A Week) For $99.99) For Two Weeks (For Ipad)
 For Free (For Mac) For A Week (For A Week) For $99.99) For Two Weeks (For Ipad)") User Manual Wireless Pan & Tilt Camera CIPCAMPTIWL v1.0 Index 1 INTRODUCTION... 4 1.1 THE PACKAGE INCLUDES... 4 1.2 FUNCTION AND FEATURES... 4 1.3 TECHNICAL SPECIFICATIONS... 4 2 APPEARANCE AND INTERFACE...
User Manual Wireless Pan & Tilt Camera CIPCAMPTIWL v1.0 Index 1 INTRODUCTION... 4 1.1 THE PACKAGE INCLUDES... 4 1.2 FUNCTION AND FEATURES... 4 1.3 TECHNICAL SPECIFICATIONS... 4 2 APPEARANCE AND INTERFACE...
Multi-Profile CMOS Infrared Network Camera
 Multi-Profile CMOS Infrared Network Camera Quick Start Guide About multi-profile Multi-profile stands for simultaneously video stream. The Network Camera and Video Server can generate MPEG4 and MJPEG streaming
20M IR Mega-Pixel CMOS Network Camera. JNC-V2428M-PoE. User s Manual. Date: 7/02/2010 Firmware Version: V3.2.70
 20M IR Mega-Pixel CMOS Network Camera JNC-V2428M-PoE User s Manual Date: 7/02/2010 Firmware Version: V3.2.70 Content Content...1 1. Preface...2 2. Product Specifications...2 3. Product Installation...4
FB-500A User s Manual
 Megapixel Day & Night Fixed Box Network Camera FB-500A User s Manual Quality Service Group Product name: Network Camera (FB-500A Series) Release Date: 2011/7 Manual Revision: V1.0 Web site: Email: www.brickcom.com
NetProbe Lite. Web Based 8 Channel Sensor Collector. User Manual. Version 1.2
 NetProbe Lite Web Based 8 Channel Sensor Collector User Manual Version 1.2 Copyright Information Copyright 2004-2005, Mega System Technologies, Inc. All rights reserved. Reproduction without permission
B Series Robot Model. IP Camera 2013-7 V4.18. User Manual
 B Series Robot Model IP Camera 2013-7 V4.18 User Manual Index 1 INTRODUCTION... 3 2 APPEARANCE AND INTERFACE... 5 3 VISIT IP CAMERA FROM LAN... 6 4 VISIT IP CAMERA FROM WAN... 10 5 OTHER SETTINGS... 12
Wifi Pan/Tilt IP Camera User Manual
 Wifi Pan/Tilt IP Camera User Manual Rev. 3.0 Software Version 3.00 May. 25 th.2009 Table of Contents 1. PRODUCT VIEWS...3 1.1. PRONT PANEL...3 1.2. BACK PANEL...3 1.3. ACCESSORIES...4 2. SETUP AND STARTUP...5
IP Video 9100A User Guide
 IP Video 9100A User Guide IP VIDEO 9100A PLUS USER MANUAL User Guide IP Video 9100A Manual version: 2.1 Date: June. 30, 2004-1 - VER. 2.10, Caution: Any changes or modifications not approved by the party
ImagineWorldClient Client Management Software. User s Manual. (Revision-2)
") ImagineWorldClient Client Management Software User s Manual (Revision-2) (888) 379-2666 US Toll Free (905) 336-9665 Phone (905) 336-9662 Fax www.videotransmitters.com 1 Contents 1. CMS SOFTWARE FEATURES...4
ImagineWorldClient Client Management Software User s Manual (Revision-2) (888) 379-2666 US Toll Free (905) 336-9665 Phone (905) 336-9662 Fax www.videotransmitters.com 1 Contents 1. CMS SOFTWARE FEATURES...4
SkyIPCam 250W Wireless Network Camera. Model # AIC250W. User s Manual
 SkyIPCam 250W Wireless Network Camera Model # AIC250W User s Manual Ver. 1B Table of Contents 1. Introduction... 4 2. Getting Started... 5 3. Installing the Setup Wizard... 6 4. Gathering Information...
Wireless Router Setup Manual
 Wireless Router Setup Manual NETGEAR, Inc. 4500 Great America Parkway Santa Clara, CA 95054 USA 208-10082-02 2006-04 2006 by NETGEAR, Inc. All rights reserved. Trademarks NETGEAR is a trademark of Netgear,
WIRED/WIRELESS IP CAMERA USER MANUAL V1.0
 WIRED/WIRELESS IP CAMERA USER MANUAL V1.0 CATALOGUE 1.DESCRIPTION OF PRODUCT -------------------------------------------------------------------------1 1.1 Packing ------------------------------------------------------------------------------------------------------2
Quick-Start Guide. Remote Surveillance & Playback SUPER DVR MONITORING SOFTWARE. For use on Q-See s QSDT series of PC Securitiy Surveillance Cards
 Quick-Start Guide SUPER DVR MONITORING SOFTWARE Remote Surveillance & Playback For use on Q-See s QSDT series of PC Securitiy Surveillance Cards 2 CONFIGURING ROUTER FOR REMOTE ACCESS REMOTE SURVEILLANCE
TL-PS310U Single USB 2.0 Port MFP and Storage Server
 TL-PS310U Single USB 2.0 Port MFP and Storage Server Rev: 2.0.0 1910010313 Contents Chapter 1 Introduction... 1 1.1 Product Overview...1 1.2 Network Management...1 1.3 Components and Features...1 1.4 Hardware
IPCam Client User Manual For X10 IP Camera models XX34A, XX36A, XX39A, XX40A
 IPCam Client User Manual For X10 IP Camera models XX34A, XX36A, XX39A, XX40A Contents 1. INSTALLATION... 3 2. SOFTWARE OPERATION... 5 2.1. Login... 5 2.2. For Multi-windows... 6 2.3. System Settings...
IP Power Stone 4000 User Manual
 IP Power Stone 4000 User Manual Two Outlet Remote AC Power Controller Multi Link, Inc. 122 Dewey Drive Nicholasville, KY 40356 USA Sales and Tech Support 800.535.4651 FAX 859.885.6619 techsupport@multi
User s Manual Ver. 2.3
 Office NAS 3.5 IDE/SATA Network Attached Storage Model # ANAS350 User s Manual Ver. 2.3 Table of Contents 1. Introduction... 3 1.1 Package Contents... 3 1.2 Features... 3 1.3 NAS Diagram... 4 2. Hard Drive
MJPEG Camera Client User Manual
 MJPEG Camera Client User Manual CONTENTS User Manual 1 WELCOME... 3 1.1Features... 3 1.2Installation Requirements... 3 1.3 Software Installation... 3 2 Software Operation... 5 2.1 Tab bar... 6 2.2 Device
CHAPTER 2: USING THE CAMERA WITH THE APP
 TABLE OF CONTENTS OVERVIEW... 1 Front of your camera... 1 Back of your camera... 2 ACCESSORIES... 3 CHAPTER 1: Navigating the Mobile Application... 4 Device List: How to Use this Page... 4 My Messages:
Table of Contents. Wireless Installation Considerations... 10. Software Installation...11
 Table of Contents Table of Contents Product Overview...4 Package Contents...4 System Requirements...4 Introduction...5 Features... 6 Hardware Overview...7 Hardware Installation...9 Wireless Installation
Chapter 6 Using Network Monitoring Tools
 Chapter 6 Using Network Monitoring Tools This chapter describes how to use the maintenance features of your Wireless-G Router Model WGR614v9. You can access these features by selecting the items under
Chapter 6 Using Network Monitoring Tools
 Chapter 6 Using Network Monitoring Tools This chapter describes how to use the maintenance features of your RangeMax Wireless-N Gigabit Router WNR3500. You can access these features by selecting the items
2MP H.264/ MPEG-4/ MJEPG
 2-MegaPixel Outdoor 30fps 25 meter IR IPCAM T he is a high-end 2.0 MegaPixel (MP) network camera which designs for professional outdoor surveillance and security applications. This 2.0MP IP camera offers
Ethernet Radio Configuration Guide
 Ethernet Radio Configuration Guide for Gateway, Endpoint, and Repeater Radio Units April 20, 2015 Customer Service 1-866-294-5847 Baseline Inc. www.baselinesystems.com Phone 208-323-1634 FAX 208-323-1834
1.3 CW-720. 1280x720 Pixels. 640x480 Pixels. 720P Wireless 150Mbps IPCAM. High Quality 720P MegaPixel Image
 CW-720 720P Wireless 150Mbps IPCAM 30FPS at 1.3 Mega Mode 30FPS at 720P Mode 150Mbps Wireless-B/G/N Use 10X Times Less Storage with H.264 Video Compression Micro SD Card Slot for Local Storage ios and
E13. 5MP Cube with Basic WDR, Fixed lens Hardware User s Manual. (PoE) Ver. 2012/10/22
 Ver. 2012/10/22") E13 5MP Cube with Basic WDR, Fixed lens Hardware User s Manual (PoE) Ver. 2012/10/22 Table of Contents 0. Precautions 3 1. Introduction 4 Package Contents... 4 Features and Benefits... 5 Safety Instructions...
E13 5MP Cube with Basic WDR, Fixed lens Hardware User s Manual (PoE) Ver. 2012/10/22 Table of Contents 0. Precautions 3 1. Introduction 4 Package Contents... 4 Features and Benefits... 5 Safety Instructions...
PC-ZViewer User Manual
 PC-ZViewer User Manual For further help, please visit www.zmodo.com Contents Preface... 3 Statement... 3 Intended Reader... 3 Terms in this Manual... 3 Software Introduction... 3 Operating Environment...
LevelOne. FCS-0010 10/100Mbps Network Camera / WCS-0010 11g Network Camera. User s Manual
 LevelOne FCS-0010 10/100Mbps Network Camera / WCS-0010 11g Network Camera User s Manual Ver. 1.00-0707 Copyright (c) 2007 Digital Data Communications Co., Ltd. All Rights Reserved All the features and
Addonics T E C H N O L O G I E S. NAS Adapter. Model: NASU2. 1.0 Key Features
 1.0 Key Features Addonics T E C H N O L O G I E S NAS Adapter Model: NASU2 User Manual Convert any USB 2.0 / 1.1 mass storage device into a Network Attached Storage device Great for adding Addonics Storage
IP Wireless / Wired Camera NIGHT VISION & REMOTE PAN/TILT ROTATE. User Manual
 IP Wireless / Wired Camera NIGHT VISION & REMOTE PAN/TILT ROTATE User Manual WELCOME This model IP Camera is an integrated wireless IP Camera solution. It combines a high quality digital Video Camera with
CONTENTS. 1. Outline of how to use.1 2. How to setup each step...1
 CONTENTS 1. Outline of how to use.1 2. How to setup each step...1 2.1 Connect your IP Camera to the LAN..1 2.2 Install the following software before view video.....2 2.3 Basic configuration setting...2
AXIS 205 Network Camera Goes anywhere your network goes
 I N S T A L L A T I O N G U I D E Goes anywhere your network goes Introduction 1 Introduction Focus guide (see page 6) Status indicator (surrounding the focus ring) Focus ring (see page 6) Serial number
IP Camera (L series) User manual 2013-05 V1.1
 User manual 2013-05 V1.1") Dear users, the configuration for this camera is professional, so please read the user manual carefully before using the camera. IP Camera (L series) User manual 2013-05 V1.1 Statement If the user manual
Dear users, the configuration for this camera is professional, so please read the user manual carefully before using the camera. IP Camera (L series) User manual 2013-05 V1.1 Statement If the user manual
OC810 Outdoor Camera Setup Guide
 OC810 Outdoor Camera Setup Guide P/N: 957YU60001 Document Version: 1.0 Copyright 2010. All Rights Reserved. All trademarks and trade names are the properties of their respective owner i Package Contents
How To Check If Your Router Is Working Properly
 Chapter 6 Using Network Monitoring Tools This chapter describes how to use the maintenance features of your RangeMax Dual Band Wireless-N Router WNDR3300. You can access these features by selecting the
mysensors mysensors Wireless Sensors and Ethernet Gateway Quick Start Guide Information to Users Inside the Box mysensors Ethernet Gateway Quick Start
 mysensors Information to Users mysensors Wireless Sensors and Ethernet Gateway Quick Start Guide This equipment has been tested and found to comply with the limits for a Class B digital devices, pursuant
How To Check If Your Router Is Working Properly On A Nr854T Router (Wnr854) On A Pc Or Mac) On Your Computer Or Ipad (Netbook) On An Ipad Or Ipa (Networking
 On A Pc Or Mac) On Your Computer Or Ipad (Netbook) On An Ipad Or Ipa (Networking") Chapter 7 Using Network Monitoring Tools This chapter describes how to use the maintenance features of your RangeMax NEXT Wireless Router WNR854T. These features can be found by clicking on the Maintenance
Chapter 7 Using Network Monitoring Tools This chapter describes how to use the maintenance features of your RangeMax NEXT Wireless Router WNR854T. These features can be found by clicking on the Maintenance
your Gateway Windows network installationguide 802.11b wireless series Router model WBR-100 Configuring Installing
 your Gateway Windows network installationguide 802.11b wireless series Router model WBR-100 Installing Configuring Contents 1 Introduction...................................................... 1 Features...........................................................
RC8021 Indoor Camera Installation Guide
 RC8021 Indoor Camera Installation Guide P/N: 957YL502GJ Document Version: 1.0 Copyright 2011. All Rights Reserved. All trademarks and trade names are the properties of their respective owners i Package
BlackHawk for MAC Software User Guide
 BlackHawk for MAC Software User Guide Products: BLK-DH2 Series and BLK-HD Series DVRs Please read this manual before using your software, and always follow the instructions for safety and proper use. Save
3.1 RS-232/422/485 Pinout:PORT1-4(RJ-45) RJ-45 RS-232 RS-422 RS-485 PIN1 TXD PIN2 RXD PIN3 GND PIN4 PIN5 T+ 485+ PIN6 T- 485- PIN7 R+ PIN8 R-
 RJ-45 RS-232 RS-422 RS-485 PIN1 TXD PIN2 RXD PIN3 GND PIN4 PIN5 T+ 485+ PIN6 T- 485- PIN7 R+ PIN8 R-") MODEL ATC-2004 TCP/IP TO RS-232/422/485 CONVERTER User s Manual 1.1 Introduction The ATC-2004 is a 4 Port RS232/RS485 to TCP/IP converter integrated with a robust system and network management features
MODEL ATC-2004 TCP/IP TO RS-232/422/485 CONVERTER User s Manual 1.1 Introduction The ATC-2004 is a 4 Port RS232/RS485 to TCP/IP converter integrated with a robust system and network management features
GRAND MEGA PIXEL IP CAMERA. User s Manual INDEX
 INDEX GRAND MEGA PIXEL IP CAMERA 1.3 Mega Pixel Digital Recording/ Video & Audio Transmission User s Manual ISSUE:0705, 2009 1. Package Contents.... 1 2. Introduction.... 1 3. System Requirements......
3.5 EXTERNAL NETWORK HDD. User s Manual
 3.5 EXTERNAL NETWORK HDD User s Manual Table of Content Before You Use Key Features H/W Installation Illustration of Product LED Definition NETWORK HDD Assembly Setup the Network HDD Home Disk Utility
UPnP POE. POE-FSH804 PoE Status Link/ACT SPEED 1. POWER PoE Max. 8-Port Fast Ethernet POE Switch. POE Switch
 POE-FSH804 8 7 6 5 PoE Status Link/ACT SPEED 4 3 2 1 POWER PoE Max. 8-Port Fast Ethernet POE Switch 1/3 CMOS Dual Stream PoE IP Camera T he is a high-performance camera designed for professional indoor
WN-200HD. 2 Mega-Pixels. 2.0 Mega Pixel Wireless 150Mbps IPCamera. High Quality 2.0 MegaPixel Image. Full Feature 150Mbps Wireless N Camera
 2.0 Mega Pixel Wireless 150Mbps IPCamera S till couldn't find a way to watch your children or the elders when you are in busy or on duty? Or just need an easy solution for monitoring your office, store
OC810 Outdoor Camera Installation Guide
 OC810 Outdoor Camera Installation Guide P/N: 957YU601GJ Document Version: 1.0 Copyright 2011. All Rights Reserved. All trademarks and trade names are the properties of their respective owner i Package
Professional Surveillance System User s Manual
 Professional Surveillance System User s Manual \ 1 Content Welcome...4 1 Feature...5 2 Installation...6 2.1 Environment...6 2.2 Installation...6 2.3 Un-installation...8 3 Main Window...9 3.1 Interface...9
H.264 HD IP Cameras INSTRUCTION MANUAL
 H.264 HD IP Cameras INSTRUCTION MANUAL Executive Summary The video compression engine of the H.264 HD (high definition) IP camera provides high video quality, 720P resolution, bandwidth efficiency, and
Privacy Button IP7133/IP7134. IP Surveillance
 Privacy Button IP7133/IP7134 IP Surveillance Table of Contents Overview3 Read before use 3 Package contents 3 Physical description 4 Installation 7 Network deployment 7 Software installation 9 Accessing
Third Party Domain Name Settings
 Validity Queries: Check the validity of embedded domain name. Now you can use http:// Domain name + HTTP Port to access the camera via internet. Take hostname camera.myfoscam.org and HTTP Port no. 88 for
TL-SC3171G Wireless Day/Night Surveillance Camera
 TL-SC3171G Wireless Day/Night Surveillance Camera REV: 1.0.1 1910010431 COPYRIGHT & TRADEMARKS Specifications are subject to change without notice. is a registered trademark of TP-LINK TECHNOLOGIES CO.,
OPERATION MANUAL. MV-410RGB Layout Editor. Version 2.1- higher
 OPERATION MANUAL MV-410RGB Layout Editor Version 2.1- higher Table of Contents 1. Setup... 1 1-1. Overview... 1 1-2. System Requirements... 1 1-3. Operation Flow... 1 1-4. Installing MV-410RGB Layout
NVMS-1200. User Manual
 NVMS-1200 User Manual Contents 1 Software Introduction... 1 1.1 Summary... 1 1.2 Install and Uninstall... 1 1.2.1 Install the Software... 1 2 Login Software... 3 2.1 Login... 3 2.2 Control Panel Instruction...
Broadband Phone Gateway BPG510 Technical Users Guide
 Broadband Phone Gateway BPG510 Technical Users Guide (Firmware version 0.14.1 and later) Revision 1.0 2006, 8x8 Inc. Table of Contents About your Broadband Phone Gateway (BPG510)... 4 Opening the BPG510's
1CH VIDEO SERVER INSTALLATION GUIDE. Please read instructions thoroughly before operation and retain it for future reference.
 314Z 1CH VIDEO SERVER INSTALLATION GUIDE Please read instructions thoroughly before operation and retain it for future reference. x931_931a_v1.1 314Z 1CH VIDEO SERVER INSTALLATION GUIDE Please read instructions
LabelWriter. Print Server. User Guide
 LabelWriter Print Server User Guide Copyright 2010 Sanford, L.P. All rights reserved. 08/10 No part of this document or the software may be reproduced or transmitted in any form or by any means or translated
Barracuda Link Balancer Administrator s Guide
 Barracuda Link Balancer Administrator s Guide Version 1.0 Barracuda Networks Inc. 3175 S. Winchester Blvd. Campbell, CA 95008 http://www.barracuda.com Copyright Notice Copyright 2008, Barracuda Networks
VS-100. PoE. H.264 PoE Video Server. H.264 Compression H.264 DI/DO. Compression Rate Comparison MJPEG MPEG4 H.264.
 H.264 Video Server T he AirLive is a one channel video server for easily upgrade your old CCTV camera to a network-enabled IP camera and hence convert your local surveillance system into a global one.
Central Management System (CMS) USER MANUAL
 USER MANUAL") Central Management System (CMS) USER MANUAL LEGAL INFORMATION Reproduction, transfer, distribution or storage of part or all of the contents in this document in any form without the prior written permission
Central Management System (CMS) USER MANUAL LEGAL INFORMATION Reproduction, transfer, distribution or storage of part or all of the contents in this document in any form without the prior written permission
Quick Start Guide. Plug n Play NVR DS-7604NI-E1/4P DS-7608NI-E2/8P. www.hikvision.com/en/us
 Quick Start Guide Plug n Play NVR DS-7604NI-E1/4P DS-7608NI-E2/8P Note: For more information refer to the complete User Manual located on the CD-ROM OVERVIEW 1. Overview 2. Main Menu Layout 3. Formatting
EM6230 e-camview HD outdoor IP camera
 EM6230 e-camview HD outdoor IP camera 2 ENGLISH EM6230 e-camview HD outdoor IP camera Table of contents 1.0 Introduction... 3 1.1 Packing contents... 3 1.2 Requirements to access the camera.... 3 1.3 Major
How To Use 1Bay 1Bay From Awn.Net On A Pc Or Mac Or Ipad (For Pc Or Ipa) With A Network Box (For Mac) With An Ipad Or Ipod (For Ipad) With The
 With A Network Box (For Mac) With An Ipad Or Ipod (For Ipad) With The") 1-bay NAS User Guide INDEX Index... 1 Log in... 2 Basic - Quick Setup... 3 Wizard... 3 Add User... 6 Add Group... 7 Add Share... 9 Control Panel... 11 Control Panel - User and groups... 12 Group Management...
1-bay NAS User Guide INDEX Index... 1 Log in... 2 Basic - Quick Setup... 3 Wizard... 3 Add User... 6 Add Group... 7 Add Share... 9 Control Panel... 11 Control Panel - User and groups... 12 Group Management...
Dual Bay Home Media Store. User Manual
 Dual Bay Home Media Store User Manual CH3HNAS2 V1.0 CONTENTS Chapter 1: Home Page... 3 Setup Wizard... 3 Settings... 3 User Management... 3 Download Station... 3 Online User Manual... 3 Support... 3 Chapter
Single-bay NAS Server
 Single-bay NAS Server NAS-1100 User s Manual Copyright (C) 2004 PLANET Technology Corp. All rights reserved. The products and programs described in this User s Manual are licensed products of PLANET Technology,
PLANET is a registered trademark of PLANET Technology Corp. All other trademarks belong to their respective owners.
 Trademarks Copyright PLANET Technology Corp. 2004 Contents subject to revise without prior notice. PLANET is a registered trademark of PLANET Technology Corp. All other trademarks belong to their respective
Index. 4.1 INTERNET CONNECTION...13 4.2 PORT FORWARDING...13 4.3 DDNS...14 4.3.1 Manufacturer s DDNS...14 4.3.2 Third Party DDNS...
 "This product is meant for providing convenience for baby monitoring. The manufacturer is not responsible for any legal liability caused by negligence. " ibaby Monitor Model: M3 User Manual Index 1 INTRODUCTION...4
IP camera User Manual
 IP camera User Manual Safety Instructions These instructions are intended to assist users with the operation of the IP camera and also to instruct on how to avoid dangerous situations or damage to the
User s Manual TCP/IP TO RS-232/422/485 CONVERTER. 1.1 Introduction. 1.2 Main features. Dynamic DNS
 MODEL ATC-2000 TCP/IP TO RS-232/422/485 CONVERTER User s Manual 1.1 Introduction The ATC-2000 is a RS232/RS485 to TCP/IP converter integrated with a robust system and network management features designed
C n o t n e t n e t n s
 Preface Thank you for choosing our product, for a better understanding of the product, we recommend you read the instruction and safety information before use. Notice: This user manual is an operation
AirCam OD-325HD-2.5MM
 H.264 MegaPixel Outdoor 25M IR Night vision POE Camera T AirCam OD-325HD-2.5MM AirCam OD-325HD-2.5MM is a high-end 1.3 MegaPixel network camera designed for professional outdoor surveillance and security
7 MEGAPIXEL 180 DEGREE IP VIDEO CAMERA
 Scallop Imaging is focused on developing, marketing and manufacturing its proprietary video imaging technology. All our activities are still proudly accomplished in Boston. We do product development, marketing
ibaby monitor Model: M3 User Manual The manufacturer is not responsible for any legal liability caused by negligence.
 ibaby monitor Model: M3 User Manual The manufacturer is not responsible for any legal liability caused by negligence. Index 1 INTRODUCTION... 4 1.1 PACKAGE CONTENTS... 4 1.2 FUNCTION AND FEATURES... 4
LOREX CLIENT Remote Software 4.0
 LOREX CLIENT Remote Software 4.0 Instruction Manual English Version 2.0 MODEL: L20WD800 Series www.lorexcctv.com Copyright 2008 LOREX Technology Inc. Table of Contents Table of Contents Software Installation...
Multifunctional Broadband Router User Guide. Copyright Statement
 Copyright Statement is the registered trademark of Shenzhen Tenda Technology Co., Ltd. Other trademark or trade name mentioned herein are the trademark or registered trademark of above company. Copyright
HELP...47 Installing the DCS-2121 Behind a Router...48 1) Identify Your Camera on the Network...48 2) Assign a Local IP Address and Port for Your
 Identify Your Camera on the Network...48 2) Assign a Local IP Address and Port for Your") Table of Contents Package Contents...1 Minimum System Requirements...2 Introduction...3 Features and Benefits...4 Hardware Overview...5 Hardware Installation...7 Attach the Antenna...7 Connect the camera
Table of Contents Package Contents...1 Minimum System Requirements...2 Introduction...3 Features and Benefits...4 Hardware Overview...5 Hardware Installation...7 Attach the Antenna...7 Connect the camera
TL-SC3171 Day/Night Surveillance Camera
 TL-SC3171 Day/Night Surveillance Camera Rev: 1.0.1 1910010430 COPYRIGHT & TRADEMARKS Specifications are subject to change without notice. is a registered trademark of TP-LINK TECHNOLOGIES CO., LTD. Other
Load Balancer LB-2. User s Guide
 Load Balancer LB-2 User s Guide TABLE OF CONTENTS 1: INTRODUCTION...1 Internet Features...1 Other Features...3 Package Contents...4 Physical Details...4 2: BASIC SETUP...8 Overview...8 Procedure...8 3:
AirCam POE-200HD. H.264 1.3 MegaPixel POE Dome. H.264 Compression. 1.3 Mega-Pixel Video Quality
 AirCam POE-200HD H.264 1.3 MegaPixel POE Dome T he AirLive AirCam POE-200HD is a highend 1.3 -megapixel network camera designed for professional indoor surveillance and security applications. Megapixel
TDP43ME NetPS. Network Printer Server. Control Center. for Ethernet Module
 Panduit Corp. 2010 TDP43ME NetPS PA26306A01 Rev. 01 11-2010 Network Printer Server Control Center for Ethernet Module NOTE: In the interest of higher quality and value, Panduit products are continually
ADSL MODEM. User Manual V1.0
 ADSL MODEM User Manual V1.0 CONTENTS 1.OVERVIEW... 3 1.1 ABOUT ADSL... 3 1.2 ABOUT ADSL2/2+... 3 1.3 FEATURES... 3 2 SPECIFICATION... 4 2.1 INTERFACE INTRODUCTION... 4 2.1.1 INDICATOR AND INTERFACE...
TD-8610/TD-8610B External ADSL2+ MODEM
 TD-8610/TD-8610B External ADSL2+ MODEM Rev: 1.0.2 1910010011 COPYRIGHT & TRADEMARKS Specifications are subject to change without notice. is a registered trademark of TP-LINK TECHNOLOGIES CO., LTD. Other
GWA502 package contains: 1 Wireless-G Broadband Router 1 Power Adapter 1 Ethernet Cable 1 Manual CD 1 Quick Start Guide 1 Warranty/Registration Card
 Wireless-G Broadband Router GWA502 Quick Start Guide Read this guide thoroughly and follow the installation and operation procedures carefully to prevent any damage to the unit and/or any of the devices
IP Video 9100(A) User Guide
 User Guide") IP Video 9100(A) User Guide IP VIDEO 9100 & 9100A PLUS USER MANUAL User Guide IP Video 9100(A) Manual version: X.XX Date: AUG, 2005-1 - VER. 2.32, Caution: Any changes or modifications not approved by
IP Video 9100(A) User Guide IP VIDEO 9100 & 9100A PLUS USER MANUAL User Guide IP Video 9100(A) Manual version: X.XX Date: AUG, 2005-1 - VER. 2.32, Caution: Any changes or modifications not approved by
Network Storage System with 2 Bays
 USER GUIDE Network Storage System with 2 Bays Model: NAS200 About This Guide About This Guide Icon Descriptions While reading through the User Guide you may see various icons that call attention to specific
1.3 CW-720IR. 720P Day/Night Wireless IPCAM. 1.3M Resolution and Quality Enhancement 64GB. Audio. IR for. Two-Way
 CW-720IR 720P Day/Night Wireless IPCAM Easy Plug-n-Play Installation H.264 and MJPEG Encoder 30fps at 1280x1024 / 1280x720 IR LED for Day/Night Surveillance WDR, LDC, De-Fog Function Two-Way Motion, and
DSL-2600U. User Manual V 1.0
 DSL-2600U User Manual V 1.0 CONTENTS 1. OVERVIEW...3 1.1 ABOUT ADSL...3 1.2 ABOUT ADSL2/2+...3 1.3 FEATURES...3 2 SPECIFICATION...4 2.1 INDICATOR AND INTERFACE...4 2.2 HARDWARE CONNECTION...4 2.3 LED STATUS