TERMINAL SERVICE PLUS DOCUMENTATION
|
|
|
- Damian Wheeler
- 8 years ago
- Views:
Transcription
1 TERMINAL SERVICE PLUS DOCUMENTATION General information Get Started Prerequisites Installation TSplus Editions Activating your license Activating your support license Updating Terminal Service Plus Upgrading Terminal Service Plus Securing a Terminal Service Plus server Fundamental Features Server Management Portable Client Generator Edit or Delete the Parameters of a Generated Client Seamless and RemoteApp Connection Clients Remote Taskbar and Floating Panel Application Publishing Assigning Applications to Users or Groups File Transfer Secured Folder Sharing Open Files on Client Side Open URLs on Client Side Remote Printing Universal Printer Printing with Standard RDP Printer-Mapping Feature Virtual Printer Using the Web to Access your Server Built-in Web Server Management RemoteApp Plugin Web Applications Portal Web Applications Portal: Parameters in URL address Services and Ports Using IIS (Microsoft Internet Information Services) Using Apache Creating and Customizing HTML Web Access pages using the Web Portal Preferences How to completely customize the Web Access Page beyond the Web Portal capabilities? Web logon page: How to close the Logon form after logon Web Credentials Web Autologon: connect from web without portal

2 TERMINAL SERVICE PLUS DOCUMENTATION Securing your Web Connection Free and Easy-to-install SSL Certificate HTTPS & SSL Third Party Certificates Tutorial Choosing your Ciphers Suites to enhance security Run Windows or Java client under Proxy environment Enforce the use of web portal to connect to the server Mobile Client (HTML5) Remote Connection from an iphone / ipad / Android device HTML5 Client: Using Gestures on mobile devices (Touch) HTML5 Client: RDP session resolution on mobile devices HTML5 Client: What is the difference between Websockets and XHR? HTML5 Client: Supported Browsers HTML5 Client: How to maximize the browser window HTML5 Client: Parameters in URL address Web logon page: How to open the HTML5 client in the same tab HTML5 Client: Using Clipboard HTML5 Client: Using File Transfer HTML5 Client: Using two languages HTML5: Changing language to Chinese Gateway Features Gateway Feature Managing Gateway Users Using the Load Balancing Feature Using the Reverse Proxy feature Using servers behind Reverse Proxy Advanced Features How To: Mount a logical drive Html Pages and Customization Web logon page: How to change the logon Splashscreen How To: Add a Custom HTTP Header

3 TSplus: Get started Step 1 : Installation. Installing Terminal Service Plus is an easy process. Just download it from our web site, run the Setup-TSplus.exe program and wait until the program asks you to reboot. We recommend you to install Java prior to start the setup program. Java is mandatory to benefit from our great Web Access technology. Files are decompressed and copied into : C:\Program Files\TSplus folder (32 bits systems) C:\Program Files(x86)\TSplus folder (64 bits system). The trial version is a full Corporate Edition TSplus system and enables up to 5 concurrent users for a period of 15 days. After reboot you will see 2 new icons on your Desktop: The AdminTool is what you need to use TSplus. The Portable Client Generator will create a TSplus connection client for your users.

4 Pre-requisites: On Server side: From Windows XP Pro to W10 with at least 2GB of memory. The operating system must be on the C drive. On Windows Server Environment (2003,2008,2012) please make sure that the TSE/RDS role and the TSE/RDS licensing role are not installed to prevent conflict with TSplus services. It is mandatory to use a fixed private IP address and a fixed public IP address. If your ISP (Internet Service Provider) did not provide you with a fixed public IP address, you need to subscribe to a free DNS account, see this tutorial for more information. On Client side: Microsoft workstation: Windows XP, W7, W8 and W10 are supported. A PDF Reader (like FoxIt) and Java should be installed on the users PCs. Macintosh workstation: You can use any MAC RDP client, or TSplus HTML5 clients. Linux Workstation: You can use Linux Rdesktop RDP client or TSplus HTML5 clients. Step 2 : Creating users. After reboot, the TSplus host is almost ready to go. So the first action will be to create users and the AdminTool will help you to do so:
 did not provide you with a fixed public IP address, you need to subscribe to a free DNS account, see this tutorial for more information.")

5 Each user must have a logon AND a password. Beware when you create users of the box checked by default: "User must change password at next logon", if you don't want your user to change his/her password each time, uncheck this box and check the "Password never expires" or "User cannot change password". For Windows 10 Home users, the process to create users is different, since you will get this error message if you wish to create users with TSplus:

6 Open the Start menu and click on Settings, then on Accounts, select the 'Family and other Users' tab, and click on the 'add someone else to this PC' button: On the 'How will this person sign in?' window, click on the 'I don't have this person sign-in information' line at the bottom. On the next window: 'Let's create your account', click on the 'Add a user without a Microsoft account' line at the bottom and finally, fill-in the required fields to create your user. Step 3 : Select the most suitable client for your needs. TSplus complies with Windows RDP protocol. So, any user can connect locally or remotely with a standard Remote Desktop Connection client (mstsc.exe) or any RDP compatible client. To fully benefit from the TSplus advanced features (Seamless client, RemoteApp, Universal Printer ) you can use a TSplus generated client or the TSplus Web Portal. TSplus is a very flexible solution and offers multiple ways to open a session: Classic Remote Desktop Connection (MSTSC.EXE). Portable TSplus RDP client which will display a Windows Remote Desktop. TSplus Seamless client which will only display applications and no desktop. MS RemoteAPP client which will display application using the native MS RemoteApp. Windows client over the TSplus Web Portal. HTML5 client over the TSplus Web Portal. These clients give the user the following experience: With Remote Desktop Connection (mstsc.exe) Connection: The connection is a very standard one. The Universal Printer is not supported in that type of connection. Display: Users will see their session within a Remote Desktop window. This desktop displays the content of the user s desktop folder. If the administrator has assigned specific applications with the AdminTool, only these applications will be displayed (no taskbar, no Desktop).

7 TSplus RDP generated client. This is a unique TSplus solution, it empowers local and remote users to connect using one single dedicated program. It includes the connection program, the Universal Printing advanced feature, portability with high level of security while keeping it very simple for the users. So, it is much better than a classic Remote Desktop Connection. The TSplus Seamless generated Client (or the RemoteApp one). Remote applications will exactly look like any local application. Instead of a classical Remote Desktop window, you will be free to switch between your local and remote applications without having to minimize a Remote Desktop window. If your TSplus host support the MS RemoteApp (W7 Enterprise/Ultimate, W8 Enterprise, W2008 or W2012) you can use this native alternative for the TSplus Seamless technology. Accessing your TSplus server from a remote location In order to access your TSplus server from a remote location, you will have to create a port forwarding or port redirection rule of 3389/80/443 ports depending on your preferred connection method. You can change the RDP port on the "change the RDP port tile" on the server tab: The 80/443 ports can be changed on the manage web servers tile, more information about changing communication ports can be found here.

8 Step 4 : Application publishing and Application Control. One of TSplus major benefit is the freedom to assign application to user(s) or to a group of users using the AdminTool. If you assign one application to a user, he will only see this application. You also can assign him the TSplus Taskbar or the Floating Panel to display multiple applications. You can of course decide to publish a full Remote Desktop if you want to. On this example, the administrator has decided that the user ad will get the TSplus Taskbar with 4 applications: Notepad, Word, Excel and Outlook. See this documentation and this video for more information. Please visit our support pages on our web site where you will find an on-line guide, a FAQ and video tutorials: Support Page For any question, please send an to: support@terminalserviceplus.com ENJOY your use of TSplus!

9 Terminal Service Plus Prerequisites 1) Hardware Terminal Service Plus can work on your PC and here is the minimal recommended hardware: Number of users Equipment for XP/2003 Windows 2008/2012/8 or and above 1 GB ONE CPU 1 GB One CPU 2 GHZ I5 or above 4 GB One CPU 2.5 GHZ I5 or above I5 or above 16 GB Dual CPU I5 or above 4 GB One CPU 2 GHZ I5 or above 8 GB One CPU 2 GHZ 8 GB One CPU I7 or Xeon 16 GB Dual CPU SSD Disk dedicated to the system Over 50 concurrent sessions, we recommend to use a farm of servers. Each server (physical or virtual ones) handling up to 50 concurrent users. Comment: The type of hardware you need will mostly depend on what kind of resources the applications you wish to publish consume the most (CPU/memory/Disk). You might consider getting a server with SSD drives if you plan on using an application that accesses a database on your TSplus server as it will greatly enhance the performances. 2) Operating system Your hardware must use one of the operating systems below: Windows XP Professional or Windows XP Home. Windows Vista Home Premium, Professional, Corporate or Ultimate Edition Windows 7 Home Premium, Professional, Corporate or Ultimate Edition Windows 8 Professional/8.1 Windows 10 Windows 2003 Server or 2003 SBS Windows 2008 Server or 2008 R2/SBS Windows 2012 Server or 2012 R2 32 and 64 bits are supported. If you install TSplus on Windows 2003/2008/2012 make sure the RDS or Terminal Services roles as well as the RDS Terminal Services licensing role are not installed before installing TSplus. If these roles were present, remove them and reboot.
 handling up to 50 concurrent users.")

10 3) Network parameters The Terminal Service Plus "server" must have a fixed IP address: Remote access (from Wide Area Network - WAN) A DSL connection is recommended as well as a public fixed address. Without a fixed IP address, you should install a dynamic DNS service like More information about how to set this up can be found here. The TCP RDP port (by default 3389) must be opened both ways on your firewall.


11 Terminal Service Plus Installation Run Terminal Service Plus Setup program and then follow the installation steps. First, chose your preferred language. Click on "I accept the agreement". A message then appears to ask you to confirm the TSplus files creation on C: The installation path is mandatory : %ProgramFiles%\TSplus


12 We recommend you to accept our TSplus default installation settings. According to our experience, most of the production issues are due to Windows security features. The progress bar appears and allows you to follow the progress of the process.


13 Then the TSplus logo appears and a window informs you about the completion of the installation. To use TSplus, you must reboot your system. The trial periods delivers a full product for 15 days and 5 concurrent users. See the video for the installation.

14 How to identify your TSplus Edition You can see the type of License you purchased on the License Tile, under your Serial Number: TSplus has merged old licenses into one in order to have more clarity. The System and Printer Editions still have the same core features: TSplus Administrator Tool (AdminTool), Concurrent connections support, Application Control per user and/or per groups, TSplus Remote Taskbar and/or TSplus Floating Panel, Remote Desktop access, TSplus Portable Client Generator, Seamless and RemoteApp connection client, Fully compliant with RDP protocol, Dual Screen support, bi-directional Sound, RemoteFX when compatible with Windows version, Local and Remote connection support, Workgroup and Active Directory users support. The Printer Edition enables you to print from any location, without having to install any specific driver. The old licenses names were the following: Web Access Edition (Which incorporated connection from any web browser with TSplus HTTP Web Server). The Secure Web Edition (Which incorporated http + https access with ssh tunneling). The Mobile Web Edition (Which incorporated the Web Access and Secure Web Editions features + HTML5 access on mobile devices). They are now merged with the Mobile Web Edition.

15 The Mobile Edition enables you to: Connect from any web browser with TSplus HTTP Web Server, Entirely secured connection from any web browser with TSplus HTTPS Web Server and SSH server, HTML pages includes Windows, Java and HTML5 web access clients, Easily connect from iphone/ipad and Android devices, Customize logon web page with TSplus easy-to-use Webmaster Toolkit, With TSplus Web Applications Portal, users can access their application list inside their web browser, Instead of Windows Credentials, TSplus Web Credentials allows users to connect with only an or a pin-code, Universal Printer enables you to print from any location, without having to install any specific printer driver. The Enterprise Edition includes all the following features: Connect from any web browser with TSplus HTTP Web Server, Connect fully securely from any web browser with TSplus HTTPS Web Server and SSH server, The provided HTML pages includes Windows, Java and HTML5 web access clients, Easy connection from iphone/ipad and Android devices, Customize logon web page with TSplus easy-to-use Webmaster Toolkit, With TSplus Web Applications Portal, users can access their application list inside their web browser, Instead of Windows Credentials, TSplus Web Credentials allows users to connect with only an or a pin-code, Support an unlimited number of servers within each TSplus Farm, Thousands of users working concurrently on a scalable Load-Balanced architecture, Single Enterprise Portal to access all your TSplus servers, Ability to assign one or several Application Server(s) to users or groups of users, Load Balancing and Failover support included, The Universal Printer enables you to print from any location, without having to install any specific printer driver, TSplus Administrator Tool (AdminTool), Concurrent connections support, Application Control per user and/or per groups, TSplus Remote Taskbar and/or TSplus Floating Panel, Remote Desktop access, TSplus Portable Client Generator, Seamless and RemoteApp connection client, Fully compliant with RDP protocol, Dual Screen support, bi-directional Sound, RemoteFX when compatible with Windows version, Local and Remote connection support, Workgroup and Active Directory users support.

16 Locating TSplus serial number and activating it Option One This will appear on Windows startup : Option Two Locate the Administrator Tool on your desktop : Double-click on it, then click on the license tile. You can now see the Serial Number:


17 Activating your license When you order a license, connect to our Licensing Portal and enter your Order Number, your address and your Serial Number: You will get your license.lic file, then, on the Admin Tool, click on the "Activate your license" tile:


18 Locate your license.lic file, then open it, your license is activated!

19 Activating your support license file The 8.20 version of TSplus introduced a new and easy way to handle your annual support contract. Please update your version to the latest release before following this procedure. The support services include our worldwide Ticket/ support service, Forum access, license rehosting, FAQ and tutorial support. The update services include the delivery of Update codes, the right to install and to use any new release, patch and updates. The update code is requested once a year to be able to apply the Update Release patch. It is delivered by our support team on demand. This update code is now replaced with a support.lic file that you can activate in the licensing tile of the Admin Tool. We are investing every day to enhance TSplus and to fix all known issues. So, we recommend all our customers to keep their TSplus installation updated. The annual fee is not expensive and is available here : Annual Support & Updates services. Step One Locate the Admin Tool on your desktop : Double-click on it, then click on the license tile. You can now see the Serial Number :

20 Step Two Connect to the Licensing Portal by entering your Order Number, your address and your Serial Number: You will get a Support.lic file. Step Three Click on the "Activate your license" tile:


21 Then select "Extend Support period": Then locate your Support.lic file and open it in order to activate it!

22 Updating Terminal Service Plus Our development team is working on a daily-basis to ensure the stability and compatibility of TSplus with the latest versions of Microsoft Operating Systems and the latest Updates. We are proud to provide you with new features and enhancements every week. This is why it is recommended to keep your server up to date. By subscribing to our annual Support and Updates Services, you will have access to the latest Updates and bug fixes. In order to see which TSplus version you have and update it: You can check the status of your TSplus release by opening an Admin Tool, click on the license tile, then you can see the version already installed: You can then click on the "Check for Updates" tile or on this link: Update Release. If you have users connected when you want to apply the Update, we recommend you to rename these 3 programs located in "C:\Program Files\TSplus\UserDesktop\files": logonsession.exe srvterminal.exe runapplication.exe Make sure no users are logged in before installing this update, you can check for remote users by launching a task manager and clicking on the users tab. Disabling your anti virus is also recommended. Then, execute the Update Release program.
23 Upgrading your TSplus version If you wish to upgrade your current version of TSplus, in order to add more users or more features, click on the "Upgrade Edition or add users" tab on the License tile: On the displayed window, you can see which edition you currently have and your number of users. Below is your Upgrade License Code: When you click on the "Check Upgrade price" button, the following webpage opens and you can chose which edition you wish to upgrade to, with the number of users, for example here, from a Mobile Web Edition to an Enterprise version:
24 If you have a version 7.xx or below, go to this page and download the Upgrade License Code generation program, available at the bottom of the page, in order to get your Upgrade License Code.
25 Securing a Terminal Service Plus server Overview Securing any server is a never-ending story where every expert could add another chapter. TSplus benefits from and is compatible with existing security infrastructure in a company (Active Directory, GPOs, HTTPS servers, SSL or SSL telecommunication systems, VPN, access control with or without ID cards, etc). For customers who want to easily secure their servers, TSplus offers a set of simple and effective ways to enforce good levels of security. Changing the RDP port number and setting up the firewall With the AdminTool, you can select a different TCP/IP port number for the RDP service to accept connections on. The default one is You can choose any arbitrary port, assuming that it is not already used on your network and that you set the same port number on your firewalls and on each TSplus user access programs. TSplus includes a unique port forwarding and tunnelling capability: regardless the RDP port that has been set, the RDP will also be available on the HTTP and on the HTTPS port number! If users want to access your TSplus server outside from your network, you must ensure all incoming connections on the port chosen are forwarded to the TSplus server. On the Server tab, click on the "Change RDP Port" tile :


26 Server side security options The AdminTool allows you to deny access to any user that is not using a TSplus connection program generated by the administrator. In this case, any user that would attempt to open a session with any Remote Desktop client other than the TSplus one (assuming he has the correct server address, the port number, a valid logon and a valid password) will be disconnected automatically. The administrator can decide that only members of the Remote Desktop User group will be allowed to open a session. The administrator can decide that a password is mandatory to open a session. Through setting the applicable local Group Policy, the administrator can specify whether to enforce an encryption level for all data sent between the client and the remote computer during a Terminal Services session. If the status is set to Enabled, encryption for all connections to the server is set to the level decided by the administrator. By default, encryption is set to High. The administrator can decide to set a firewall on the user PC names. Only the PCs that are listed on the UsersPCnamelist.ini file located on the Pc names firewall on the Security tile (or on the folder /Program Files(x86)/TSplus/UserDesktop/files/) are able to open a session: Any other PC, even with a valid logon/password, will be rejected.

27 The administrator can also set as a rule that only users with a TSplus connection client will be able to open a session. Any incoming access with a standard RDP or a web access will be automatically rejected. Hiding the server disk drives: The AdminTool includes a tool that enables hiding the server disk drives to prevent users from accessing folders through My Computer or standard Windows dialog boxes. On the Security tab, click on "Hide Disk drives" : The tool works globally. This means that even the administrator will not have a normal access to drives after the settings have been applied. On the example below, all drivers have been selected with the "select all" button, which will check all the box corresponding to drives that will be hidden to everybody:

28 Comment: This functionality is powerful and does not disable the access to the disk drives. It just prevents the user to display it. Notes: The tool flags the disks drives as hidden, but it also adds the HIDDEN property to the entire root folders and users list in Document and Settings. If the administrator wants to see these files he must: 1. Type the disk drive letter. For example: D:\ which will take you to the D: drive. 2. Turn on SHOW HIDDEN FILES AND FOLDERS in the folder view properties. Advanced security options You can find multiple advanced security options if you click on the tab of the same name on the Security tile: Administrator Pin Code The Administrator can secure the Administrator Tool access by setting a pin code which will be asked at every start: TSplus access program security options: The TSplus client generator gives the capability to lock the TSplus client to: A specific PC name. It means this program will not be able to start from any other PC. A physical drive serial number (PC HDD or USB stick). This is a very easy and powerful way to set a high level of security. The only way to connect is with a specific client, and this specific client can only start on a specific USB stick or PC HDD. Some of our customers are delivering fingerprint-reading USB sticks to each of their users and each generated program is locked to the device serial number. This way, they can restrict access to the client's program itself, as well as ensuring it cannot be copied off the USB stick and used elsewhere. For more security feature information, check our FAQ

29 Server Management Management of users and sessions The session manager is located on the Server's tab and enables you to monitor your users sessions.


30 You can display your server's task manager, and you have the possibilities to active a remote control, disconnect, logoff or send a message to your users. You can activate the remote control via a remote session with an admin account on the following Operating Systems: Windows 2008 R2 Windows 2012 R2 Windows 7 Windows 8.1 Windows 10 On Windows XP, 2003, Vista, and 2008 there is no remote control button. On Windows 2012 and 8 a message appears advising you to update to 2012 R2 or 8.1. When you activate the remote control for a user's session, this message appears, indicating the keyboard shortcut to end the session: On the client side, this message appears to accept the remote control: You can also send a message to your user:

31 Message appearing on Client Side The Users and Groups tab allows you to add/edit or delete users. See this documentation for more information.
32 With the Group Policies (GPO) tab, you can set various connection settings for each session and user:
33 The session opening preference tab allows you to set up preferences for the opening of sessions:
34 You can see the event logs of the server with the events logs tab. Services The W7/W2008 System Toolkit is an enhanced control panel, summarizing all the Windows Administration tools.

35 You can also launch the "Server Properties" tab to have an overview of the control panel.
36 You can see all the services on your server and their status on the Services tile. Server Properties Ports With the Server WAN IP tab, you can see the IP and Wan address of your server:

37 You can change the Server communication port with the "Change RDP port" tab: See this documentation. Backup and restore your server parameters You can backup or restore your server parameters by clicking on the tile of the same name. The backup and restore are made on this folder: Backing up your parameters will allow you to save your TSplus license, your custom web Portal page, assigned applications as well as all of your TSplus settings.
38 Session Opening Preference The session opening preference allows you to chose your shell session preference, your logon preferences, and the background color of your sessions. By default, the TSplus native shell is activated, as well as the "Display progress bar during logon" and "Display last connected users" on the logon preferences, and a blue background color:
39 In order to authorize click-once applications, on the Session Opening Preference tile, on the server tab, select the "Use native Windows shell when opening sessions": Chrome and click once applications are supported by TSplus. If you wish to be able to use Chrome browser on your TSplus server you need to select the "Use windows native shell" box and save: A reboot will be necessary. Reboot your server The "Reboot the server tab" allows you to reboot your server.

40 Portable Client Generator Overview TSplus creates by default an icon for the Portable Client Generator: The generated clients can be copied to users Desktop or onto a USB stick for portable use. The Portable Client Generator program also allows you to change the icon and the connection client program name. Main window - General Settings Server Address: Enter the IP address of the server to which the client must be connected. Port Number: Enter the server port number. Domain name: Enter a domain name if any. User and Password: If you enter a user/password, the client program will not ask to retype it at each session. If you type *SSO in the user name field, the client program will just ask once the logon/password at the very first connection and will save this information on the user s workstation so that the user doesn t have to identify himself ever again. To reset this logon/password saving, you must create and edit a shortcut of the Remote Desktop Client and add -reset on switch at the end of the target field.
41 Preferred Display Mode: You can chose your preferred Display Mode between: The classical Remote Desktop. The Microsoft RemoteApp connection client, which has a better graphical performance over minimized applications. The Seamless Client, which only displays published applications as if they were installed on the local computer, the advantages of the Seamless client is its compatibility with any Windows version. Network speed: You can also now chose between two options depending on your network speed: Disabling background display & graphic animations for low speed networks. Enabling background display and graphic animations for fiber optic or fast network. Terminal Service Plus Seamless vs Microsoft RemoteApp Microsoft RemoteApp is a Microsoft feature which requires W7 Enterprise or Ultimate, W8 Enterprise or W2008/W2012. All users PCs must have at least a RDP6 client. Terminal Service Plus Seamless delivers a similar user experience and is available on any Windows host system. Based on one transparency color selected by the Administrator, the Microsoft Remote Desktop is not displayed anymore and the user will just see his published applications. The Seamless color can be modified and must be the same when using the AdminTool and the Portable Client Generator. Display Client name: You can name your client as you wish. Client icon: You can upload an icon for your client. Language preference: Here you can set the language of your choice (as for now, 20 languages are available). On this tab, you change the color and the session screen resolution. You can also adapt your session for a dual-screen, span it or smart-size it and you can enable the TAB command into the session.
42 Remote Desktop Client features On this tab, you can chose which resolution you want to enable for the user: Seamless and Remoteapp clients See this page. Local Resources
43 The local resources tab gathers all the devices that you may redirect in your remote session. Printers correspond to LPT ports, and COM Ports correspond to Serial Ports. Beneath, you can chose your option for printing, with the universal printer: Local PDF Reader preview: the document will be pushed and the local Acrobat Reader will open with the generated PDF file. The user can print it, or save a copy on his local disk drive. See the video tutorial to preview documents with the local PDF reader. Print on the user's default printer: the document will be automatically pushed to the default user's printer (the local printing driver is included into the TSplus connection client). See the video tutorial to print on the default printer. Select a local printer: The user can select one of his local printer (the local printing driver is included into the TSplus connection client). If you do not have a PDF Reader installed on your machine, we recommend the use of Foxit Reader. Program You can decide to set an application via the Portable Client Generator, however, we recommend to use the AdminTool in order to assign the desired applications. Security The ID of a USB key can be used to prevent anyone from using the connection client on any other device than the one it is locked on. In order to lock a connection client onto a USB key you can do so by copying the client generator located in: C:\Program Files (x86)\tsplus\clients\windowsclient. Now double click on the client generator and check the lock on serial box located in the security tab. Once it is done, you can delete the client generator from the USB key. The generated connection client is now locked on your USB key. You can delete the client generator that you copied on the USB key afterwards.
44 Gateway Portal You can also enable the Load Balancing to connect to one server of your farm. Do not check the "Use Gateway" box if you did not activate the Load-Balancing feature on your server. You will need to enter the gateway Web Portal port, which should be the same as the default web port used on all the servers of your farm.

45 Credentials If you don't want to save credentials, enter "nosavecredential" on the logon field of the Portable Client Generator. If you don't want to display the logon window with the user name, password and domain name, simply enter "nopassword" on the password field. If you want to enable autologon, enter "*SSO" on the logon and password fields. If you want the current local user's name to be displayed as a logon for the session, enter "**", or "%USERNAME%" on the logon field. See the video tutorial to generate a Connection Client.

46 Edit or Delete the Parameters of a Generated Client There are many reasons why you would want to change the parameters of your connection client: the IP address of your TSplus server changed, you need to add the printer redirection or change the universal printer settings or so on... You first need to create a shortcut of your connection client. Then, right click on it and hit properties. Place your mouse at the end of the "target" field and type in " /?" Now click OK and double click on the shortcut. A list of switch appears :


47 Click OK, you are asked if you want to check your parameters, click Yes. Click OK, the list of all the parameters appears in a small window. You can now edit them to match your preferences, you will need to log off and log on again to apply the changes. Clean the Parameters of a Generated Client If you upgraded your TSplus version from a 7.X version to a 8.X or above then you will need to generate new connection clients. If the newly generated connection client has the same name than the previous one, you will to clear to the client cache, by following this procedure: Create a shortcut of your connection client, right click and hit properties. Place your mouse at the end of the "target" field and type in /clean.
48 Click ok and double click on the shortcut, a message confirming your action will appear:
49 Seamless and RemoteApp connection clients Seamless connection client The Seamless connection client works on every Operating System, regardless of the version on the client or on the server side. When connecting remotely, you can access your applications by selecting the seamless mode as if they were installed locally on your computer. A transparency color can be set manually to insure your application will appear perfectly (green, blue or pink). The Seamless Client is based on one transparency color selected by the Administrator. As the Remote Desktop background color is painted with the selected transparent color, the Microsoft Remote Desktop is not displayed anymore and the user will just see his published applications. Warning: Installation default is green and should work fine with most applications. We offer you the choice between 3 transparency colors: Pink, Green and Blue. Of course, the server and the connection clients must use the same color. Some elements on an application can also not be visible anymore because of the transparency color.

50 When you assign applications to a user, you can enable the TSplus remote taskbar:
51 Which you can customize by clicking on the "Customize Taskbar" tile : If you want that your maximized applications overlap the Windows taskbar, click on this box, on the Seamless client tab:
52 The TSplus Remote Taskbar will also overlap the Windows taskbar: Floating Panel or Applications Panel You can also either chose to enable the Floating Panel or the Application Panel for your user. Assign it as an application:
53 Under the "Customize Floating Panel" tile you can customize the Floating Panel or the Application Panel at your convenience :
54 Microsoft Remote Desktop You can also generate the whole Remote Desktop experience into your session. 4 ways of customizing your user's experience are available. You can also chose to publish one unique application to be launched seamlessly at the user's logon. For more information, see this page and this video. RemoteApp connection client The RemoteApp connection client, contrary to the Seamless client, does not depend on the transparency color settings. Hence, it enables a perfect application display as well as a native Windows behavior. On the Client side, the installation of RDP6 or above is imperative.
55 On the Server side, TSplus has to be installed on a Windows 7 Ultimate or Enterprise, Windows 8 or 8.1 Enterprise, W10 or Windows 2008/2012. As for the Seamless connection client, you can publish applications with the TSplus remote taskbar, the Floating Panel and the Microsoft remote desktop. You can change the RemoteApp client display and Printing preferences on the Web tab of the Admintool: Minimized applications can be directly found inside the Windows taskbar, like a local application. On this example, Firefox and Paint are launched locally; Notepad, Word and Foxit are launched remotely.
56 Remote Taskbar and Floating Panel Administrator tools on the server With the AdminTool, the Administrator can easily decide what will be the default Remote Desktop theme the user will see when opening a session. On the Applications tab, click on the "Customize Taskbar" tile : With the standard settings, the user can choose a different default theme. The Administrator can restrict users from changing themes. You can also customize the Floating Panel :
 is modifiable by the administrator using Notepad:")
57 By editing the users menu, the Administrator can add/suppress applications and functionalities. Customization of the users menu is easy. The content of user menus (located in Program Files/TSplus/UserDesktop/mainmenu.mnu) is modifiable by the administrator using Notepad:
58 Seamless connection program In the Admin Tool, on the server or on the applications tile, the administrator can select 3 different styles of Remote Desktop TSplus Taskbar. The TSplus Taskbar is extremely useful when a session is run with the Seamless TSplus connection program. The user can launch remote applications with one click on the TSplus taskbar and still have the full local Desktop available. Right side Blue theme taskbar: Right side Silver theme taskbar:
: Thin-client or any RDP based connection program The administrator can select 4 different styles of full screen Remote Desktop.")

59 On Top taskbar If activated on the assigned applications, you can see on the middle left of the user screen the mini drop-down list of applications or floating panel (very much appreciated by TSplus users): Thin-client or any RDP based connection program The administrator can select 4 different styles of full screen Remote Desktop. The standard Microsoft Remote Desktop can also be used if preferred. Because these TSplus Desktops are full screen desktops, the user's display is entirely filled when a session is opened from dedicated thin-clients, any RDP based client, or accessed from a web page or TSplus Remote Desktop clients. There are benefits over a standard Remote Desktop. It enhances the server security (no START button neither full control of the Desktop). The Administrator can also customize the desktop background by replacing it with your corporate logo.
60 Standard Microsoft Remote Desktop The user has a complete desktop including Start Button and full control of the desktop To assign to complete desktop, just assign the Microsoft Remote Desktop application. TSplus Desktop theme one To customize, the Administrator can change the desktop to display the Corporate logo.
61 TSplus Desktop theme two To customize, the Administrator can change the desktop to display the Corporate logo. TSplus logon theme To customize, the Administrator can change the desktop to display the Corporate logo.
62 Application Publishing Overview TSplus supports 4 different kinds of Application Publishing: Microsoft Remote Desktop. The user will see the full Windows Remote Desktop in the session. TSplus Taskbar. Any application, folder, shortcuts, documents copied on the user's Desktop folder will be published with the TSplus Remote Taskbar. In this case, the user does not have any access to applications other than those decided by the administrator. Application Control has a much finer grain. The Floating Panel. All the applications can be published on a mini drop-down list. Assigning one, two, three, or more specific applications to a user/group. In this case the user will only see their assigned applications when opening a session. There is a priority rule to remember: The Microsoft Remote Desktop has the highest priority, then the TSplus Taskbar, then specific applications. If a user has a specific application assigned and TSplus taskbar or Microsoft Remote Desktop, they will not see the specific application because they have a lower priority. Managing Application using the Admin Tool You will add or delete applications using the AdminTool, by clicking on the "Application Publishing tab" on the Applications tile:

63 1. Notepad is published as an example. To publish an application, click on the "Add a new application" button, then browse your folders, and finally name it in the dedicated field. 2. You must click on the "Save" button to store any modification. 3. After declaring a new application, we recommend to use the "Test (start selected)" button to check that the application has correctly started. 4. For each new application, you can specify if this application must start maximized, minimized or hidden. You can also tell the system to apply this application to all users. Publishing applications from Start Menu You can also publish applications from the Start Menu of your server, by clicking on the "Application from Start Menu" button on the previous window or on this tab:
64 Select and save the desired applications to publish: Important remarks After installation, the default setting is: Any RDP user will see the complete Microsoft Remote Desktop. Any Seamless user will have the TSplus Remote Taskbar. The TSplus Taskbar publishes all shortcuts copied in the user's Desktop folder. When selecting the TSplus Taskbar, you can request to automatically copy any of the shortcuts available in the All Users Desktop folder and/or, to automatically create shortcuts from applications assigned to the users with Application Control.
65 Assigning Applications to Users or Groups Overview Once you have published some applications, you can publish them to one or more users and/or groups. To do so, click on the "Assign Application" tile in the "Applications" section of the AdminTool. The following window will be displayed. It allows you to assign applications:
66 How to Assign an Application to a user (or a group) In the left tree view, you can see a complete list of all your users and groups (local as well as from your Active Directory if any). All users and groups having at least one application assigned are displayed with their name in bold. In the left tree view, click on a user (or a group): his currently assigned applications will be checked in the right tree view. You can check an application to assign it to the currently selected user (or group). You can uncheck an application to unassign it. Changes to users assignments are instantly applied. Changes to groups assignments require that you click on the "Save" button to be fully applied. Change all Applications Assignments You can change which application is available to which user/group on the same window. It is a good way to visually check the current application assignments. In this example, the users John and Julia, as well as any member of the "Users" Group will be able to use the "Foxit" application:
67 Important remarks when using TSplus Seamless Client With the TSplus Seamless Client, the users will not display the Microsoft Remote Desktop windows. The applications can be found on the local desktop as if they were native local applications. Users will only see the applications assigned by the administrator. If a user has the right to use the default Microsoft Remote Desktop, the Seamless Client will display a background color to avoid having both the Remote and the Local Desktop icons piled on the screen. The Seamless Client session is held open only when an application is running and being pushed through to the local client. If no application has been assigned to this user, TSplus will automatically use the TSplus Taskbar. If a user has specific applications assigned, they will seamlessly see these applications when the session is opened. When the last application is closed the session ends. Rules for Microsoft Remote Desktop, TSplus Remote TaskBar and Floating Panel You can customize your user's work environment by assigning one application out of these three: Microsoft Remote Desktop, TSplus Remote TaskBar and Floating Panel. If no application is assigned to one user, he will see the Microsoft Remote Desktop which will display the Desktop folder shortcuts. If one user has several allocations plus the Microsoft Remote Desktop, he will see a remote desktop. If a user has several applications plus the TSplus TaskBar, he will see the TaskBar which displays the shortcuts of his Desktop folder. For more information on the Remote Taskbar and Floating Panel : Remote Taskbar and Floating Panel documentation. Running scripts/programs on session opening If you want to start a script when the session opens, you must name it LOGON.BAT or LOGON.CMD and copy this script: In the Application Data folder of All Users if this script applies to all users, In the Application Data of the user if this script applies to this user. If you want to start a script on the client side when a session is opening, you just have to name a program STARTUP.EXE and to copy it at the home drive of the user PC (C:\startup.exe). If you want a program to be started as a service when the TSplus server reboots you have to name this program STARTUP.EXE and copy it in the folder: C:\Program Files\TSplus\UserDesktop\Files\


68 Fast and easy File Transfer between the User and the Server Overview TSplus includes a unique method of transferring files: from the local user workstation => to the user Remote Desktop from the TSplus server => to the local user Desktop Because the file transfers are based on a Virtual Channel, it is a lot faster than a file copy, and it can even be done when the local user disk drives are not mapped. FileTransfer program and Generated Clients The File Transfer program is located in your TSplus program folder, under the name "FileTransfer.exe" into the following path: "UserDesktop\files" Transferring files Transferring files is very easy. First, launch the File Transfer (for instance by using TSplus Floating Panel):
69 Then navigate to your file using the folders tree: server's folders and files are on the left part of the window (server side) local workstation's folders and files are on the right part of the window (client side) Finally, right click on the file that you want to transfer to the other side, and click on "Send to server" (or "Send to client"): File Transfer works from the local workstation to the server, as well as the other way around (from the server to the local workstation).


70 Secured Folder Sharing - Folder.exe The Folder application will securely display the content of a folder that you will make available for your users. First, create a folder on your server with Applications or documents that you want to share. Open an explorer.exe and locate the folder.exe application in C:\Program Files\tsplus\UserDesktop\files: Create a shortcut of this file. Edit the properties of this shortcut by right clicking on it.then modify the target path of the shortcut by entering the path of your applications folder on the "Target" line, after the original target path, for example: "C:\Program Files\tsplus\UserDesktop\files\folder.exe" "C:\Shared Folder"
71 When you open the folder.exe shortcut, it should look like this (with your own documents and applications): This shortcut can be copied to a user's profile desktop folder or you can publish the folder.exe for a user as an application. If you do the latest, you will have to indicate the path of your folder in the Command Line option section: There is an alternative way of sharing a Folder of documents.
72 Publishing a shared folder as a unique application: Open an Admin Tool. Click on the Management of published application tab. In the display name type in the name of the shared folder or any name you want. Click on the browse button located on the right side of the "Path/Filename" field and locate C:\Windows\explorer.exe. The start directory will be filled in automatically with the path of explorer.exe. In the Command line option field, type in the path of the shared folder, it can be a local folder or a network shared folder using a UNC path (example : data\shared folder). Fill in the field below with your shared folder information:

73 Then click on "Save". Click on the "Assign application" tab. Check the TSplus Remote Taskbar and Shared Folder boxes: Here is the result, when you open a session with an rdp client, you will see the TSplus taskbar with the shared folder application:
74 You can also do this with the floating panel. Open an admin tool and click on the "Assign application" tab. Check the Floating Panel and the Shared Folder boxes. Here is the result:
75 Open Files on Client Side Overview This feature is a powerful one. It allows to open documents located on the server on the client side depending on its file extension. For instance, you can open a Microsoft Office Word document without having Office installed on your server. The.docx (or.xlsx) document is automatically uploaded on the user side where the local Office will be used to open it. If you are hosting your application on a Cloud server and if your application is generating an Excel, Access or Word document, this feature avoid to care about Office licenses on the server. Configuring a File Type to open on the client side The tile "Open Files on Client Side" is located in the "Server" tab of the AdminTool. Click on it to display the configuration window: The button "Add a new File Type" allows you to add an extension (such as ".docx" for Microsoft Office Word ) to the list. All the files having an extension in this list will then be opened on client side, provided that you use one of Terminal Service Plus connection clients: Any generated Terminal Service Plus Client (Seamless, RemoteApp or RDP) Any Windows connection from the Terminal Service Plus Web Portal Any HTML5 connection from Terminal Service Plus Web Portal Warning: this feature is not supported for: Any RDP client (mstsc for example) Any Java connection from TSplus Web Portal
76 Troubleshooting If you have configured a file type to open on client side, and it is not working (i.e. the file is still opened on its own computer), then we advise you to check the "Open With" list in Windows context-menu: right-click on the file. click on the "Open With" menu item. if there is more than one application in this list, click on "Choose default program" and select "OpenOnClient.exe". This Terminal Service Plus great tool applies its configuration to all users using the computer, however please keep in mind the following rules: Windows allows each user to change this default opening program with another program of its choice. Using HTML5 connection client, the file will be downloaded and managed by the local browser. Some browsers treats some file types in specific ways, so browser's settings should also be checked twice. These rules explain most of the issues when using the Open On Client feature, that is why we advise you to start by checking the default program: for the logged user on the server for the user on the client for the browser on the client (when using HTML5)
77 Open URLs on Client Side Overview This feature is a powerful one. It allows to open on the client side every websites links and websites shortcuts located on the server. For instance, you can open YouTube videos directly on the client, thus saving lots of bandwidth and CPU power on your server. The web address (URL) is automatically transferred on the user side where the local default browser will be used to open it. Enabling this Feature on a server The tile "Open URLs on Client Side" is located in the "Server" tab of the AdminTool. Click on it to display the configuration window: The button "Activate URLs opening on user side" allows you to activate this feature for all users on the server. In order to fully enable this feature, every user will have to restart its session (logoff then login) before they can use this feature. All the web links and shortcuts will then be opened on client side, provided that you use one of Terminal Service Plus connection clients: Any generated Terminal Service Plus Client (Seamless, RemoteApp or RDP) Any Windows connection from the Terminal Service Plus Web Portal Warning: this feature is not supported for: Any RDP client (mstsc for example). Any HTML5 connection from Terminal Service Plus Web Portal. Windows 8 and 8.1 Starting with Windows 8, Microsoft has forbidden automatic change of user's default browser. This is why, once the feature is activated on the server, every user will have to choose 'Url On Client' when asked for a default browser. This window will only be displayed the first time a user opens a web link. Unfortunately, this is Microsoft Windows policy and we are not aware of any workaround.
78 Advanced printing option: Universal Printer The TSplus Universal Printer offers you a great ability: to print documents from any PC and any mobile device. When selecting this printer, the document to print is automatically converted into a PDF format file. This PDF file is automatically pushed to the local PDF Reader of the user's workstation. You can choose from 3 printing options on the local resources tab of the Portable Client generator : Local PDF Reader preview: the document will be pushed and the local Acrobat Reader will open with the generated PDF file. The user can print it, or save a copy on his local disk drive. See the video tutorial to preview documents with the local PDF reader. Print on the user's default printer: the document will be automatically pushed to the default user's printer (the local printing driver is included into the TSplus connection client). See the video tutorial to print on the default printer. Select a local printer: The user can select one of his local printer (the local printing driver is included into the TSplus connection client). If you do not have a PDF Reader installed on your machine, we recommend the use of Foxit Reader.

79 See the video tutorial to print with the Universal Printer. Terminal Service Plus - Documentation Printing with Standard RDP Printer-Mapping Feature This is commonly used by Remote Desktop users and is equivalent to what you would have with Microsoft Terminal Services. It can be useful to check this box if you plan on using exotic printers such as receipt printers. Most of the time it will require that you install the same version of printer drivers on client side and on server in order to work properly. This means that if your server is a Windows bits and your client computers are installed with Windows XP 32 bits, you will need to install the 32 bits XP Printer Drivers on the server. Click on the Start Menu, then on Devices and Printers. Select the Universal Printer or any other printer, to display the Print server properties button at the top of the window:

80 Once in the Print Server Properties, click on the Driver tab to manually add your (for example) XP 32 bits drivers: You can of course also directly install your printer drivers using the Printer Manufacturer Website. It is recommended to check your hardware manual for an installation procedure on terminal server environment. It is also recommended to use RDP 6 for a better support of USB printers.
81 Virtual Printer for HTML5 The virtual printer is a new feature integrated to the TSplus 8.40 version. Print speed is drastically enhanced when you chose this virtual printer to print using an HTML5 connection. You can choose between the virtual printer with preview if you want to display a preview of your print job using your local pdf reader or without preview which will directly display the list of your local printers. With the PDF preview, you will be able to print on any of your local printers:
82 Built-in Web Server Management A Management Console is available in the Administrator Tool. This Management Console enables you to configure Terminal Service Plus built-in Web Server. Restart / Stop the Web Server Service If you click on the "Restart Web Servers" button, the Web Servers will be restarted. If you click on the "Stop Web Servers" button, the Web servers will be stopped. The HTTP and HTTPS server status will now display a red "X" indicating that the HTTP / HTTPS services are stopped: Web Server Components Status The status of the Web Server main components is displayed in the Web Server Management Console. A red "X" indicates that the service is Stopped. A green "+" indicates that the service is Running. Manage Web Servers
83 For more in-depth information about servers customization and preferences, see these pages: Web Portal Preferences, Web Applications Portal, Web Credentials.


84 Remote App Plugin Since the new 8.40 version of TSplus, there is no need any more for a Java plugin to be installed on the client browser. In previous versions of TSplus, Java was necessary in order to launch the Windows Remoteapp client. You can access the Windows RemoteApp client by downloading and installing a small Windows plugin. This operation is needed only once per client. The message displayed below will stay even after you have installed the plugin. This is the message displayed after you download the RemoteApp plugin: This message can also be displayed for your first connection if you are using Firefox, check the "Remember my choices" to disable this warning for your future connections:

85 Web Applications Portal Overview Terminal Service Plus Web Application Portal provides a single, flexible solution that can streamline application and desktop deployment and life-cycle management to reduce IT costs. By centrally managing and web delivering on-demand applications, IT can improve the success rate of application deployment providing role-based management, application control, security and users support. Terminal Service Plus Web Application Portal virtualizes and transforms Windows apps and desktops into a secure on-demand service. With Web Application Portal, you will be able to publish Microsoft Windows applications (business applications, Office applications...) to the web. As in Citrix, your users can access their applications directly from the Internet, simply by clicking on the application icon in the Portal web page, directly inside their own Internet browser. Managing your Web Applications The Web Application Portal feature is fully integrated in Terminal Service Plus. It means that all the applications published by Terminal Service Plus Applications Publishing feature can be used in the Web Applications Portal. If you would like to know more about this publication process, feel free to review our documentation about Application Publishing and Assigning Applications to Users or Groups. Designing your Web Applications Portal In the Admin Tool, open the "Web" tab and click on the "Applications Portal" tile.
86

87 To generate a web access page with the Web Applications Portal feature activated, check the "Enable Applications Portal" checkbox. You can customize your web access page to your liking, then click on "Publish" to publish this new web access page. Using the Web Applications Portal In this example we have published the new web access page with the default name "index". To access it, open a web browser and go to (in this example we use directly from the server itself). The first web page displayed is the standard Terminal Service Plus web logon page:


88 Once logged in, a new web page is displayed, this is the Web Applications Portal: As you can see, the user get an icon for every published application that he has access to. The user can now click on one or more icon, in order to remotely open the matching application in a new tab: Important Notes The Web Applications Portal feature is compatible with Farm / Gateway configuration and it also supports load-balancing. In a Farm / Gateway configuration, the Applications must be published and assigned on every server of the farm at the moment. In terms of Terminal Service Plus licensing, a user can open several applications at the same time without counting for more that 1 user.
89 Web Applications Portal: Parameters in URL address If you want to bypass Terminal Service Plus standard logon Web Access page when using the Web Applications Portal and go directly to the Web Applications Portal page, you must specify several parameters in the URL address: user login user password user domain server port client type (HTML5, JAVA or Windows) Here is an example of a full URL address for user "john" with password "demo" on localhost server with an HTML5 client: t=3389&type=html5 The domain, server, port and type parameters being optional, the following URL address has exactly the same behavior: To use a JAVA client, use: &type=java To use a Windows client, use: &type=remoteaccess Using those parameters in the URL address, you can go directly to the Web Applications Portal page. You do not have to specify all these parameters at the same time: the parameters not specified will have their default configured value.
90 Services and Ports Services Running Services for the TSplus HTTP / HTTPS / HTML5 / SSH: Ports Considerations (Local Machine and Firewall / Router) Terminal Service Plus only requires either Port 80 or Port 443 to be opened. Port 3389 can stay closed. To change the Ports: Open an Admin Tool and click on the Web tile.
91 Then click on the "Manage Web Servers" tile: At the bottom of the window, you can see the Web Servers Options: Change the HTTP and/or HTTPS port number with your chosen value. Click save. Make sure that the port you entered is not currently used by another application to avoid any conflict, if a conflict occur TSplus web server will not work. Here is a non- exhaustive list of TCP port that might be used by an application on your server. Click on "Save and Restart AdminTool" to apply your new settings.

92 You can also click on "Restart Web servers", if the modification was not taken into account: How to change the Communication Port Open the Admin tool and click on the server tile.
93 Click on "Change RDP port". The value currently in used is displayed, here by default it is the 3389 port that is used. Enter the new port number in the corresponding window. Make sure that the port you entered is not currently used by another application to avoid any conflict, if a conflict occur TSplus will not work. Here is a non-exhaustive list of TCP port that might be used by an application on your server. A reboot of the server is mandatory for the changes to apply.
94 How to use IIS rather than Terminal Service Plus default Web servers Pre-requisites It can be a good idea to Update Terminal Service Plus to be sure that you get the latest TSplus programs. 1) Start AdminTool and go to the Web Management Tool In the Http Web Server tile, check Use a different HTTP web server because you want to use IIS A pop-up will recommend you to change IIS HTTP port to 81:
95 Then, click on the web folder tile and use the button Select a new Web Server root path to tell TSplus where will be the new web folder root. TSplus will copy the requested files/folders into this new root folder and, at this point, the TSplus setting for IIS is near completion. It s now time to start IIS Manager. 2) IIS Manager Change the HTTP from 80 to 81 using the Binding function of IIS Manager:
96 And restart the IIS service. 3) Going back to TSplus Web Management tool You can set the HTTP and HTTPS ports in TSplus Web Management tool. We recommend using standard ports, but this feature can be handy when trying to avoid a conflict with another process. 4) Permissions For the Universal Printer, we need to be able to write in the PRINTS folder. So, verify that Everyone/Users... have full rights on.../prints folder:
97 For the applications icons in the Web Applications Portal, add the "Write" permission to the "C:\inetpub\wwwroot\software\html5\imgs\topmenu" folder for the IIS user (typically IIS_IUSRS). For the RemoteApp web client, add the "Full Control" permission to the "C:\inetpub\wwwroot\cgi-bin\remoteapp" folder for the "Users" group. Then select the.html file you wish to use as a Web Access page in: 'C:\Program Files (x86)\tsplus\clients\www' and copy it as index.html in: 'C:\inetpub\wwwroot' 5) Specific Settings for TSplus Gateway Portal, Load Balancing and/or HTML5 file transfer If you want to use this IIS based system as a TSplus Gateway Portal and/or use TSplus Gateway Portal Load Balancing feature and/or use HTML5 file transfer feature, you will need to allow the execution of TSplus GCI scripts by IIS. First, you must have the CGI role service enabled in IIS.
98 Go to the "Server Manager", then "Roles", then "Add Role Services" Once you have CGI role enabled, you can start up the "Internet Information Services (IIS) Manager". In the left panel tree, expand the tree under your server, then under "Sites", and right click on your site in order to add a new "Virtual Directory":

99 In the "Alias" field, type "cgi-bin". In the "Physical path" field, type "C:\Program Files (x86)\tsplus\clients\www\cgi-bin". Then click on "OK" and you will see that the nw "cgi-bin" virtual directory has been added to your IIS site. Right-click on this "cgi-bin" virtual directory and click on "Convert to Application". Click "OK" and accept the default settings. Now select the "Handler Mappings" icon for this folder on the right hand side of the Manager window. Click on the "Add Module Mapping" option on the right hand side. Enter the following settings: Request path: *.exe Module: CgiModule Leave the "Executable" field blank Name: CGIexe Click "OK" to finish adding the module mapping. Now, the last step is to allow the CGI extension to run on the server. You do this on the "ISAPI and CGI Restrictions" page. This can be found by clicking on the machine name in the tree view to the left-hand side of the window. On the "ISAPI and CGI Restrictions" page, click on "Add..." on the right hand side of the window. Now specify the full path to the "hb.exe" file hosted in the folder we have configured before. Make sure to check the option to "Allow extension path to execute".

100 Checking your settings: To validate your settings, please open a web browser on your server and go to If you get a IIS error page, you have an issue in your IIS configuration. If you get a line of text/numbers, everything is fine! 6) Add a Mime-Type in IIS Launch a Command Prompt as an Administrator, paste the following command and execute it by pressing the "Enter" key: %SystemRoot%\system32\inetsrv\appcmd set config /section:staticcontent /+[fileextension='.dat',mimetype='text/plain'] 7) Test with local host Warning: Use a different user account. If you try with your current user account from your own RDP session to the server, then you will be disconnected and not be able to reconnect.
 Start the AdminTool and go to the Web Tab Click On the Manage Web Servers tile, check Use a different HTTP web server because you want to use Apache.")
101 How to use Apache rather than Terminal Service Plus default Web server Pre-requisites It can be a good idea to Update Terminal Service Plus to be sure that you get the latest TSplus programs. 1) Start the AdminTool and go to the Web Tab Click On the Manage Web Servers tile, check Use a different HTTP web server because you want to use Apache. A pop-up will recommend you to change Apache HTTP port to 81.
102 Then, click on the web folder tile and use the button Select a new Web Server root path to tell TSplus where will be the new web folder root. TSplus will copy the requested files/folders into this new root folder and, at this point, the TSplus setting for Apache is near completion. It s now time to set up Apache. 2) Setting up Apache Change the HTTP from 80 to 81. The specific way of doing this depends on your Apache version and your current Apache settings. We advise you to backup any Apache settings file before modifying them, so you will have a way to restore them if needed. Usually you can change Apache listening port by editing the file httpd.conf found in "Apache\conf" directory: Listen 81 Once it is done, restart the Apache service. 3) Going back to TSplus Web Servers Management tool You can set the HTTP and HTTPS ports in TSplus Web Management tool. We recommend using standard ports, but this feature can be handy when trying to avoid a conflict with an other process. 4) Last steps For the Universal Printer, we need to be able to write in the PRINTS folder. So, verify that Everyone/Users... have full rights on.../prints folder.


103
104 Then select the.html file you wish to use as a Web Access page in: 'C:\Program Files (x86)\tsplus\clients\www' and copy it as index.html in your web root folder, typically this is the "Apache\htdocs" directory. 5) Specific Settings for TSplus Gateway Portal, Load Balancing and/or HTML5 file transfer If you want to use this Apache based system as a TSplus Gateway Portal and/or use TSplus Gateway Portal Load Balancing feature and/or use HTML5 file transfer feature, you will need to allow the execution of TSplus GCI scripts by Apache. First, you must have the CGI module enabled in Apache. Edit the file httpd.conf found in "Apache\conf" directory, and search for a line looking like: ;LoadModule cgi_module modules/mod_cgi.so Remove the ";" to enable the CGI module: LoadModule cgi_module modules/mod_cgi.so Then, find a line starting by: AddHandler cgi-script And add the.exe extension to authorize.exe files to be handled as CGI programs by Apache: AddHandler cgi-script.exe Finally, you must tell Apache that the TSplus "cgi-bin" folder contains CGI programs. To do so, you must add the following line in the file httpd.conf found in "Apache\conf" directory: ScriptAlias /cgi-bin/ "C:/Program Files (x86)/tsplus/clients/www/cgi-bin/" Once it is done, restart the Apache service. If you face any issue setting up CGI on your Apache server, please refer to the Official Apache documentation Checking your settings: To validate your settings, please open a web browser on your server and go to If you get a Apache error page, you have an issue in your Apache configuration. If you get a line of text/numbers, everything is fine!

105 Creating and Customizing HTML Web Access pages using the Web Portal Preferences and the Web Portal Design Using the Web Portal Preferences, you will be able to create your own customized HTML Web Access pages - and there is no need to be a web developer! Web Portal Design You will be able to customize all the display and graphic settings, as well as adding your own logo. You have the choice between a collection of 20 photos, where you can also add your own, the color theme with the background color of your choice or the classic themes.

106 Some advanced tips: You don't have to click on a "Choose..." button if you already know a color code: just type it in the input. Be careful with the real size of the pictures: your page could be quite bad-looking if a picture is too big. Do not hesitate to use the "Preview" button on the bottom, it's fast and easy! Web Portal Preferences
107 This tile allows you to configure the Web Access in the page: "Default Values": you can specify a default login, password and/or domain that will be pre-filled in the page. "Show the Domain Field": when checked, the Domain is asked to the user, otherwise it is not displayed. "Keyboard": only for advanced administrators who are facing special keyboard issues. "Available Clients": choose between 2 types of web connection clients. If both are checked, the user will have the choice. "Gateway Portal": check it to activate the Gateway Portal features (such as the Gateway Portal Load Balancing and the Gateway Portal Users/Servers Assignments). You can also change the labels for every input field in the page in the "Field Labels" section at the bottom of the window. The "Web Credentials" section allows you to enable (or disable) the Web Credentials feature. When using Web Credentials, you might want to allow empty passwords. If you only have Web Credentials with empty passwords, we recommend that you uncheck the "Show Password Field" option, in order to simplify even more the web login page.
108 Remote App tile This tile is for Windows clients specific settings. You can chose your display between Seamless, RemoteApp (remote connection without the remote desktop) or Standard RDP.
109 HTML5 tile On this tile, you can edit the parameters for the HTML5 web display. You can chose to enable the menu bar and key combination for a specific type of client, enable file transfer, modify the display settings and the connection timeout.
110 HTML5 Top Menu Tile This tile enables you to chose the applications to display on level 1 or 2 on the Top Menu of your generated remote web session. You can also edit these applications in order for them to appear on a specific client type : pc, mobile, ios... on or all of them.
111 Saving typed values and Resetting to default ones When you close this window, all the values you typed and checked are saved. If you want to reset these values to values by default, click on the "Reset" button on the bottom. Generating the HTML Web Access page We advise you to try a "Preview" before generating a new HTML Web Access page. Once you are pleased by the preview, then you can click on the "Publish" button to generate and publish the page to your web server's root folder. You will be asked for a page name. If you want to overwrite your default page, use "index". In this case, the newly published web page will be accessible at:
112 How to completely customize the Web Access Page beyond the Web Portal capabilities? Overview By using the Web Portal you can customize Terminal Service Plus Web Access Pages in an extensive way. However, in some cases, this is not enough. In these cases, you can completely customize the Web Access Page, beyond the Web Portal capabilities, by modifying by yourself the Web Access Page generated by the Webmaster Toolkit. Warning, this documentation is intended only for skilled Web developers. Generating mandatory settings In order to include the mandatory settings in your Web Access page, we recommend that you start by generating your Web Access Page by using the Web Portal. Files location The Web Access Page will be generated in the "C:\Program Files (x86)\tsplus\clients\www" folder, for instance if you choose "index" as the page name, it will be the file named "index.html" in this folder. It is a standard HTML file, so you can use all your knowledge of HTML, JavaScript and CSS programming languages to develop your custom page. All the files inclusion are written relatively to the "C:\Program Files (x86)\tsplus\clients\www" folder. For instance, the main CSS styles file is located at "C:\Program Files (x86)\tsplus\clients\www\software\common.css", so it is included in the HTML Web Access Page file by the following line: <link rel="stylesheet" type="text/css" href="software/common.css" /> Minimal Web Access Page Starting from an HTML file generated by the Web Portal Preferences, we will reduce it down to a minimal Web Access Page. We advise you to use a text editor such as Notepad or Notepad++ (do not use Word). After our work, it will look like the screenshot below: First, you must keep everything that is between the HTML tags: - meta tags to force browsers to clear their cache -.js files inclusions - JavaScript settings declarations.
113 Then, you can reduce the content between the 'body' and '/body' HTML tags down to these few lines: <body onkeypress="checkkey(event);" onload="setall();" style="padding:20px;"> <form name="logonform"> <div><input type="text" name="login" id="editbox1" onblur="onlogintyped();" value=""/> </div><br/> <div id="tr-password"><input type="password" name="password" id="editbox2" onfocus="on PasswordFocused();" value=""/></div><br/> <div id="trdomain"><input type="text" name="domain" id="editbox3" value="" /></div><br/> <input id="buttonlogon" type="button" value="log on" onclick="cplogon();" /><br/> <br/> <div id="accesstypeuserpanel" style="margin:0;"> <label id="label_accesstypeuserchoice_html5" for="accesstypeuserchoice_html5"><inp ut type="radio" value="html5" name="accesstypeuserchoice" id="accesstypeuserchoice_html5" chec ked="checked"> HTML5 client</label> <label id="label_accesstypeuserchoice_remoteapp" for="accesstypeuserchoice_remotea pp"><input type="radio" value="remoteapp" name="accesstypeuserchoice" id="accesstypeuserchoice _remoteapp"> Windows</label> </div> </form> </body> Refresh the web page in your web browser, and you should get the minimal page of the above screenshot. We recommend you to clear your browser's cache after saving any changed file. Finally, it is now up to you! As long as you keep the calls to JavaScripts functions on specific events and the given identifiers (id="..."), your fully customized Web Access Page will be working fine!
114 Web logon page: How to close the Logon form after logon Overview On the Web logon page, when the user clicks on the "Log on" button, the chosen client (HTML5, JAVA or Windows) is opened in a new browser's tab. Sometimes, and more specifically when using the Windows client, you might want to hide the logon form to the user, for instance in order to avoid the user to click again on the "Log-on" button. Depending on the Internet browser used, you have two choices on how to change this default behavior. Both solutions requires you to modify a JavaScript file. Solution A: Closing the Logon tab - For Internet Explorer only In this solution, when the user clicks on the "Log on" button, the chosen client will be opened in a new browser's tab and the Logon tab will close itself. Depending on the Internet Explorer version, a small message window might be displayed to the user, asking him to confirm that he wants to close this tab. Edit the file "common.js" file which is stored into the "C:\Program Files (x86)\tsplus\clients\www\software" folder. We advise you to use a text editor such as Notepad or Notepad++ (do not use Word). Search for these lines: p = 'software/remoteapp.html'; window.name = " " + window.opforfalse; if (cpwin!= false) { cpwin.name = window.opforfalse; cpwin.location.replace(hostgateway + jwtsclicklinkbefore(getside(), p)); } else { window.open(hostgateway + jwtsclicklinkbefore(getside(), p), window.opforfalse); } And replace them by those lines: p = 'software/remoteapp.html'; window.name = " " + window.opforfalse; if (cpwin!= false) { cpwin.name = window.opforfalse; cpwin.location.replace(hostgateway + jwtsclicklinkbefore(getside(), p)); } else { window.open(hostgateway + jwtsclicklinkbefore(getside(), p), window.opforfalse); } window.open('','_parent',''); window.close(); We recommend you to clear your browser's cache after saving the changed JavaScript file. Solution B: Redirecting the Logon tab to another web page - For all browsers In this solution, when the user clicks on the "Log on" button, the chosen client will be opened in a new browser's tab and the Logon tab will automatically navigate to another web page. You are free to use any existing Internet address (URL) such as " or " or you can create your own web page by using "thankyou.html" as the URL and creating a file named "thankyou.html" in the "C:\Program Files (x86)\tsplus\clients\www" folder and putting HTML content in it. Edit the file "common.js" file which is stored into the "C:\Program Files (x86)\tsplus\clients\www\software" folder. We advise you to use a text editor such as Notepad or Notepad++ (do not use Word).
115 Search for these lines: p = 'software/remoteapp.html'; window.name = " " + window.opforfalse; if (cpwin!= false) { cpwin.name = window.opforfalse; cpwin.location.replace(hostgateway + jwtsclicklinkbefore(getside(), p)); } else { window.open(hostgateway + jwtsclicklinkbefore(getside(), p), window.opforfalse); } And replace them by those lines: p = 'software/remoteapp.html'; window.name = " " + window.opforfalse; if (cpwin!= false) { cpwin.name = window.opforfalse; cpwin.location.replace(hostgateway + jwtsclicklinkbefore(getside(), p)); } else { window.open(hostgateway + jwtsclicklinkbefore(getside(), p), window.opforfalse); } window.location.href = " We recommend you to clear your browser's cache after saving the changed JavaScript file.
116 Web Credentials Overview Terminal Service Plus Web Credentials is a state-of-the-art unique feature, which allows users to connect with just an address or a pin-code. With Web Credentials, you can secure your server's access with the address of a user, or with a simple pin-code generated by your business application. One of the great benefits of this feature is that these credentials ( or pin-code) are pure web credentials : the user will not know the Windows user account he is currently using, and he does not need to know a real Windows login/password to connect to his application! With Web Credentials, you will be able to define custom pure web credentials and match them to any existing Windows / Active Directory user account. The user will then be able to connect using these custom credentials, instead of the Windows / Active Directory ones. Managing your Web Credentials In the Admin Tool, open the "Web" tab and click on the "Web Credentials" tile.

117 The Web Credentials Manager will open and display this window: You can now create a new Web Credential by matching a custom login and (optional) password with an existing Windows / Active Directory user account, as show below: You can also edit and remove an existing Web Credential, thus changing or disabling any custom credentials you configured. Important Notes Please note the following limitations: In a Farm / Gateway configuration, Web Credentials only support the load-balancing mode (i.e. it does not work with serverassigned mode. In a Farm / Gateway configuration with the load-balancing mode, the Web Credentials must be defined on every server of the farm at the moment.
118 Web Autologon: connect from web without portal Overview Terminal Service Plus Web Portal allows users to connect to their remote servers from any web browser simply by using their Windows credentials. Sometimes however, you want to connect automatically when you launch a given URL address. This feature is called Web Autologon. With Web Autologon, you will connect using the settings (login, password, ports,...) specified in specific Terminal Service Plus files. Web Autologon using HTML5 client You will be able to connect directly by browsing to You can modify the connection settings by editing the following file with Notepad or any text editor (such as Notepad++ - do not use MS Word): C:\Program Files (x86)\tsplus\clients\www\software\html5\settings.js You will need to specify at least a login and a password in order to benefit from Web Autologon. You might need to refresh the page on your web browser after modifying this file. Web Autologon using RemoteApp Web Client You will be able to connect directly by browsing to You can modify the connection settings by editing the following file with Notepad or any text editor (such as Notepad++ - do not use MS Word): C:\Program Files (x86)\tsplus\clients\www\software\remoteapp2.js You will need to specify at least a login and a password in order to benefit from Web Autologon. You might need to refresh the page on your web browser after modifying this file.
119 Free and Easy-to-install SSL Certificate Overview Starting with version 9.20, Terminal Service Plus provides an easy to use feature to generate of a free and valid SSL certificate. In 3 mouse clicks you will get a secured valid certificate, renewed automatically, and configured automatically into Terminal Service Plus built-in web server. This feature uses Let's Encrypt to provide a free and secure SSL certificate for your HTTPS connections. Prerequisites Please ensure that your Terminal Service Plus server meet these requirements before using the Free Certificate Manager: You must use Terminal Service Plus built-in web server listening on port 80 for HTTP. This is required by Let's Encrypt domain ownership validation process. Your server's domain name must be accessible from the public Internet. This is required as well to validate that you are the real owner of the domain. You must run this program on the Gateway server or a Standalone server, not an Application server (except if your Application Server is accessible from the public Internet and has a public domain name). It is not possible to get a certificate for an IP address, be it public or private. It is not possible to get a certificate for an internal domain name (i.e. a domain which only resolves inside your private network). Free Certificate Manager GUI To open Terminal Service Plus Free Certificate Manager GUI, open Terminal Service Plus AdminTool, click on "Security", then click on "Free Certificate Manager" as shown in the screenshot below:
120 The Free Certificate Manager GUI will open and remind you about the prerequisites, as shown in the screenshot below: Please read carefully and check that your server meet all the requirements, then click on the "Next" button. Step 1: Enter your As shown in the screenshot below, you only need to enter a valid address. This will not be used to spam you. Actually it will not even be sent to Terminal Service Plus or any third party, except the certificate issuer: Let's Encrypt. They will only contact you if needed, according to their Terms Of Service. Enter a valid , then click on the "Next" button.
121 Step 2: Accept the Terms Of Service As shown in the screenshot below, you will be able to open Let's Encrypt Terms Of Service by clicking on the big button. To accept these Terms Of Service and continue, check the checkbox and click on the "Next" button. Step 3: Enter the server's Domain Name As shown in the screenshot below, you only need to enter your server's public domain name. This is the public Internet accessible Domain Name, something like gateway.your-company.com
122 As explained in the GUI, do not add a protocol prefix and/or a port suffix, just enter the clean domain name. The certificate will be generated for this domain name, and it will only be valid on a web page hosted at this domain name. If your users connect to your Web Portal using then you must enter "server1.example.com". Enjoy your Certificate! Terminal Service Plus Free Certificate Manager will now use all the data to connect with Let's Encrypt, validate that you really own the domain name you typed, and get the matching valid certificate. Once the program receives the certificate, it will automatically handle all the required file format conversions and softly reload Terminal Service Plus built-in web server in order to apply the new certificate to every new connection. The web server is not restarted and no connection is stopped. Certificate Renewal Let's Encrypt certificates are valid for 90 days. Terminal Service Plus will automatically renew the certificate every 60 days for safety. A check is done at every reboot of the Windows server, and then every 24 hours. You can manually renew your certificate by opening the Free Certificate Manager tool. It will display the domain name of the certificate and its expiration date, as shown in the screenshot below. To manually renew your certificate, just click on the "Next" button. Best Practices If no error occurs, Terminal Service Plus will renew the certificate automatically every 60 days. We recommend that you check every days that your certificate has been automatically renewed.
123 We also recommend that you backup at least every month the following folder and its sub-folders: C:\Program Files (x86)\tsplus\userdesktop\files\.lego This is an internal folder, containing your Let's Encrypt account private key, as well as the key pair of your certificate. Troubleshooting In case of an error, please contact support and them the following log file: C:\Program Files (x86)\tsplus\userdesktop\files\.lego\logs\cli.log This log file (and maybe the other log files in the same folder) should help our support team to investigate and to better understand the issue. If you want to restore a previously used certificate, go to the folder: C:\Program Files (x86)\tsplus\clients\webserver It will contain every "cert.jks" files used. These are the "key store" files and we never delete them, we only rename them with the date and time of their disabling. Error Codes Error 801: Free Certificate Manager was not able to register your Let's Encrypt account. Check your Internet connection. Check that your is not already registered at Let's Encrypt. Try again with another . Error 802 & Error 803: Free Certificate Manager could not retrieve Let's Encrypt Terms Of Service URL address. This is a non blocking error: you still can continue and accept Let's Encrypt Terms Of Service - be sure to read them from your browser first of course. Error 804: Free Certificate Manager was not able to validate your agreement to Let's Encrypt Terms Of Service with Let's Encrypt servers. Check your Internet connection. Try again. Error 805 & Error 806: Free Certificate Manager was not able to validate that you own the domain you entered during certificate creation (Error 805) or certificate renewal (Error 806). Check again all the prerequisites. Check your Internet connection. Check that your web server is listening on port 80. Check that you do not use a third-party web server such as IIS or Apache. Check that your domain name is accessible from the public Internet.
124 HTTPS & SSL Certificates Tutorial Terminal Service Plus HTTPS & SSL Features The Web Server included with Terminal Service Plus can manage HTTPS protocol, SSL encryption with either self-signed certificate or CA certificate delivered by a Certificate Authority (CA). The HTTPS protocol encrypts the communication between the client and the server. The unique certificate, generated from a 2048 Bits RSA key, includes the encryption key and the certification of the Server or the Domain Name on which the user is connected. The user is informed that the communication is encrypted and the Server or Domain name is certified by a Certification Authority. This information appears in the address bar of the navigator, as a green padlock. In this tutorial, we will learn how to install a certificate in the Terminal Service Plus Web Server, providing users the security of HTTPS, 2048 SSL encryption and Domain name certification. In order to receive an SSL Certificate we recommend you purchase it from a trusted vendor as GoDaddy or DigiCert. Please follow the this procedure to order and install your SSL on the TSplus Gateway / Server. Tutorial Content 1. Certificates and Certification process 1. Certification Process 2. The Certificates 3. Certificates Properties 4. Important notice about the Key Pair (Private Key) 2. How to do a CA Request and Get a Certificate 1. Reminder - Certification process 2. How to generate a CSR (Certificate Signing Request) 3. How to get a SSL Cert 4. How do I generate what I need for TSplus? 3. Importation of the Certificates 1. What we need for the importation 2. Importation of a Key Pair or Private Key 3. Importation of the certificates 4. Result of the importation of the certificate 5. Importation of the CA Reply 6. Restart the web Server 4. Trouble shooting 1. I received only one file (.crt or cer) which contains MydomainName.com Certificate 2. My private key is.pem. I cannot import my private key in Portecle 3. HTTPS errors 4. Notice concerning Terminal Service Plus and Microsoft IIS web server
125 Certificates and Certification process 1. Certification Process The certificates are delivered by the Certificates Authorities (CA). The process has 3 steps. a) The generation of a Key Pair or Private Key in standard RSA 2048 bits. This key will be used to generate a CA Request based on it. b) The CA Request generated is transmitted to the CA. It contains all the information that are necessaries to the provider to deliver a certificate (Country Name 2 letters code, State or Province Full Name, Locality Name, Organization Name e.g. Company, Organization Unit Name e.g. Section, valid address and Common Name (CN) e.g. MyDomainName.com). c) The Certificate authority verifies the information you transmitted and returns the certificate. It contains your certificate certifying your Domain name, and eventually also intermediates Certificates that are requisite to access to your certificate. The certificate also contains the CA Reply (the validated Private Key). Once you have the certificate, the CA reply, its key pair (private key), and the intermediates certificates, they must be imported in the key store handled by Terminal Service Plus. 2. The Certificates The delivery usually contains several files. Each file is a certificate. As said previously, the authority delivers the certificate of your Domain name and intermediates Certificates that are mandatory to access to your certificate. The common format file is.cer or.crt. These extensions are recognized by the OS which associates the certificate Icon. In our example above, we received 4 files (.crt). The first, second and third are intermediate certificates (CARoot, TrustCA, DomainValidationCA). The fourth is our Certificate which certifies our domain name MyDomainName.crt. They all have to be installed together. For a best understanding of how to proceed, let s examine the certificates. 3. Certificates Properties The properties of the certificate CA Root show its path. Each certificate has a path from the root to the certificate of your domain name.
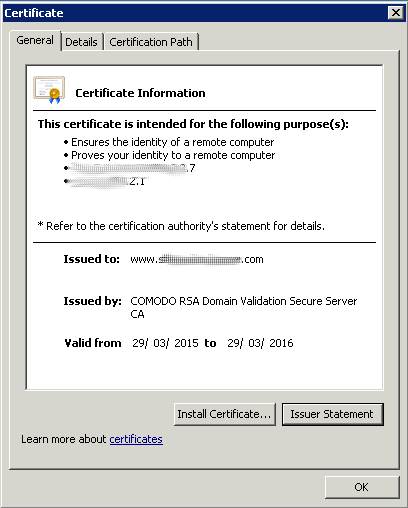
126
127 The properties of our certificate show all the general information about the certificate (purposes, addresses, issued to (CN), issued by and validity. What is important to notice is the certification path. It includes the entire path needed to access our certificate. It displays all the intermediate certificates that are included inside ours. This is a simple process. We must import this entire certification path, plus the Key Pair in the Terminal Service Plus Key store file. 4. Important notice about the Key Pair (Private Key) The key Pair is the RSA 2048 Bit key generated for the CA Request of the certificate. It has been generated either in the Portecle add-on we provide, or with another generator available like openssl, IIS, or online sites, CA provider s applications. You must have and keep this Private Key. It is either a flat file text format unsecured.pem or a secured format.p12 or.pfx. The Private Key generated is mandatory to be able installing correctly the certificates.
128 How to do a CA Request and Get a Certificate As a reminder, here is the certification process explained. This process can be done either in the Portecle add-on we provide, or with another generator available like openssl, IIS, or online sites, CA provider s applications. 1. Reminder - Certification process The certificates are delivered by the Certificates Authorities (CA). The process has 3 steps. a) The generation of a Key Pair or Private Key in standard RSA 2048 bits. This key will be used to generate a CA Request based on it. b) The CA Request generated is transmitted to the CA. It contains all the information that are necessaries to the provider to deliver a certificate (Country Name 2 letters code, State or Province Full Name, Locality Name, Organization Name e.g Company, Organization Unit Name e.g Section, valid address and Common Name (CN) e.g. MyDomainName.com). The main job consists to create the Request inquiring correctly a form which asks for all the information listed above. c) The Certificate authority verifies the information you transmitted and returns the certificate. It contains your certificate certifying your Domain name, and eventually also intermediates Certificates that are requisite to access to your certificate. The certificate also contains the CA Reply (the validated Private Key). Once you have the certificate, the CA reply, its key pair (private key), and the intermediates certificates, they must be imported in the keystore handled by Terminal Service Plus. 2. How to generate a CSR (Certificate Signing Request) You will need Microsoft IIS installed on a server or even your desktop. Simply Turn features on and off for Internet Information Services except for FTP (it can be removed later) 1) Open Internet Information Services (IIS) Manager 1.From Start, select Administrative Tools, and then select Internet Information Services (IIS) Manager. 2.In the Connections panel on the left, click the server name for which you want to generate the CSR. 3.In the middle panel, double-click Server Certificates. 4.In the Actions panel on the right, click Create Certificate Request. 5.Enter the following Distinguished Name Properties, and then clicknext: The following characters are not accepted when entering information:< > # $ % ^ * / \ ( )? & - Common Name The fully-qualified domain name (FQDN) or URL for which you plan to use your certificate (the area of your site you want customers to connect to using SSL). - An SSL certificate issued for is not valid for secure.coolexample.com. If you want your SSL to cover secure.coolexample.com, make sure the common name submitted in the CSR is secure.coolexample.com. - If you are requesting a wildcard certificate, add an asterisk () on the left side of the Common Name (e.g.,.coolexample.com or *.secure.coolexample.com). Organization The name in which your business is legally registered. The organization must be the legal registrant of the domain name in the certificate request. If you are enrolling as an individual, enter the certificate requester s name in the Organization field, and the Doing Business As (DBA) name in the Organizational Unit field. Organizational Unit Use this field to differentiate between divisions within an organization (such as Engineering or Human Resources ). City/Locality The full name of the city in which your organization is registered/located. Do not abbreviate. State/Province The full name of state or province where your organization is located. Do not abbreviate. Country The two-letter International Organization for Standardization- (ISO-) format country code for the country in which your organization is legally registered. 6.For Cryptographic service provider, select Microsoft RSA SChannel Cryptographic Provider. 7.For Bit length, select 2048 or higher, and then click Next. 8.Click, enter the location and file name for your CSR, and then click Finish.
129 3. How to get a SSL Cert 1) Open the csr which you have just saved with Notepad. Copy all of the text, including -BEGIN NEW CERTIFICATE REQUEST - and -END CERTIFICATE REQUEST - 2) Log into your preferred SSL Cert vendor and create or re-key a SSL Cert. Paste all of the text, including -BEGIN NEW CERTIFICATE REQUEST - and -END CERTIFICATE REQUEST - Complete your vendors instructions an wait until it is ready. When you download it please use the IIS option. When the new cert is ready, please download it. It will be in a.zip. After the download unzip it. Now that you have the cert what do you do? 1.Click Start, mouse-over Administrative Tools, and then click Internet Services Manager. 2.In the Internet Information Services (IIS) Manager window, select your server. 3. Scroll to the bottom, and then double-click Server Certificates. 4. From the Actions panel on the right, click on Complete Certificate Request... 5.To locate your certificate file, click. 6. In the Open window, select. as your file name extension, select your certificate (it might be saved as a.txt,.cer, or.crt), and then click on Open. 7. In the Complete Certificate Request window, enter a Friendly name for the certificate file, and then click OK. For Wildcard SSL certificates make sure your Friendly Name to matches your Common Name (i.e. *.coolexample.com) 4. How do I generate what I need for TSplus? 1) Download and install (for example) the DigiCert Certificate Utility ( a) click on SSL. b) click on Refresh. You will now see the cert that you have installed Highlight your cert:

130 Click on the bottom button Export Certificate : Ensure that Yes, export the private key and pfx file / Include all certificates in the certification path if possible are checked off. Next, Save the file in the folder with the certs that you have unzipped.
131 Importation of a SSL Certificate 1. What we need for the importation The intermediate certificates included in the path. One file per certificate (.crt or.cer). The certificate of our domain name. It contains the entire path, the certificate and the CA reply. One file (.crt or cer). The key Pair or Private Key used to do the request. (See section how to do a request for further information). The Terminal Service Plus web server keystore file (cert.jks). The add-on Portecle we provide to manage the keystore files. In our example, we suppose that we generated the key pair with Portecle in cert.jks (See section How to do a request). So we presume the generated key pair is already in cert.jks. If the key was created with another tool, it must be imported in cert.jks. 2. Importation of a Key Pair or Private Key Only if created with another tool than Portecle, otherwise, see directly chapter 3 below. Copy the file of your certification which contains.pfk and crt files to the TSplus Server, on this path: "\Program Files (x86)\tsplus\clients\webserver". We first make a copy of the file cert.jks to have a backup. We open the original file cert.jks (which password is 'secret'). Then right click on the key pair jwts, choose Delete and confirm. We do not need it as we will import ours. A Private Key in flat text format.pem cannot be imported in Portecle. You must have a.pfk or.p12 file secured format. Report to section Trouble Shooting of this document for more information about how to get a.pfk or p12 format. In Portecle, select / Tools / Import Key Pair. Choose the key and confirm.

132 Enter the password used to create the key (e.g. yourpassword). Confirm the key pair to import Enter the alias 'jwts'. This Alias is only the 'name' of the Key Pair, not the value taken for the domain name (e.g. mydomainname.com) Set the new password to 'secret' (remember, it has to be 'secret').

133 3. Importation of the certificates We start here with cert.jks which contains our RSA 2048 bit Key Pair used for the request. We must import the entire certification path, one by one.
134 Click on Tools / Import Trusted Certificate: Select the certificate to import. Confirm the importation of the trusted certificate:
135 Confirm you accept the certificate as trusted: Confirm the alias. The certificate is imported: 4. Result of the importation of the certificate Once we have imported all the certificates we received on the right path, Portecle displays them. We can notice that the list respects the order of the path attached to the certificate. As a result, we have the same display that was shown in the certificate properties, except the key pair that appears in Portecle above the certificate of the domain name.
136 5. Importation of the CA Reply The CA Reply is the Key Pair certified by the CA. It is contained in our domain name certificate (e.g. Certificate MyDomainName.com). This is the reason why it is important, when it is possible, to get a certificate with an exportable key. To import the CA Reply, click right on the key pair (jwts) and choose Import CA Reply. Follow the steps and confirm the importation. It is important to remember that the password of the Key Pair has to be 'secret'. If you have any doubt, right click on the key pair and choose set Password.
137 Enter CA Certs Keystore password. 6. Restart the web Server The certificates and the CA reply Key Pair have been imported. Our web server is now ready to use it. Save the file cert.jks (file / Save). The password has to be 'secret'. Restart the Terminal Service Plus Web Server. The certificate is now installed and shown in the address bar of the navigator when pointing In the followings section, we ll examine some trouble shootings.


138 Trouble shooting 2. I received only one file (.crt or cer) which contains MydomainName.com Certificate Look at the path in the certificate properties. If your certificate is at the root, then you don t have any intermediate certificate. You must only import the.cer ou crt you received. If the path contains others intermediates certificates, then they will be needed. You can export theses certificates included in yours and create a file by certificate. You can export each certificate listed in the path and get one file per certificate. Double click on the certificate you want to export. Then go to Details / Copy to file.
139 Click next. Default values are ok. Click next until you have to give a name. Confirm your exportation. The result is a file.cer containing only the certificate exported. Repeat this exportation for each level of the path. 3. My private key is.pem. I cannot import my private key in Portecle You can convert you.pem in pfx format with Tools or online sites. For example, on this site: You must have your Private Key and your certificate (e.g. MyDomainName.com) Browse to select the certificate to convert and the Private Key that goes with it. Current certificate type is PEM. Type to convert to is PFX (PKCS#12). As.pfx is a secured format, you must enter a password. You can choose whatever you want, but, at least, you will have to set it to 'secret'. So you should enter the password 'secret'. The result is a.pfx format that you will be able to import in Portecle. As we saw in the installation section, this Private Key imported in Portecle must receive a CA Reply. See section Installation / CA reply for further information.

140 4. HTTPS errors SSL error no cypher overlaps. The Private Key or the Key Pair has not been imported in cert.jks or is invalid. Others errors types give the same screen with another error code. Take a look at this code error. It concerns the certificate and something with it that goes wrong. It is usually because one of the fields of the certificate is not valid or blank. Have a look to your certificate Properties and Request. Verify that all the fields are correct. Report to section how to do a Request for more information. 5. Notice concerning Terminal Service Plus and Microsoft IIS web server Please refer to our documentation about using IIS with Terminal Service Plus. However, here is some important information about IIS and certificates: When using IIS, the certificates has to be installed in the keystore cert.jks. This must be done in the same way as if we were using Terminal Service Plus Web Server, and as described in the previous chapter. Don't bind the 443 HTTPS port IN IIS, as this is the Terminal Service Plus Web server that handles the HTTPS protocol, the certificate and its encryption. Not any bind has to be created on port 443. So, IIS must only have port 81 bound. We are free to use IIS Request Tool to create the Private Key and the CA Request. It is simple to export the Private Key from IIS (IIS/Default site/certificates) in the.pfx format and import it in cert.jks as described in the previous chapter.
141 Choosing your Ciphers Suites to enhance security Overview TLS/SSL, the security behind HTTPS, can use several different algorithms to secure, encrypt and authenticate a connection. The choice of the algorithm to use is decided by an agreement between the server and the client, depending on which algorithms are available on each side. A cipher suite is a named combination of authentication, encryption, message authentication and key exchange algorithms. Terminal Service Plus server can handle a lot of different ciphers suites. Some of them are more secure than others, but some old/legacy browsers might require relatively weak algorithms to connect. This is the reason why Terminal Service Plus let you choose the ciphers suites you want to enable. Of course, Terminal Service Plus also has an easy setting to disable the weakest algorithms, thus enhancing your connections security. Ciphers Selection GUI To open Terminal Service Plus Ciphers Selection GUI, open Terminal Service Plus AdminTool, click on "Security", then click on "SSL Ciphers Selection" as shown in the screenshot below:
142 The Ciphers Selection GUI will open, as shown in the screenshot below: Enabling/Disabling a Cipher Suite You can easily enable a cipher suite by checking its checkbox, and disable a ciper suite by unchecking it. When your selection is done, click on "Save". This will save your selection and reload the new configuration in Terminal Service Plus built-in web server. Your new ciphers suites selection is instantly applied for every new connection to your server. Recommended Ciphers Suites Selection We recommend to most administrator to use our recommended ciphers suites selection, by simply clicking on the "Disable weak ciphers" button and then the "Save" button. This action will disable all ciphers suites which are currently known to be weak. You can check with SSL Labs Online Testing Tool: without those weak ciphers suites you should get the maximum grade: A!
143 Run Windows or Java client under Proxy environment Usually the SSH package support HTTP(S) proxies and this should be sufficient to overcome most known proxies. However, there are existing very difficult cases, where the proxy environment cannot be properly recognized, is hidden from third party software or the target servers are behind reverse proxies. For such difficult cases the software contains Non-SSH solution called "Rescue mode". If you can establish HTML5 connection, then you can be sure this software will help you to establish native socket connections through Websocket(FF, Chrome, Opera, IE10 etc) or XHR (IE6-IE9). Be careful, some proxies allow Websocket/XHR traffic only via HTTPS layer, so use https address instead of http. If proxy does not ask for proxy authentication and you can access pages via browser: 1. Open http(s)://yourserver.com/software/html5/jwres/ 2. Wait for successful connection (and authorize Java execution if asked) 3. Click on the red text "open the link" to open the working web access page 4. Use Java/Windows client access as usual If proxy requests proxy authentication and you can access pages via browser: 1. Open http(s)://yourserver.com/software/html5/jwres/ 2. If the proxy requests for authentication for java applets, press "cancel" 3. Click on "Download LocalWebserver", and execute it after successful download, that will start local http server on port Click on "Force Applet loading from this will reload the page with loading of jars from local http server 5. Wait for successful connection 6. Click on the red text "open the link" to open the working web access page 7. Use Java/Windows client access as usual Enforce the use of web portal to connect to the server Starting from Terminal Service Plus version 6.60, you can block/disable any attempt to connect using mstsc.exe (or any RDP clients) over the open/redirected port (80 or 443). This feature only allows accesses from the Terminal Service Plus Web Portal and disables any other RDP connection on port 80/443. To activate this feature on a server, edit the file C:\Program Files (x86)\tsplus\userdesktop\files\appcontrol.ini and add/modify the following variable: [Security] Block_rdp_splitter=yes
144 Remote Connection from an iphone / ipad / Android device You can connect to your Terminal Service Plus server from any mobile device supporting the HTML5 technology, such as: an iphone an ipad an Android smartphone an Android tablet Edit the preferences for Mobile devices You can set up various different HTML5 settings for mobile devices or computers on the HTML5 client tab of the Web Tile:
145 Edit the HTML5 Top Menu On the HTML5 Top Menu tab, you can add applications that will be displayed on the first or second level of the Top Menu in HTML5: On level one, you can find the integrated HTML5 features: printing, file transfer and a clipboard. (For more information about these features, go to these pages: Using Clipboard, Virtual Printer for HTML5 and Using file transfer.) On this example, Notepad and Excel are published on level 2:
146 And can be found under the integrated features on the top menu into the HTML5 session: Terminal Service Plus built-in HTML5 client provides the user a completely new menu on tablets and mobile devices. With this new menu the user gets an easy access to mobile keyboard and right click, but also to file sharing and to our unique Universal Printing feature! If the mouse icon/action arrow on the top covers important area, that you want to click/touch, you can just touch and move the icon to other wished position on touch devices or move it with mouse on PC. You can also change the initial position (in percentages) in the file Clients\www\software\html5\settings.js imgswitchpos = 75; actionnewposition = 50; If you do not have a file named "settings.js" in the "C:\Program Files (x86)\tsplus\clients\www\software\html5" folder, then your TSplus version is older and this documentation does not apply. Please update your system first or contact support.
147 HTML5 Client: Using Gestures on mobile devices (Touch) Using screen area: 1. Easy touch on screen = mouse move to touched position and left mouse click 2. Fast double tap on screen = mouse move to touched position and left mouse double click 3. Touch and hold for one second on screen = mouse move to touched position and right mouse click 4. Touch and move outside of cursor area = scrolling the visible session frame (this is native browsers behavior for scrolling especially after pinch-zoom) 5. Touch in cursor area and move = mouse cursor moving only 6. Double tap inside cursor area and move = left mouse down and mouse moving Useful for moving window, moving elements, resizing. 7. Double tap on screen(outside of cursor area) and move finger down/up = middle mouse scrolling Useful for scrolling pages or view pdf's. 8. Pinch zoom with two fingers = zoom the RDP session frame (this is native browsers behavior) Using mouse pad area - additional functions in the middle point of mouse pad: 1. Easy touch in the middle = left mouse click 2. Double tap in the middle = left mouse double click 3. Touch and move in the middle = mouse move and mouse pad moving 4. Touch and hold for one second = right mouse click Keyboard mode on: 1. Easy touch on screen = focus lose, keyboard disabled (this is native browsers behavior) but this will fire mouse move and left mouse click. 2. Fast double tap = mouse move and left mouse click (without keyboard disabling) Useful to reposition the cursor, set focus on different character and stay at the same time in keyboard mode.
148 HTML5 Client: RDP session resolution on mobile devices The common screen resolution by most devices, especially mobile phones is 320x480, but that is obviously not sufficient to create the RDP session. Therefore the resolution was preset to 800 in width. The height of resolution gets recomputed by hidden browsers native logic. The higher the width the bigger the height. As an example, standard resolution is 320x480, now when you set the viewport to 800, the browser recomputes the value for height for example to 800x904, when you set the width to 1280, then it's 1280x1160 etc. The height and width depend on landscape/portrait view of your device, like 800x904 or 904x800 etc. Each browser can recompute it on its own logic to fit the rdp screen into the viewport of your device and may differ depending on the browser even when used on same device. If you set the height manually, then you will break the viewport ratio of your device and the final RDP session will be out of your port view, and to reach these areas you will have to scroll to wished positions. Therefore it is recommended not to set height manually, but let the device choose automatically the height. If you need more height, increase the width! By testing on mobile phone devices, the good value for width was 800. Though you must pay attention : the CPU's on most mobile phones are usually slow, therefore when you increase the height, it will increase the CPU load. On tablet devices the CPU's are faster, therefore it is recommended to set the width to higher value like 1280 and allow the device to recompute the value for height. Because some browsers like FireFox mobile do not allow the setting of viewport after page loading, this value was set fixed into the Clients\www\software\html5.html file: <meta name="viewport" content="width=800, maximum-scale=1.4"> For example change it to: <meta name="viewport" content="width=1280, maximum-scale=1.4"> to increase width and at same time height recomputed by browsers native internal logic. As a second example, changing it to : <meta name="viewport" content="width=1280, height=1400, maximum-scale=1.4"> would break viewport area and RDP session would not fit the screen.
149 HTML5 Client: What is the difference between Websockets and XHR? Websockets is the persistent connection that can be used to receive/send data without sequential order and without http header. Xhr-polling creates new request with http header and waits for answer with http header, also sequential order. Doing so, XHR data flow always looks like this: HTTP_HEADER_REQUEST -> HTTP_HEADER_ANSWER HTTP_HEADER_REQUEST - > HTTP_HEADER_ANSWER and so on, also before the data can be downloaded, it must be requested with HTTP_HEADER, therefore its name: xhr-polling. Websockets data flow may look like this: FRAME_DATA_SEND FRAME_DATA_SEND FRAME_DATA_RECEIVE FRAME_DATA_SEND FRAME_DATA_RECEIVE FRAME_DATA_RECEIVE Also it is random data sending/receiving without special sequential order and without any http header data. That makes the usage with reverse proxies impossible due to the lack of Websockets support by most known reverse proxies; but half of the xhr transport may work with Apache reverse proxy.
150 HTML5 Client: Supported Browsers If your browser shows red warning on start by using HTML5 client It means that your browser does not support Websockets or your browser does not support Canvas. Such browsers that do not support these technologies are IE6, IE7, IE8, IE9 and need FLASH to emulate these features. Browsers supporting Websocket and Canvas Browsers Canvas Websocket FireFox Full Full starting by version 4 Chrome Full Full in most known versions on PC's Opera Full Full in most newest versions IE6 Flash Flash (emulated and no proxy support) XHR (with proxy support) IE7 Flash Flash (emulated and no proxy support) XHR (with proxy support) IE8 Flash Flash (emulated and no proxy support) XHR (with proxy support) IE9 Flash (emulated and no proxy support) XHR (with proxy support) IE10 Full Full Android native Full XHR Opera mobile Full Full in most newest versions Firefox mobile Full Full Safari mobile Full Full in most newest versions up ios4, else emulated via XHR Also see: What's the difference between Websockets and XHR? If your browser automatically reloads the pages to HTTPS address It means that Websockets transport is not supported. This is the case on several Android native mobile browsers. It is due to the fact that the browser automatically switches to XHR transport. But because this transport layers on long distances with HTTP protocol, each request creates new connection. It is very slow and unstable to create new connections (up to 20 new connections per second), therefore to avoid this instability the program is conceived so that the page reloads automatically to HTTPS address to enforce HTTPS connection. Physically you also get mostly persistent secured connection and much more stable on long distances. So the logic of browser reuses already established SSL connection instead of creating a new connection like by the use of HTTP protocol. This behavior can be changed by the following option on the setting.js file located in the TSplus program folder under this path: Clients\www\software\html5\settings.js: forcesslforxhr = false; But it is absolutely not recommended to disable the use of SSL in XHR mode. *If you do not have a file named "settings.js" in the "C:\Program Files (x86)\tsplus\clients\www\software\html5" folder, then your TSplus version is older and this documentation does not apply. Please update your system first or contact support.*
151 HTML5 Client: How to maximize the browser window Overview The RDP protocol does not allow to resize while connected without a reconnection. Please note that you will get the best experience possible from Terminal Service Plus HTML5 client by connecting with a maximized browser. However, if you want to force the browser window to be as big as possible, you can try to "force" the HTML5 window to open with the maximum size (but not as a "maximized" window, due to internet browsers security limitations). Maximizing the browser window You will have to modify the file "Clients\www\software\common.js" located in your Terminal Service Plus directory. We advise you to use a text editor such as Notepad++ (do not use Word). In order to have a browser window which uses all the screen, you will have to modify the line(s) with "window.open" in it, and add the following text: "screenx=0,screeny=0,left=0,top=0,fullscreen=yes,width="+(screen.availwidth-5)+",height="+(screen.availheight-(55)) This allows IE/Chrome/Firefox/Safari to open the window with a screen size (minus Windows bar). Unfortunately it is not possible to force a web browser to "maximize" the window in a "fullscreen" Windows meaning. Open the file and search "window.open(" Then add the new at the end before the brackets, for example: window.open(hostgateway + jwtsclicklinkbefore(getside(), p), window.opforfalse); will become: window.open(hostgateway + jwtsclicklinkbefore(getside(), p), window.opforfalse, "screenx=0,screeny=0,left=0,top=0,fullscreen=yes,width="+(screen.availwidth-5)+",height="+(screen.availheigh t-(55))); And again: tmpwin = window.open(p, '_blank'); //Chrome needs _blank will become: tmpwin = window.open(p, '_blank', "screenx=0,screeny=0,left=0,top=0,fullscreen=yes,width="+(screen.availwidth- 5)+",height="+(screen.availHeight-(55))); //Chrome needs _blank And again: success = window.open(p, k); will become: success = window.open(p, k, "screenx=0,screeny=0,left=0,top=0,fullscreen=yes,width="+(screen.a vailwidth- 5)+",height="+(screen.availHeight-(55))); And finally : cpwin = window.open("about:blank", n); will become: cpwin = window.open("about:blank", n, "screenx=0,screeny=0,left=0,top=0,fullscreen=yes,width=" +(screen.availwidth-5)+",height="+(screen.availheight-(55)));
152 HTML5 Client: Parameters in URL address When using Terminal Service Plus HTML5 client to connect to a remote server, you can specify several parameters in the URL address to override default parameters, such as: user login user password program to run startup directory for the program to run command line for the program to run Run a Specific Application Here is an example of a full URL address to open a remote session for user "john" with password "demo" and by starting standard notepad upon session opening: 2\\\\notepad.exe&startupdir=c:\\\\windows\\\\system32¶ms= Please note that in the URL address all slashes characters must be repeated 4 times. You do not have to specify all these parameters at the same time: the parameters not specified will have their default configured value. Connect with Web Credentials If you want to use a Web Credential to connect, you can pass it in an URL by adding an "@" before the Web Login. Here is an example of a URL address to open a remote session for Web Credentials "1234" with password "demo":
153 Web logon page: How to open the HTML5 client in the same tab Overview On the Web logon page, when the user clicks on the "Log on" button, the HTML5 client is opened in a new browser's tab. You can change this behavior and have the HTML5 client to open in the same browser tab as the Web logon page by modifying a JavaScript file. Modifying the common.js file Edit the file "common.js" file which is stored into the "C:\Program Files (x86)\tsplus\clients\www\software" folder. We advise you to use a text editor such as Notepad or Notepad++ (do not use Word). Search for these lines: if (cpwin!= false) { window.name = " " + k; cpwin.name = k; cpwin.location.replace(p); } else { window.name = " " + k; var success = false; if(window.open && window.navigator && navigator.useragent && navigator.useragent.match(" C rios")) { tmpwin = window.open(p, '_blank'); //Chrome needs _blank tmpwin.name = k; success = tmpwin; } else if(window.open) { success = window.open(p, k); } And replace them by those lines: if (cpwin!= false) { window.name = " " + k; location.href = p + '#'; cpwin.close(); cpwin = false; } else { window.name = " " + k; location.href = p + '#'; var success = true; Modifying the common_applications.js file If you are using Terminal Service Plus Web Applications Portal feature, then you need to edit a second file. Edit the file "common_applications.js" file which is stored into the "C:\Program Files(x86)\TSplus\Clients\www\software" folder. We advise you to use a text editor such as Notepad or Notepad++ (do *not* use Word). Search for these lines: if (childurl!= '') { child = window.open(childurl, childname); childrenwindows[childrenwindows.length] = child; } And replace them by those lines: if (childurl!= '') { location.href = childurl + '#'; } We recommend you to clear your browser's cache after saving the changed JavaScript files.
154 HTML5 Client: Using Clipboard The clipboard can be found on the HTML5 Top menu, with this icon: Most browsers except older MSIE browsers do not support the direct clipboard reading and writing due to security reasons. To copy the text from session to clipboard use Ctrl+C and to insert the text from clipboard use Ctrl+V. But pay attention when you copy the text with Ctrl+C, wait some time before releasing the pushed Ctrl+C buttons, because if the requested clipboard text arrives after you release this key combination, the text will not be added to your environment clipboard. This way uses a native browser clipboard copy support initiated by Ctrl+C. Alternatively you can use the clipboard menu to copy from and to insert the text into RDP session clipboard. There you can just insert the text into RDP session clipboard or add it to clipboard and auto-initiate Ctrl+C on RDP session side to insert text. The clipboard menu can be opened via action menu or Shift + F11. When you copy the clipboard with mouse inside a RDP session, the text gets sent to browser and as soon as you go out of browser focus, the clipboard menu appears automatically to inform you that there was a clipboard text and that you did not add it to your clipboard environment. To avoid this behavior set the following line on the settings.js file on the Clients folder, by default, the path is: C:\Program Files(x86)\tsplus\Clients\www\software\html5\settings.js : openonclipblur = false; If you do not have a file named "settings.js" in the "C:\Program Files (x86)\tsplus\clients\www\software\html5" folder, then your TSplus version is older and this documentation does not apply. Please update your system first or contact support
155 HTML5 Client: Using File Transfer Use the top menu for file transfer. Unlike real RDP session the browsers do not allow to access the hard drives directly, the file transfer is emulated. The sub-folder of gateway gets mounted as a WebFile device into your RDP session. Inside the RDP session you can access it via Explorer by clicking on "WebFile" or call "\tsclient\webfile" directly:


156 There are three different ways to transfer a file: From the local computer to the server: From the server to the local computer:
157 The file manager which enables you to transfer files from the local computer to the server, with an history of the transferred files:
158 On the browser side the files are showed inside the browser's list menu. It can be opened via action menu or with Shift + F12. When you copy files with Explorer into the WebFile folder, this triggers automatically the event about the creation of a new file in the WebFile folder and the browser menu opens/refreshes automatically to show the new file: When using a custom folder, make sure this folder exists on client and server sides. You can set the upload/download destination folder on the Web Portal preferences tile on the web tab of the Admin Tool:
159 If you want to avoid this behavior, set the following line on the setting.js file which path is by default: C:\Program Files (x86)\tsplus\clients\www\software\html5\settings.js : dropboxonnewfile = 0; Additionally you can set: sharedfolder = "yes"; to show shared folder and share your files with other users (disabled by default). If you do not have a file named "settings.js" in the "C:\Program Files (x86)\tsplus\clients\www\software\html5" folder, then your TSplus version is older and this documentation does not apply. Please update your system first or contact support
160 HTML5 Client: Using two languages First, you need to decide which language you want to have by default. The browsers actually never report set keyboard language, the browser reports only language of browser, where the program can assume, which language should be preferred. For example if your browser is in French, then you get French as standard language, in German language you will get German and so on. If you accidentally install English version of browser instead of your language, then you will get english as auto-recognized language. Therefore to avoid this, you can force your language on the page Clients\www\index.html, as example for german: var lang = 'de_de'; Remember, changing this variable inside Clients\www\software\html5.html will not affect the language, since this variable gets overwritten by parent window, where you opened this page from. On your HTML5 installation inside Clients\www\software\html5\languages\ you will find known languages. Inside RDP session you should switch to wished language, the program will then automatically switch the used translation table. Since it is not native client, but used via browser, you need to synchronize your local keyboard language with remote RDP language manually. That means, if you set German inside RDP session, you have to switch to German on your local system to be able to type specific German chars. If you set to English inside RDP session, then switch to English on your local system too, and vice versa. If you notice some problems with keyboard input, please first check that the option in Clients\www\software\html5\settings.js: preferchars = true; is really set to true and not false. If you do not have a file named "settings.js" in the "C:\Program Files (x86)\tsplus\clients\www\software\html5" folder, then your TSplus version is older and this documentation does not apply. Please update your system first or contact support.
161 HTML5: Changing language to Chinese You need Windows 7 Enterprise or Ultimate / Windows 8 Enterprise or Professional to use multi-language on one system. You can install every language on the system if you need. You could publish a language applet for users to change their own O/S language of UI and add IME (Input Method Editor). For Windows 7: control /name Microsoft.RegionAndLanguage For Windows 8: control /name Microsoft.Language Complete List:
162 Optional : this is how to restrict the Control Panel behavior for users by GPO : Users can change O/S language of UI after logon system. (Users have to logout and logon again to take effect after change this setting).
163 The user have to select Chinese IME first to input Chinese chars.
164 Gateway Feature Terminal Service Plus Gateway has a lot of benefits. It allows you to assign servers to users or groups. Doing so, your users will be able to access the servers that are assigned to them. You will also be able to configure the load balancing for your farm of TSplus servers. This feature is useful if you plan on having a large number of users. Gateway Tab Open the Admin Tool and click on the Gateway tile: Overview A server can be set as the Gateway of your farm of servers. You can Add/Edit/Remove servers from your farm. You can assign one or several servers to a user / a local group / an Active Directory group. According to his credential, the user will be able to choose which server he wants to access in the list of servers assigned to him. If the farm is within a Domain, the Gateway will use his AD credentials and the user will connect with Single Sign-On (SSO). Otherwise, he must have the same local credentials on each server.
165 Managing the Servers of the Gateway To manage the servers please click on the "Servers list Management" tile. The window "Add, Edit or Remove Servers from your Gateway Portal" will open: When you click on the "Add a new Server" button you can then add a Terminal Service Plus Server by Display name and IP address (you can type an IP or a domain name, without a port number): When you are done, please click the "Save" button to add the server to the Servers list. To remove a server from the Servers list, click on the server you want to remove and then click on the "Remove Server" button. After a confirmation message, the server will then be removed from the list. You can also edit a server by selecting it on the list and clicking on the "Edit Server" button. The "Manage Users" button is explained in Managing Gateway Users.
166 TSplus Farm of Servers Architecture There are 2 options to deploy a TSplus farms of servers: Option 1: All your servers have public IP addresses and can be reached from the Internet. OR Option 2: Only the Gateway Portal can be reached from the Internet. The Gateway is providing a Reverse Proxy Role. In both options: Every server has the same TSplus configuration. Every server has the same HTTP/HTTPS ports. To publish a new Application just add it the AdminTool on the Gateway Portal. Of course, make sure that this application is installed on the targeted Application Servers. All Web Access types are available without any specific configuration: RemoteApp and HTML5 clients. In the Admin Tool, click on the Web tile, then click on the Web Portal Preferences tile. Check the "Generate a Gateway Portal enabled Web Page" box, then click on "Save".
167 Option 1 - All Servers have their own Public IP Address and can be reached from the Internet. This is the recommended architecture to use Terminal Service Plus Gateway. This architecture follows best practices and allows the IT Administrator to industrialize its environment: Every server has the same Terminal Service Plus configuration Every server has the same HTTP/HTTPS ports Deploying a new Application server is only a matter of minutes (just add the server to the farm in the AdminTool on the Gateway server) With this architecture, all access types are available without any specific configuration: RemoteApp and HTML5 clients.
168 This architecture is described in the diagram below: * * * Option 2: Only the Gateway Portal can be reached from the Internet and includes a Reverse Proxy Role. Terminal Service Plus Gateway can also be set up with only 1 Public IP Address. The Gateway redirects any external connection request to any available server. If you do not use the load balancing feature, users will connect to their assigned server(s).
169 This architecture is described in the diagram below: For more information about the Reverse Proxy Role, see the Reverse Proxy Feature documentation. TSplus farm of Servers without Load Balancing You can set a range of Application Servers. Each of them with different types of applications (Accountancy Server, Payroll Server, Office Automation Servers ). In such deployment, the Administrator will enter a list of servers and will assign servers to users. For example, the user John will be allowed to access to the 3 servers, but the user Paul will have access only to the Payroll Server. To setup this kind of Farm, please read: Managing Gateway Users. Load Balancing and Failover : When the load balancing is activated, it is no more the user who select the Server where he is going to open a session. It is the TSplus load balancer which checks which server is less loaded and will assign it to the incoming user request. To setup a load balanced Farm of Servers, please read this page.
170 Managing Gateway Users Managing Users of the Gateway To manage the users please click on the "Assign Servers to Users" button. The window "Assign Servers per User or per Groups" will open: To assign a server to a user, simply click on the user in the "Users and Groups" list and then check the server's checkbox in the "Servers" list. To remove a server from a user, simply click on the user in the "Users and Groups" list and then uncheck the server's checkbox in the "Servers" list. When everything is set up and you are ready to exit, please click on the "Save" button in order to apply your changes.
171 Notes The server must be added first to assign it to a user. To add a server, click on the "Manage Servers" button to open the Gateway Servers Management tool. The example above is for a Domain or a Workgroup. If you use a workgroup the users logins must be the same on each Terminal Service Plus server that you assign Example of what you will get when users connect to the Gateway John can select the server. He wants and he will get an auto-logon to this server: If he types a wrong password, John will have to retype his password:
172 Julia has a different list of possible servers: Someone tries to hack the Gateway. He does not see any server and the Gateway blocks his web access.
173 Load Balancing Feature Pre-requisites Using this feature, you will be able to manage a load balanced environment. It means that the load of all your users will be distributed between your servers. The workload will be shared between all the servers of your farm. Load Balancing enables to use an unlimited number of servers with load balancing. This very powerful and advanced capability is to be used when a large number of users/servers has to be deployed. Usually we recommend using one server for 50 concurrent users. For standard commercial application written in VB, C, C++, Delphi or Uniface you can go up to 100 concurrent users especially if you decide to use XP 64 bits which, according to our experience, tops most operating systems delivered by Microsoft. XP or Windows 7 are much more stable operating systems. For W7, we recommend to use the 64 bits version. Generated Clients and Web Access There are two ways to connect to a Load Balanced cluster: Using a Generated Client(executable program, created by the Portable Client Generator) Using a Gateway Portal Web Access by activating it on the Web Portal Preferences window. Please note that the Gateway Portal is only enabled in Terminal Service Plus Enterprise edition. This page describes how to use the Load Balancing Manager with a Gateway Portal. Gateway and Application Server Roles The Load Balancing Manager tool must be used on the server having the Gateway role. Using it on another server of the load balanced cluster will have no effect on the load balancing.
174 Load Balancing Main Window The main window displays a lot of data and allows you to configure your Gateway Portal Load Balancing. It lists all the servers in your Load Balanced server farm, and allows you to add a new server (by clicking on the "Add a new Server" button) or displays an existing server (by clicking on it). It also allows you to enable, disable and configure the Load Balancing (more on this below). Enabling/Disabling Load Balancing On top of the Gateway Portal Load Balancing window, you will see a big button: This button display the current state of the Load Balancing. If you click on it, it will enable or disable the Load Balancing depending on its current state. Here is the button when the Load Balancing is Disabled. A click on it will activate it, and disable the Users/Servers Assignment. Here is the button when the Load Balancing is Enabled. A click on it will deactivate it, and enable the Users/Servers Assignment.
175 How does Load Balancing choose a server? When Load Balancing is enabled, the user will be sent to the less loaded server at the time of his connection. Configuring the Computation of Servers' Loads To determinate which is the less loaded server, the load of every server is computed using a weighted average between several performance indicators: number of connected users processor usage memory usage disk usage You can modify the weight (importance) of these indicators by using the following sliders: Using these sliders, you will be able to fine-tune the Load Balancing, and to optimize it to your own needs. For instance if your users launch a business application with big memory requirements, it might be a good idea to increase the impact of the RAM in the load computation using the "Memory" slider. You can also reset these values by clicking on the "Back to Default Settings" button. How is Server's Load computed? The load of each server is computed when needed in order to decide on which server the user must be sent. For this computation, we use a weighted average between 4 hardware metrics. The 4 sliders allow you to give more (or less) weight on each of these metrics, which are: Users : number of connected users CPU : percentage of non-idle processor time Memory : percentage of used memory I/O : percentage of non-idle disk time For example, if you put the "Memory" slider on its right side and all the other sliders on their left side, the load of each servers will be computed using almost only the percentage of used memory - and your users will be sent to the server having the most available memory. When a slider is completely on the left, the weight used in load computation will be 1. When a slider is completely on the left, the weight used in load computation will be 100. Moreover, the load of a given server depends on the ratio [ used resources / total resources ] ; so if a server A is twice as powerful as a server B, twice more users should be sent to server A than to server B (all other things being equals).
176 Adding a new Server To add a new server, simply click on the "Add a new Server" button. The following window will be displayed: The "Display Name" is the title that will be shown to your users on the Web Access HTML page. It is supposed to be more userfriendly than a technical value (such as an IP), for instance "US Server" or "Blue Zone". When using the Gateway Portal Load Balancing, the "RDP Port" will not be used. It is only used when connecting using a Generated Client. We advise you to keep the default setting ("Same as web"). Editing an existing Server To modify an existing server, simply click on the "Edit" button of the server you want to update. The following window will be displayed: The progress bar shows the current load of the server. It also confirms you that the server is well configured and can be contacted by the Gateway. Load Balancing using a Connection Client You are not using the Reverse Proxy role of the Gateway (default case) This is the default case if you just installed Terminal Service Plus. In this case, if you want to generate a Connection Client to connect to a given Application server, then: Do not check the "Use Gateway" checkbox on the on the Gateway Portal tab of the Connection Client Generator Use the public IP address or hostname of your Application Server directly in the "Server" field. However, if you want to generate a Connection Client to connect to the less loaded server and use Load Balancing, then: Check the "Use Gateway" checkbox on the Connection Client Generator Use the public IP address or hostname of your Gateway Server directly in the "Server" field.
177 You are using the Reverse Proxy role of the Gateway ("/~~" in URL) See this page. Activating the Load Balancing for a Gateway Portal access Activating Load Balancing is really easy. It only takes three steps: 1) Generate a Web Access page with the option "Generate a Gateway Portal enabled Web Page" checked, by clicking on the Web Portal Preferences tile of the Web tab:
178 2) Enable Load Balancing by clicking on the "Enable/Disable Load Balancing" button (in the Load Balancing Manager, located in the Gateway tab of the AdminTool):
179 3) Open a browser and navigate to the Web Access page you generated in step 1 (by default: After typing a login, you will see that the Web Access page choose the less loaded server of your farm:

180 Using the Reverse Proxy Server Feature This feature is available in the TSplus Enterprise Edition. The Reverse Proxy system acts as an intermediary for its associated servers to be contacted by any client. The advantage of using a reverse-proxy is simple: you will no longer need to create as many port redirection rules as your number of TSplus servers. In TSplus, it provides an unique access point to a farm of load-balanced TSplus servers: This unique access point will be your Gateway Portal Server. Since this server is going to be accessed remotely, you will need to set up one port redirection rule on your router, including the http or https ports depending on your preference (80 being the default port for http and 443 for https). Click on the Gateway tile then click on the "Reverse-Proxy Server Role" tile:

181 The Gateway Public IP must be set with a fixed valid IP address. Select Http or Https for your preferred connection method, the servers of your farm must be able to communicate with each other on either port 80 or 443, depending on which connection method you use. It is also important that your windows firewall don't block these ports. Enable the load-balancing feature if you wish to load-balance your farm. If you do not activate this feature, you will need to assign the servers of your farm to the Users or Groups. More information on this subject can be found here. Click on "Add an Application server" and fill in the Display Name for your server, its hostname in the Internal Name field and its Private (LAN) IP address, then click on "Save".
182 Once you completed your list of servers, click on "Save Gateway Reverse-Proxy settings" and restart the Web services located in the Admin Tool's Web tile. Reverse-Proxy and Generated Connection Clients You can generate a Connection Client which will connect to an Application Server through the Reverse-Proxy Server. To do so, assuming that your gateway has public IP and your backend server has internal name "srv2", then use the special URL :443/~~srv2 in the server address field of the Connection Client Generator. For example:
183 Don't forget to also check this box: Unless you want to connect to a given Application server. Using servers behind Reverse Proxy It is possible to use servers behind reverse proxies via xhr-polling, with some limitations. As described, Websockets are not part of HTTP protocol, even if first http request looks like http request, actually, it isn't, therefore most known reverse proxies do not support Websockets and drop many important areas of first Websocket request. If you know that the server is behind reverse proxy, disable Websockets by setting this option in Clients\www\software\html5\settings.js : disablewebsocket = true; That will enforce the usage of XHR-polling and avoid time delay when connecting. If you do not have a file named "settings.js" in the "C:\Program Files (x86)\tsplus\clients\www\software\html5" folder, then your TSplus version is older and this documentation does not apply. Please update your system first or contact support. Please note that the usage of XHR-polling is not as stable as Websockets due its connection nature. The other limitation using Xhr polling via reverse proxy is the poor support on files upload. While working with XHR in direct connection, done for example via Apache reverse proxy, Apache can accidentally interrupt the file's upload.
184 How to mount a logical drive within a TSplus session This tutorial will cover the following aspects: How to deploy a logon script and have multiple logon scripts scenarii. Mounting a specific folder within a session from client or server side. If you wish to publish a folder on a logical virtual drive for your users, just follow this procedure: Prior to creating the script, open windows explorer and click on "Folder and search options". Then, click on the view tab and uncheck the box "Hide extensions for known types":

185 Create a text document and modify the extension by naming it "logon.bat": Inside the file, enter for example this command to publish the local Documents folder: "subst Y: tsclient\c\users\%username%\documents" Then, on the start menu, type in gpedit.msc on the search taskbar. We are going to use local policy so that every user connecting to this server launches the script. Go into the user's configuration menu, then into the Windows settings, and finally, into Scripts (Logon/Logoff) Double click on the Logon script, then click on "Add", then on "Browse". Copy your logon.bat script into the path given by the Policy Editor, i.e.: "C:\Windows\System32\GroupPolicy\User\Scripts\Logon" You can copy this logon.bat file in C:\ProgramData if you want this script to be executed for all of your users. If you need a specific logon script for each user then copy the script in C:\Users\Username\AppData\Roaming Now how do we make this Y drive appear in the user session? There many ways to achieve this.you can create a new application within the admin tool and assign it to your users, doing so the shortcut will appear in the session:
How To Use Tsplashbox On A Pc Or Mac Or Mac (For A Pc) With A Windows 7 Computer (For Mac) Or Mac) With Tsplatro (For Pc) Or Ipad (For Windows) With An
 With A Windows 7 Computer (For Mac) Or Mac) With Tsplatro (For Pc) Or Ipad (For Windows) With An") TSplus User Guide Administration and Configuration for TSplus Remote Desktop Software TSplus - www.terminalserviceplus.com Page 1 Contents TSplus User Guide... 1 Administration and Configuration for TSplus
TSplus User Guide Administration and Configuration for TSplus Remote Desktop Software TSplus - www.terminalserviceplus.com Page 1 Contents TSplus User Guide... 1 Administration and Configuration for TSplus
User Guide TSplus. background. amazing Drag & Drop wizard, Per user or Per Groups wizards
 User Guide TSplus TSplus product range is the greatest offering of the world market today! It is a powerful and the easiest way to publish any of your Windows application on a LAN or a WAN. Features Benefits
User Guide Terminal Service Plus
 User Guide Terminal Service Plus Terminal Service Plus product range is the greatest offering of the world market today! It is a powerful and the easiest way to publish any of your Windows application
Terminal Service Plus Documentation. TSplus Documentation. General informations. Fundamental Features. Remote Printing
 Terminal Service Plus Documentation Video Tutorials:Terminal Service Plus Essential Video Tutorials AdminTool Administrator Guide : Click on AdminTool tiles and display its administrator guide User Guide
ThinPoint Quick Start Guide
 ThinPoint Quick Start Guide 2 ThinPoint Quick Start Guide Table of Contents Part 1 Introduction 3 Part 2 ThinPoint Windows Host Installation 3 1 Compatibility... list 3 2 Pre-requisites... 3 3 Installation...
Setting up VPN and Remote Desktop for Home Use
 Setting up VPN and Remote Desktop for Home Use Contents I. Prepare Your Work Computer... 1 II. Prepare Your Home Computer... 2 III. Run the VPN Client... 3 IV. Remote Connect to Your Work Computer... 4
Setting up VPN and Remote Desktop for Home Use
 Setting up VPN and Remote Desktop for Home Use Contents I. Prepare Your Work Computer... 1 II. Prepare Your Home Computer... 2 III. Run the VPN Client... 3-4 IV. Remote Connect to Your Work Computer...
Mercy s Remote Access Instructions
 Mercy s Remote Access Instructions ~~~~~~~~~~~~~~ Section A Windows 2000 / XP ~~~~~~~~~~~~~~ I. Install Meditech............................... A1 II. Install VPN Client............................. A3
Hosting Users Guide 2011
 Hosting Users Guide 2011 eofficemgr technology support for small business Celebrating a decade of providing innovative cloud computing services to small business. Table of Contents Overview... 3 Configure
Important. Please read this User s Manual carefully to familiarize yourself with safe and effective usage.
 Important Please read this User s Manual carefully to familiarize yourself with safe and effective usage. About This Manual This manual describes how to install and configure RadiNET Pro Gateway and RadiCS
Remote Application Server Version 14. Last updated: 25-02-15
 Remote Application Server Version 14 Last updated: 25-02-15 Information in this document is subject to change without notice. Companies, names, and data used in examples herein are fictitious unless otherwise
Remote Application Server Version 14. Last updated: 06-02-15
 Remote Application Server Version 14 Last updated: 06-02-15 Information in this document is subject to change without notice. Companies, names, and data used in examples herein are fictitious unless otherwise
Configure thin client settings locally
 This chapter contains information to help you set up your thin client hardware, look and feel, and system settings using the Control Center. Tip While it is not recommended to use dialog boxes for configuring
Sharp Remote Device Manager (SRDM) Server Software Setup Guide
 Server Software Setup Guide") Sharp Remote Device Manager (SRDM) Server Software Setup Guide This Guide explains how to install the software which is required in order to use Sharp Remote Device Manager (SRDM). SRDM is a web-based
Sharp Remote Device Manager (SRDM) Server Software Setup Guide This Guide explains how to install the software which is required in order to use Sharp Remote Device Manager (SRDM). SRDM is a web-based
User Manual. Onsight Management Suite Version 5.1. Another Innovation by Librestream
 User Manual Onsight Management Suite Version 5.1 Another Innovation by Librestream Doc #: 400075-06 May 2012 Information in this document is subject to change without notice. Reproduction in any manner
2X SecureRemoteDesktop. Version 1.1
 2X SecureRemoteDesktop Version 1.1 Website: www.2x.com Email: info@2x.com Information in this document is subject to change without notice. Companies, names, and data used in examples herein are fictitious
Installation and Deployment
 Installation and Deployment Help Documentation This document was auto-created from web content and is subject to change at any time. Copyright (c) 2016 SmarterTools Inc. Installation and Deployment SmarterStats
How To Use Senior Systems Cloud Services
 Senior Systems Cloud Services In this guide... Senior Systems Cloud Services 1 Cloud Services User Guide 2 Working In Your Cloud Environment 3 Cloud Profile Management Tool 6 How To Save Files 8 How To
Copyright 2012 Trend Micro Incorporated. All rights reserved.
 Trend Micro Incorporated reserves the right to make changes to this document and to the products described herein without notice. Before installing and using the software, please review the readme files,
InventoryControl for use with QuoteWerks Quick Start Guide
 InventoryControl for use with QuoteWerks Quick Start Guide Copyright 2013 Wasp Barcode Technologies 1400 10 th St. Plano, TX 75074 All Rights Reserved STATEMENTS IN THIS DOCUMENT REGARDING THIRD PARTY
Enterprise Remote Control 5.6 Manual
 Enterprise Remote Control 5.6 Manual Solutions for Network Administrators Copyright 2015, IntelliAdmin, LLC Revision 3/26/2015 http://www.intelliadmin.com Page 1 Table of Contents What is Enterprise Remote
Ultra Thin Client TC-401 TC-402. Users s Guide
 Ultra Thin Client TC-401 TC-402 Users s Guide CONTENT 1. OVERVIEW... 3 1.1 HARDWARE SPECIFICATION... 3 1.2 SOFTWARE OVERVIEW... 4 1.3 HARDWARE OVERVIEW...5 1.4 NETWORK CONNECTION... 7 2. INSTALLING THE
2X ApplicationServer & LoadBalancer Manual
 2X ApplicationServer & LoadBalancer Manual 2X ApplicationServer & LoadBalancer Contents 1 URL: www.2x.com E-mail: info@2x.com Information in this document is subject to change without notice. Companies,
Lenovo Online Data Backup User Guide Version 1.8.14
 Lenovo Online Data Backup User Guide Version 1.8.14 Contents Chapter 1: Installing Lenovo Online Data Backup...5 Downloading the Lenovo Online Data Backup Client...5 Installing the Lenovo Online Data
http://docs.trendmicro.com
 Trend Micro Incorporated reserves the right to make changes to this document and to the products described herein without notice. Before installing and using the product, please review the readme files,
Allworx OfficeSafe Operations Guide Release 6.0
 Allworx OfficeSafe Operations Guide Release 6.0 No part of this publication may be reproduced, stored in a retrieval system, or transmitted, in any form or by any means, electronic, mechanical, photocopy,
Comodo LoginPro Software Version 1.5
 Comodo LoginPro Software Version 1.5 User Guide Guide Version 1.5.030513 Comodo Security Solutions 1255 Broad Street STE 100 Clifton, NJ 07013 Table of Contents 1.Introduction to Comodo LoginPro... 3 1.1.System
Windows and MAC User Handbook Remote and Secure Connection Version 1.01 09/19/2013. User Handbook
 Windows and MAC User Handbook How to Connect Your PC or MAC Remotely and Securely to Your U.S. Department of Commerce Account Developed for You by the Office of IT Services (OITS)/IT Service Desk *** For
Setup Instructions for Firm-Hosted Client Access
 ACCOUNTING CS Setup Instructions for Firm-Hosted Client Access version 2015.x.x TL 29086 (05/12/15) Copyright Information Text copyright 2009-2015 by Thomson Reuters. All rights reserved. Video display
CONNECT-TO-CHOP USER GUIDE
 CONNECT-TO-CHOP USER GUIDE VERSION V8 Table of Contents 1 Overview... 3 2 Requirements... 3 2.1 Security... 3 2.2 Computer... 3 2.3 Application... 3 2.3.1 Web Browser... 3 2.3.2 Prerequisites... 3 3 Logon...
Version 3.8. Installation Guide
 Version 3.8 Installation Guide Copyright 2007 Jetro Platforms, Ltd. All rights reserved. This document is being furnished by Jetro Platforms for information purposes only to licensed users of the Jetro
WhatsUp Gold v16.3 Installation and Configuration Guide
 WhatsUp Gold v16.3 Installation and Configuration Guide Contents Installing and Configuring WhatsUp Gold using WhatsUp Setup Installation Overview... 1 Overview... 1 Security considerations... 2 Standard
Aspera Connect User Guide
 Aspera Connect User Guide Windows XP/2003/Vista/2008/7 Browser: Firefox 2+, IE 6+ Version 2.3.1 Chapter 1 Chapter 2 Introduction Setting Up 2.1 Installation 2.2 Configure the Network Environment 2.3 Connect
Table of Contents. Introduction...9. Installation...17. Program Tour...31. The Program Components...10 Main Program Features...11
 2011 AdRem Software, Inc. This document is written by AdRem Software and represents the views and opinions of AdRem Software regarding its content, as of the date the document was issued. The information
CYCLOPE let s talk productivity
 Cyclope 6 Installation Guide CYCLOPE let s talk productivity Cyclope Employee Surveillance Solution is provided by Cyclope Series 2003-2014 1 P age Table of Contents 1. Cyclope Employee Surveillance Solution
An additional website URL has been added to the districts website address making this gateway easy to access and bookmark for future use.
 Veribest ISD Virtual Desktop Integration Installing vworkstation for Remote (Home) Use Section 1: Installing the vworkstation Gateway The convenience of home access to your school district desktop is going
http://docs.trendmicro.com
 Trend Micro Incorporated reserves the right to make changes to this document and to the products described herein without notice. Before installing and using the product, please review the readme files,
Guide to Installing BBL Crystal MIND on Windows 7
 Guide to Installing BBL Crystal MIND on Windows 7 Introduction The BBL Crystal MIND software can not be directly installed on the Microsoft Windows 7 platform, however it can be installed and run via XP
SonicWALL SSL VPN 3.5: Virtual Assist
 SonicWALL SSL VPN 3.5: Virtual Assist Document Scope This document describes how to use the SonicWALL Virtual Assist add-on for SonicWALL SSL VPN security appliances. This document contains the following
Dell SonicWALL SRA 7.5 Secure Virtual Meeting and Secure Virtual Assist
 Dell SonicWALL SRA 7.5 Secure Virtual Meeting and Secure Virtual Assist Document Scope This document describes how to configure and use the Dell SonicWALL SRA Secure Virtual Meeting feature and the Dell
Citrix Access Gateway Plug-in for Windows User Guide
 Citrix Access Gateway Plug-in for Windows User Guide Access Gateway 9.2, Enterprise Edition Copyright and Trademark Notice Use of the product documented in this guide is subject to your prior acceptance
Core Protection for Virtual Machines 1
 Core Protection for Virtual Machines 1 Comprehensive Threat Protection for Virtual Environments. Installation Guide e Endpoint Security Trend Micro Incorporated reserves the right to make changes to this
WinConnect Server ES User Manual
 THINSOFT PTE LTD 23 Tai Seng Drive, #06-00, Singapore 535224, Fax (65) 6289-7308 www.thinsoftinc.com WinConnect Server ES User Manual Document Version 1.0 1 WinConnect Server ES User Manual Copyright 2007
Before You Begin, Your Computer Must Meet the System Requirements
 Before You Begin, Your Computer Must Meet the System Requirements Windows: Minimum: Windows Vista SP2 or Windows 7 & 8 Remote Desktop Protocol (connection) 7.1 or higher 150 MB hard drive space 2 GB RAM
Charter Business Desktop Security Administrator's Guide
 Charter Business Desktop Security Administrator's Guide Table of Contents Chapter 1: Introduction... 4 Chapter 2: Getting Started... 5 Creating a new user... 6 Recovering and changing your password...
Password Memory 6 User s Guide
 C O D E : A E R O T E C H N O L O G I E S Password Memory 6 User s Guide 2007-2015 by code:aero technologies Phone: +1 (321) 285.7447 E-mail: info@codeaero.com Table of Contents Password Memory 6... 1
Topaz Installation Sheet
 Topaz Installation Sheet P/N 460924001E ISS 08FEB12 Content Introduction... 3 Recommended minimum requirements... 3 Setup for Internet Explorer:... 4 Topaz installation... 10 Technical support... 14 Copyright
A Guide to New Features in Propalms OneGate 4.0
 A Guide to New Features in Propalms OneGate 4.0 Propalms Ltd. Published April 2013 Overview This document covers the new features, enhancements and changes introduced in Propalms OneGate 4.0 Server (previously
Installation Instruction STATISTICA Enterprise Server
 Installation Instruction STATISTICA Enterprise Server Notes: ❶ The installation of STATISTICA Enterprise Server entails two parts: a) a server installation, and b) workstation installations on each of
Dell UPS Local Node Manager USER'S GUIDE EXTENSION FOR MICROSOFT VIRTUAL ARCHITECTURES Dellups.com
 CHAPTER: Introduction Microsoft virtual architecture: Hyper-V 6.0 Manager Hyper-V Server (R1 & R2) Hyper-V Manager Hyper-V Server R1, Dell UPS Local Node Manager R2 Main Operating System: 2008Enterprise
Qbox User Manual. Version 7.0
 Qbox User Manual Version 7.0 Index Page 3 Page 6 Page 8 Page 9 Page 10 Page 12 Page 14 Page 16 Introduction Setup instructions: users creating their own account Setup instructions: invited users and team
EZblue BusinessServer The All - In - One Server For Your Home And Business
 EZblue BusinessServer The All - In - One Server For Your Home And Business Quick Start Guide Version 3.11 1 2 3 EZblue Server Overview EZblue Server Installation EZblue Server Configuration 4 EZblue Magellan
Mirtrak 6 Powered by Cyclope
 Mirtrak 6 Powered by Cyclope Installation Guide Mirtrak Activity Monitoring Solution v6 is powered by Cyclope Series 2003-2013 Info Technology Supply Ltd. 2 Hobbs House, Harrovian Business Village, Bessborough
Propalms TSE Deployment Guide
 Propalms TSE Deployment Guide Version 7.0 Propalms Ltd. Published October 2013 Overview This guide provides instructions for deploying Propalms TSE in a production environment running Windows Server 2003,
2X ApplicationServer & LoadBalancer Manual
 2X ApplicationServer & LoadBalancer Manual 2X ApplicationServer & LoadBalancer Contents 1 URL: www.2x.com E-mail: info@2x.com Information in this document is subject to change without notice. Companies,
How To Install Sedar On A Workstation
 SEDAR Client Installation Guide Version 1.2 January 27, 2014 10 Contents About This Guide... 2 Assumptions... 3 Date Format Synchronization... 3 Before You Begin the Installation Test of the SEDAR Client...
Citrix Remote Access Portal U s e r M a n u a l
 Citrix Remote Access Portal U s e r M a n u a l 1 P a g e Table of Contents Table of Contents... 2 Introduction... 3 1. What is Citrix and how does it work?... 4 2. PC Setup/Internet Explorer - Connecting
Verizon Remote Access User Guide
 Version 17.12 Last Updated: August 2012 2012 Verizon. All Rights Reserved. The Verizon names and logos and all other names, logos, and slogans identifying Verizon s products and services are trademarks
LDCDP 11999.GdW. L force Controls. Ä.GdWä. Software Manual. Industrial PC. WindowsR CE Thin Client. Operating system
 L force Controls Ä.GdWä LDCDP 11999.GdW Software Manual Industrial PC WindowsR CE Thin Client Operating system l Please read these instructions before you start working! Follow the enclosed safety instructions.
Advanced Event Viewer Manual
 Advanced Event Viewer Manual Document version: 2.2944.01 Download Advanced Event Viewer at: http://www.advancedeventviewer.com Page 1 Introduction Advanced Event Viewer is an award winning application
Magaya Software Installation Guide
 Magaya Software Installation Guide MAGAYA SOFTWARE INSTALLATION GUIDE INTRODUCTION Introduction This installation guide explains the system requirements for installing any Magaya software, the steps to
Customer Tips. Xerox Network Scanning TWAIN Configuration for the WorkCentre 7328/7335/7345. for the user. Purpose. Background
 Xerox Multifunction Devices Customer Tips dc07cc0432 October 19, 2007 This document applies to these Xerox products: X WC 7328/7335/7345 for the user Xerox Network Scanning TWAIN Configuration for the
MCTS Guide to Microsoft Windows Server 2008 Applications Infrastructure Configuration (Exam # 70-643)
") MCTS Guide to Microsoft Windows Server 2008 Applications Infrastructure Configuration (Exam # 70-643) Chapter Four Windows Server 2008 Remote Desktop Services, Part 1 Objectives Describe the Remote Desktop
MCTS Guide to Microsoft Windows Server 2008 Applications Infrastructure Configuration (Exam # 70-643) Chapter Four Windows Server 2008 Remote Desktop Services, Part 1 Objectives Describe the Remote Desktop
Network Connect Installation and Usage Guide
 Network Connect Installation and Usage Guide I. Installing the Network Connect Client..2 II. Launching Network Connect from the Desktop.. 9 III. Launching Network Connect Pre-Windows Login 11 IV. Installing
Fiery E100 Color Server. Welcome
 Fiery E100 Color Server Welcome 2011 Electronics For Imaging, Inc. The information in this publication is covered under Legal Notices for this product. 45098226 27 June 2011 WELCOME 3 WELCOME This Welcome
Allworx Installation Course
 VPN Hello and welcome. In the VPN section we will cover the steps for enabling the VPN feature on the Allworx server and how to set up a VPN connection to the Allworx System from your PC. Page 1 VPN The
Iridium Extreme TM Satellite Phone. Data Services Manual
 Iridium Extreme TM Satellite Phone Data Services Manual Table of Contents 1 OVERVIEW... 1 2 HOW IT WORKS... 1 3 BEFORE INSTALLING... 2 4 USB DRIVER INSTALLATION... 3 5 MODEM INSTALLATION AND CONFIGURATION...
LifeCyclePlus Version 1
 LifeCyclePlus Version 1 Last updated: 2014-04-25 Information in this document is subject to change without notice. Companies, names and data used in examples herein are fictitious unless otherwise noted.
Use Remote Desktop capabilities to Access your Work PC from home over VPN
 Use Remote Desktop capabilities to Access your Work PC from home over VPN With Remote Desktop on Windows XP Professional, you can have access to a Windows session that is running on your computer when
Installation and Setup: Setup Wizard Account Information
 Installation and Setup: Setup Wizard Account Information Once the My Secure Backup software has been installed on the end-user machine, the first step in the installation wizard is to configure their account
System Administration Training Guide. S100 Installation and Site Management
 System Administration Training Guide S100 Installation and Site Management Table of contents System Requirements for Acumatica ERP 4.2... 5 Learning Objects:... 5 Web Browser... 5 Server Software... 5
Dell SonicWALL SRA 7.5 Citrix Access
 Dell SonicWALL SRA 7.5 Citrix Access Document Scope This document describes how to configure and use Citrix bookmarks to access Citrix through Dell SonicWALL SRA 7.5. It also includes information about
Intelligent Power Protector User manual extension for Microsoft Virtual architectures: Hyper-V 6.0 Manager Hyper-V Server (R1&R2)
") Intelligent Power Protector User manual extension for Microsoft Virtual architectures: Hyper-V 6.0 Manager Hyper-V Server (R1&R2) Hyper-V Manager Hyper-V Server R1, R2 Intelligent Power Protector Main
Intelligent Power Protector User manual extension for Microsoft Virtual architectures: Hyper-V 6.0 Manager Hyper-V Server (R1&R2) Hyper-V Manager Hyper-V Server R1, R2 Intelligent Power Protector Main
EZblue BusinessServer The All - In - One Server For Your Home And Business
 EZblue BusinessServer The All - In - One Server For Your Home And Business Quick Start Guide Version 3.8 1 2 3 EZblue Server Overview EZblue Server Installation EZblue Server Configuration 4 EZblue Magellan
Citrix Access on SonicWALL SSL VPN
 Citrix Access on SonicWALL SSL VPN Document Scope This document describes how to configure and use Citrix bookmarks to access Citrix through SonicWALL SSL VPN 5.0. It also includes information about configuring
Pcounter Web Report 3.x Installation Guide - v2014-11-30. Pcounter Web Report Installation Guide Version 3.4
 Pcounter Web Report 3.x Installation Guide - v2014-11-30 Pcounter Web Report Installation Guide Version 3.4 Table of Contents Table of Contents... 2 Installation Overview... 3 Installation Prerequisites
The SSL device also supports the 64-bit Internet Explorer with new ActiveX loaders for Assessment, Abolishment, and the Access Client.
 WatchGuard SSL v3.2 Release Notes Supported Devices SSL 100 and 560 WatchGuard SSL OS Build 355419 Revision Date January 28, 2013 Introduction WatchGuard is pleased to announce the release of WatchGuard
2X Cloud Portal v10.5
 2X Cloud Portal v10.5 URL: www.2x.com E-mail: info@2x.com Information in this document is subject to change without notice. Companies, names, and data used in examples herein are fictitious unless otherwise
CODESOFT Installation Scenarios
 CODESOFT Installation Scenarios NOTES: CODESOFT is a separate install from existing versions of CODESOFT. You will need to make note of your current settings (default directories, etc.) so you can duplicate
Aqua Connect Remote Desktop Services 3.7 User Manual
 Aqua Connect Remote Desktop Services 3.7 User Manual Table of Contents About Aqua Connect Remote Desktop Services... 3 Features... 3 System Requirements... 4 Hardware... 4 Software... 4 Getting Ready...
VERITAS Backup Exec TM 10.0 for Windows Servers
 VERITAS Backup Exec TM 10.0 for Windows Servers Quick Installation Guide N134418 July 2004 Disclaimer The information contained in this publication is subject to change without notice. VERITAS Software
OPERATION MANUAL. MV-410RGB Layout Editor. Version 2.1- higher
 OPERATION MANUAL MV-410RGB Layout Editor Version 2.1- higher Table of Contents 1. Setup... 1 1-1. Overview... 1 1-2. System Requirements... 1 1-3. Operation Flow... 1 1-4. Installing MV-410RGB Layout
Installation Guide for Pulse on Windows Server 2012
 MadCap Software Installation Guide for Pulse on Windows Server 2012 Pulse Copyright 2014 MadCap Software. All rights reserved. Information in this document is subject to change without notice. The software
The All-in-One Support Solution. Easy & Secure. Secure Advisor
 The All-in-One Support Solution. Easy & Secure. Secure Advisor Secure Advisor - A Perfect Solution for Online Support Fast and easy remote support from anywhere Problems that often sound complicated on
Avalanche Remote Control User Guide. Version 4.1.3
 Avalanche Remote Control User Guide Version 4.1.3 ii Copyright 2012 by Wavelink Corporation. All rights reserved. Wavelink Corporation 10808 South River Front Parkway, Suite 200 South Jordan, Utah 84095
Synchronizer Installation
 Synchronizer Installation Synchronizer Installation Synchronizer Installation This document provides instructions for installing Synchronizer. Synchronizer performs all the administrative tasks for XenClient
User Guide Win7Zilla
 User Guide Win7Zilla Table of contents Section 1: Installation... 3 1.1 System Requirements... 3 1.2 Software Installation... 3 1.3 Uninstalling Win7Zilla software... 3 Section 2: Navigation... 4 2.1 Main
XenClient Enterprise Synchronizer Installation Guide
 XenClient Enterprise Synchronizer Installation Guide Version 5.1.0 March 26, 2014 Table of Contents About this Guide...3 Hardware, Software and Browser Requirements...3 BIOS Settings...4 Adding Hyper-V
Table of Contents. FleetSoft Installation Guide
 FleetSoft Installation Guide Table of Contents FleetSoft Installation Guide... 1 Minimum System Requirements... 2 Installation Notes... 3 Frequently Asked Questions... 4 Deployment Overview... 6 Automating
Upgrading from Call Center Reporting to Reporting for Contact Center. BCM Contact Center
 Upgrading from Call Center Reporting to Reporting for Contact Center BCM Contact Center Document Number: NN40010-400 Document Status: Standard Document Version: 02.00 Date: June 2006 Copyright Nortel Networks
GE Healthcare Life Sciences UNICORN 5.31. Administration and Technical Manual
 GE Healthcare Life Sciences UNICORN 5.31 Administration and Technical Manual Table of Contents Table of Contents 1 Network setup... 1.1 Network terms and concepts... 1.2 Network environment... 1.3 UNICORN
Installation Guide for Pulse on Windows Server 2008R2
 MadCap Software Installation Guide for Pulse on Windows Server 2008R2 Pulse Copyright 2014 MadCap Software. All rights reserved. Information in this document is subject to change without notice. The software
vtcommander Installing and Starting vtcommander
 vtcommander vtcommander provides a local graphical user interface (GUI) to manage Hyper-V R2 server. It supports Hyper-V technology on full and core installations of Windows Server 2008 R2 as well as on
User Guide. Version 3.2. Copyright 2002-2009 Snow Software AB. All rights reserved.
 Version 3.2 User Guide Copyright 2002-2009 Snow Software AB. All rights reserved. This manual and computer program is protected by copyright law and international treaties. Unauthorized reproduction or
NetWrix USB Blocker. Version 3.6 Administrator Guide
 NetWrix USB Blocker Version 3.6 Administrator Guide Table of Contents 1. Introduction...3 1.1. What is NetWrix USB Blocker?...3 1.2. Product Architecture...3 2. Licensing...4 3. Operation Guide...5 3.1.
Installation Notes for Outpost Network Security (ONS) version 3.2
 version 3.2") Outpost Network Security Installation Notes version 3.2 Page 1 Installation Notes for Outpost Network Security (ONS) version 3.2 Contents Installation Notes for Outpost Network Security (ONS) version 3.2...
Outpost Network Security Installation Notes version 3.2 Page 1 Installation Notes for Outpost Network Security (ONS) version 3.2 Contents Installation Notes for Outpost Network Security (ONS) version 3.2...
Password Reset PRO. Quick Setup Guide for Single Server or Two-Tier Installation
 Password Reset PRO Quick Setup Guide for Single Server or Two-Tier Installation This guide covers the features and settings available in Password Reset PRO version 3.x.x. Please read this guide completely
Diamond II v2.3 Service Pack 4 Installation Manual
 Diamond II v2.3 Service Pack 4 Installation Manual P/N 460987001B ISS 26APR11 Copyright Disclaimer Trademarks and patents Intended use Software license agreement FCC compliance Certification and compliance
SQL Server 2008 R2 Express Installation for Windows 7 Professional, Vista Business Edition and XP Professional.
 SQL Server 2008 R2 Express Installation for Windows 7 Professional, Vista Business Edition and XP Professional. 33-40006-001 REV: B PCSC 3541 Challenger Street Torrance, CA 90503 Phone: (310) 303-3600
Steltronic Focus. Main Desk Internet connection
 Steltronic Focus Main Desk Steltronic S.p.A. Via Artigianale 34, 25082 Botticino Sera Brescia - Italy Tel: +39 030 2190811 fax: +39 030 2190798 Service: + 39 030 2190830 http: www.steltronic.com Service: