PORTABLE DATA COLLECTION TERMINAL
|
|
|
- Frederica Fowler
- 8 years ago
- Views:
Transcription
1 PORTABLE DATA COLLECTION TERMINAL WINDOWS TRANSFER UTILITY HELP FILES BETA EDITION Compsee, Inc. A Subsidiary of McRae Industries, Inc.

2 2

3 Welcome Thank you for using the Apex III Windows Transfer Utility Software from Compsee, Inc. You have received this program in conjunction with the purchase of your Apex III Portable Data Collection Terminal (PDT) or the Apex III Program Generator application. The Apex III Windows Transfer Utility application is designed to help you easily perform file transfers between a PC (or other serial device capable of running Windows ) and your Apex III PDT. The application program works in conjunction with the Apex III PDT preloaded [dx.exe] File Transfer Utility. Before utilizing this application you should be familiar with the Apex III PDT and the communications techniques outlined in the Apex III PDT Technical Reference Manual. The Windows Transfer Utility application is configured to run on a PC or similar device, which meets the following requirements: System Requirements Windows 95/98/NT operating system 100 MHz Pentium or better 16 Mb RAM for Windows 95/98, 32 Mb RAM for Windows NT 2 Mb of free Hard Disk space A CD-ROM drive If you have any questions about the use of this program, after reviewing the HELP files, you can contact Compsee, Inc at the following number: 1 (800) Copyright Acknowledgements: Windows is a registered Trademark of the Microsoft Corporation. Pentium is a registered trademark of the Intel Corporation. Apex III and Compsee are registered trademarks of McRae Industries 3

4 The Apex III Windows Transfer Utility Environment The Apex III Windows Transfer Utility utilizes the Windows Environment and is compatible with Windows 95/98 and NT 4.0, or later. Within this context, various Windows are used to display information about the utility and/or allow input from the user. The Window titles listed below comprise the major components of the system. The Apex III Windows Transfer Utility Main Window The Receive Files From The Apex III Window The Send Files To The Apex III WIndow In addition to these major windows, various secondary windows allow the user to customize each transfer operation to their communication specifications. The Secondary Apex III Windows Transfer Utility windows are accessed from within the major application windows or from the various application Menus located at the top of the Main Window. 4

5 Basic Windows Techniques Before using the Apex III Windows Transfer Utility Application, you should already be familiar with basic windows techniques and know how to navigate around in a Windows based environment. We have included a Windows Basics section (booklet) in the Apex III Windows Transfer Utility Help files located on the Contents tab under the Apex III Windows Transfer Utility Components heading. Should you require a more detailed description of how to navigate within the Windows environment, refer to the Windows Help Menu of your Windows Operating System or an appropriate Windows User manual. 5

6 Apex III Windows Transfer Utility Menus The Apex III Windows Transfer Utility Main Window contains the following Menu options: File Menu Communications Menu Setup Menu Help Menu Select the Menu Title with the left mouse button to open the sub-menu options. Alternately you can press and hold down the Alt Key and then press the underlined letter in the Menu Title (ALT + Underlined Menu Title Letter) to open the menu. e.g. File Menu = ALT + F. 6

7 Starting (Opening) The Apex III Windows Transfer Utility Starting (Opening) the Apex III Windows Transfer Application by clicking on the Apex III Windows Transfer Utility application in your Windows Start/Programs menu. The Apex III Windows Transfer Utility Main Window will open automatically with the program ready for you to commence a communications operation. Application parameters and secondary program windows that allow you to perform communication operations are accessed through the Menu Bar. See also: Apex III Windows Transfer Utility Menus 7

8 The Apex III Windows Transfer Utility Main Window The Apex III Windows Transfer Utility Main Window is used as the application workspace for all of the other windows utilized by the system. The Main application window contains the Title Bar, Menu Bar, the communications Work Area, and the Scroll Bars (if applicable). Note: Move your cursor over the Main Window image below to identify Hotspots. Hotspots are identified by showing you a hand in any hotspot area. Clicking on a hotspot with the left mouse button, will open a hotspot window or popup window that displays one of the Main Window areas just discussed. Clicking again with the left mouse button will close the open popup window. Other major application windows used by the system are as follows: The Receive Files From The Apex III Window The Send Files To The Apex III WIndow 8

9 Receive Files From The Apex III Window The Receive files from the Apex III Window opens when you choose the Retrieve Files sub-menu option from the Communications Menu. The window allows you to specify files that are to be received from the Apex III, what operation is to be performed for each file (Overwrite, Append, Rename), compile file lists, open file lists, edit file lists, and receive the designated files from the Apex III PDT. When the window opens it is automatically configured to begin a new file list. To list files to be received from the Apex III PDT you can use the Select PC File Name button (preferred method) or simply type the name into an empty line in the List File Name/Apex File field. You can select an unlimited number of files to complete your listing for a specific receive operation. To include files using the Select PC File Name button, left click on the button with your mouse. The Add A File Window will open allowing you to choose the location (path/folder) and filename for the received file. Note that you can type in a non-existing file name and extension into the File Name field to receive the file under a new name or one which doesn t already exist in the location selected. Once you have performed this operation, the filename and path will be automatically appended to the List File Name field in the Receive Files From The Apex III Window. To type in the file name of a file you wish to receive, left click on the first open List File Name/Apex File field and type the filename.extension. You should note that when using this method you must also left click on the respective New PC File field in the same line and enter the path to the location where you want the file to be placed upon receipt (see below example). To delete a file from the list, simply click on the Apex File name and select the Delete File From List button. All fields on the same line will automatically be deleted from the list. Once you have chosen a file or files you must select the appropriate operation to perform upon receipt. Click on the Down Arrow button in the right side of the respective files Operation field to choose the Overwrite(default), Append, or Rename operation. Overwrite: Upon receipt of the file from the Apex III PDT, the received file will automatically overwrite the new filename in the location (path/folder) chosen. Append: Adds the received file information at the end of the selected new filename in the location chosen. Rename: Places the received file in the selected new filename in the location chosen. 9
 or simply type the name into an empty line in the List File Name/Apex File field.")
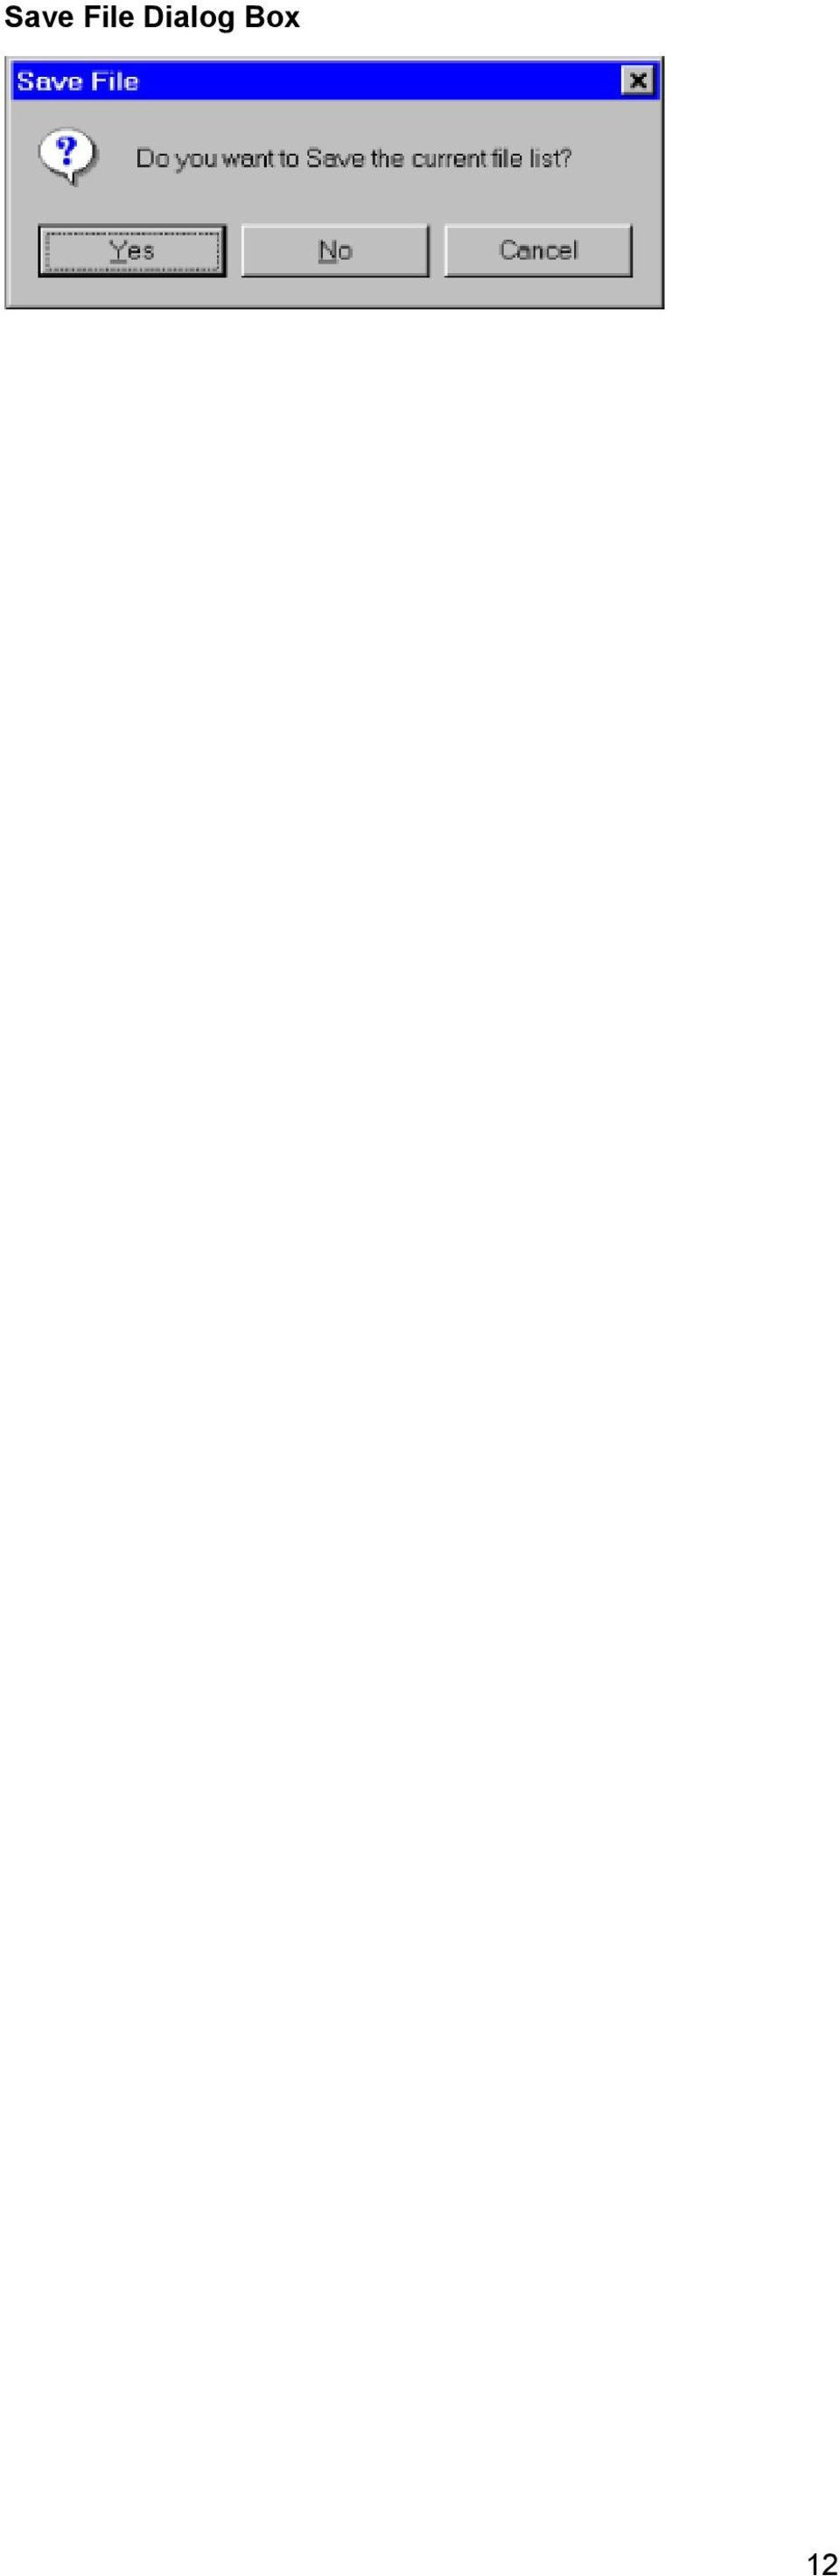
10 Note: If the new filename already exists, then a filename is automatically generated using the following format; New filename path + New filename + Number + New Filename Extension. The number portion of the filename is automatically incremented until a nonexisting filename is created. To start a new file list, click on the New File List button. Clicking on the New File List button, clears the present file listing if the file list has been previously saved. If the list has not been saved, a Save File Dialog Box will appear prompting you to either choose Yes, No, or Cancel. Choosing Yes opens the Save Receive File List Window allowing you to specify a name and location in which to save the list. Choosing No clears the existing list without saving to begin a new list. Choosing Cancel, cancels the operation. To open an existing file list click on the Open File List button. If an existing list was still displayed which had not been saved the Save File Dialog Box will open prompting you to determine the fate of the list (see above). If any previous listing had already been saved, the old listing will be cleared from the Receive Files From The Apex III Window and the Open Receive File List Window will appear. To save the displayed File List click on the Save File List File List Window will appear. button. The Save Receive Clicking on the Receive Files button, initiates the receive operation of the displayed file list from the Apex III PDT using the communications parameters you have previously set in the Setup Menu (Port and Speed submenus). A YMODEM protocol transfer will be initiated and if no preferences have been set, communications parameters will defaults to the COM1 and 115,200 baud). For a more detailed discussion on Apex III communications process refer to the Apex III PDT Technical Reference Manual. At the completion of the transfer, a Transfer Status Report will be displayed in the Communications Status box (the status of each individual file transfer is depicted unless the entire transfer was a failure). Close the Receive Files To The Apex III Window when you have completed all of the receive operations. Selecting the Show Comm. Status Window checkbox displays a status window during the transfer operation showing you the status of the file transfer. Selecting the Close Window When Complete checkbox, closes the Receive Files From The Apex III Window automatically upon completion of the receiving operation. 10

11 Add A File Window Upon opening, the Add A File Window displays the files listed within the Windows Transfer Utility home directory (by default). Note: When opening this window from the Send Files To The Apex III Window the.exe File Type (Apex III Generated Program) will be automatically chosen in the Files of type field. When opening the window from the Receive Files From The Apex III Window the All Files (*.*) File Type will be automatically chosen. In each case, the subsequent type will be displayed within the Open Directory field. Select the file you wish to add to the Send Files To The Apex III Window/List File Name area and left click the OK button. The selected filename and path will appear in the List File Name field within the Send Files To The Apex III Window. If the file you wish to send is on another drive or in another directory, migrate to the correct drive/directory by using the directory down arrow or the up one Level button in the Open Apex Template Window. Once the file is located, click on the OK button. If you wish to send a different type of file, click on the down arrow button to the left of the Files of Type: field and select the appropriate file type option. Return to the Send Files To The Apex III Window Return to the Receive Files From The Apex III Window 11

12 Save File Dialog Box 12
13 Save Receive File List Window The Save Receive File List Window allows you to save a Receive File List. This is especially useful if you have a list of files which require periodic downloading/updating. Type the name you wish to save the file listing under in the File Name field. Note that the.rfl extension will automatically be added to the filename (see Files of Type field). Choose the location where you wish to save the file (drive/folder/subfolder etc.) and click on the save button. Return to the Receive Files From The Apex III WIndow 13
.")
14 Send Files To The Apex III Window The Send files to the Apex III Window opens when you choose the Send Files sub-menu option from the Tools/Communications Menu. The window allows you to specify files to be sent, compile file lists, open existing file lists, edit file lists, and send the designated files to the Apex III PDT. When the window opens it is automatically configured to begin a new file list. To add a file to the new file list click on the Add File Button. The Add a File Window will open allowing you to specify a file to be appended to the list. To remove a file from the list, click on the filename within the List File Name field (the name will become highlighted), then select the Delete File Button. The file will be removed from the list. Clicking on the New File List button clears the present file listing if the file list has been previously saved. If the list has not been saved, a Save File Dialog Box will appear prompting you to either choose Yes, No, or Cancel. Choosing Yes opens the Save Send File List Window allowing you to specify a name and location in which to save the list. Choosing No clears the existing list without saving to begin a new list. Choosing Cancel, cancels the operation. Clicking on the Open File List button opens the Open Send File List Window allowing you to select an existing file list for editing or sending to the Apex III. Clicking on the Save File List button opens the Save Send File List Window allowing you to name and specify a location to save the displayed file list. Clicking on the Xmit Files button, transmits the displayed file list to the Apex III PDT using the communications parameters you have previously set in the Setup Menu (Port and Speed submenus). A YMODEM protocol transfer will be initiated and preferences if not set, will default to COM1 and 115,200 baud. For a more detailed discussion on Apex III communications refer to the Apex III PDT Technical Reference Manual. At the completion of the transfer, a Transfer Status Report will appear in the Communications Status field (the status of each individual file transfer is depicted unless the entire transfer was a failure). Close the Send Files To The Apex III Window when you have completed all of send operations. Selecting the Show Comm. Status Window checkbox display a status window during the transmit operation showing you the status of the file transfer. Selecting the Close Window When Complete checkbox, closes the Send Files To The Apex III Window automatically upon completion of the send operation. 14

15 Save Send File List Window The Save Send File List Window allows you to save a Send File List. This is especially useful if you have a list of files which require periodic updating. Type the name you wish to save the file listing under in the File Name field. Note that the.sfl extension will automatically be added to the filename (see Files of Type field). Choose the location where you wish to save the file (drive/folder/subfolder etc.) and click on the save button. Return to the Send Files To The Apex III WIndow 15
.")
16 Open Send File List Window Select the drive/folder and name of the file list you wish to open (by default the window will automatically open to the folder containing the Apex III Windows Transfer Utility application). If the file list you wish to open is in another directory (folder) or on another drive use the Down Arrow or the Tree buttons to migrate to the correct location. Click on the file list name you wish to open (note the name will appear in the File Name field), then click on the Open button. The names of the files contained within the file list will appear within the List File Name field of the Send Files To The Apex III Window. Note that the path and file list name appears above the List File Name area. Modify the listing as necessary by utilizing the features available within the Send Files To The Apex III Window. Return to the Send Files To The Apex III Window 16

17 About The Apex III Windows Transfer Utility HELP Files The Apex III Windows Transfer Utility Application Help Files are designed to assist you in learning and using the full capabilities of the Apex III Windows Transfer Utility. Use of these files will greatly enhance the speed in which you learn to use the application and begin your first Apex III PDT communications. Context Sensitive Help (help for the Windows Transfer Utility area where the cursor is located or the active window) can be obtained by pressing the F1 key on your keyboard. Use the Help File Contents Tab to navigate your way through the various Help files much the way you would use My Computer or Windows Explorer. Use the Help File Index Tab to find keywords located in the Help File Titles index and areas with which you require assistance. Use the Help File Find Tab to identify Help file areas containing a keyword or words for which you need assistance. Apex III Windows Transfer Utility Help Files created by Docu-Write, Mooresville, NC exclusively for Compsee, Inc. All Rights Reserved

18 Title Bar Displays the Window Title at the top of the Window area. 18

19 Menu Bar Display the Apex III Windows Transfer Utility application Menus. If a menu is active the Menu Title appears in black. If a menu is inactive (cannot be used during a specific operation), the Menu Title will be grayed out. The Apex III Windows Transfer Utility Main Menu items are the File Menu, Communications Menu, Setup Menu, and the Help Menu 19

20 Work Area The Work Area is the main area within the Windows Transfer Utility Main Window where the communication work is conducted. The Apex III Windows Transfer Utility secondary application windows are loaded within this area allowing the user to interface with the program and the Apex III PDT. 20

21 Window Control Buttons The Window Control Buttons control the size of the active Window and or close the window completely. Minimize Button: Maximize Button: Close Button: Changing The Window Size: Causes the Window size to be reduced to it s smallest area and be placed on the Windows Status Bar.. Causes the Window to grow to it s maximum area which will fill the entire Windows screen. Closes the Window and removes it from the Windows screen. The Window will have to be reopened from the View Menu if this operation has been performed. Most of the internal Apex III Windows Transfer Utility Windows have a preset size, which cannot be altered. If a window allows variable size control (e.g. the Main Window) you can change a window s size as follows (note this only applies when a window is not maximized): Carefully place the mouse cursor over window border until the cursor becomes a twosided arrow. Press and hold the left mouse key down and drag the edge of the window to the position desired. Change two sides at once, by placing the cursor in the window corner and dragging diagonally. 21
22 Scroll Bar The Scroll Bars allows the user to scroll through the application window to view items which are larger than the window itself or larger then the applicable window section. You will not have a scroll bar within the Main Window unless a secondary windows position underlays the Main Window s border (open a secondary window, grab the window by the title bar, and position it so some of the window underlays the Main Windows side or bottom border a scroll bar will appear). Depending on the secondary windows position, either a Horizontal (above) or Vertical (right) Scroll Bar will be displayed. A Horizontal Scroll bar (normally located at the bottom of the window ) allows the application programmer to "scroll" horizontally within the designated window or applicable window section. The Vertical Scroll Bar (normally located on the right side of the window or applicable window area allows the application programmer to "scroll" vertically to view the entire contents of the designated window or window section. Scrolling methods include: Continually clicking on a scrolling arrow until the desired window area is being displayed. If you go too far, click on the arrow pointing the opposite direction. Clicking on the scroll bar locator, holding down the left mouse button and dragging the locator until the desired window area is being displayed, then releasing the left mouse button. Clicking with the left mouse button on an empty area of the scroll bar in the direction you wish to view. 22
23 File Menu The File Menu is the first menu on the Apex III Windows Transfer Utility Menu Bar. Clicking on the File Menu allows the user to choose the Exit option, closing the Apex III Windows Transfer Utility Application and returning you to the Windows Desktop. This operation is normally performed when you have completed all of your required communications tasks. 23
24 Communications Menu The Communications Menu is available to the user from the Main Window Menu Bar. By left clicking on the Communications Menu, the user can choose from two available sub-menus options: Retrieve Files: Xmit Files: Choosing the Retrieve Files option, opens the Receive Files From The Apex III Window. Choosing the Xmit Files option opens the Send Files To The Apex III Window. 24
25 Setup Menu The Setup Menu is accessed from the Apex III Windows Transfer Utility Main Window Menu Bar. Left clicking on the Setup Menu allows the user to choose between two sub-menu options: Port: Speed: Choosing the Port sub-menu option displays a choice of COM. Ports to utilize when communicating with the Apex III PDT. Choose the PC port that you are going to connect to the Apex III PDT serial connector (RS-232) or Apex III Dock (IR communications). The default port is COM1. Refer to your PC manual (configuration) and the Apex III PDT User s Manual and Technical Reference Manual for additional details on conducting Apex III communications. Choosing the Speed sub-menu option displays a choice of baud rates at which the communications process will be conducted. The user can choose one of the following speeds: Baud Rate (default) Note: For proper communications to occur, you must ensure the Apex III PDT [dx.exe] program is set for the same baud rate. 25
26 Help Menu The Help Menu displays the various Help options available for the Apex III Windows Transfer Utility Application. Left click on the option which you wish to utilize and the appropriate item will open. Also refer to About the Apex III Windows Transfer Utility HELP Files for additional information. 26
27 Conducting Communications With The Apex III PDT Notes: 1. Normally the PC serial RS-232 port is used to conduct communications with the Apex III PDT (using cable PN ). Other PC ports can be used depending on your PC s configuration. Contact Compsee, Inc. for available cable information. 2. If conducting Apex III communications using the Apex III Dock, the Apex III IR port must be enabled (refer to the Apex III PDT Technical Reference Manual for additional information). 3. The Apex III PDT s [dx.exe] utility implementation of the YMODEM protocol includes the file time and date parameter. Like all YMODEM utilities that implement the time/date parameter, the time/date is sent as Greenwich Mean Time (GMT). Transmitting or receiving a file from a system utilizing a different time zone will result in a received file time different than the original transmitted file time. e.g. The Apex III will receive a file from a PC set for the Eastern Standard Time zone with a time stamp of the original EST + 5 hours. Sending a file from the Apex III to the PC will result in a time stamp of the original EST - 5 hours. Note that if you are in a different time zone, the difference will vary by the amount of time difference between your time zone and GMT. Communications Guidelines A. With the PC turned-off connect the Apex III approved cable to the PC port to be utilized (generally the serial port). B. If using the Apex III PDT internal serial port or Serial End Cap, power down the Apex III PDT and connect the other end of the cable to the unit. C. Boot the PC and the Apex III PDT. D. Open the Apex III Windows Transfer Utility application on your PC. E. Choose the communications operation you wish to perform by selecting either the Communications/Retrieve Files menu (receiving files from the Apex III) or the Communications/Xmit Files menu (sending files to the Apex III). F. Configure the secondary application window (either the Send Files To or the Receive Files From ) in the prescribed manner for the operation you wish to perform. Receive Files From The Apex III Window Send Files To the Apex III Window G. Prepare the Apex III PDT for a file transfer by using the [dx.exe] utility (pre-installed on the Apex III at the factory). Refer to the Apex III PDT Technical Reference Manual for details on the [dx.exe] utilities use and configuration and for communication operation information in general. Note that the Apex III PDT IR port MUST be enabled for communications using the Apex III Dock. H. Use the Save File List button to save any Receive File Lists or Send File Lists that may be used on a routine basis to configure your Apex III PDT. I. Perform the transfer (communication process) by choosing the Receive Files button (Receive Files From Window) or the Xmit Files button (Send Files To Window). J. Verify the communication process was successful. K. Close the Apex III Windows Transfer Utility application. 27
28 Closing (Exiting) The Apex III Windows Transfer Utility Note: It is recommended that you save any File List before closing (exiting) the program. There are several ways to Exit the Apex III Windows Transfer Utility Application. Using The File Menu: Left click on the File Menu. Left click on the Exit sub-menu. The Windows Transfer Utility Application will close. Using The Close Button: Left click on the Close Button in the top left hand corner of the Apex III Windows Transfer Utility Main Window. The Windows Transfer Utility Application will close. 28
29 Technical Support Technical Support for the Apex III Windows Transfer Utility and the Apex III PDT are available from Compsee, Inc. through the following methods: Through our Website: " By phone: (800) Via Before calling please follow these guidelines: Refer to the appropriate sections of this HELP Files to ensure you have correctly performed the operation or function in question. Have the Apex III Windows Transfer Utility Version Number in-hand. Have your PC s information handy (System information, Operating System type, etc.), a complete description of the problem as well as when it occurs. 29
30 This Page Intentionally Left Blank 30
31 31
32 Compsee, Inc. Contact Information 1 (800)
JEROME COMMUNICATIONS SOFTWARE (JCS) INSTALLATION and OPERATION MANUAL V1.02 for Windows XP
 INSTALLATION and OPERATION MANUAL V1.02 for Windows XP") AZI P/N 700-0042-B Last update May 2009 USER MANUAL JEROME COMMUNICATIONS SOFTWARE (JCS) INSTALLATION and OPERATION MANUAL V1.02 for Windows XP May 2009 ARIZONA INSTRUMENT LLC 3375 N Delaware Street Chandler,
AZI P/N 700-0042-B Last update May 2009 USER MANUAL JEROME COMMUNICATIONS SOFTWARE (JCS) INSTALLATION and OPERATION MANUAL V1.02 for Windows XP May 2009 ARIZONA INSTRUMENT LLC 3375 N Delaware Street Chandler,
OPERATION MANUAL. MV-410RGB Layout Editor. Version 2.1- higher
 OPERATION MANUAL MV-410RGB Layout Editor Version 2.1- higher Table of Contents 1. Setup... 1 1-1. Overview... 1 1-2. System Requirements... 1 1-3. Operation Flow... 1 1-4. Installing MV-410RGB Layout
NDA-30141 ISSUE 1 STOCK # 200893. CallCenterWorX-Enterprise IMX MAT Quick Reference Guide MAY, 2000. NEC America, Inc.
 NDA-30141 ISSUE 1 STOCK # 200893 CallCenterWorX-Enterprise IMX MAT Quick Reference Guide MAY, 2000 NEC America, Inc. LIABILITY DISCLAIMER NEC America, Inc. reserves the right to change the specifications,
File Management Utility. T u t o r i a l
 File Management Utility T u t o r i a l Contents System Requirements... 2 Preparing Files for Transfer to GlobalMark... 2 Application Launch... 2 Printer Setup... 2 Communication Status... 4 Communication
User's Guide. Using RFDBManager. For 433 MHz / 2.4 GHz RF. Version 1.23.01
 User's Guide Using RFDBManager For 433 MHz / 2.4 GHz RF Version 1.23.01 Copyright Notice Copyright 2005 Syntech Information Company Limited. All rights reserved The software contains proprietary information
Using Your Online Help System
 Using Your Online Help System GS-2993A Universal Imaging Corporation 502 Brandywine Parkway, West Chester, PA 19380 USA Tel: (610) 344-9410 Fax: (610) 344-9515 Copyright, Notices, and Trademarks 1998,
History of Revisions. Ordering Information
 No part of this document may be reproduced in any form or by any means without the express written consent of II Morrow Inc. II Morrow, Apollo, and Precedus are trademarks of II Morrow Inc. Windows is
Guest PC. for Mac OS X. User Guide. Version 1.6. Copyright 1996-2005 Lismore Software Systems, Ltd. All rights reserved.
 Guest PC for Mac OS X Version 1.6 User Guide Copyright 1996-2005 Lismore Software Systems, Ltd. All rights reserved. Table of Contents About Guest PC... 1 About your Virtual Computer... 1 Creating a Virtual
DUKANE Intelligent Assembly Solutions
 PC Configuration Requirements: Configuration Requirements for ipc Operation The hardware and operating system of the PC must comply with a list of minimum requirements for proper operation with the ipc
English. TI.GRAPH LINKé. FOR WINDOWSë FOR THE TI.92 Plus CONDENSED GUIDEBOOK. Texas Instruments Instructional Communications. Guidebook developed by:
 English TI.GRAPH LINKé FOR WINDOWSë FOR THE TI.92 Plus CONDENSED GUIDEBOOK Guidebook developed by: Texas Instruments Instructional Communications TI-GRAPH LINK is a trademark of Texas Instruments Incorporated.
TimeValue Software Due Date Tracking and Task Management Software
 User s Guide TM TimeValue Software Due Date Tracking and Task Management Software File In Time Software User s Guide Copyright TimeValue Software, Inc. (a California Corporation) 1992-2010. All rights
IBM Sterling Gentran:Director Connection. User Guide
 IBM Sterling Gentran:Director Connection User Guide Version 6.2 4108-540-USER04-0002 Copyright This edition applies to the 6.2 Version of IBM Sterling Gentran:Director Connection and to all subsequent
Vicon Flash Upgrade Software
 INSTRUCTION MANUAL Notes Refer to XX134 NO. XX134-13-01 REV. 1212 Vicon Flash Upgrade Software It is possible to upgrade software for the SurveyorVFT and Surveyor -Mini Camera Domes through a PC using
Table of Contents. 1. Overview... 3. 1.1 Materials Required. 3 1.2 System Requirements. 3 1.3 User Mode 3. 2. Installation Instructions..
 Table of Contents 1. Overview..... 3 1.1 Materials Required. 3 1.2 System Requirements. 3 1.3 User Mode 3 2. Installation Instructions.. 4 2.1 Installing the On Call Diabetes Management Software. 4 2.2
Trace600 OTDR Test Management Software User s guide
 Trace600 OTDR Test Management Software User s guide T e s t & I n s p e c t i o n A Trace600 OTDR Test Management Software User s guide T e s t & I n s p e c t i o n 2002, AFL Telecommunications, all rights
BNA ESTATE & GIFT TAX 706 PREPARER QUICK START GUIDE
 :::::::::::::::::::::::::::::::::::::::::::::::::::::::::::::::::::::::::::::::::::::::::::::::::::::::::::::::::::::::::::::::::::::::::: BNA ESTATE & GIFT TAX 706 PREPARER QUICK START GUIDE Version 2015.2
Ansur Test Executive. Users Manual
 Ansur Test Executive Users Manual April 2008 2008 Fluke Corporation, All rights reserved. All product names are trademarks of their respective companies Table of Contents 1 Introducing Ansur... 4 1.1 About
Appendix A How to create a data-sharing lab
 Appendix A How to create a data-sharing lab Creating a lab involves completing five major steps: creating lists, then graphs, then the page for lab instructions, then adding forms to the lab instructions,
Introduction to Computers: Session 3 Files, Folders and Windows
 Introduction to Computers: Session 3 Files, Folders and Windows Files and folders Files are documents you create using a computer program. For example, this document is a file, made with a program called
Network Scanner Tool R3.1. User s Guide Version 3.0.04
 Network Scanner Tool R3.1 User s Guide Version 3.0.04 Copyright 2000-2004 by Sharp Corporation. All rights reserved. Reproduction, adaptation or translation without prior written permission is prohibited,
How to Configure Windows 8.1 to run ereports on IE11
 How to Configure Windows 8.1 to run ereports on IE11 Description: Windows 8.1 ships with IE10, but can be updated to IE11. There is a special mode in IE11 called Enterprise Mode that can be used to emulate
SA-9600 Surface Area Software Manual
 SA-9600 Surface Area Software Manual Version 4.0 Introduction The operation and data Presentation of the SA-9600 Surface Area analyzer is performed using a Microsoft Windows based software package. The
Device configurator DRC200
 Operating manual 42/49-27 EN Engineer IT Device configurator DRC200 R&C Process Data Management Software Impressum Device configurator DRC200 Operating manual Document No. 42/49-27 EN Date of issue: 11.02
SharpdeskTM R3.1. Installation Guide Version 3.1.01
 SharpdeskTM R3.1 Installation Guide Version 3.1.01 1 Copyright 2000-2004 by Sharp Corporation. All rights reserved. Reproduction, adaptation or translation without prior written permission is prohibited,
StrikeRisk v6.0 IEC/EN 62305-2 Risk Management Software Getting Started
 StrikeRisk v6.0 IEC/EN 62305-2 Risk Management Software Getting Started Contents StrikeRisk v6.0 Introduction 1/1 1 Installing StrikeRisk System requirements Installing StrikeRisk Installation troubleshooting
Getting Started Guide. Chapter 14 Customizing LibreOffice
 Getting Started Guide Chapter 14 Customizing LibreOffice Copyright This document is Copyright 2010 2012 by its contributors as listed below. You may distribute it and/or modify it under the terms of either
Cyberex BCM-SFCM Configurator/Monitor User's Manual
 BRANCH/SUBFEED CIRCUIT MANAGEMENT Cyberex BCM-SFCM Configurator/Monitor User's Manual Updated: 04/01/13 Thomas & Betts Power Solutions 5900 Eastport Boulevard Richmond, VA 23231-4453 Tel: 800-238-5000
Updates Click to check for a newer version of the CD Press next and confirm the disc burner selection before pressing finish.
 Backup. If your computer refuses to boot or load Windows or if you are trying to restore an image to a partition the Reflect cannot lock (See here), and then you will have to start your PC using a rescue
Manual. Danfoss Central Station Communications Software Version 3
 Manual Danfoss Central Station Communications Software Version 3 RS.8A.Q1.02 1-2001 Contents Introduction 4 System Overview 4 Minimum and Recommended Hardware Requirements 4 Using the Keyboard to Select
Newton Backup Utility User s Guide. for the Windows Operating System
 Newton Backup Utility User s Guide for the Windows Operating System K Apple Computer, Inc. 1995 Apple Computer, Inc. All rights reserved. Under the copyright laws, this manual may not be copied, in whole
QUICK START GUIDE EDI Claims Link for Windows version 3.1
 QUICK START GUIDE EDI Claims Link for Windows version 3.1 System Requirements - Operating system: Windows 98 or later - Computer/Processor: Pentium 2, 233 MHz or greater - Memory: 64MB Ram - Initial application
FaxFinder Fax Servers
 FaxFinder Fax Servers Models: FF130 FF230 FF430 FF830 Client User Guide FaxFinder Client User Guide Fax Client Software for FaxFinder Series PN S000460B, Version B Copyright This publication may not be
Scanning. WorkCentre C2424 Copier-Printer
 Scanning This chapter includes: "Basic Scanning" on page 4-2 "Installing the Scan Driver" on page 4-4 "Adjusting Scanning Options" on page 4-5 "Retrieving Images" on page 4-11 "Managing Files and Controlling
Instruction manual. testo easyheat Configuration and Analysis software
 Instruction manual testo easyheat Configuration and Analysis software en 2 General Information General Information This documentation includes important information about the features and application of
for Windows 7 Laplink Software, Inc. Quick Start Guide h t t p : / / w w w. l a p l i n k. c o m / h e l p MN-LLG-EN-15 (REV.
 1 for Windows 7 Laplink Software, Inc. Customer Service/Technical Support: Web: http://www.laplink.com/help E-mail: CustomerService@laplink.com Laplink Software, Inc. 14335 NE 24th Street, Suite 201 Bellevue,
 Control Technology Corporation CTC Monitor User Guide Doc. No. MAN-1030A Copyright 2001 Control Technology Corporation All Rights Reserved Printed in USA The information in this document is subject to
Signature Center Getting Started Guide
 Signature Center Getting Started Guide 1113710 PRODUCED IN IRELAND Copyright 2010 McKesson Corporation and/or one of its subsidiaries. All Rights Reserved. This documentation is an unpublished work of
Event Record Monitoring and Analysis Software. Software Rev. 3.0 and Up. User s Guide
 Event Record Monitoring and Analysis Software Software Rev. 3.0 and Up User s Guide 2 Contents Contents Chapter 1: About ERMAWin 4 Chapter 2: Overview 5 About this Manual 5 System Requirements 5 Installing
Contents. Hardware Configuration... 27 Uninstalling Shortcuts Black...29
 Contents Getting Started...1 Check your Computer meets the Minimum Requirements... 1 Ensure your Computer is Running in Normal Sized Fonts... 7 Ensure your Regional Settings are Correct... 9 Reboot your
How to Install Microsoft Windows Server 2008 R2 in VMware ESXi
 How to Install Microsoft Windows Server 2008 R2 in VMware ESXi I am not responsible for your actions or their outcomes, in any way, while reading and/or implementing this tutorial. I will not provide support
Module 1: Getting Started With Altium Designer
 Module 1: Getting Started With Altium Designer Module 1: Getting Started With Altium Designer 1.1 Introduction to Altium Designer... 1-1 1.1.1 The Altium Designer Integration Platform...1-1 1.2 The Altium
VERITAS Backup Exec 9.1 for Windows Servers Quick Installation Guide
 VERITAS Backup Exec 9.1 for Windows Servers Quick Installation Guide N109548 Disclaimer The information contained in this publication is subject to change without notice. VERITAS Software Corporation makes
Model 288B Charge Plate Graphing Software Operators Guide
 Monroe Electronics, Inc. Model 288B Charge Plate Graphing Software Operators Guide P/N 0340175 288BGraph (80207) Software V2.01 100 Housel Ave PO Box 535 Lyndonville NY 14098 1-800-821-6001 585-765-2254
Legal Notes. Regarding Trademarks. 2012 KYOCERA Document Solutions Inc.
 Legal Notes Unauthorized reproduction of all or part of this guide is prohibited. The information in this guide is subject to change without notice. We cannot be held liable for any problems arising from
Windows XP Pro: Basics 1
 NORTHWEST MISSOURI STATE UNIVERSITY ONLINE USER S GUIDE 2004 Windows XP Pro: Basics 1 Getting on the Northwest Network Getting on the Northwest network is easy with a university-provided PC, which has
Lotus Notes 6.x Client Installation Guide for Windows. Information Technology Services. CSULB
 The goal of this document This document was created by the Information Technology Services department to assist the Lotus Notes Coordinators in the successful installation of Lotus Notes release 6 (R6)
VRC 7900/8900 Avalanche Enabler User s Manual
 VRC 7900/8900 Avalanche Enabler User s Manual WLE-VRC-20030702-02 Revised 7/2/03 ii Copyright 2003 by Wavelink Corporation All rights reserved. Wavelink Corporation 6985 South Union Park Avenue, Suite
Allworx OfficeSafe Operations Guide Release 6.0
 Allworx OfficeSafe Operations Guide Release 6.0 No part of this publication may be reproduced, stored in a retrieval system, or transmitted, in any form or by any means, electronic, mechanical, photocopy,
PTPhoneManager II. User guide
 COMMUNICATION AT ITS BEST PTPhoneManager II User guide Communications A member of PEIKER group DOCUMENT PEI TEL Communications GmbH - PTPhoneManager II - 2 - T ABLE OF CONTENTS Table of contents Table
Nortel ipview Software Wallboard Setup and Operation Guide ipview Setup and Operation Guide
 Nortel ipview Software Wallboard Setup and Operation Guide ipview Setup and Operation Guide Reporting for Call Center Release 2.2.1xx Document Number: 200-0200-110 Document Status: Standard Document Version:
Getting Started Guide. Trimble Accubid Enterprise Software
 Getting Started Guide Trimble Accubid Enterprise Software Revision A August 2013 F Toronto Office Trimble Canada Ltd. 7725 Jane Street Concord, Ontario L4K 1X4 Copyright and Trademarks 2005-2013 Trimble
User Guide. DocAve Lotus Notes Migrator for Microsoft Exchange 1.1. Using the DocAve Notes Migrator for Exchange to Perform a Basic Migration
 User Guide DocAve Lotus Notes Migrator for Microsoft Exchange 1.1 Using the DocAve Notes Migrator for Exchange to Perform a Basic Migration This document is intended for anyone wishing to familiarize themselves
PureEdge Viewer Training Guide
 Table of Contents Introduction PureEdge e-forms 3 Course Objectives 3 PureEdge Viewer Overview What is a PureEdge e-form? 4 The PureEdge Viewer 5 What You See in the Viewer 6 The PureEdge Toolbar 7 Toolbar
Getting Started with Vision 6
 Getting Started with Vision 6 Version 6.9 Notice Copyright 1981-2009 Netop Business Solutions A/S. All Rights Reserved. Portions used under license from third parties. Please send any comments to: Netop
Trace.Net OTDR Test Management Software User s guide
 Trace.Net OTDR Test Management Software User s guide 2007-2009, AFL Telecommunications, all rights reserved. TRAC-01-1000 Revision B, 2009-06-10 Specifications are subject to change without notice. I Contents
Installing the Gerber P2C Plotter USB Driver
 Installing the Gerber P2C Plotter USB Driver 1 You can install a Gerber P2C plotter using a USB connection and communicate with it using compatible design software. The following procedures describe installing
User Manual UM 1187. Group: Controls PN: 300040523 Date: September 2000. MicroTech Monitor 2.01 For Windows 95/98. User Manual. 2013 Daikin Applied
 User Manual UM 1187 Group: Controls PN: 300040523 Date: September 2000 MicroTech Monitor 2.01 For Windows 95/98 User Manual 2013 Daikin Applied Daikin Page ii CONTENTS INTRODUCTION...V What You Need to
Print/Scan System (U)
") Print/Scan System (U) KM-3035/4035/5035 Network Scanner Operation Guide ALWAYS read this Operation Guide thoroughly before use. After reading, maintain it in good condition and keep it
Print/Scan System (U) KM-3035/4035/5035 Network Scanner Operation Guide ALWAYS read this Operation Guide thoroughly before use. After reading, maintain it in good condition and keep it
When upgrading your TAPIT software make sure that all call accounting data has been exported before you begin the installation process.
 When upgrading your TAPIT software make sure that all call accounting data has been exported before you begin the installation process. Registration Settings: SERIAL NUMBER: COMPUTER ID: REGISTRATION NUMBER:
Centran Version 4 Getting Started Guide KABA MAS. Table Of Contents
 Page 1 Centran Version 4 Getting Started Guide KABA MAS Kaba Mas Welcome Kaba Mas, part of the world-wide Kaba group, is the world's leading manufacturer and supplier of high security, electronic safe
Guide to Installing BBL Crystal MIND on Windows 7
 Guide to Installing BBL Crystal MIND on Windows 7 Introduction The BBL Crystal MIND software can not be directly installed on the Microsoft Windows 7 platform, however it can be installed and run via XP
Centre for Learning and Academic Development. IT Training. File Management. Windows Vista. Version 1.0 www.skills.bham.ac.uk
 Centre for Learning and Academic Development IT Training File Management Windows Vista Version 1.0 www.skills.bham.ac.uk File Management Windows Vista Author: Phil Smith and Linda Clark Version: 1.0, August
User s Guide for version 5 Page
 Network Management Interface Catalog VPi 32.15E For use with these ATS products: 7000 & 4000 Series (Group 5 Controller) Series 300 (Group 1 Controller), and 940, 962, 436, 434, 447, 448 (Group 6A/7A Control
Nortel Networks Call Center Reporting Set Up and Operation Guide
 Nortel Networks Call Center Reporting Set Up and Operation Guide www.nortelnetworks.com 2001 Nortel Networks P0919439 Issue 07 (24) Table of contents How to use this guide... 5 Introduction...5 How this
ATSystem AUTO-TRACKING SPECTROPHOTOMETER. ATS Software Manual
 ATSystem AUTO-TRACKING SPECTROPHOTOMETER ATS Software Manual X-RITE SOFTWARE LICENSE AGREEMENT This is a legal agreement between you (either an individual or an entity) and X-Rite, Incorporated. By opening
Central Management Software CV3-M1024
 Table of Contents Chapter 1. User Interface Overview...5 Chapter 2. Installation...6 2.1 Beginning Installation...6 2.2 Starting the CMS software...10 2.3 Starting it from the Start menu...10 2.4 Starting
QUICK START GUIDE EDI Claims Link for Windows version 3.5
 QUICK START GUIDE EDI Claims Link for Windows version 3.5 System Requirements - Operating system: Windows XP or later - Computer/Processor: Pentium 2, 233 MHz or greater - Memory: 64MB Ram - Minimum Screen
How To Restore Your Data On A Backup By Mozy (Windows) On A Pc Or Macbook Or Macintosh (Windows 2) On Your Computer Or Mac) On An Pc Or Ipad (Windows 3) On Pc Or Pc Or Micro
 On A Pc Or Macbook Or Macintosh (Windows 2) On Your Computer Or Mac) On An Pc Or Ipad (Windows 3) On Pc Or Pc Or Micro") Online Backup by Mozy Restore Common Questions Document Revision Date: June 29, 2012 Online Backup by Mozy Common Questions 1 How do I restore my data? There are five ways of restoring your data: 1) Performing
Online Backup by Mozy Restore Common Questions Document Revision Date: June 29, 2012 Online Backup by Mozy Common Questions 1 How do I restore my data? There are five ways of restoring your data: 1) Performing
Customer Appointment Manager
 Customer Appointment Manager Getting Started Guide Standard & Pro Editions This page is intentionally blank. ii License Agreement Software License Agreement PLEASE READ THIS DOCUMENT CAREFULLY BEFORE USING
FileMover 1.2. Copyright Notice. Trademarks. Patents
 FileMover 1.2 Copyright Notice No part of this publication may be reproduced, transmitted, transcribed, stored in a retrieval system, or translated into any human or computer language, in any form or by
e-dpp 4.0.2 May 2013 Quick Installation Guide Microsoft Windows 2003 Server, XP, Vista, 7 Access Database
 e-dpp 4.0.2 May 2013 Microsoft Windows 2003 Server, XP, Vista, 7 Access Database ELTECHS Engineering and Consulting Co., Ltd., Japan www.eltechs.co.jp Tel No. +81 (47) 490-1010 Fax No. +81 (47) 490-1011
EasySuite. User Guide V1.0
 EasySuite User Guide V1.0 1 Launch EasySuite...3 Stop the EasySuite:...4 System Requirements...5 EasyCopy...6 Function Description...7 File Transfer...9 EasyMover...12 Function Descriptions of EasyMover...12
Quickstart Tutorial. Bradford Technologies, Inc. 302 Piercy Road, San Jose, California 95138 800-622-8727 fax 408-360-8529 www.bradfordsoftware.
 Quickstart Tutorial A ClickFORMS Tutorial Page 2 Bradford Technologies. All Rights Reserved. No part of this document may be reproduced in any form or by any means without the written permission of Bradford
Setup and Configuration Guide for Pathways Mobile Estimating
 Setup and Configuration Guide for Pathways Mobile Estimating Setup and Configuration Guide for Pathways Mobile Estimating Copyright 2008 by CCC Information Services Inc. All rights reserved. No part of
Appointment Scheduler
 EZClaim Appointment Scheduler User Guide Last Update: 11/19/2008 Copyright 2008 EZClaim This page intentionally left blank Contents Contents... iii Getting Started... 5 System Requirements... 5 Installing
SOFTWARE INSTALLATION INSTRUCTIONS
 AUDITGARD LGA Electronic Combination Lock SOFTWARE INSTALLATION INSTRUCTIONS Implementation Package The AuditGard Software implementation package includes: 707013 AuditGard Software Install CD 42145 Programming/Audit
Nortel Networks ipview Software Wallboard Set Up and Operation Guide
 Nortel Networks ipview Software Wallboard Set Up and Operation Guide www.nortelnetworks.com 2002 Nortel Networks P0988907 (06) 2 Table of Contents Table of Contents How to use this guide... 3 Introduction...3
Web File Management with SSH Secure Shell 3.2.3
 Web File Management with SSH Secure Shell 3.2.3 June 2003 Information Technologies Copyright 2003 University of Delaware. Permission to copy without fee all or part of this material is granted provided
MGC WebCommander Web Server Manager
 MGC WebCommander Web Server Manager Installation and Configuration Guide Version 8.0 Copyright 2006 Polycom, Inc. All Rights Reserved Catalog No. DOC2138B Version 8.0 Proprietary and Confidential The information
Basic Web Development @ Fullerton College
 Basic Web Development @ Fullerton College Introduction FC Net Accounts Obtaining Web Space Accessing your web space using MS FrontPage Accessing your web space using Macromedia Dreamweaver Accessing your
User Guide Win7Zilla
 User Guide Win7Zilla Table of contents Section 1: Installation... 3 1.1 System Requirements... 3 1.2 Software Installation... 3 1.3 Uninstalling Win7Zilla software... 3 Section 2: Navigation... 4 2.1 Main
All Rights Reserved. Copyright 2006
 All Rights Reserved Copyright 2006 The use, disclosure, modification, transfer, or transmittal of this work for any purpose, in any form, or by any means, without the written permission of the copyright
Getting Started with IntelleView POS Administrator Software
 Getting Started with IntelleView POS Administrator Software Administrator s Guide for Software Version 1.2 About this Guide This administrator s guide explains how to start using your IntelleView POS (IntelleView)
IXP120 Alarm Monitor Utility
 IXP120 Alarm Monitor Utility SOFTWARE MANUAL Scope of Document This document provides a brief overview of the Alarm Monitor Utility and its interaction with the IXP120 Software. Document Conventions We
DinoXcope User Manual
 DinoXcope User Manual Contents 1 System Requirements 1 Installation 2 Adding a time stamp to the live view 3 Capturing an image 4 Creating a real time movie 5 Creating a time-lapse movie 6 Drawing on an
Welcome to MaxMobile. Introduction. System Requirements. MaxMobile 10.5 for Windows Mobile Pocket PC
 MaxMobile 10.5 for Windows Mobile Pocket PC Welcome to MaxMobile Introduction MaxMobile 10.5 for Windows Mobile Pocket PC provides you with a way to take your customer information on the road. You can
Installing LearningBay Enterprise Part 2
 Installing LearningBay Enterprise Part 2 Support Document Copyright 2012 Axiom. All Rights Reserved. Page 1 Please note that this document is one of three that details the process for installing LearningBay
Doors for use with Windows
 Doors for use with Windows Access Control Software Users Guide v2.1 1998 Keri Systems, Inc. ALL RIGHTS RESERVED Document Number 01821-001, Revision 2.1 October, 1998 Keri Systems, PXL-250, SB-293, Tiger
1. Requirements for Network Installation on 840D
 Content 1. Requirements for Network Installation on 840D... 1 2. Installing the Network... 2 2.1. Enable IRQ 11 for the 3C509 ISA network card in BIOS... 2 2.2. Configuring the 3COM Etherlink III COMBO
Unified Messaging. User Guide
 Unified Messaging User Guide Notice This user guide is released by Inter-Tel, Inc. as a guide for end-users. It provides information necessary to use Unified Messaging v2.2. The contents of this user
Important. Please read this User s Manual carefully to familiarize yourself with safe and effective usage.
 Important Please read this User s Manual carefully to familiarize yourself with safe and effective usage. The latest software and User's Manual are available for download from our site: http://www.eizo.com
DTAP3000 DTSX3000 Control Visualization Software LAS2.0 Data Conversion Guide
 User s Manual DTAP3000 DTSX3000 Control Visualization Software LAS2.0 Data Conversion Guide 1st Edition Blank Page < Introduction > i Introduction About this Manual Thank you for purchasing the DTSX3000
SMART Ink 1.5. Windows operating systems. Scan the following QR code to view the SMART Ink Help on your smart phone or other mobile device.
 SMART Ink 1.5 Windows operating systems User s guide Scan the following QR code to view the SMART Ink Help on your smart phone or other mobile device. Trademark notice SMART Ink, SMART Notebook, SMART
Meridian 1 Meridian 1 Attendant PC LAN Interface Installation Guide
 Meridian 1 Meridian 1 Attendant PC LAN Interface Installation Guide Document Number: P0874391 Document Release: Standard 1.00 Date: November 1997 Year Publish FCC TM 1997 All rights reserved Printed in
Using the Medical Language Specialist Client Application
 Page 1 Using the MLSClient Application April 20, 2008 Using the Medical Language Specialist Client Application April 20, 2008 Prepared by: WebChartMD P.O. Box 6154 Johnson City, TN 37602 877-302-9263 Page
16.4.3 Lab: Data Backup and Recovery in Windows XP
 16.4.3 Lab: Data Backup and Recovery in Windows XP Introduction Print and complete this lab. In this lab, you will back up data. You will also perform a recovery of the data. Recommended Equipment The
Samsung Auto Backup User Manual
 Samsung Auto Backup User Manual [Rev. 06 06/05/2009 Samsung Auto Backup User Manual First edition October 2008 This revision - 05] Copyright 2008 Clarus, Inc. All Rights Reserved. No part of this document
Using SSH Secure Shell Client for FTP
 Using SSH Secure Shell Client for FTP The SSH Secure Shell for Workstations Windows client application features this secure file transfer protocol that s easy to use. Access the SSH Secure FTP by double-clicking
Welcome to MaxMobile. Introduction. System Requirements
 MaxMobile 10.5 for Windows Mobile Smartphone Welcome to MaxMobile Introduction MaxMobile 10.5 for Windows Mobile Smartphone provides you with a way to take your customer information on the road. You can
VERITAS NetBackup Microsoft Windows User s Guide
 VERITAS NetBackup Microsoft Windows User s Guide Release 3.2 Windows NT/95/98 May, 1999 P/N 100-001004 1994-1999 VERITAS Software Corporation. All rights reserved. Portions of this software are derived