DAB Radio. Instruction Manual L55DAB10
|
|
|
- Evan Tucker
- 10 years ago
- Views:
Transcription
1 DAB Radio Instruction Manual L55DAB10 L55DAB10_IB_110810_Zell.indd 1
2 L55DAB10_IB_110810_Zell.indd 2

3 Contents Unpacking...5 Product Overview...6 Top View... 6 Rear View... 6 Power Source...7 Battery Power... 7 Battery Life (Approx. Hours)... 7 Knowing When to Replace the Batteries... 7 Mains Power... 8 Connections...8 Connecting to the Earphones Socket... 8 Basic Operation...9 Powering ON/OFF... 9 Selecting Modes... 9 Adjusting the Volume... 9 Setting the Clock... 9 Setting the Alarm (AC Operation Only)... 9 Activating the Alarm Function...10 Automatic Alarm Repeat...10 Snooze Function (AC Operation Only)...10 Sleep Function (AC Operation Only)...11 System Reset...11 DAB Operation...12 DAB Auto Scan...12 Secondary Services...13 Manual Tuning...13 Storing Stations...13 Recalling a Stored Station...13 DAB Display Modes...14 FM Operation...15 Switching from DAB to FM Mode...15 Auto Scan...15 Manual Scan...15 Audio Mode...15 Storing Stations...15 Recalling a Stored Station...16 FM Display Modes...16 Display Backlight...16 L55DAB10_IB_110810_Zell.indd 3

4 Maintenance...17 Hints and Tips...17 Specification...17 Safety Warnings...18 L55DAB10_IB_110810_Zell.indd 4

5 Thank you for purchasing your new Logik DAB Radio. We recommend that you spend some time reading this instruction manual in order that you fully understand all the operational features it offers. You will also find some hints and tips to help you resolve any issues. Read all the safety instructions carefully before use and keep this instruction manual for future reference. Unpacking Remove all packaging from the unit. Retain the packaging. If you dispose of it please do so according to local regulations. The following items are included: Clock Radio Mains Cable (P.N.: ) Instruction Manual (P.N.: L55DAB10-002) If items are missing or damaged, please contact Partmaster (UK only). Tel: for assistance. 5 L55DAB10_IB_110810_Zell.indd 5

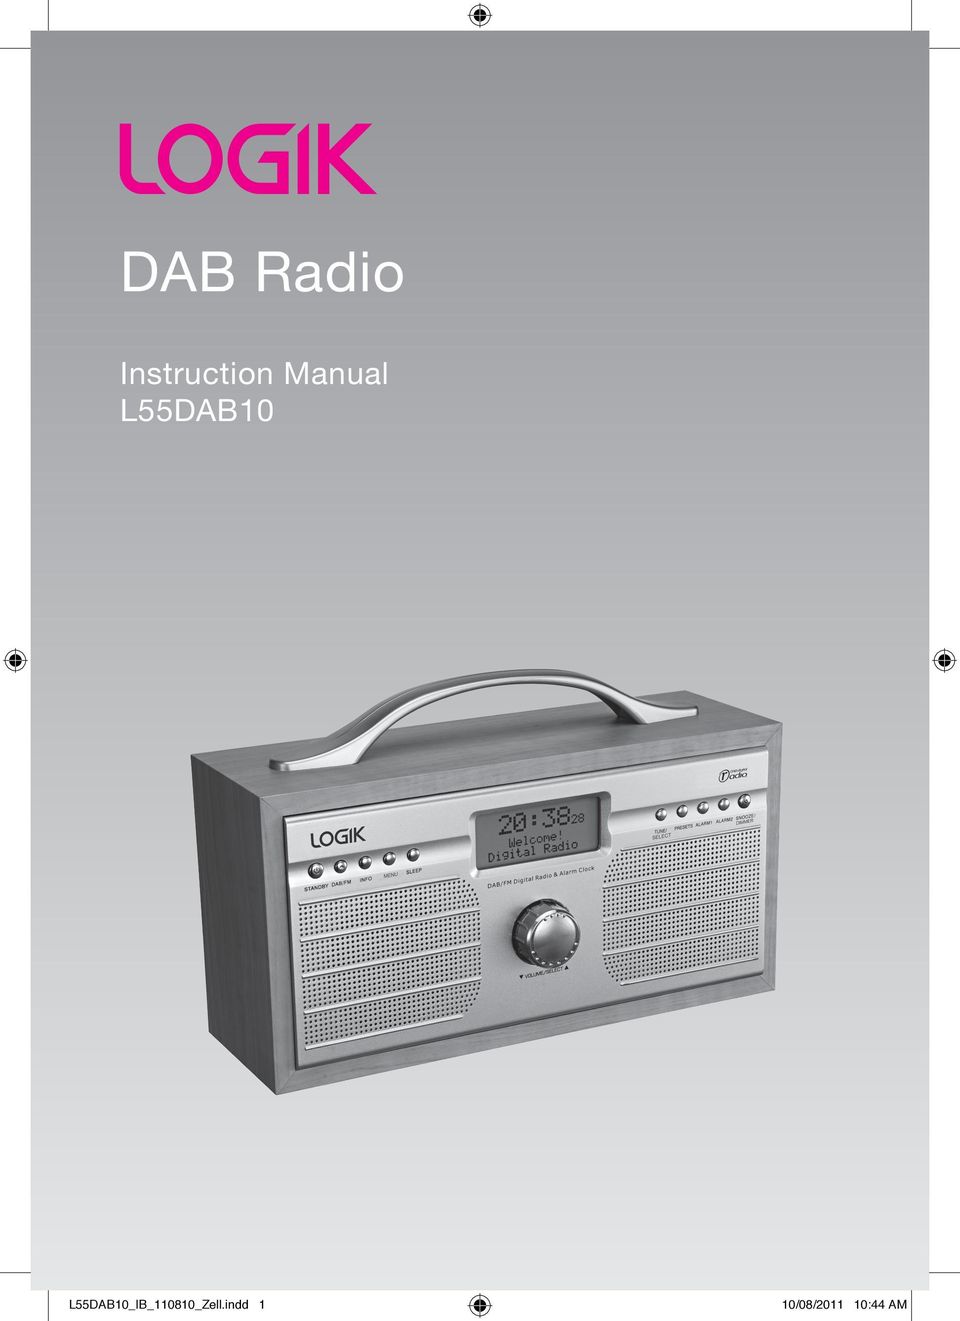
6 Product Overview Top View Handle 2. STANDBY Button 3. DAB/FM Button 4. INFO Button 5. MENU Button 6. SLEEP Button 7. Speaker 8. VOLUME/SELECT Control 9. LCD Display 10. TUNE/SELECT Button 11. PRESETS Button 12. ALARM1 Button 13. ALARM2 Button 14. SNOOZE/DIMMER Button Rear View Earphones Socket 16. FM Aerial 17. Battery Door 18. Mains Cable Socket L55DAB10_IB_110810_Zell.indd 6

7 Power Source Battery Power Insert 4 X 1.5V AA battery (not included) into the battery compartment located at the bottom of the unit. Alarm and sleep function are not available under battery power. Battery Life (Approx. Hours) Battery Type DAB FM Alkaline (Size AA) 5 6 Knowing When to Replace the Batteries When the batteries lose power, the sound becomes weak and distorted. When the batteries are completely exhausted, the power is turned off. Always switch the unit off after use to conserve the battery life. Handling the Batteries Improper or incorrect use of batteries may cause corrosion or battery leakage, which could cause personal injury or damage to property. Install the batteries correctly by following the polarity (+ and ) indications in the battery compartment. Use only the types of the batteries which are indicated in this manual. Do not install new batteries with used ones and do not mix different types of batteries. Do not dispose of the used batteries as domestic waste. Dispose of them in accordance with local regulations. If you are not going to use the unit for a long time, remove the batteries to avoid damage from battery leakage and corrosion. Due to the short battery life span of some alkaline batteries. It is recommended to use rechargeable batteries. You will need to purchase a charger to charge the rechargeable batteries. This saves cost and is more environmentally friendly. 7 L55DAB10_IB_110810_Zell.indd 7

8 Mains Power Before using, connect the supplied power cable to the mains cable socket at the rear of the unit and to the mains socket. Connections Connecting to the Earphones Socket 1. Connect earphones (3.5mm stereo mini plug) to the earphones socket. 2. Adjust the volume control to obtain the desired volume level. 3. When the earphones are connected, the speakers will automatically mute. Long-term exposure to loud music may cause hearing damage. It is best to avoid extreme volume when using earphones, especially for extended periods. 8 L55DAB10_IB_110810_Zell.indd 8

9 Basic Operation Powering ON/OFF Press and hold the Press and hold the STANDBY button to switch the unit on. STANDBY button to switch the unit back to standby mode. Disconnect the mains plug from the mains socket if you want to switch the unit off completely. Selecting Modes Press the DAB/FM button repeatedly to switch between modes (DAB or FM). Adjusting the Volume Adjust the volume to the desired level by turning the VOLUME/SELECT control. Setting the Clock The clock can only set and be updated if you can receive DAB signals in your location. In order for the clock to synchronise to the current local time you must leave it on one DAB station for a short period of time. Manual clock setting is not required. Setting the Alarm (AC Operation Only) Make sure you have preset FM and DAB stations before setting the Alarm. 1. The unit has two alarms. Press and hold the ALARM1/ ALARM2 button to set alarm 1 or alarm 2. The display will show Alarm # Setting and the hour digits will flash. 2. Turn the VOLUME/SELECT control to adjust the hour digits and then press the TUNE/SELECT button to confirm. 3. The minute digits will flash. Turn the VOLUME/SELECT control to adjust the hour digits and then press the TUNE/SELECT button to confirm. 4. Turn the VOLUME/SELECT control to select DAB preset station. Press the TUNE/SELECT button to confirm. 5. Turn the VOLUME/SELECT to select FM preset station. Press the TUNE/SELECT button to confirm. 6. Turn the VOLUME/SELECT to select Buzzer 1/2. Press the TUNE/SELECT button to confirm. 7. Turn the VOLUME/SELECT to select the alarm wake up volume level. Press the TUNE/SELECT button to confirm. 9 L55DAB10_IB_110810_Zell.indd 9

10 Activating the Alarm Function 1. To activate the alarm function, repeatedly press the ALARM1 or ALARM2 button, the alarm wake-up modes will be displayed and change in the below sequence on every press: Alarm Off DAB Preset # FM Preset # Buzzer Tone # 2. When the display shows your desired alarm wake-up mode, release the button, the alarm function is now activated and an alarm icon will be displayed. 3. When the alarm time arrives, the selected wake-up mode will be on and the alarm icon in the display will flash to indicate the alarm is triggered. To stop the alarm sooner, press the STANDBY button. 4. To check the alarm status, press the ALARM1 or ALARM2 button. The alarm status will show on the display. If you have activated the alarm function and the wake-up mode is DAB or FM, make sure that the volume is at a sufficient level for you to hear. Automatic Alarm Repeat The alarm will automatically repeat each day at the selected time as long as the alarm icon is displayed. To cancel this function, repeatedly press the ALARM1 or ALARM2 button until Alarm Off shows on the display. Snooze Function (AC Operation Only) When the alarm has triggered, press the SNOOZE button to temporarily switch off the alarm for 5 minutes. The display will show Zz to indicate that snooze is on. Snooze function will continue for 1 hour from the set alarm time. If alarm 2 is due to go off within 1 hour of alarm 1, it will not activate until alarm 1 has been switched off. 10 L55DAB10_IB_110810_Zell.indd 10

11 Sleep Function (AC Operation Only) This function allows you to program the unit to switch off by itself after a set period of time. 1. To activate the sleep function, press the SLEEP button repeatedly until the Sleep Timer shows on the display. The time will change in the below sequence on every press: When your desired sleep time appears in the display, release the button and the sleep function will be activated in two seconds. S# will show on the display (for example S1 represents 10 minutes sleep time). 3. When the sleep time counts to zero, the unit will go off. To put the sleep function off while the sleep timer is still counting down, press the SLEEP button once, Sleep Off will show on the display. 4. Press the INFO button repeatedly to the display the sleep timer status. The sleep function can be activated only in AC power operation. System Reset There may be times when you need to reset your unit back to the factory settings especially when you have moved house. If you experience reception problems you may want to reset and try again. If you move to another part of the country and pick up the local and national DAB stations in that area, your previously tuned channels may no longer be available. 1. Press and hold the MENU button until the Press SELECT to confirm reset shows on the display. 2. Press the TUNE/SELECT button to start the system reset, Restarting will show on the display. After the reset is complete, the unit will go to standby mode. 3. Press the STANDBY button again to turn the unit on, the unit will then start scanning for DAB channels immediately. After the system reset, all the tuned stations, DAB & FM preset stations and alarm settings will be erased. 11 L55DAB10_IB_110810_Zell.indd 11
. 3. When the sleep time counts to zero, the unit will go off.")
12 DAB Operation If the unit is connected to the mains power and then switched on from standby for the first time, the unit will automatically enter into the DAB mode and perform auto scan function. During the scan the display will show Scanning... together with a slide bar that indicates the progress of the scan and the amount of stations that have been found so far. Once the scan has finished, the unit will select the first alphanumerically found station. To explore the found stations, press the TUNE/SELECT button and then turn the VOLUME/SELECT control. When you find a station that you would like to listen to, press the TUNE/SELECT button. If no stations are found after auto scan, the unit will then enter into the Tune Select Menu. Turn the VOLUME/SELECT control and then press the TUNE/ SELECT button to select manual tune or auto scan modes for stations. DAB Auto Scan The auto scan will search for the entire DAB Band III channels. After the scan has finished, the first alphanumerically found station will be automatically selected. Full auto scan will not replace the DAB stations in memory. If you want to remove all the previous scanned stations, system reset is required. 1. To activate auto scan, first press the MENU button to enter into the Tune Select Menu, then rotate the VOLUME/SELECT control to select Autoscan, finally press the SELECT button to confirm, the display will show Scanning and a progressing slide bar. 2. All the stations that have been found will be stored automatically, to explore and select listening to the found stations, press the TUNE/SELECT button and then turn the VOLUME/SELECT control. Press the TUNE/SELECT button to confirm. 12 L55DAB10_IB_110810_Zell.indd 12

13 Secondary Services You may see a > symbol after the name of the station, this indicates that there are secondary services available to that station. These secondary services contain extra services that are related to the primary station. e.g. a sports station may want to add extra commentaries. The secondary services are inserted directly after the primary station in the station list. To select the secondary station, press the TUNE/SELECT button when the < appears in the display before the station name. When the secondary service ends, the unit will automatically switch back to the primary station. Manual Tuning As well as the auto tune function, you can manually tune the receiver. This can help you when aligning your aerial or when adding stations that were missed while auto tuning. 1. Press the MENU button and then press the TUNE/ SELECT button to select Manual tune, the display will now show Manual tune. 2. Turn the VOLUME/SELECT control to cycle through the DAB channels, which are numbered from 5A to 13F. 3. After your desired channel number is selected, press the TUNE/SELECT button to enter the current multiplex, the top line will now display the first station in the multiplex. 4. Press the TUNE/SELECT button to select a station that you would like to listen to. Storing Stations You can store up to 10 of your favourite stations to the memory. This will enable you to access your favourite stations quickly and easily. 1. To store a preset, you must first be listening to the station that you would like to save, press and hold the PRESETS button. The Empty preset # will show on the display and the preset number will flash. 2. Turn the VOLUME/SELECT control to select your desired preset station number and then press the TUNE/SELECT button to confirm. 3. The station will be stored and the screen will then show Preset # Saved. Recalling a Stored Station 1. Once you have saved a station to one of the preset buttons, you can recall it by pressing the PRESETS button. 2. Turn the VOLUME/SELECT control to select your desired preset station number. 3. Press the TUNE/SELECT button to confirm the selection. 4. If you choose a preset that hasn t been allocated a station, the Empty preset # will be displayed. 13 L55DAB10_IB_110810_Zell.indd 13

14 DAB Display Modes Every time you press the INFO button, the display will cycle through the following display modes: Ensemble/Multiplex (Group name), Time/Date, Frequency, Audio Bit Rate, Signal Strength, DLS, Programme Type. The information is displayed on the lower segment of the display. Multiplex Name A multiplex is a collection of radio stations that are bundled and transmitted on one frequency. There are national and local multiplexes. Local ones contain stations that are specific to that area. DAB unlike normal radio, groups together several radio stations and transmits them on one frequency. Ensemble/Multiplex (Group name) Time/Date Time/Date The broadcaster (Radio station) provides clock and date information automatically so there s no need to manually set this information. Frequency The frequency of the present station will be displayed. Audio Bit Rate The display will show the digital audio bit rate being received. Signal Strength The display will show a slide bar to indicate the signal strength, the stronger the signal, the longer the bar will be from left to right. DLS (Dynamic Label Segment) Dynamic label segment is a scrolling message that the broadcaster may include with their transmissions. The message usually includes information, such as program details etc. Programme Type This describes the style of the programme that is being broadcast. If the information is not available, the display will show <Programme Type>. Frequency Audio Bit Rate Signal Strength DLS Programme Type 14 L55DAB10_IB_110810_Zell.indd 14

15 FM Operation Switching from DAB to FM Mode To switch the unit from DAB to FM mode, press the DAB/FM button once. The display will show FM and the frequency. Auto Scan To search for an FM station, press and hold the TUNE/SELECT button to start the auto scan. The display will show Searching.... Once a station has been found, the scanning will stop automatically. Manual Scan To search for FM stations manually, press the TUNE/SELECT button. The display will show <Tuning>. Turn the VOLUME/SELECT control until your desired frequency is reached. Audio Mode Press the MENU button to toggle between the Stereo or Mono selection. The unit will automatically switch between stereo and mono mode, but you can override this and switch this function manually. This is helpful when receiving poor signal reception. Storing Stations You can store up to 10 of your favourite stations to the memory. This will enable you to access your favourite stations quickly and easily. 1. To store a preset, you must first be listening to the station that you would like to save, press and hold the PRESETS button. The Empty preset # will show on the display and the preset number will flash. 2. Turn the VOLUME/SELECT control to select your desired preset station number and then press the TUNE/SELECT button to confirm. 3. The station will be stored and the screen will then show Preset # Saved. 15 L55DAB10_IB_110810_Zell.indd 15

16 Recalling a Stored Station 1. Once you have saved a station to one of the preset buttons, you can recall it by pressing the PRESETS button. 2. Turn the VOLUME/SELECT control to select your desired preset station number. 3. Press the TUNE/SELECT button to confirm the selection. 4. If you choose a preset that hasn t been allocated a station, Empty preset # will be displayed. FM Display Modes Every time you press the INFO button, the display will cycle through the following display modes: Programme Type, Signal Strength, Time/Date, Channel Frequency, Audio Mode, Radio Text. Programme Type This describes the Style or genre of music that is being broadcast e.g. Rock or Classical. Time/Date The broadcaster (Radio station) provides clock and date information automatically so there s no need to manually set this information. In the unlikely event that the broadcaster does not transmit any clock information; the display will show <Time/ Date>. Radio Text As with DAB, the broadcaster can include a scrolling text that displays information about the current program. If Radio text information is not available, then the display will show <Radio Text>. Frequency This shows the frequency of the current station. Programme Type Time/Date Radio Text Frequency Display Backlight There are four backlight levels for you to select from in AC mode. During AC standby and DC on mode, the backlight will be turned on to full brightness for 5 seconds on every key press. There is no backlight setting in DC operation. To set the backlight, repeatedly press the BACKLIGHT/SNOOZE button and the brightness of the display will change in the below sequence on every press: Backlight off > Backlight 01 > Backlight 02 > Backlight 03 > Backlight off > The display backlight level is defaulted to Backlight 01 in AC standby and Backlight 03 during operation. This is resumed only when the factory reset has taken place. 16 L55DAB10_IB_110810_Zell.indd 16

17 Maintenance Ensure to unplug the unit from the mains socket before cleaning. To clean the unit, wipe the case with a slightly moist, lint-free cloth. Do not use any cleaning fluids containing alcohol, ammonia or abrasives. Do not spray an aerosol at or near the unit. Hints and Tips No Sound Problem Static Sound Sound is distorted Desired station not found The display shows SERVICE N/A The display is blank Solution Adjust the volume control, it may not be turned up. Signal reception too low. Adjust the aerial or move the unit to a stronger signal location. Volume is too high. Adjust the volume control. Weak signal. Use the Manual Tune function. No DAB coverage in your area or poor reception. Adjust the position of the aerial. Poor reception. Adjust the position of the aerial. This may occur if the broadcaster changes the label of a service or removes a label. The unit will try to retune or perform a scan. Specification Mains Supply AC V~ 50/60Hz DC 6V 1.5V(UM3) x 4 Output Power 1.6W x 2 Radio Frequency Range FM MHz DAB MHz Dimension 246 (L) x 86.5 (W) x 126 (H) mm Weight 1.26kg Features and specifications are subject to change without prior notice. 17 L55DAB10_IB_110810_Zell.indd 17

18 Safety Warnings Read all the instructions carefully before using the unit and keep them for future reference. Retain the manual. If you pass the unit onto a third party make sure to include this manual. Check that the voltage marked on the rating label matches your mains voltage. Damage Please inspect the unit for damage after unpacking. Do not continue to operate the unit if you are in any doubt about it working normally, or if it is damaged in any way - switch off, withdraw the mains plug and consult your dealer. Location of Unit The unit must be placed on a flat stable surface and should not be subjected to vibrations. Do not place the unit on sloped or unstable surfaces as the unit may fall off or tip over. The mains socket must be located near the unit and should be easily accessible. This unit is designed for indoor use only. Temperature Avoid extreme degrees of temperature, either hot or cold. Place the unit well away from heat sources such as radiators or gas/ electric fires. Avoid exposure to direct sunlight and other sources of heat. Naked Flames Never place any type of candle or naked flame on the top of or near the unit. Moisture To reduce the risk of fire, electric shock or product damage, do not expose this unit to rain, moisture, dripping or splashing. No objects filled with liquids, such as vases, should be placed on the unit. If you spill any liquid into the unit, it can cause serious damage. Switch it off at the mains immediately. Withdraw the mains plug and consult your dealer. Ventilation To prevent the risk of electric shock or fire hazard due to overheating, ensure that curtains and other materials do not obstruct the ventilation vents. Do not install or place this unit in a bookcase, built-in cabinet or in another confined space. Ensure the unit is well ventilated. Safety Always disconnect the unit from the mains supply before connecting/disconnecting other devices or moving the unit. Unplug the unit from the mains socket during a lightning storm. Mains Cable Make sure the unit or unit stand is not resting on top of the mains cable, as the weight of the unit may damage the mains cable and create a safety hazard. If the mains cable is damaged it must be replaced by the manufacturer, its service agent, or similarly qualified persons in order to avoid a hazard. Interference Do not place the unit on or near appliances which may cause electromagnetic interference. If you do, it may adversely affect the operating performance of the unit, and cause a distorted picture or sound. Batteries Batteries used in the unit are easily swallowed by young children and this is dangerous. Keep loose batteries away from young children and make sure that the battery holder tray is secure in the unit. Seek medical advice if you believe a cell has been swallowed. Please dispose of batteries correctly by following the guidance in this manual. 18 L55DAB10_IB_110810_Zell.indd 18

19 Supervision Children should be supervised to ensure that they do not play with the unit and the remote control. Never let anyone especially children push anything into the holes, slots or any other openings in the case - this could result in a fatal electric shock. CAUTION RISK OF ELECTRIC SHOCK DO NOT OPEN The lightning flash with arrowhead symbol, within an equilateral triangle, is intended to alert the user to the presence of uninsulated dangerous voltage within the unit s enclosure that may be of sufficient magnitude to constitute a risk of electric shock. The exclamation point within an equilateral triangle is intended to alert the user to the presence of important operating and maintenance (servicing) instructions in the manual accompanying the unit. Service To reduce the risk of electric shock, do not remove screws. The unit does not contain any user-serviceable parts. Please leave all maintenance work to qualified personnel. Do not open any fixed covers as this may expose dangerous voltages. Maintenance Ensure to unplug the unit from the mains socket before cleaning. Do not use any type of abrasive pad or abrasive cleaning solutions as these may damage the unit s surface. Do not use liquids to clean the unit. 19 L55DAB10_IB_110810_Zell.indd 19

20 NOTE: If you require a replacement for any of the items listed below, please quote their corresponding part numbers: Replacement Part Part Number Mains Cable Visit Partmaster.co.uk today for the easiest way to buy electrical spares and accessories. With over 1 million spares and accessories available we can deliver direct to your door the very next day. Visit or call (UK customers only) Calls charged at National Rate. Notes for battery disposal The batteries used with this product contain chemicals that are harmful to the environment. To preserve our environment, dispose of used batteries according to your local laws or regulations. Do not dispose of batteries with normal household waste. For more information, please contact the local authority or your retailer where you purchased the product. This symbol on the product or in the instructions means that your electrical and electronic equipment should be disposed at the end of its life separately from your household waste. There are separate collection systems for recycling in the EU. For more information, please contact the local authority or your retailer where you purchased the product. All trademarks are the property of their respective owners and all rights are acknowledged. DSG Retail Ltd Maylands Avenue Hemel Hempstead Herts HP2 7TG England (P.N.: L55DAB10-002) L55DAB10_IB_110810_Zell.indd 20

21 L55DAB10_IB_110810_Zell.indd 21
22 L55DAB10_IB_110810_Zell.indd 22
23 L55DAB10_IB_110810_Zell.indd 23
24 L55DAB10_IB_110810_Zell.indd 24
DBT-003 FM/DAB+ Radio with Bluetooth Receiver
 DBT-003 FM/DAB+ Radio with Bluetooth Receiver User Manual : English Contents Important Safety Precautions... 3 Features and Controls... 4 Listening to your radio...5-6 Storing and Recalling Stored Stations...
DIGITAL ALARM CLOCK RADIO
 DIGITAL ALARM CLOCK RADIO INSTRUCTION MANUAL For information and support, www.lenco.eu CR3302 LENCO ENG FM ONLY IM 98 x1 1 11/5/2009 9:14:35 CAUTION RISK OF ELECTRIC SHOCK DO NOT OPEN WARNINGS ATTENTION
Digital Radio/DAB+/FM RDS digital clock radio with dual alarm Operating instruction
 381SE1D-A Digital Radio/DAB+/FM RDS digital clock radio with dual alarm Operating instruction GB Contents Controls... 2-3 Using the clock radio for the first time... 4 Operating your clock radio... 5 Selecting
PG-01instruction manual
 PG-01instruction manual DIGITAL RADIO fairbank house ashley road altrincham WA14 2DP united kingdom t: +44 (0)161 924 0300 f: +44 (0)161 924 0319 e: [email protected] www.intempodigital.com PG-01
PORTABLE ALARM CLOCK. Dual Alarm. FM Radio. Wake-up Sounds. USB Phone Charger G-1CR
 G-BUZZ PORTABLE ALARM CLOCK Dual Alarm FM Radio Wake-up Sounds USB Phone Charger G-1CR Welcome Alarm clocks can be boring. Get ready to shake things up with your new G-BUZZ. Slap the snooze for more ZZZ
DAB+ / FM Tuner Model: TU-201
 DAB+ / FM Tuner Model: TU-201 Instruction Manual www.pulse-audio.co.uk 1 Safety Information The lightning bolt within a triangle is intended to alert the user to the presence of dangerous voltage levels
Controls (front) 1. Loudspeaker 2. Light button 3. Band button 4. Auto tune button 5. Alarm button 6. LCD display
 1. Loudspeaker 2. Light button 3. Band button 4. Auto tune button 5. Alarm button 6. LCD display") GB Contents Controls... 2-4 Mains operation... 5 Operating your radio... 6 Selecting a station DAB... 7 Display modes DAB... 8 Finding new stations - DAB... 9 Secondary services DAB... 9 Manual tuning
GB Contents Controls... 2-4 Mains operation... 5 Operating your radio... 6 Selecting a station DAB... 7 Display modes DAB... 8 Finding new stations - DAB... 9 Secondary services DAB... 9 Manual tuning
Important Safety Instructions
 PR-D7 GB Revision 1 Important Safety Instructions 1. Read these instructions. 2. Keep these instructions. 3. Heed all warnings. 4. Follow all instructions. 5. Do not use this apparatus near water. 6. Clean
User Guide. DAB-109CR DAB Digital Radio alarm clock
 User Guide DAB-109CR DAB Digital Radio alarm clock IMPORTANT SAFETY INFORMATION CAUTION! RISK OF ELECTRIC SHOCK DO NOT OPEN TO REDUCE THE RISK OF ELECTRIC SHOCK DO NOT REMOVE COVER (OR BACK) This symbol
User Guide. CR-111IP Clock radio with dock for ipod
 User Guide CR-111IP Clock radio with dock for ipod IMPORTANT SAFETY INFORMATION CAUTION! RISK OF ELECTRIC SHOCK DO NOT OPEN TO REDUCE THE RISK OF ELECTRIC SHOCK DO NOT REMOVE COVER (OR BACK) This symbol
H203D 中文 GB Version 1
 H203D 中 GB文 Version 1 Contents Installing batteries... 4 Using the AC adapter (not supplied)... 5 Setting the clock... 6-7 Updating your radio - DAB... 8 Selecting a station - DAB... 9 Secondary services
DAB2+ Dear Customer, Congratulations with your new Argon DAB2+
 Dear Customer, Quality has always been our driving force and founding Argon Audio is a natural extension of this philosophy. We have 20 years' experience in creating and specifying high quality products,
INSTRUCTION MANUAL RM-5750. AM/FM Digital Alarm Clock Radio
 INSTRUCTION MANUAL RM-5750 AM/FM Digital Alarm Clock Radio Fig. 1 CAUTION: THE APPARATUS SHALL NOT BE EX- POSED TO DRIPPING OR SPLASHING. NO OBJECTS FILLED WITH LIQUIDS, SUCH AS VASES, SHALL BE PLACED
DR 70 Portable Digital DAB+ and FM Radio Receiver User Manual English Please read carefully before using this product
 DR 70 Portable Digital DAB+ and FM Radio Receiver User Manual Please read carefully before using this product 15 1 Table of Contents 1 Table of Contents... 16 2 Safety Instructions:... 17 3 Specification:...
Single Day Alarm Clock with. Bluetooth and USB Play-through
 Single Day Alarm Clock with Bluetooth and USB Play-through MODEL : BSC 200 READ THIS INSTRUCTION MANUAL BEFORE OPERATING THE APPLIANCE. SAVE THIS MANUAL FOR FUTURE REFERENCE. TABLE OF CONTENTS IMPORTANT
User Guide. DCR1401B/G Crescendo DAB alarm clock radio
 User Guide DCR1401B/G Crescendo DAB alarm clock radio IMPORTANT SAFETY INFORMATION CAUTION! RISK OF ELECTRIC SHOCK DO NOT OPEN TO REDUCE THE RISK OF ELECTRIC SHOCK DO NOT REMOVE COVER (OR BACK) This symbol
DAB+ Digital Alarm Clock Radio with Dock for iphone
 DAB+ Digital Alarm Clock Radio with Dock for iphone BCR33DABIP The Gold Technical Support Line: 1902 215 259 (Charges will apply at $2.95 per minute) www.bushaustralia.com.au Safety Instructions Ensure
STANDBY SCAN PRESET ALARM ENTER SNOOZE MODE INFO/MENU. User Guide. DR1402 DAB Radio
 STANDBY SCAN PRESET MODE INFO/MENU ALARM ENTER SNOOZE User Guide DR1402 DAB Radio IMPORTANT SAFETY INFORMATION CAUTION! RISK OF ELECTRIC SHOCK DO NOT OPEN TO REDUCE THE RISK OF ELECTRIC SHOCK DO NOT REMOVE
PR-D9W. GB Version 1
 PR-D9W Version 1 Table of contents Important safety instructions... 2-3 Introduction... 4 Controls... 5-8 Using your weather alert radio for the first time... 9 Operating your radio Search tuning AM/FM...
AM/FM ALARM CLOCK RADIO
 AM/FM ALARM CLOCK RADIO Instruction Manual JL-206 Please read this manual carefully before operating and save it for future reference. Have a question? Please visit http:// INTRODUCTION Thank you for purchasing
DAB & FM RADIO Installation Manual
 Size: 105x145mm 105g copper paper DAB & FM RADIO Installation Manual Model: 10798 10799 10800 10801 Thank you for purchasing this AGK DAB/FM radio. Please read the instructions and warnings carefully before
THE NEW GENERATION IN TECHNOLOGY. NI-3103A Alarm Clock w/fm Radio ipod & iphone Docking. Operating Instructions
 THE NEW GENERATION IN TECHNOLOGY NI-3103A Alarm Clock w/fm Radio ipod & iphone Docking Operating Instructions Table of Contents Important Safeguards... 3 Parts... 6 Controls... 6 To Set Up... 7 ipod/iphone
DAB DIGITAL RADIO MODEL: CANVAS USER MANUAL
 DAB DIGITAL RADIO MODEL: CANVAS USER MANUAL 1 Welcome 2 Your DAB Digital Radio 2.1 In The Box 2.2 Front View 2.3 Top View 2.4 Rear View 3 Quick Setup 4 Features POWER button 4.5 FM mode choosing menu options
Sonic Boom Travel & Bed side Alarm Clock with Bed Shaker Model SB200ss-v3
 Sonic Boom Travel & Bed side Alarm Clock with Bed Shaker Model SB200ss-v3 IMPORTANT Please read these instructions carefully before use and retain for future reference. See operating instructions on back.
DAB Adapter 2+ Dear Customer,
 Dear Customer, Quality has always been our driving force and founding Argon Audio is a natural extension of this philosophy. We have 20 years' experience in creating and specifying high quality products,
GMR1886DAB DAB Digital Radio User Guide
 GMR1886DAB DAB Digital Radio User Guide IMPORTANT: Please read all instructions carefully before use and keep for future reference Introduction Thank you for choosing this DAB digital radio which has been
User Manual of WT 493
 User Manual of WT 493 Introduction Congratulations on your purchase of this smart unit. This unit can be used as a radio to catch the latest news and enjoy the beautiful music; it can also be used as an
CR9986 ROBERTS. Dual Alarm CD Clock Radio. Sound for Generations. Please read this manual before use
 ROBERTS Sound for Generations CR9986 Dual Alarm CD Clock Radio Please read this manual before use Contents Contents... Controls... - Switching on and setting the time... 4 Listening to the radio... 5 Compact
AM / FM Tuner + RDS. Model: TU-101. www.pulse-audio.co.uk
 AM / FM Tuner + RDS Model: TU-101 www.pulse-audio.co.uk 1 Safety Information The lightning bolt within a triangle is intended to alert the user to the presence of dangerous voltage levels within the product
RD-11 ROBERTS. FM RDS/DAB digital radio with. Sound for Generations. Please read this manual before use
 ROBERTS Sound for Generations RD- FM RDS/DAB digital radio with Please read this manual before use Contents Controls... Battery operation... 3 Mains operation... 3 Operating your radio - DAB... 4 Selecting
ROBERTS. Enjoy Listening. DAB/FM RDS digital portable radio. Please read this manual before use
 ROBERTS Enjoy Listening DAB/FM RDS digital portable radio Please read this manual before use Contents Controls... 2-3 Battery operation...4 Using the AC adaptor...5 Operating your radio - DAB...6 Selecting
ROBERTS. Enjoy Listening. DAB/FM RDS digital portable radio. Please read this manual before use
 ROBERTS Enjoy Listening DAB/FM RDS digital portable radio Please read this manual before use Contents Controls... -3 Battery operation...4 Using the AC adaptor...5 Operating your radio - DAB...6 Selecting
ROBERTS. Enjoy Listening. DAB / FM RDS Digital Clock Radio with large display. Please read this manual before use
 ROBERTS Enjoy Listening DAB / FM RDS Digital Clock Radio with large display Please read this manual before use Contents Controls... -3 Using the clock radio for the fi rst time...4 Operating your clock
RCR-22 AM/MW 2 bands Digital Clock Radio instruction manual
 RCR-22 AM/MW 2 bands Digital Clock Radio instruction manual Important safety instructions 1. Read and understand all safety and operating instructions before the radio is operated. 2. Retain instruction:
Daily use. Never use alcohol or other solvents to clean any part of the loudspeakers!
 BeoLab 6002 Guide WARNING: To reduce the risk of fire or electric shock, do not expose this appliance to rain or moisture. Do not expose this equip ment to dripping or splashing and ensure that no objects
CR9971 2 Band Auto Set Dual Alarm Clock Radio ROBERTS. Sound for Generations. Please read this manual before use
 ROBERTS Sound for Generations CR9971 2 Band Auto Set Dual Alarm Clock Radio Please read this manual before use Contents Contents... 1 Controls...2-5 Switching on... 6 Setting the time manually... 6 Setting
Model SBB500SS-v3. Sonic Boom Alarm Clock & Bed Shaker OPERATION INSTRUCTIONS
 Model SBB500SS-v3 Sonic Boom Alarm Clock & Bed Shaker OPERATION INSTRUCTIONS IMPORTANT Please read these instructions carefully before use and retain for future reference. See operating instructions on
Radio BMR100 INSTRUCTION MANUAL. ENGLISH (Original instructions)
") ENGLISH (Original instructions) INSTRUCTION MANUAL Radio BMR00 WARNING: For your personal safety, READ and UNDERSTAND before using. SAVE THESE INSTRUCTIONS FOR FUTURE REFERENCE. Symbols The following show
ENGLISH (Original instructions) INSTRUCTION MANUAL Radio BMR00 WARNING: For your personal safety, READ and UNDERSTAND before using. SAVE THESE INSTRUCTIONS FOR FUTURE REFERENCE. Symbols The following show
CAUTION RISK OF ELECTRIC SHOCK DO NOT OPEN
 BeoLab 7-6 Guide CAUTION RISK OF ELECTRIC SHOCK DO NOT OPEN CAUTION: To reduce the risk of electric shock, do not remove cover (or back). No User-serviceable parts inside. Refer servicing to qualified
REVIVE DAB/FM ALARM CLOCK RADIO
 kitsound.co.uk REVIVE DAB/FM ALARM CLOCK RADIO USER MANUAL JB. 3208 / Made in China. KitSound 2014. Christchurch, Dorset. BH23 4FL We are craftspeople. We are musicians. We are KitSound And we all commit
When you switch off your system, or mute the sound, the red indicator light appears immediately, indicating that the subwoofer is not in use.
 BeoLab 11 Guide WARNING: To reduce the risk of fire or electric shock, do not expose this appliance to rain or moisture. Do not expose this equip ment to dripping or splashing and ensure that no objects
CAUTION RISK OF ELECTRIC SHOCK DO NOT OPEN
 BeoLab 4 Guide CAUTION RISK OF ELECTRIC SHOCK DO NOT OPEN CAUTION: To reduce the risk of electric shock, do not remove cover (or back). No User-serviceable parts inside. Refer servicing to qualified service
ATS-505. GB Version 1
 ATS-505 GB Version 1 Control Locations Power/Sleep Power On/off/Alarm off/sleep function Display Switch between radio frequency and time while radio is power on Mode Mode set up (please see below mode
Introduction and Contents
 Introduction and Contents Thank you for buying this Bush product, which is designed to give you many years of trouble-free service. You may already be familiar with using a similar unit, but please take
Prescott. CD Alarm Clock Radio INSTRUCTION MANUAL
 1215205 Prescott CD Alarm Clock Radio INSTRUCTION MANUAL Important Safety Instructions CAUTION RISK OF ELECTRIC SHOCK DO NOT OPEN The lightning flash with arrowhead symbol, within an equilateral triangle
Controls. LCD Display. Tuning Up Time Set and Station Scan
 PR-D8 GB Revision 3 1 1 2 4 5 7 9 10 12 14 16 18 20 22 24 25 26 27 29 31 33 35 36 37 38 Controls Stereo Built-in Microphone (Left Channel) LCD Display Stereo Built-in Microphone (Right channel) Power/Auto
DAB1001. Wireless Digital Radio Interface. Installation & User Guide
 DAB1001 Wireless Digital Radio Interface Installation & User Guide Contents Contents... 2 Introduction... 3 Contents of Package... 4 Installation... 5 Product Overview... 5 Installation Procedure... 5
The Bouncer Bluetooth Stereo Speaker
 The Bouncer Bluetooth Stereo Speaker 1 Welcome to JLab! Thank you for purchasing The Bouncer Bluetooth Speaker! Enjoy your music wirelessly from any smartphone, tablet, laptop, or other Bluetooth enabled
DAB/FM personal digital radio with OLED display
 DAB/FM personal digital radio with OLED display ROBERTS Enjoy Listening Please read this manual before use Contents Controls... 3-4 Using the AC adaptor... 5-6 Keylock function... 7-8 Navigation... 9-10
INSTRUCTION MANUAL PLEASE READ ALL THE INSTRUCTIONS COMPLETELY BEFORE USE AND SAVE THIS MANUAL FOR FUTURE REFERENCE
 INSTRUCTION MANUAL PLEASE READ ALL THE INSTRUCTIONS COMPLETELY BEFORE USE AND SAVE THIS MANUAL FOR FUTURE REFERENCE m Before Use Please read IMPORTANT SAFETY INSTRUCTIONS on page 10 before use. It is important
CMP30. User Manual. www.audac.eu
 CMP30 User Manual www.audac.eu 2 Index Introduction 4 Precautions 5 Safety requirements 5 Caution servicing 5 EC Declaration of Conformity 5 Waste of Electrical and Electronic Equipment (WEEE) 6 Caution
Register your product and get support at. www.philips.com/welcome AS111. User manual
 Register your product and get support at www.philips.com/welcome AS111 User manual Contents 1 Important 4 Safety 4 English 2 Your docking speaker for AndroidTM 5 Introduction 5 What's in the box 5 Overview
Retro Radio. Operation Guide. Operation Guide. Guía de funcionamiento Guia de Operação. Guide d utilisation Betriebsanleitung.
 Retro Radio Operation Guide Guida Operativa Operation Guide Guide d utilisation Betriebsanleitung Guía de funcionamiento Guia de Operação GB View Quest Retro DAB+ Operation Guide 2 View Quest Retro DAB+
Control Location. Replacing Battery
 Functions - Normal Time with PM Indicator - 12/24 hour selectable - Dual Alarm, Snooze, Sleep Timer Green LED Backlight display - Month and Date Display - Thermometer (32oF - 122-F) - AM/FM Radio Receiver
RD-27 ROBERTS. FM RDS/DAB digital radio with. Sound for Generations. Please read this manual before use
 ROBERTS RD-7 Sound for Generations FM RDS/DAB digital radio with Please read this manual before use Contents Controls... Battery operation... 3 Mains operation... 3 Operating your radio - DAB... 4 Selecting
How To Use Internet Radio On A Iphone Or Ipod Or Ipad Or Ipo Or Ipode Or Ipon Or Ipot Or Ipro Or Ipor Or Ipob Or Ipow Or Ipop Or Ipos Or Ipok
 M7 Internet, DAB/DAB+ and FM Receiver I n s t r u c t i o n M a n u a l Safety Precautions To achieve the utmost in enjoyment and performance, and in order to become familiar with its features, please
CAUTION RISK OF ELECTRIC SHOCK DO NOT OPEN
 BeoLab 4000 Guide CAUTION RISK OF ELECTRIC SHOCK DO NOT OPEN CAUTION: To reduce the risk of electric shock, do not remove cover (or back). No User-serviceable parts inside. Refer servicing to qualified
Albrecht DR314. DAB/DAB+/FM Radio 1.) User Manual
 User Manual") Albrecht DR314 DAB/DAB+/FM Radio 1.) User Manual -1- Important Safety Notes TO PREVENT FIRE OR SHOCK HAZARD, DO NOT USE THIS PLUG WITH AN EXTENSION CORD, RECEPTACLE OR OTHER OUTLET UNLESS THE BLADES CAN
Albrecht DR314 DAB/DAB+/FM Radio 1.) User Manual -1- Important Safety Notes TO PREVENT FIRE OR SHOCK HAZARD, DO NOT USE THIS PLUG WITH AN EXTENSION CORD, RECEPTACLE OR OTHER OUTLET UNLESS THE BLADES CAN
PEBBLE USER MANUAL. MODEL: GMR1888DAB DAB Digital & FM Radio. Hyper-link ALL text to corresponding sections
 PEBBLE Hyper-link ALL text to corresponding sections MODEL: GMR1888DAB DAB Digital & FM Radio USER MANUAL 1 2 Welcome Your DAB Digital&FM Radio 2.1 In The box 2.2 Front View 2.3 Top View 2.4 Rear View
DAB digital/fm radio. Instruction manual
 DAB digital/fm radio Instruction manual DAB digital/fm radio Thank you for purchasing this DAB digital/fm radio. Please read the instructions and warnings carefully before use to ensure safe and satisfactory
G e t t i n g. Know your radio. 1 external power connector. on /off switch. aerial
 G e t t i n g 1 external power connector Know your radio on /off switch aerial battery compartment Warning: See the Safety Notes on the back page. headphone connector Warning: Do not turn your radio on
Evolution Digital HD Set-Top Box Important Safety Instructions
 Evolution Digital HD Set-Top Box Important Safety Instructions 1. Read these instructions. 2. Keep these instructions. 3. Heed all warnings. 4. Follow all instructions. 5. Do not use this apparatus near
CAUTION RISK OF ELECTRIC SHOCK NO NOT OPEN
 Evolution Digital HD Set-Top Box Important Safety Instructions 1. Read these instructions. 2. Keep these instructions. 3. Heed all warnings. 4. Follow all instructions. 5. Do not use this apparatus near
DUALIT KITCHEN RADIO INSTRUCTION MANUAL GB 10/06
 DUALIT KITCHEN RADIO INSTRUCTION MANUAL GB 10/06 CONTENTS SAFETY PRECAUTIONS... 3 / 4 PACKAGE CONTENTS... PARTS AND CONTROLS... RADIO HOUSING CONTROLS INPUTS AND OUTPUTS QUICK START... SETTING UP... CLOCK
Pocket DAB & FM Radio with Speaker
 Pocket DAB & FM Radio with Speaker P MODEL: GDPRDAB USER MANUAL 1 Welcome 2 Your DAB Digital Radio 2.1 In The Box 2.2 Front View 2.3 Rear View 3 Quick Setup 3.1 Power On and Autoscan 3.2 Changing DAB Stations
ROBERTS CRD-37. Sound for Generations. DAB / FM RDS / CD Clock radio with MP3 / WMA playback facility. Please read this manual before use
 ROBERTS Sound for Generations CRD-37 DAB / FM RDS / CD Clock radio with MP3 / WMA playback facility Please read this manual before use Contents CRD-37 Clock Radio features... Controls... 3-4 Using your
INSTRUCTION MANUAL CD/MP3 PLAYER WITH FM RADIO AND USB READER
 English INSTRUCTION MANUAL CD/MP3 PLAYER WITH FM RADIO AND USB READER Please read and follow these instructions before using your unit. OVERVIEW OF THE PLAYER 1 2 3 10 8 4 5 6 9 7 11 12 13 14 15 16 17
Touch Nightball DAB Radio
 Touch Nightball DAB Radio DAB/FM Radio Alarm Clock Nightball DRAFT 1.indd 1 7/11/07 17:13:21 co n t e n t s Introducing the Touch Nightball DAB Radio 3 What is DAB Digital Radio? 3 Where to put your radio
Operation Manual for Users
 Operation Manual for Users Model No.: FLTAMFMRCD!!!!!!!!!! ATTENTION!!!!!!!!!! THE RESET BUTTON MUST BE PRESSED TO ENSURE PROPER OPERATION. SEE INSTRUCTION MANUAL Table of Contents Table of Contents ---------------------------------------------------------------------------------------------
DAR-101. GB Version 1
 DAR-101 Version 1 Table of contents Important security notice... 2-3 Introduction... 4 Controls and connections... 5-9 Battery operation... 10 Using the AC adaptor / Charging the batteries... 11 Setting
ATTENTION RISQUE D ÉLECTROCUTION! NE PAS OUVRIR!
 Quick Start Guide ATTENTION RISQUE D ÉLECTROCUTION! NE PAS OUVRIR! CAUTION: TO REDUCE THE RISK OF ELECTRIC SHOCK, DO NOT REMOVE COVER (OR BACK). NO USER-SERVICEABLE PARTS INSIDE. REFER SER- VICING TO QUALIFIED
Portable Air Conditioner
 Portable Air Conditioner Owner's Manual Model:3 in 1 12,000 Btu/h Series 3 Please read this owner s manual carefully before operation and retain it for future reference. CONTENTS 1. SUMMARY...1 2. PORTABLE
Indoor Remote Controlled Power Points
 Indoor Remote Controlled Power Points Model Number: HE214039 INSTRUCTION MANUAL Description goes here Indoor Remote Controlled Power Points Warranty Details The product is guaranteed to be free from defects
Weather Radio Alarm Clock
 1200093 User s Guide Weather Radio Alarm Clock Thank you for purchasing your Weather Radio Alarm Clock from RadioShack. Please read this user s guide before installing, setting up, and using your new weather
INSTRUCTION MANUAL PLEASE READ ALL THE INSTRUCTIONS COMPLETELY BEFORE USE AND SAVE THIS MANUAL FOR FUTURE REFERENCE
 INSTRUCTION MANUAL PLEASE READ ALL THE INSTRUCTIONS COMPLETELY BEFORE USE Ver. 2.0 AND SAVE THIS MANUAL FOR FUTURE REFERENCE Table of Contents Unpacking... 3 About the CCRadio-EP... 4 Quick Start Guide...
Dual Alarm Clock with SmartSet Auto Time Setting System
 Dual Alarm Clock with SmartSet Auto Time Setting System (U.S. Patent No. 6,567,344) OWNER S MANUAL AC100 Visit our web site at www.emersonradio.com AC100_072806.p65 16 TO PREVENT FIRE OR SHOCK HAZARD,
August International Ltd United Kingdom Telephone: +44 (0) 845 250 0586 www.augustint.com
 845 250 0586 www.augustint.com") August International Ltd United Kingdom Telephone: +44 (0) 845 250 0586 www.augustint.com EN FR DE IT ES FM Radio and Music Alarm Clock Radio-Réveil FM et Lecteur de Musique Musikanlage und Radiowecker
August International Ltd United Kingdom Telephone: +44 (0) 845 250 0586 www.augustint.com EN FR DE IT ES FM Radio and Music Alarm Clock Radio-Réveil FM et Lecteur de Musique Musikanlage und Radiowecker
DX-395. FM/AM/SW1/SW2 PLL Synthesized Receiver OWNER S MANUAL. Cat. No. 20-225. Please read before using this equipment.
 20-225.fm Page 1 Wednesday, August 4, 1999 10:07 AM Cat. No. 20-225 OWNER S MANUAL Please read before using this equipment. DX-395 FM/AM/SW1/SW2 PLL Synthesized Receiver 20-225.fm Page 2 Wednesday, August
IMPORTANT SAFETY INSTRUCTIONS
 IMPORTANT SAFETY INSTRUCTIONS Before you install or use the apparatus, you must read and understand these Important Safety Instructions. At all times when using the apparatus you must follow these Important
DUAL ALARM CLOCK RADIO WITH AUTO TIME SET
 DUAL ALARM CLOCK RADIO WITH AUTO TIME SET USER MANUAL JCR-230 PLEASE READ THIS USER MANUAL COMPLETELY BEFORE OPERATING THIS UNIT AND RETAIN THIS BOOKLET FOR FUTURE REFERENCE. WARNING TO PREVENT FIRE OR
Pop Maxi with Bluetooth
 Pop Maxi with Bluetooth Pure Warranty Statement for Australia This statement replaces any reference to warranty which may be contained elsewhere within this manual. What do you need to do now? Keep your
COMPANION 20 MULTIMEDIA SPEAKER SYSTEM. Owner s Guide Guía de usuario Notice d utilisation
 COMPANION 20 MULTIMEDIA SPEAKER SYSTEM Owner s Guide Guía de usuario Notice d utilisation Safety and Regulatory Information Please read this owner s guide Please take the time to follow the instructions
DAB+/FM/AM Digital Radio
 DAB+/FM/AM Digital Radio TR82DAB Instruction Book Toll Free Warranty and Service: 1800 509 394 The Gold Technical Support Line: 1902 215 259 (Charges will apply at $2.95 per minute for gold technical support
Spider IV 15. Pilot s Handbook Manuel de pilotage Pilotenhandbuch Pilotenhandboek Manual del Piloto 取 扱 説 明 書
 Spider IV 15 Pilot s Handbook Manuel de pilotage Pilotenhandbuch Pilotenhandboek Manual del Piloto 取 扱 説 明 書 40-00-0187 Pilot s Handbook available @ www.line6.com/manuals Rev D Important Safety Instructions
Tiny Audio C3. English TINY AUDIO C3. Please read carefully before using this product
 English TINY AUDIO C3 Please read carefully before using this product 1 Safety Instructions: 1. Do not use this radio near water. 2. Clean with dry cloth. 3. Do not block any ventilation openings. 4. Do
Use and Care Manual. Model CPA12KH AIR CONDITIONER
 Use and Care Manual Model CPA12KH AIR CONDITIONER Introduction Thank you for choosing this air conditioner to provide you and your family with all of the "Home Comfort" requirements for your home, cottage
MODEL NPB-252 PORTABLE CD MP3 RADIO PLAYER
 MODEL NPB-252 PORTABLE CD MP3 RADIO PLAYER PLEASE READ THIS USER MANUAL COMPLETELY BEFORE OPERATING THIS UNIT AND RETAIN THIS BOOKLET FOR FUTURE REFERENCE. WARNING TO PREVENT FIRE OR SHOCK HAZARD, DO NOT
ALTEC LANSING ONE YEAR LIMITED WARRANTY (TWO-YEAR LIMITED WARRANTY IN THE EUROPEAN UNION AND ASIA)
") User s guide The lightning flash with arrowhead, within an equilateral triangle, is intended to alert the user to the presence of uninsulated dangerous voltage within the product s enclosure that may be
User s guide The lightning flash with arrowhead, within an equilateral triangle, is intended to alert the user to the presence of uninsulated dangerous voltage within the product s enclosure that may be
Panasonic. Proprietary Telephone for Electronic Modular Switching System MODEL NO. KX-17030. Illustrated Model: White 1
 Panasonic Proprietary Telephone for Electronic Modular Switching System MODEL NO. KX-17030 Illustrated Model: White 1 KX-T7030 is compatible with all of the Panasonic Electronic Modular Switching Systems
Altec Lansing Moondance Home Digital Speaker System and Alarm Clock for ipod M302 User Guide
 Altec Lansing Moondance Home Digital Speaker System and Alarm Clock for ipod M302 User Guide Welcome Thank you for purchasing the Altec Lansing Moondance Home speaker system. Designed specifically to work
ENGLISH (Original instructions) Job Site DAB Radio BMR101. INSTRUCTION MANUAL IMPORTANT: Read Before Using.
 Job Site DAB Radio BMR101. INSTRUCTION MANUAL IMPORTANT: Read Before Using.") ENGLISH (Original instructions) Job Site DAB Radio BMR0 INSTRUCTION MANUAL IMPORTANT: Read Before Using. ENGLISH (Original instructions) Symbols The following show the symbols used for the equipment. Be
ENGLISH (Original instructions) Job Site DAB Radio BMR0 INSTRUCTION MANUAL IMPORTANT: Read Before Using. ENGLISH (Original instructions) Symbols The following show the symbols used for the equipment. Be
BIG GAMES HOME VIDEO ARCADE ASSEMBLY INSTRUCTIONS
 TM BIG GAMES HOME VIDEO ARCADE ASSEMBLY INSTRUCTIONS IN-HOME ASSEMBLY OF YOUR BIGGAMES HOME VIDEO ARCADE MAY BE AVAILABLE IN YOUR AREA FOR AN ADDITIONAL CHARGE. FOR INFORMATION, PLEASE CALL (800) 749-4345.
USER GUIDE MANUAL DCT700. One-way Application
 USER GUIDE MANUAL DCT700 One-way Application CAUTION: CAUTION RISK OF ELECTRIC SHOCK TO REDUCE THE RISK OF ELECTRIC SHOCK, DO NOT REMOVE COVER (OR BACK). NO USER-SERVICEABLE PARTS INSIDE. REFER SERVICING
7 High-Resolution Digital Photo Frame
 TM 16-1003 User s Guide 7 High-Resolution Digital Photo Frame One demo photo included, as illustrated Please read this user s guide before using your new photo frame. Package contents Photo Frame AC Adapter
BOSE. Link AL8 HOMEWIDE WIRELESS AUDIO LINK
 BOSE Link AL8 HOMEWIDE WIRELESS AUDIO LINK Français English SAFETY INFORMATION Please read this owner s guide Please take the time to follow the instructions in this owner s guide carefully. It will help
LIFESTYLE V35/V25 HOME ENTERTAINMENT SYSTEMS T20/ T10 HOME THEATER SYSTEMS. Setup Guide Guía de instalación Guide d'installation
 LIFESTYLE LIFESTYLE V35/V25 HOME ENTERTAINMENT SYSTEMS T20/ T10 HOME THEATER SYSTEMS Setup Guide Guía de instalación Guide d'installation TAB 8 TAB 7 TAB 6 TAB 5 TAB 4 TAB 3 TAB 2 English SAFETY INFORMATION
24 Wide Screen LED Monitor with HDMI
 24 Wide Screen LED Monitor with HDMI USER MANUAL L24LE11B_MANUAL_EN_R1 Please read this manual carefully before using, and keep it for future reference. TABLE OF CONTENTS GETTING STARTED Monitor Stand
SOUNDDOCK DIGITAL MUSIC SYSTEM. Owner s Guide Guía de usuario Notice d utilisation
 SOUNDDOCK DIGITAL MUSIC SYSTEM Owner s Guide Guía de usuario Notice d utilisation TAB 8 TAB 7 TAB 6 TAB 5 TAB 4 TAB 3 TAB 2 English IMPORTANT SAFETY INSTRUCTIONS Please read this owner s guide Please take
Daker DK 1, 2, 3 kva. Manuel d installation Installation manual. Part. LE05334AC-07/13-01 GF
 Daker DK 1, 2, 3 kva Manuel d installation Installation manual Part. LE05334AC-07/13-01 GF Daker DK 1, 2, 3 kva Index 1 Introduction 24 2 Conditions of use 24 3 LCD Panel 25 4 Installation 28 5 UPS communicator